

Ready to give your bedroom a fresh new look without spending a fortune? These 75 DIY bedroom decor ideas are projects you can actually make, from quick weekend crafts to bigger furniture makeovers. You’ll find stenciled headboards and nightstand updates, wall art you can paint with zero experience, clay jewelry dishes, beaded plants that never need watering, cozy pillows and pretty candles for the nightstand. Most use simple supplies from the craft store or Dollar Tree. Perfect for teen rooms, guest rooms, dorms, small rentals and anyone who wants a room that feels like them!
Table of Contents
- 1. DIY Duvet Cover Confetti-Style
- 2. DIY Channel Tufted Headboard
- 3. Pressed Flower Fairy Light Jar
- 4. DIY Room Decor Ideas – Bedside Bench
- 5. Denim Roses from Old Jeans
- 6. Textured Heart Canvas Art
- 7. DIY Painted Rug Inspired by West Elm
- 8. Roman Numeral Clock
- 9. DIY Chic Hoops
- 10. DIY Pouf
- 11. Decoupage Flower Vase
- 12. Beaded Wind Chime
- 13. DIY Flower Wall Hanging
- 14. Beachy Boho Bedroom
- 15. DIY Copper Pipe Marble Plant Stand
- 16. DIY Two Tier Side Table Makeover
- 17. DIY Gold Leaf Embellished Curtains
- 18. Painted Crate Hairpin Side Table
- 19. Vintage Doily Dreamcatcher DIY
- 20. Tribal Sideboard
- 21. DIY Flower Tea Light
- 22. DIY Octopus Art
- 23. DIY Easy Rope Shelf
- 24. DIY Cushion with Cross Print
- 25. Driftwood Jewelry Hanger
- 26. DIY Concrete Planter
- 27. Fairy Jar Lamp
- 28. DIY Leaf Art
- 29. Clay Flower Mirror
- 30. Jewelry Catch-Alls
- 31. DIY Glass Terrariums
- 32. Make a Woven Headboard
- 33. DIY Simple Boho Hanging Planter
- 34. Q-Tip Flower Bouquet
- 35. DIY Confetti Tray
- 36. DIY Fiber Art
- 37. DIY Letter Board
- 38. Flower Chandelier
- 39. DIY Faux Fur Ottoman
- 40. Batik Nesting Tables
- 41. DIY Raw Crystal Necklace Display
- 42. Make Fabric Flowers
- 43. DIY Rope Rainbow Wall Hanging
- 44. Fork Pom Pom Flowers
- 45. DIY Hanging Barn Door
- 46. Wallpaper Your Closet Doors
- 47. Resin Paper Nightlight Shade
- 48. DIY Dresser Door Upgrade
- 49. Chicken Wire Suncatcher
- 50. DIY Hanging Rope Nightstand
- 51. Yarn Tassel Garland
- 52. Hanging Wood Box Wall Organizer
- 53. Wall Mounted Jewelry Organizer
- 54. Stenciled Wood Headboard and Footboard
- 55. Concrete Tea Light Holders
- 56. Stenciled Mid Century Nightstand
- 57. Air Dry Clay Pebble Jewelry Dish
- 58. Decoupage Clay Jewelry Dish
- 59. Clay Jewelry Tray
- 60. Clay Flower Ring Holder
- 61. Napkin Decoupage Pillar Candle
- 62. Beaded Strawberry Plant
- 63. Beaded Vine Desk Plant
- 64. Jute Rope Tray
- 65. Punch Needle Flower Hoop Art
- 66. Folded Book Flower Vase
- 67. Posca Marker Painted Candles
- 68. $12 Roman Shade from a Mini Blind
- 69. Bandana Throw Pillow
- 70. Beaded Lantern and Plant Hanger
- 71. Dried Flower Resin Coaster
- 72. Light Bulb Mini Planter
- 73. Paper Towel Rose Bouquet
- 74. Yarn Pom Pom Wreath
- 75. Bubble Wrap Hydrangea Painting
1. DIY Duvet Cover Confetti-Style

Plain white bedding gets a scatter of pastel dots here, and the trick is acrylic paint mixed one to one with fabric medium so the color survives the wash. Poppytalk traces the circles around a roll of washi tape, tossed onto the fabric and traced wherever it lands so the pattern never looks like a grid. Slide cardboard inside the cover first or the paint bleeds through to the other side. It is a cheap way to get bedding nobody else has.
Get the full tutorial at Poppytalk.
2. DIY Channel Tufted Headboard
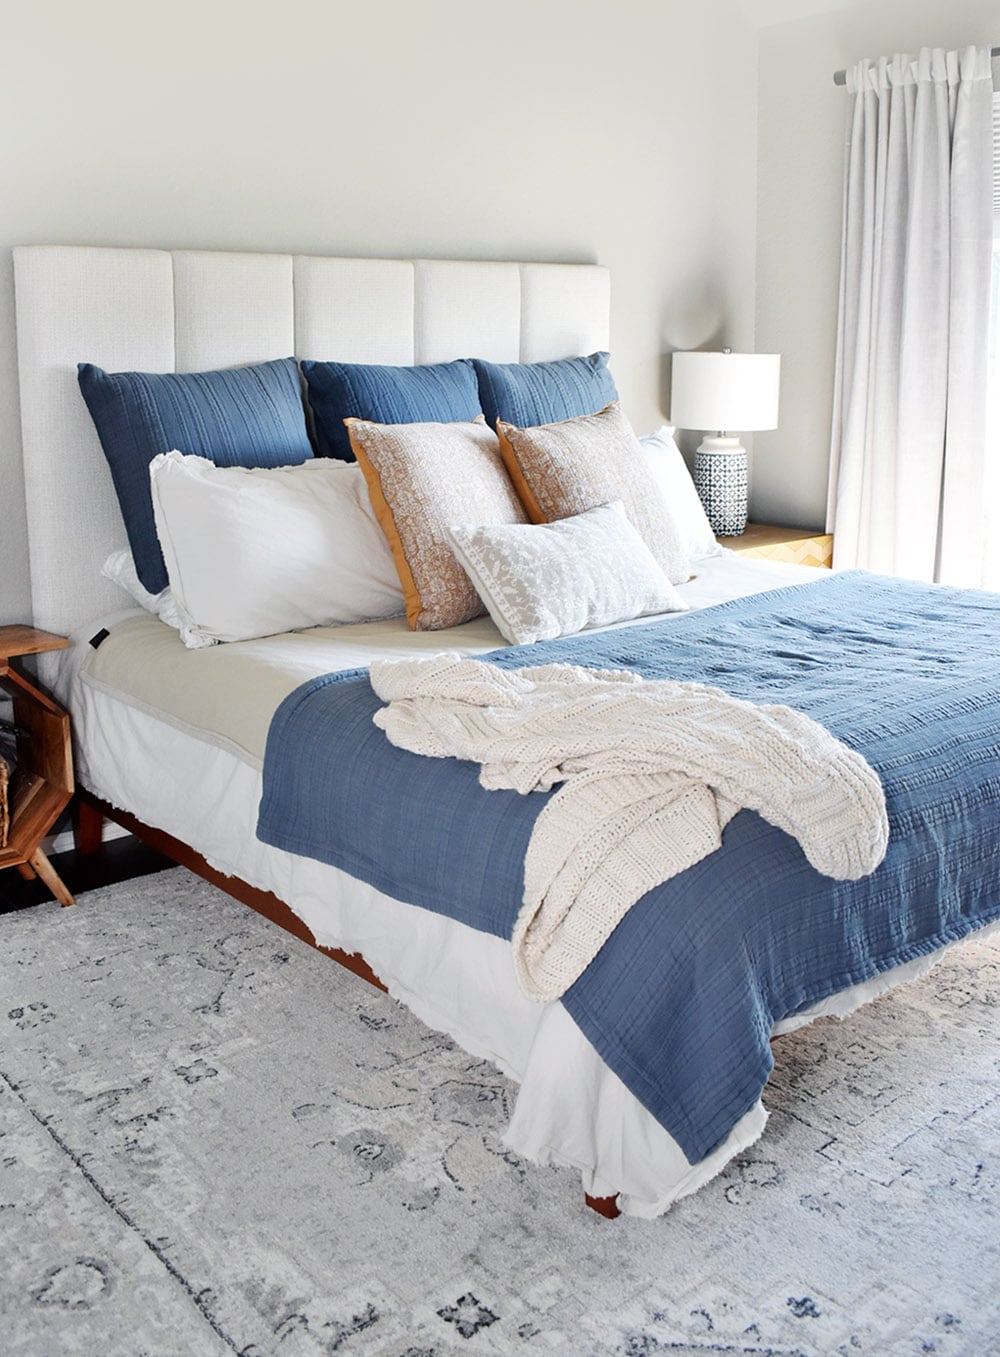
A DIY channel tufted headboard gives a bedroom that plush, custom upholstered look for a fraction of the store price. Plywood panels get a layer of 2-inch upholstery foam, a puffy layer of high-loft batting and sturdy upholstery fabric, then the panels connect with sliding mending plates (or cheaper furring strips) and hang on the wall from D-rings. The king version here came in at about $151 against a nearly $380 store-bought lookalike, which is a lot of extra money for throw pillows. The free tutorial covers every bed size from twin to king with the panel, foam and fabric counts for each.
Get the full tutorial at Dream a Little Bigger.
3. Pressed Flower Fairy Light Jar
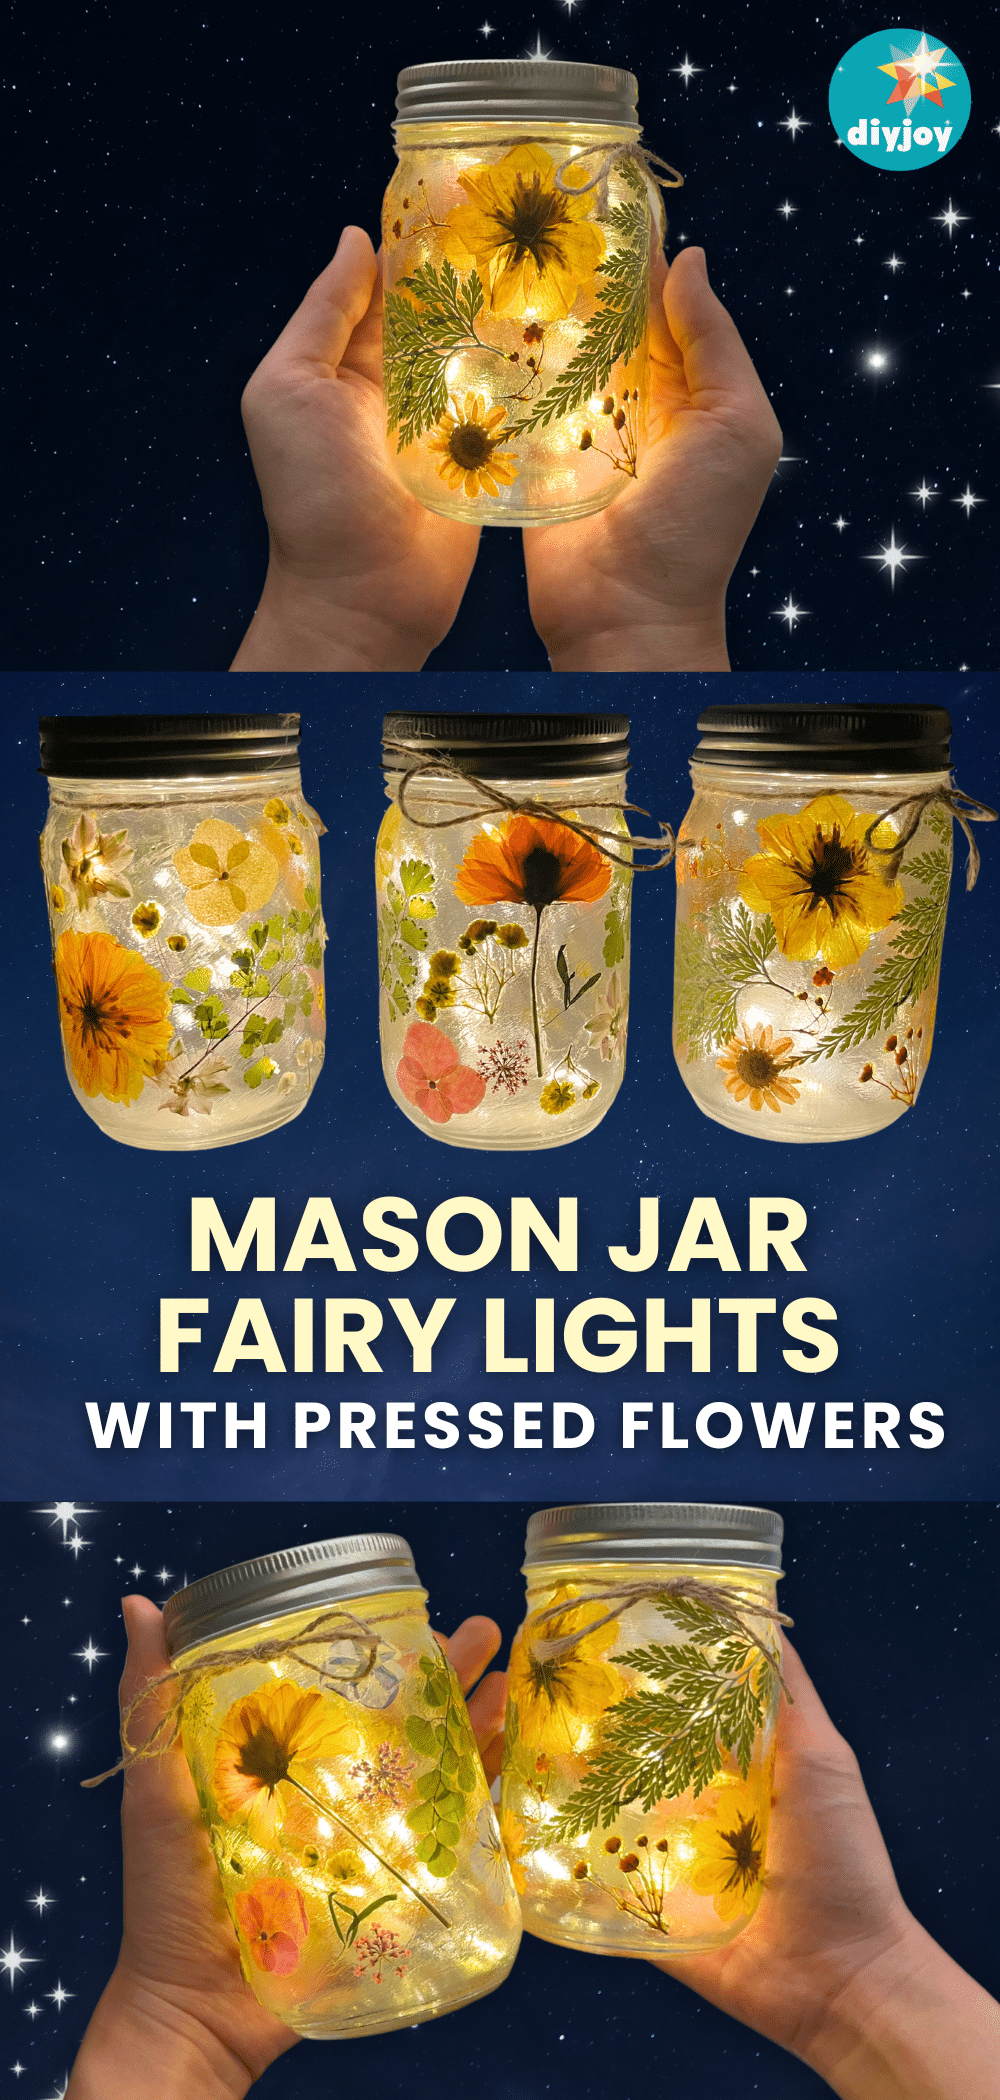
Pressed flowers line the inside of a mason jar and a string of fairy lights goes in behind them, so the whole jar glows like a lantern out of a storybook. It’s a sweet spring project, and it turns jars that have been sitting in a cupboard doing nothing into the prettiest thing on your nightstand. Your flowers don’t need to be perfect, because the lights hide every flaw anyway. Grab a jar, and the full step by step is on the DIY JOY post.
Get the full tutorial at DIY JOY.
4. DIY Room Decor Ideas – Bedside Bench

A bench at the foot of the bed is one of those pieces that quietly makes a room look finished. A Beautiful Mess builds this one from a sheet of three quarter inch plywood cut to 44 by 18 inches, a rug stapled over one inch foam batting and a pair of hairpin legs. The rug needs to be two or three inches wider and longer than the bench top on every side so it wraps properly. The build came in at $195, which is a fraction of what a patterned upholstered bench costs.
Get the full tutorial at A Beautiful Mess.
5. Denim Roses from Old Jeans

Worn out jeans turn into roses here, with no sewing anywhere in the project. If you’ve ever stared at a pile of old denim wondering what to do with it, this is your answer, and a jar of these on a dresser adds the kind of soft handmade texture you can’t buy. The petals are cut denim shapes rolled and shaped by hand, so it’s beginner friendly the whole way through and forgiving if your first one looks a bit lumpy. The full step by step is on the DIY JOY post.
Get the full tutorial at DIY JOY.
6. Textured Heart Canvas Art
Tissue paper builds up under paint here to give a small canvas real dimension, so the hearts sit proud of the surface instead of lying flat on it. You don’t need to be a professional artist for this one, and there’s no single right way to do it, which is half the fun. Simple supplies, a mini easel and a raised pink heart pattern that reads like something you picked up at a gallery. Head to the DIY JOY post to see how it comes together.
Get the full tutorial at DIY JOY.
7. DIY Painted Rug Inspired by West Elm

copied a $350 West Elm wool dhurrie for about $20 by painting the geometric kilim pattern straight onto a plain rug. There is a useful fork in the tutorial: if your design is mostly lines, use a Sharpie instead, because the rug stays soft and the marker is far quicker. Paint is the right choice only when you want filled in blocks of color. Either way the pattern is taped and worked in sections, and patience is the main supply.
Get the full tutorial at Mountain Modern Life.
8. Roman Numeral Clock

An oversized clock does a lot of work on a bedroom wall, and this one starts with a 24 inch pre-cut wooden round from a hardware store, so there is no cutting involved. Handmade Haven paints it with Rustoleum Linen White, distresses it with Annie Sloan Aubusson Blue and then applies a Roman numeral vinyl decal that costs about ten dollars. The decal arrives rolled, so flatten it under something heavy first or the numbers go on crooked. Chalk paint is worth it here purely for the fast dry time.
Get the full tutorial at Handmade Haven.
9. DIY Chic Hoops

Embroidery hoops become wall decor here, but not the way you would guess. Little Inspiration strips faux flowers and greenery stems off their wires and hot glues them directly around the hoop, so each one turns into a light, open ring of blooms rather than a stretched fabric circle. They hang on glue dots, string or clear push pins, which makes them renter friendly. Hang a cluster above a bed, or use the same hoops as outdoor party decor and move them indoors afterward.
Get the full tutorial at Little Inspiration.
10. DIY Pouf

This is an IKEA hack rather than a build from scratch. Kristi Murphy takes the cover off an IKEA cube footstool, uses it as the pattern for six panels cut one inch larger than each face, sews them together with half inch seams and moves the original zipper across. One yard of fabric will do it, one and a half to be safe. Her total came to about forty dollars against poufs that cost several times that, and a bold kilim print is what makes it look custom.
Get the full tutorial at Kristi Murphy.
11. Decoupage Flower Vase
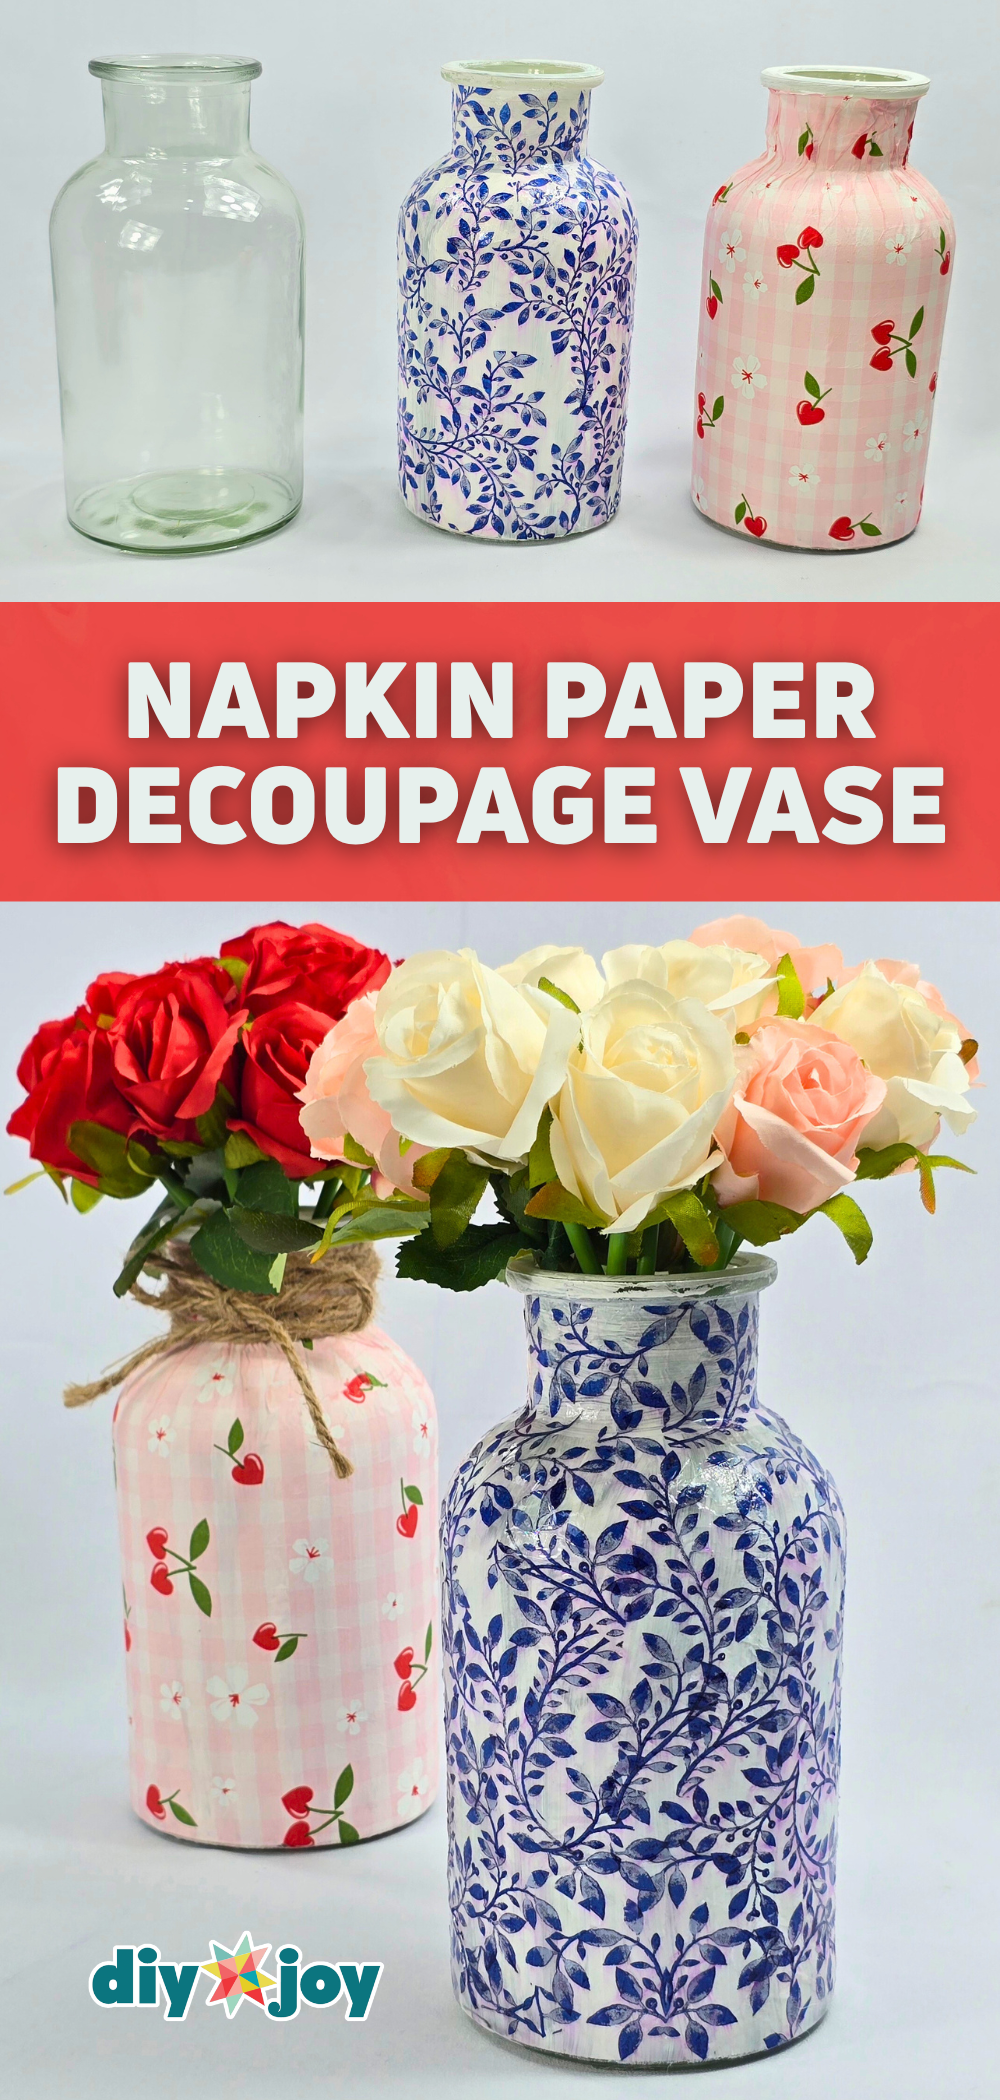
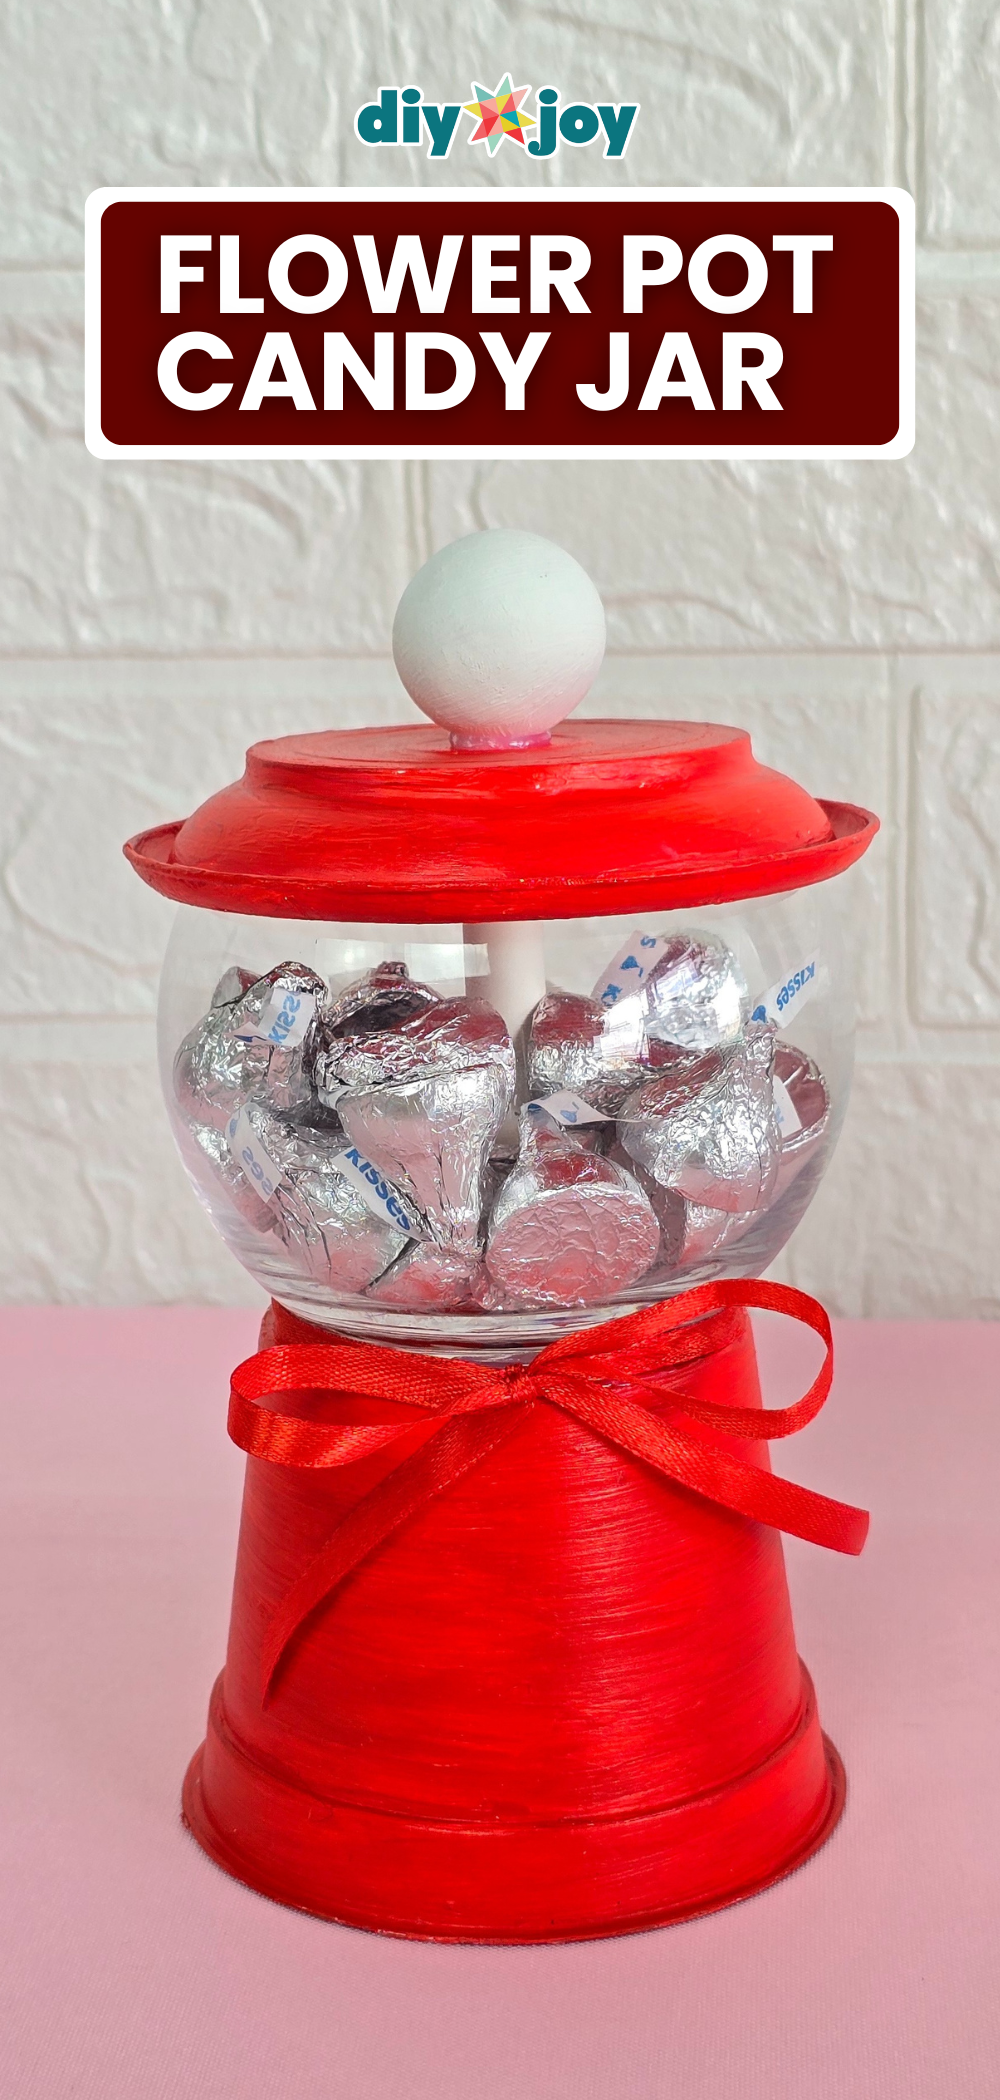
A plain Dollar Store jar with no real purpose gets a whole new life here. Some napkin paper and glue later, it earns its place on your dresser holding whatever stems you’ve picked that week. Decoupage napkins are thinner than regular paper, which is exactly why the pattern settles into the glass instead of sitting on top in a lumpy layer. Go in with zero expectations and you’ll be surprised. The DIY JOY tutorial walks you through the whole thing.
Get the full tutorial at DIY JOY.
12. Beaded Wind Chime

Strands of beads and charms hang from a branch here, catching light by a window and moving with every draft, which makes a bedroom feel alive rather than still. If you’ve been eyeing a jar of beads and charms with no plan, this wind chime is the plan. It’s a boho piece for very little money, and the strands are simple to thread, so it suits a beginner or a kid who wants to help. The instructions are on the DIY JOY post.
Get the full tutorial at DIY JOY.
13. DIY Flower Wall Hanging

Faux flowers and leaves hang in loose vertical rows from a length of driftwood here, so a blank wall gets a garden falling down it without a single nail in the plaster beyond the hanger. The Learner Observer shared it as part of a February blog hop, and the density is the design decision: sparse rows read modern and airy, packed rows read romantic. It photographs beautifully, which is why the same idea turns up as a wedding backdrop.
Get the full tutorial at The Learner Observer.
14. Beachy Boho Bedroom

A whole room rather than a single project, and the lesson in it is restraint. The Lilypad Cottage layers driftwood tones, white bedding, woven texture and black and white pattern, and lets the palette do the coastal work instead of seashells. The canopy is two teen drapes sewn together and hung over the bed, and the dresser was a $30 flea market find with rope pulls. Coastal style dies from accessory overload and lives on texture variety.
Get the full tutorial at The Lilypad Cottage.
15. DIY Copper Pipe Marble Plant Stand

Copper pipe and a 12 inch marble tile make a plant stand that looks like a design shop impulse buy, and nothing is soldered. A Bubbly Life glues half inch copper into tees, street elbows and end caps, so the whole frame presses and glues together. The cut list is four 14 inch legs, three 11 inch pieces, four at 6 inches and four at 2 inches out of ten feet of pipe. A pipe cutter makes short work of it and the copper warms as it ages.
Get the full tutorial at A Bubbly Life.
16. DIY Two Tier Side Table Makeover
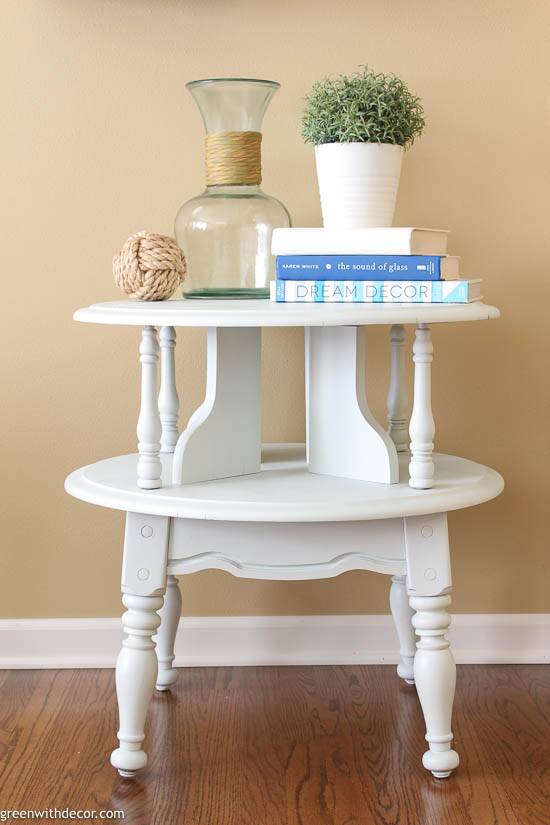
picked this two tier table up off the side of the road, and it was by her own account the filthiest piece she had ever started with, which all came off with a good clean. From there it is patch primer, sanding and paint, sprayed rather than brushed, in Sherwin Williams Dewy. The two tiers are the real reason to grab a table like this: books and a plant on top, everything you do not want seen on the shelf below.
Get the full tutorial at Green With Decor.
17. DIY Gold Leaf Embellished Curtains

gilds a pair of plain Ikea Merete panels, bought for $30, with gold metal leaf. Masking tape marks out the design, spray adhesive goes down, the leaf is laid on and a spray sealer locks it in. Iron the panels first, because wrinkles wreck the pattern. She also learned the hard way not to do this on pillows, which get sat on; curtains hang untouched, so the leaf survives. Metallic catches lamplight at night in a way printed fabric never does.
Get the full tutorial at The Gathered Home.
18. Painted Crate Hairpin Side Table

A $13.99 craft store crate on hairpin legs is the whole recipe, and it comes out looking like a small furniture line. Dwell Beautiful stains hers with Rust-Oleum Early American, wraps gold embroidery floss as a detail, then screws the legs to the base. Mounted on the wall or standing on the floor, the crate opening takes books as though it were designed for them. Choose a crate that is not warped and watch for the grain before you commit to stain over paint.
Get the full tutorial at Dwell Beautiful.
19. Vintage Doily Dreamcatcher DIY

A lace doily stretched in a wooden embroidery hoop does the job a woven web usually does, only prettier. Belle Notti’s method is simple: the doily must be larger than the hoop, lay it over the inner ring, tighten the outer ring down, pull it taut and trim the excess from the back. Three to five lengths of leather cord tie on at the bottom with overhand loop knots, with feathers on both ends, so leave plenty of length. Thrifted doilies cost pennies.
Get the full tutorial at Belle Notti.
20. Tribal Sideboard

bought this mid century sideboard for $5, found the exterior panels warped and glued on, and knocked them off with a hammer. New plywood door fronts went on in their place, sealed with clear varnish tinted with ten percent teak brown stain, two coats front, back and edges, sanded lightly between. Then an all over batik stencil laid across all the doors at once, lined up with the frame gaps. Pick plywood that is flat and check the grain before you stain it.
Get the full tutorial at The Painted Hive.
21. DIY Flower Tea Light

A single bloom sits over a small light so the petals glow from inside, and it looks genuinely magical on a bedside table at night. You’ll be surprised how quickly it goes together, and it works just as well for a wedding or a party if you make a few and scatter them down a table. It’s the kind of small, glowing touch that makes a room feel finished. The full how-to for this flower tea light is on the DIY JOY post.
Get the full tutorial at DIY JOY.
22. DIY Octopus Art

Oversized art is the fastest way to fix a blank wall, and this one is a giant black line drawing of an octopus hung as a single panel above a bed. Scale is the whole idea: one enormous image beats a grid of small frames and costs less than framing six prints. The photo shows two people on step stools holding the finished piece up against the wall, which tells you honestly that this is a two person hanging job rather than a one person one.
Get the full tutorial at House of Jade Interiors.
23. DIY Easy Rope Shelf

A board, four lengths of rope and two big hook screws, and Burkatron’s whole shelf came in around fifteen pounds of materials. The detail worth copying is the hole size: 8mm rope needs 10mm holes, because a tight hole is impossible to thread. Four one meter lengths go through the corners and knot underneath, with the top ends knotted over the hooks. That last knot is also how you level it, so adjust rather than redrill. Light objects only, not books.
Get the full tutorial at Burkatron.
24. DIY Cushion with Cross Print

Scandinavian minimal pattern from a potato. Big DIY Ideas cuts a cross shape into a halved potato, or uses a bought stamp, inks it with fabric printing ink and stamps a loose scattered grid across one square of fabric. The second square stays plain, so the cushion is reversible, and the two get sewn right sides together with bias edging sandwiched between them around the perimeter. Slight irregularity in the stamping is the style working, not failing.
Get the full tutorial at Big DIY Ideas.
25. Driftwood Jewelry Hanger

Necklaces hang untangled and visible, which quietly changes how often the good ones get worn. DIY Candy drills a piece of driftwood with a 3/16 inch bit, screws crystal knobs along its length, adds a picture hanger or eye hooks and hangs it from jute. It is rated beginner, the only skills being drilling and screwing into wood. Some driftwood wants sealing and some is better left raw, which the tutorial covers. No beach nearby means buying a piece online instead.
Get the full tutorial at DIY Candy.
26. DIY Concrete Planter

‘s father, who she calls the authority on all things concrete, told her not to use bare cement mix, so the ratio here is two parts dry cement to three parts sand. More cement makes a paler result; equal parts gives a very light gray. The wet mix goes into a plastic bowl, gets tapped to bring air bubbles up, then a smaller round container is pressed in to form the cavity. Sand the edges once cured. Place it before you plant, because it is heavy.
Get the full tutorial at Burkatron.
27. Fairy Jar Lamp
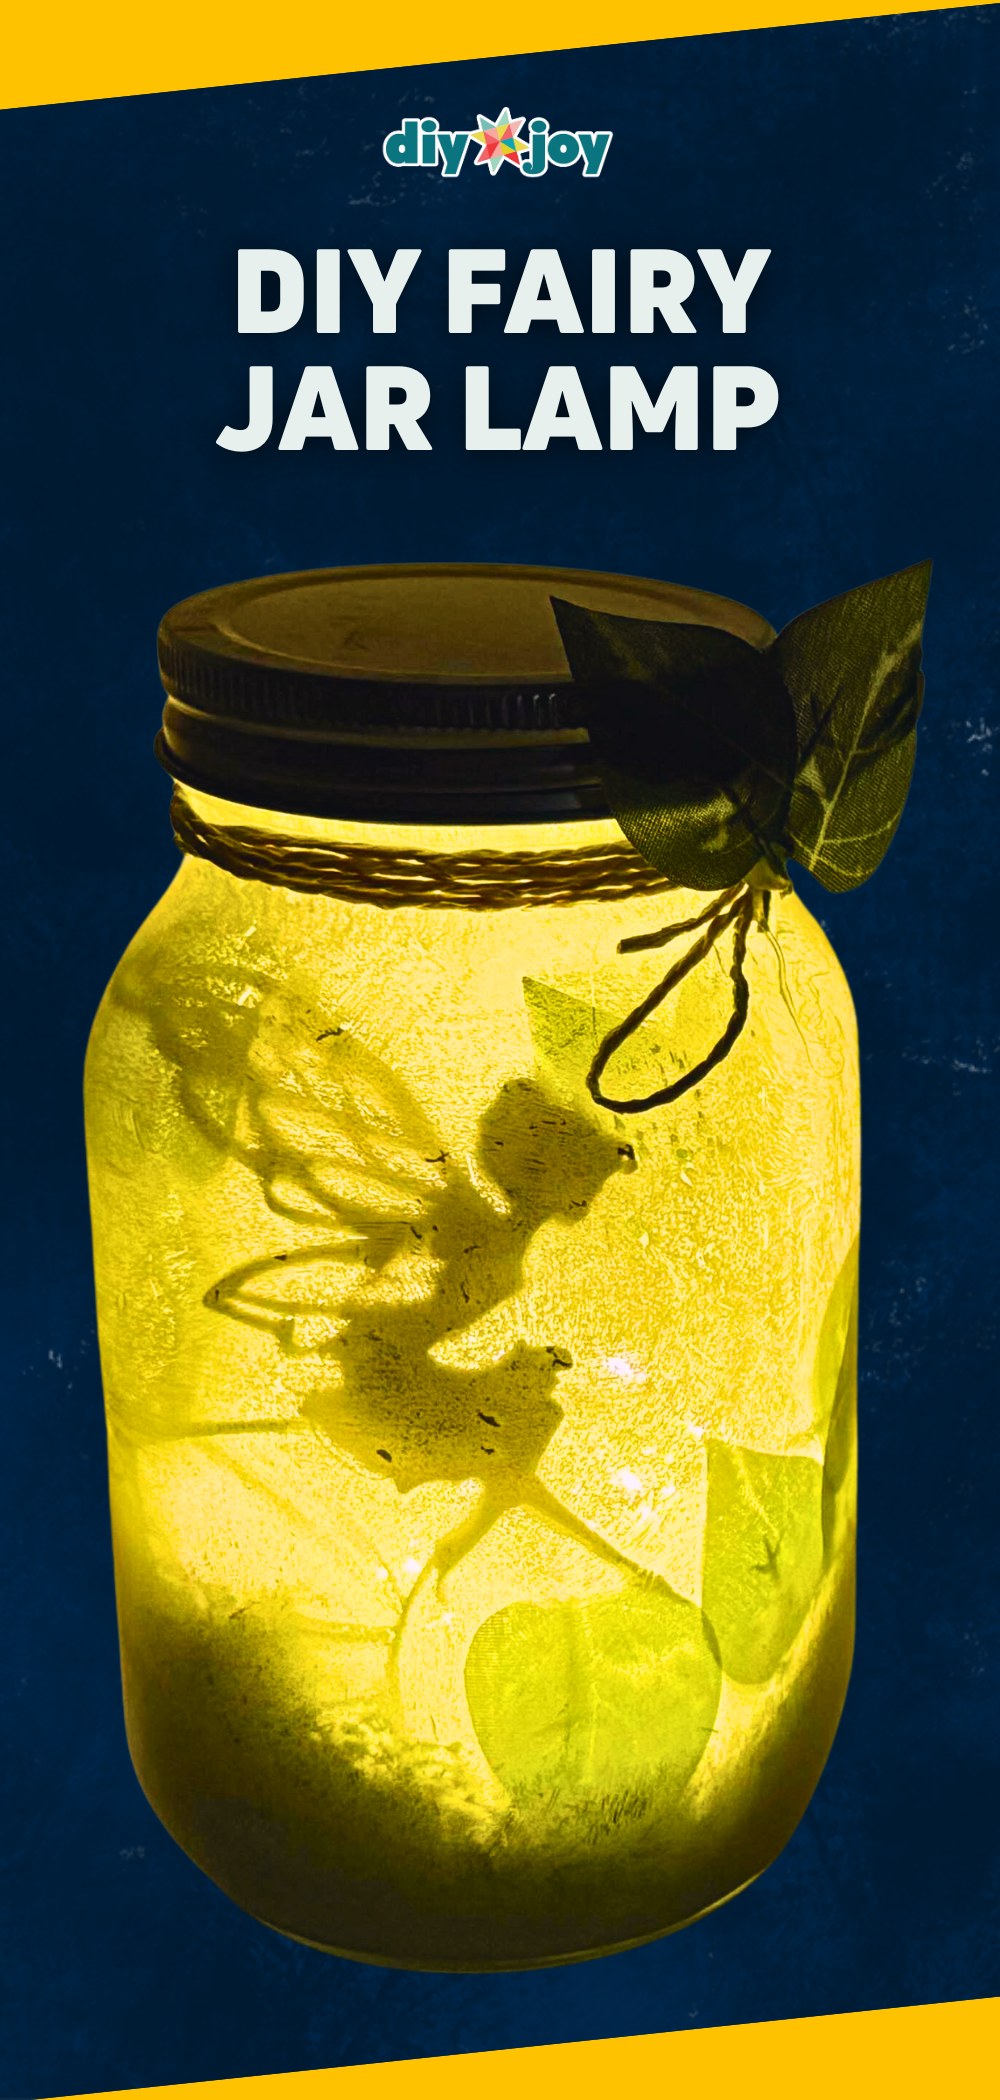
A soft night light rather than a bright one, which is exactly what your bedside table wants. If you’ve got a soft spot for cottagecore crafts, this fairy jar lantern is a lovely place to start: a glass jar, a warm glow and a little silhouette that shows through the sides once it’s lit. It’s cheap, it’s quick and it gives a room that warm, cozy, not too bright light no overhead fixture manages. The full how-to is on the DIY JOY post.
Get the full tutorial at DIY JOY.
28. DIY Leaf Art

Strips of green paper woven into a single oversized leaf shape and set in a plain wooden frame, held up in the photo against a white wall. It is a piece of art that costs the price of a sheet of paper and reads as far more than that, and the weaving is the whole technique, so anyone who made a paper mat in school already has the skill. A large single botanical shape is a calm thing to hang over a bed.
Get the full tutorial at Monsters Circus.
29. Clay Flower Mirror
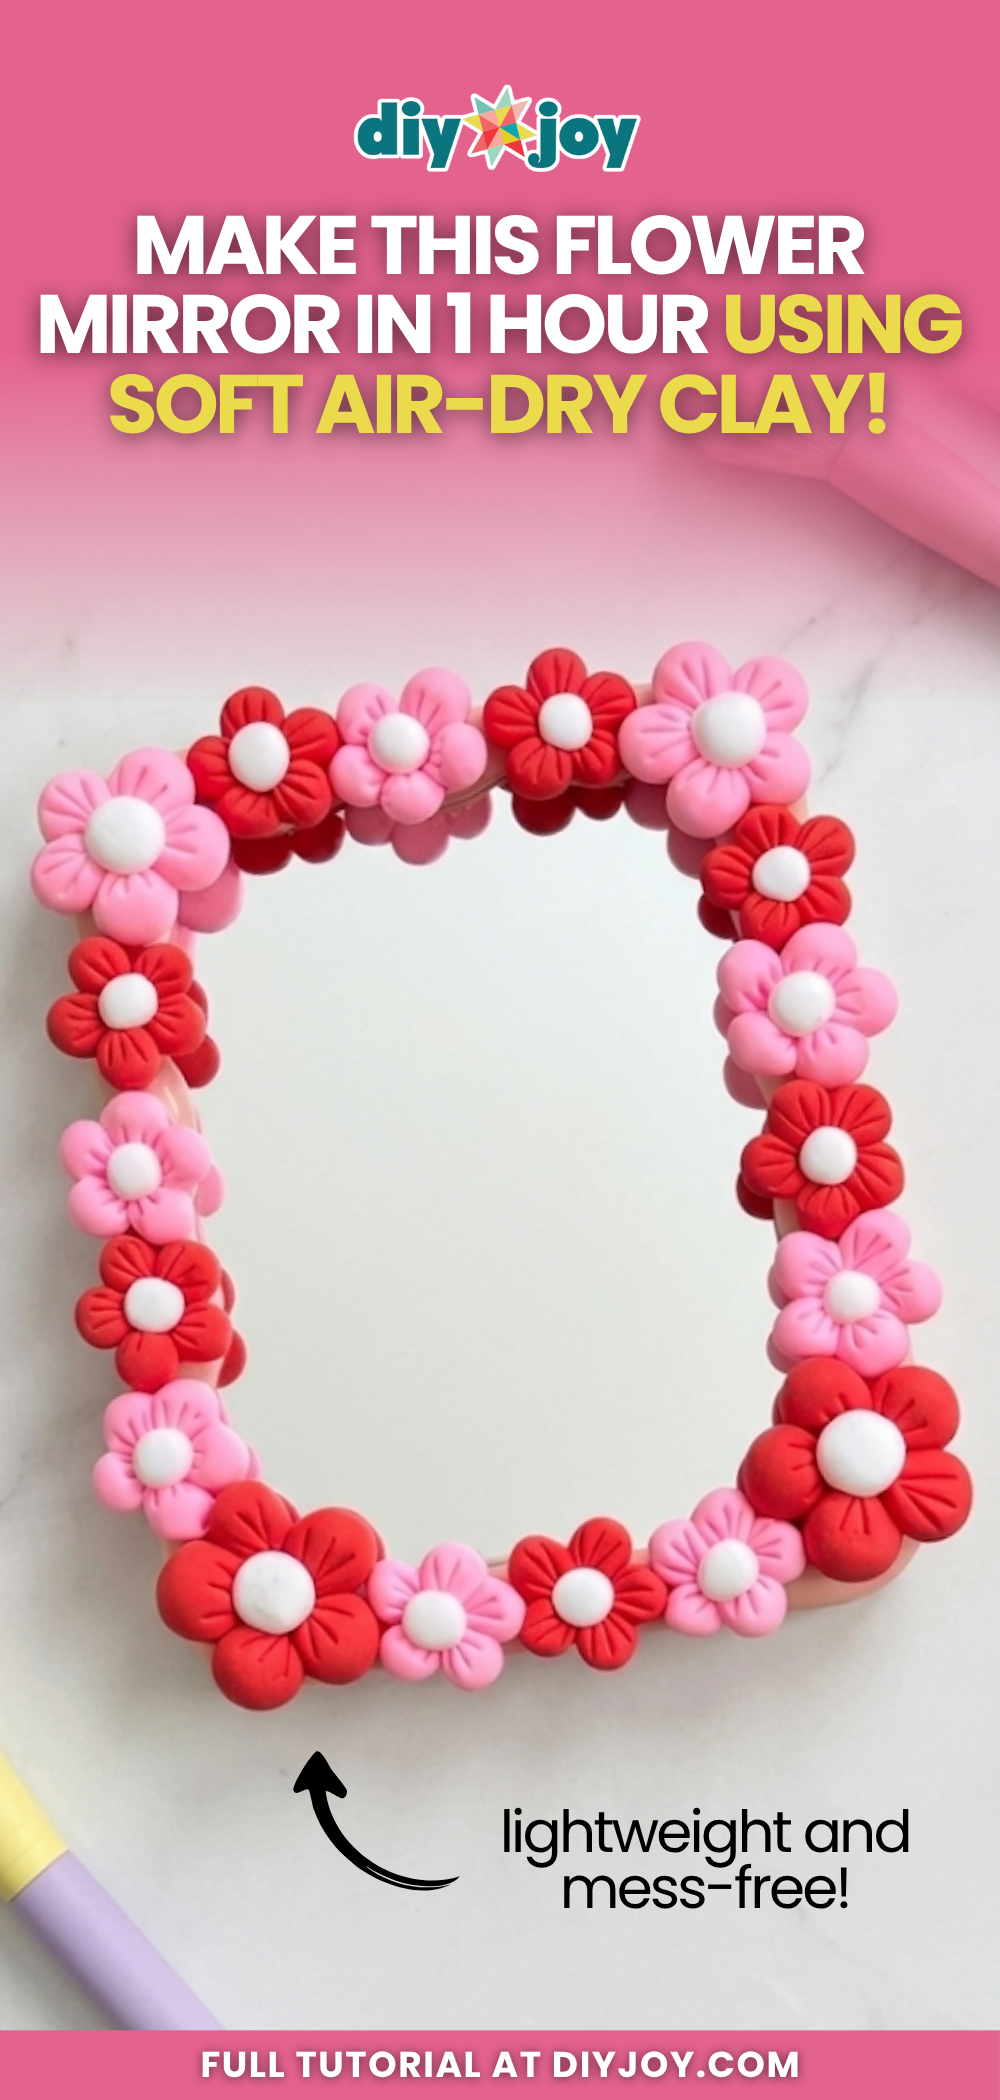
A plain mirror that feels a little too basic gets an edge of soft clay flowers, and it completely changes the piece. It works on an old mirror you already have or a simple one from the dollar store, which makes it such a cheap upgrade for something that takes up real wall space. You shape the flowers by hand from soft clay, so the color mix is yours, and the whole thing takes about an hour. Follow the full step by step on the DIY JOY post.
Get the full tutorial at DIY JOY.
30. Jewelry Catch-Alls

Those carved wooden leaves and bowls that sit unloved in every thrift shop get a color block makeover here. Thoughts from Alice, writing for Jennifer Rizzo, sands them lightly, sprays them white, then tapes off sections at an angle and paints color blocks with gold on each one. Her own warning is the useful bit: let each coat dry a good twelve to twenty four hours before retaping, because she had to touch up where the tape lifted early paint.
Get the full tutorial at Jennifer Rizzo.
31. DIY Glass Terrariums

The most ambitious project on this list, and Why Don’t You Make Me says so herself. You cut your own glass from a sheet using a glass cutter, gloves and goggles, with a downloadable template, then sand the edges, tape the shapes together from the inside and seal every edge with E6000 in sections so it does not glue itself to the table. Copper foil tape goes on last and hides the seams. Watch a lot of glass cutting videos first.
Get the full tutorial at Why Don't You Make Me.
32. Make a Woven Headboard

Two hours, rated beginner, and no loom. The Etsy journal’s method uses gridded latch hooking rug canvas cut to the width of your bed, with vertical slits cut across it at regular intervals. Four pounds of super chunky merino wool, a pound each of yellow, peach, ivory and white, gets spread out by hand until it reaches full volume and then woven through the slits. Two by fours and flush mount brackets or French cleats hang it on the wall.
Get the full tutorial at Etsy Journal.
33. DIY Simple Boho Hanging Planter

Four pieces of one inch square dowel cut to nine inches make a cradle that holds an eight inch terra cotta pot, which is the measurement that matters if you want to copy it. Vintage Revivals drills a hole at each end of every piece, then threads rope through opposite corners and knots each end under a wooden bead. Brass rings at the top carry two 80 inch ropes, and four shorter 15 inch pieces wrap and secure them. Adjust the long ropes to change the hanging height.
Get the full tutorial at Vintage Revivals.
34. Q-Tip Flower Bouquet
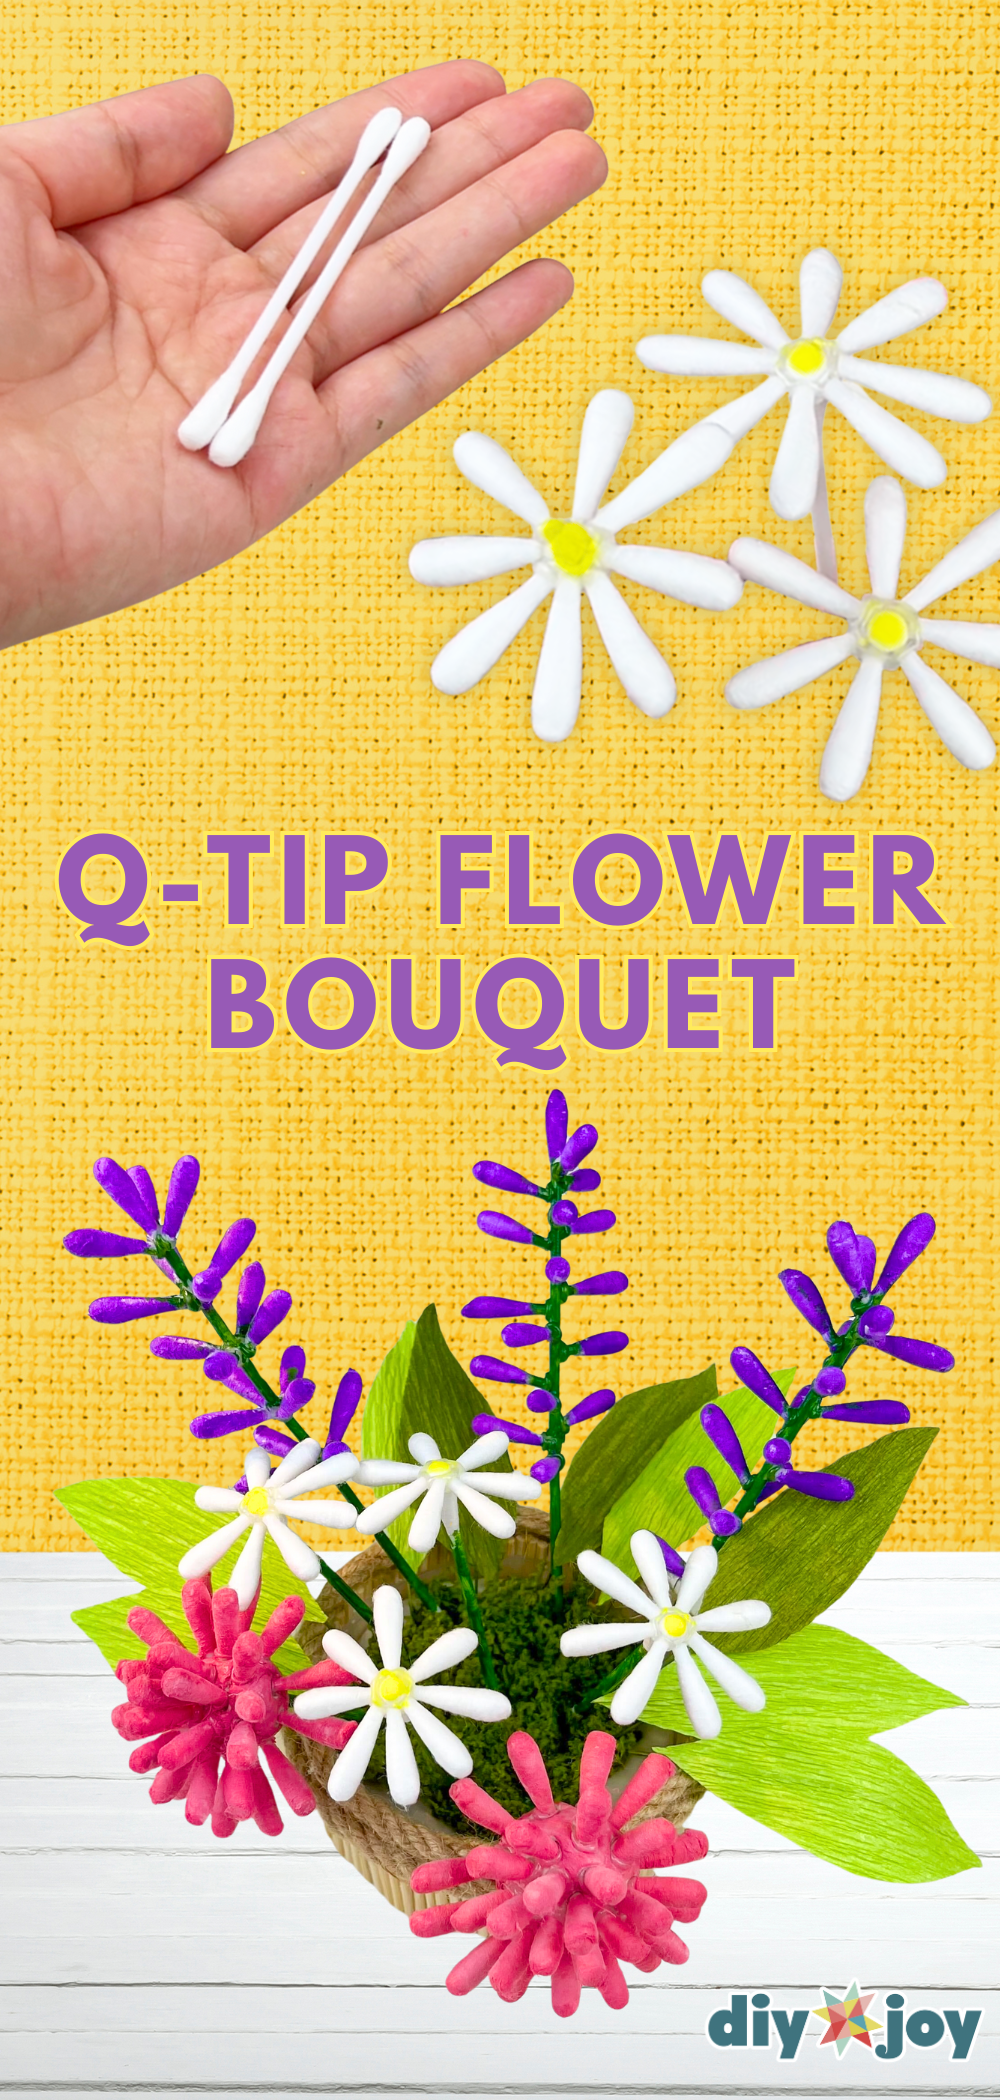
Cotton swabs turn into a bouquet here, and there are three different flowers in the tutorial: a pom pom flower, lavender and a daisy. They’re easy and genuinely fun to make, and the supply list is a box of Q-tips, paint and glue, which makes this a great rainy afternoon project with kids. A jar of them on your dresser never wilts and never needs water. Try this simple flower craft at home, and the full step by step is on the DIY JOY post.
Get the full tutorial at DIY JOY.
35. DIY Confetti Tray

layers Mod Podge over a plain wooden tray, pours confetti straight onto the wet glue and then seals the whole surface under Mod Podge Dimensional Magic, which dries clear and thick so the confetti sits suspended under glass rather than under paper. Her honest note is worth reading: two years on, the paper had dried out and the tray shifted from hot pink toward coral. Still lovely, just different, and that is how paper behaves under resin type finishes.
Get the full tutorial at Delineate Your Dwelling.
36. DIY Fiber Art

Around seventy tassels, each about four inches long, hooked into a latch hook mat and hung from a wooden dowel a few inches wider than the piece. A Beautiful Mess mixes a medium weight yarn with a super chunky one so the texture comes out slightly random rather than uniform, and marks the finished size on the wall with painter’s tape before shopping so the yardage is right. Use a sturdy neutral string to hang it, because yarn will not carry the weight.
Get the full tutorial at A Beautiful Mess.
37. DIY Letter Board

Felt letter boards sell for fifty dollars and up, and Jolly and Happy makes one for about twenty. An Ikea Ribba 12 by 16 frame is the base, felt gets ironed flat then cut into strips, and each strip is folded over a wooden skewer and hot glued so the skewer holds the channel open. She cut hers at two and a quarter inches and reckons one and three quarter would go further. Glue gun burns are a real risk, so leave yourself extra fabric to hold.
Get the full tutorial at Jolly and Happy.
38. Flower Chandelier

A cascade of faux blooms and trailing greenery hangs from the ceiling above a crib here, part of a whimsical woodland nursery reveal. As a bedroom idea it moves easily: hung over a bed rather than a crib it does what a chandelier does without any wiring, and it suits a room where the ceiling is the last blank surface left. The greenery falling down one side is what stops it looking like a wreath stuck to the ceiling.
Get the full tutorial at Pink Little Notebook.
39. DIY Faux Fur Ottoman

A soft white faux fur cube sitting on a trellis patterned rug in the photo, beside a gold side table and a gold framed chair. A fur topped stool is the easiest texture win in a room that has gone flat, because it adds softness at floor level where rugs alone usually have to carry it. It also doubles as a footstool or extra seat, and a plain thrifted cube or storage ottoman is all the base you need underneath.
Get the full tutorial at Classy Clutter.
40. Batik Nesting Tables

paints a set of plain nesting tables in Napoleonic Blue chalk paint, then stencils the tops with a Moroccan batik pattern using a different color on each one: Pure White on the large table, Paris Grey on the medium, a pearl stencil creme on the small. Tape the stencil down and work along the pattern. The whole set is distressed and dry brushed afterwards to age it, then sealed with clear wax. Nesting tables were made for small bedrooms.
Get the full tutorial at Finding Silver Pennies.
41. DIY Raw Crystal Necklace Display

Raw crystal points mounted along small wall plaques act as hooks, with necklaces hanging from each one, arranged in three staggered rows in the photo. It is jewelry storage that works as wall art when it is empty, which is the test any open storage has to pass in a bedroom. Hanging necklaces rather than piling them also means they stop tangling, and tangled necklaces are necklaces that never get worn.
Get the full tutorial at Julep by Minted.
42. Make Fabric Flowers

Anyone who sews ends up with bins of scraps, and Gina Michele’s fabric flowers are the scrap busting project that finally uses them. A Clover Flower Frills template folds the fabric so petals cut out in one go, then a needle and thread strings them together, about twenty petals for a full flower. Lightweight cotton or silk works, nothing thick. Glue the finished blooms to twigs for a display that never wilts, or string them together into garland.
Get the full tutorial at Gina Michele.
43. DIY Rope Rainbow Wall Hanging

Rope wrapped in yarn, bent around wire so it holds its arc, and the layers sewn together with a curved upholstery needle. Pure Sweet Joy is honest that this is not a quick one: the wrapping takes time and she worked on it a bit each day for five days. What it does buy you is total freedom on color and texture, since every arc can be a different yarn. Lay the rope out in the rainbow shape and tape the ends before cutting anything.
Get the full tutorial at Pure Sweet Joy.
44. Fork Pom Pom Flowers

No special tools for this one. All you need is a fork and a paper clip, both of which are already in your house, and they make colorful yarn pom pom flowers that cost almost nothing. It is cheap, incredibly easy, fun to make and perfect for beginners, even with no experience at all, which is why it is such a good one to do with kids. A jar of them on a shelf adds color in a room that needs some.
Get the full tutorial at DIY JOY.
45. DIY Hanging Barn Door
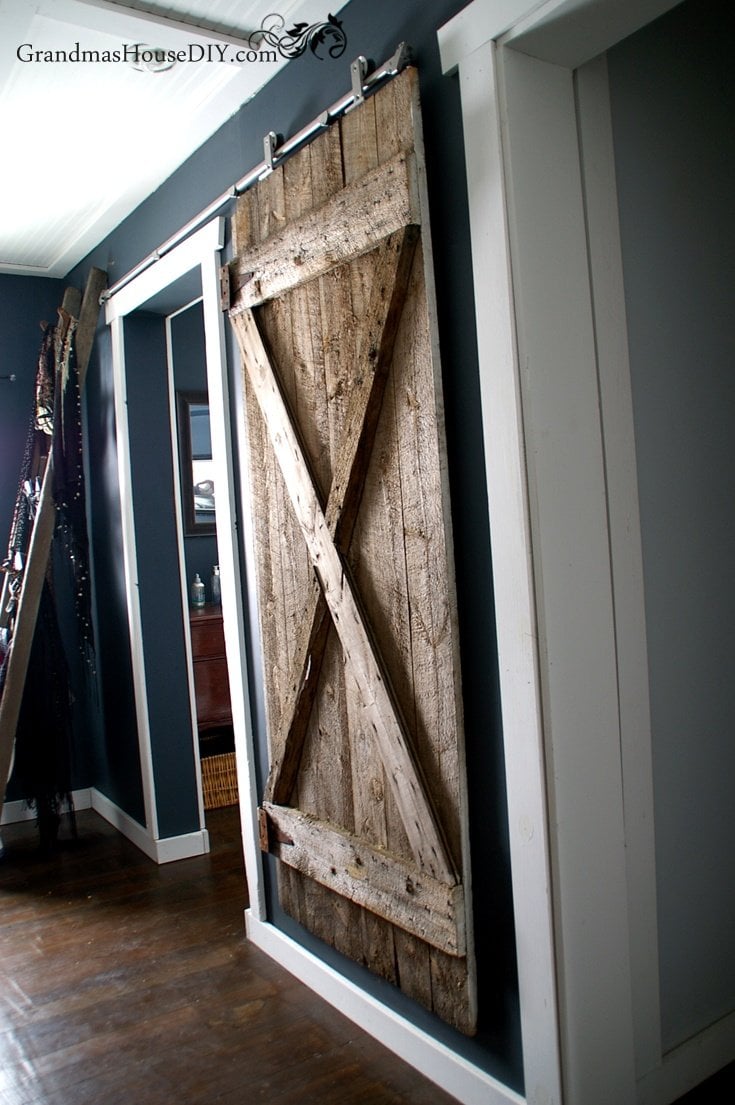
A weathered plank barn door on a metal sliding track, running across a doorway in a dark blue gray room in the photo. A sliding door earns its place in a bedroom for a practical reason rather than a decorative one: it needs no swing clearance, so it works where a hinged door would hit the bed or the dresser. The reclaimed plank face and the exposed hardware are what make it a feature instead of a fix.
Get the full tutorial at Grandma's House DIY.
46. Wallpaper Your Closet Doors

Hot pink chinoiserie wallpaper on a run of closet doors, from a New York studio that LOFT designer Austyn Zung converted with her architect husband. The idea transfers straight to a bedroom: closet doors are a huge flat surface and papering them puts all the pattern in a room in one place, leaving the walls calm. Opened, the doors become the bright back drop to a tidy closet. Removable paper makes the same idea work in a rental.
Get the full tutorial at Domino.
47. Resin Paper Nightlight Shade

, writing as Sustain My Craft Habit, pours high gloss resin over a 12 by 12 sheet of decorative scrapbook paper to make a sheet of resin paper, then re-covers a small lampshade with it. Her thrift store shade cost twenty five cents and then, in a very honest turn, did not fit the nightlight at all, so the plan changed mid project. Adhesive velcro dots and hot glue do the assembly. Work somewhere well ventilated.
Get the full tutorial at Resin Crafts Blog.
48. DIY Dresser Door Upgrade

A teal dresser with bold floral paper on the sides of the drawers, so the pattern only shows when they are open. Painted by Kayla Payne sprayed the piece in Sherwin Williams Holiday Turquoise and used heavy gift wrap rather than wallpaper, which is far cheaper: an extremely thin coat of Mod Podge, smoothed from one corner with a squeegee, the excess trimmed with a razor and a sealing coat over the top. Too much glue is what causes bubbles.
Get the full tutorial at Painted by Kayla Payne.
49. Chicken Wire Suncatcher

Beads threaded onto a panel of chicken wire inside a hoop, so sunlight through your window throws color across the room and a breeze makes the whole thing chime gently. It’s a fun summer craft that pulls double duty as a suncatcher and a wind chime at the same time. The beads are colorful enough to catch attention even without the sun on them, and the wire grid means every bead has its own place to sit. The full step by step is on the DIY JOY post.
Get the full tutorial at DIY JOY.
50. DIY Hanging Rope Nightstand
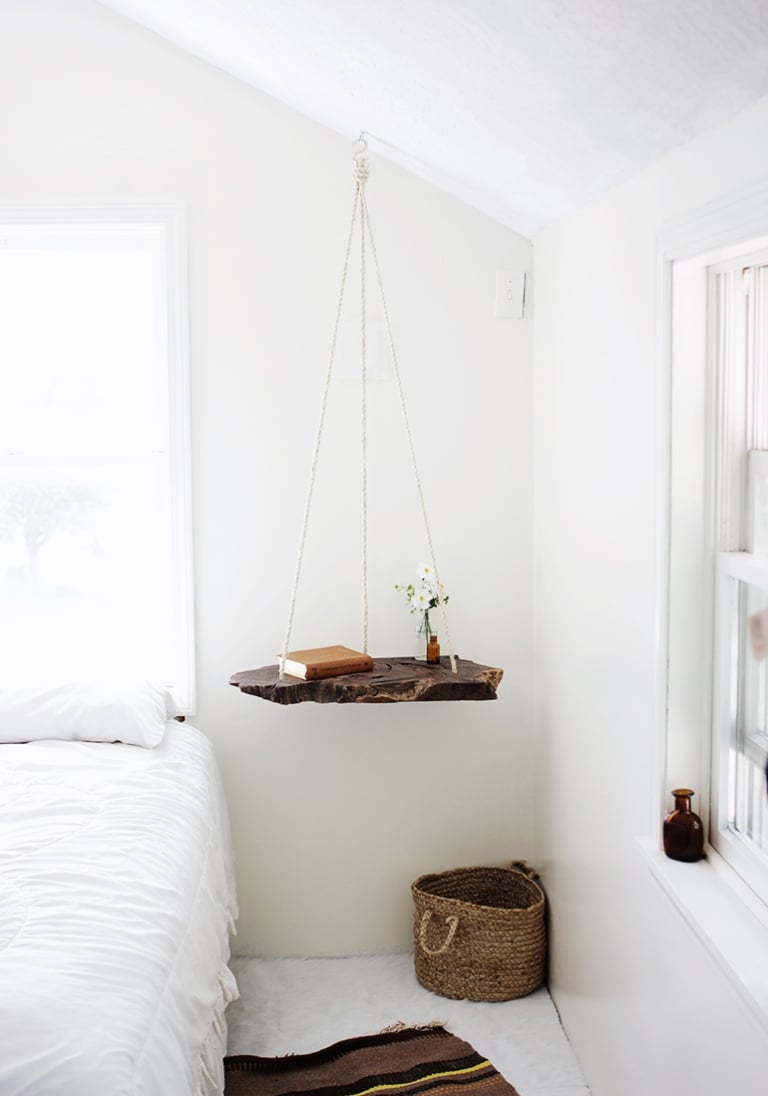
Short on floor space next to the bed? Hang your nightstand instead! A thick live edge wood slab gets three holes drilled through it, then rope laces up through the holes and loops over an S-hook on an eye screw in the wall. A toggle anchor keeps it secure, and you level the shelf by sliding the knot up or down before trimming the ends. It leaves the floor clear for a basket, and it’s just big enough for a book, a lamp or a little vase of flowers.
Get the full tutorial at The Merrythought.
51. Yarn Tassel Garland
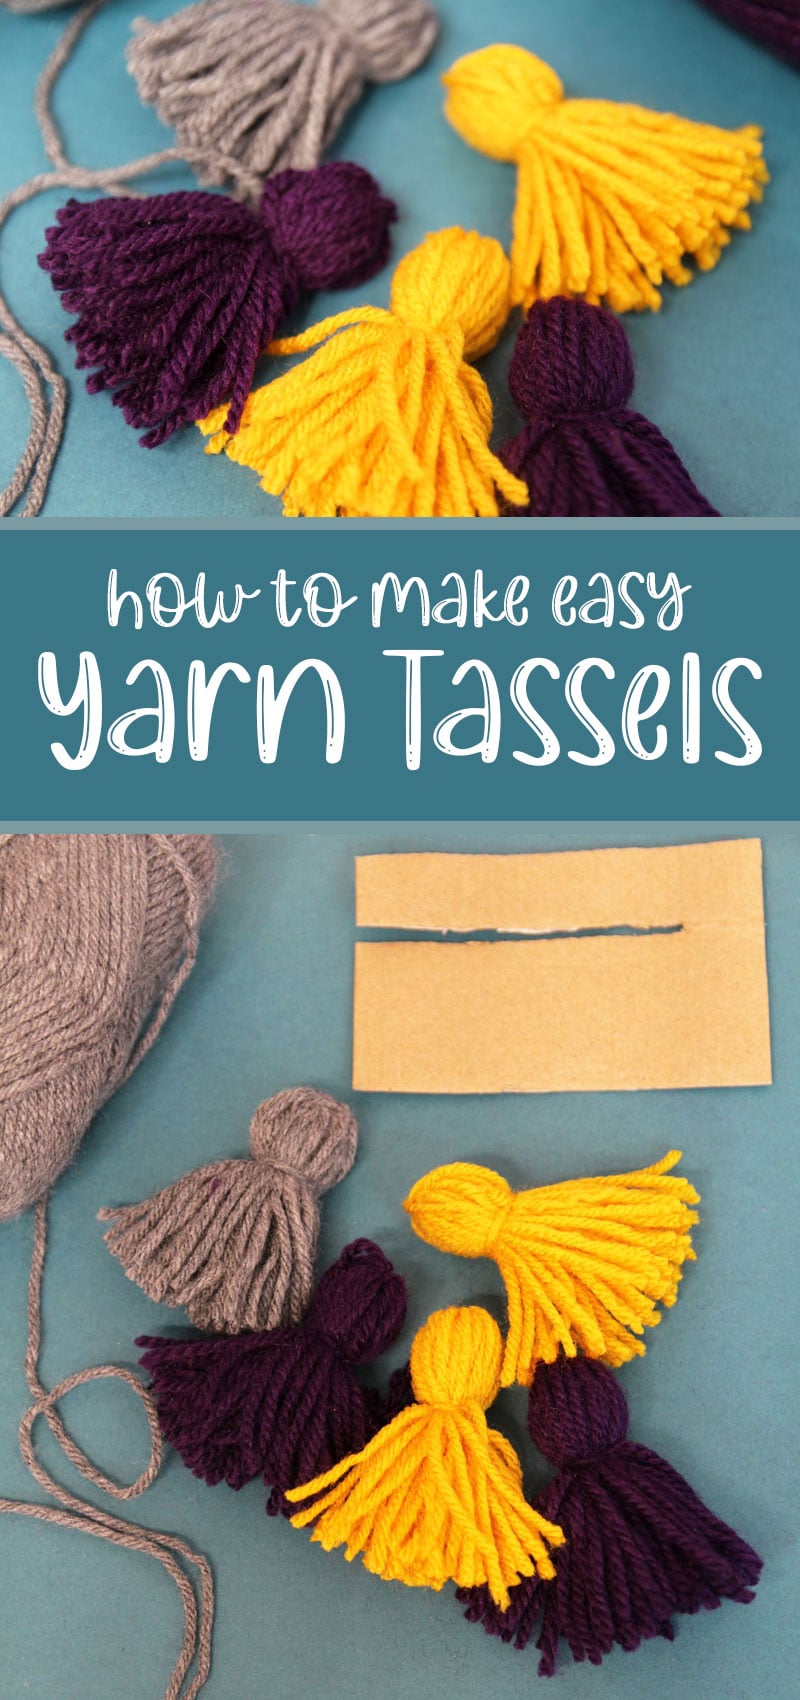
Want an easy way to add color over your bed or across a headboard? Make a yarn tassel garland! Cut a simple tassel maker from cardboard with a slit near the top, wind the yarn 30 to 35 times, tie off the head and snip the bottom loops. Wrap the neck, trim it even and string your tassels on cotton twine. Pick yarn colors that match your bedding and you’ve got custom decor for pennies. Kids love helping with this one too.
Get the full tutorial at Moms and Crafters.
52. Hanging Wood Box Wall Organizer
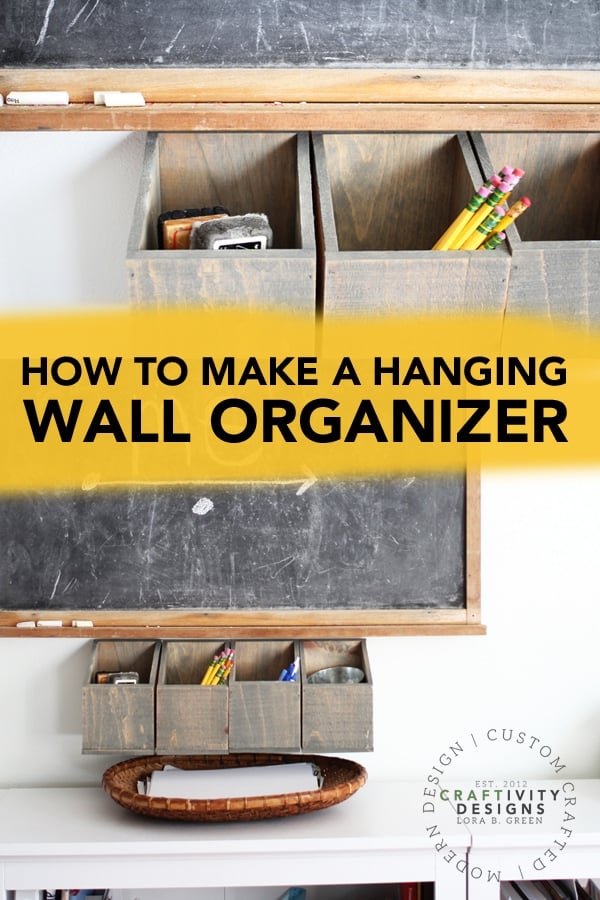
Is the desk in your bedroom buried under pens and clutter? Move it all to the wall! This hanging organizer starts with unfinished wood boxes lined up side by side and clamped together. A heavy duty hanging cleat screws across the backs so the bins can hold real weight, then gray stain goes on with a foam brush and gets rubbed back with a cloth. Hang it over a desk or dresser for chargers, pencils, makeup or mail. It’s simple, sturdy and so tidy.
Get the full tutorial at Kenarry: Ideas for the Home.
53. Wall Mounted Jewelry Organizer
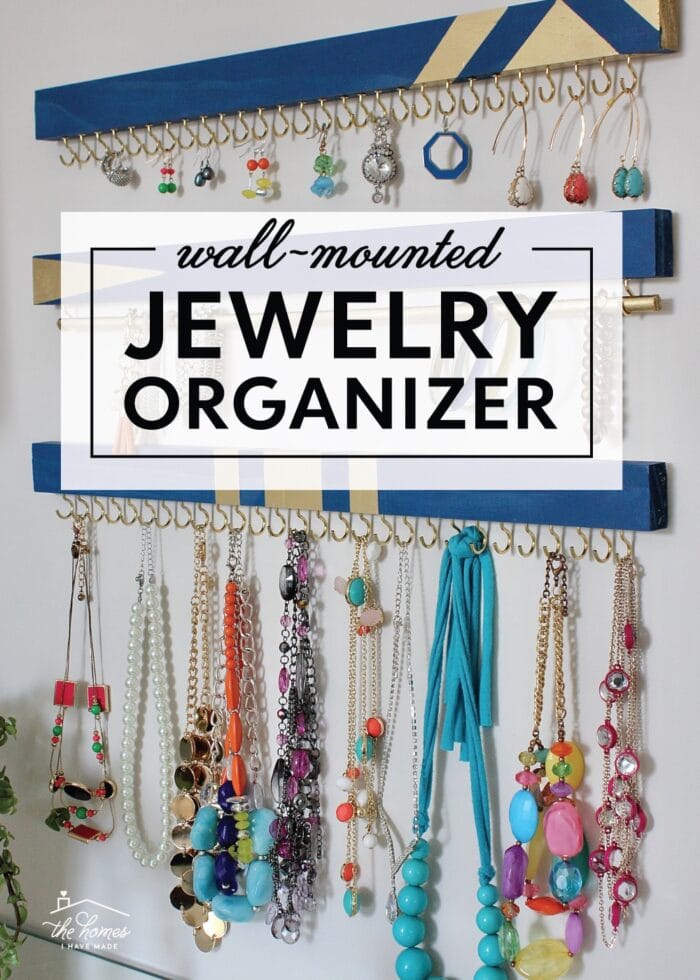
Tired of untangling necklaces every morning? This wall jewelry organizer keeps every piece out where you can see it. Three 1×2 boards get cut to the same length, sanded and painted, then taped off for a two-tone gold and blue design. Brass cup hooks go across the top and bottom boards for earrings and necklaces, and the middle board holds a painted dowel for bracelets. Hang it with Command strips, so it’s perfect for renters too. Pick colors that match your room!
Get the full tutorial at The Homes I Have Made.
54. Stenciled Wood Headboard and Footboard
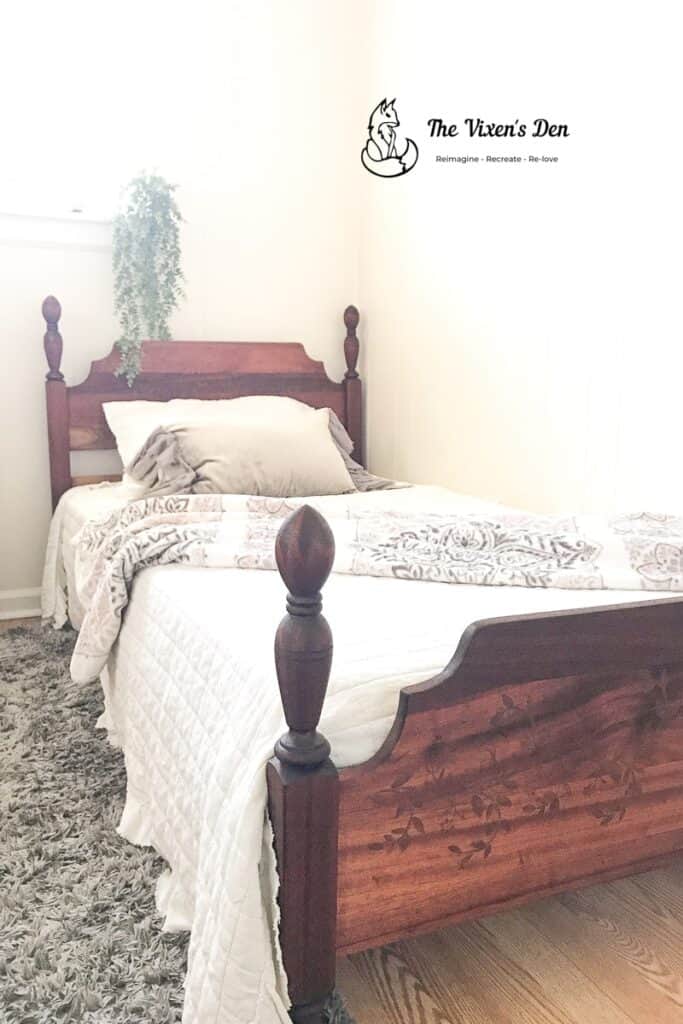
Got an old wood bed with a worn, flaky finish? Sand it back and give it a sweet stenciled vine! The finish comes off with a mouse sander, working from 40 grit up to 180, and a strip of emery cloth wrapped around the turned posts like floss keeps the curves intact. Then a leaf and vine stencil goes on with a gel stain a shade darker than the wood, and hemp oil seals it all. It’s a subtle detail that fits any style of bedroom.
Get the full tutorial at The Vixen's Den Studio.
55. Concrete Tea Light Holders
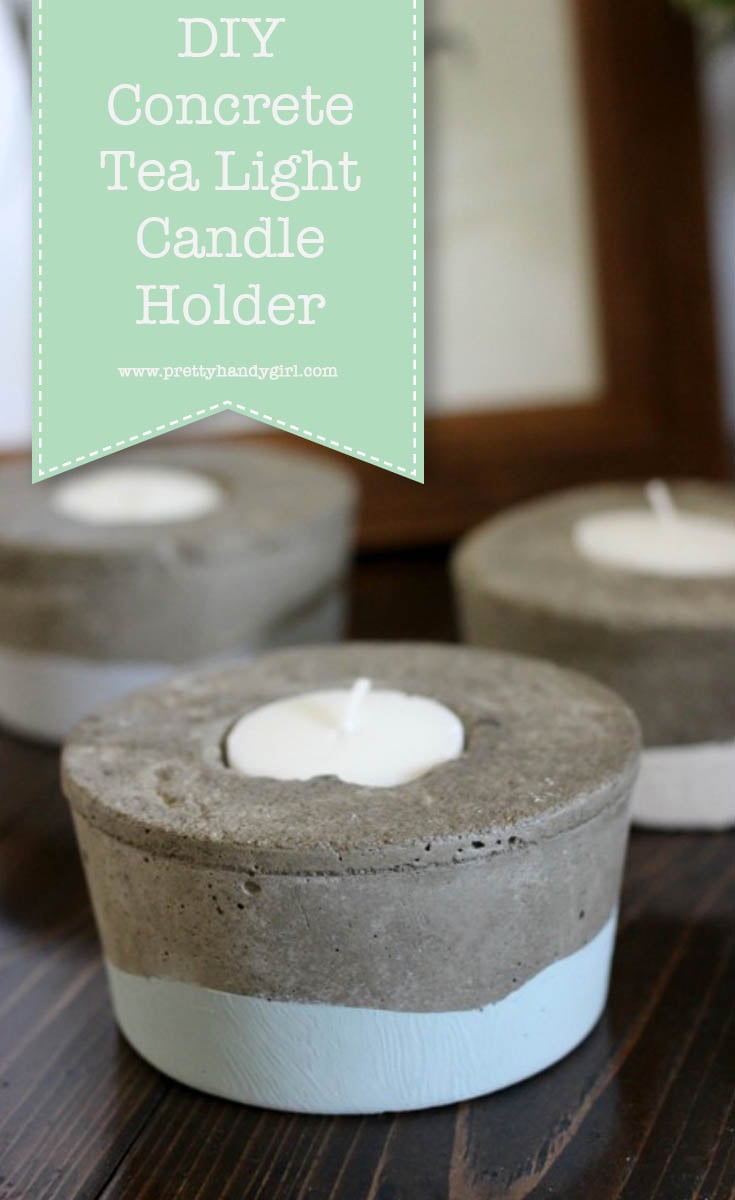
Love that modern concrete look? These tea light holders are made with plastic containers as molds. Spray the inside with WD-40 so nothing sticks, fill with mixed concrete and tap out the air bubbles. Press a tea light into the center while it’s wet, push it down again after ten minutes, then let it set for up to a week. Seal with clear spray paint and dip the bottoms in paint for a color block finish. They look so good on a nightstand!
Get the full tutorial at Pretty Handy Girl.
56. Stenciled Mid Century Nightstand
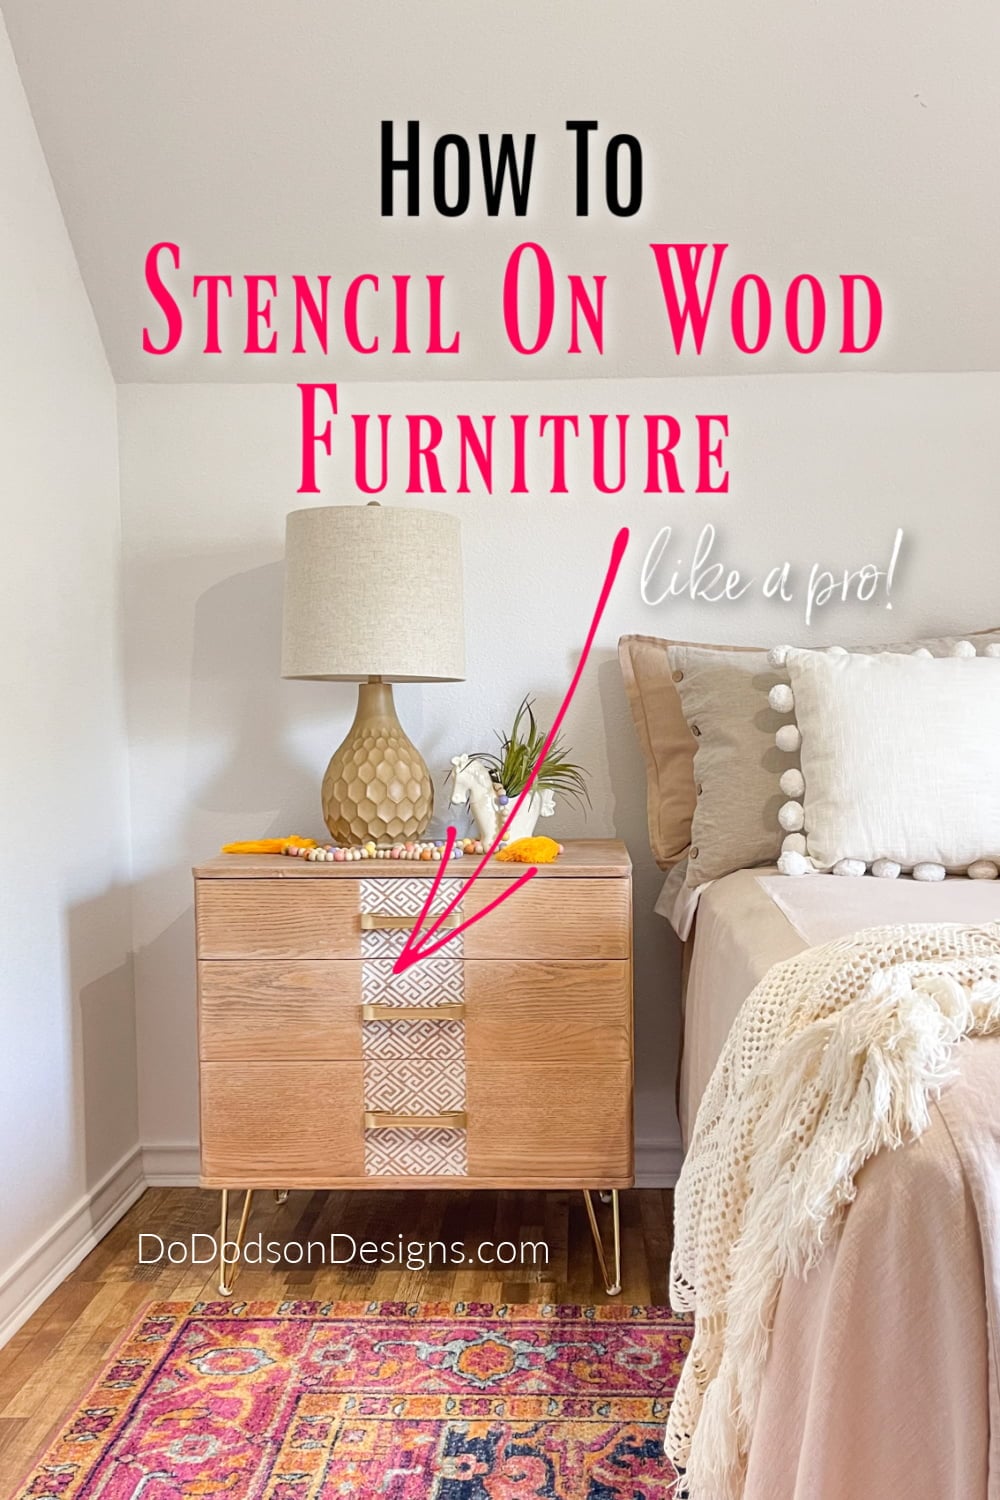
Found a boxy little nightstand at the thrift store? Give it a mid century update! Sand the old varnish off with 100 grit, then 220 for a silky smooth natural wood finish. Add gold hairpin legs with a few scraps of wood for a level base, and spray the hardware with reflective gold paint. A Greek key stencil in white chalk mineral paint runs down the drawer fronts for a bright pop of pattern. It’s such a fresh look for a bedroom!
Get the full tutorial at Do Dodson Designs.
57. Air Dry Clay Pebble Jewelry Dish
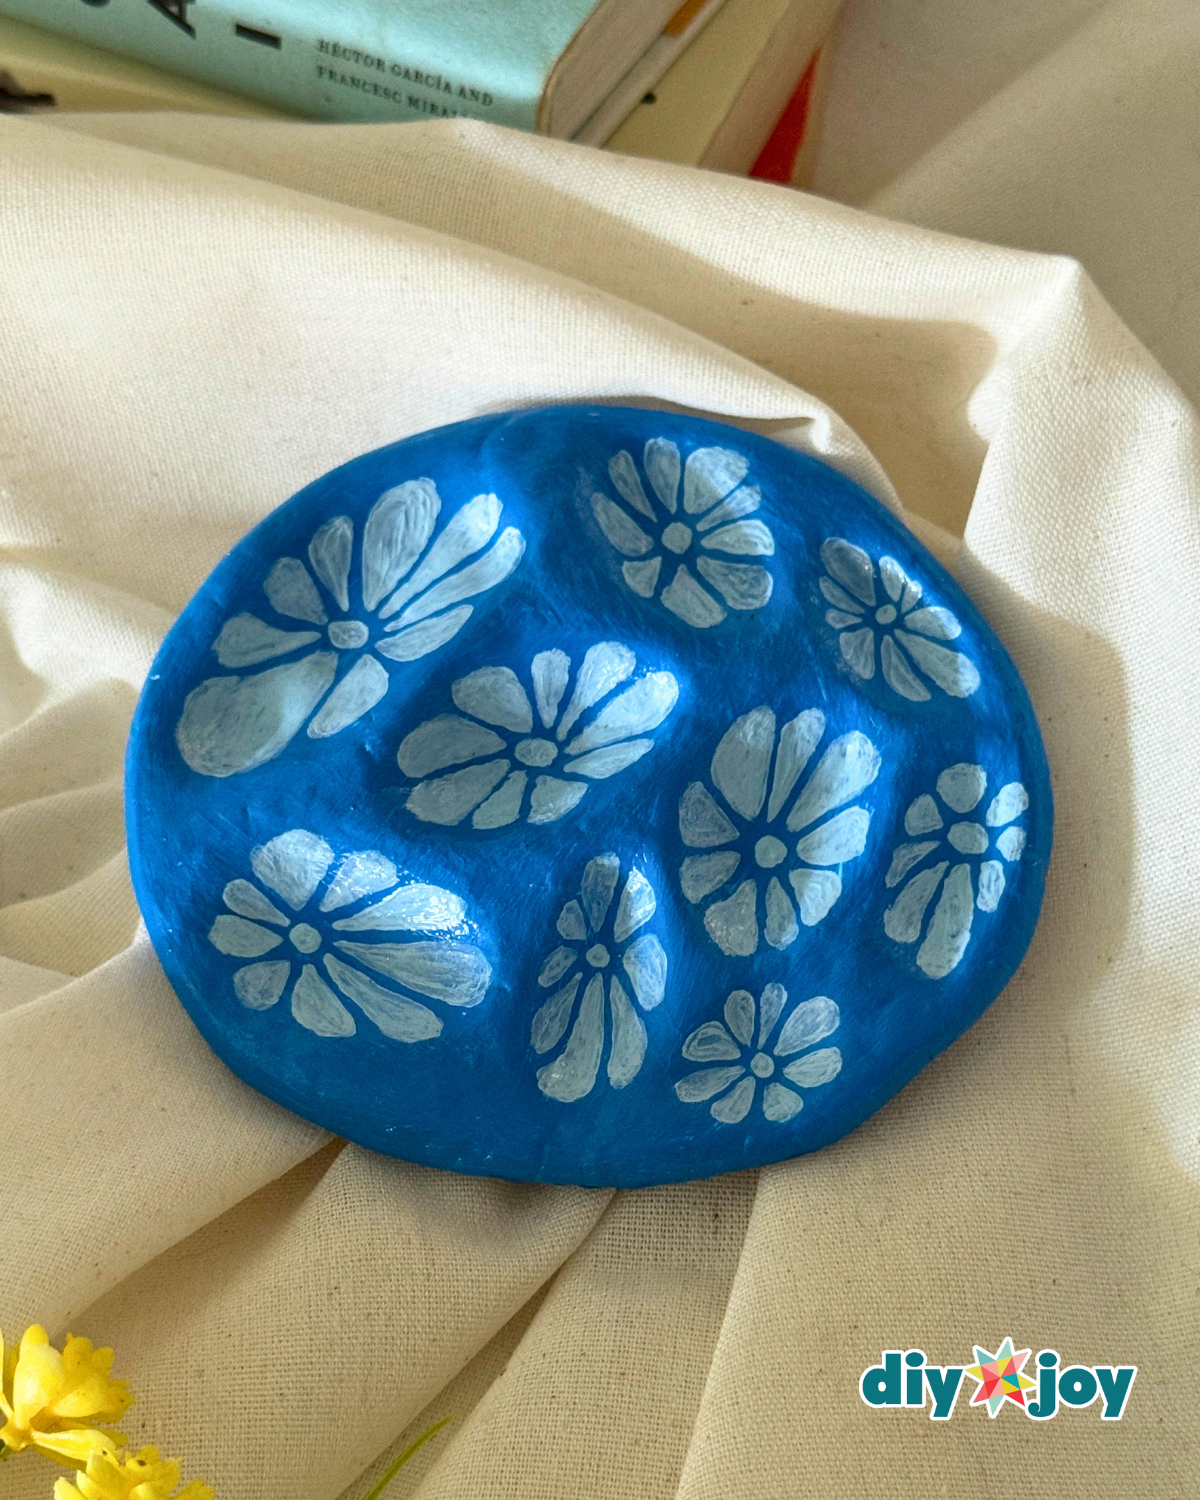
Need a cute spot for rings and earrings on your nightstand? Make this textured jewelry dish with air dry clay and a few smooth pebbles! Instead of a plain smooth finish, the pebbles press into the clay to shape little petal dips, so the dish has a soft, organic texture. Paint it in a bold color, pick out the flower shapes in white and seal it. It’s useful, pretty on display and a sweet handmade gift too.
Get the full tutorial at DIY JOY.
58. Decoupage Clay Jewelry Dish
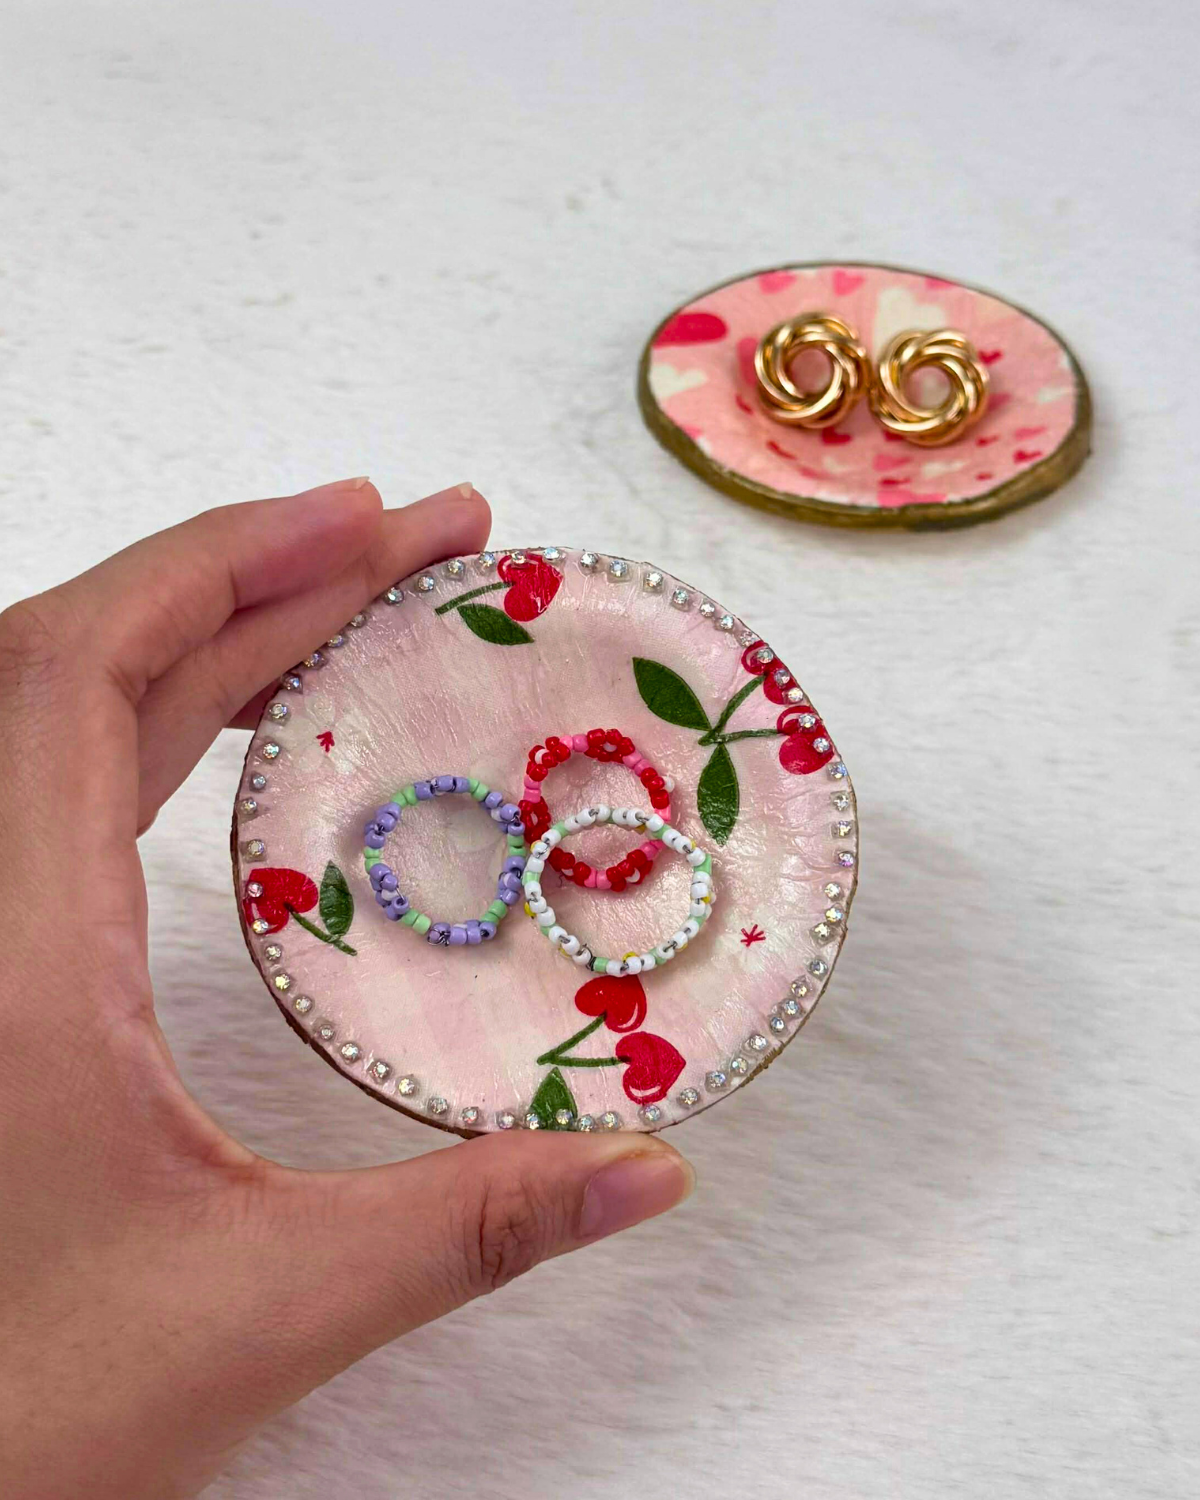
Want a jewelry dish that looks store bought? This one is air dry clay topped with napkin decoupage! Roll and shape the clay into a shallow round dish, let it dry, then lay a pretty printed napkin layer over the top and seal it so the design looks painted on. A sparkly rim finishes it off. It’s lightweight but sturdy, and it keeps your rings and earrings together by the bed. Make a few in different prints to give as gifts.
Get the full tutorial at DIY JOY.
59. Clay Jewelry Tray
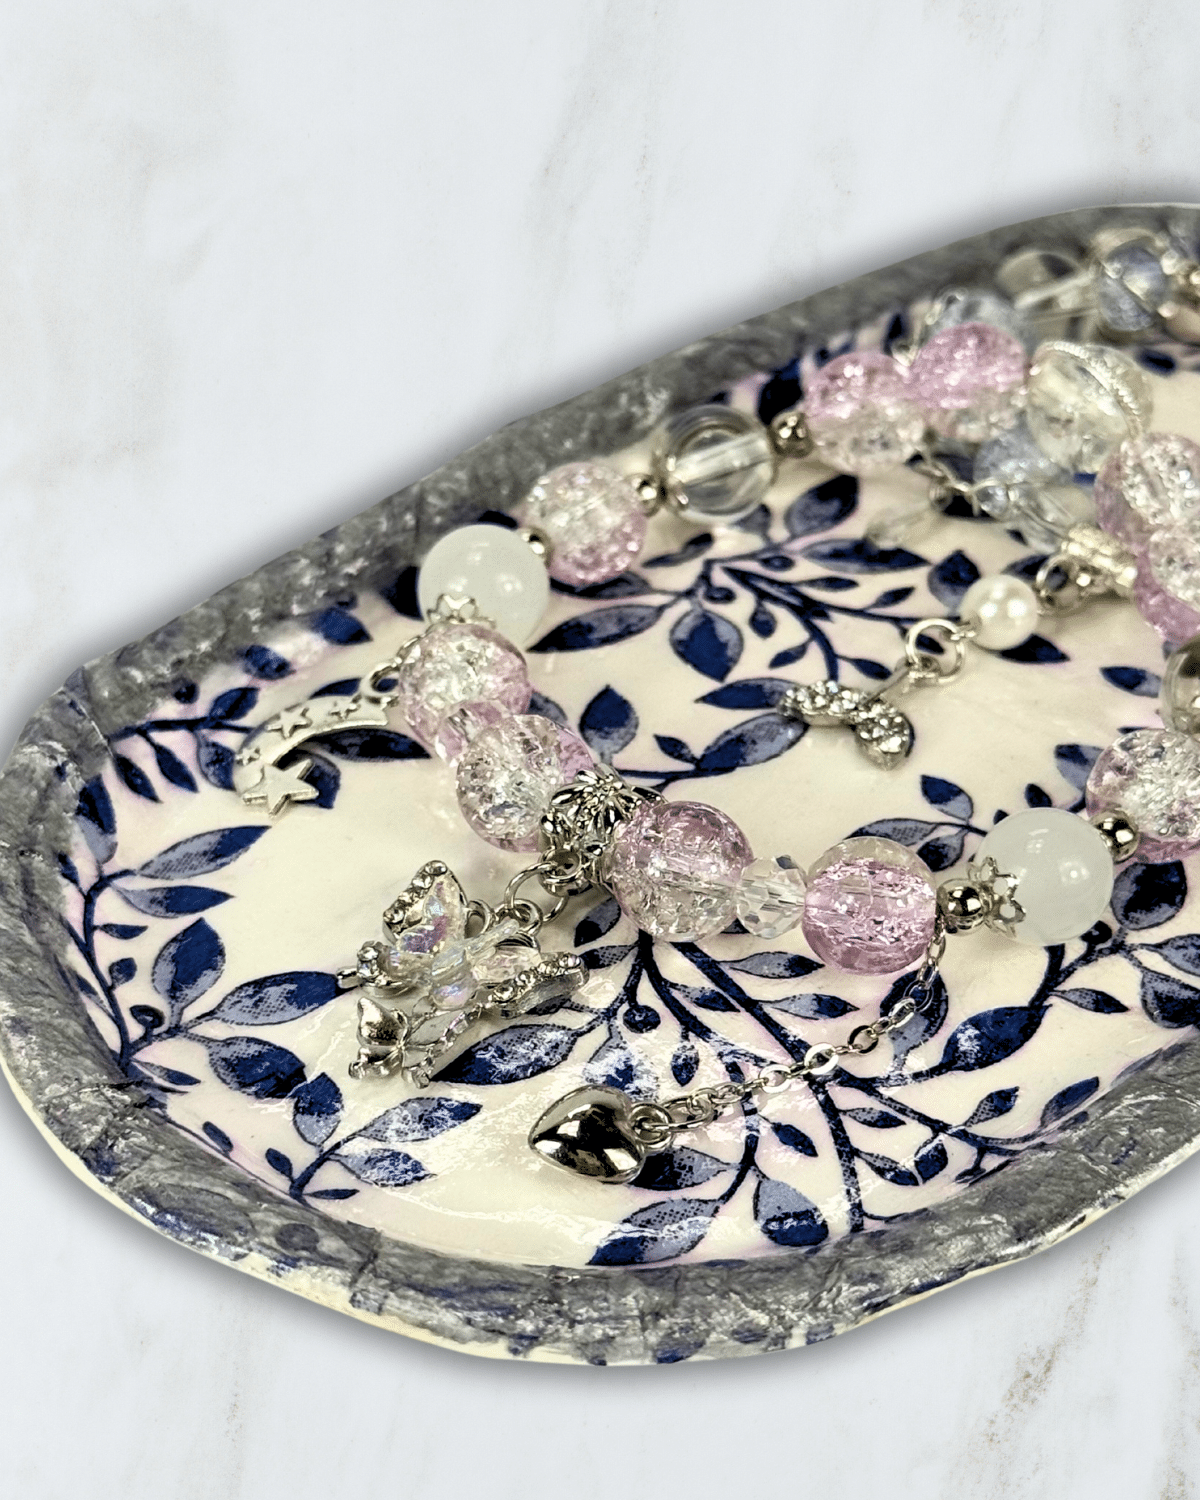
Want a jewelry tray big enough for bracelets and necklaces, not just rings? Roll out air dry clay, cut an oval and lift the edges into a shallow tray. Once it’s dry, decorate it with napkin paper for a blue and white porcelain look, then seal it so it shines. It holds all your everyday pieces on a dresser and looks lovely on its own too. Smooth, textured or colorful, you can make it match any bedroom.
Get the full tutorial at DIY JOY.
60. Clay Flower Ring Holder
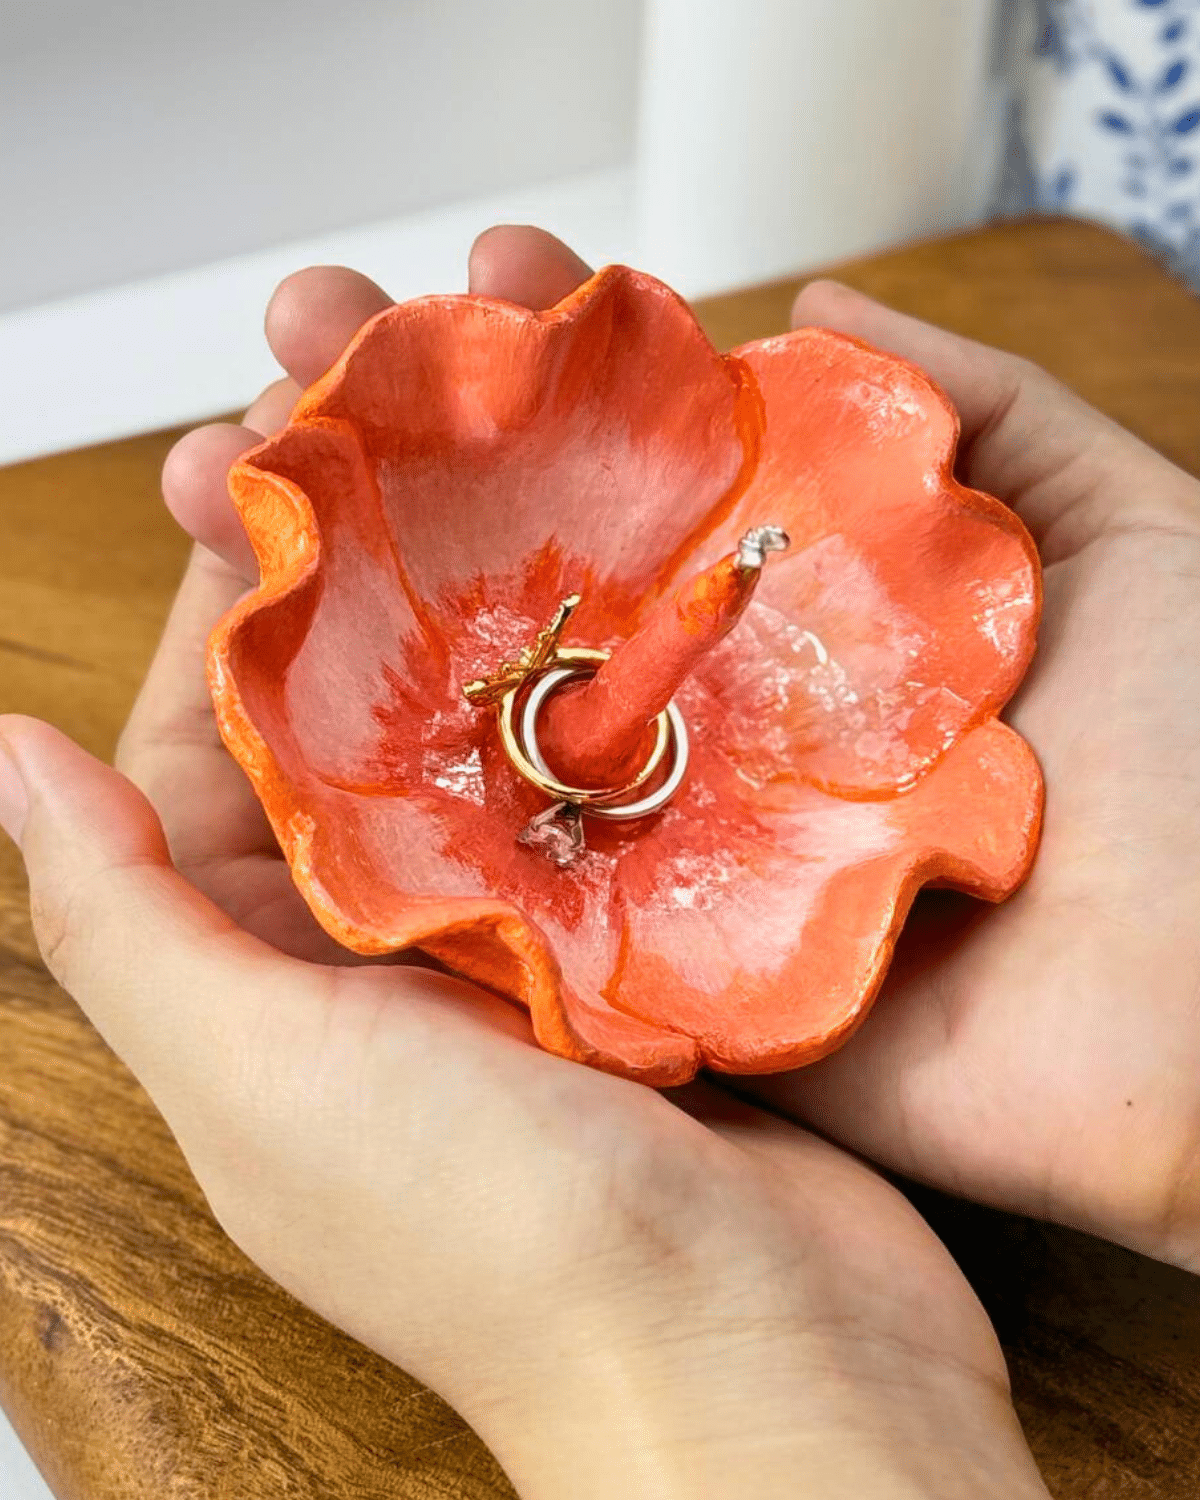
Looking for a pretty place to slip off your rings at night? This flower shaped ring holder is made with air dry clay, so there’s no kiln or baking. Shape wavy petals around a little center, add a small post for rings to sit on and let it dry. Paint it a bright coral or any color you love, then coat it with resin for a glossy, almost porcelain finish. It’s practical, sturdy and makes a thoughtful gift.
Get the full tutorial at DIY JOY.
61. Napkin Decoupage Pillar Candle
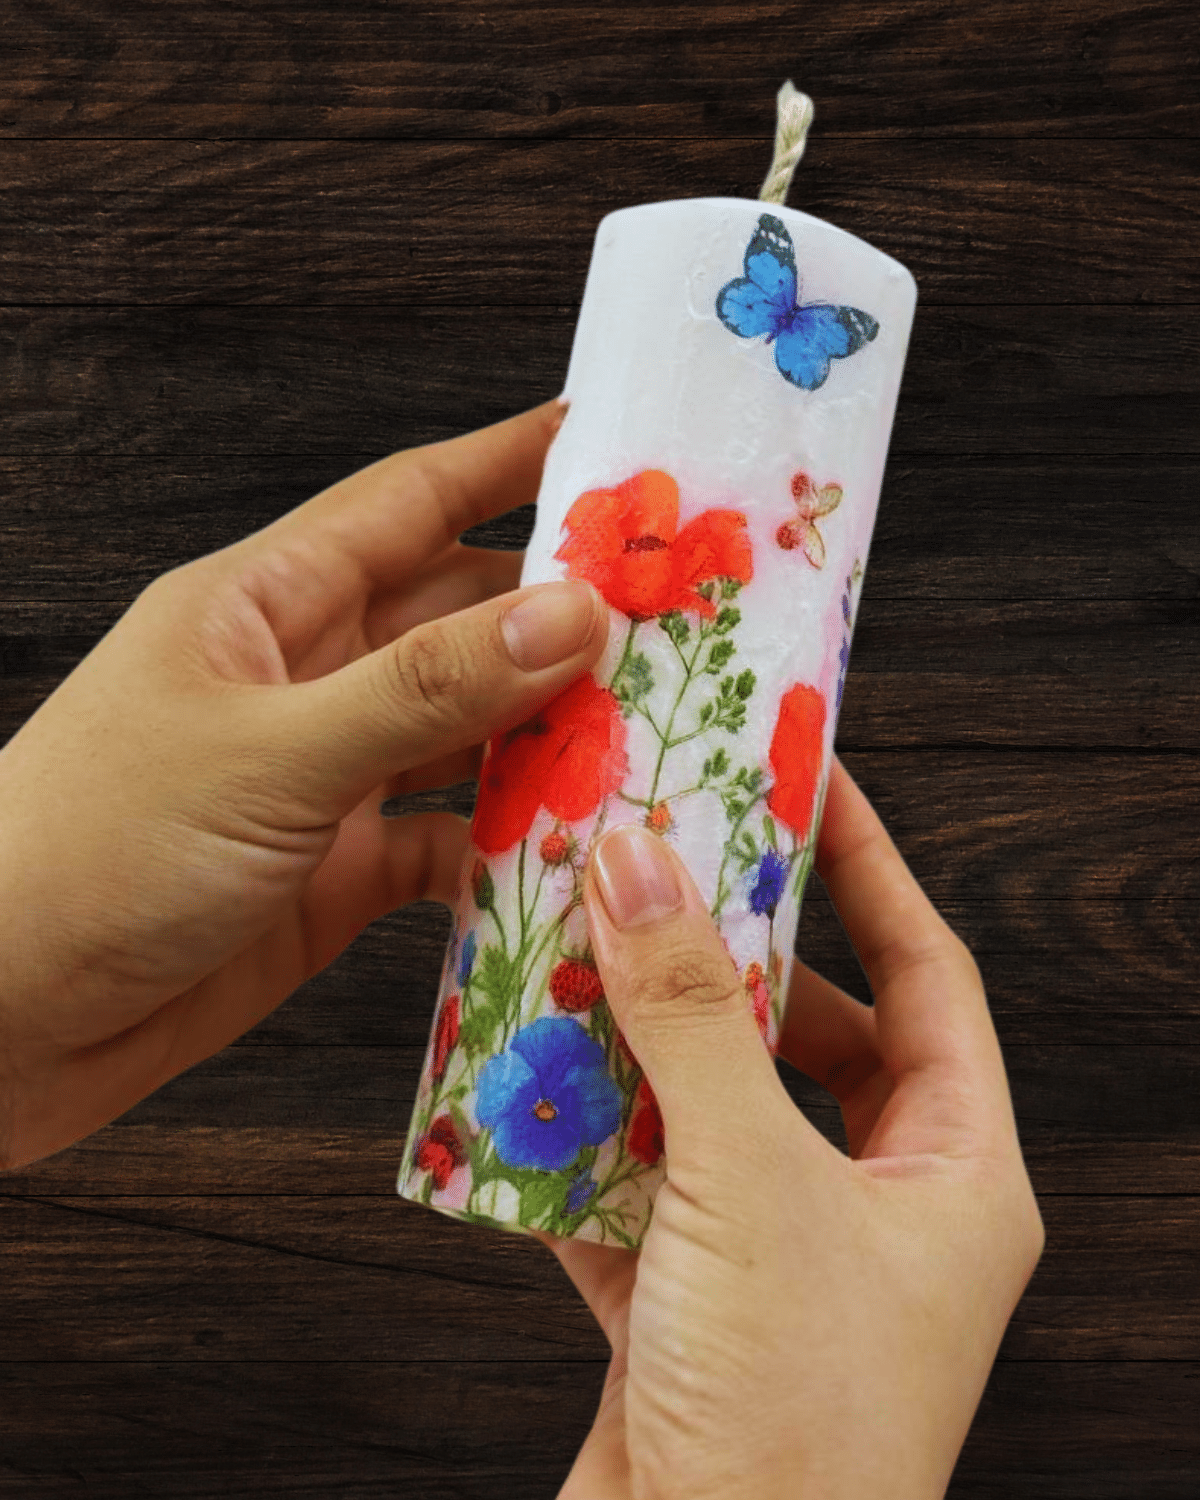
Have a plain candle that needs a glow up? Wrap it in a printed napkin! Trace and cut the napkin to fit, peel away the extra plies so only the printed layer is left, then wrap it around the candle and cover it with wax paper. Run a warm iron over the wax paper and the print melts right into the candle wax. No glue, no paint, no mess. Wildflower prints make a sweet bedroom accent.
Get the full tutorial at DIY JOY.
62. Beaded Strawberry Plant
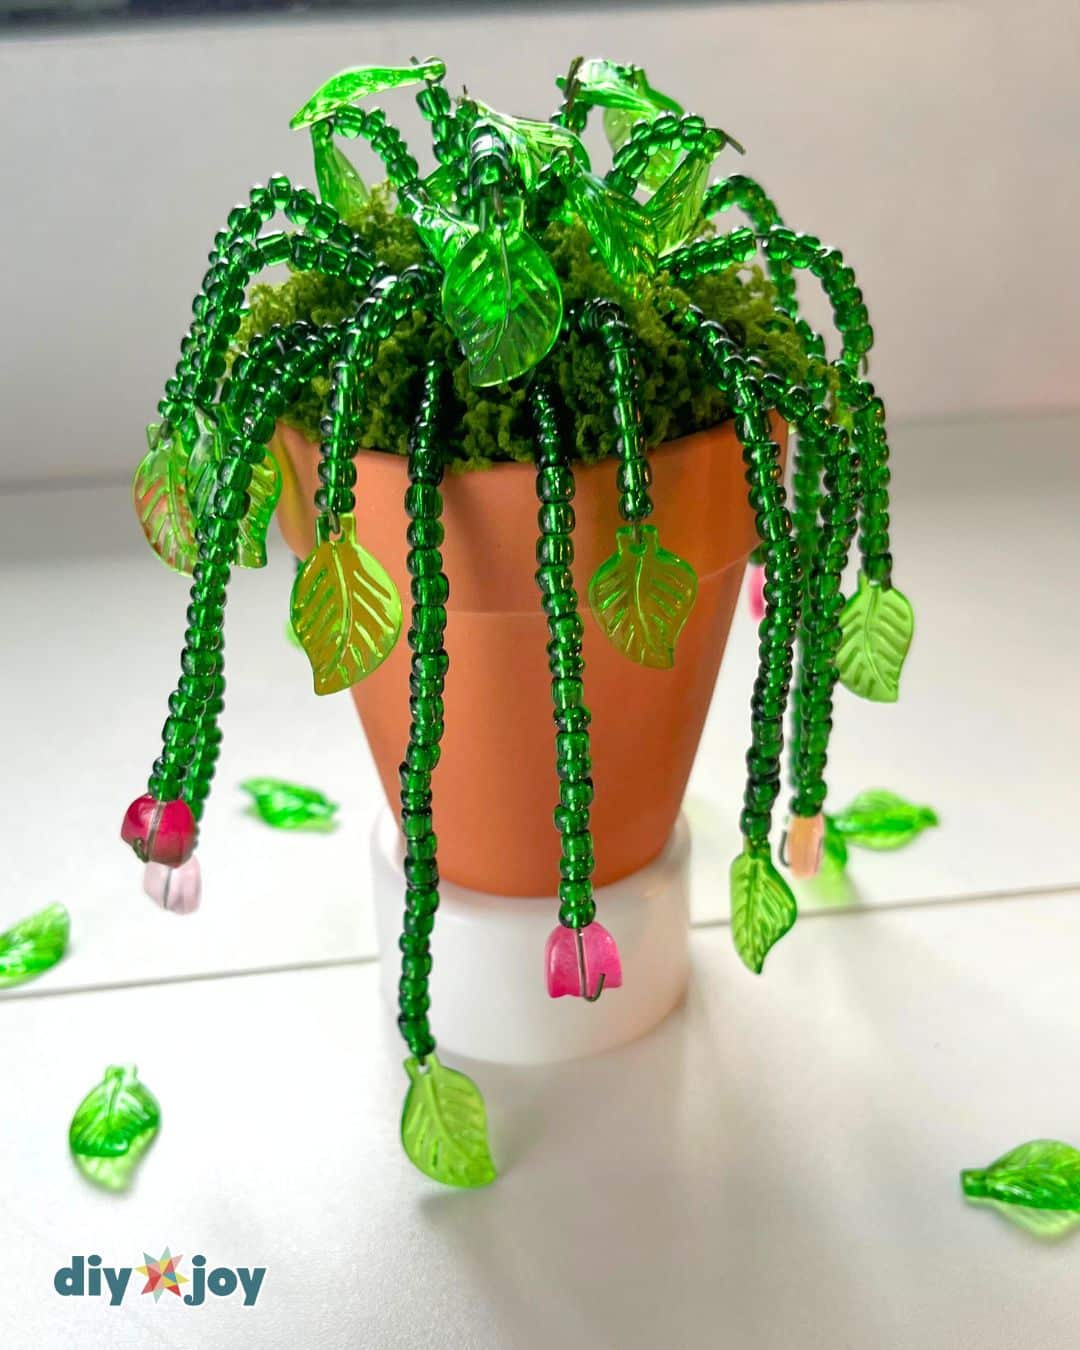
Want a plant that never needs watering? This beaded plant is strung on wire with green seed beads, leaf beads and little red strawberry beads at the ends of the stems. Twist each stem, bend them so they trail over the side of a small terracotta pot and anchor them in foam. Set it near a window and the glass beads catch the light like a suncatcher. It’s a cute shelf or desk plant for any bedroom.
Get the full tutorial at DIY JOY.
63. Beaded Vine Desk Plant

Seen those beaded plants all over social media? Here’s an easy way to make your own! Thread green beads onto wire to make long trailing vines, then tuck them into a mini terracotta pot filled with foam and topped with faux moss. Keep it on a desk or nightstand, or hang it with jute rope in a sunny window. Glass beads turn it into a little suncatcher. Pair it with paper flowers and a lamp for a fairytale corner.
Get the full tutorial at DIY JOY.
64. Jute Rope Tray

Love the look of woven jute trays but not the price? Make your own with a couple dollars of jute rope and Mod Podge! Coil the rope tightly into a flat spiral, brushing on Mod Podge as you go so it holds its shape and dries stiff. Make it any size and add handles or trim if you like. It’s perfect on a dresser or nightstand for candles, a lamp or paper flowers. Most of the supplies come from Dollar Tree.
Get the full tutorial at DIY JOY.
65. Punch Needle Flower Hoop Art
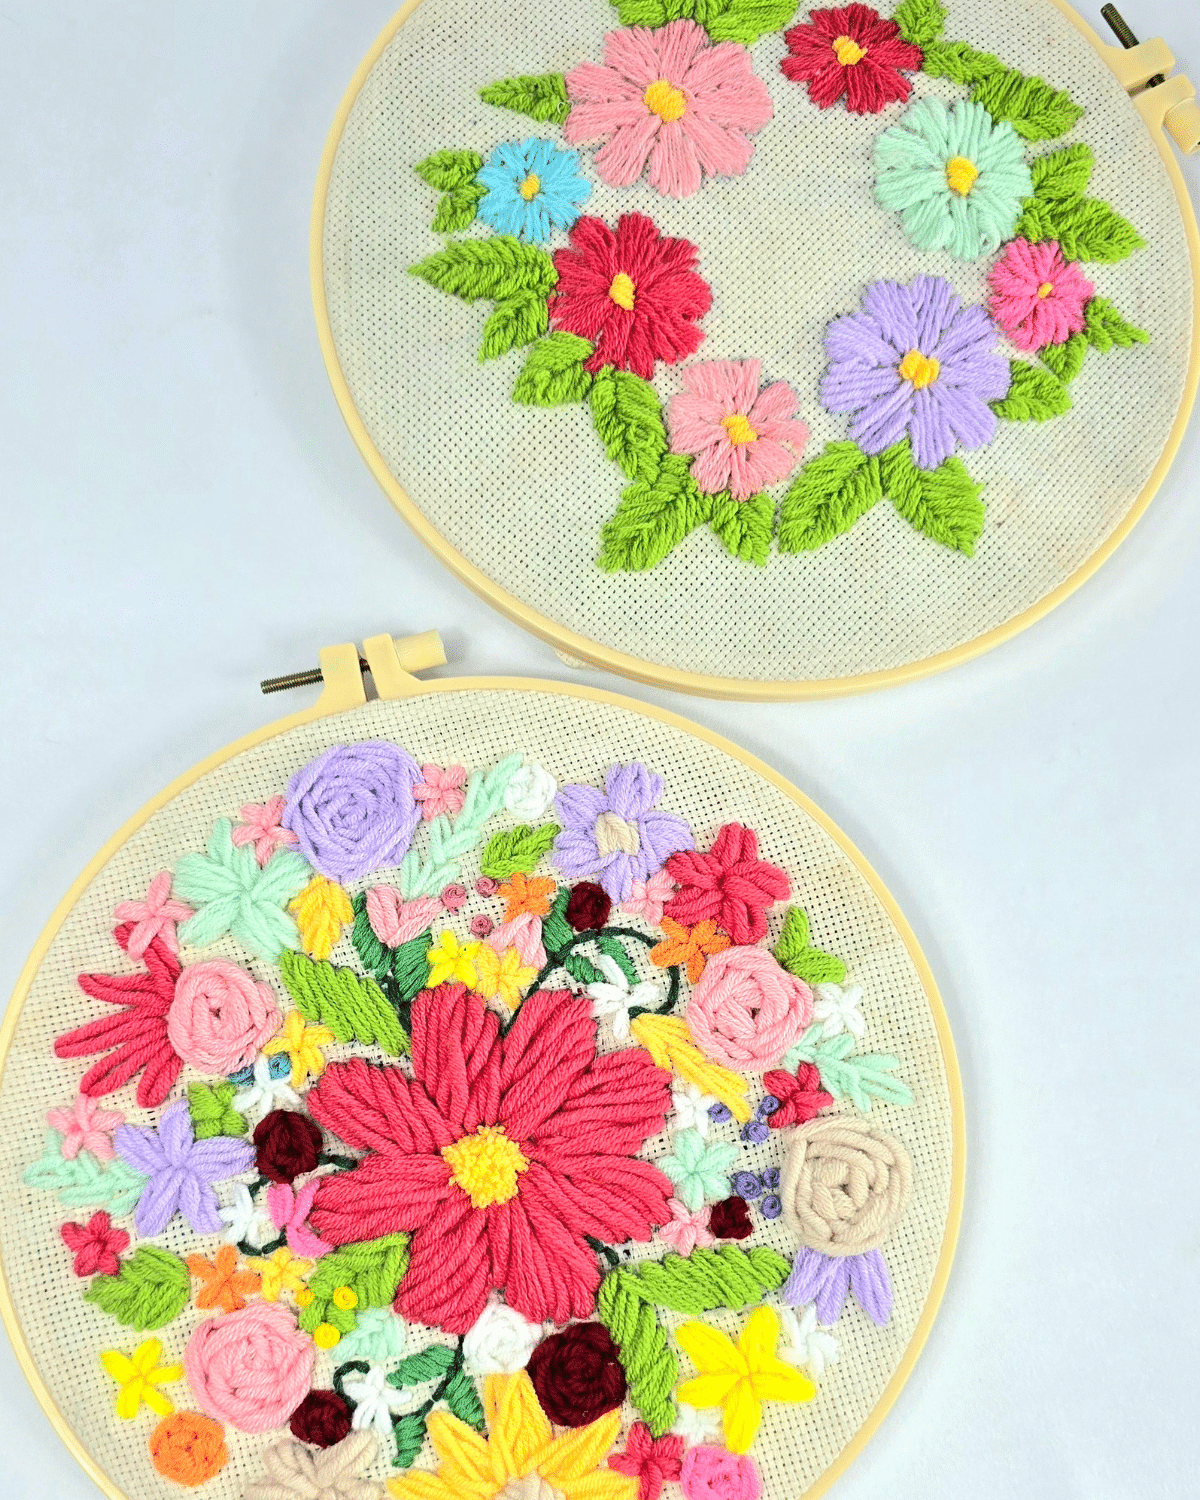
Want to try punch needle? This flower hoop is a great first project. Punch needle uses yarn instead of thread, so every flower comes out plush and textured, and it fills in quickly. Trace a simple floral design on fabric, stretch it tight in an embroidery hoop and start punching, changing colors as you go. Hang a few finished hoops together over the bed for soft, cozy wall art. It’s a great way to use up leftover yarn too.
Get the full tutorial at DIY JOY.
66. Folded Book Flower Vase

Have an old book that’s falling apart? Turn it into a vase for dried or faux flowers! Fold and roll the pages into tubes, tape them in place with double sided tape and cut a few with a blade cutter so the flowers stand tall. It takes just a few minutes and no special tools. Fill it with dried lavender, paper daisies or crepe paper flowers. Look for old books at thrift stores so nothing you love gets torn up.
Get the full tutorial at DIY JOY.
67. Posca Marker Painted Candles

Want an easy way to brighten up your room? Grab some plain taper candles and Posca markers! Draw flowers, butterflies, bunnies or simple patterns in soft pastels, then add a bow and set them in holders. They look so cheerful on a dresser or windowsill. These are for display only, so don’t light them. It’s an easy craft for all ages and a fun weekend activity with the kids. Swap the designs for any season you like.
Get the full tutorial at DIY JOY.
68. $12 Roman Shade from a Mini Blind
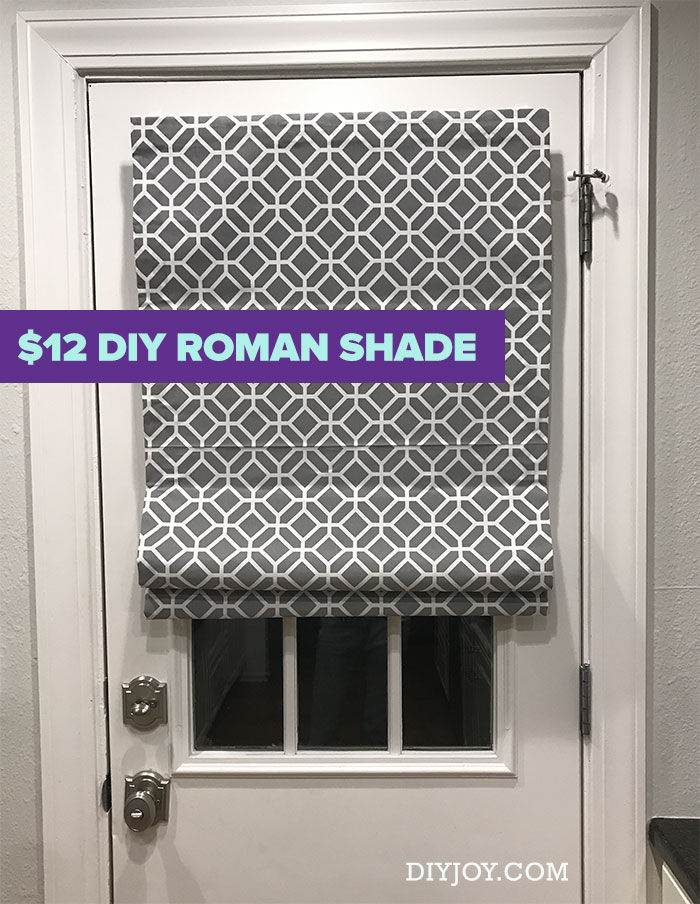
Love Roman shades but not the custom price? Make one from a cheap mini blind and fabric for about $12! Have the blind cut to fit your window, then remove most of the slats, leaving a few spaced out for the folds. Glue your fabric to the remaining slats with fabric glue, trim the cords and you’re done. There’s no sewing at all, just careful measuring. It’s an easy way to give a bedroom window a custom look.
Get the full tutorial at DIY JOY.
69. Bandana Throw Pillow
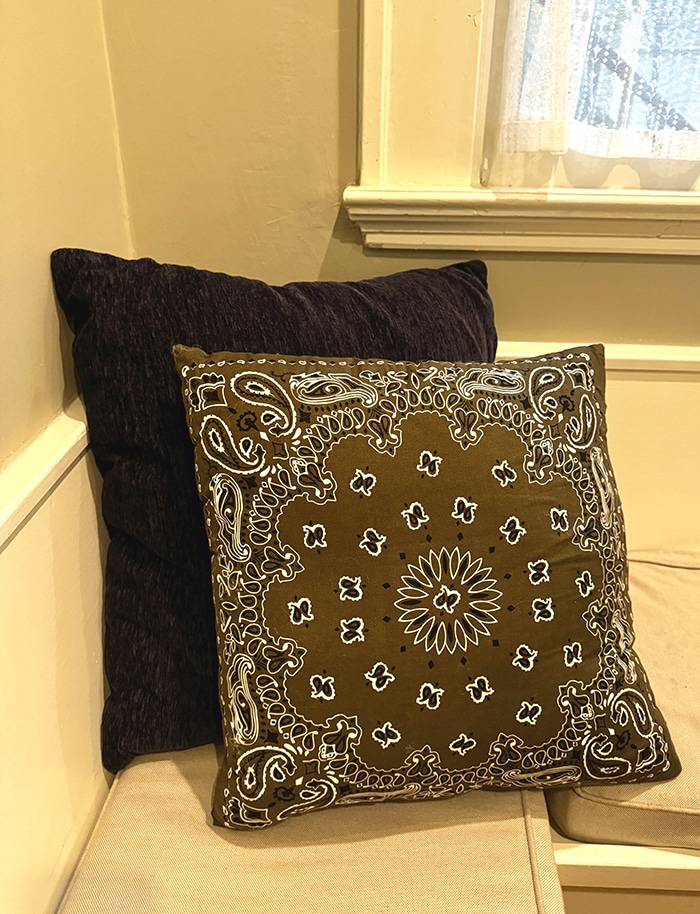
Looking for a throw pillow nobody else has? Sew one from two bandanas! Bandanas from the dollar store mean a pillow costs just a few dollars, and the paisley borders frame the front perfectly. Stitch the two squares right sides together, leave an opening, stuff or slip in a pillow form and close it up. Mix colors for a fun country look on the bed. They make great housewarming and Christmas gifts too.
Get the full tutorial at DIY JOY.
70. Beaded Lantern and Plant Hanger

Want a hanger that does double duty? This beaded one holds a jar with a candle or a small potted plant! Fold four five foot lengths of fishing line through a small wooden ring, then string 8mm and 14mm glass beads until the strands form a cradle. Knot the eight strands at the bottom, drop in your jar or planter and hang it. Hang it in a bedroom window to catch the light, or use it on the porch.
Get the full tutorial at DIY JOY.
71. Dried Flower Resin Coaster
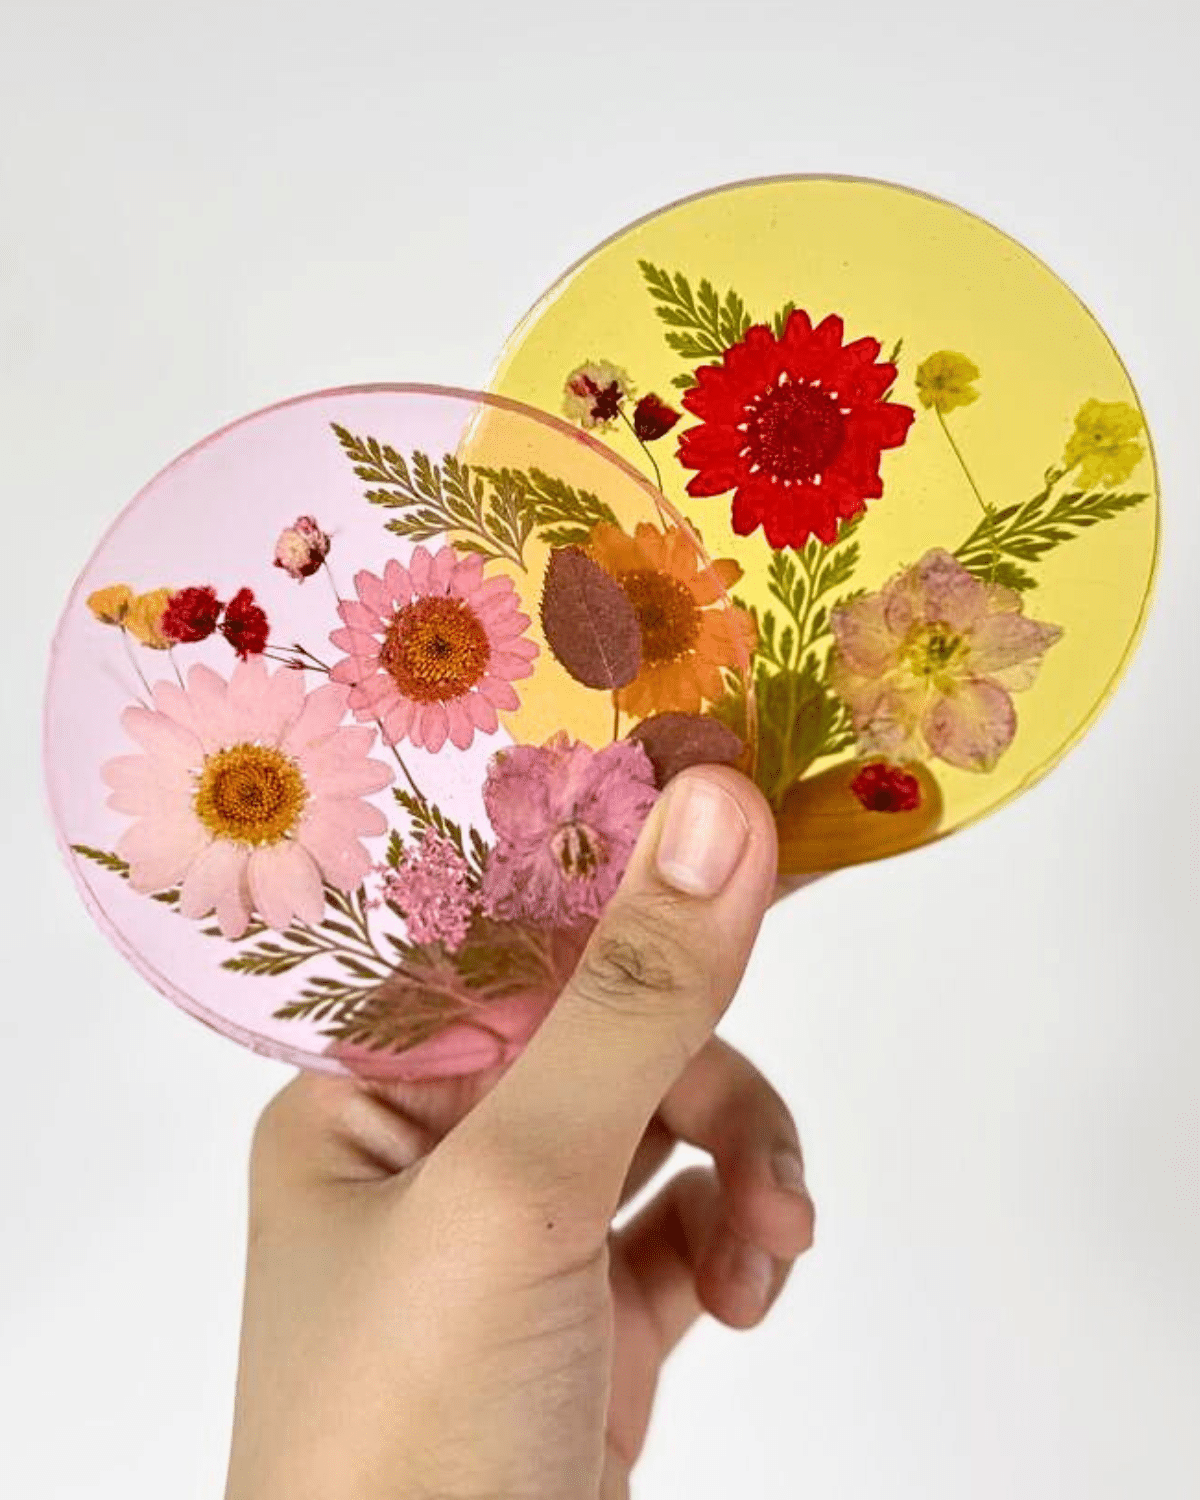
Have flowers from a special day you’d love to keep? Preserve them in a resin coaster! Mix epoxy resin and hardener by weight, add a touch of pigment if you want color, and pour a thin layer into a round mold. Arrange dried flowers with tweezers, top with more resin and let it cure. You get a crystal clear coaster for your nightstand with real blooms inside. Beginners and seasoned crafters can both make these.
Get the full tutorial at DIY JOY.
72. Light Bulb Mini Planter
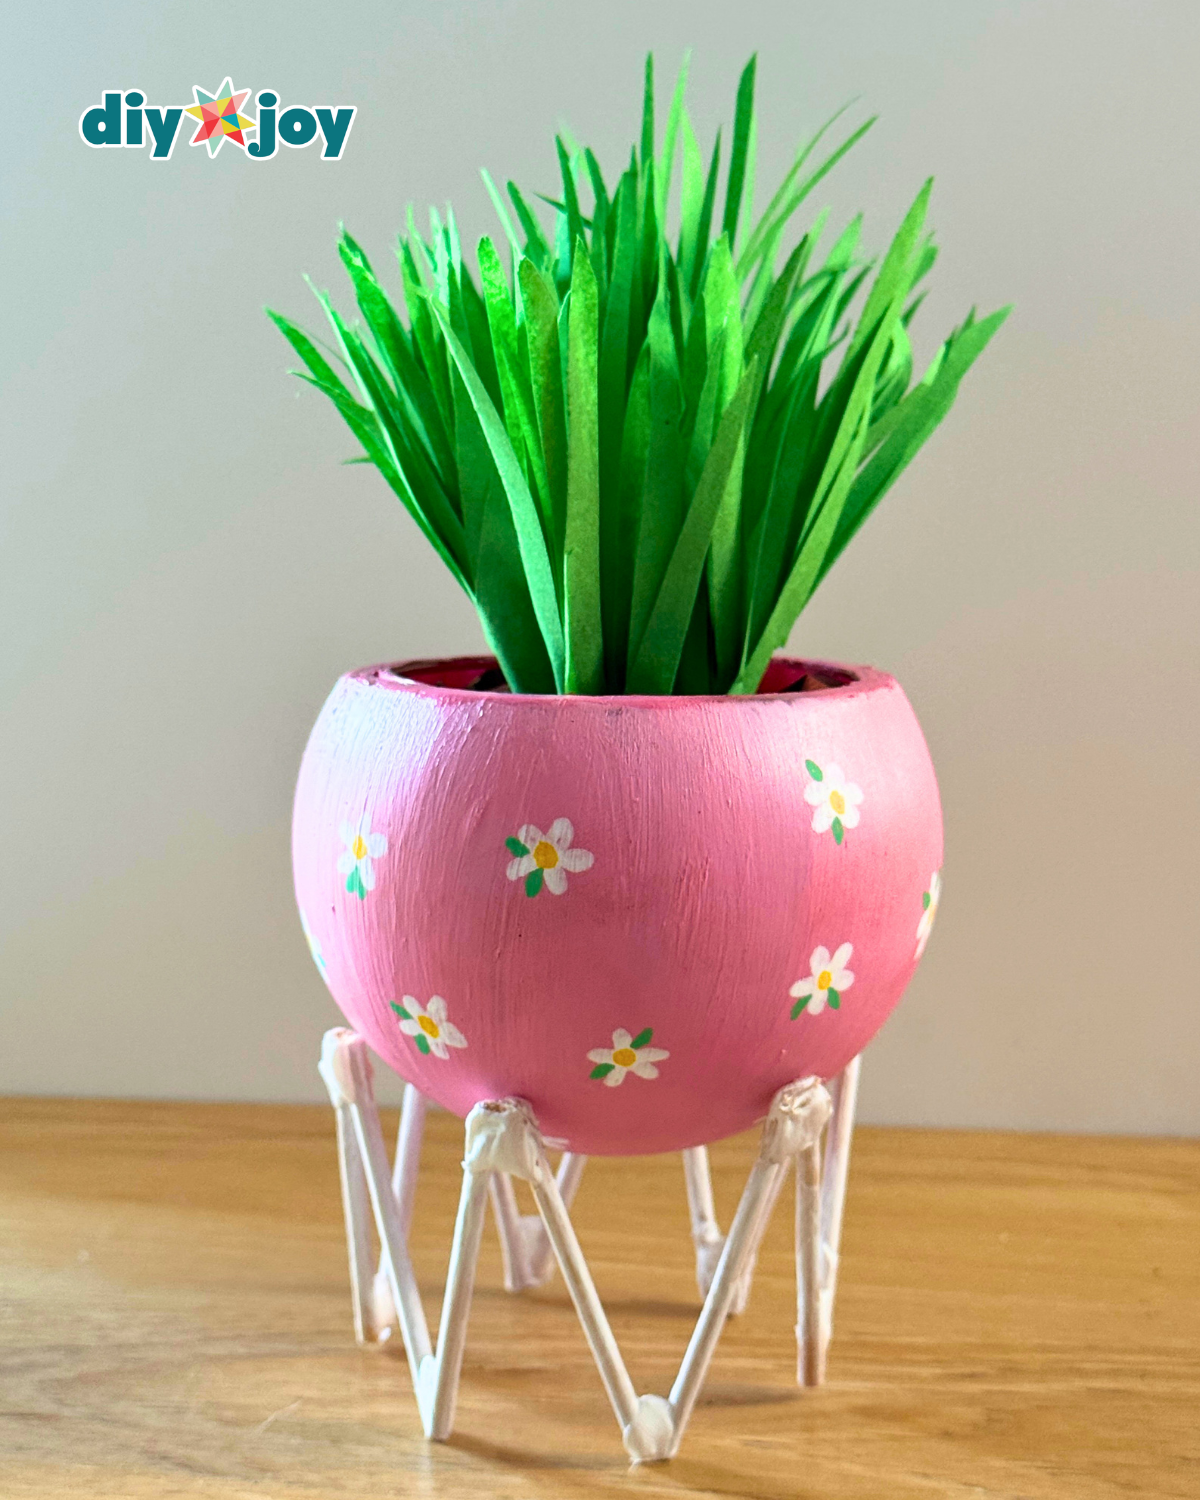
Don’t toss that burned out bulb! Turn it into a mini planter instead. The round glass part becomes the pot, so you paint it a cheerful color, add little flowers and set it on a tiny stand. Fill it with a small succulent, faux plants or paper grass. It’s quick, uses very few materials and makes a fun bit of greenery for a desk, nightstand or windowsill. Perfect for beginners who want an easy upcycle.
Get the full tutorial at DIY JOY.
73. Paper Towel Rose Bouquet
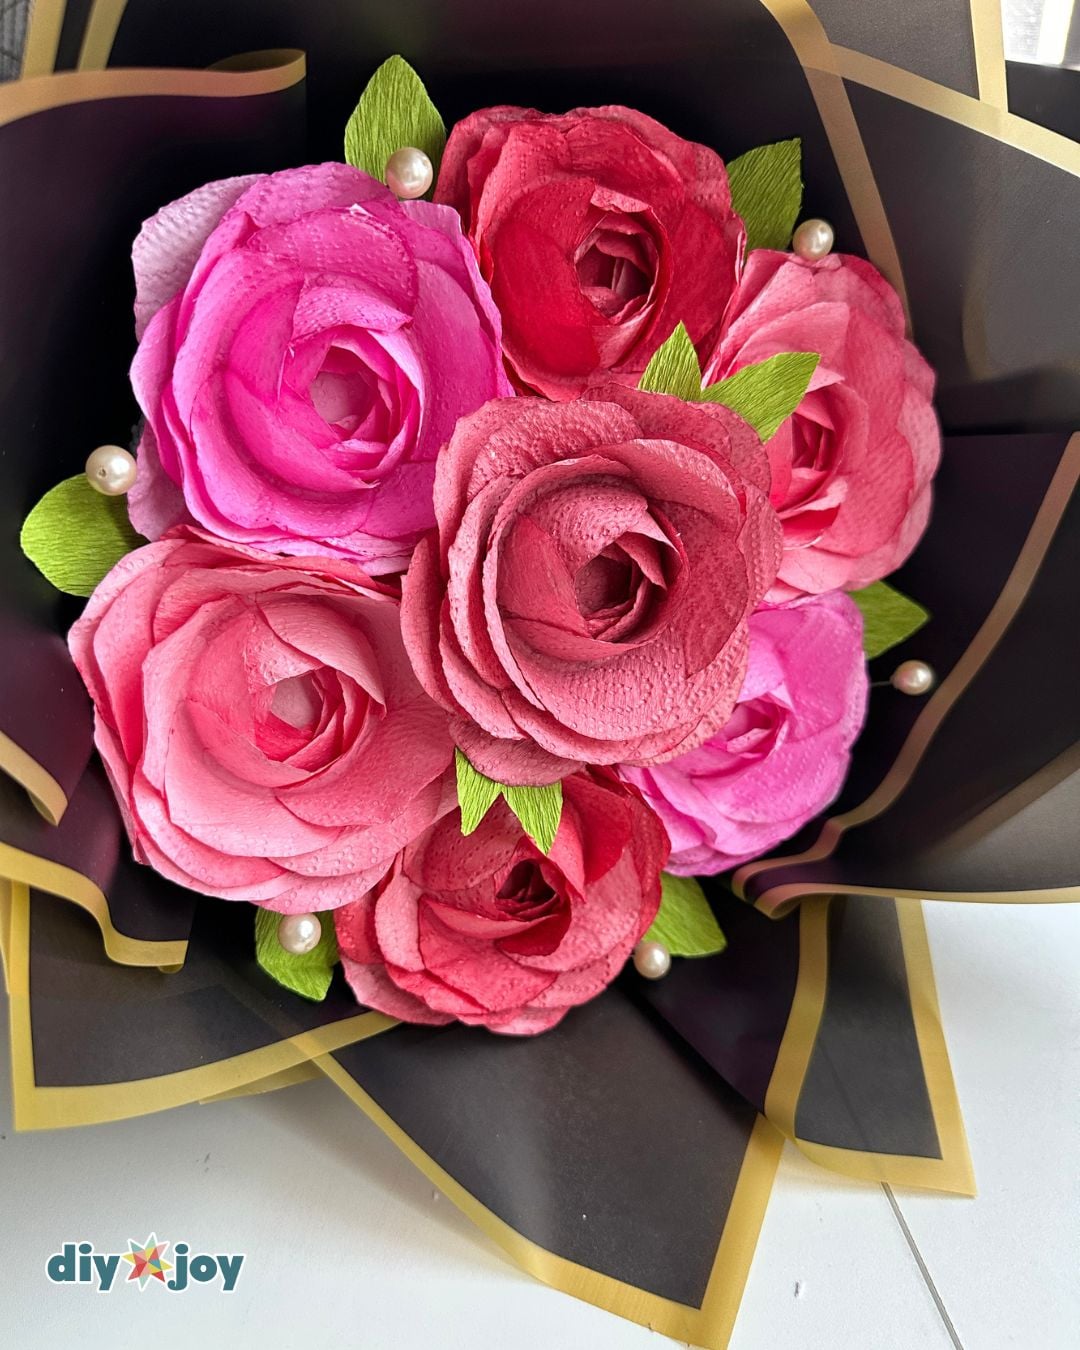
Would you believe these roses are paper towels? Cut paper towels into circles, dip them in paint and let them dry. Then fold the circles around the rim of a glass to build each rose, much like a salami rose. Glue the roses onto a foam base and wrap it all in floral paper, no stems needed. The result is a lush bouquet that lasts forever on a dresser or shelf. It makes a lovely Mother’s Day or anniversary gift too.
Get the full tutorial at DIY JOY.
74. Yarn Pom Pom Wreath

Want a soft, colorful wreath for your bedroom door? Make one from yarn pom poms! Wrap yarn 80 times around a slotted cardboard rectangle, tie it tight in the middle, then snip and trim it into a fluffy ball. Make big and small pom poms in pastel colors and hot glue them all around a wreath form. Finish with a big ribbon bow. It’s fun for all ages and easy to change up for any season.
Get the full tutorial at DIY JOY.
75. Bubble Wrap Hydrangea Painting
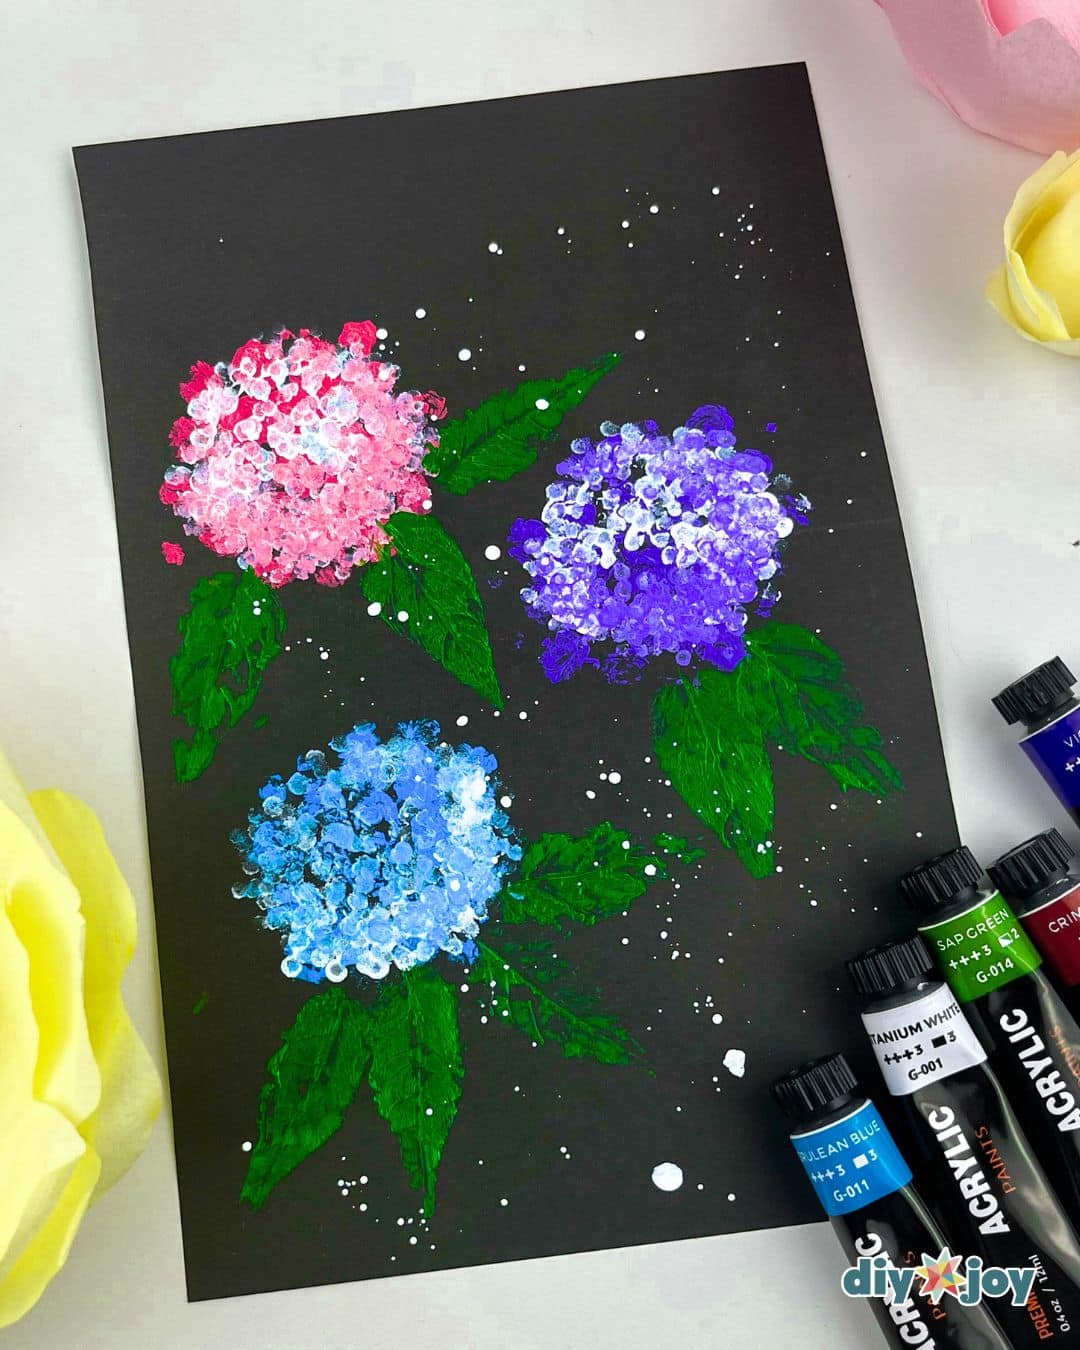
Never painted before? You can still make this! Bubble wrap dabbed in acrylic paint makes the perfect hydrangea blooms, and cotton swabs add tiny dots of light on top. Paint the green leaves with a brush, then press on pink, purple and blue bubble wrap clusters over black paper or canvas. It’s forgiving, fun and looks so professional. Frame it for colorful wall art over a dresser or bed. Great for kids and beginners too.
Get the full tutorial at DIY JOY.






