Perfume bottles, rings and that one lipstick you actually wear look so much better corralled on a tray than scattered across the counter. These 18 DIY vanity trays cover every style and budget, from marbled paper trays and mirrored picture frames to tiered stands built from thrift store plates, candlesticks and even a deviled egg plate. A few take an afternoon with E6000 and spray paint. Others are small air-dry clay dishes you shape by hand, and five DIY JOY video tutorials are mixed in. Make one for the bathroom, one for the dresser and one to give away, because a pretty tray is one of the easiest handmade gifts there is. Quick tip: before you glue anything, set your bottles on the tray to check the fit. Find more clay projects on the air-dry clay hub.
1. Marbled Vanity Trays

Marbled vanity trays take plain store-bought trays and line them with swirly marbled paper, so they look like stone without the weight. Cut the paper to fit with a ruler and rotary cutter, then trace along the swirls with a gold paint marker, varying the line weight so it looks natural. Coat the back with Mod Podge, press it in and weigh it down with books overnight. For extra protection, have the hardware store cut glass to fit; it’s usually just a few dollars. Printed marbled paper works if you’d rather skip marbling your own.
Get the full tutorial at Lia Griffith.
2. Easy DIY Air-Dry Clay Jewelry Tray
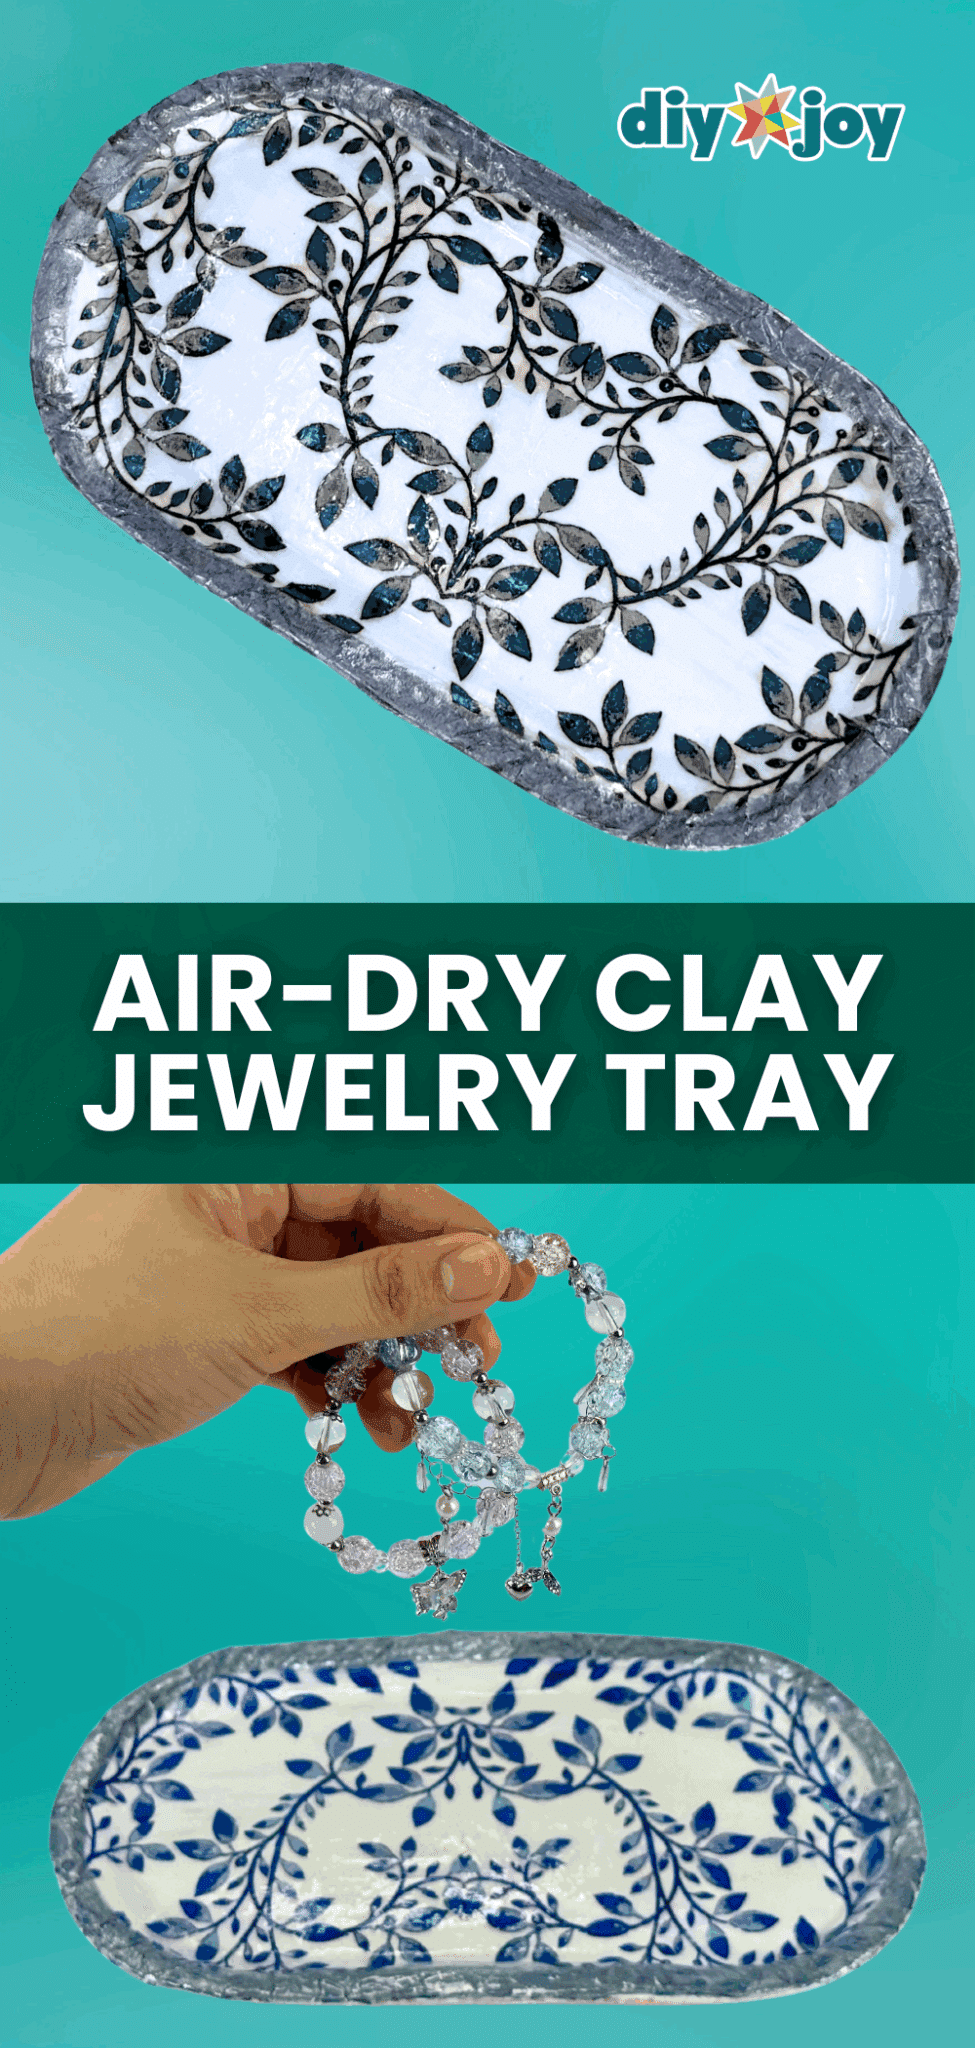
An air-dry clay jewelry tray looks like hand-painted porcelain, and it’s all napkin and glue. Roll out the clay, dust a store-bought tray with baby powder and press the clay into it as a mold, smoothing it with a damp sponge. Once it’s dry, pop it out, prime it and Mod Podge a patterned paper napkin across the inside. Trace the rim with a metallic marker, then seal it with a thin coat of UV resin and cure it under a lamp. No kiln, no oven, and it keeps rings right where you’ll find them.
Get the full tutorial at DIY JOY.
3. Mirrored Vanity Tray from Wooden Picture Frames

A mirrored vanity tray from a thrift store picture frame is one of the cheapest upgrades you can make for a dresser. Pick a small frame with some carved detail, since paint makes that detail pop. Paint the frame any color you like, then give the glass a mirror-effect paint treatment so it reflects with a soft, dusty, vintage look rather than a bright bathroom shine. Set the glass back in and the frame becomes a shallow tray for brooches, pearls and necklaces. It makes a sweet gift for a first apartment, too.
Get the full tutorial at Sadie Seasongoods.
4. DIY Air-Dry Clay Decoupage Jewelry Dish
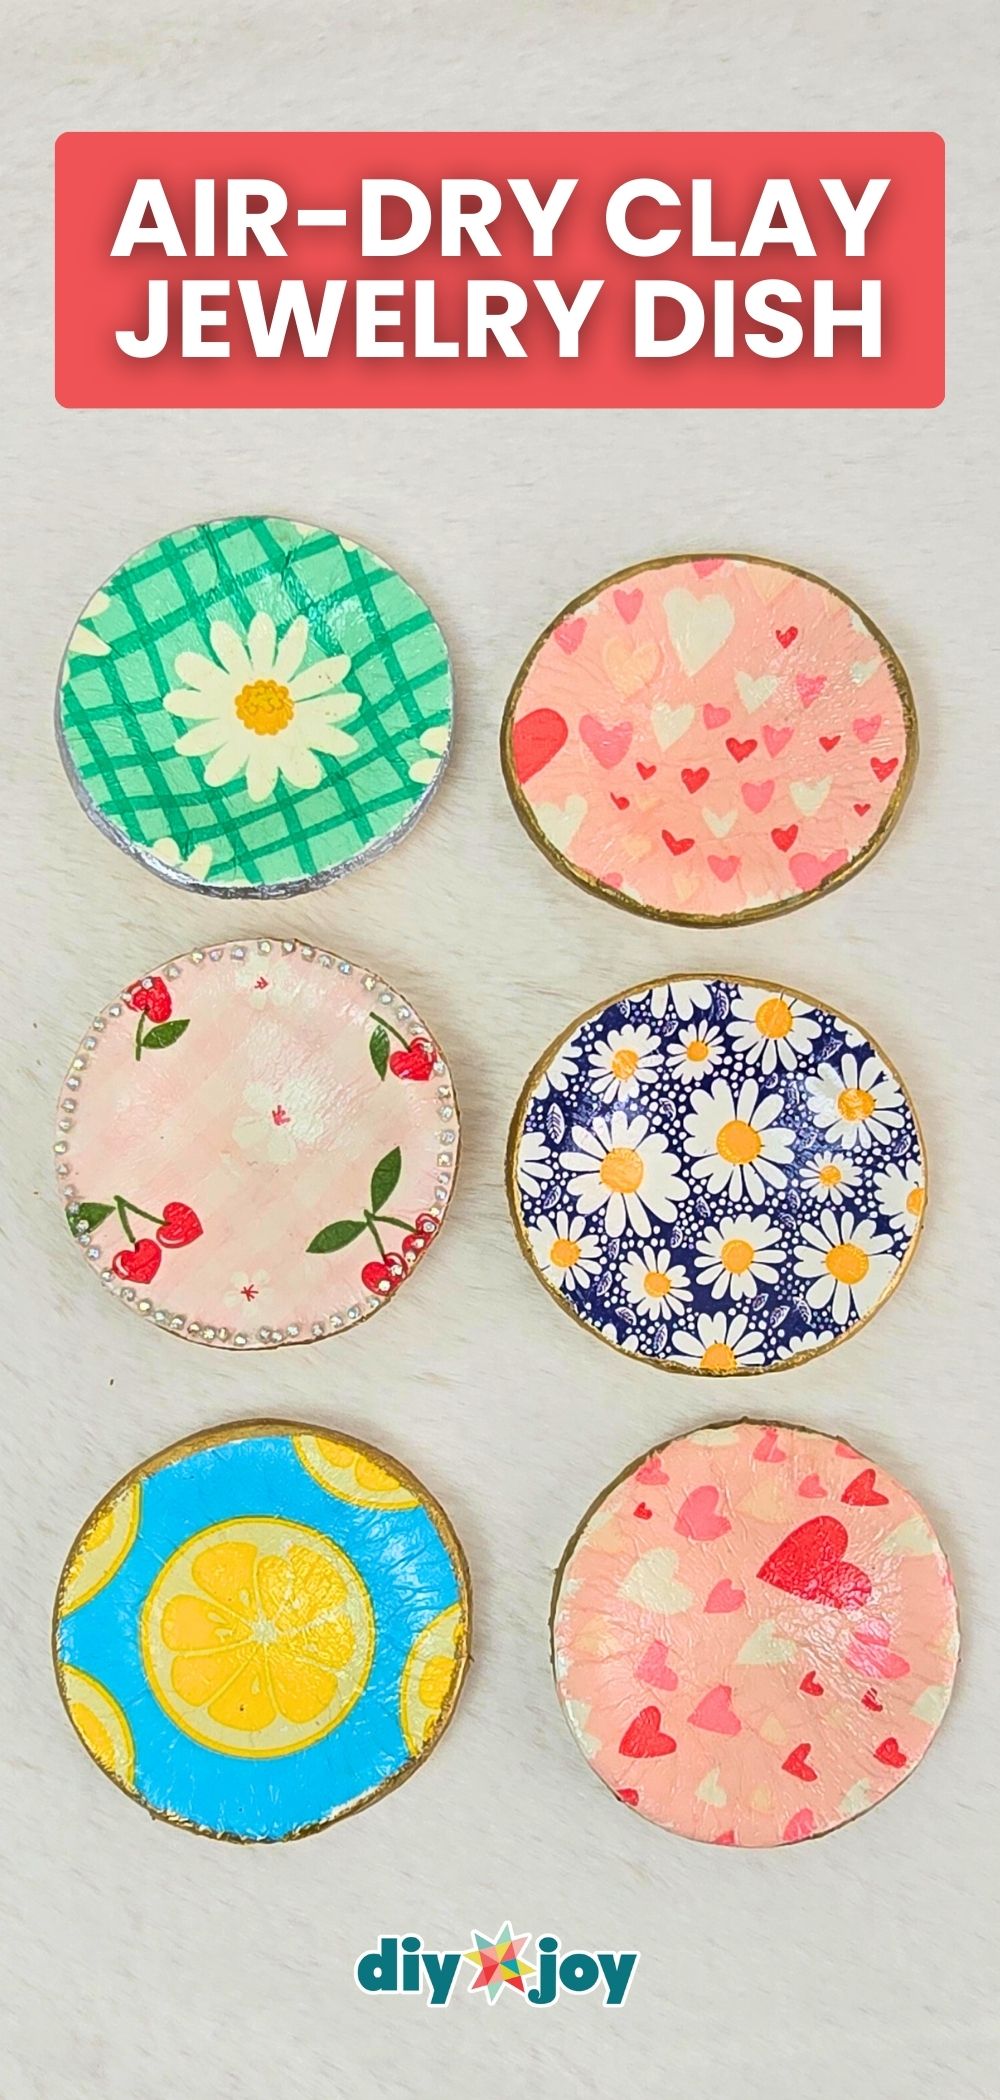
Decoupage jewelry dishes are the quickest of the clay projects here. Roll out air-dry clay, peel the backing layers off a printed napkin and lay the top layer right on the clay. Cut a circle with a cookie cutter or jar lid, brush on Mod Podge, then press it into a muffin pan so it dries overnight with a gentle bowl shape. Paint the rim gold and seal it with gloss varnish. Hearts, cherries or florals all work, so you can match any bathroom or bedroom.
Get the full tutorial at DIY JOY.
5. Air-Dry Clay Jewelry Trinket
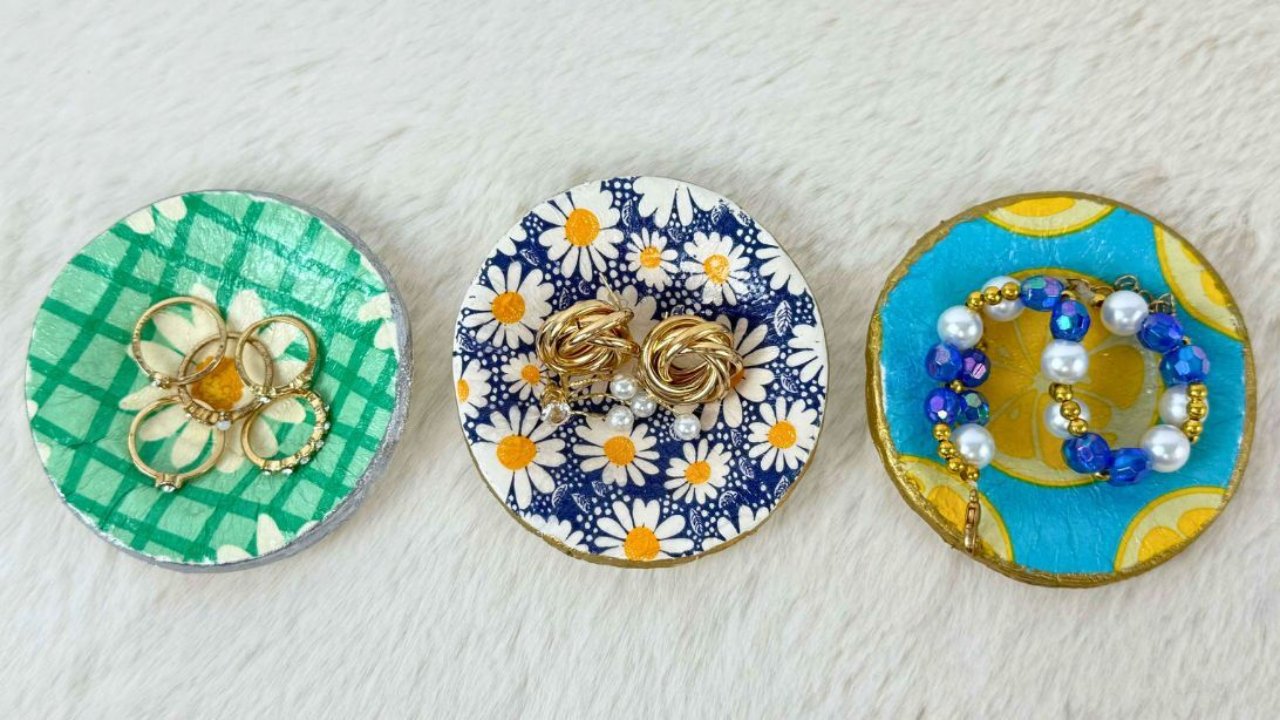
An air-dry clay jewelry trinket dish is a great first clay project, since you’ll get a polished result on the first try. Flatten a chunk of clay, press a printed napkin on top and cut the shape with a mason jar lid. Coat it with Mod Podge, set it in a muffin pan and press the center down for a slight dip, then let it dry overnight. Paint the edge gold and finish with gloss varnish. Try daisies, gingham and lemons for a set that looks good side by side.
Get the full tutorial at DIY JOY.
6. Amazing Farmhouse Style Tiered Tray from Thrift Store Items

This farmhouse style tiered tray proves you can build one from almost anything at the thrift store. Hunt for three wooden bowls or trays in small, medium and large, plus posts to hold them apart: salt shakers, candlesticks or even a ceramic bird all work. Saw the posts to height, sand the tops level and glue the first post to the bottom tray, letting it dry before adding the next layer. Spray everything in chalk paint, then dry brush gold streaks for an aged look. A lazy Susan base lets it spin.
Get the full tutorial at Bathtub Rings & Artsy Things.
7. DIY a 2-Tiered Tray

A 2-tiered tray is about the easiest makeover you can do with a pair of small wooden trays. Paint both trays and a wooden dowel in rose gold, or any metallic you love. Hold the dowel up between the trays to pick a height you like, then cut it to size. Screw up through the bottom of the lower tray into the dowel, then down through the top tray the same way. It’s easier with a helper holding the pieces steady. Use it for washi tape, perfume or jewelry.
Get the full tutorial at Happily Ever After, Etc.
8. Make a Three-Tiered Vanity Tray

A three-tiered vanity tray gives a bathroom counter real storage without taking up more space. Start with three unfinished wood trays in small, medium and large, plus thrifted candlesticks to hold them apart. Dry brush the trays with black paint, then stain them for a barn wood look and add a clear top coat. Paint the candlesticks black and wipe the edges while wet so they read as aged gold. Drill into each candlestick to attach it to its tray, glue the tiers together and top it off with a pair of glass dresser knobs.
Get the full tutorial at Goodwill Akron.
9. Simple 3-Tiered Jewelry Organizer

This simple 3-tiered jewelry organizer is built from dinnerware, and the deviled egg plate on the bottom is the clever part. Each egg hollow holds a pair of stud earrings. Glue a drinking glass upside down to the center of the egg plate, a dinner plate on the glass, a candlestick on the plate and a cereal bowl on top, all with E6000. Let it dry a few hours somewhere airy. Spray paint it in thin coats, or brush on acrylic for a smoother finish on glass and porcelain.
Get the full tutorial at Curbly.
10. DIY Air-Dry Clay Jewelry Organizer Using Pebbles
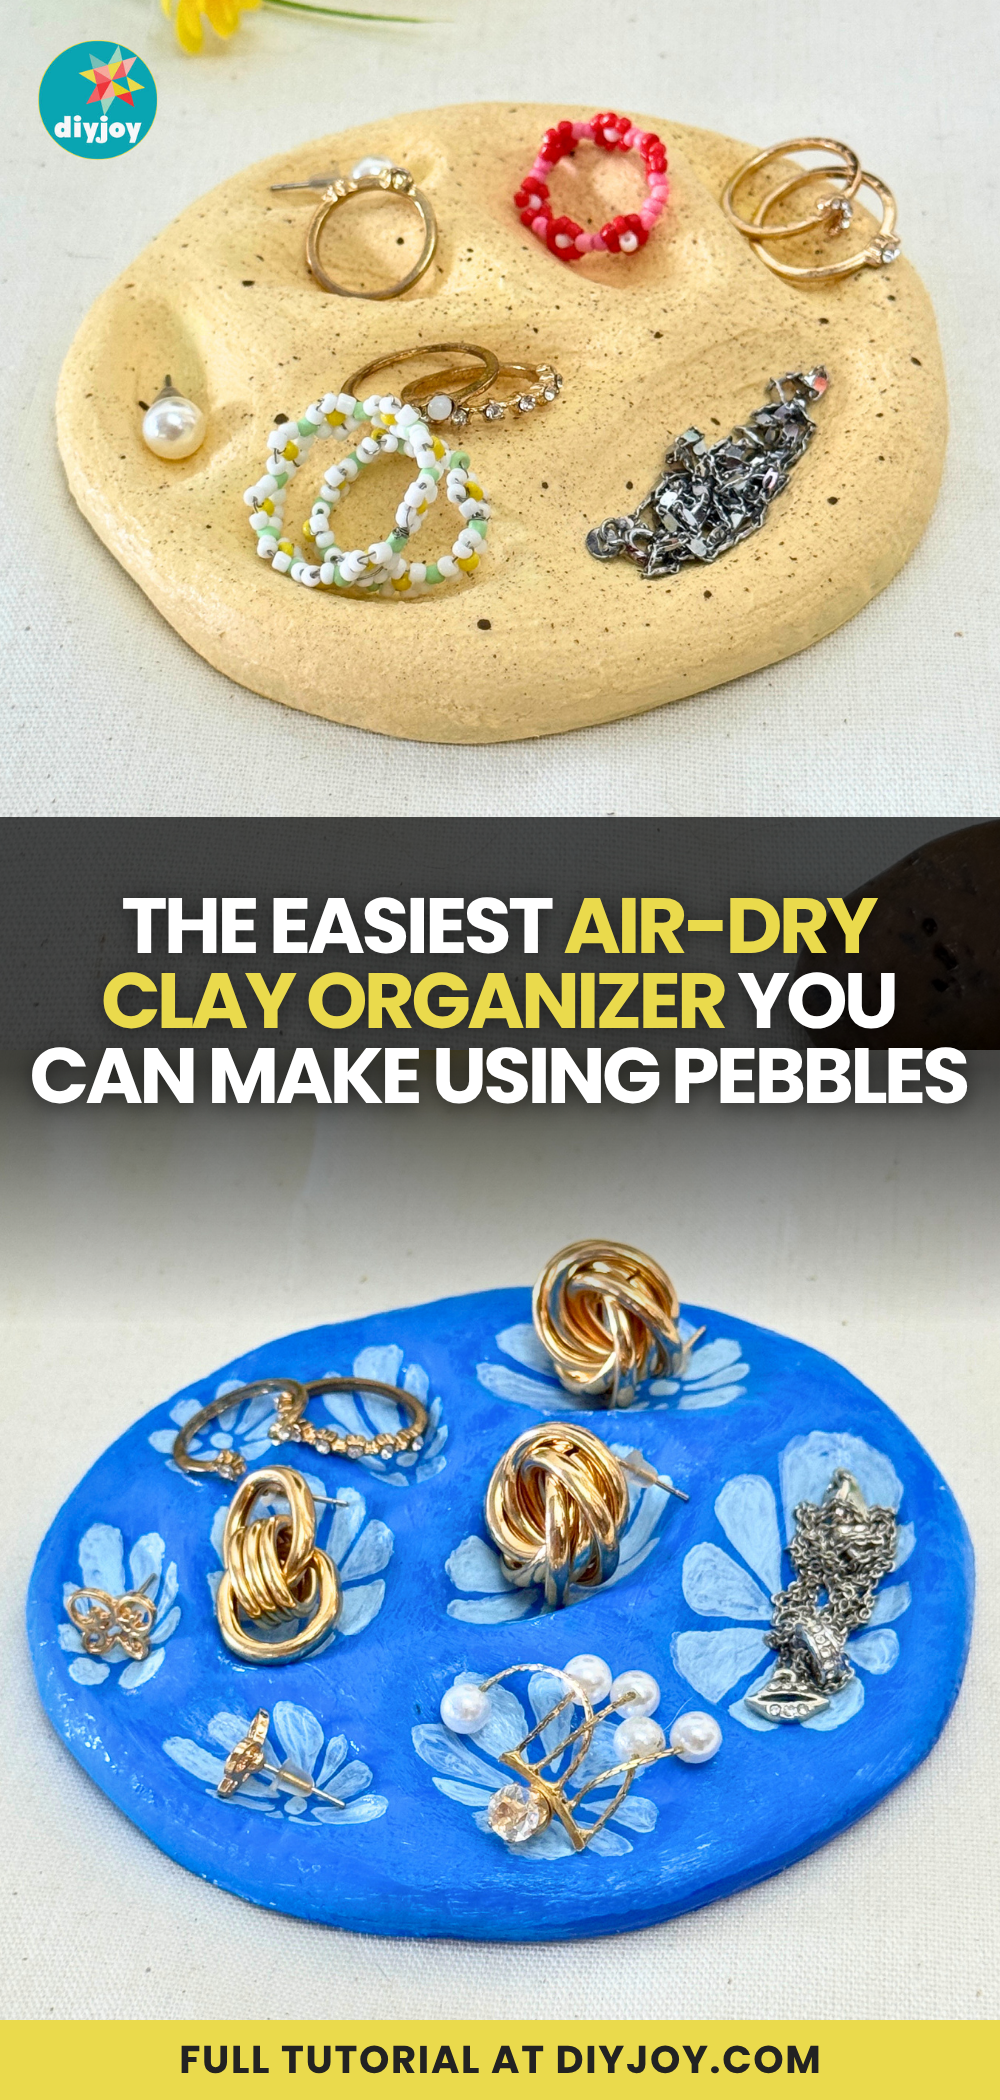
An air-dry clay jewelry organizer shaped with pebbles gives every ring and earring its own little hollow. Roll the clay into a smooth circle, then press wet pebbles into it one at a time and lift them out gently, leaving soft dips. Smooth any cracks with damp fingers and let it dry completely, which can take a few days. Prime it, paint a base color mixed with baking soda for a sandy texture, then paint flowers inside the hollows and finish with a gloss sealer or resin.
Get the full tutorial at DIY JOY.
11. DIY Frame Vanity Tray

A DIY frame vanity tray gets its charm from what’s under the glass. Make a cardboard template of the back of a picture frame, mark where cabinet handles will go, then drill through and attach them. Sand and wax the frame first if you’d like it distressed. Spray adhesive onto the frame backing, press it onto burlap and trim, then sandwich a piece of crochet lace between the glass and the burlap. Add felt pads over the screw heads and corners so it won’t scratch the dresser.
Get the full tutorial at My Pinterventures.
12. Easy DIY Jute Rope Tray

A jute rope tray costs a couple of dollars and gives a vanity that boho texture. Wrap an existing tray in cling wrap and brush on plenty of Mod Podge. Coil the rope tightly in a spiral from the center, adding glue as you go and checking that it stays flat. Cover the base, cut the end, glue it down and coat the whole thing again. Let it dry somewhere airy, weighted if needed, then lift it off the wrap. Keep the sides low so it holds its shape.
Get the full tutorial at DIY JOY.
13. Easy Vanity Tray DIY Makeover

An easy vanity tray makeover turns an old tray you don’t love into one that matches your room. Clean it, then spray paint it in several light coats until the old color disappears. Measure the base and cut a piece of vinyl fabric to fit; metallic pleather wipes clean and doesn’t fray, so there’s no sewing. Spread E6000 over the bottom with an old gift card, lay the vinyl in carefully and press it into the corners. A pin prick clears any stubborn bubbles. Perfume bottles never looked so good.
Get the full tutorial at Style on Main.
14. Shabby Chic 3-Tiered Tray

This shabby chic 3-tiered tray is an honest lesson in what to buy and what to make. Nesting trays and wooden candlesticks form the tiers, joined by drilling out the candlestick ends and connecting them with a dowel, then gluing everything to the trays. Prime every piece, paint it antique white, then dry brush a dark charcoal over the top so the texture catches a little gray. Fair warning: the total crept close to the price of a new one, so shop your house for trays first.
Get the full tutorial at What's On My Porch.
15. Dollar Tree DIY Faux Wood Tray

A Dollar Tree faux wood vanity tray starts with three 8 by 10 picture frames. Glue the three glass panes together with E6000, then stack and glue the frames, keeping the metal prongs on only the bottom one. After 24 hours, spray paint the frame stack. Stick peel-and-stick faux wood onto the glass, lay it wood side down into the frame, and bend the prongs to hold it. Finish with two handles. It reads as real wood until someone picks it up.
Get the full tutorial at DIY JOY.
16. DIY No-Screw Tiered Tray
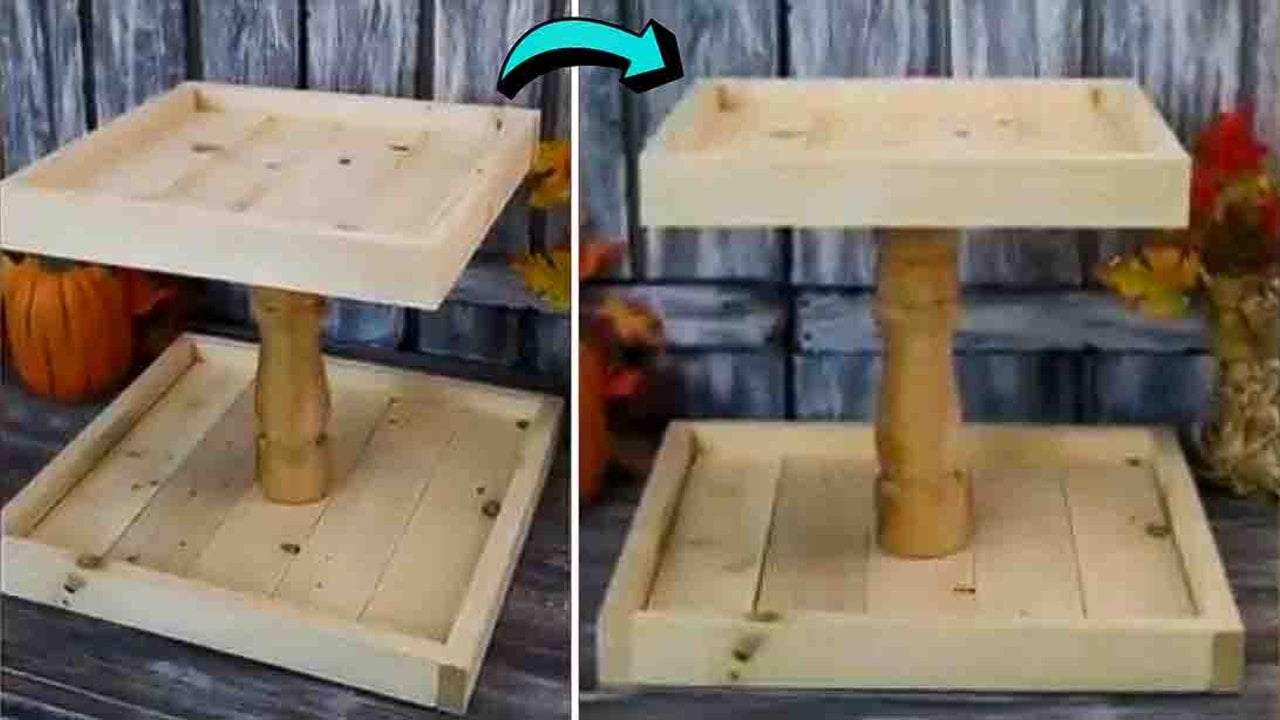
This no-screw tiered tray is real wood held together with hot glue and a table leg. Cut 1 by 3 furring strips into five 12 inch pieces for the bottom and 1 by 2 strips into four 10 inch pieces for the top. Glue each set side by side, then frame the edges, marking the center of the base before the last edge goes on. Drill a hole at the mark, set the table leg in and glue the smaller tray on top. The whole build costs under $10.
Get the full tutorial at DIY JOY.
17. Repurposed Vanity Tray

A repurposed vanity tray can start as three old plastic plates and a couple of 70s juice glasses. Spray the glasses gold, prime the plates, then paint them with a soft blue chalk paint and finish with a pearl coat spray for a subtle shimmer. Glue the glasses upside down to the center of each plate with E6000, working outside because the fumes are strong. Stack it into a three-tier stand and load it with rings, bangles and necklaces. It’s a great reason to look twice at thrift store glassware.
Get the full tutorial at Artsy Chicks Rule.
18. Dollar Store DIY Tiered Tray

This dollar store tiered tray proves you don’t need to spend much to clear off a bathroom counter. Everything comes from the dollar store: three round metal trays, clear crystal-look candlesticks, super glue and a sponge brush. Paint the trays in a soft sage green, or any shade that suits your room, and let them dry. Then glue a candlestick to the center of each tray and stack the tiers. Keep perfume up top and watches, bracelets and brooches below, and it works just as well in a kitchen or office.
Get the full tutorial at Liz Marie Blog.