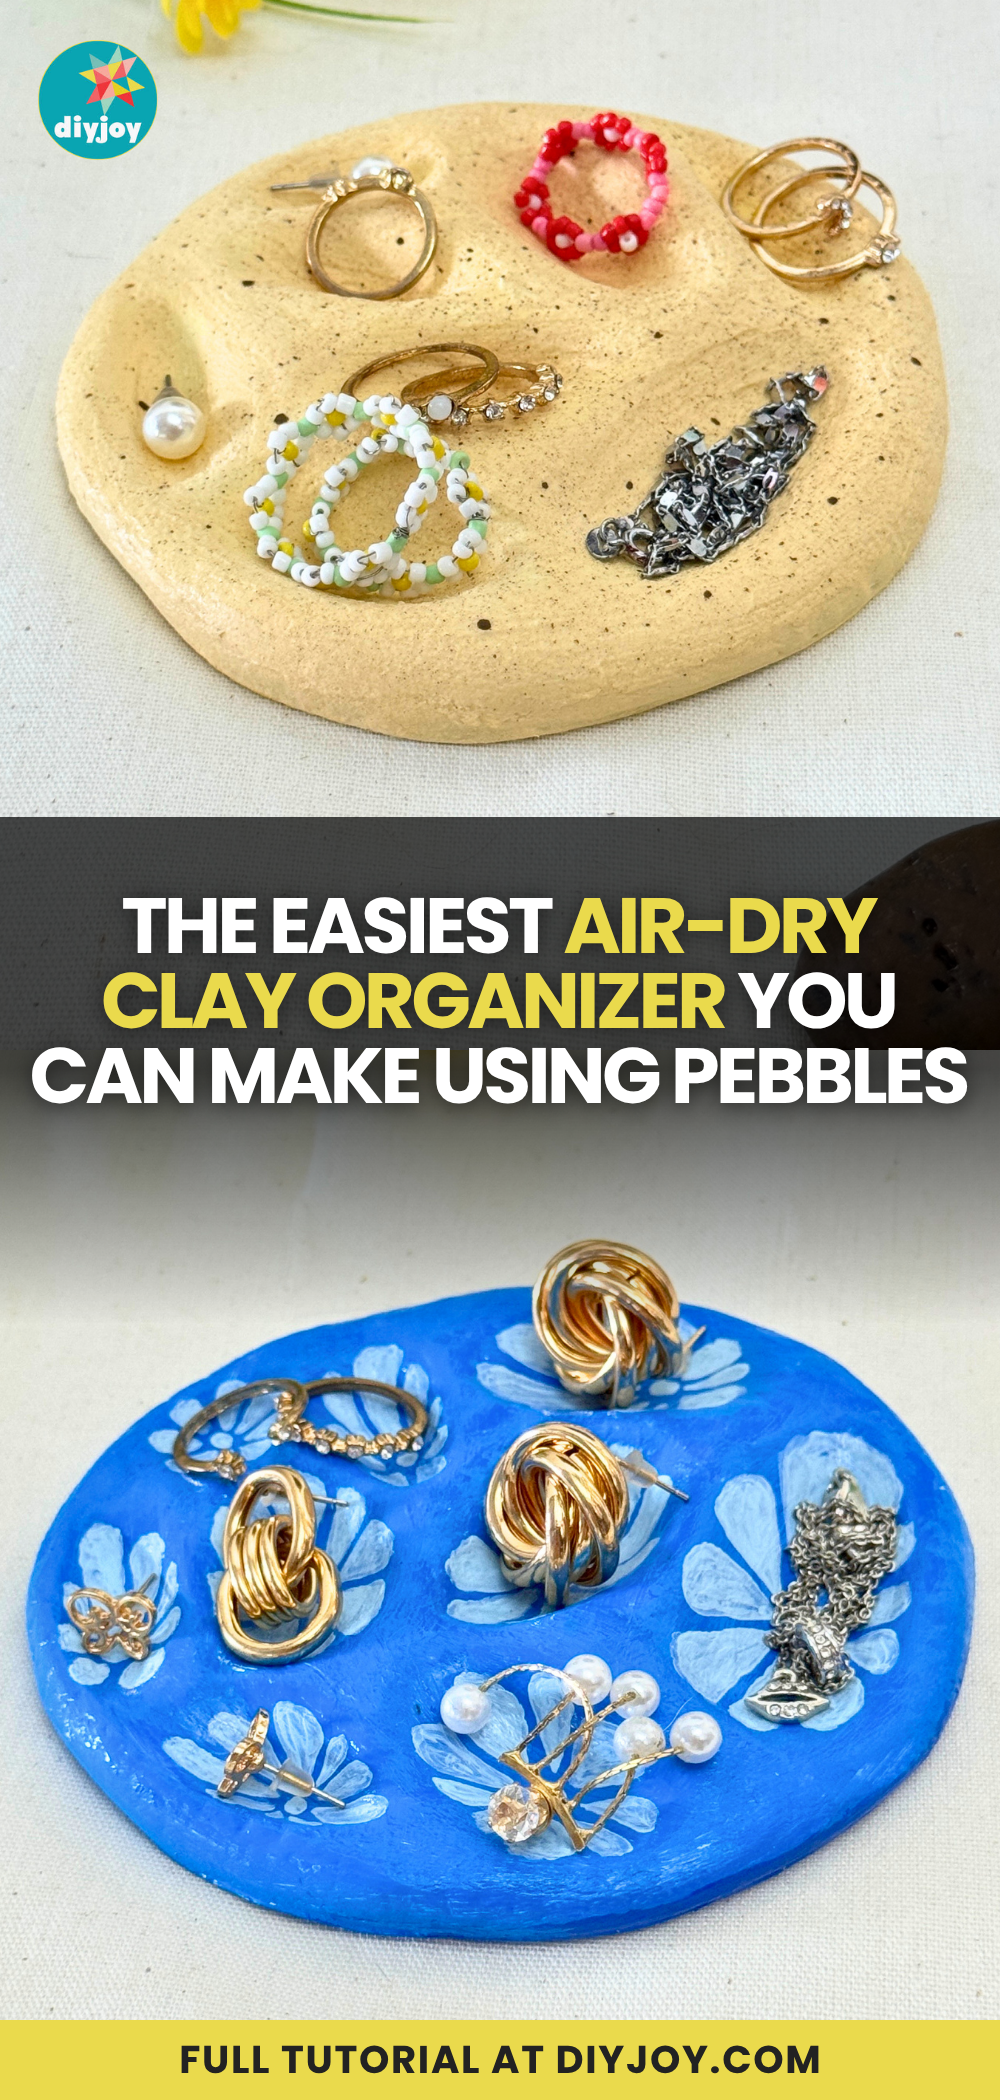
If you love air-dry clay projects as much as I do, you already know how satisfying it is to turn a simple lump of clay into something useful and beautiful. I’ve tried quite a few ideas over time, and one of my absolute favorites is making jewelry dishes and small trinkets that keep accessories like rings, earrings, and tiny keepsakes organized and easy to reach while still looking cute on display.

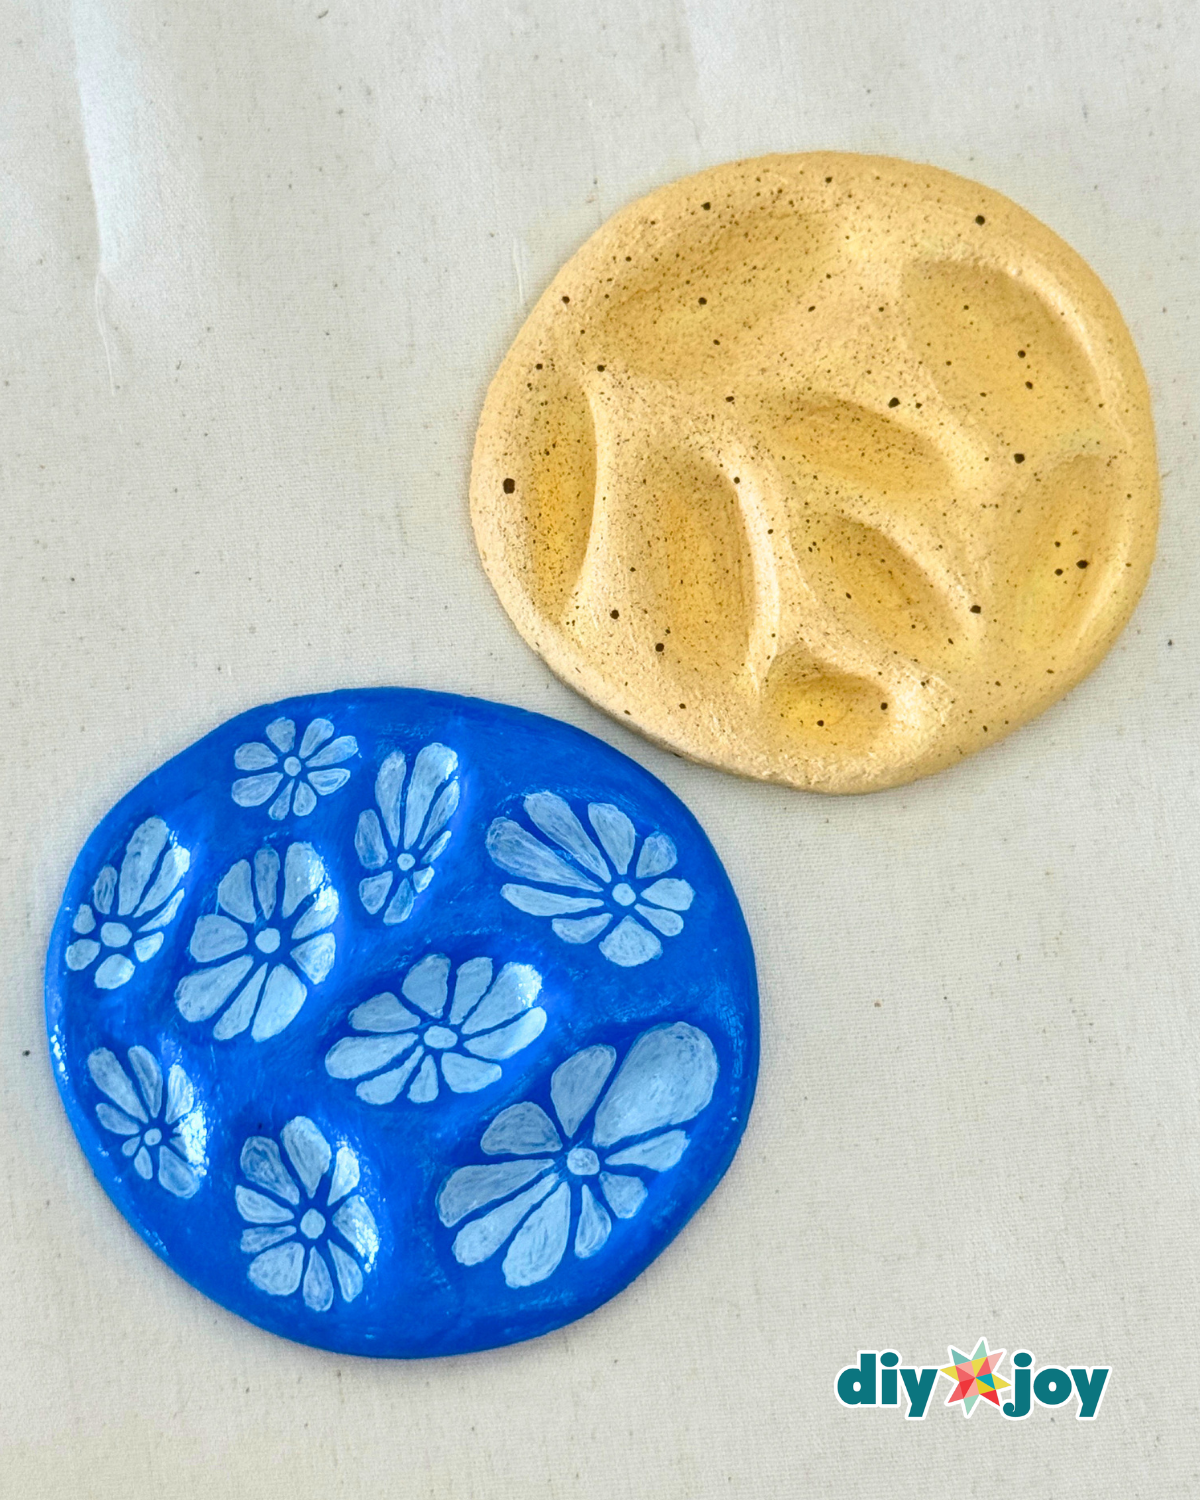
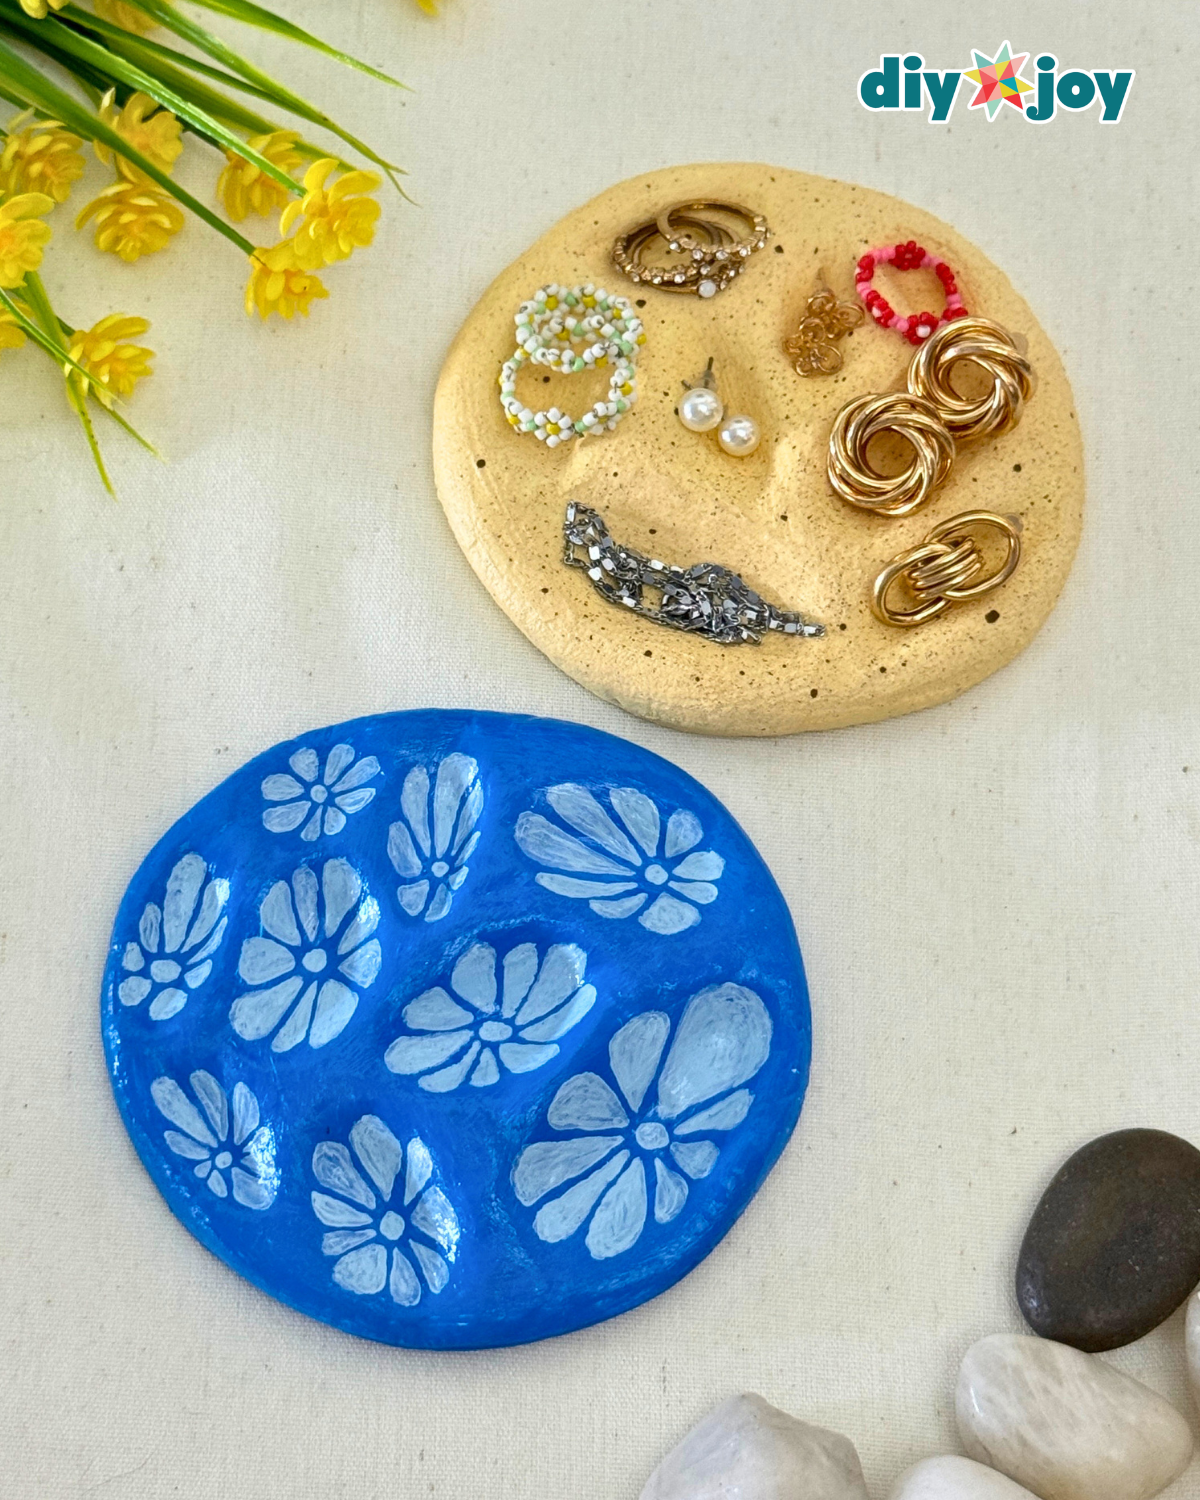
I’ve made round clay dishes and even a few ring holders before, but this time I wanted to try something a little different and more textured. Instead of sticking to the usual smooth finish, I experimented with using pebbles to shape the clay—and honestly, it made the whole project feel so much more unique and fun.
Here’s another cute craft idea to try :
How to Make a Clay Jewelry Trinket Using Napkin Paper
![]()
Have you seen our TikTok & Instagram yet?
Our viral videos are super popular and fun to watch. Here’s the air-dry clay jewelry organizer TikTok, but the YouTube video is also at the bottom of this post so you can watch the full tutorial. Links below for all our socials. Follow and be the first to see our latest crafts. ⬇️
To match that vibe, I also tried a different painting approach for this air-dry clay project by using baking soda and mixing it with paint. The final result has a soft beachy, summer-inspired look that feels relaxing just to look at.
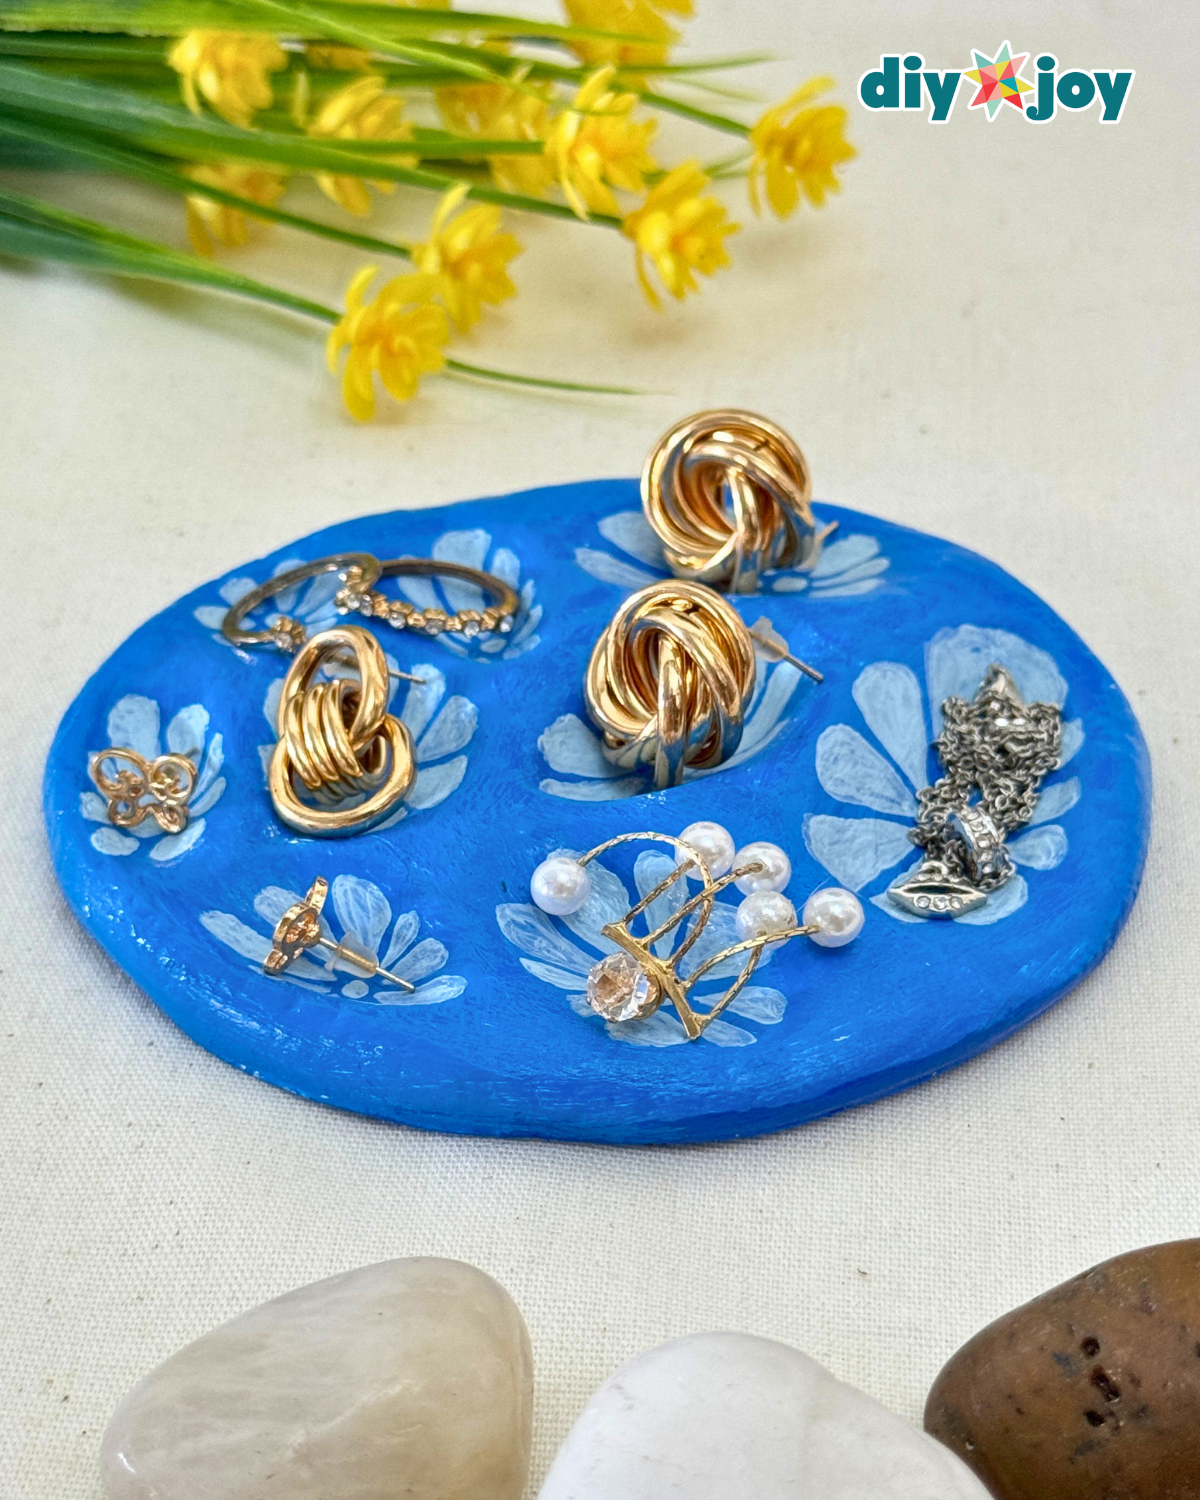
It’s one of those easy DIY air-dry clay ideas that doesn’t just help you organize small items, but also makes your space feel more personal and creative. If you enjoy simple clay crafts that are fun, satisfying, and a little different from the usual, I think you’re going to love this one.
How to Make an Air-Dry Clay Jewelry Organizer Using Pebbles
<strong>Step 1: Roll and Shape the Clay Base</strong>
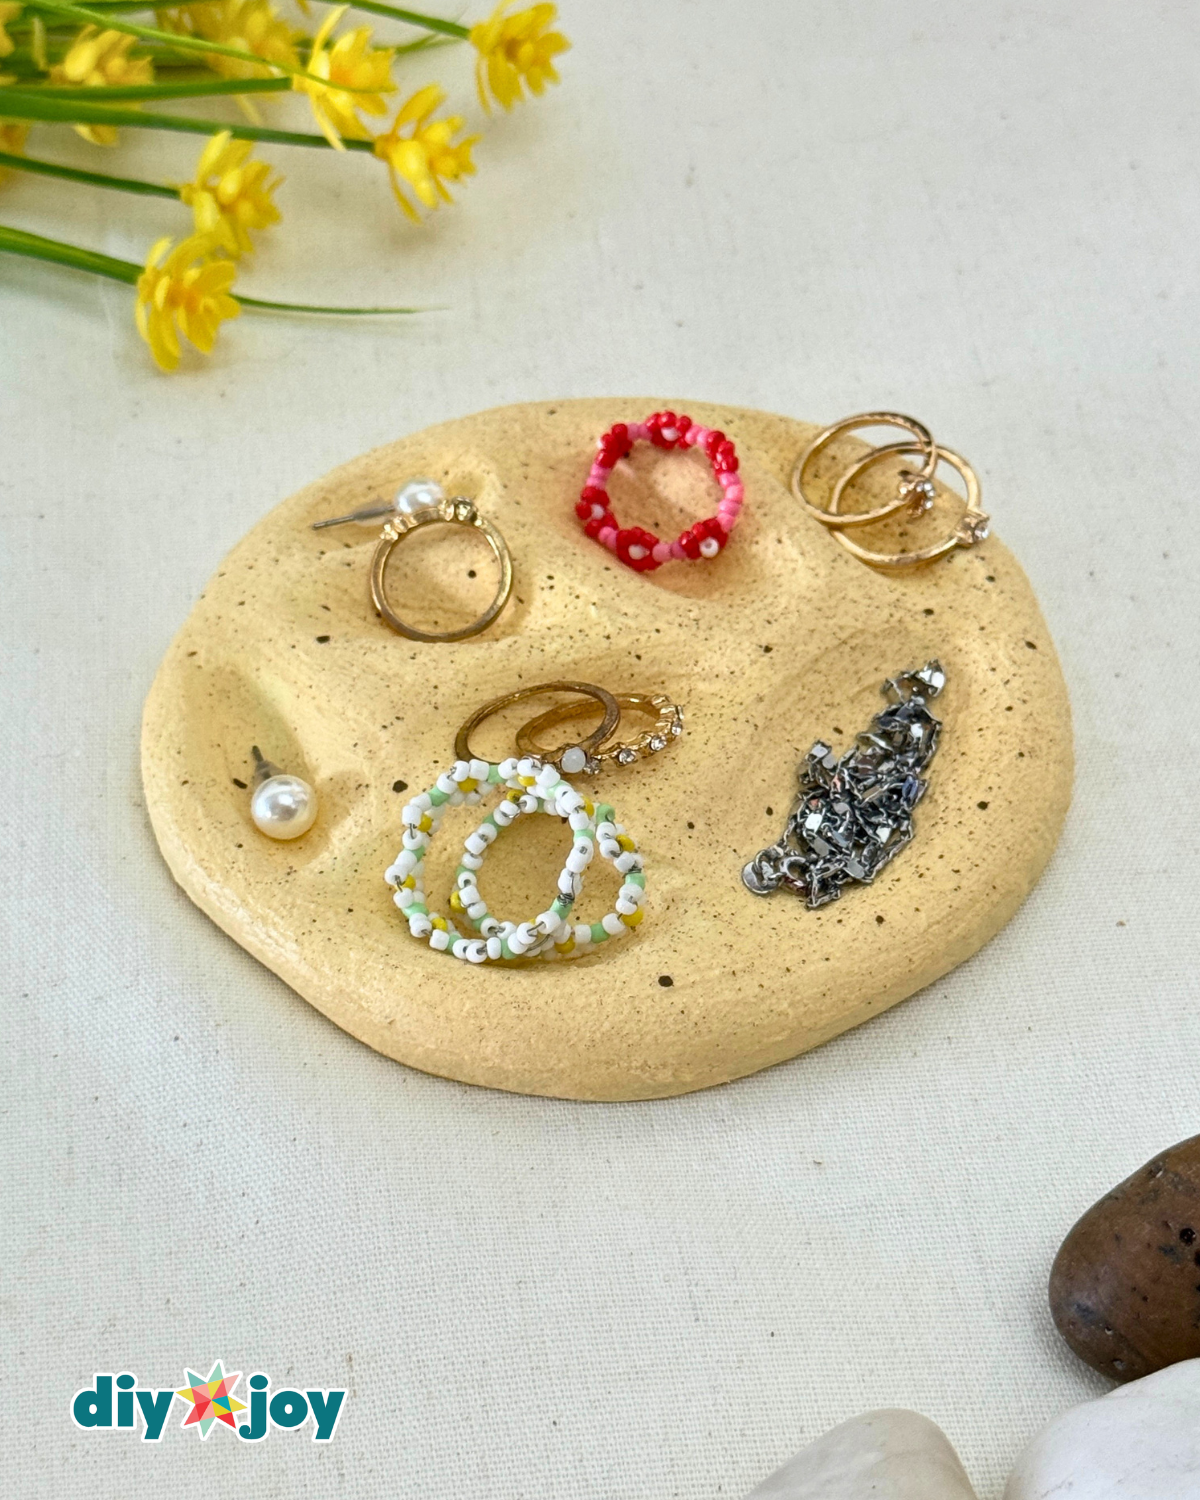
Take a piece of air-dry clay and roll it out evenly. Flatten it until it reaches your desired thickness, then shape it into a circle as evenly as possible.
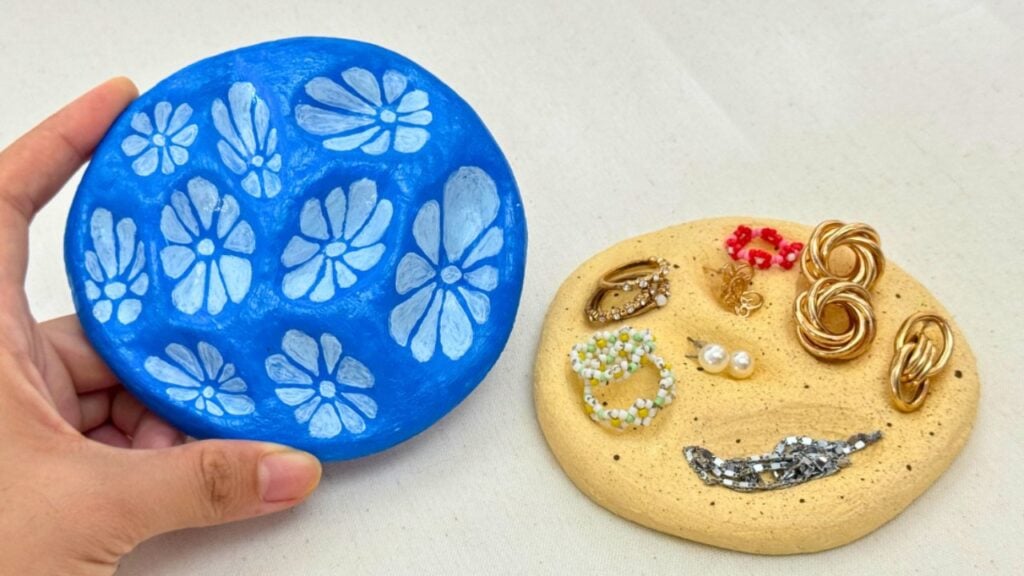
<strong>Step 2: Press the Pebbles into the Clay</strong>
Choose the pebbles you want to use, then press them one by one into the clay to create indentations or sunken spaces. Carefully remove the pebbles, making sure to do it gently so the clay does not crack or break. It may help to wet the stones first to prevent them from sticking to the clay. Once all the pebbles are removed, use damp fingers to smooth out the indentations and remove any cracks from the clay surface.
<strong>Step 3: Let the Clay Dry and Apply the Base Coat</strong>
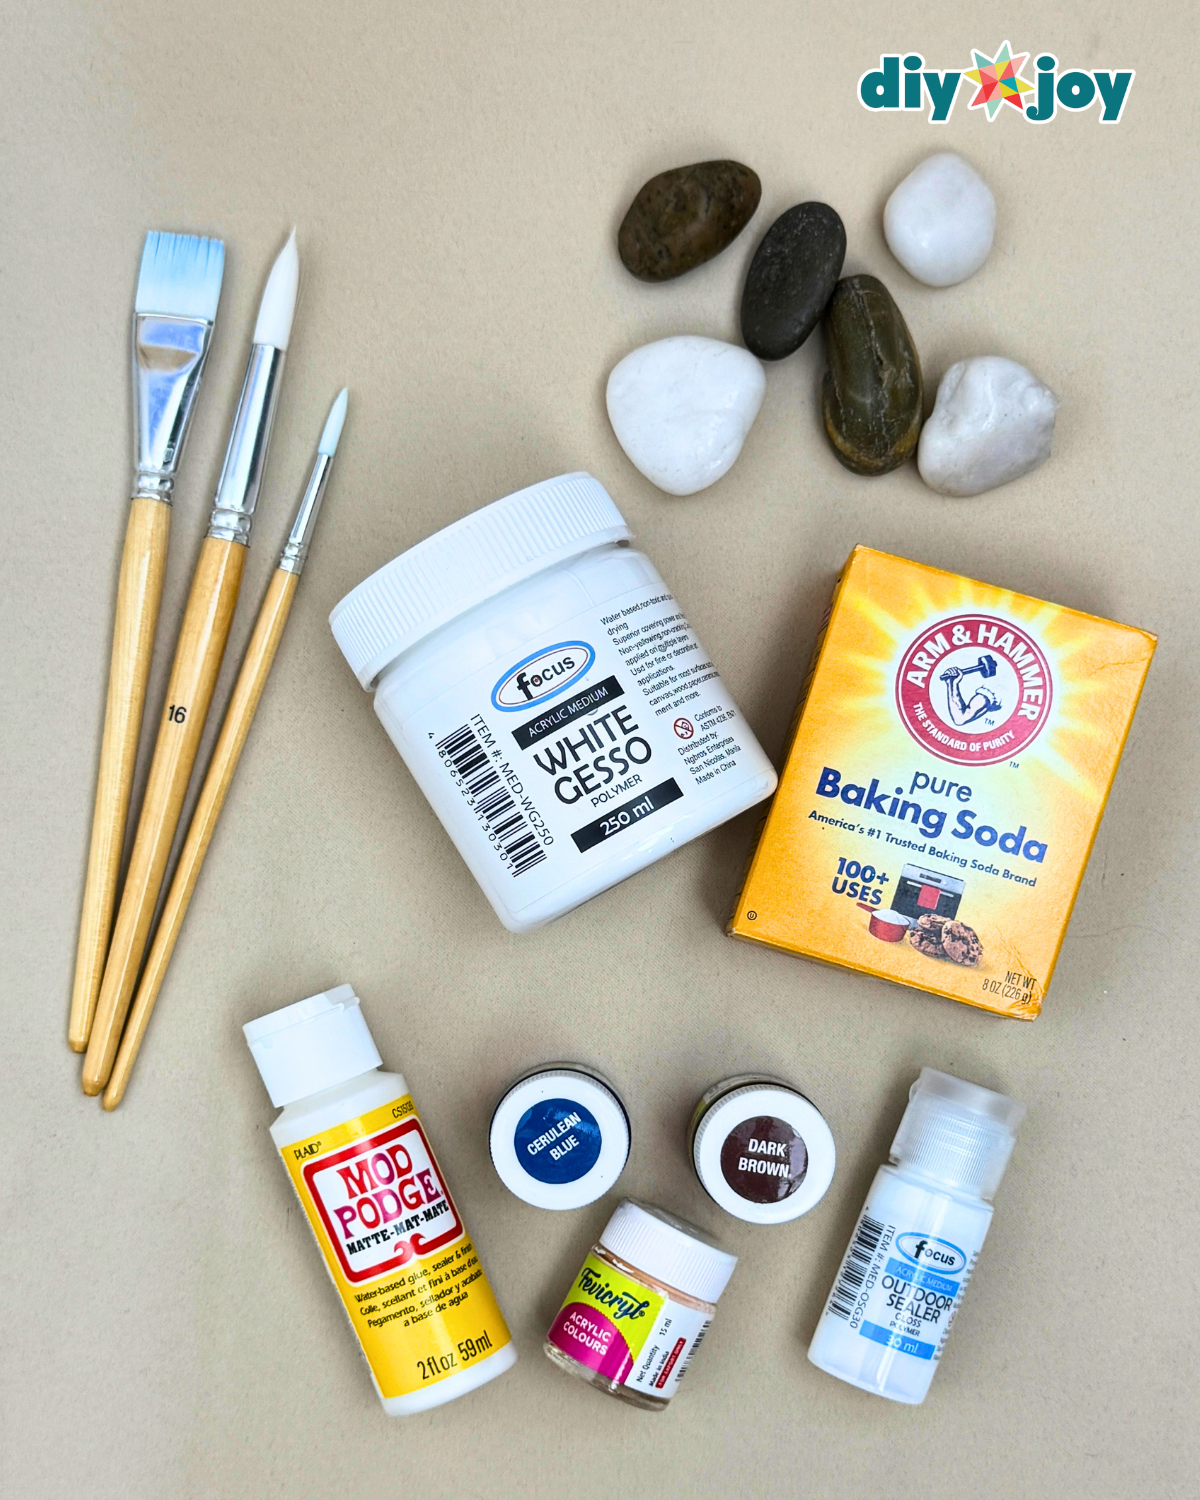
Set the clay aside and leave it undisturbed until completely dry. Drying time can take anywhere from overnight to several days, depending on the type of air-dry clay used and the thickness of your project. Once fully dry, apply a coat of gesso or primer over the entire surface and let it dry completely. After that, paint the project with your base color and allow it to dry before moving on to the next step.
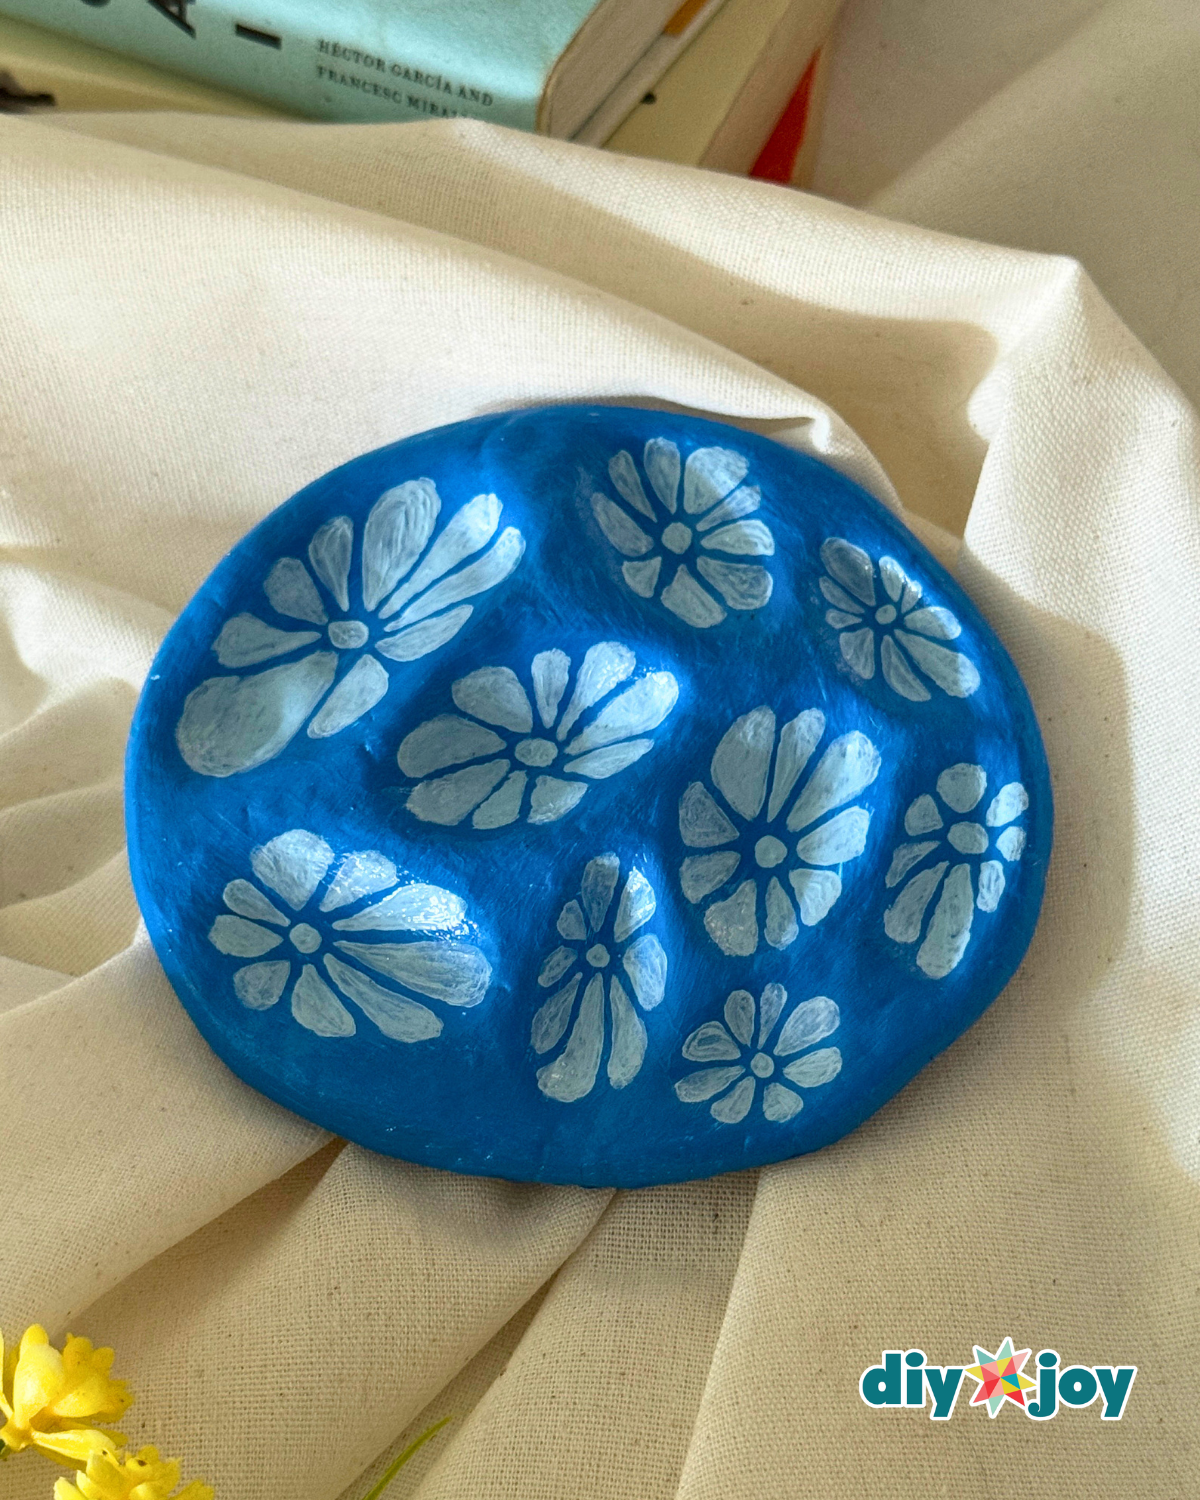
<strong>Step 4: Add the Design and Seal the Tray</strong>
Paint a flower inside the sunken areas of the clay piece, or create any design you like. Once the paint is completely dry, apply an outdoor sealer or your preferred gloss finish over the entire surface. You can also use resin for a glossy finish. Use a brush to spread the coating evenly and allow it to dry completely.
<strong>Step 5: Create a Textured Paint Finish</strong>
Here’s another way to design your clay piece. Mix baking soda and paint together until fully combined and smooth enough to spread easily. If the mixture feels too thick or difficult to work with, add a small amount of water, but avoid adding too much so the texture stays thick and workable.
<strong>Step 6: Paint and Finish the Tray</strong>
Start by applying the baking soda and paint mixture all over the clay piece. Set it aside and allow it to dry completely. Once dry, use a brush with stiff bristles, load it with paint, and use your fingers to flick the bristles, splattering paint across the surface to create random dot patterns and texture. Let it dry fully. Finish by applying a coat of Mod Podge, sealer, or resin—any gloss finish of your choice—to protect and seal the clay piece.
![]()
Pro Tips 💡
- Always work with a slightly damp brush or fingers when smoothing air-dry clay to prevent cracks and keep the surface even.
- Don’t rush drying time—air-dry clay needs to fully harden before painting or sealing to avoid soft spots later.
- If using the baking soda and paint mixture, test the consistency first on a small area so it doesn’t become too runny or too thick.
- When doing paint splatter effects, cover your workspace well and test the flicking motion on scrap paper before applying to your project.
- Apply thin layers of sealer or Mod Podge instead of one thick coat to avoid streaks or cloudiness.
- Let each layer (paint, splatter, sealer) dry completely before moving to the next step for the cleanest finish.
DIY Projects To Try Next:


*If you love this craft, then visit our official website, follow our Facebook page, and subscribe to our YouTube channel for more!
Easy DIY Air-Dry Clay Jewelry Organizer Tutorial