Christmas has always been one of my favorite times of the year. I mean, who doesn’t love Christmas, right? Apart from Thanksgiving, it’s one of those special occasions when loved ones, friends, and family come together to celebrate, spend quality time, and show their love and appreciation for one another. Of course, it’s also the perfect time for gift-giving and decorating!
Some people start putting up their Christmas decorations really early, even when there’s still another holiday coming up, while others wait until the last minute. If you’re someone who doesn’t have much time to prepare, decorating can get a little stressful. There’s just so much to think about, from deciding what decorations to put up to choosing a theme and figuring out whether to make or buy everything.
But the great thing about Christmas decorating is that there really is no right or wrong way to do it! You can go all out with colorful and festive decorations or keep things simple with a more minimalist approach. Either way, what matters is that you love how everything turns out.
Personally, even with all the beautiful Christmas decorations available in stores, I still prefer making my own. There are just some decorations that you can’t find anywhere else, and making them yourself gives you the freedom to customize them exactly how you want. Plus, I think handmade decorations are so much more fun and special!
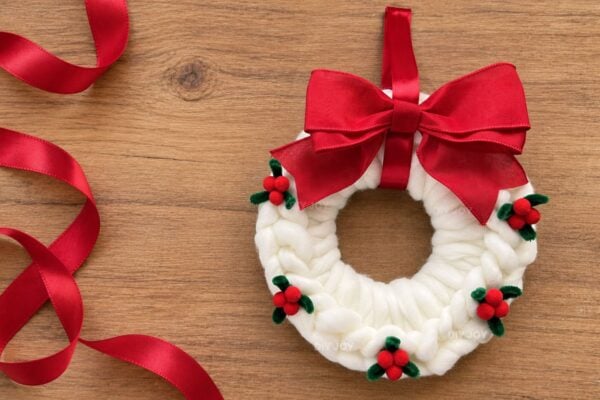
Previously, I made a beautiful beaded Christmas wreath ornament, and I absolutely love how it looks, especially when the beads catch the sunlight coming through the window. If you haven’t seen that project yet, you can check it out here.
Recently, I decided to try making DIY salt dough Christmas ornaments, and let me tell you, it was both fun and a little stressful! Salt dough is one of those things that can turn out perfectly on your first try, or it can take a few failed attempts before you finally get it right. In my case, I definitely had to learn through trial and error!

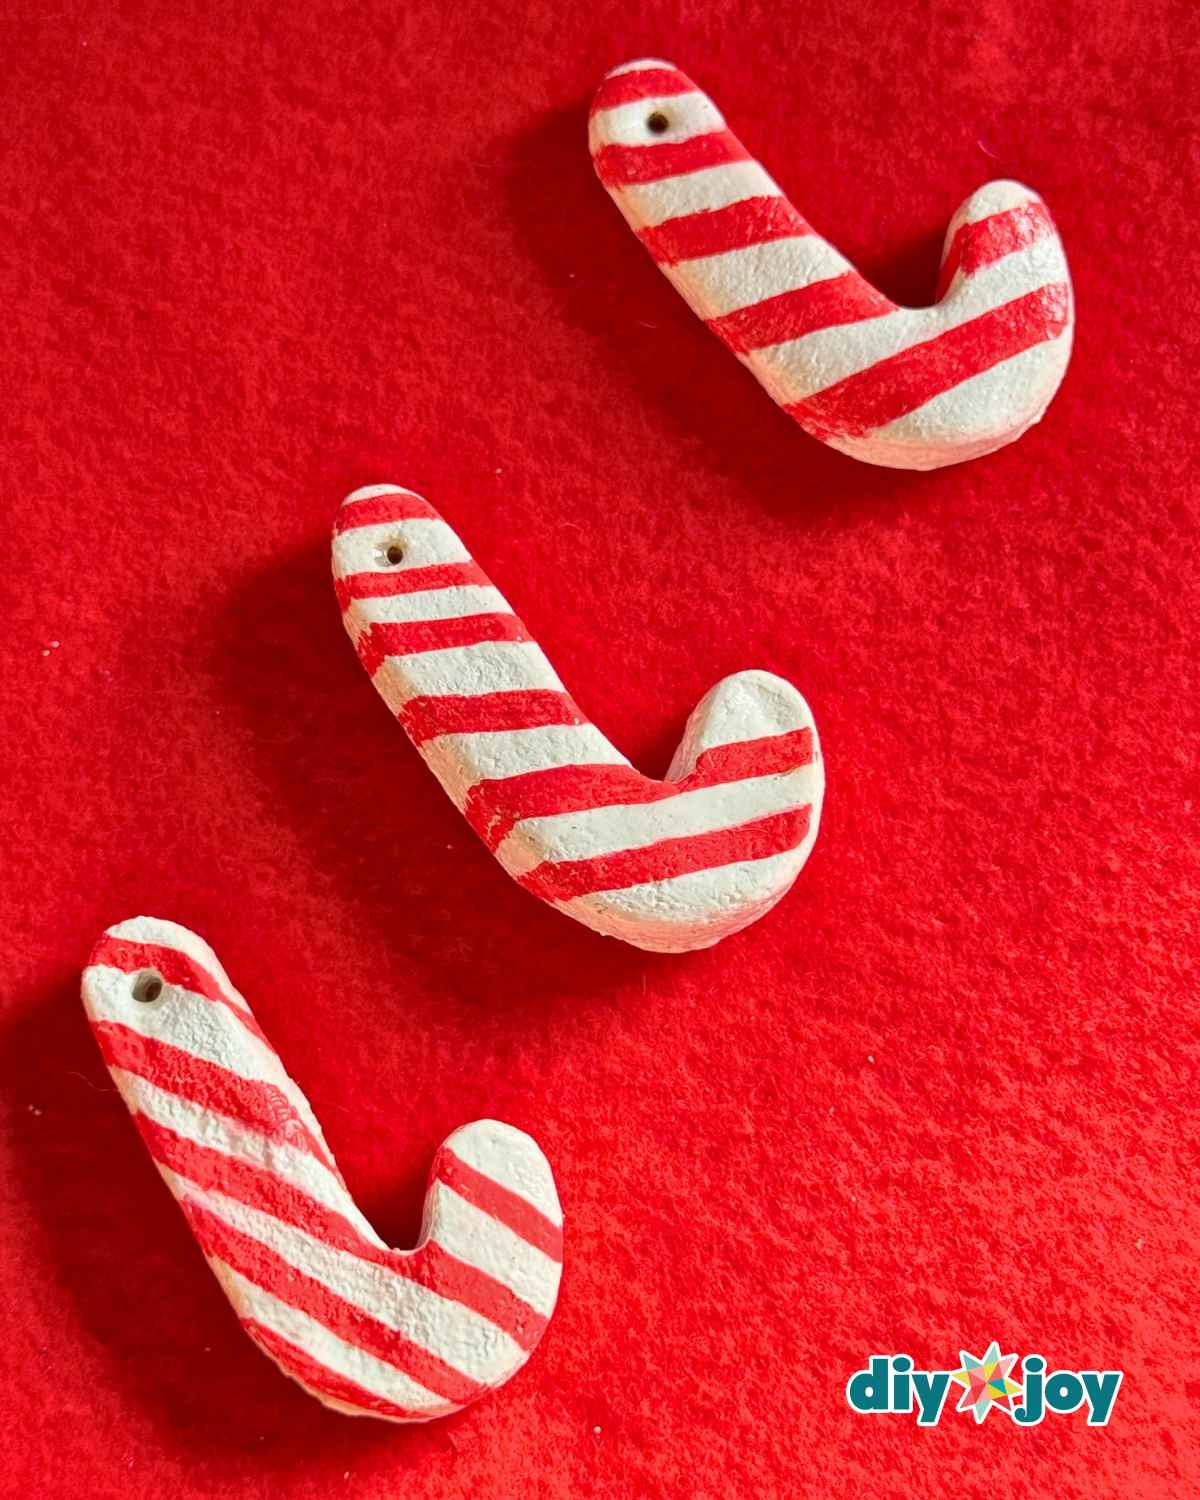
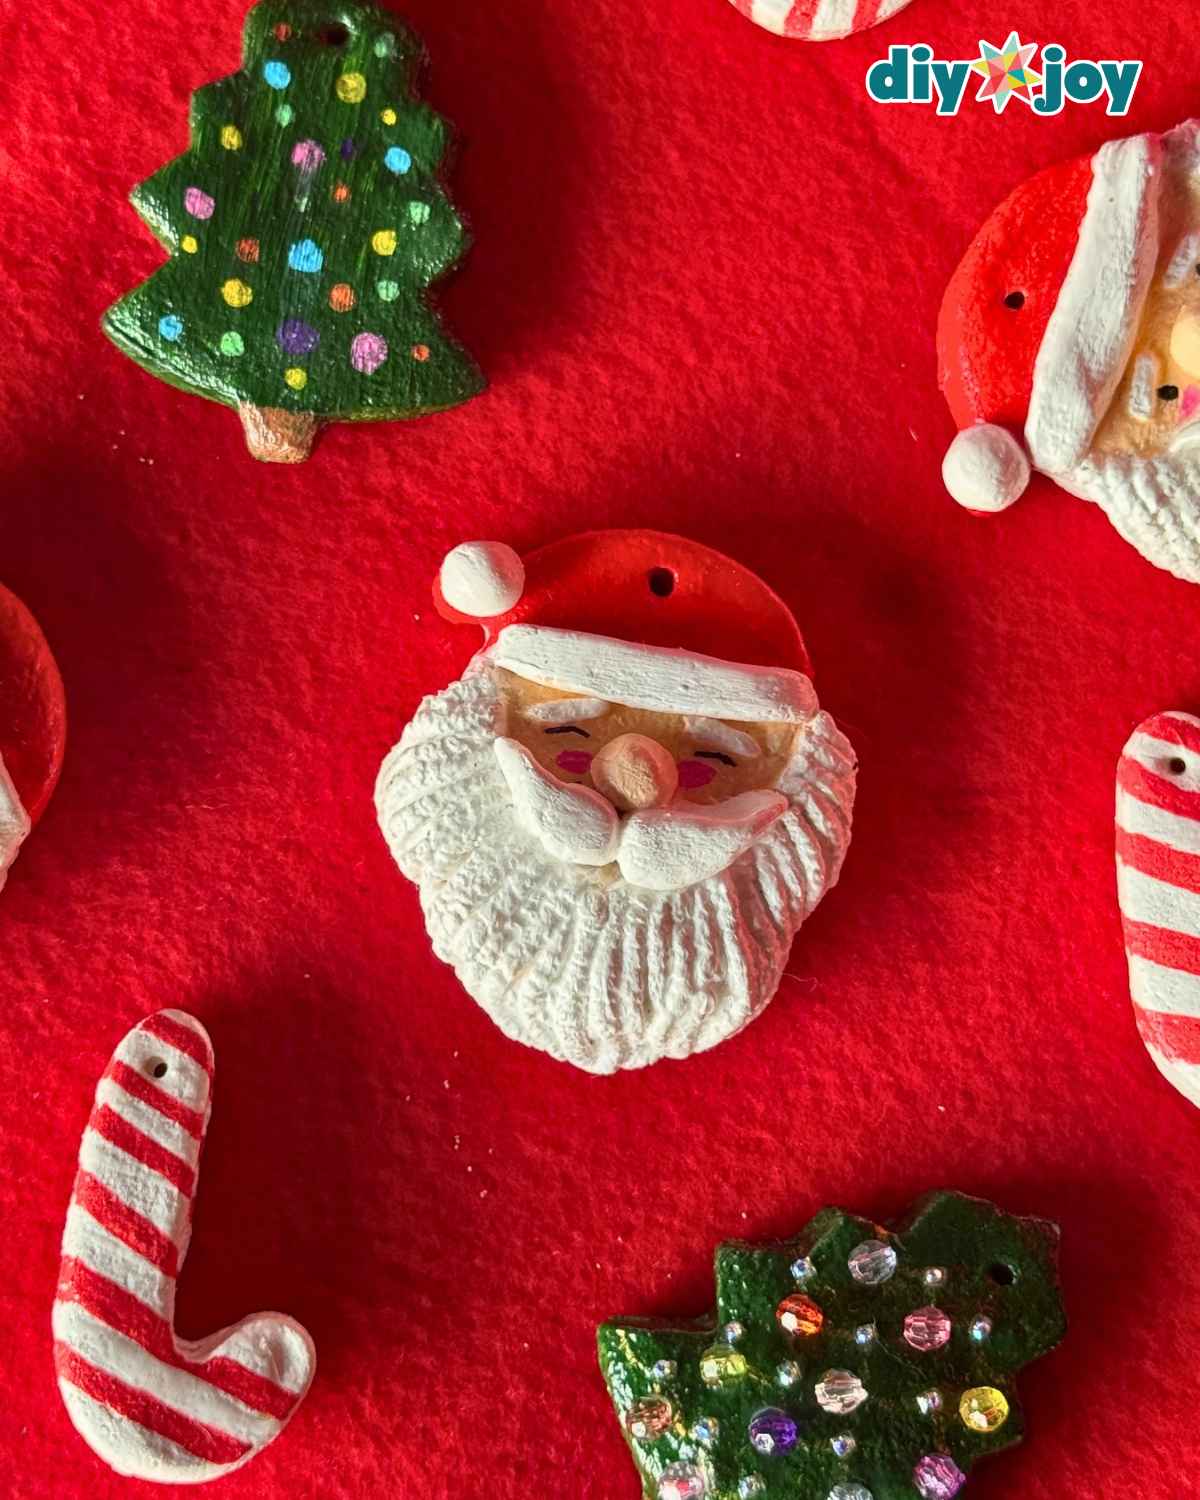
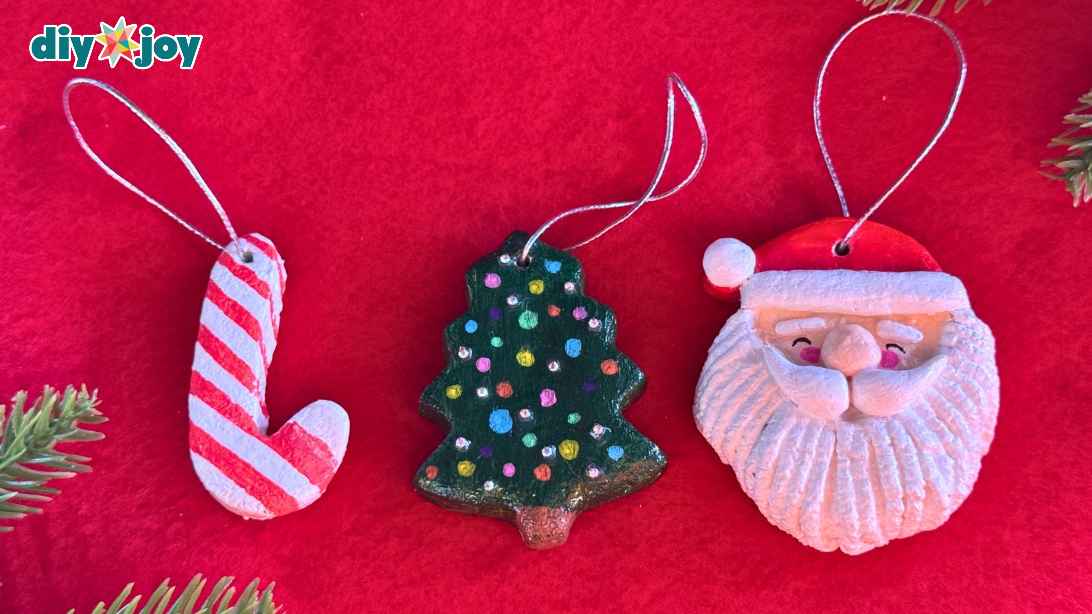
But after a couple of tries, I finally figured it out, and I’m so happy with how my ornaments turned out. I made three different designs: a Christmas tree, a candy cane, and my personal favorite, a Santa-shaped ornament!
Today, I’ll show you exactly how I made these adorable salt dough ornaments, along with the steps and details that helped me get them right. Keep reading below for the full instructions!
RELATED: More DIY Christmas ornaments
Craft Supplies Needed:
- Flour
- Salt
- Cornstarch, optional
- Warm water
- Measuring cups
- Parchment or wax paper
- Cookie cutters
- Food colors, optional
- Scissors
- Sculpting tools
- Acrylic paint
- Gesso, optional
- Paintbrush
- Sharpie
- POSCA pens
- Rhinestones or gems, optional
- Gloss finish
- Metallic Elastic Cord
Shop the Supplies
Here are the main supplies we used for these salt dough ornaments, so you can grab the same ones and get straight to crafting.
Christmas Cookie Cutter Set

Liquitex Acrylic Paint

Metallic Elastic Cord

*Some of the supply links above are affiliate links. If you buy through them, I earn a small commission at no extra cost to you.
DIY Christmas Ornament Using Salt Dough
Learn how to make handmade Christmas ornaments with salt dough!
Salt Dough Santa Ornament Steps
Step 1: Shaping the Dough
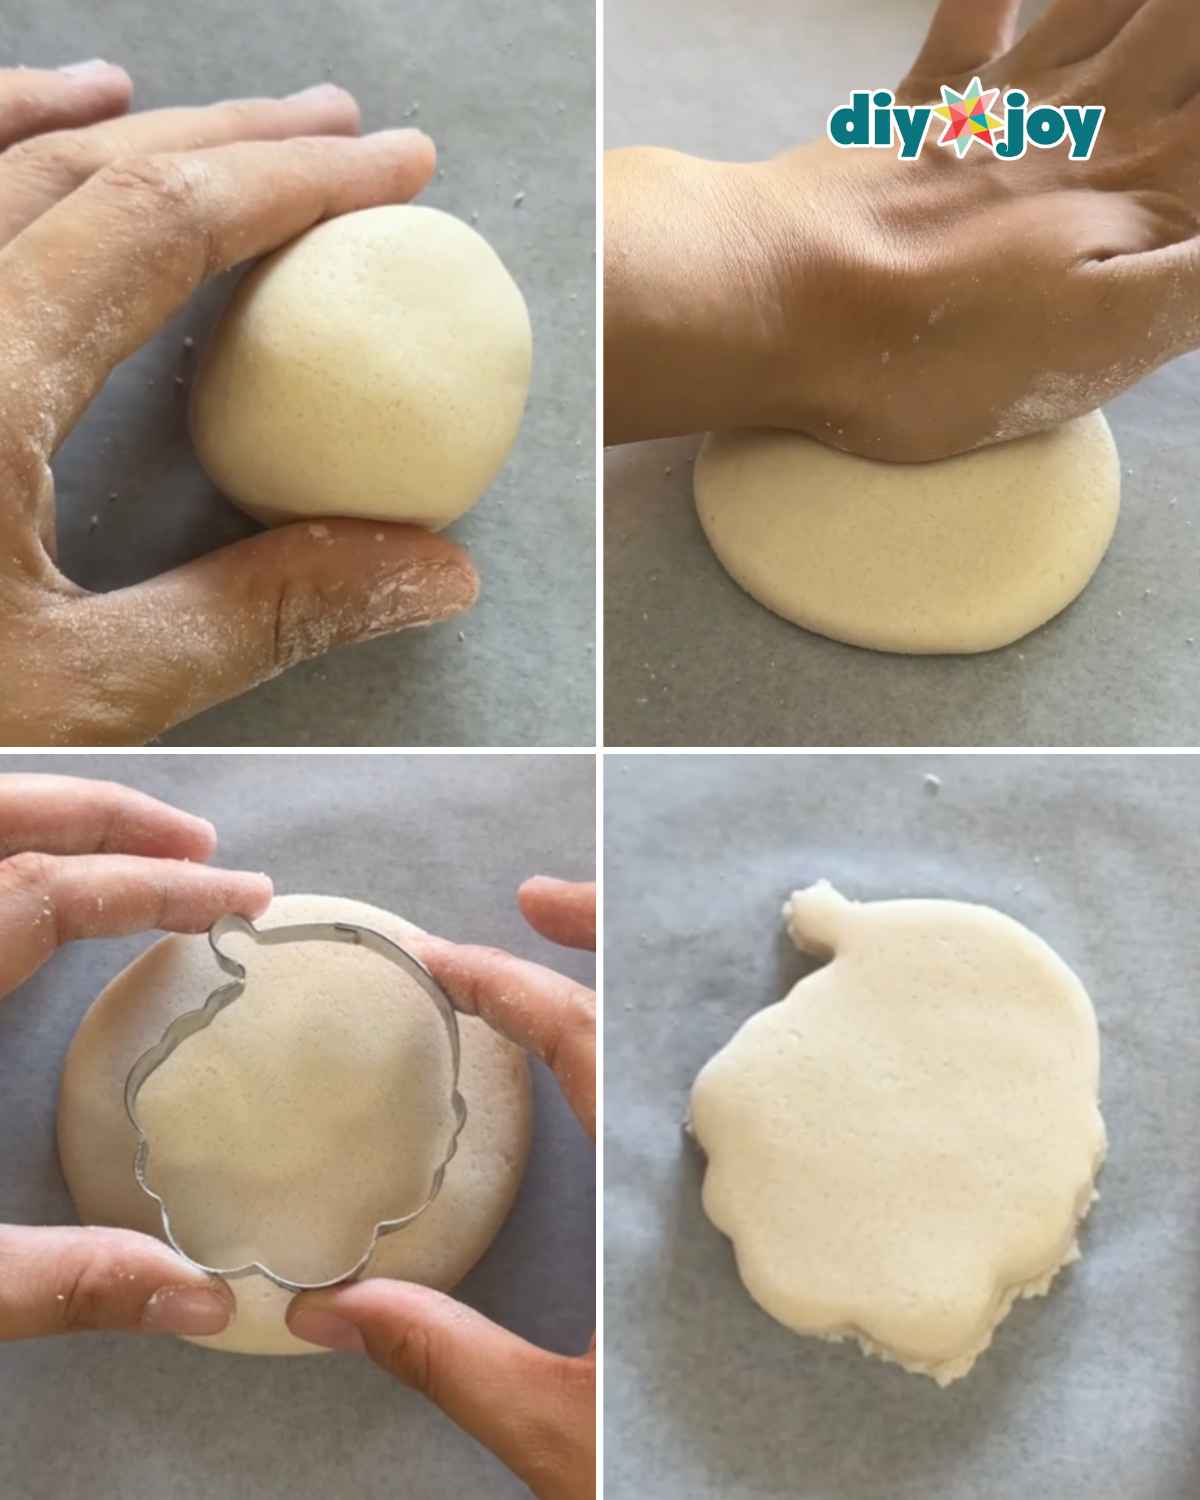
Once your salt dough is ready, take a small piece and roll it into a smooth ball. Gently press it down with your palm, applying just enough pressure to flatten it without making it too thin.
Next, grab a Santa-shaped cookie cutter and press it firmly into the dough to cut out the shape. Carefully remove the excess dough, then use your fingers to smooth out any rough edges. You can also dip your fingers in a little water to make smoothing the edges much easier.
Step 2: Adding the Details of Santa’s Hat
Take a small piece of dough and roll it into a thin strip. Next, lightly mark the Santa-shaped dough where you want the cuff of the hat to go, then carefully place the strip along that area.
Use your fingers to gently press down the edges of the strip, making sure it sticks well and blends with the dough underneath. Once that’s done, roll a tiny piece of dough into a small ball and attach it to the tip of Santa’s hat to make the pom-pom.
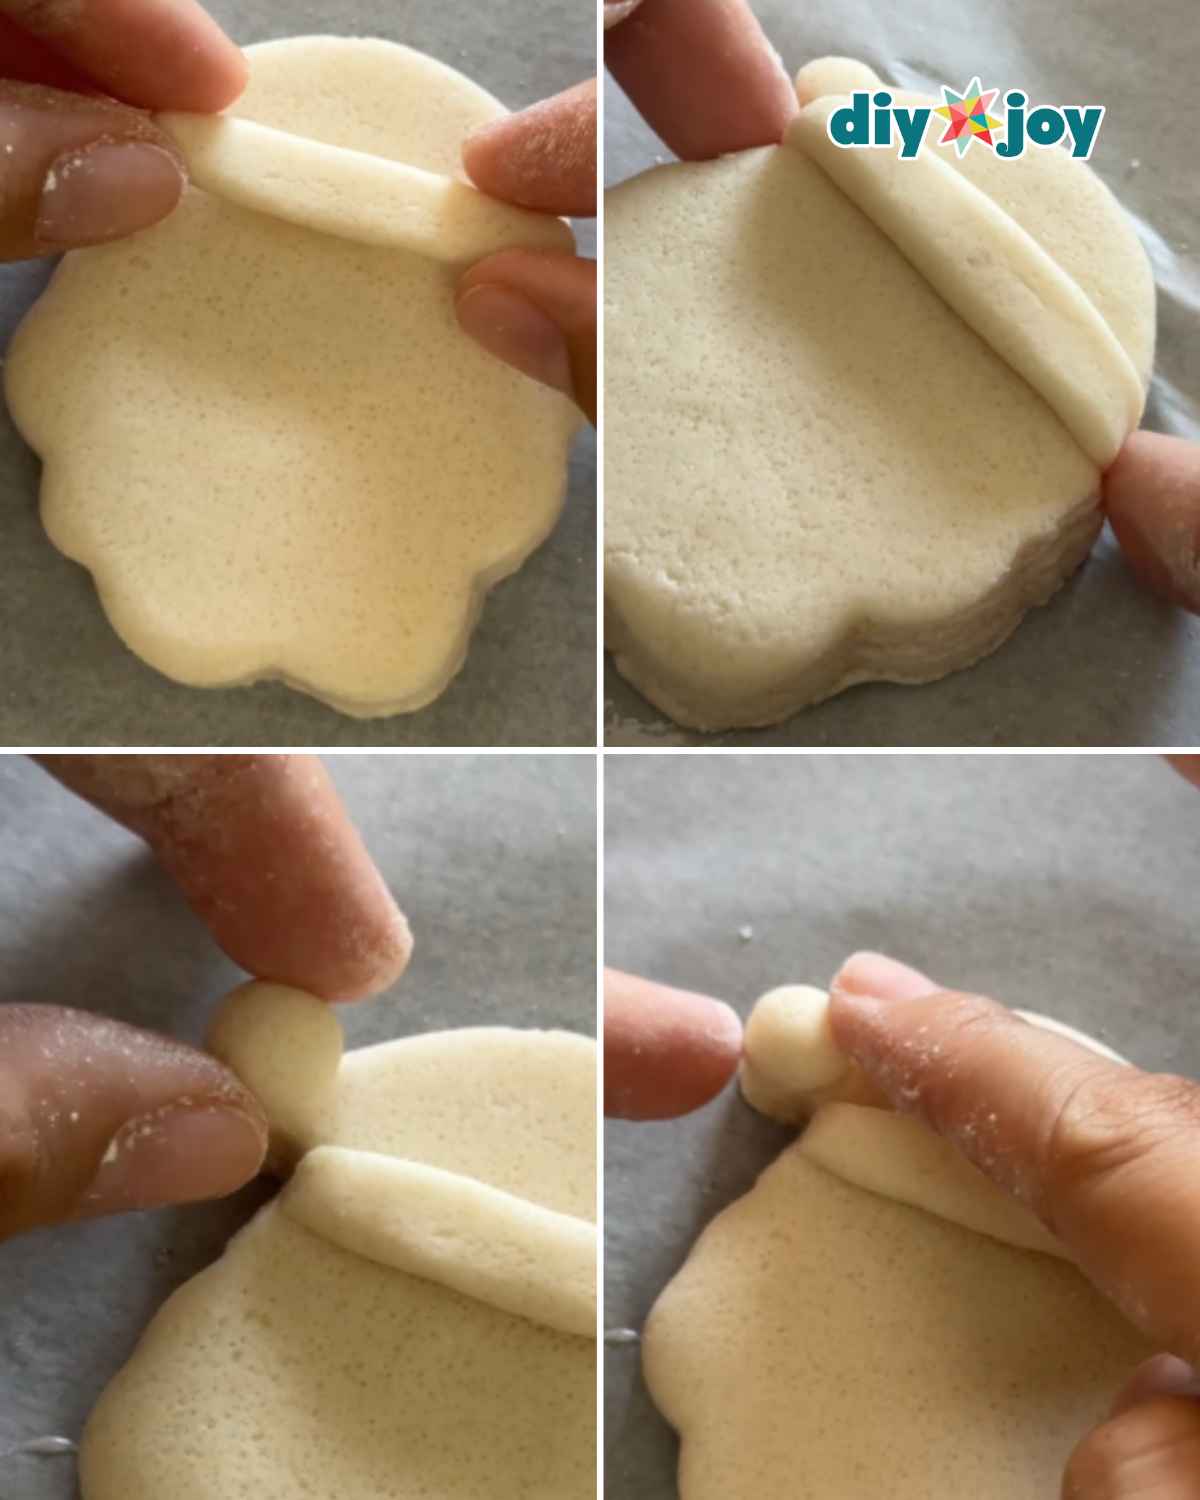
Note: Whenever you’re attaching another piece of dough, make sure to lightly wet the surface with a little water first. This helps the pieces stick together and creates a stronger bond as the dough dries.
Step 3: Adding the Beard
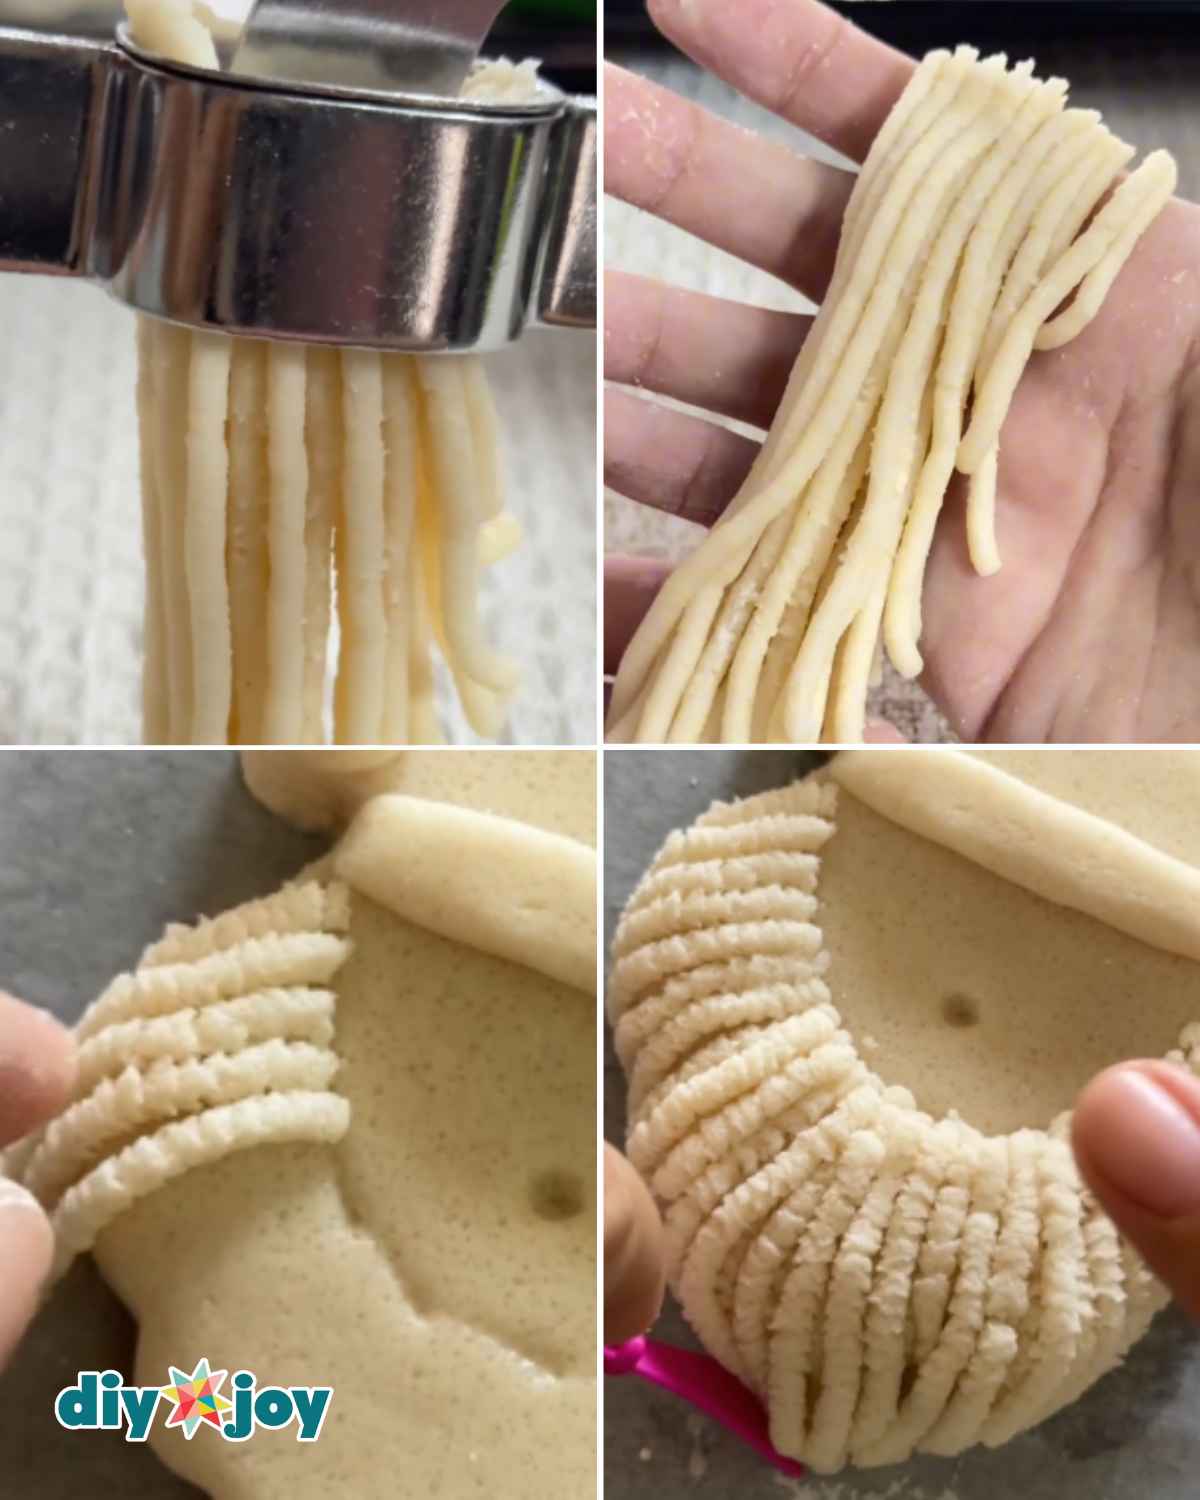
Take a few small balls of dough and place them inside a garlic press, then squeeze to create long, thin strips. This step is completely optional, though! If you don’t have a garlic press, you can simply roll the dough into thin strips by hand and cut them into smaller pieces.
Once you have enough strips, lightly mark where Santa’s nose will go to help you find the center. From there, mark where you want the beard to be, then start placing the strips along your markings. Keep adding and layering the strips until you’re happy with how full the beard looks. Finally, trim off any excess length and gently shape the beard to make it look neat and natural, as shown in the photo.
Step 4: Adding the Details of Santa’s Face
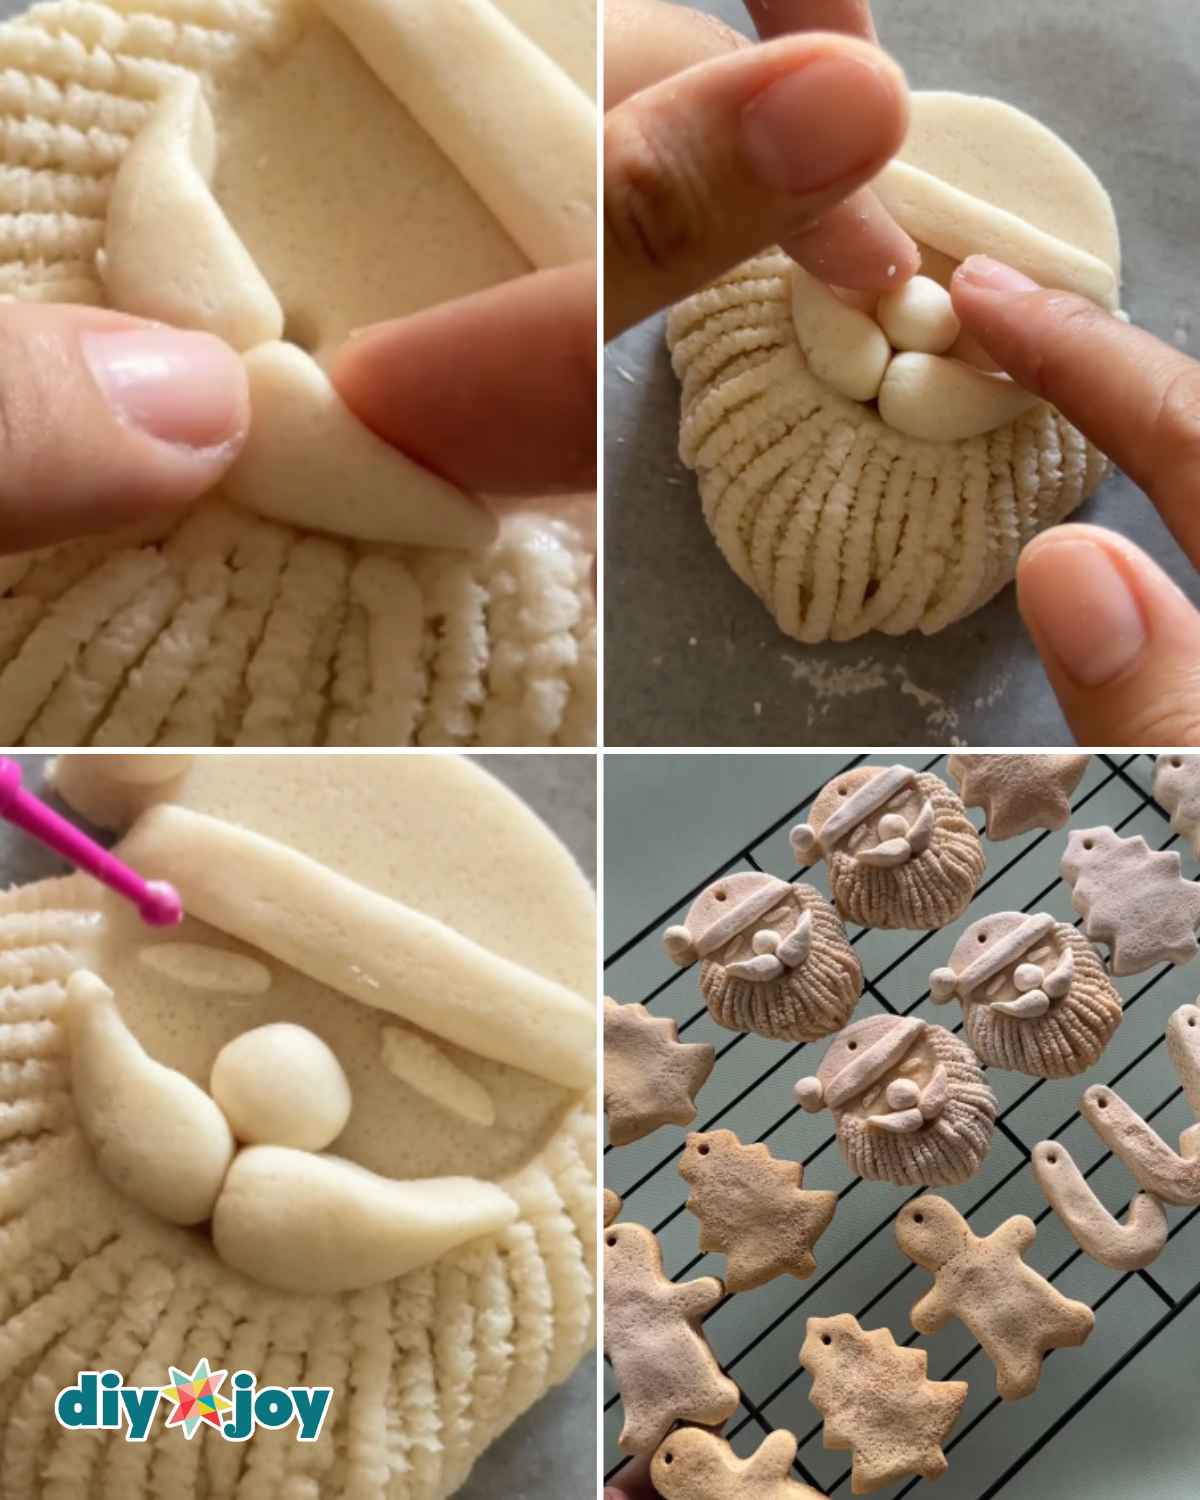
Take a small piece of dough and shape it into a teardrop, then bend it slightly to create one side of Santa’s mustache. Carefully attach it sideways, just above where the beard starts. Repeat the same process on the other side to complete the mustache. Next, roll a small piece of dough into a ball for Santa’s nose and place it right in the center, just above the mustache. Once you’re happy with how everything looks, use a small tool to make a hole at the top of the ornament where you’ll insert the hanging cord later.
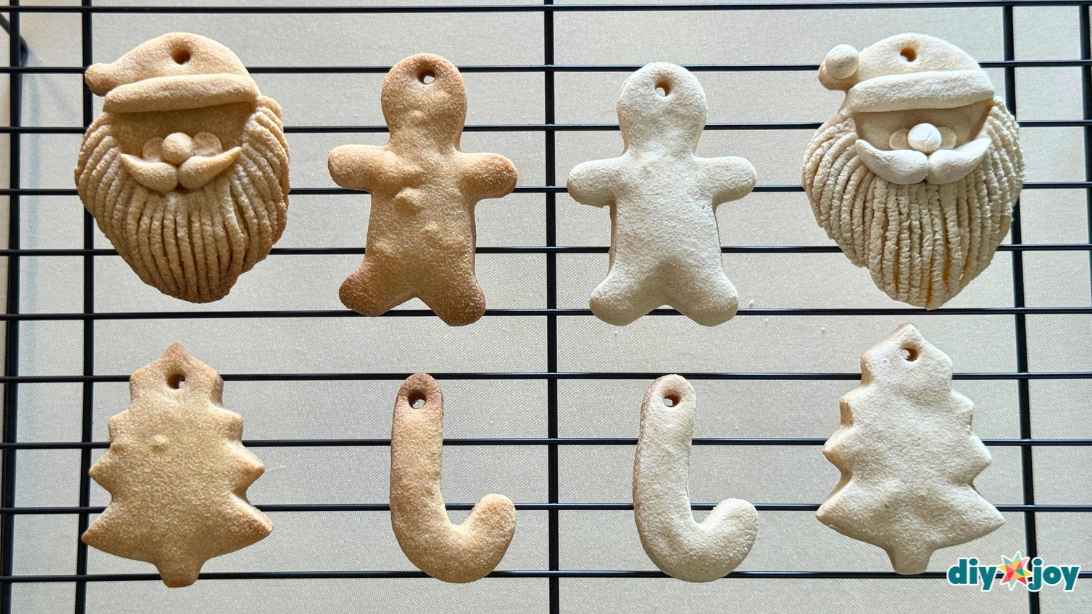
Carefully transfer the finished ornament to a baking sheet lined with parchment paper. Bake at 150°C (302°F) for about 1 to 1.5 hours, depending on the thickness of your dough. I baked mine with the oven door slightly propped open, about 3 to 5 cm (1 to 2 inches), to help release moisture as the ornament dried. Make sure your oven’s manufacturer allows baking with the door ajar.
Note: It may also help to place an empty baking tray on the rack below the ornaments to act as a heat shield. There’s no need to add water to the tray. Make sure to check the ornaments every 20 to 30 minutes and keep a close eye on them to prevent burning or over-browning. Once they’re done baking, let them cool and air-dry completely before moving on to decorating.
Step 5: Adding Color to the Ornament
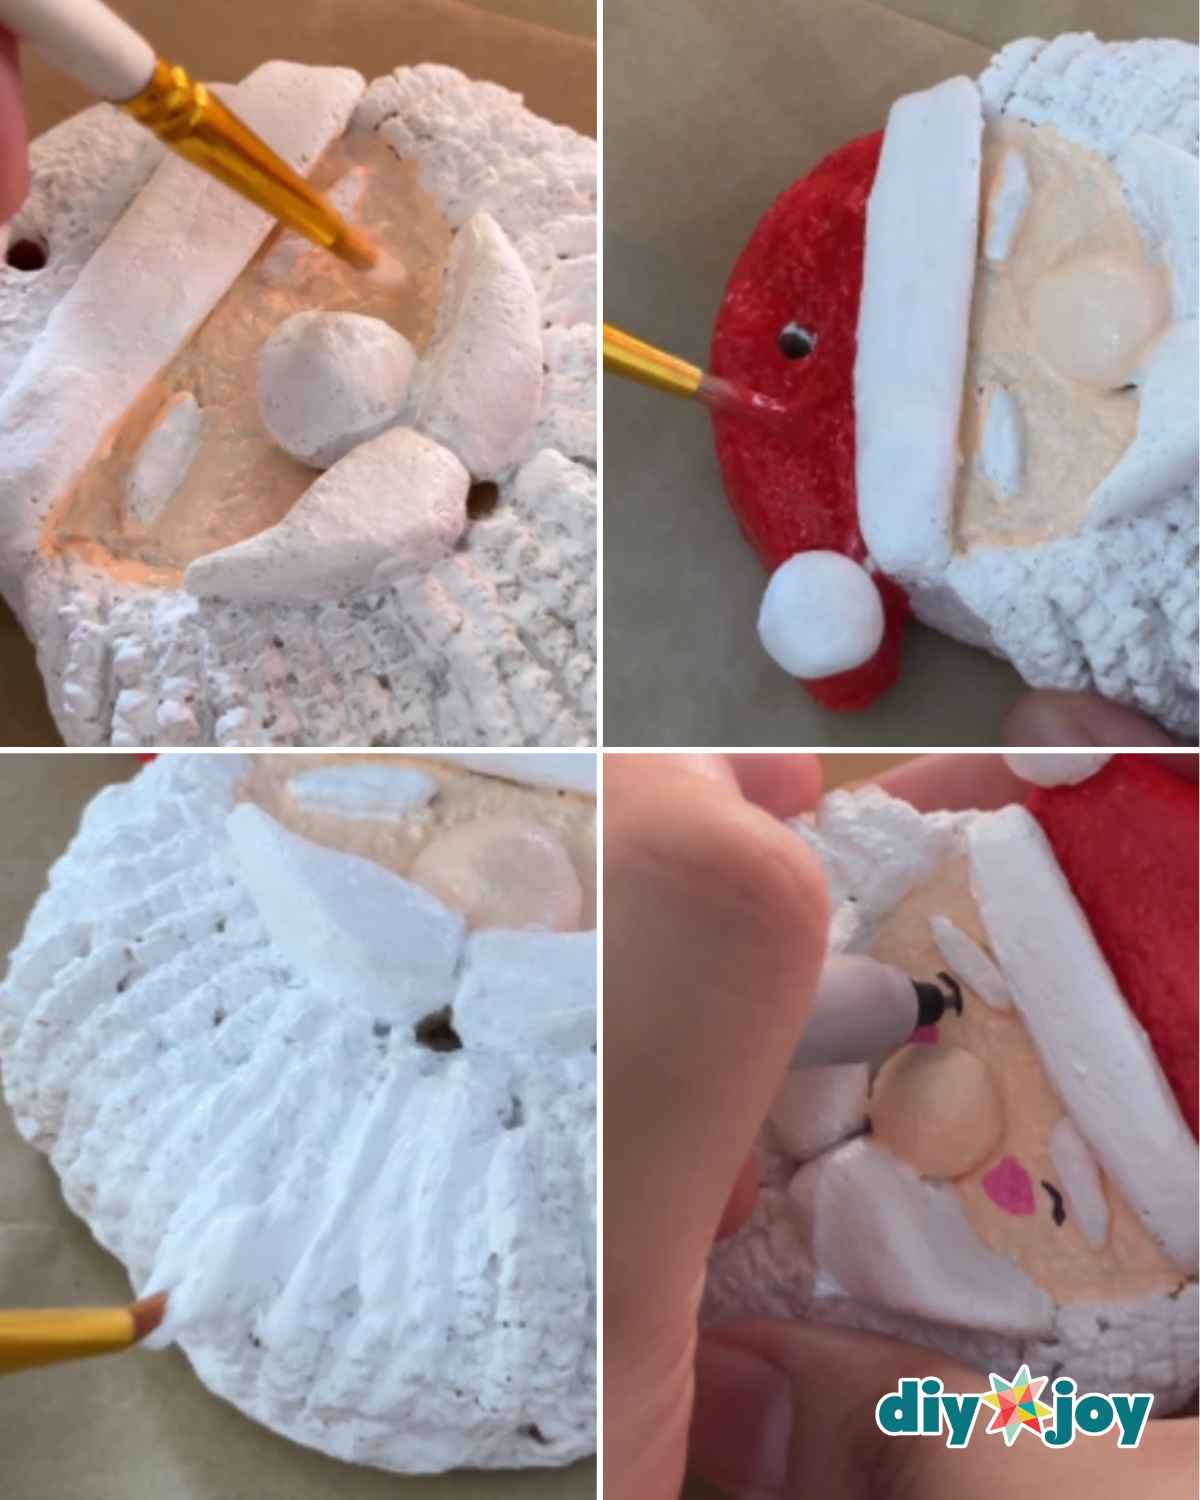
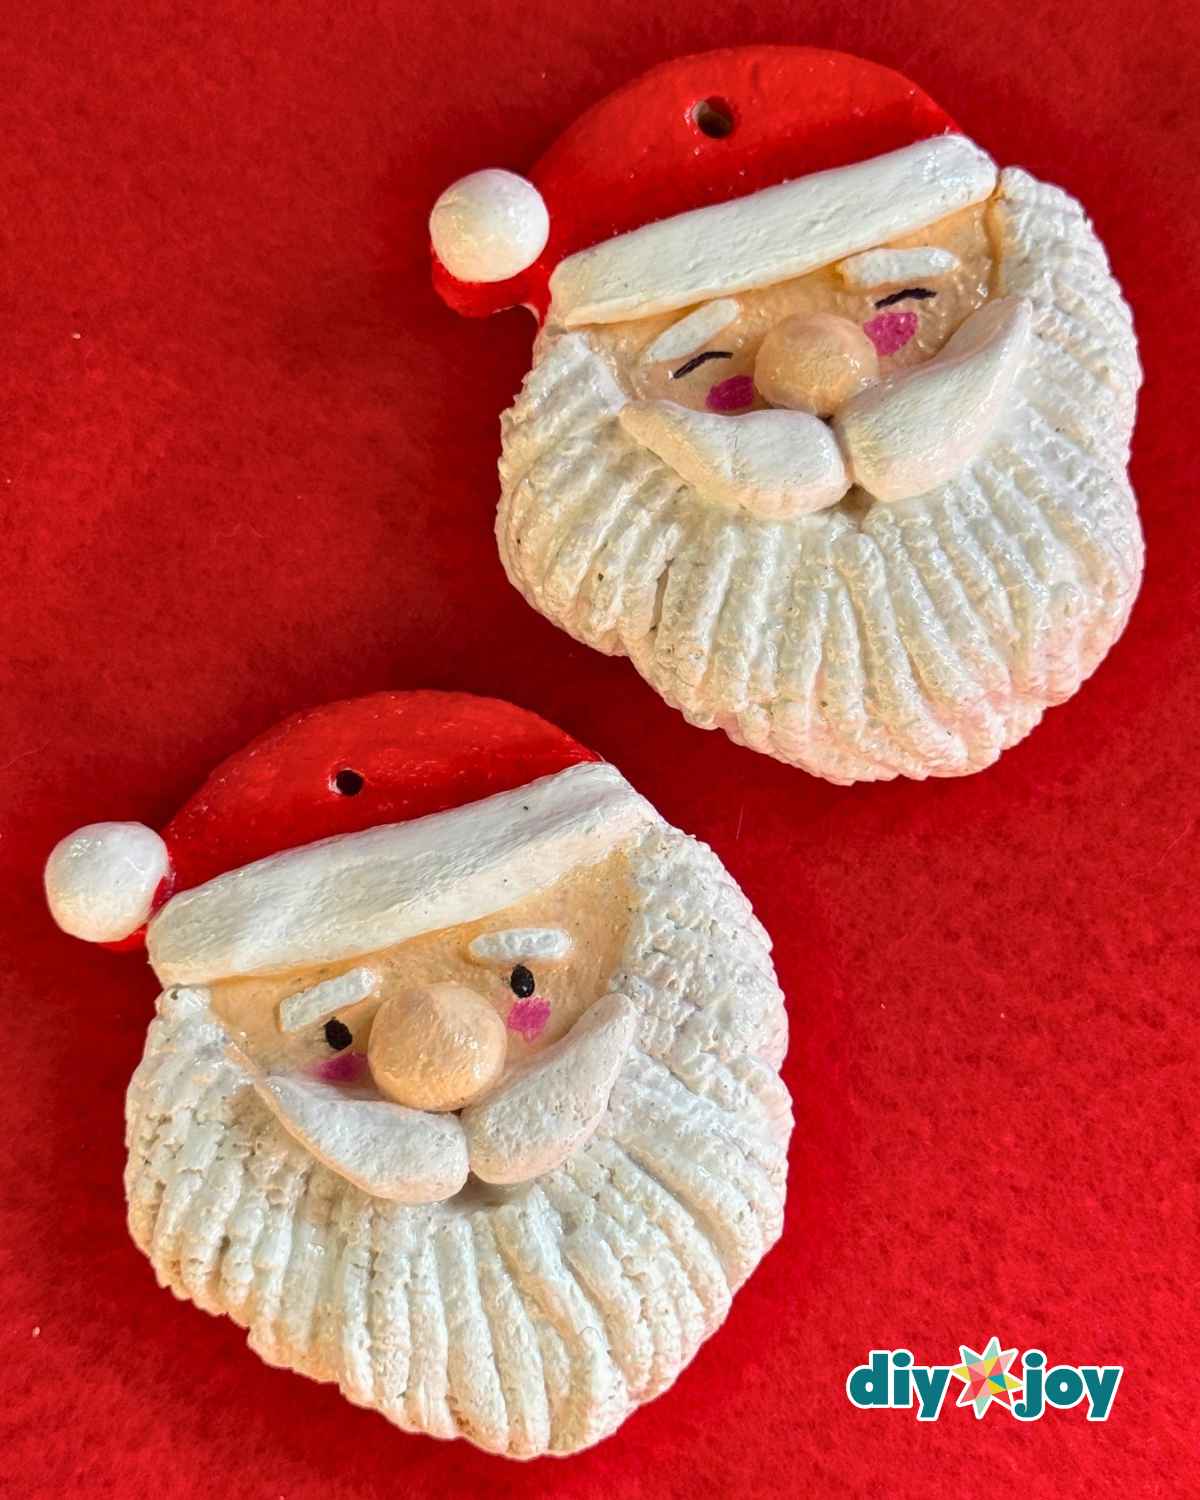
Now comes the fun part, painting and bringing Santa to life! Start by painting Santa’s face and nose with a skin-tone paint to give them a more natural look. Next, paint the top of his hat red, including the sides, then carefully paint the remaining areas white. If you want the colors to look more vibrant, feel free to apply another coat of paint once the previous layer has dried completely.
Once you’re happy with the colors, it’s time to add Santa’s facial details! I used a fine-tip Sharpie to carefully draw his eyes, but you can make them look however you like. You can also add a little blush to his cheeks using a POSCA pen or Sharpie to give him an even cuter look.
After all the paint and details have dried completely, apply a layer of clear gloss over the entire ornament to seal and protect your work. Make sure to follow the product’s instructions and allow the coating to dry and cure completely before handling.
Finally, thread a piece of cord through the hole at the top of the ornament, make a loop, and tie the ends together with a secure knot. Your adorable handmade Santa salt dough ornament is now ready to hang on your Christmas tree!
Note: Before you start painting, if your salt dough ornament looks a little burnt or isn’t as white as you expected, you can apply a layer of gesso or white acrylic paint first. This helps cover any discoloration and creates a nice, even base that makes the colors appear more vibrant. Just make sure to let it dry completely before adding your colors. Also, when applying the clear gloss, use a soft brush and apply it as lightly as possible to avoid smudging Santa’s facial details, especially if you used a Sharpie or paint pen. It’s best to test the gloss on a small area first to make sure it doesn’t smear the ink.

Salt Dough Tree Ornament Steps
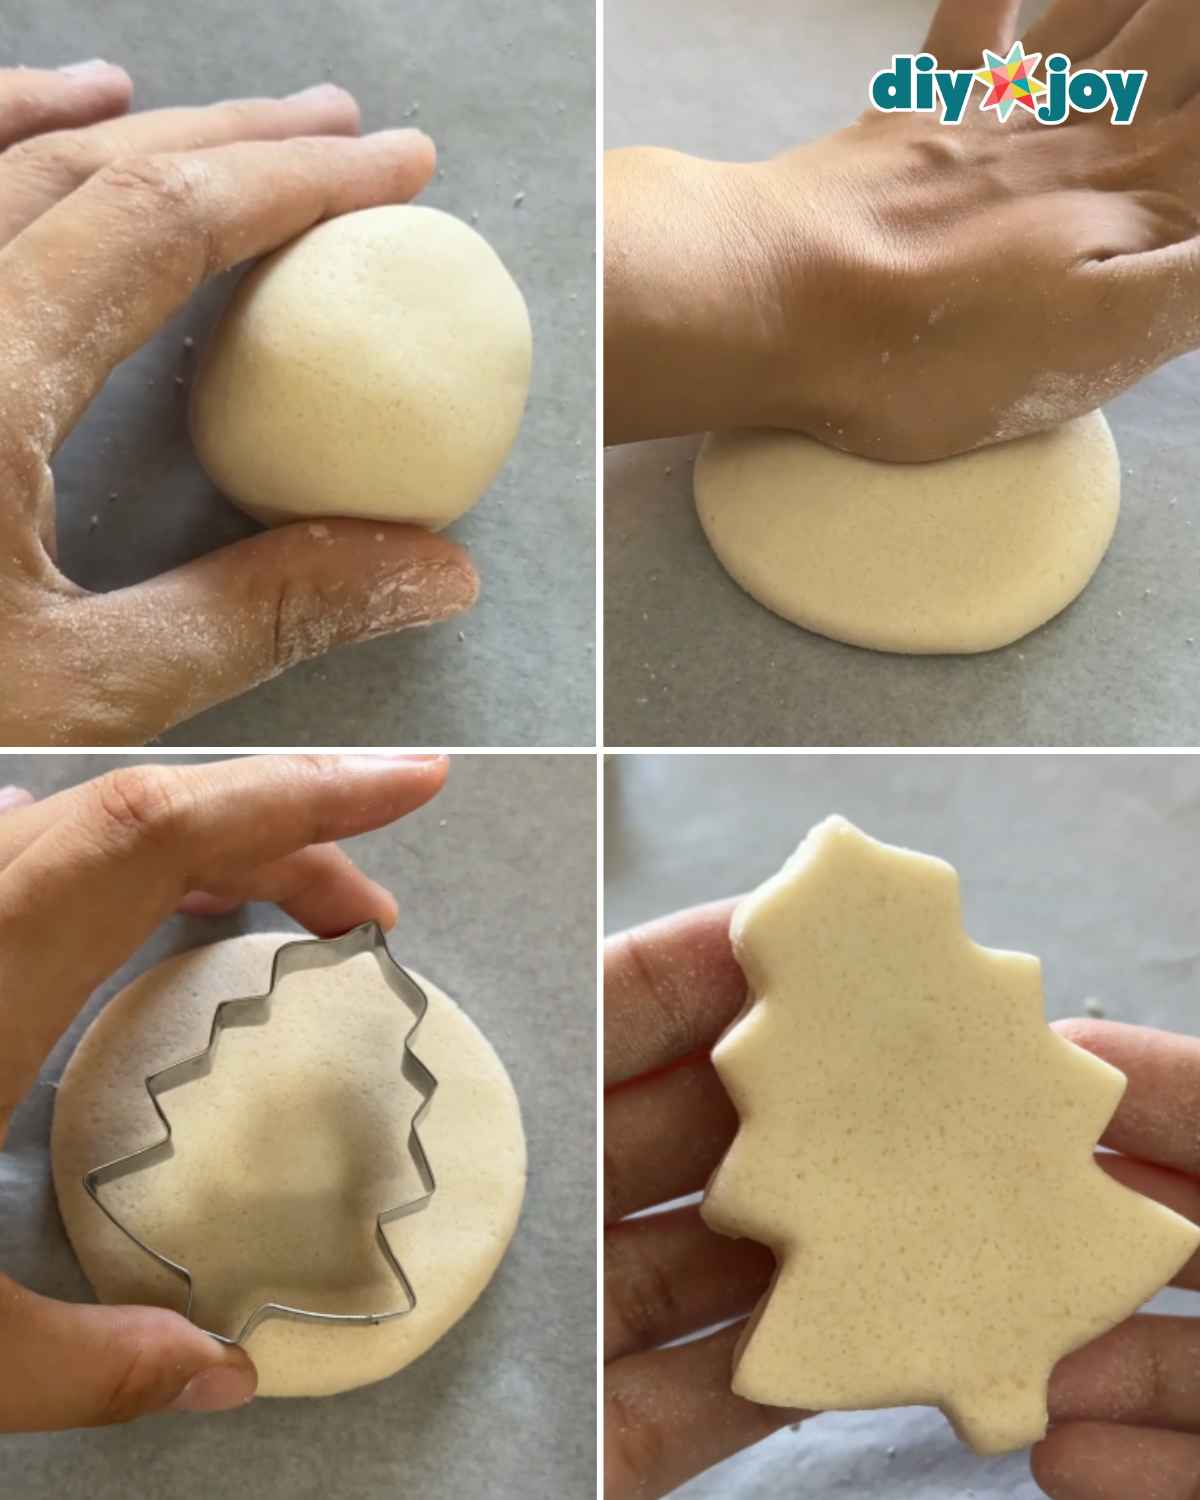
Step 1: Shaping the Dough
Once your salt dough is ready, take a small piece and roll it into a smooth ball. Gently press it down with your palm, applying just enough pressure to flatten it without making it too thin.
Next, grab a Christmas tree-shaped cookie cutter and press it firmly into the dough to cut out the shape. Carefully remove the excess dough, then use your fingers to smooth out any rough edges. You can also dip your fingers in a little water to make smoothing the edges much easier.
Step 2: Painting the Ornament
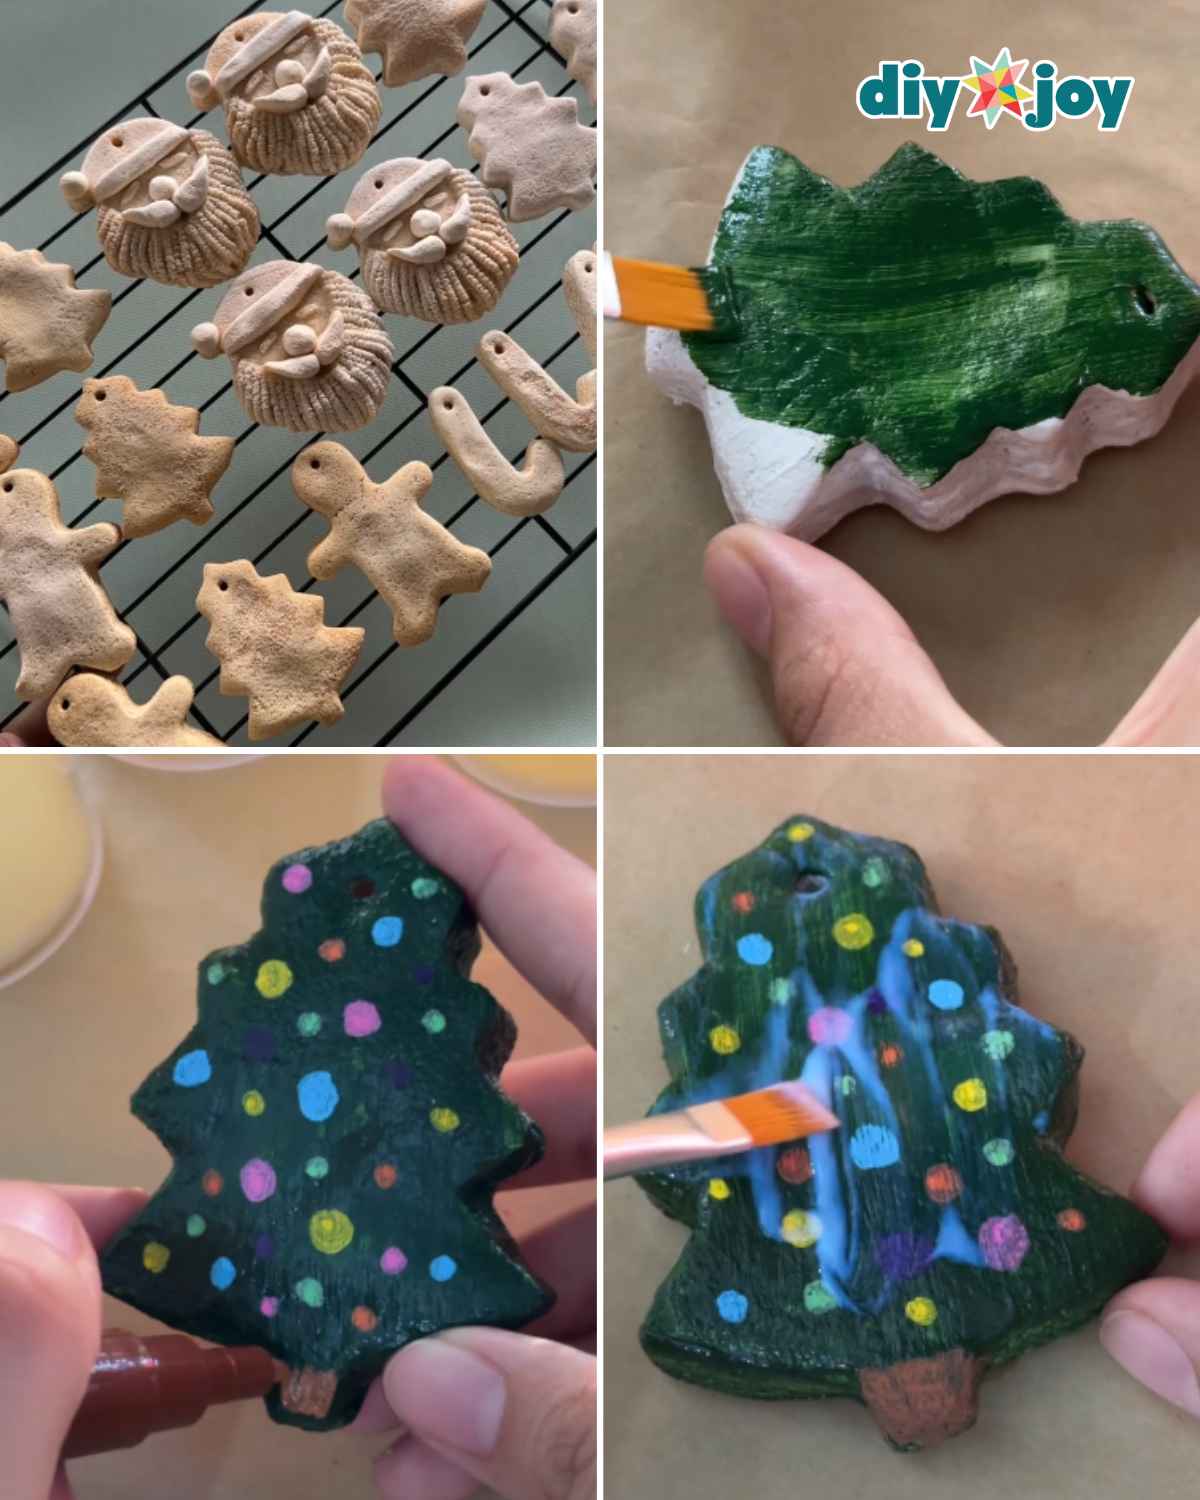
Use a small tool to make a hole at the top of the ornament for the hanging cord. Transfer it to a baking sheet lined with parchment paper, then bake at 150°C (302°F) for about 1 to 1.5 hours, depending on the thickness. You can leave the oven door slightly open (3 to 5 cm) to release moisture, but only if your oven’s manufacturer allows it.
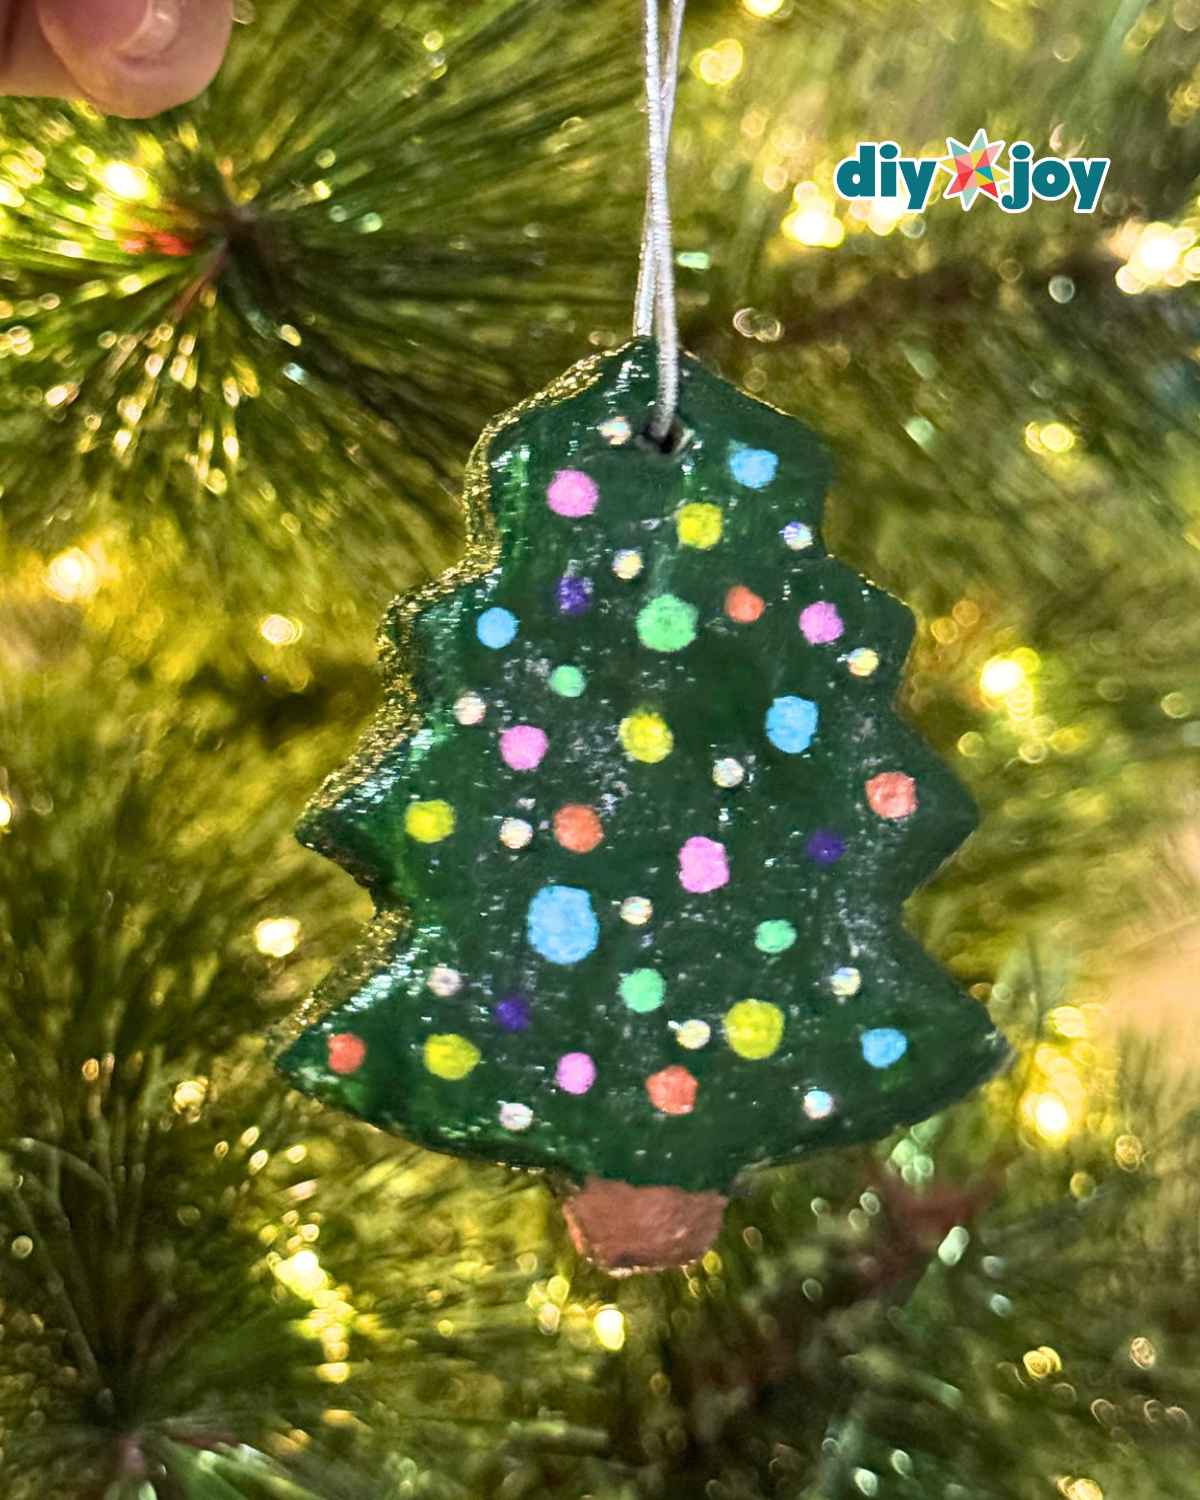
Once the ornament has cooled and dried completely, paint it with your favorite shade of green. You can also apply gesso beforehand for a smoother base and more vibrant color. Once the paint dries, use POSCA pens to draw some details and add rhinestones or gems for extra sparkle.
Finally, apply a light coat of clear gloss, being careful not to smudge the drawings. Let it dry and cure completely, then insert a cord through the hole, make a loop, and tie the ends into a secure knot. Your Christmas tree ornament is ready to hang!
Salt Dough Candy Cane Ornament Steps
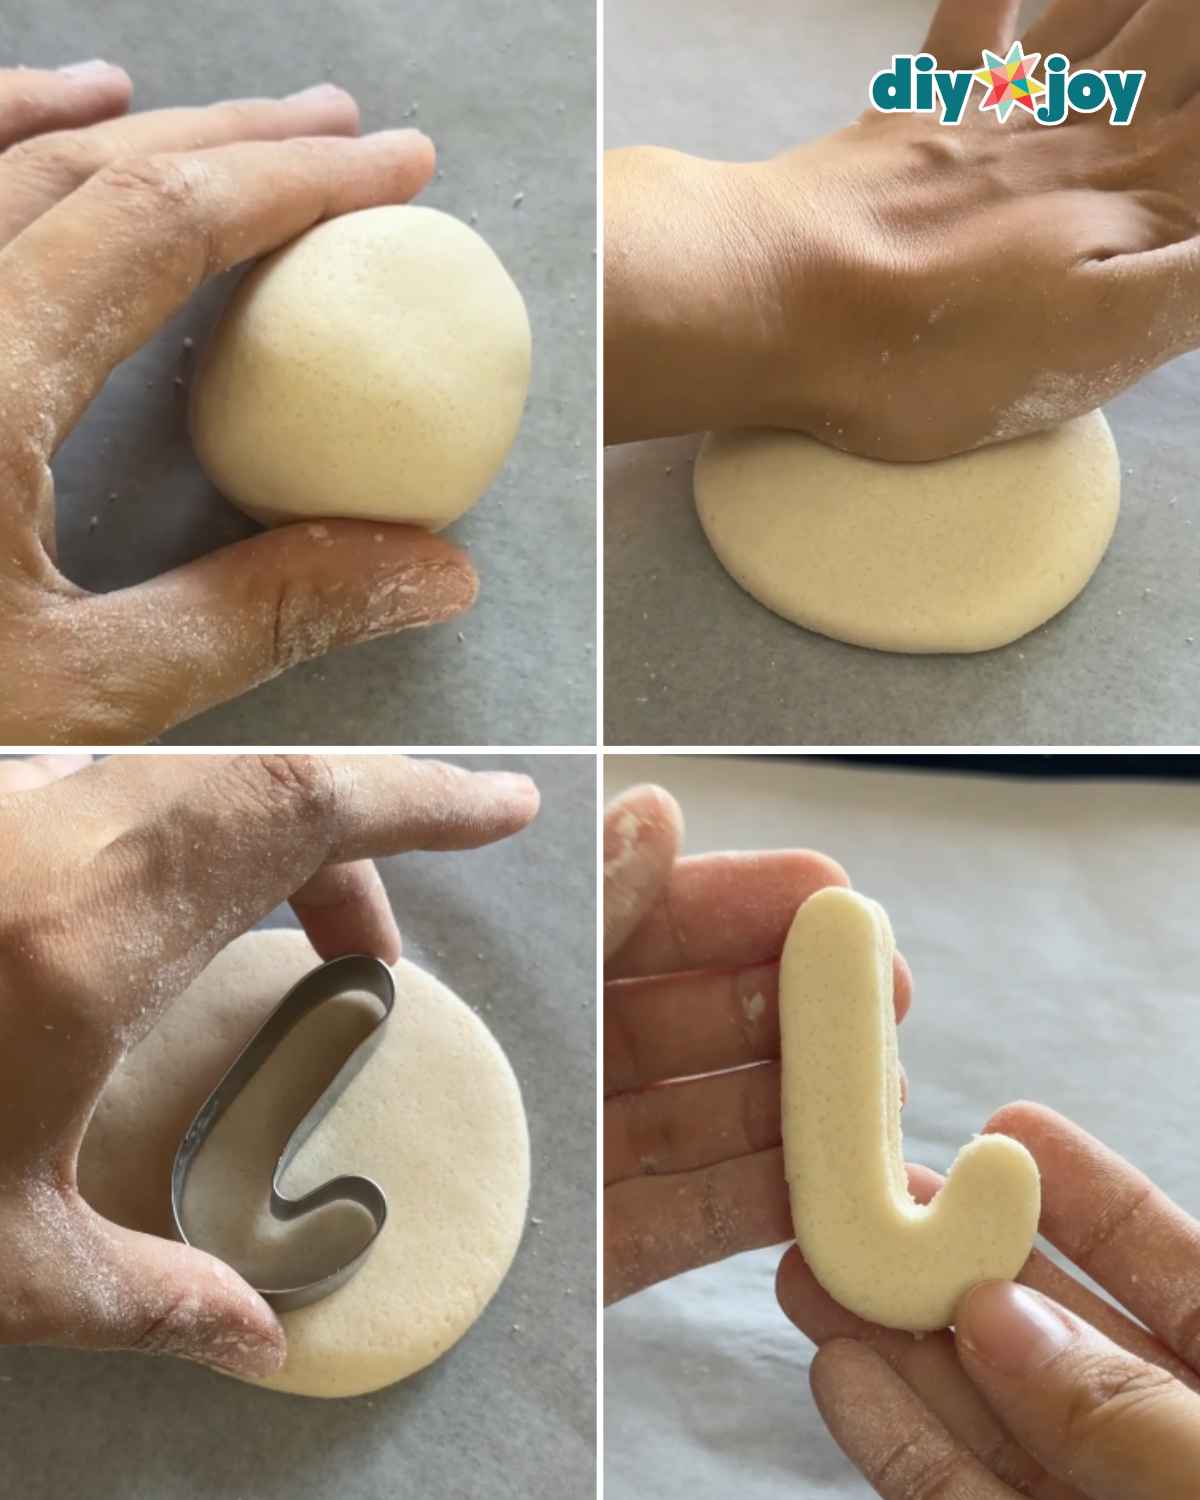
Step 1: Shaping the Dough
Once your salt dough is ready, take a small piece and roll it into a smooth ball. Gently press it down with your palm, applying just enough pressure to flatten it without making it too thin. Next, grab a candy cane-shaped cookie cutter and press it firmly into the dough to cut out the shape. Carefully remove the excess dough, then use your fingers to smooth out any rough edges. You can also dip your fingers in a little water to make smoothing the edges much easier.
Step 2: Painting the Ornament
Use a small tool to make a hole at the top of the ornament for the hanging cord. Transfer it to a baking sheet lined with parchment paper, then bake at 150°C (302°F) for about 1 to 1.5 hours, depending on the thickness. You can leave the oven door slightly open (3 to 5 cm) to release moisture, but only if your oven’s manufacturer allows it.
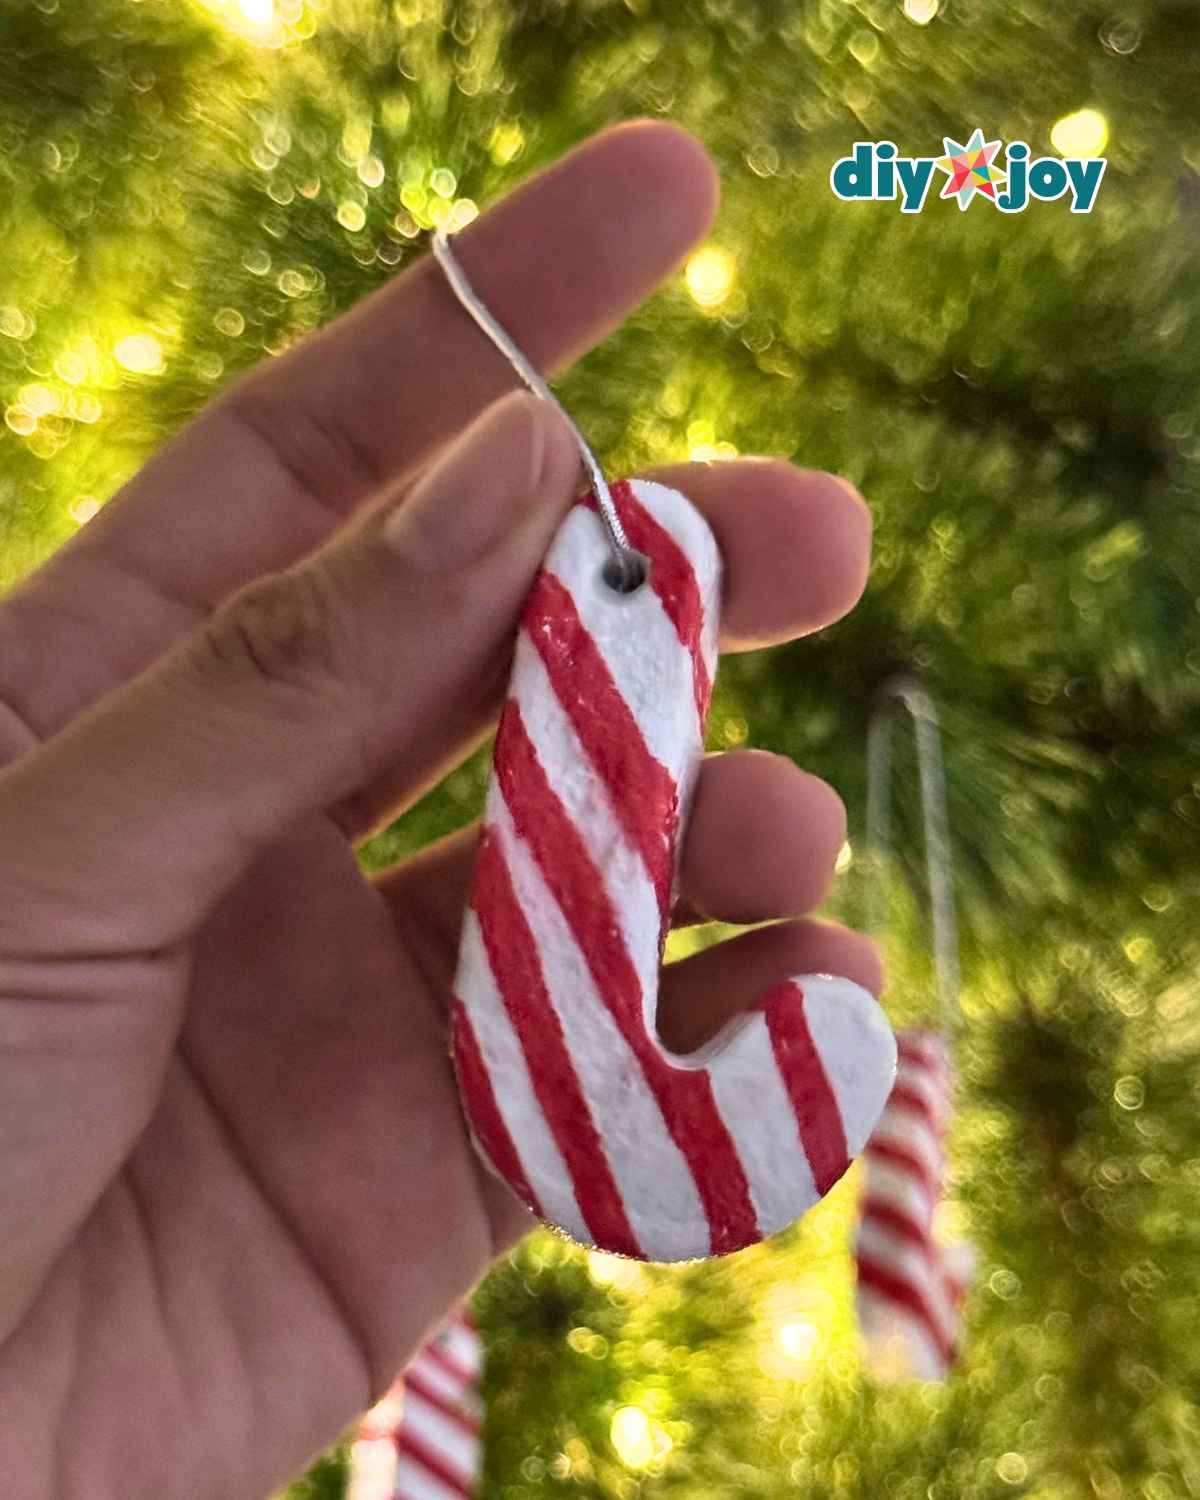
Once the ornament has cooled and dried completely, you can apply a layer of gesso or white acrylic paint to create a nice, even base. Let it dry completely, then use POSCA pens to draw diagonal stripes across the candy cane. Feel free to use any color you like, but I personally love the classic red and white combination!
Finally, apply a light coat of clear gloss, being careful not to smudge the stripes. Let it dry and cure completely, then thread a cord through the hole, make a small loop, and tie the ends together with a secure knot. Your adorable candy cane ornament is ready to hang!
Salt Dough Recipe
Servings
n/a minutes
Preparing Time
30 minutes
Cooking Time
60 minutes
Calories
n/a kcal
INGREDIENTS
1/2 cup of fine salt
1/3 to 1/2 cup of warm water, added a little at a time
1/4 cup of cornstarch
1 cup of flour or 3/4 cup of flour, if using cornstarch
DIRECTION
- Mixing the Ingredients
In a large mixing bowl, combine the flour, salt, and cornstarch (if using). Slowly pour in the warm water, a little at a time, while mixing everything together with a spatula until the ingredients start to come together.
- Kneading the Dough
Once the mixture starts coming together, use your hands to continue mixing and kneading the dough. Add a little more water if the mixture feels too dry, or sprinkle in some flour if it becomes too sticky. Keep kneading until the dough is smooth, easy to work with, no longer sticky, and holds its shape well.
- Baking the Salt Dough
Once you’ve shaped your ornaments and added all the details, carefully transfer them to a baking sheet lined with parchment paper. Bake at 150°C (302°F) for about 1 to 1.5 hours, depending on the thickness of the dough. You can leave the oven door slightly open, about 3 to 5 cm (1 to 2 inches), to release moisture, but only if your oven’s manufacturer allows it.
You can also place an empty baking tray on the rack below to act as a heat shield. Check your ornaments every 20 to 30 minutes to make sure they aren’t burning or browning too much. Once baked, let them cool and air-dry completely before painting or decorating. If they still feel soft after cooling, they may need additional drying time.
NOTES
Storage Tip: This recipe can make about 10 ornaments using standard-sized cookie cutters, depending on how thick you roll the dough. If you’re making a large batch and have some leftover dough, simply wrap it tightly in cling wrap to prevent it from drying out, then place it in an airtight container or resealable bag. Store it in the refrigerator for up to 3 to 5 days. When you’re ready to use it again, let it soften slightly at room temperature and give it a quick knead before shaping.

Pro Tips
- Bake Low and Slow – One of the best ways to make salt dough ornaments really hard is to dry them slowly at a low temperature. Try baking them at around 100–120°C (212–248°F) for 2 to 3 hours or longer, depending on their thickness. This helps the moisture escape without browning or burning the outside.
- Make Sure They’re Completely Dry Inside – Just because your ornaments feel hard on the outside doesn’t always mean they’re fully dry inside! If they’re still slightly soft or flexible after cooling, they may need more drying time. You can also leave them in a dry, well-ventilated area for another day or two before decorating.
- Avoid Making the Dough Too Thick – Thicker ornaments take much longer to dry, and sometimes the outside hardens while the center remains soft. For simple ornaments, aim for an even thickness of about ¼ inch (6 mm). If you’re adding raised details, like Santa’s beard or hat, expect those areas to need extra drying time.
- Seal the Entire Ornament – Once your ornaments are completely dry and painted, apply a clear sealer to protect them from moisture. Make sure to coat the front, back, and edges, not just the decorated side! Allow each coat to dry thoroughly before adding another.
- Keep Them Away From Humidity – Salt dough can absorb moisture from the air, which may cause the ornaments to soften over time. Store them somewhere cool and dry, preferably in a sealed container once the coating has fully cured. You can also add a silica gel packet to help control moisture during storage.
Save this Craft on Pinterest
Roll over the image to get the button.