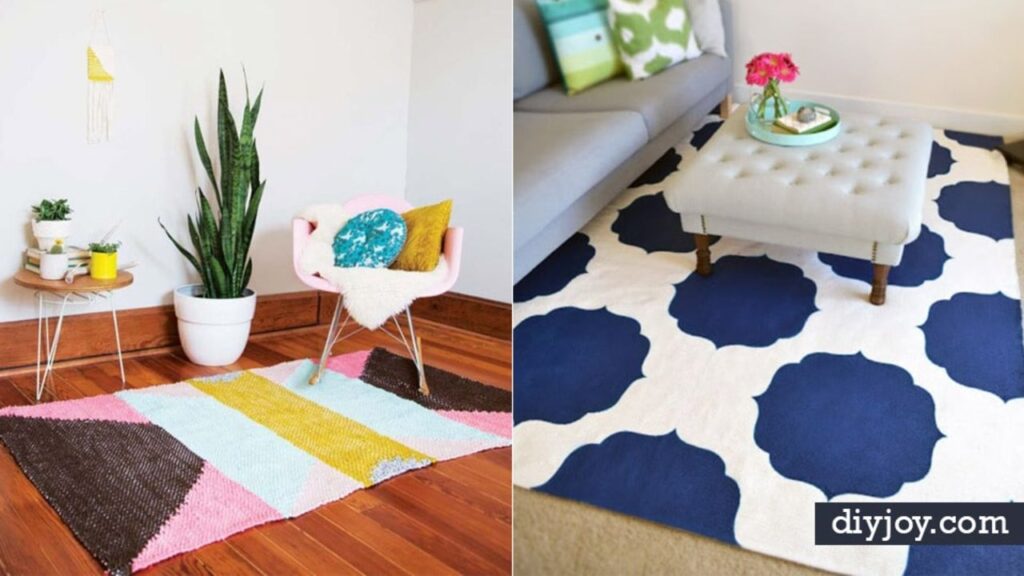
A rug is the single most expensive thing on most floors and the single easiest thing to fake. That is the whole argument for DIY rugs, and the 26 below prove it twice over: one of them is a $600 zebra rug rebuilt from two cheap rugs and a roll of seaming tape for $119, and another is a pile of old bath towels braided into a bathroom mat for nothing at all. There is a rug here for whatever skill you already have. Crochet, sewing, weaving on a hula hoop, a paint brush and a roll of masking tape, or nothing but scissors and a glue gun. A few take four weeks of evenings and the tutorial says so up front. Most take an afternoon, and almost all of them start with fabric you were about to throw out.
DIY Rugs For Any Room
1. DIY Positive Vibes Rug
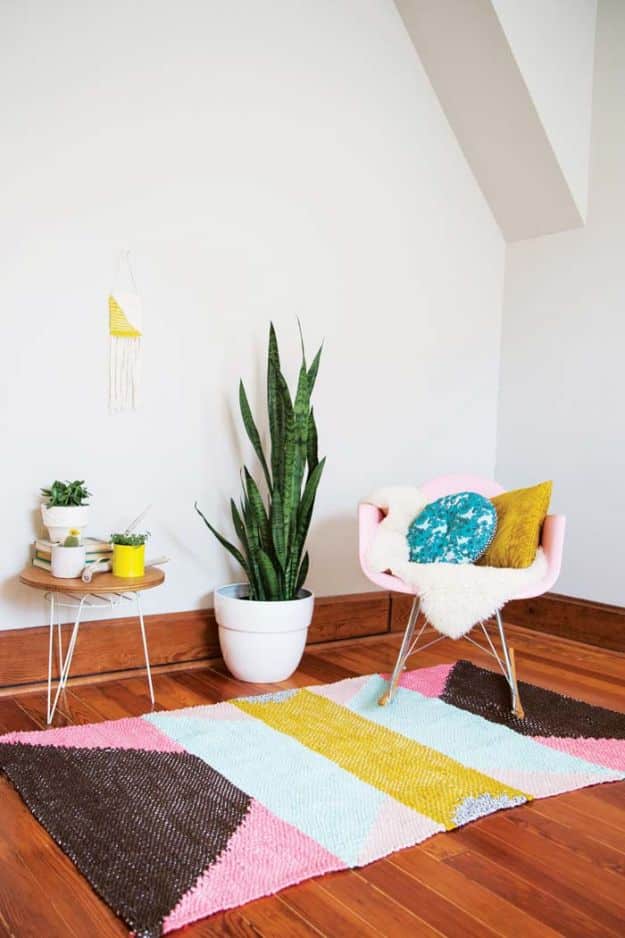
A long flat-woven rug worked in big blocks of colour, dark brown into dusty pink into mint into mustard, with the pile sitting low and dense enough to read as a real woven rug rather than a craft project. The photograph is doing the selling here: it is laid across bare boards in a bright attic room with a snake plant and a moulded chair, and the colour blocks are what stop the room being beige. Colour-blocking is the forgiving part of any woven rug, because a change of yarn hides a change in your tension better than a single flat colour ever will.
Get the full tutorial at Poppytalk.
2. DIY Mod Podge Fabric Rug
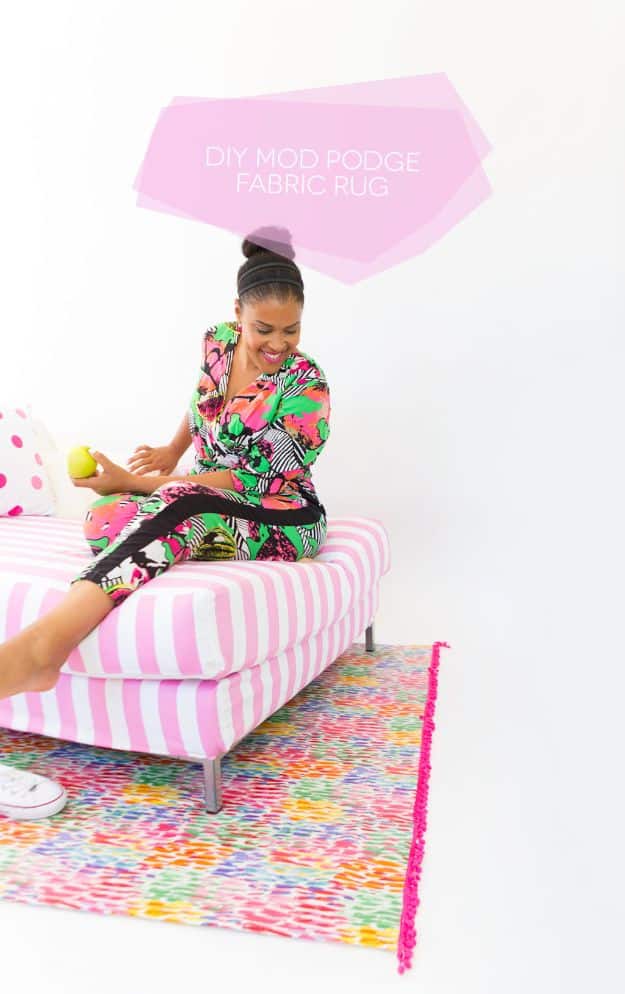
Two yards of home decorator fabric, which runs about 54 inches wide and is therefore already close to rug width, glued to a canvas drop cloth with fabric Mod Podge and then sealed. Six bottles went into a five by eight, so buy more than you think. The step that matters is coating both surfaces before they meet, because glue sticks to glue far better than glue sticks to dry canvas. A coat of polyurethane over the top makes it wipeable, and the maker walked over hers roughly fifty times a day for two months with no smudging. Around $130 all in, and pom pom trim round the edge is optional but correct.
Get the full tutorial at Damask Love.
3. DIY Anthropologie Rug
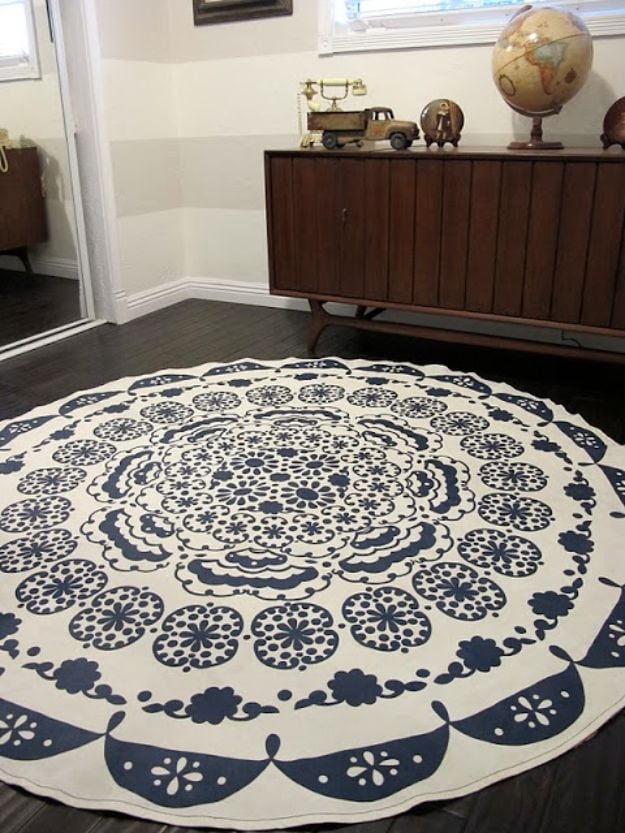
A cotton tablecloth turned into a floor cloth with three rolled coats of water-based satin polyurethane, then mounted on a cut-to-fit rug pad with spray adhesive. Skipping the adhesive is the mistake to avoid; without it the cloth slides around on the pad constantly. Work outside or in the garage even with a low-odour product, and lift the cloth off the tarp between coats so it does not bond to it. Be honest with yourself about the result: it comes out firm, more floor cloth than plush, so it belongs somewhere that does not get heavy traffic. About $100 with a tablecloth nobody would call cheap, and far less with a thrifted one.
Get the full tutorial at Dream Book Design.
4. From Rope To Rug

Sixty feet of 5/8 inch natural fibre rope, cut into lengths and glued in rows onto a three dollar doormat, with a few extra inches left at each end to fray out into a fringe. No sewing at any point. Heavy duty Liquid Nails through a caulk gun is the adhesive that held, and the maker and her husband argued about that choice before settling on it. The doormat underneath is the structure, so pick one you can cut down to the size you actually want rather than the size it comes in. About $30 of rope for something that looks like a jute rug from a catalogue.
Get the full tutorial at TIDBITS.
5. DIY Kilim Rug

A yard of patterned fabric wrapped around rubber shelf liner, glued rather than sewn, with fringe trim added to the two short edges. The nicest detail is accidental: the maker found the face of her fabric too loud, flipped it over and used the muted reverse as the good side, which is worth remembering any time a print is nearly right. Fabric Fusion glue does the folding-over along all four edges. This is a bathroom-sized project rather than a living room one, and it is genuinely easier than it looks, though the fringe means you are hand washing it rather than machine washing it.
Get the full tutorial at The Honeycomb Home.
6. Make Your Own Rope Rug
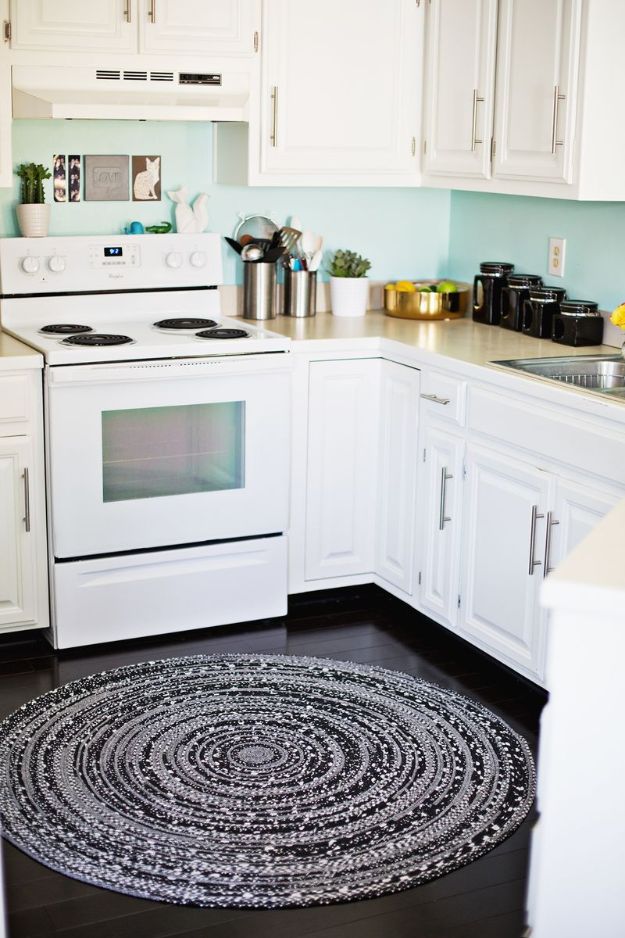
Quarter inch cotton clothesline wrapped in two inch fabric strips and sewn straight down the middle on a machine as you wrap, then coiled and joined with a wide zigzag. Nine yards of fabric in four patterns went into this one and it finished at fifty five inches across, so it is a proper rug rather than a mat. Two rules decide whether it lies flat. Never pull the rope as you join it, just lay it alongside the coil, and keep the growing circle supported on a second table level with the machine bed. Waves that appear anyway steam out under a damp iron and a stack of books.
Get the full tutorial at A Beautiful Mess.
7. DIY Stenciled Rug

A plain natural-fibre rug being filled in through a large cut stencil with a brush of bright blue, which is the cheapest way to get a patterned rug that exists. Stencilling onto a textured rug is not like stencilling onto a wall: the pile drinks paint and lifts the stencil edge, so work with the brush almost dry and dab straight down rather than dragging sideways. Two thin passes beat one heavy one every time. A fabric medium mixed into the paint keeps the finished surface from going board-stiff underfoot, which is the usual complaint about painted rugs.
Get the full tutorial at DIY Joy.
8. Knitting Loom T-Shirt Rug
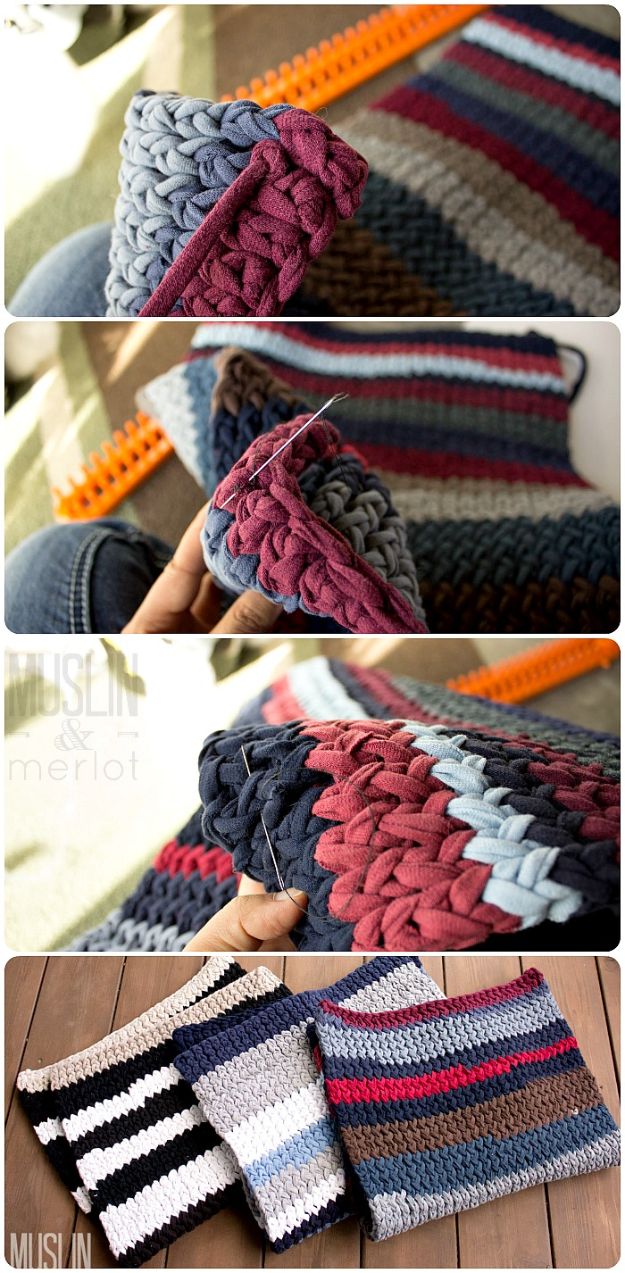
Sixteen to twenty t-shirts cut into one inch “tarn” and double knitted on a 62 peg extra long loom, which produces something thick enough to actually sink your toes into rather than the thin mat most t-shirt projects give you. Two rules from the maker save the whole thing: use shirts with no side seams, and avoid anything with a printed decal below the armpit. Sew the joins between shirts properly rather than using the no-sew slit-and-pull trick, which she tried and did not rate. Reckon on four or five days of evenings, and put a non-slip pad under it on a hard floor.
Get the full tutorial at Muslin and Merlot.
9. Crochet an Outdoor Rug

Eight packs of 550 paracord from the hardware store, single crocheted into a 14 by 20 inch mat that survives full sun far better than anything woven from cotton. Single crochet is the only stitch involved, so a beginner can genuinely do this, but the cord is stiff and does not glide off the hook, and the maker picked up a blister making hers. That is the honest trade. Want it wider? Just start with a longer chain. Around $50 for the cord, which is more than the rug it replaces cost, but it will outlast several of them.
Get the full tutorial at Mama in a Stitch.
10. Woven Rag Rug
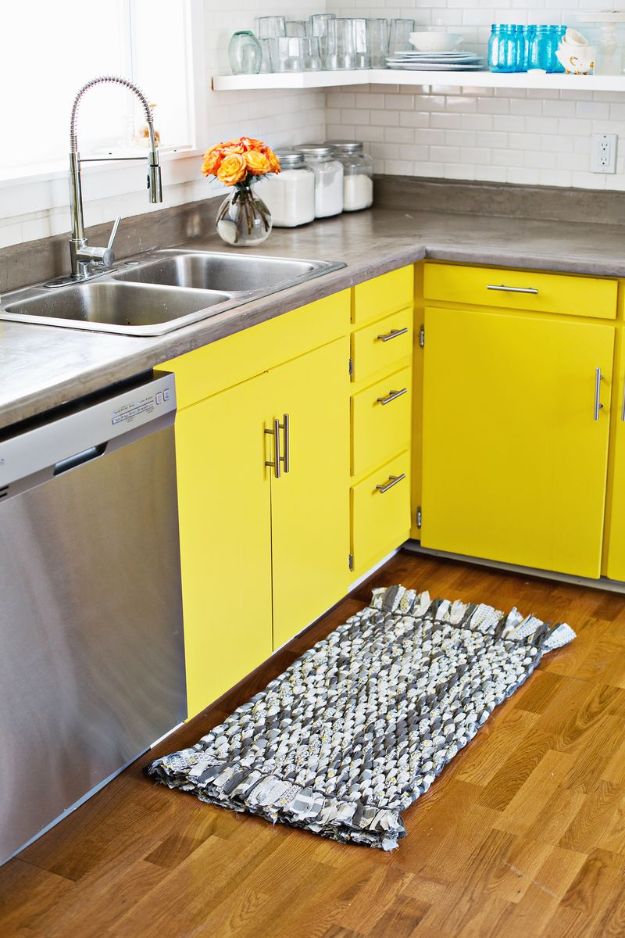
Three king size cotton bedsheets torn into two inch strips and woven on a sheet of cardboard twenty three by forty three inches, with two inch slots cut every half inch along both short ends. No loom, no sewing machine and no stitching anywhere. Groups of three strips fold in half into the slots to make the warp, then one designated colour weaves over and under, turns at the end and travels back. Masking tape wrapped round the weaving end makes it feed like a needle. New strips join by cutting a slot in each and pulling one through the other.
Get the full tutorial at A Beautiful Mess.
11. Felted Stone Rug

Hundreds of wool offcuts felted into balls of different sizes and stitched together with nylon twine into a round mat that genuinely looks like a river bed. Some of the balls were felted by hand and some went through the washing machine, and the two methods give visibly different results, with some keeping the stitch definition of the original yarn and others going to a solid mass. That variation is what sells it as stone. It is thick, cushy and extremely good underfoot, and it is a stash-buster rather than a shopping project. Set aside a couple of weeks; the maker’s took twelve days.
Get the full tutorial at Yes, I Made That.
12. Make a Faux Cowhide Rug for Under $50

Two and a half yards of heavyweight cow-print upholstery fabric cut to a hide shape, which comes out around five by seven feet and takes under an hour. The method for getting the shape right is the clever bit: print a photograph of a real cowhide, draw a grid over half of it, fold the fabric in half and draw the same grid on the back, then copy the outline square by square and cut through both layers at once. The raw edge gets sealed by running a lighter along it so the fibres melt slightly and stop fraying. Do that with ventilation and care.
Get the full tutorial at Cozy DIY Home.
13. DIY Lighted Rug

A round crocheted mat worked in white t-shirt yarn with a six metre outdoor LED rope crocheted into alternating rounds, so the whole thing glows from inside like a doily somebody lit up. Roughly 70 centimetres across, finished with a scalloped chain edge. Increase your stitches only on the rounds that carry the rope, or it will not lie flat. Use a proper outdoor-rated LED rope rather than any old string of lights, for the obvious reason. The one real limitation is that it cannot go in the wash, so put it somewhere that stays clean: a bedroom corner or a bathroom, not a hallway.
Get the full tutorial at BautaWitch.
14. Insanely Awesome DIY Outdoor Rug

A twenty dollar plain indoor-outdoor rug from a big box store, masked off freehand with two inch tape and hit with about three and a half cans of outdoor spray paint in bright green, yellow and coral. Around $40 and three hours total, with the taping alone taking about forty five minutes. Now the honest part, which the maker added later: after a couple of months in full sun it faded considerably, and she specifically warns off the fluorescent Rust-Oleum, which went first while the standard Painter’s Touch held up. Treat it as a bright two-season rug rather than a permanent one.
Get the full tutorial at Design Improvised.
15. Easy Hula Hoop T-Shirt Rug
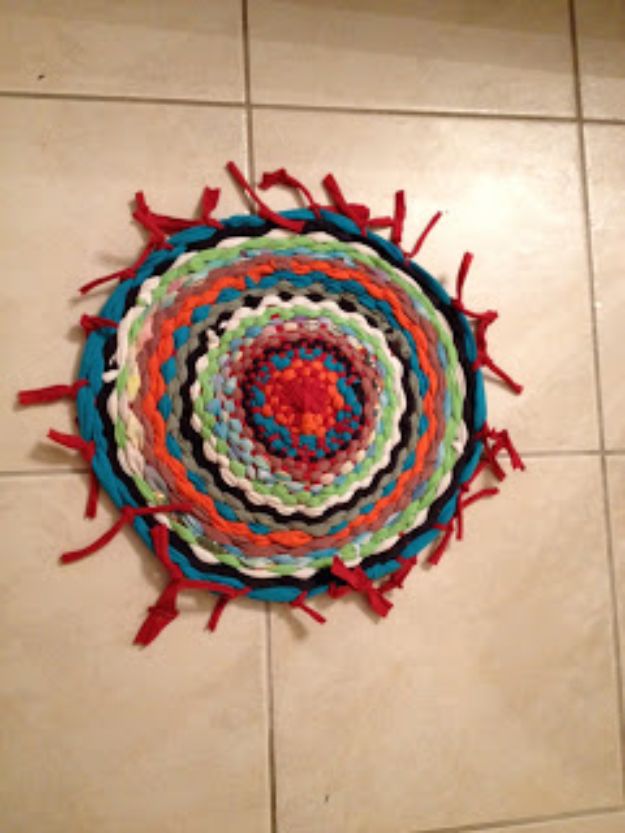
About ten old t-shirts cut into one inch loops and woven on a hula hoop, finished in roughly two hours. One youth size shirt supplies the eleven loops that become the warp, which is why the number is odd: an odd count is what makes an over-under weave alternate on its own. Two practical warnings from the maker, both learned the hard way. Do not over-tighten as you weave, or it will refuse to lie flat. And if the hoop distorts while you are loading the spokes, straighten it before you start weaving or the finished circle comes out lopsided.
Get the full tutorial at Mrs. Colon's Classroom Corner.
16. Two In One Rug
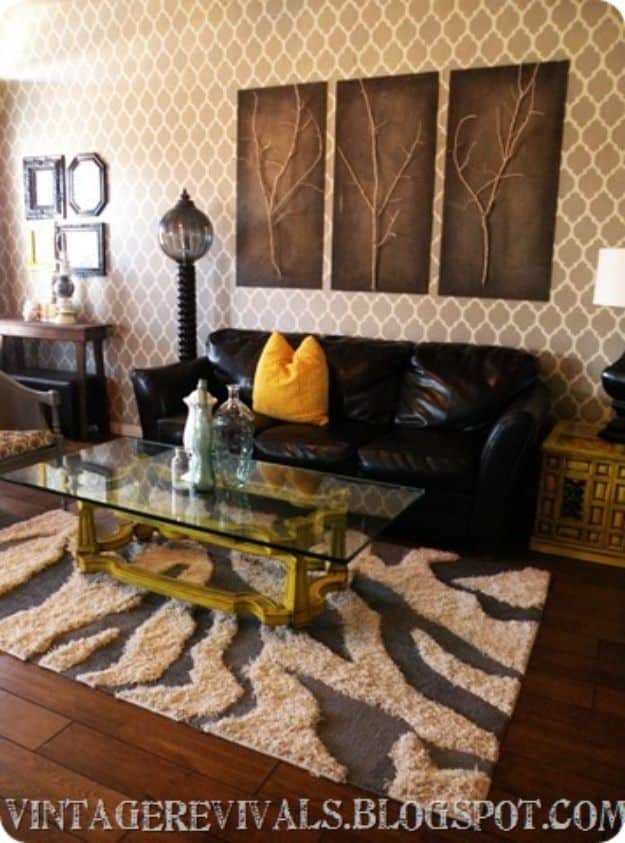
Two cheap rugs cut apart and swapped into each other, giving a zebra-striped five by eight for $119 in place of the $600 one the maker actually wanted. A white rug from a home store and a grey one from a discount store, stripes drawn on the back of one, cut with a fresh box cutter blade, then used as templates on the second. It joins from the back with pressure sensitive seaming tape, not carpet tape. Two things make it work: a genuinely new blade, and keeping every piece that touches an outside edge as a piece that already had the factory binding on it.
Get the full tutorial at Vintage Revivals.
17. Make A Custom Kitchen Rug

A sewn kitchen mat that finishes at 17 by 27 inches, built in three layers: a decorator fabric top, a plain towel for padding and non-slip shelf liner as the backing. Cut the top oversized at 29 by 19 so there is enough to fold over the edges and sew down. Sew three straight lines through the towel and the liner before you assemble anything, which stops the inner layers shifting into wrinkles you can feel through your socks. The underside will not be pretty and that is fine, nobody sees it. It goes in the washing machine and comes out fine; dry it flat or hanging.
Get the full tutorial at The Crafty Blog Stalker.
18. Braided Rug From Old Towels

Three stained bath towels cut into inch and a half strips, braided into one enormous rope and coiled into a round mat, hand stitched row to row from the back with a heavy duty needle. Terry cloth is the obvious material for a bathroom and nobody uses it, which is odd. The step that decides how it wears is folding the raw cut edge inward as you braid, because an exposed terry edge sheds constantly. Stitch through from the back as you spiral so the rows sit flush; a coiled rug pulls itself into a dome the moment the tension goes uneven across the rounds.
Get the full tutorial at Sisters of the Wild West.
19. DIY Shag Rag Rug

A four by six shag in pink and ivory, made by threading short fabric strips through the holes of a non-slip rug pad and knotting each one. Curved jewellery tweezers are the tool that makes this survivable. Cotton interlock is the fabric to use, and it costs more than the alternatives for a reason: thickness and durability, so four weeks of work does not flatten in a season. Be very clear about the time. The maker put in two to four hours a day for four weeks, in front of the television, and $130 of materials. Cut a big batch of strips at once rather than as you go.
Get the full tutorial at My Love of Style.
20. Half Hexagon Crochet Rug DIY
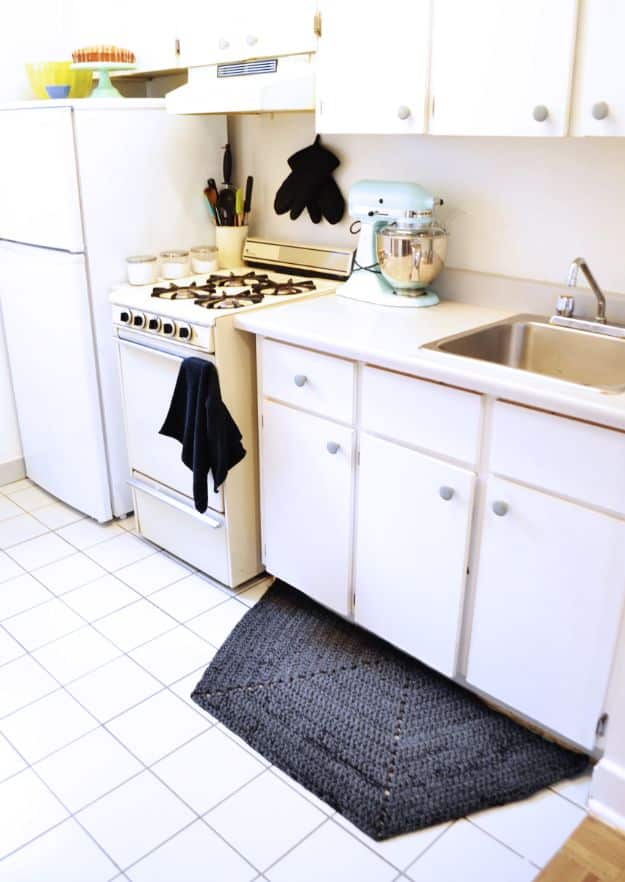
Two cones of chunky t-shirt yarn crocheted into a half hexagon, twenty one rows for the large one, about six hours of work. The shape is the reason to make it: a half hexagon sits flat against a run of kitchen cupboards in a way a half circle never quite does. Chain three at the start of every row and double crochet into the base of that chain, then finish each row with two double crochets into the same stitch, which is what keeps the straight edge straight while the piece grows. Run a row of single crochet along the flat bottom to finish. The open holes are deliberate.
Get the full tutorial at Pop Shop America.
21. Pot Holder Area Rugs

The loop potholder loom from childhood, scaled up to area rug size, which is a genuinely lovely idea and is exactly as simple as it sounds. Old clothes get cut into loops, hung on a large loom and woven, then the ends are worked together and it comes off the frame. Sizes run from a small mat to twelve by sixteen feet. The material choice is what decides the character: the photographs show one worked mostly in t-shirts and another mostly in sweaters, and they look like different crafts. It is repetitive in the good way, and the technique was developed over twenty years by the artist who teaches it.
Get the full tutorial at Heather McManus.
22. Giant Circular Rug

Seven and a half pounds of merino wool roving finger-crocheted into a three foot circle, no hook and no sewing at any point. Roving is wool that has been cleaned and combed ready for spinning, and using it straight as yarn is what gives that enormous pebbled texture. It is worked as a continuous spiral rather than closed rounds, with six single crochets into the starting loop and six increases every round, into the back loop only. Mark the end of every round or you will lose your place immediately. Merino is expensive; two to three inch fabric strips are the cheap substitute and the maker says so herself.
Get the full tutorial at Expression Fiber Arts.
23. Rose Bath Rug
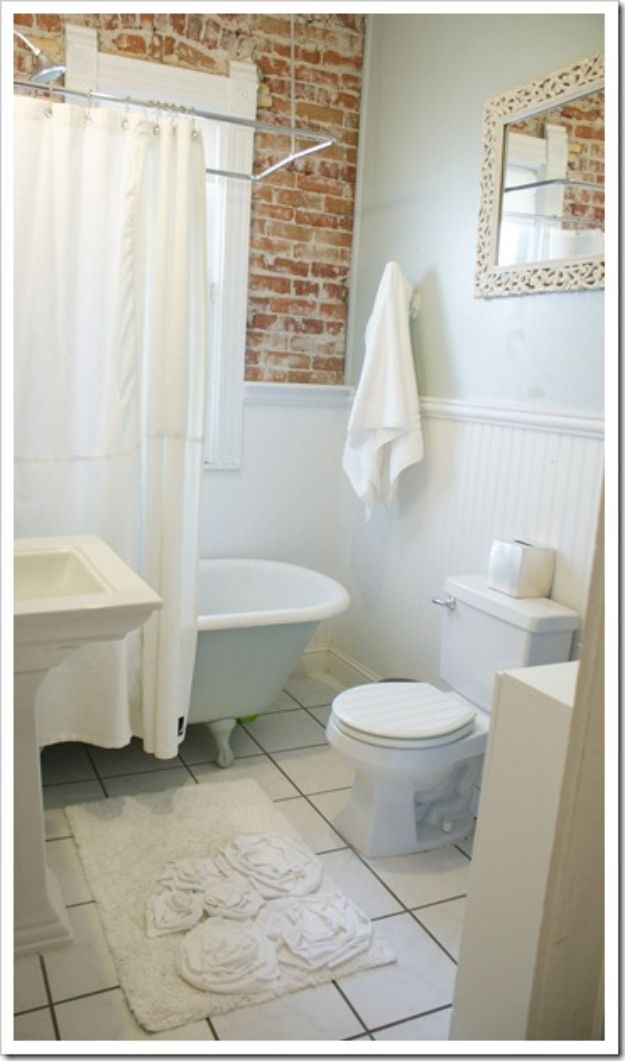
Fabric roses hot glued onto a plain bath mat, made from felt or fleece circles wrapped in t-shirt strips. There is no sewing and no skill involved: cut a circle, wrap a strip round and round it while gluing as you go, and it turns into a rose. Vary the circle sizes so the flowers vary too. Worth knowing before you commit is that the maker’s household compromised and put flowers on only half the mat, so each person got a side, and a commenter asks about the washing machine and never gets an answer. Glue and a machine cycle are not natural allies.
Get the full tutorial at Better Together.
24. Old Jeans Rag Rug
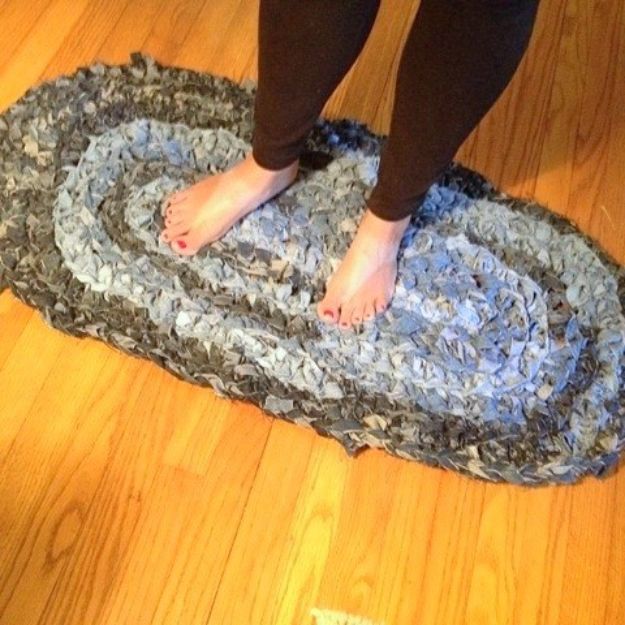
An oval rag rug knotted from old jeans, with the light worn denim in the centre ring and the darker, dirtier blues out at the edge, on a wood floor with somebody standing barefoot on it. Grading denim from light in the middle to dark at the outside is a trick worth stealing for any oval rag rug, because it makes a pile of mismatched jeans look like a deliberate colour scheme. Denim is heavy enough to hold an oval shape without a backing, which is not true of jersey. Expect it to shed a little blue lint for the first few weeks and then stop.
Get the full tutorial at Laura's Little House Tips.
25. Round Amish Knot Rug
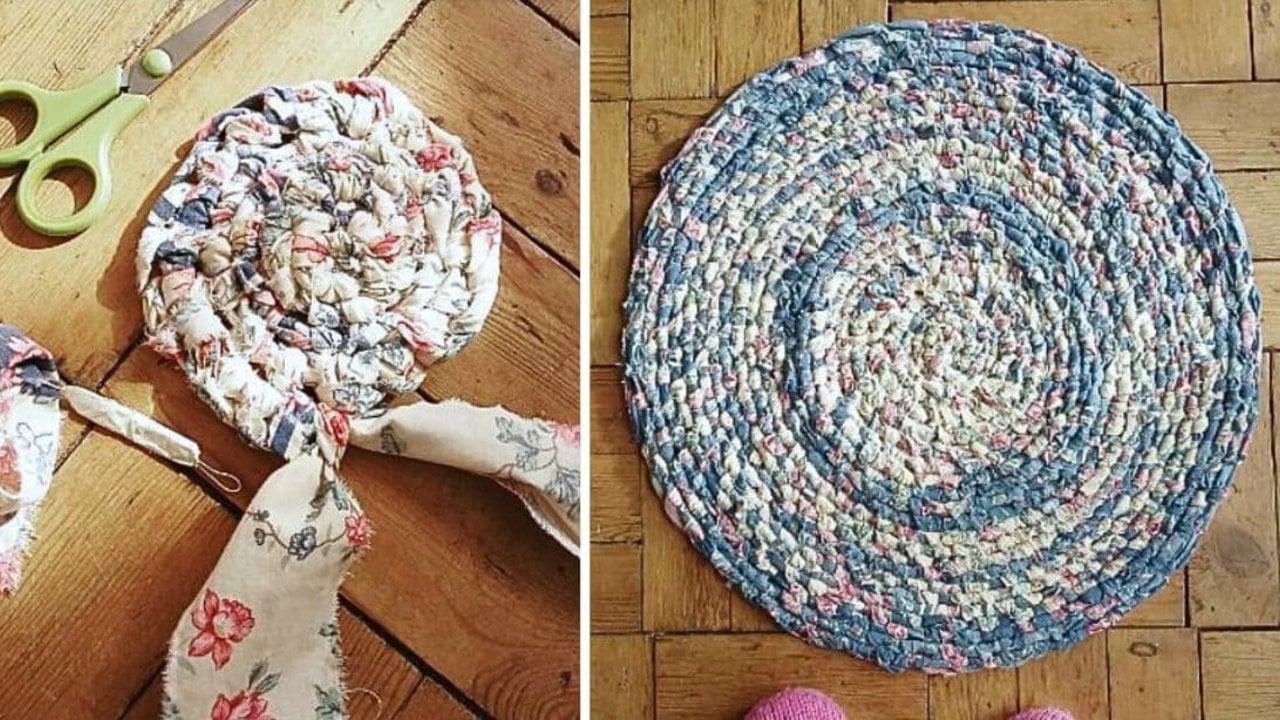
Old bed sheets torn into strips and knotted into a round rag rug with no loom, no sewing machine and not a single stitch anywhere. The Amish knot, also called the toothbrush method, loops one strip through a hole in another and locks it, then builds outward in a widening spiral. The needle is a three inch piece of wire folded into two loops and taped, which costs nothing. Cotton sheets are the material because they tear in a dead straight line once you nick one edge, so you cut once and rip the rest. Mixing prints on purpose is the fun part, since the pattern only appears as it grows.
Get the full tutorial at DIY Joy.
26. Easy DIY Rug Using Plastic Bags
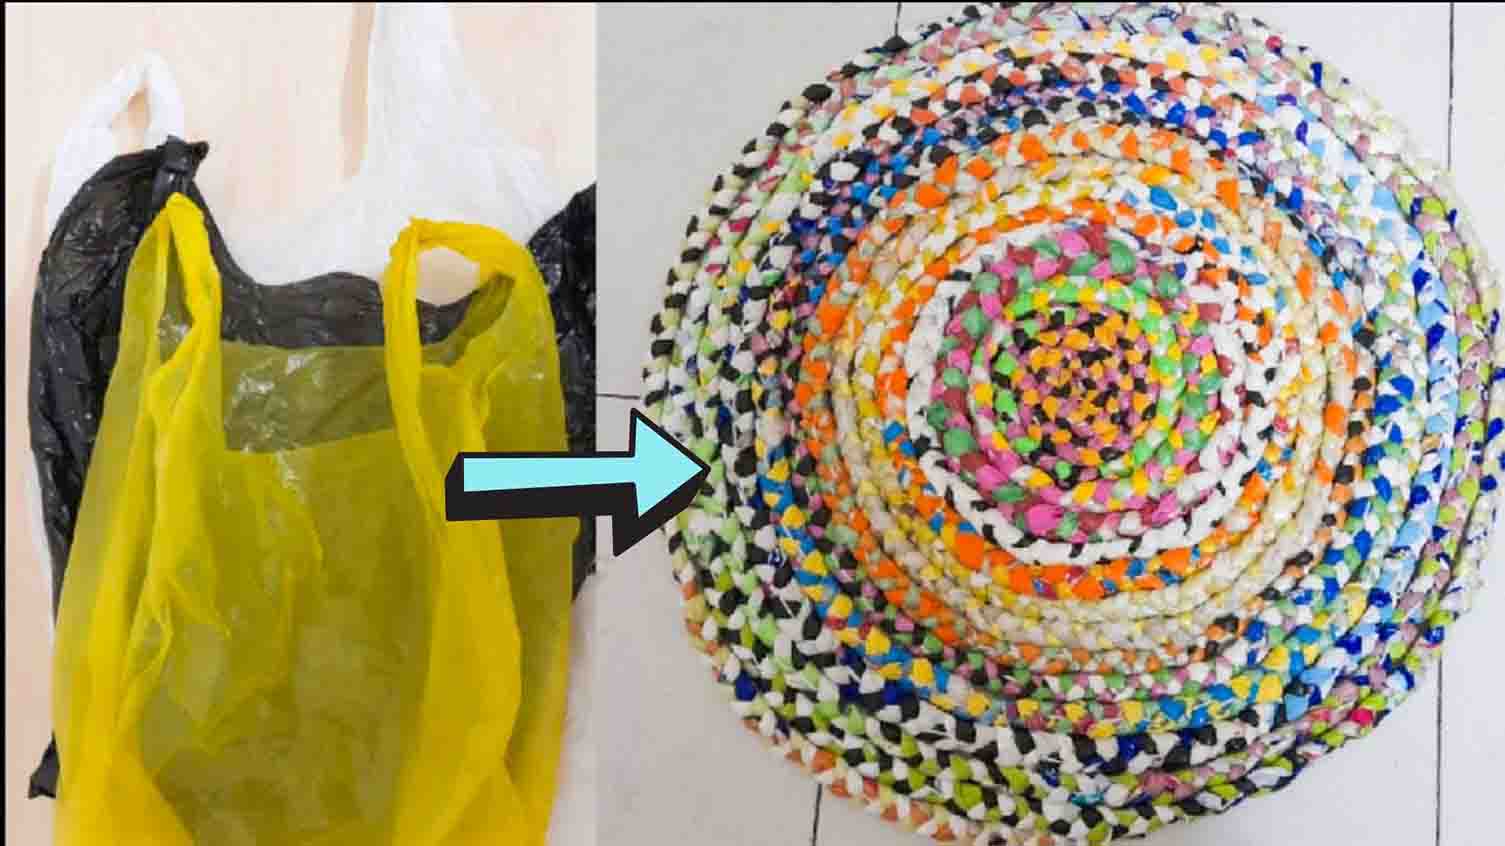
Carrier bags cut open, taped down at the top in threes and braided, then coiled and stitched into a round mat. The detail that makes it work is a lighter: melting the tip of the braid locks the plastic so nothing unravels, and the same trick seals the finished end. New strips feed straight into the braid as it runs out, so a drawer full of bags becomes one continuous rope. Plastic does not absorb water, which makes this a genuinely sensible mat for a back door or a utility room rather than just a way to use up bags.
Get the full tutorial at DIY Joy.