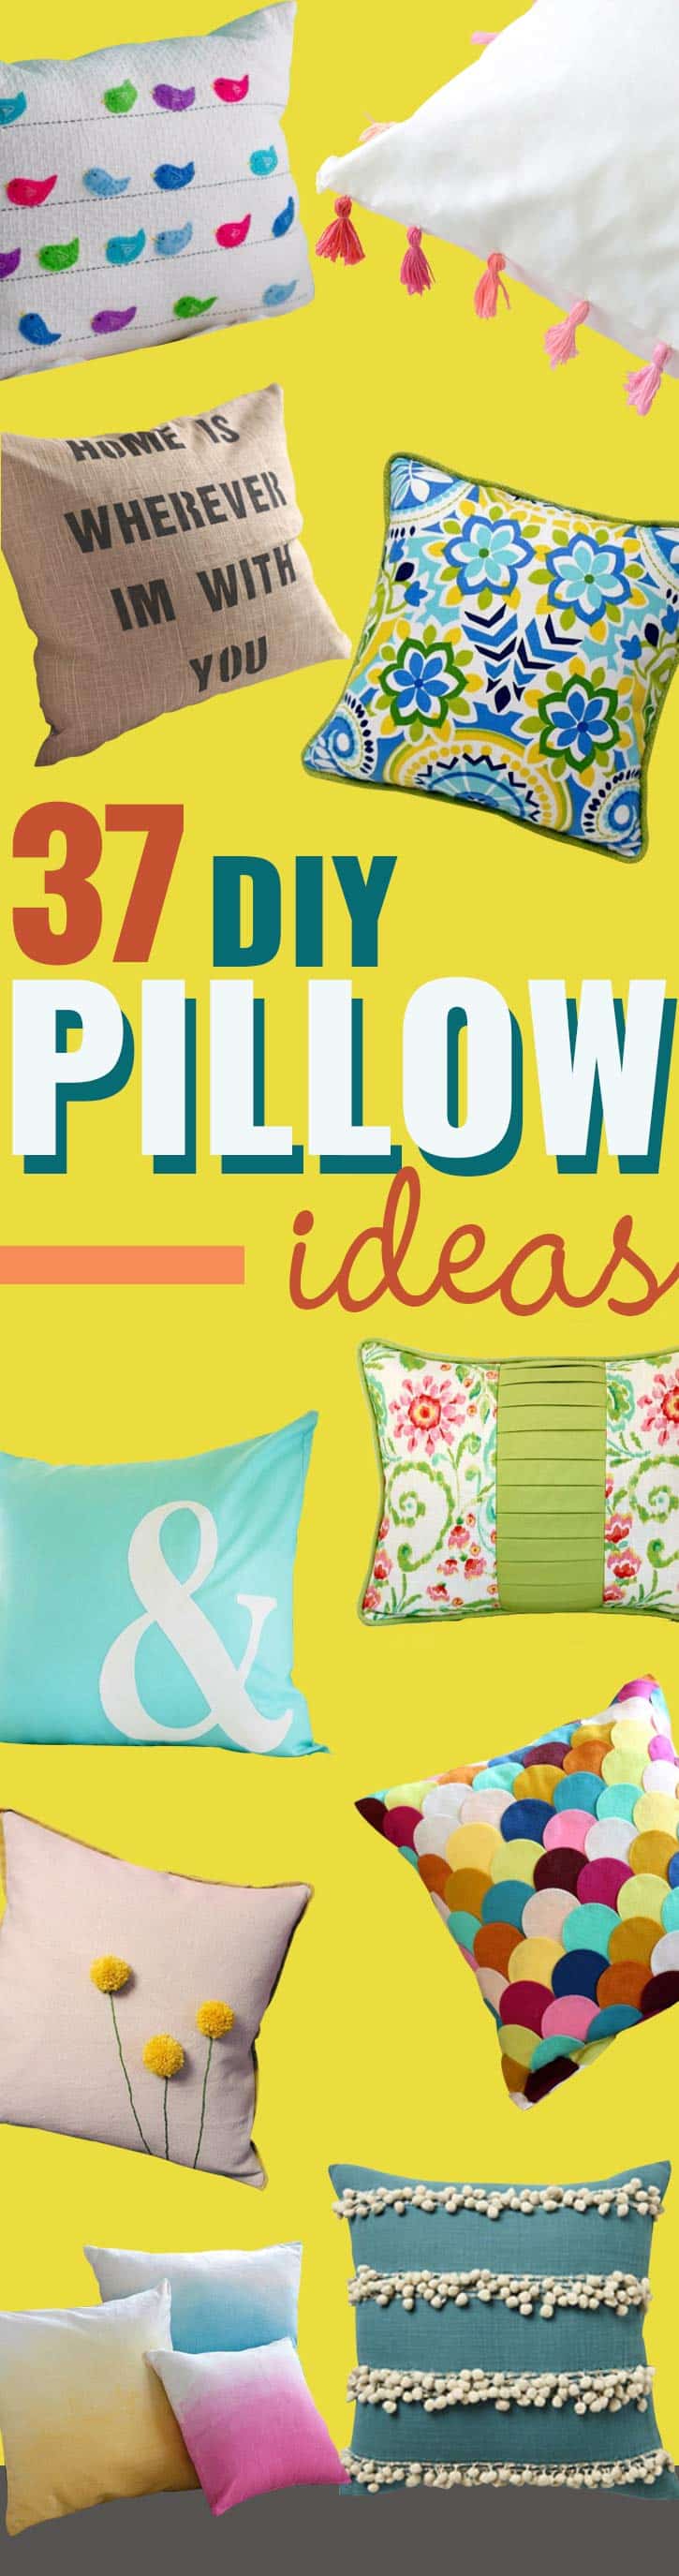
Swapping throw pillows is the fastest way to change how a room feels, and these 21 DIY pillows make it cheap and fun. A DIY pillow can be as simple as a store cover with hot glued felt or pom pom trim, or as involved as a pieced sprocket cushion with curved seams. You’ll find no-sew ideas, beginner sewing projects, painted and stamped covers, shibori dyed cotton and cozy upcycles like old sweaters turned into cable knit cushions. There’s even a reading pillow with a pocket for books and a tablet pillow for lazy movie nights. Our own bandana pillow comes with a step by step video, with a sewn version and a fabric glue version. Start with one cover in a color you love, then build a mix of textures. Find even more ideas on the DIY pillows project hub.
1. DIY Gold Arrow Pillows
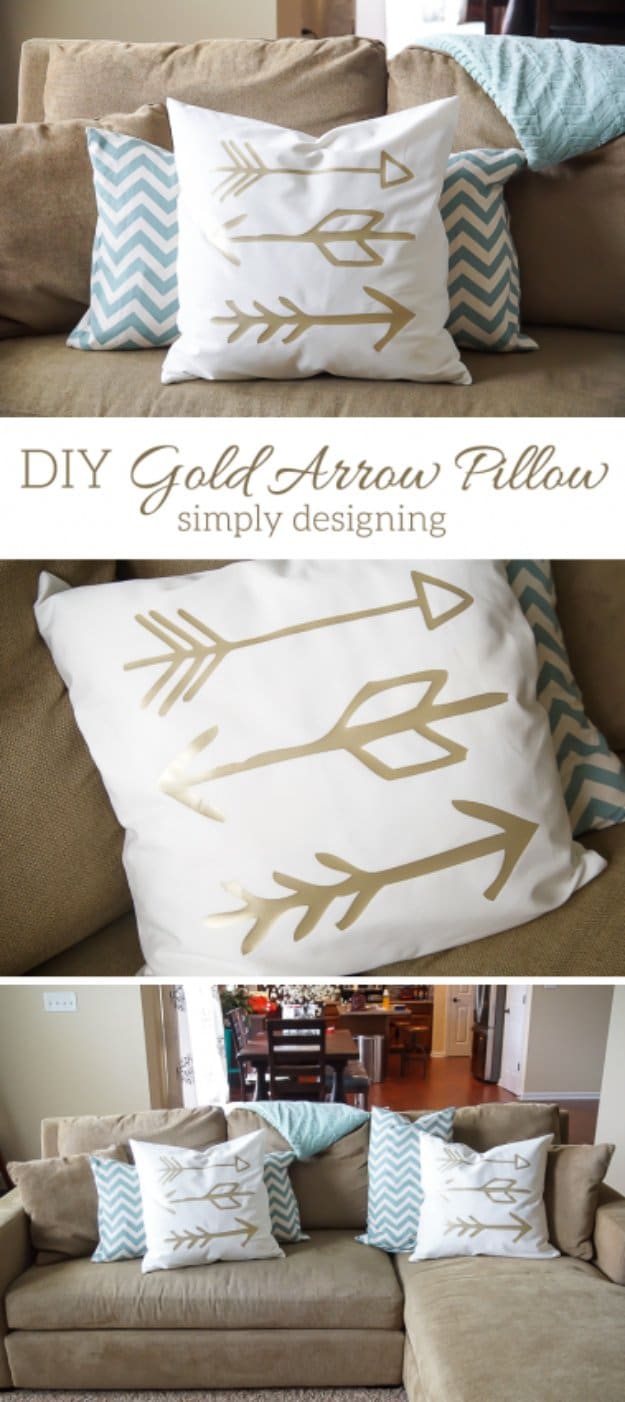
DIY gold arrow pillows pair a crisp white twill cover with hand drawn arrows cut from gold heat transfer vinyl. The cover is two squares sewn on three sides with an invisible zipper in the last seam, so it slips off for washing. Three arrow designs are sized in Silhouette Studio to fit a 22 inch pillow, squeezed onto one 12 by 24 inch vinyl sheet and cut on heat transfer settings after a quick test cut. Weed the extra vinyl, press each arrow on with an iron and the set is done.
Get the full tutorial at Simply Designing.
2. Crafty Throw Pillow Made From Fabric Scraps
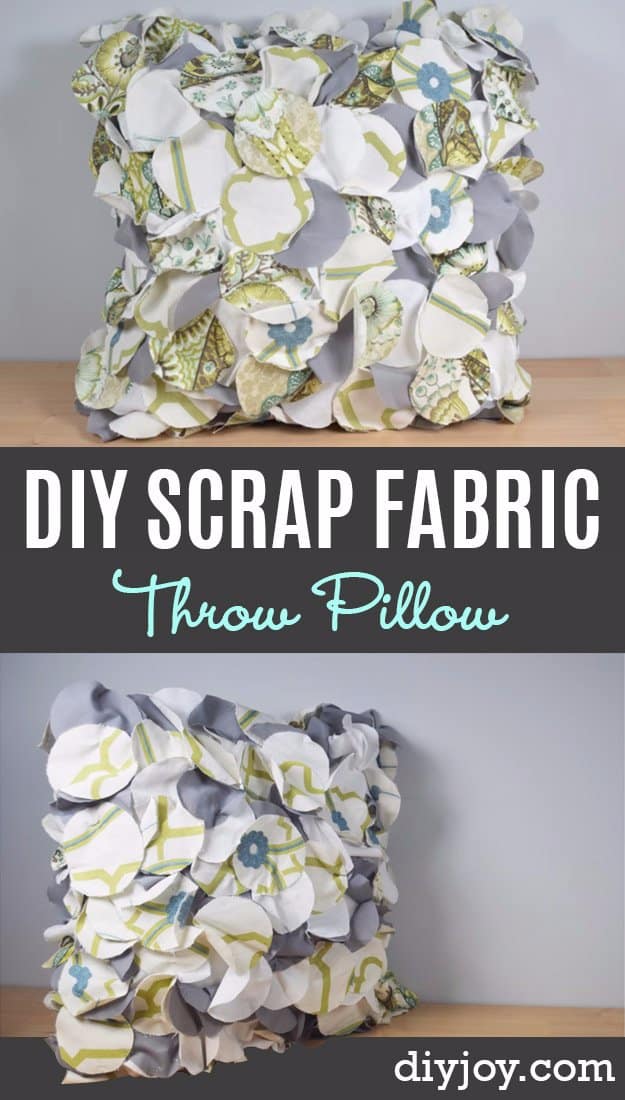
A crafty throw pillow made from fabric scraps is the answer to that basket of remnants too pretty to toss. Small pieces in gray, white, yellow and blue prints are cut into soft petals and layered across a plain cover until the whole front ruffles with texture. No expert sewing skills are needed, which makes it a friendly beginner project, and every pillow comes out a little different depending on the scraps on hand. Swap the colors with the seasons for an easy, budget friendly refresh.
Get the full tutorial at DIY JOY.
3. How to Make Bandana Pillows
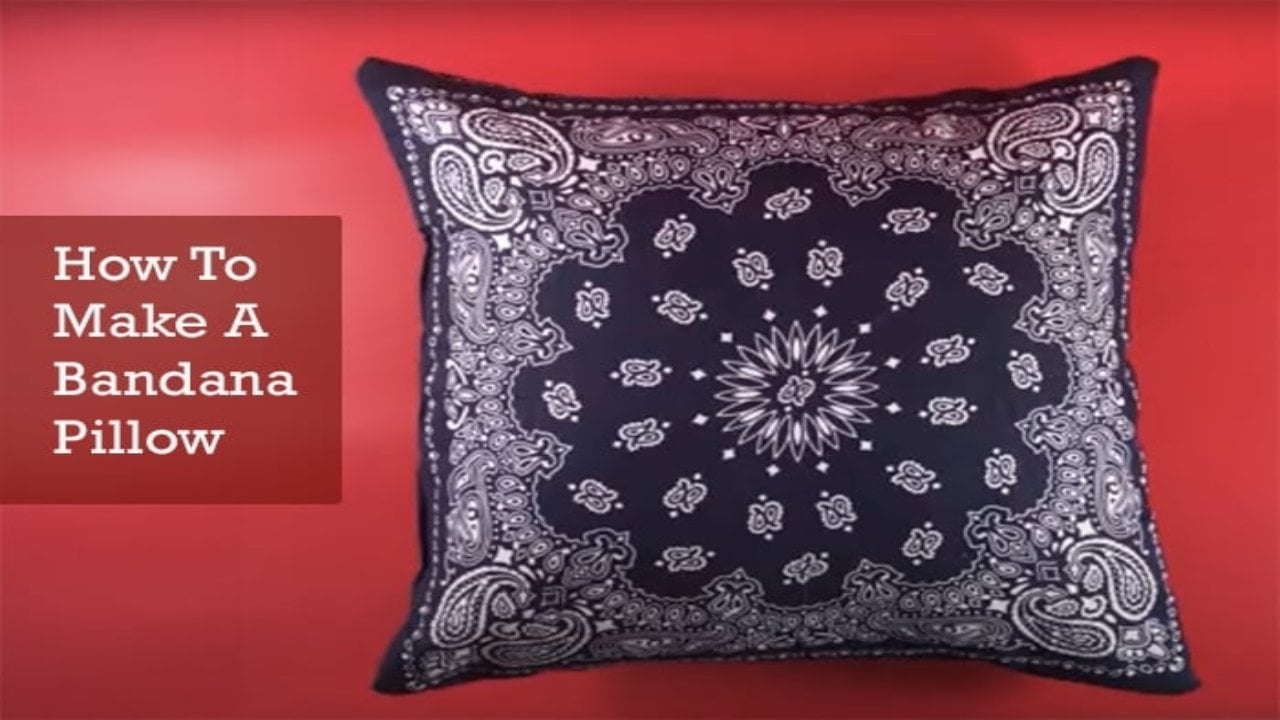
Bandana pillows sew up in about the time it takes to watch an episode of a favorite show. Two 20 inch bandanas go right sides together, a chalk line marks the seam and a straight stitch runs around the edges with a gap left for turning. An 18 inch insert or a few handfuls of Polyfil fill it out nicely. Skipping the machine? Run fabric glue along the same lines and hold the layers with sewing clips or clothespins while it dries. The cotton washes well and holds up to pillow fights.
Get the full tutorial at DIY JOY.
4. DIY No-Sew Felt Scalloped Pillow
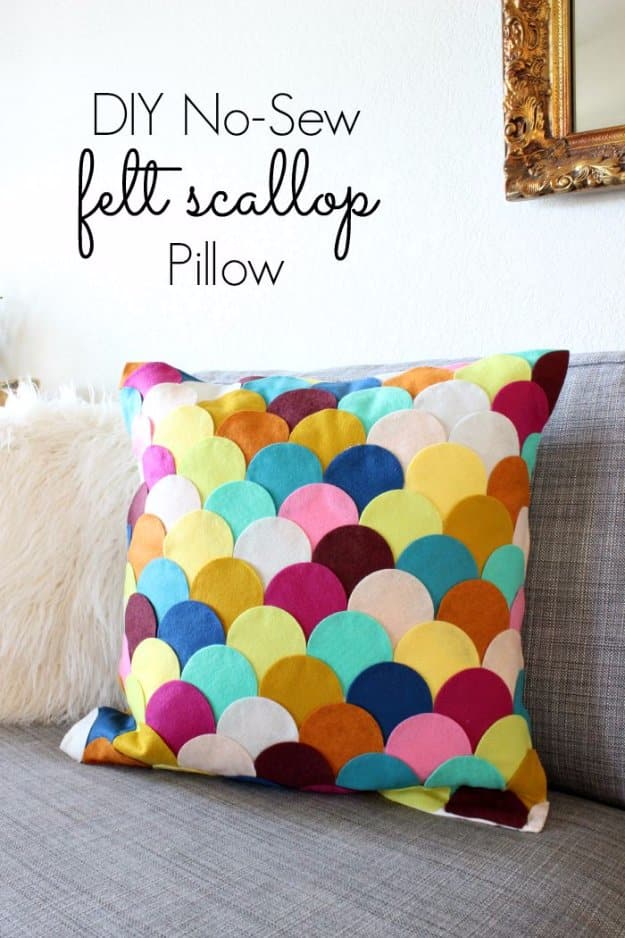
A DIY no-sew felt scalloped pillow brings a whole rainbow into a room with nothing more than precut felt circles, a glue gun and a plain cover like the GURLI from IKEA. Lay out the top row to check spacing, then cut those circles in half. After that, overlap whole circles row by row so the curves form scallops, gluing only around each edge. Trim any circle that hangs past the side and finish the bottom row the same way. Wool felt in a dozen colors gives the richest look.
Get the full tutorial at Classy Clutter.
5. Lovely Ruffle Pillow DIY
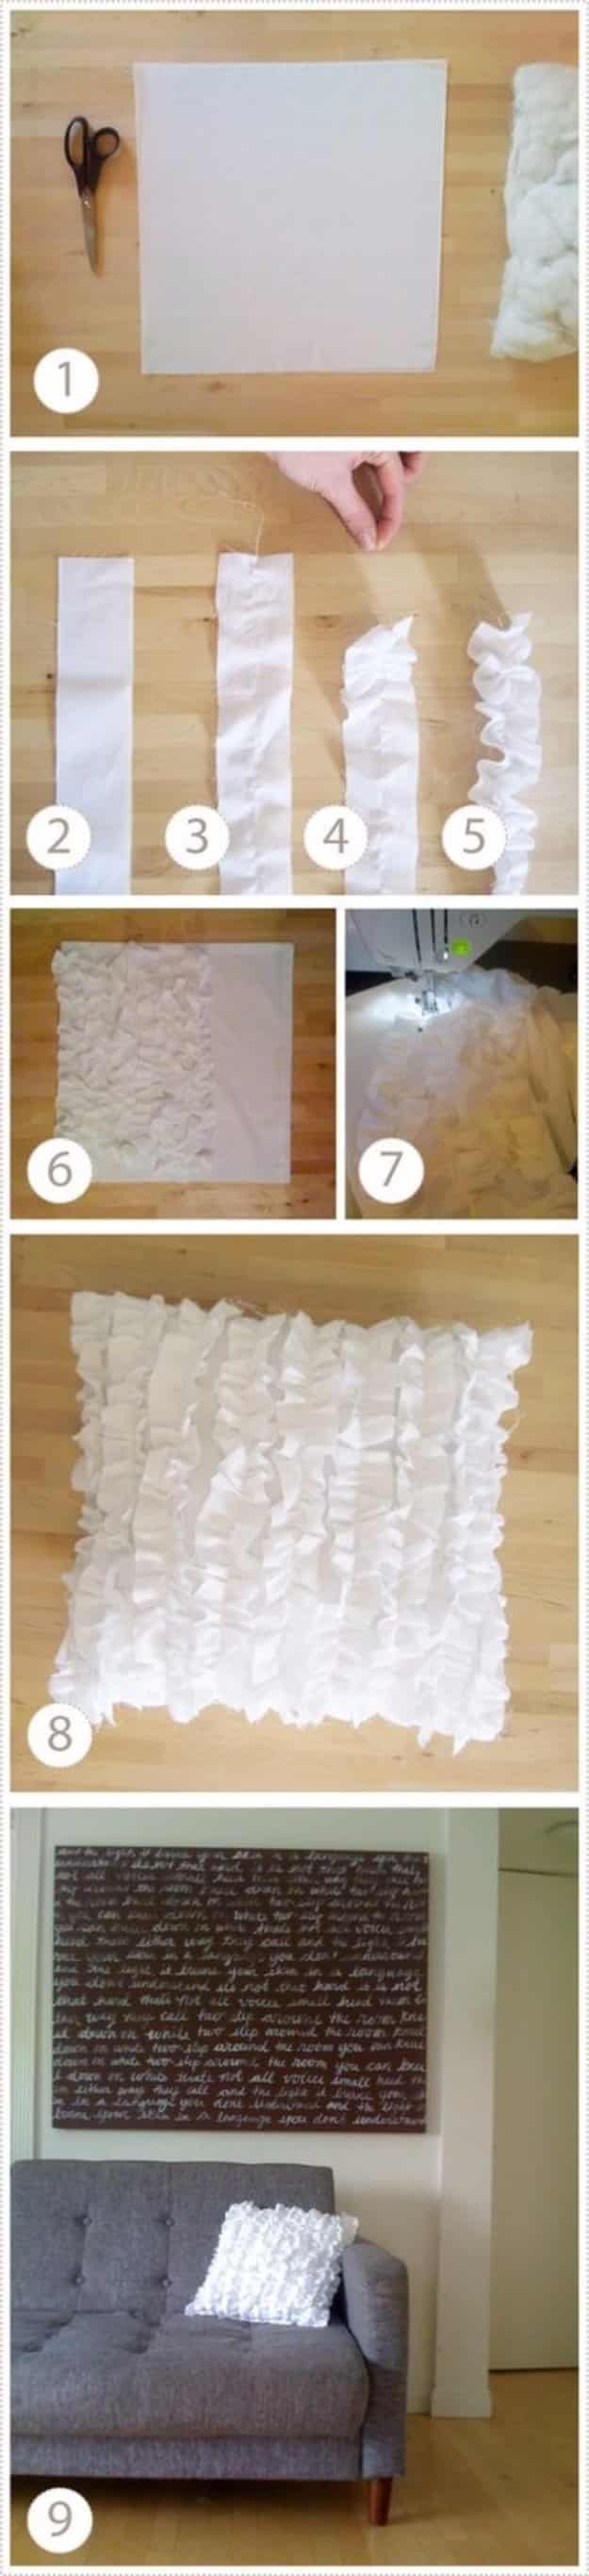
A ruffle pillow gives a sofa that soft, romantic look for the cost of one piece of fabric. Cut a front and back, then cut long strips from the same fabric, much longer than the pillow is wide. Run a basting stitch down the middle of each strip, leaving thread tails, then pin the strips side by side across the front and pull the tails to gather. Stitch each ruffle down the center at a normal length, add the back and sew around the edges, keeping the ruffles clear of the seam.
Get the full tutorial at AllDayChic.
6. Anthropologie Tassel Pillow Knockoff
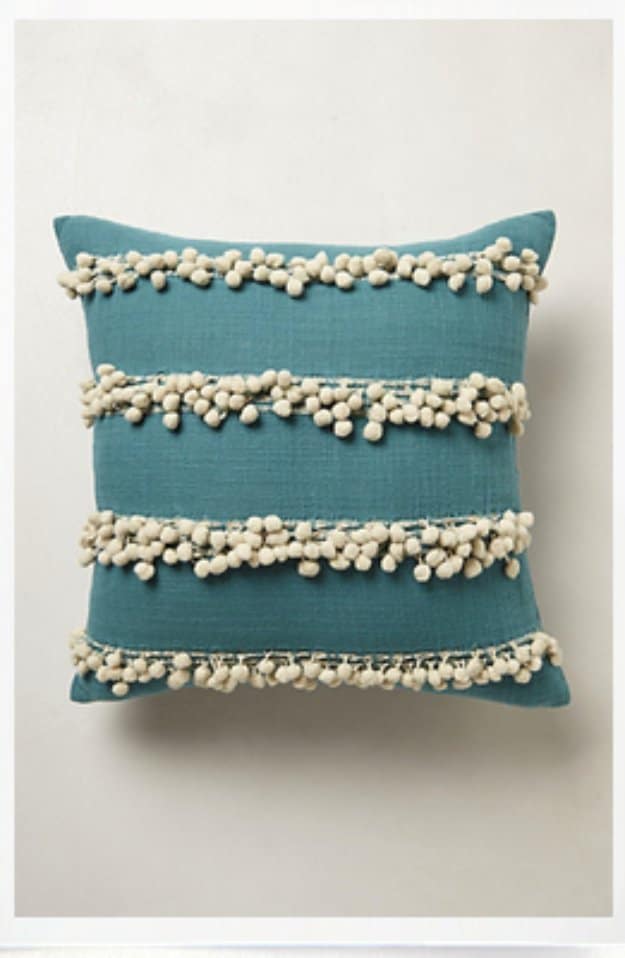
An Anthropologie tassel pillow knockoff comes together for a fraction of the nearly $60 price tag. Start with an inexpensive store bought rectangular pillow, then pick up pom pom trim from the fabric store. Two strands sit side by side for a fuller fringe, and the trick is to make them imperfect: tug some poms lower than others and twist the strands so they look relaxed and a little wild. Hand stitch two rows across the front. Perfect is overrated, and the tousled look reads more designer.
Get the full tutorial at The Inspired Room.
7. DIY Pillow With Silhouette Heat Transfer Material
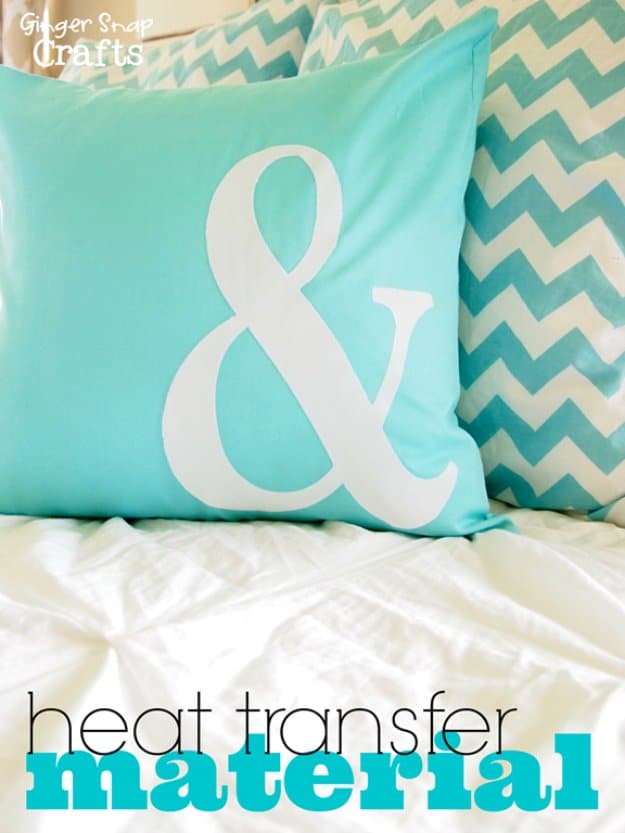
A DIY pillow with Silhouette heat transfer material gets a big, soft ampersand in white flocked vinyl. Cut the symbol in a favorite font, remembering to mirror the image first so it reads correctly once pressed. Heat transfer material feeds into the machine shiny side down with no cutting mat. Weed away the negative spaces, lay the design face down on the pillow, cover it with a scrap of fabric and press with a hot iron. Peel the backing slowly and iron again anywhere it lifts.
Get the full tutorial at Ginger Snap Crafts.
8. DIY Knot Pillows Tutorial
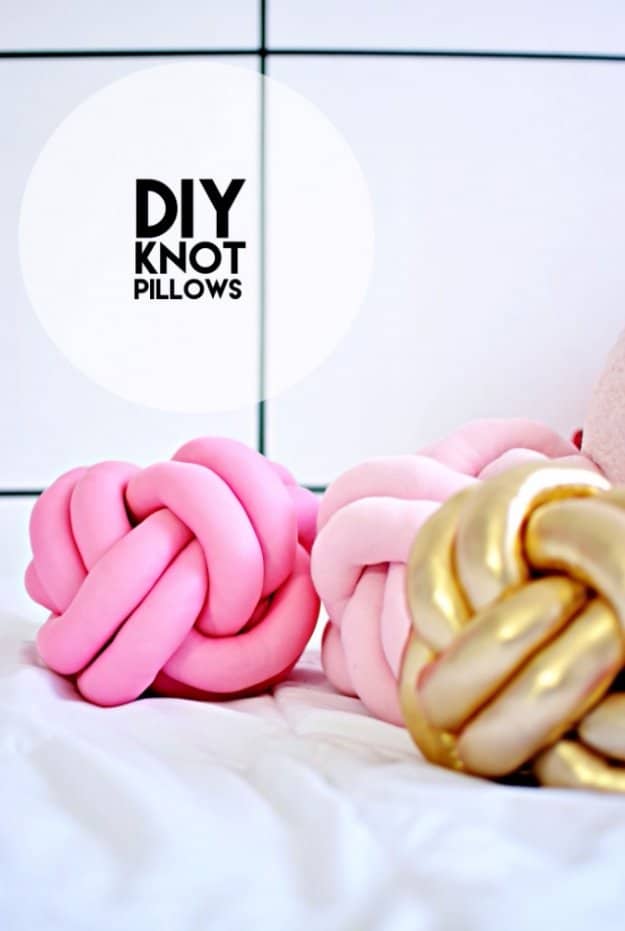
DIY knot pillows are the soft sculpture trend done at home. Sew two 5 inch by 1 yard strips of stretchy knit fabric into tubes, then turn them right side out with help from an empty wrapping paper roll. Slide the roll back inside and push stuffing through it with a dowel, which keeps the tube even. The ball shape comes from a simplified Turk’s head knot worked with both tubes at once. Pull the ends tight and stitch them inside. The finished knot is roughly 10 inches across.
Get the full tutorial at Little Inspiration.
9. Re-Purposed Sweater Pillows
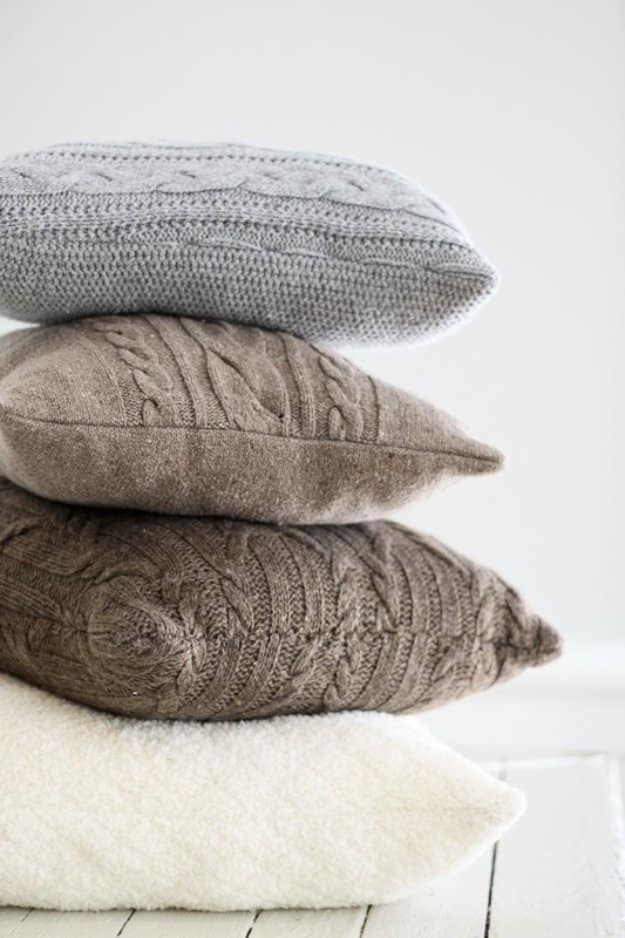
Re-purposed sweater pillows give a chunky knit thrift store find a cozy second life. Line the pillow form up below the sleeves, trace around it with a fabric marker and cut the front and back from the body of the sweater. The key to avoiding wavy, stretched seams is lightweight fusible interfacing ironed to the back of the knit before sewing. After that, a regular sewing machine handles it fine, no serger needed. Keep existing buttons or zippers on the back as a built in closure.
Get the full tutorial at The Keeper of the Home.
10. Stunning Color Block Pillow With A Twist
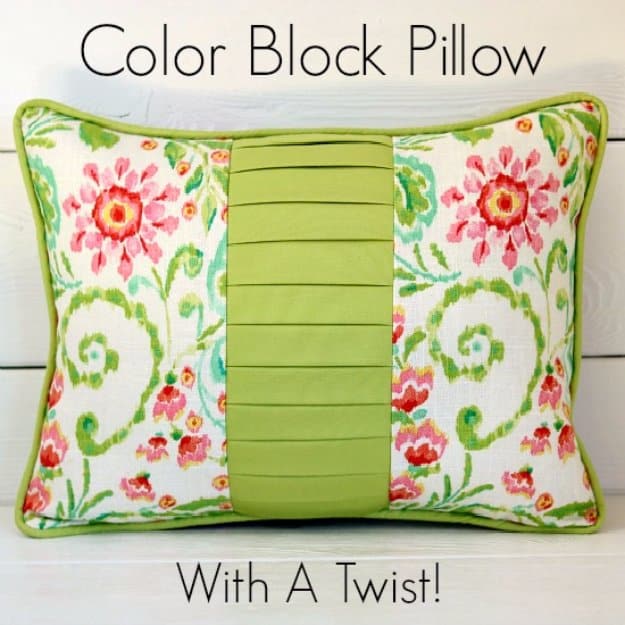
This color block pillow has a twist: a knife pleated middle panel that adds detail and dimension to the front. It is a smart way to use two or three fabric scraps. For a 12 by 16 inch form, the finished sections are 5 1/2 inches, 4 inches and 5 1/2 inches. To cut the pleated center, multiply the finished length by three and add a couple of inches. Iron on stabilizer keeps the pleats crisp. Cording around the edge is optional, and the plain back makes it reversible.
Get the full tutorial at So Sew Easy.
11. On-the-Go Reading Pillow
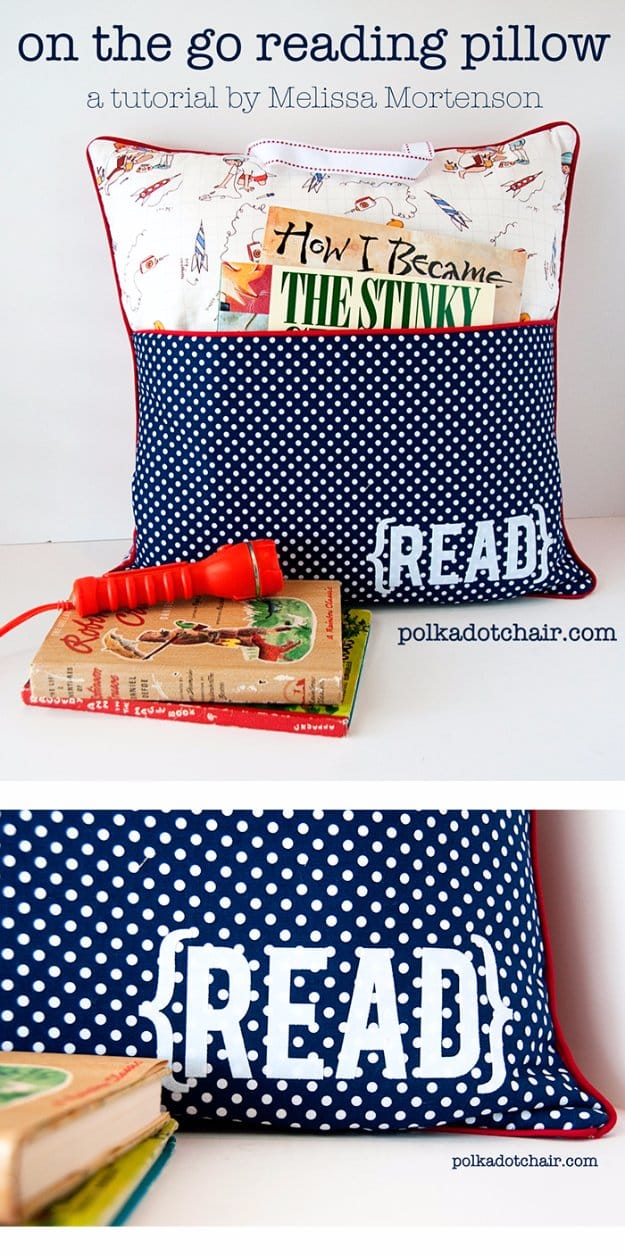
An on-the-go reading pillow has a big pocket across the front for books, a flashlight and small treasures, plus a ribbon handle so it travels from the bedroom to the car. Three fat quarters cover an 18 inch pillow with almost no waste. Fusible fleece goes behind the front and pocket pieces for body, piping finishes the edge and the word READ is cut from flocked heat transfer material or bought as iron on letters. The free tutorial walks through cutting, the pocket and the envelope back.
Get the full tutorial at The Polka Dot Chair.
12. Painted Watercolor Pillow With An Envelope Closure
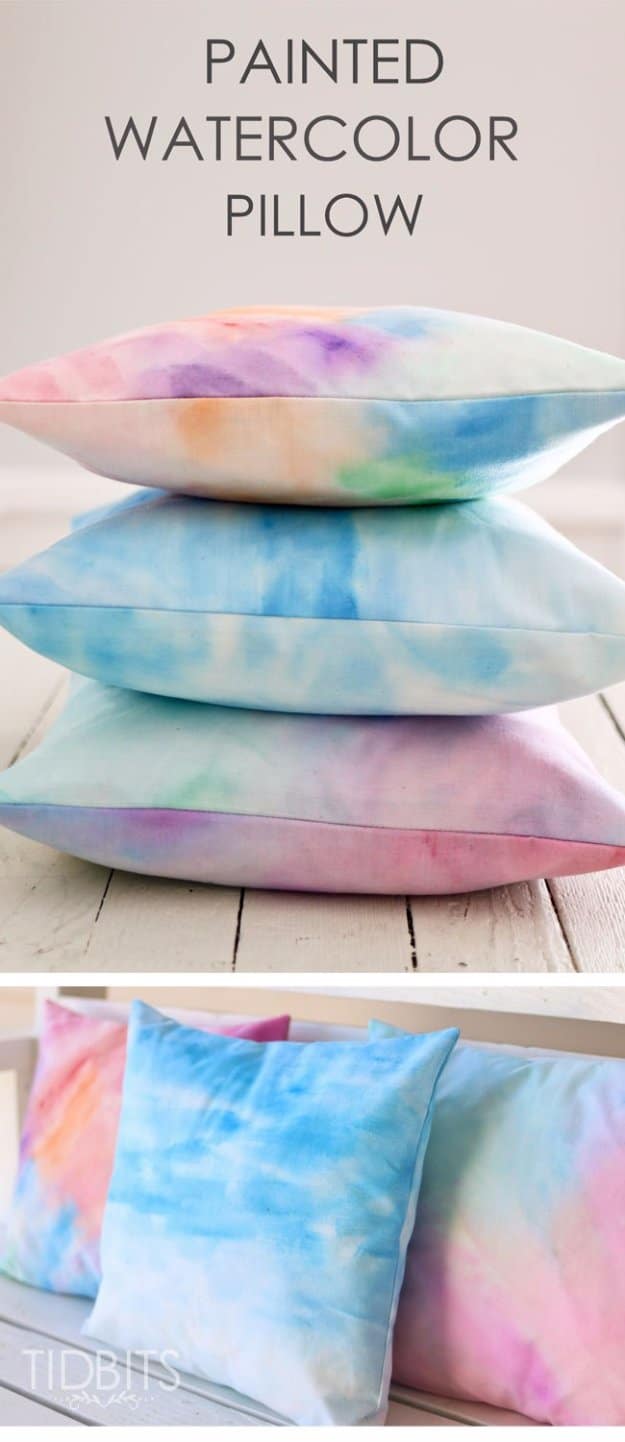
A painted watercolor pillow starts with plain white fabric and a set of watercolor paints, then gets sewn into an envelope closure cover that fits any form. Measure the form and add 2 to 4 inches for the front, using more for full, puffy inserts. For the back, add 5 to 7 inches to the front width, cut it in half and hem the two cut edges so they overlap. A thick linen, canvas, twill or outdoor fabric works best because it holds its shape and hides the insert.
Get the full tutorial at The Keeper of the Home.
13. DIY Song Lyric Pillow
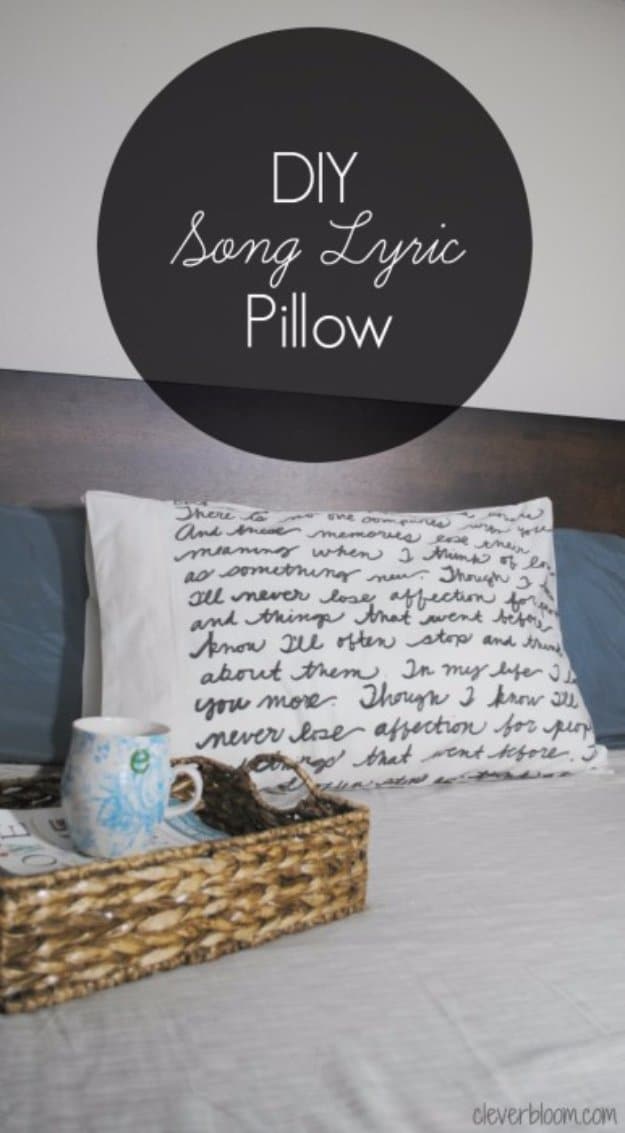
A DIY song lyric pillow puts the words to a wedding song, a favorite verse or a poem right onto a pillowcase. Wash and iron a white or light colored case, slide cardboard inside so the marker does not bleed through, then lay a ruler across the fabric as a guide. Write the lyrics in a black fabric marker, going over any lines that look faint, and let it dry about 24 hours before washing. Fancy handwriting is not needed, since a loose, casual script looks more natural.
Get the full tutorial at Clever Bloom.
14. Seashell Stamped Pillow Tutorial
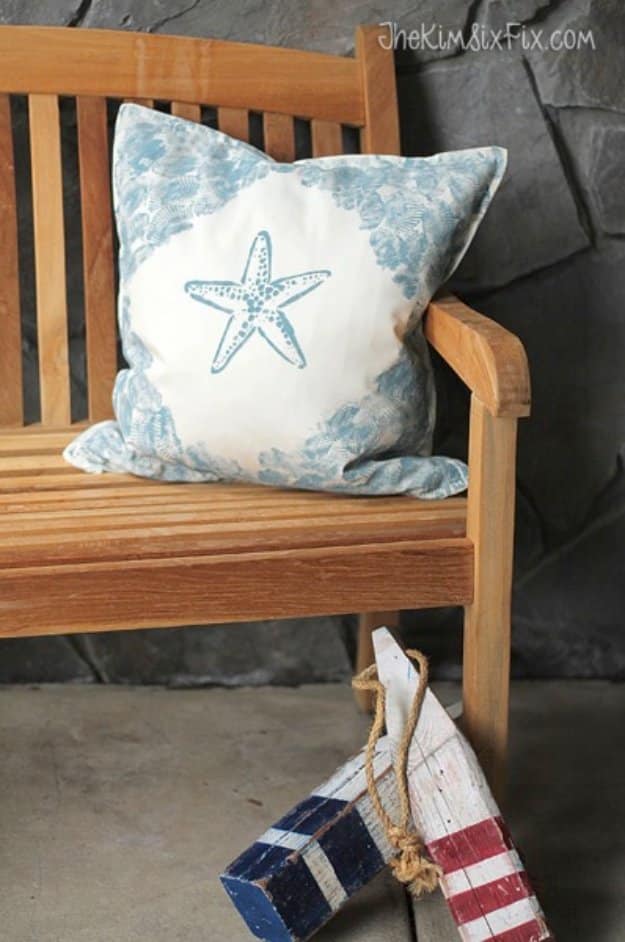
A seashell stamped pillow uses real clam shells as stamps, so the ridges print right onto the fabric. Brush paint over the top of each shell, dab off the excess so the texture still shows, then press firmly, lifting and wrapping the fabric around the shell. Test on paper towels first. A plain white IKEA GURLI cover keeps the cost to about $4. A starfish stenciled in the center from contact paper adds a focal point. Fabric paint holds up in the wash; heat set it as directed.
Get the full tutorial at The Kim Six Fix.
15. DIY Bandana Pillows
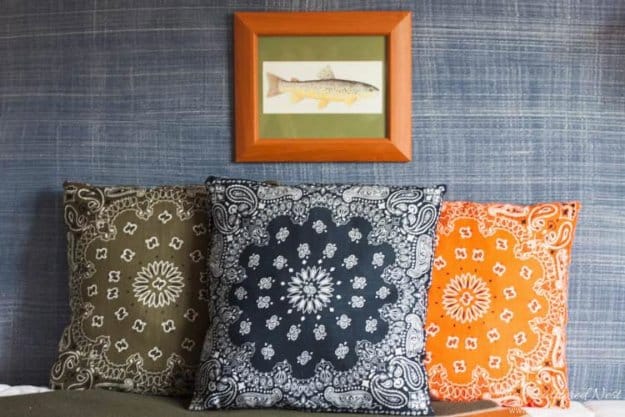
DIY bandana pillows cost about $8 or less each with dollar store bandanas. For the simplest version, place two bandanas good sides together, stitch three and a half sides with a generous seam allowance, turn, stuff with Polyfil and hand stitch the gap. Large 22 inch bandanas make 16 inch pillows. For a removable, washable cover, use three bandanas and sew an envelope back. A no-sew version swaps the thread for iron on stitch adhesive. They hold up to rough play in a kids room or camp tent.
Get the full tutorial at The Heathered Nest.
16. DIY Stenciled Rooster Pillow
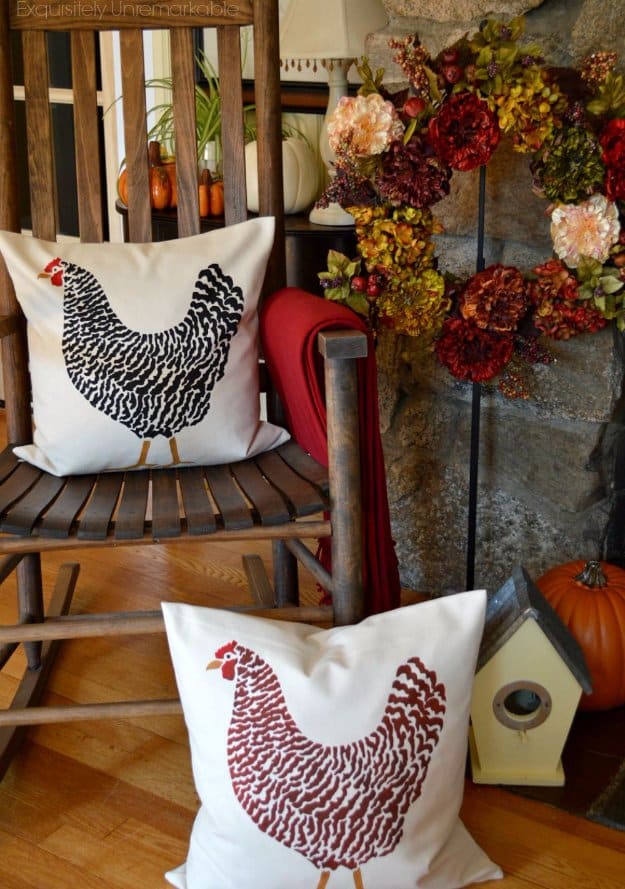
A DIY stenciled rooster pillow gives a farmhouse living room a charming focal point. A paint a pillow kit includes a cover, insert, stencil, roller, paint and a frame that clips the stencil and fabric tightly in place, which stops the slipping and buckling that make fabric stenciling tricky. Load the roller lightly, roll over the stencil, then use a small brush for edges and details. Unclip, lift the cover out and start the next one. An extra roller cover saves washing between colors.
Get the full tutorial at Exquisitely Unremarkable.
17. DIY Shibori Indigo Pillows
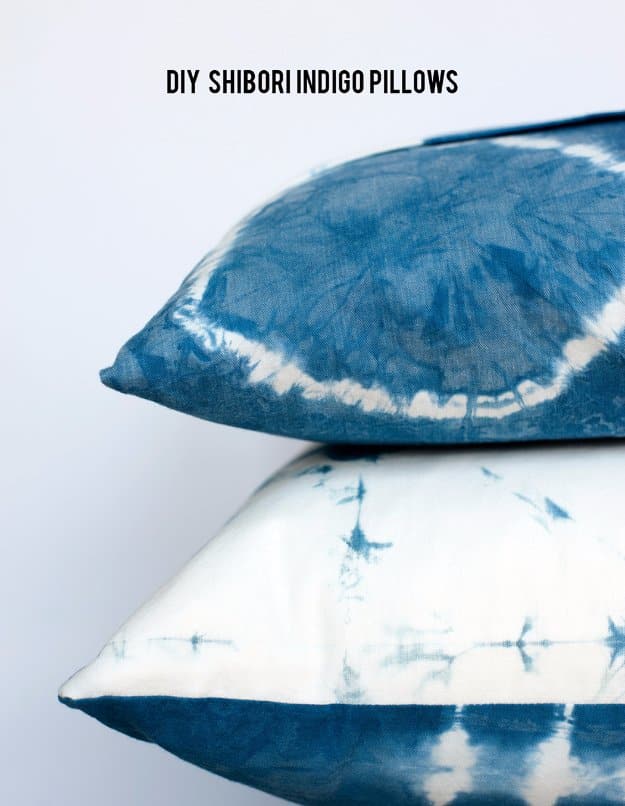
DIY shibori indigo pillows use the Japanese resist technique to pattern plain 100 percent cotton with deep blue. For the arashi look, wrap wet fabric at an angle around a PVC pipe, bind it tightly with twine and scrunch it down the pipe in sections. Dip it in the indigo bucket for 3 to 5 minutes and watch it turn from green to blue as it oxidizes, then repeat for a deeper shade. A simple rubber band binding gives stripes. Rinse and wash in cold before sewing the covers.
Get the full tutorial at Alice and Lois.
18. DIY Sprocket Pillows Tutorial
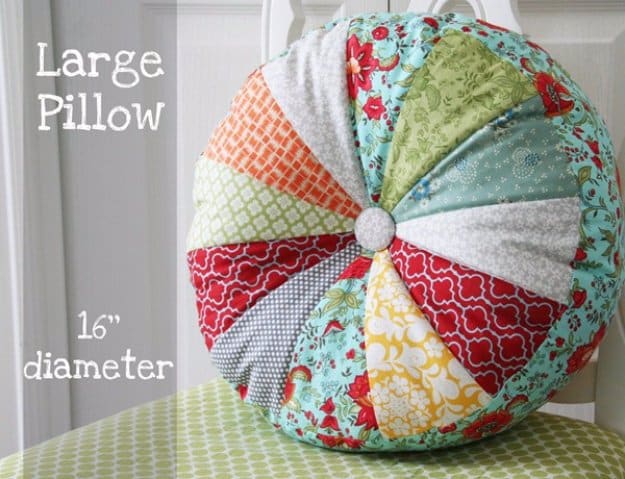
DIY sprocket pillows are round, sectioned cushions that look like a colorful pinwheel. Wedge shaped pieces cut from mixed fabric scraps are sewn into a circle, then finished with a covered button in the center. The large size measures 16 inches across. Curved seams can feel intimidating, but these are a friendly first try at sewing curves, and a slow, steady pace does most of the work. They make a fantastic scrap buster for anyone who has been saving fabric bits for years.
Get the full tutorial at DIY JOY.
19. iPad Pillow Tutorial
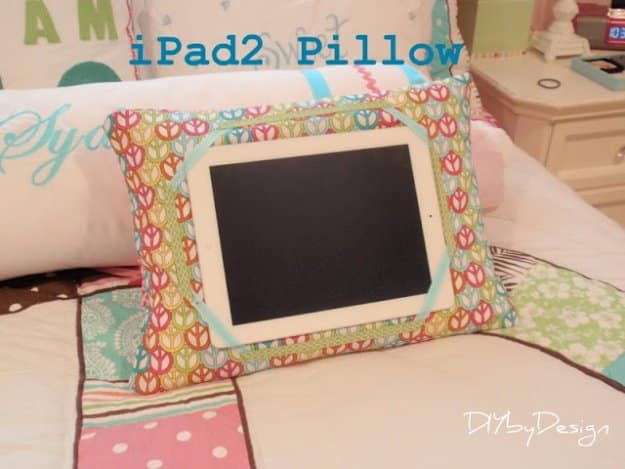
An iPad pillow works like a soft lap desk for watching shows or reading in bed. A 12 by 16 inch form gets an envelope cover with a 1/4 inch seam allowance all around. Before sewing, lay the front fabric over the form and use the tablet as a guide to pin ribbon across all four corners, then stitch each ribbon so the device slides under and stays put. A contrasting ribbon glued on with fabric glue adds a finishing touch. A flat iron smooths the creases in a pinch.
Get the full tutorial at DIY by Design.
20. Pink Pleated Pillow Tutorial
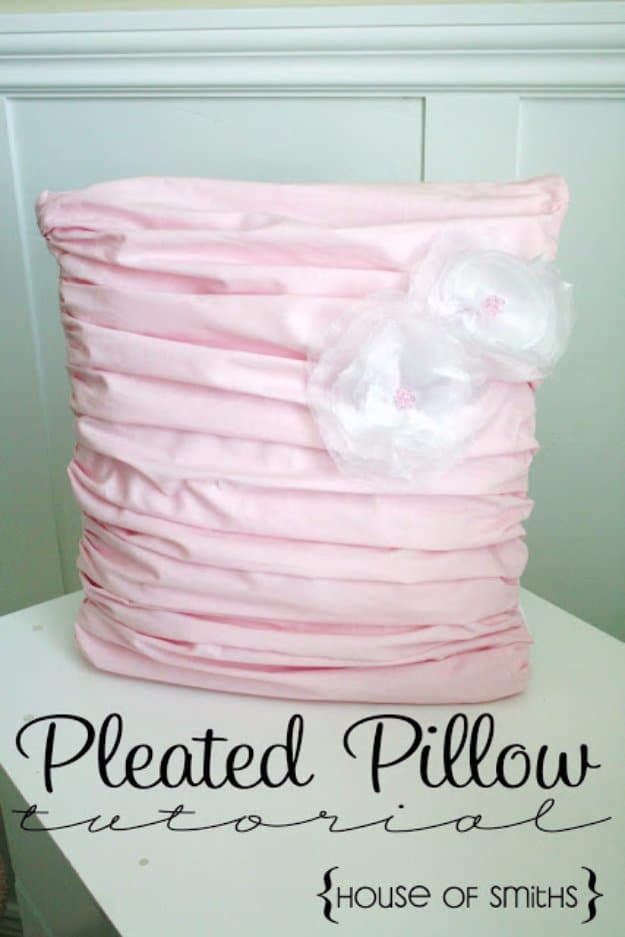
A pink pleated pillow is a pretty way to use a long leftover strip of fabric. Cut the strip into three sections a little longer than the pillow form, free hand a ruffle along each side of the large piece and then fold it into loose pleats over a square of fabric the size of the pillow. Sew down one side of the pleats, then the other. A slip in back made from two overlapping pieces lets the insert slide in. Hand stitch a few singed fabric flowers on top to finish.
Get the full tutorial at The House of Smiths.
21. DIY Pillow With Cording
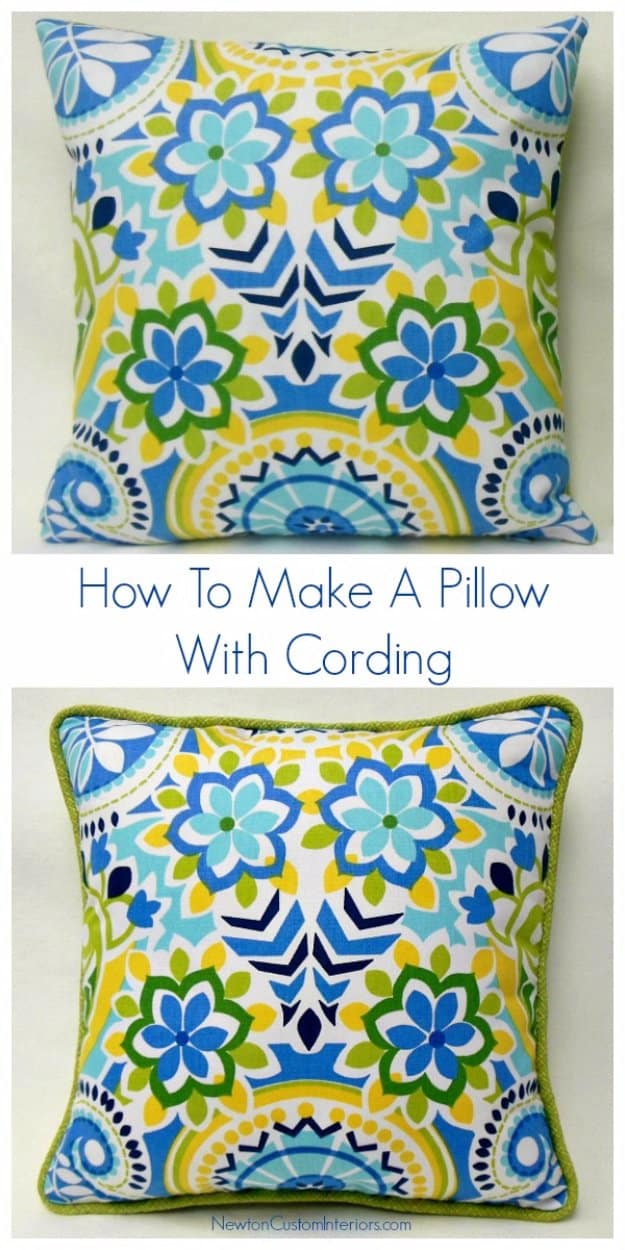
A DIY pillow with cording looks instantly more custom, whether the cording contrasts or matches the pillow fabric. Cut the front and back the same size as the form for a snug fit, so a 14 inch form gets 14 inch squares. Measure all four sides and add 5 inches, which gives 61 inches of cording for that size. Sew the cording to the right side of the front, starting near the bottom and leaving about 3 inches loose to join the ends neatly before adding the back.
Get the full tutorial at Newton Custom Interiors.