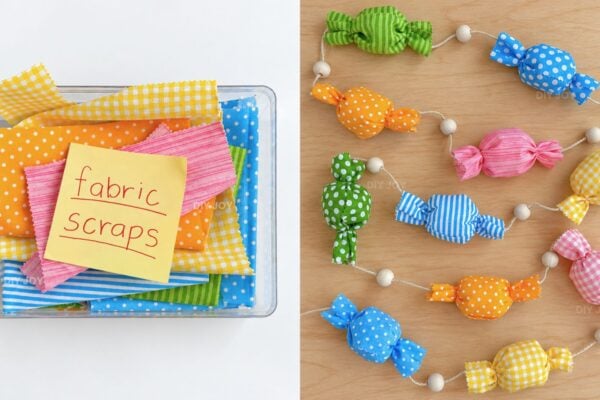
Half a lemon, a roll of paper towels and an empty chocolate box walk into a craft room, and they come out as the best diy mothers day gift ideas on the list. These 35 handmade gifts are things she’ll actually use and happily show off, from clay jewelry dishes to slippers stuffed with treats. Stamp citrus print tea towels using real fruit (yes, the lemon is the stamp), press garden blooms onto mason jar fairy lights for her nightstand, or tuck candy inside paper tulips with chocolate so the bouquet comes with dessert. Have an hour? Give a plain mirror a clay flower frame. And that gold Ferrero Rocher tray becomes a jewelry box, which is the best excuse ever to eat the chocolates first. If you want mothers day gift ideas that feel personal without costing much, start here. Perfect for moms, grandmas, stepmoms, aunts, new moms and every mother figure who deserves a handmade thank you.
1. Citrus Print Tea Towels
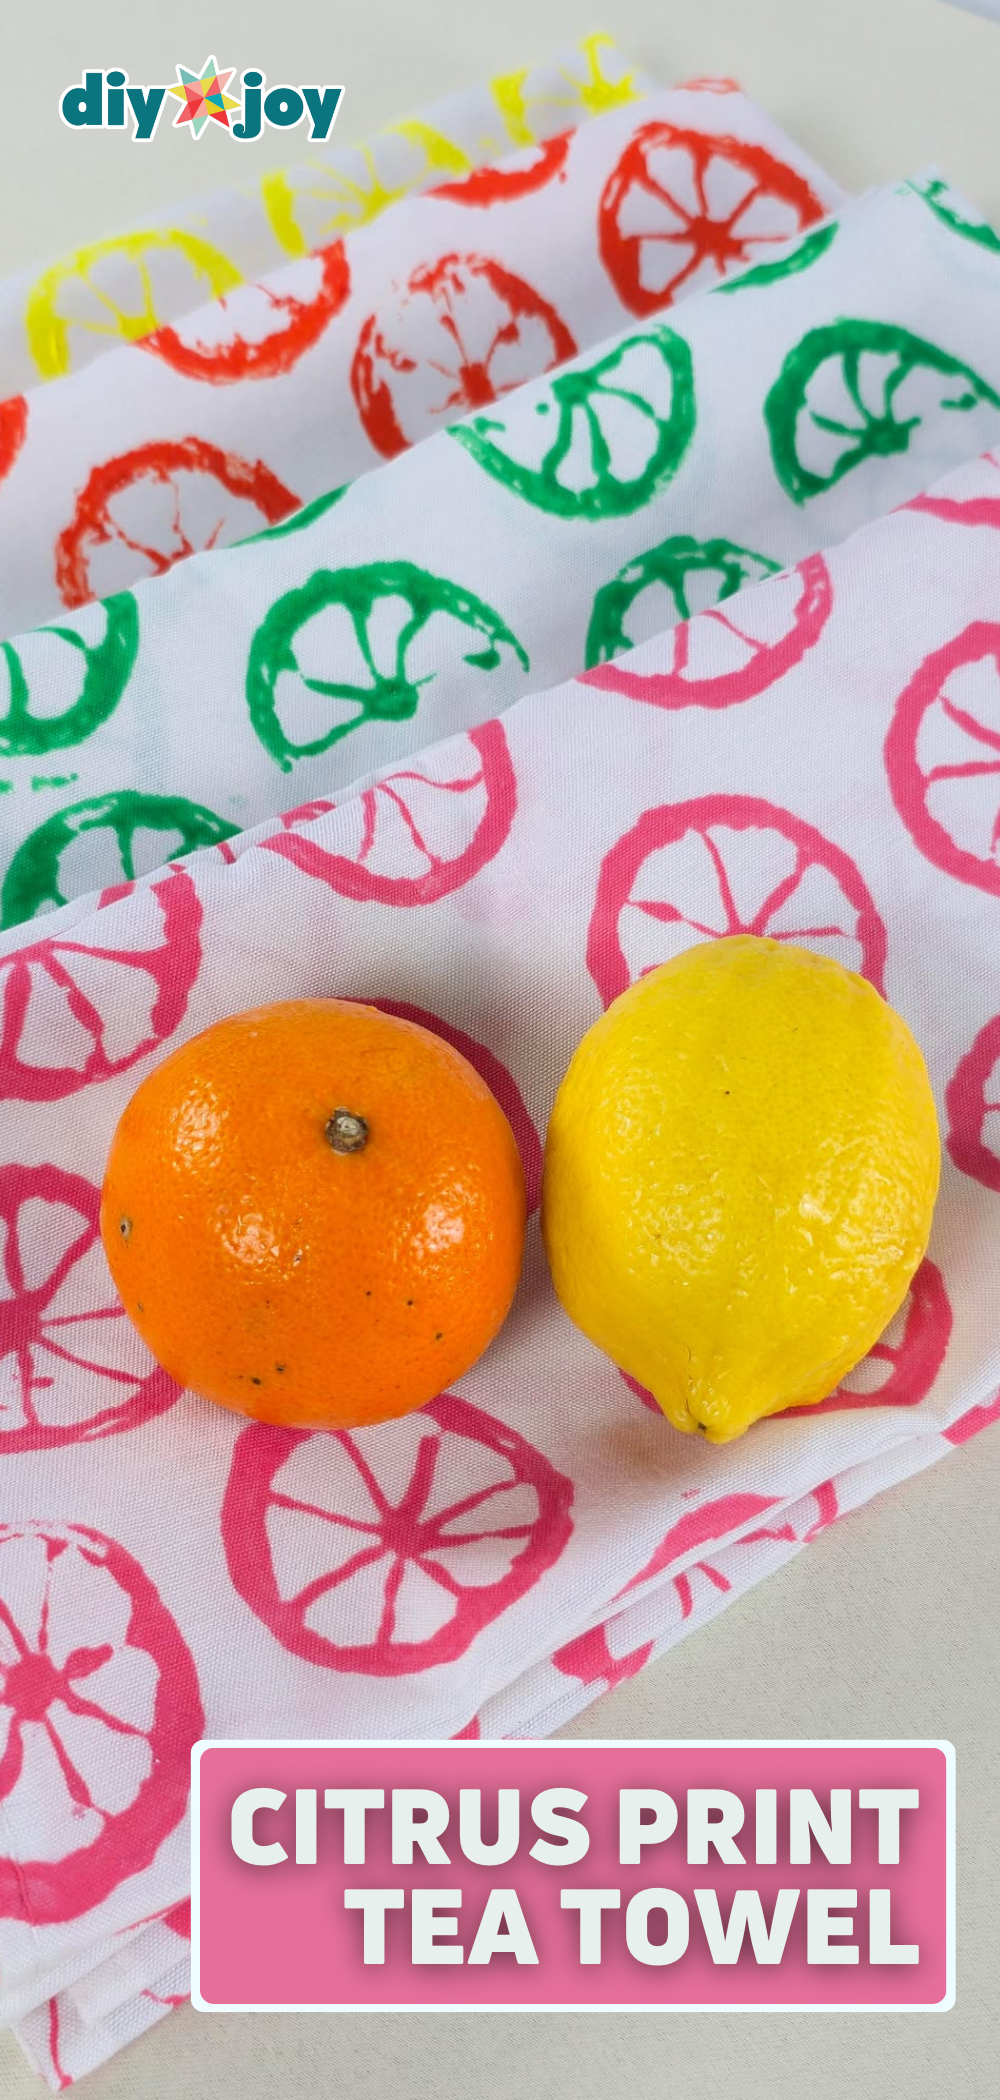
Half a lemon turns into the cutest stamp you’ll ever own. Scoop out the pulp but leave the membrane walls, pat the fruit dry, then brush on fabric paint mixed with textile medium (about equal parts, or whatever the label says). Stamp across a plain white tea towel in staggered rows, switching colors as you go. Go easy on the paint, because too much blurs those pretty segment lines. Tape the towel down underneath so it can’t slide. She gets a boutique kitchen towel, and you get to play with fruit.
Get the full tutorial at DIY JOY.
2. DIY Jute Rope Tray

A boho tray that looks like it came from a pricey home store, built from a couple dollars of jute rope and a bottle of Mod Podge. Wrap a tray in cling wrap, brush on plenty of glue, then coil the rope into a tight spiral, adding more Mod Podge as you go. Weight it flat while it dries and lift it off the plastic once it holds its shape. Keep the coils snug with no gaps (that’s what makes it sturdy). Add a couple of paper flowers and her nightstand looks instantly pulled together.
Get the full tutorial at DIY JOY.
3. Pop Up Flower Mother's Day Card
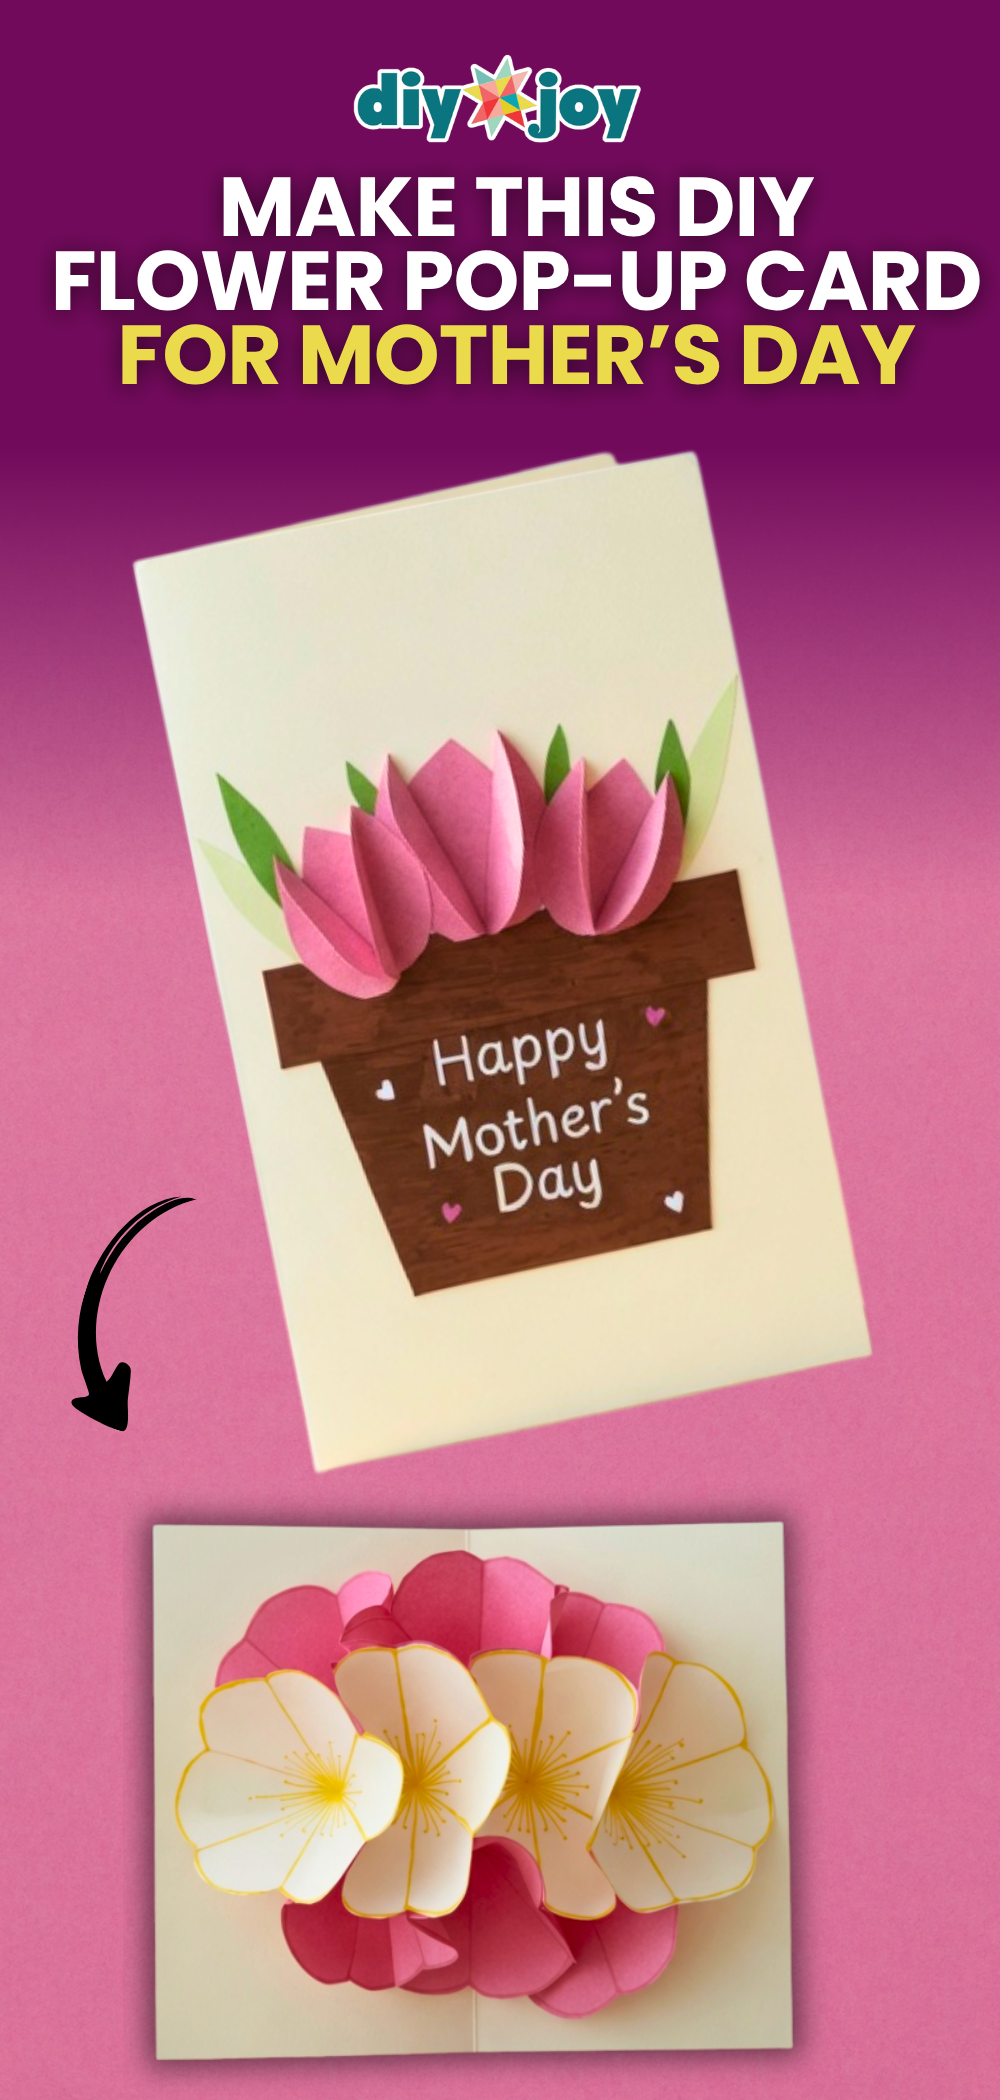
Store cards get a glance. This one gets a gasp, because a whole cluster of paper flowers blooms the second she opens it. Start with 6 inch squares of colored paper, fold each into a small triangle, cut a curved edge and unfold a flower. Trace the creases and petal edges with a Sharpie, add little lines and dots for stamens, then snip off one petal and glue the gap closed so it cups into 3D. Make 7 to 10 and layer them inside the card. Just paper, glue and a little patience.
Get the full tutorial at DIY JOY.
4. DIY Marble Cutting Board

Wood and marble in one board, which is about as fancy as cheese night gets. A strip of hardwood is cut to the width of a marble piece, then both are glued onto a birch plywood backing, with a line of glue run along the seam where they meet. Stack heavy books on top overnight, sand the edges and rub in wood butter. If the hardwood is thicker than the marble, plane it down first so the top sits flush. It needs a scroll saw, so it’s perfect for the family member with a workshop.
Get the full tutorial at The Merrythought.
5. DIY Lipstick Holder

For the mom whose lipsticks roll around every bathroom drawer. Two 2 by 7.5 inch pieces of 1/4 inch birch plywood make a top and base, joined by two 1.75 inch lengths of 5/8 inch dowel. Five holes drilled with a 7/8 inch Forstner bit hold the tubes upright. Measure out from a center mark in 1.25 inch steps so the holes land evenly, then glue and clamp until dry. It slips into a medicine cabinet but looks cute enough to leave out (her favorite shades deserve a display).
Get the full tutorial at The Merrythought.
6. Photo Bookmarks
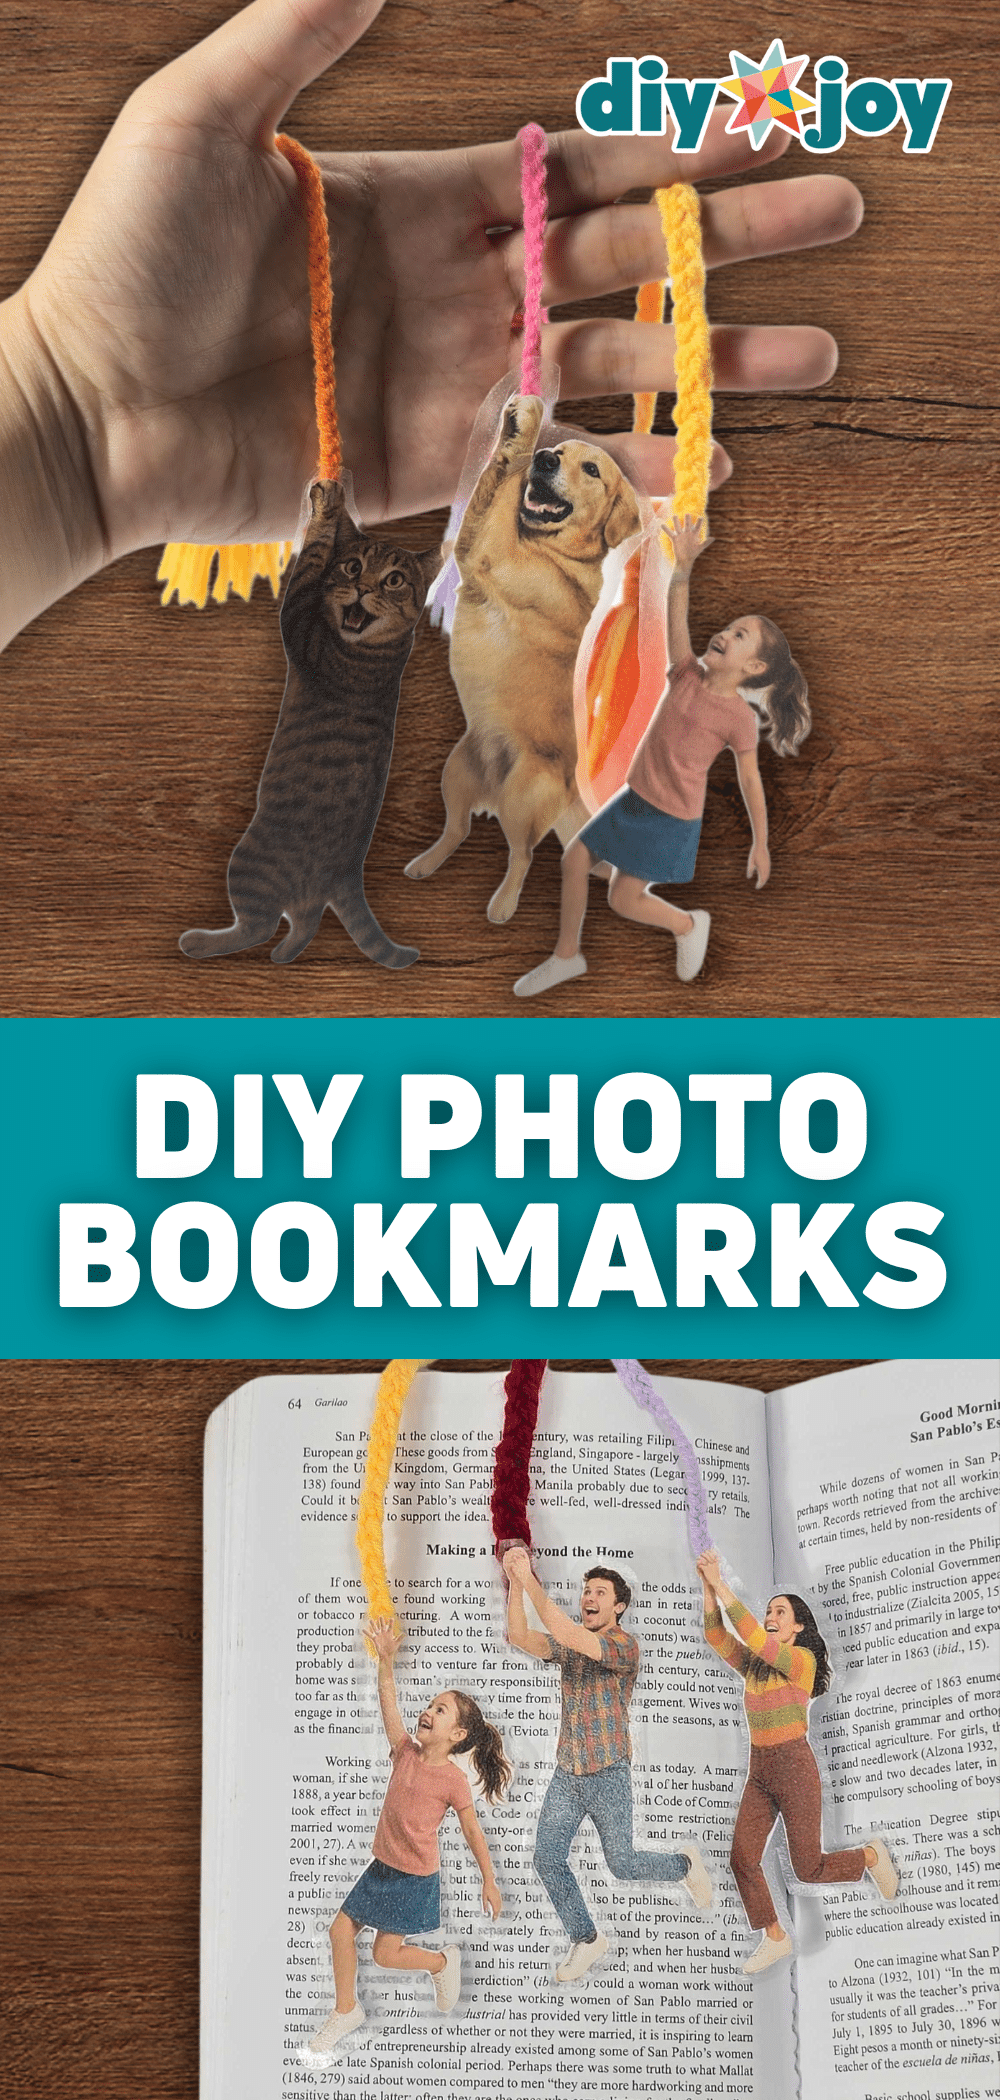
Her favorite people (or pets) dangling off the top of the page. Print a photo, cut it out close to the edges and glue it to cardstock, leaving the hands unglued so a tassel loop can slip between the layers. Seal the front and back with contact paper, smoothing out the bubbles, then trim with about 1/8 inch to spare. Use a craft knife for fiddly corners. The finished bookmark looks like the kids or the dog are hanging on for dear life, which gets a laugh every time she opens her book.
Get the full tutorial at DIY JOY.
7. Air-Dry Clay Catchall Tray
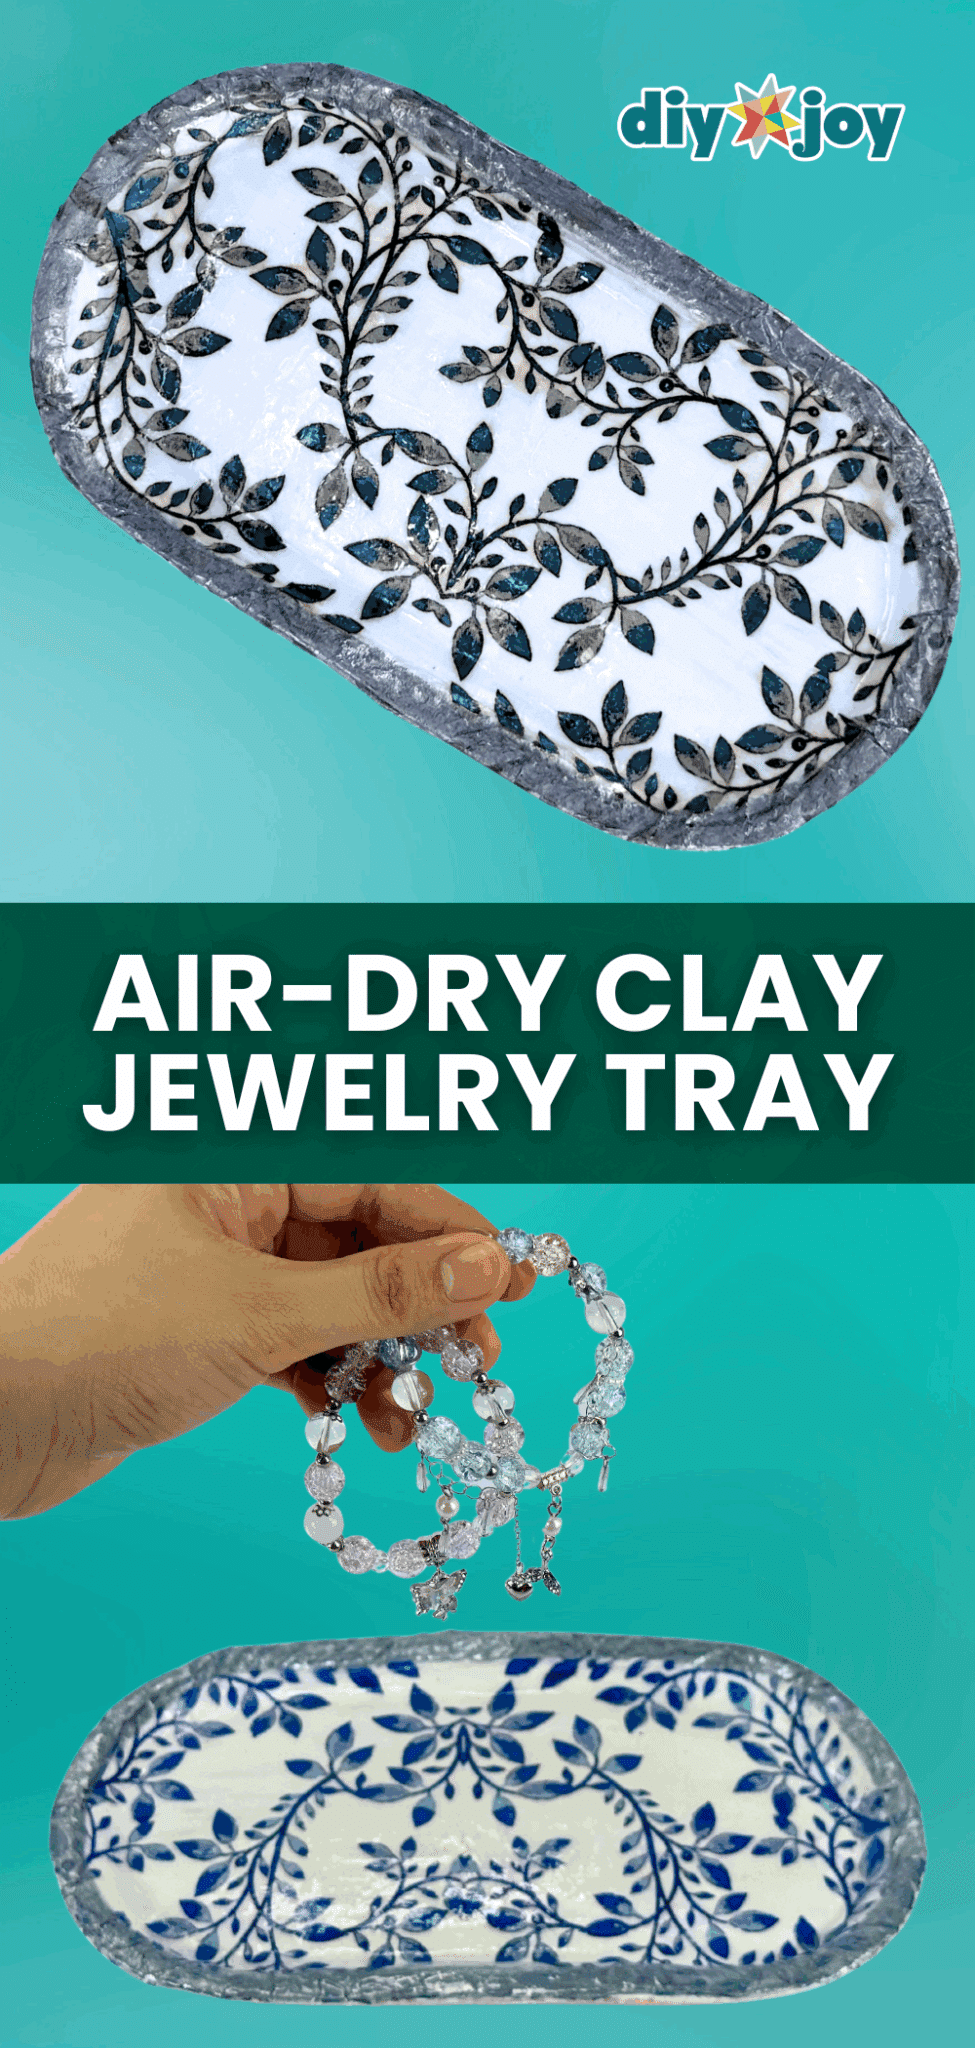
Rolled clay, a napkin print and a glossy resin finish. Dust a tray with baby powder, press rolled air-dry clay into it and smooth it with a damp sponge. Once dry, it pops right out (that powder is the secret), then gets primer, Mod Podge and a printed napkin layer. Trace the rim with a metallic marker and seal everything with UV resin under a lamp. No Mod Podge? Mix 2 parts white glue to 1 part water. It holds rings, earrings and that one hair tie she can never find.
Get the full tutorial at DIY JOY.
8. Kate Spade Nautical Tote Knock Off

Navy and white stripes, gold letters that say Get Out Of Town and a hot pink polka dot lining, for a fraction of the designer price. Heavyweight twill strips are sewn into stripes, stiffened with fusible interfacing and given an ultra-firm stabilizer base. The lettering is a freezer paper stencil with gold paint, left to dry overnight. One funny warning from the tutorial: sew the base to the bottom, not the top, or the words end up upside down. It’s roomy enough for a carry-on, so it suits a mom with a trip planned.
Get the full tutorial at Flamingo Toes.
9. A Helping Hand Mother's Day Gift

Every mom loves a tiny handprint, and this one goes straight to work in the kitchen. Pour fabric paint onto a paper plate, rub a little one’s hand in it until it’s fully coated, then press it firmly onto a cloth oven mitt and lift carefully (it sticks a little). Once it’s dry, add a message, a name or the date with a fabric marker. Three supplies and one willing helper. Grandmas go wild for this, and every time she pulls a pan from the oven she gets a little high five.
Get the full tutorial at Trish Sutton.
10. Cozy Slippers Gift Idea

Cozy slippers stuffed with little treats and tied up with a bow. That’s the whole idea, and it’s genius. Find out her shoe size, grab soft slippers (or slide flats for warmer months), then tuck in small favorites like nail polish, lip balm, a face mask, chocolate, a scrunchie or a gift card. Fill them with as much or as little as the budget allows, since even just chocolate looks adorable. A striped ribbon tied around both slippers makes it look boutique wrapped, no box needed.
Get the full tutorial at Pretty Providence.
11. Photo Resin Coaster
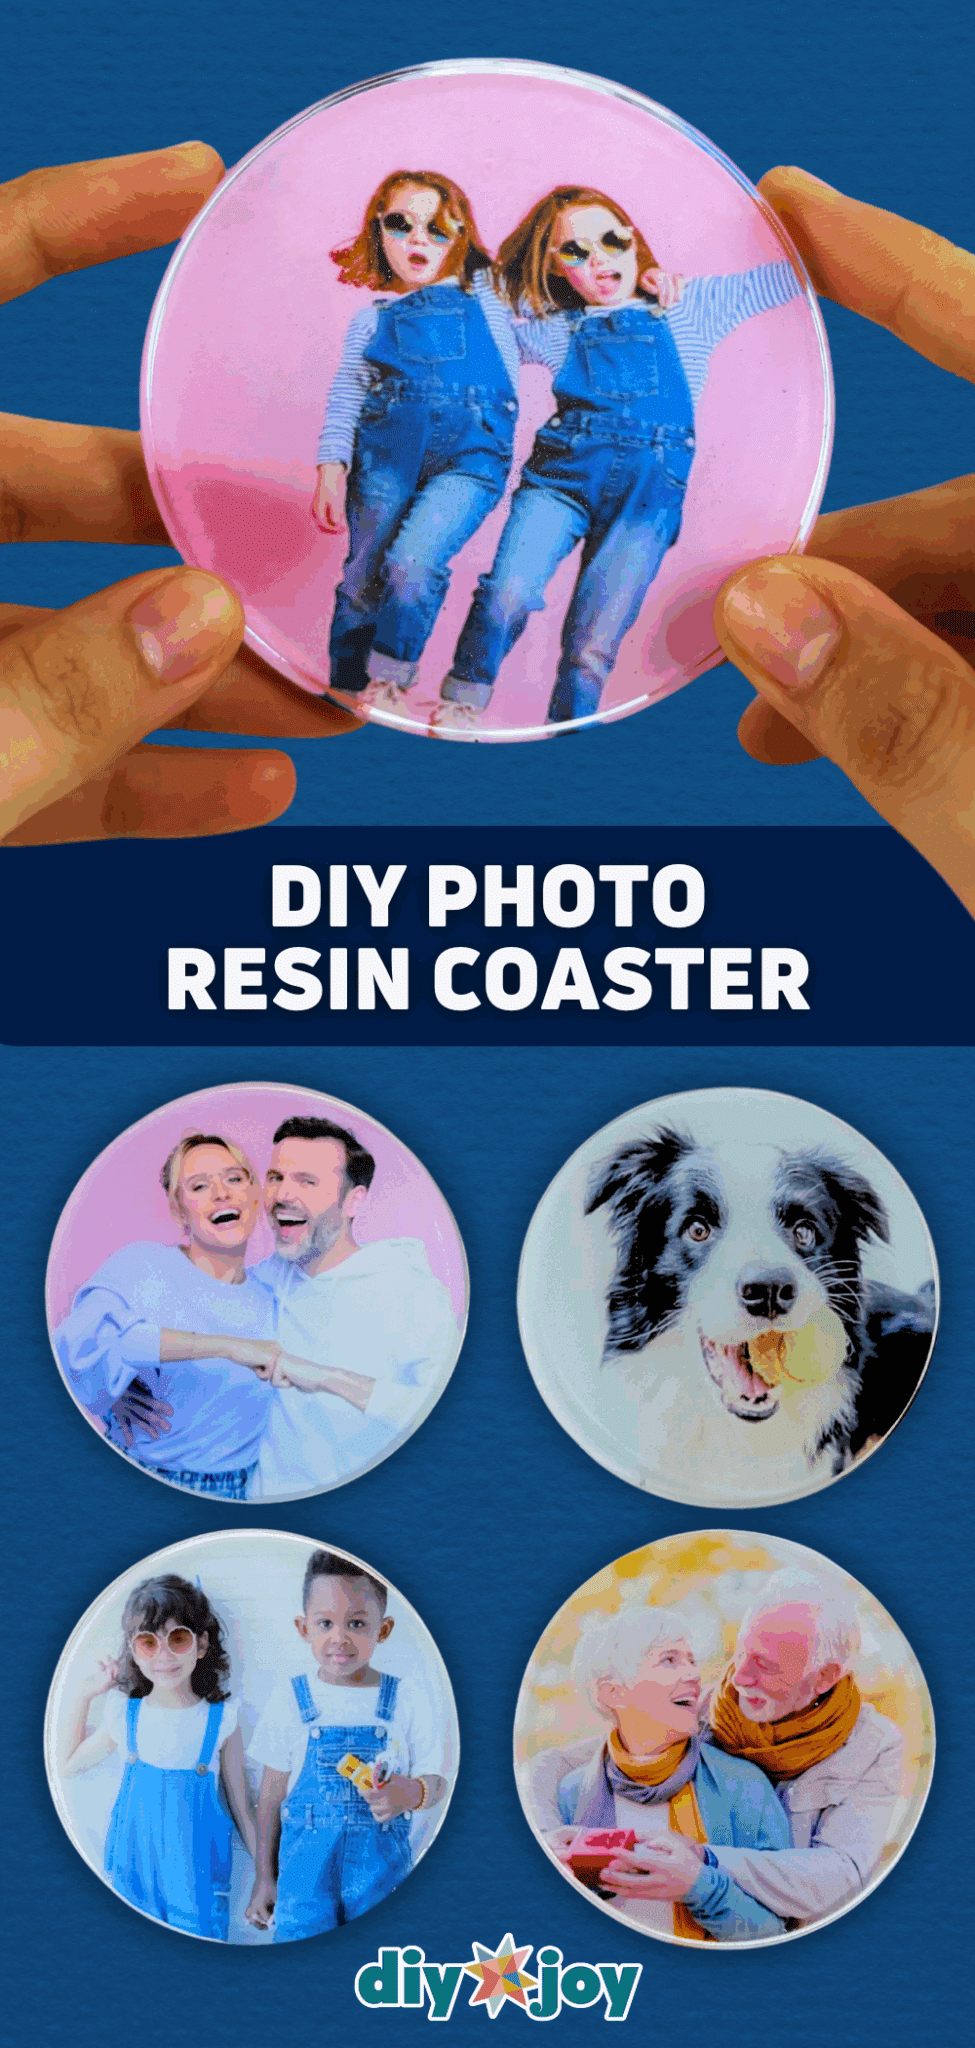
Her favorite photo, sealed under crystal clear resin and ready for her morning coffee. Mix about 36 grams of epoxy resin with 12 grams of hardener (a 3 to 1 ratio) and stir slowly for 5 to 10 minutes, because rushing it makes bubbles. Pour a thin layer into a round silicone mold, trace and cut the photo using a round object as a guide, set it in, then fill the mold. After 24 hours it pops out glossy and done. Wear nitrile gloves. Grandkids, pets and wedding shots all look great.
Get the full tutorial at DIY JOY.
12. Mini Succulent Garden

A tiny garden in a bowl for the mom who loves plants. Pick a handful of mini succulents in different shapes and colors, find a bowl with personality (the original is a 99 cent thrift store pedestal bowl), then plan the arrangement before anything goes in. Add a layer of rocks to the bottom, then plant each succulent one at a time, packing cactus soil in tightly around them. Mix the odd ones in with the classics, because the weird little guys are the most fun. Keep it in bright sun and water sparingly.
Get the full tutorial at Homey Oh My.
13. DIY Painted Cork Coasters

Plain cork coasters plus painter’s tape equals a set that looks custom made. Tape off stripes, triangles or waves, wrapping the tape around the edges and pressing it down hard, since cork is porous and paint loves to creep. Add at least two coats of acrylic, spray with a water-resistant sealer while the tape is still on, then peel. The bare cork strips soak up drips from a sweaty glass. Glue felt to the bottoms and wait 2 to 3 weeks before hot mugs go on top. The original set of 4 cost under $4.
Get the full tutorial at The Thinking Closet.
14. Polka Dot Fold Over Clutch

Gold polka dots and a leather band make this clutch look like a boutique splurge. The dots are stenciled onto cream fabric with metallic gold acrylic mixed with fabric painting medium, rolled on lightly with a foam roller so it doesn’t bleed, then heat set with a dry iron. A 3 by 13 inch strip of lightweight leather is stitched on with a leather needle, the corners are rounded using a CD as a guide, and the zipper goes in like a basic zip pouch. If she’s a little bit fancy, this is her gift.
Get the full tutorial at Polka Dot Chair.
15. DIY Planked Picture Frame

A chunky, shabby chic frame that looks expensive and costs a few dollars of lumber. Three 1 by 4 boards are cut to 14 inches and joined across the back with two 1/2 by 1 inch strips and a little liquid nails. Paint or stain the wood (a distressed whitewash looks great), then cut her favorite family photo into three strips to match the planks. Mod Podge each piece down and cover the whole front in a thick coat that dries clear. Mark the cuts carefully so nobody loses half a face.
Get the full tutorial at The Pinning Mama.
16. Personalized Sharpie Mug
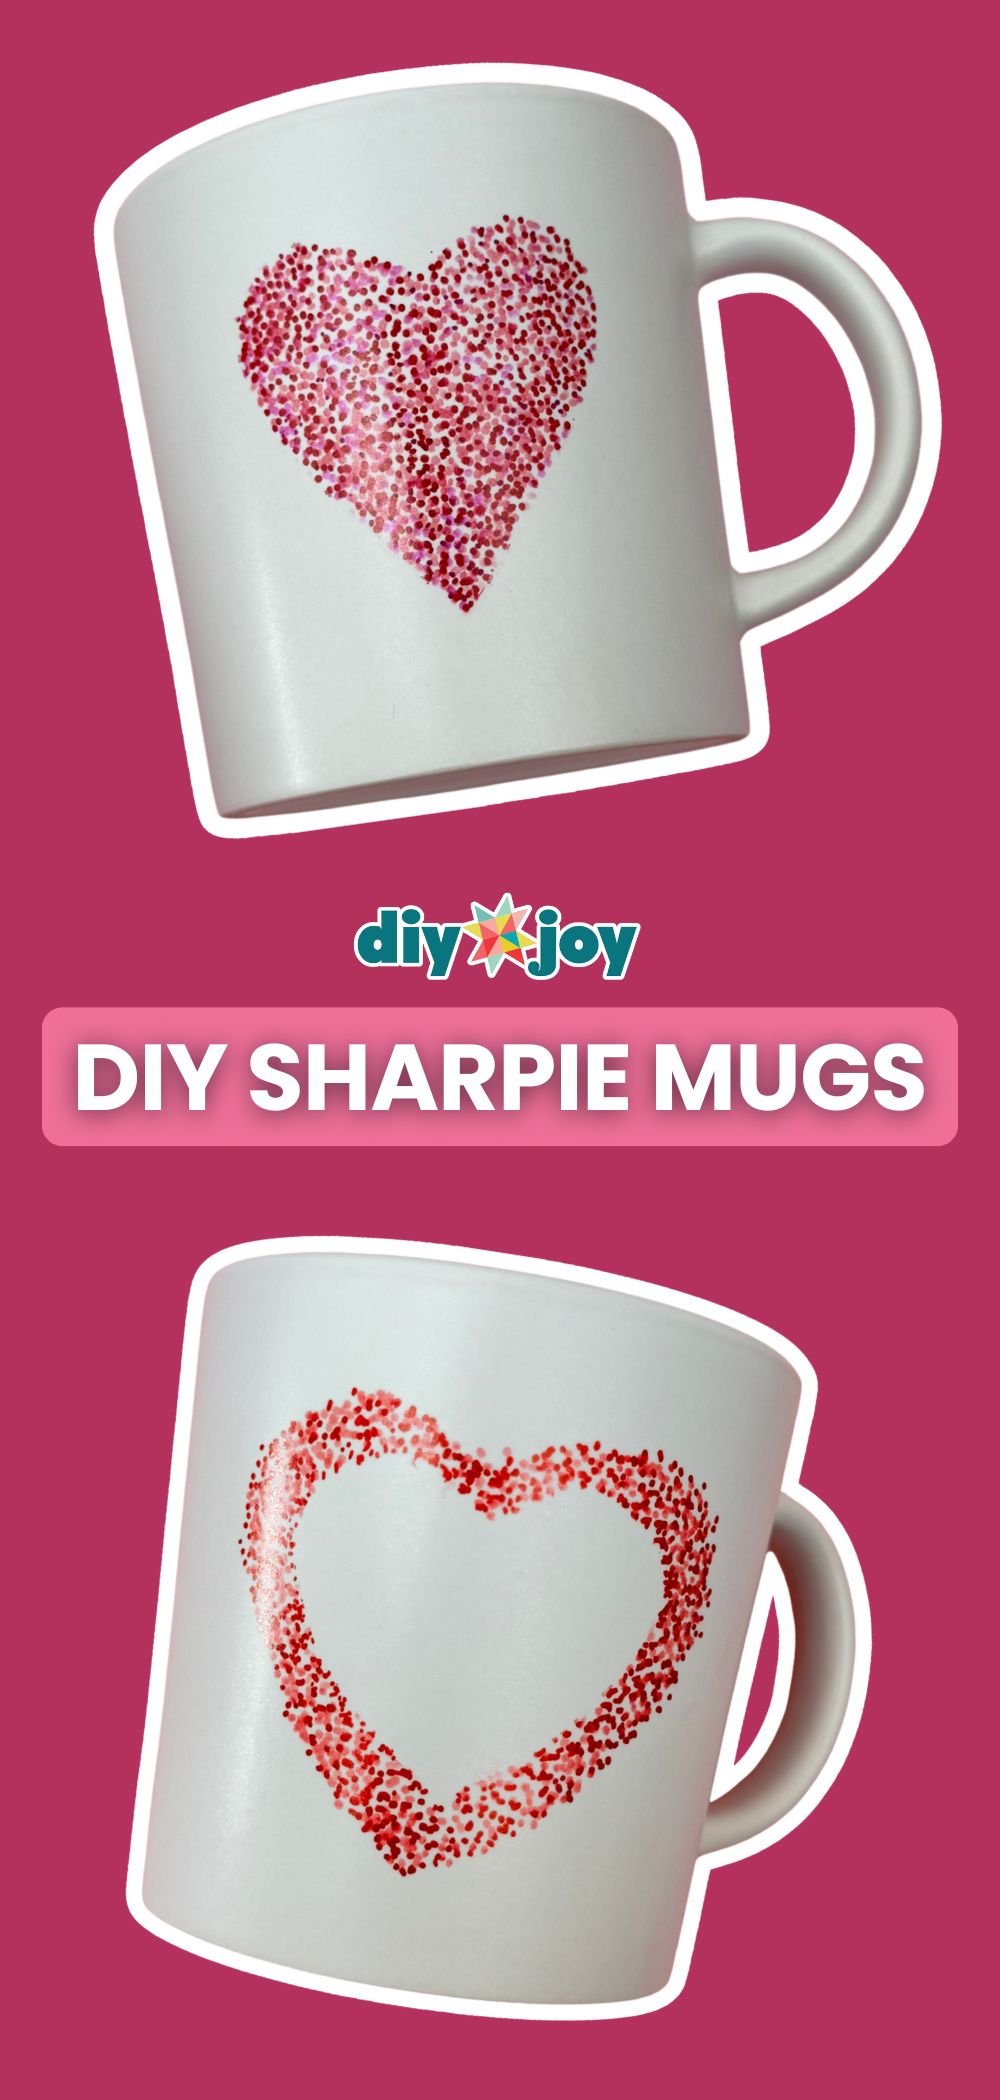
A heart made entirely of tiny dots, finished in a few minutes. Cut a paper heart, coat the back with a Zig 2 Way glue pen and wait for the glue to turn white so it becomes repositionable, like a sticky note. Stick it to the center of a white mug, dot red and pink Sharpie all around it, then peel the heart away. Want it to survive the dishwasher? Use an oil-based Sharpie paint marker, let it sit 24 hours and bake it upside down starting from a cold oven.
Get the full tutorial at DIY JOY.
17. Photo Frame Magnets

These tiny gold frames look antique, and they’re made of hot glue. Print photos about 0.85 by 1 inch, cover each with crystal clear hot glue and press a chilled, dry wax seal stamp into it for 10 to 15 seconds. Lift the stamp, trim the excess glue, then paint the frame metallic gold and add a small magnet. Chilling the stamp on an ice pack keeps the glue from sticking, and a 15W glue gun helps avoid bubbles. Make a whole set and her fridge becomes a mini family gallery.
Get the full tutorial at DIY JOY.
18. Macrame Bracelet

One knot, repeated, and that’s the whole skill. Cut two cords about 4.9 feet each, fold them in half, tie the ends and tape them to the table (a clipboard holds them even better). Tie square knots, alternating the working thread from side to side so the little rose pattern forms. Keep going until it wraps around her wrist, then braid the tails together and knot the end. Pink and purple cords make the roses pop. No hooks or special tools, just an evening and something good on TV.
Get the full tutorial at DIY JOY.
19. Crochet Washcloths

Pretty washcloths in the lacy blossom stitch, about 8 1/2 inches square. Chain 30, then repeat two simple rows of single and double crochet until it’s square, and finish with a single crochet border that has 3 stitches in each corner. Any worsted weight cotton yarn works, and half a 2.5 oz ball makes one cloth. Add or subtract chains in multiples of 4 to change the size. Pair a few with a nice soap or lotion, or tuck them into a basket for a spa night gift.
Get the full tutorial at Craftaholics Anonymous.
20. DIY Wood Bathroom Caddy

Her bathroom counter, finally organized. This wooden caddy has four slots for mason jars of cotton balls and swabs, toothbrushes and everyday lotions. It’s stained in Minwax Special Walnut, then two 1/4 inch holes drilled at each end take a sisal rope handle knotted on the inside. BATH is stenciled across the front in white acrylic paint, and a coat of polyurethane seals it. The box itself follows a woodworking plan linked from the post. Fill the slots with her favorite toiletries before you wrap it.
Get the full tutorial at Making Home Base.
21. Easy Flower Bouquet

Grocery store flowers, upgraded into a paper cone bag she can carry like a purse. Glue two 11 inch squares of wrapping paper together, roll them into a cone and glue it closed. Punch holes for a bead chain handle, thread ribbon through two more holes on the front and tie a bow (dab glue on the ends to stop fraying). Trim the tip to fit the stems and tuck the flowers in. Gingham paper and pink carnations look so sweet. Want them to last? Swap in paper or pipe cleaner flowers.
Get the full tutorial at DIY JOY.
22. Air-Dry Clay Decoupage Jewelry Dish
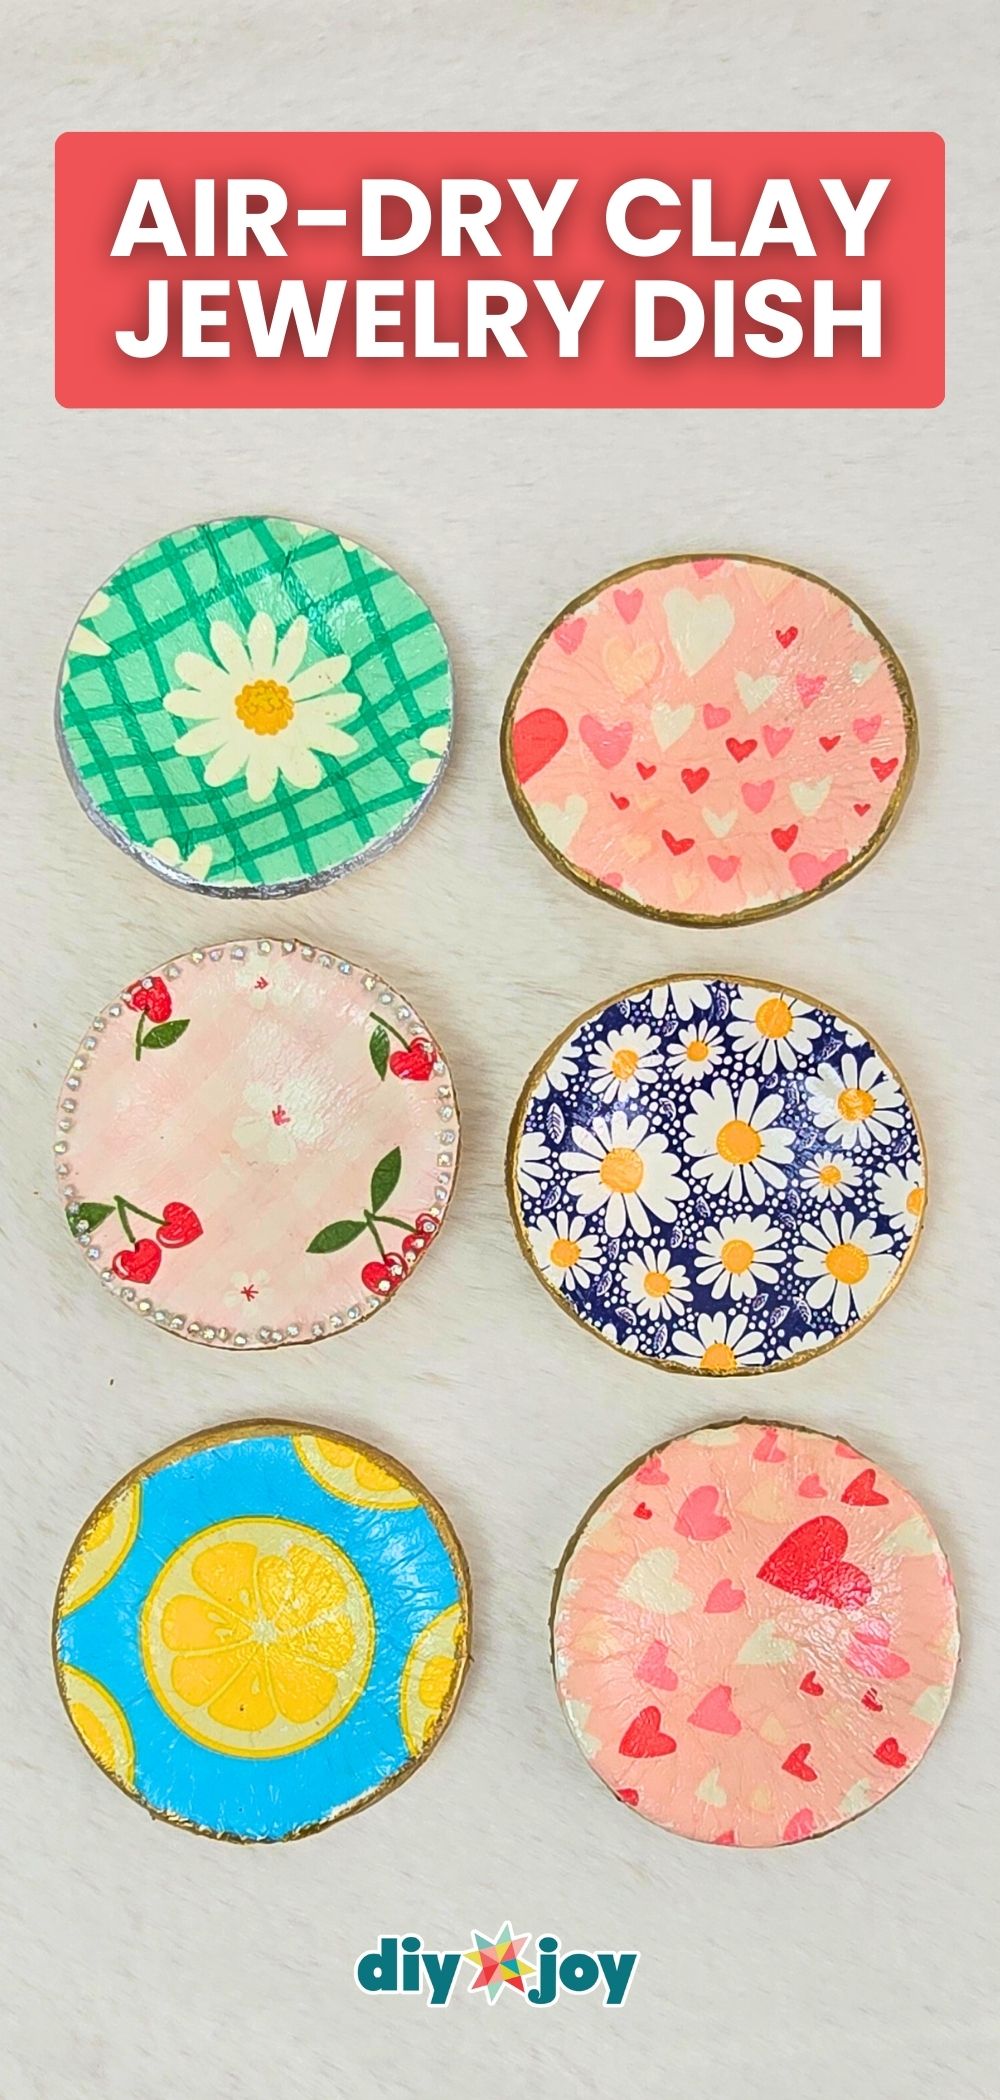
Napkin prints pressed right into the clay, so the pattern looks painted on. Roll out air-dry clay, peel the backing from a printed paper napkin and lay it on top, then cut circles with a cookie cutter or a jar lid. Brush on Mod Podge and press each one into a muffin pan so the edges cup, then let it dry overnight. Paint the rims gold and finish with gloss varnish. Daisies, cherries, hearts and lemons all look darling. Crimp the edges before they dry for a ruffled version.
Get the full tutorial at DIY JOY.
23. DIY Coffee Body Scrub

Coffee lovers, meet the scrub that smells like a fresh pot. Add fine sugar, coffee grounds, coconut oil, castile soap and a splash of vanilla extract to a jar, then mix until everything is evenly combined from top to bottom. Wipe the rim and screw on the lid. Out of vanilla? Coffee extract swaps right in. More sugar makes it coarser for elbows and heels. An old jam jar works perfectly once the label is off, and a twine bow makes it look spa shelf ready.
Get the full tutorial at DIY JOY.
24. Resin Coaster with Dried Flowers
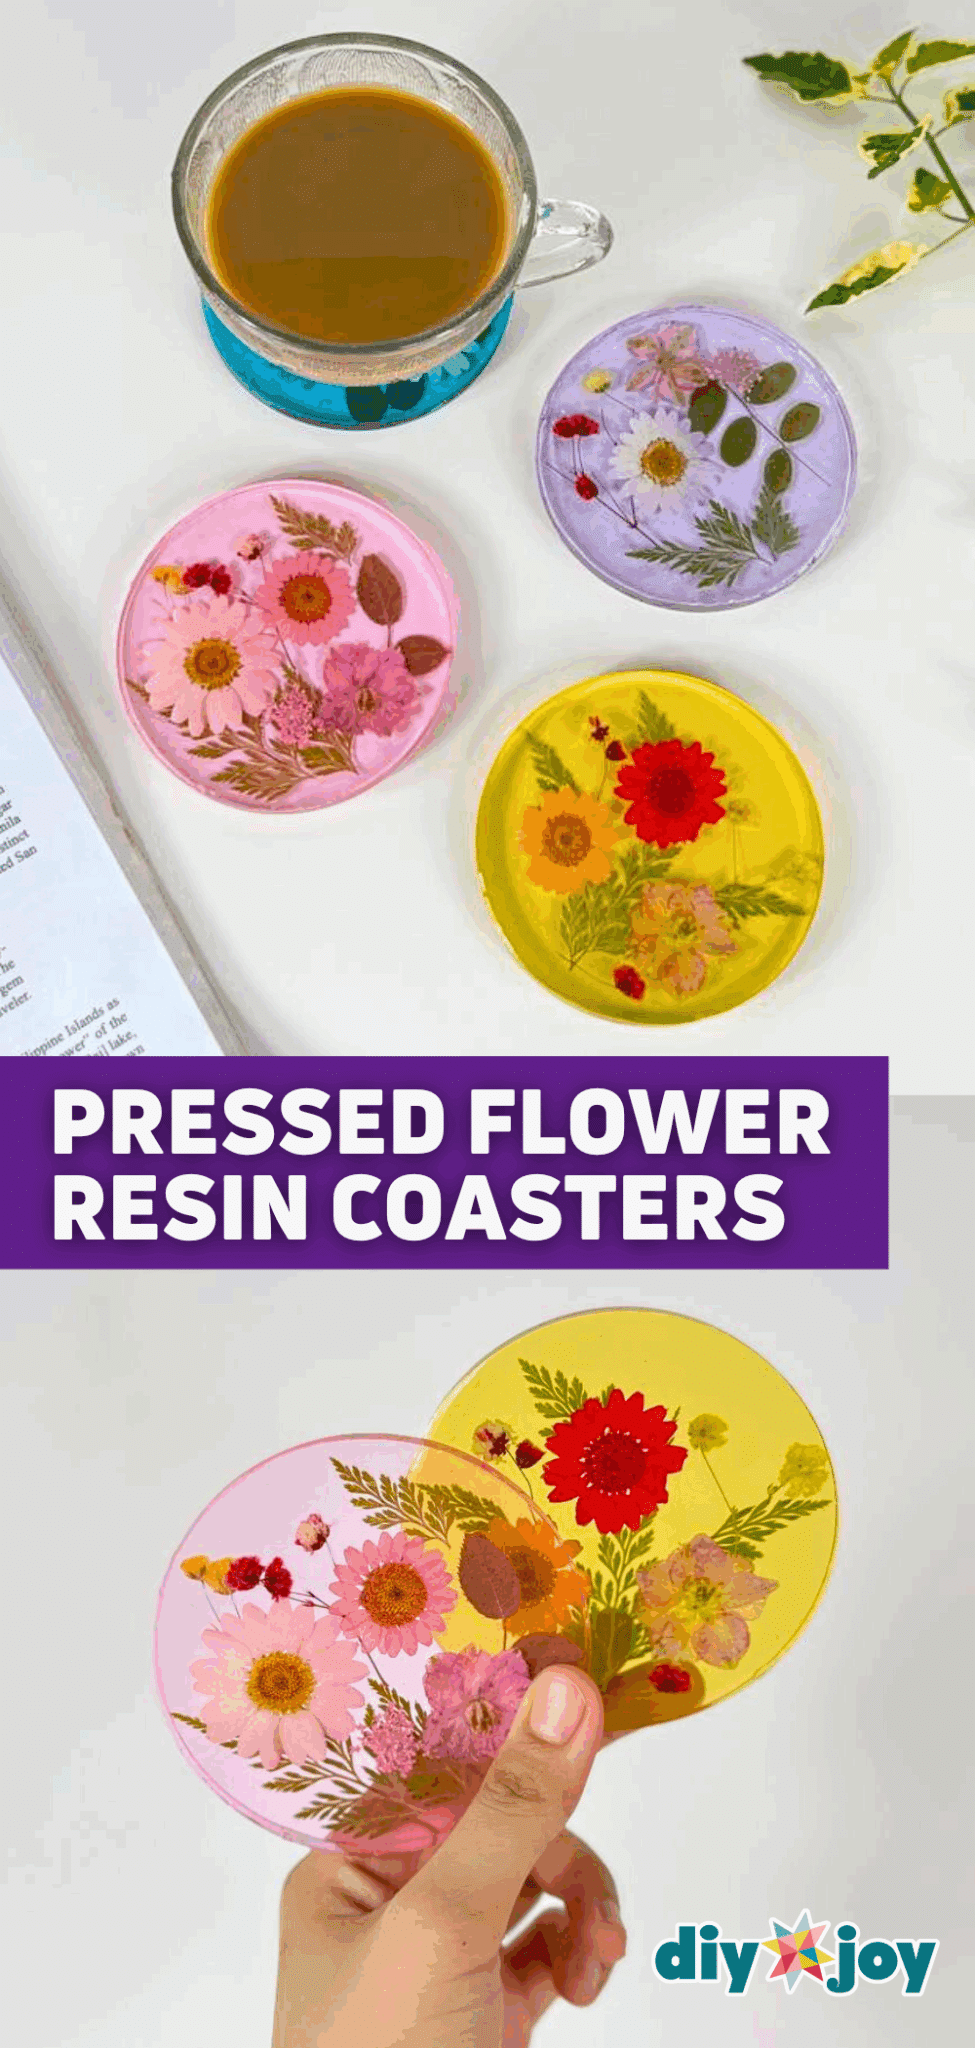
Real flowers, preserved forever and sitting right under her teacup. Mix about 36 grams of epoxy resin with 12 grams of hardener, stir slowly for 5 to 10 minutes, then tint it with 2 to 3 drops of pigment. Pour half into a clean mold, arrange pressed flowers with tweezers and add the rest on top. A quick pass with a lighter pops the bubbles. After it sets overnight, a thin coat of UV resin on the front makes it extra glossy. Use blooms from her own garden and it’s a keepsake twice over.
Get the full tutorial at DIY JOY.
25. Mason Jar Fairy Lights With Pressed Flowers
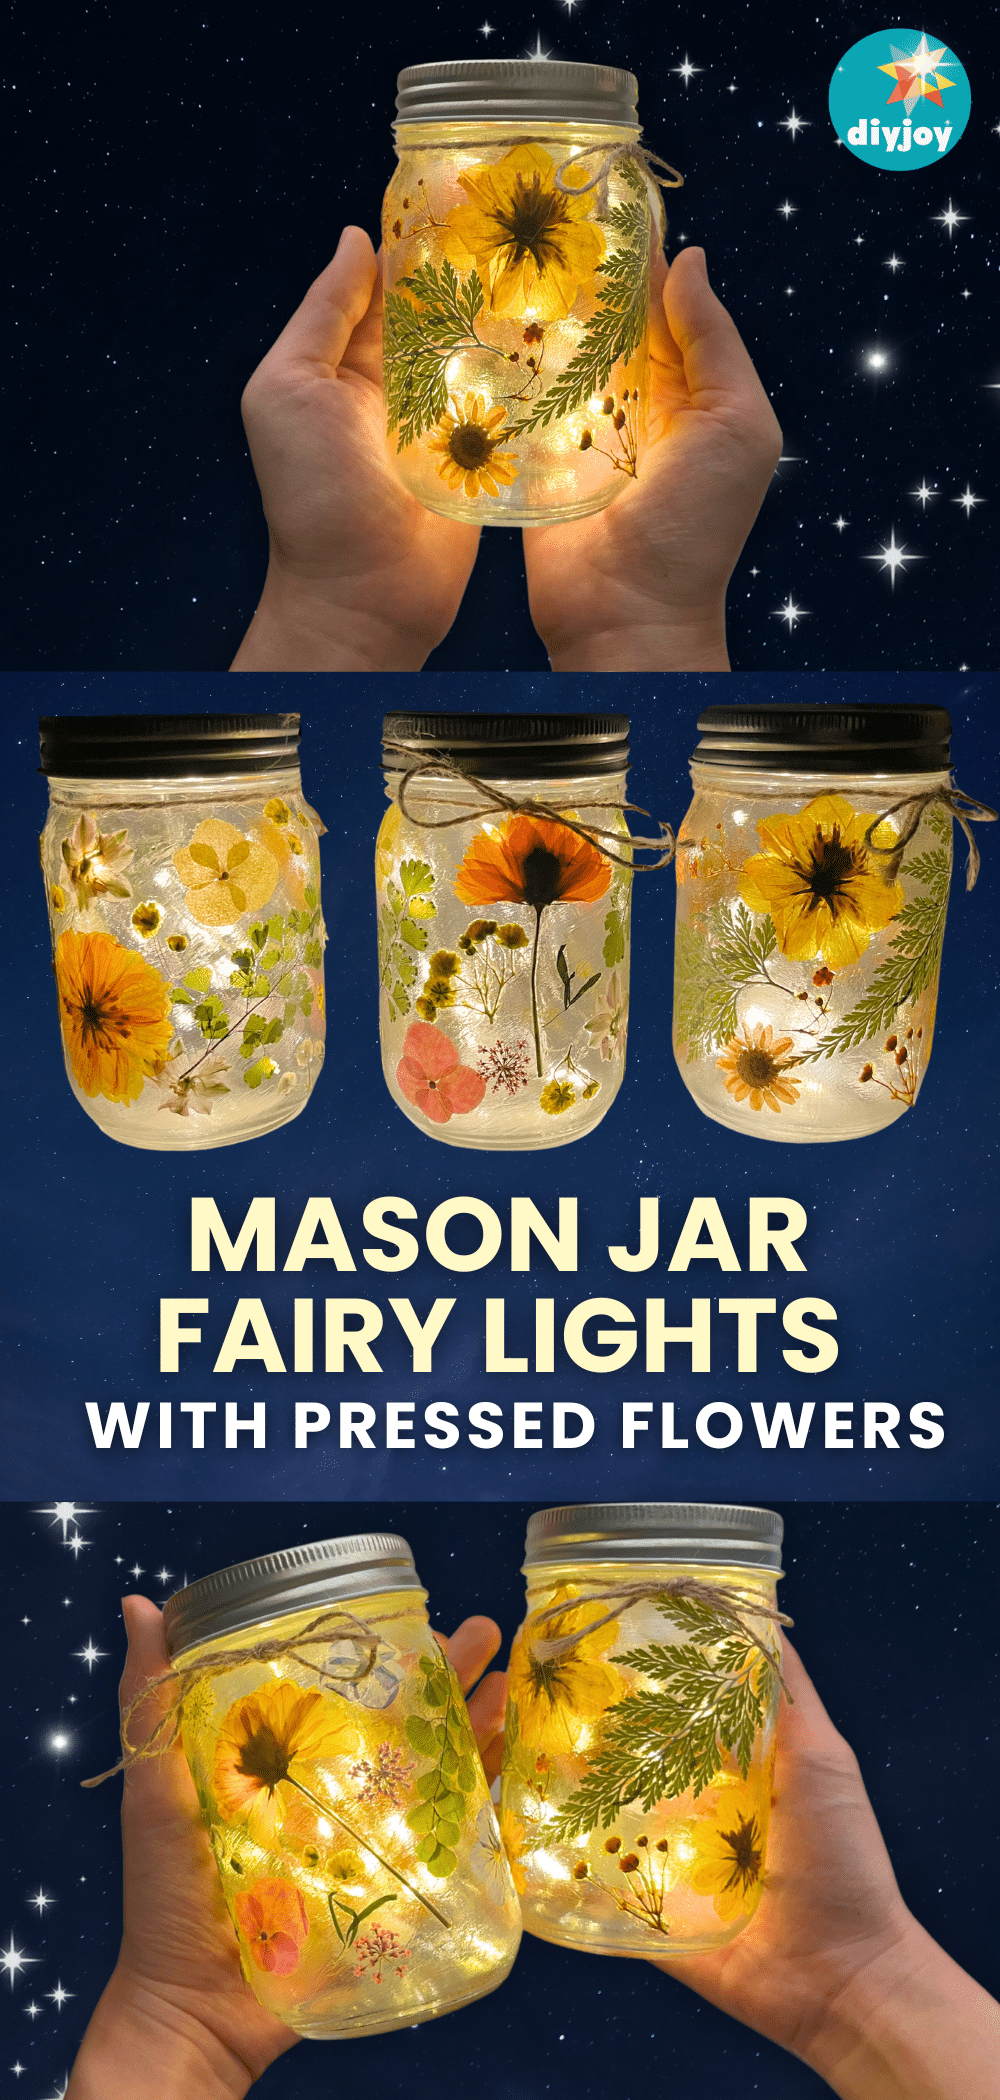
A mason jar, a handful of pressed flowers and a string of fairy lights. Switch it on and it glows like something out of a storybook. Clean and dry the jar, plan the layout, then brush on a thin coat of Mod Podge, press each flower down and brush more over the top. Work in sections so the glue doesn’t dry too soon. Thin flowers and leaves let the most light through. Seal with a second coat, drop in the lights, put on the lid and tie on a jute twine bow.
Get the full tutorial at DIY JOY.
26. DIY Decoupage Vase Using Napkin Paper
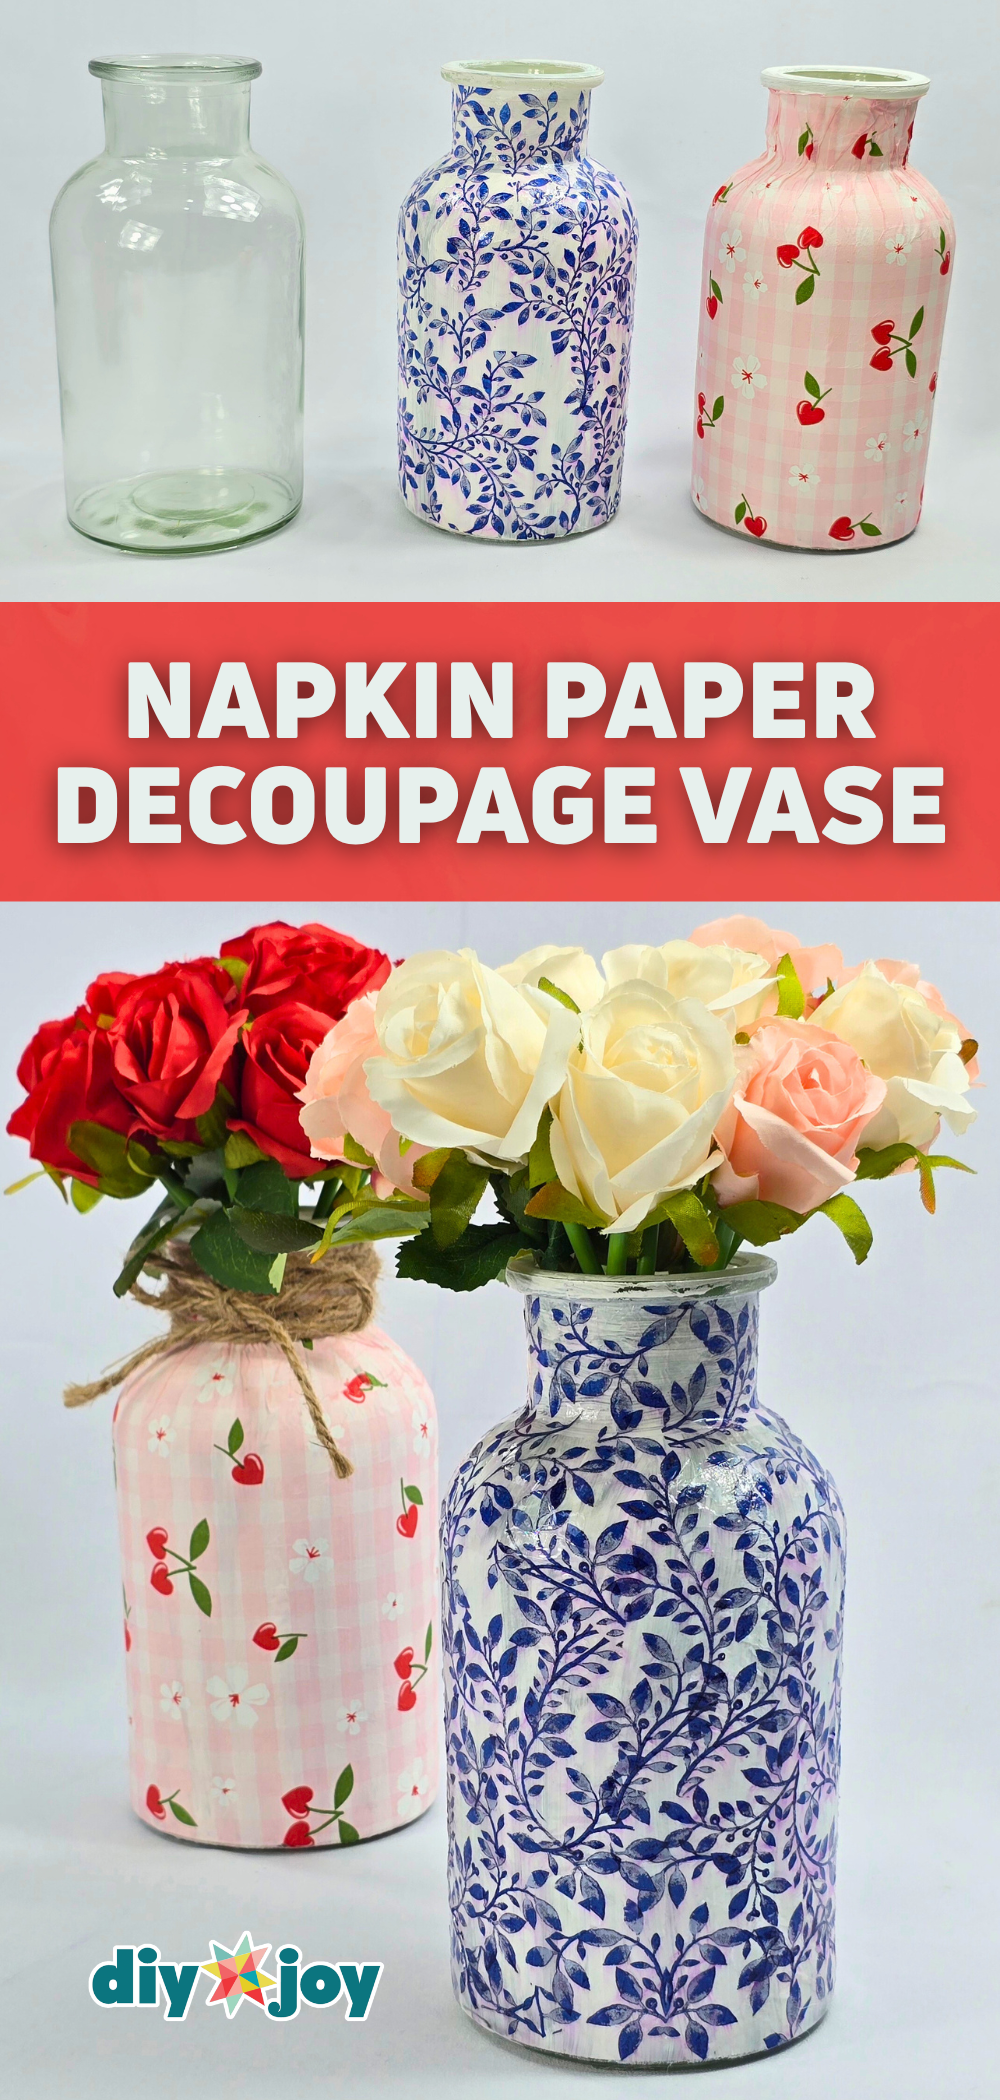
A plain glass jar becomes a vase that looks like blue and white china. Paint the outside white (two coats if needed), cut out napkin designs close to the pattern, peel off the backing and Mod Podge them on, brushing from the center outward so nothing wrinkles. Keep going until it’s covered. For extra shine, seal it with UV resin cured under a lamp, or use clear nail polish. Chinoiserie florals or cherry gingham both look great. Fill it with her favorite flowers and it’s a two-in-one gift.
Get the full tutorial at DIY JOY.
27. Paper Tulips With Chocolate

Flowers and chocolate in one, which is basically the perfect gift. Wrap a chocolate in crepe paper, tape it and hot glue a skewer into the bottom. Gather and stretch crepe paper pieces into six petals, glue three around the candy, then fill the gaps with the other three. Add stretched crepe paper leaves and bundle several stems with a few dried flowers for texture. Once the chocolates are gone, she still has a bouquet that never wilts. The measurements for each piece are in the tutorial.
Get the full tutorial at DIY JOY.
28. Clay Flower Mirror in 1 Hour
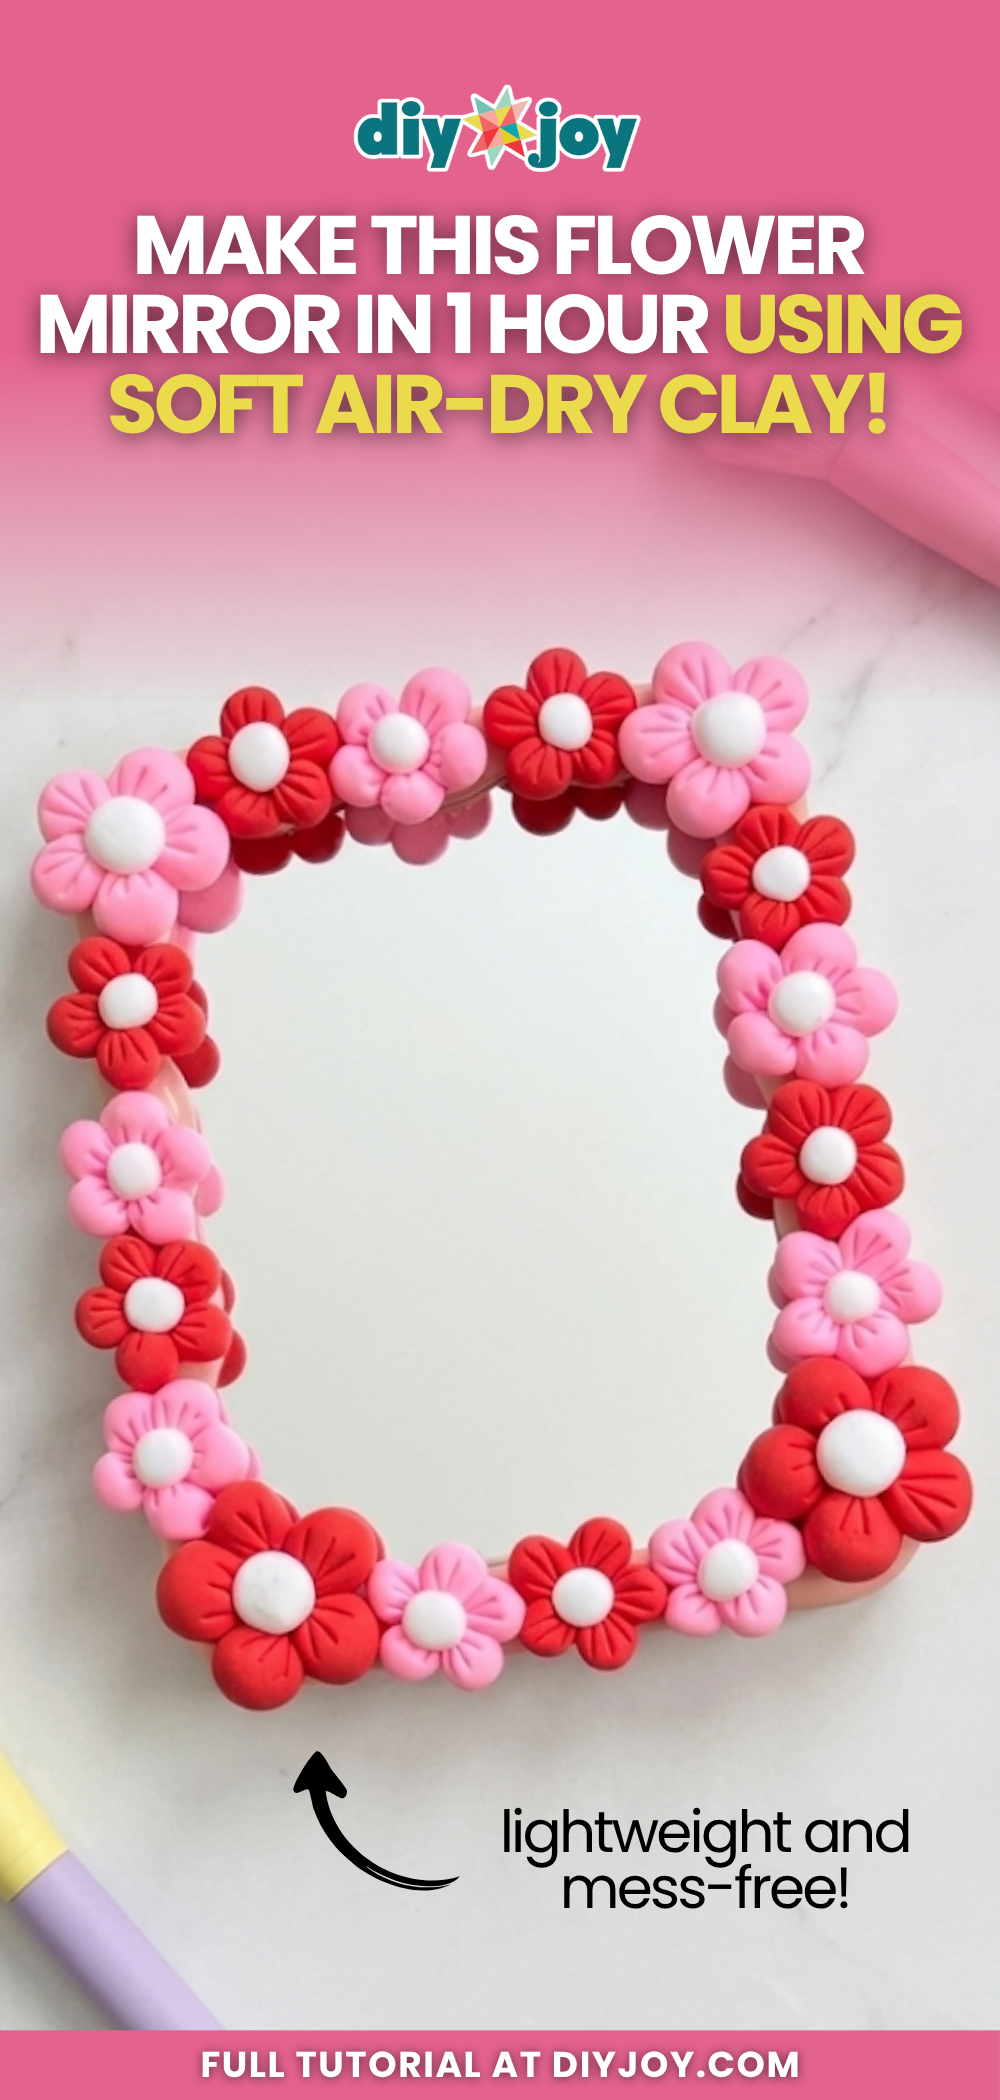
A plain dollar store mirror, transformed in about an hour. Roll soft clay into smooth balls, press three lines into the bottom of each with a sculpting tool, and set five together to form a flower with a little white ball in the center. Make a bunch in different colors and sizes. Once they firm up, arrange them around the frame and hot glue them down. Soft clay is lightweight and not sticky, so it’s a relaxing project. A coat of gloss varnish helps keep the petals from cracking.
Get the full tutorial at DIY JOY.
29. Easy DIY Woven Yarn Mug Cozy
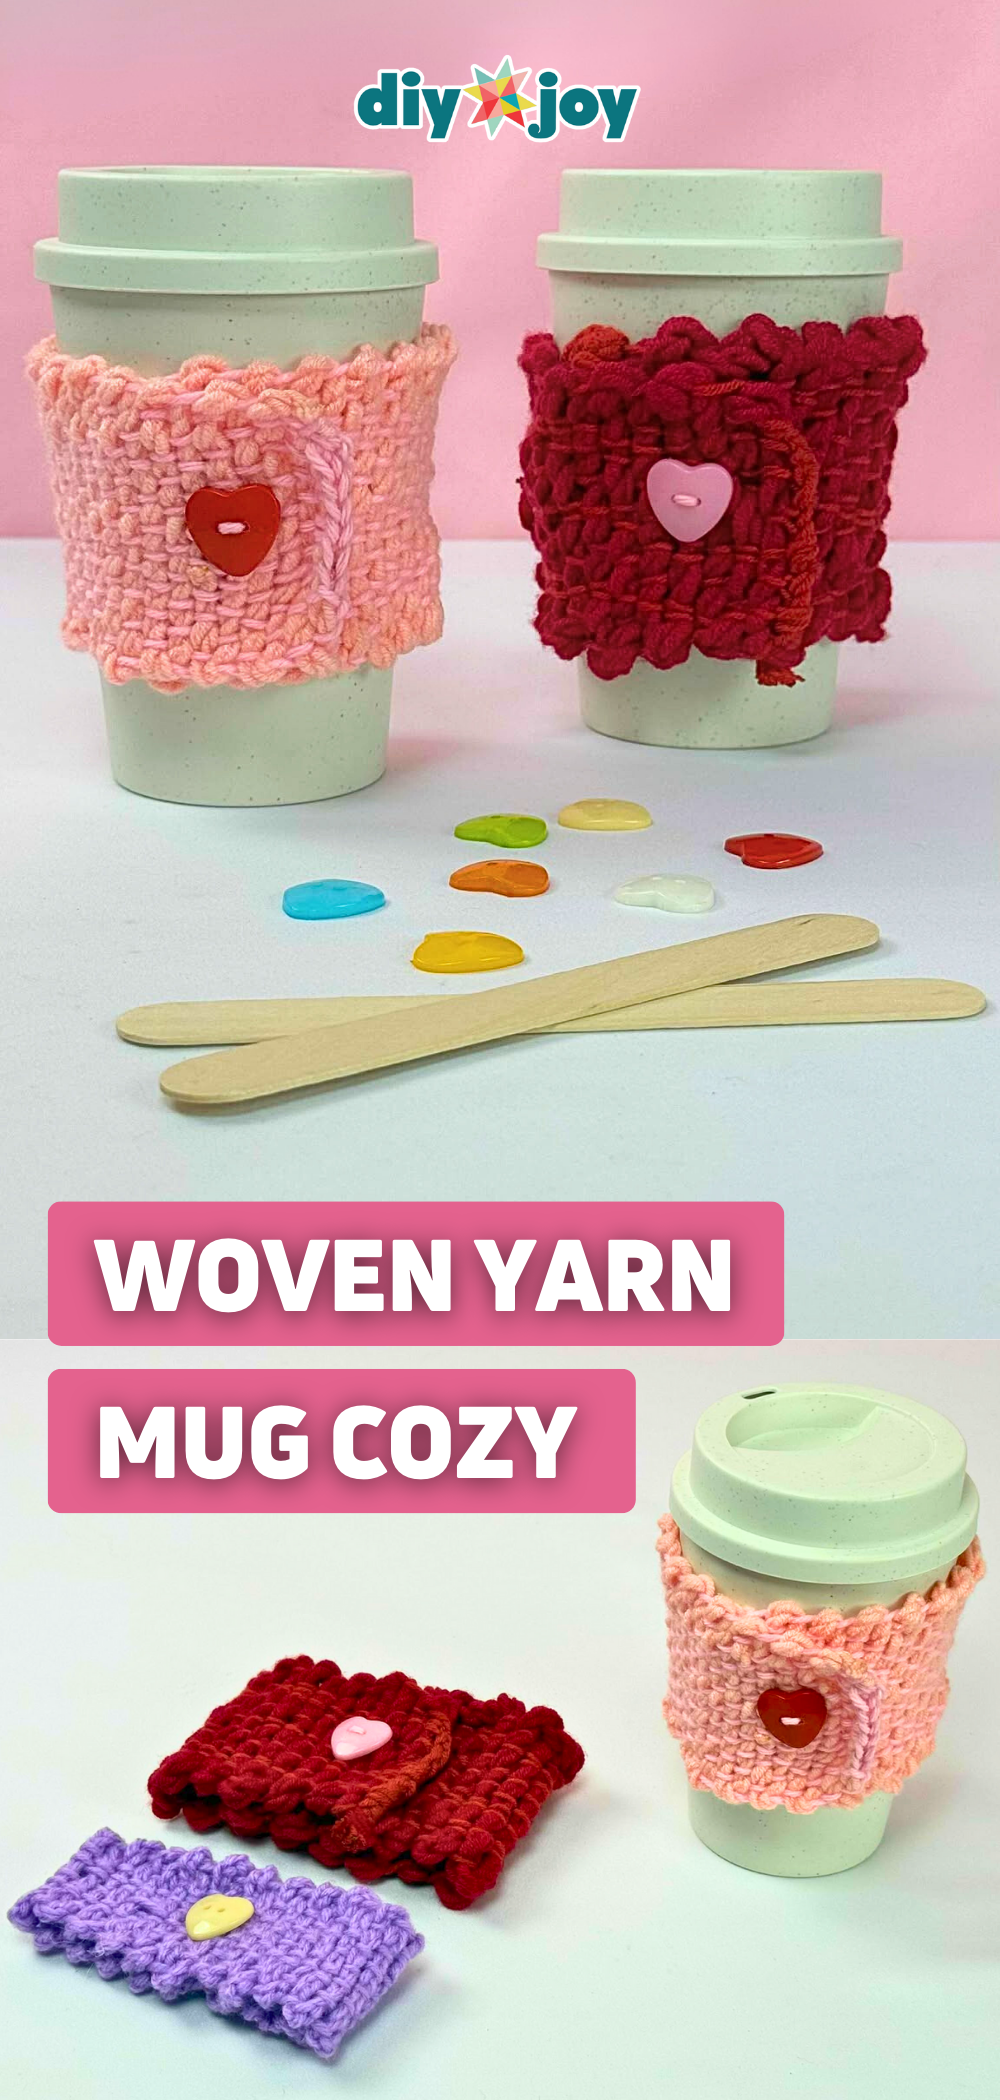
Basically crochet without the crochet. Cut cardboard to fit around her mug, notch the ends about 1 cm deep and 1 cm apart, and wrap yarn through the slits for the base strands. Thread more yarn through a slit in a popsicle stick and weave over and under until the cardboard is full. For a chunkier texture, twist the yarn on itself before weaving. A touch of crochet finishes the edge. The ones shown wear heart buttons, which makes them extra sweet, and they keep her coffee warm longer.
Get the full tutorial at DIY JOY.
30. Upcycled Ferrero Rocher Jewelry Box

That gold lined chocolate box is too pretty to toss, so it becomes her jewelry box. Peel the label off the lid with wide tape, arrange pressed flowers inside the lid and Mod Podge them in place, then wrap gold washi tape around the chocolate compartments. Each little cup is the right size for rings, earrings and small necklaces. Bonus: somebody has to eat the chocolates first, and that’s a sacrifice worth making. No Mod Podge? Mix equal parts white glue and water.
Get the full tutorial at DIY JOY.
31. Simple DIY Daisy Bead Rings
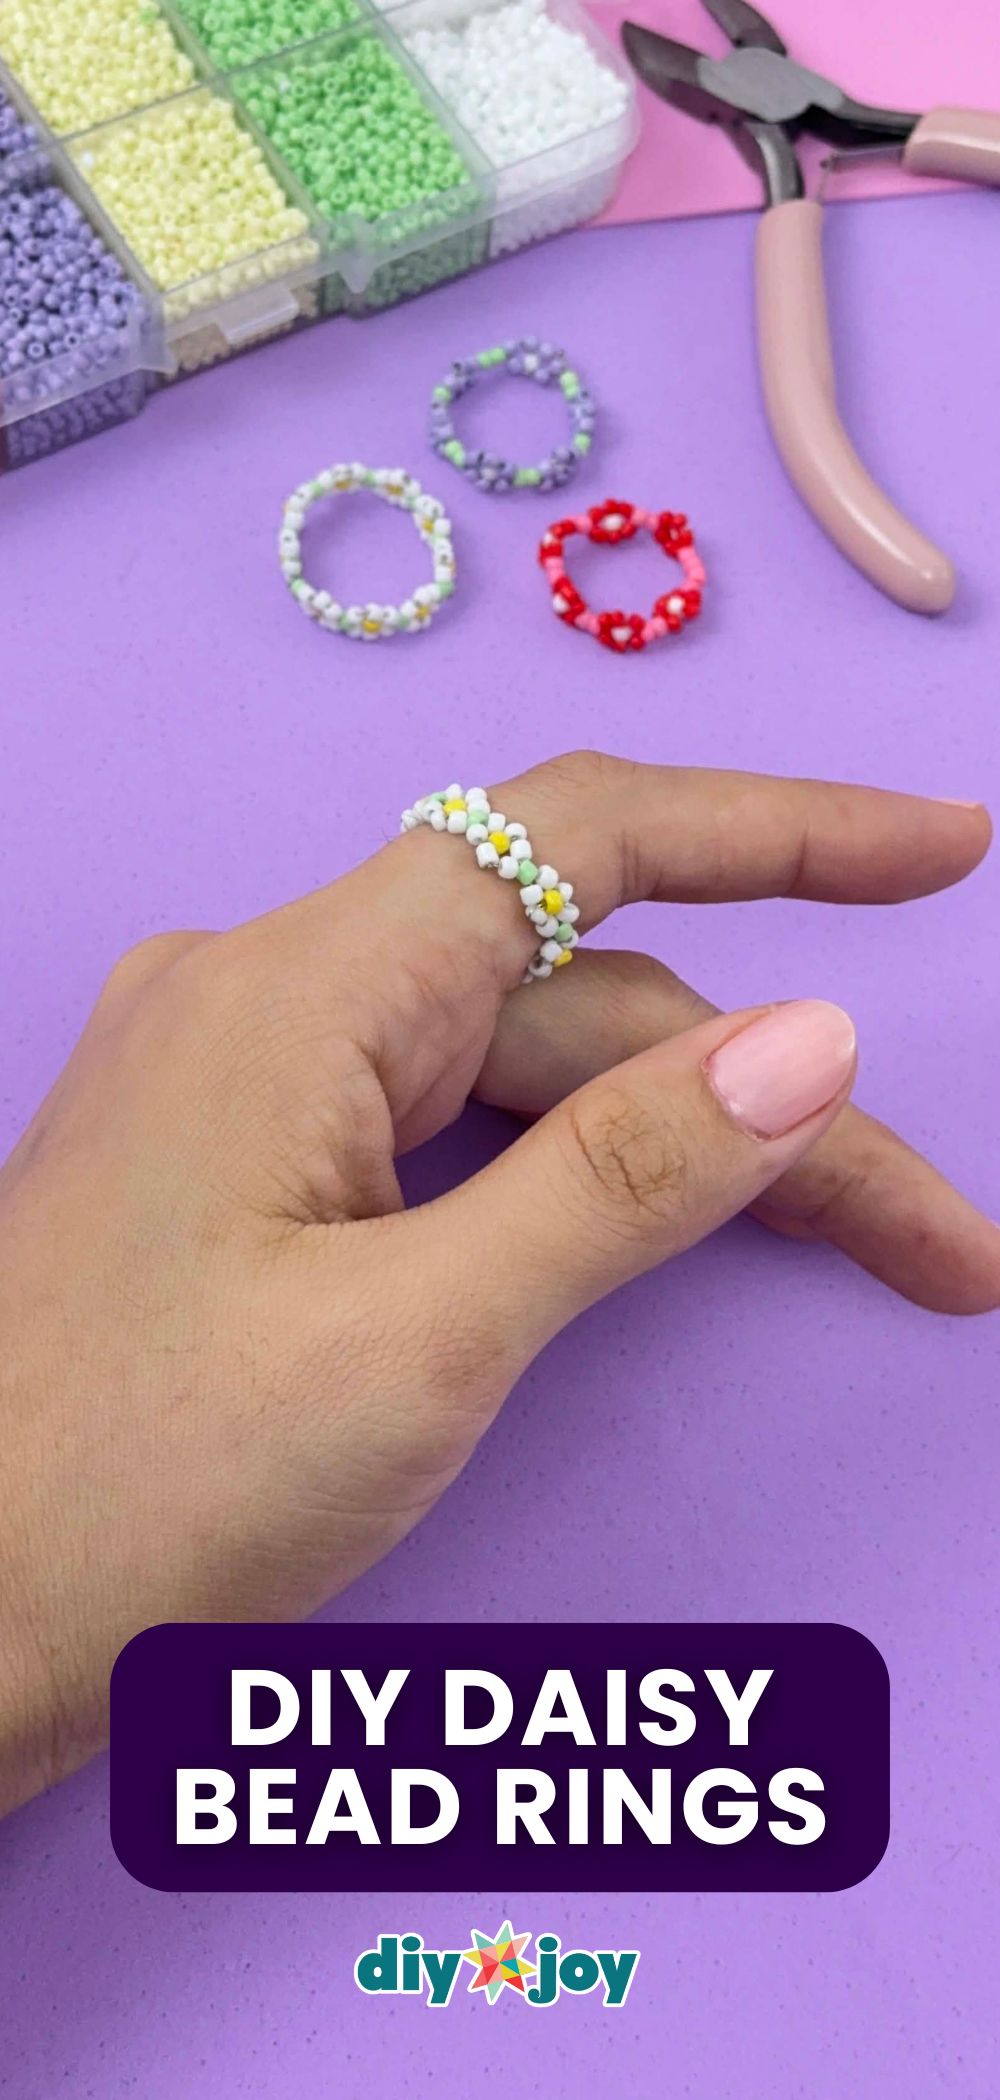
A stack of seed bead daisy rings is a sweet, wearable surprise. Fold jewelry wire in half, add two white beads to each tail and a yellow bead to one, then cross both ends through a seed bead to lock it. Thread back through the white beads so the yellow slides to the center, add a white bead to each tail and a green bead to finish the daisy. Repeat until it fits her finger, then lock it closed. It gets easier with every ring. If kids are helping, swap the wire for fishing line.
Get the full tutorial at DIY JOY.
32. Easy Air-Dry Clay Ring Holder
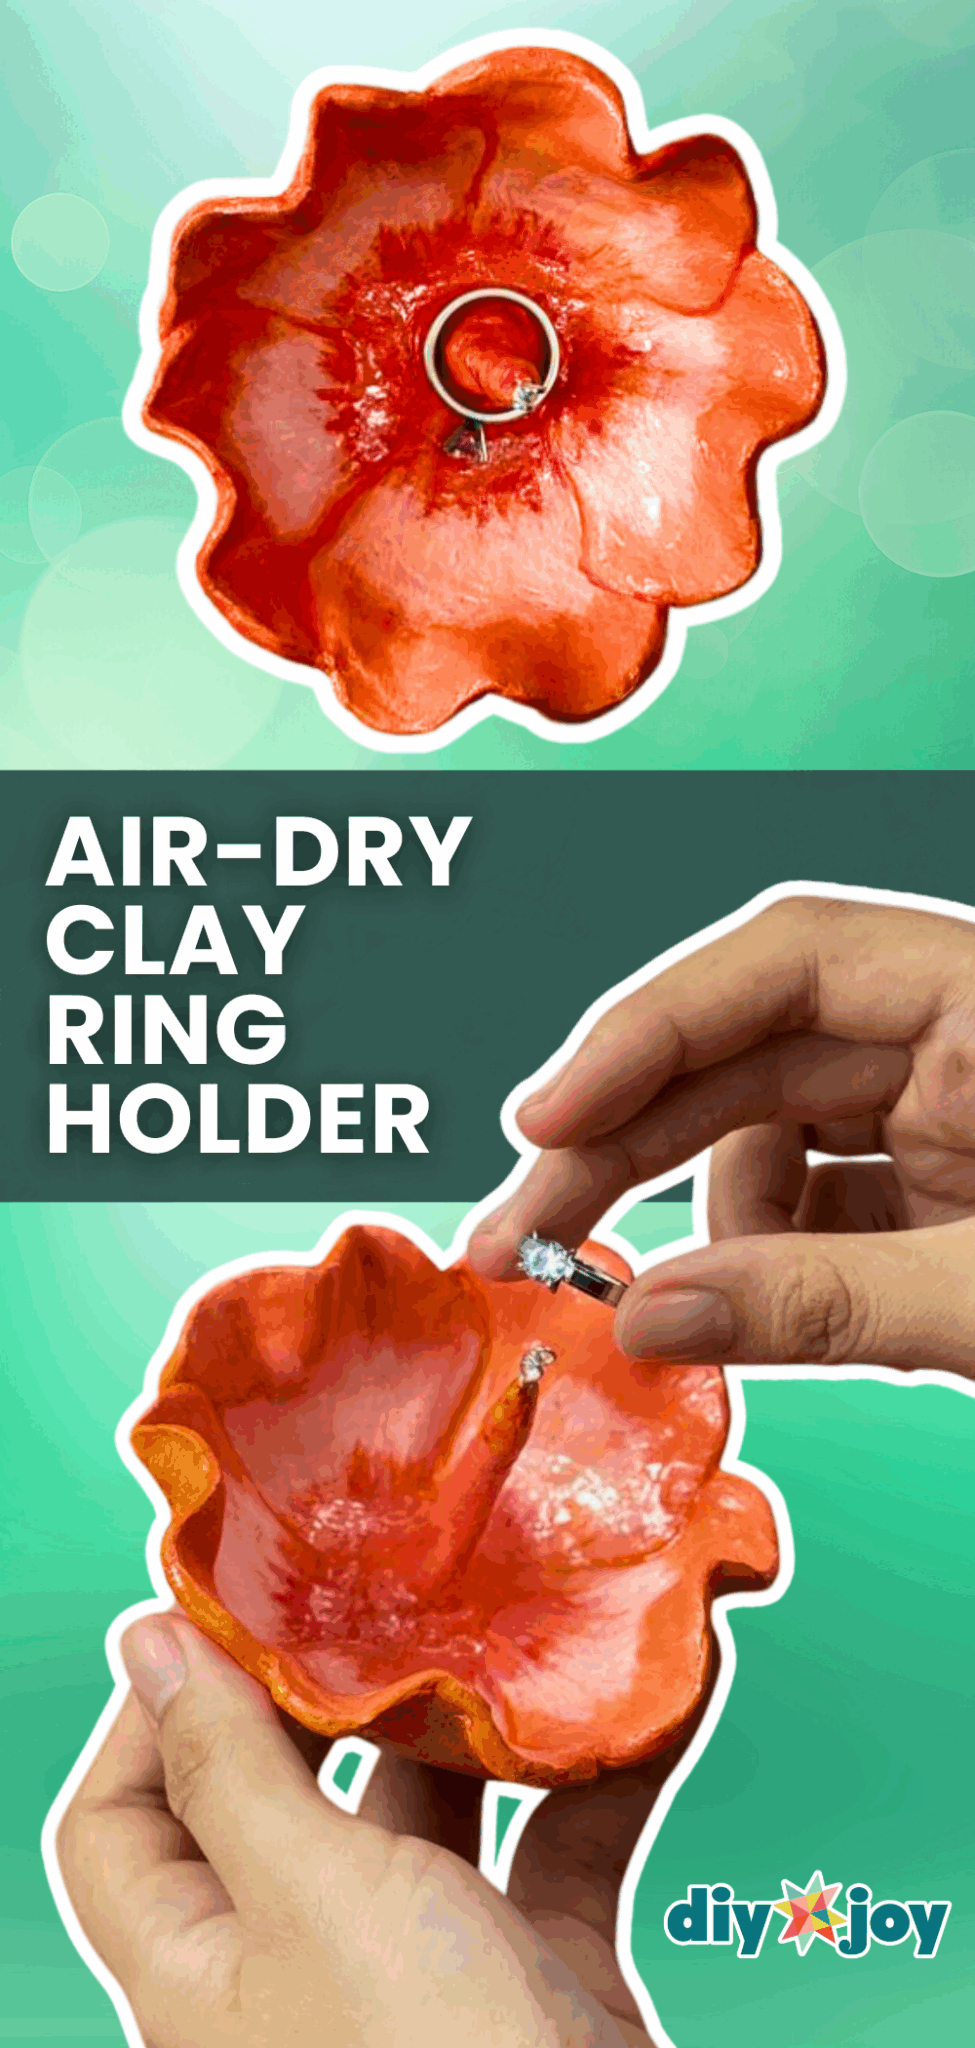
A clay flower that cups her rings, and no kiln or oven required. Roll out air-dry clay, cut it with a petal template, slit between the petals and overlap them, then set it in a bowl on a towel so it holds its cupped shape. Roll a skinny log of clay into a stamen with wire eyelets in the center and attach it with a wet brush. Prime it, paint it (shading from the outer edge inward looks great) and seal it with UV resin. Red and orange make it look like a poppy.
Get the full tutorial at DIY JOY.
33. DIY Air-Dry Clay Jewelry Organizer Using Pebbles
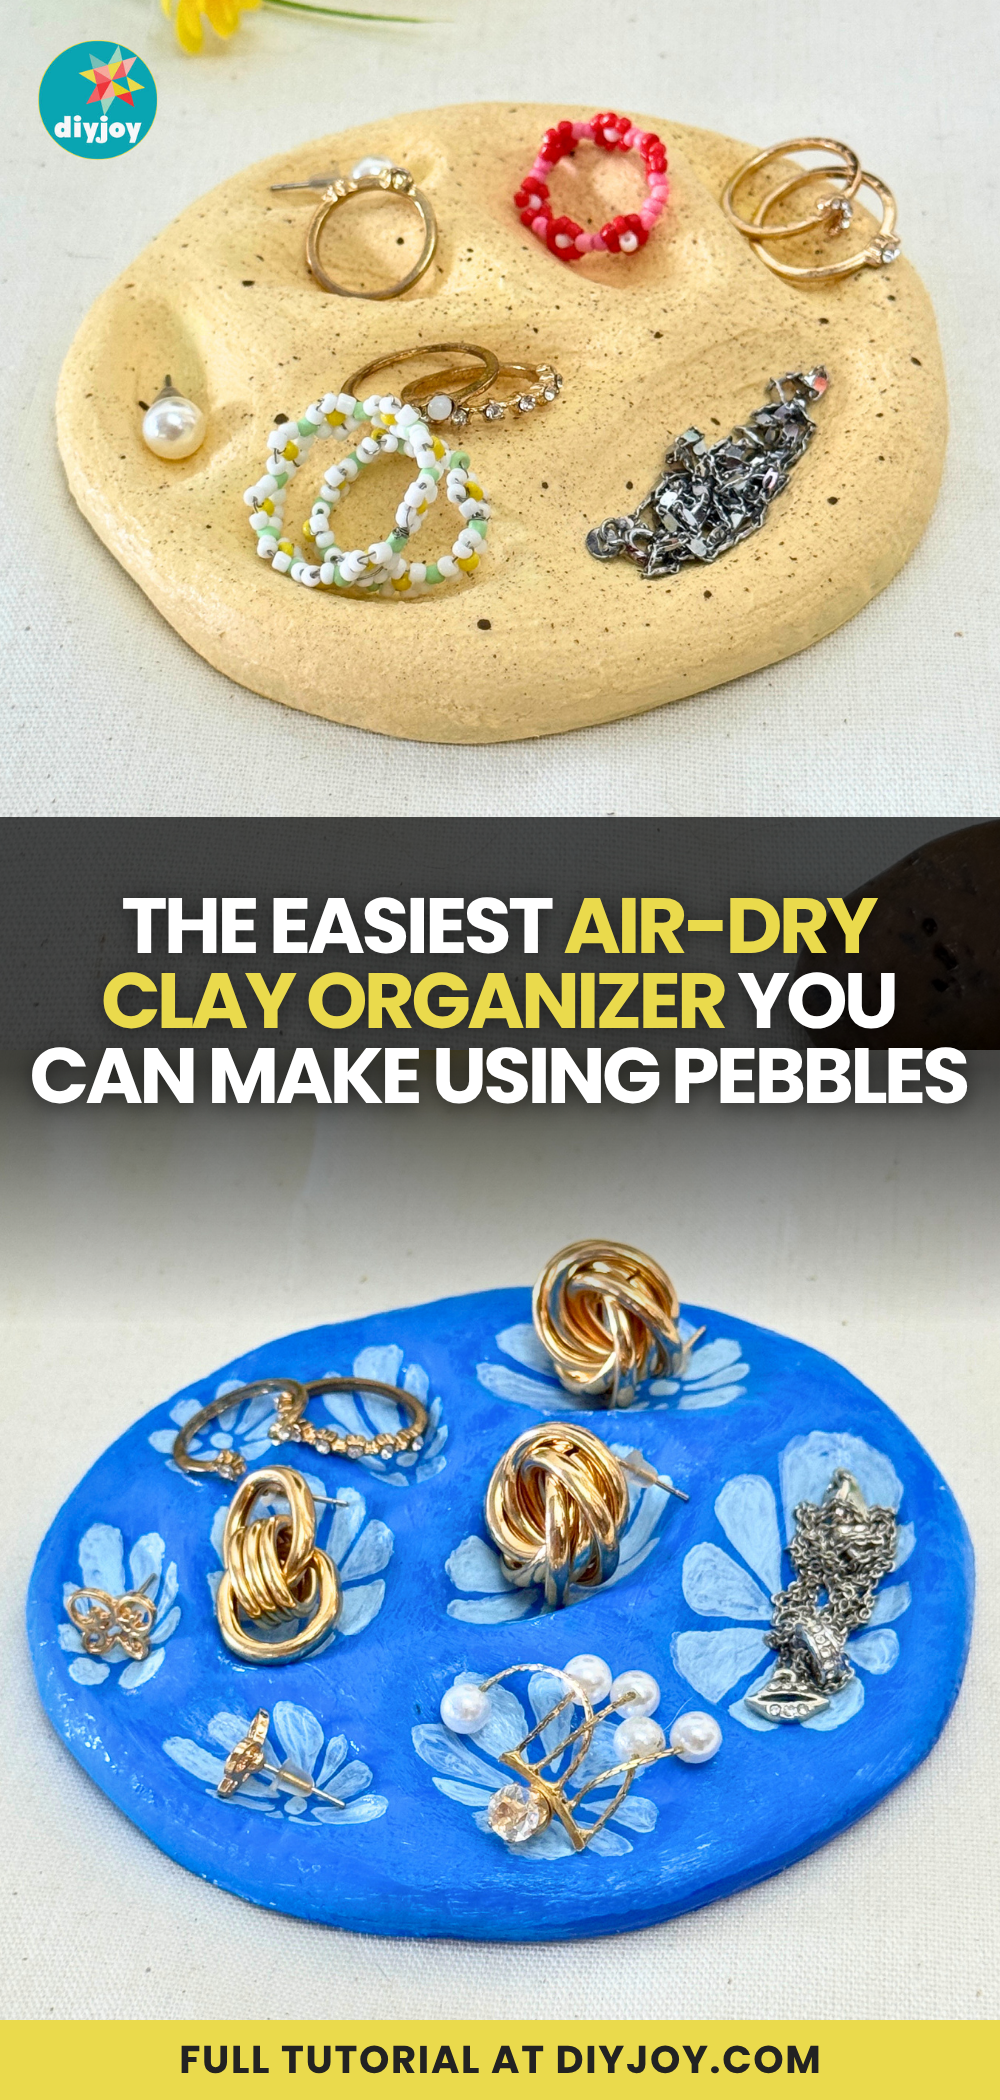
Pebbles press perfect little hollows into clay, just right for rings and earrings. Roll air-dry clay into a circle, press in pebbles one by one and lift them out gently (wet stones release more easily). Smooth the dents with damp fingers and let it dry, which can take anywhere from overnight to several days. Prime it, paint a base color (baking soda mixed into the paint gives a soft beachy texture), then paint flowers in the hollows and seal it with a gloss finish.
Get the full tutorial at DIY JOY.
34. DIY Book Flower Vase

An old book folds into a vase in a few minutes. Open it to the center, draw a line across the page, count 12 pages each way and slide cardboard behind them so the cutter stops where it should. Cut along the line, tear off the top, then tape the cut pages together three at a time with double-sided tape and fold them toward the middle. Dried lavender or paper flowers look lovely tucked inside. Grab a thrift store or clearance book, since the book lovers in the family may flinch.
Get the full tutorial at DIY JOY.
35. Aesthetic Paper Flower Bouquet With Paper Towels
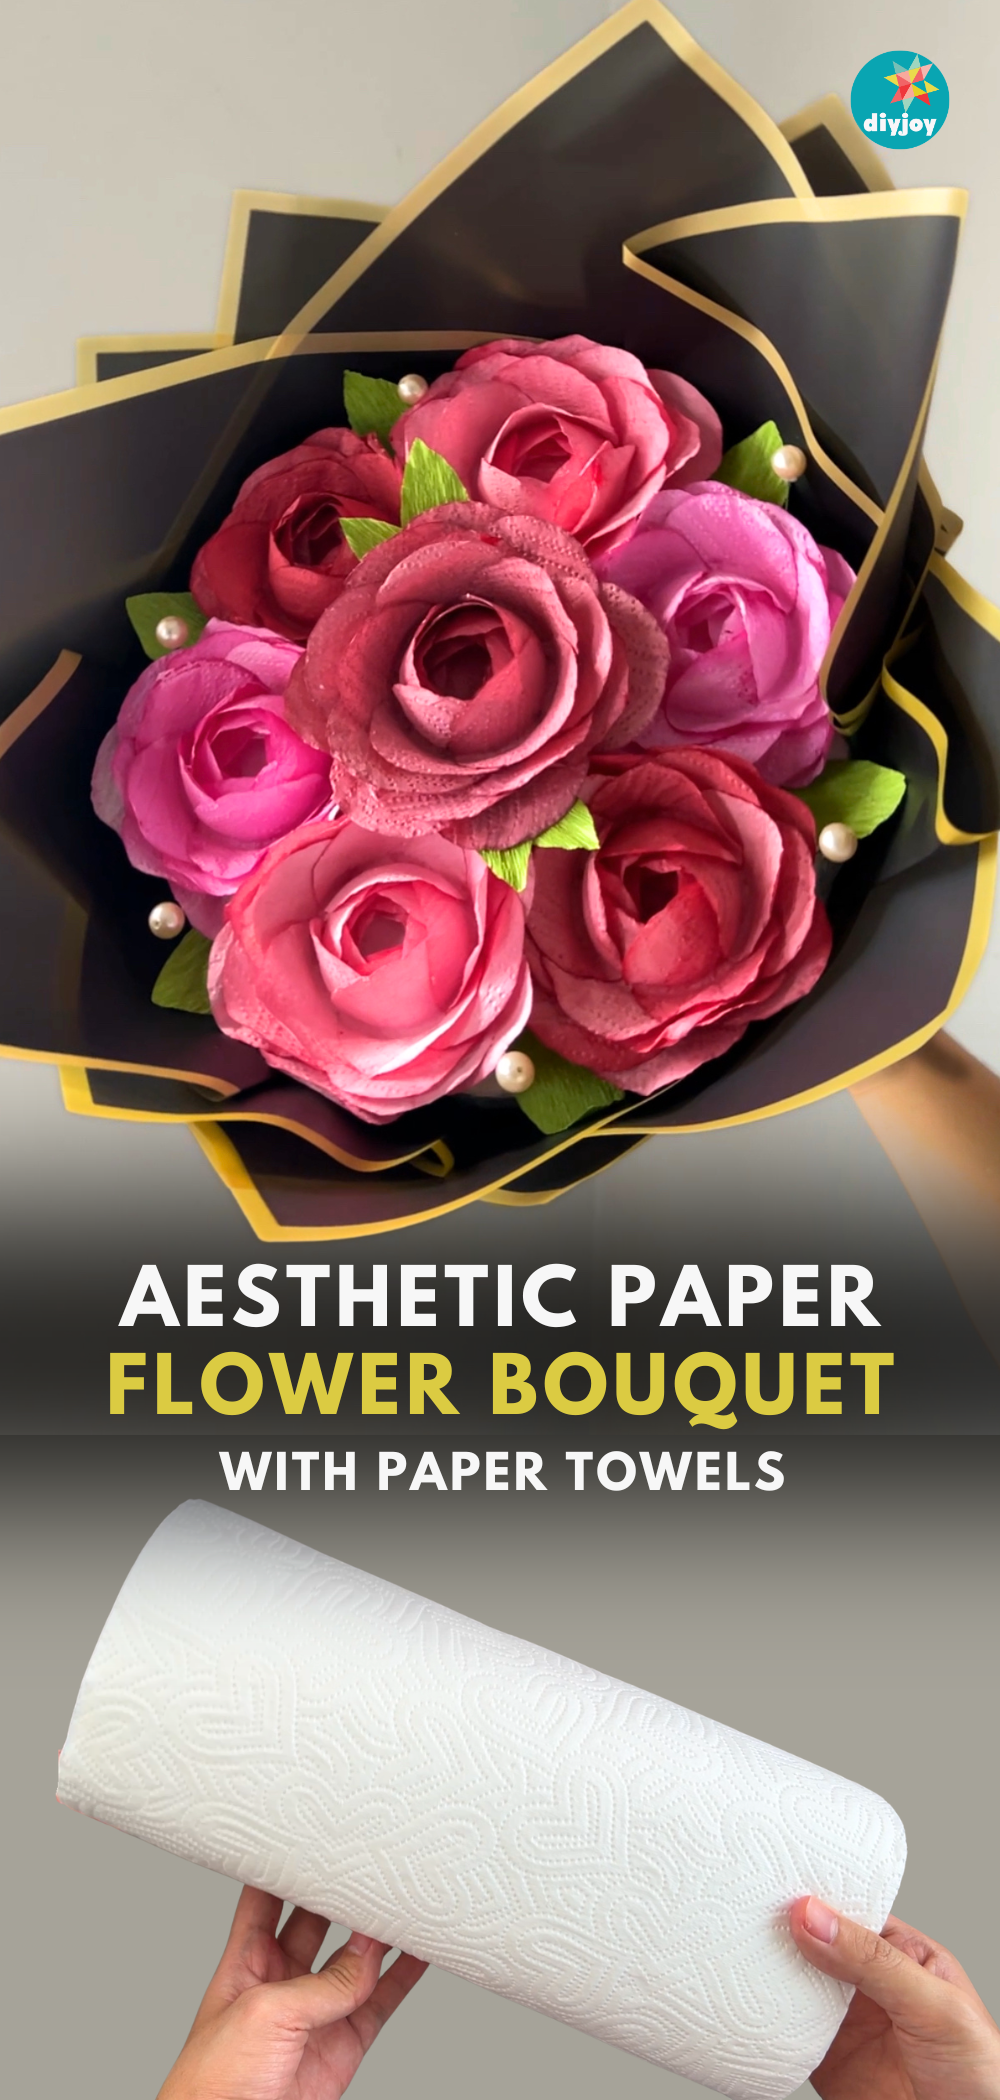
Roses made from paper towels. Seriously. Trace a glass rim onto paper towels and cut 21 circles per flower, dip them in diluted acrylic paint, squeeze them out and let them dry flat on plastic. Then fold the circles over the glass rim in overlapping layers, gluing as you go, to build each rose. Glue the roses to a foam base and wrap the bunch in floral paper (no stems needed). No paper towels? Toilet paper or tissue works too. She’ll never guess what they started out as.
Get the full tutorial at DIY JOY.