Cheap mothers day gifts don’t have to look cheap, and these 35 prove it. Most of them start with stuff already in your house or sitting in a dollar store aisle: a roll of paper towels, an empty jar, coffee filters, even the gold tray from a box of chocolates. Paper towels turn into a rose bouquet (nobody ever guesses). A plain jar becomes a napkin decoupage vase. A dollar mug and two Sharpies make a dotted heart mug she’ll reach for every morning, and pebbles from the yard shape a clay jewelry organizer. There’s even a coffee body scrub mixed from your pantry. These inexpensive DIY Mother’s Day gift ideas are quick, plenty are kid friendly, and every one feels more personal than anything off a store shelf. Perfect for tight budgets, last minute makers, kids crafting with a grown up, grandmas, stepmoms and every mom who swears she doesn’t want anything.
1. Yarn-Wrapped Bracelet

Got a bag of yarn scraps you can’t bring yourself to toss? About 25 inches of leftover yarn turns a plain chain link bracelet into something soft, bright and a little unexpected. Thread the yarn onto a needle, tie it off at one end, then wrap it through the links along one side only so the shiny metal still peeks out. Leave three or four loose loops at the end to tuck the tail through. Open jump rings sideways, never pulled apart into a V (that’s how they lose their shape). A dab of clear nail polish keeps the end from fraying.
Get the full tutorial at A Pretty Fix.
2. DIY Dip Dyed Ombre Bag

A plain canvas tote and one bottle of Rit dye, and suddenly Mom has the cutest bag in the carpool line. Pour the liquid dye into a bucket of hot water, stir in some salt, wet the bag first, then hang it on a clamp so the bottom sits in the dye. Every few minutes, raise it an inch or two, so the bottom soaks longest and goes darkest. Drip dry, rinse in cold water until it runs clear and wash it by itself. Do this outside and wear gloves (this dye is not playing around).
Get the full tutorial at Hi Sugarplum.
3. DIY Mother's Day Vase

Fresh flowers are lovely, but a vase made just for her keeps the thank you going long after the blooms fade. The tutorial walks through a pressed flower vase: wash a clear glass vase, plan your layout, then brush on Mod Podge one small section at a time and lay the flowers down with tweezers. Tuck in tiny greenery to fill gaps, seal with a light coat and let it cure before adding water. Real or faux pressed flowers both work, and you can pick a plain vase up for next to nothing.
Get the full tutorial at U Create.
4. Mom's Emergency Stash

Every mom needs a secret chocolate supply, and this one takes about five minutes to put together. Grab a clear plastic organizer box from the bead aisle, fill each little compartment with her favorite candy bars, then print the free Mom’s Emergency Stash tag, trim it, punch a hole and tie it on with ribbon. That’s it. She hides it somewhere the kids will never look (top shelf of the linen closet, maybe), so when a hard day hits, the good stuff is right there. Kids can easily put this one together with a little help.
Get the full tutorial at Eighteen25.
5. Gorgeous Coffee Filter Flowers

Coffee filters, tissue paper and a pipe cleaner, and you get a bloom big enough to fill both hands. Fold each filter into eighths, cut an arch across the top and unfold a flower, then paint it with watercolors that aren’t watered down much. Once dry, stack two filters and one tissue layer on a pipe cleaner with the tip rolled down about half an inch, squishing each layer up as you go. For a vase, slide the stems into straws and fill the vase with salt to hold them upright. A dollar store vase works great here.
Get the full tutorial at One Creative Mommy.
6. Mother's Day Keepsake Box

Proof that a gift doesn’t need a big price tag to matter: this box started out costing about a dollar. Spray paint a small wooden box flat white, then sand the edges and rub on ink for a soft distressed finish. Top the lid with paper spiral flowers (one for each of her kids is such a sweet touch) and wrap a ribbon around it. Inside the lid, a small frame with MOM in heat embossed letters. The flowers in the tutorial are machine cut, but hand-rolled paper flowers would work too.
Get the full tutorial at Ribbons and Glue.
7. DIY Monogram Clay Keychains

Little, personal and almost suspiciously cheap to make in a batch. Roll polymer clay flat on parchment, cut out circles, rectangles or diamonds, then press her initials in with a clay embossing stamp. Poke a hole near the top with a toothpick, wiggling it in small circles to open it up, and bake at 230F for 40 minutes. Add a jump ring, a smaller jump ring and a key ring. Granite clay darkens in the oven and its silver specks give it real depth. Make one for Mom and the whole family will want one.
Get the full tutorial at Homey Oh My.
8. Beaded Cluster Rings

They look complicated. They are not, and the tutorial promises it right up front. Anchor thin wire (28 to 32 gauge) to an adjustable beadable ring base, then work around the outer holes with 4mm beads, coming up through one hole and back down the next in a kind of backstitch. Fill the inner circle the same way and add a few beads on top for a domed look. Wrap the wire around the base and snip it so no sharp end pokes out. About 40 minutes, and she gets a statement ring in her favorite colors.
Get the full tutorial at Amy Latta Creations.
9. Mother's Day Map Plaque

Home is where Mom is, and this plaque spells it out with a little red heart right on her state. Paint a 14 inch wooden USA shape matte black for an old school chalkboard feel, then paint the script letters and small block letters white and a 1 inch wood heart bright red. Arrange everything, glue each piece down with a small dab of craft glue, and once dry, glue twine to the back corners and tie it in a bow for hanging. Living far apart? Put the heart where she lives.
Get the full tutorial at CraftCuts.
10. Homemade Polaroid Coasters

Family photos she’ll actually see every day, every time she sets down her coffee. Print 3.5 by 5 photos, trim them to 3.25 by 3.75 inches and Mod Podge them onto plain 4 inch white ceramic tiles, leaving about a quarter inch border on top and sides and an inch at the bottom (that’s the Polaroid look). Brush Mod Podge over the whole tile in straight strokes, let it dry, then seal with clear acrylic spray and add felt dots underneath. Scuff the tile with sandpaper first so nothing slides. The tiles cost under a dollar each when the tutorial was written.
Get the full tutorial at Darkroom and Dearly.
11. Mother's Day Chocolate Bouquet

Flowers plus chocolate, in one jar, with a tag that says Mom, I Pick You. Print the free flower pages, cut out the blooms and tape a Lindt truffle into the center of each one (the printables are sized to fit them). Tape each flower to a straw or popsicle stick, push the stems into a floral foam brick inside a jar, and tuck tissue paper around the top. Grab truffles in a mix of wrapper colors so the bouquet looks bright. It’s easy enough for kids to assemble almost on their own.
Get the full tutorial at Fun-Squared.
12. Homemade Mother's Day Gift

String art MOM sign with a row of family photos clipped across the top, and it’s a lot more forgiving than it looks. Stain or paint a board, tape the printable letters on and hammer in 1 1/4 inch nails with big heads, starting the heart from the center. Outline each letter in yarn first, then fill it in messy, crisscrossing in every direction (messy fills the bald spots best). Clip wallet prints of the kids on with mini clothespins. The tutorial found dollar store clothespins held up better than pricier ones, which is the best kind of news.
Get the full tutorial at Lily Ardor.
13. Mini Ombre Painted Flower Pots

Tiny terra cotta pots are about the cheapest thing in the garden aisle, and three shades of one paint color make them look boutique. Mix your shades on a paper plate: lightest is white with a dot of color, middle is half and half, darkest is color with a dot of white. Paint the bottom band darkest and work up toward the lightest at the rim with a half inch foam brush. Fill them with faux blooms (zero watering, which is a gift in itself) or a little herb. They look adorable lined up on a windowsill.
Get the full tutorial at Small Stuff Counts.
14. Easy Leather Cord Keeper

For the mom whose earbuds come out of her purse as one giant knot. These little leather cord keepers are cut as half circles, folded around a coiled cord and closed with a snap, so everything stays neatly wrapped. A scrap of faux leather goes a long way here, and you can make three or four from one small piece. Add a gold painted or metallic leather triangle for a little shine. Leather pieces sold in craft stores are cheap, and this is one of those quick gifts she’ll use every single day.
Get the full tutorial at A Beautiful Mess.
15. Marbled Clay Ring Dish

Every one of these comes out different, and that’s half the fun. Twist a few colors of clay together, roll them flat so the swirls stretch into marble, then shape a small round dish. A gold painted rim makes it look like it came from a pricey home shop. Don’t over-mix the colors or they’ll muddy into one shade (stop while you can still see the streaks). One block of clay makes a stack of them, so Mom, grandma and your sister can each pick a favorite.
Get the full tutorial at A Beautiful Mess.
16. Mother's Day Printable Canvas

A free printable quote that ends up looking like real canvas art. Print the image in reverse and get a color copy from a copy shop (it has to be a toner copy, not an inkjet print, or the transfer won’t work). Brush a thick coat of image transfer medium over the front, flip it onto an 8 by 10 canvas, smooth out the bubbles and wait 24 hours. Then dampen the paper and gently rub until it balls up and peels away, leaving the image behind. The quote is F. Scott Fitzgerald, and it’s a tearjerker.
Get the full tutorial at Craftaholics Anonymous.
17. Kitchen Towel Cake

A cake with zero calories that she’ll actually use in the kitchen. Fold each kitchen towel in thirds lengthwise and roll it up like a sleeping bag, overlapping the next towel a couple of inches before you keep rolling. The base layer in the tutorial uses six towels, tied with a ribbon. For the top tier, roll more towels around the handles of a whisk, spatulas and wooden spoons so they stick out like candles, then tie that one too. Add the free printable Take the Cake tag. Dollar store towels and utensils work perfectly here.
Get the full tutorial at Fun-Squared.
18. DIY Concrete Candle Holders

The mold for these is an eggshell. Seriously. Mix quick set concrete with water to pancake batter thickness, then crack the top off a drained egg and set it on a bottle cap so it stays put. Fill it about a third full and press a taped roll of cardstock into the middle for the candle hole, keeping half an inch of concrete below it. After 24 hours, twist out the insert and peel the shell. A swirl of 16 gauge wire makes the stand, and a touch of gold paint on the rim makes it gift worthy.
Get the full tutorial at Nerdy Mamma.
19. DIY Citrus Print Tea Towel
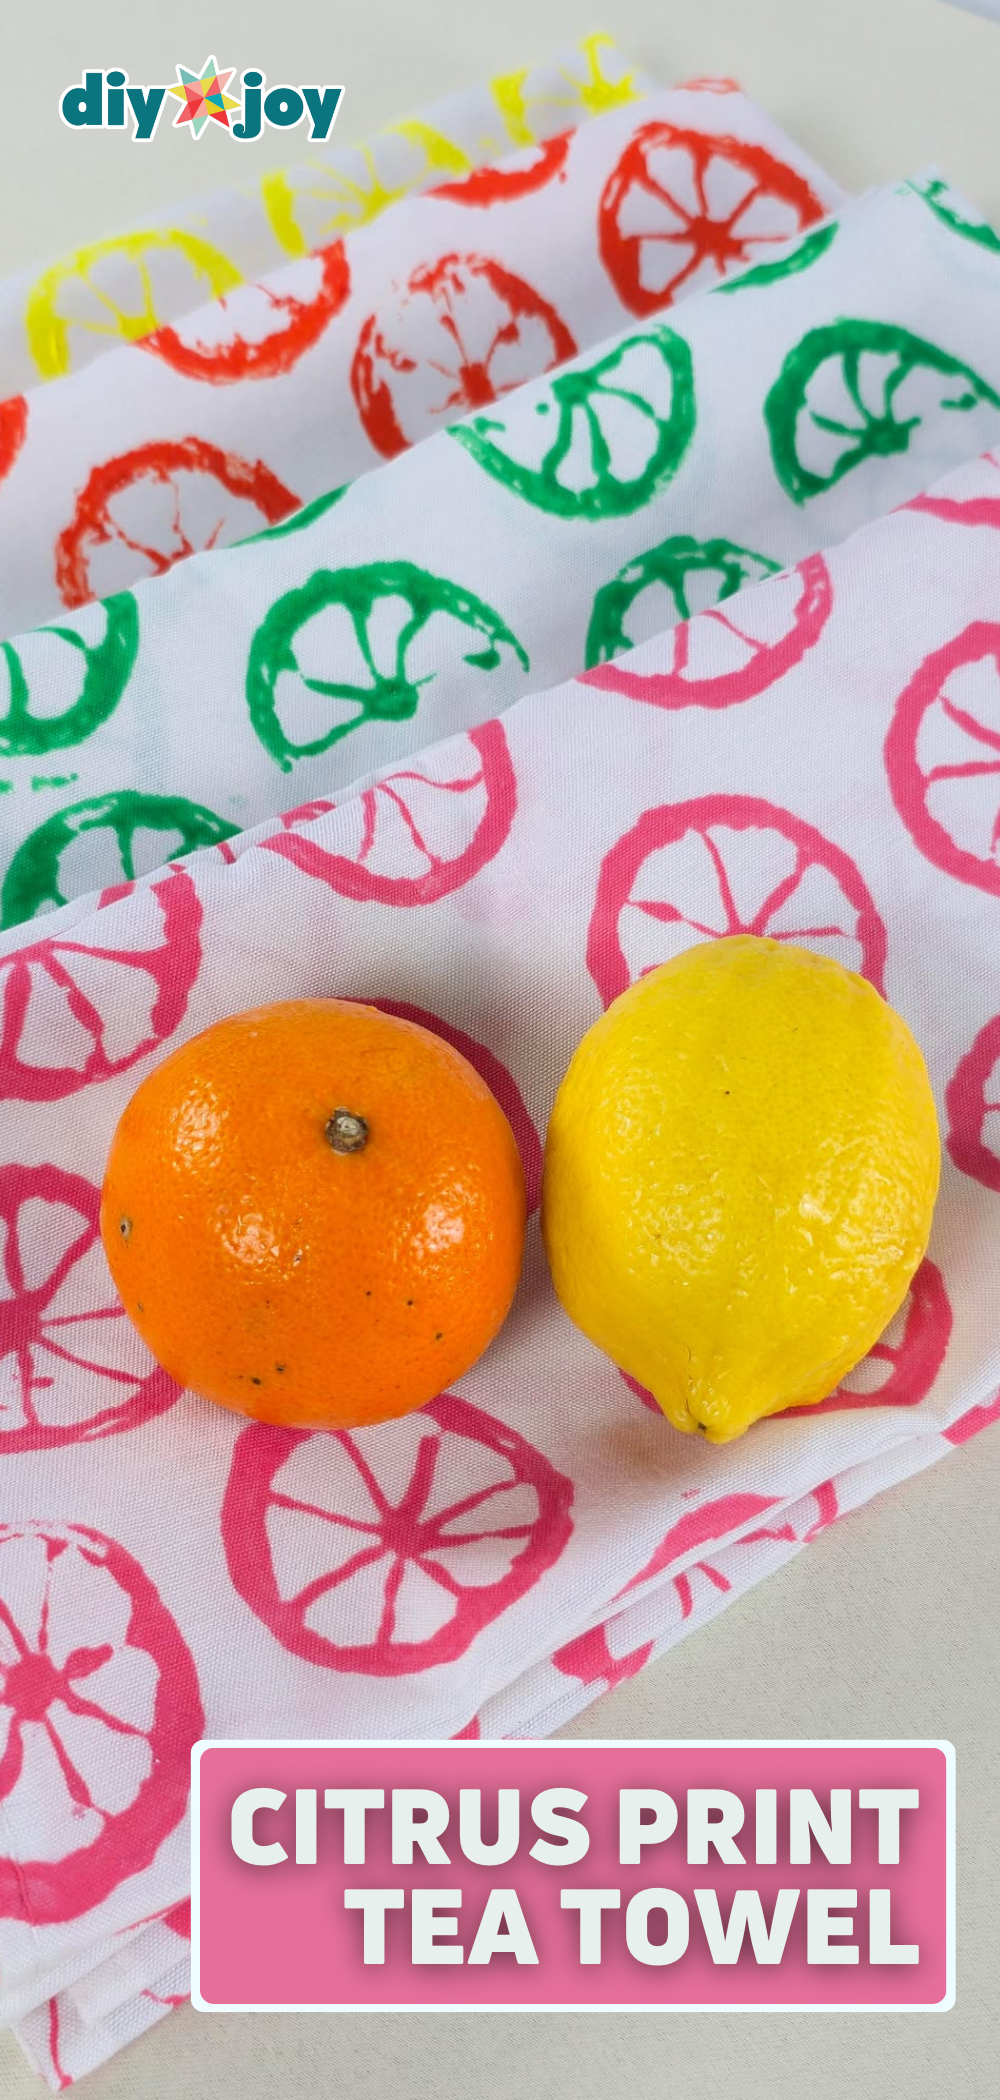
A plain white tea towel plus whatever orange is rolling around your fruit bowl. Cut the citrus in half, scoop out the pulp while keeping the membrane walls, then dry it well. Brush paint mixed with textile medium onto those walls and the rind edge, and stamp in rows with a gap in each so the next row can nestle in between. For smaller prints, cut a wedge and slide a toothpick along the straight edge to keep it firm. Put parchment underneath, since paint seeps through. Tea towels come in cheap multipacks, so make a set.
Get the full tutorial at DIY JOY.
20. Mother's Day Flower Pop-Up Card Tutorial
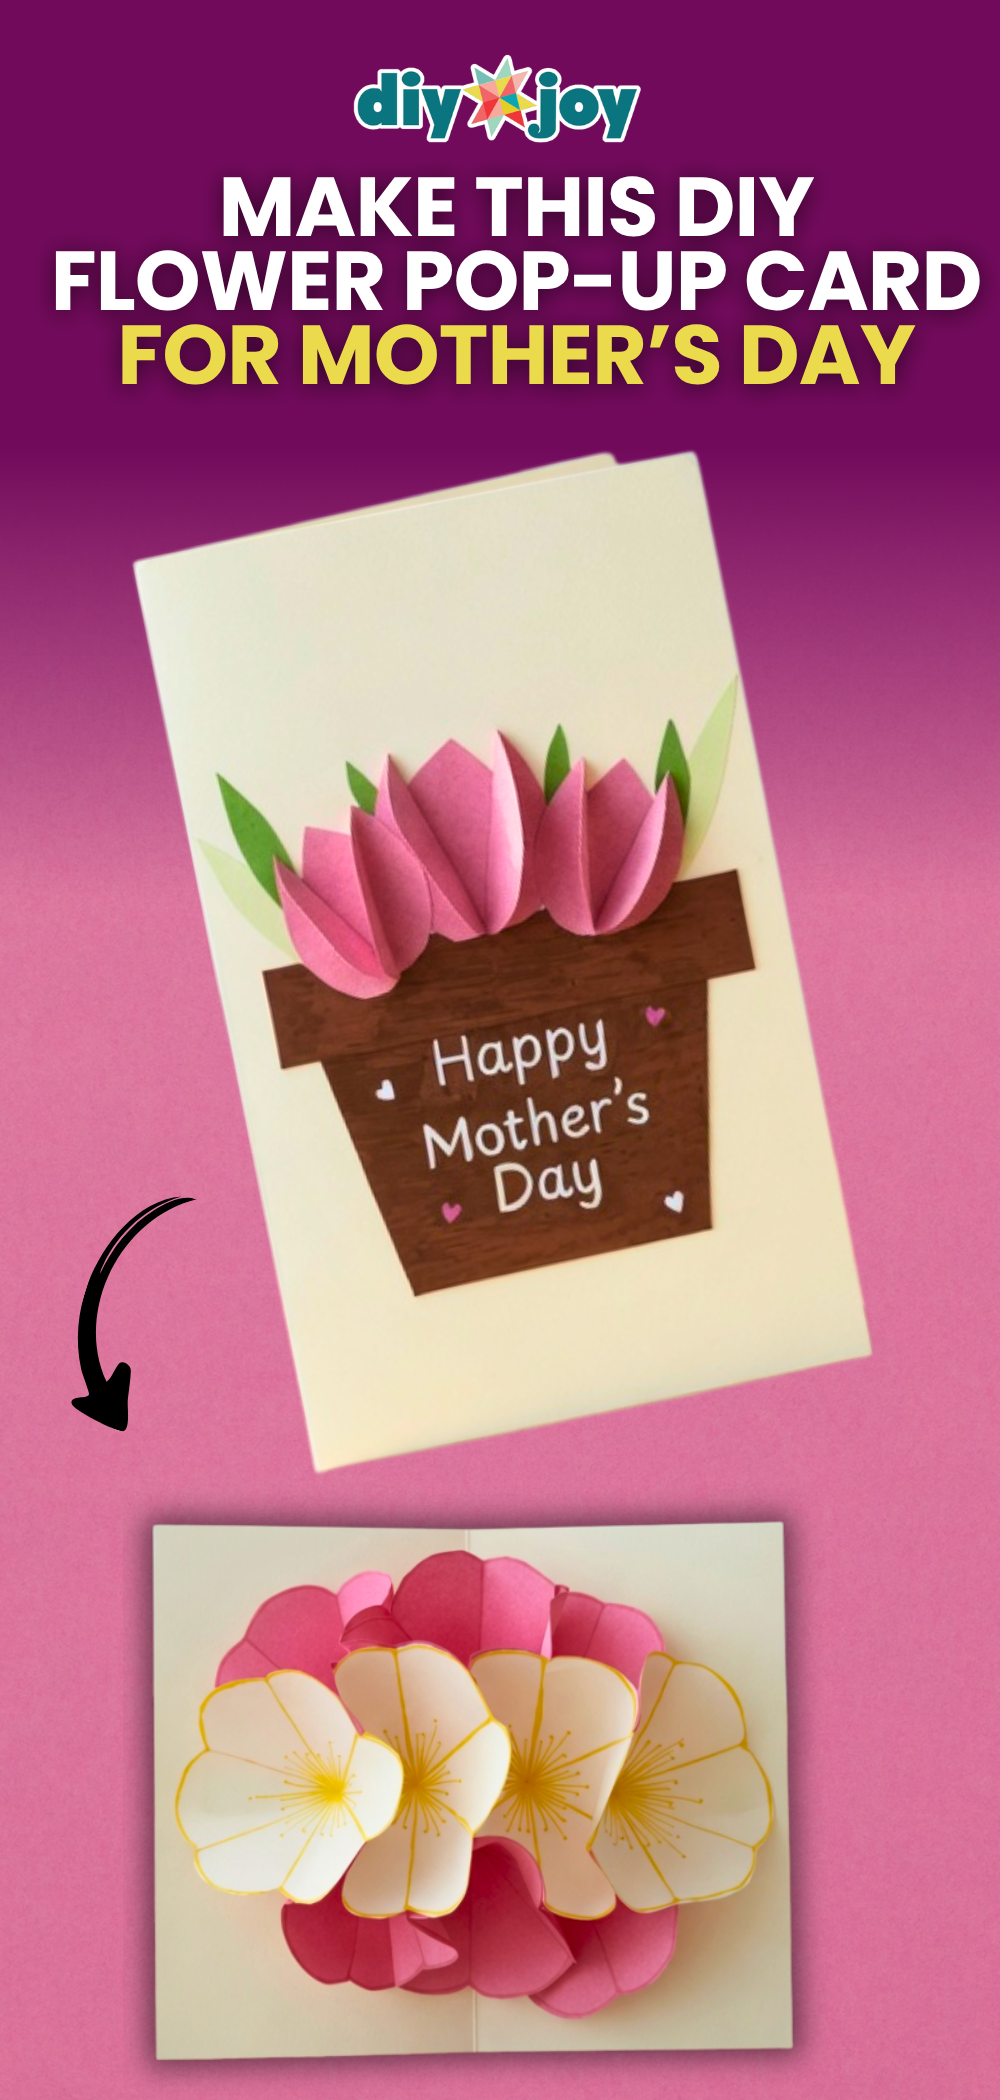
Colored paper and glue are all it takes for a card that blooms open in her hands. Cut 6 inch squares, fold each one into a triangle three times, draw a curve along the wide edge and cut. Unfold a flower, trace the creases with a Sharpie and add lines tipped with dots for stamens. Snip out one petal and glue the edges together so it cups. Make 7 to 10, then glue them in alternating layers, finishing with a horizontal one. This is way more fun to open than anything off a card rack.
Get the full tutorial at DIY JOY.
21. DIY Customized Mug Using Sharpie
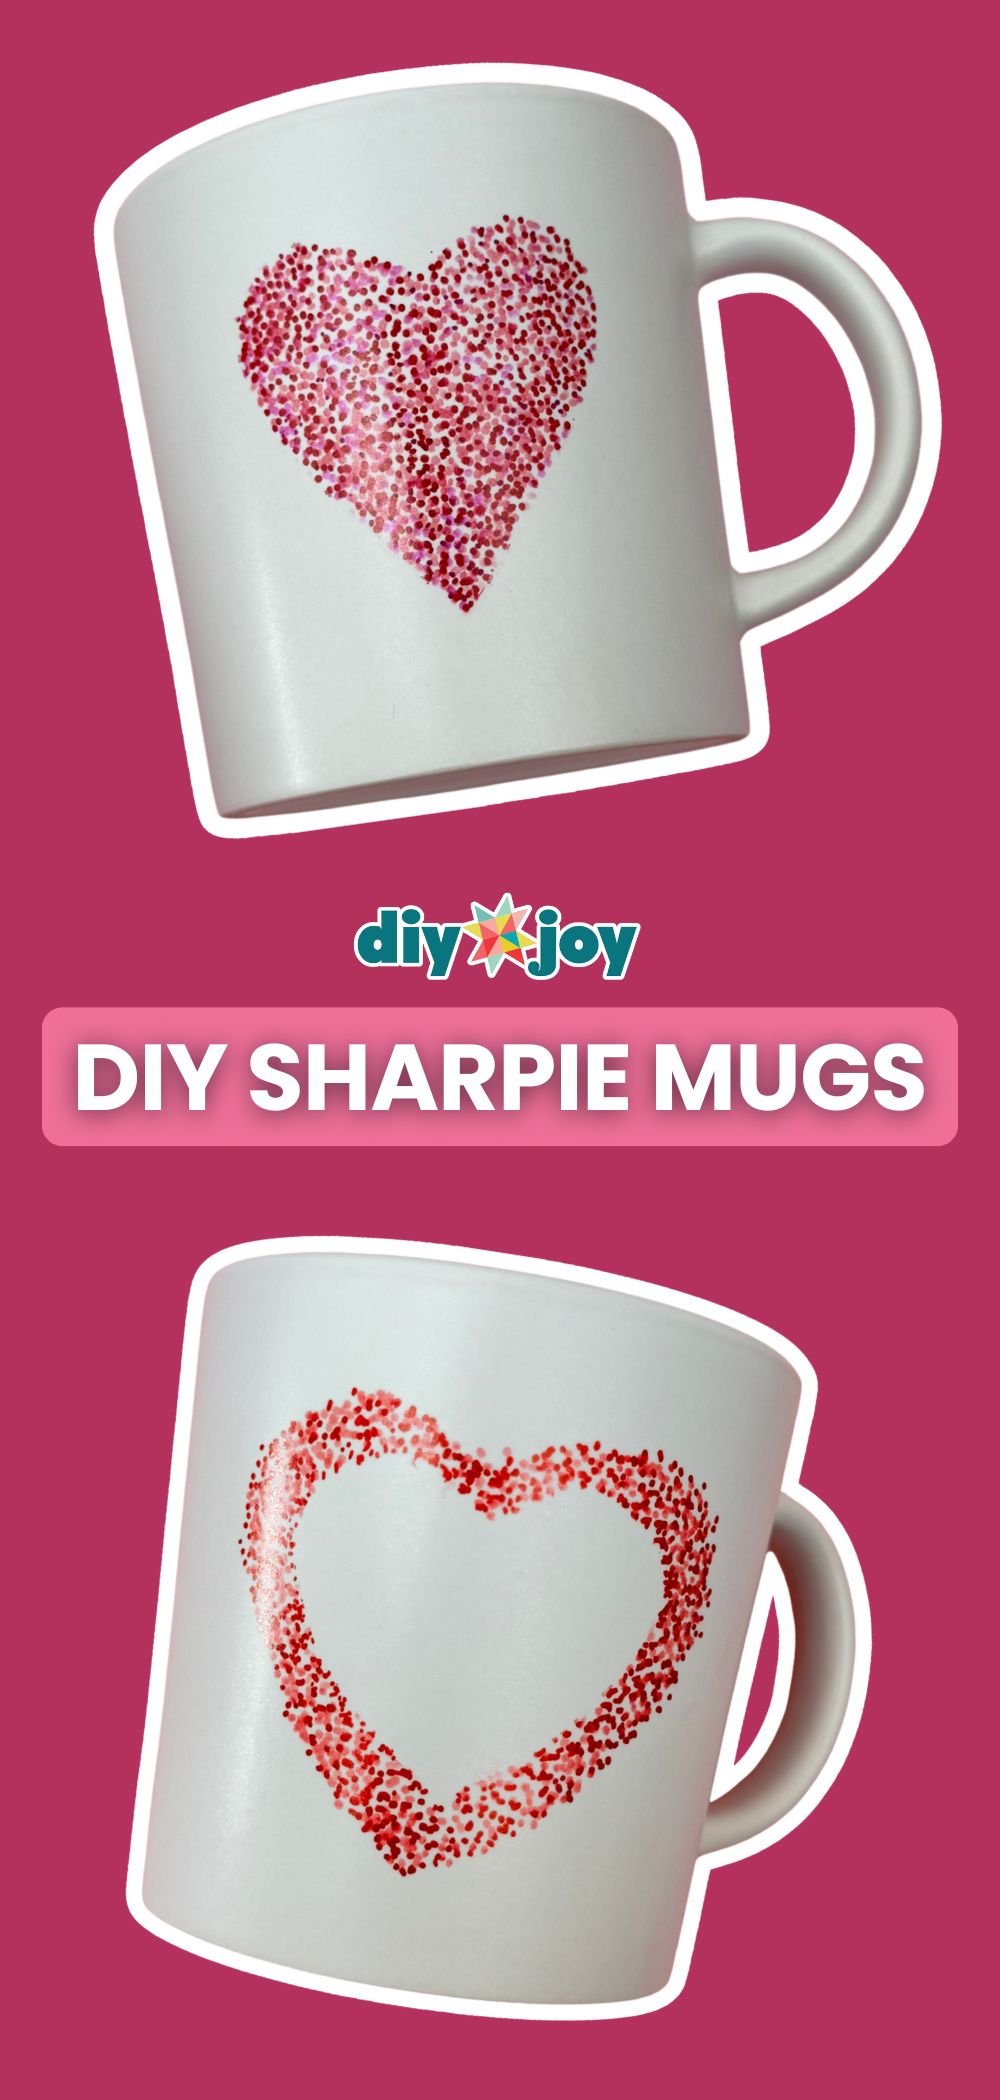
A dollar store mug and two Sharpies, and her morning coffee gets a whole lot more loving. Cut a paper heart, coat the back with a Zig 2 Way glue pen and wait until the glue turns from blue to white so it peels off like a sticky note. Stick it on the mug and dot all around it in red and pink, letting a few dots land on the paper. Peel it away and there’s a crisp heart. For a design that survives washing, use an oil based paint marker, wait 24 hours, and bake it starting from a cold oven.
Get the full tutorial at DIY JOY.
22. Paper Tulips With Chocolate

Every tulip in this bouquet hides a chocolate, which is the only acceptable way to hide chocolate from Mom. Wrap a candy in stretched crepe paper, tape it and glue it onto a skewer. Shape six petals by gathering, twisting and folding crepe paper pieces, stretching the middles with your thumbs, then glue three around the candy and three more in the gaps. Add pointed leaves and spiral wrap green crepe paper down the stem. Go easy when you stretch (crepe tears). Five or six tulips with dried statice make a full bouquet.
Get the full tutorial at DIY JOY.
23. Aesthetic Paper Flower Bouquet With Paper Towels
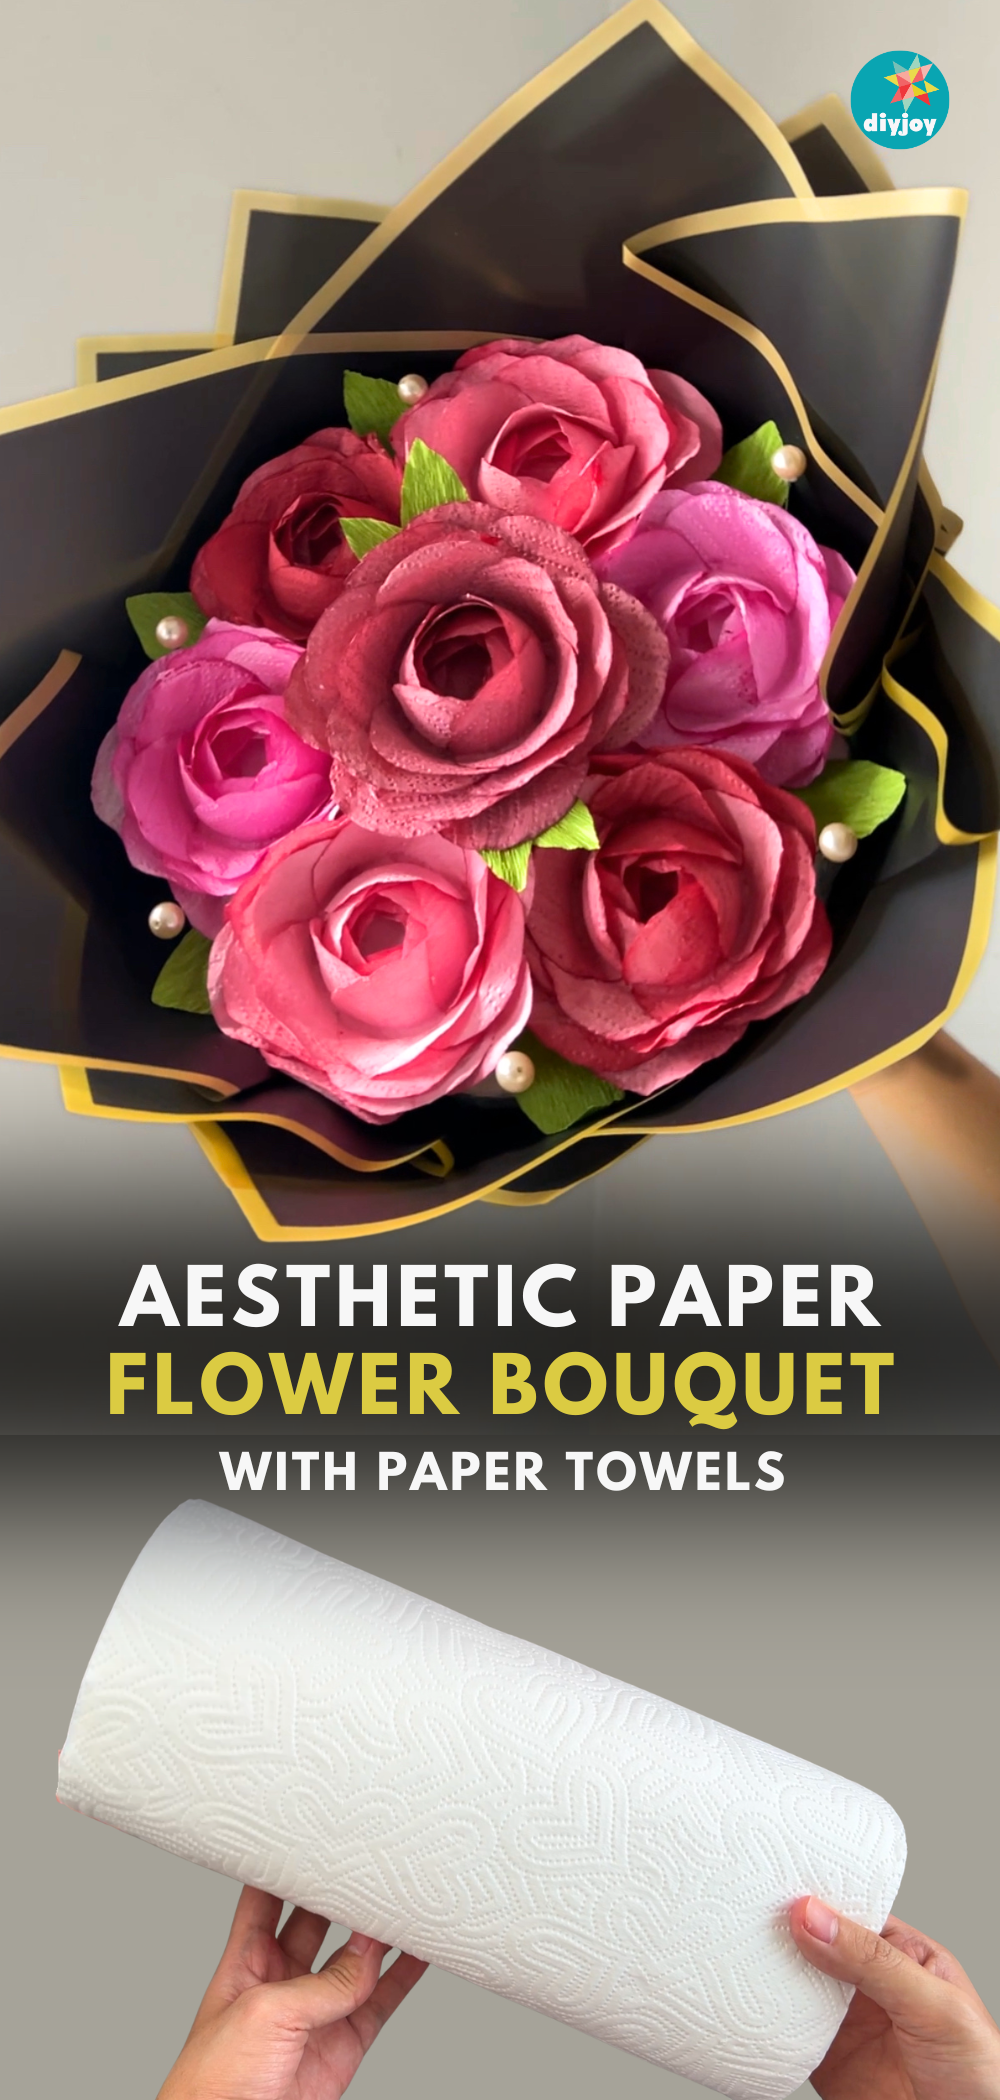
Yes, these roses started on the paper towel roll under your sink. Trace a glass rim onto paper towels and cut 21 circles for each flower, dip them in watered down acrylic paint, squeeze and dry them flat on plastic. Fold the circles over the glass rim in overlapping layers with a dot of glue, seal the top with the circle you saved, then slide the rose off. Seven roses glue onto an 8.3 inch foam round, and floral wrap finishes it. Out of paper towels? Toilet paper works too.
Get the full tutorial at DIY JOY.
24. DIY Coffee Body Scrub Recipe

For the mom who runs on coffee, a scrub that smells like her favorite mug. Add fine sugar and coffee grounds to a jar, scoop in coconut oil, pour in castile soap and a splash of vanilla extract, then mix until it’s all combined. Wipe the rim and cap it. An old jam jar works great once the label soaks off (free packaging, always a win). No vanilla? Coffee extract swaps right in. Tie twine around the lid and it looks like something from a fancy bath shop.
Get the full tutorial at DIY JOY.
25. Mason Jar Fairy Lights With Pressed Flowers
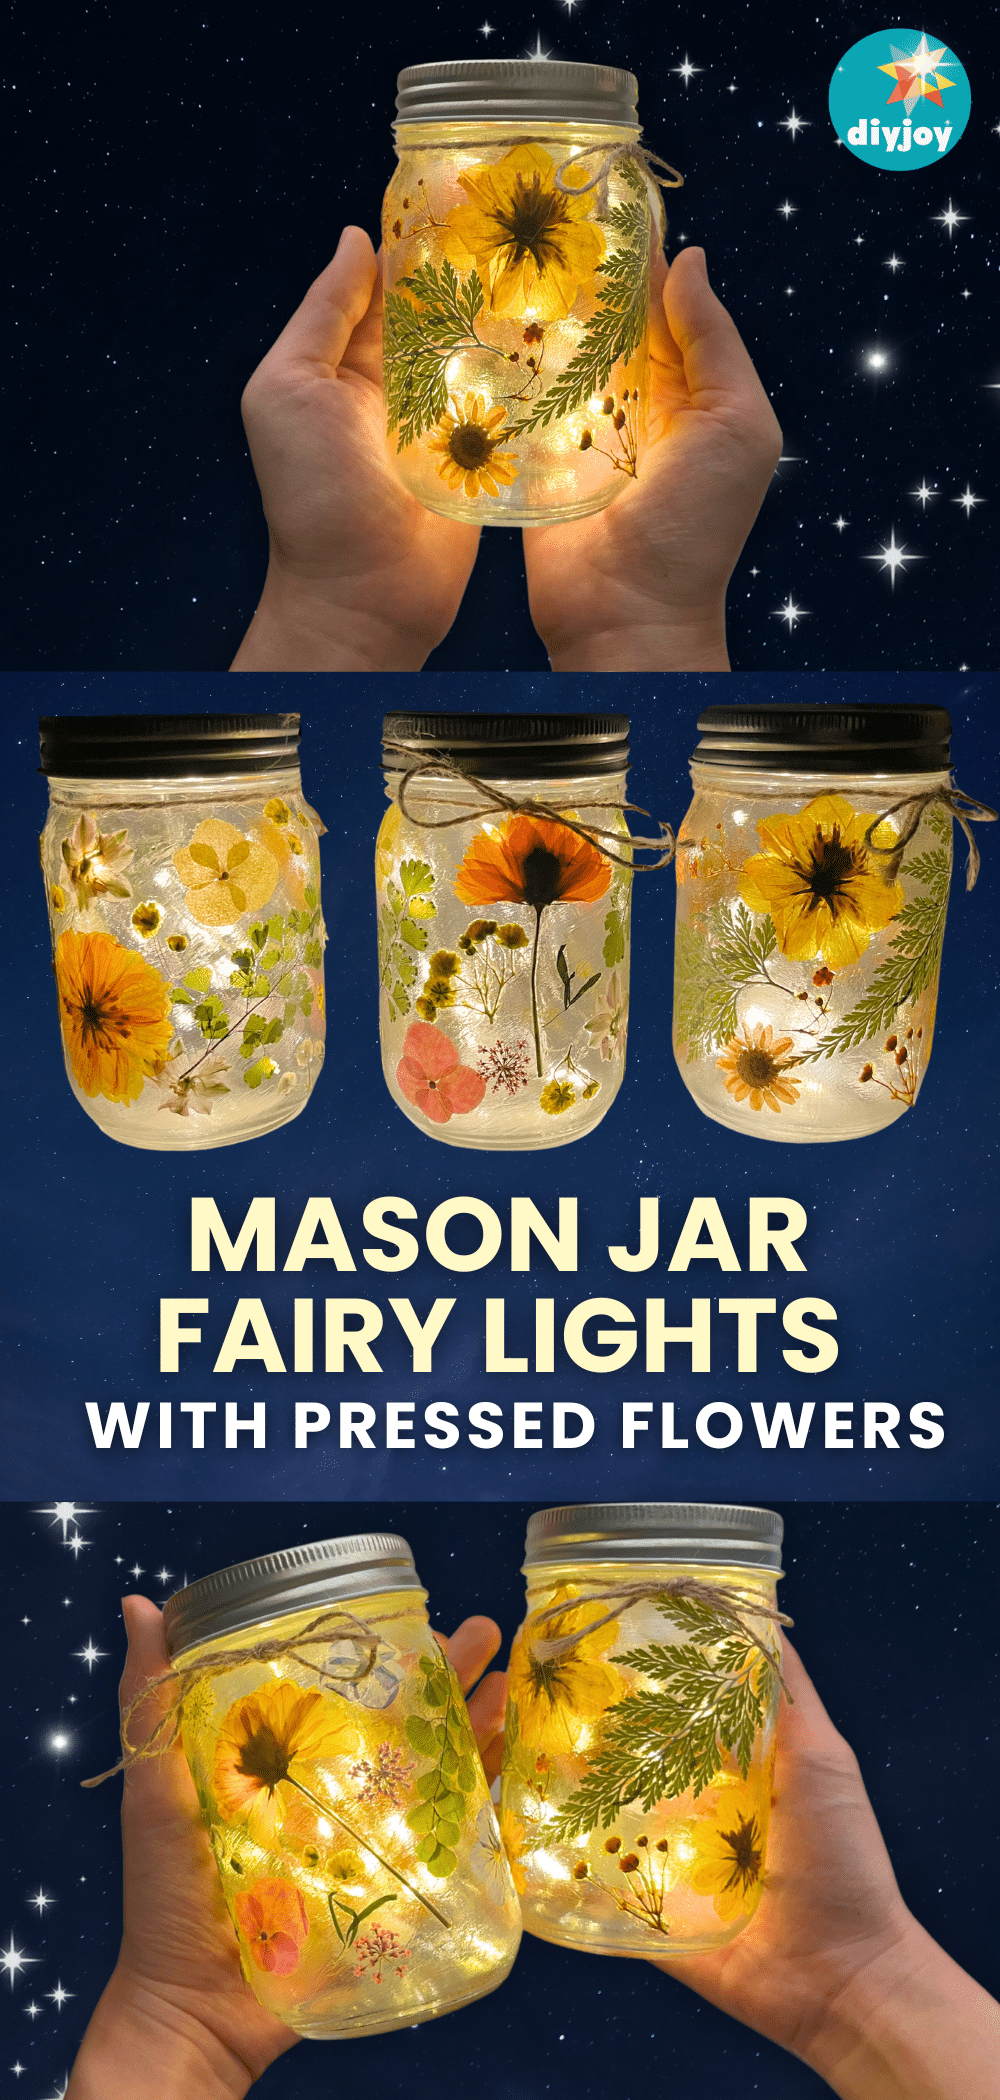
An empty mason jar, a handful of pressed flowers and a strand of fairy lights, and her nightstand gets a glow up. Clean the jar well, play with your layout first, then brush a thin layer of Mod Podge onto the glass, press a flower down and brush more over the top. Work in small sections so the glue doesn’t dry before you get there. If a stem won’t behave, glue a bloom over its end, and trim bulky stems. Drop the lights inside and switch them on (it’s a little bit Tinkerbell).
Get the full tutorial at DIY JOY.
26. DIY Decoupage Vase Using Napkin Paper
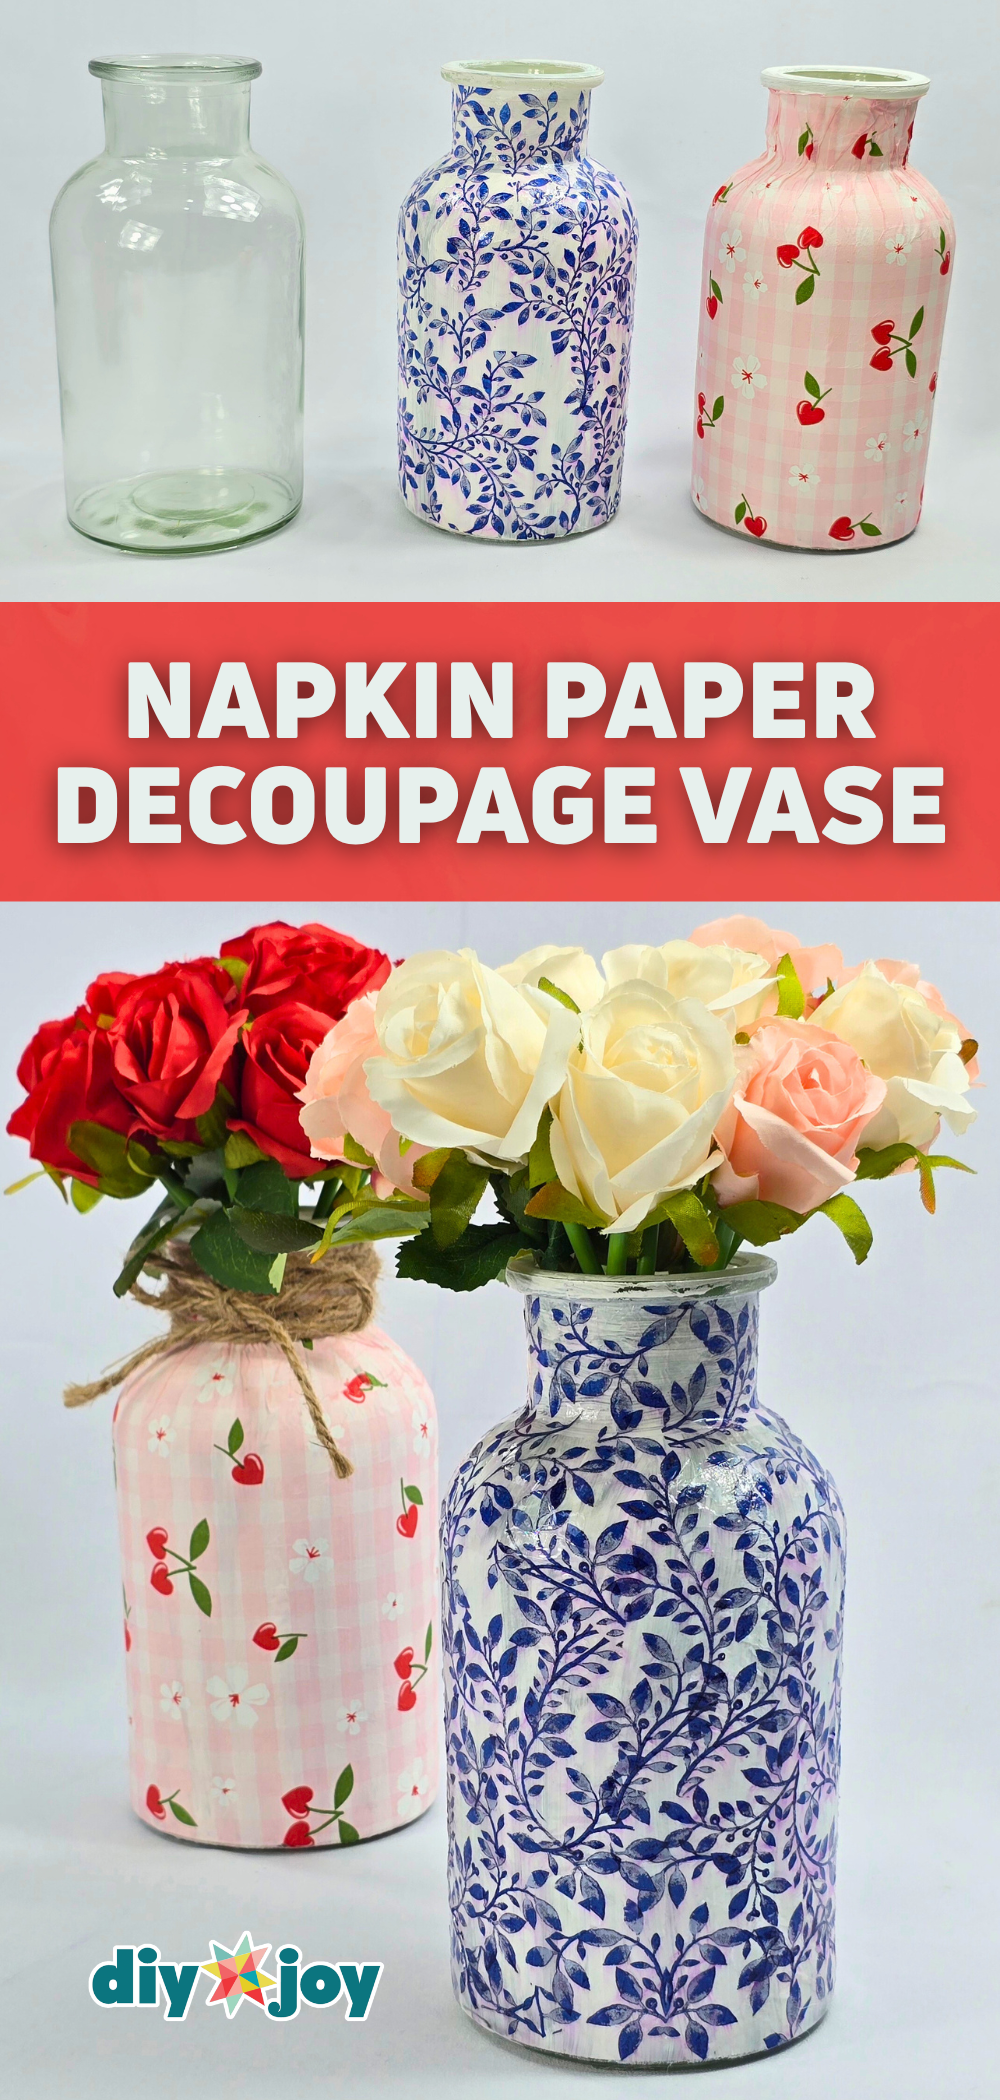
A dollar store jar plus a pretty paper napkin, and it looks like a vase from a craft market. Paint the jar white all over (two coats if the glass still shows). Cut out napkin motifs close to the pattern and peel off the backing plies so only the printed layer is left. Brush on Mod Podge, or a white glue and water mix, lay the paper down and coat over it. Keep going until it’s covered. Seal with UV resin if you want shine, or clear nail polish if that’s what’s in your drawer.
Get the full tutorial at DIY JOY.
27. DIY Book Flower Vase

A thrift store book becomes a flower vase, and it’s a total conversation piece on her shelf. Open the book to the middle and draw a line across the page. Count 12 pages in from each side, slip cardboard underneath to protect the rest, cut along the line and tear away the top. Shift the cut pages to one side, tape them together in groups of three with double sided tape, and fold each group toward the center. Use a sharp blade for clean cuts (and an old book nobody is still reading).
Get the full tutorial at DIY JOY.
28. Upcycled Ferrero Rocher Jewelry Box

Eat the chocolates first (purely for craft reasons), then turn that gold box into a jewelry organizer. Lift the label off the lid by pressing wide tape over it and peeling, a few times, until the plastic is clear. Plan your pressed flowers, then Mod Podge them inside the lid. No Mod Podge? Equal parts white glue and water works. Wrap gold washi tape around the inner compartments for a polished edge. Each little cup holds a ring or a pair of earrings perfectly, and the whole thing costs almost nothing.
Get the full tutorial at DIY JOY.
29. Simple DIY Daisy Bead Rings
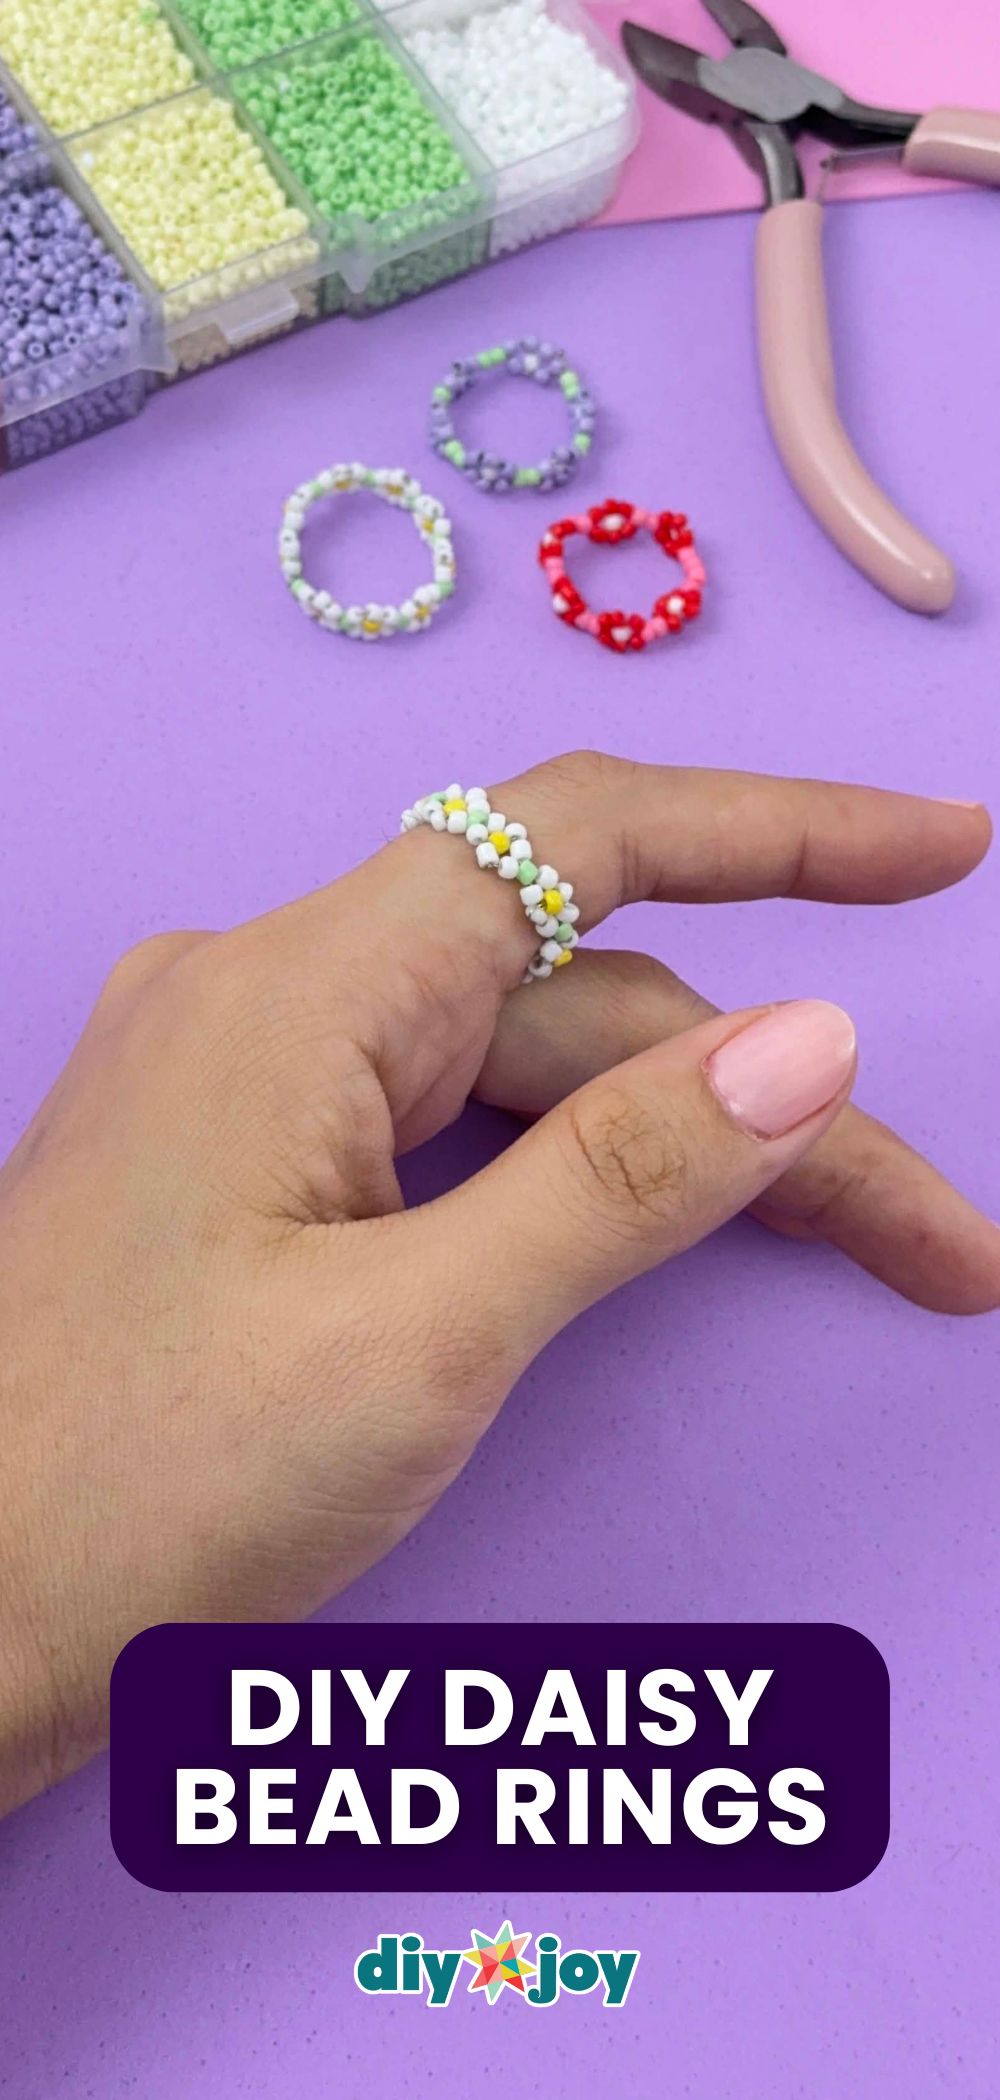
Tiny daisies all the way around her finger, made with seed beads and a bit of jewelry wire. Fold the wire in half, add two white beads to each tail and a yellow bead on one, then cross both tails through a single bead to lock it. Thread back through the white beads so the yellow pops into the center. One more white bead per side, then a green bead on both tails locks the daisy and becomes the leaf. Repeat until it fits, then knot the ends. The first one is the hardest; after that you’ll fly.
Get the full tutorial at DIY JOY.
30. Easy Air-Dry Clay Ring Holder
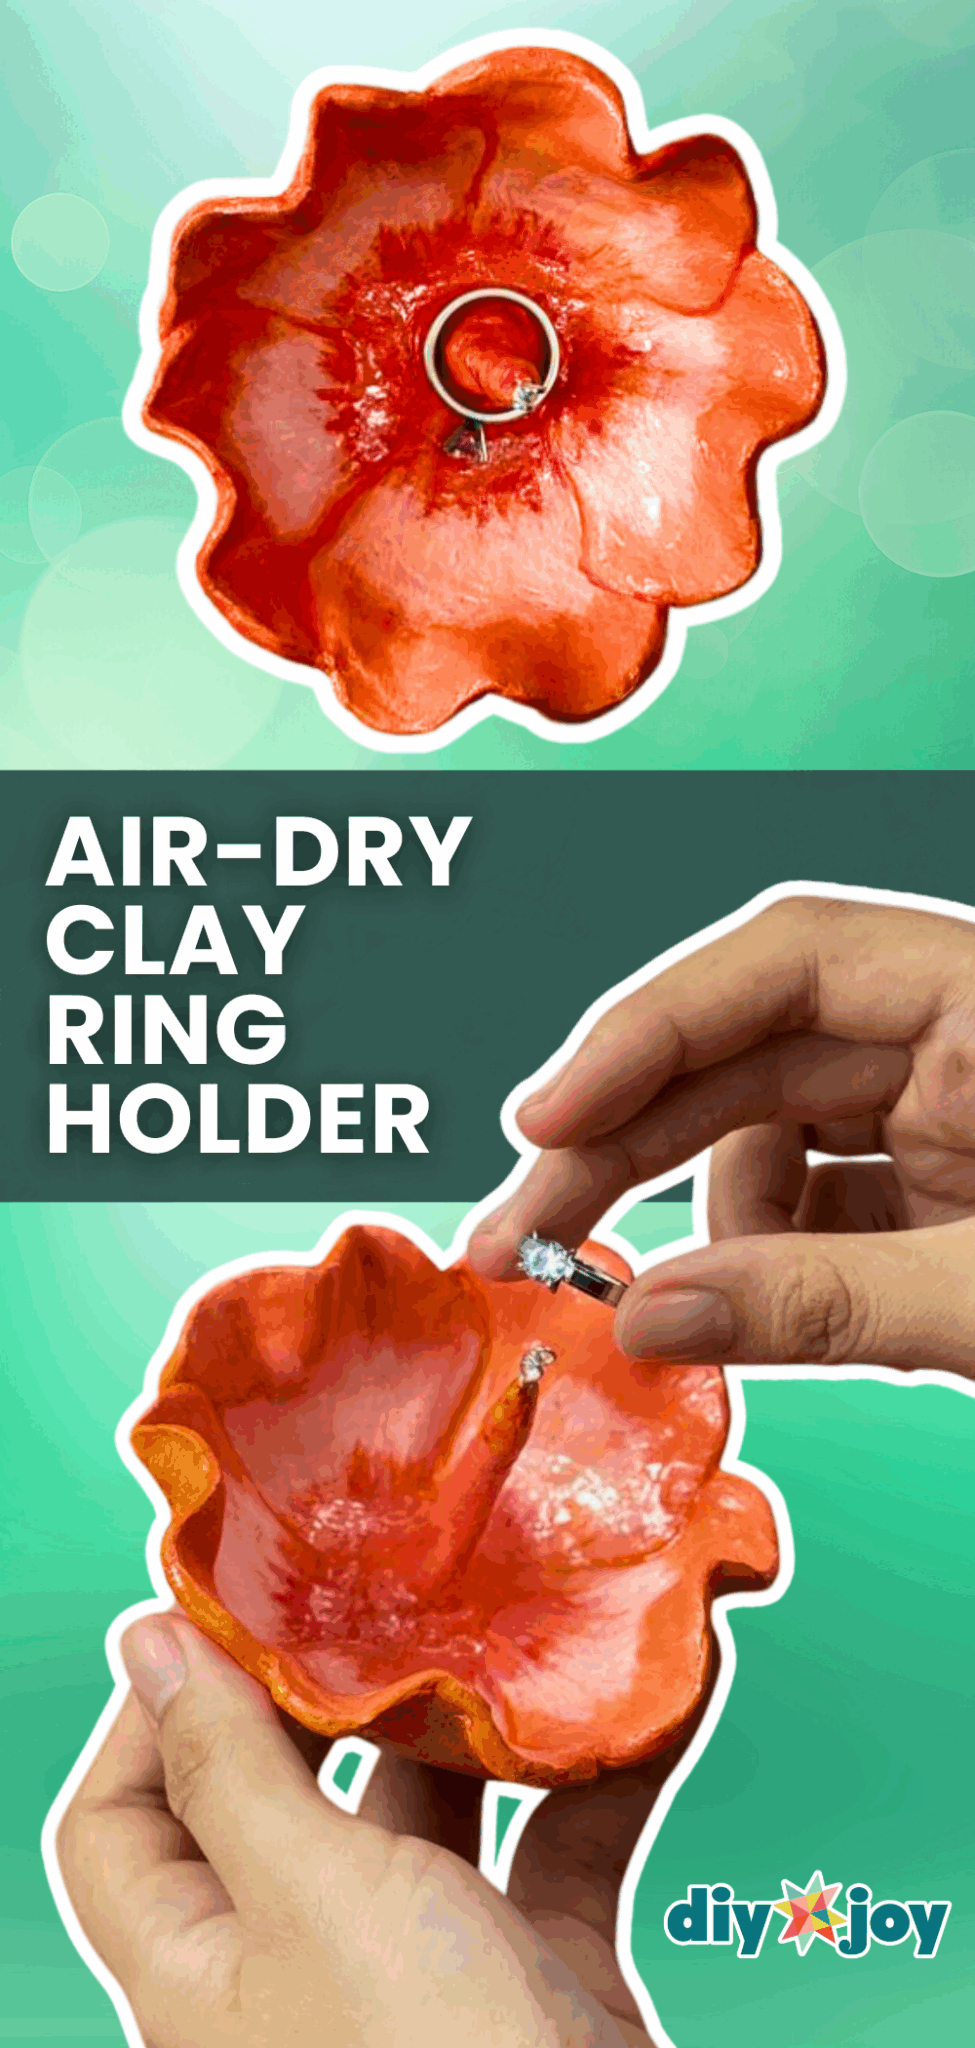
A flower shaped ring dish with a little stamen in the middle that’s perfect for catching her rings. Roll air dry clay flat, cut it with a petal template and slit between the petals. Set it on a towel, overlap the petals, then rest it in a bowl (holding the towel) so it dries cupped. Roll a thin log for the stamen and attach it in the center with a wet brush. Once dry, prime, paint and seal with UV resin for a porcelain look. No kiln, no oven, and a block of clay is cheap.
Get the full tutorial at DIY JOY.
31. Easy DIY Air Dry Clay Jewelry Tray
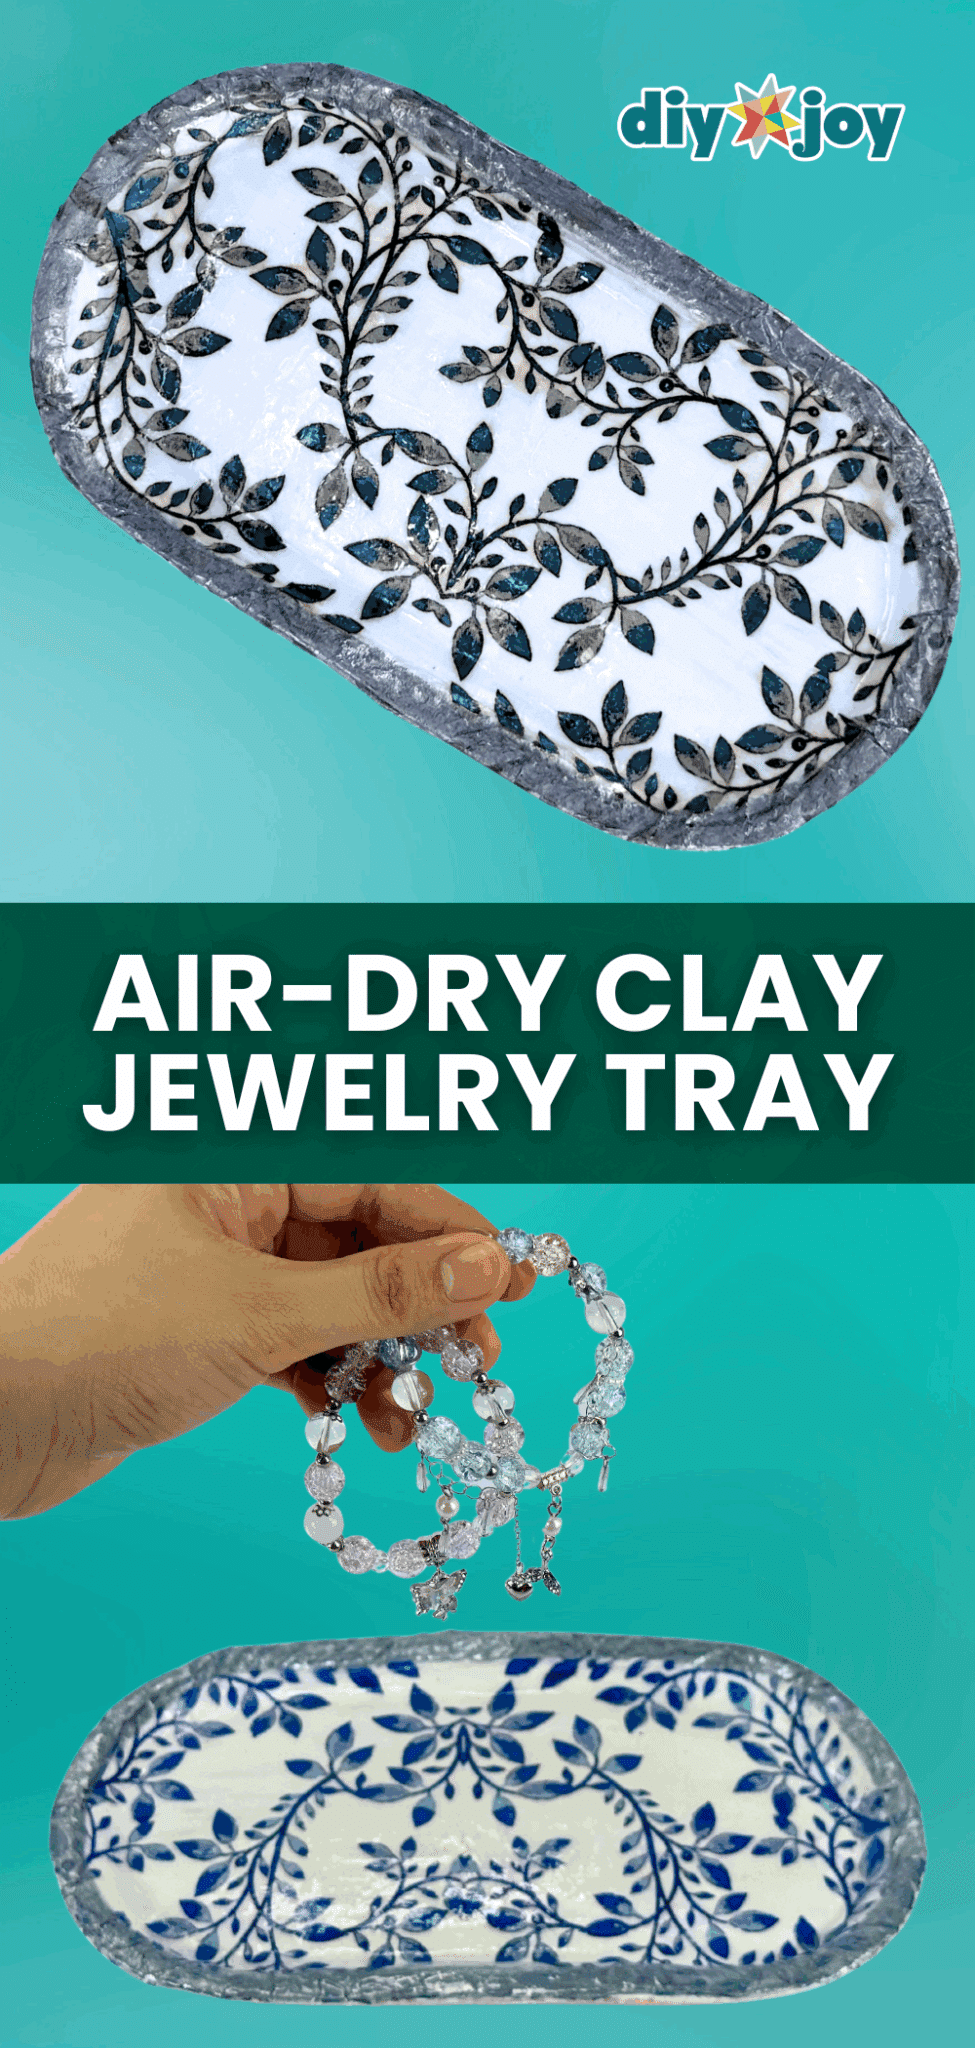
That blue and white tray looks like a pricey ceramic piece. It’s air dry clay and a paper napkin. Dust a tray you already own with baby powder, press rolled clay into it and smooth it with a damp sponge, then trim the excess. Once dry, pop it out (the powder stops it from sticking), prime it and Mod Podge on the napkin. Run a metallic marker around the edge, then seal with UV resin. If you’re out of Mod Podge, two parts white glue to one part water does the job.
Get the full tutorial at DIY JOY.
32. DIY Air-Dry Clay Decoupage Jewelry Dish
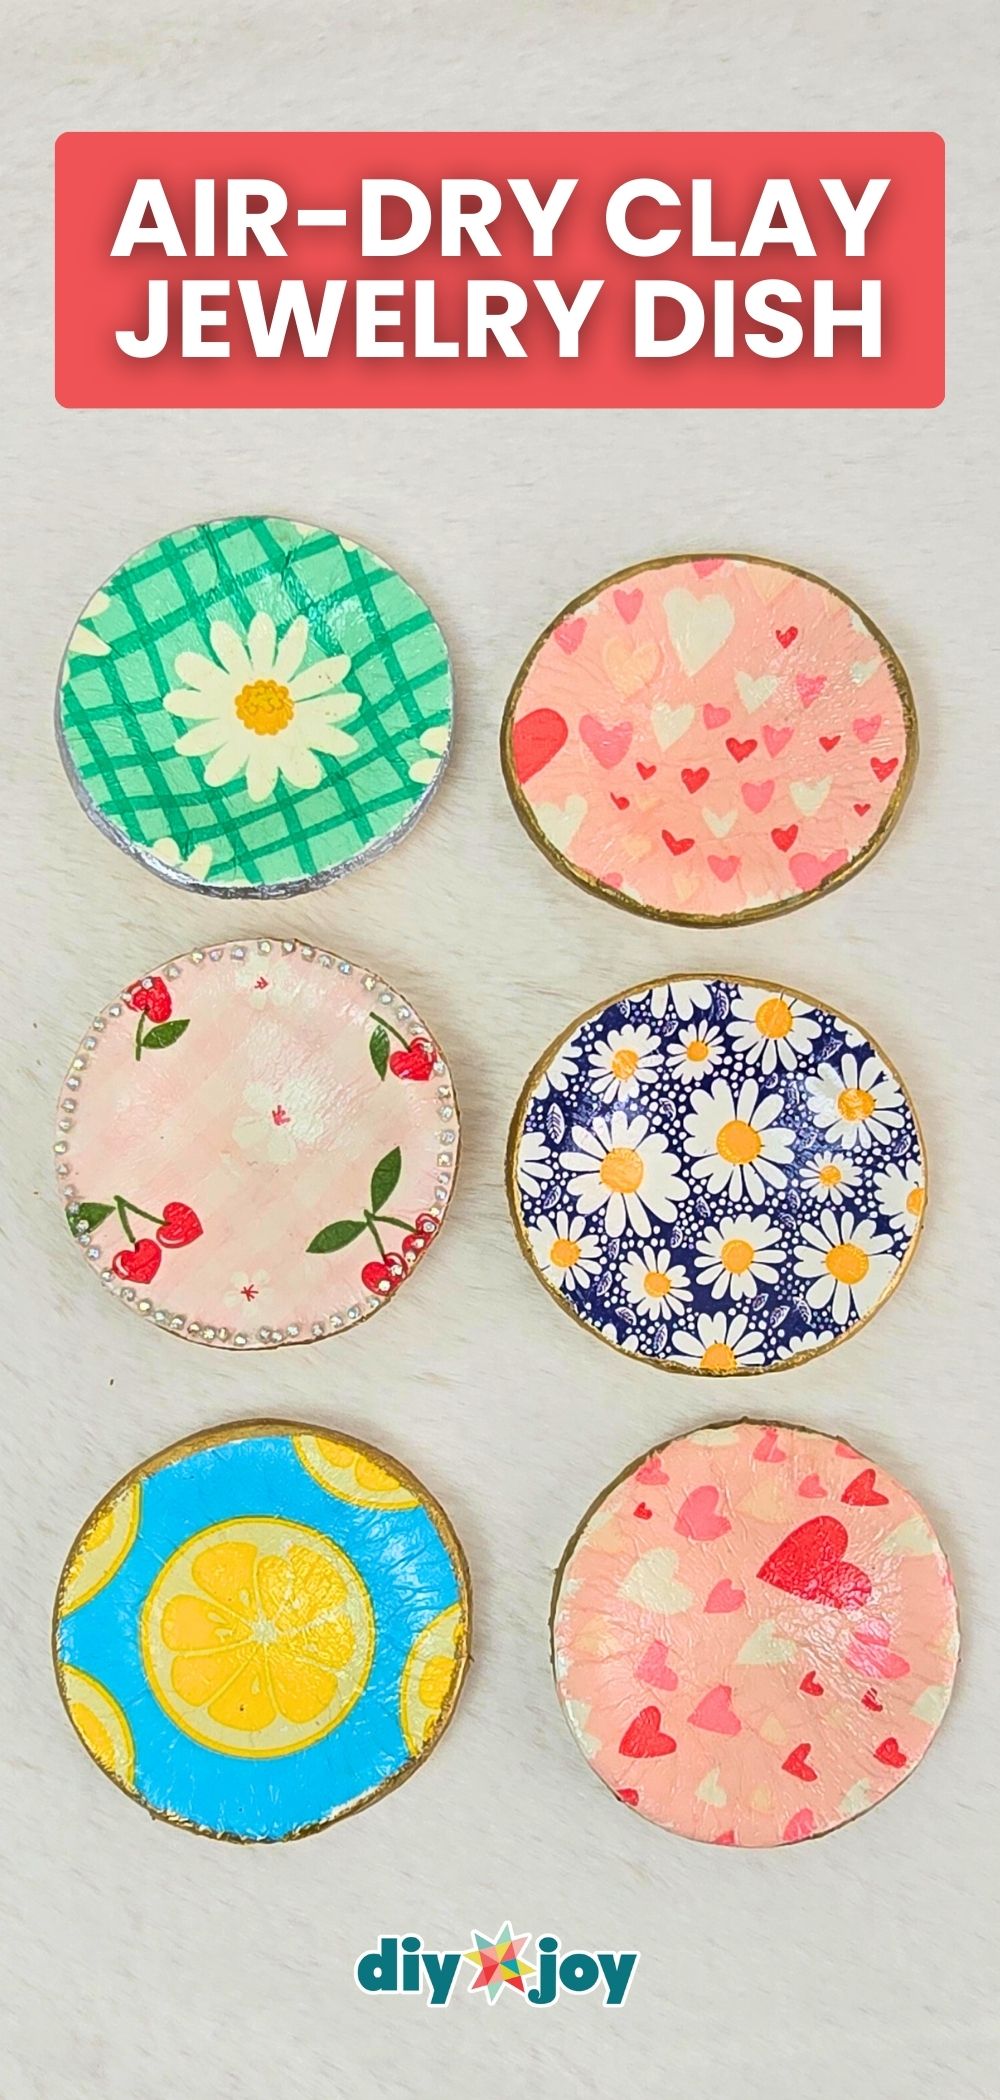
Your muffin pan has a side job: shaping little jewelry dishes. Roll out air dry clay, lay a printed napkin (backing layers peeled off) right on top, then cut a circle with a cookie cutter or jar lid. Brush on Mod Podge, press the circle into a muffin cup so it curves into a bowl, and let it dry overnight. Paint the edge gold and finish with gloss varnish. Daisies, cherries, lemons, hearts: pick a napkin that’s very her, and make a few, because one clay block goes a long way.
Get the full tutorial at DIY JOY.
33. DIY Air-Dry Clay Jewelry Organizer Using Pebbles
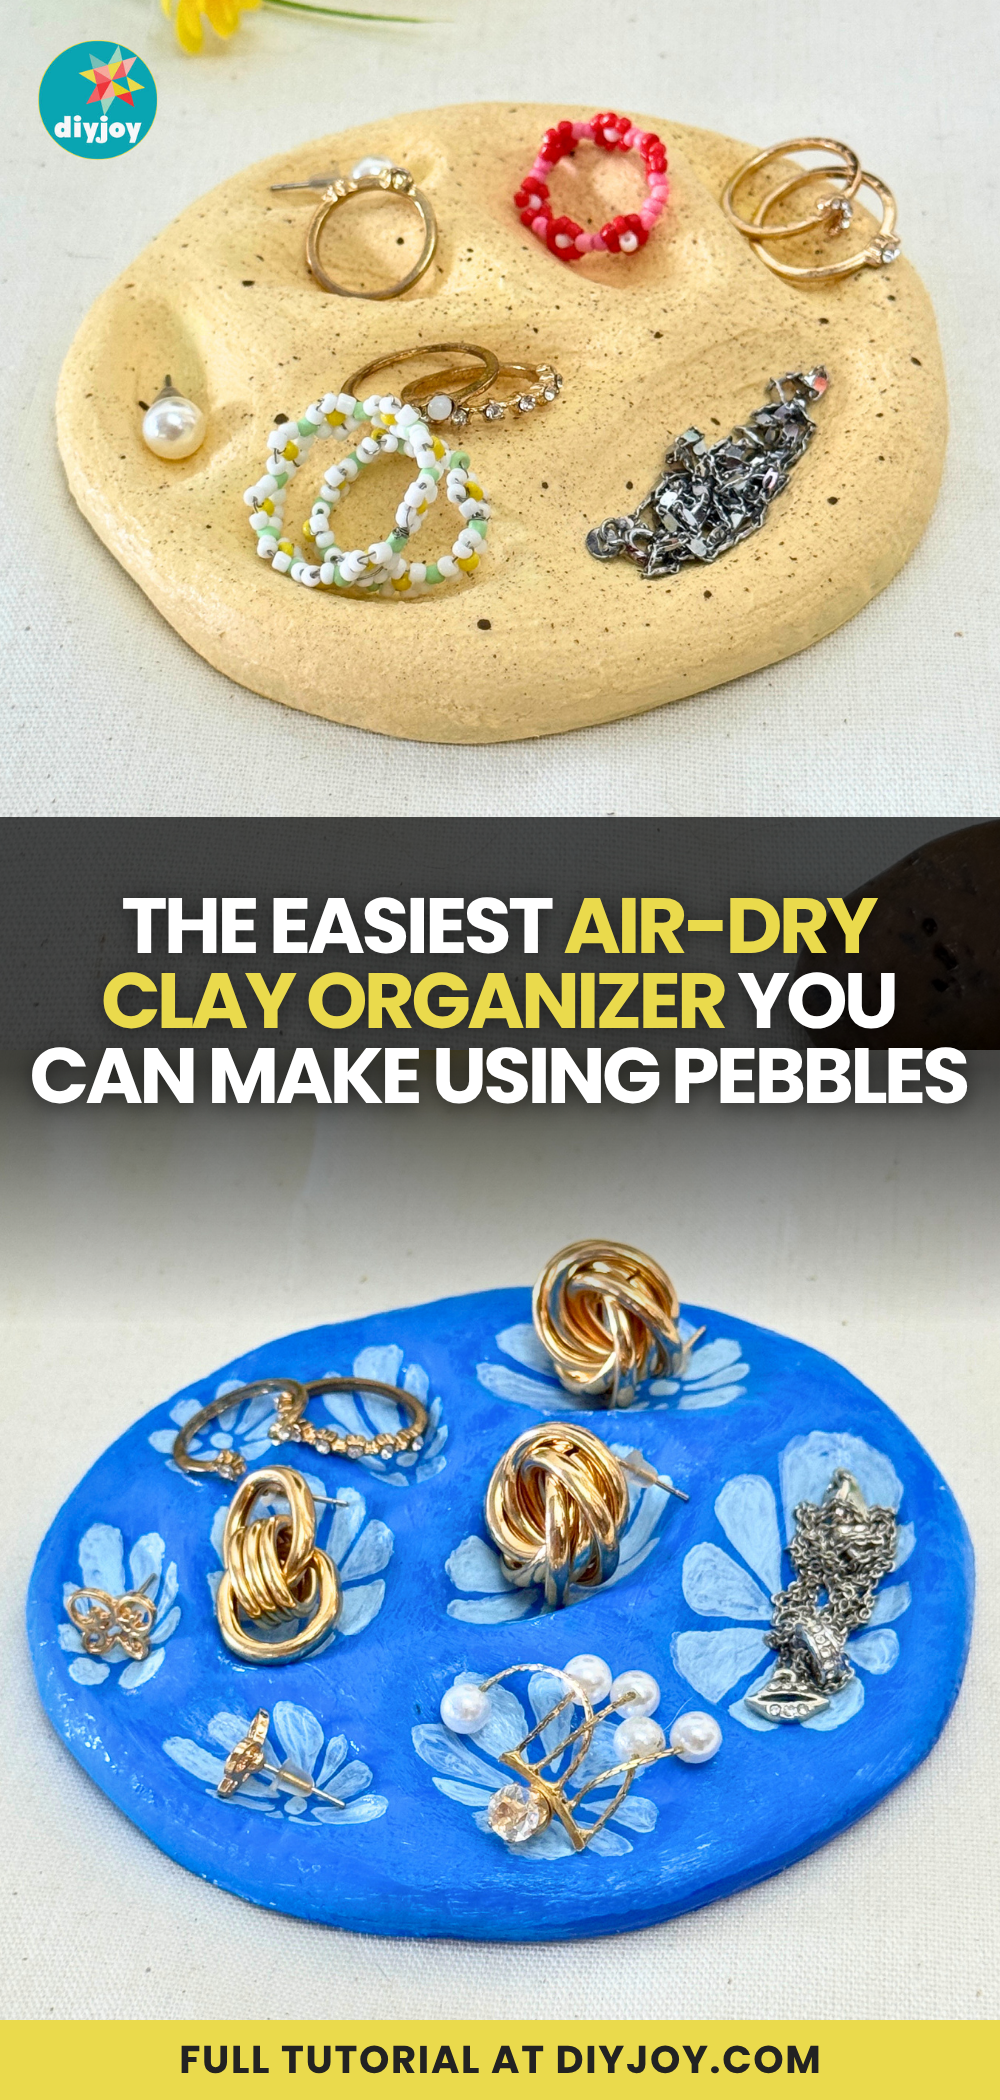
Pebbles from the yard make the perfect little ring wells, and they’re free. Roll air dry clay into a flat round, press the stones in one at a time and lift them out gently (wet them first so they don’t stick). Smooth any cracks with damp fingers, then let it dry, which can take overnight or a few days depending on thickness. Prime with gesso, paint a base color and add flowers inside the hollows. Want texture? Mix baking soda into the paint. Seal it glossy and every dip holds a ring.
Get the full tutorial at DIY JOY.
34. Easy DIY Woven Yarn Mug Cozy
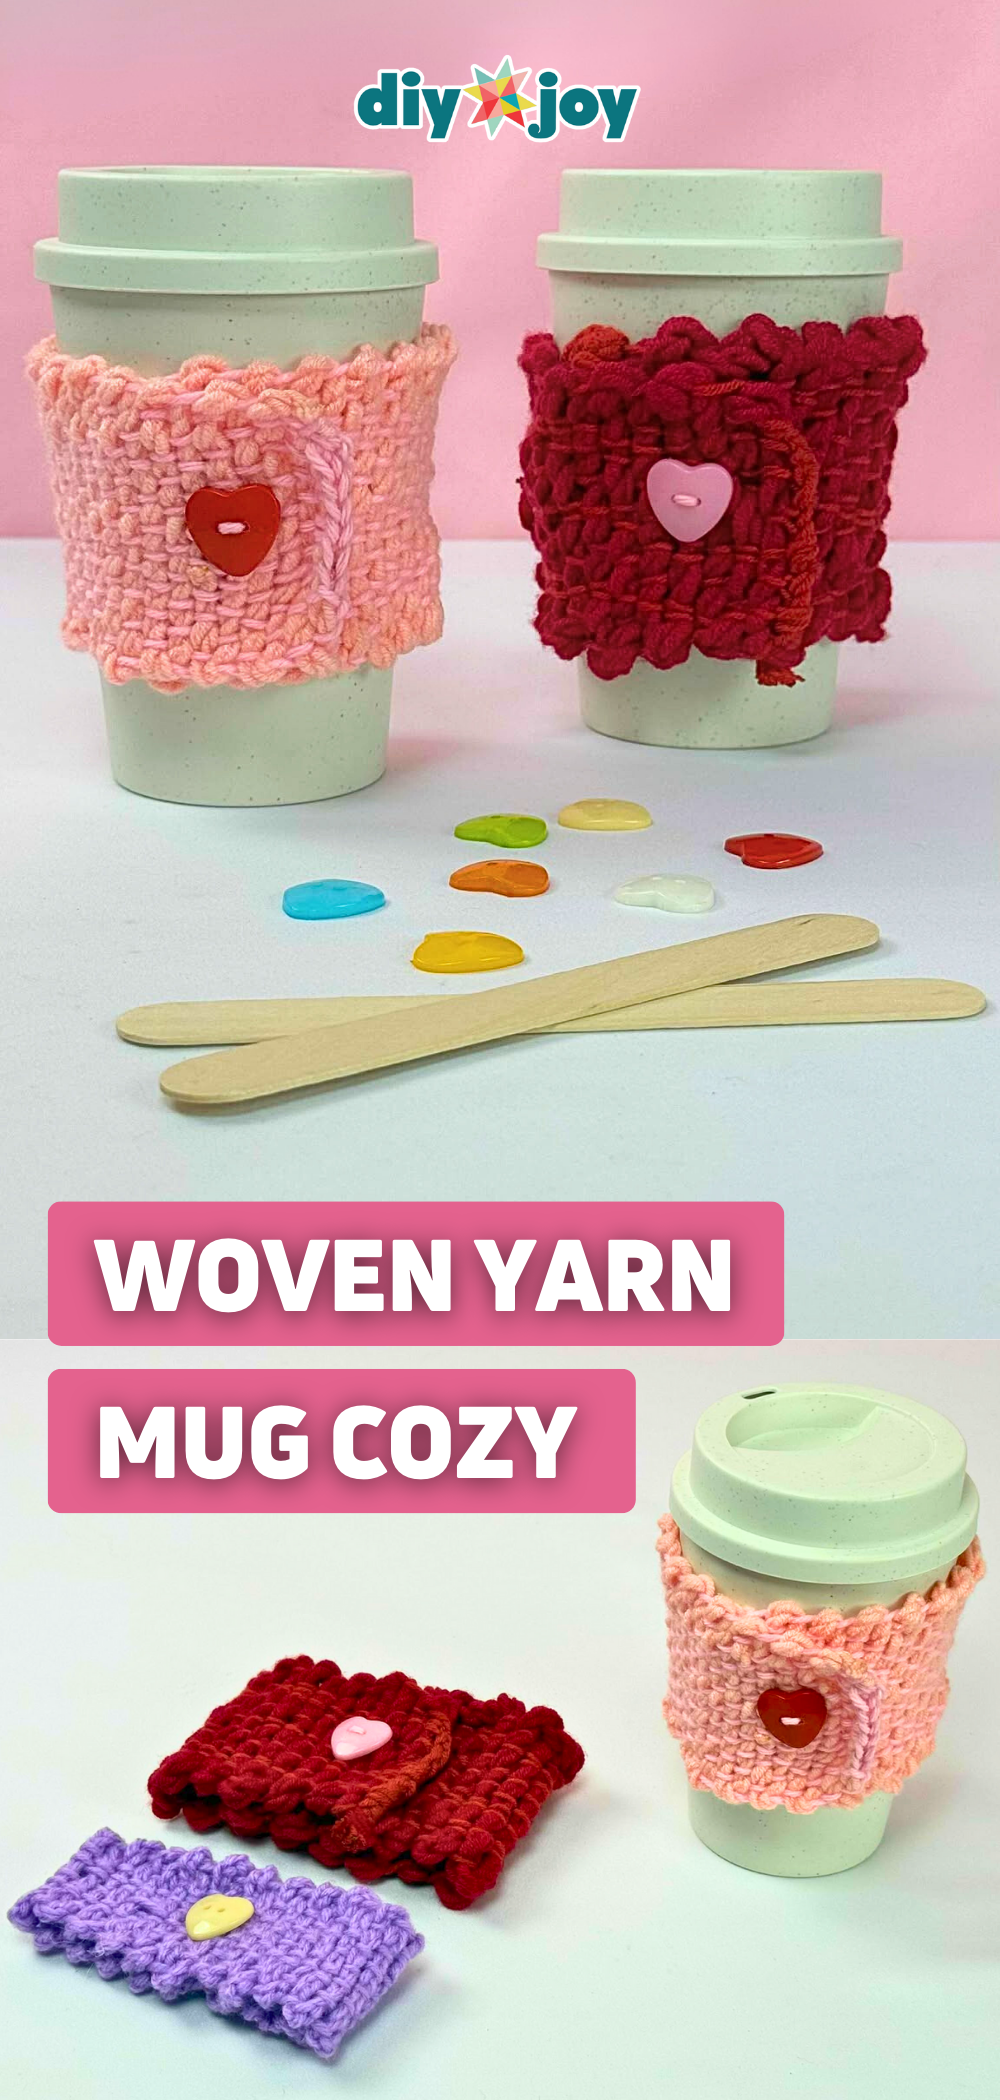
The look of crochet with none of the crochet, and a scrap of cardboard is your loom. Cut cardboard to fit around her mug, notch both ends about 1 cm deep and 1 cm apart, and wind yarn through the notches for the base strands. Slit the end of a popsicle stick, thread your weaving yarn through and go over and under across the strands, back and forth. Twist the yarn on itself first if you want a chunkier texture. Sew a heart button on the front and her cup of tea gets a sweater.
Get the full tutorial at DIY JOY.
35. Wrapping Paper Flower Cone

That leftover roll of wrapping paper in the closet is about to become the fanciest thing on her front door. Two 11 inch squares glued back to back fold into a sturdy cone, and a quick dab of hot glue holds the seam. A hole punch, a bit of bead chain for a handle and a ribbon bow through the front finish it off. Measure the stems before you trim the tip so the blooms sit right. Pick a print that matches her kitchen, then fill it with grocery store flowers or handmade ones that never wilt.
Get the full tutorial at DIY JOY.