The wall above the sofa is the hardest wall in the house, because everything sized to fill it costs three figures. These 48 DIY wall art ideas are the cheap way out, and a few of them are genuinely better than what you would have bought. There is a shower curtain stapled to a lumber frame for under twenty dollars that ends up four feet wide. There is a stack of postcards on foam board, a grid of oversized Scrabble tiles, eight hundred wine corks on plywood, and a canvas covered in glue-dipped string. Some are twenty minute projects. One took three days of painting one triangle at a time. Scroll for canvas, paper, fabric, pallet wood, wood slices and metal leaf, and pick whichever one matches the wall you keep walking past.
1. DIY Indigo Wall Art With Framed Fabric
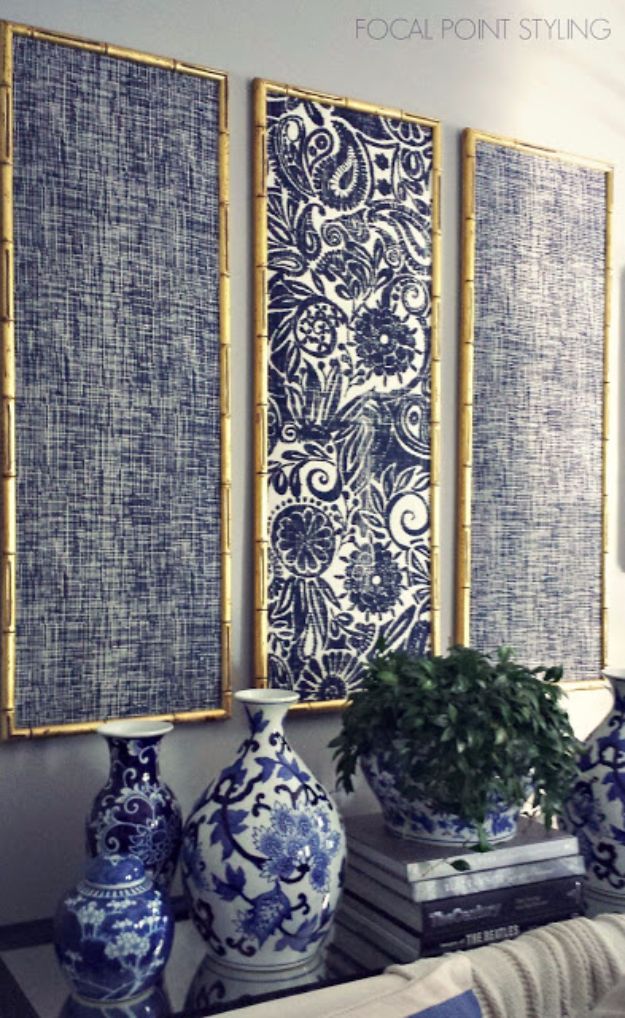
Twenty four dollars, twenty minutes of work and ten more to hang it, for a grouping that covers forty inches by forty six. Three gilded bamboo frames came from a consignment shop for twelve dollars total and a double-sided blue and white table runner came off a clearance rack for another twelve. Test the runner inside the frame panel before cutting anything, then take the side seams off first and the bottom edge last. Wrap the cardboard backing that came with the frame like a gift, shipping tape on the back, slide it in. Two crosshatch panels flanking one ikat.
Get the full tutorial at Focal Point Styling.
2. Batik Fabric Painting With Acrylic and Glue
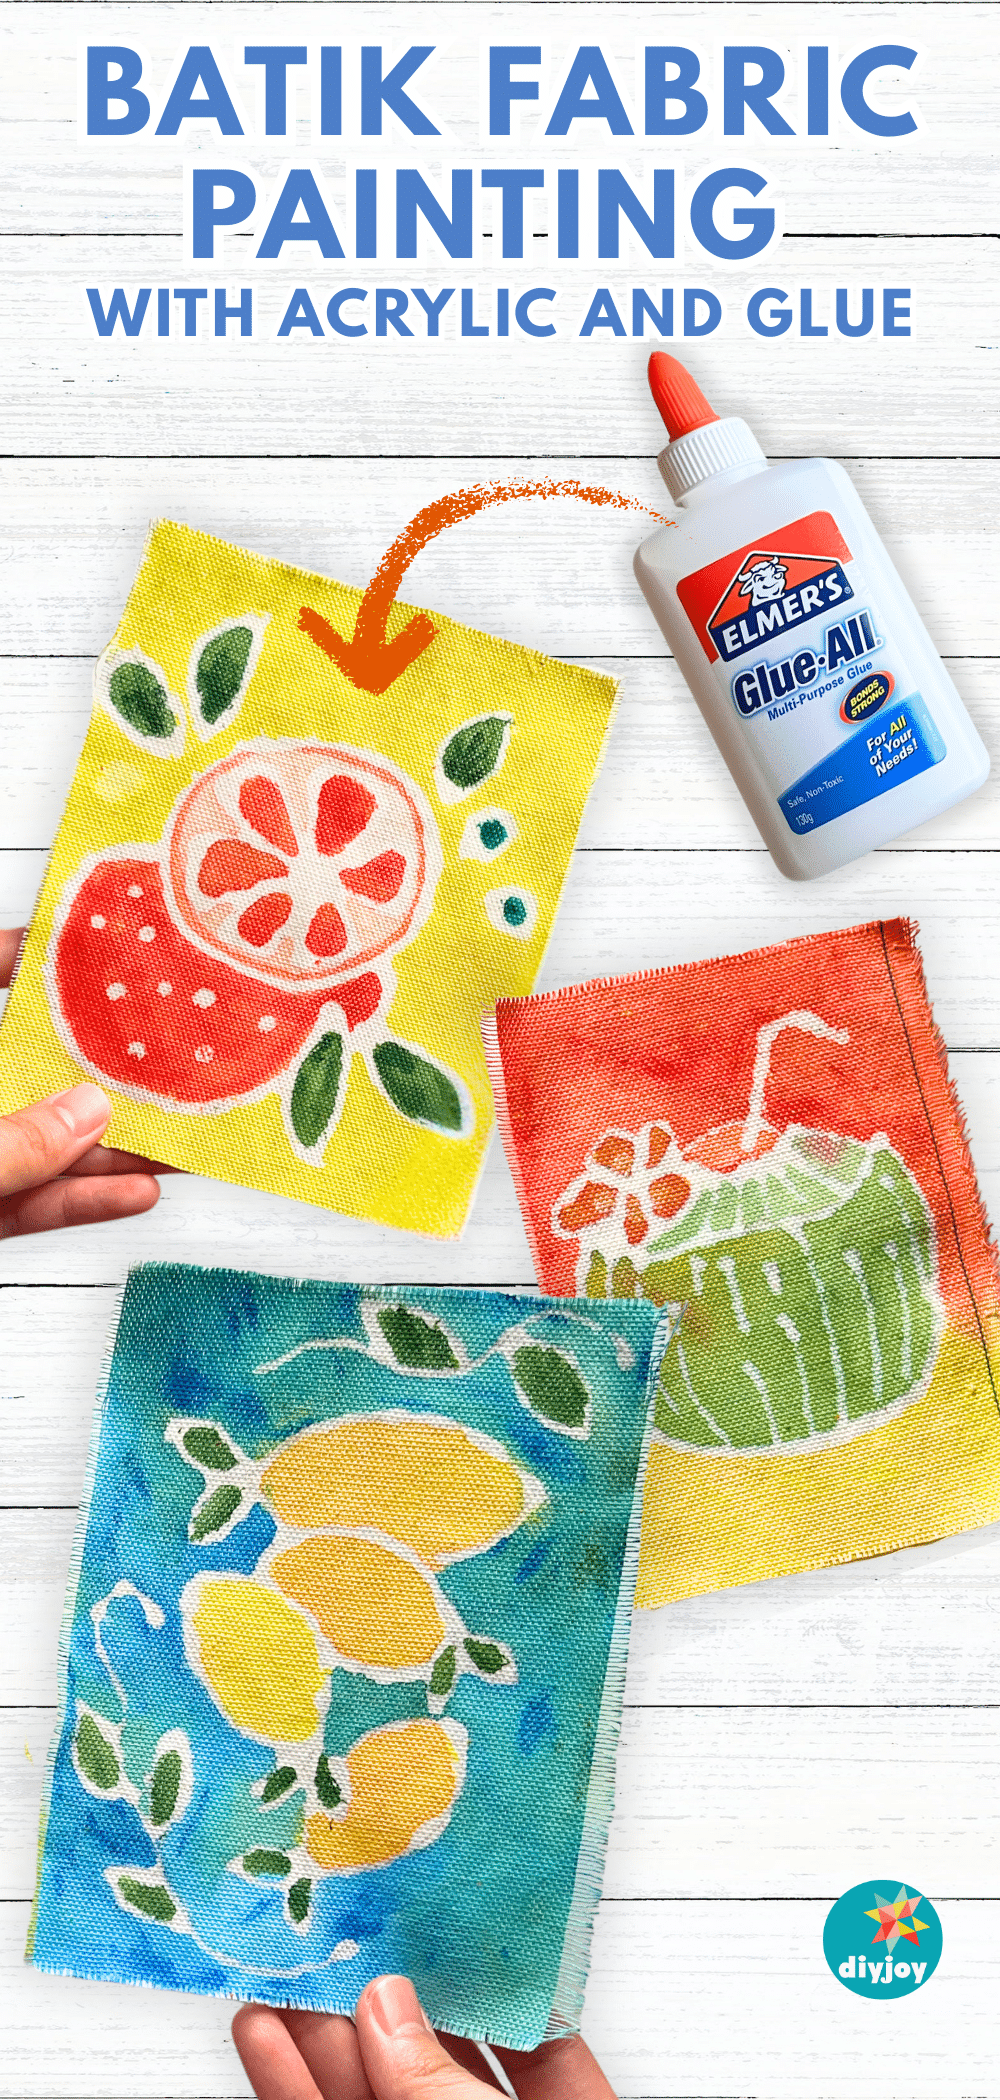
Batik without wax, without a dye bath and without any of the equipment that usually stops people trying it. White school glue does the resist work instead: draw the design in glue, let it dry completely, then paint acrylic over the whole surface of the fabric. Once the paint is dry the piece goes into water, the glue dissolves, and the lines it protected come back as clean white outlines. Stretch the finished square over a canvas frame or drop it in a shadow box and it holds a wall. Citrus and leaf shapes suit the technique because the outlines want to be simple.
Get the full tutorial at DIY JOY.
3. DIY Yarn Wall Art Hanging
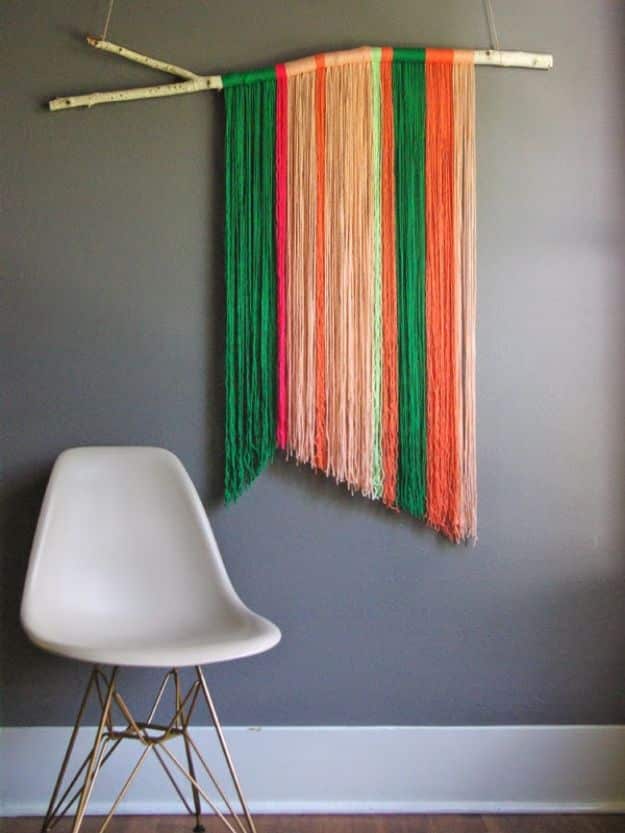
A yarn hanging is the fastest way to put color and softness on a big cold wall, and it costs whatever the yarn costs. Hang your twig or branch on the wall before you start, so you are working with gravity rather than against it. Cut every length of yarn twice as long as you want the finished piece, fold each one in half, lay the fold over the front of the branch and pull the two ends back through the loop. Slide each length hard against the last so no gap shows. Cut a paper template for the hem and hold it up against the yarn while you trim, because a straight cut freehand is almost impossible once every strand is hanging.
Get the full tutorial at Oleander and Palm.
4. Easy DIY Painters Tape Wall Art
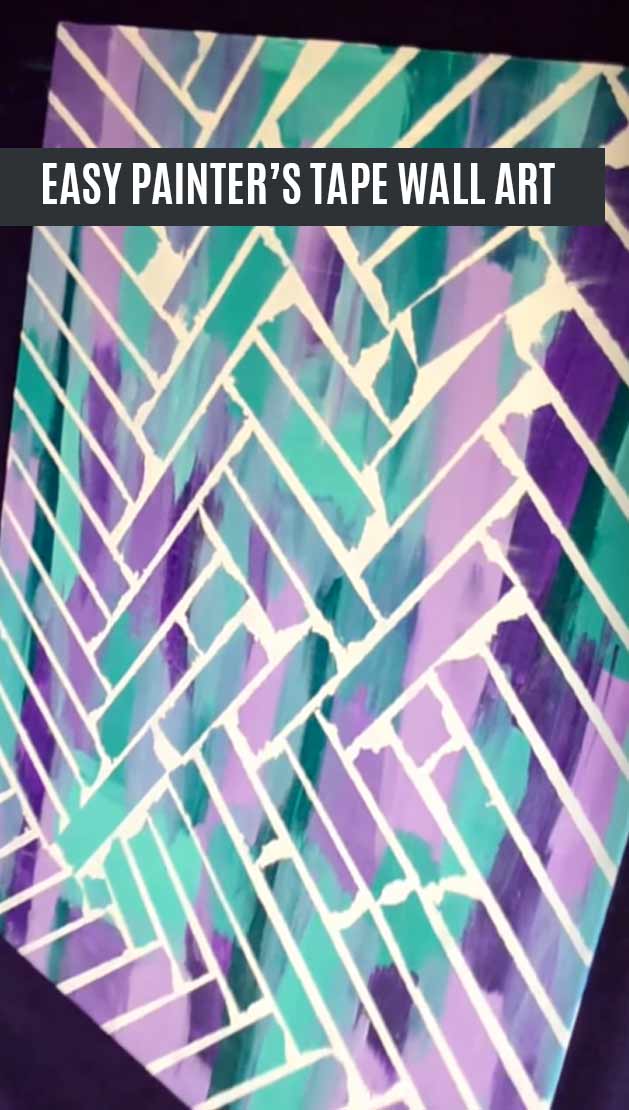
Painter’s tape, a canvas, a few shades of acrylic and a coat of clear gloss, and no artistic skill required at any point. Lay the tape down in overlapping angled runs, paint across the whole surface in colors that complement each other rather than clash, and pull the tape once it is dry. What is left is a crisp geometric pattern in negative space. Picking two or three shades of one color plus a contrast is what keeps it from going muddy. Oil paint works too if you have it, it just takes considerably longer to dry.
Get the full tutorial at DIY JOY.
5. Cork Wall Art
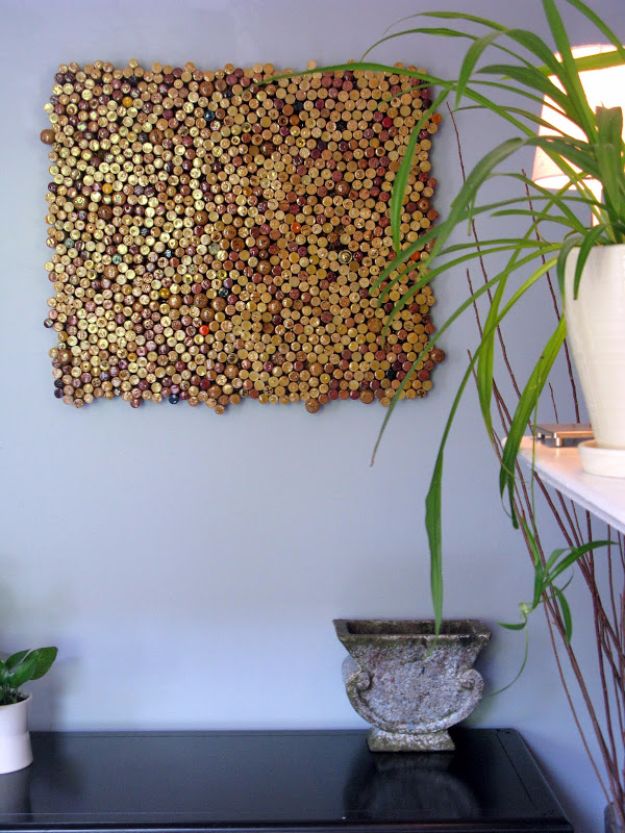
Somewhere between eight hundred and twelve hundred corks, depending on size and how big you go, which is the number nobody expects. They press into a bed of tile mastic spread on three quarter inch plywood exactly like setting tile, arranged at random so the heights and the wine stains vary. Construction adhesive handles the edges and any cork that works loose later. Then roughly ten coats of gloss polyurethane over a few weeks, brushed on. It ends up heavy, so heavy duty picture hanging hardware on the back is not optional. Worth pairing with other wine cork crafts.
Get the full tutorial at Project Rowhouse.
6. DIY Wall Art Patterned Squares
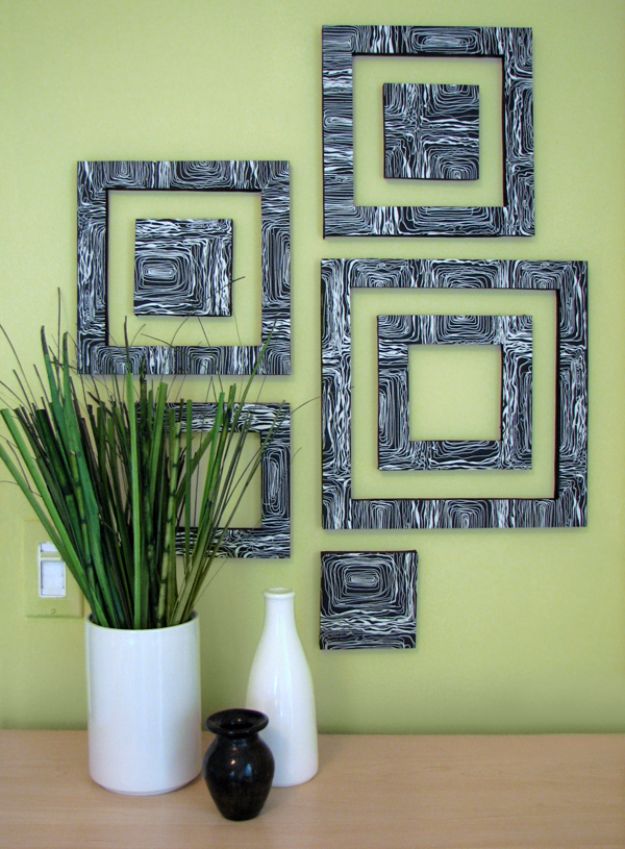
Half inch foam board, decorative paper and spray adhesive, cut into concentric square frames with an X-acto knife. Spray the board first and lay the paper down carefully, hitting the corners and edges so nothing lifts later. Mark the outer square, cut it, then decide how wide you want each frame, an inch and a quarter here, mark the inner corners and cut again. Use several light passes rather than one deep one, then push the cutouts out from the back. Paint the exposed foam edges to match the paper. Wall putty or poster tape hangs them. Works with any modern DIY home decor scheme.
Get the full tutorial at decor8.
7. Macrame Feather Wall Hanging
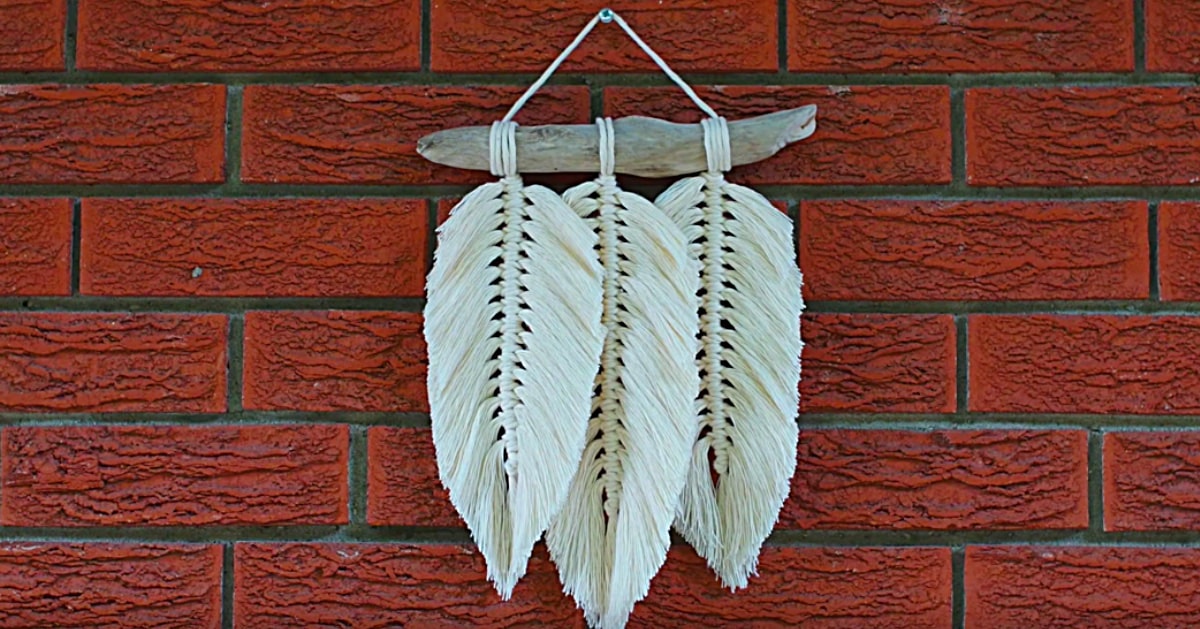
Three macrame feathers tied to a length of driftwood, and it is the one macrame project that does not need a single knot anybody has to learn. Lariat knot a doubled cord over the spine, add pairs of shorter cords down both sides, then comb every strand out until the whole thing fluffs. The shape comes from the haircut, not the knotting: trim the outline freehand with sharp scissors, then go back and taper the point. A stiffening spray is what keeps the vanes lying flat instead of drifting apart on the wall. Cotton cord combs out softer than synthetic.
Get the full tutorial at DIY JOY.
8. DIY Honeycomb Hexagon Wall Art
Thirty seven ten foot lengths of one by two, at about a dollar each, and a miter saw set to thirty degrees. Roll the paint on before you cut, with all the boards pushed together, and sand the drips off afterward rather than trying to prevent them. Cut one end at thirty degrees left of center, then build a jig so every following piece comes out identical, then rotate the saw thirty degrees right for the second jig that finishes the point. Mount with a nail gun, and tape each hexagon to the wall with painter’s tape first so you can adjust the angles before committing.
Get the full tutorial at Vintage Revivals.
9. Quilled Monogram Letter Wall Art
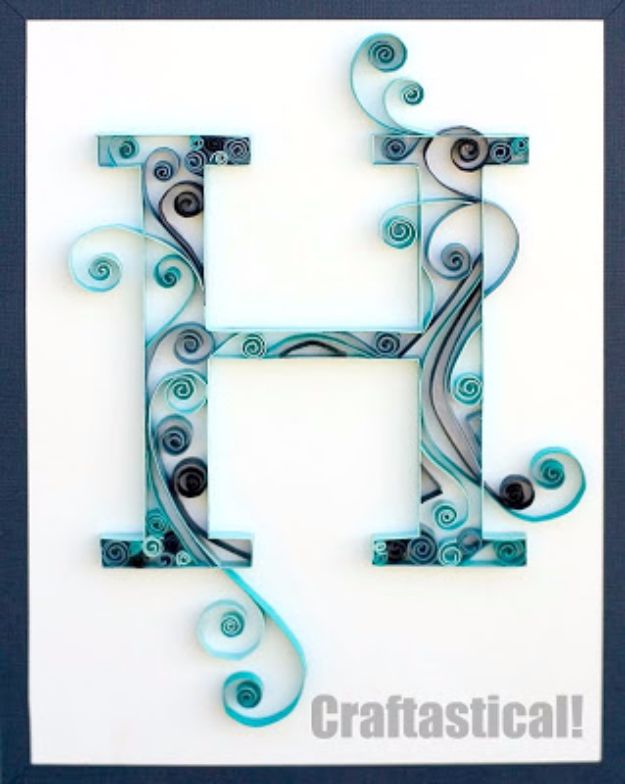
Quarter inch strips of colored paper, folded and glued on edge to trace a printed letter outline, then filled with loose coils and scrolls. Print the monogram in a light gray so the guide disappears under the paper, using a serif font with an outline effect and no fill. Fold rather than curl for the outline itself, measuring and marking each turn, and do not glue until a whole strip is finished. Mod Podge brushed just inside the lines with a medium brush holds it. The one real warning is about clean hands, because this smudges the moment you stop being fussy.
Get the full tutorial at Craftastical.
10. DIY Gold Foil Wall Art
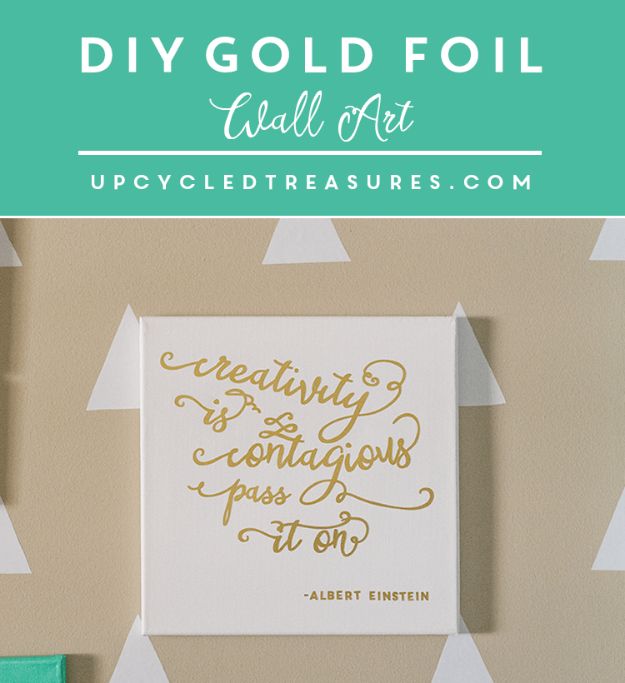
Printable gold foil run through a home cutting machine and transferred onto a twelve by twelve canvas, which is how a hand-lettered quote ends up with a real metallic shine rather than a gold-colored ink that photographs flat. The foil comes in packs, the canvas is standard craft store stock, and wood works just as well as a substrate. Keep the lettering large and simple on a first attempt, because fine strokes are where foil transfer fails. Scale is the whole design here: one short quote, big, centered, with nothing else on the canvas competing.
Get the full tutorial at Mountain Modern Life.
11. Easy Flower Canvas Painting
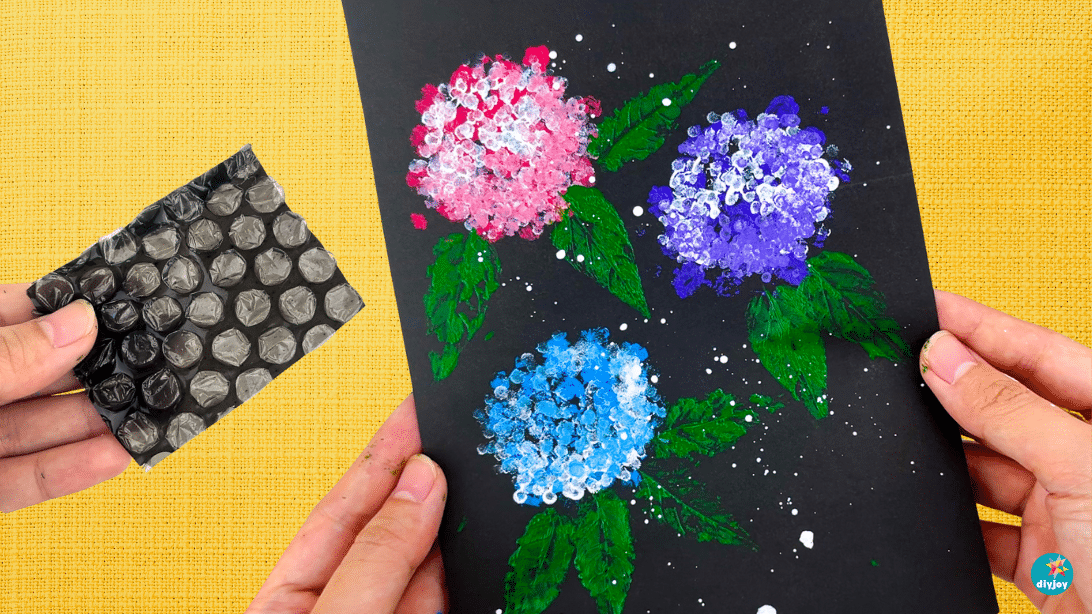
Bubble wrap, of all things, is what makes the hydrangea heads look like hydrangea heads. Press a piece of small-bubble wrap into paint and stamp it onto the canvas in loose clusters, and every bubble leaves one small round petal, which is exactly the texture a hydrangea has and exactly the thing a brush cannot fake. Cotton swabs handle the smaller dots and the stray flecks. Work on a dark ground so the pale flower colors have something to sit against. No painting experience is needed anywhere in this, which is the point.
Get the full tutorial at DIY JOY.
12. DIY Wood Slice Wall Art
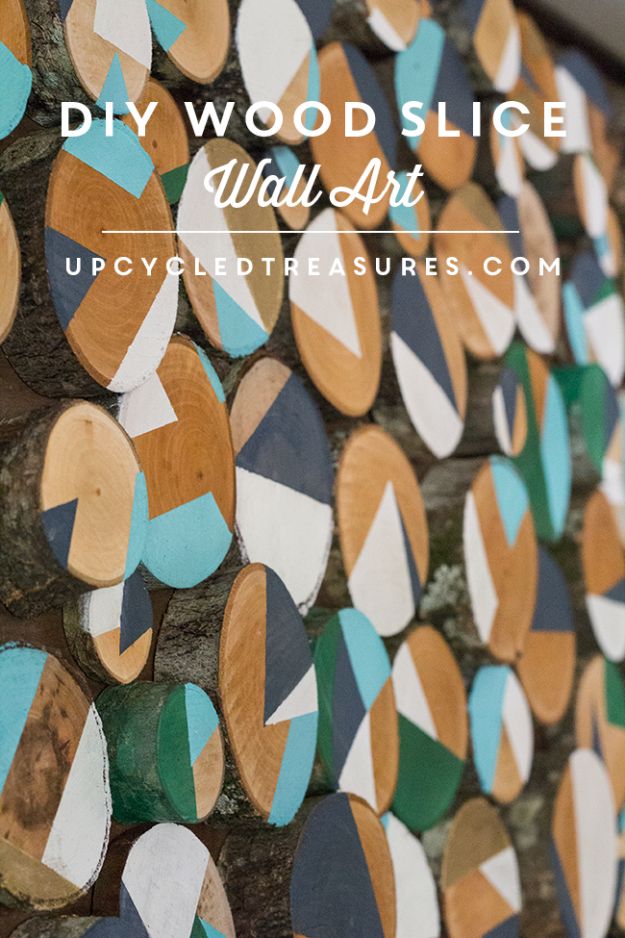
Branches from a tree that came down in the yard, sliced thin, painted and glued onto a plywood panel inside a one by four frame. The painting is what lifts this above a pile of wood rounds: each slice gets a hard-edged block of color over part of its face, teal, white, black, and the bare grain shows on the rest. Rub’n Buff adds the metallic ones. Sand every slice with two twenty grit first, stain the ones staying natural, then glue with a heavy duty adhesive. Craft store slices work if no tree has obliged you lately.
Get the full tutorial at Mountain Modern Life.
13. Backlit Canvas Flora and Fauna Wall Art
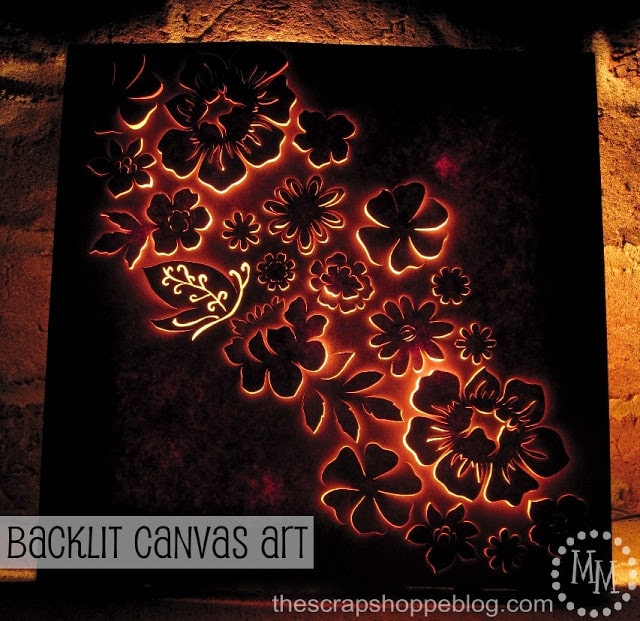
Plain cardstock and an X-acto knife over a mounted canvas, lit from behind with a string of Christmas lights. Stamp flowers across a twelve inch sheet of kraft cardstock in a subtle ink, then cut each one partially free, never all the way around, and push the shapes forward from the back so they pop. By day it reads as a paper relief sculpture; switch the lights on and it becomes something else entirely. Christmas lights rather than a single bulb, deliberately, because one bulb left on gets hot behind paper.
Get the full tutorial at The Scrap Shoppe.
14. Salt and Glue Painting
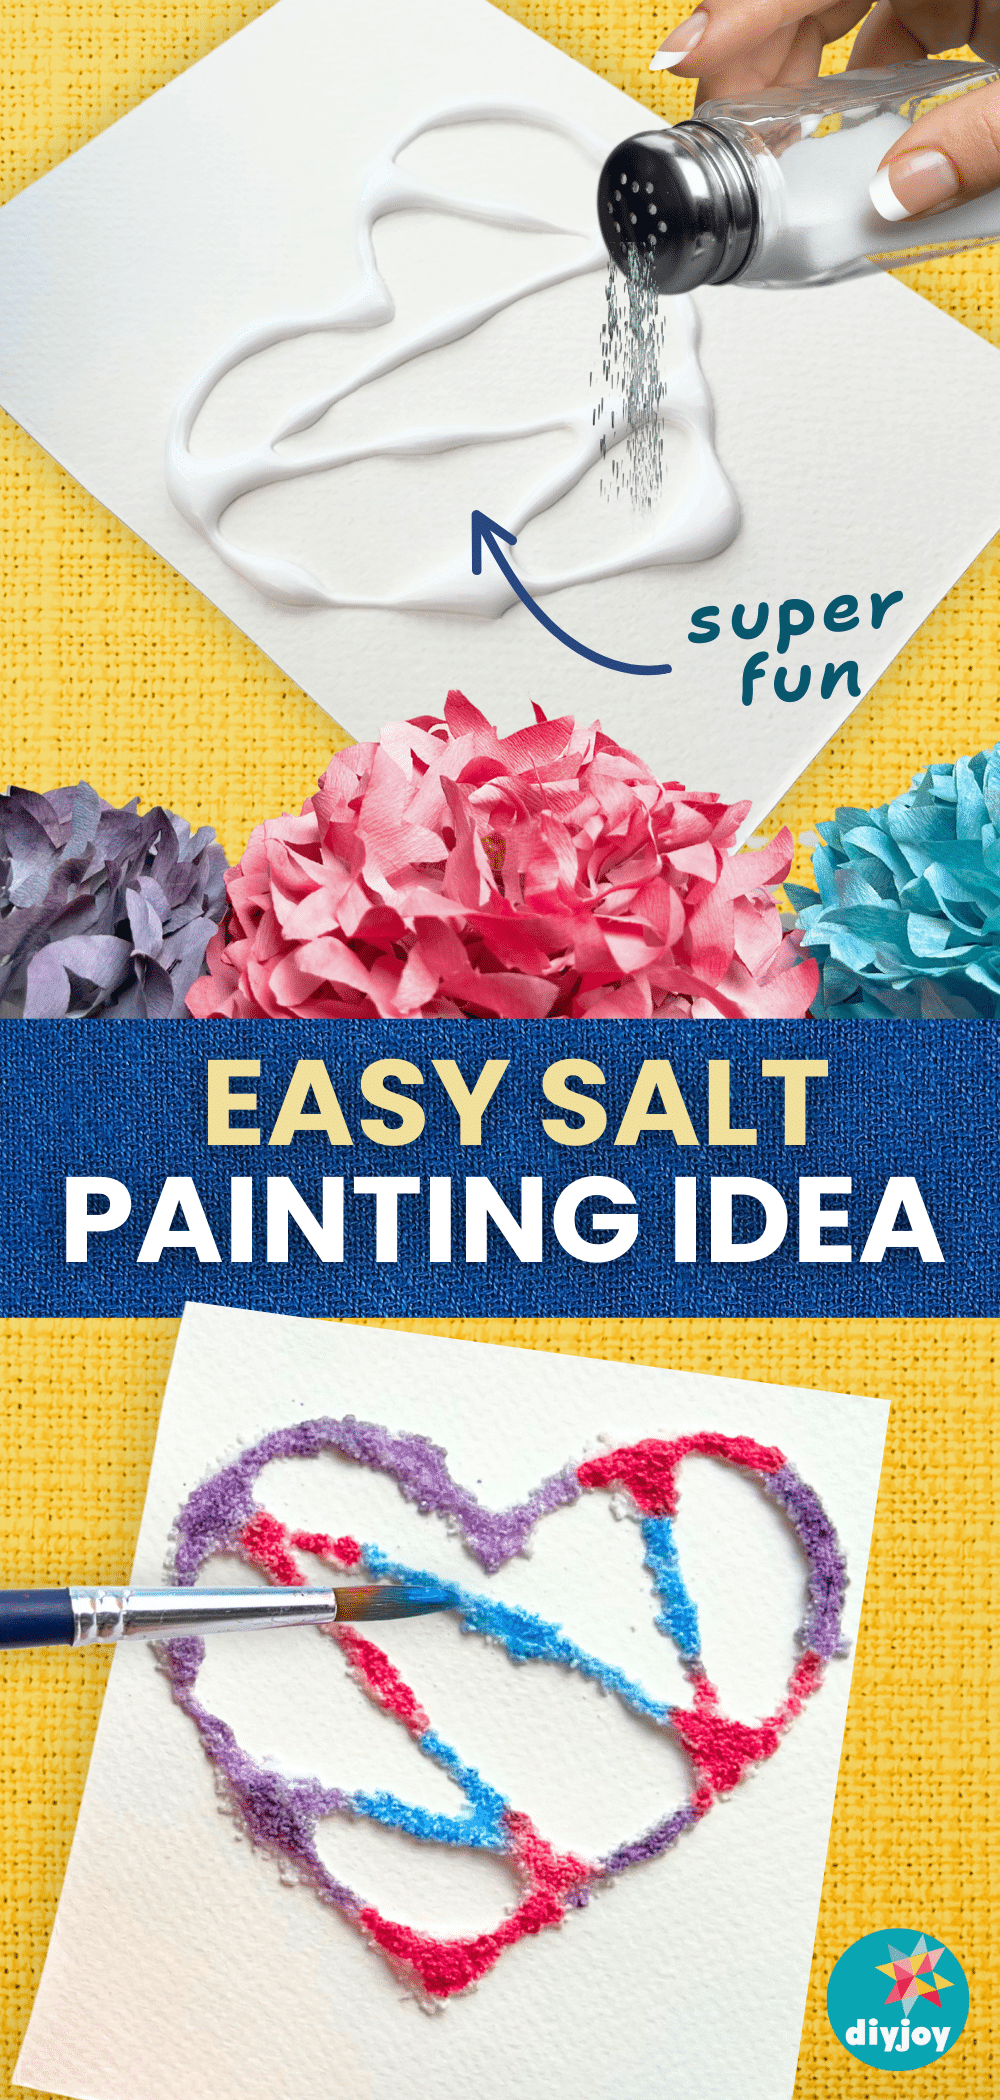
Glue drawn onto the surface in raised lines, salt poured over while it is still wet, then diluted paint touched to the crystals with a brush. The color wicks along the salt and spreads through the whole line on its own, which is the part that looks like magic and is really just capillary action. Use plenty of salt and tip the excess off before painting. Diluted paint travels, thick paint sits, so thin it more than feels right. A heart or a simple outline is the right first subject because the technique does the decorating.
Get the full tutorial at DIY JOY.
15. DIY Doily Wall Art
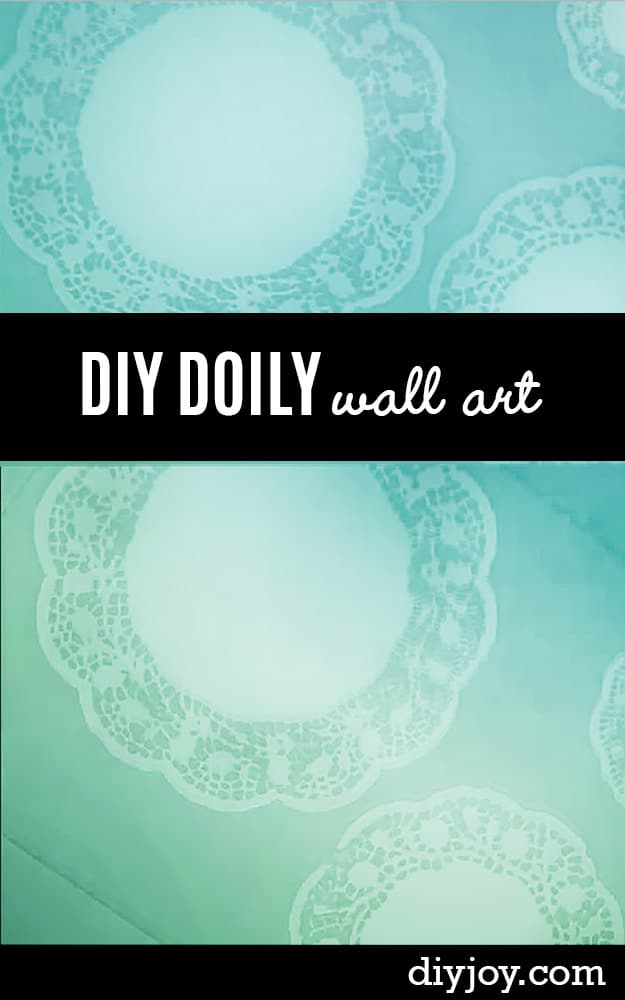
Paper doilies laid on a canvas as stencils, sprayed or brushed over, then lifted to leave their lace pattern behind in negative. Spray gives even coverage fast; a brush gives you control and lets you blend two colors into one another across the canvas, which is worth the extra minutes. Hold each doily flat while you work, because any lift lets color creep underneath and blurs the lace. Three canvases in three colors makes a set. The whole supply list is canvas, doilies and paint, which makes this one of the cheapest projects on this page.
Get the full tutorial at DIY JOY.
16. Easy DIY Dumpster Texture Art
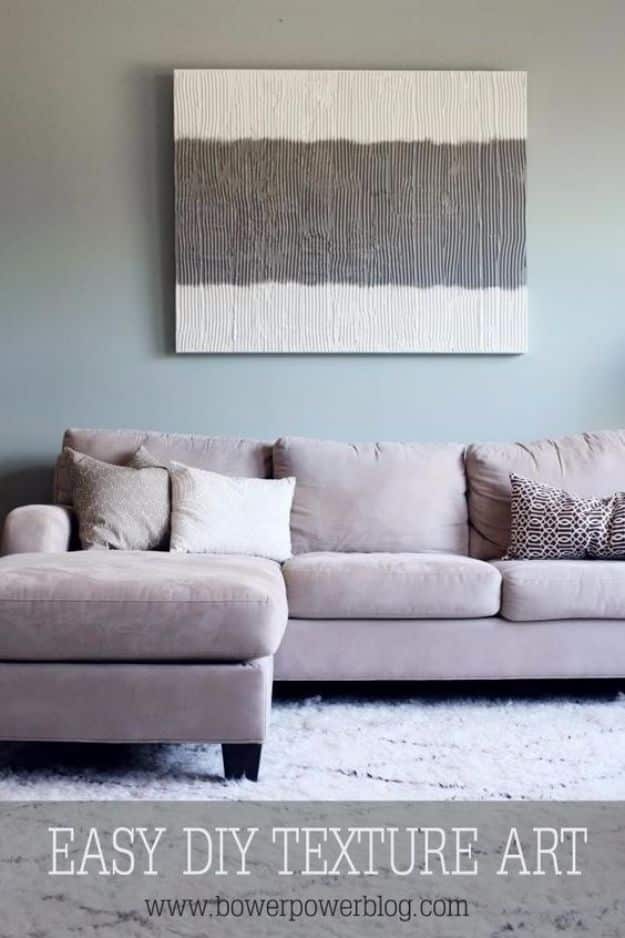
A large canvas pulled out of a trash pile, painted over with drywall compound troweled across the surface in long straightish strokes. Load the trowel, press the compound flat onto the canvas, then angle the blade and scrape the excess off in lines. It took two days to harden and four before painting. Rough sandpaper cleans the excess off the edges, then a dust brush clears the crevices. Two coats of white, painted with the grain of the texture, then one broad horizontal band in a muted gray brown, deliberately not straight. Total cost was nothing.
Get the full tutorial at Bower Power.
17. DIY Pallet Vintage Picture Wall Art
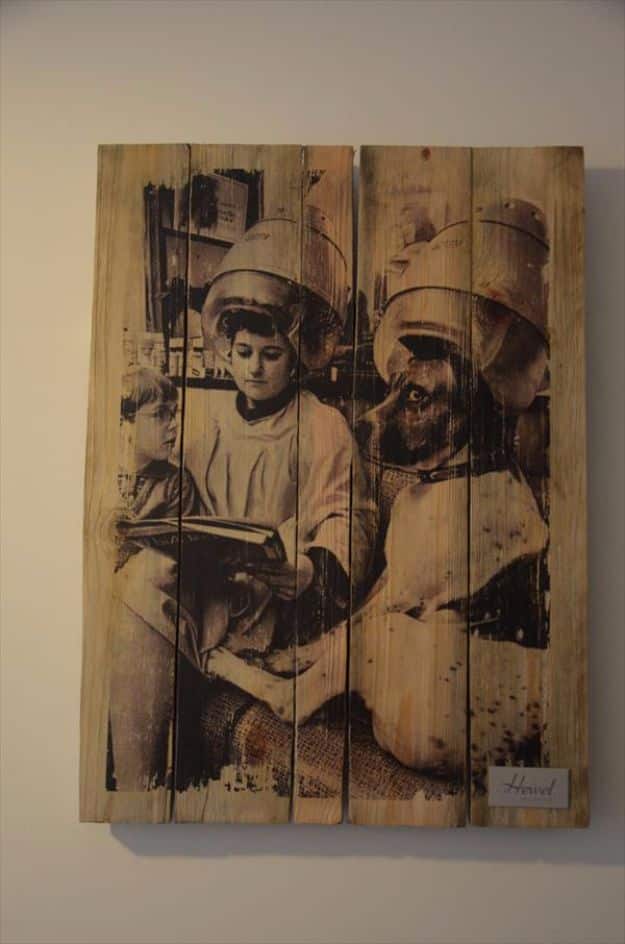
A black and white photograph transferred onto a panel of pallet boards with Mod Podge, so the image takes on the grain and the gaps between the slats. Pick a photo with strong contrast and large simple shapes, because a transfer loses fine detail into the wood and a busy image turns to mud. Vintage and archival images suit the technique for exactly that reason. Once it is transferred you can leave the edges raw or trim the panel with metal or timber. The wood is free, which makes this one of the cheapest large pieces here.
Get the full tutorial at 99 Pallets.
18. Make DIY Colorful 3D Geometric Wall Art
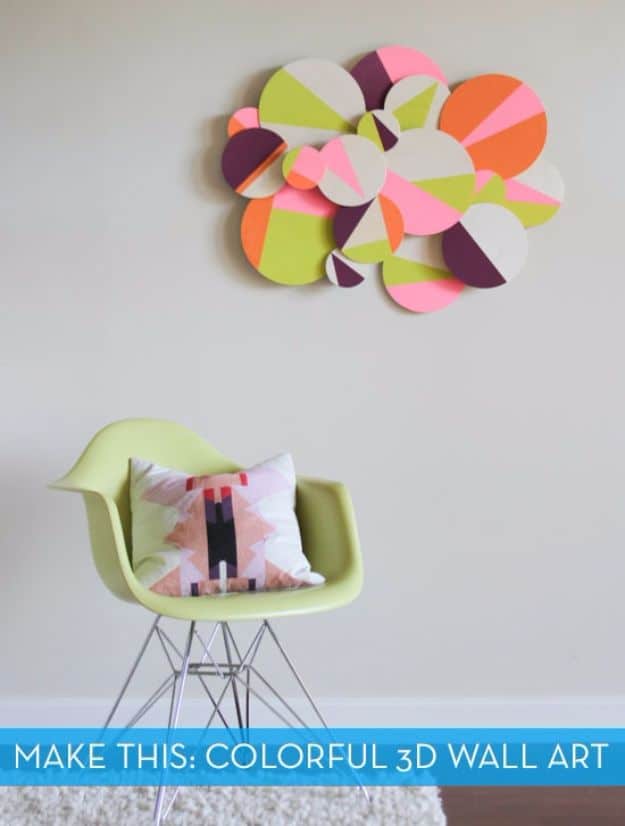
Wood circles in four sizes, four, six and a half, eight and ten inches, painted with taped-off geometric blocks and then mounted at different depths on half inch dowels so the whole cluster stands off the wall. Cut the dowels to four different lengths and glue some circles straight to the backing board as well, so the depths vary. Five colors maximum, and let bare wood count as one of them. The build came in under fifty dollars. It doubles as a photo booth prop, which tells you how light the finished thing is.
Get the full tutorial at Curbly.
19. DIY Postcard Wall Art
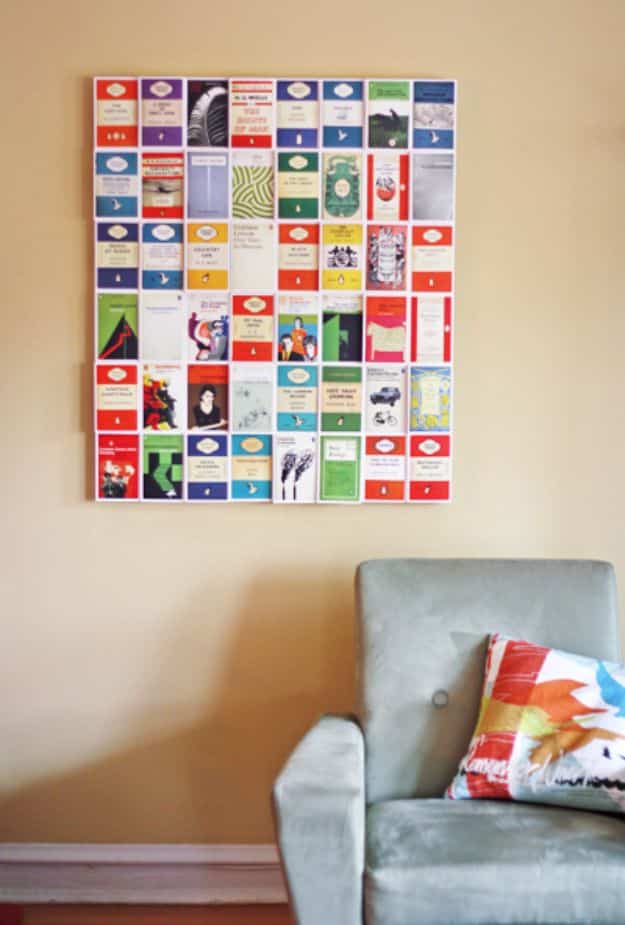
A boxed set of a hundred vintage book cover postcards, mounted on the biggest sheet of foamcore the art store had, thirty by forty inches for five dollars. The detail that lifts it is depth: small squares of foam board stacked one, two or three layers thick under some cards so they stand forward off the surface. Double-sided tape rather than wet glue, which would warp the cards. Stick everything except the right column and the bottom row, trim the board to the cards with a knife, then add the last ones flush to the cut edge.
Get the full tutorial at How About Orange.
20. Boho Palm Leaves Wall Decor
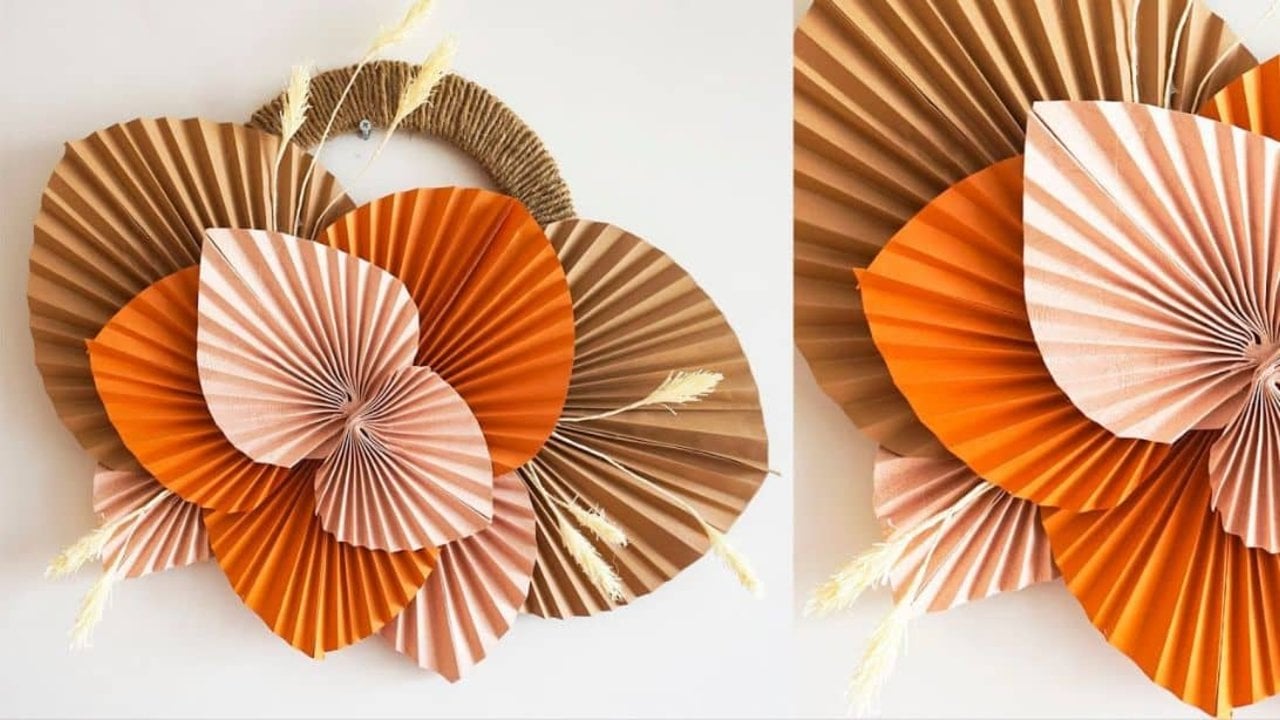
Colored paper, crepe paper and a sheet of cardboard, folded into pleated fans and cut into leaf shapes. Concertina fold the paper first, then cut the outline while it is still folded, which is what gives every frond the same taper without measuring anything. Open the fans out, glue them onto a cardboard backing in overlapping rings, and tuck a few dried grasses between them so the edges are not all paper. Keeping the whole thing inside one warm range, rust through terracotta through blush, is what stops a paper wall piece reading as a party decoration.
Get the full tutorial at DIY JOY.
21. Plastic Bag Painted Flowers
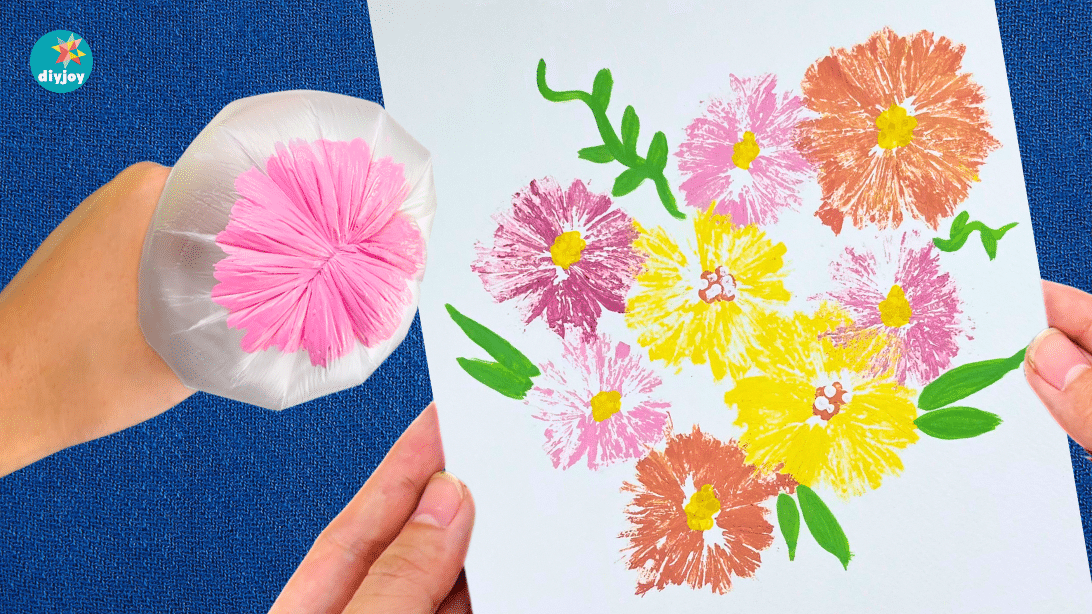
Scrunch a piece of used plastic into a loose ball, press it into paint, and stamp. Each stamp leaves a ragged ring of petals with a hollow middle, which is exactly what a zinnia or a cosmos looks like and exactly what a brush struggles to do without looking laboured. Re-scrunch the plastic between colors and the texture changes again. Add stems and leaves with a brush afterward and dot the centers in a contrasting color. No painting skill is required, which is the argument for it, and it uses packaging that was heading for the bin anyway.
Get the full tutorial at DIY JOY.
22. Watercolor Phrase Wall Art
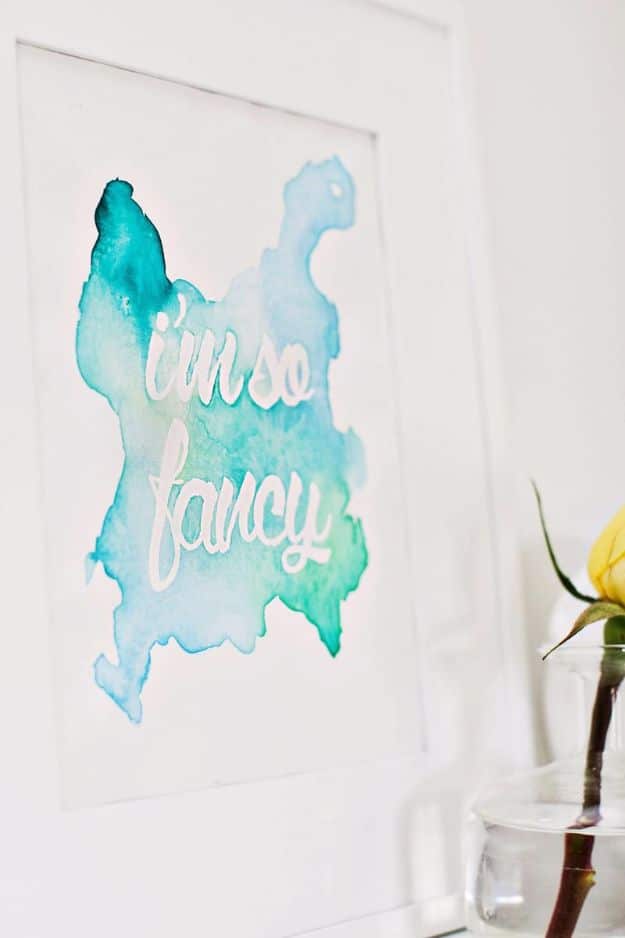
A loose watercolor blot with hand lettering reversed out of it in white, framed simply and hung with nothing around it. The shape is the whole design and it is meant to be irregular, so let the water do the spreading rather than painting an outline and filling it. Work wet into wet in one color at two or three strengths so the blot has light and dark areas. Getting the lettering to sit inside the shape without touching the edges is the fiddly part, and a light pencil sketch first is not cheating.
Get the full tutorial at A Beautiful Mess.
23. Abstract Floral Art Using a Chain
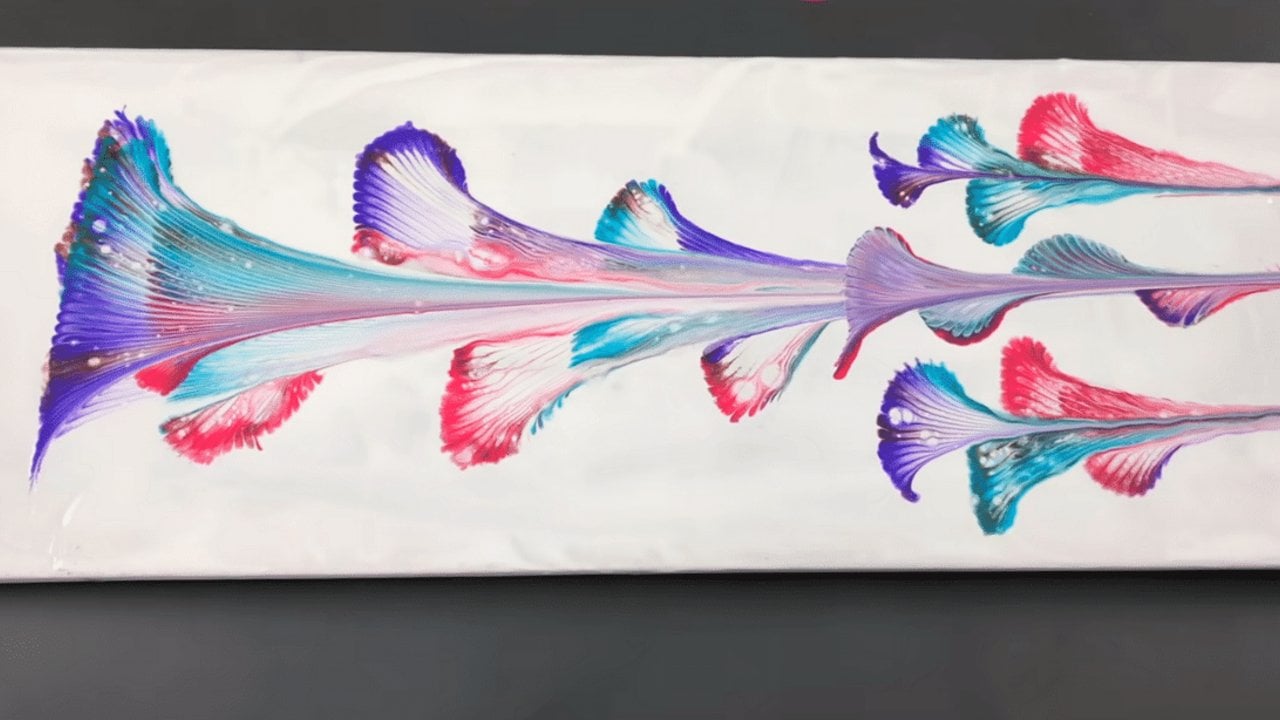
A length of ordinary metal chain is the brush. Lay the chain in acrylic paint, lift it, then press it onto the canvas and drag it in a curve, and the links print a row of feathered petal shapes that fan out from wherever the chain started. Change the curve and you change the flower. Two or three colors loaded along the chain at once bleed into each other on contact, which is where the depth comes from. Work on a canvas laid flat, not propped up, so nothing runs, and keep the paint thick enough to hold an edge.
Get the full tutorial at DIY JOY.
24. DIY Rustic State Map Wall Art
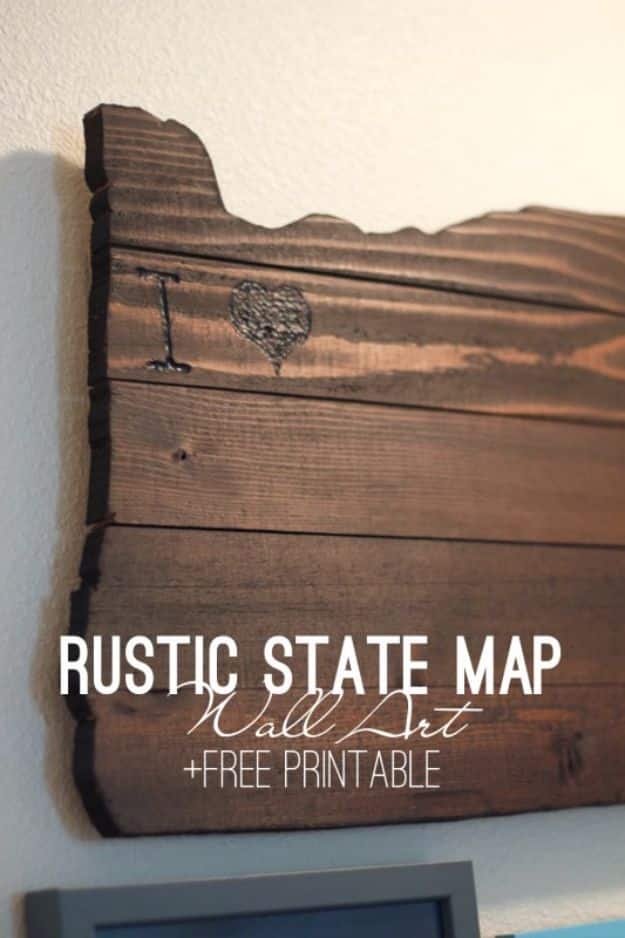
An old fence gate broken down into boards, planed, cut to length and ripped in half width-wise so the slats stay thin, then a state outline burned into the face with a wood burning pen and the whole panel stained. Free printable outlines of all fifty states come with the tutorial, and they tile across several sheets if you want the map bigger than letter size. Print, cut out, tape down and trace. It is an afternoon’s work plus drying time, and old pallet boards do the job just as well as a salvaged gate.
Get the full tutorial at A Crafted Passion.
25. Junkmail Typography Collage Art
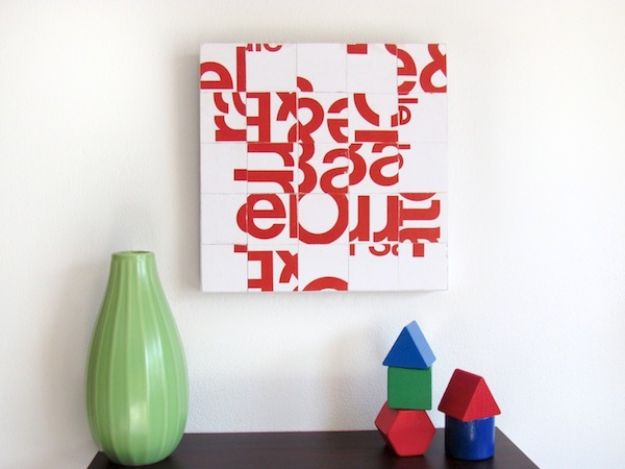
Two mailers, a one inch square punch and a five by five block of primed plywood, and the whole thing costs nothing but the Mod Podge. Punch twenty five one inch squares out of the red and white sections only, tape a sheet of cardstock to a gridded cutting mat so the rows line up, mount the squares in five rows of five, then trim the mounted block back to exactly five inches. Decoupage it to the front. Running a brayer with dried Mod Podge on it over the top scuffs the surface into something that looks aged rather than new.
Get the full tutorial at Mod Podge Rocks.
26. DIY Retro Wood Wall Art
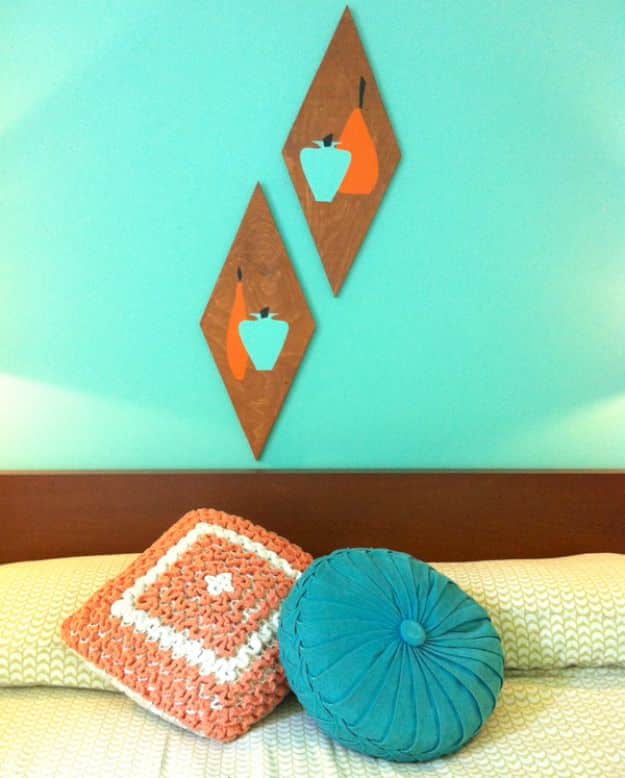
Two big plywood diamonds, custom cut, stained a medium brown with a red tint that reads like sixties teak, then stencilled with overlapping shapes in orange and turquoise. Stain fast and finish the whole piece in one go, because it dries quickly and a restart shows. Cut the stencils while the stain dries, tape them down hard, and do two coats through the tall stencil first, letting it dry completely before the second stencil goes on top of it. Small details like an apple stem are quicker painted freehand than stencilled. Clear spray seals it.
Get the full tutorial at Oh So Lovely Vintage.
27. DIY Wall Art Popsicle Stick Hexagon Shelf
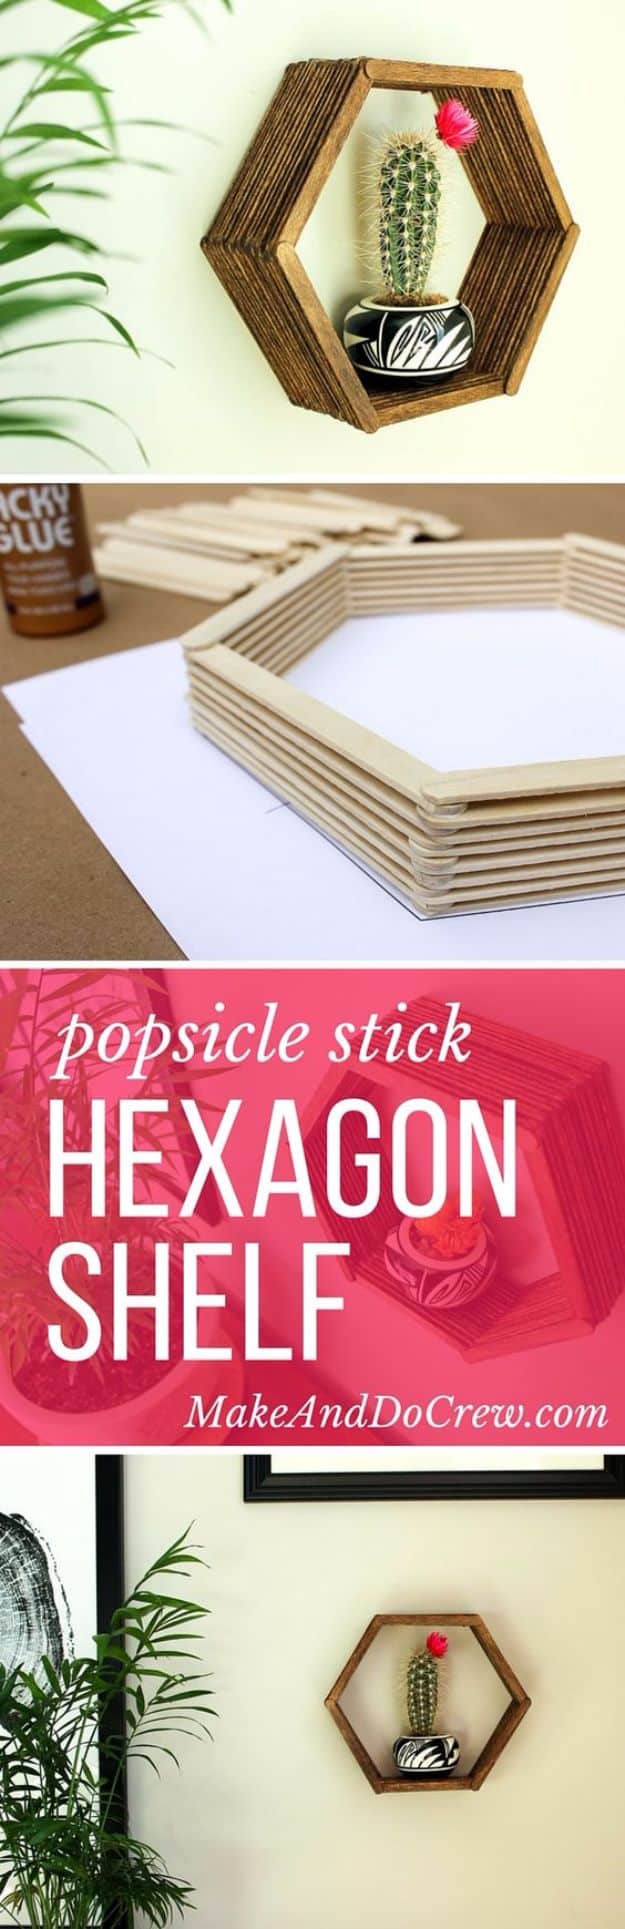
About a hundred popsicle sticks and a bottle of tacky glue, and the result holds a small plant. Put a drop of glue on both ends of three sticks and lay them in a triangle, then layer three more across them to close the hexagon, and keep going until the stack is as deep as you want it. Sixteen sticks deep is the depth here. Let the glue dry properly before you move it, then stain the whole thing, working the color down between every layer rather than just over the outside. A printable template makes the angles land right. A picture hanger on the back is optional, since two nails in the wall will hold it.
Get the full tutorial at Make and Do Crew.
28. DIY Calendar Pages Wall Art
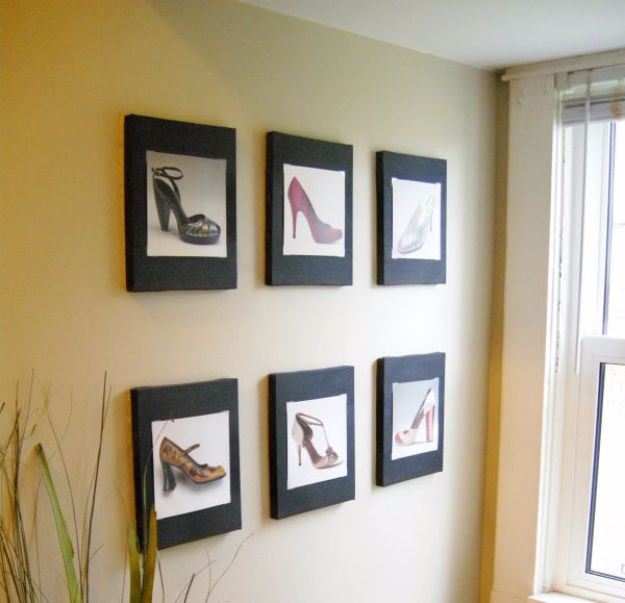
A page-a-day calendar you cannot bear to throw out becomes six small canvases, and the point is that nothing gets glued. Paint each canvas including all four sides and let it dry. Crop the images to remove the dates and to fit the canvas face, find the center, then hold each image on with four clear photo corners. Because the images are only cornered in place they swap out whenever you like, so a set of shoes can become a set of red ones at Christmas. Light canvases hang on adhesive strips with no holes at all.
Get the full tutorial at Etcetorize.
29. Shower Curtain into Large Wall Art
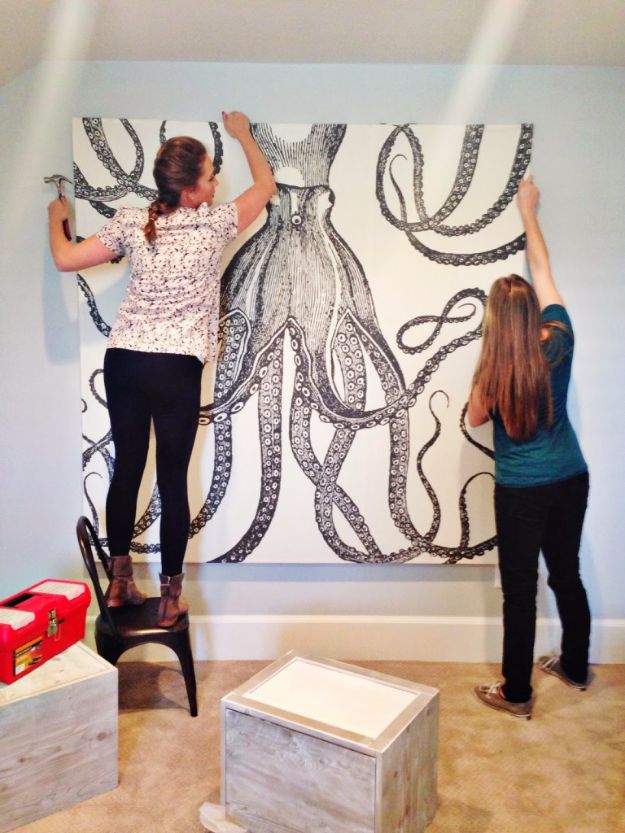
Under twenty dollars for a piece nearly six feet square, and the frame is six lengths of one by two. Two verticals at sixty seven inches, four horizontals at sixty five, with the middle two purely for support, screwed together with an inch and a half screw so the whole thing behaves like a canvas stretcher. Standard shower curtains run seventy two by seventy two, so buy the curtain first and size the wood to it. Iron every crease out before stapling, then pull the fabric tight and staple round the back. The lumber came to just under seven dollars.
Get the full tutorial at House of Jade Interiors.
30. DIY Wall Art With a Canvas Stretcher Frame and Fabric
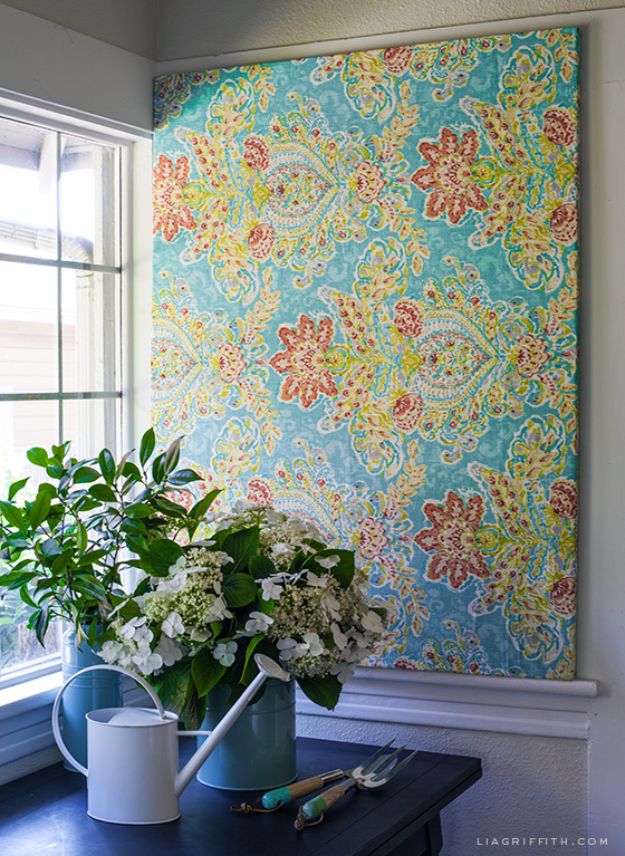
Ten minutes, if the fabric is already cut. A canvas stretcher frame, thirty six by forty eight here, bought as a set or as individual bars from any art supply store, with a length of interior weight fabric trimmed a few inches oversize on every side and wrapped round to the back. Upholstery weight fabric behaves far better than dressmaking cotton on a stretcher because it does not distort as you pull it. This one was sized to cover an awkward window that looked into a tool closet, which is a use worth remembering for any blank or ugly rectangle.
Get the full tutorial at Lia Griffith.
31. DIY Simple Textured Wall Art
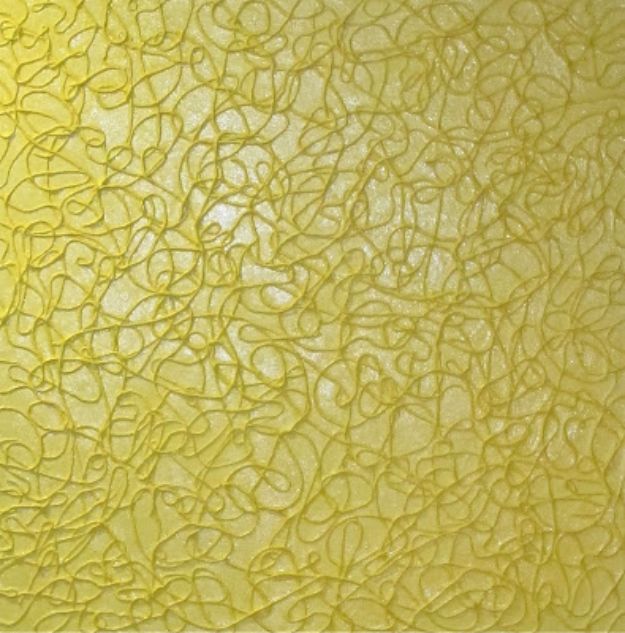
String, glue and a canvas, and it is genuinely easy enough for a child to do. Thin the decoupage glue with a little water so it runs off the string rather than clinging in blobs, then dunk about a yard at a time, squeeze the excess out and drop it onto the canvas in loops. Wear gloves, because that glue is unpleasant to get off skin. Once it is dry, one or two coats of gesso over the whole surface unify the string and the canvas into one texture, and only then does the color go on.
Get the full tutorial at BluKat Kraft.
32. DIY Rustic Shutter and Stars Wall Art
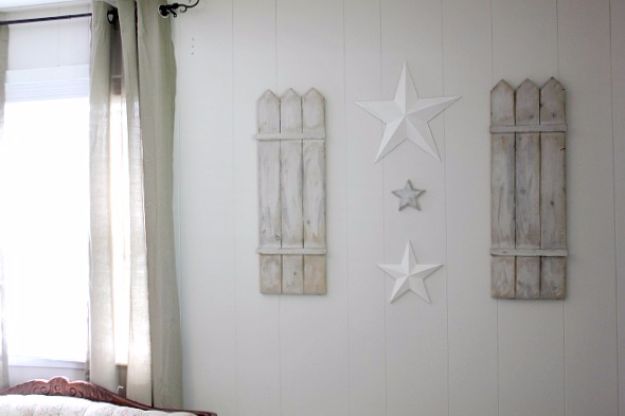
Two weathered shutters flanking a cluster of white stars, and the whole thing came out of a cupboard for nothing. The shutters were built from basic one by six lumber cut into picket shapes with thin strips laid across the front for stability, held together with wood glue and clamps alone. The front was painted to look weathered using whatever random paints were on hand, layered rather than mixed. The stars were things already owned and no longer loved, painted fresh white. Hold each star up and stand back before you fix any of them.
Get the full tutorial at The Creek Line House.
33. DIY Scrabble Wall Art
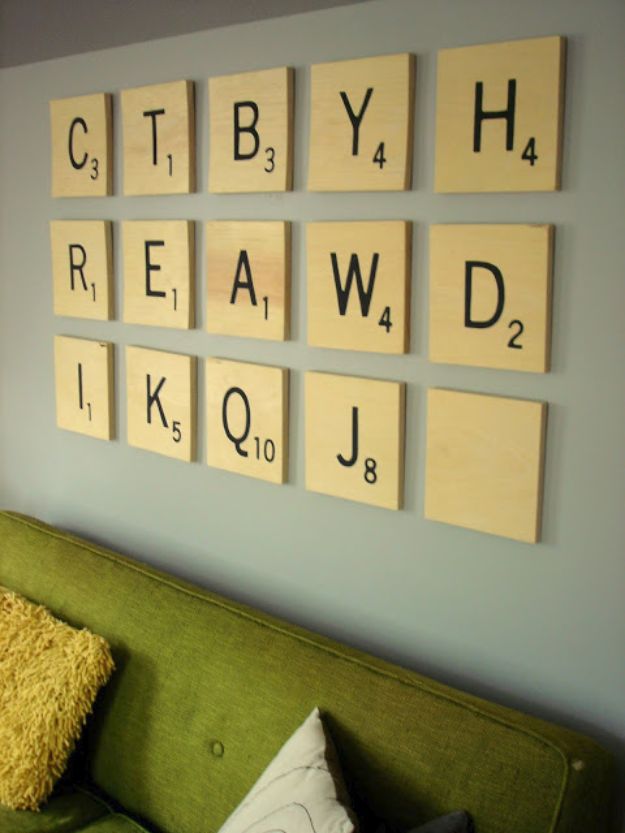
Fifteen oversized tiles, three days and fifty dollars, and it fills a whole wall above a sofa. Home Depot cuts the nine and a half inch squares for you; sand the corners round so they read as tiles. Print each letter at roughly the square size, scribble pencil on the back of the print over the letter and the number only, and that turns the printout into homemade carbon paper. Lay it face up on the wood, trace hard, and you get a faint gray outline to fill with black acrylic. Hardware on the back of each one, then hang.
Get the full tutorial at Insideways.
34. DIY Birch Tree Wall Art
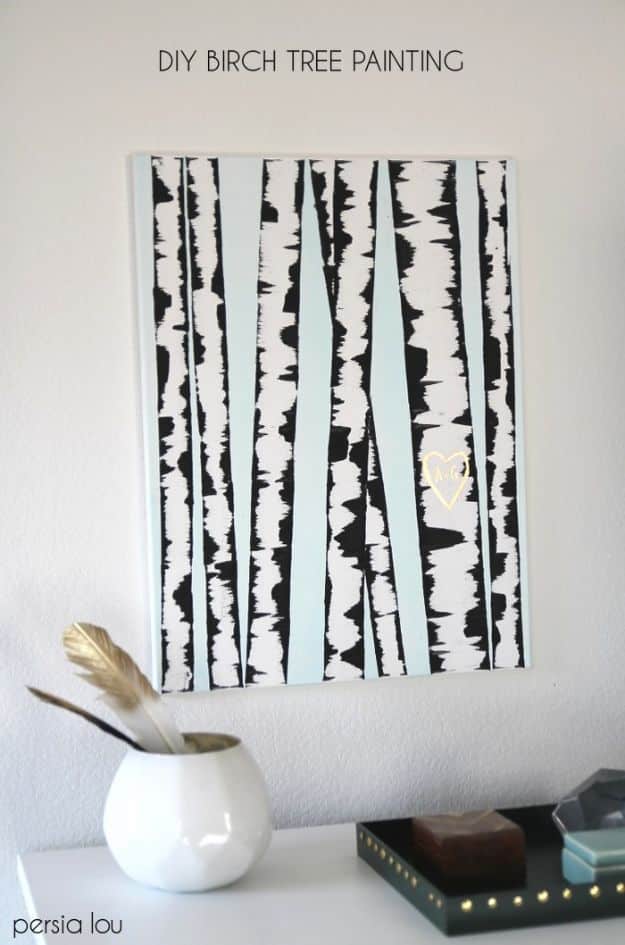
An eighteen by twenty four canvas, masking tape in several widths and an old credit card. Tape off the tree trunks first, overlapping two inch tape for the widest one, and where trunks cross, tape the front tree down first. Paint the background in a pale flat color with a sponge brush. Then the actual trick: dip the edge of the card in black paint, stand it perpendicular to the surface and scrape it along the tape edge, which gives you birch bark markings no brush can imitate. Practice on scrap paper before touching the canvas.
Get the full tutorial at Persia Lou.
35. Textured Heart Canvas
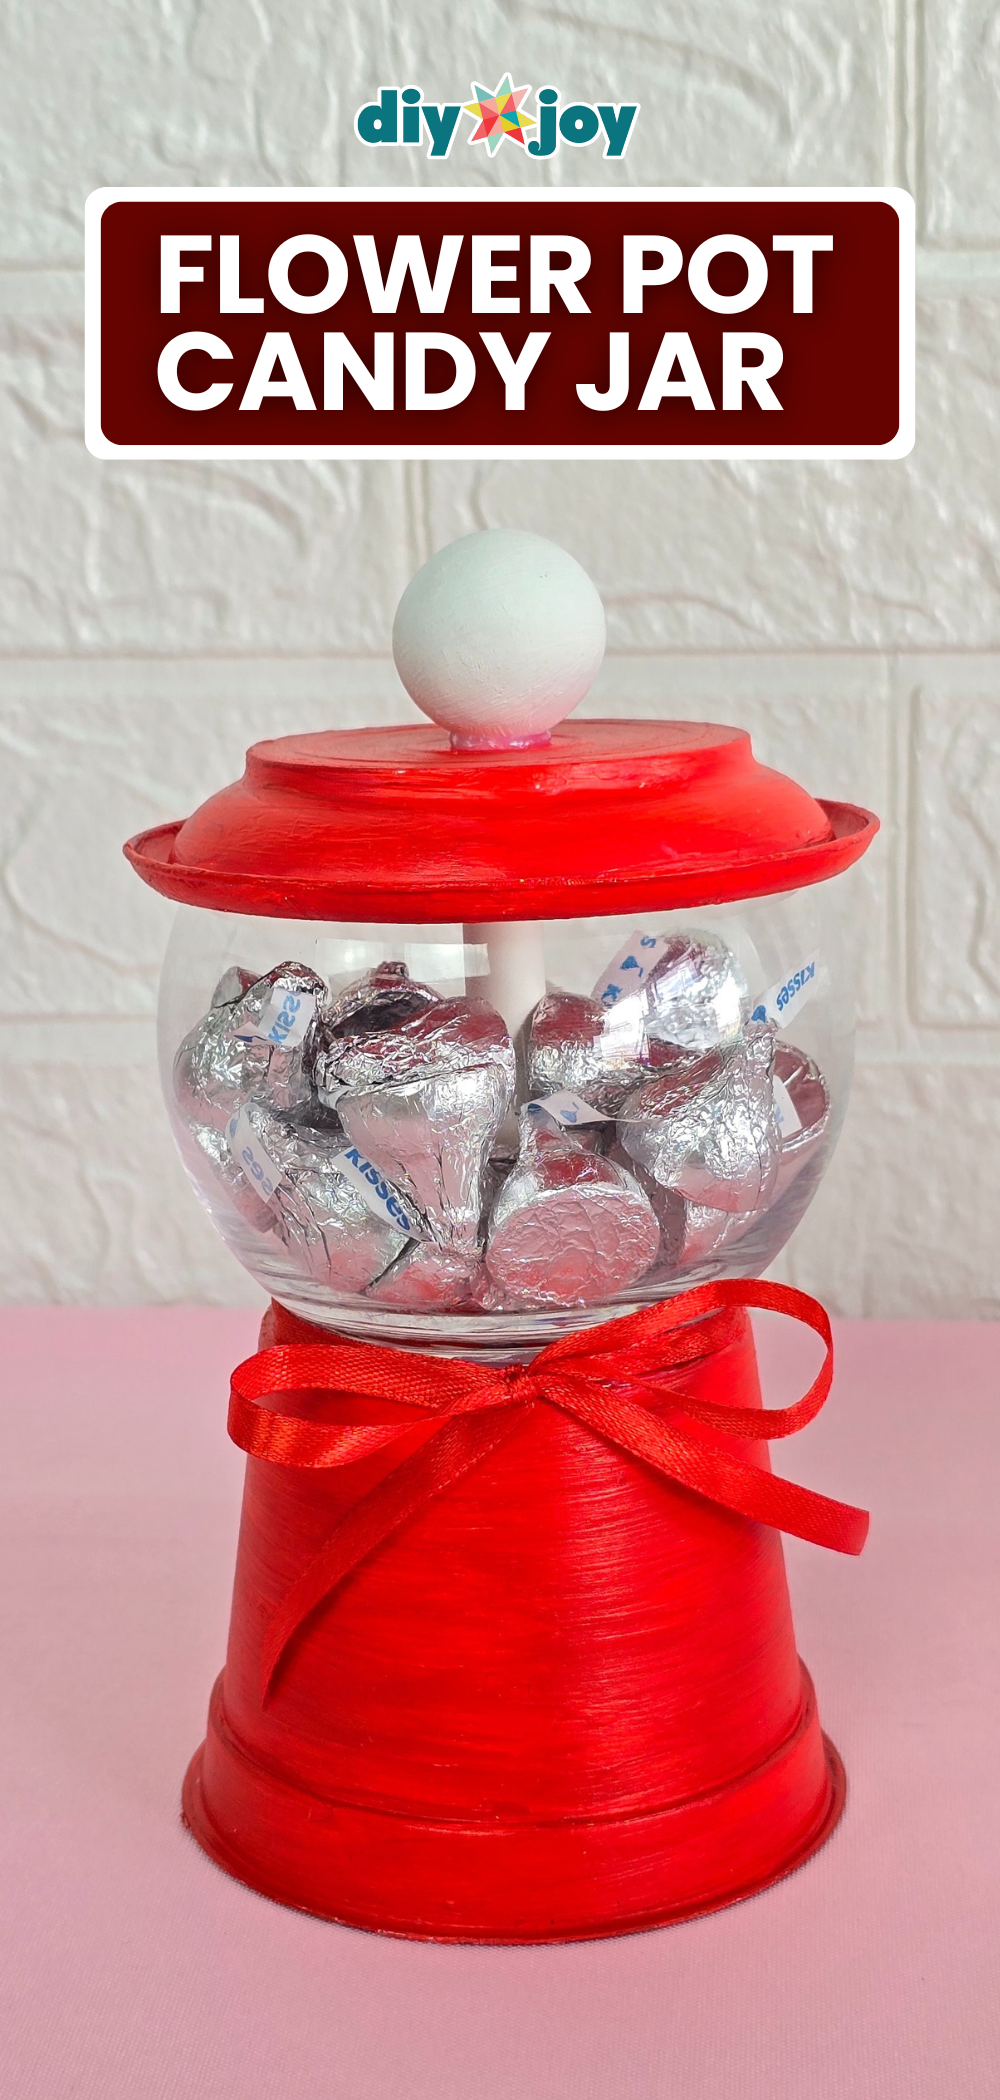
Tissue paper worked over a canvas to build real relief, then painted, so the hearts stand up off the surface instead of sitting flat in it. The photograph shows a magenta canvas with a scatter of pale pink hearts, each one visibly raised and slightly irregular at the edges. That irregularity is the charm and it is not worth fighting. The same paper mache technique scales down onto small canvases for keychains, which is a useful thing to know if you ever make these to sell. No painting experience is needed for any part of it.
Get the full tutorial at DIY JOY.
36. Black and White Styrofoam Wall Art
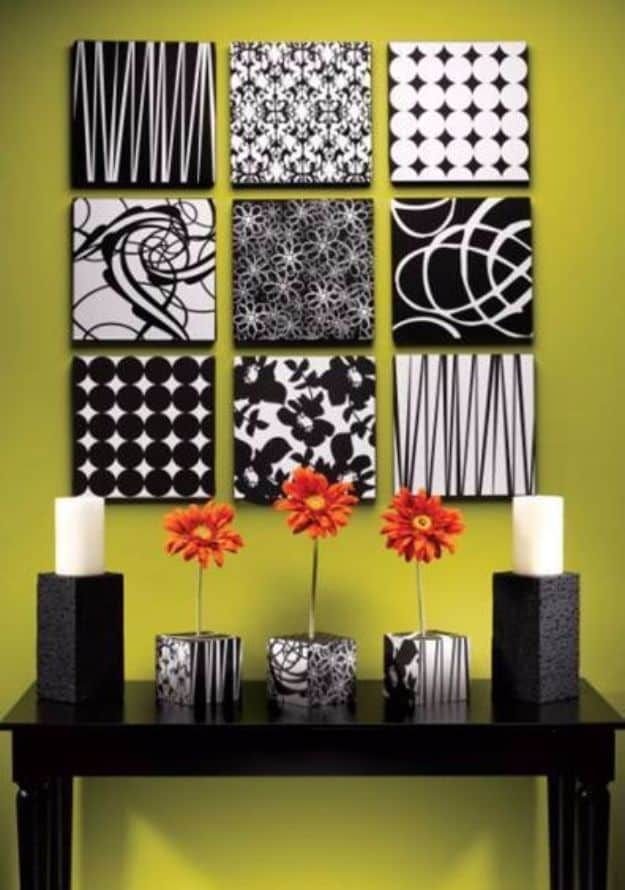
Four twelve inch foam squares, just under an inch thick, faced with black and white scrapbook paper and edged all the way round with seven eighths inch grosgrain ribbon. The honest warning from the maker is worth passing on: thick tacky craft glue ripples the paper, a thinner liquid glue ripples it less but still some, and neither is ideal. Spray adhesive or sticky-back sheet is the thing to try instead. The ribbon glues up perfectly with tacky glue either way. The panels weigh almost nothing, so a single straight pin will hold one on a wall.
Get the full tutorial at Curbly.
37. Marble Hanging Wall Art
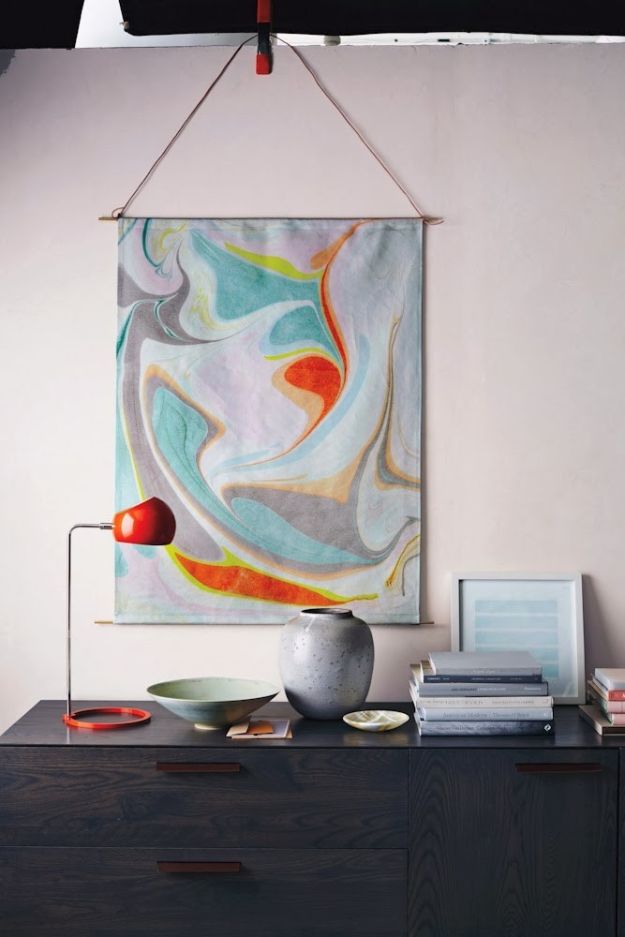
Paper marbling, hung as a scroll from a cord rather than framed, which suits a large sheet far better than glass would. Marbling looks intimidating and is not: color floated on a thickened bath, swirled into a pattern, then paper laid onto the surface to lift the pattern off in one go. The result is different every single time, which is the appeal and also the reason to make several and pick. Hanging it from a dowel and a cord costs almost nothing and lets a big sheet stay a big sheet.
Get the full tutorial at Flax and Twine.
38. DIY Basket Wall Art
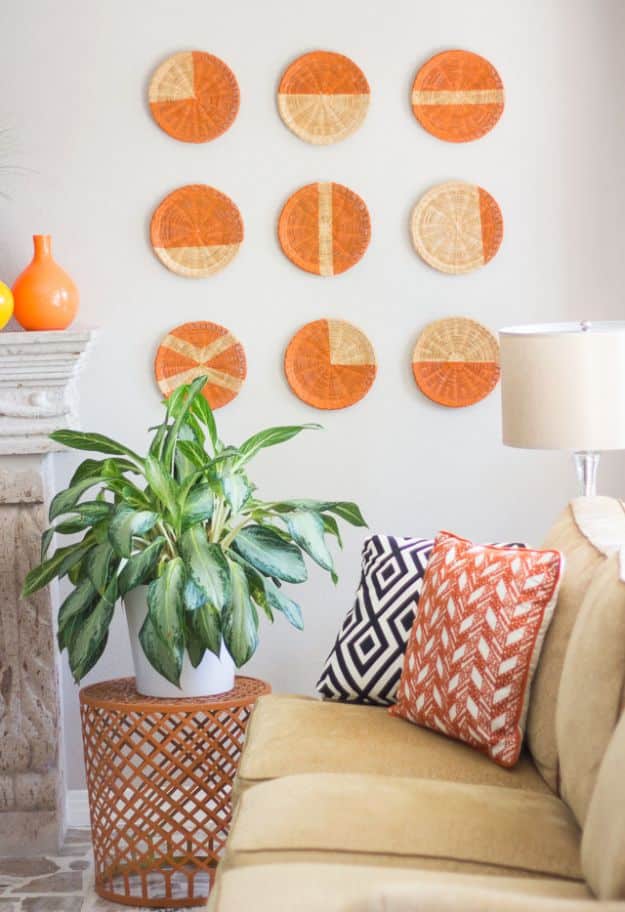
Woven rattan paper plate holders, the kind that live at the back of every parent’s kitchen cupboard, bought as a bundle of twenty from a thrift store for three dollars. Tape off part of each one with painter’s tape, running a fingernail hard along the tape edge so nothing seeps underneath, then one good coat of spray paint. Peel the tape after a few hours. Vary the masked shape from plate to plate so the group has some rhythm. Command strips will not grip rattan; a small nail through the middle of each one holds fine.
Get the full tutorial at Design Improvised.
39. Easy DIY Shades of Green Circles Wall Art
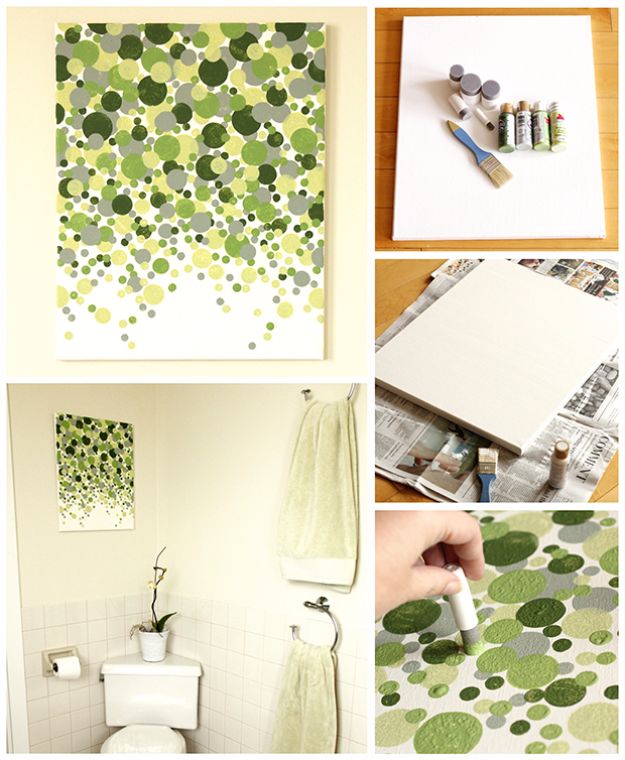
Circles stamped in several strengths of one green, densest along the top edge of the canvas and thinning out as they fall, so the piece reads as something scattering rather than as a pattern. The build shots show a plain white canvas, a handful of paint tubes and a round stamp being pressed on by hand. Vary the size as well as the tone and let some circles run off the canvas edge. It is hung in a bathroom, which is where a single-color piece like this earns its place, because one color at four strengths is quiet enough to live with at seven in the morning.
Get the full tutorial at Dabbles and Babbles.
40. DIY Wooden World Map Wall Art
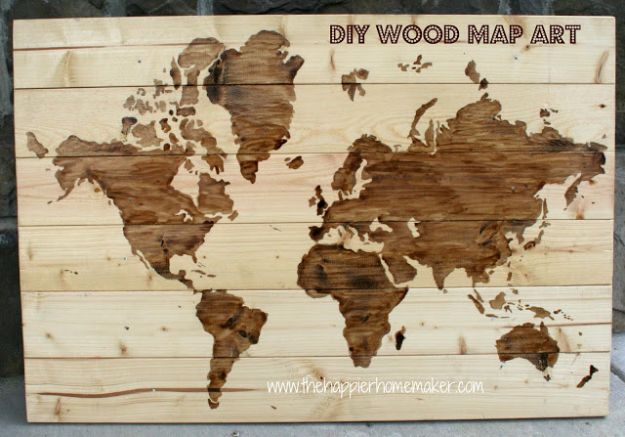
A four hundred and seventy five dollar store bought wooden map was the thing this one set out to beat, and scrap planks nailed to a backing board did it. Print a map template, slide carbon paper underneath it and trace the outline straight onto the wood, because the stain covers the traced lines afterward. Then the step you cannot skip: condition the wood and sand it with a fine grit before any stain touches it, or the stain bleeds sideways out of every line you traced. Outline each continent with a fine brush and fill with a wider one. Stain ruins brushes, so buy cheap ones.
Get the full tutorial at South Georgia Style.
41. DIY Pixel Wall Art
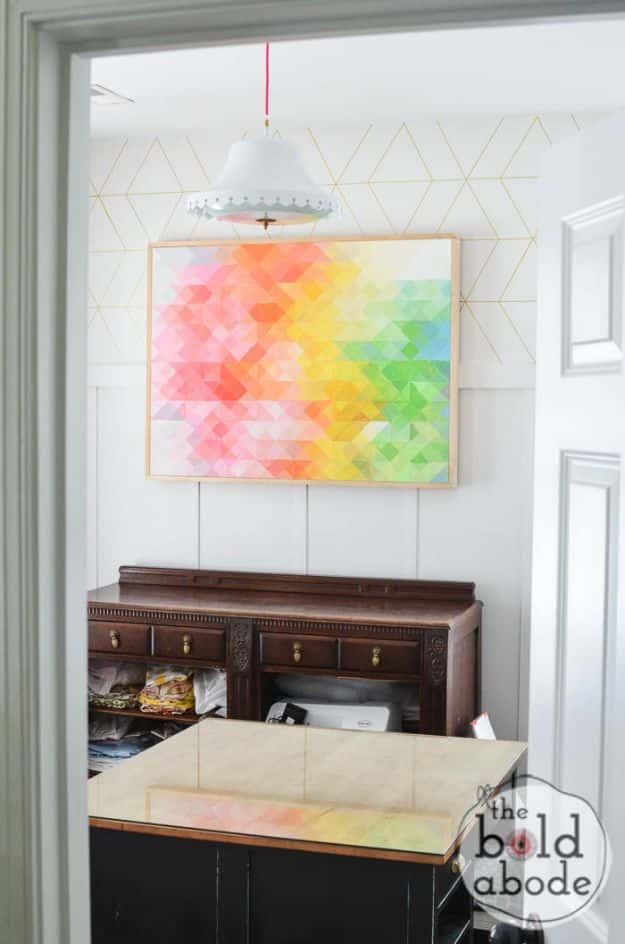
Three solid days of painting one triangle at a time, on a thirteen dollar canvas measuring thirty six by forty eight. The canvas gets gridded out first at three inches by an inch and a half, lines drawn against a long offcut of scrap wood, and then every cell is filled with a mixed shade of multi-surface acrylic. The advice from someone who has done it is worth taking: do not chase precision, do not wash the brush between every triangle, and mix new shades right there on the paper plate. A simple box frame finishes it.
Get the full tutorial at The Bold Abode.
42. Doormat Wall Art
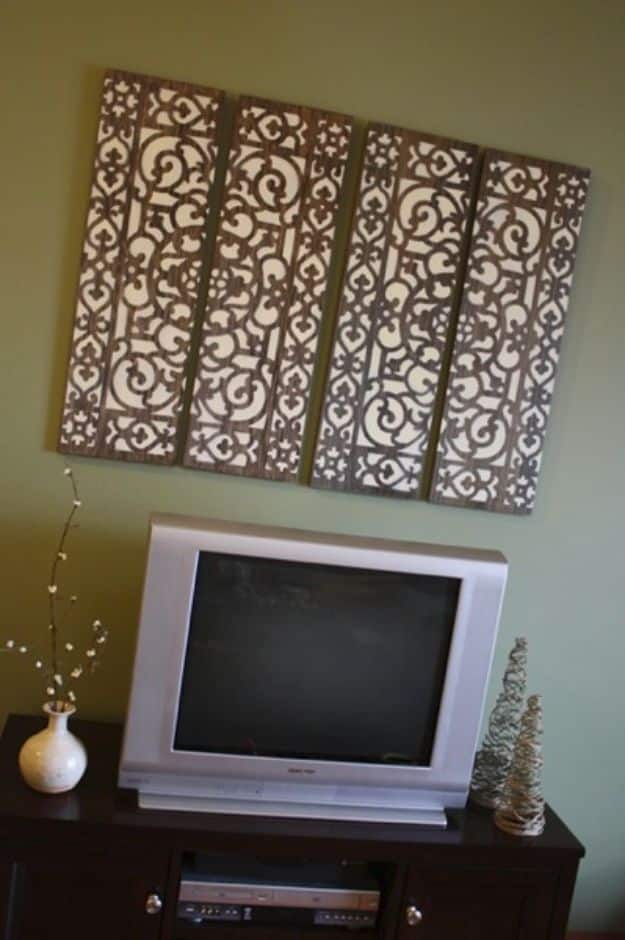
A rubber doormat used as a giant stencil, which is a better idea than it sounds. Two poplar boards, one by twelve by six feet, cut in half to give two three foot panels, sanded and stained dark walnut. Trim any extra rubber off the mat with a craft knife first so the lines come out crisp. Tape the edges, lay the mat down and spray four light coats of ivory through it, two straight down and two from opposing angles to fill the gaps. Thirty minutes to dry, lift the mat, seal with spray polyurethane.
Get the full tutorial at Lemon Tree Creations.
43. DIY Cut Canvas Wall Art
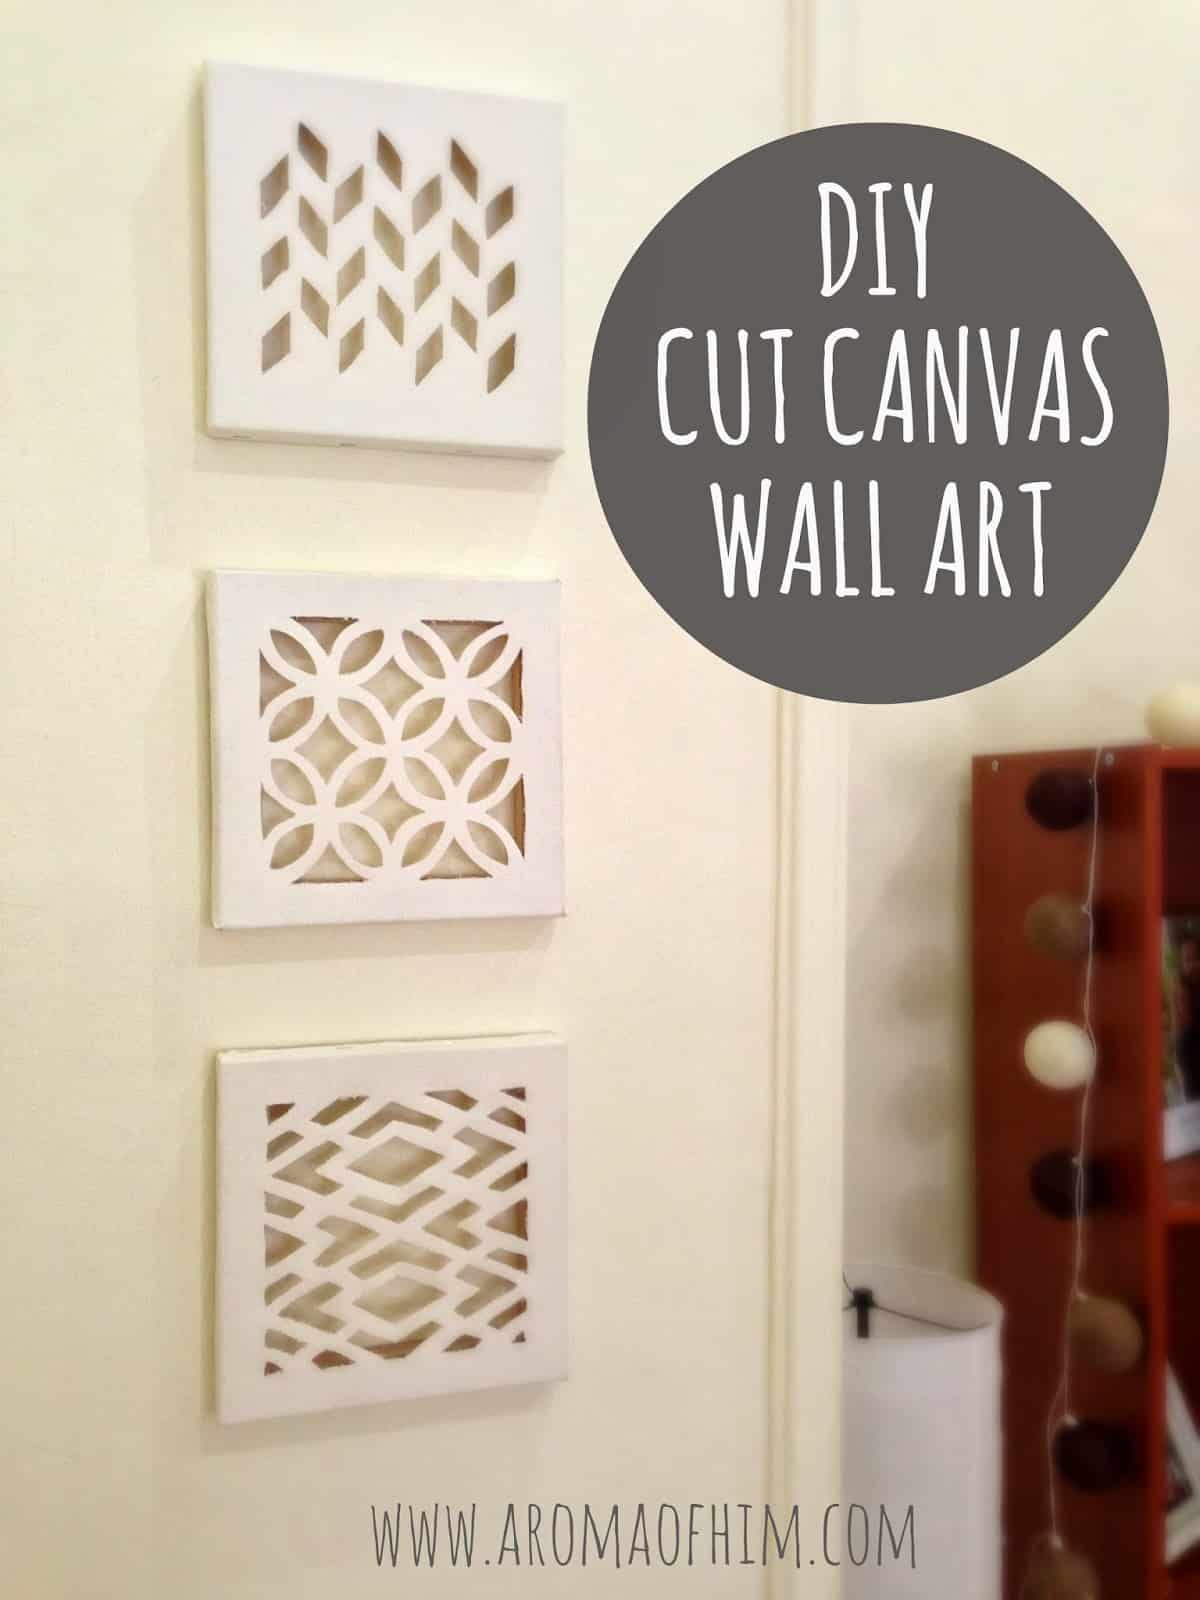
Three eight inch square canvases with a geometric pattern cut straight through the canvas with a craft knife, so the shadow of the wall behind becomes part of the design. Smaller is better here, because every shape is cut by hand. Search for simple geometric patterns and pick a black and white one, since you will be tracing it through the canvas from the inside with a window behind you. Trace from the framed side, paint the canvas first if you want it colored, cut on a cardboard backing, and use a genuinely sharp blade.
Get the full tutorial at A Sweet Fragrance.
44. Sliced Dowel Wall Art
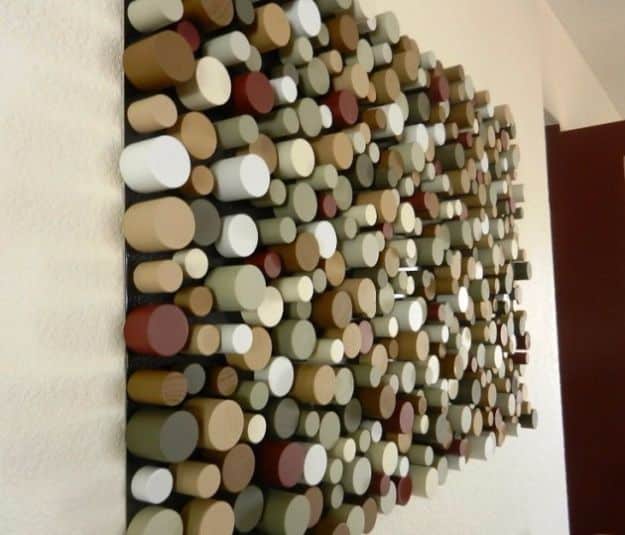
Dowels in two thicknesses, each about three feet long, cut into slices at one inch, one and a half and two inches, then dipped into paint sample pots from the hardware store. The varying lengths are what give the finished panel its relief, because the deeper slices stand proud of the shallower ones. Everything is epoxied to a thin sheet of aluminum painted black, and two of the dowels are placed to cover the screws holding the hanging hooks. Dipping rather than brushing is what keeps the color clean right to the cut edge.
Get the full tutorial at Craziness Ensues.
45. Kitchen Wall Art Printables
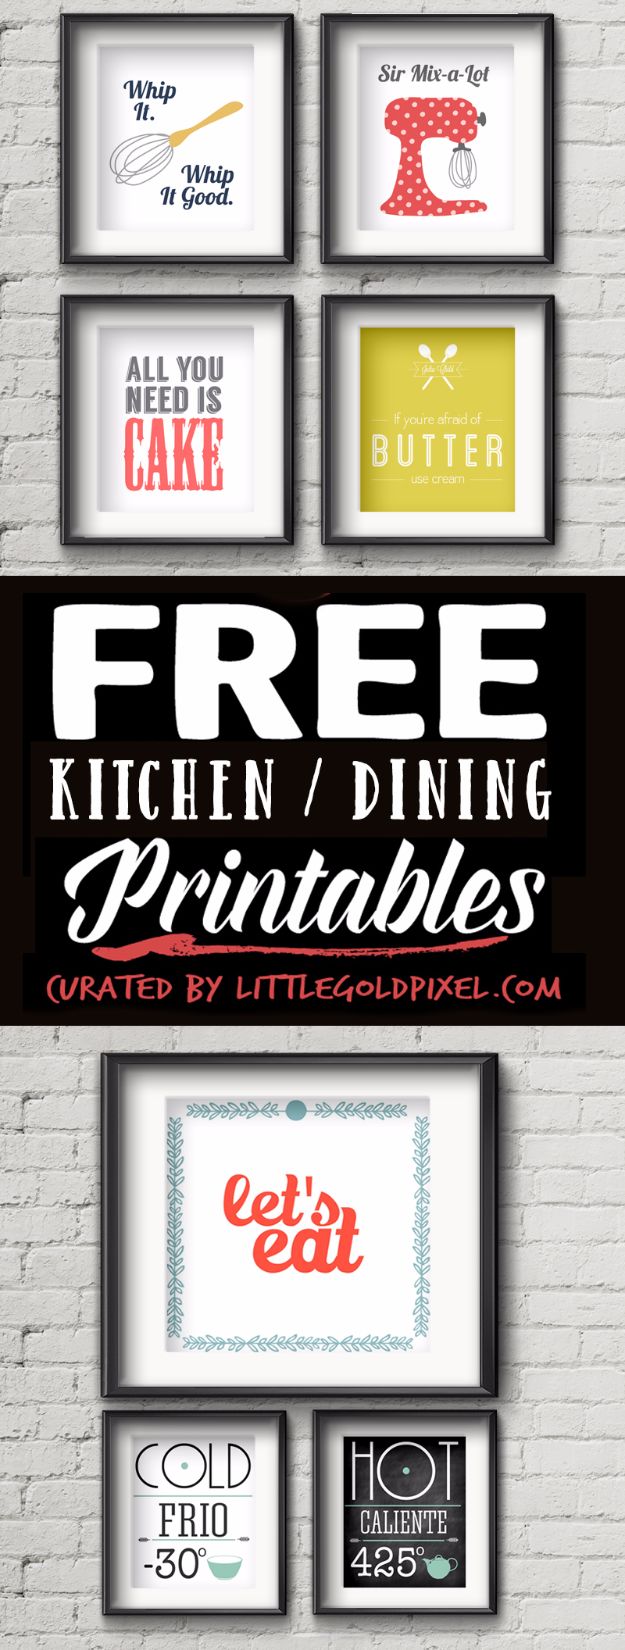
Free printables are the shortcut everyone forgets, and a kitchen is the easiest room to use them in because the subjects are small and repeatable. This is a curated set of twenty, ready to download and print, covering the usual kitchen lines plus conversion charts and food type. Print on a heavier matte stock than your printer’s default paper, because plain copy paper behind glass looks like plain copy paper. Frame a set of four or six in identical frames rather than one alone, and hang them off a measured grid.
Get the full tutorial at Little Gold Pixel.
46. DIY Modern Rustic Wall Hanging
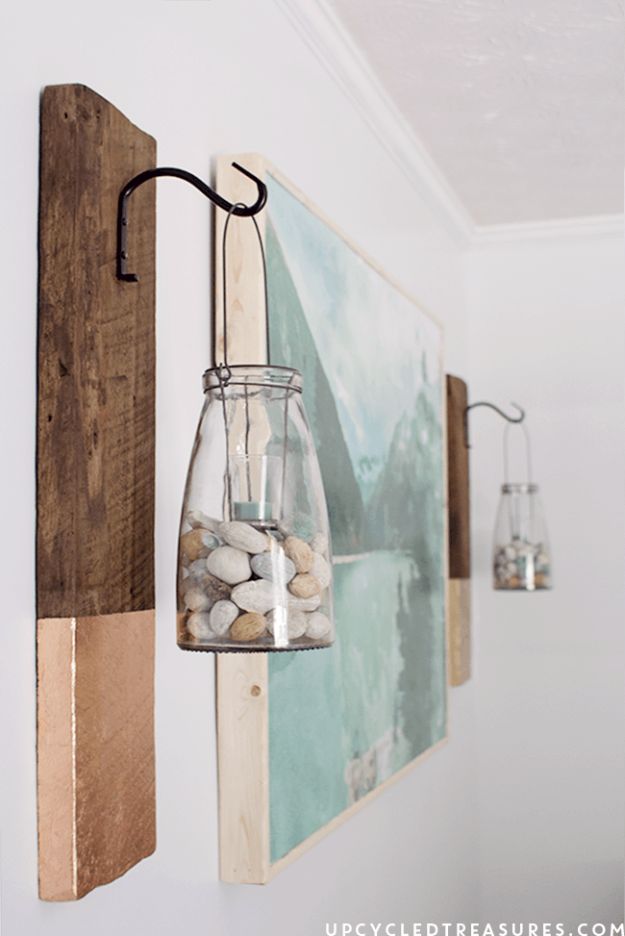
Under twenty five dollars, against a four hundred dollar store version that started the whole thing. Reclaimed barnwood cut to roughly seven by thirty inches, sanded, stained Golden Oak, with the ends belt-sanded to break the straight factory line. Copper leaf foil goes on over spray adhesive and gets sealed. Then a six inch plant bracket screws to the face, so the piece is both art and a hanger for a jar or a lantern. New wood pre-cut at the hardware store works just as well as salvage. Functional wall art is a rare and useful thing.
Get the full tutorial at Mountain Modern Life.
47. Geometric Paper Patchwork Wall Art
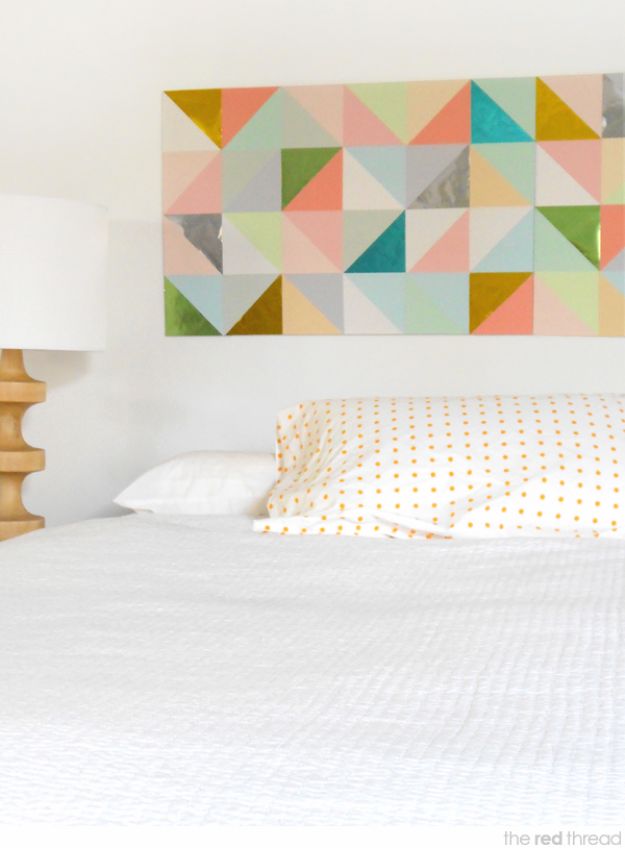
Squares of paper cut corner to corner into triangles, then reassembled on a board in a patchwork so each square carries two colors. The palette is the whole piece: soft mint, coral, mustard, gray and white, muted enough that a big block of pattern stays restful above a bed. Cut every square the same size first, then cut them all diagonally, then lay the triangles out and shuffle them before any glue comes out. Rotating a handful so their diagonals run the other way is what stops it reading as stripes rather than patchwork.
Get the full tutorial at We Are Scout.
48. Marbleized Paper Wall Art
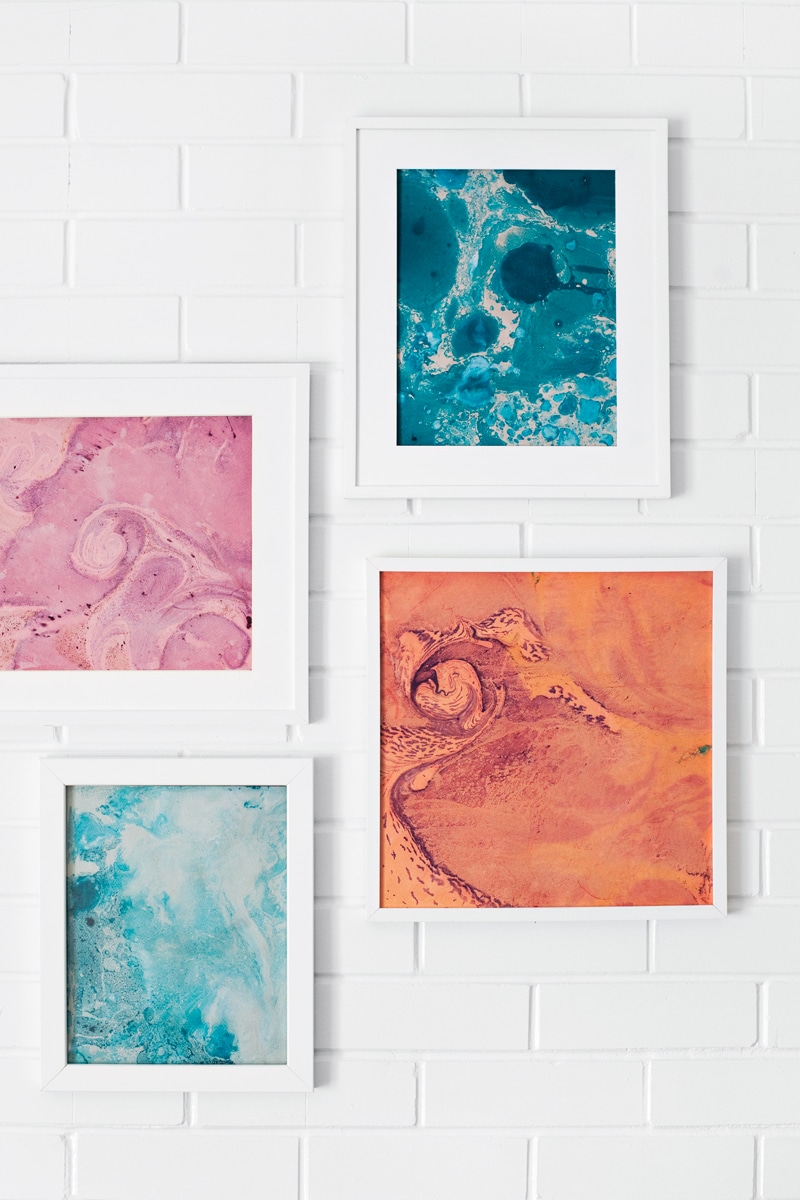
Four marbled sheets framed in white and hung as an offset cluster on white brick, each one a different color, teal, blush, orange and pale aqua. Marbling gives you a different result every pull, so make far more sheets than you need and choose the four that sit well together. Framing each in an identical white frame and hanging them at staggered heights rather than in a grid is what turns four accidents into a considered group. Wide white mats would push it further, and a set of four beats a lonely single every time.
Get the full tutorial at A Beautiful Mess.