Nothing compares to seeing something in your home and knowing you made it, which is exactly why I make as many of my fall decorations as I possibly can. So these fall decorating ideas are the ones worth your Saturday: wreaths you build without a single hot glue burn, faux pumpkins rescued with fabric tape, real leaves pressed around a mason jar until the candlelight turns them translucent, and a birch log drilled for tea lights that carries a table from the first cool week of October all the way through Thanksgiving. Some take fifteen minutes and a dollar store bag of leaves. A couple are proper weekend projects with a jigsaw involved. Every one of them has a full tutorial behind it, and quite a few will still look right in December. Perfect for a front porch, a mantel, a dinner table or a bare wall that needs warming up!
DIY Fall Decorating Ideas
1. Fall Succulent Planters
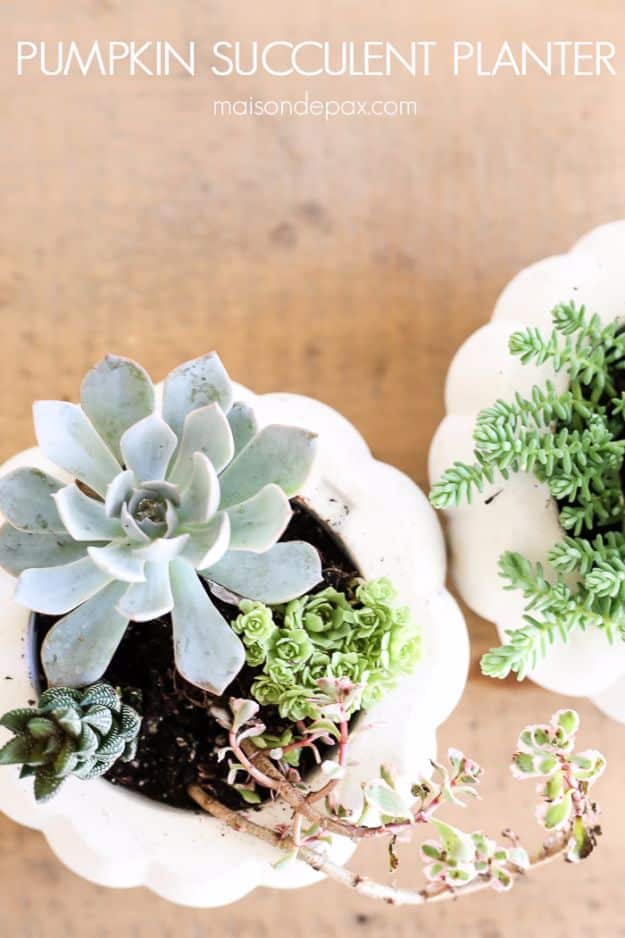
Skip the real pumpkin and use a foam-core craft pumpkin instead, which is what makes this one possible in September when the good pumpkins are not in the shops yet. You cut a circle at an inward angle with a drywall saw, dig out the foam by hand, line the hollow with a plastic grocery sack, then fill with potting mix. Two tricks decide how it looks: mix your succulent colors and textures, and plant them much closer together than feels right. No drainage hole means go easy on the water.
Get the full tutorial at Maison de Pax.
2. Fall Burlap Wreath
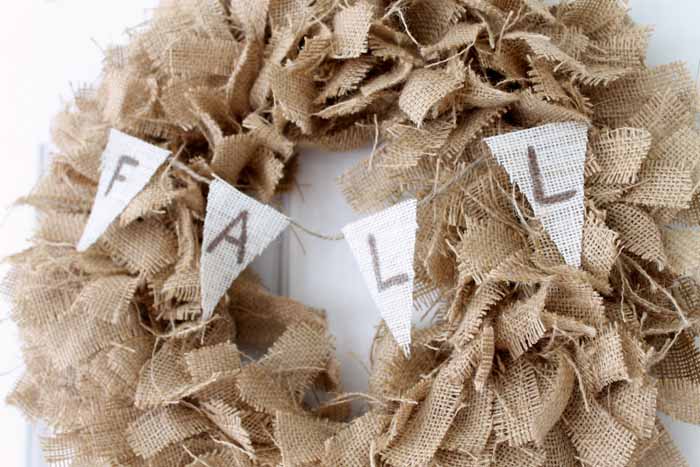
Two yards of brown burlap cut into strips roughly one inch by eight inches, tied around a wire wreath form all the way around. That is the whole build, and the only hard part is that the strips take a while to cut. A small banner of white burlap triangles, two by three inches, spells FALL in Sharpie and hangs across the middle. Pack the strips tighter than you think you need to, because a thin burlap wreath looks unfinished and a dense one looks expensive.
Get the full tutorial at The Country Chic Cottage.
3. Pumpkin Yarn Tassels
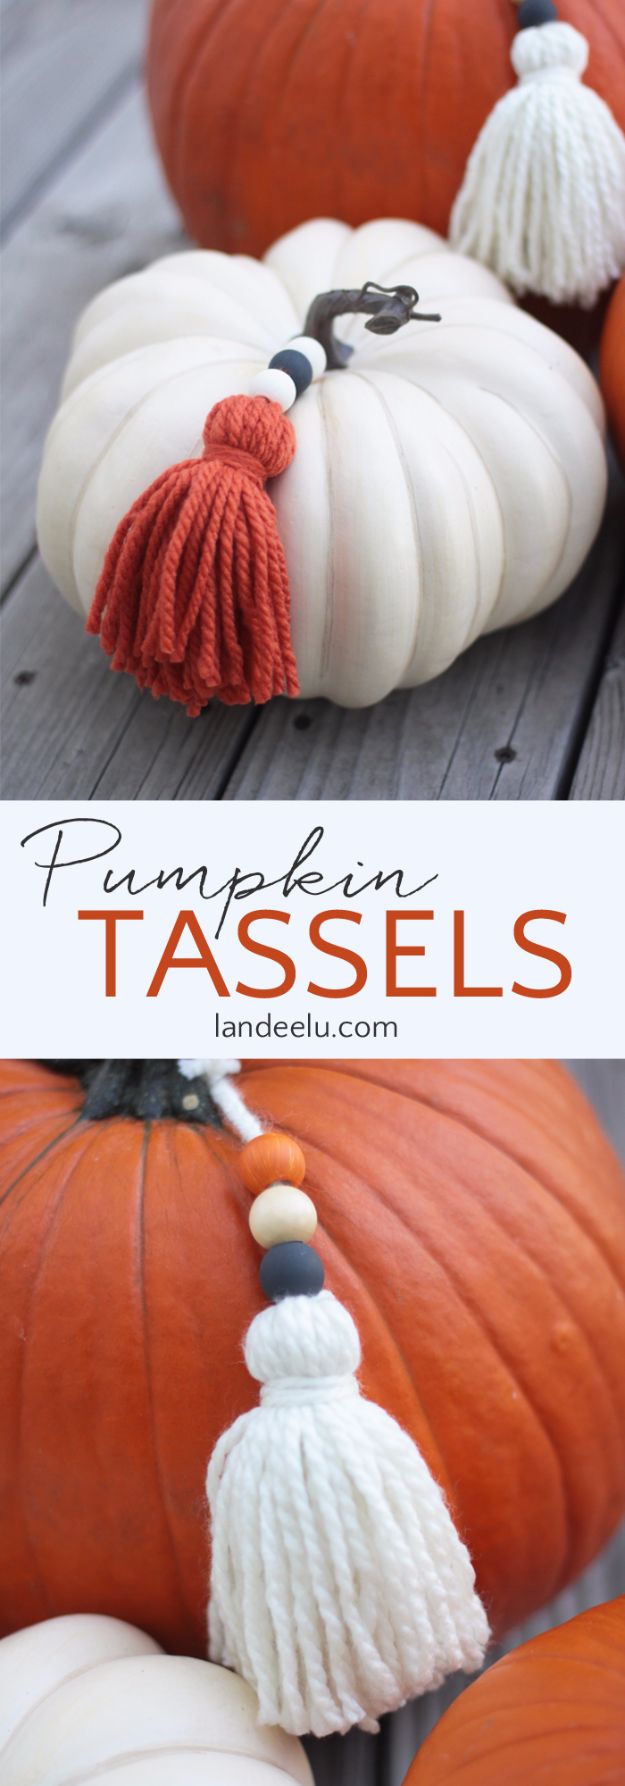
Leftover yarn and a handful of wooden beads turn plain white and orange pumpkins into something that looks styled rather than bought. The tassels tie around the stem, so nothing is glued to the pumpkin and everything comes off again when the season ends. Rust and cream read the most expensive against a white pumpkin. This is a genuinely good one to hand to kids, because wrapping and cutting a tassel is hard to get wrong and they can make a dozen in an afternoon.
Get the full tutorial at Landeelu.
4. DIY Fall Acorns
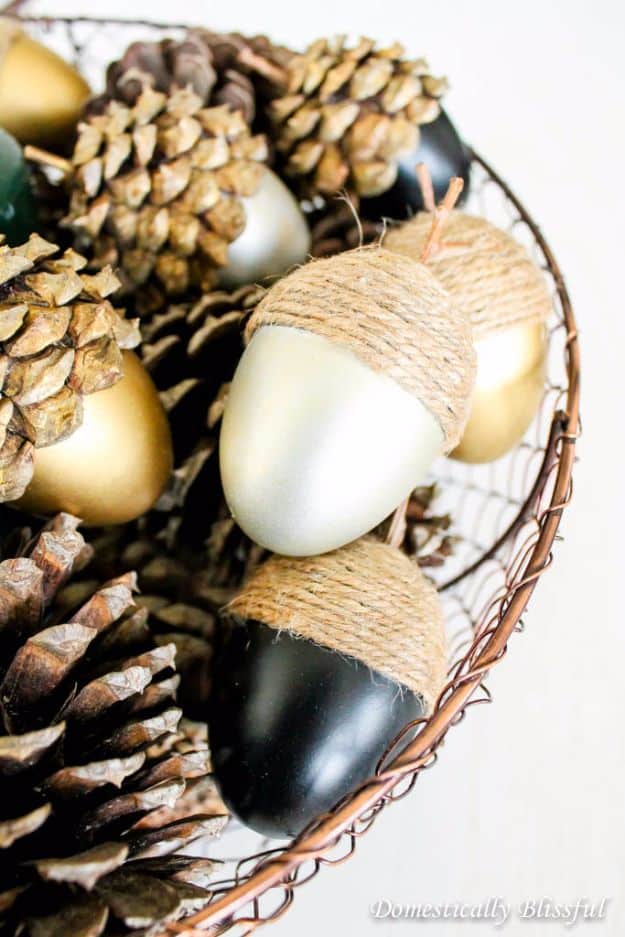
The acorn caps are plastic Easter eggs, which is the kind of swap that makes a project worth sharing. Eggs get spray painted, two coats of white first so the color underneath cannot show through, then gold, silver, black chalkboard paint or left white, and sealed with clear polyurethane. Twine wraps the top half into a cap, or glitter and Mod Podge do the job instead. Pile them in a wire basket with real pinecones and nobody guesses what they started as.
Get the full tutorial at Domestically Blissful.
DIY Fall Garlands
5. DIY Falling Leaves Garland
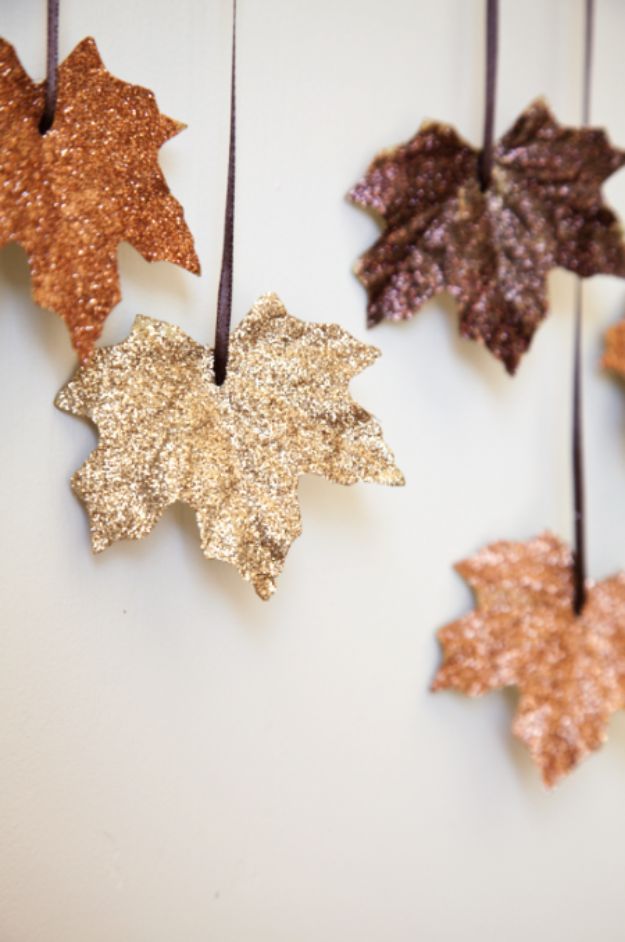
A bag of artificial leaves from the dollar store, Elmer’s glue painted on with a brush, glitter shaken over the top and the excess tipped off once it sets. Punch a hole in each leaf, tie on a short ribbon and hang them from one long ribbon strand across a doorway or a mantel. It is about as forgiving as a craft gets, which is why it works with small children helping. Do the glittering on a tray unless you want to find it in the carpet until Christmas.
Get the full tutorial at House of Jade Interiors.
6. Rustic DIY Pumpkin Decor
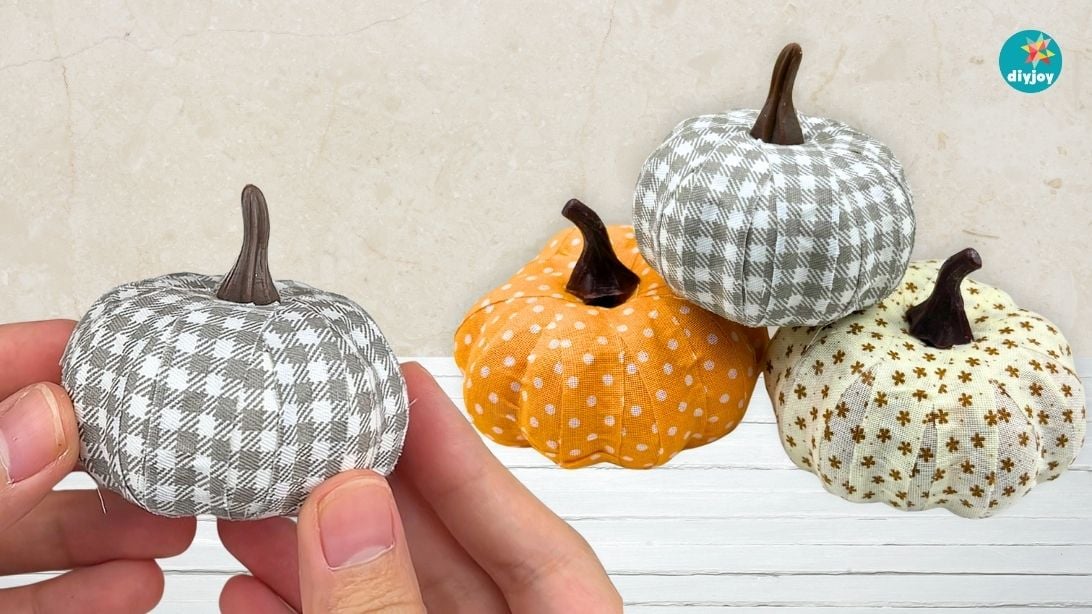
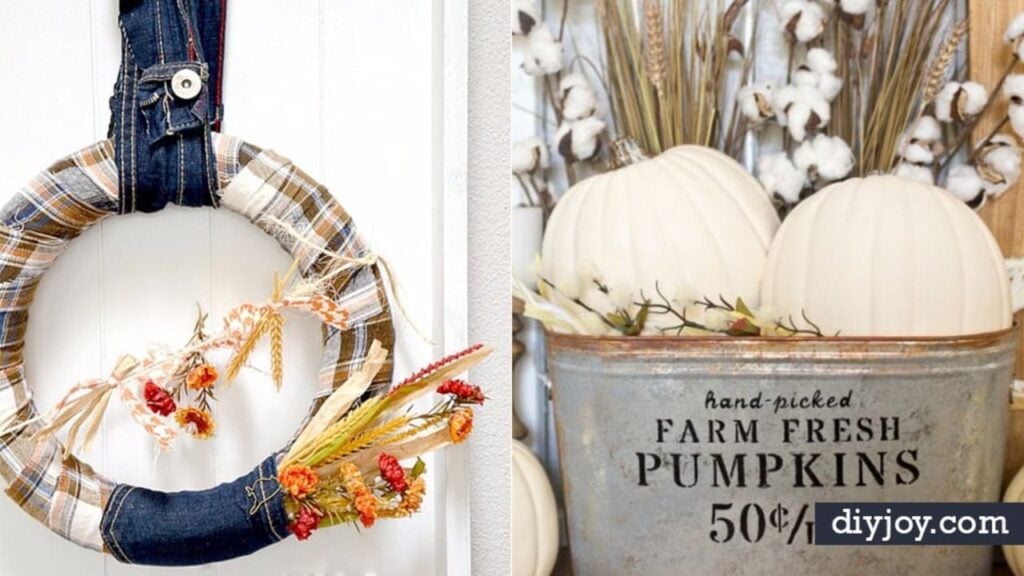
If you have faux pumpkins whose color has gone dull and sad, do not throw them out. I cover mine in fall fabric using double-sided tape, and they come back looking better than they did new, with a soft texture that suits a mantel or an entry table. The fabric does not have to read as autumnal, just warm: I pull the oranges, browns and yellows out of my scrap stash and leave the summery prints for something else. Gingham and polka dots are my favorites.
Get the full tutorial at DIY Joy.
7. Yarn Pumpkins Using Balloons
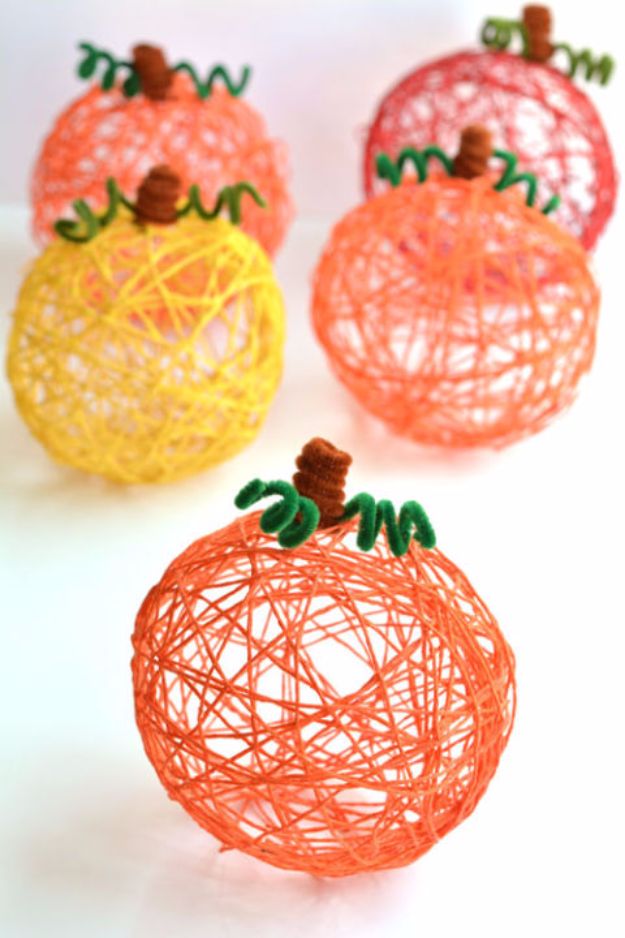
Blow a twelve inch balloon up about halfway, cut twenty-one lengths of orange yarn around thirty-six inches each, and wind them over the balloon after dunking each one in glue. The tip that saves this project: run the wet yarn between the tines of a plastic fork to strip the excess, because fingers take off too much and the pumpkin dries soft. Use half Aleene’s Tacky Glue and half water rather than dollar store white glue, which never sets hard.
Get the full tutorial at One Little Project.
DIY Fall Decor
8. Easy No-Glue Fall Wreath
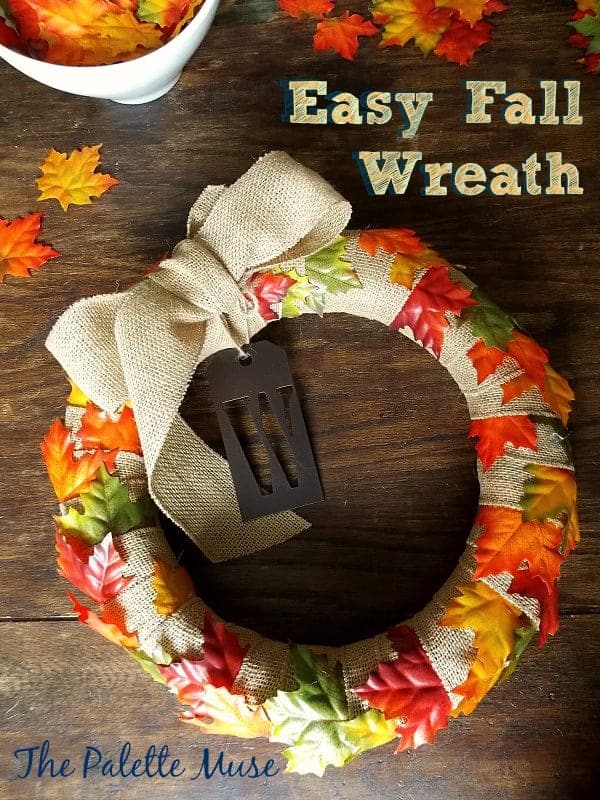
No hot glue anywhere, and no fasteners of any kind. You hold a wide ribbon about two feet from its end, wrap it tightly around a wreath form without cutting it, tuck a leaf into the edge here and there as you go, then knot the two ends together and tie a bow. Wire-edged ribbon is worth hunting for because it holds its shape. A standard fourteen inch form takes at least twenty-two feet of ribbon two and a half to three inches wide.
Get the full tutorial at The Palette Muse.
9. DIY Buffalo Check Tray
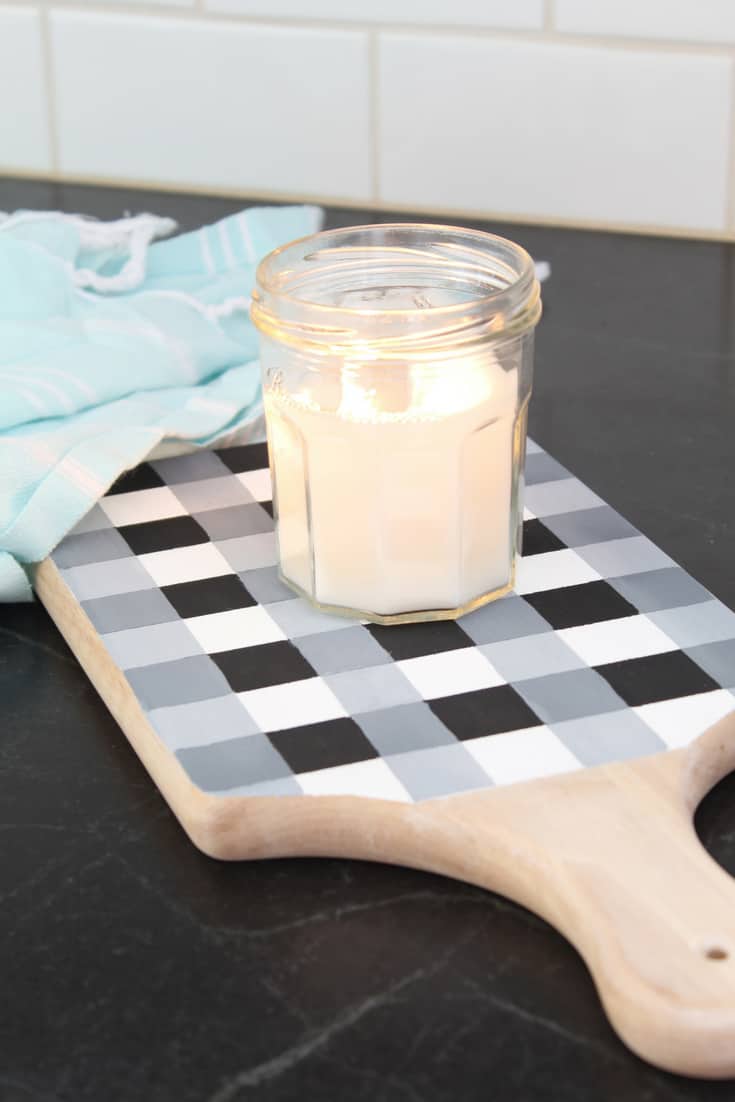
Buffalo check needs four colors, not two, and that is the part people get wrong. Start with white, mix a light gray and a dark gray from your white and black, and paint in that order: base coat, light gray vertical stripes, dark gray horizontals, then black in the open squares. One inch painters tape gives stripes a shade over an inch. Buy decent tape, because cheap tape bleeds and there is no fixing it. Let every layer cure before taping the next.
Get the full tutorial at A Nod to Navy.
10. 15-Minute Fall Porch Decor
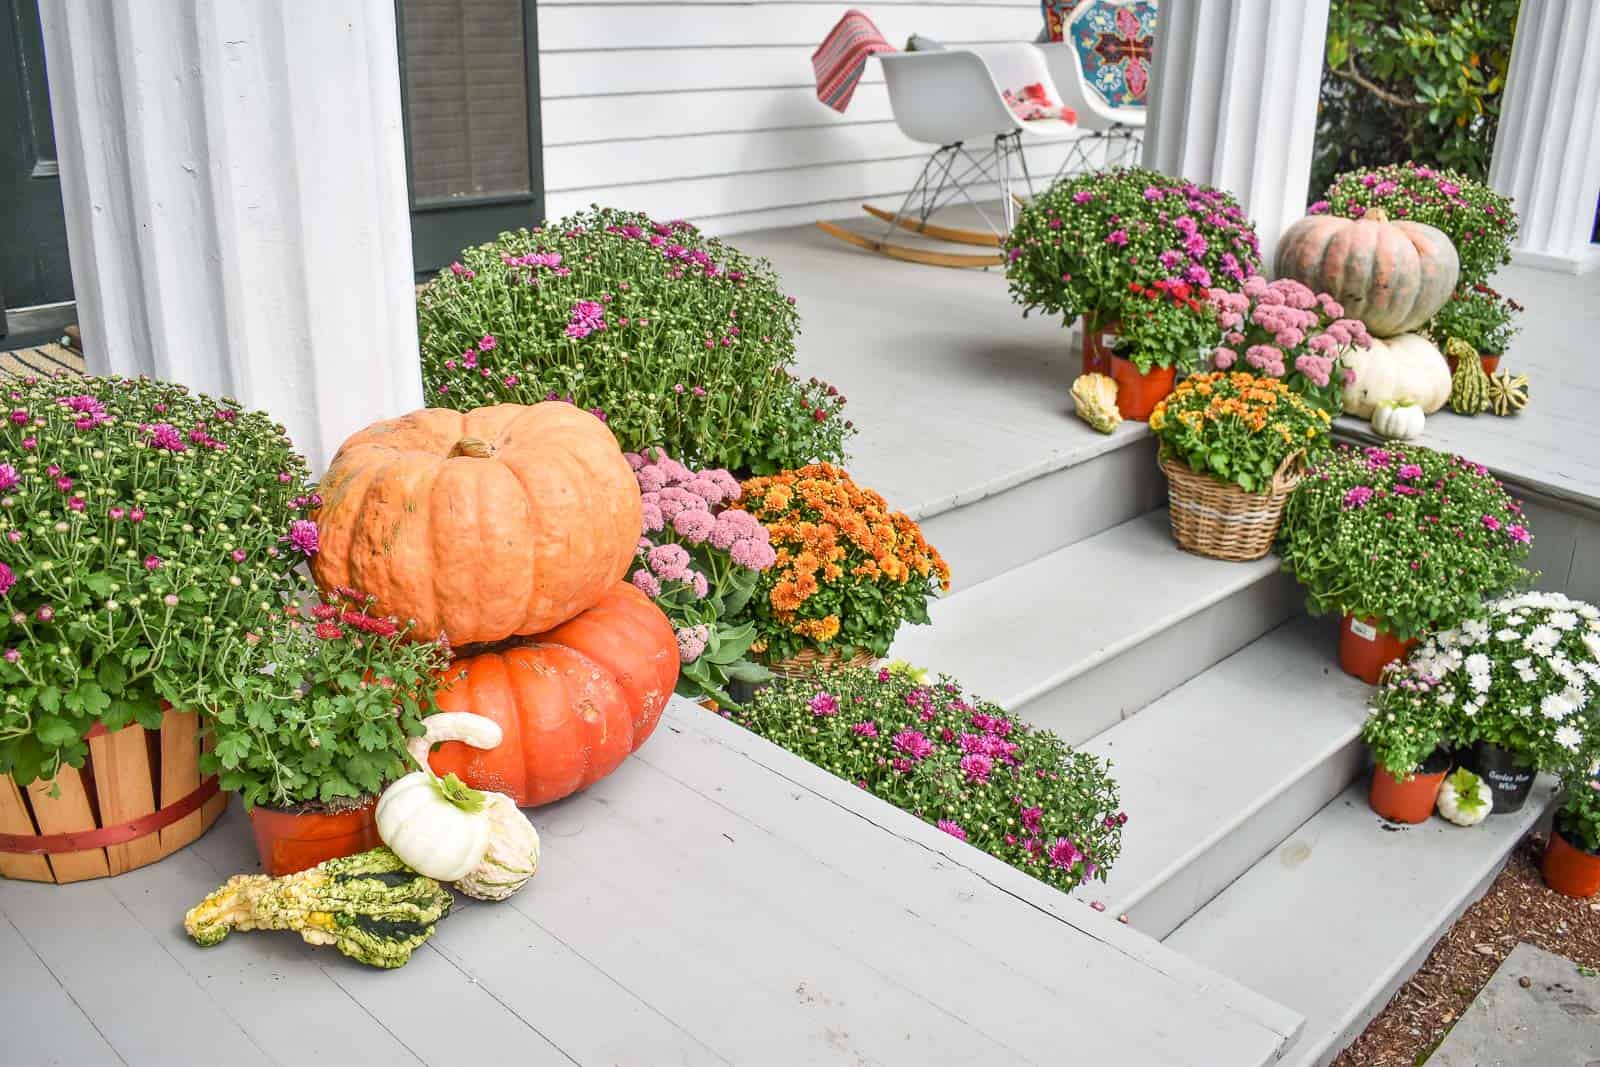
The whole look here is plants and containers, nothing built. Two large mums anchor the base of the columns, smaller eight inch mums step down the stairs, and a few ugly squash and decorative peppers fill the gaps between them. Thrift store and dollar baskets hide the plastic pots, which is the single move that makes a porch read as finished. Stick to three colors and vary the plant sizes. Layer a plain sisal mat under a patterned one to fill a wide doorway.
Get the full tutorial at At Charlotte's House.
11. DIY Fabric Pumpkins
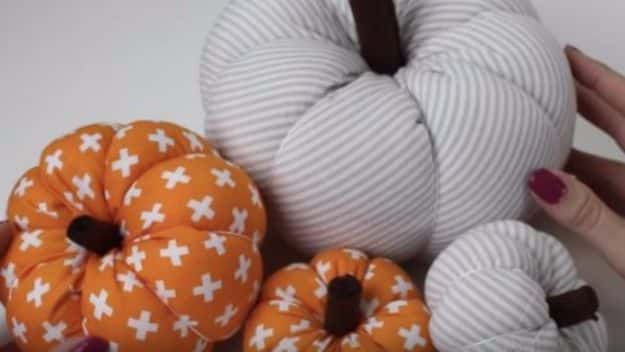
Soft stuffed pumpkins sewn from fabric scraps, with a stem sunk into the middle so they dimple the way a real pumpkin does. They are the kind of thing that never gets put away, because everyone picks one up off the sofa and ends up holding it. Rust prints, cream ticking stripes and small repeating patterns read best together in a group. Make them in several sizes rather than one, and stuff them far more firmly than feels necessary so they keep their shape.
Get the full tutorial at DIY Joy.
12. Fall Owl Mason Jar
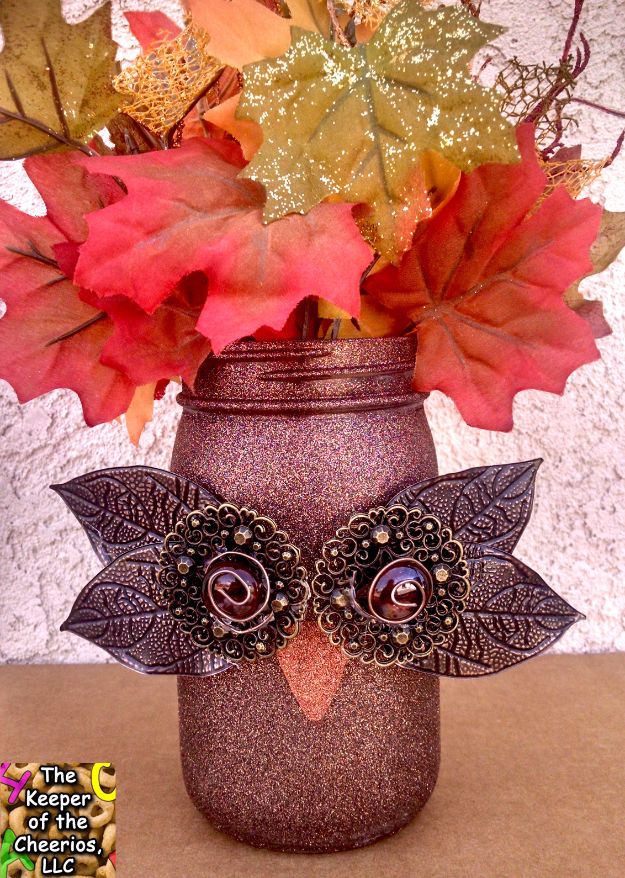
Glitter blast spray paint over a clean mason jar, left a full twenty-four hours to dry, is the base for the whole thing. The owl face is built from layered metal leaves, a round metal embellishment and a brown glass marble for each eye, wire wrapped around the marble, with a beak cut from metal embossing sheet. Hot glue first, then a few drops of glass glue for real hold. Spray in thin coats from a distance or the glitter runs.
Get the full tutorial at The Keeper of the Cheerios.
13. Acorn Embellished Picture Frame
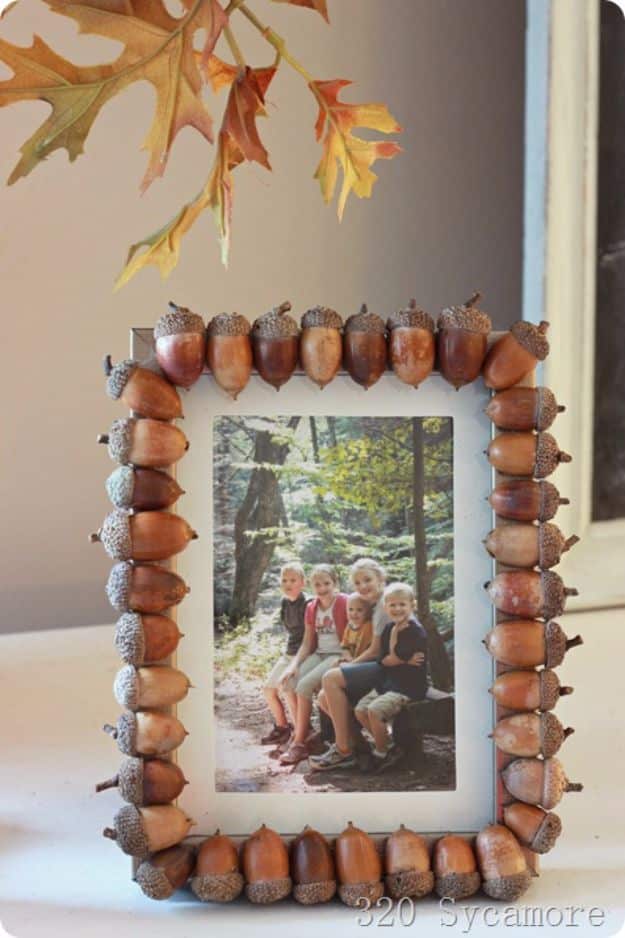
Acorns collected on a walk, hot glued around the edge of a dollar store frame, with a photo from that same walk inside. It is under ten dollars and under an hour, and it is the rare fall craft that means something a year later. Set the acorns on their sides rather than standing up so they sit flush, and bake or freeze them first if you want to be sure nothing hatches out of them on your mantel in November.
Get the full tutorial at 320 Sycamore.
14. Fall Fairy Garden
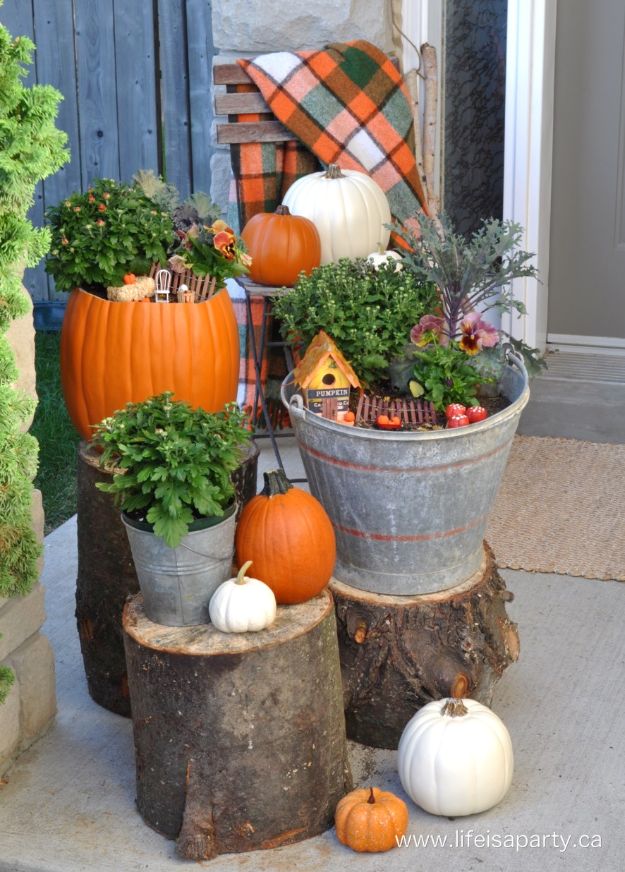
A craft pumpkin makes the container: mark a pencil line, cut the top off with a sharp knife, drop some rocks in the bottom for drainage and fill it with potting soil. A galvanized bucket does the same job. Then pick genuinely small fall plants, a mum, an ornamental kale and a pansy, all of which handle cool nights. Miniature furniture, a birdhouse and a tiny fence finish it. Choose the smallest plants in the shop, because a fairy garden is ruined by scale.
Get the full tutorial at Tatertots and Jello.
15. DIY Fall Tag Banners
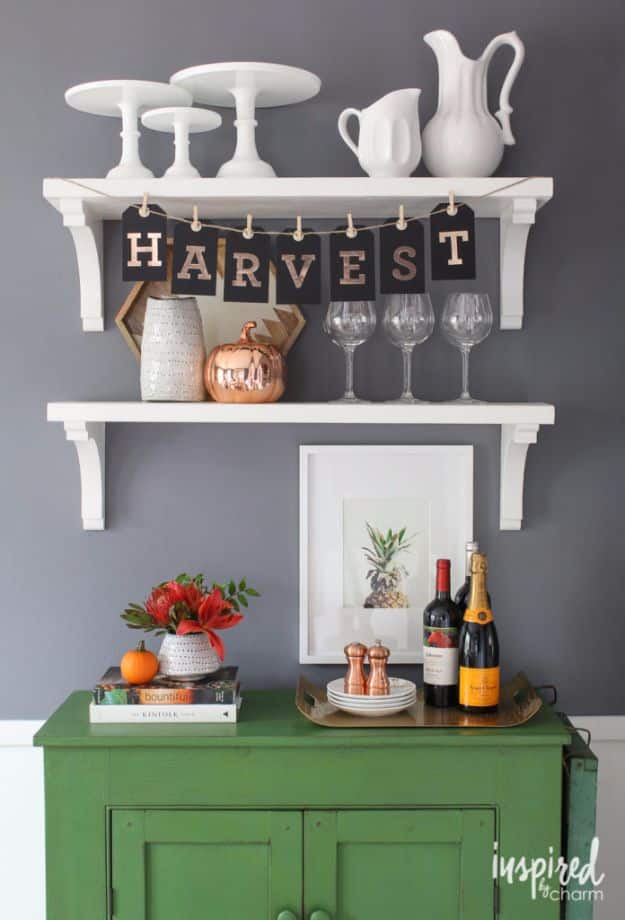
Large hang tags, alphabet stickers, twine and mini clothespins. There are no tools involved at all, which makes this the banner to make when you need one tonight and the shops only sell Halloween. Watch two sizes before you buy: the letters have to fit the tag, and the finished string has to fit the shelf or mantel it is going on. Buy spare tags and letters and you can swap HARVEST for THANKSGIVING on November first without starting again.
Get the full tutorial at Eighteen25.
16. Fall-Colored Painted Entryway Table
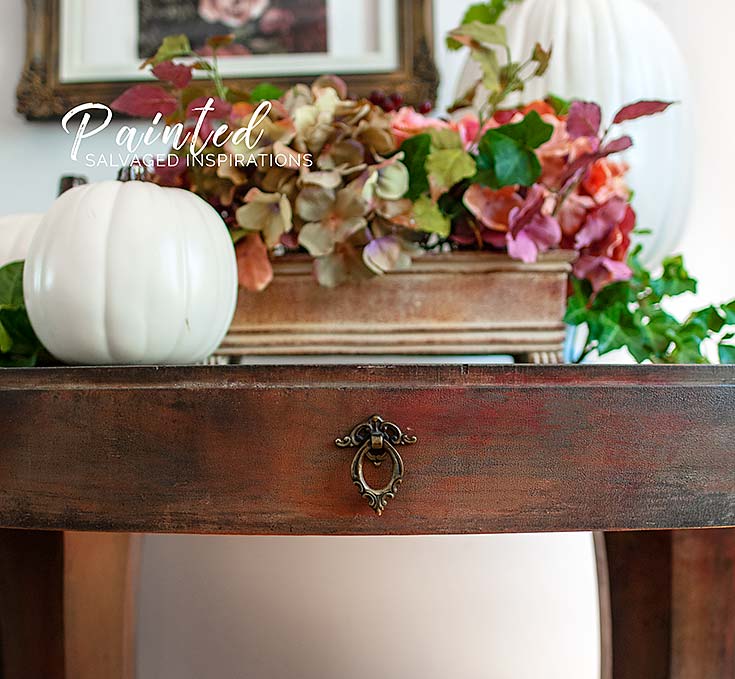
Damaged veneer, no sanding, and it still comes out beautifully. Layers of warm fall color go down first, terracotta and barn red and putty, which sounds alarming mid-project and is exactly what distracts the eye from the flaws underneath. Coffee Bean, a rich brown black, mutes the lot at the end and ties it together. The real trick is a bonding primer instead of sanding, because sanding old veneer invites bleed-through. Seal it well if it lives by the front door.
Get the full tutorial at Salvaged Inspirations.
17. DIY Twine Lanterns
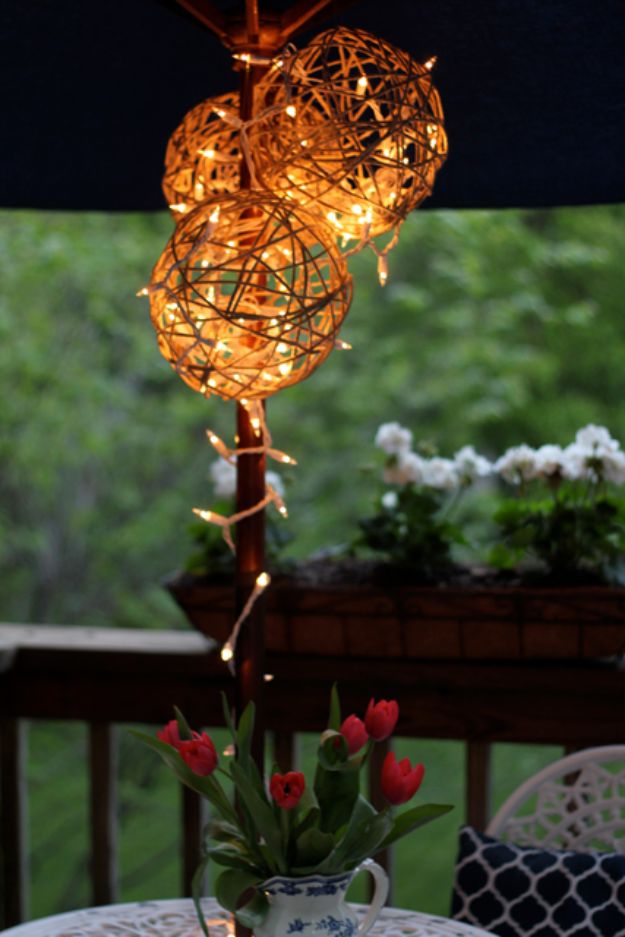
Five or six balloons, hemp twine or cotton yarn, and a homemade paste of four ounces of white glue, half a cup of cornstarch and a quarter cup of warm water. Rub the balloon with petroleum jelly first or you will never get it off. Wind the soaked twine around, let it harden, pop the balloon and thread string lights inside. Be warned by the maker: it is a genuinely messy job, so a plastic drop cloth and gloves are not optional.
Get the full tutorial at Splash of Something.
18. DIY Farmhouse Pumpkin Bucket
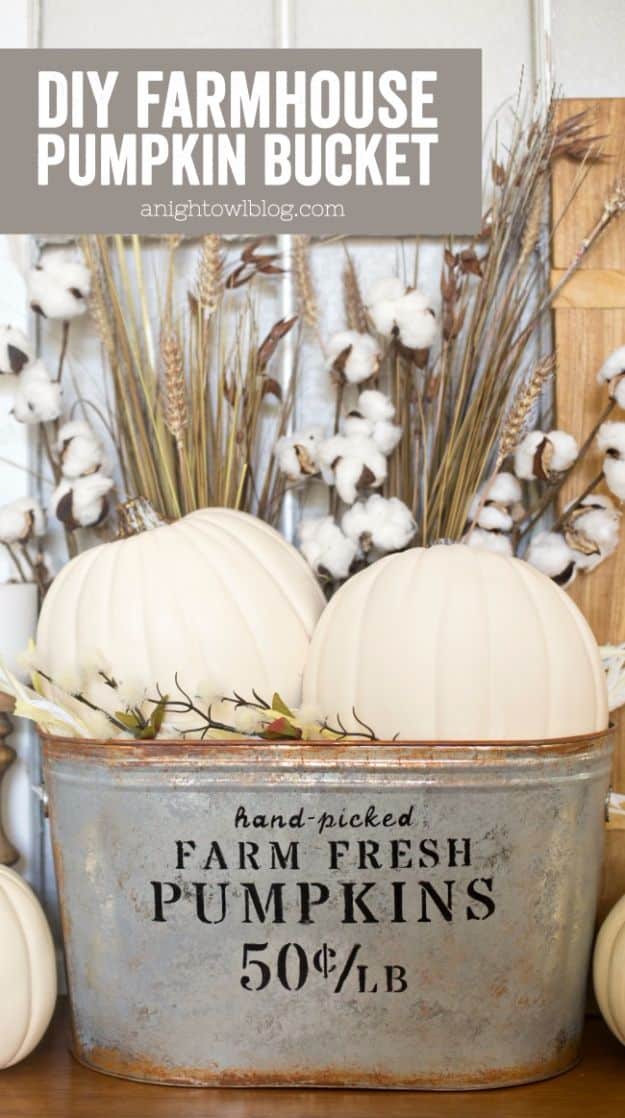
An ordinary galvanized bucket, aged with sea sponges and a paint pouncer until it looks like it came out of a barn. Rust colored paint goes on first around the edges, then a coat of dark gray, then light gray, each one dry before the next, and the whole thing cures overnight. A stencil and black paint add the lettering. Fill the bottom half with filler so the pumpkins sit high, and use half pumpkins rather than whole ones so they layer.
Get the full tutorial at A Night Owl Blog.
19. Candy Corn Button Art
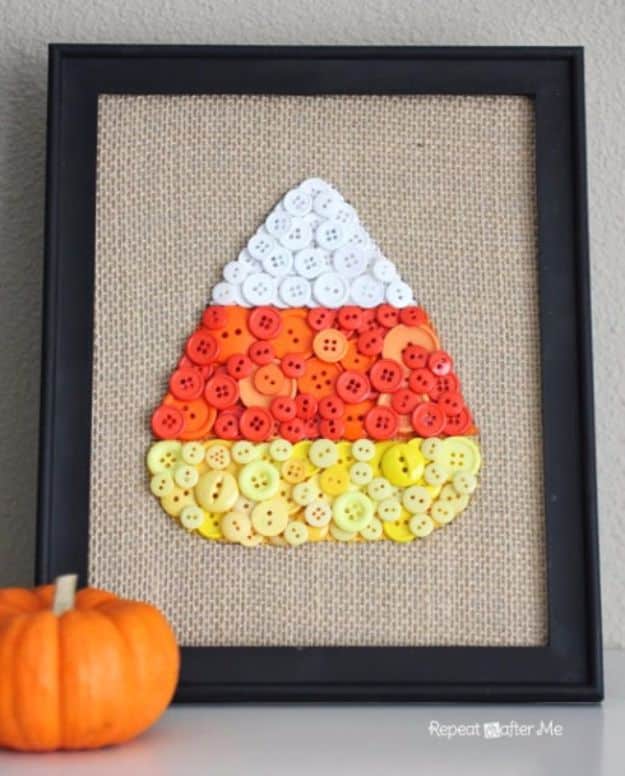
Burlap gets Mod Podged to the back of an eight by ten dollar store frame and trimmed flush. Draw a candy corn outline on it, paint inside the lines in yellow, orange and white so no burlap shows through the gaps, then glue buttons on top. Put the large buttons down first and fill the spaces with the small ones. Roughly thirty-five white, fifty orange and sixty yellow did it here, and bigger buttons mean fewer of them.
Get the full tutorial at Repeat Crafter Me.
20. Crepe Paper Marigold Garland
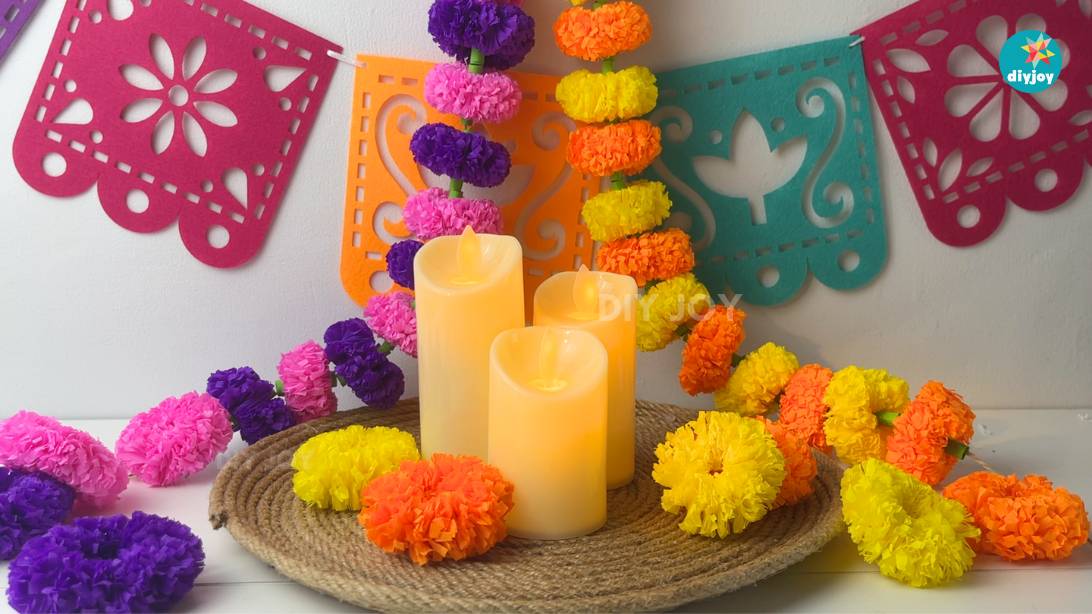
Marigolds have the richest color of any fall flower, and I make mine from streamer crepe paper rather than sheets because it cuts the fussy trimming time right down. Beginner friendly, genuinely inexpensive, and I hang them for fall and again for Dia de los Muertos. Yellow, orange, violet and pink is the mix I use, and the flowers are just as good loose on a table as they are strung up. They come back out of the box year after year.
Get the full tutorial at DIY Joy.
21. DIY Fall Wreath With Felt Leaves
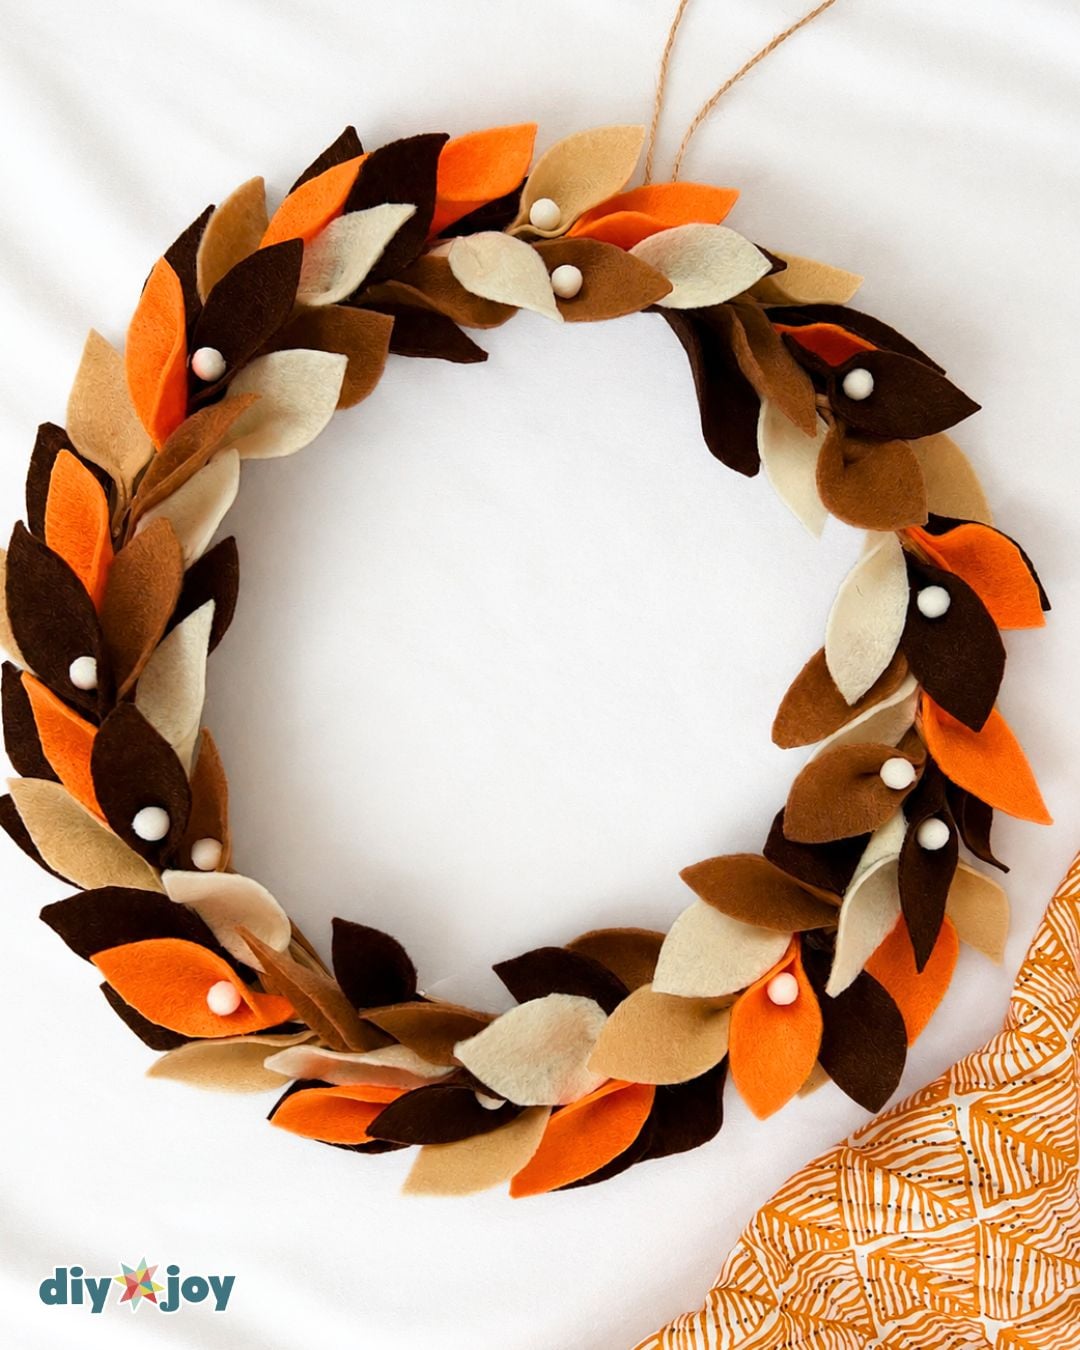
Felt leaves do not go brittle, do not fade and pack flat, so this wreath comes out of the box looking exactly as it did the day it was made. It is built on an eleven inch form from felt in mixed fall colors, cut from one leaf pattern two and a half inches long by one and a quarter wide, with white pom poms and small fabric pumpkins tucked in. No sewing anywhere. I put mine up in September and leave it through Thanksgiving.
Get the full tutorial at DIY Joy.
22. Watercolor Paper Leaf And Branch Mobile
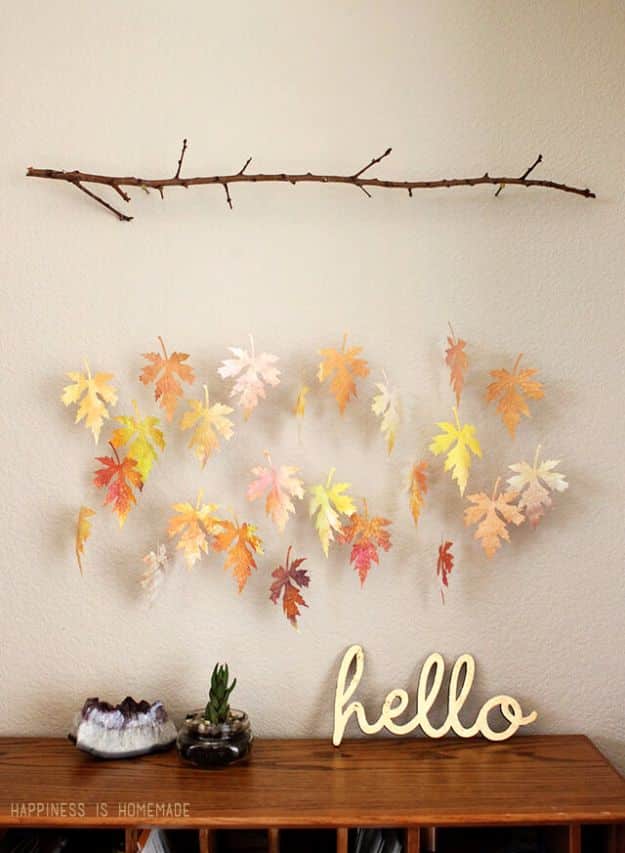
Paint sheets of paper in fall colors, cut leaf shapes out of them, emboss each one for texture, then tie them with thread to a branch from the yard. Six sheets of paper and about an hour is the whole cost. Use thread that matches your wall color so the leaves appear to float. Hang the first row, then add rows behind it at different lengths, because the depth is what makes it look like a mobile and not a line of paper leaves.
Get the full tutorial at Happiness is Homemade.
23. DIY Pinecone Spheres
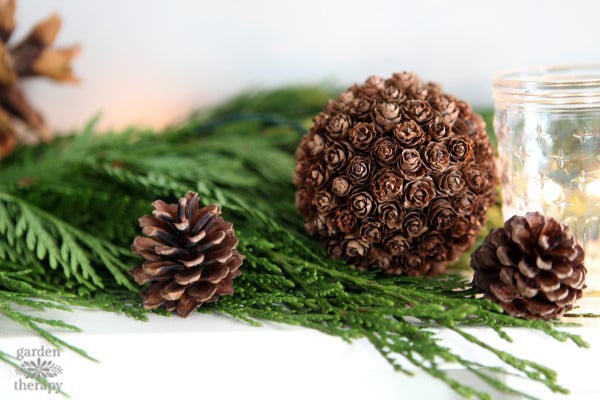
Foam spheres and dry pinecones, hot glued base first, largest cones on and smaller ones filling the gaps. Four inch balls suit large pinecones and two inch balls suit small ones. Pinecones are dry when they have opened fully and no longer feel cool to the touch, which is the detail that decides whether yours look crisp or damp. If you want to hang them, staple a twine loop into the foam before you glue anything, not after.
Get the full tutorial at Garden Therapy.
24. Gold Leaf Pumpkin
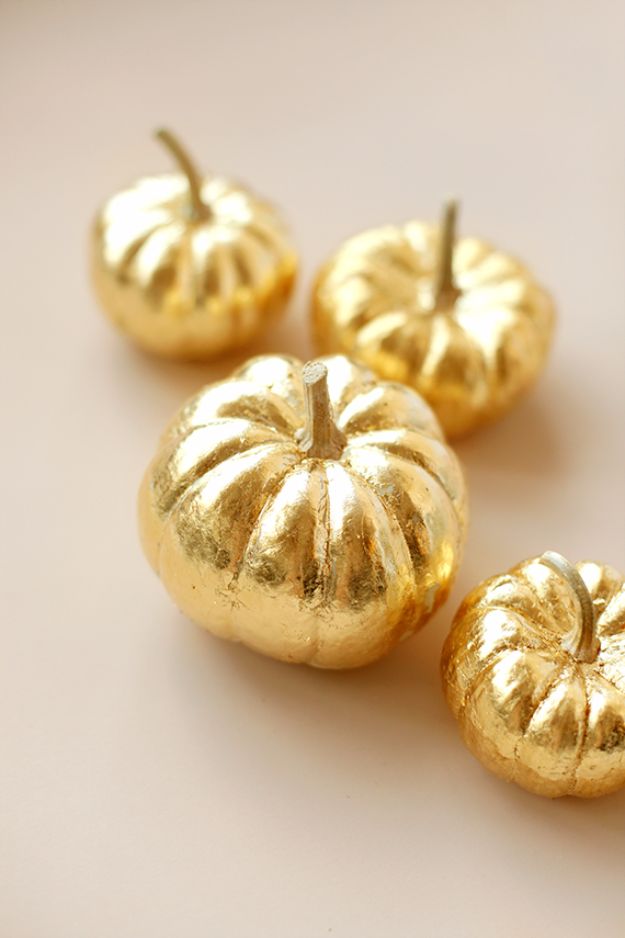
Brush metal leaf adhesive over the whole pumpkin and leave it thirty minutes. It goes on milky white and turns clear and tacky, and that change is how you know it is ready. Then lay the gold leaf sheets on and burnish. Rinse the brush straight away, because adhesive that dries in the bristles ends the brush. Work over parchment paper, because gold leaf goes everywhere. Craft stores carry both the sheets and the adhesive.
Get the full tutorial at Minted.
25. Pumpkin Candle Holder
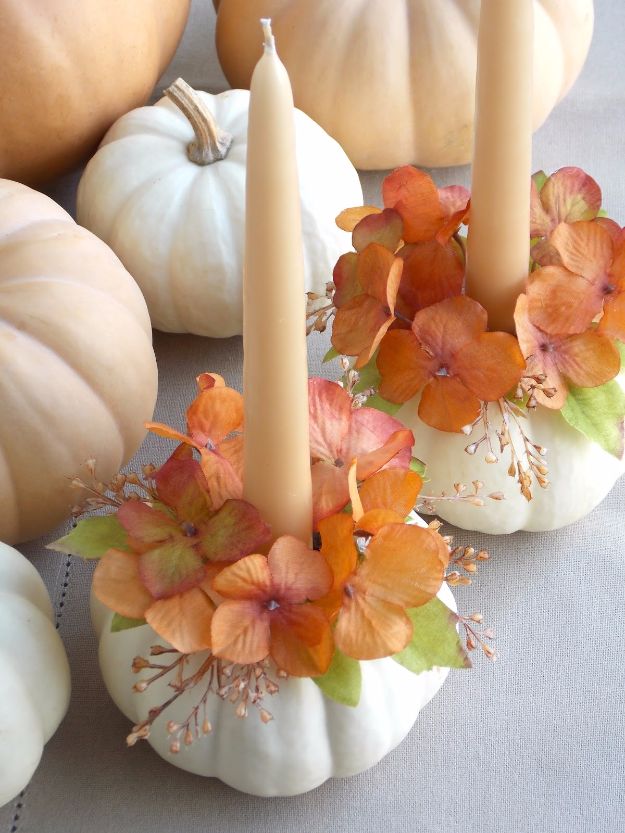
Break the stalk off a small pumpkin, cut a hole where it was slightly larger than your taper candle, and scoop the seeds out. Then hot glue silk flowers in a ring around the opening. One warning worth having: glue to the outside of the pumpkin, never the inside, because the moisture in there means nothing sticks. Silk rather than fresh if you want it to last a month. Real or artificial pumpkins both work, and the whole thing comes in under five dollars.
Get the full tutorial at A Homemade Living.
26. DIY Owl Tree
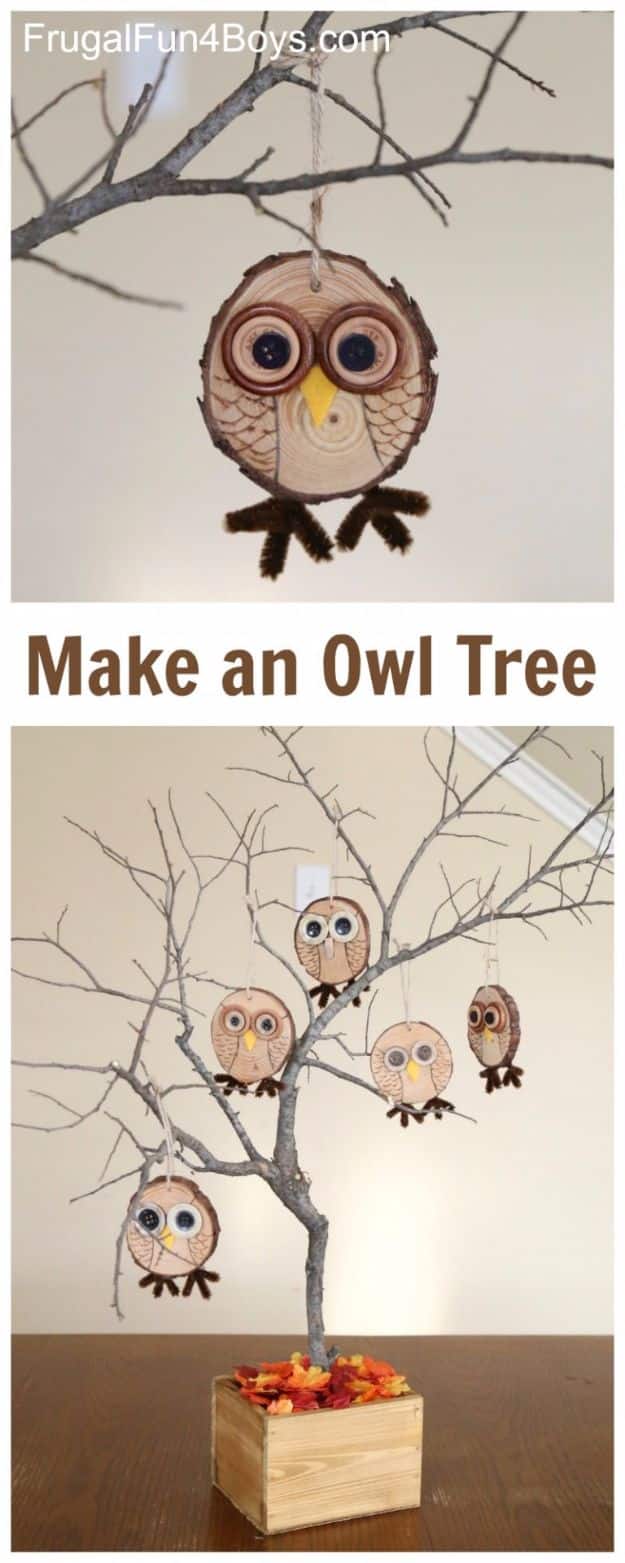
Wood slice ornaments with pre-drilled holes make the owls, with layered wood-look buttons for eyes, yellow felt beaks and brown pipe cleaner feet glued to the back. Wood burned feathers give them character and that part is firmly an adult job. Do the burning before you glue anything on. Be careful placing the buttons, because hot glue does not come off wood slices without a knife. Set the finished owls on a branch in a box of stones for the tree.
Get the full tutorial at Frugal Fun For Boys and Girls.
27. Rustic Birch Log Centerpiece
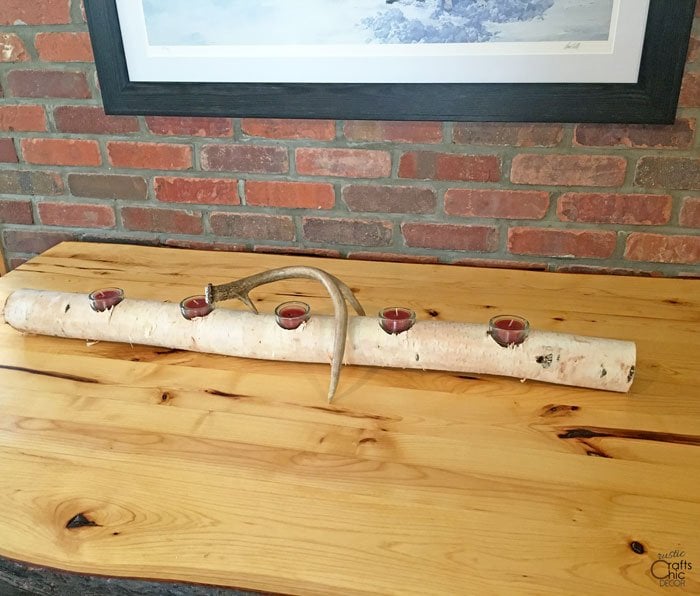
One long birch log laid down the middle of the table, with holes drilled along it for glass tea light holders. A drill press and a Forstner bit make clean flat-bottomed holes, and the depth is a real decision: shallow holes leave the glass showing, deeper ones sit the candles flush with the wood. No flowers means nothing to replace, so it carries from October to the end of November. An antler laid across the middle is the only other thing here.
Get the full tutorial at Rustic Crafts & DIY.
28. Hang Sunflowers Around The House
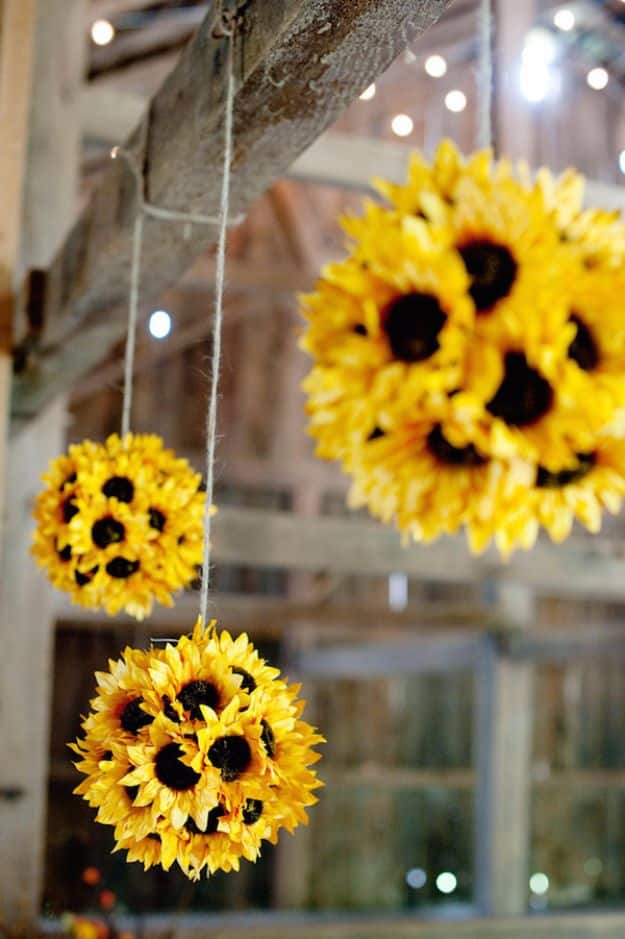
Artificial sunflower heads hot glued all over a styrofoam ball or a wiffle ball, hung on a string. Cut the stems short before you glue so the heads sit flat against the ball, and keep going past the point where it looks done, because a bald patch is obvious from across the porch. A wiffle ball is the better base outdoors since it does not crumble in the rain. Three at staggered heights look far better than one.
Get the full tutorial at Smart Schoolhouse.
29. Indian Corn Cake Stand
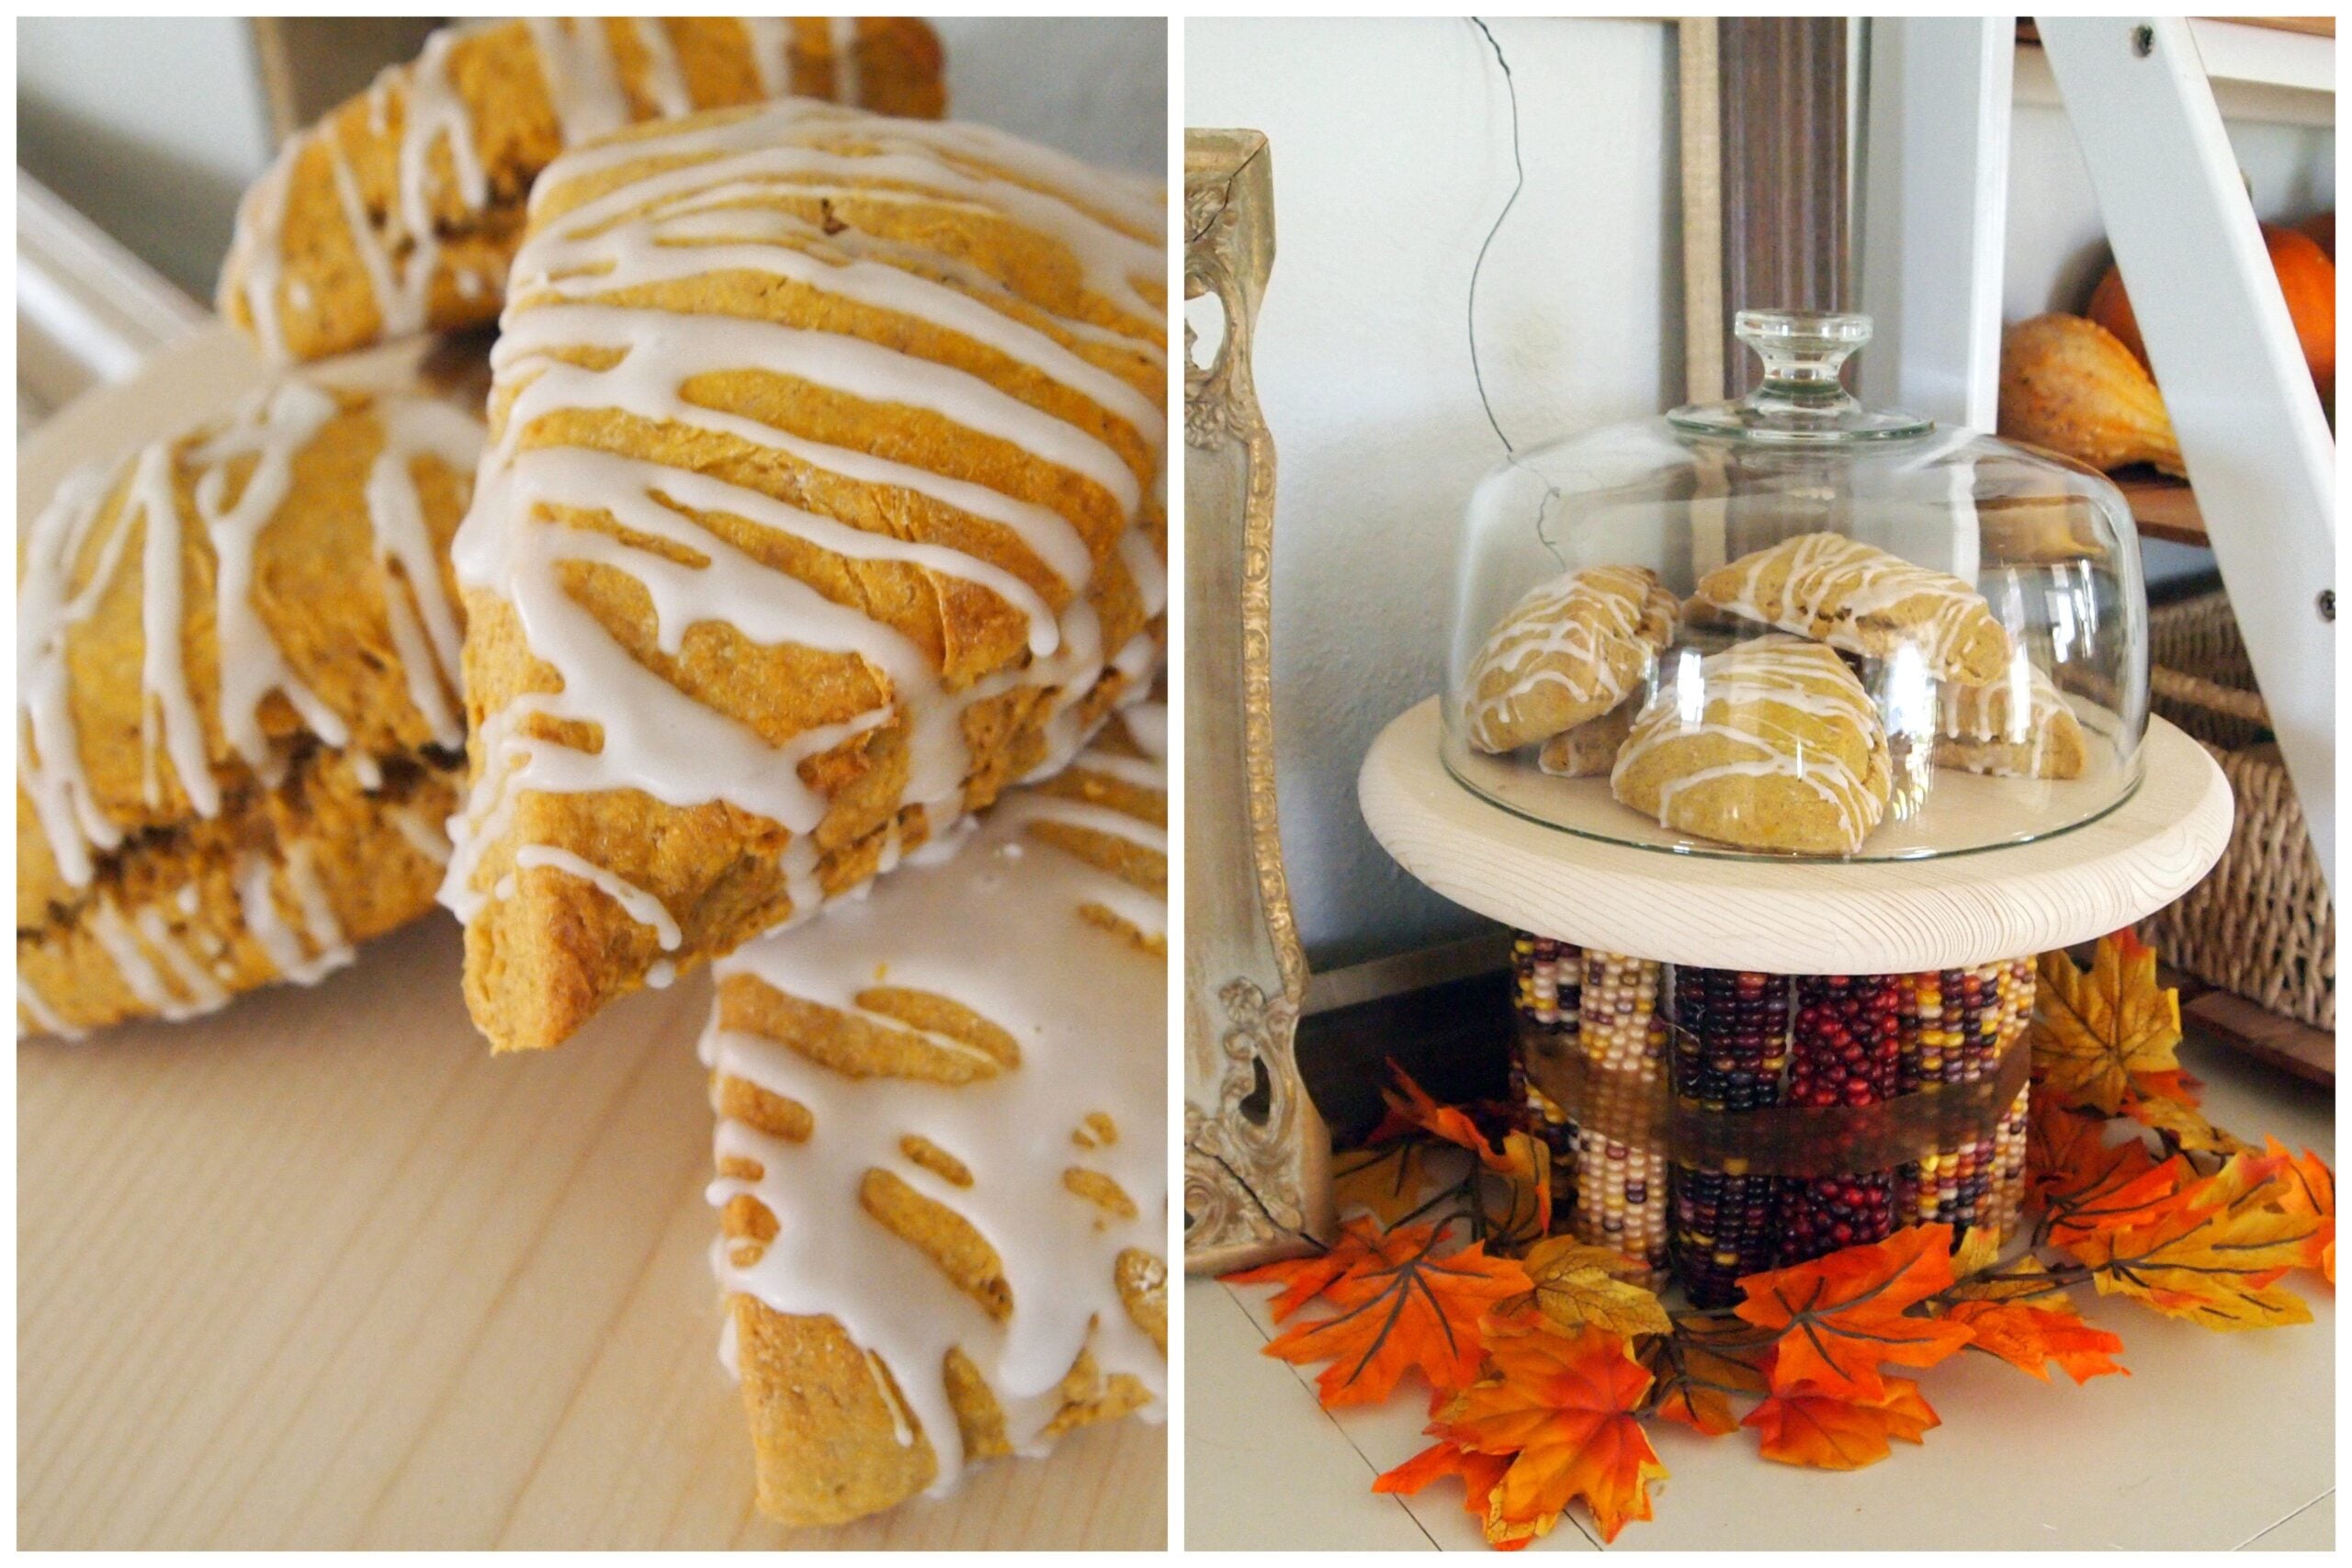
Ears of Indian corn husked, sliced lengthwise on a band saw and cut to the exact height of a coffee can, then super glued around the can one piece at a time. A ribbon tied round while the glue cures holds everything in place, and it looks so right that it stays on as part of the design. An oiled wooden circle glued to the top makes the plate, using food safe cutting board oil. Kernels will fly off the cut edges. Ignore them.
Get the full tutorial at Reality Daydream.
30. Fall Candle Centerpiece
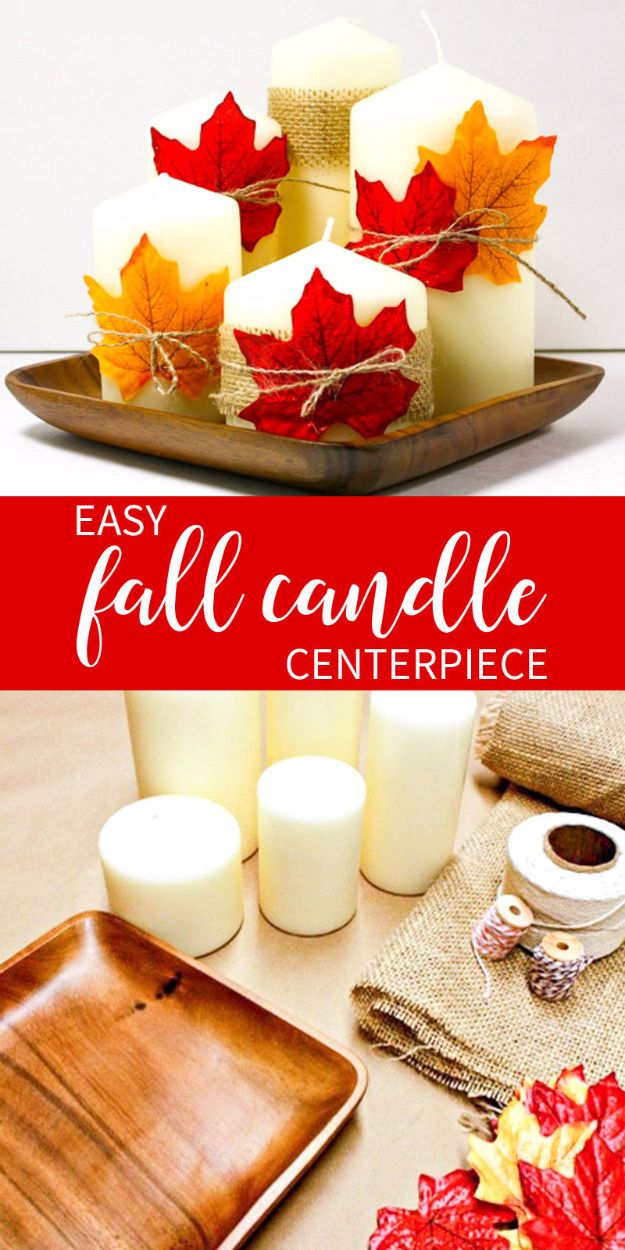
Plain pillar candles, a bag of faux leaves, burlap ribbon and twine, and the point is that no two candles are dressed the same. One gets a leaf and twine, one gets two leaves in different colors, one gets burlap ribbon with a leaf on top, one gets nothing at all. Pull a few threads out of a cut strip of burlap for a soft frayed edge. Group them on a wooden tray or a charger and the variation is what makes it look styled.
Get the full tutorial at That's What Che Said.
31. Wooden Fall Sign
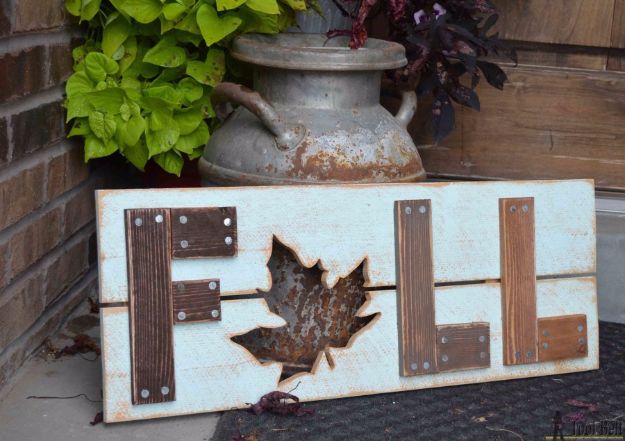
Two cedar fence pickets, a jigsaw and about eight dollars. The word FALL is built from cut letters nailed on with large flat head roofing nails, with a jigsaw-cut maple leaf standing in for the A. Paint a light coat of orange over the planks, then a light coat of aqua on top, then sand most of the aqua back so the orange ghosts through. Pre-drill the letters before nailing, because the nails split them otherwise.
Get the full tutorial at Her Tool Belt.
32. Decoupage Fall Vase
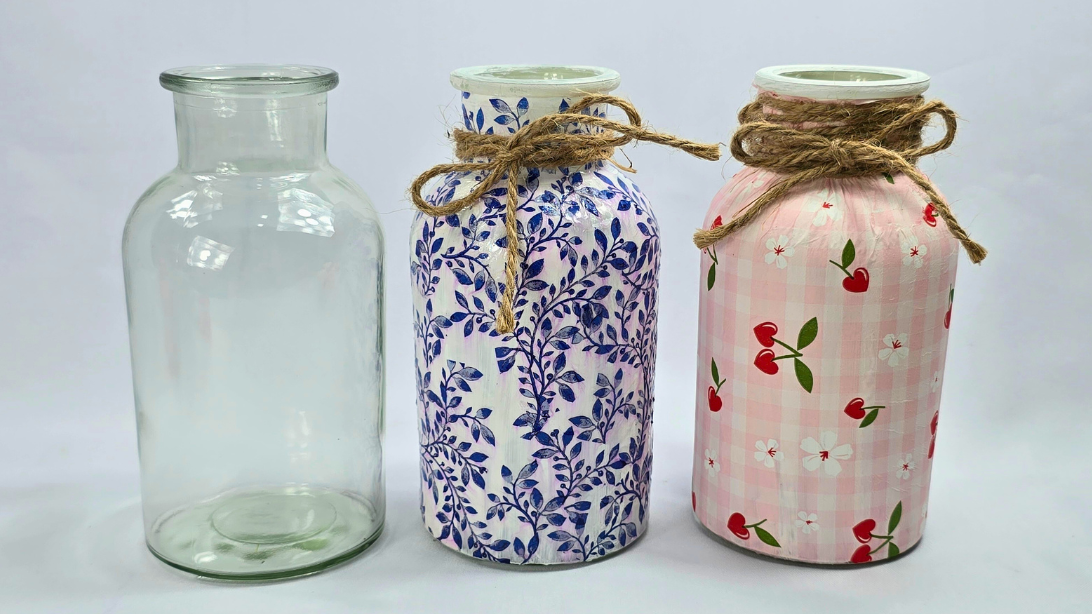
An empty glass jar, a paper napkin and a bit of glue, and the jar you were keeping just in case finally has a job. Separate the napkin down to its printed top ply before you start, or the layers underneath go cloudy and gray through the glue. Work from the middle outward with a soft brush so the paper does not tear. Fill it with branches, wheat or dried stems. Make three in different sizes and group them, which always looks better than one.
Get the full tutorial at DIY Joy.
33. Fall Leaf Initial
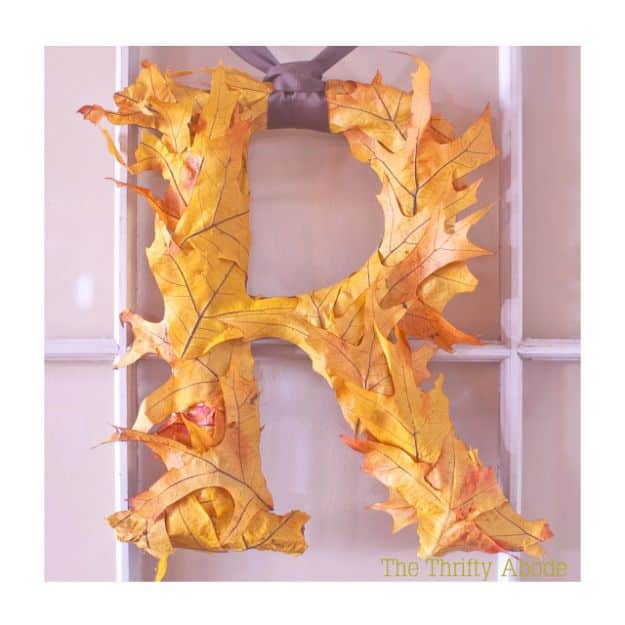
A large foam or cardboard letter covered in overlapping artificial leaves, which is one of the cheapest personalized pieces on this list. Spray mounting adhesive holds the leaves while you position them, then a stronger spray adhesive over the backs locks them down once you are happy. Overlap them generously so no letter shows through. Leaves left over from last year are perfect for this, and a monogram works on a door, a wreath or a shelf.
Get the full tutorial at The Thrifty Abode.
34. Fall Welcome Yard Sign
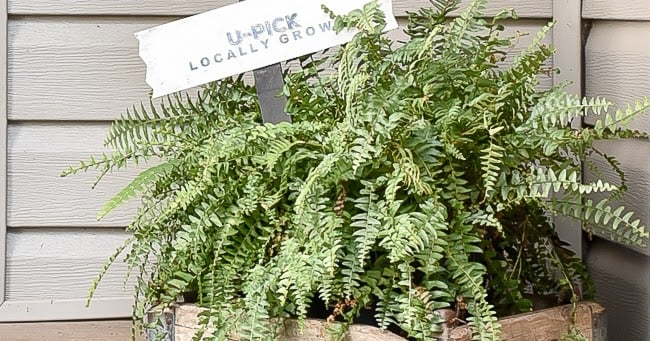
A one dollar particle board yard sign from Dollar Tree, sanded to knock the glitter off, repainted in white chalk paint and aged with black gel stain and aging dust so it reads farmhouse instead of cutesy. A free printable goes on with Mod Podge to replace the original lettering, then clear wax seals it. Sandpaper along the edges afterwards is what sells the age. Everything here except the stain comes from the dollar store.
Get the full tutorial at Little House of Four.
35. Crepe Paper Sunflowers
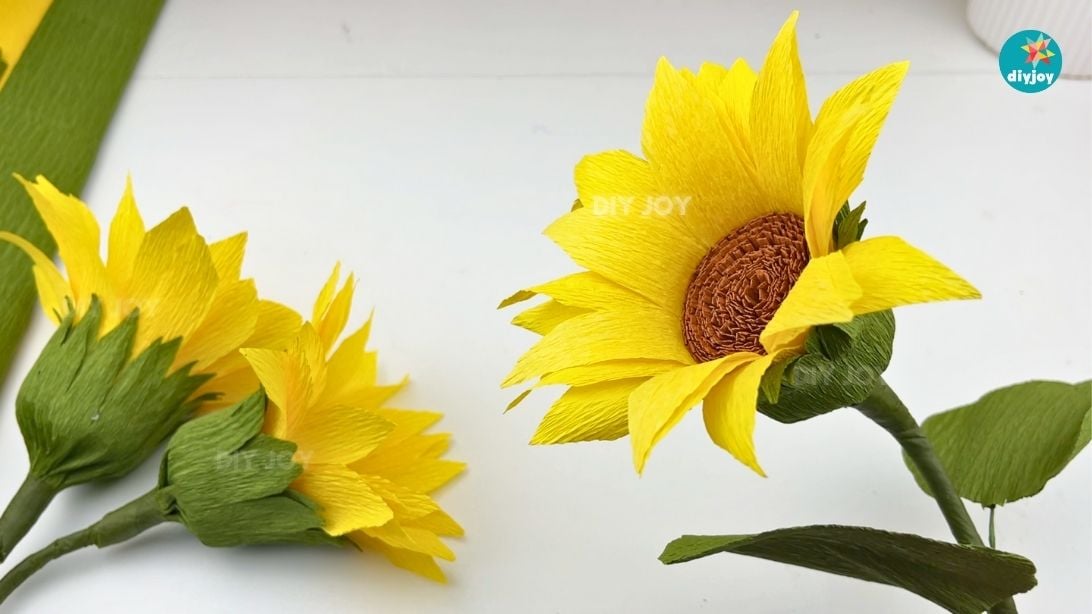
Sunflowers are the paper flower readers ask me for more than any other, and I could never find a tutorial that was both easy to follow and gave real measurements, so I sat down and worked them out myself. These golden crepe paper blooms fill a vase or a wreath and never need watering. Every measurement is in the post, which is the part that was missing everywhere else. They keep their color and they come back out every September.
Get the full tutorial at DIY Joy.
36. DIY Thankful Sign
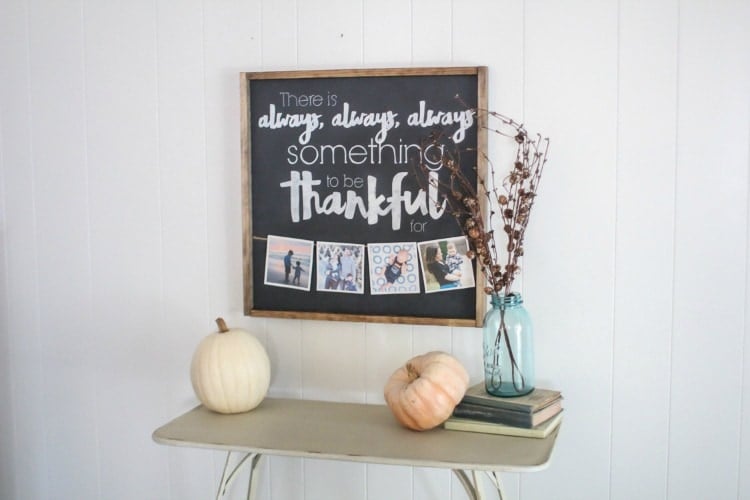
A two foot square of half inch birch plywood, sold at that size so nothing needs cutting, framed with one by two pine and painted with chalkboard paint for the matte finish rather than for writing on. Jute rope and mini clothespins across the front hold family photos, so it doubles as a keepsake. Stain the frame pieces before you assemble anything, which saves fighting drips later. Swap the photos each year and it becomes a small tradition.
Get the full tutorial at Lovely Etc.
37. Fall Banner made from Book Pages
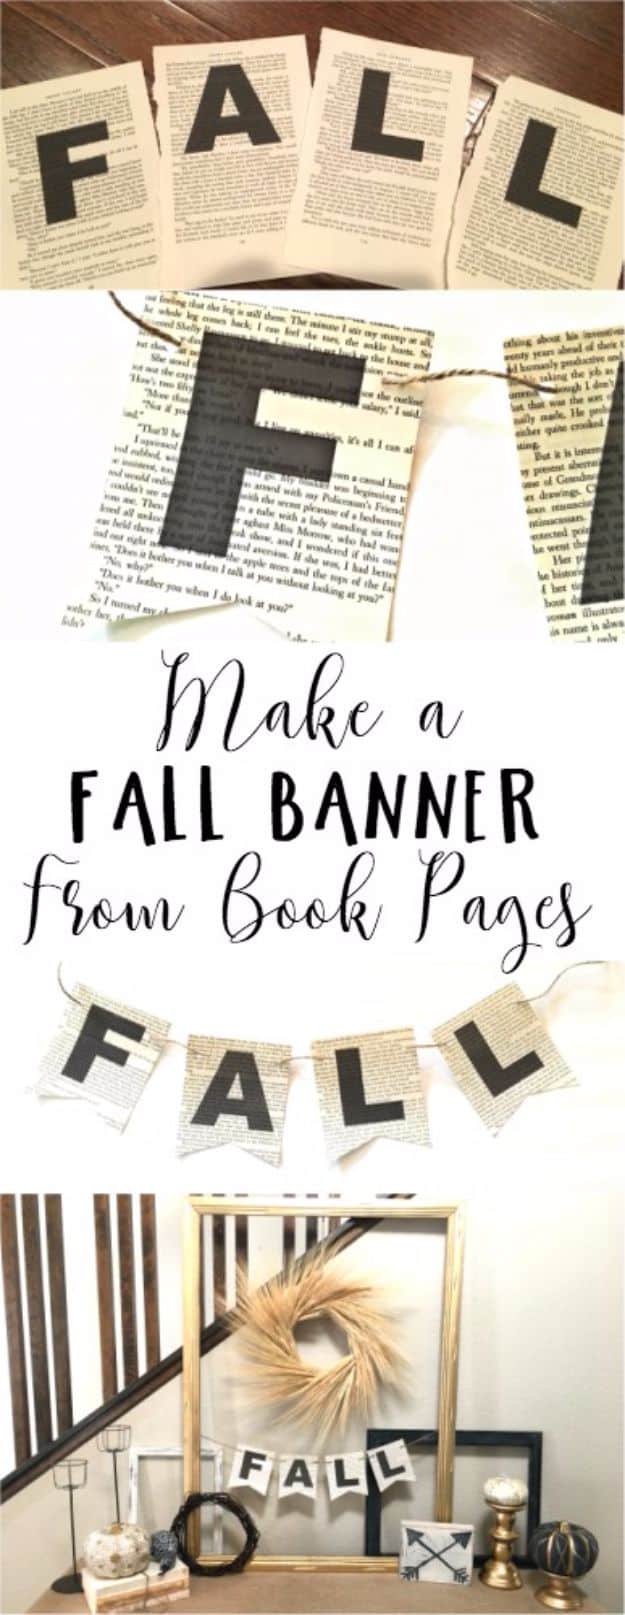
Print the letters onto plain paper first, then tape a book page over each printed letter and run the sheet through again so the letter prints onto the book page. That dodge means you never have to fight your printer over paper size. Cut a card stock template, here four by four and three quarter inches, trace and cut each page, punch the holes through the template so they line up, then thread jute. Thrift store books cost about a dollar.
Get the full tutorial at Dream Design DIY.
38. Decorate For Fall At The Dollar Tree
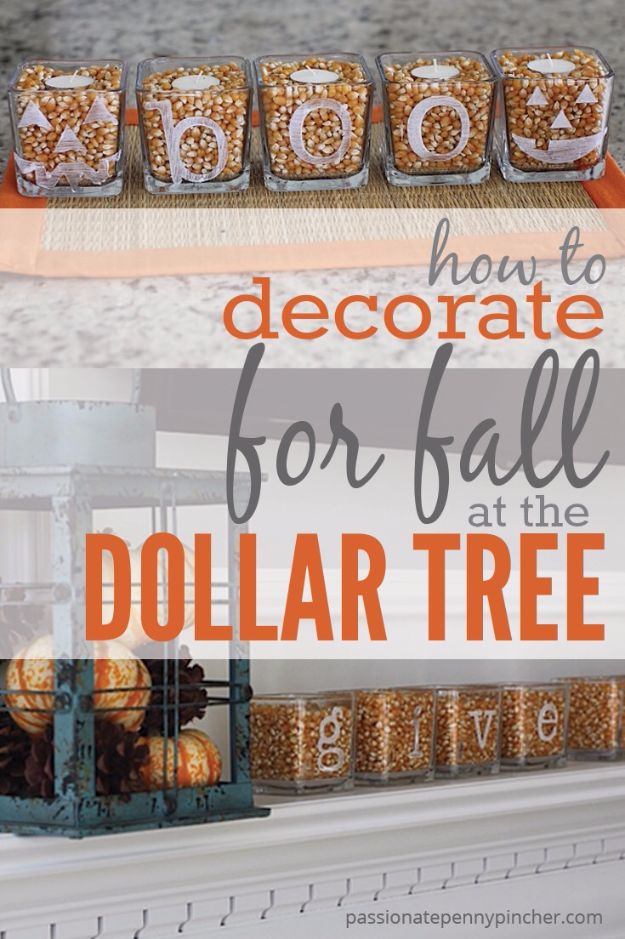
Cheap glass votives filled with popcorn kernels, with a vinyl or sticker letter on the front of each one, lined up to spell a word along a mantel. The kernels give it that warm amber color for the price of a bag of corn, and a tea light sitting on top of them throws a good glow. Adhesive stickers work just as well as a cutting machine here. Change the word and the same votives carry you from September through Thanksgiving.
Get the full tutorial at Passionate Penny Pincher.
39. Falling Leaves Door Decor
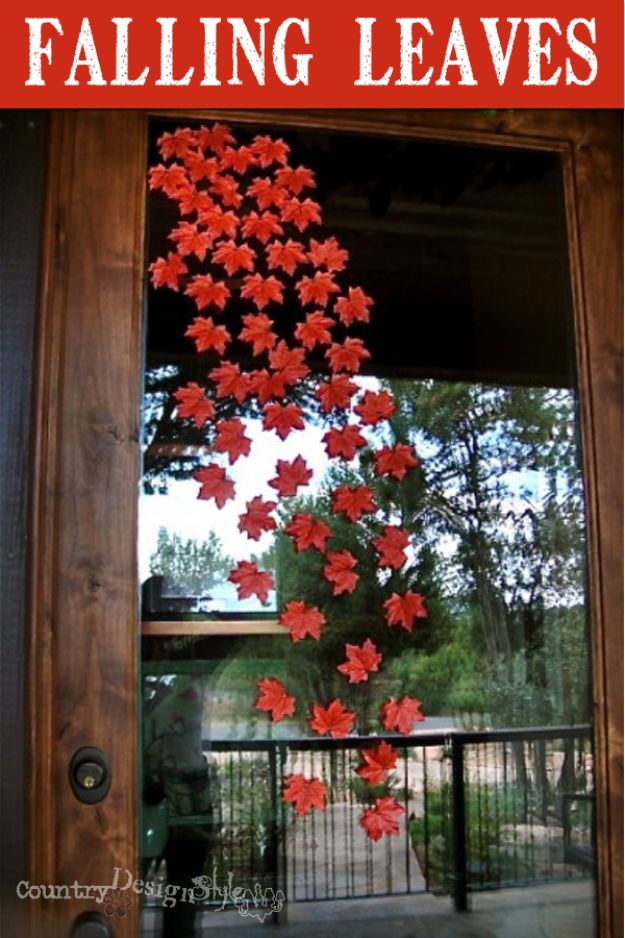
Silk leaves hot glued straight onto the glass of a front door, tight together at the top and spreading out as they fall toward the bottom, so it reads as leaves coming down rather than leaves stuck on. Clean the glass properly first with a squeegee, which matters more than it sounds. The reassuring part is that hot glue picks off glass easily when the season ends. A dollar store bag of leaves is enough for a whole door.
Get the full tutorial at Country Design Style.
40. Mason Jar Leaf Lanterns
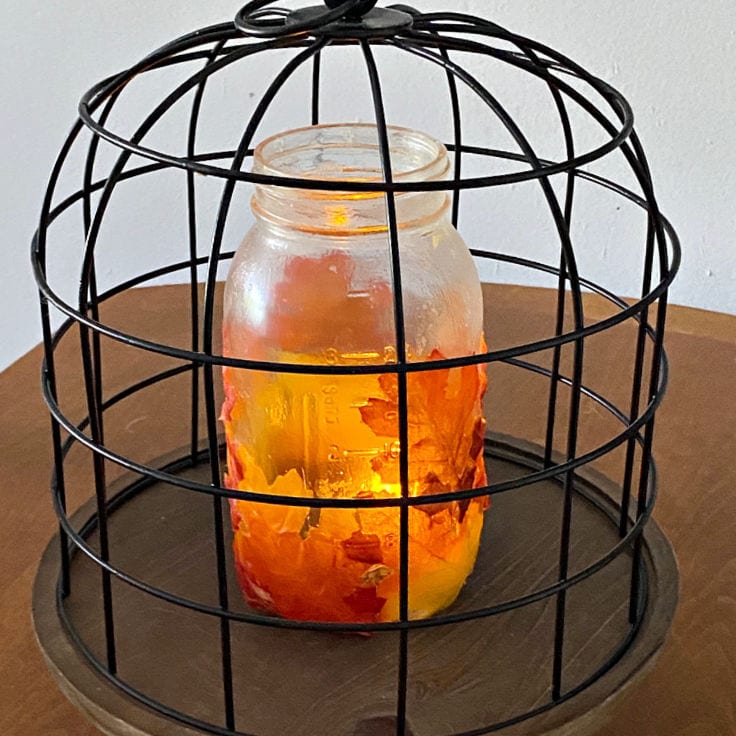
Wipe the jar with rubbing alcohol first, because Mod Podge lifts off fingerprints and dust later and you cannot fix it once the leaves are on. Take the stems off so the leaves lie flat, work in small sections and let the Mod Podge go slightly tacky, a minute or two, before pressing each leaf down. Rushing that step is exactly where leaves wrinkle. A battery tea light inside turns real leaves translucent in a way nothing store-bought does.
Get the full tutorial at Kenarry.
41. Fall Crafts – Yarn Pumpkins Made From Toilet Paper Rolls

Wrap an empty toilet paper roll in chunky chenille yarn until no cardboard shows anywhere, and you have a soft little pumpkin for a shelf or a mantel. No knitting, no crochet, no sewing. Go as chunky as the yarn aisle allows, because thin yarn takes forever and still lets the cardboard peek through. I lined a few colors up down the middle of my dining table and they made a genuinely good Thanksgiving centerpiece. Burnt orange, cream and warm mustard together is the mix that works.
Get the full tutorial at DIY Joy.
42. DIY Fall Garland
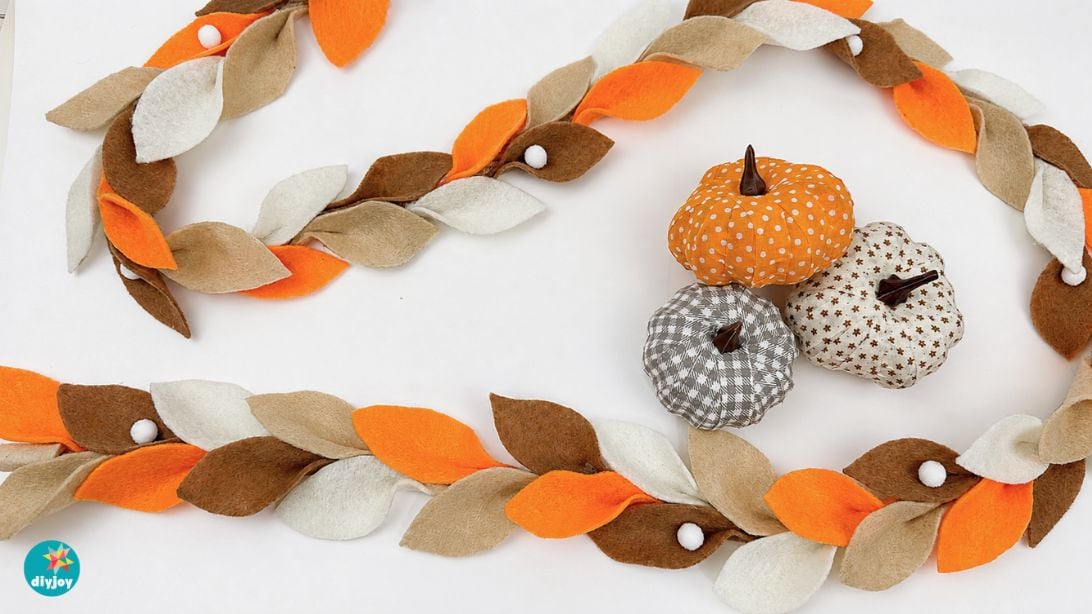
Felt leaves and white pom poms glued along a length of five millimetre jute rope, in orange, light brown, brown and white. You can finish it in an afternoon and it costs very little, and because you set the length yourself it fits a staircase, a mantel, a doorway or a plain wall without any measuring gymnastics. Cut one leaf pattern and use it over and over rather than freehanding each one, which is what keeps the garland looking intentional instead of homemade.
Get the full tutorial at DIY Joy.
43. Fall Crafts – Twine Pumpkins Made From Toilet Paper Rolls
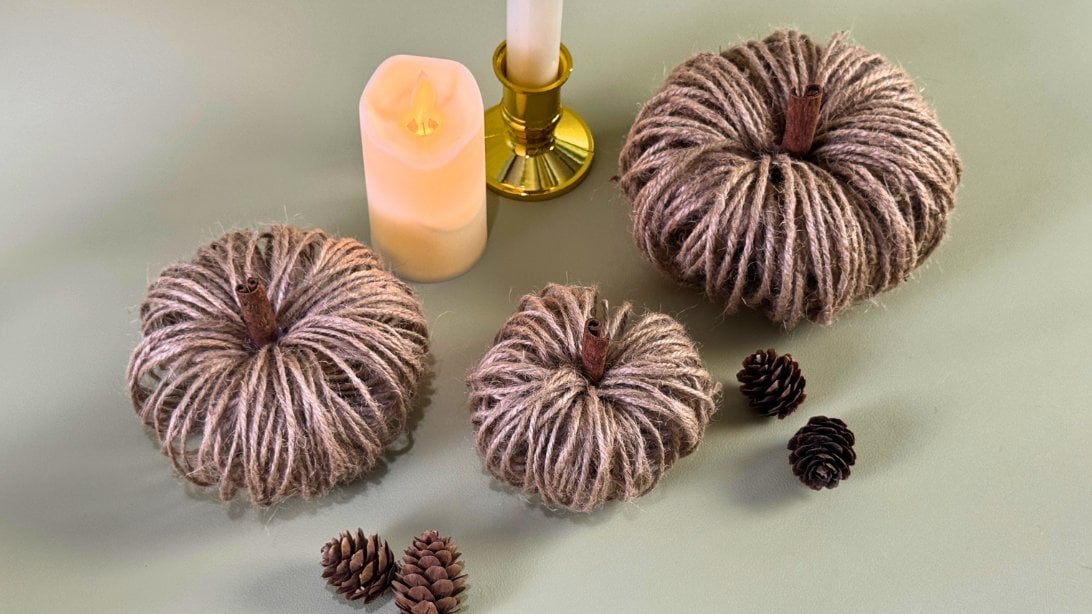
The best thing about these is not how they look, it is that the stem is a real cinnamon stick, so the whole shelf smells like fall. The body is a recycled cardboard tube wrapped in twine, and dollar store twine works perfectly, which makes this about as cheap as fall decor gets. An ordinary small stick works if you have no cinnamon. Older kids can make them, but honestly this is a late night crafting binge project that you finish four pumpkins later.
Get the full tutorial at DIY Joy.
44. DIY Marigold Paper Flower Garland
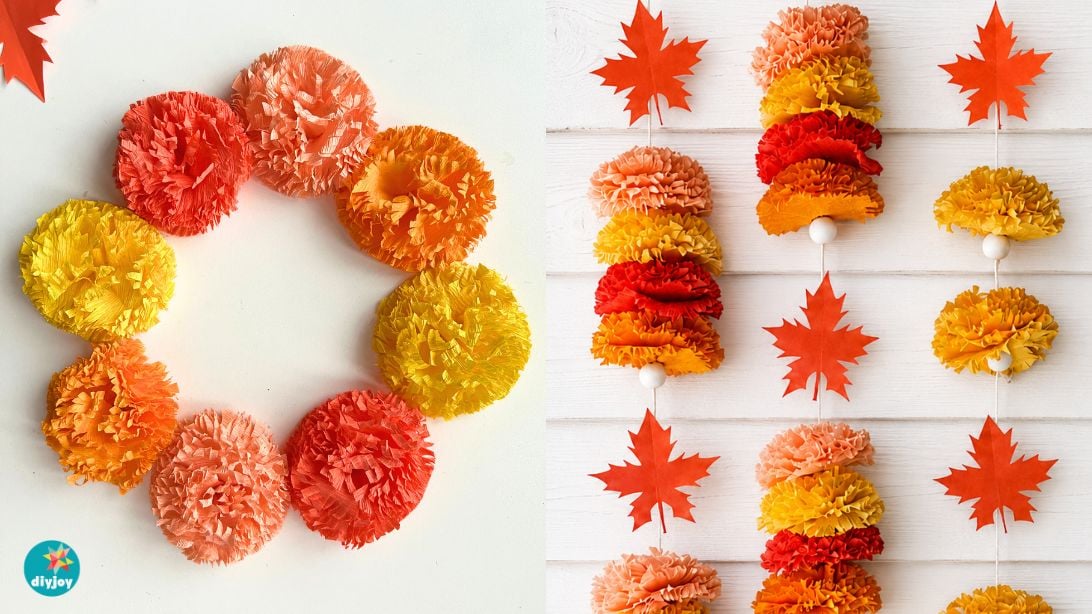
Crepe paper, scissors, a stapler, string and small white pom poms is the whole supply list for this one. Each flower is six two and a quarter inch circles stacked, stapled through the middle, fringed around the edge, then scrunched layer by layer toward the center. Multi-blade scissors are the one thing worth buying if you plan to make a lot, because cutting the fringe is the only slow part. Keep the flowers loose or string them into a garland.
Get the full tutorial at DIY Joy.