Is your closet still stuck in sweater mode while the weather has moved on? These 31 cool and easy DIY fashion ideas for spring are the fix, and most of them start with something you already own. Spring fashion DIY is all about light, fresh pieces you make or refashion yourself: a breezy tunic, flouncy shorts, a pretty dress, plus the earrings, bracelets and rings that finish the look. Beginners can start with a five minute pair of crystal studs or a lace sleeve tank, then work up to a knit dress when the sewing bug bites. Old jeans get plenty of love here too, with hand embroidered flowers, a crossbody bag and a button covered bracelet, and those DIY JOY projects come with step by step videos. Grab your scissors, a few scraps and some thread, and let’s get your wardrobe ready for warmer days! Find more ideas on the DIY fashion sewing hub.
1. Leaf DIY Earrings

These brass monstera leaf earrings start as a printed leaf template taped to a scrap of wood. Tap small wire brads in at every point where the outline bends, then wrap 14 gauge brass wire around them, starting with the center vein. Slip the wire off, pinch the leaf splits together with flat nose pliers and coax it back into shape. Wrap the cut end at the base, add an ear hook and make the second one to match. Don’t stress if they aren’t twins, since real leaves never are.
Get the full tutorial at DIY in PDX.
2. DIY File Tasseled Lace-Up Sandals

Got a pair of plain ankle strap sandals? This quick hack turns them into trendy lace-up sandals with a pair of long laces and a few pretty tassels. The creator shows two different ways to tie them, so one pair gives you two looks for spring. Add tassels in a contrast color and they go up a notch, perfect with cuffed jeans or a sundress. It’s seriously easy, so anyone can do it, handy or not, and the shoes you already own get a whole new life.
Get the full tutorial at Gaby Burger.
3. Pink Scalloped Hem Dress

This pale pink shift dress takes about a yard and a half of soft cotton poly fabric and no zipper at all. Use a boxy top or shift dress you already own as the pattern, cut the dress, sleeves, neckline facings and two strips for scallop lining, then sew the shoulders. Trace scallops along the hem with a cup and tailor’s chalk, sew the lining strips along the curves, trim and clip, then turn. Add darts if you need more shaping through the bust.
Get the full tutorial at Merrick's Art.
4. Peplum T-Shirt DIY

A peplum tee is really just one big ruffle at the waist, and two plain white t-shirts make it. Try on a fitted tee and mark where the peplum should start. Cut a wide band from an oversized men’s tee, keeping its finished hem as the bottom edge of the ruffle. Pin it face down around the fitted shirt, gathering or pleating as you go, and stitch from side seam to side seam. The ruffle folds down over the stitches and hides them completely.
Get the full tutorial at Love, Maegan.
5. Floral Embroidery for Jeans Leg
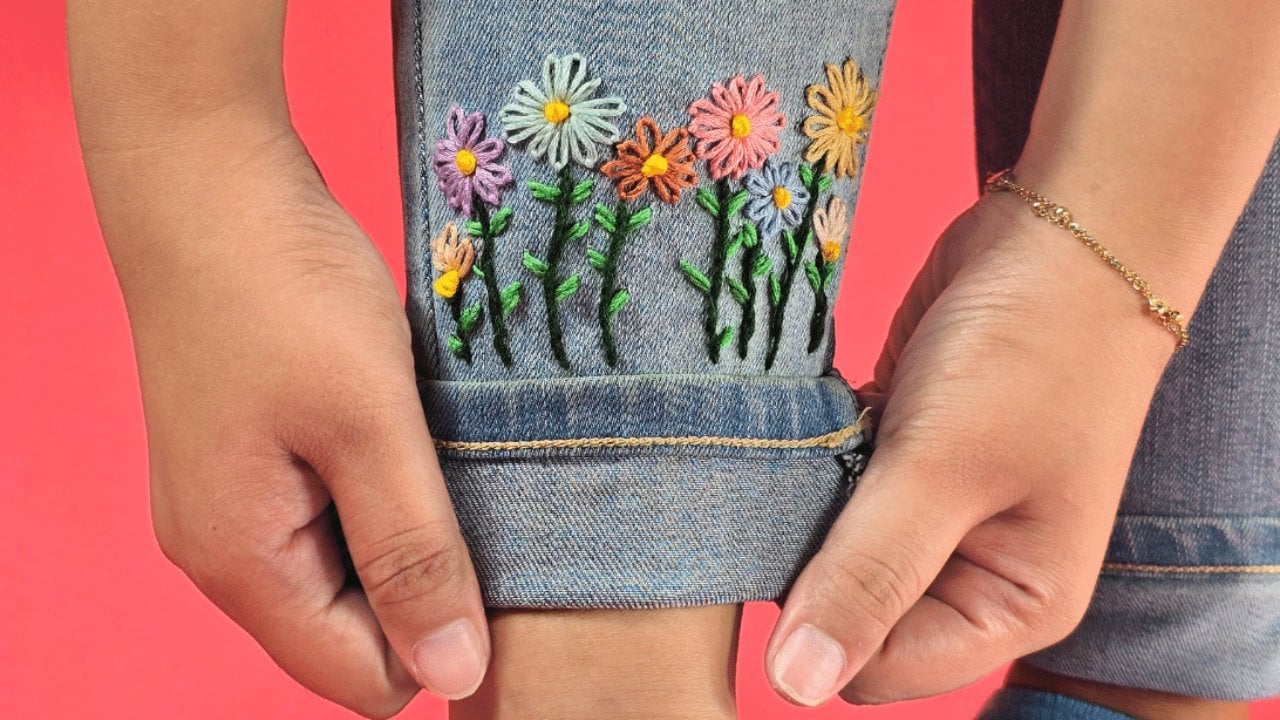
Plain jeans get a whole garden climbing up the hem with this easy hand embroidery. Draw or print a simple pattern, then work the stems in a stem stitch, keeping the thread twisting the same direction. Double stitch the leaves so they read thicker, and use lazy daisy stitches for half daisies and full blooms. No fancy equipment is needed, just a needle, embroidery floss and a free evening. The step by step video shows every stitch up close.
Get the full tutorial at DIY JOY.
6. Dolman Knit Dress

This dolman sleeve knit dress sews up fast because there are no set in sleeves to wrestle. Start with any dolman top pattern and cut the front and back bodice half an inch below your waistline. Two rectangles make the skirt, each as wide as your waist and as long as you like plus seam and hem allowance. Stabilize the waist seam with clear elastic, and use a serger or a long, narrow zigzag so the seams stretch. A soft French terry keeps it cozy.
Get the full tutorial at Sew Much Ado.
7. DIY Flip Flops for Summer Crafts
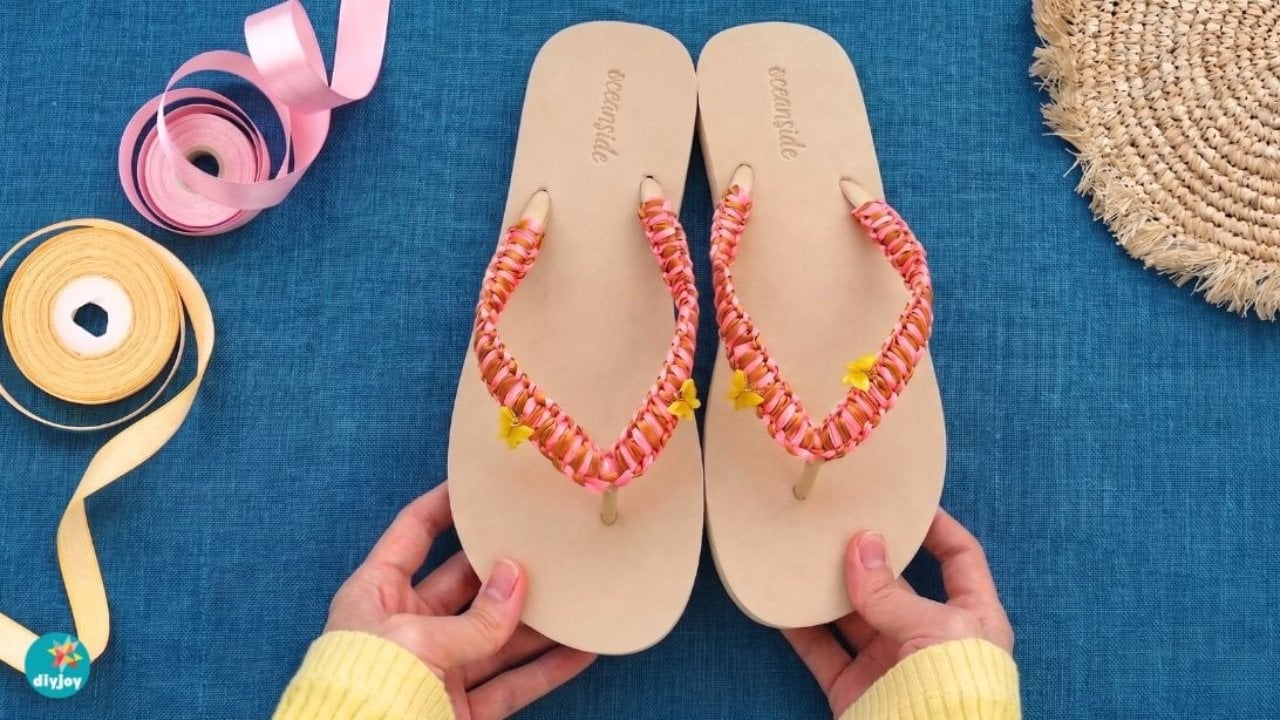
Plain flip flops from the store get a custom braided strap with nothing but ribbon. Fold one ribbon in half and tuck it under the toe post, then lock a second ribbon through its loop so you have two strands on each side. Working down one strap, cross the colors and thread them around the strap, pulling tight each time. Knot the ends, trim and tuck them into the braid, then repeat on the other side. Finish with a few tiny flower charms.
Get the full tutorial at DIY JOY.
8. DIY Denim Flower Bracelet
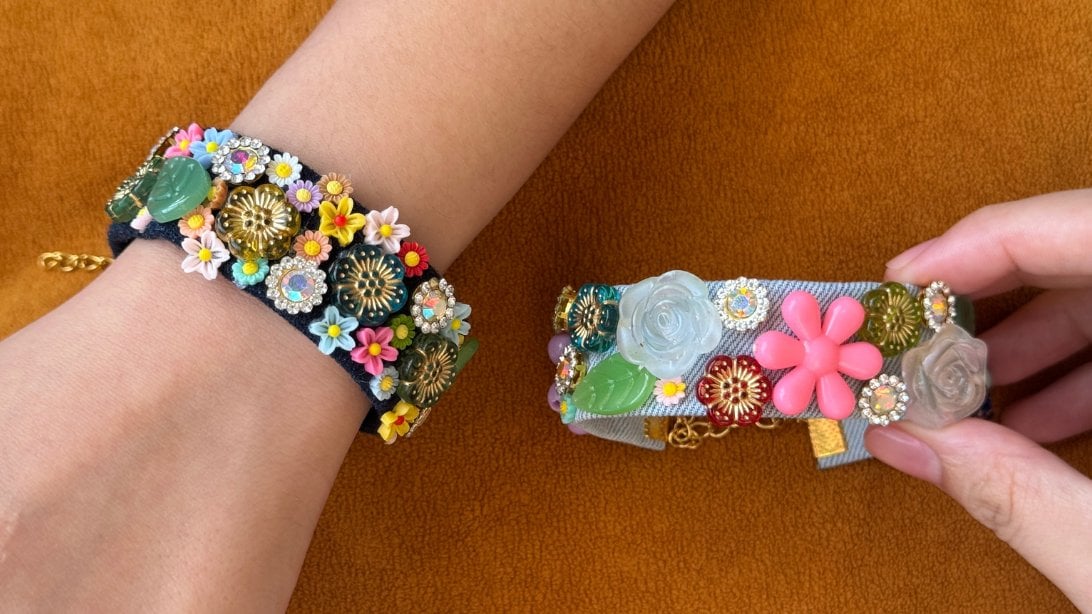
Leftover denim and that jar of saved buttons finally have a job. Cut a strip of denim to your wrist length, fold both long edges in toward the center and hold them with double sided tape. Lay out flower buttons, beads and rhinestones before stitching anything, starting from the middle so the design stays balanced. Sew each piece on, then add crimps, a bit of chain and a lobster clasp. Nothing has to match, which is half the fun.
Get the full tutorial at DIY JOY.
9. Tie Dyed T-Shirt Dress

Four old t-shirts become a floor length beach cover up. Trim the hems off the first shirt, then cut sleeve extensions from a second shirt so the sleeves run down to its hem. A third shirt cut straight across under the arms becomes the midsection, and a fourth keeps its hem to finish the bottom of the dress. Stitch the sleeves with half inch seams, join the tiers right sides together and tie dye the finished dress in bright blue.
Get the full tutorial at DIY Joy.
10. Breezy Tee Tunic

A free tee pattern turns into an easy tunic with three small tweaks. Lengthen the hem by eight or nine inches and curve it up at the side seams, lower the armholes about an inch and a half for woven fabric, and skip the sleeve and pocket pieces. One yard of silky peach skin is enough. Sew the shoulders and sides, hem the armholes and bottom with a narrow double fold, then bind the neckline with bias tape made from scraps.
Get the full tutorial at It's Always Autumn.
11. Easy Flower Embroidery on Jeans
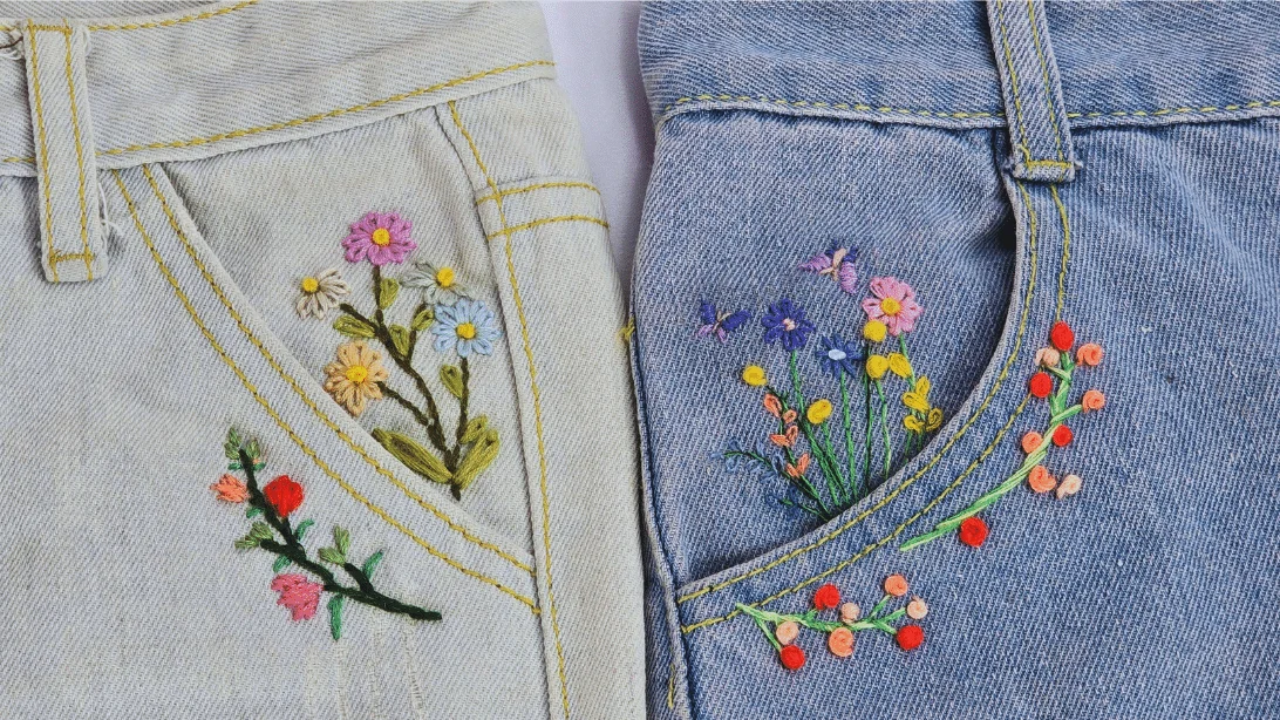
Pretty flowers on jeans take only a few beginner stitches. Print a simple pattern onto water soluble stabilizer, trim around it and stick it to the denim. Stitch the petals with lazy daisy stitches, fill the centers with French knots and satin stitch the leaves, then join everything with a backstitch or stem stitch. Rinse the stabilizer away and the design is left behind. Denim is thick and forgiving, so it’s an ideal fabric to learn on.
Get the full tutorial at DIY JOY.
12. Lace And Chambray Shorts

These elastic waist linen chambray shorts get a sweet lace trim along each leg and real pockets. You need one yard of fabric, two yards of lace and a yard of one inch elastic. Sew the inseams first, finish the outer leg edges and press them under, then stitch the pockets to the side seams. Lay the lace under the folded hem and topstitch it in place before closing the sides and adding a 42 inch waistband. They slip right over a swimsuit.
Get the full tutorial at Melly Sews.
13. Simple DIY Daisy Bead Rings
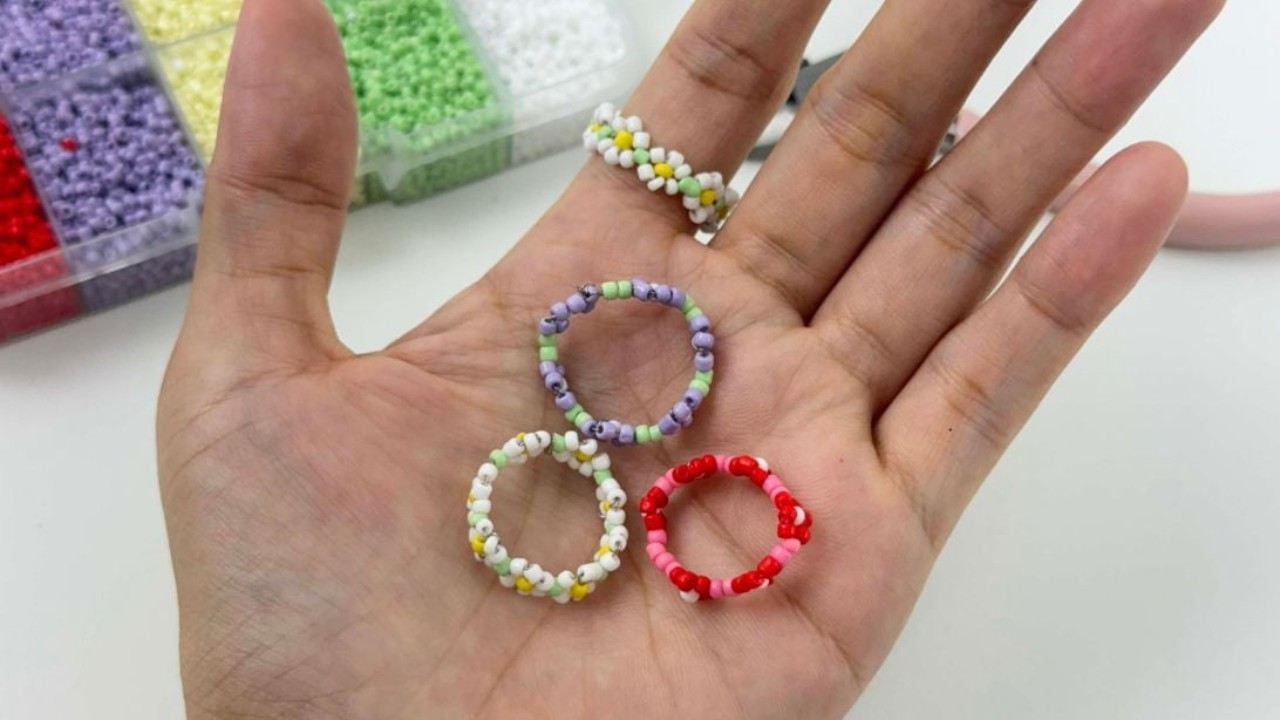
Daisy bead rings look tricky but follow one easy rhythm. Fold a length of jewelry wire, thread two white seed beads on each tail and a yellow bead on one, then cross both ends through a single bead to lock it. Pass the wire back through the white beads so the yellow slides into the center as the daisy’s heart. Add a band of colored beads to fit your finger and twist the ends closed. For little crafters, swap the wire for fishing line.
Get the full tutorial at DIY JOY.
14. Raglan Tee Maxi Dress

A raglan tee pattern plus a stretchy waistband and a long skirt add up to a comfortable maxi dress. Plan on about three and a half yards of cotton lycra jersey, and prewash it before cutting. Sew the raglan bodice, then join it to a fold over knit waistband that stretches as you move. Gather the skirt panels to the band and hem. It’s a step up from a basic tee, so it’s best once you’ve sewn a skirt and a top before.
Get the full tutorial at It's Always Autumn.
15. DIY Lace Sleeve Tank Top

A cotton spaghetti strap tank gets soft flutter sleeves from a strip of six inch lace trim. Starting an inch or two from the end of the lace, pin it along one strap without cutting anything first. Hand stitch or machine sew it to the strap, trim the extra, then overlap the ends and stitch them into a loop. Repeat on the other side. The lace sticks out when the top lies flat, but it drapes over your arms beautifully once you put it on.
Get the full tutorial at Love, Maegan.
16. Big Bow Pencil Skirt

A yard sale rose fabric became this high waisted pencil skirt finished with an oversized bow at the waist. The skirt was cut from a pencil skirt pattern in a sewing book with easy to read instructions, then given a taller waistband and a big bow on the front. It’s a great project for practicing new skills: an invisible zipper, darts for shaping and an invisible hem. Hem it at the knee or leave it a little longer, whichever length you love.
Get the full tutorial at Say Yes.
17. Easy Upcycled DIY Denim Jeans Bag
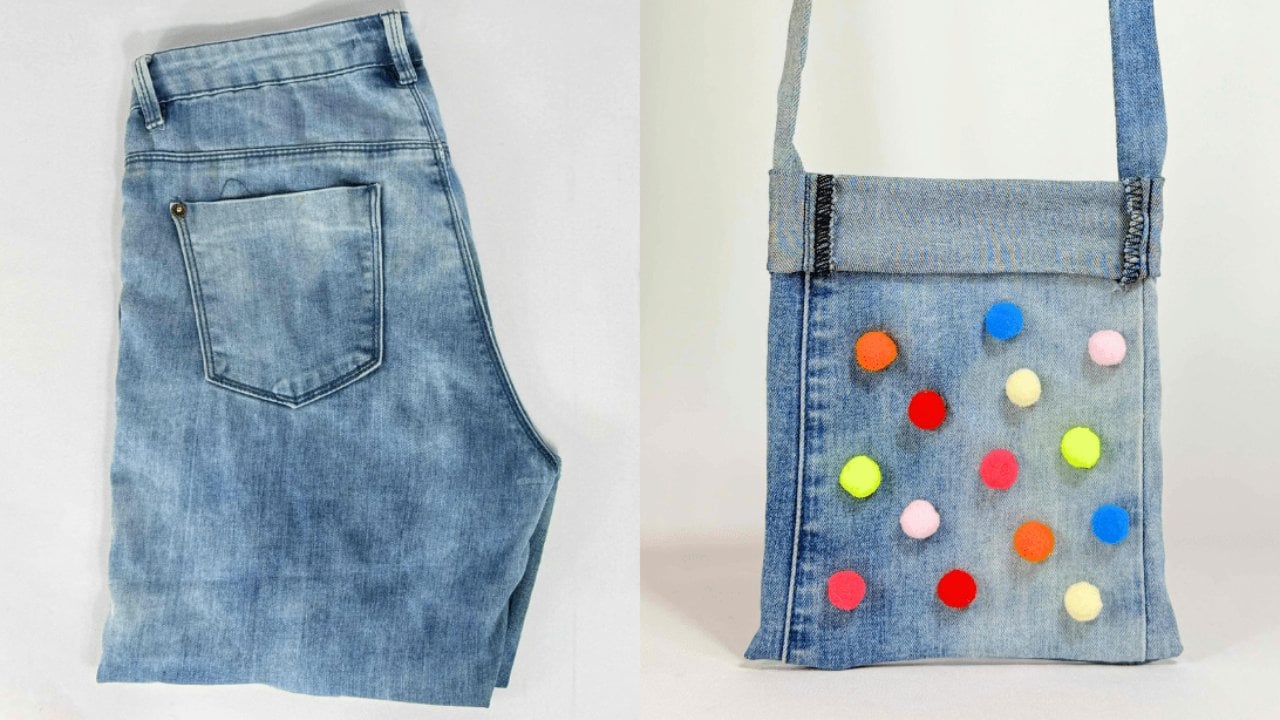
One leg of an old pair of jeans is already a bag waiting to happen. Cut the leg to your size, turn it inside out and seal the bottom with hot glue, then fold the top edge down about two inches. Glue two strips from the other leg into a long strap, fold the edges in and attach the ends inside. Add a Velcro closure, glue the back pocket on the outside and decorate the front with colorful pom poms or charms.
Get the full tutorial at DIY JOY.
18. Leather Fringe Collar Necklace DIY

A runway gown inspired this bold leather fringe collar, and it starts as a simple rectangle of real or faux leather, about 15 by 5 inches. Find the center, then use a ruler and blade or sharp scissors to slice thin fringe all the way down, leaving at least a quarter inch uncut at the top. Hold it to your collarbone to check the fit and trim the ends. Punch holes, add jump rings, chain and a lobster claw clasp.
Get the full tutorial at Love, Maegan.
19. DIY Raw Stone Earrings

Raw stone stud earrings really do take about five minutes. Pick two rough minerals that are close in size and shape, like rose quartz, amazonite, fluorite or garnet, from a bead shop or online. Put a small dab of E6000 glue on a flat gold earring stud, press the stone firmly onto it and let it dry. That’s the whole project! The natural colors and textures do all the work, so every pair turns out a little different.
Get the full tutorial at Alice and Lois.
20. Easy T-Shirt Name Embroidery Hack
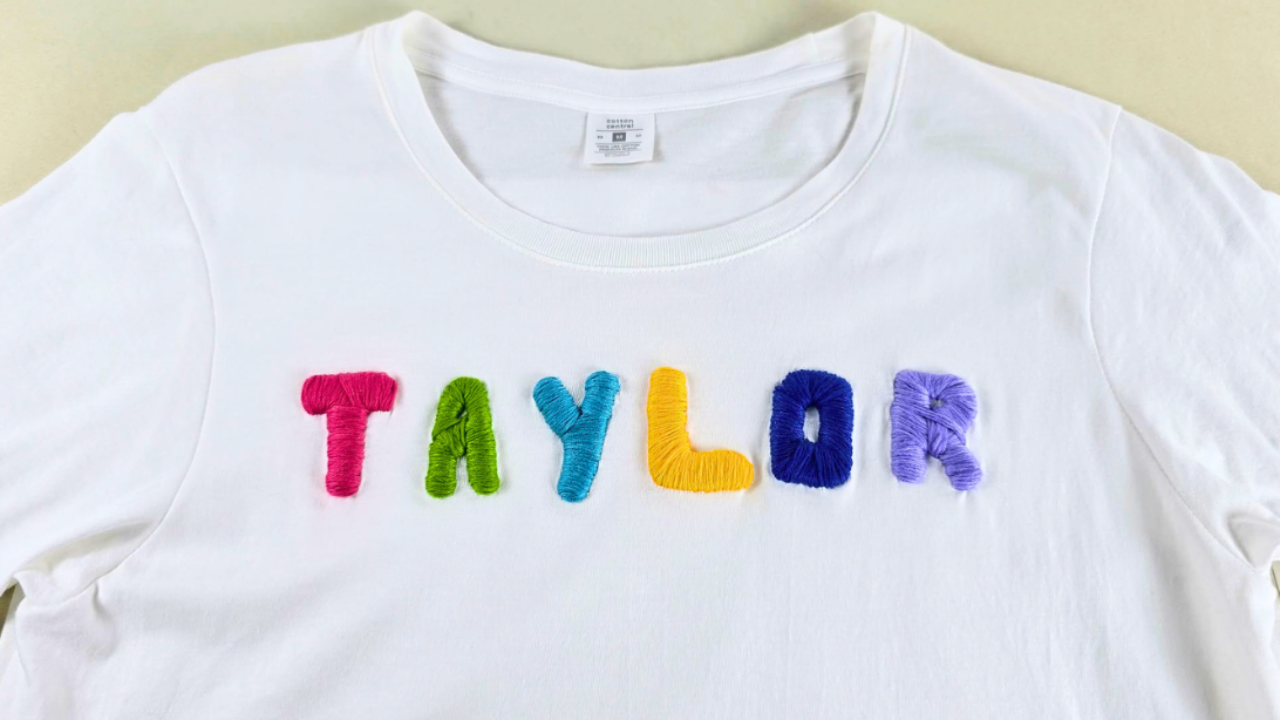
Puffy embroidered letters are easier than they look thanks to a hot glue trick. Write a name on paper, cut out the letters and trace them onto a plain t-shirt. Outline each letter with hot glue and let it harden completely. Then stitch back and forth over the glue, keeping your stitches close and even until each letter is fully covered. The glue lifts the thread so it looks raised. Use a hoop to keep the knit from puckering.
Get the full tutorial at DIY JOY.
21. Easy Grape Bracelet Tutorial
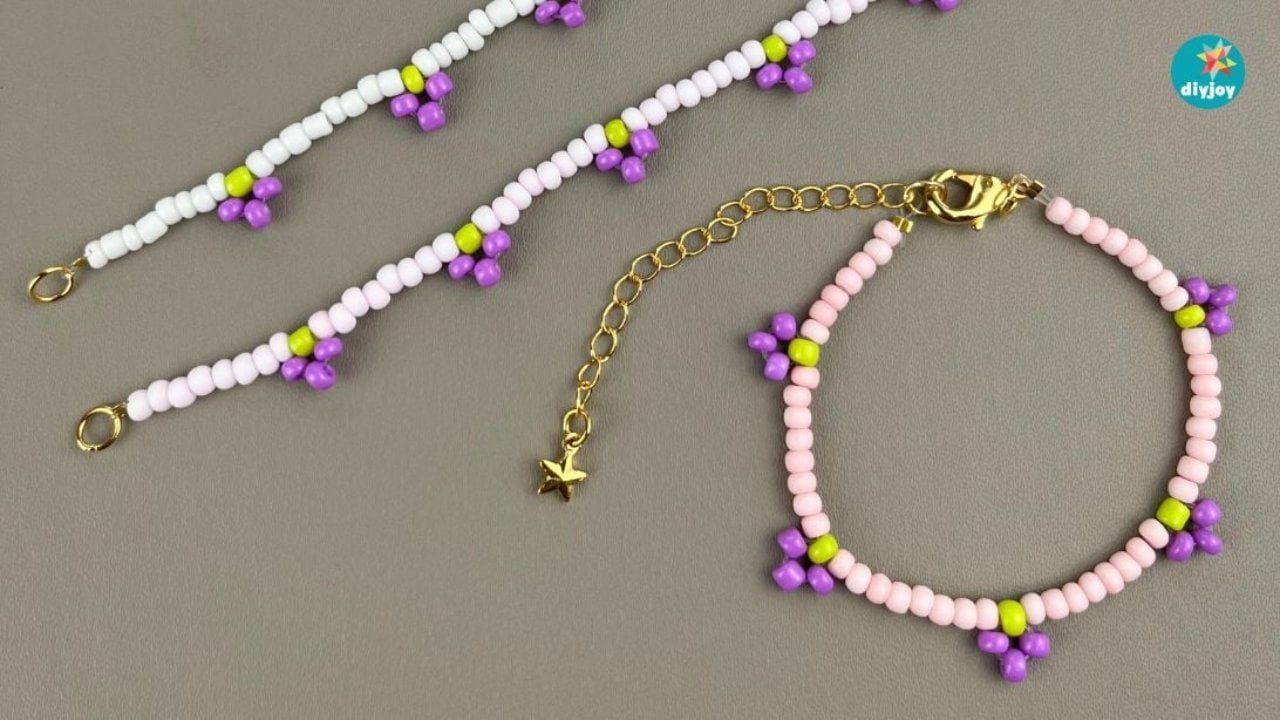
Little purple grape clusters make this seed bead bracelet a beginner favorite. Cut bead thread to your wrist size plus a few inches, then crimp on a lobster clasp and tape it down. String eight light beads, then add one green and three purple beads and pass the thread back through the green bead to pull them into a tiny bunch. Repeat the pattern all the way around and crimp on a jump ring. Add a star chain extender for a cute finish.
Get the full tutorial at DIY JOY.
22. DIY Blue Stone Bracelet

A bag of stone chips that’s been sitting in the craft drawer becomes a dainty bar bracelet in minutes. Thread the blue chips onto an eye pin, leaving about one centimeter of wire bare at the end. Bend the extra wire to 90 degrees and roll it into a loop with round nose pliers. Use jump rings to attach a length of fine gold chain to both ends, check the fit around your wrist and add a clasp.
Get the full tutorial at Fall For DIY.
23. Floral Embroidery for Jean Pockets
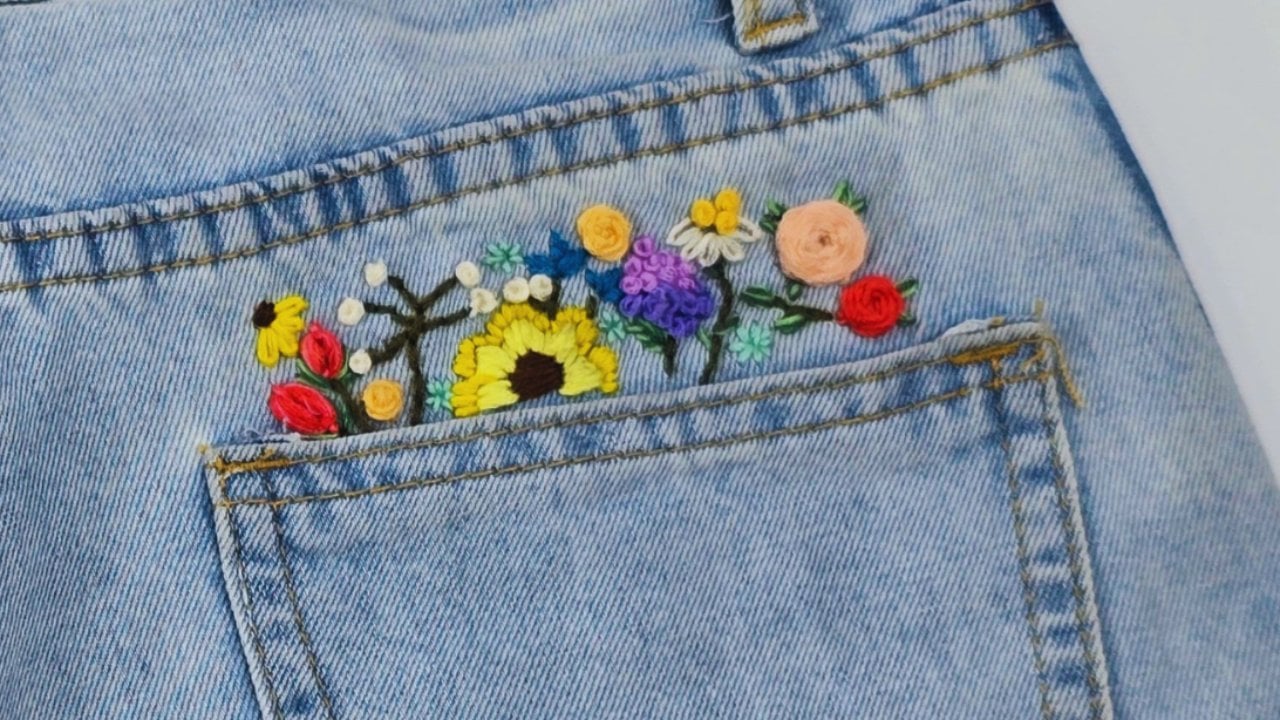
A back pocket is the perfect little frame for a row of embroidered flowers. Print your pattern on water soluble paper, or draw your own, and stick it where you want the design. Fill the larger blooms with satin stitches, going back and forth between your lines, and make roses with woven wheel stitches that weave thread around a few spokes. A sunflower, berries and leaves round out the bouquet. It’s a portable project you can stitch on the couch or at lunch.
Get the full tutorial at DIY JOY.
24. DIY Plastic Bottle Bracelet
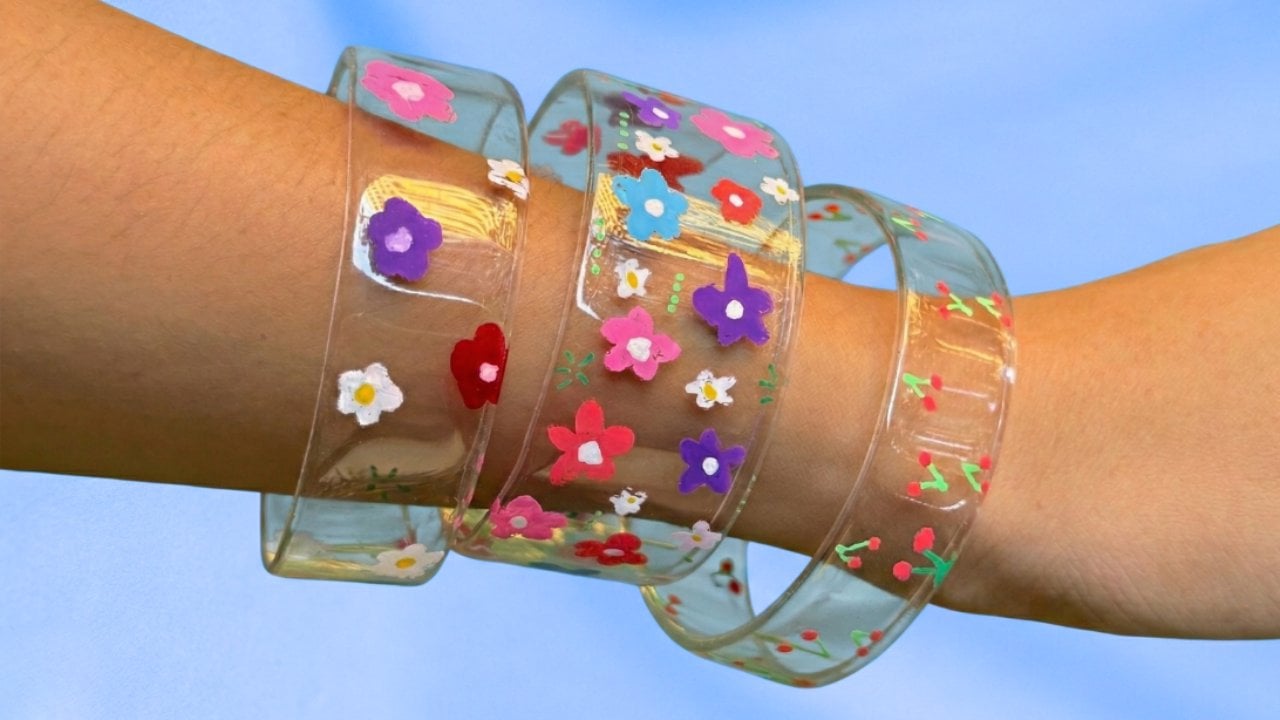
An empty plastic bottle can become a clear, colorful bangle. Cut a straight ring from the bottle with a craft knife or scissors; its width sets how chunky the bracelet will be. Draw flowers, hearts or any doodles all around it with POSCA paint pens. Then set the iron to low and gently press each edge against the bottom so the plastic curves and softens instead of staying sharp. A light clear sealer helps the art last.
Get the full tutorial at DIY JOY.
25. Easy DIY Fruit Embroidered Tote Bag
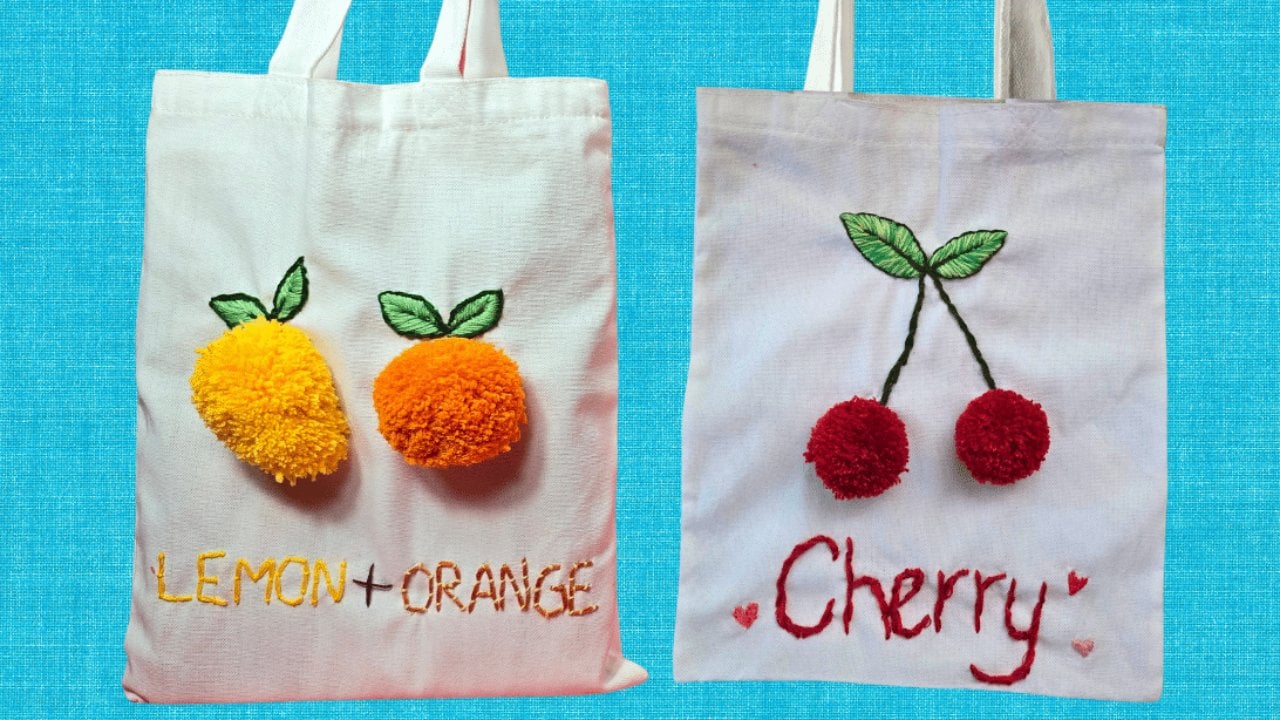
Fluffy pom pom fruit and stitched leaves turn a blank canvas tote into a summery carryall. Draw your design right on the bag, whether cherries, lemons or oranges. Make each pom pom by wrapping yarn about 100 times around three fingers, tying the middle tight, cutting the loops and trimming it round. Backstitch the leaf outlines, fill them with satin stitch and stem stitch the cherry stems. Hot glue the pom poms on and embroider a cute word underneath.
Get the full tutorial at DIY JOY.
26. How to Make a Cherry Bracelet
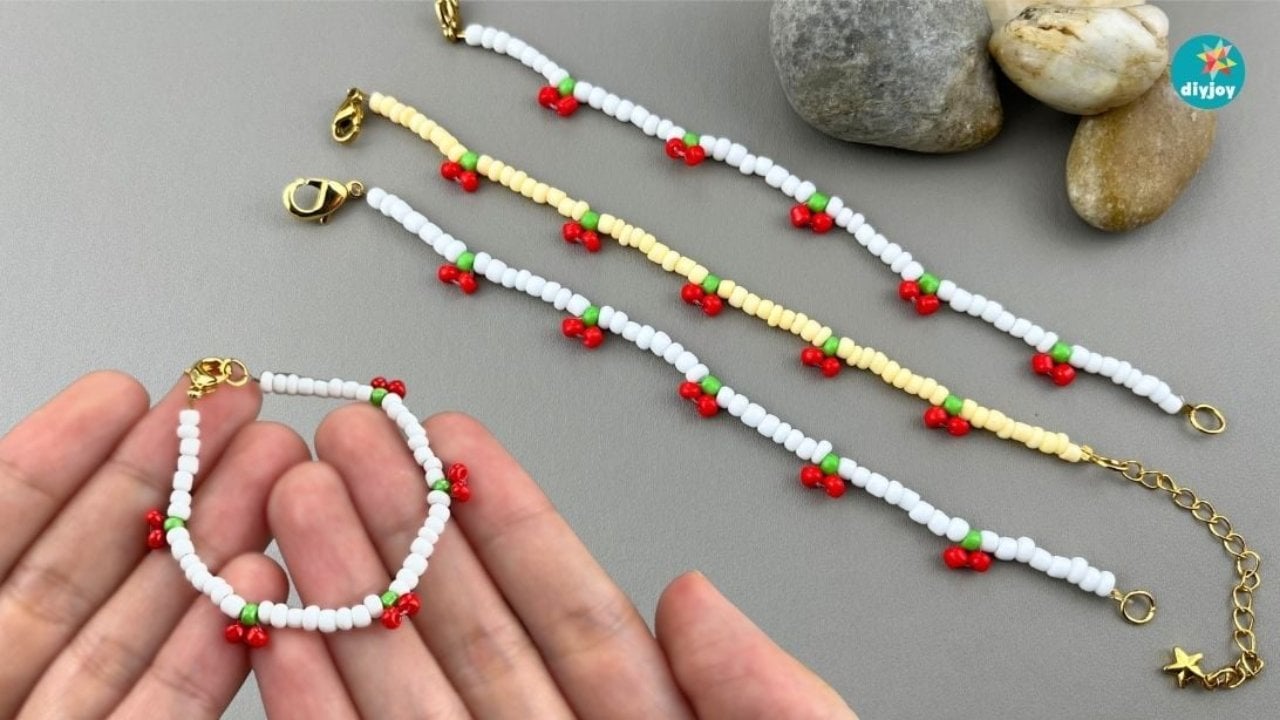
Tiny red cherries make this minimal seed bead bracelet a quick win. Measure bead thread around your wrist, add a few inches and crimp a lobster clasp onto one end, then tape it to the table. String eight white beads, then one green and two red. Pass the thread back through the green bead and pull until the reds hang as a little cherry pair. Repeat to the end and crimp it closed. Try a cream base for a vintage look.
Get the full tutorial at DIY JOY.
27. DIY Sequin Shorts

Copper sequin shorts are a simple sew once you have a pattern, and a pair of shorts you already own can be that pattern. Fold about two yards of sequin fabric in half, lay the folded shorts along the fold and cut two identical pieces with a little extra all around. Pin the two rounded seams with sequins facing in and sew. Rearrange the tube so those seams meet in the middle, then sew the crotch with a zigzag and fold over an elastic waistband.
Get the full tutorial at Geneva Vanderzeil.
28. Beginner-Friendly Beaded Bracelet
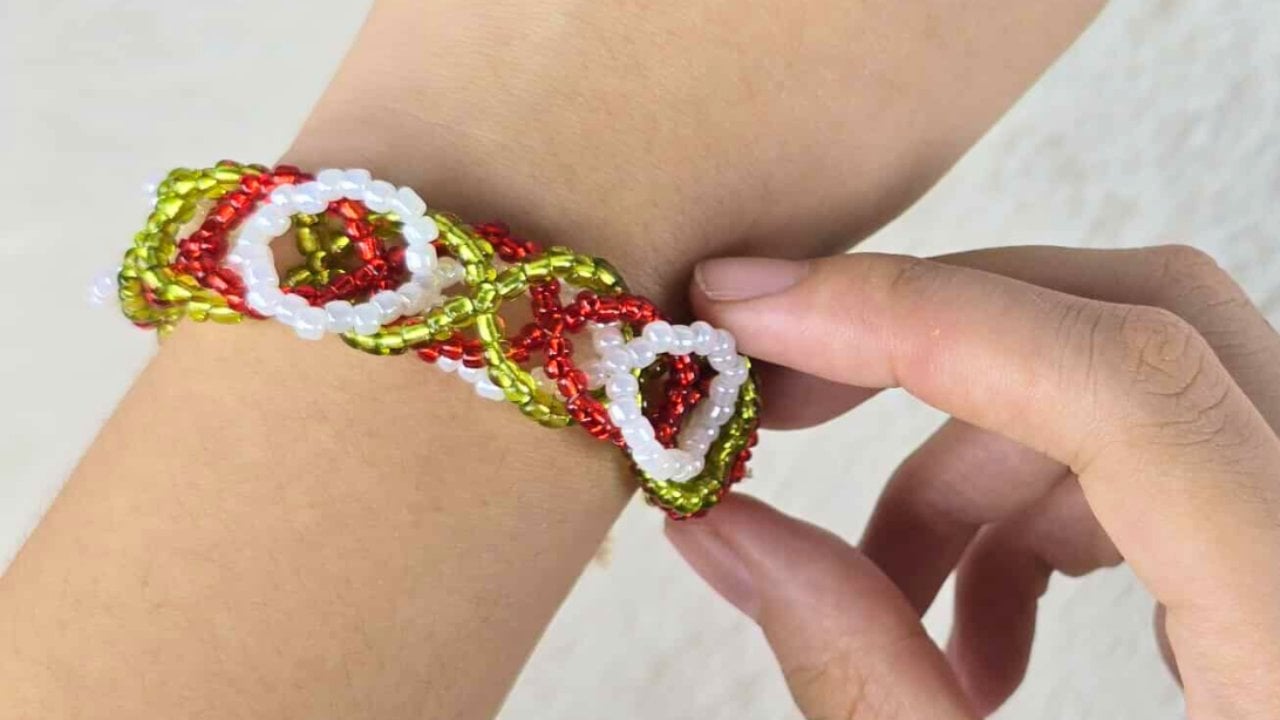
Interlocking loops of seed beads make a sturdy bracelet that looks woven. Thread 22 red beads onto nylon cord and cross both ends through one bead to close a loop. Then string 11 beads on each tail and cross through a single bead again, repeating until you have about 12 loops. Make a white strand and a green strand the same way and link them together. Keep the tension even, double knot the ends and seal the knot with clear polish.
Get the full tutorial at DIY JOY.
29. Easy Macrame Rose Bracelet

Only one knot stands between you and this macrame rose bracelet: the square knot. Cut two cords about 4.9 feet each, fold them in half, tie the ends and tape them to the table. Tie square knots down the cords, alternating the working threads from side to side to build the little rose pattern. When the band is long enough to wrap your wrist, braid the tails and knot them. No hooks or special tools needed, just tape and scissors.
Get the full tutorial at DIY JOY.
30. DIY Shrinky Dink Flower Bracelet
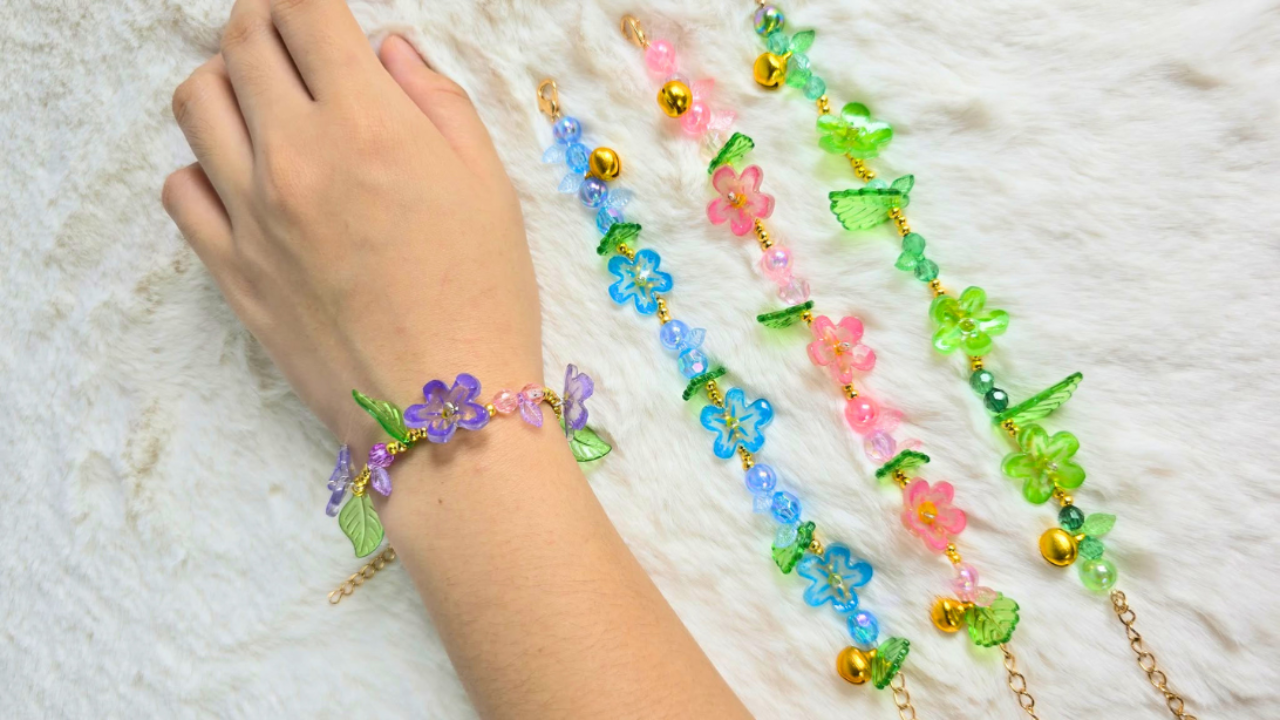
Shrink plastic flowers look like delicate glass once they’re baked. Draw flowers on the rough side of the sheet, then lightly score the lines with a craft knife so they stand out. Scrape chalk over the flower and rub it in with a napkin for a soft tint, add oil pastel to the center and draw fine lines out toward the petal tips with colored pencil. Draw everything bigger than you want, since it shrinks to about a third of its size.
Get the full tutorial at DIY JOY.
31. Braided Fabric Statement Bracelet
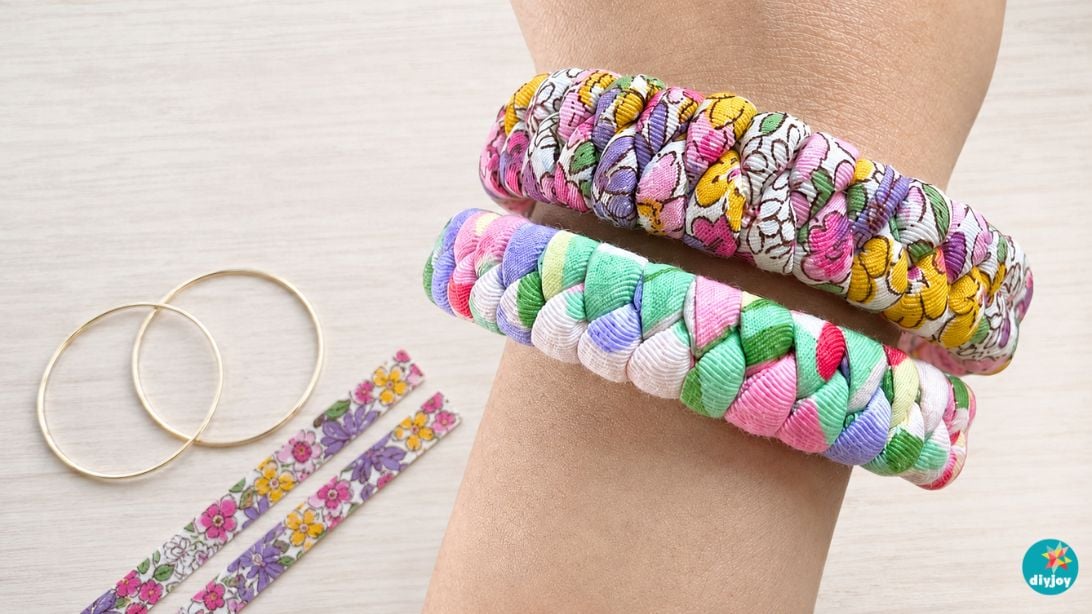
Two old bangles and a strip of fabric scraps become a soft, braided statement bracelet. Fold the strip lengthwise, press it and sew along the edge, then flip it right side out with a loop turner. Pull five strands of yarn through the tube to stuff it. Hand sew one end around a bangle, then weave the tube back and forth through both bangles until they’re completely covered and tuck the end in. Florals look especially pretty for spring.
Get the full tutorial at DIY JOY.