Jewelry has a sneaky habit of ending up in one big knot at the bottom of a dish, and these 30 DIY jewelry boxes and storage ideas are the cure. DIY jewelry storage means boxes, trays, wall racks and stands you make yourself from cigar boxes, wooden craft boxes, picture frames, scrap wood and air-dry clay, so every ring, stud and chain gets its own spot. Some take ten minutes and a knob (truly, ten), while others, like the standing jewelry cabinet, are a proper weekend build. A handful of DIY JOY favorites with step by step videos are tucked in too, from a flower shaped clay ring holder to a jar cap jewelry purse made with old nail polish. Best tip for all of them? Count your earrings before you pick a project, because the collection is always bigger than you think. Find more ideas on the organizing ideas hub.
Table of Contents
- 1. DIY Crystal Geode Jewelry Box
- 2. Cigar Box Ring Holder
- 3. 10 Minute DIY Jewelry Box
- 4. Air-Dry Clay Jewelry Trinket
- 5. Shabby Chic Dangly Earring Display
- 6. DIY Framed Jewelry Storage
- 7. Wall Mounted Jewelry Hook Rails
- 8. Standing Jewelry Cabinet
- 9. Marbled Clay Ring Dishes
- 10. Chicken Wire Frame Jewelry Organizer
- 11. Thrifted Jewelry Box With Rose Transfers
- 12. DIY Nail Polish Marbled Jewelry Purse
- 13. DIY Miniature Card Catalog Jewelry Box
- 14. DIY Air-Dry Clay Decoupage Jewelry Dish
- 15. Jewelry Blocks
- 16. DIY Table top Jewelry Holder from Scrap Wood
- 17. DIY Air-Dry Clay Jewelry Organizer Using Pebbles
- 18. Angled Wood and Dowel Jewelry Holder
- 19. DIY Ring and Earring Jewelry Storage
- 20. Secret Compartment Jewelry Case
- 21. Easy DIY Cabinet Hardware Jewelry Storage
- 22. Old Toolbox Turned Jewelry Chest
- 23. DIY Jewelry Tray
- 24. Upcycled Ferrero Rocher Jewelry Box
- 25. Jewelry Holder from a Cutlery Tray
- 26. DIY Jewelry Box Altoid Can
- 27. DIY Book Jewelry Box
- 28. Air Dry Clay Jewelry Tray
- 29. Easy Air-Dry Clay Ring Holder
- 30. Leather And Wood Jewelry Box
1. DIY Crystal Geode Jewelry Box

This DIY crystal geode jewelry box grows its own sparkle on the kitchen counter. Coil white pipe cleaners into a dense disc, tie it to a string and hang it from a pencil in a jar of borax dissolved in boiling water tinted with gel food coloring. Leave it covered for up to 24 hours, then lift it out and pat it dry. Gold enamel paint around the edge makes it look like a sliced stone, and E6000 fixes it to the lid of any box. Extra borax gives bigger, denser crystals than a weak solution does.
Get the full tutorial at Posh in Progress.
2. Cigar Box Ring Holder

A vintage cigar box ring holder is mostly rolled up quilt batting, which is why it costs next to nothing. Measure the inside of the box (this one is about 6 inches square), cut batting strips just a little longer than the box is wide, roll each one tight and stitch it closed with a quick running stitch. Then wrap every roll in a square cut from an old bed sheet and stitch that shut too. Pack the rolls in snug so rings can slip between them. Glue them down if the box is going to someone as a gift.
Get the full tutorial at Sadie Seasongoods.
3. 10 Minute DIY Jewelry Box

This 10 minute DIY jewelry box needs a small unfinished wooden box, a knob and some acrylic paint. Find the center of the lid and make a hole the same size as the knob’s screw. The wood on these craft boxes is soft enough that a hammer and nail or a hand drill will do it. Paint the lid one color and slip a hidden pop of a second color inside, then screw the knob in once everything is dry. E6000 works if the knob never needs to come off, and a coat of polyurethane keeps it looking fresh.
Get the full tutorial at The Crafted Life.
4. Air-Dry Clay Jewelry Trinket
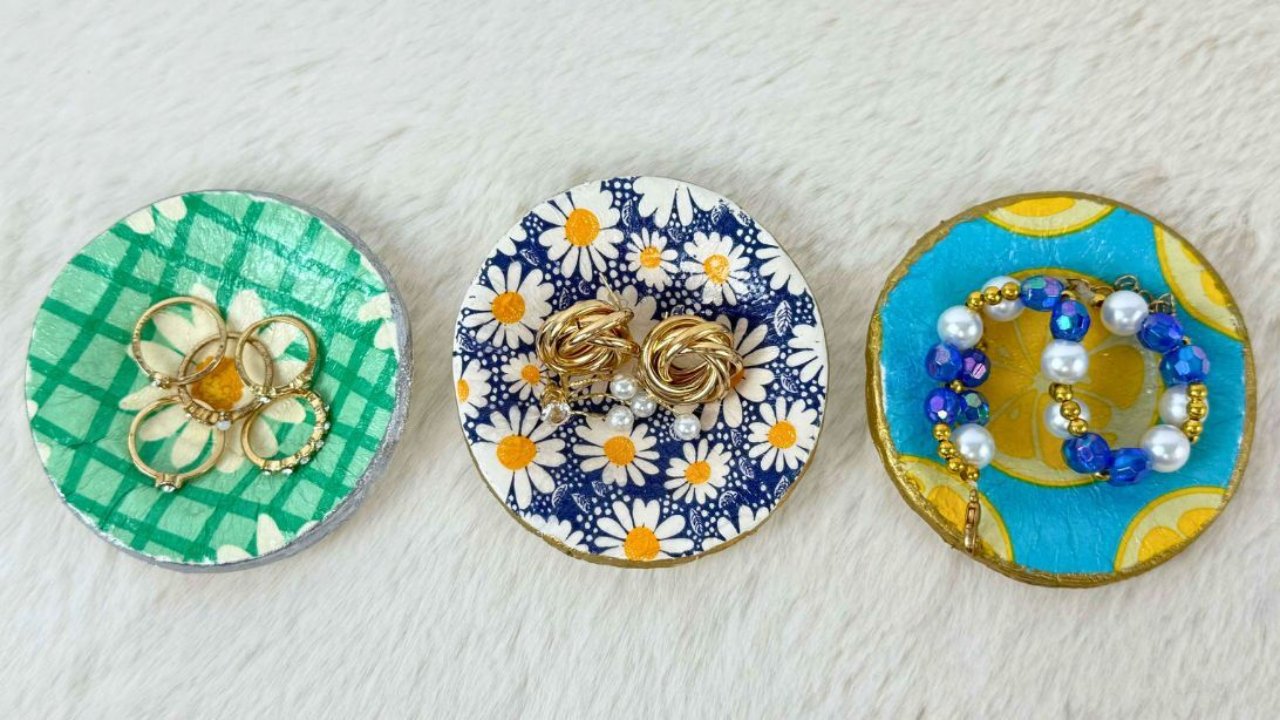
An air-dry clay jewelry trinket dish takes a chunk of clay, a printed paper napkin and one night of drying. Roll the clay flat, peel the napkin down to its thin printed layer and lay it on top, pressing gently. Cut the shape with a cookie cutter or a mason jar lid, brush on Mod Podge, then press it into a muffin pan so the center dips. Once it is dry overnight, paint the rim gold and finish with gloss varnish. Daisies, gingham and lemons all make a cute set, and no kiln is needed.
Get the full tutorial at DIY JOY.
5. Shabby Chic Dangly Earring Display

A shabby chic dangly earring display costs about five dollars and half an hour. Start with a flat 8 by 10 picture frame, the cheap kind from a big box store, and dry brush it with off white acrylic paint so the old color peeks through like aged wood. Even a smooth plastic frame takes the antiqued look well. Then run picture hanging wire back and forth across the back, stapling it at each side, so every row is a rail for hook earrings. A staple gun is the only tool. Hang it or prop it on a dresser.
Get the full tutorial at Kevin & Amanda.
6. DIY Framed Jewelry Storage

DIY framed jewelry storage starts with an ornate frame, and this one came from a yard sale for one dollar. Measure the wall first so you know what size frame to hunt for. A first coat of gold metallic paint did not give the burnished look the maker wanted, so a coat of warm silver went over it, which is a good reminder that metallic finishes sometimes take a little trial and error. Cut chicken wire to fit with metal shears, staple it across the back and hang S-hooks for necklaces. Earrings hook straight into the mesh.
Get the full tutorial at Marty's Musings.
7. Wall Mounted Jewelry Hook Rails

Wall mounted jewelry hook rails keep every necklace untangled and in plain sight. Cut 1×2 boards to the length you want (these are about 20 inches), sand them, then paint or stain. Tape off sections for a two tone look, like blue stain with gold blocks. Drill 1/16 inch pilot holes and twist in brass cup hooks in a row along each board. A dowel cut about 2 inches shorter than the boards rests in the hooks and holds bracelets. Command strips hang the whole thing with no holes in the wall.
Get the full tutorial at The Homes I Have Made.
8. Standing Jewelry Cabinet
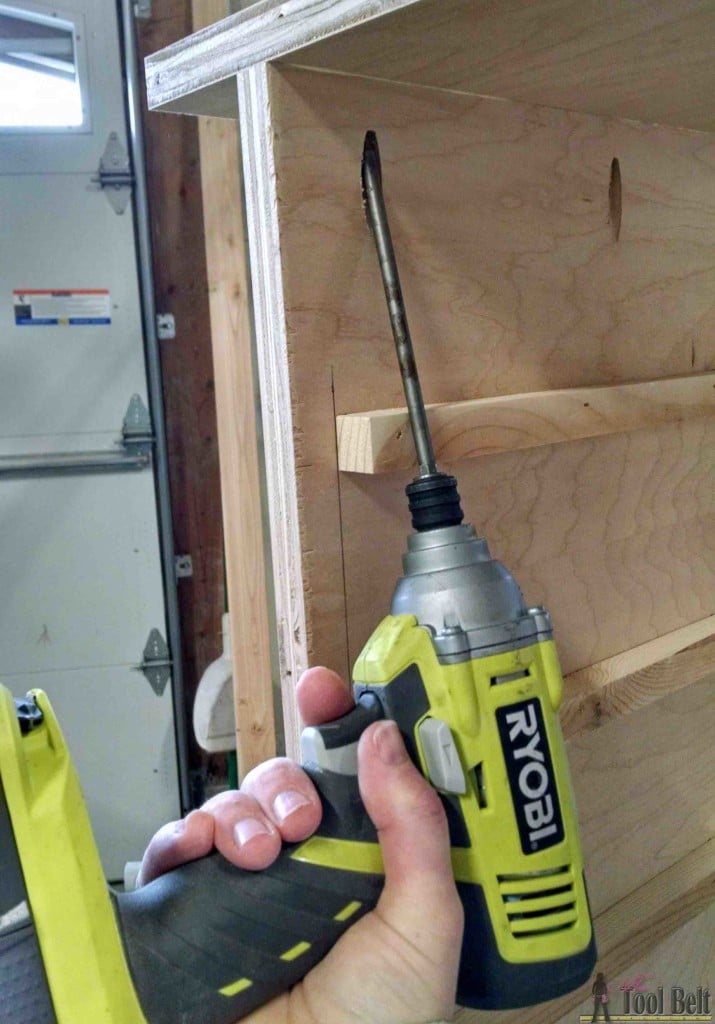
A standing jewelry cabinet is the big weekend build on this list, and it is made from a single sheet of 3/4 inch plywood plus a few boards. Six drawers ride on simple wood runners, the lid lifts on a support to reveal a mirror and a shallow tray, and two side doors open onto rows of 1 inch cup hooks so long chains hang straight. Pocket hole screws and brad nails hold it together, and a magnet catch keeps the doors shut. The full cut list is on the source, and curved legs lift it to dresser height.
Get the full tutorial at Her Tool Belt.
9. Marbled Clay Ring Dishes

Marbled clay ring dishes are made with oven bake clay, so the swirls run all the way through. Roll white, gray, black and one accent color into 5 inch snakes, twist them together, roll the twist out to double length, fold it and twist again two or three times. Squash it into a ball and roll it flat to about 1/4 inch, then cut a 6 inch circle around a can. Set it into a small oven safe bowl so it sags into a dish shape and bake. A brush of gold liquid gilding on the rim finishes it.
Get the full tutorial at A Beautiful Mess.
10. Chicken Wire Frame Jewelry Organizer

This chicken wire frame jewelry organizer is mostly leftovers. Measure an old frame and cut chicken wire to size. It loves to roll back up, so weigh it flat with something heavy, like a cast iron skillet. Pull it as tight as you can and staple it to the back about every two inches, and the earring side is done. For necklaces and bracelets, stain a scrap board to look like old barn wood, mark evenly spaced holes and drill them for a row of industrial style knobs. Hang the two pieces together beside a mirror.
Get the full tutorial at Bless'er House.
11. Thrifted Jewelry Box With Rose Transfers
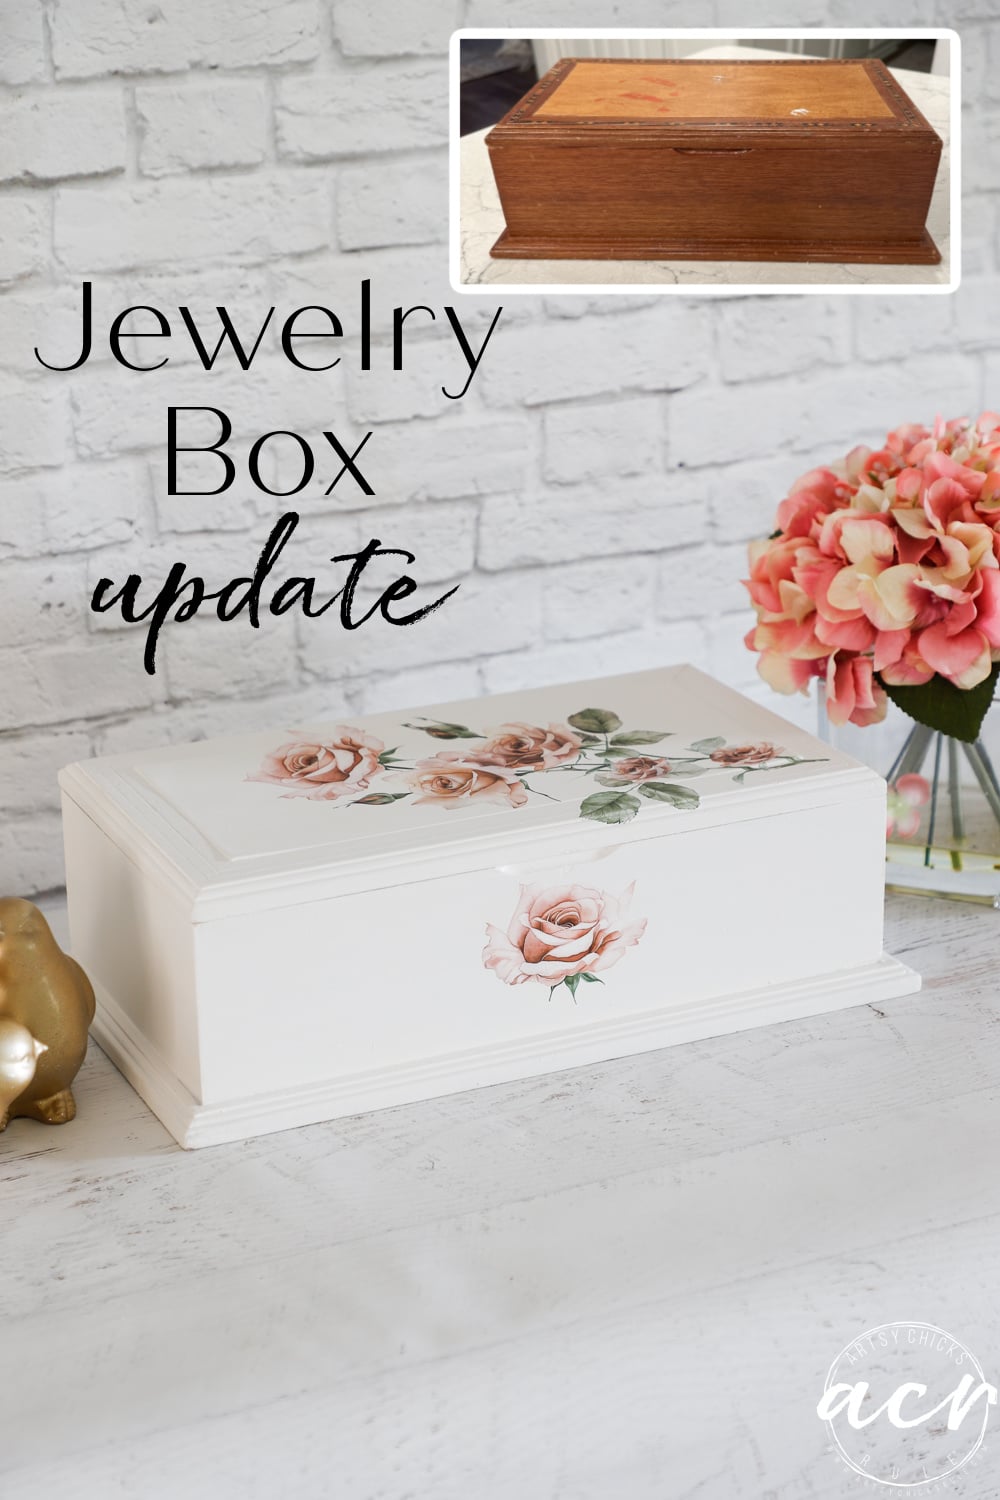
A thrifted jewelry box with rose transfers is a fast makeover because the inside of these old boxes is usually still perfect. Clean the velvet lining by pressing tape over it to lift the lint, then leave it alone. Two coats of a soft chalk style paint cover the dated finish outside, and a small rose transfer laid across the lid gives it hand painted florals with no painting skill needed. A protective topcoat seals the transfer. Look for solid wood and working hinges at the thrift store and ignore the color entirely.
Get the full tutorial at Artsy Chicks Rule.
12. DIY Nail Polish Marbled Jewelry Purse
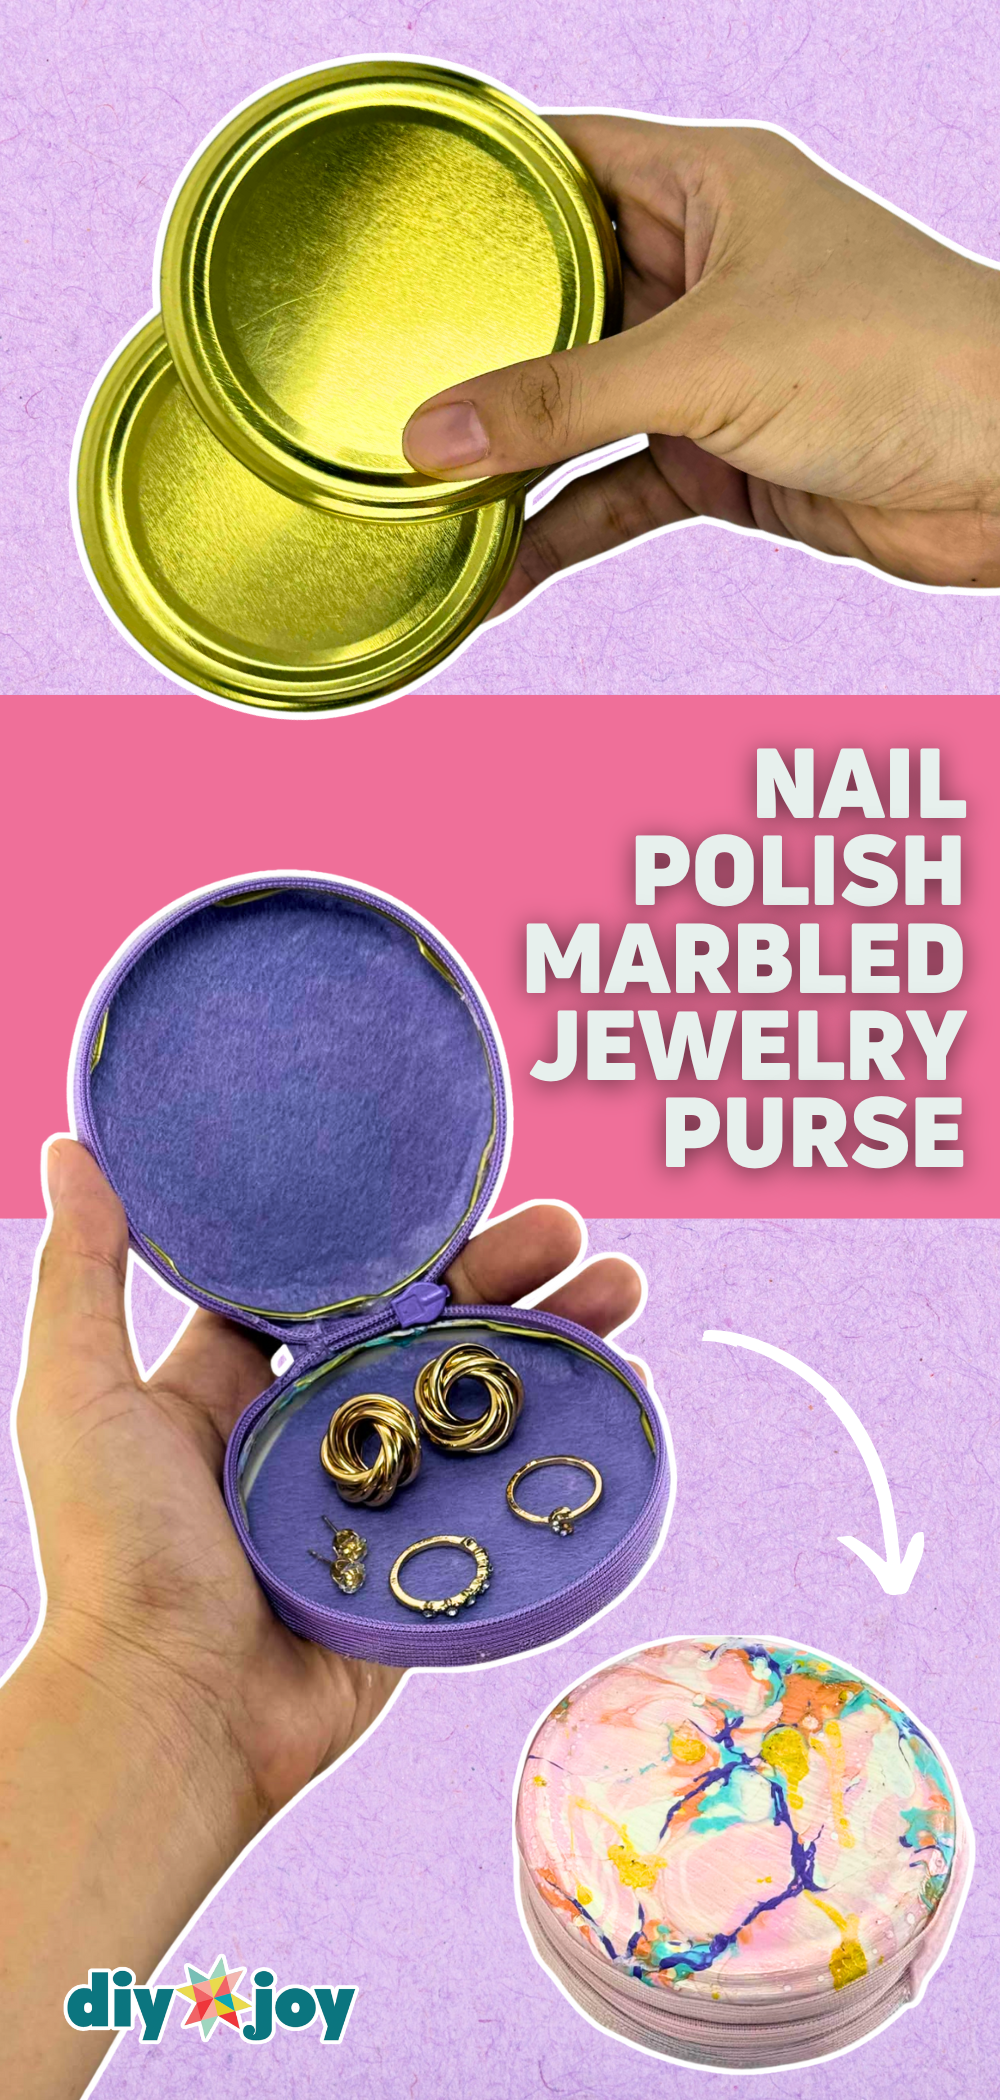
This DIY nail polish marbled jewelry purse is built from two metal lug caps off old jars. Prime the caps with white primer or gesso so the polish grabs, then pour a few nail polish colors onto a container of water and dip each cap straight in, no swirling needed. Shake off the excess and let them dry. Trace the cap onto felt, cut two circles and tuck one inside each cap, then hot glue a zipper around the rim of one cap and attach the second cap to close it up. It is a little travel case for earrings or earbuds.
Get the full tutorial at DIY JOY.
13. DIY Miniature Card Catalog Jewelry Box

A DIY miniature card catalog jewelry box starts as an unfinished wooden drawer box from the craft store. Remove the hardware and fill the holes, then glue 1/4 inch square dowels around the front as trim and stacked basswood strips between the drawers so it looks like an old library cabinet. Sand with 220 grit, stain it, and rub antique gold wax onto scrapbook card catalog label pulls before tacking them on with upholstery tacks. Felt in each drawer keeps rings and earrings from sliding around. It looks like a flea market antique.
Get the full tutorial at The Gathered Home.
14. DIY Air-Dry Clay Decoupage Jewelry Dish
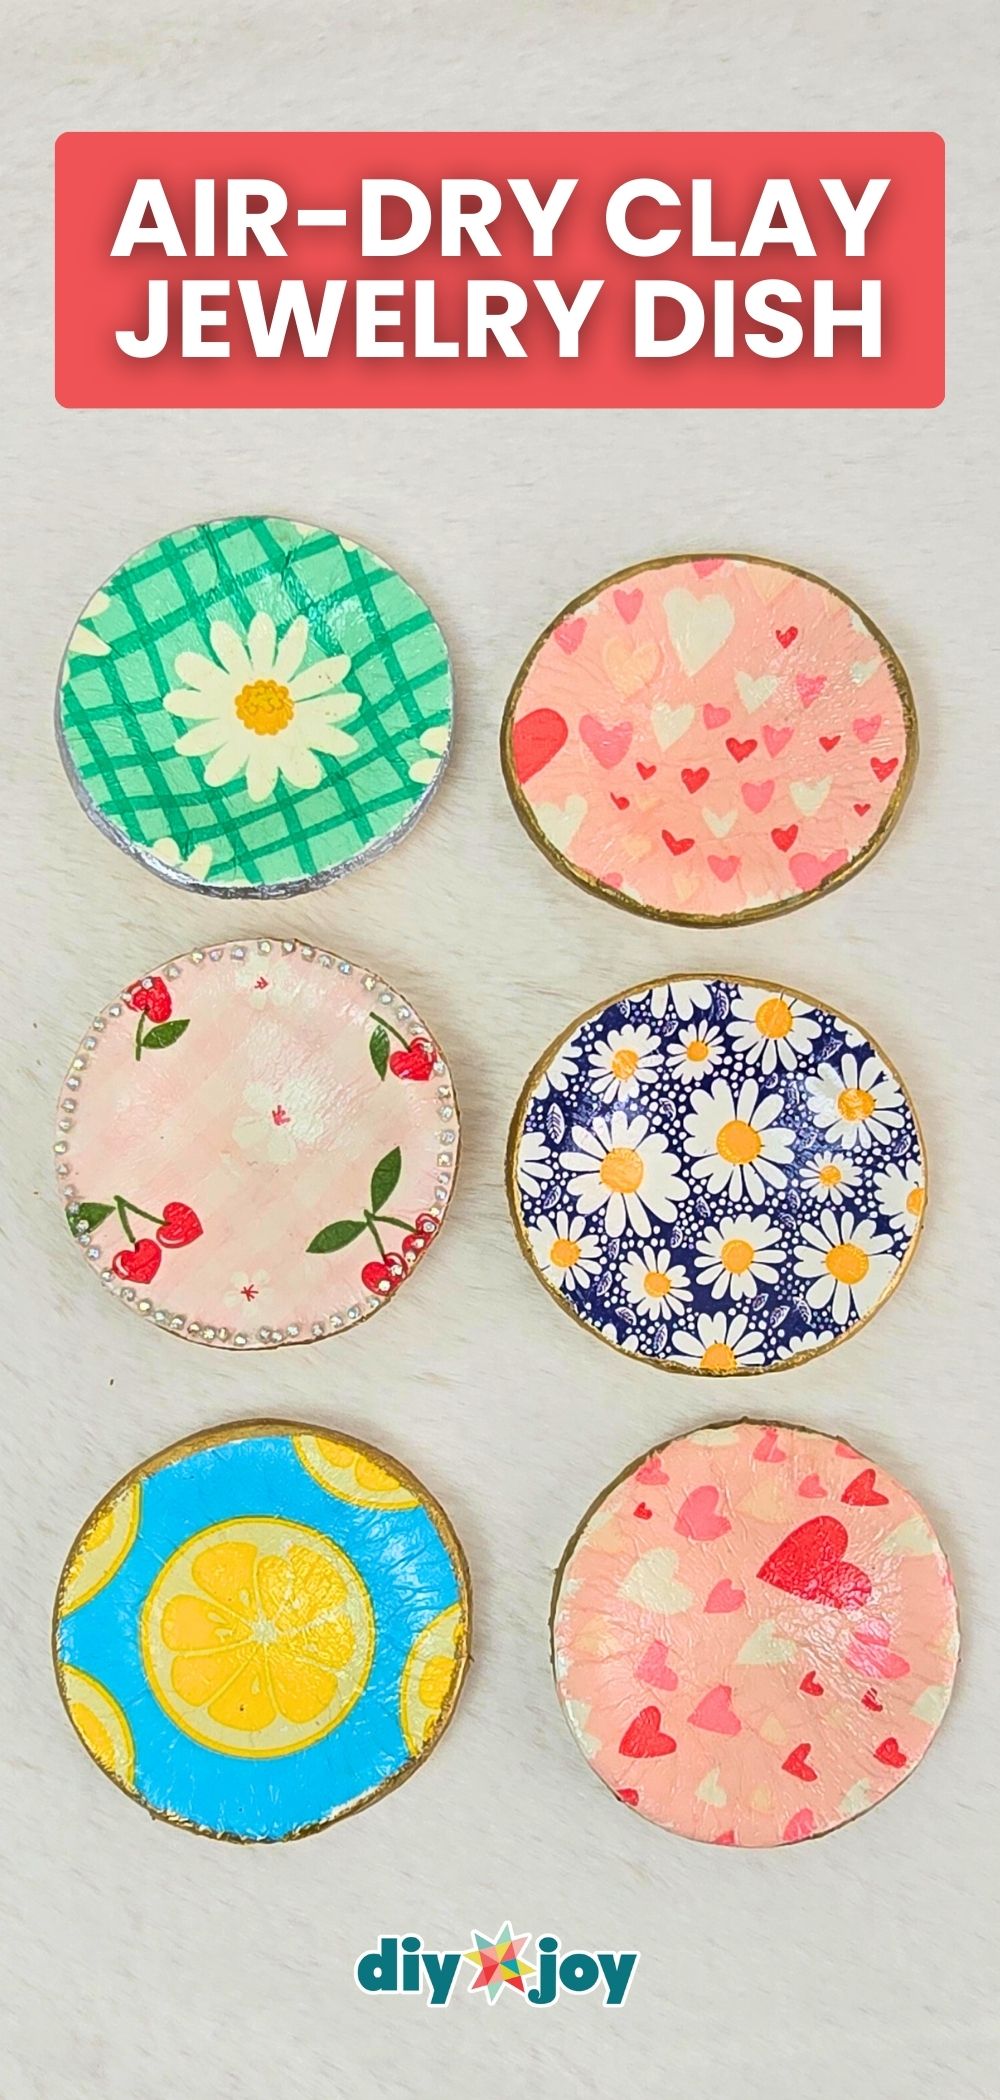
A DIY air-dry clay decoupage jewelry dish pairs sturdy clay with the pattern from a paper napkin. Roll the clay out, lay the napkin’s printed layer on top and cut the shape with a cookie cutter or jar lid. Brush on Mod Podge, press the dish into a muffin pan to form a shallow bowl and let it dry overnight. Gold paint on the edge and a gloss varnish finish it. To make it your own, add rhinestones or tiny beads around the rim, or gently crimp the edge before it dries.
Get the full tutorial at DIY JOY.
15. Jewelry Blocks

Jewelry blocks are a modern, almost gallery style way to hang everyday pieces. Buy a 2×2 in any length at the hardware store and cut it into squares, by hand saw or by asking the store to do it. Sand the rough edges and wipe on a very light coat of stain with a lint free cloth so the grain still shows. Hammer a sawtooth hanger onto the back of each block and glue a short brass dowel into the front. Hang several in a row on the wall for necklaces, bracelets and rings.
Get the full tutorial at Emily Henderson.
16. DIY Table top Jewelry Holder from Scrap Wood
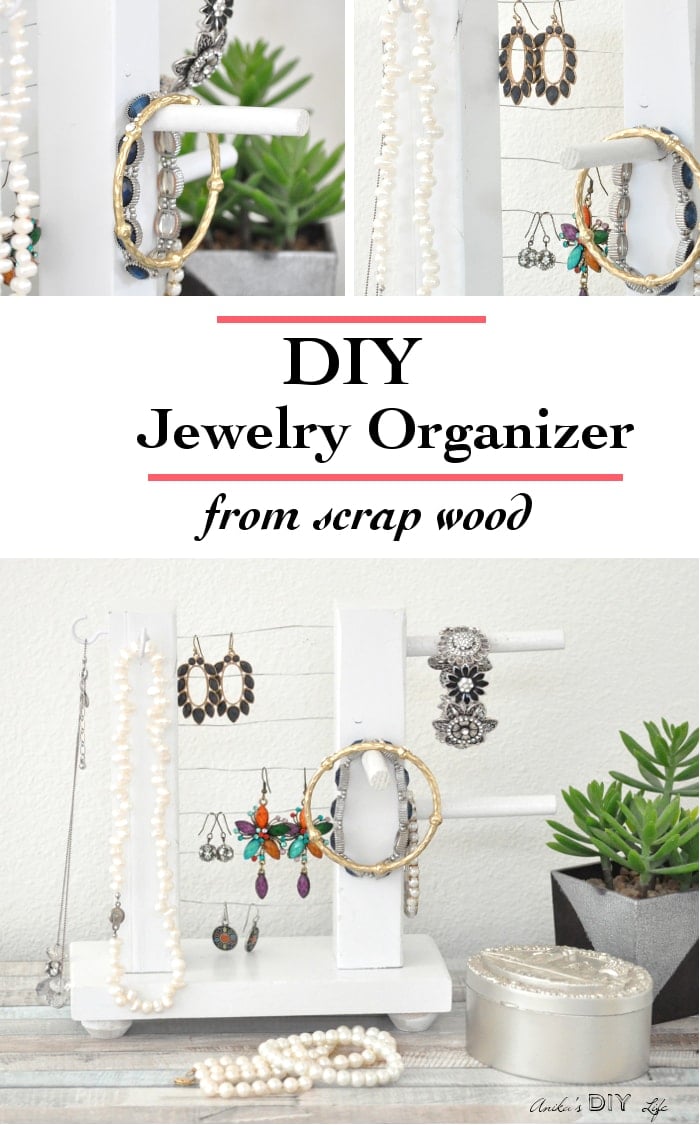
This DIY tabletop jewelry holder from scrap wood is a stand with a spot for everything. A short 1×4 makes the base, with doll pin stands glued underneath as feet, and two 2×2 posts stand up from it. Drill holes in one post for three 3/8 inch dowels that hold bracelets, and staple rows of 22 gauge floral wire between the posts for earrings. Cup hooks take necklaces. Spray paint the pieces before assembly, and here is a clever trick: hold each dowel by a screw stuck in foam while it dries.
Get the full tutorial at Anika's DIY Life.
17. DIY Air-Dry Clay Jewelry Organizer Using Pebbles
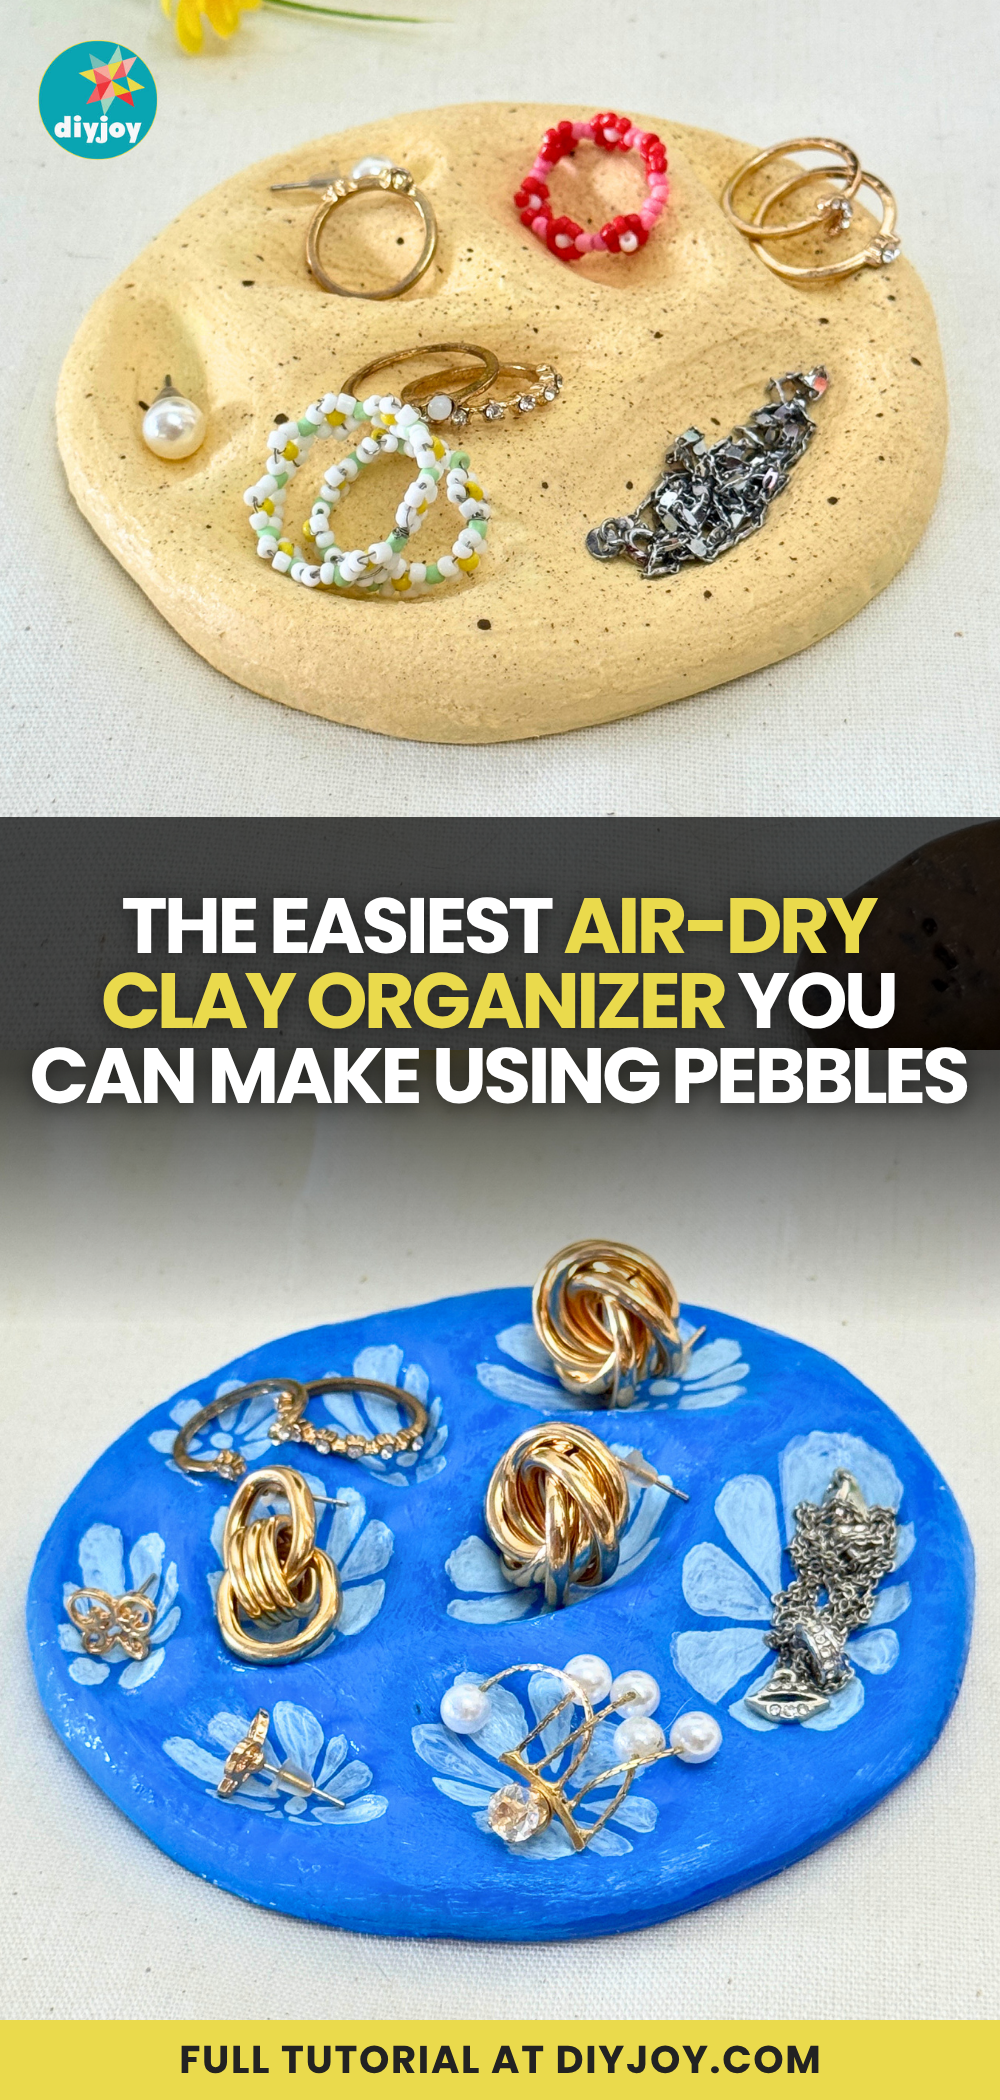
This DIY air-dry clay jewelry organizer uses pebbles to press little wells into the clay. Roll a circle of clay, then push smooth stones in one by one and lift them out gently. Wetting the stones first stops them sticking. Smooth any cracks with damp fingers and let it dry completely, which can take overnight to several days. Prime it, paint a base coat and add a design in the hollows, like simple flowers. Mixing baking soda into the paint gives a soft, sandy texture, and a gloss sealer or resin finishes it.
Get the full tutorial at DIY JOY.
18. Angled Wood and Dowel Jewelry Holder
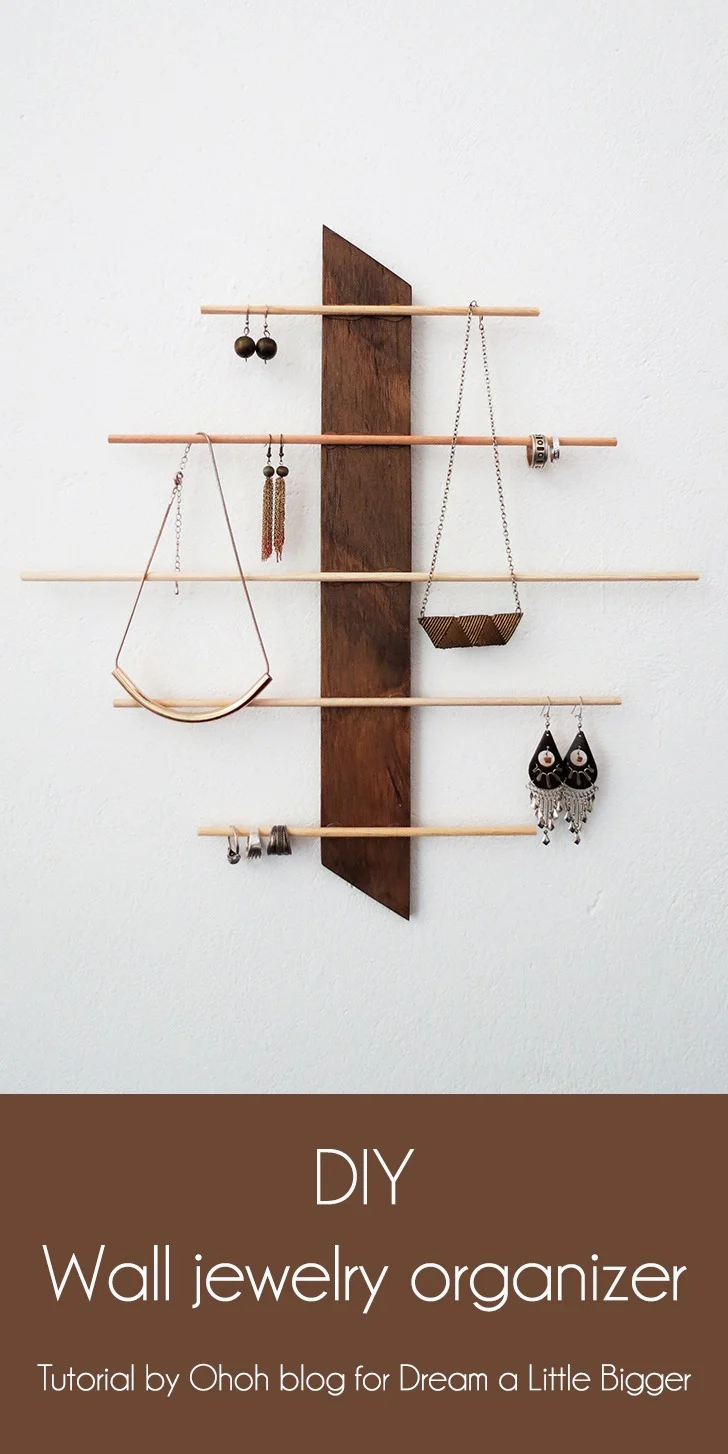
This angled wood and dowel jewelry holder hangs on the wall like a little piece of art. Cut plywood into an 18 by 2 1/2 inch strip and angle both ends at 30 degrees, then sand the edges well. Nail a frame hook to the back, centered, and stain the board. An Early American shade gives it the warm look in the photo. Mark five lines 3 inches apart and glue on dowels cut to 9, 13 and 18 inches so the lengths stagger. Once the glue dries clear, hang it and load it up.
Get the full tutorial at Dream a Little Bigger.
19. DIY Ring and Earring Jewelry Storage

This DIY ring and earring jewelry storage is an open tray, so studs stay in sight and actually get put away. Take the lid off an unfinished wooden craft box, or use a shoe box lid or a souvenir box. Sand the top edge smooth first, then cover the outside with gift wrap and decoupage, snipping small slits so it folds neatly at the corners. Cut dowels to fit with a miter box, wrap each in felt and hot glue the rows inside. Earrings post right between the rolls. A water based poly protects the paper.
Get the full tutorial at IHeart Organizing.
20. Secret Compartment Jewelry Case

A secret compartment jewelry case looks like a mirrored wall cabinet and hides a full jewelry stash. The framed mirror, about 20 by 15 3/4 inches (a home store can cut one for around 12 dollars), sits in a pocket hole frame with paneling behind it and cup hooks for necklaces. Below it, drawers ride on full extension glides, and coat hooks underneath take bags or scarves. The source gives every board length and angle, from 45 degree frame cuts to the corbels. A pocket hole jig, table saw and finish nailer do the heavy lifting.
Get the full tutorial at Sawdust 2 Stitches.
21. Easy DIY Cabinet Hardware Jewelry Storage

Easy DIY cabinet hardware jewelry storage is a board covered in knobs and pulls, and it looks like wall art. Cover a 22 inch square of 3/8 inch MDF with repositionable wallpaper, folding and mitering the corners like a wrapped present. Play with an arrangement of knobs, cup pulls and bar pulls, mark the holes and drill. Because MDF is thinner than a cabinet door, short 3/4 inch bolts replace the long screws that come with the hardware. Cup pulls cradle rings, bars hold necklaces and knobs take bracelets. Triangle hangers on the back finish it.
Get the full tutorial at The Happy Housie.
22. Old Toolbox Turned Jewelry Chest

An old toolbox turned jewelry chest is a smart reuse because a toolbox already has a latch, a handle and a hinged lid. This one started out red. A couple of coats of soft pink chalk paint covered it, then clear wax went on and was buffed once it cured. Silver metallic acrylic on the hardware and handle adds a little glamour. Inside, a ring roll insert holds rings and studs, and the long shallow body suits chains and bracelets. Little decorative feet lift it off the dresser so it reads as a keepsake chest.
Get the full tutorial at Rustic Crafts & DIY.
23. DIY Jewelry Tray

This DIY tiered jewelry tray is built entirely from dollar store finds: two candlesticks, a pizza pan, a 9 inch pie pan and an 8 inch cake pan. Wipe everything with rubbing alcohol so the paint sticks, then give it all a couple of coats of multi surface craft paint. Dry brushing a second, lighter shade over the top gives it a soft vintage finish. Stack the pans largest to smallest with a candlestick between each layer and glue them with E6000. A thrifted lamp finial on top makes a pretty handle, though it is optional.
Get the full tutorial at The Happy Housie.
24. Upcycled Ferrero Rocher Jewelry Box

An upcycled Ferrero Rocher jewelry box starts with the gold tray inside the chocolate box, which already has round wells just the right size for rings, studs and small pendants. Tuck pressed flowers between the cups so it stops reading as candy packaging, and put the clear lid back on to keep dust out. It is a quick, pretty way to use something most people throw away, and it looks lovely on a dresser or tucked into a drawer. The step by step and the video show exactly how to set the flowers.
Get the full tutorial at DIY JOY.
25. Jewelry Holder from a Cutlery Tray

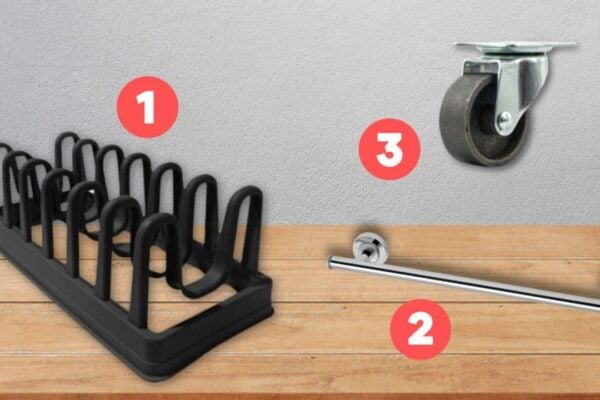
A jewelry holder from a cutlery tray hangs on the wall like a shadow box, with a section for every necklace. Sand the tray well, especially a laminate back, so the paint grips. Brush two coats of paint into every corner. Sample pots are plenty, and this one is a soft gray. Add hand painted white details inside the sections, or try a stencil or decoupaged fabric. Screw a pretty glass knob or cup hook into the top of each section, then finish with a few clear coats so it wipes clean.
Get the full tutorial at Cozy DIY Home.
26. DIY Jewelry Box Altoid Can

A DIY jewelry box from an Altoid can is the perfect travel case for earrings and small rings. Stripping the printed paint is optional since paper covers most of it, but scraping with a penny first helps a stripping gel work faster. Glue scrapbook paper to the lid, sides and bottom with rubber cement, notching it to fit around the hinges. Cut a thin cardboard divider, cover it in paper and dab rubber cement underneath so it stays put. A few small charms glued on the lid add a personal touch.
Get the full tutorial at carpediemkindoflife.
27. DIY Book Jewelry Box

A DIY book jewelry box hides a secret compartment inside an old hardcover. Open the book and draw a rectangle on the first page, leaving a 1/2 to 1 inch border all around. Cut along the lines with a craft knife a few pages at a time, because thick books take many passes. Uneven pages just add to the vintage look. Brush Mod Podge between every few pages, around the outer edges and inside the hollow so it all bonds into one solid box. Hot glue a few silk flowers on the cover to finish it.
Get the full tutorial at Eat. Sleep. Decorate.
28. Air Dry Clay Jewelry Tray

An air dry clay jewelry tray is a great first clay project. Roll the clay flat, shape a shallow oval and turn the edge up so nothing rolls off. The blue and white pattern comes from a printed napkin pressed into the surface, so no painting skill is needed at all. There is no kiln and no baking, just drying time and a sealer. On a dresser it looks like a piece of old china. The full step by step and the video show how to keep the thin napkin from tearing.
Get the full tutorial at DIY JOY.
29. Easy Air-Dry Clay Ring Holder
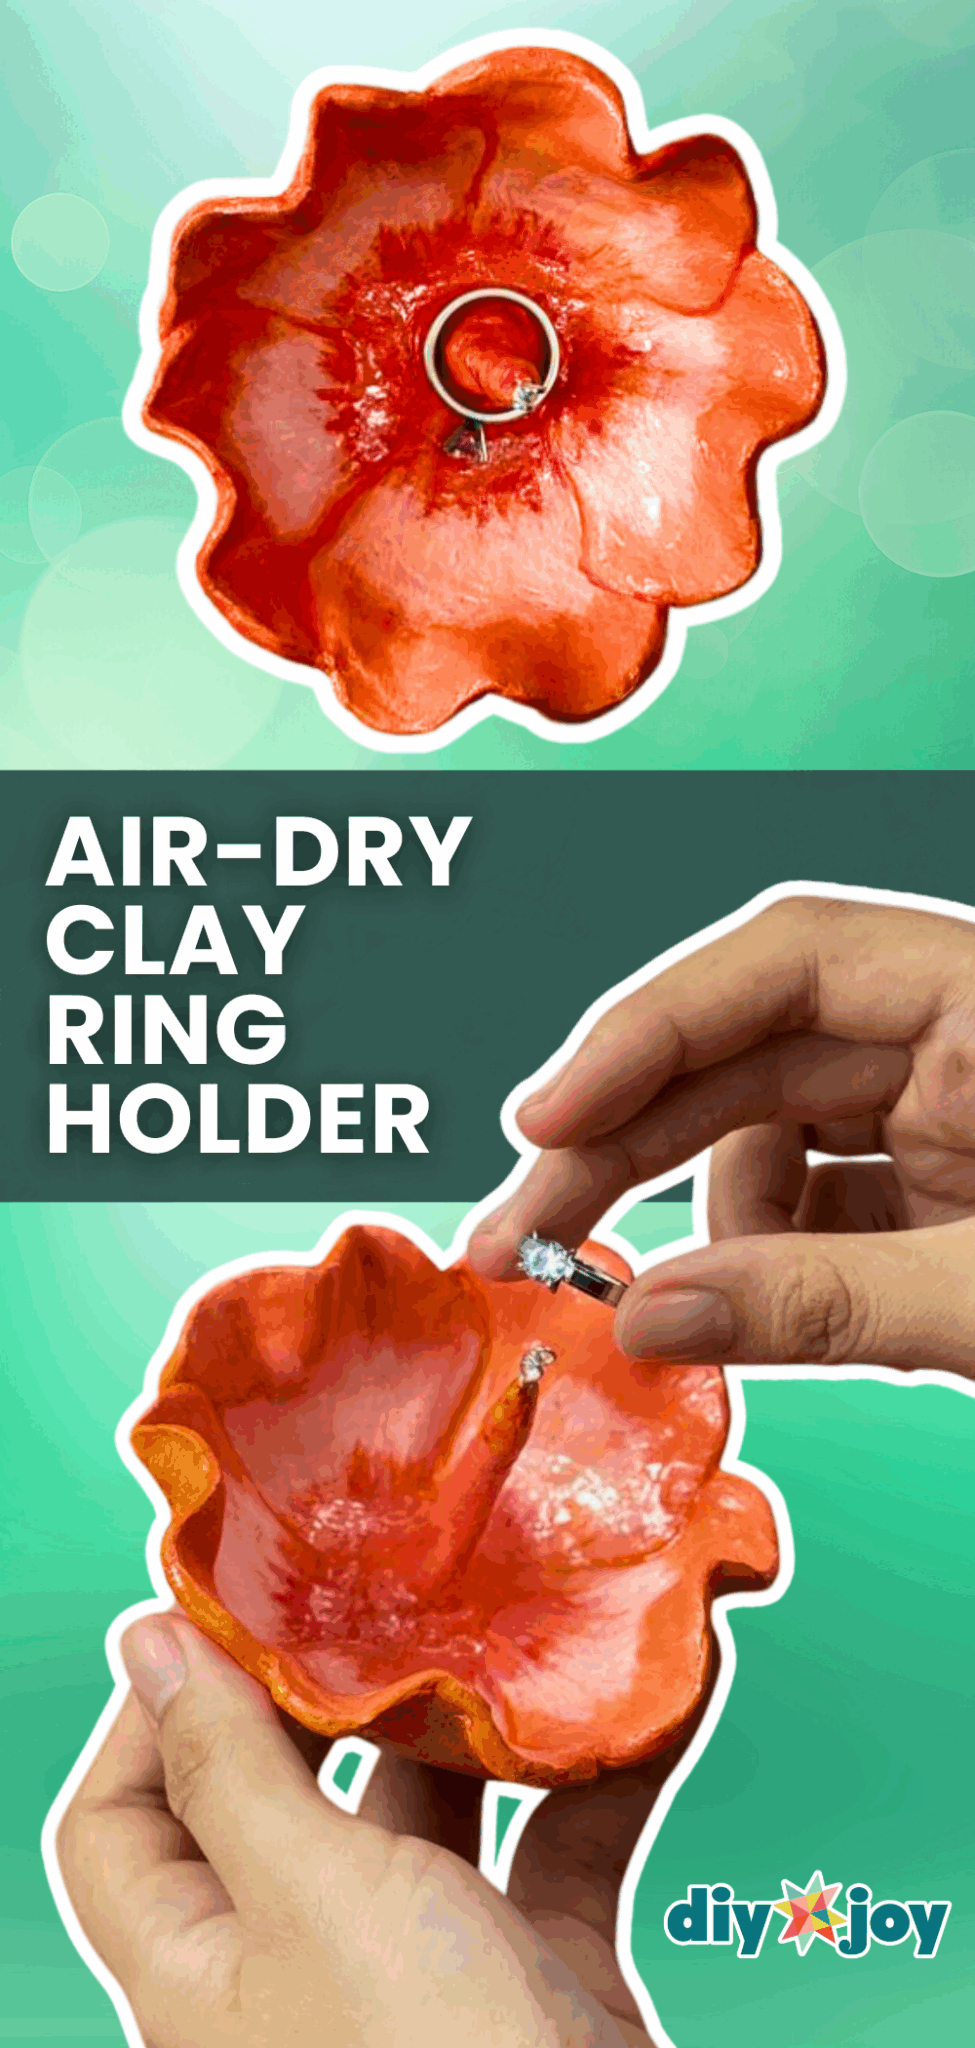
An easy air-dry clay ring holder is shaped like a flower with a little stem in the middle for rings. Roll the clay smooth, cut it around a template, then slit between the petals. Lift it on a towel into a bowl and overlap the petals so they cup, smoothing the slits and sharp edges. Roll a thin log for the center, press a wire eyelet into it and attach it with a wet brush, adding clay at the base. Prime, paint and coat it in UV resin for a porcelain look, and no kiln is needed.
Get the full tutorial at DIY JOY.
30. Leather And Wood Jewelry Box

This leather and wood jewelry box starts as a plain 5 1/2 inch craft store box. Take off the hardware, fill the holes (and any engraving you do not want) with wood filler and paint at least three coats. For ring rolls, roll strips of batting the width of the box, about 6 1/2 inches long, glue the ends and wrap each in velvet. One layer of batting is plenty, since two made the rolls too fat. Pack them in tight. A folded strip of natural leather, held on with a thumbtack, makes the pull.
Get the full tutorial at Homey Oh My.