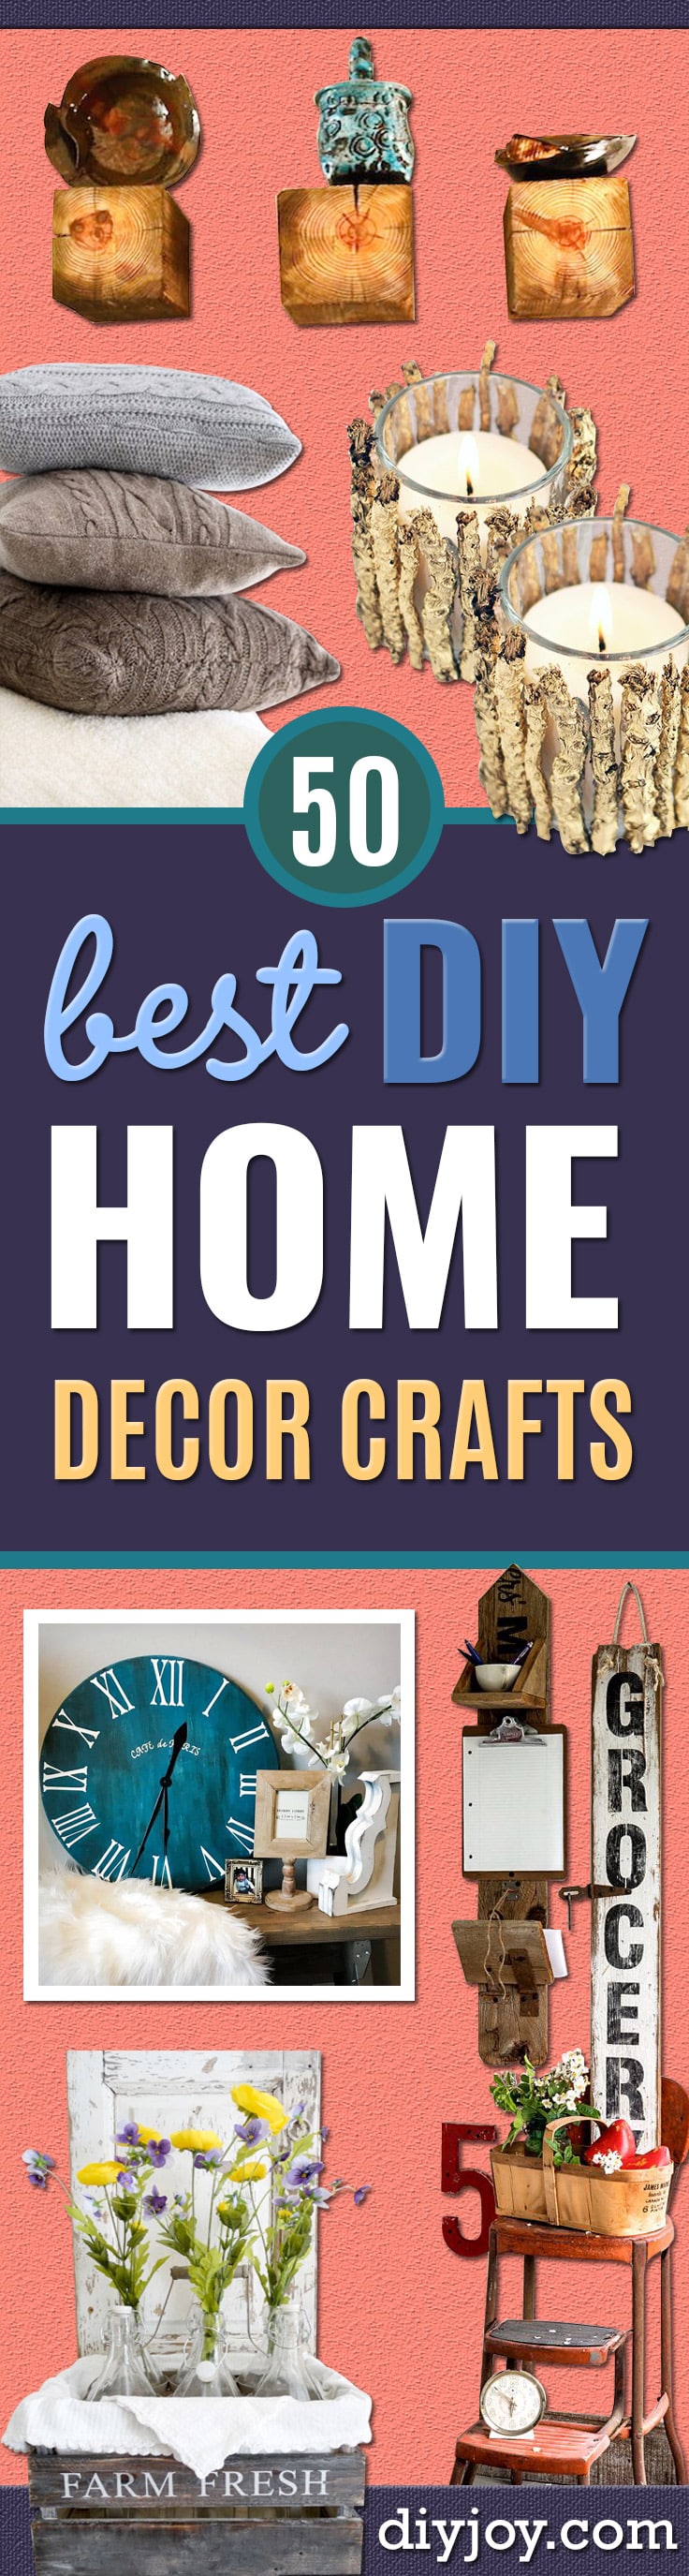
Handmade decor is what makes a house look like the people who live there, and most of it costs less than a trip to the home store. These 41 DIY home decor crafts run from five minute projects to weekend builds. Fifteen are DIY JOY originals with video tutorials, like a clay flower mirror, mason jar fairy lights with pressed flowers, a jute rope tray, a folded book vase and bandana pillows. The rest are favorites from around the web: a wood bead garland, sequin wall art, a faux brick world map wall, cozy sweater pillows, a Roman numeral clock and a feather pendant light. Plenty of them start with a thrift store find or something already headed for the recycling bin. Pick a room and make it yours.
1. How to Make Clay Flower Mirror in 1 Hour
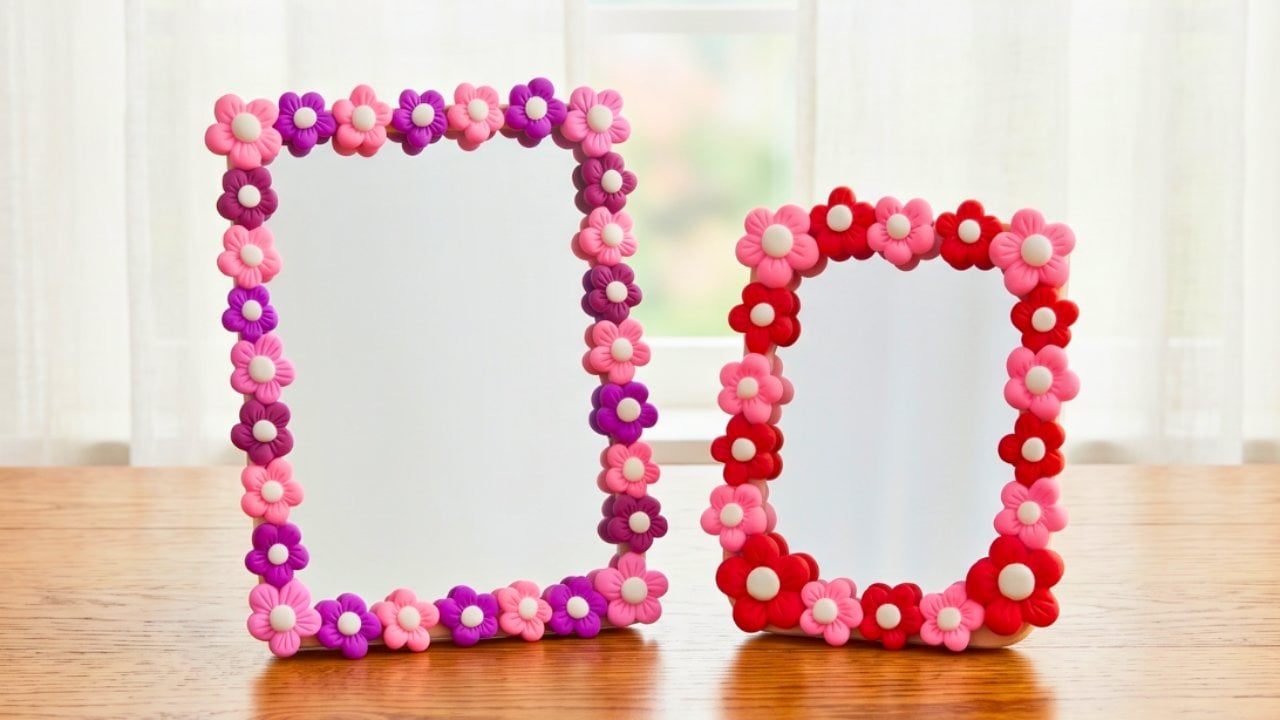
A plain mirror, even a dollar store one, gets a full makeover with soft clay flowers in about an hour. Roll a ball of clay, press three lines into the bottom with a sculpting tool so they meet in a point, and make five of those for petals. Arrange them into a flower with a small white ball in the center, then make more in different colors and sizes. Let them firm up, plan the layout around the frame and hot glue each one down. A coat of gloss varnish helps them last.
Get the full tutorial at DIY JOY.
2. DIY Twig Votive Candle Holders
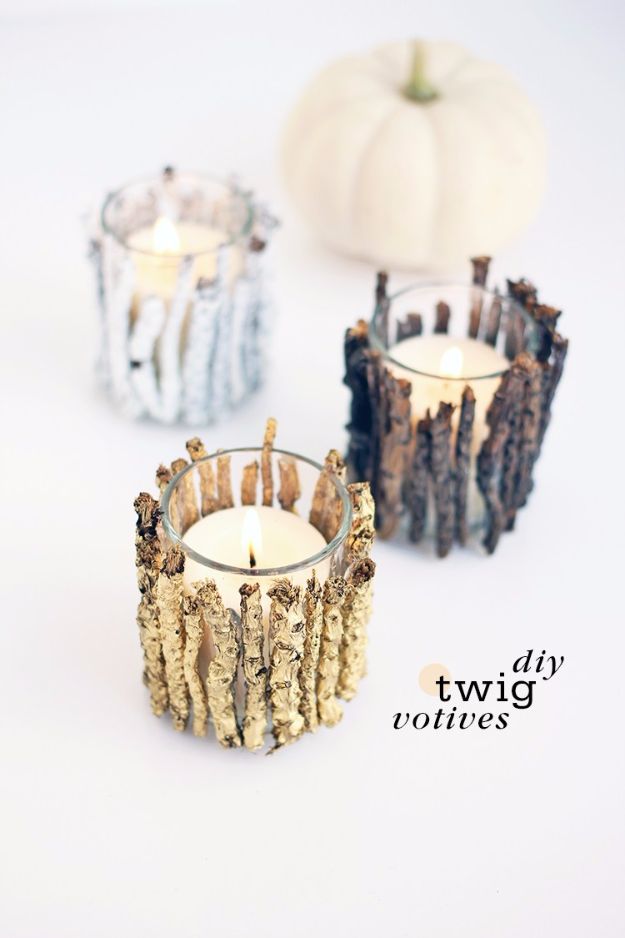
Twigs from the craft store turn plain glass votives into rustic little candle holders with a hint of glam. Break the twigs into pieces about 2 1/2 inches long and sort them into three piles of at least 25 each. Spray one pile gold, one white and leave the third natural. Then run a thin line of hot glue down each twig and press it to the side of the glass until it is covered. Keep the twigs short so they stay well away from the flame. Pretty on a fall table or a mantel.
Get the full tutorial at Freutcake.
3. DIY Floral Wall Sconces

Wood pennant flags and white craft chicken wire make a wall pocket for flowers that doubles as a May Day basket. Cut a triangle of chicken wire slightly larger than the flag, fold the top edge over so nothing scratches, then sandwich the wire ends between two pennant flags with E6000 and clamp the edges with clothespins until dry. Press in bits of preserved moss, add a wired sisal vine handle and fill it with flowers. Fresh blooms need a small baggie or florist water picks.
Get the full tutorial at Tried & True Creative.
4. Mason Jar Fairy Lights With Pressed Flowers
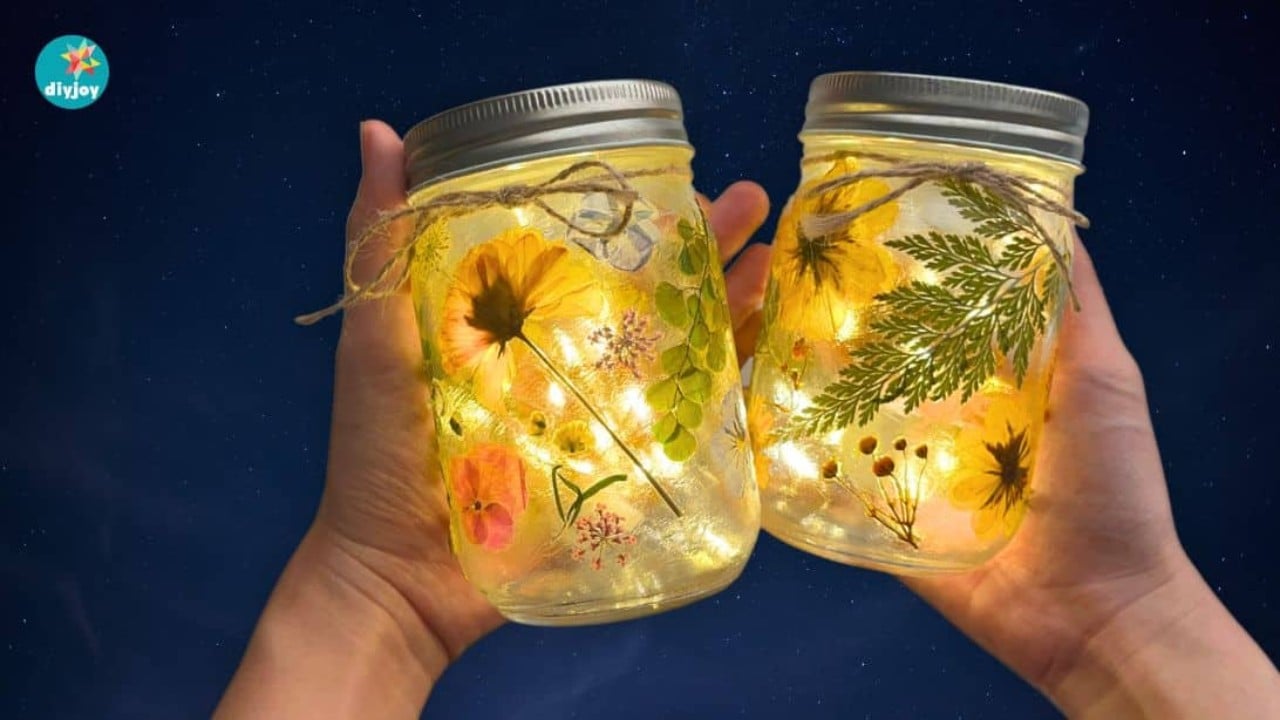
Pressed flowers and fairy lights turn an empty mason jar into a glowing little night light. Clean the jar, play with the flower layout, then brush a thin layer of Mod Podge onto the glass and press each flower in place with more glue brushed over the top. Work in sections so the glue does not dry too fast. Thin flowers and leaves work best because light passes right through them. A second coat seals everything, then drop in the fairy lights, close the lid and tie a jute bow around the neck.
Get the full tutorial at DIY JOY.
5. DIY Upcycled Candle Sticks
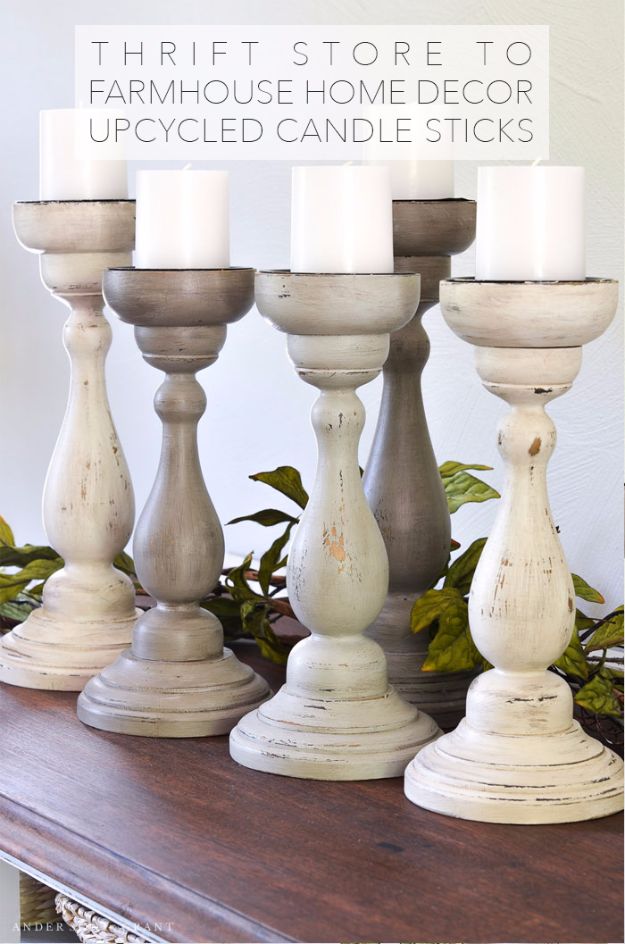
Chunky wood candlesticks, found on clearance for about $6 each, get layered paint for a farmhouse look that seems decades old. Rub a clear candle over spots where the wood should show through, paint a dark base coat, then wax again over areas meant to reveal that dark layer. Next come lighter shades of gray and cream, a different mix on each candlestick, so the group looks collected over time. Sand and the paint chips away right where the wax sits. They look great even without a candle.
Get the full tutorial at The Cottage Market.
6. Easy DIY Fairy Jar Lanterns
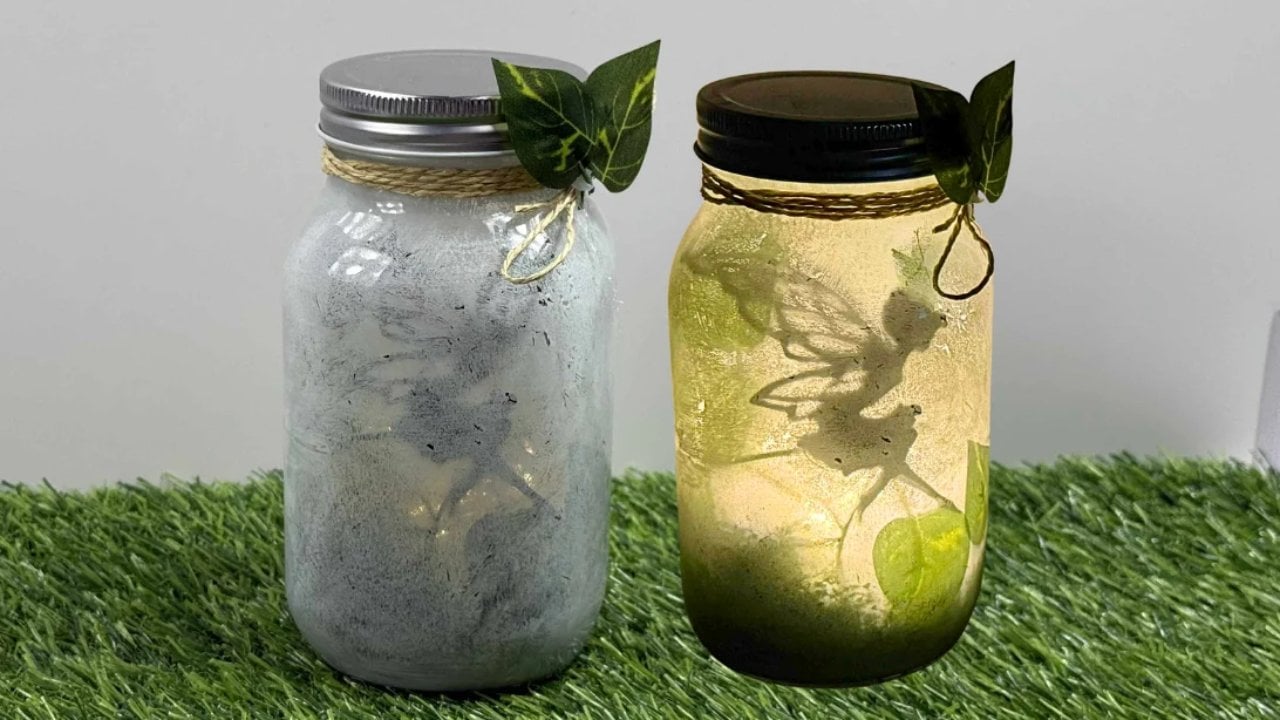
A fairy silhouette glowing inside a painted jar makes a soft, warm night light. Print a fairy, mushroom, tree or house silhouette onto paper or cardstock and cut it out. Paint the inside of a clean jar with white acrylic or primer, keeping the coat thin enough for light to pass. Tuck fake moss or crumpled tissue in the bottom, hot glue the silhouette to the inside of the glass and add a few leaves. A tea light or fairy lights go in, then twine and leaves finish the neck. Pickle jars work great.
Get the full tutorial at DIY JOY.
7. Roman Numeral Clock DIY

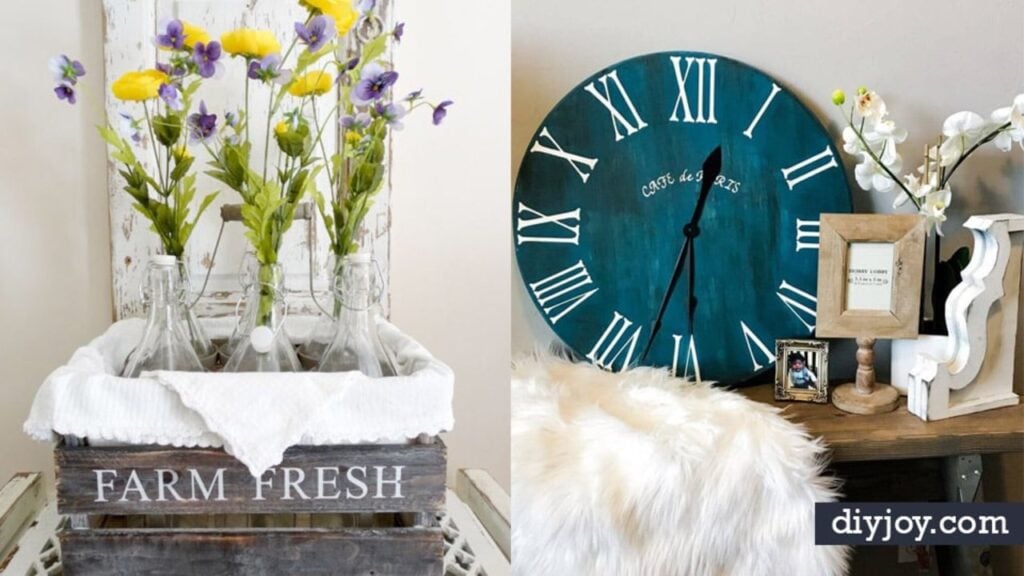
A 24 inch wooden round and a Roman numeral wall decal make a big farmhouse clock, and the decal works as a stencil. Paint the round linen white with chalk paint, which dries fast. Flatten the rolled decal under something heavy, peel the backing, place every numeral where it belongs and press the letters down with a scrap block or a credit card. Lift the top layer slowly, then paint the whole round a deep blue. Once it dries, peel the stickers with a small nail to reveal crisp white numerals and seal it with clear and dark wax. Add clock hands if you like.
Get the full tutorial at Handmade Haven.
8. How to Make a Jute Rope Tray
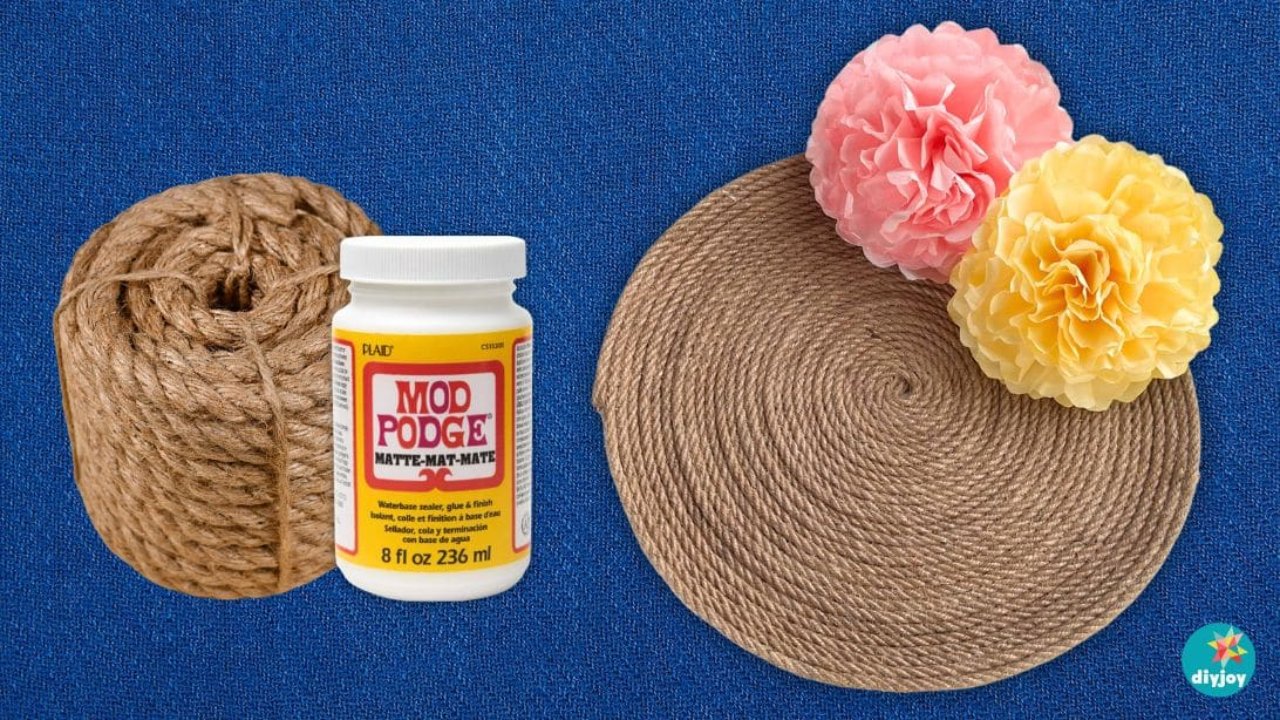
Boho jute trays cost a lot in stores, but a couple dollars of jute rope and Mod Podge make one at home. Wrap a tray in cling wrap and brush on a generous layer of Mod Podge. Starting at the center, coil the rope in a tight spiral, adding glue as you go and pressing it flat. Keep the sides low so the tray holds its shape. Coat everything with more Mod Podge, let it dry in a ventilated spot, then flip it and weight it to stay flat. Most supplies come from the dollar store.
Get the full tutorial at DIY JOY.
9. Wood Bead Garland

This might be the easiest home decor project ever, and it takes about 10 minutes. All it needs is twine and wood beads in a few different sizes. String the beads onto the twine in any pattern you like, or no pattern at all, and keep going until one size runs out. Tie a few knots at each end and add a loop on either side to hang it from hooks. Drape it on a mantel, wrap it around a banister, snake it through shelf decor or hang it on a Christmas tree. It costs only a few dollars.
Get the full tutorial at Making Joy and Pretty Things.
10. DIY Book Flower Vase
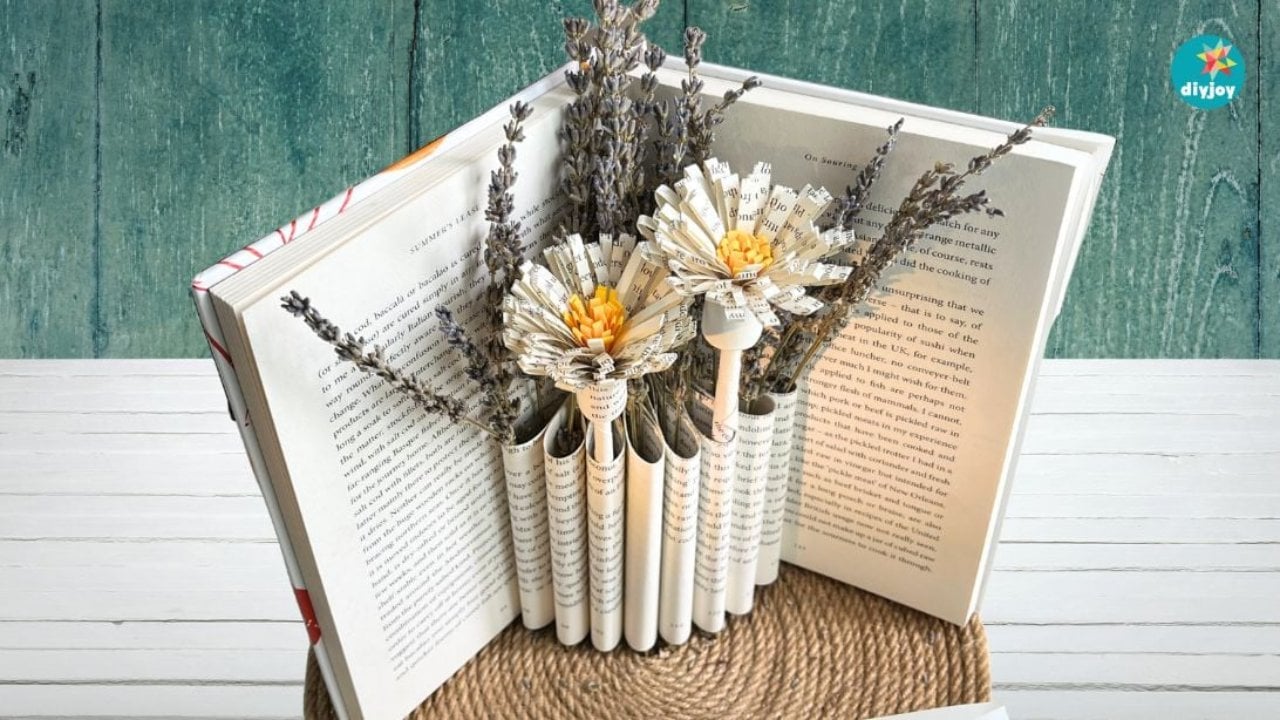
An old book becomes a folded paper vase for dried, faux or paper flowers in just a few minutes. Open the book to the center and draw a line down the middle of the page. Count 12 pages on each side, slip in cardboard to protect the rest and cut along the line, then tear off the top section. Shift the cut pages to one side, tape them in groups of three with double sided tape and fold each group toward the middle. Use a really old book or a thrift store find.
Get the full tutorial at DIY JOY.
11. DIY Decoupage Vase Using Napkin Paper
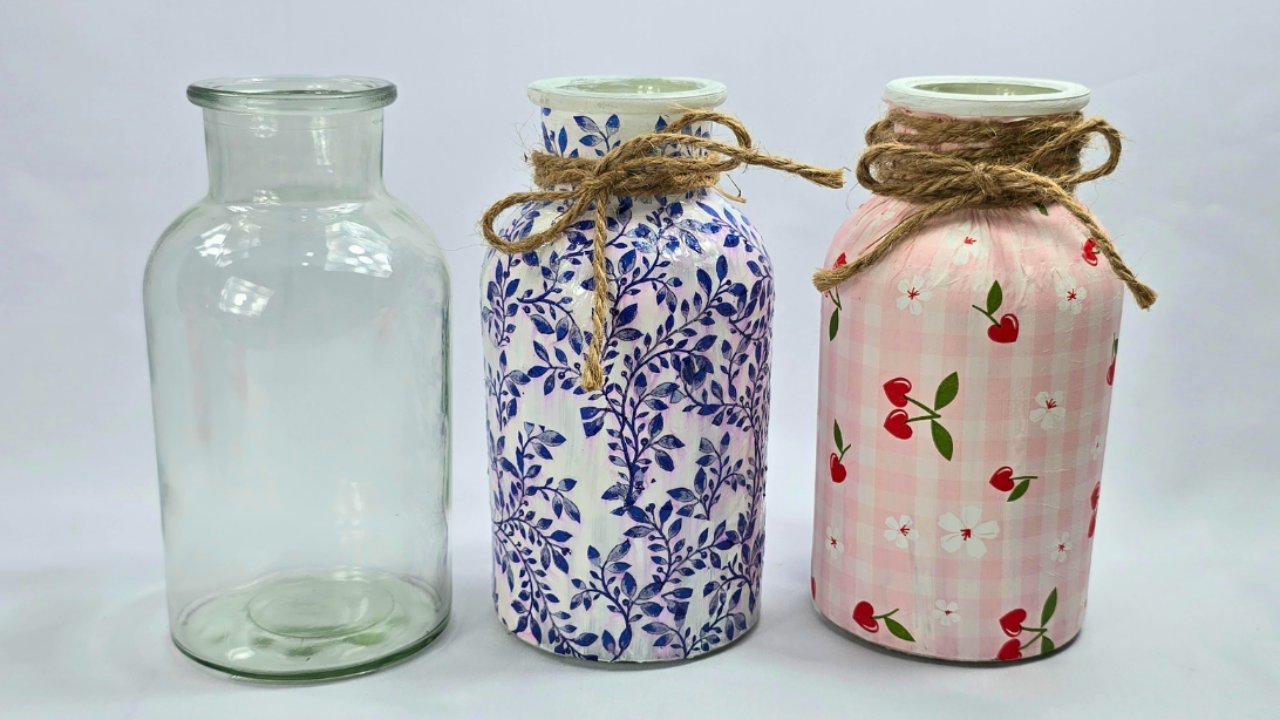
That plain glass jar saved just in case becomes a pretty vase with a printed paper napkin. Clean the outside and paint it white, adding a second coat if needed for full coverage. Cut out the napkin motifs close to the design and peel off the backing layers. Brush Mod Podge where each piece goes, or a white glue and water mix, lay the paper down and brush more over the top. Keep adding motifs until it is covered. UV resin is an optional extra layer for shine and protection.
Get the full tutorial at DIY JOY.
12. DIY Twine Garden Lanterns

Twine soaked in a glue mixture and wrapped around balloons dries into airy lantern balls for a patio. Mix 4 ounces of white glue with 1/2 cup cornstarch and 1/4 cup warm water, coat the balloons in petroleum jelly and pull twine through the glue before wrapping, first vertically then horizontally. Hang them to dry for 24 hours, then pop the balloons. A quick coat of clear spray and twinkle lights inside finish them. It is messy, so lay down a plastic drop cloth and wear gloves.
Get the full tutorial at Splash of Something.
13. Shabby Chic Rag Garlands

Extra linens, even ones with a small tear or stain, get a pretty second life as a rag garland. Cut a long piece of ribbon or twine to the length you need, then cut the old linens into strips and tie them on one after another. Mix in tulle, lace and ribbon for a softer, romantic look. Make them long for a mantel or short for the top of a mirror or a market booth display. It is a perfect way to use fabric that is too pretty to toss.
Get the full tutorial at Olivia's Romantic Home.
14. DIY Photo Wall Hanging

Phone photos finally get off the phone with this modern yarn and dowel wall hanging. Paint a wood dowel black, then tie yarn strands from it, adding a dab of super glue to each double knot. The weights at the bottom are clay triangles cut from 4 inch and 5 1/2 inch cardstock templates, poked with a straw for a hole, baked at 260 F for about 30 minutes and decorated with a white paint pen. Small square prints attach to the yarn with washi tape. It is easier than the supply list looks.
Get the full tutorial at Homey Oh My.
15. Textured Heart Canvas Art Painting
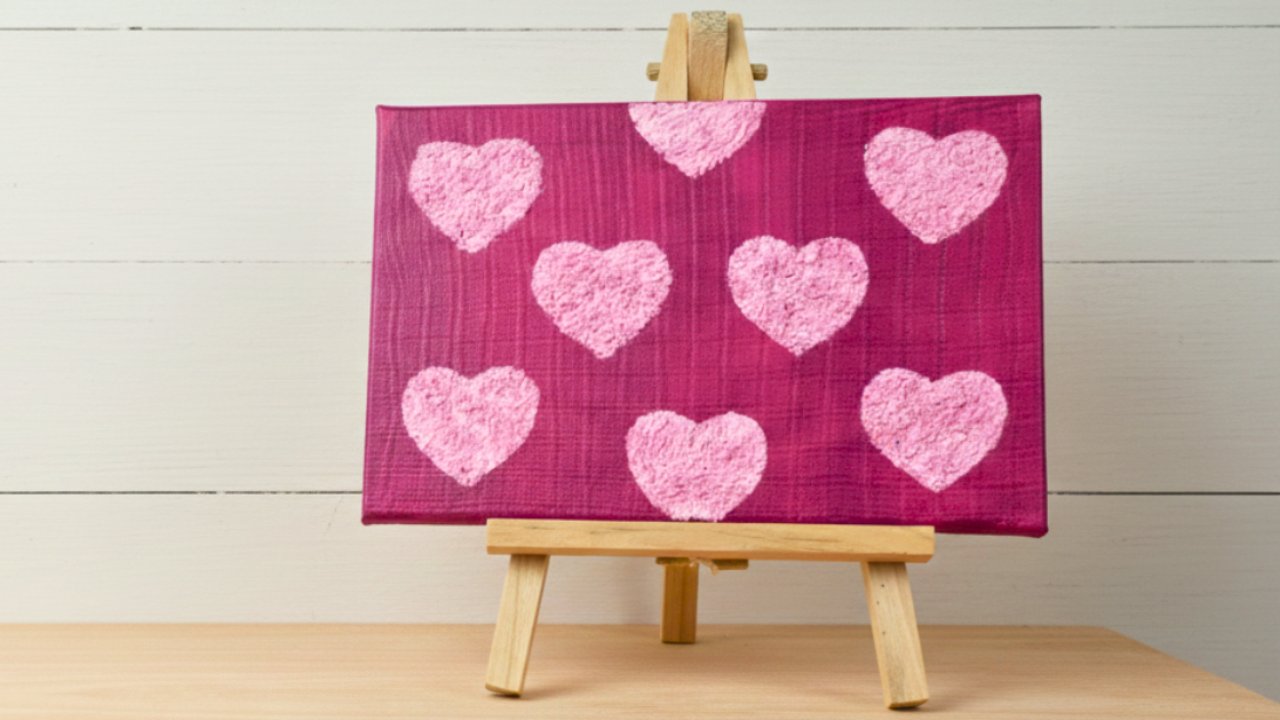
Tissue paper and glue make a raised, embossed heart on canvas that looks way fancier than it is. Paint the canvas a background color and let it dry, then lightly sketch a heart, letters or other shapes. Soak torn tissue in water, squeeze it out, tear it smaller and mix in glue and paint to make a colored paper mache paste. Spread it inside the heart to cover every line, adding layers for more texture but not so many that drying takes forever. Smaller tissue bits give a smoother finish.
Get the full tutorial at DIY JOY.
16. DIY Sequins Wall Art

More than 1,000 gold sequins pinned into a foam board make a wall sign that sparkles from across the room. Cut a sheet of rigid foam insulation to size, cut a window in the middle for the word, here INSPIRE, and spray paint the board and the letters gold. Lay out 40mm sequins in an offset pattern, roughly 50 to 60 per square foot, and pin each one in place with sequin pins. It takes 3 to 4 hours, so grab a helper and some music. Mounting tape holds it up.
Get the full tutorial at Classy Clutter.
17. DIY Chicken Wire Suncatcher
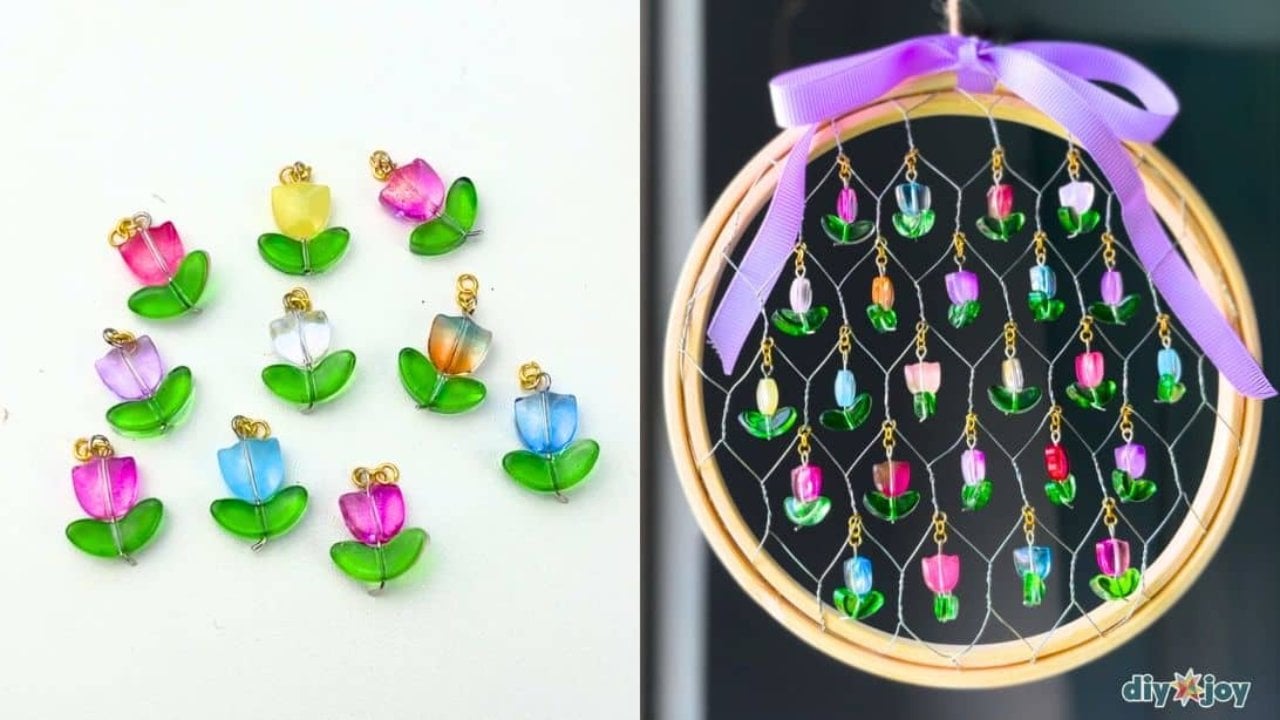
Chicken wire stretched in an embroidery hoop becomes a sparkly suncatcher that chimes softly in the wind. Remove the inner hoop, lay it on the chicken wire so you get as many full diamonds as possible and cut a circle with a little extra allowance. Fit the wire into the hoop. Then string glass tulip and leaf beads onto head pins, add jump rings and hang them from the vertical wires. Any glass beads work, since glass is what throws the light. Finish with a ribbon or jute hanger and hang it in a sunny window.
Get the full tutorial at DIY JOY.
18. DIY Picture Frame Suncatcher Tutorial
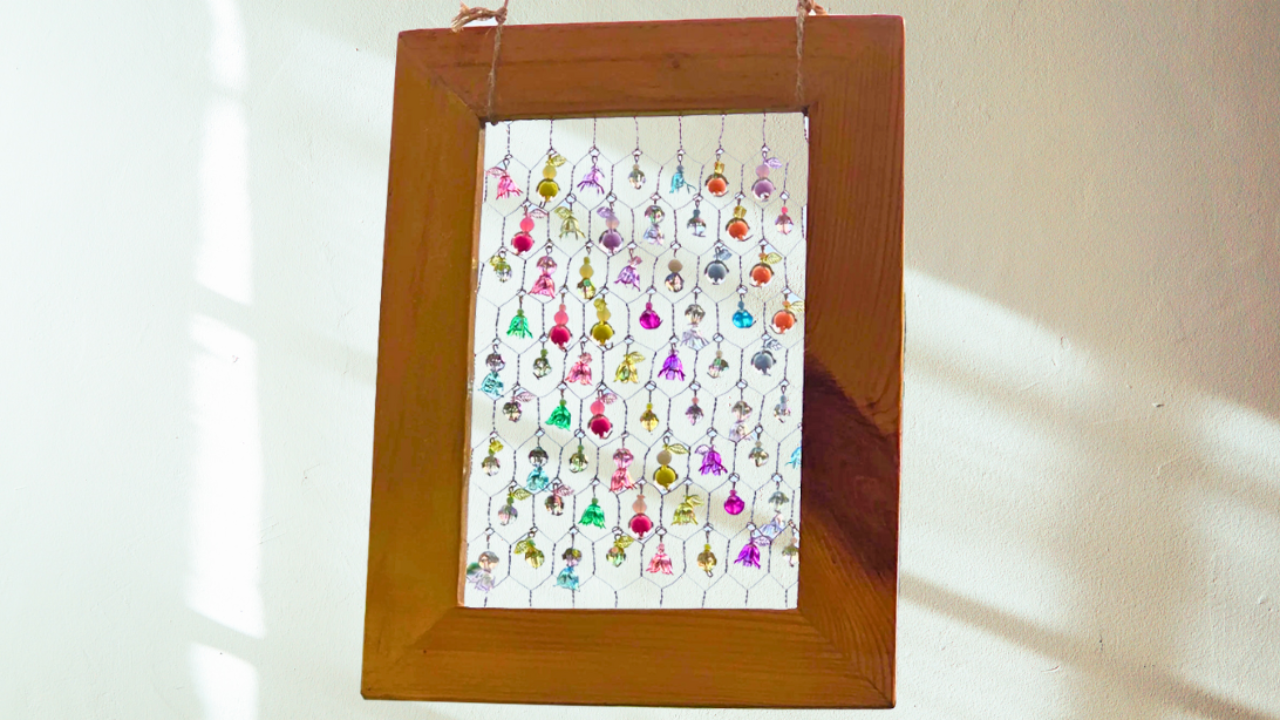
An old picture frame gets a second life as a colorful suncatcher for the window. Cut a piece of chicken wire to fit inside the frame and attach it securely. String beads and charms onto eye pins, bend the ends to hold them, then hook one or two jump rings onto the top loop so each set dangles. Hang the sets in every section of the wire and tie jute rope across the top as a hanger. Translucent or faceted beads sparkle most, and laying out the colors first keeps it balanced.
Get the full tutorial at DIY JOY.
19. Decorative Mirrors

Catalog mirrors at $199 each inspired a knockoff that cost $15 for all three. Start with plain mirrors, about $5 each, and draw the design right on the glass with a white eyeliner pencil, which wipes off easily if a line goes wrong. Mark evenly spaced lines, measure out small squares where they cross, then trace a curved shape from a cardboard stencil. Go over only the lines you want to keep with faux stained glass paint, let it dry and wipe away the pencil marks. Lined up behind a sideboard, the three read as one big statement piece.
Get the full tutorial at Thrifty and Chic.
20. Paint Stick Basket

Twenty paint stir sticks, a square dowel and a staple gun make a slatted basket in about 15 minutes for roughly $3. Cut the sticks into short sides, long sides and floor slats and cut the 1/2 inch square dowel into six corner posts. Stain or paint the sticks and color the staples with a paint pen so they disappear. Glue and staple each stick to the posts with about 1/4 inch between slats, overlapping the ends for lapped corners. Floor cleats hold the bottom slats. Use it as a centerpiece or shelf storage.
Get the full tutorial at Build Basic.
21. Repurposed Sweater Pillows

An unloved chunky knit sweater makes a cozy winter pillow, and there is one trick that makes it easy. Before sewing, iron lightweight fusible interfacing onto the wrong side of both sweater pieces. That stops the knit from stretching and warping so the seams stay straight. Pin the pieces right sides together, sew around all four sides and leave an opening, about 10 inches for a pillow form. Turn it right side out, add the insert or stuffing and hand stitch the opening closed. Buttons on the sweater can be a decorative detail.
Get the full tutorial at The Keeper of the Home.
22. DIY Photo Clipboards

Photo clipboards are a cheap stand in for picture frames, which can easily run $12 or more apiece. A 6 foot 1×12 board cut into four 13 inch pieces gives four plaques. Sand the edges and corners to look aged, wipe on dark walnut stain, let it sit about 15 minutes and wipe off the excess. Sand again lightly for a worn look, then seal with paste wax. Add a sawtooth hanger to the back and glue two small antiqued clips on the front. Clip in 8×10 prints and hang them in a row.
Get the full tutorial at Love Grows Wild.
23. Upcycled DIY Light Bulb Mini Planter
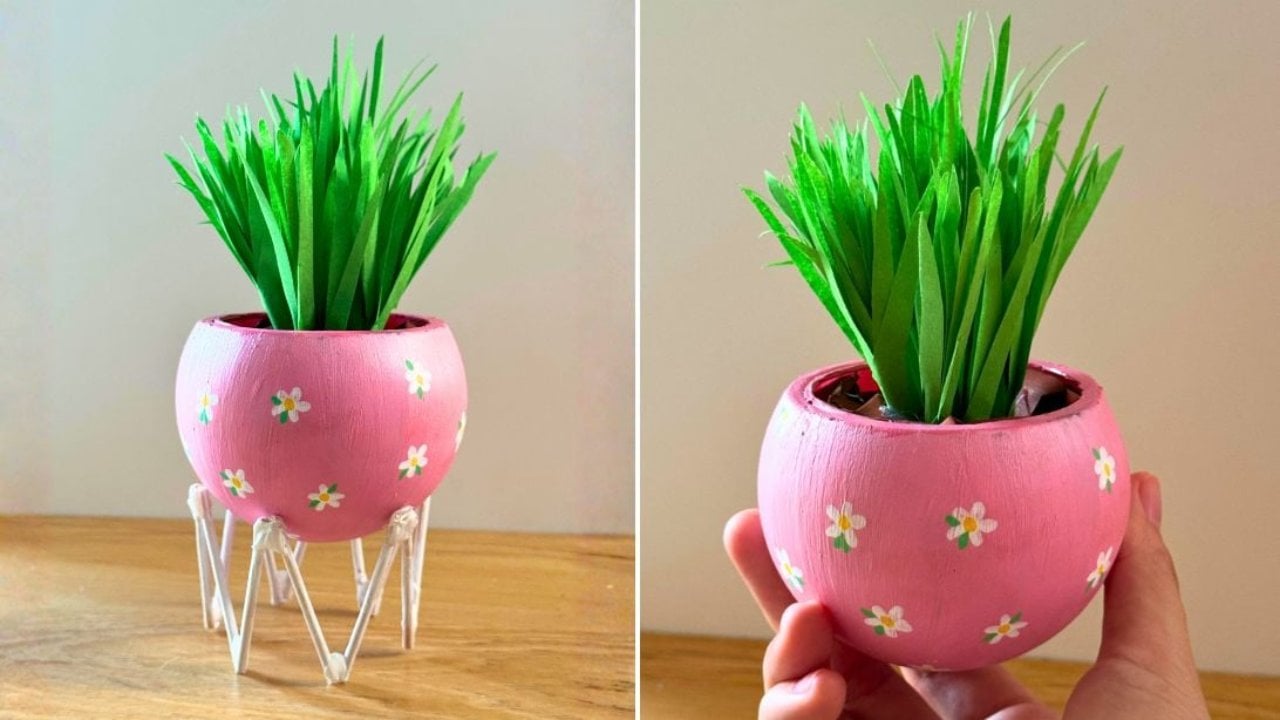
An old light bulb becomes a tiny planter instead of trash. Carefully separate the glass from the metal base and sand the opening smooth. Paint the glass, adding a second coat if needed, and draw flowers on it with POSCA pens. For the stand, cut 8 to 10 sticks to about 2 inches, hot glue them in pairs into A shapes and join the pairs into a rounded base. Fill the bulb with crumpled brown paper and top it with rolled paper grass, or use a small succulent or faux plant.
Get the full tutorial at DIY JOY.
24. Painted Daisy Mason Jar

Distressed teal mason jars with hand painted daisies bring spring indoors before the flowers bloom outside. Give each jar three coats of matte teal acrylic, lightened with one part white to two parts teal, and let them dry overnight. Rough up the edges with 80 grit sandpaper. Paint six petals per daisy in gloss enamel, starting each stroke at the outer edge and pulling toward the center, then dot the centers with high gloss paint. A clear matte spray seals the finish.
Get the full tutorial at Mason Jar Crafts Love.
25. DIY Spring Candle Decor
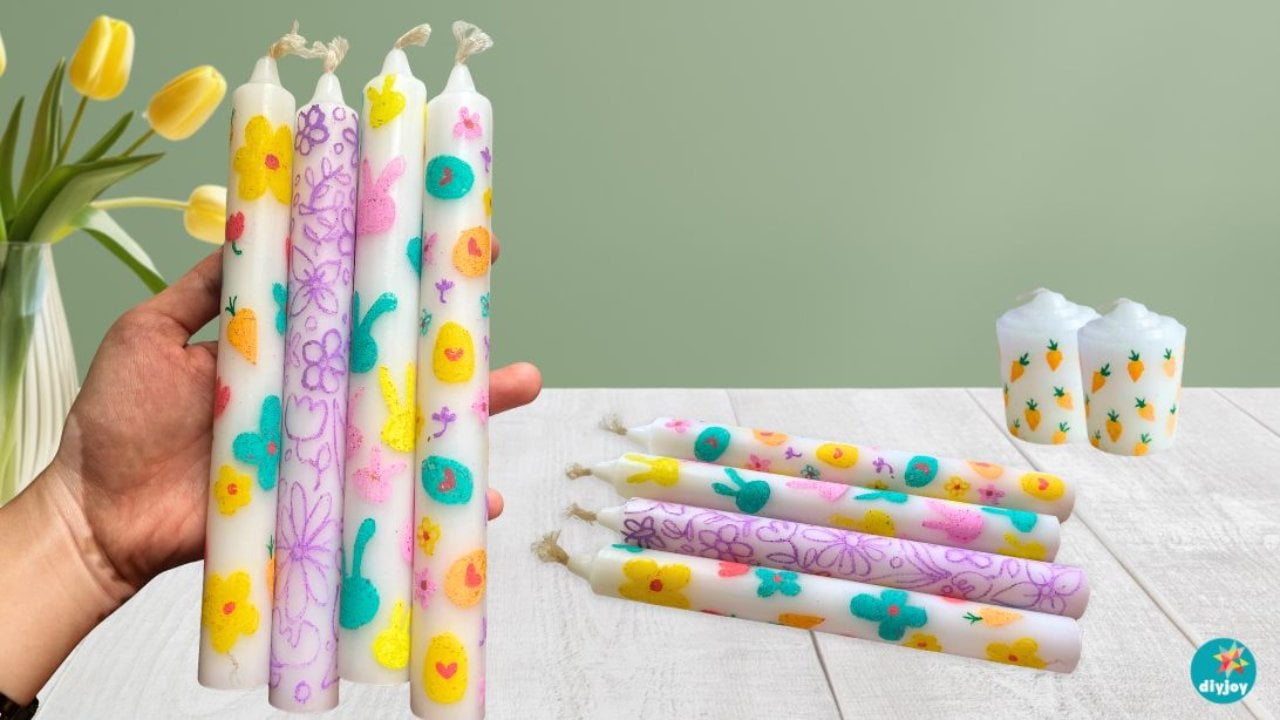
Posca markers turn plain candles into spring decorations covered in flowers, bunnies, carrots, eggs and butterflies. Pick a design, draw the outlines first and work one area at a time so nothing smudges, letting each color dry before moving on. Fill in the shapes, then add the small details. Pastels look softer than bold colors. Finish with a bow and set them in holders with flowers around the base for a centerpiece. These are display candles only, so do not light them.
Get the full tutorial at DIY JOY.
26. Faux Brick Wall World Map

Faux brick panels and a projector turn a blank wall into a rustic accent wall with a world map across it. Hang 4 by 8 foot brick panels on the studs with drywall screws. Project a world map onto the wall in the dark and trace the outline with a white chalk marker. Spread spackle here and there with a putty knife for real texture, then dry brush white paint around the map, loading the brush lightly so some red shows through. The continents stay bare brick, which is what makes the map pop.
Get the full tutorial at Classy Clutter.
27. Easy DIY Beaded Plant Hanger and Lantern
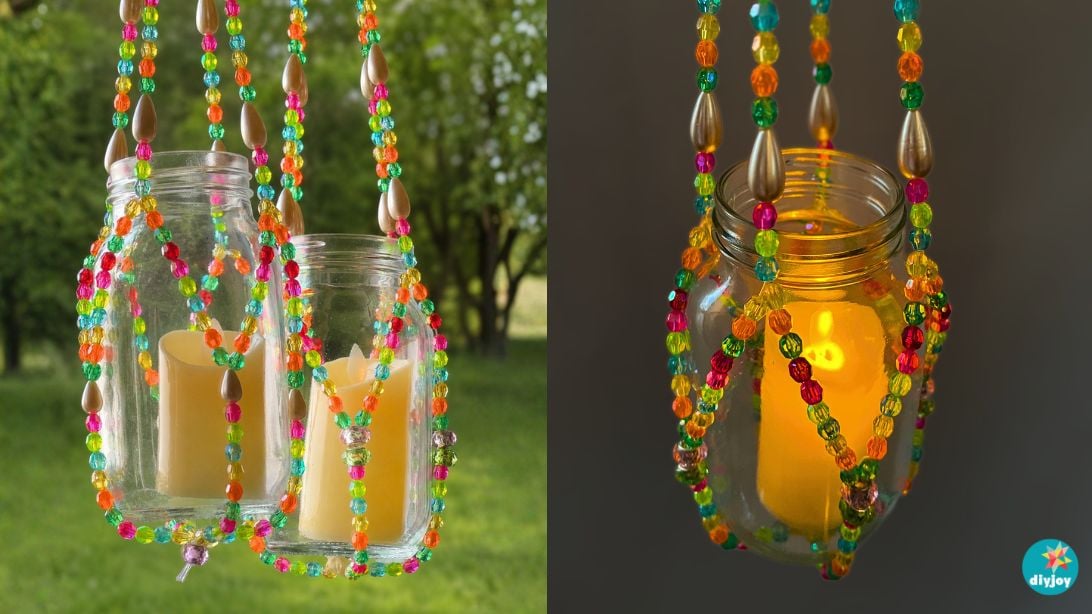
One beaded hanger works as a plant holder or a hanging candle lantern. Cut four 5 foot lengths of fishing line, fold them through a small wooden ring and pull the loose ends through the loop, taping it down while you work. Slide a large bead over all eight strands, then string 8mm and 14mm glass beads in pairs and singles to build the cradle, measuring by length if your beads differ. Knot all eight strands at the bottom. Set in a jar with a candle or a small potted plant and hang it.
Get the full tutorial at DIY JOY.
28. Easy DIY Napkin Paper Candle
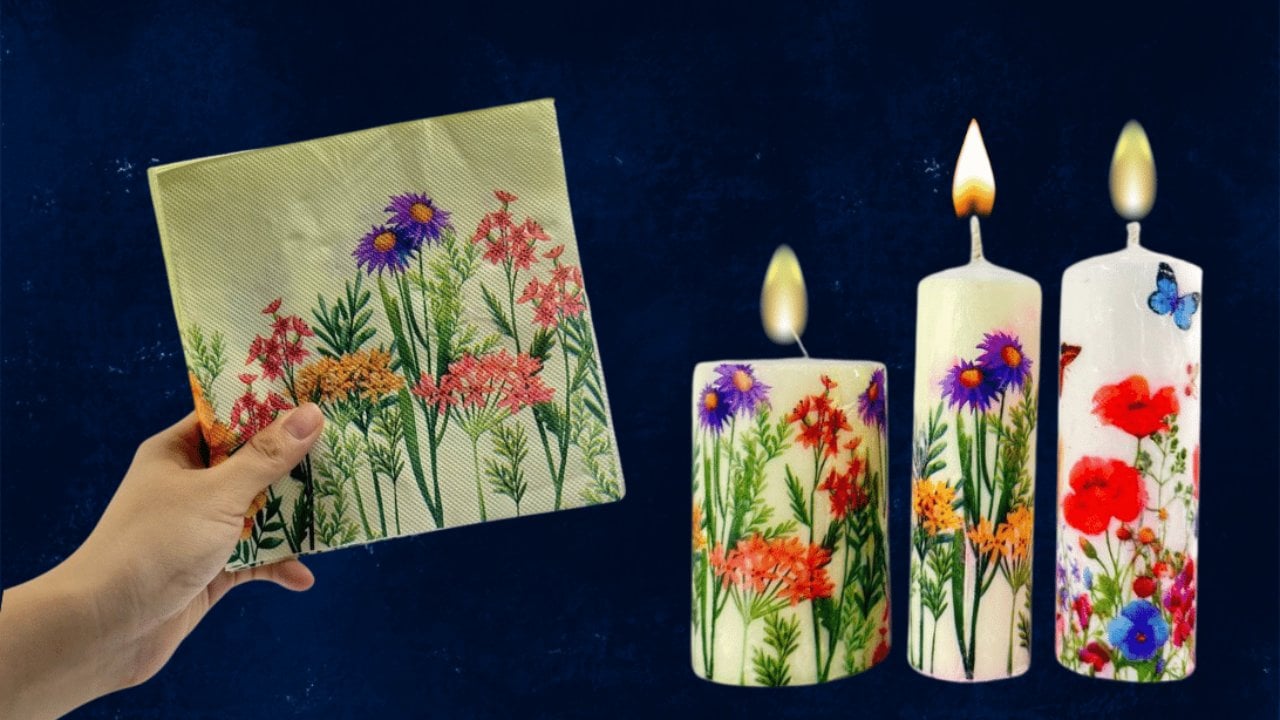
A printed paper napkin, wax paper and an iron give a plain candle a custom design in minutes. Clean the candle, peel the napkin apart and discard the backing layers, then cut it to fit and wrap it around the candle. Cover it with a piece of wax paper and carefully iron over it. The candle’s own wax melts and fuses the napkin in place. Peel off the wax paper and touch up the edges. For a keepsake, burn only the top and set an LED candle in the dip.
Get the full tutorial at DIY JOY.
29. Reclaimed Wood Message

Two old fence planks become a farmhouse message center plus a vertical grocery sign. For the message board, cut a picket tip on one plank, use offcuts for two angled brackets and two small shelves, sand everything and stencil a market phrase down the board. Screw it together, add rusty hinges and twine to hold the lower mail shelf and hang a clipboard for lists. For the sign, paint the second plank white in a loose, sloppy way, let it cure, sand lightly and stencil GROCERY down the length.
Get the full tutorial at Funky Junk Interiors.
30. DIY Mini Wooden Ladder

A mini ladder is a sweet little decor piece for a mantel, a piano or a shelf. Two 6 foot 1×2 boards are enough: cut two rails at 32 inches and four rungs at 12 inches. Lay them out and space the rungs evenly, about 5 1/2 inches apart, with a little more room at the bottom than the top. Glue and nail each rung in place, then stain or paint. Cheap 1x2s work fine, but take time to pick straight ones because they tend to twist.
Get the full tutorial at The Crafty Blog Stalker.
31. Easy DIY Pom Pom Wreath
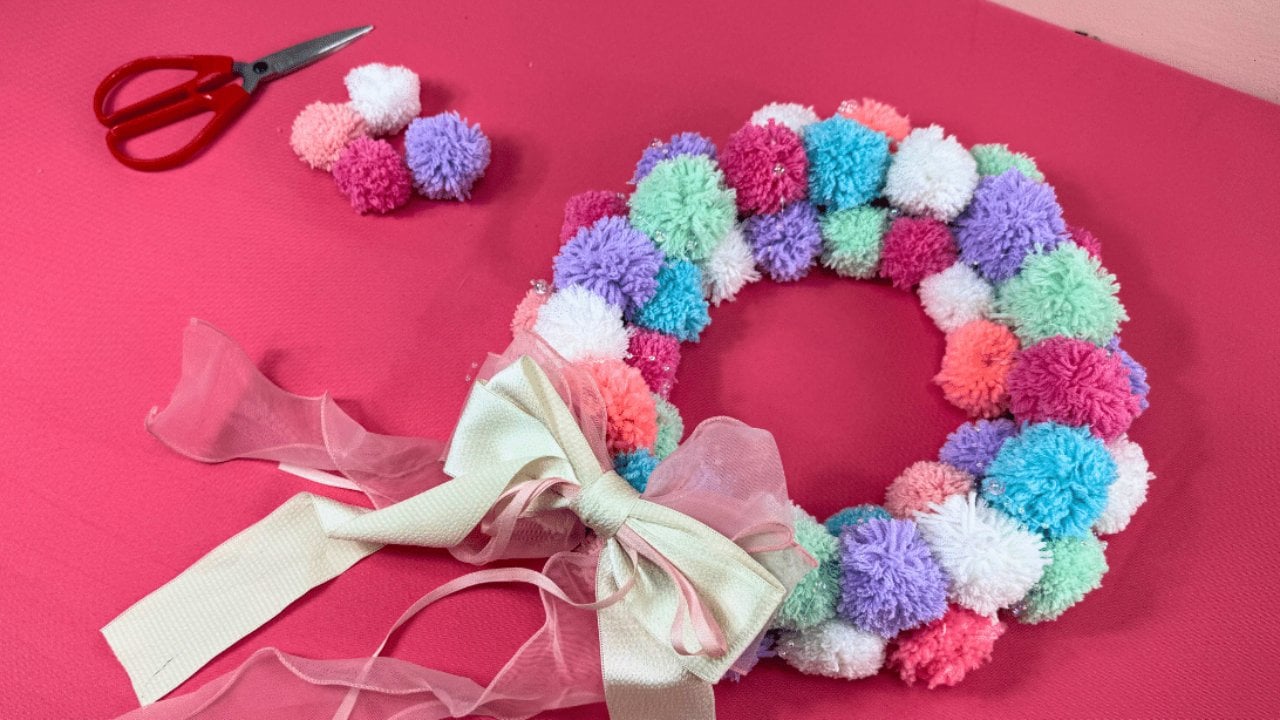
A ring of fluffy yarn pom poms makes a cheerful wreath for spring, Easter or any season with a color swap. For the big ones, wrap yarn around a 5 cm cardboard template 80 times, not too tight or loose, tie it hard in the middle, knot it a few times, cut the loops and shape it round. Make 16 large in assorted colors and 18 small on a 2.5 cm template. Hot glue the large pom poms around the wreath form, then half the small ones inside and half outside.
Get the full tutorial at DIY JOY.
32. Towel Hanger Revamp

A banged up doorknob towel hanger found at a thrift store for 50 cents got a fresh look for a girls’ bathroom. Tape off the crystal knob, spray the hanger flat white, sand the edges for a little wear and finish with a clear gloss spray. To hang it, swap out the old towel ring, which may take a fight with a stubborn wall anchor. Command picture hanging strips hold it flat and steady and come off clean later. A clearance hand towel completes the look.
Get the full tutorial at The House of Smiths.
33. How to Make Bandana Pillows

Two bandanas make one fun pillow, sewn or glued. Lay two 20 inch bandanas right sides together, mark a 1/4 inch seam with chalk on all four sides, then fold and iron along the lines. Sew three sides with a backstitch at each end and leave only about 8 inches open on the fourth. No machine? Run fabric glue along the same seam lines instead. Turn it right side out, add an 18 inch pillow insert or stuffing and close the gap. Dollar store bandanas keep the cost low.
Get the full tutorial at DIY JOY.
34. DIY Pallet Plaques

Think of these as a glorified clipboard with a rustic, worn finish, made to show off photos or kids’ artwork. Cut a 1/2 by 3 inch craft board into three 12 inch sections and a 1/2 by 2 inch board into two 8 inch cleats. Sand every edge and corner, then brush on gray chalk paint watered down half and half so the grain shows. Glue the cleats across the back, staple on a jute hanger and screw a bulldog clip to the front. Swap the art by season.
Get the full tutorial at Oh My Creative.
35. Thrift Store Farmhouse Swag

A dated thrift store canister set, $4 for all four, becomes farmhouse kitchen storage with white spray paint and a stencil. Wash everything first; lemon oil takes off sticky price tag residue and spray paint on fingers. Set the canisters upside down on newspaper and spray them white, lid handles included. Once dry, sand lightly to add character, then stencil the labels on: flour, sugar, coffee and tea. It is part of a series on turning thrift store finds into farmhouse pieces.
Get the full tutorial at Twelve On Main.
36. DIY Rustic Farmhouse Chalkboard

A big rustic chalkboard like the ones in high end catalogs, built without power tools during nap times. Lightly sand a 20 by 48 inch board, wipe it down and apply stain with a rag or foam brush, sanding lightly and adding a second coat for rich color. Tape off a 3 inch border all the way around, press the tape completely flat and paint the center with brush on chalkboard paint, stroking away from the tape. Pull the tape right after painting for a crisp edge. Add hardware and hang.
Get the full tutorial at Our Handcrafted Life.
37. Pallet Wood Memo Board

Pallet boards, a copper pipe and a roll of paper make a memo board with a tear off paper roll at the top. Cut five boards to 18 inches, drill pocket holes along the back of four of them and screw them together, adding a sawtooth hanger before flipping it. Set two screw eyes about 13 inches apart near the top, slide an 18 inch copper pipe through one, load a 12 inch roll of paper and push the pipe through the other. Copper tacks and painted paint sticks finish it.
Get the full tutorial at The How-To Home.
38. DIY Chicken Wire Picture Frame
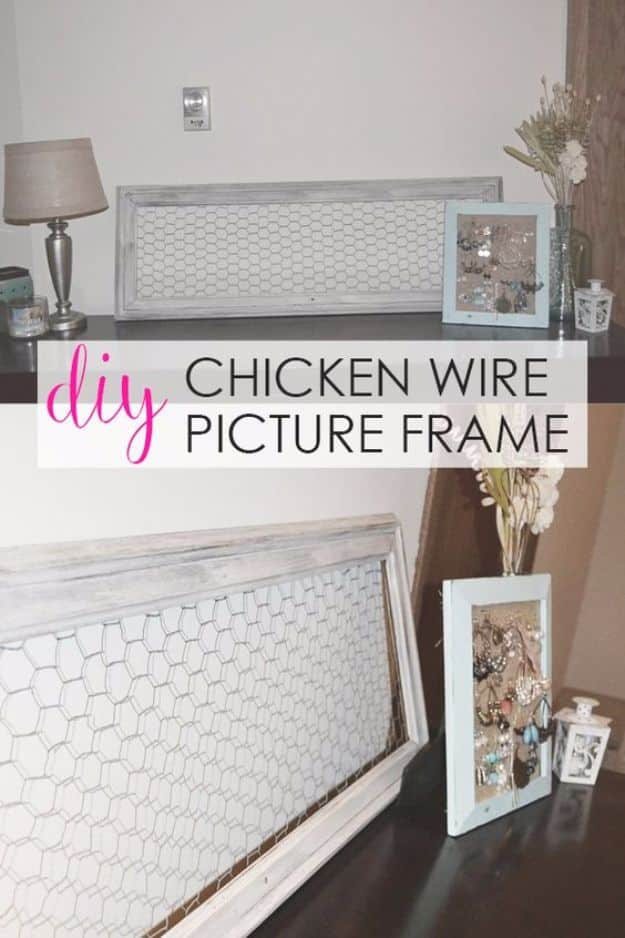
An old wood window from the thrift store becomes a chicken wire frame for clipping cards and photos. Remove the glass and lightly sand, then brush on gray chalk paint in light, long strokes, two coats. Sand the edges and corners for a worn look, dust it off and rub dark antique wax into the spots that would naturally get wear. Spray the chicken wire slate blue and staple it to the back, which goes easier with two people. Plan on about five hours including drying time.
Get the full tutorial at North Country Nest.
39. DIY Family Photo Display

Old windows stashed in the garage become an instant brag board for family photos. Stain the window frames, no sanding needed, and hang them with Command hooks. The photos go behind the glass using clear photo corners applied backwards, so the sticky side grabs the glass and each print sits right in a pane. Wooden letters down the middle spell out a word and tie the display together. Hung vertically on a big wall, the chippy frames do all the decorating.
Get the full tutorial at cottage instincts.
40. DIY Feather Pendant

White feather trim glued around a paper lantern makes a light, airy pendant at a fraction of a designer price. Use a rice paper lantern rated for a lightbulb, about eight feather trims and a hot glue gun. Start at the bottom so the feathers hang about an inch past the opening, turned to curve upward, and glue the trim all the way around. Space rows about 2 inches apart on the bottom half and 1 1/2 inches on the top. Wiring a new pendant kit is a job for an electrician.
Get the full tutorial at A Beautiful Mess.
41. Be Grateful Pallet Art

For less than $10, wood shims become a large pallet style sign that reads Be Grateful, with no leaves or orange so it can stay up all year. Build the frame from cheap shims, brush on pre stain wood conditioner and stain it a deep walnut. Let it dry overnight, then cut the words from contact paper on a cutting machine, piecing a large design together since the mat is only 12 inches wide. Press the stencil down hard, pounce on silver metallic craft paint and peel it while wet. Sand the slat edges to finish.
Get the full tutorial at Infarrantly Creative.