Cheap DIY wedding gifts are the secret weapon when the registry is picked over and the budget is tight. A handmade gift carries their names, their photo or their favorite flowers, and that’s the kind of thing that stays out on the counter long after the toaster gets shoved in a cabinet. Most of these take a few dollars of supplies (a paint pen, a slate tile, a jar, a paper napkin) and one afternoon. You’ll find a photo resin coaster that can hold their engagement picture, an air-dry clay ring holder for the nightstand, mason jar fairy lights with pressed flowers and a dollar bill heart that makes cash in a card feel like an actual present. There’s even a sofa caddy so the remotes stop disappearing (every marriage needs one). Still shopping? Browse these DIY wedding gift ideas too. Perfect for bridal showers, last minute weddings, bridesmaids and anyone who wants wedding gifts that feel personal for less.
1. Dip Dyed Frosted Tumblers

Plain stemless glasses get a frosty sea glass bottom, and they look straight out of a boutique. Painter’s tape marks the angled line, a foam pouncer dabs on translucent frost glass paint with an up and down motion, and a second coat goes on two hours later. Let it dry overnight, then peel the tape for that crisp edge (the most satisfying part, honestly). Plan ahead, because the paint air cures for 21 days or bakes in the oven. The original Martha Stewart frost paint is discontinued, so check the post’s comments for alternatives.
Get the full tutorial at Vicky Barone.
2. Etched Monogram Pitcher

A clearance rack glass pitcher plus a monogram equals a gift that looks custom ordered. The trick is the stencil: you need the outside of a vinyl monogram, not the letters themselves. Cut one with a digital cutter or order one, which usually runs $1 to $2. Start with squeaky clean glass, brush on a thick, even coat of etching cream, and tape off anything you don’t want frosted. Leave it on longer than the package suggests (the tutorial doubles it), then rinse in cold water. Fill it with lemonade at the reception and watch it disappear.
Get the full tutorial at As The Bunny Hops.
3. Sofa Remote Caddy

Every couple has had the where’s the remote argument at least once. This sofa caddy settles it for good. The fabric drapes over the arm of a chair or couch and tucks under the cushion, with a strip of gripper fabric (the stuff on the bottom of footie pajamas) to keep it from sliding. Pleated pockets with side gussets expand to hold remotes, phones and glasses without anything toppling out. Decorator weight fabric gives it heft, and the finished caddy is about 10 by 44 inches, with notes for sizing it to any chair.
Get the full tutorial at Sew4Home.
4. DIY Chalkboard Cheese Stone

This might be the easiest gift in the whole list, and it still looks fancy. A slate tile gets two coats of chalkboard paint with a foam brush (put newspaper down first) and that’s it. The fun is labeling the cheese right on the board in chalk, so guests know which one is brie before they commit. Writing on the bumpy slate takes a little practice, so keep a damp paper towel nearby, since chalk wipes right off. Wrap it with a block of good cheese and a box of crackers for a gift they’ll use at their first party.
Get the full tutorial at Frankie Hearts Fashion.
5. Leather Painted Coasters

Leather scraps and cork turn into a coaster set that looks pricey (one bag of leather scraps was $6 a pound). Cut four circles of leather and four of cork using a big glass as a stencil, glue them together and dry them under weight so the edges don’t curl. Then paint geometric patterns with air curable fabric paint and a gold glass enamel. Skip regular craft paint, since it never stops being sensitive to water. A coat of matte Mod Podge finishes them. Give the paint time to cure (up to 21 days for the enamel) before they’re gift ready.
Get the full tutorial at Confessions of a Secret Crafter.
6. Wood Slice Serving Board

No chainsaw required, promise. This rustic serving board starts with a basswood round from the craft store, takes less than an hour and costs under $10. Scrub the bark with a stiff brush to knock off anything loose, sand both sides with 150 then 220 grit, and flood it with mineral oil or butcher block conditioner. The end grain drinks it up, so add a second coat after 30 minutes and more after it soaks overnight. One honest note: it’s a serving board, not a cutting board, so it’s for cheese and salami, not a whole chicken.
Get the full tutorial at Man Made DIY.
7. Sharpie Designed Set of Mugs

Gold polka dots on white mugs, and they’re dishwasher safe. The secret is an oil based Sharpie paint pen, not a regular Sharpie, which fades and washes off. Draw your design on an oven safe mug (thrift store mugs work great), put it in a cold oven, turn the oven to 350 degrees and bake for 30 minutes. Then turn the oven off and leave the mugs inside until they cool completely. The paint pen runs around $2, so a matching set for the couple costs next to nothing. Add a bag of good coffee and you’re done.
Get the full tutorial at A Bubbly Life.
8. DIY Etched Casserole Dish

Every potluck dish goes home with the wrong person eventually, unless their name is etched right into the glass. This tutorial uses a glass etching starter kit with stencil vinyl, a cutting machine and etching cream to put a family name and a fork and spoon on an 8 by 8 casserole dish. Fonts and cut files are part of the fun. One tip that saves a ruined dish: if you etch the bottom, flip the design horizontally before cutting so it reads correctly through the glass. It’s a gift for the newlyweds that shows up at every holiday.
Get the full tutorial at The Thinking Closet.
9. DIY Wood Stained Clock

Half natural birch, half warm stain and gold hands, and it looks like a design shop clock. A plywood circle (a hardware store can cut it, or buy a round) gets painter’s tape down the middle, and one side gets stained once or twice. Drill a hole in the center for the clock kit, stain the wood die-cut numbers to contrast, attach them with Mod Podge and wax the face with a soft cloth. A cotton swab cleans wax from around the numbers. It works for a couple who just moved in together and has a bare wall.
Get the full tutorial at Kristina J. DIY.
10. Easy Air-Dry Clay Ring Holder
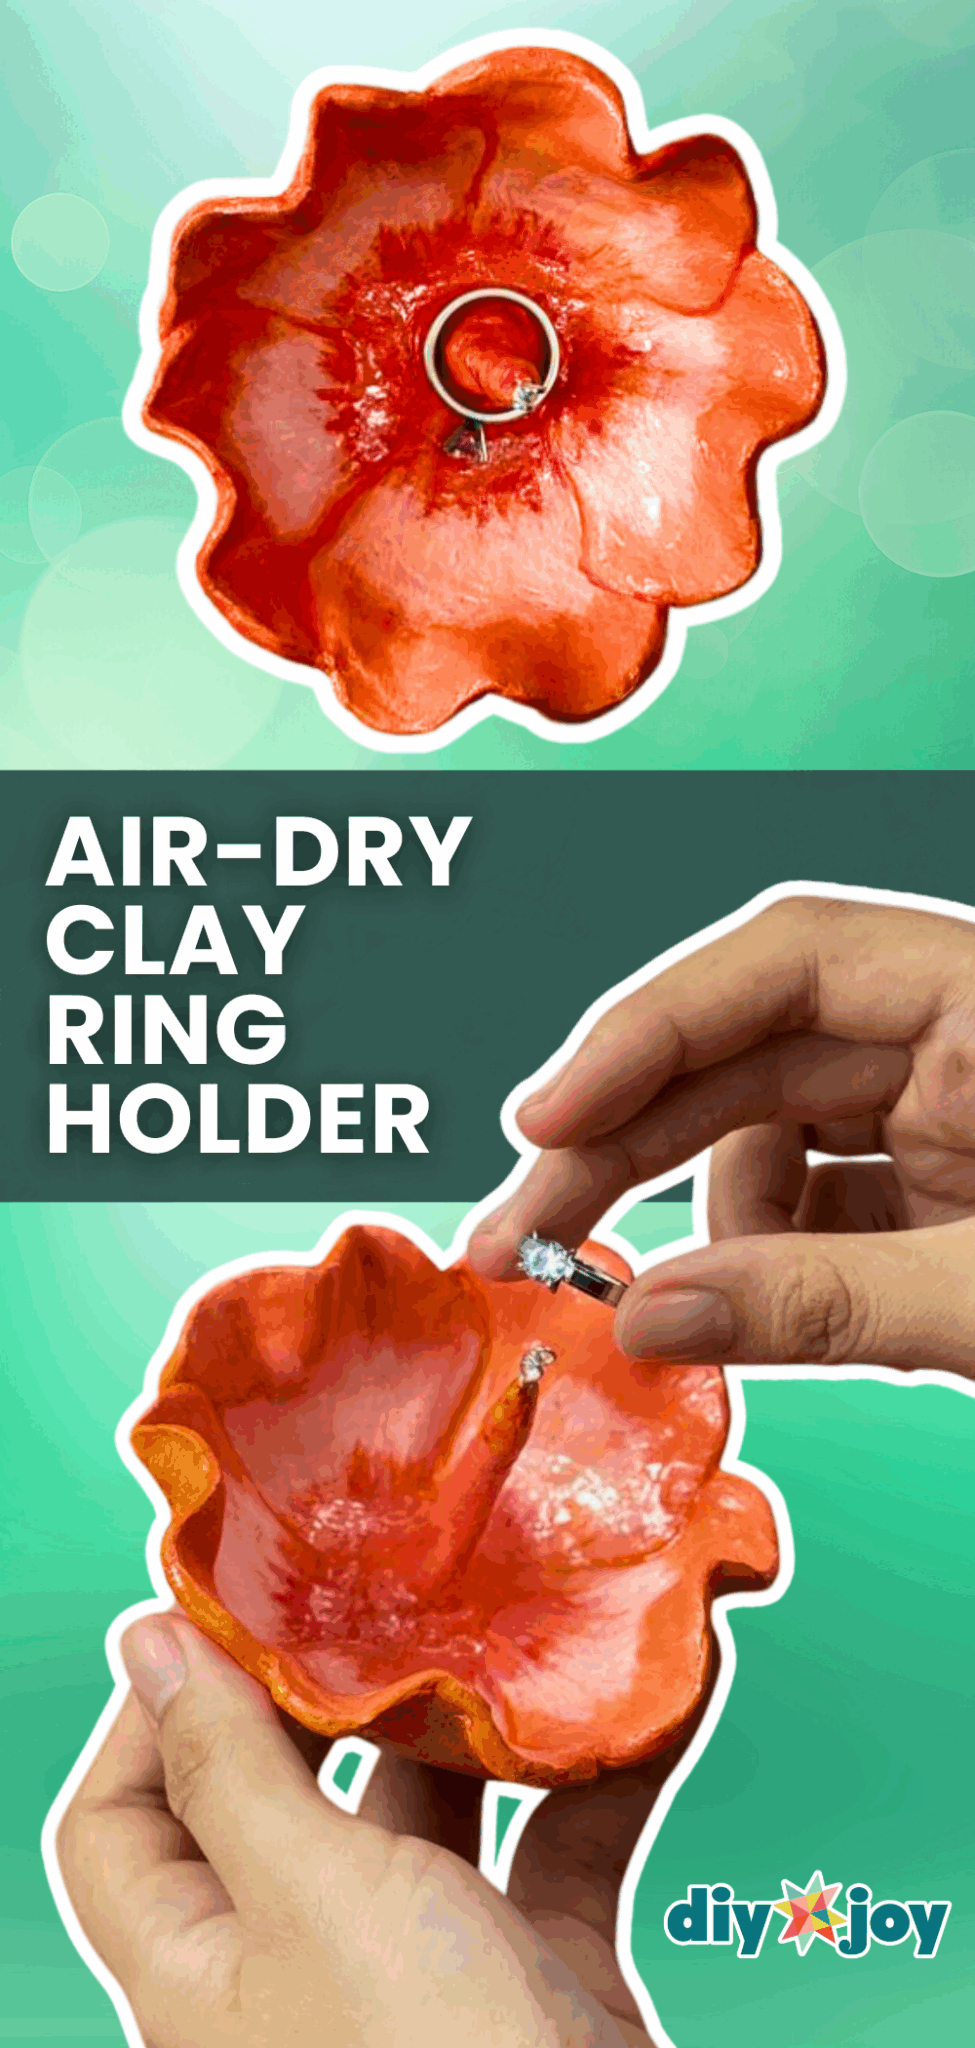
Wedding rings need somewhere to land at night, and this clay flower is a much prettier spot than the edge of the sink. Roll air-dry clay flat, cut it with a template, slit the petals and overlap them, then let it set in a bowl on a towel so it holds a cup shape. A rolled clay stamen in the center catches the ring. Primer, acrylic paint and a coat of UV resin make it look almost like porcelain. No kiln and no baking, so it’s a great first clay project. Paint it in the wedding colors and it’s a keepsake.
Get the full tutorial at DIY JOY.
11. DIY Air-Dry Clay Decoupage Jewelry Dish
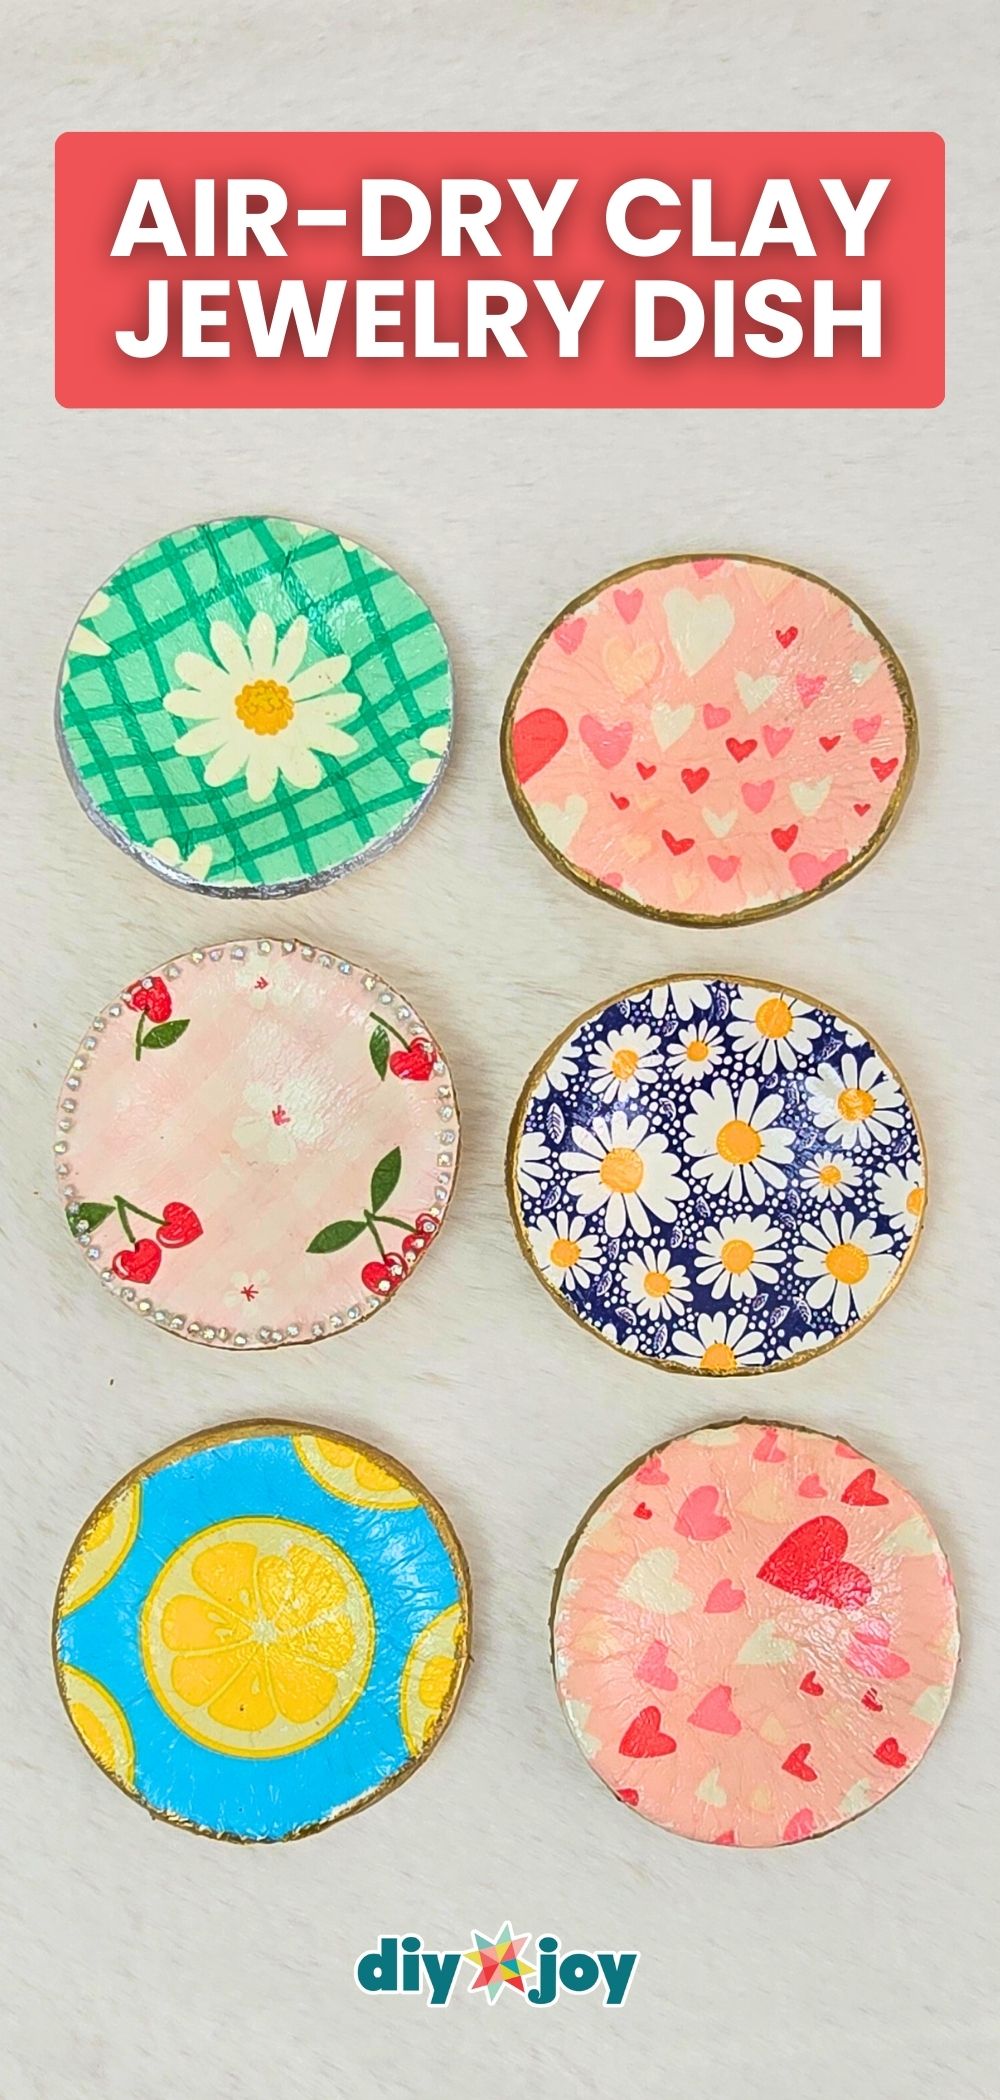
Paper napkins and air-dry clay team up for little jewelry dishes that look like they came from a gift shop. Roll the clay flat, peel the backing layer off a printed napkin and lay it on top, then cut circles with a cookie cutter or a jar lid. A layer of Mod Podge goes over the top before each one gets pressed into a muffin pan to dry overnight in a bowl shape. Gold paint on the edges and a gloss varnish finish them. Pick a napkin in daisies, cherries or hearts and make a set of matching ones for the bridesmaids too.
Get the full tutorial at DIY JOY.
12. Easy DIY Photo Resin Coaster
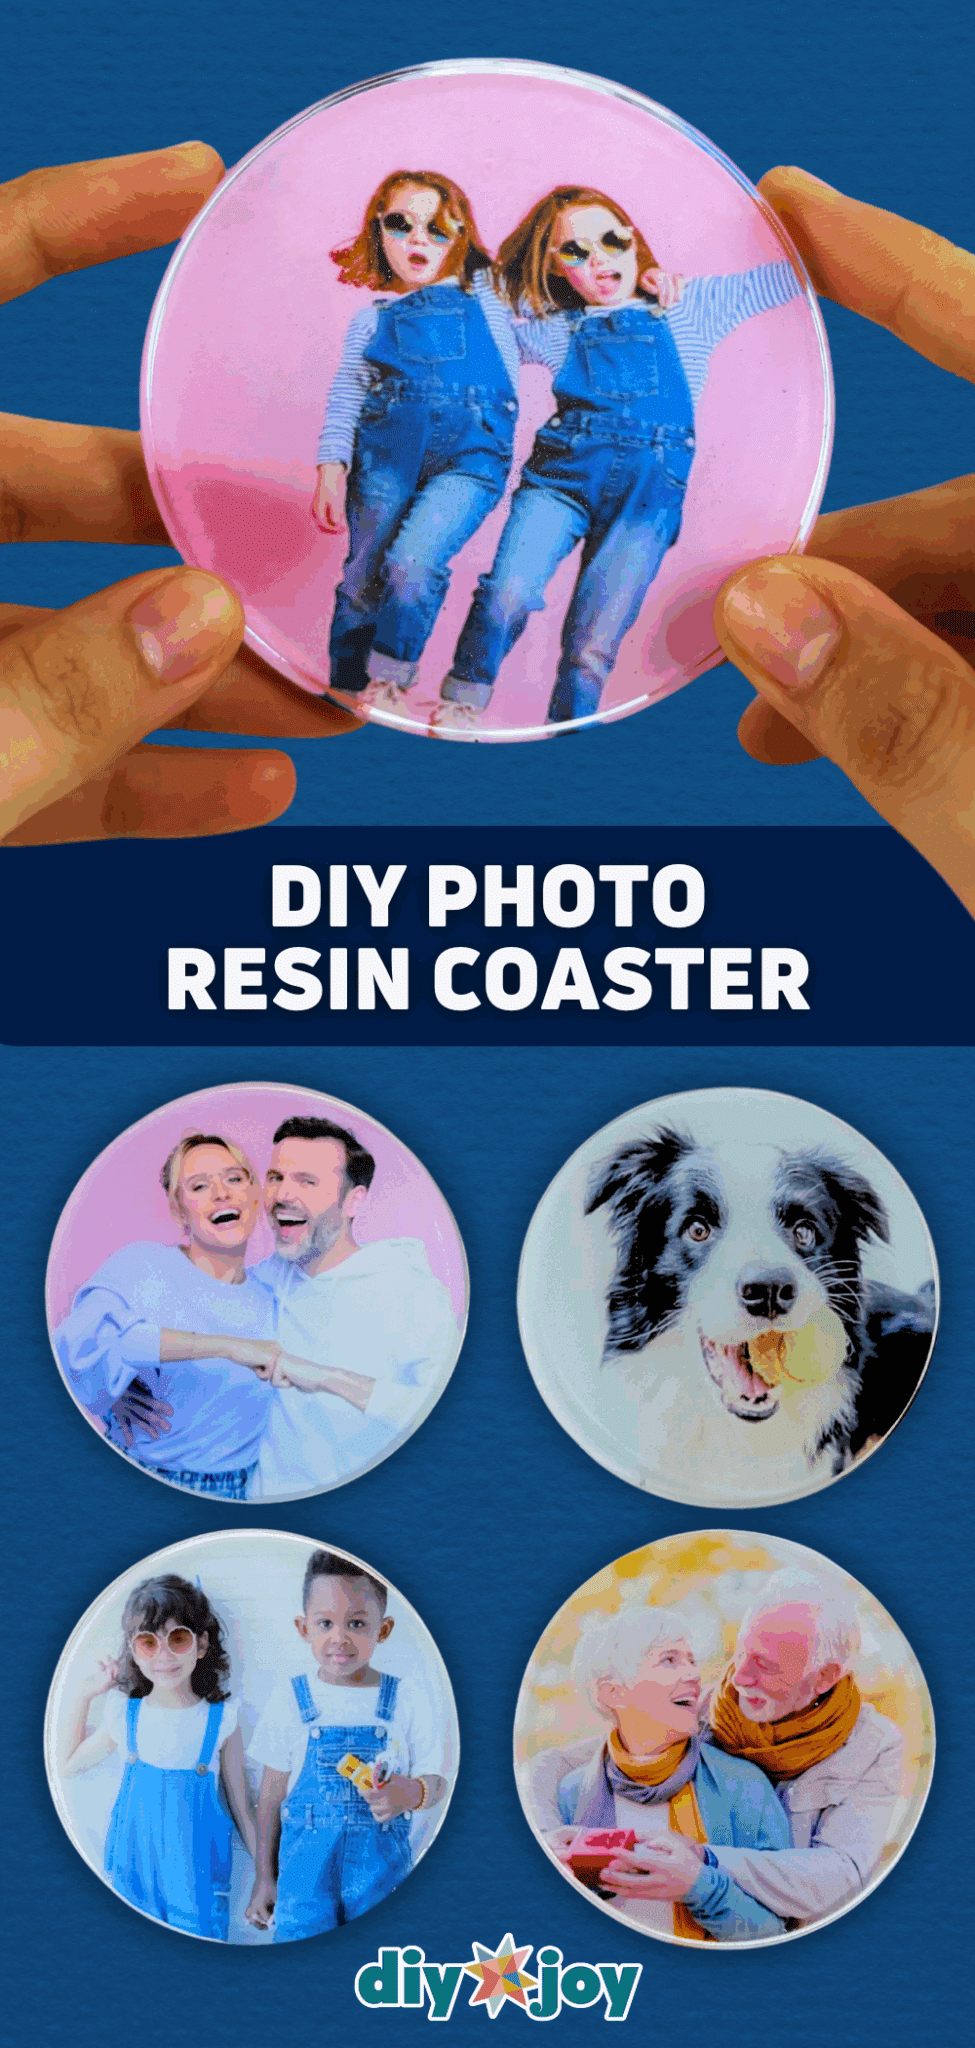
Their engagement photo deserves better than living on a phone. Here it goes into a glossy resin coaster. Mix epoxy resin and hardener at a 3 to 1 ratio (about 36 grams to 12 grams) and stir slowly for 5 to 10 minutes so you don’t whip in bubbles. Pour a thin layer into a silicone mold, trace and cut the photo to fit using a round object, lay it in and pour the rest on top. After 24 hours it pops right out. No resin experience needed, and a set of four with different photos is a gift they won’t find anywhere else.
Get the full tutorial at DIY JOY.
13. Resin Coaster with Dried Flowers
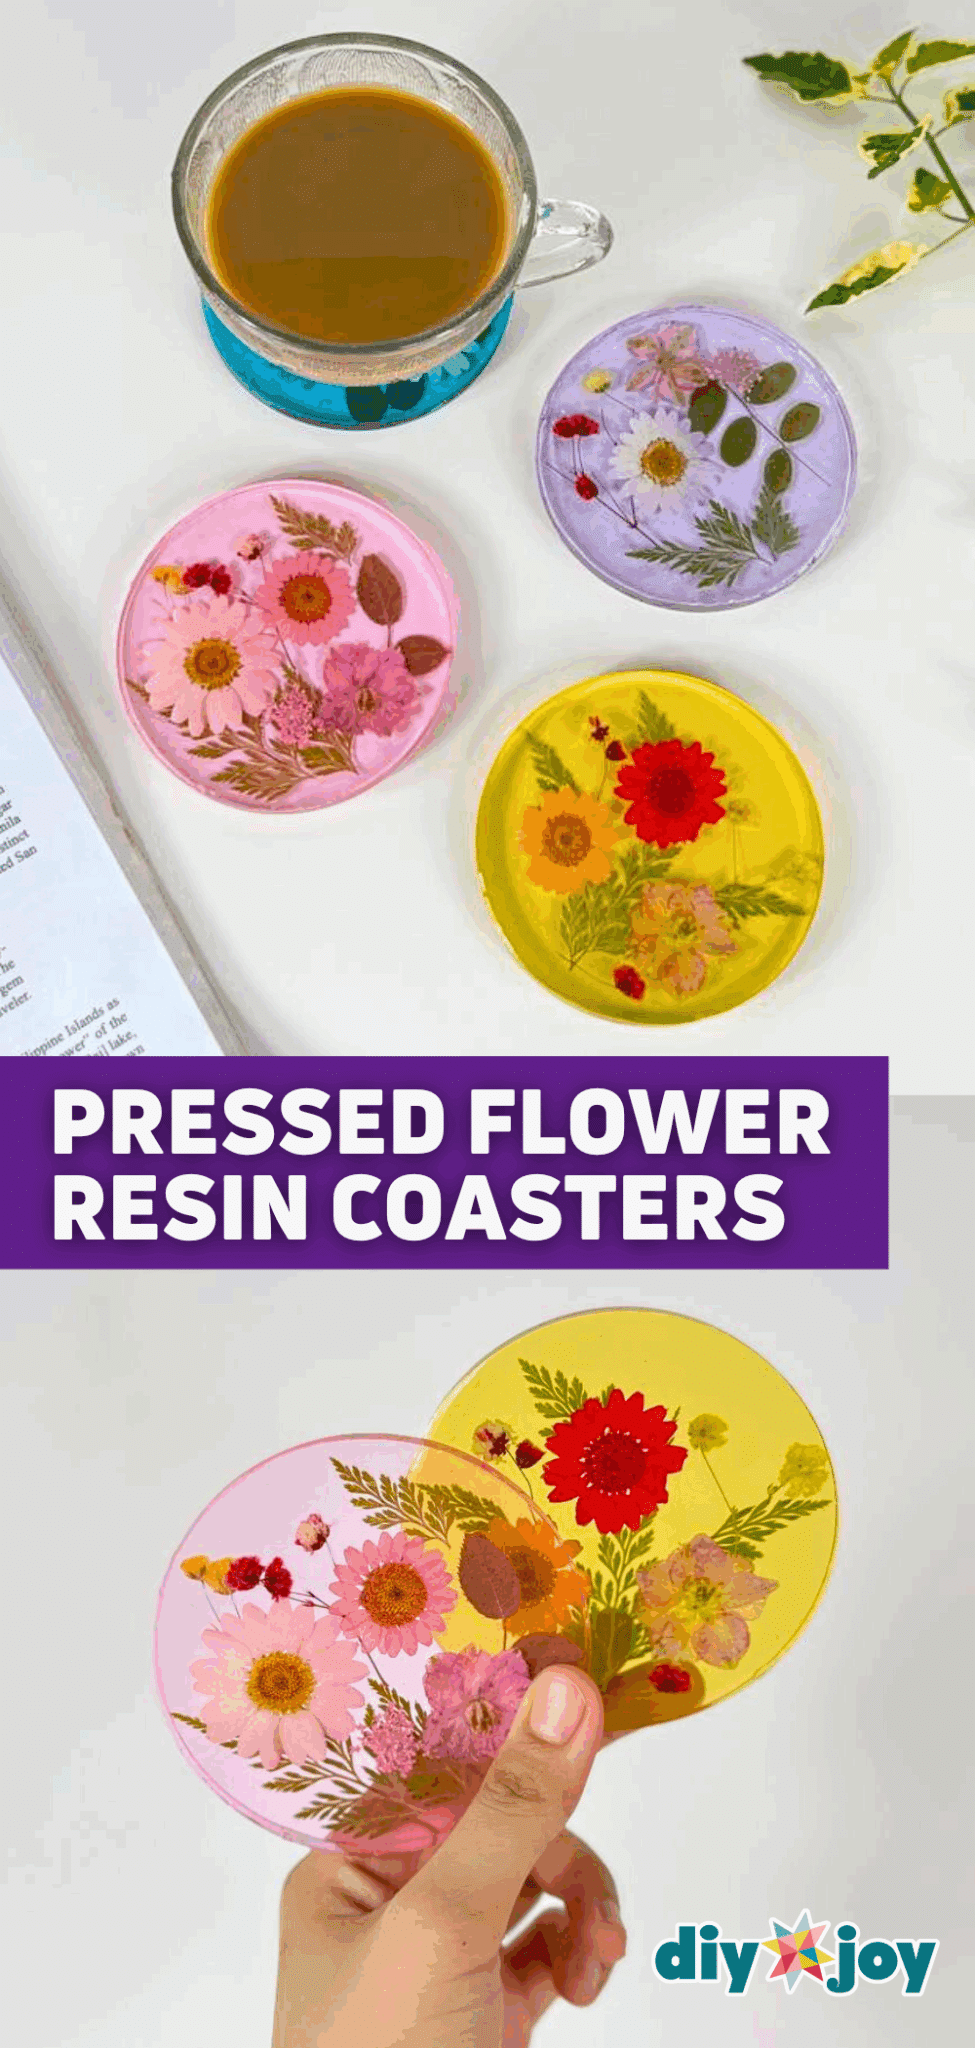
Pressed flowers floating in tinted resin, and they make every cup of coffee look like a magazine shoot. Mix epoxy resin and hardener at about 3 to 1, stir slowly, then add two or three drops of pigment. Pour half into the mold, arrange the dried flowers with tweezers and pour the rest on top (a quick pass with a lighter pops the bubbles). After it sets overnight, a UV resin top coat makes it extra clear and shiny. Here’s the sweet part: if you can get a few blooms from the bridal bouquet, these become a keepsake.
Get the full tutorial at DIY JOY.
14. Mason Jar Fairy Lights With Pressed Flowers
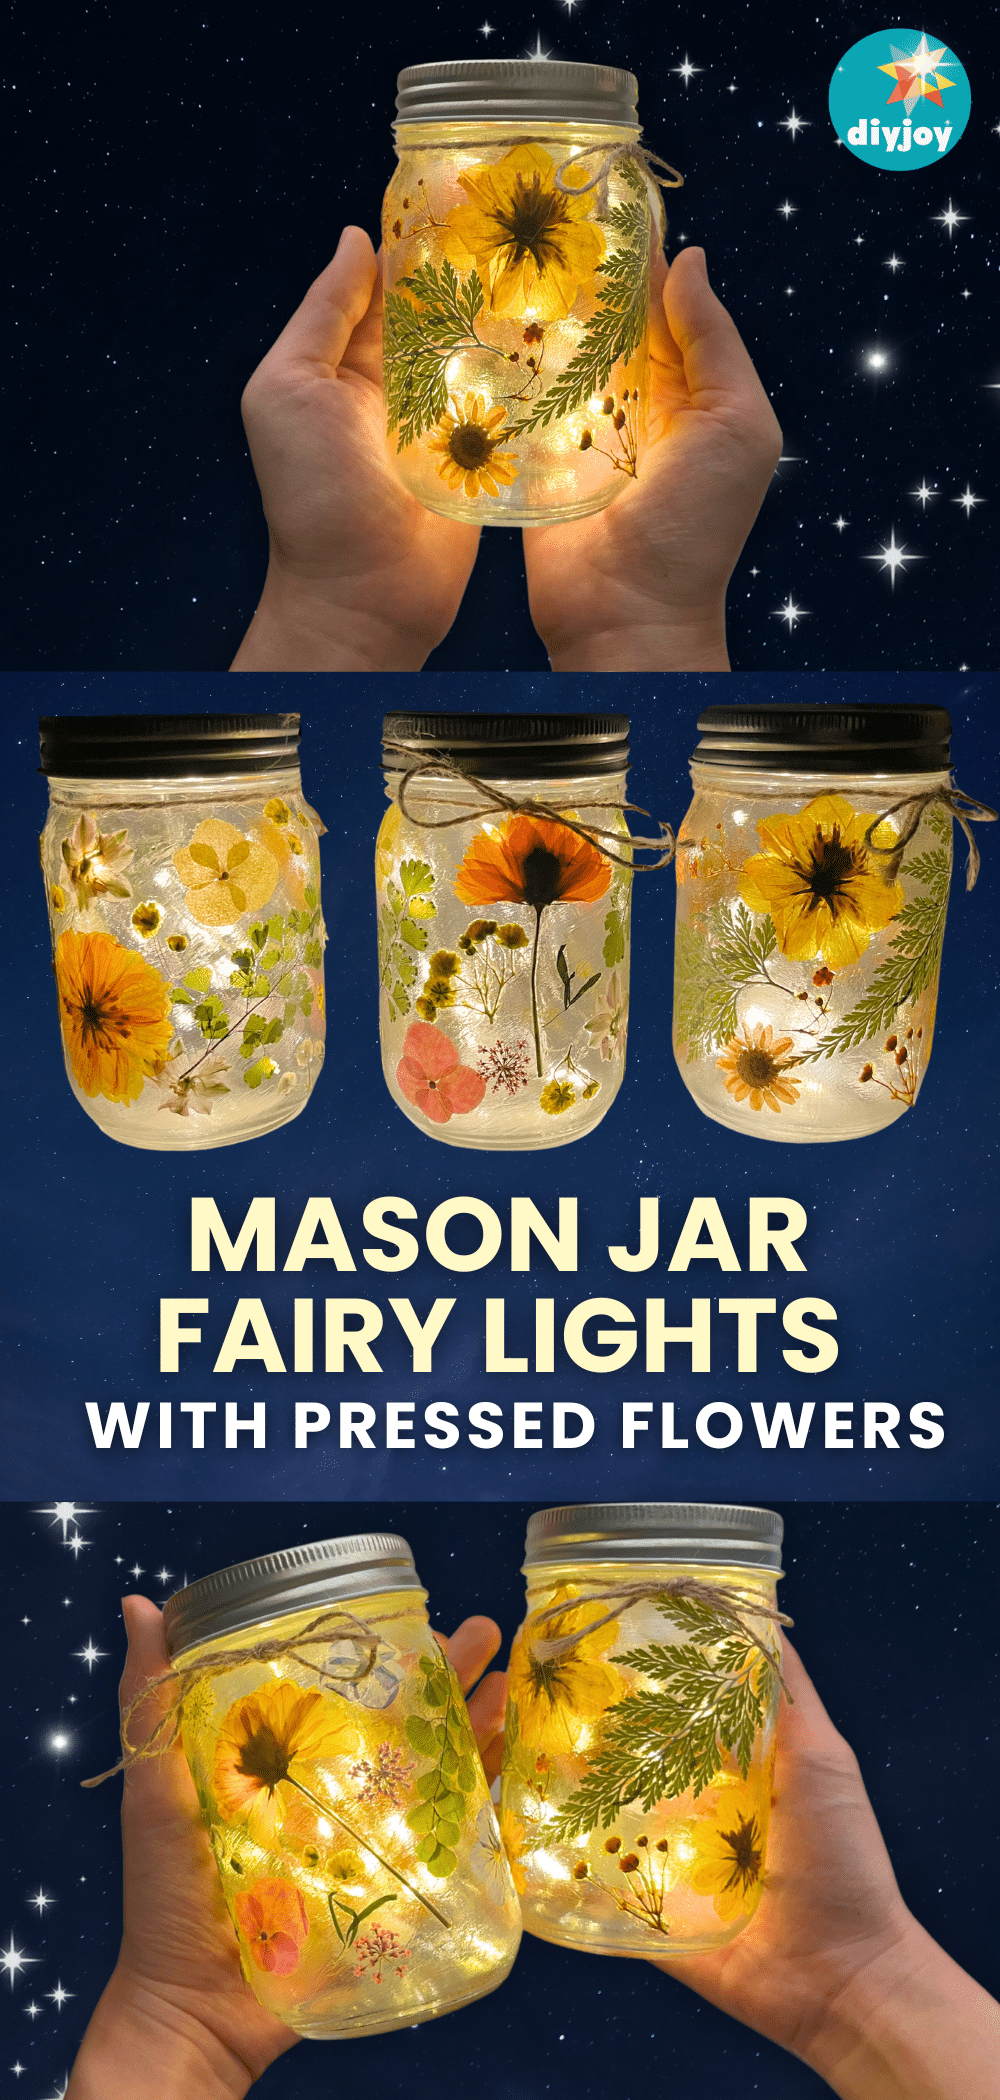
A plain mason jar, a handful of pressed flowers and a string of fairy lights turns into a glowing little lantern that feels straight out of a storybook. Brush a thin layer of Mod Podge on the glass, press a flower down and brush more over the top, working in sections so the glue doesn’t dry too fast. A second coat seals everything. Drop the fairy lights inside, screw on the lid and tie on a jute twine bow. Thin, delicate flowers let the most light through. Make a pair for the couple’s nightstands and they’ll be cozy every night.
Get the full tutorial at DIY JOY.
15. DIY Customized Mug Using Sharpie
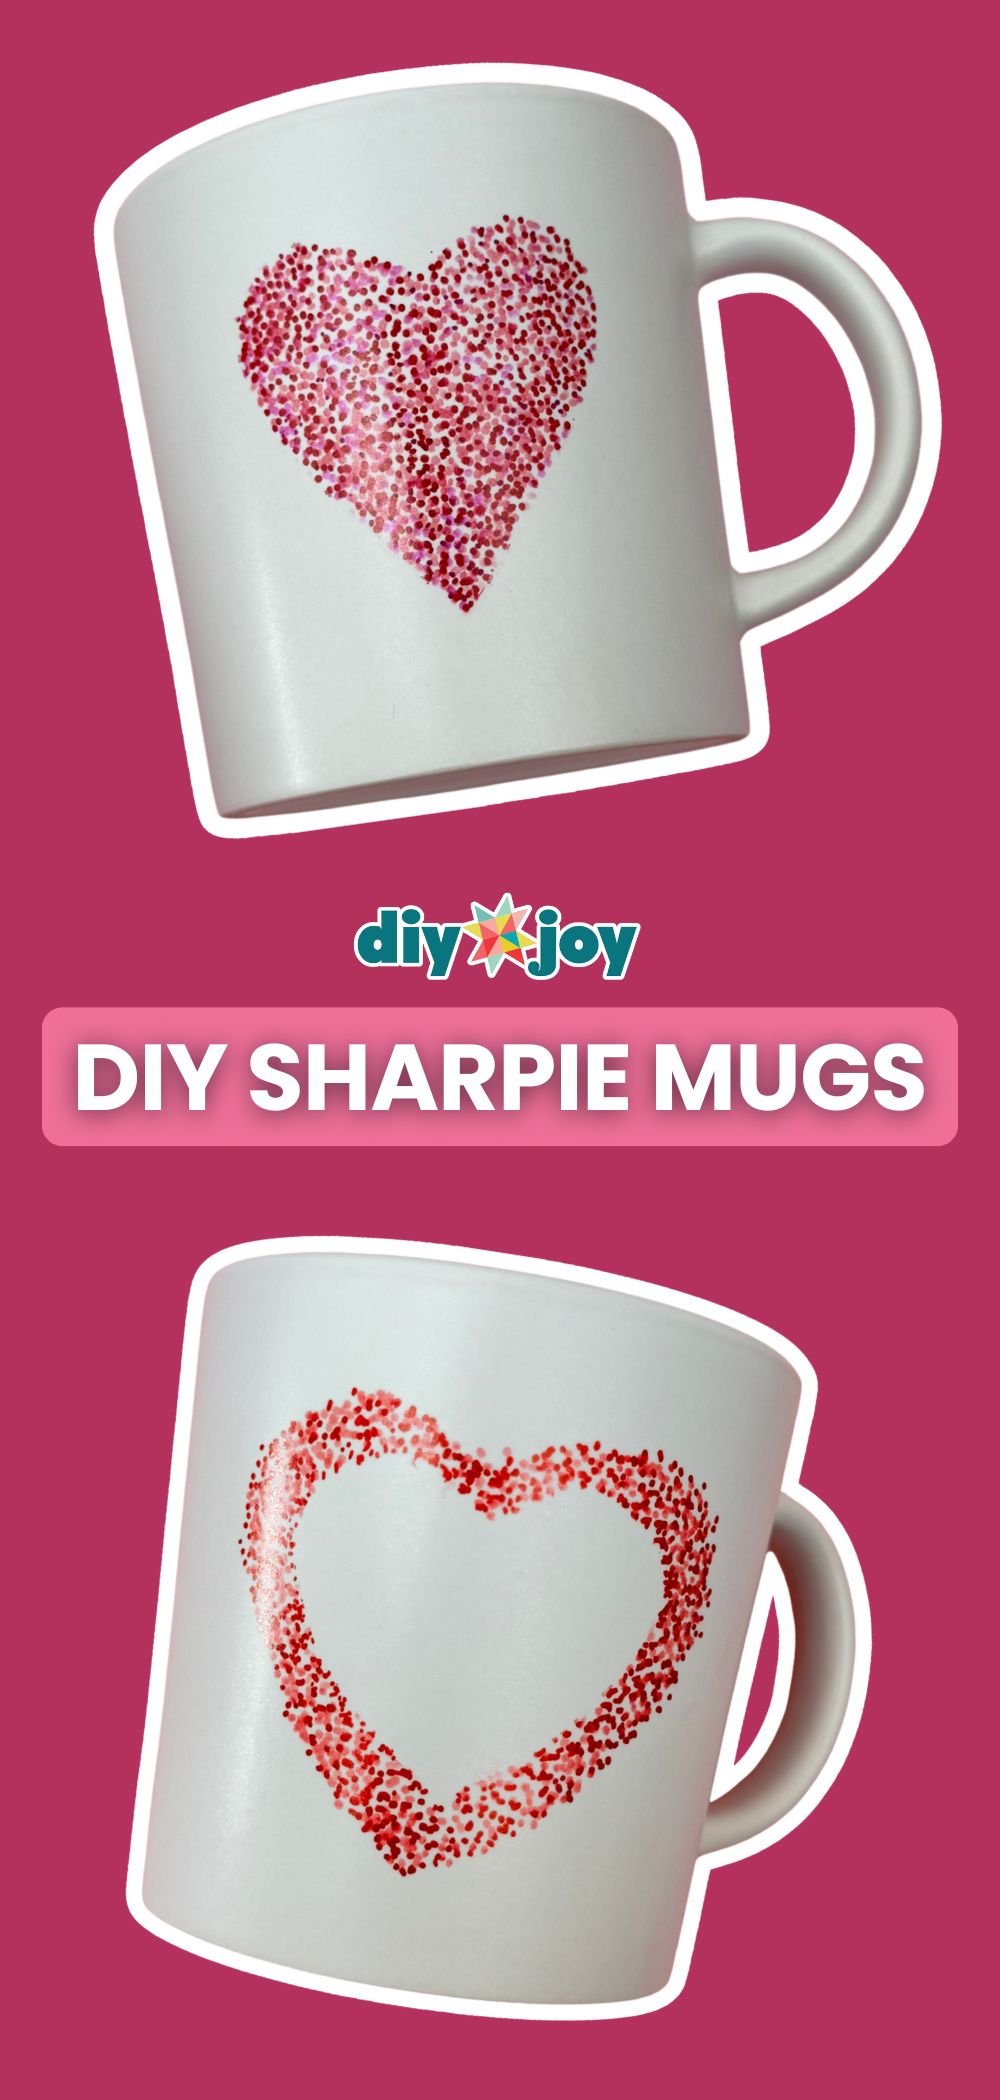
A heart made of hundreds of tiny dots, and you don’t need to draw a single straight line. Cut a paper heart, coat the back with a Zig glue pen and wait until the glue turns from blue to white so it sticks like a sticky note. Set it on the mug and dot around it in red and pink Sharpie, then peel the paper off. That’s the whole project, done in one sitting. For a mug that survives the dishwasher, use an oil based Sharpie paint marker, let it dry 24 hours and bake it upside down starting in a cold oven.
Get the full tutorial at DIY JOY.
16. How to Customize a Mug Using Sharpie
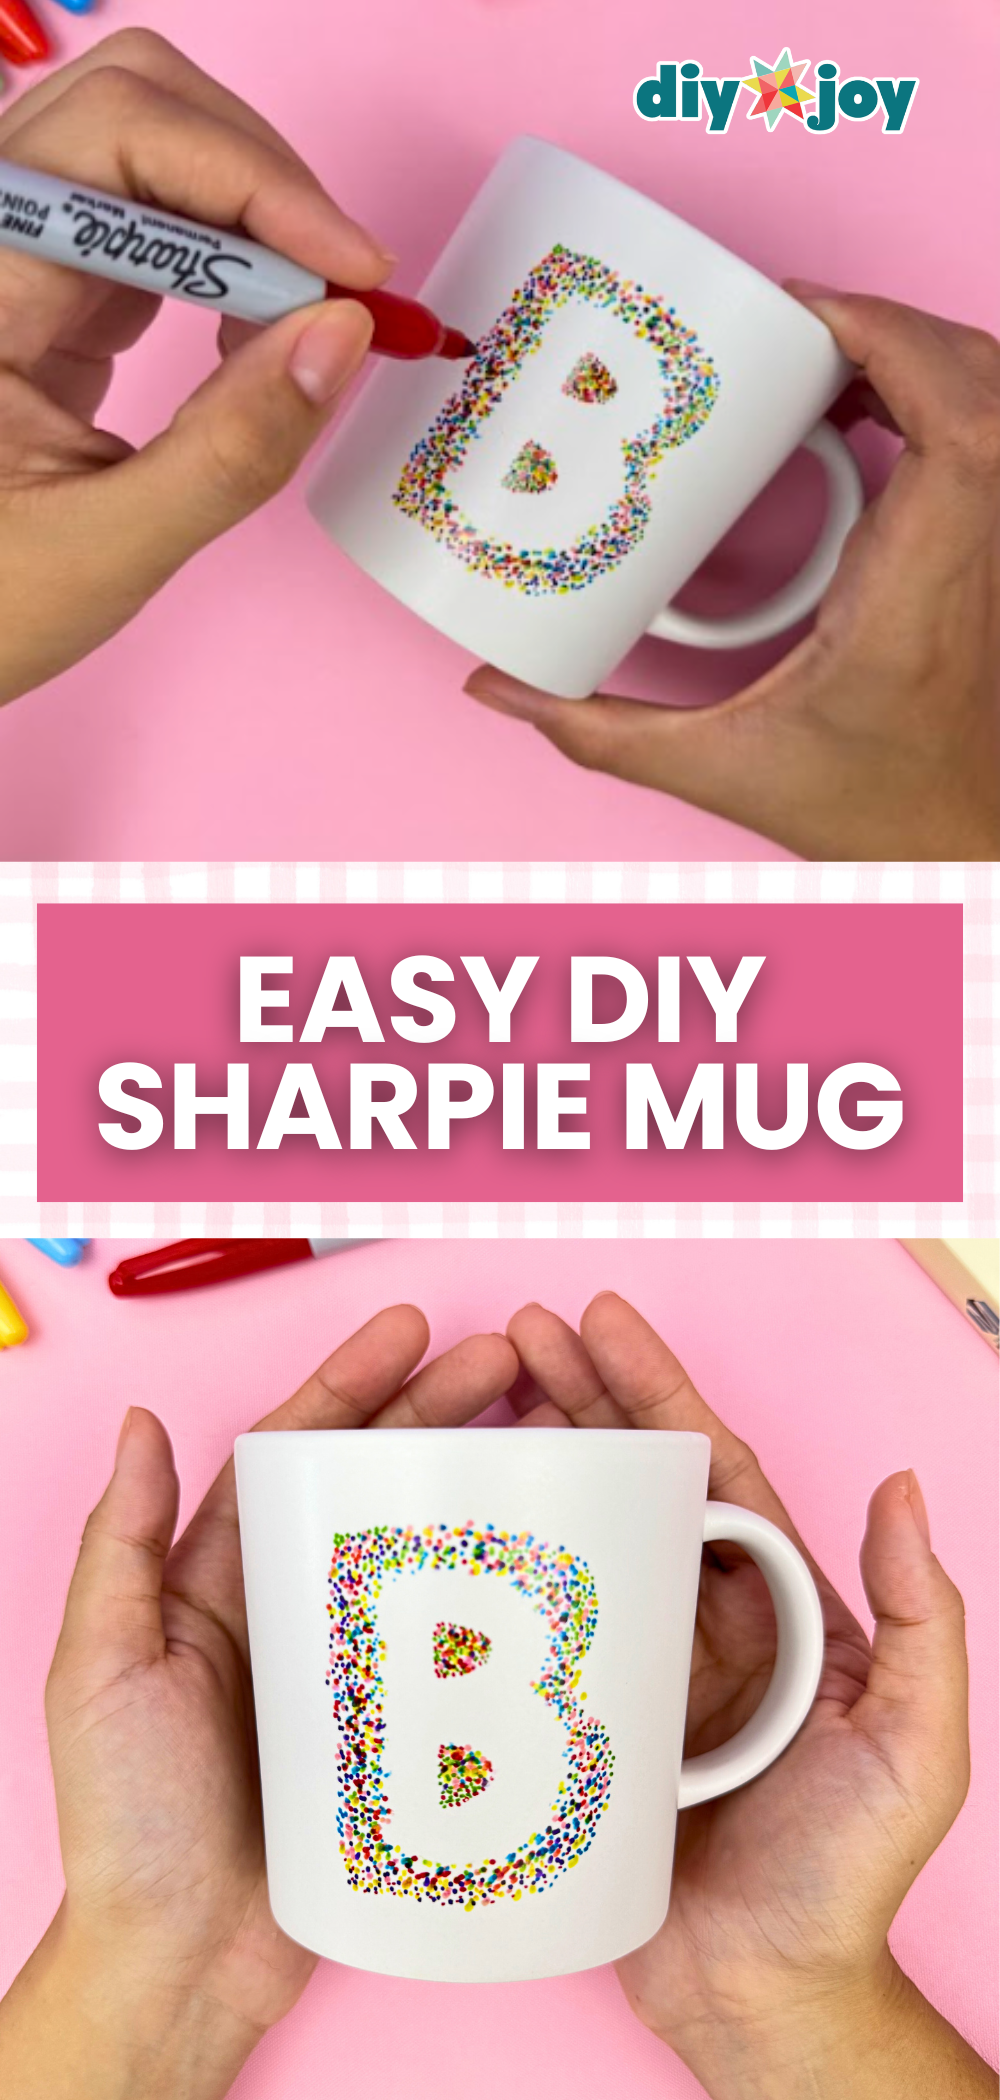
Monogram mugs without a cutting machine? Yes, with paper and a pile of colorful Sharpies. Write the letter you want on paper, cut it out, and coat the back with a Zig glue pen, waiting until the glue dries white so it peels off clean later. Set the letter in the center of the mug and dot all around it in different colors, then peel off the paper and the letter pops out crisp. Practice your letter on paper first, and go slow. Make one for each of them with their first initials, or one with the new last name.
Get the full tutorial at DIY JOY.
17. DIY Decoupage Vase Using Napkin Paper
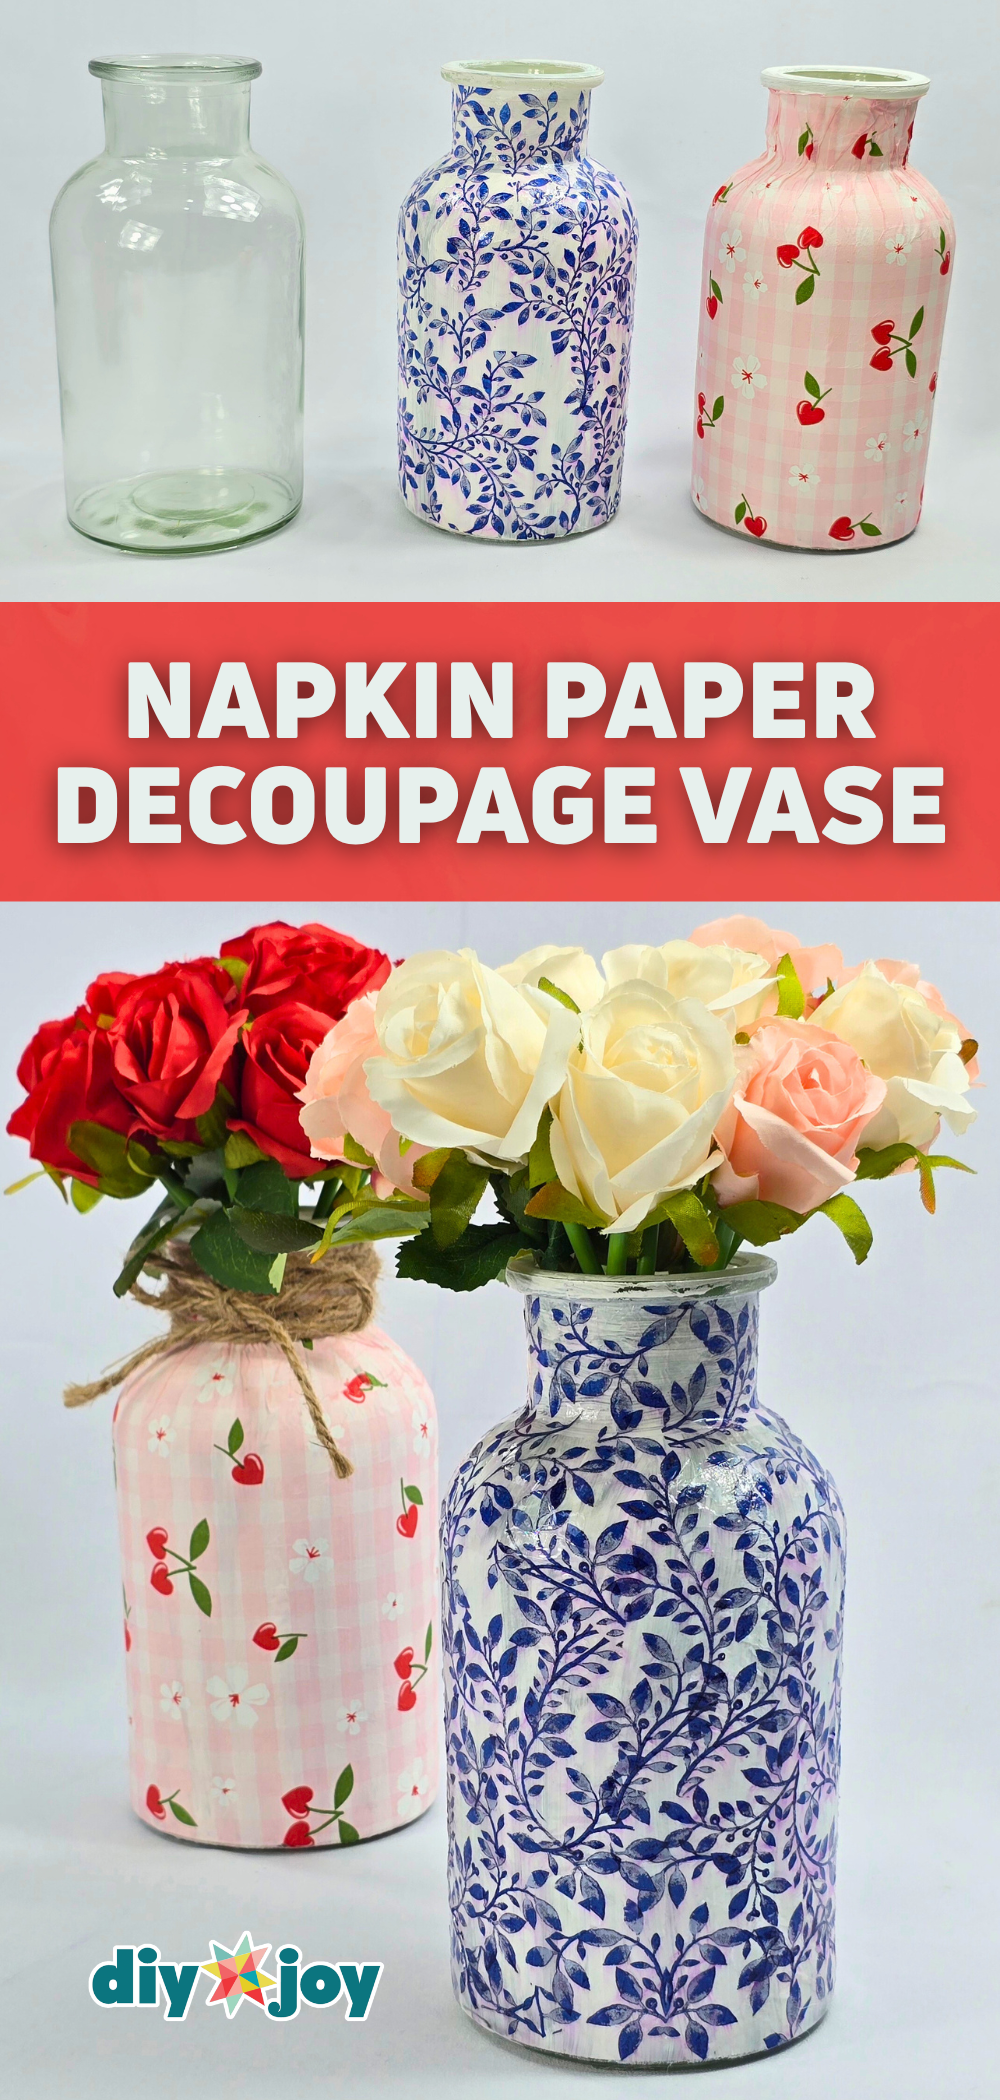
That empty glass jar in the cabinet is about to become a vase that looks like expensive chinoiserie. Paint the outside of the jar white, cut the motifs from a printed paper napkin and peel off the backing layer. Mod Podge (or a white glue and water mix) holds the pattern on, brushed from the center out so the thin paper doesn’t wrinkle or tear. Little imperfections just add charm. Seal it with UV resin or even clear nail polish if you want extra shine. Fill it with roses and it’s a gift and a centerpiece in one.
Get the full tutorial at DIY JOY.
18. How to Make a Jute Rope Tray

Boho jute trays cost a small fortune at home stores, but jute rope costs a couple of dollars and Mod Podge does the rest. Cover a tray with cling wrap, brush on Mod Podge and coil the rope into a tight spiral, adding glue as you go. Keep the coils snug with no gaps, which makes it sturdier and prettier. Coat the whole thing, press it flat and let it dry, then weight it and pop it off the cling wrap once it holds its shape. Make a matching set of jute coasters with the leftovers and the gift basket is basically done.
Get the full tutorial at DIY JOY.
19. DIY Citrus Print Tea Towel
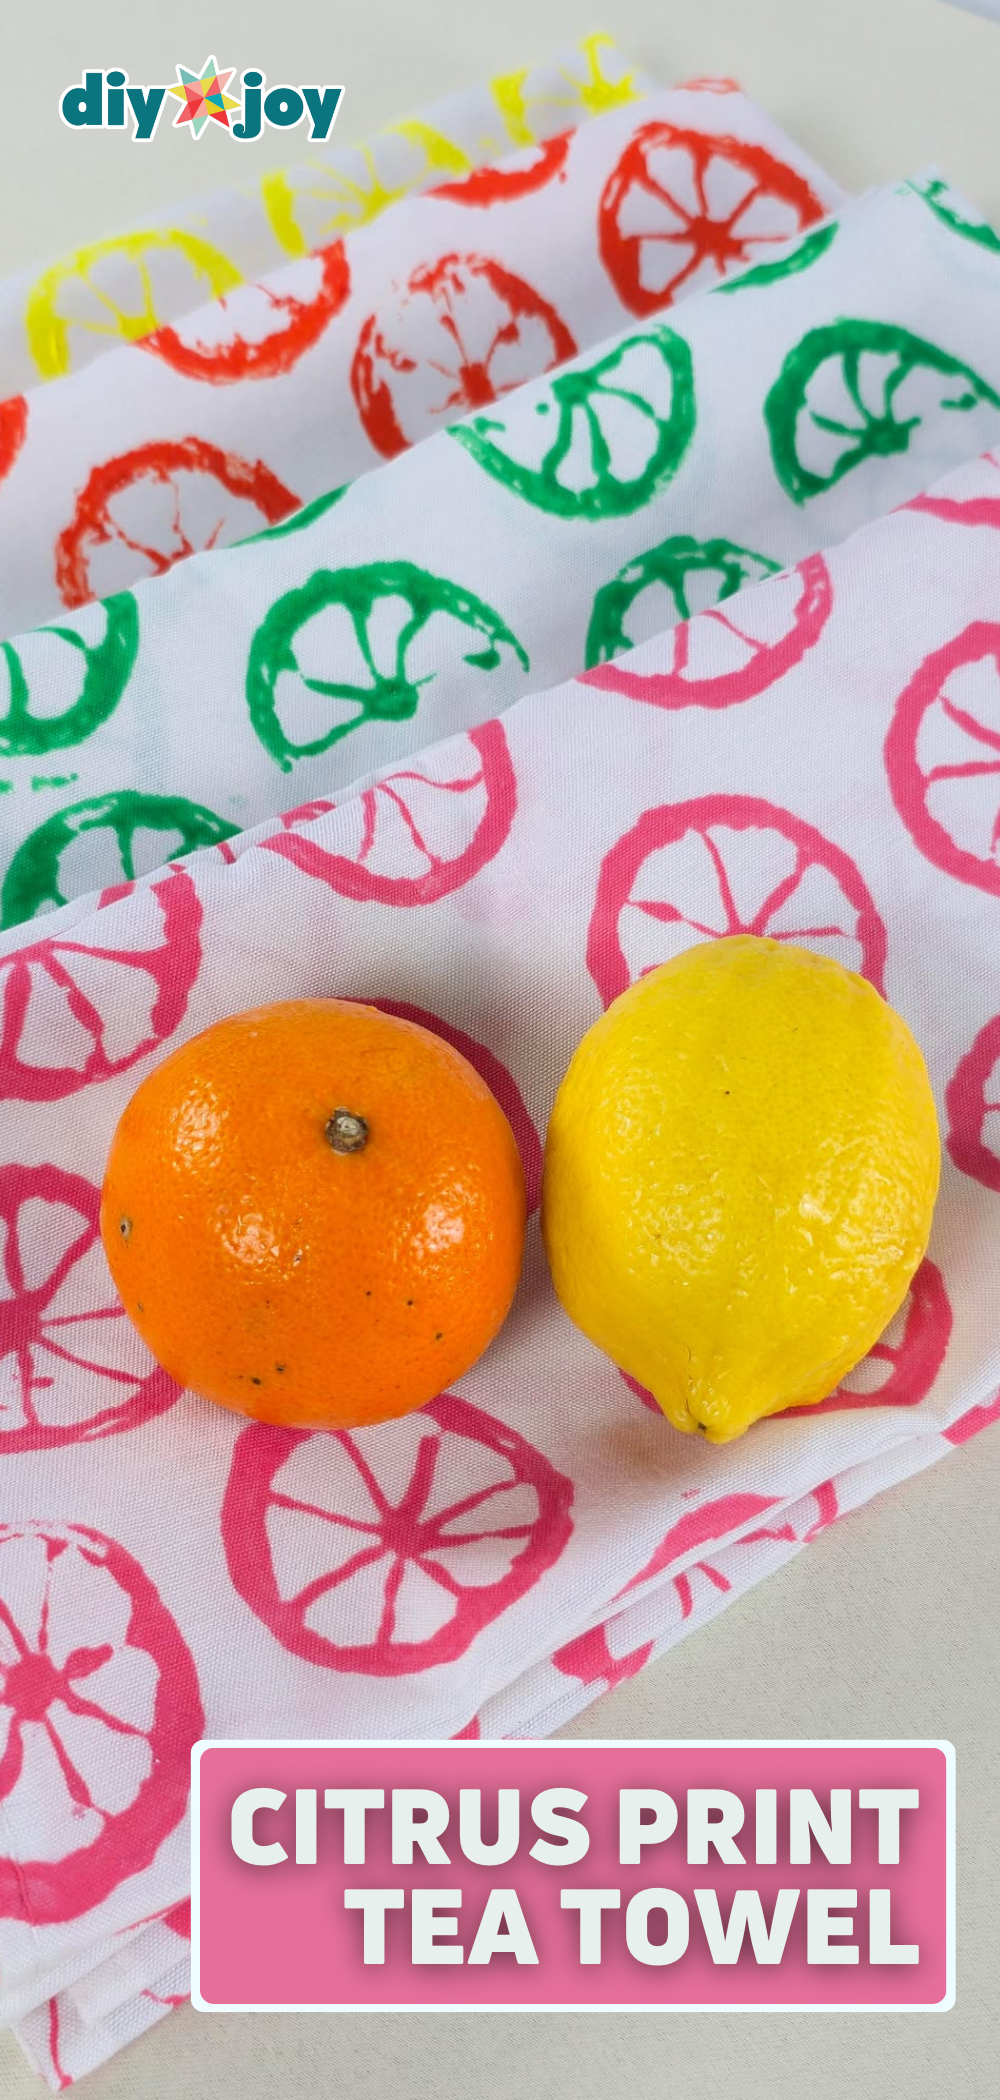
Lemons and oranges make the cutest stamps, and they turn plain tea towels into a set that looks boutique made. Cut the fruit in half, scoop out the pulp without breaking the little membrane walls (those make the pattern) and pat it dry. Mix fabric paint with textile medium, brush it onto the membranes and rind, and stamp. Offset each row so the next one lines up in the gaps. Too much paint makes it bleed, so go light. Stack them with a cute wooden spoon and you’ve got a kitchen gift that costs very little.
Get the full tutorial at DIY JOY.
20. Easy $1 Bill Heart Origami Tutorial

Cash is one of the easiest wedding gifts to give, and also the most boring to hand over. Fold the bills into hearts and suddenly it’s the card everyone wants to open. This dollar bill heart has its own shape, a little different from the classic fold, and it needs no tools or origami experience at all. Slip one into the wedding card, tuck a few into a bouquet or line them up across the top of a gift box. A stack of crisp ones works best, and two styles of hearts together look extra thoughtful (and extra fun to unfold).
Get the full tutorial at DIY JOY.
21. Textured Heart Canvas Art Painting
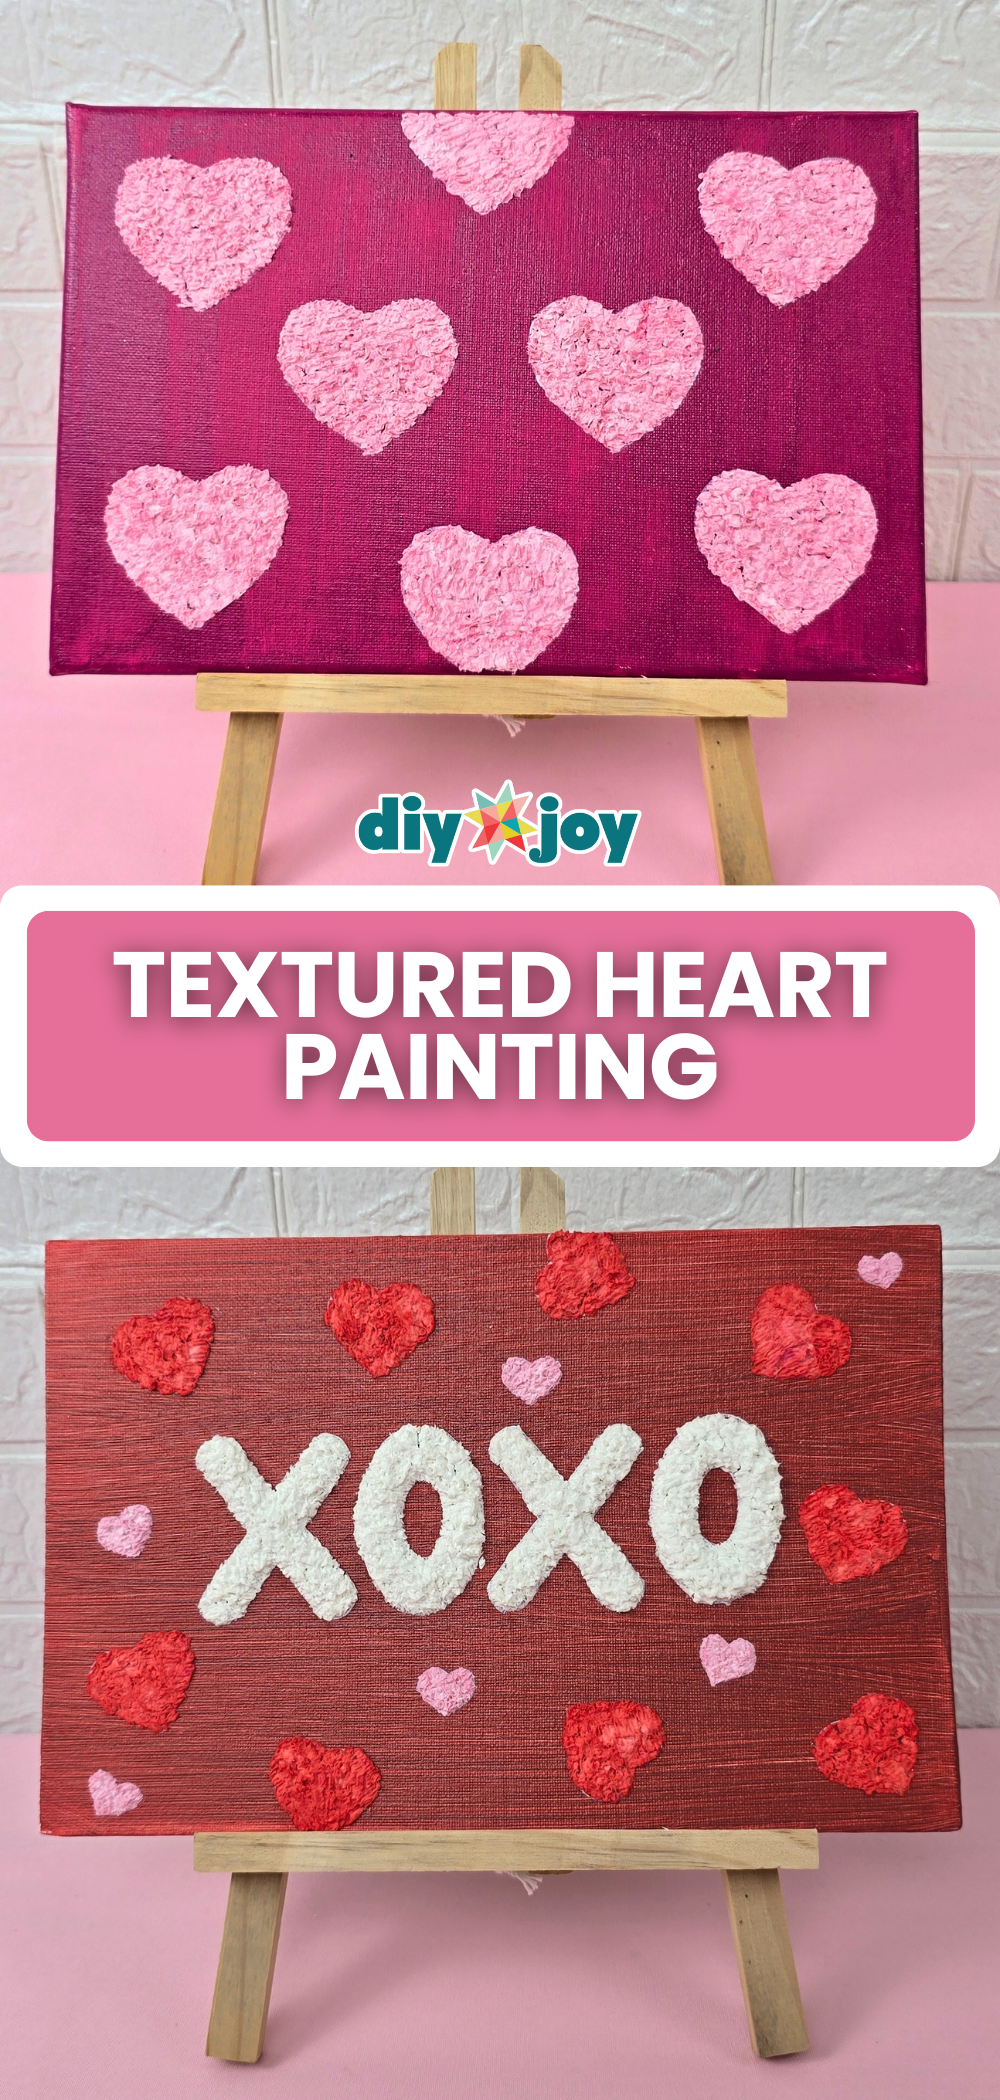
This one looks like real embossed art, and the secret is tissue paper. Paint a canvas, let it dry and lightly sketch hearts or letters. Then soak torn tissue in water, squeeze it out, tear it smaller and mix in glue and paint to make a paper mache paste. Fill each shape and let it dry. The smaller you tear the tissue, the smoother the texture, and too many layers just means a longer wait. Spell out their initials or the wedding date instead of XOXO and it’s a one of a kind piece for their first home.
Get the full tutorial at DIY JOY.
22. DIY Book Flower Vase

An old book becomes a folded paper vase, and book lovers will either swoon or gasp (pick a thrift store copy). Open the book to the middle, draw a line across the page, count 12 pages on each side and cut along the line, then tear off the top. Tape the cut pages together three at a time with double sided tape and fold each group toward the middle. Fill it with dried lavender or paper flowers. It suits rustic and vintage weddings, and it looks charming on a bookshelf long after the big day. A sharp blade makes clean cuts.
Get the full tutorial at DIY JOY.
23. Easy DIY Fairy Jar Lanterns
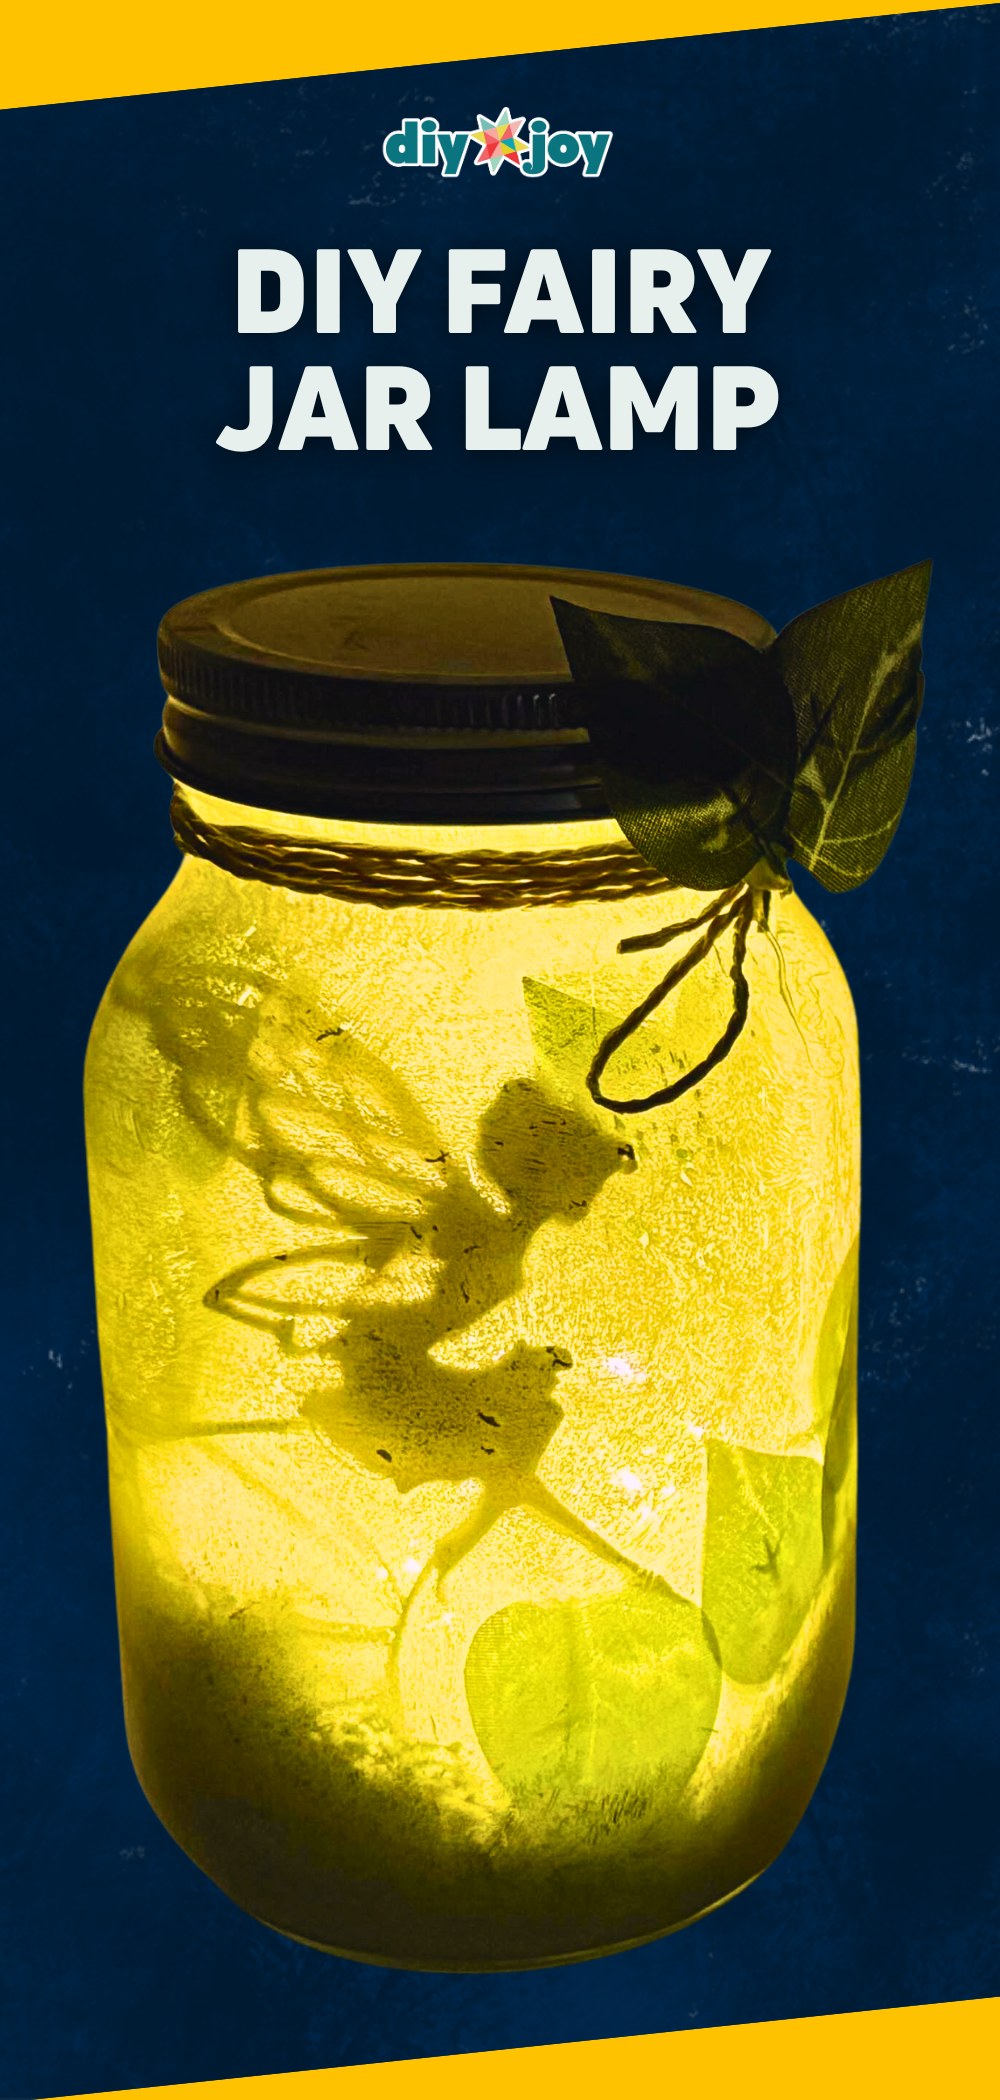
A glowing jar with a fairy silhouette inside, and it gives off the softest, coziest light. Print a fairy (or trees or mushrooms) and cut it out, then paint the inside of the jar with white acrylic or primer, thin enough for the light to pass through. Fake moss goes in the bottom, the silhouette gets hot glued to the inside, and a few leaves add shadows. Drop in a tea light or fairy lights, then tie twine around the neck with a bow and glue on a few leaves. Old pickle jars are perfect for this.
Get the full tutorial at DIY JOY.
24. Easy DIY Napkin Paper Candle
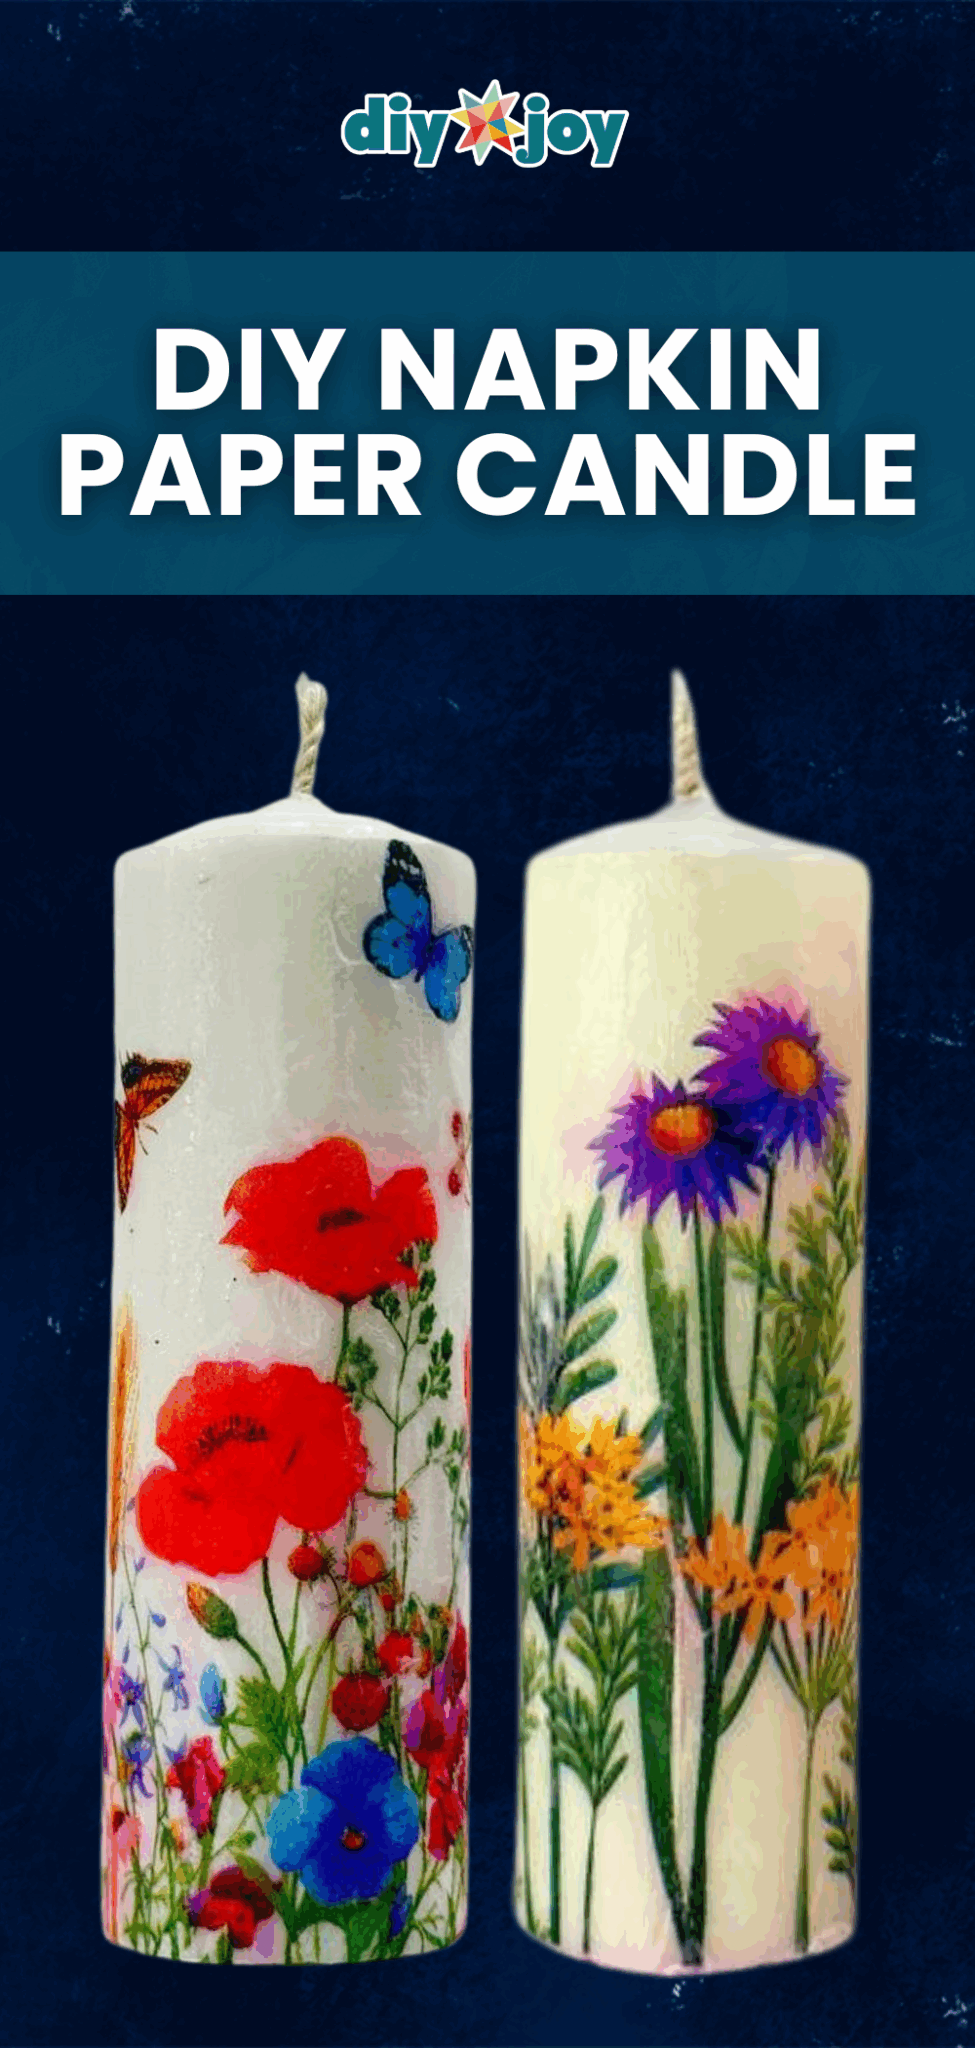
Plain pillar candles plus a pretty paper napkin and an iron, and the result looks like it came from a garden shop. Peel the napkin down to its printed top layer, cut it to wrap the candle and lay wax paper over the top. Run a warm iron over the wax paper until the candle’s own wax melts and fuses the napkin in place, then peel the wax paper off and touch up the edges. No paint and no glue. Pick wildflowers, poppies or the wedding colors. Want it to last? Burn just the top and set an LED candle inside.
Get the full tutorial at DIY JOY.
25. Hand Painted Marbled Napkins
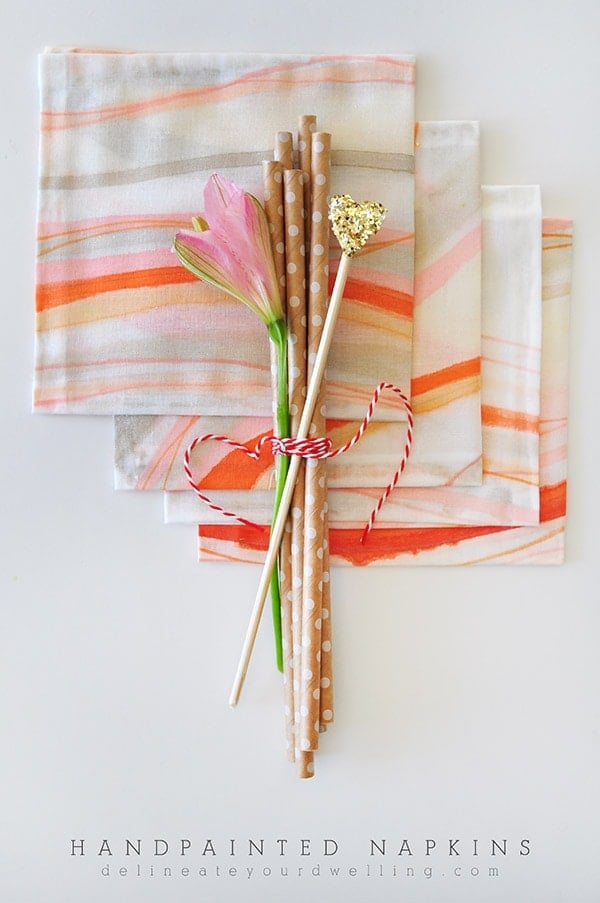
Marbled cloth napkins with zero sewing, and they look like something from a design shop. White handkerchiefs are the base. Mix acrylic paint with textile medium (start around 1 to 1) so the napkins stay washable and the paint doesn’t crack. Paint loose, flowing lines in a dark color first, then add thinner lines and watered down color for a soft watercolor look. A thick pink or orange Sharpie outlines a few lines for definition. Iron the back once it’s dry. The looser you paint, the more it looks like real marble, so don’t fuss.
Get the full tutorial at Delineate Your Dwelling.
26. Oyster Shell Candles
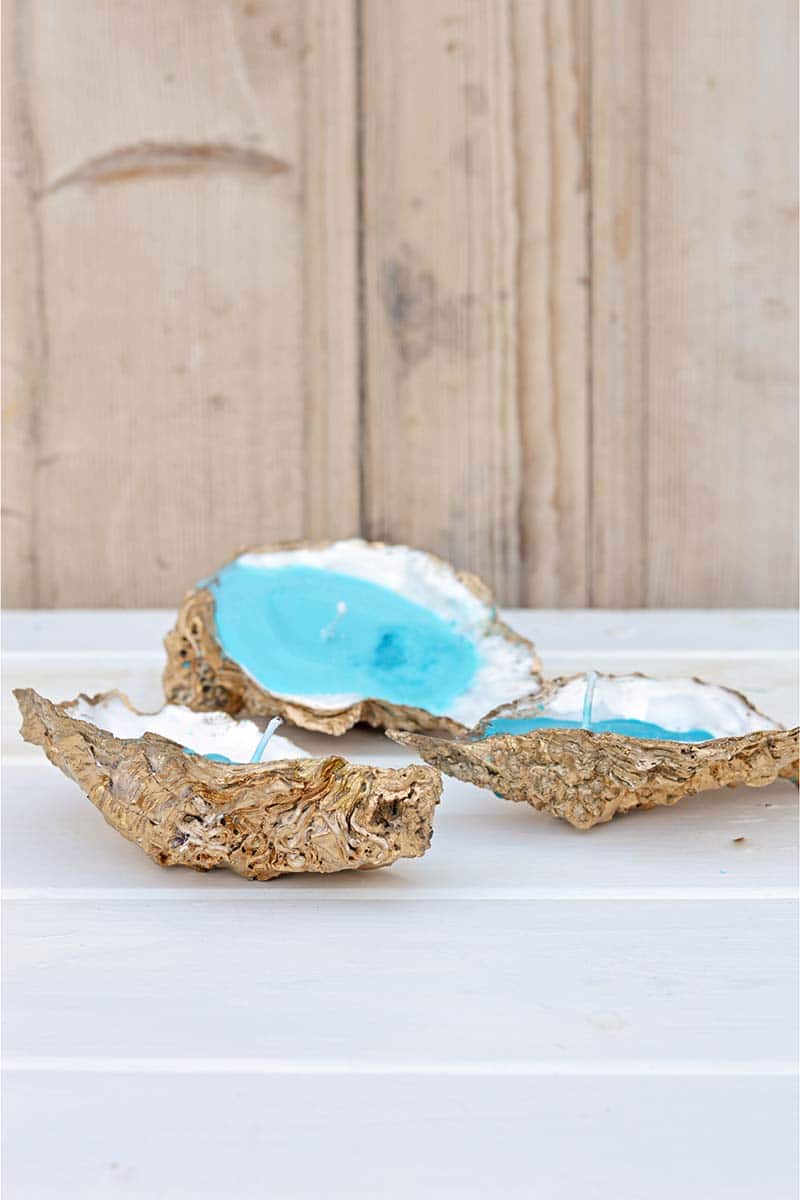
Gold oyster shells filled with candle wax, and they look like they cost a fortune at a coastal boutique. Large shells come from a fishmonger or a restaurant (just ask). Spray paint the outsides gold, then fill each shell with water and pour it into a jug to measure how much wax you’ll need. Melt soy wax flakes in a bowl set over simmering water, never directly on the heat. Add a little dye, fragrance oil and a wick, then pour. Perfect for a beach wedding couple, packed in a box with tissue paper.
Get the full tutorial at Pillar Box Blue.
27. DIY Clay Ring Dish
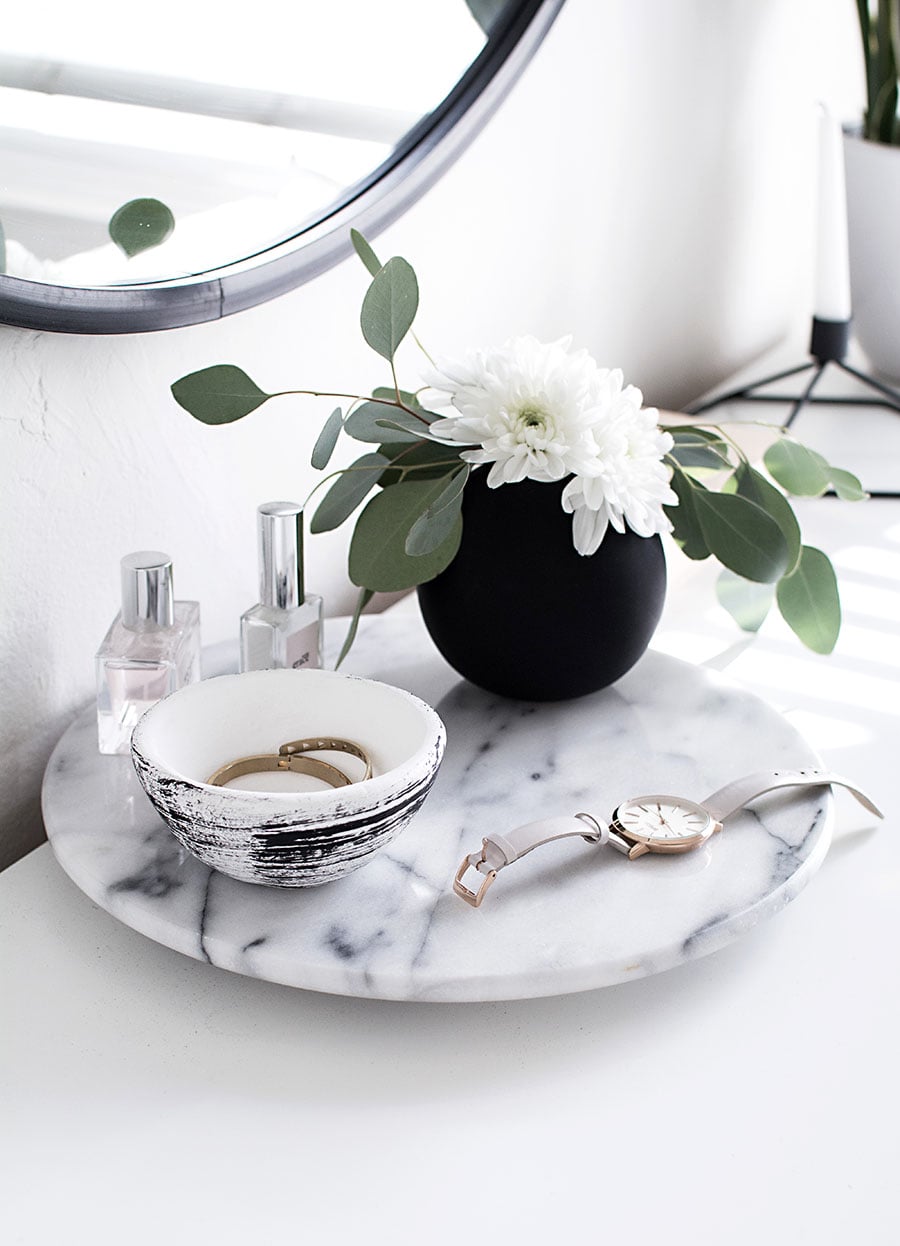
A pinch pot is the easiest way to make a bowl by hand, and it doesn’t need a kiln when you use air dry clay. Roll the clay into an orange sized ball, press a thumb into the center and pinch while turning it, working from the bottom up. A clay rib smooths the inside and edge. Keep your hands wet, since air dry clay gets a little putty-like. Let it dry at least 24 hours, then dry brush streaky strokes all the way around. It’s the perfect landing spot for wedding rings and earrings.
Get the full tutorial at Homey Oh My.
28. Hand-Rolled Beeswax Taper Candles
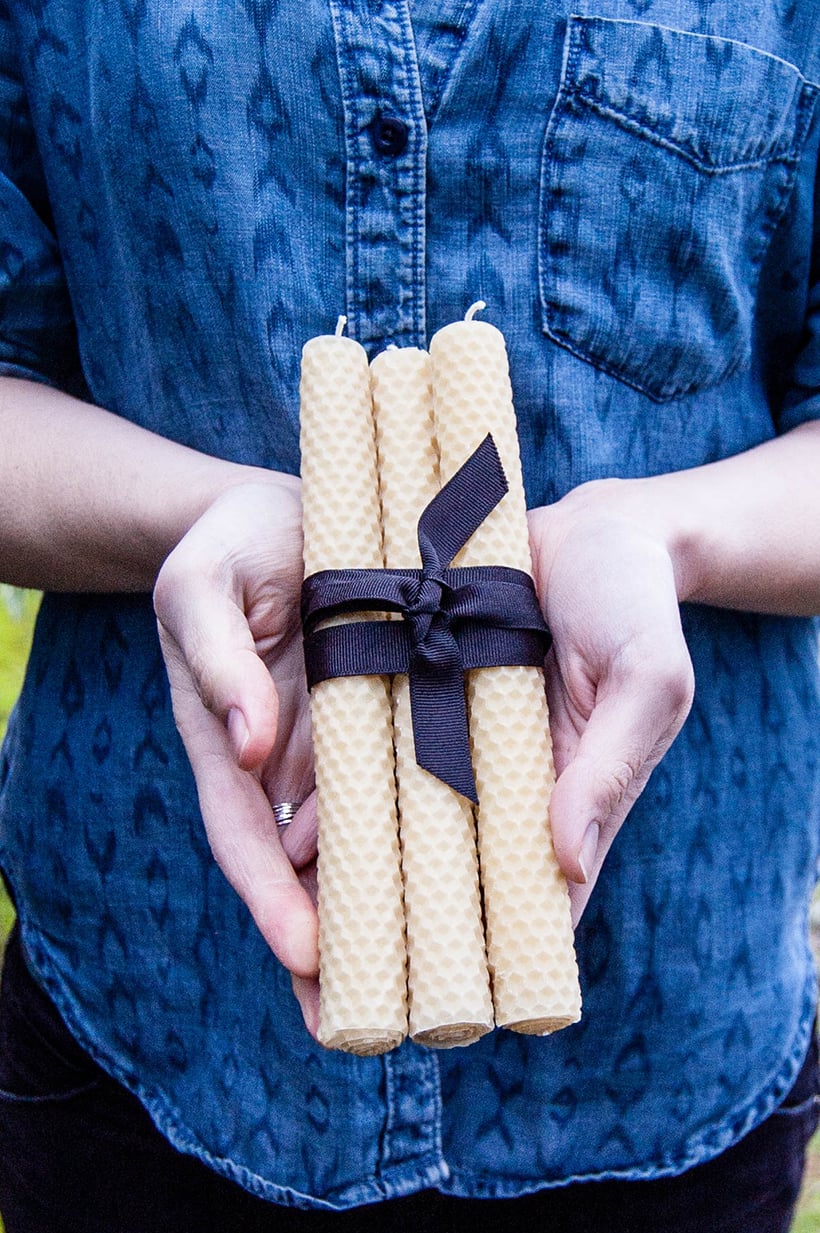
Rolled beeswax candles are one of the fastest handmade gifts around, and they smell like honey. Cut an 8 by 16 inch beeswax sheet in half, then cut a wick about half an inch longer than the candle. Lay the wick along one edge, fold the wax over it and roll as tightly as you can. Press the end into the candle until it holds. That’s it. You can roll them any size, which is handy for odd vintage holders. Tie a bundle with a ribbon and pair it with candlesticks for a dinner party ready gift.
Get the full tutorial at DIY in PDX.
29. Modern Faux Plaster Vase
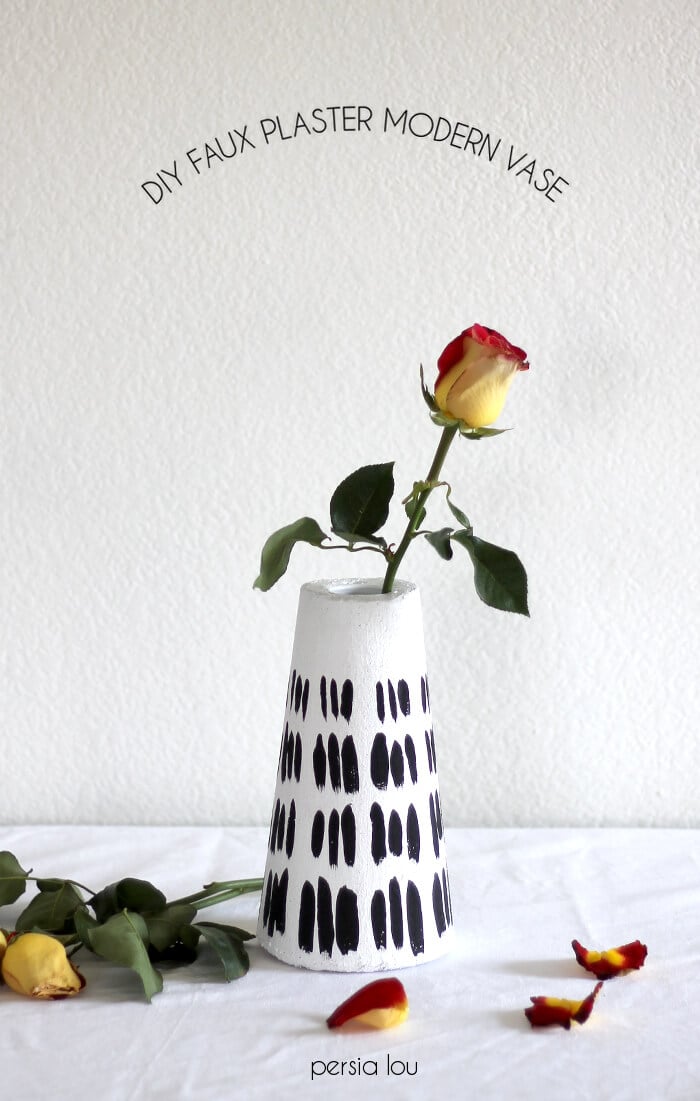
It looks like a plaster vase from a designer shop, but it starts as a craft foam cone. Cut the top off the cone, carve a hole the shape of a thin glass bud vase and push the vase in. Spread a smooth finishing product over the foam with an old plastic card and scrape off the extra. Once it’s dry, spray it white and add a simple black brushstroke pattern with a round brush. Fill the glass insert with water and a single rose. The outside is water resistant, and a clear sealer makes it waterproof.
Get the full tutorial at Persia Lou.
30. Monogrammed Candles
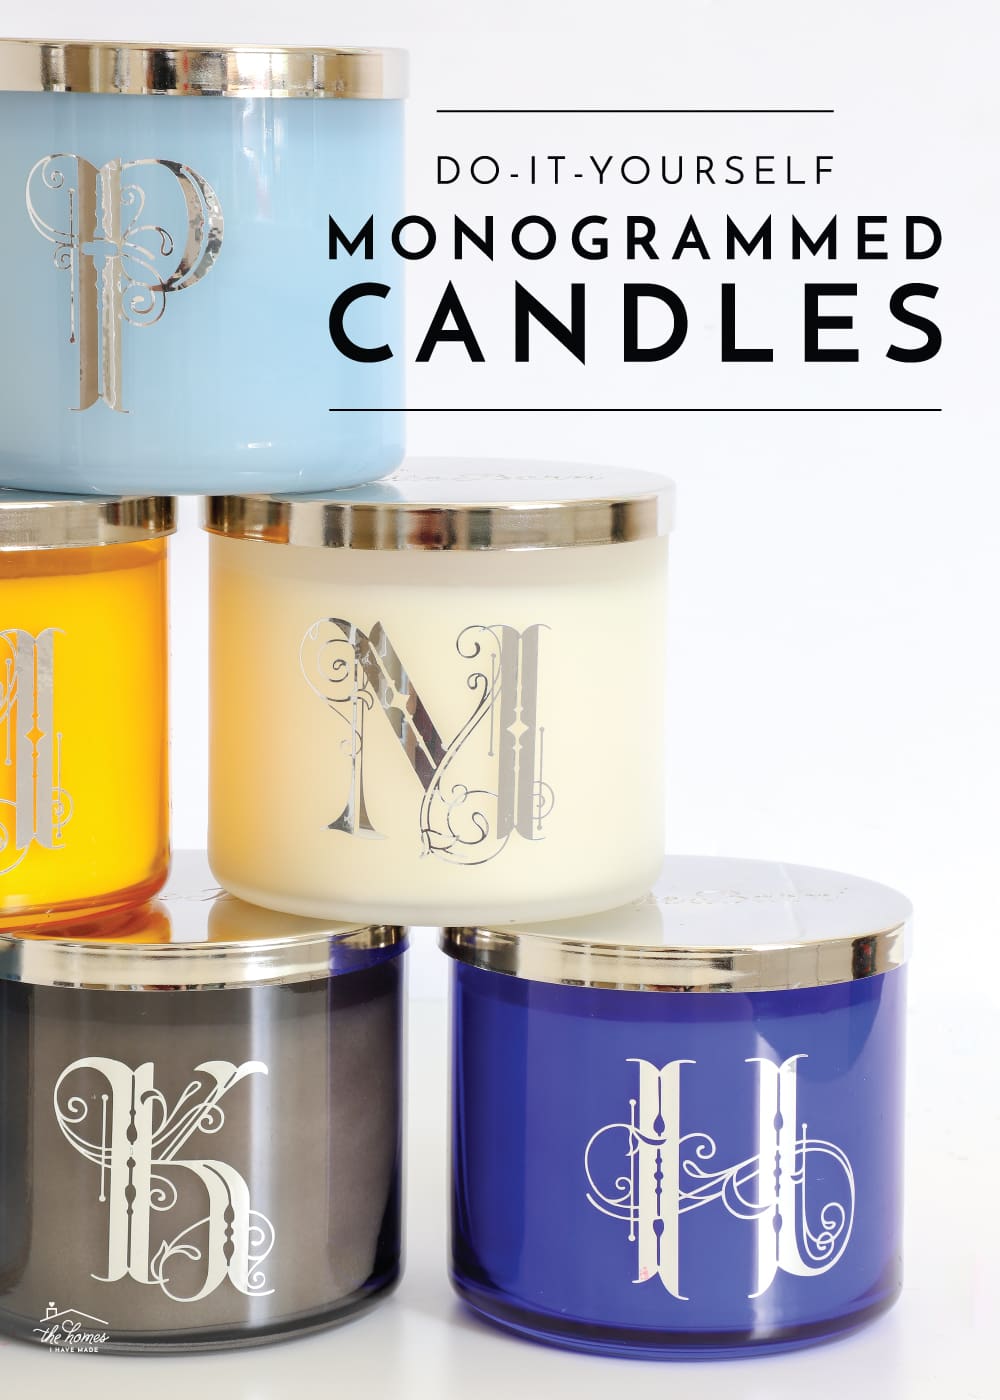
Big three wick jar candles plus a silver monogram, and suddenly a store candle looks custom made. Pick a large candle in colored glass with a small label you can peel off, so the jar can be reused as a pen cup or brush holder after it burns down. Remove the labels, cut monograms from adhesive foil vinyl on a cutting machine and smooth them onto the jars. Silver foil vinyl that matches the lid looks especially sharp. Stock up when the candles go on sale, and make one for each bridesmaid while you’re at it.
Get the full tutorial at The Homes I Have Made.
31. Personalized Silhouette Art
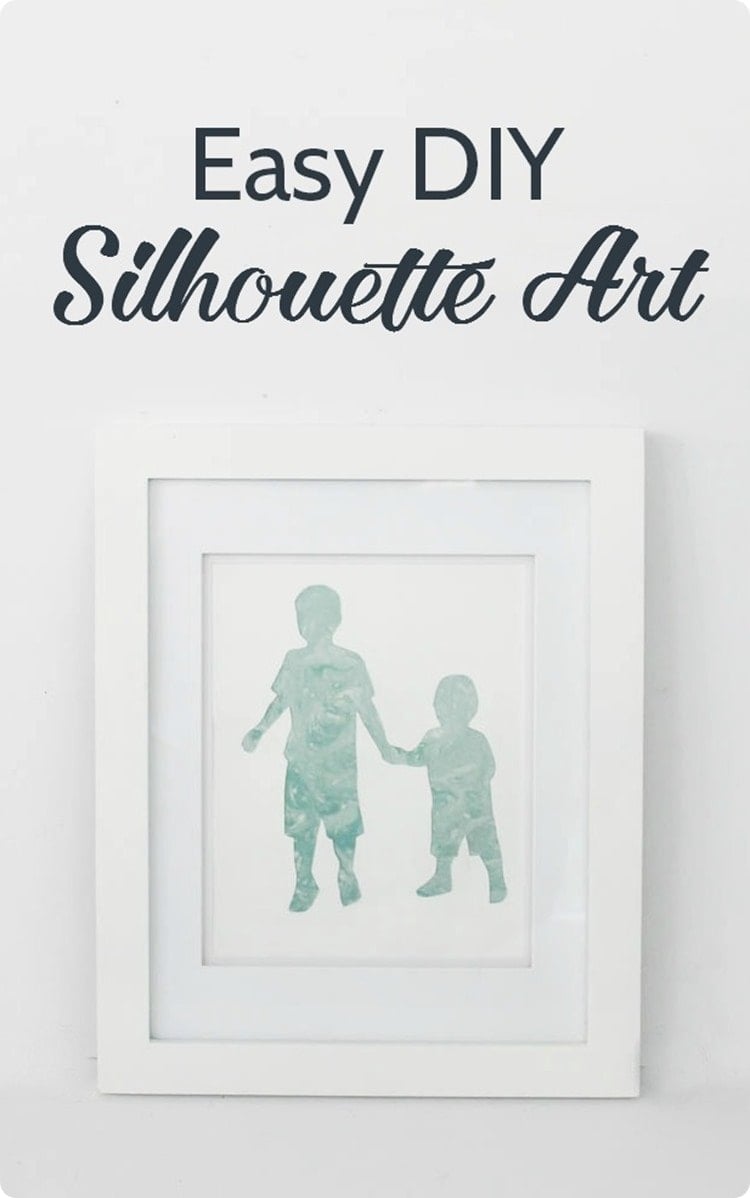
Silhouette art without a cutting machine, in about thirty minutes. Print a photo with a clear outline, scribble pencil all over the back and trace the outline onto white cardstock to transfer it. Cut along the line with a craft knife (a fresh blade, or the edges go fuzzy), then back the cutout with pretty marbled scrapbook paper and pop it in a frame. The tutorial even suggests it as a gift: a silhouette of a friend in her wedding dress. Use the couple’s first dance photo or their dog and it’s a frame they’ll keep forever.
Get the full tutorial at Lovely Etc.
32. Fabric Embroidery Hoop Wall Art
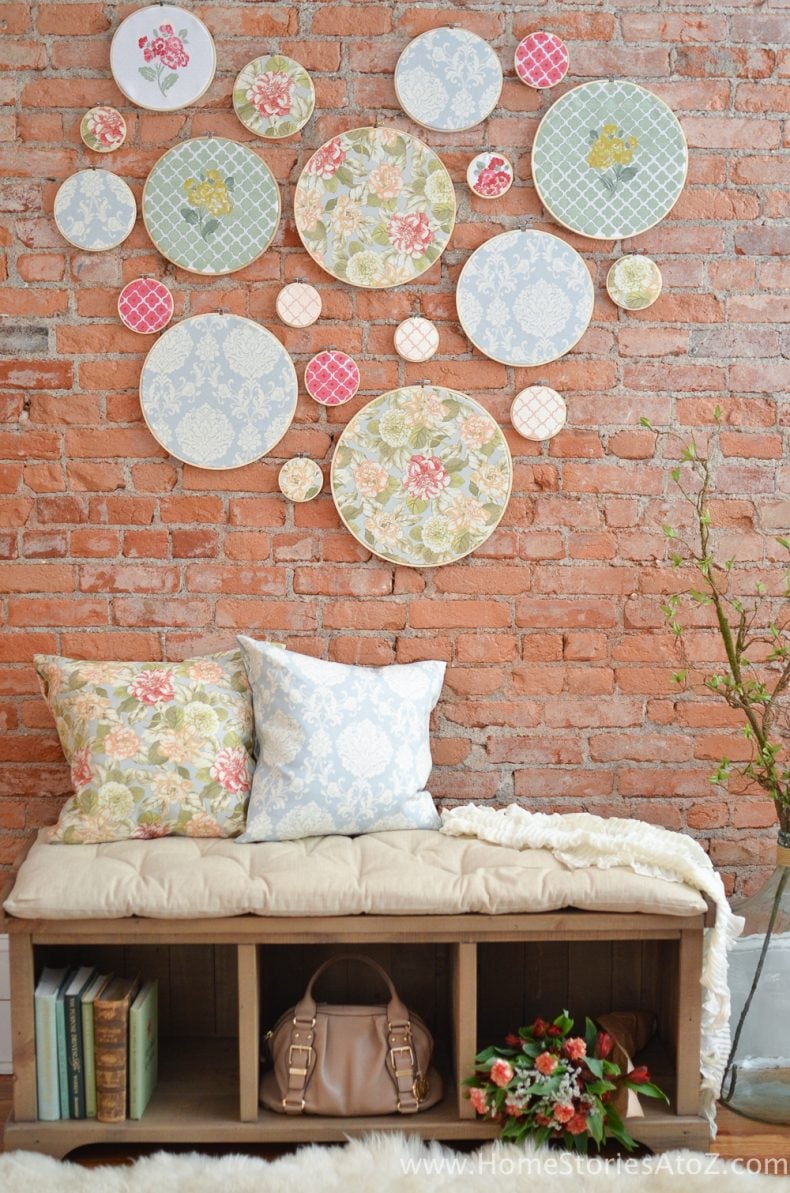
Got a big empty wall? Embroidery hoops filled with pretty fabric cover it for very little money. Lay the hoops out on the floor first, starting with the biggest ones and tucking the small 3 and 4 inch hoops into the gaps. Fill them with fabrics, or make your own by stenciling acrylic paint onto plain white fabric with a tapping motion so it doesn’t bleed. Once the paint is dry, set each hoop on the fabric, cut it out and hang. A collage in the couple’s colors makes a sweet gift for their new place.
Get the full tutorial at Home Stories A to Z.
33. Boho Clay Wall Hanging
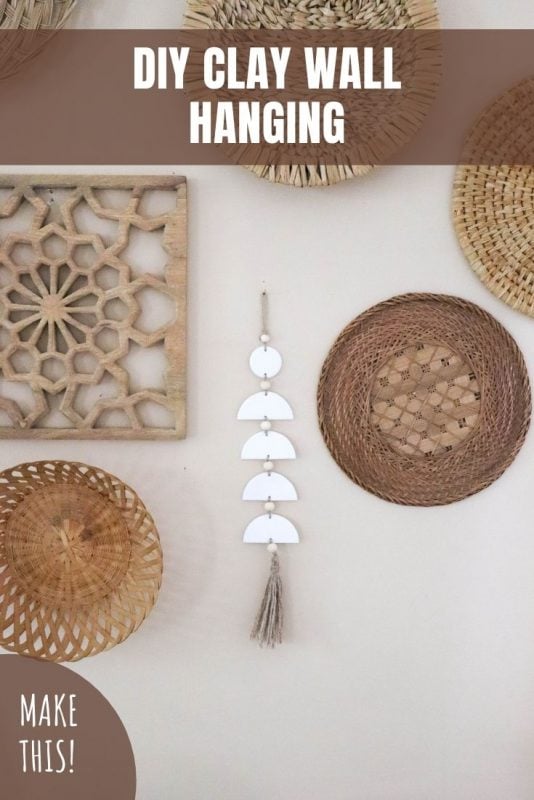
A little boho wall hanging made from white polymer clay, wood beads and hemp, and it’s as easy as it looks. Roll the clay about a quarter inch thick on parchment, cut two 2.5 inch circles and one 1 inch circle (a jar lid works if you’re missing a cutter), then slice the big circles in half. Poke holes top and bottom, lined up in the center, and bake as the package says. String the pieces on hemp with a wood bead between each and a knot on both sides. It slips right into a basket gallery wall.
Get the full tutorial at Homemade Heather.
34. Succulent Urn Planter
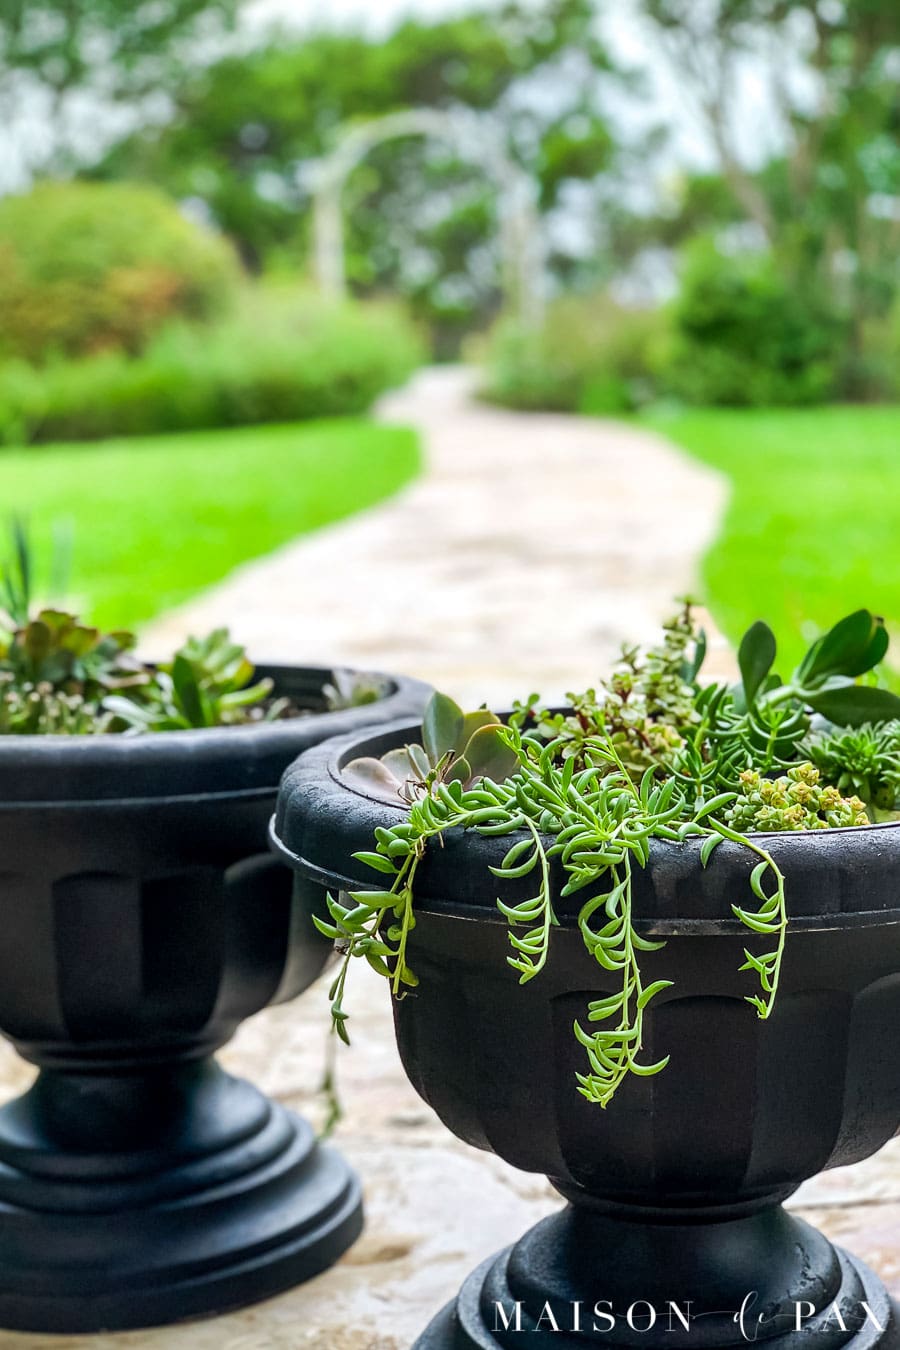
For the couple who kills every houseplant, succulents are the answer, and these urns make them look like a design statement. Old plastic urns get a coat of black spray paint for a more modern look. About 4 inches of rocks go in the bottom, followed by a well draining succulent mix. Then the plants get separated gently by the roots and spread out with room to grow. Drainage holes are a must, or the roots rot. Garden center succulent mixes stretch a long way, so a pair of planted urns costs less than it looks.
Get the full tutorial at Maison de Pax.
35. Sculpey Botanical Planter
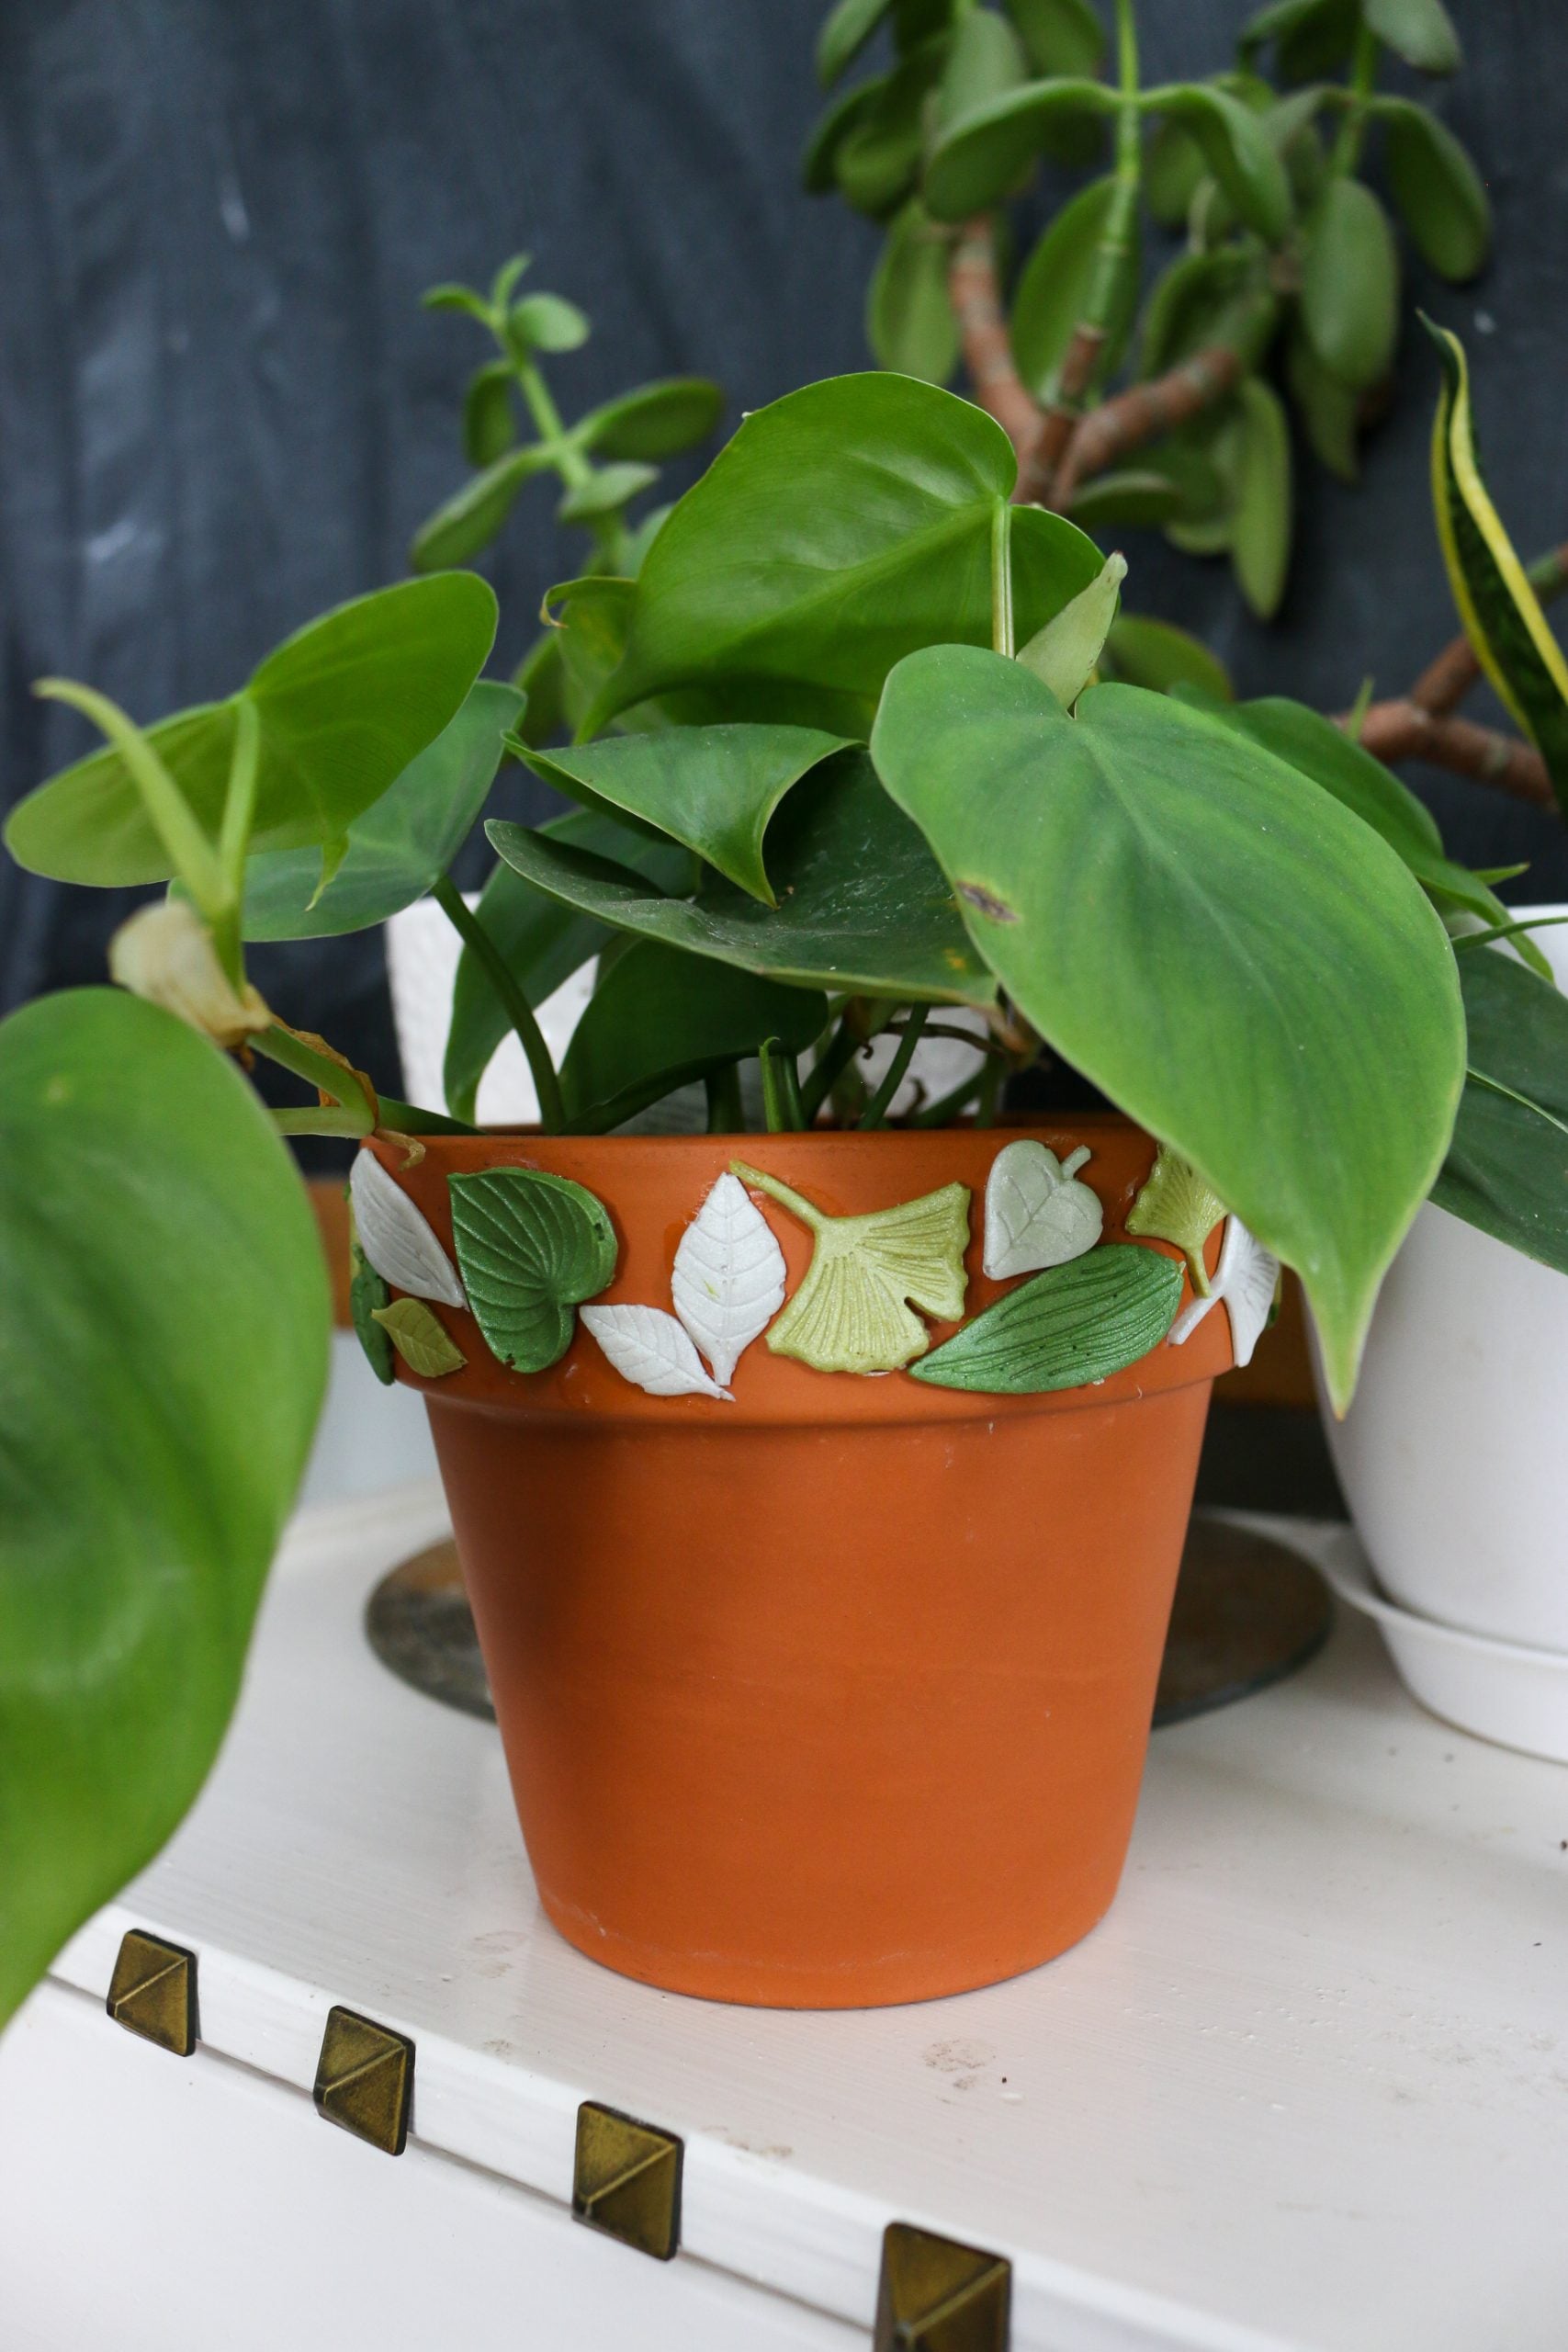
Terracotta pots are cheap and plain, so give one a botanical makeover in under an hour. Squeeze Liquid Sculpey into a silicone leaf and flower mold, scrape off the excess and bake on a tray at 275 F for 15 minutes. Once the pieces cool, pop them out and trim any extra edges. They’re flexible enough to curve around the pot, so they attach with waterproof glue. Tint the clay with alcohol ink or mica, or paint the whole pot one color for a softer look. Add a pothos cutting and it’s a gift that keeps growing.
Get the full tutorial at Mad in Crafts.
36. Pressed Flower Photo Frame
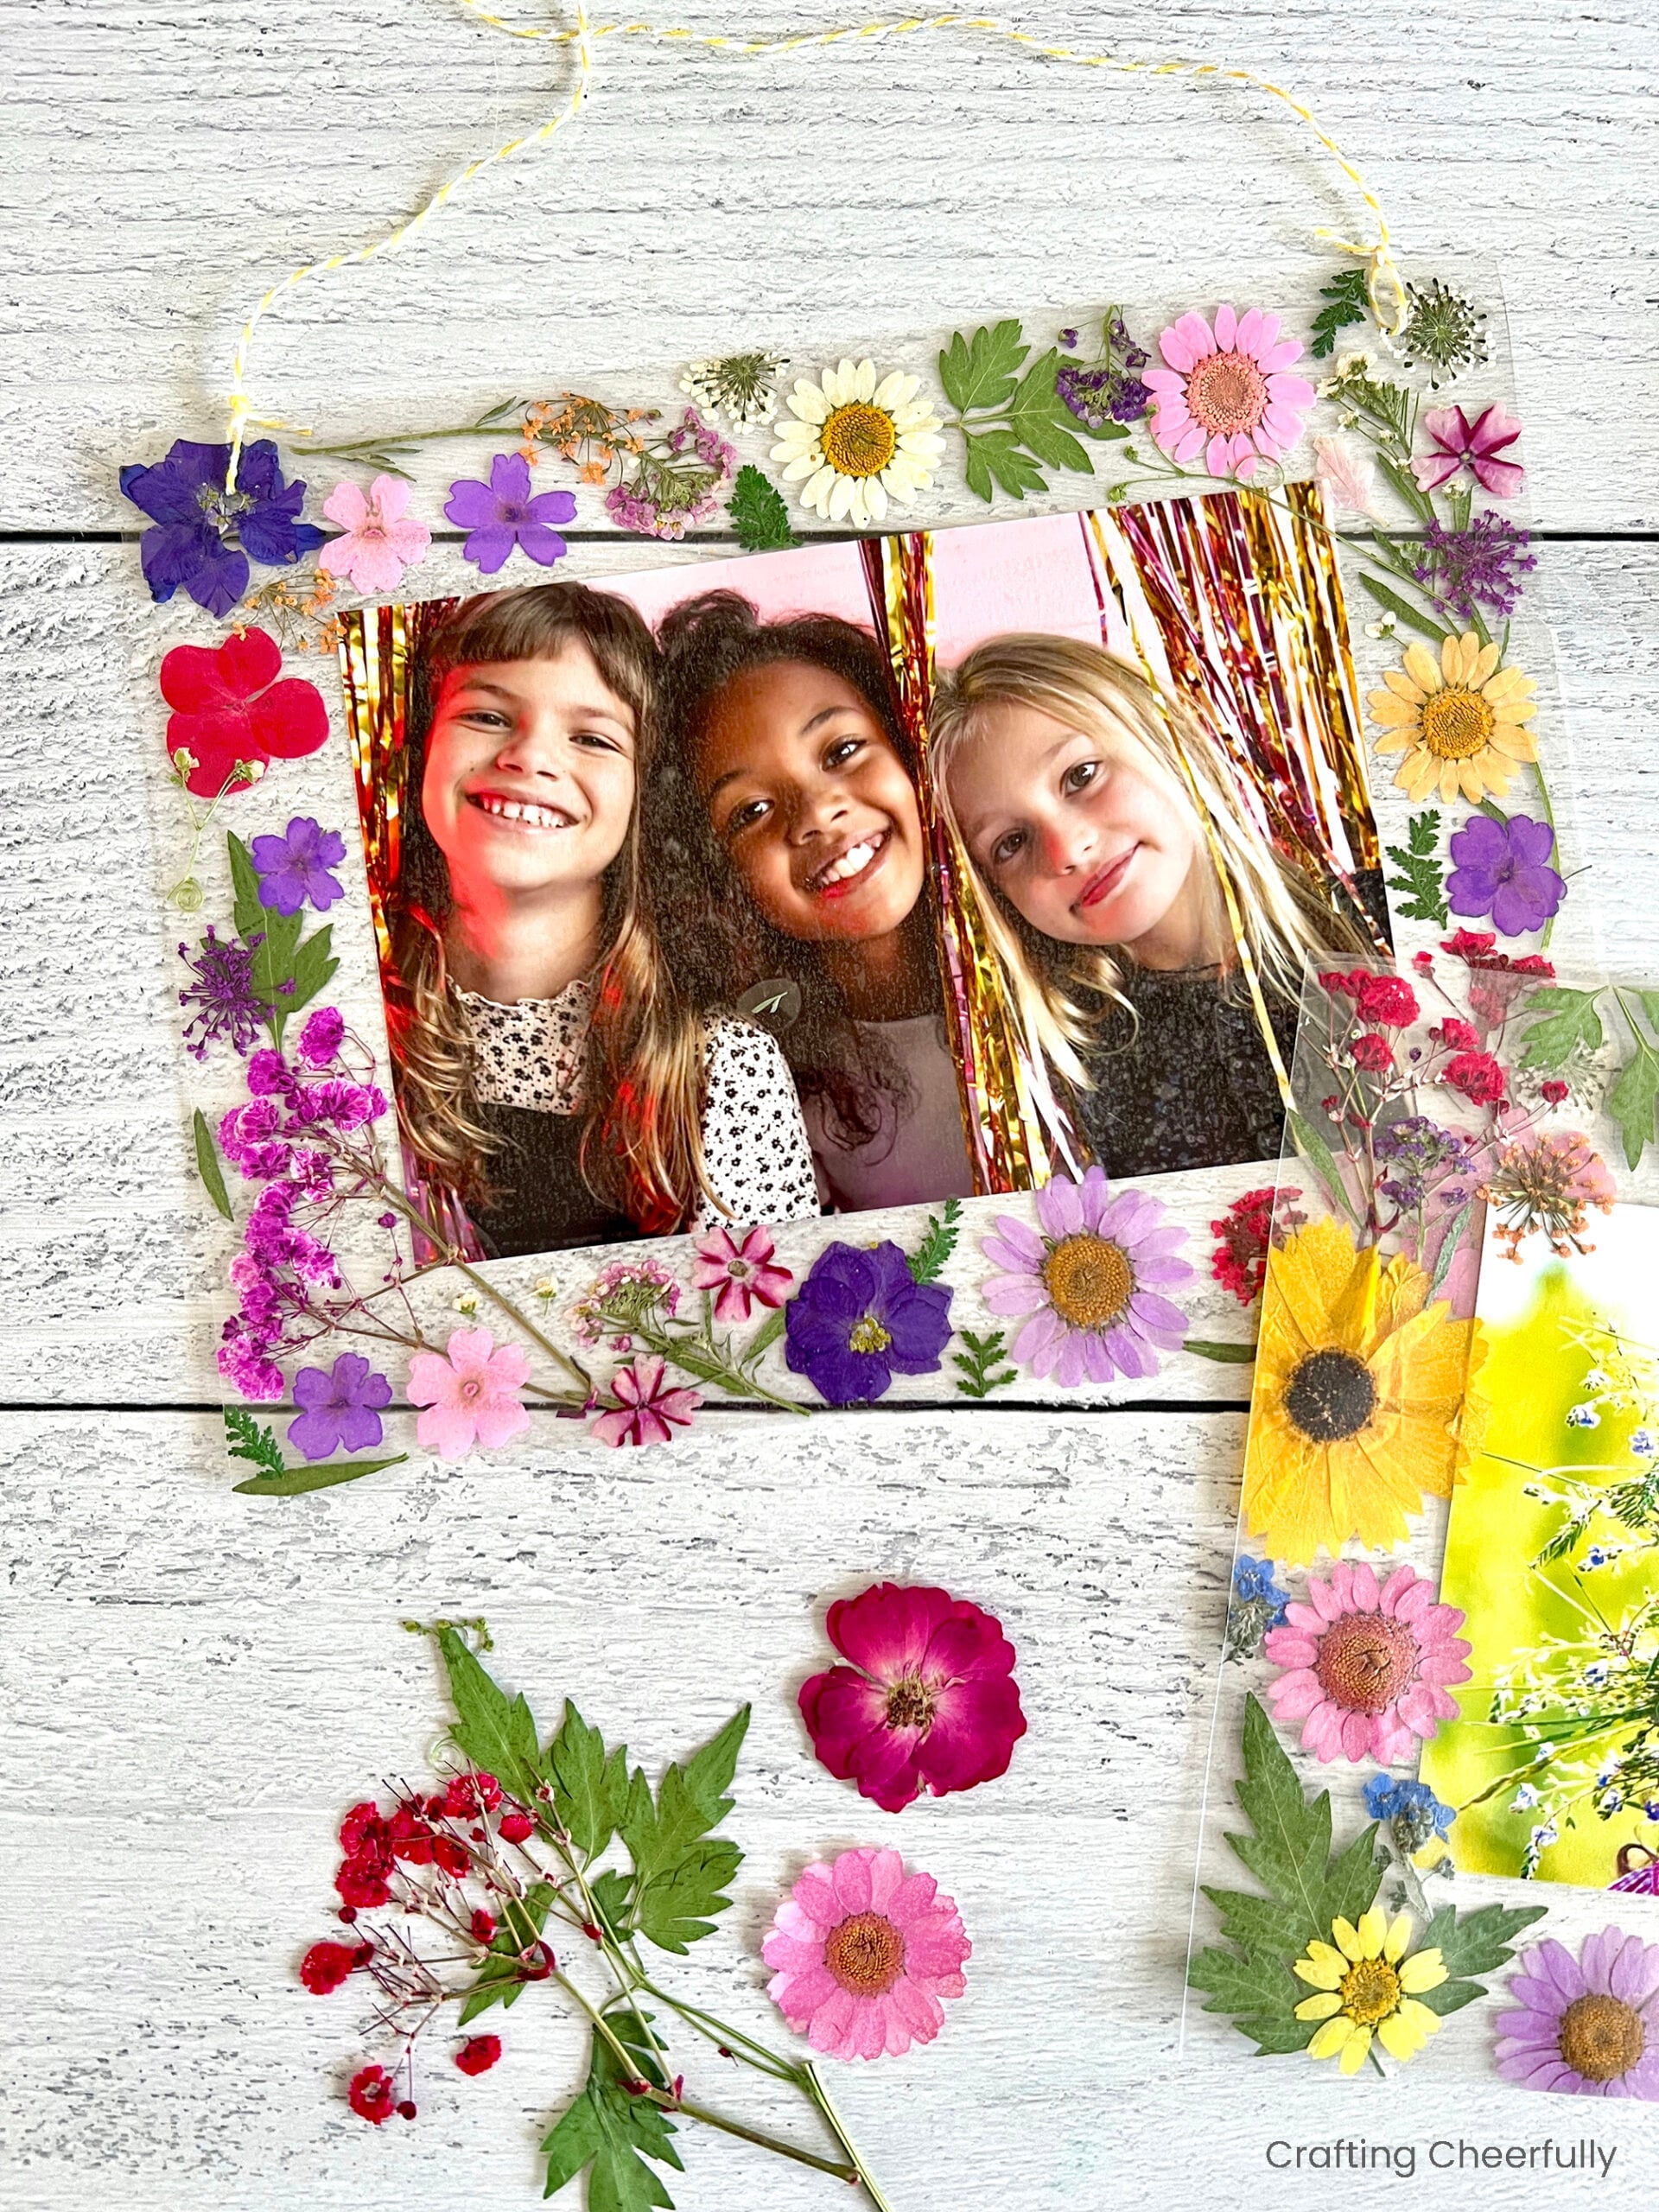
Pressed flowers look like they’re floating around the photo in this laminated frame. A free printable template guides the layout. Peel a clear self laminating sheet, lay it sticky side up over the template, then place a 4 by 6 photo in the center. Plan the flowers on a second template first, because once a petal touches the sticky sheet, it doesn’t come back up. Work in sections, starting with the pieces that sit underneath. Swap in an engagement photo, and if you saved petals from the wedding bouquet, use those.
Get the full tutorial at Crafting Cheerfully.
37. Macrame Plant Hanger
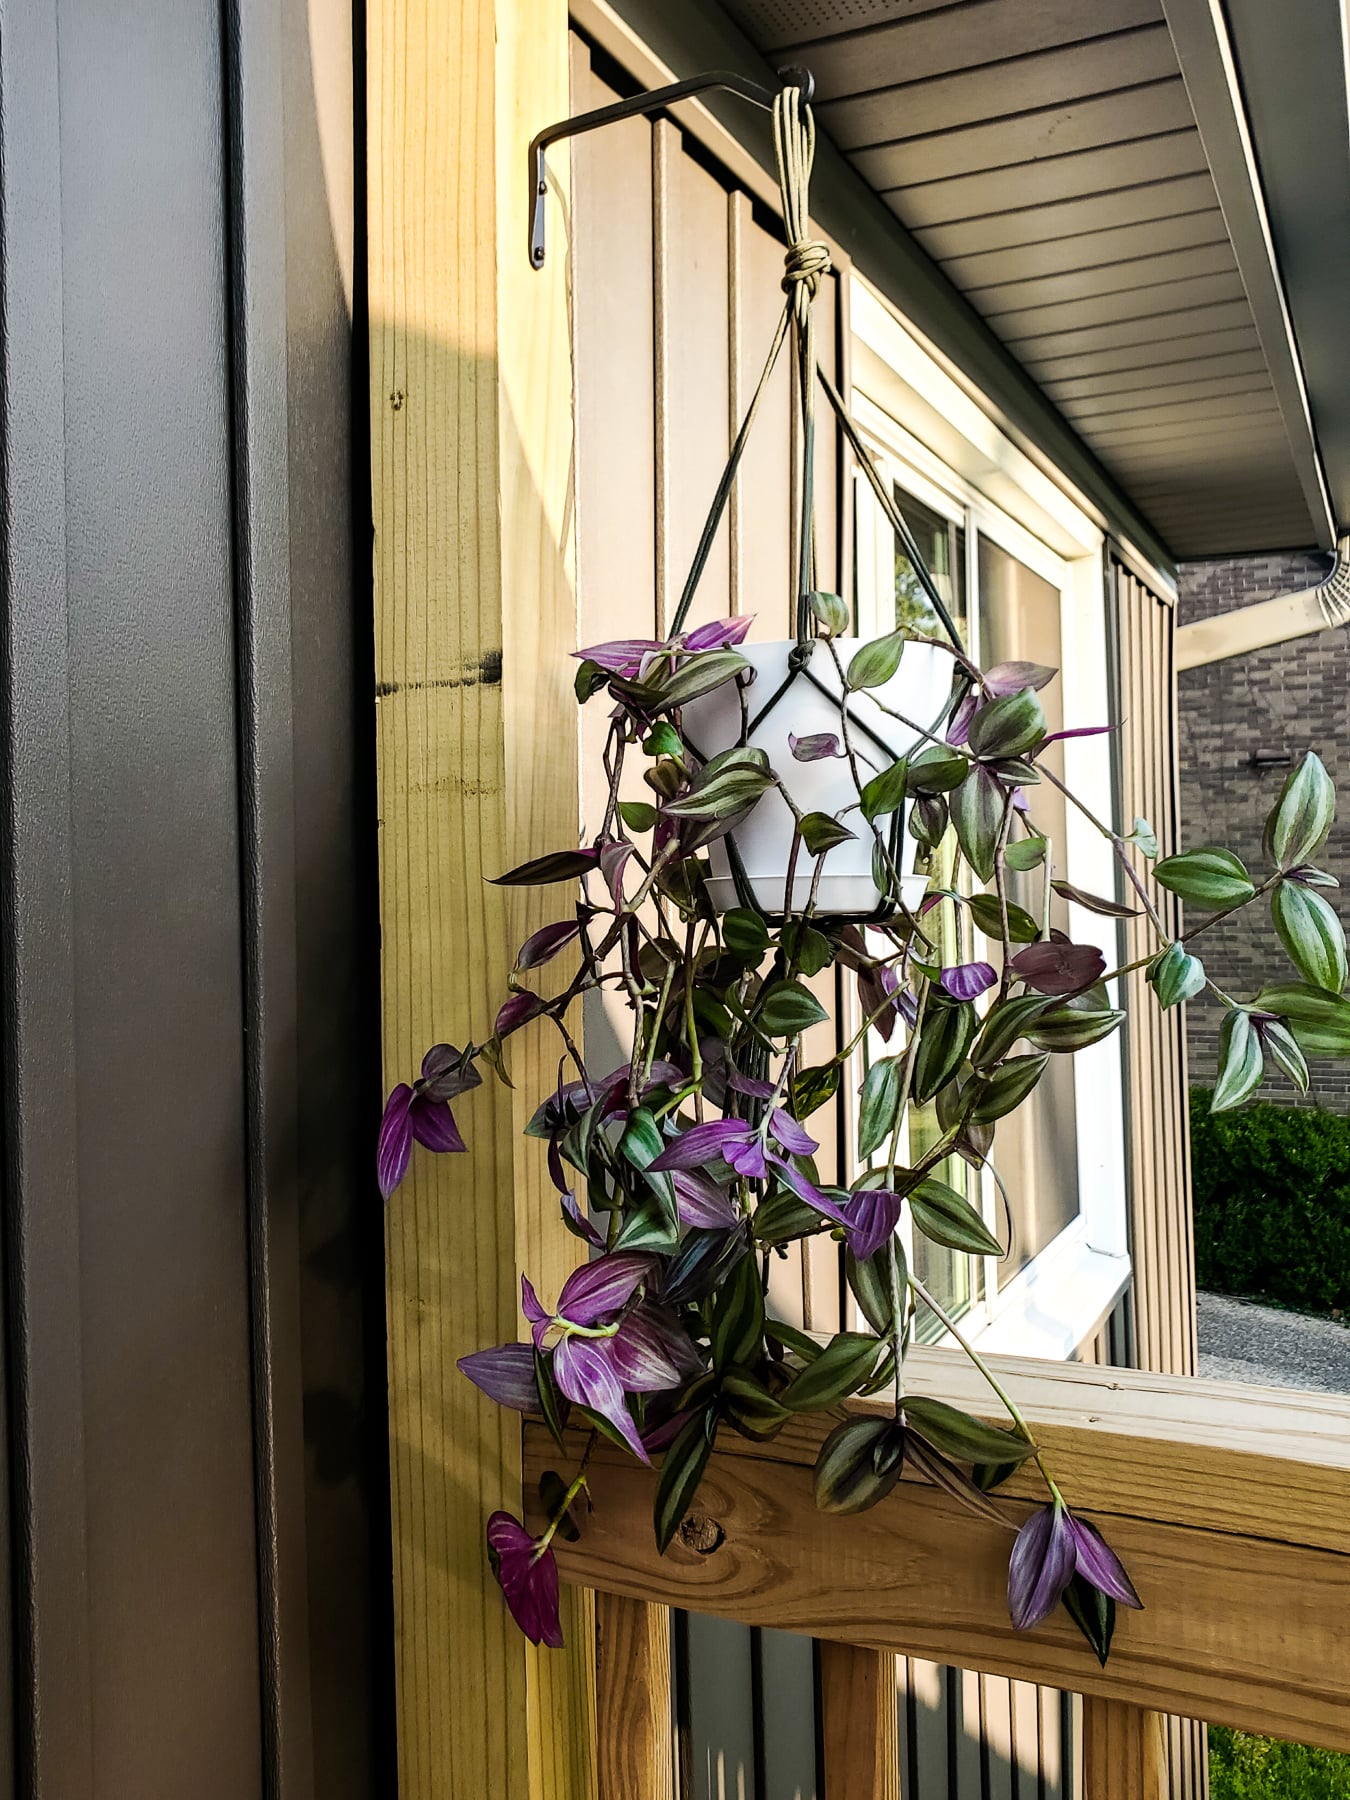
Macrame made with paracord, so it can live outside without fading or fraying. Measure the space you want it to hang in, double that and cut four cords at that length (24 inches of drop means four 48 inch cords). Bigger pots need a few extra inches. Fold the cords in half, knot a loop at the top for hanging, then tie pairs of strands together in rows to form the basket that cradles the pot. It’s a true beginner project. Pick a color that matches their porch, or plain white for a classic look.
Get the full tutorial at Craftivity Designs.