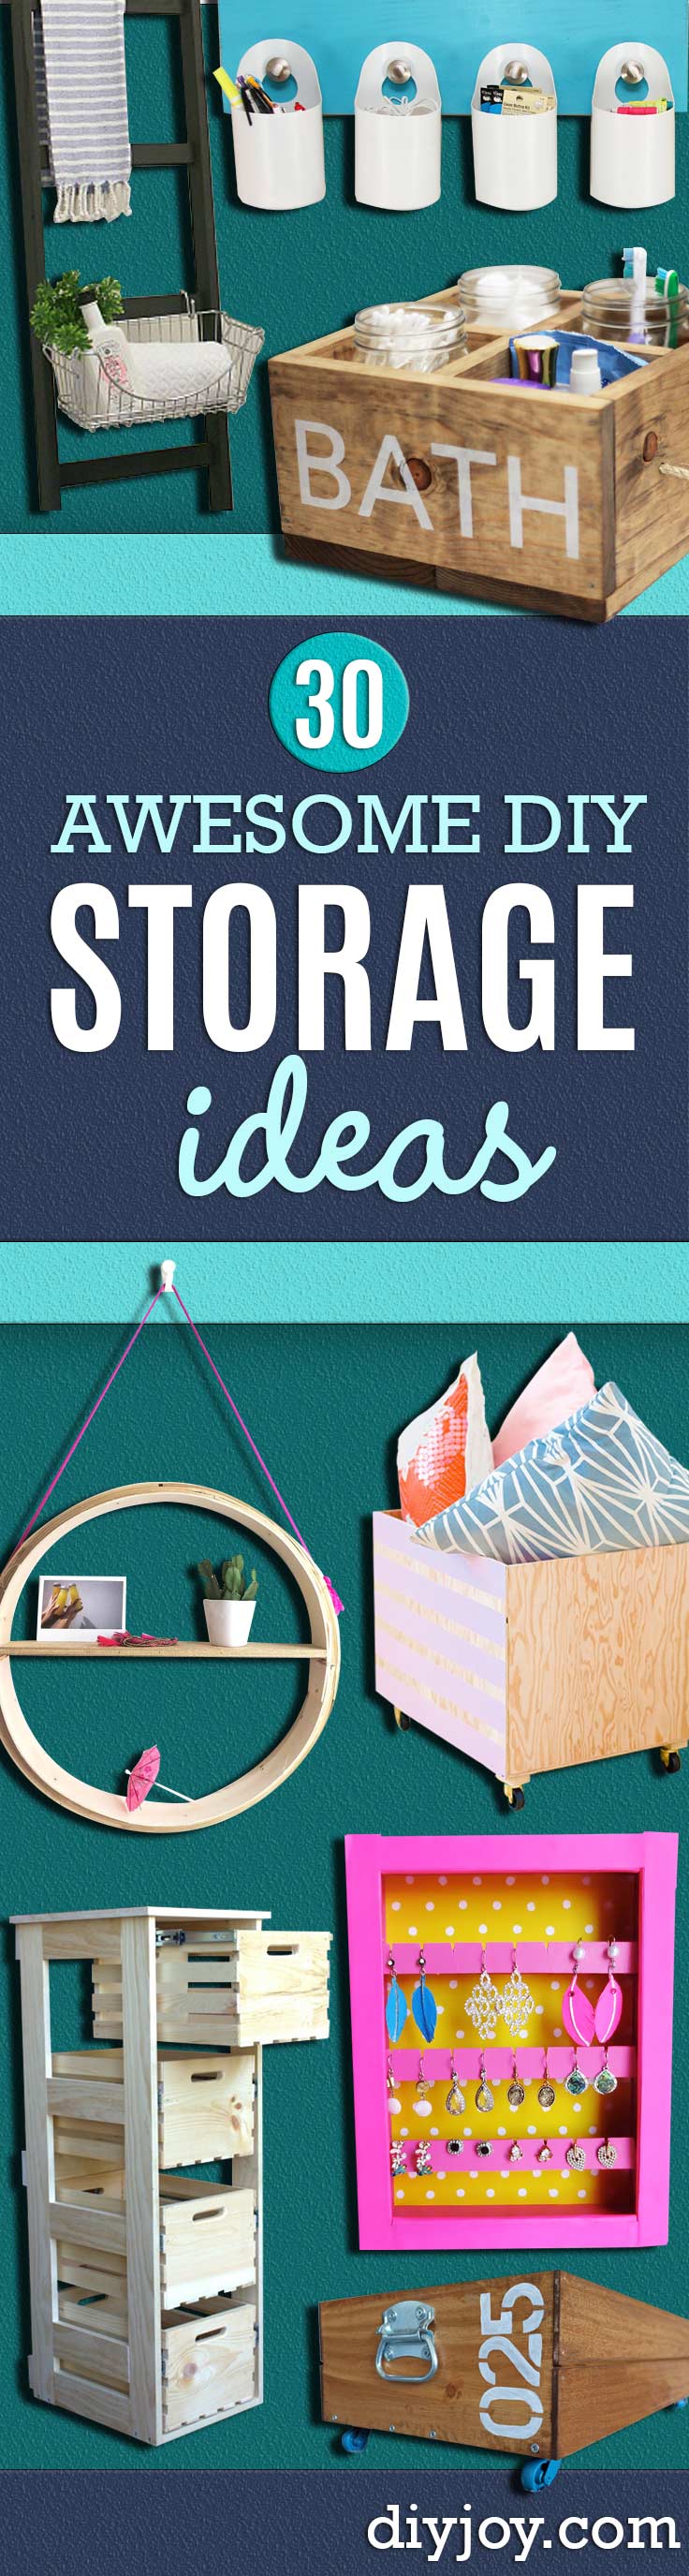
Clutter doesn’t call for a pricey container store haul, just a few crates, some scrap wood and a free afternoon. These 23 DIY storage ideas cover the living room, bathroom, entry, playroom and bedroom, with plenty of small projects for the dresser and desk too. Wooden crates show up again and again, turned into a tufted ottoman, a cabinet with sliding drawers, a coffee table and wall shelves for picture books. There’s a secret safe hiding under a dining chair and a gift wrap station on the back of a closet door. Ten DIY JOY video tutorials are mixed in, from air-dry clay jewelry dishes to a denim pocket organizer and a jute rope tray. Measure your space first, then build to fit. Find more on the organizing ideas hub.
1. DIY Tin Can Desk Organizer
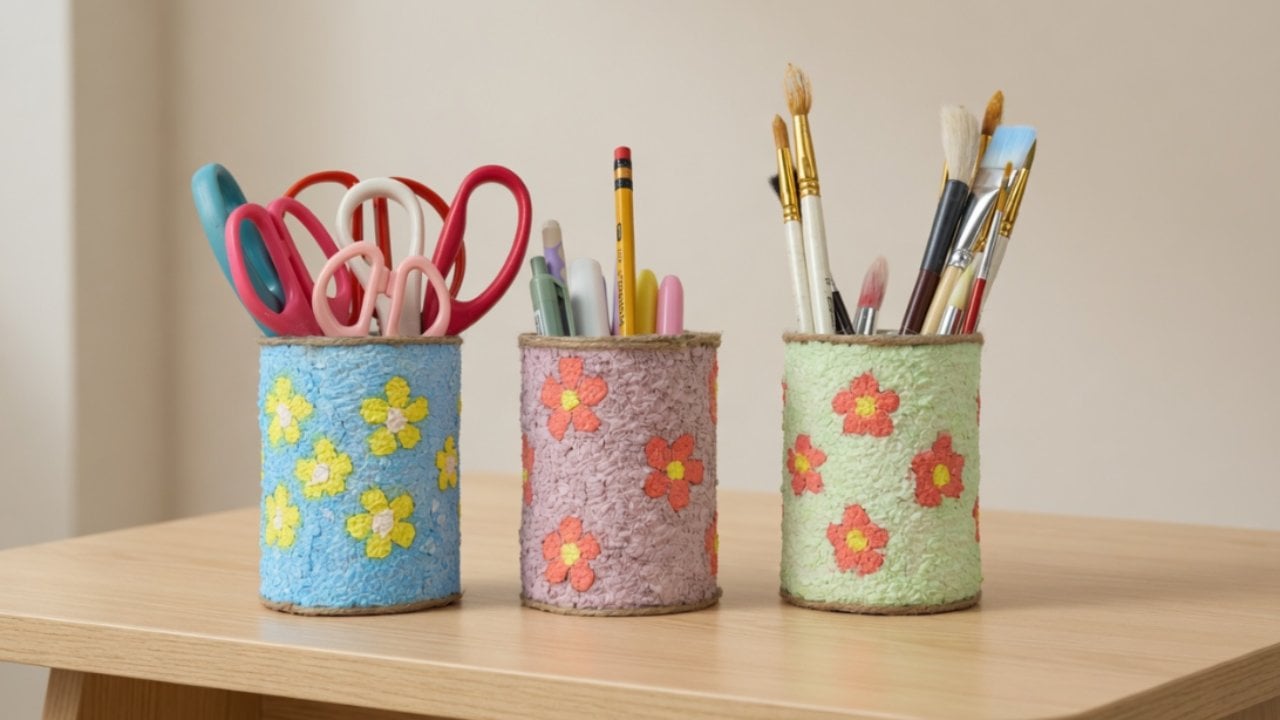
A DIY tin can desk organizer gives empty food cans a bright, textured makeover. Soak torn tissue in water, squeeze it out and mash it into a pulp, then stir in glue and paint until the color is even. Sketch a large, simple flower on each can, since bigger shapes are easier to fill. Press the colored pulp into the flower and then the background, letting the background dry first so the colors don’t blend. Allow up to 24 hours to dry before loading it up.
Get the full tutorial at DIY JOY.
2. Storage Ottoman DIY
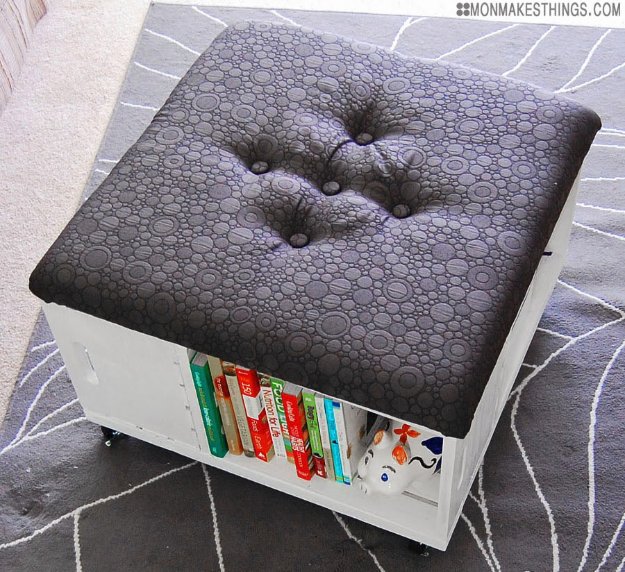
This storage ottoman DIY stacks four wooden crates into a square with open cubbies on every side. Join the crates with 2×4 supports, corner brackets and wood screws, then add 2 inch casters so it rolls. The top is a sheet of underlayment covered in 2 inch foam, batting and upholstery fabric, stapled tight underneath. Five buttons pulled through with upholstery cord give it a tufted look. Paint the crates with paint and primer first. It’s sturdy enough for feet and holds books and magazines.
Get the full tutorial at Mon Makes Things.
3. DIY Crate Cabinet with Sliding Drawers
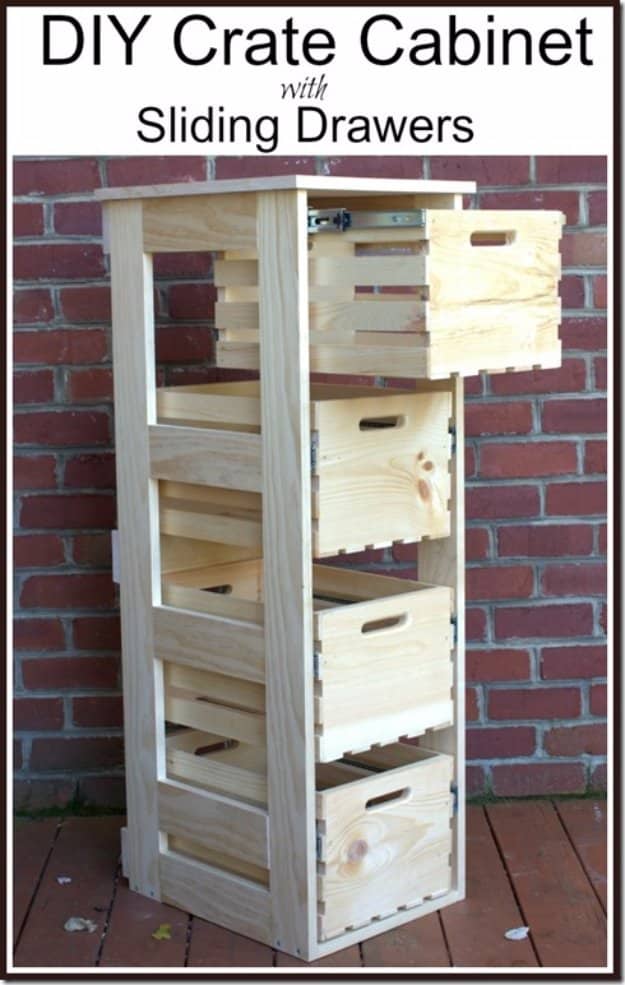
A DIY crate cabinet with sliding drawers turns hardware store crates into real furniture. Cut four 4 foot uprights and a set of 11 inch and 15 inch supports, then join the side frames with pocket holes. Glue strips of wood inside each crate where the slides attach for extra strength. Space the crates along the frame, mark the slide positions, screw them in with a square for accuracy and mirror the second side. Each crate pulls out far enough for full access.
Get the full tutorial at Sweet Pea.
4. DIY Shoe Storage Bench
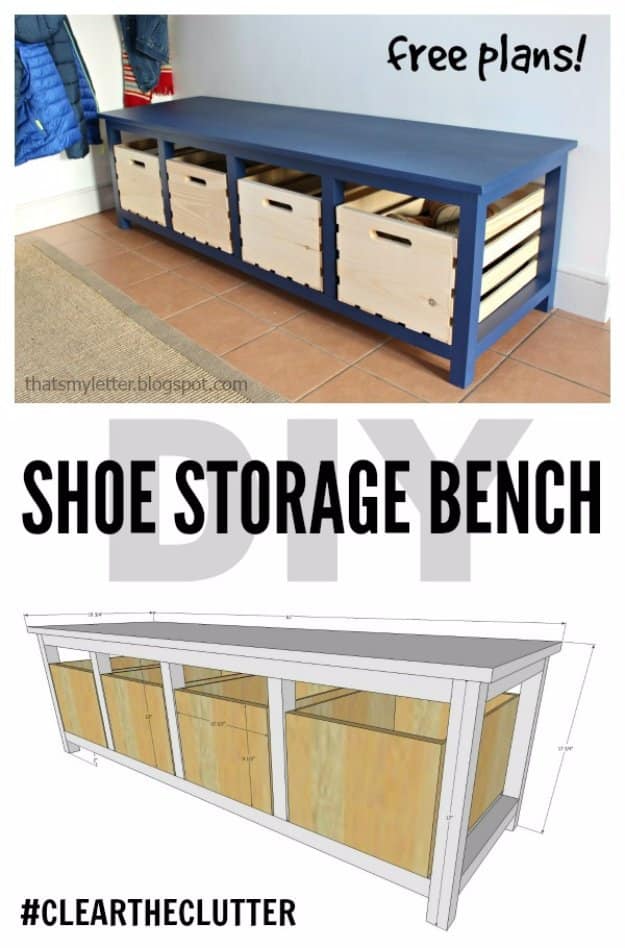
This DIY shoe storage bench is built to fit four large wooden crates. The crates slide into open cubbies under the seat, so shoes, hats, gloves and other mudroom gear get corralled in one spot, and the top gives you a handy place to sit while lacing up. The free plans include a diagram with dimensions. Paint the frame a bold color like deep navy and leave the crates natural for contrast. It’s a great fix for the pile of shoes by the door.
Get the full tutorial at Jaime Costiglio.
5. Wonderful DIY Storage Tote from Cardboard
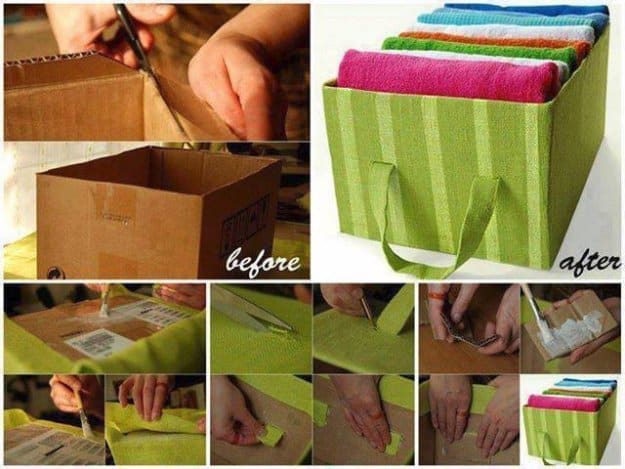
A wonderful DIY storage tote from cardboard starts with a sturdy shipping box. Trim the flaps, then brush white glue onto each side and smooth green burlap over it, wrapping the fabric over the top edge and down inside. Snip the corners so they fold flat. Fold strips of burlap into handles, push the ends through slits cut in two sides and glue them down inside, then glue a cardboard patch over the ends. It’s ideal for rolled towels or toys.
Get the full tutorial at Wonderful DIY.
6. Wood Caddy with Rope Handles for the Bathroom
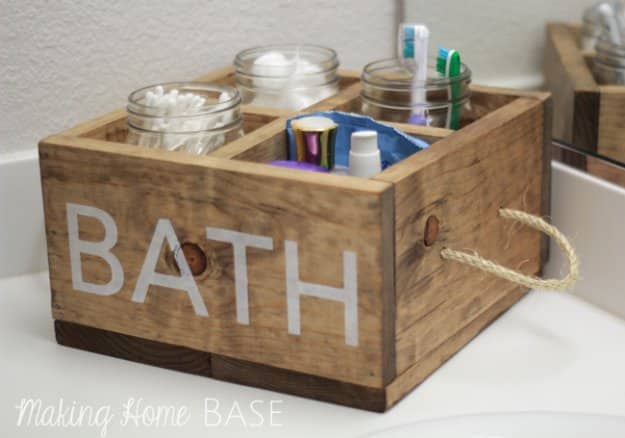
A wood caddy with rope handles keeps bathroom counters tidy. The box is built from free soda crate caddy plans, then stained in Special Walnut. For the handles, drill two 1/4 inch holes on each end, thread sisal rope through and knot it on the inside. Stencil a word like bath across the front in white acrylic paint and seal it with polyurethane. Small mason jars slip into the slots for cotton swabs, cotton balls and toothbrushes, with room left for lotions.
Get the full tutorial at Making Home Base.
7. DIY Mason Storage Jars
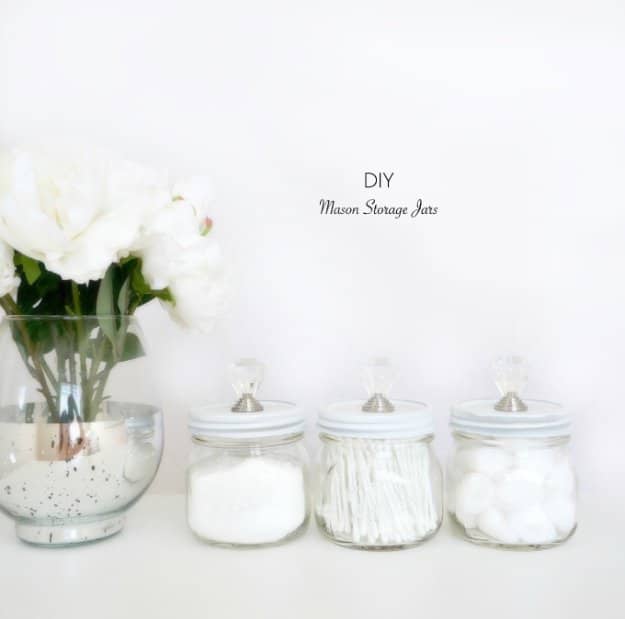
DIY mason storage jars look like fancy apothecary jars for a fraction of the price. Spray paint the outside of small round mason jar lids white, gluing the flat center of each lid to its rim first and skipping the threads, or the lids will stick. Once dry, glue a crystal knob to the center of each lid with an adhesive made for metal and let it cure. Fill them with cotton balls, cotton swabs and bath salts for a pretty bathroom counter.
Get the full tutorial at Haute & Healthy Living.
8. DIY Colored Paper Pen Holder
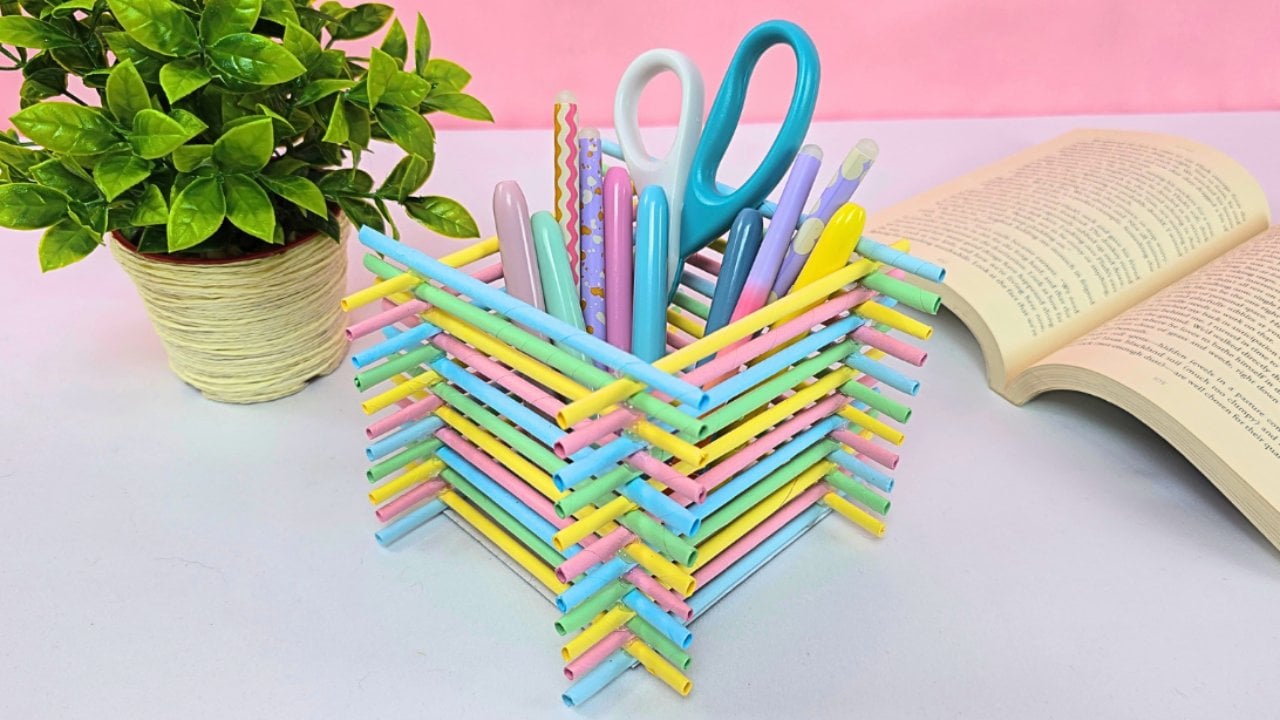
A DIY colored paper pen holder is built from tightly rolled tubes, log cabin style. Roll each sheet of colored paper diagonally around a thin skewer, glue the last flap and trim the pointy end. Make plenty in a few colors. Hot glue a matching pair onto opposite edges of a 4 inch cardboard square, then lay the next pair across them, alternating colors as the walls rise. Trim the ends even with sharp scissors. It’s surprisingly sturdy for a paper craft.
Get the full tutorial at DIY JOY.
9. Minimalist Wood Storage Bin
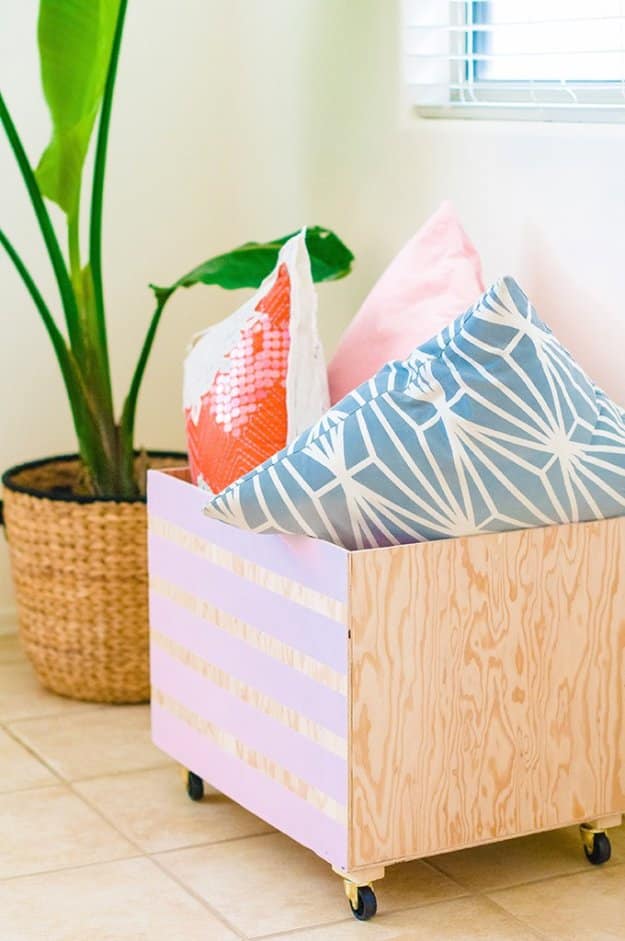
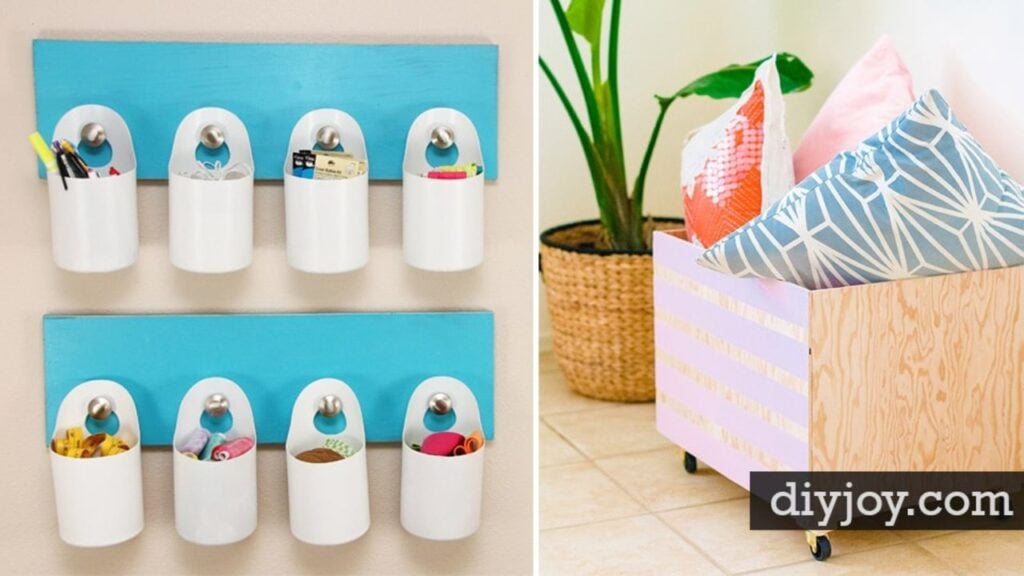
A minimalist wood storage bin on wheels is a quick afternoon build. Cut five pieces of 1/4 inch plywood: two at 22 by 16 inches, two at 16 by 15 and a bottom at 22 by 16.5. Glue and nail the sides together, fit the bottom and sand or plane any edges that don’t line up. Paint simple stripes, a diagonal line or a few circles, then glue small wood blocks under each corner and screw on casters. Roll it wherever the extra pillows need to go.
Get the full tutorial at The Proper Blog.
10. DIY Denim Jean Organizer
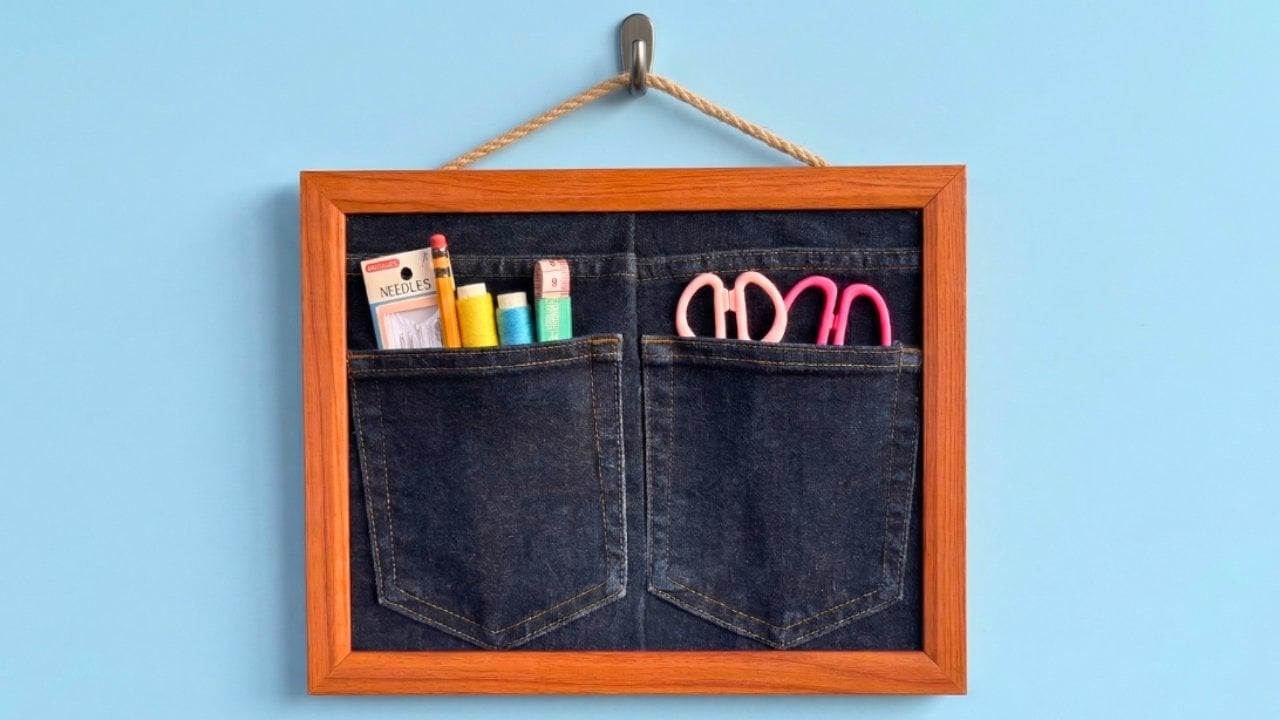
A DIY denim jean organizer puts old back pockets to work on the wall. Take everything out of a picture frame except the backing, trace the frame on the back of a pair of jeans and cut along the line. Fold one side over the other so the two pockets sit close together, and hot glue the fold. Glue the frame’s backing to the wrong side of the denim, lock the frame on top and hot glue a knotted length of jute rope to the top corners for hanging.
Get the full tutorial at DIY JOY.
11. DIY Distressed Nautical Crate
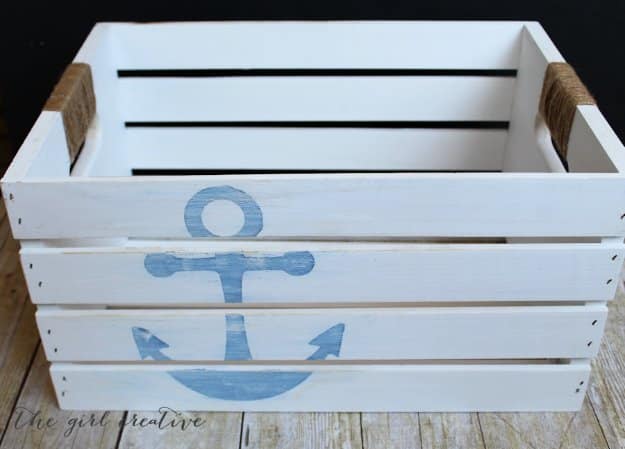
A DIY distressed nautical crate takes about an hour, especially if you start with a white craft store crate. Stencil a blue anchor on one side. If the paint bleeds under the stencil, brush a light coat of white over the whole design so the anchor shows through softly. Sand the edges once it’s dry to reveal bare wood, then rub a damp tea bag over the sanded spots to age them. Hot glue twine around the handles for a finished seaside look.
Get the full tutorial at The Girl Creative.
12. DIY Air-Dry Clay Jewelry Organizer Using Pebbles
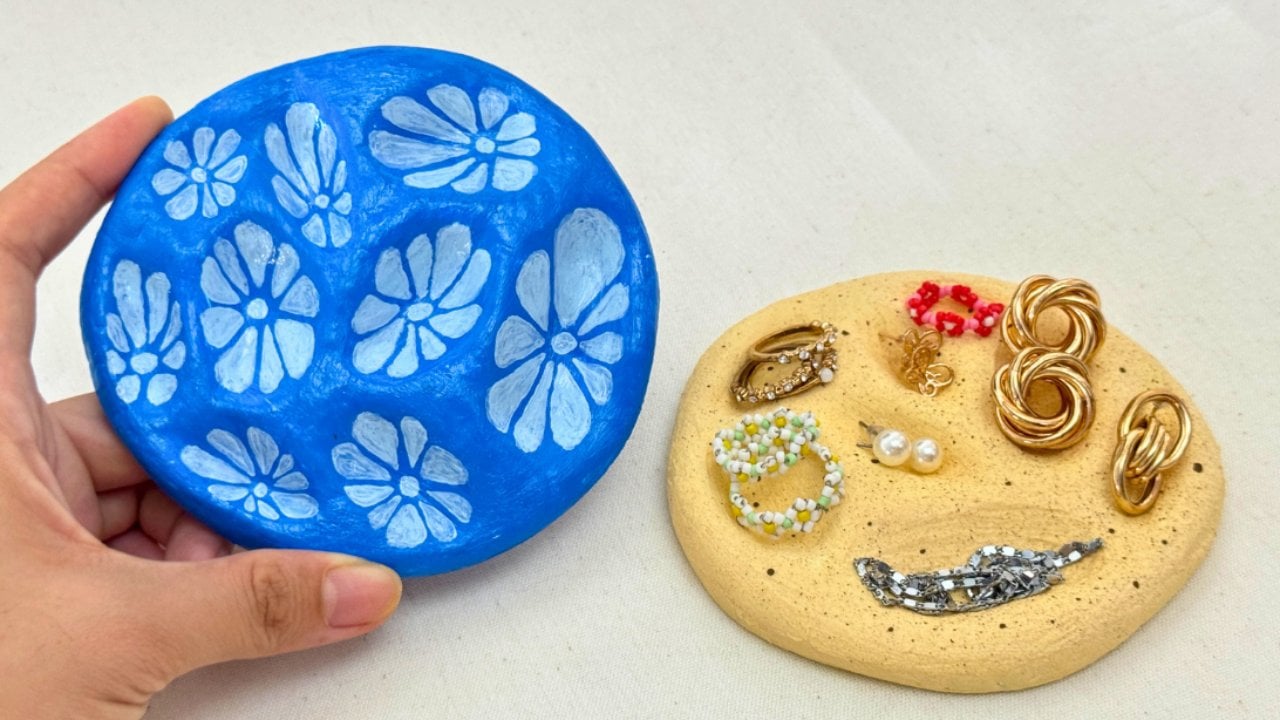
A DIY air-dry clay jewelry organizer using pebbles has wells shaped by real stones. Roll the clay into an even round slab, then press smooth pebbles in one at a time to make dips, wetting them first so they lift out cleanly. Smooth any cracks with damp fingers and let it dry completely, which can take a few days. Prime, paint a base color, then add flowers in the hollows. For a beachy texture, stir baking soda into the paint. Seal it to finish.
Get the full tutorial at DIY JOY.
13. Great Crate Book Storage

Great crate book storage turns one unfinished wooden crate into two wall shelves. Cut the crate straight down the middle with a table saw, slicing the two handled sides first and then the bottom. Screw simple wall hanging brackets to the cut edges and mount each half with drywall anchors, so they’re strong and safe for little hands. Hang them at kid height, with covers facing out. If the bottom has slats, cut a school folder or placemat to fit so small books don’t slip through.
Get the full tutorial at IHeart Organizing.
14. Easy Air-Dry Clay Ring Holder

An easy air-dry clay ring holder is shaped like an open flower with a stamen in the center. Roll the clay flat and cut it with a petal template, then slit between the petals and overlap them on a towel. Rest the towel in a bowl so the clay dries in a cup shape, and soften the petal edges. Roll a thin log for the stamen, insert a wire eyelet and attach it with a wet brush. Prime, paint and coat with UV resin for a porcelain shine.
Get the full tutorial at DIY JOY.
15. Easy DIY Air Dry Clay Jewelry Tray
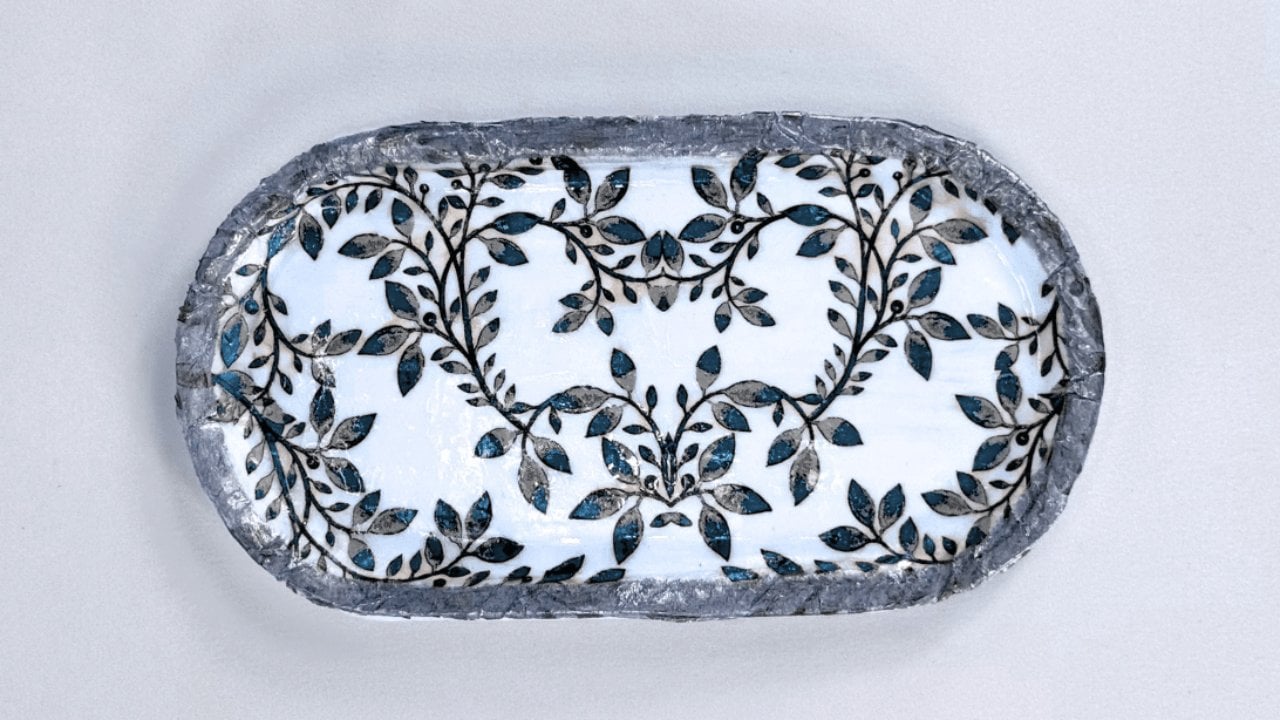
An easy DIY air dry clay jewelry tray takes its shape from a tray you already own. Dust the mold with baby powder, lay rolled clay over it and smooth it down with a damp sponge, trimming the excess. Once dry, pop it off and give it a coat or two of primer. Brush on Mod Podge, smooth the printed layer of a paper napkin into place and seal it with more Mod Podge. A metallic marker edge and a thin coat of UV resin finish it.
Get the full tutorial at DIY JOY.
16. Air-Dry Clay Jewelry Trinket
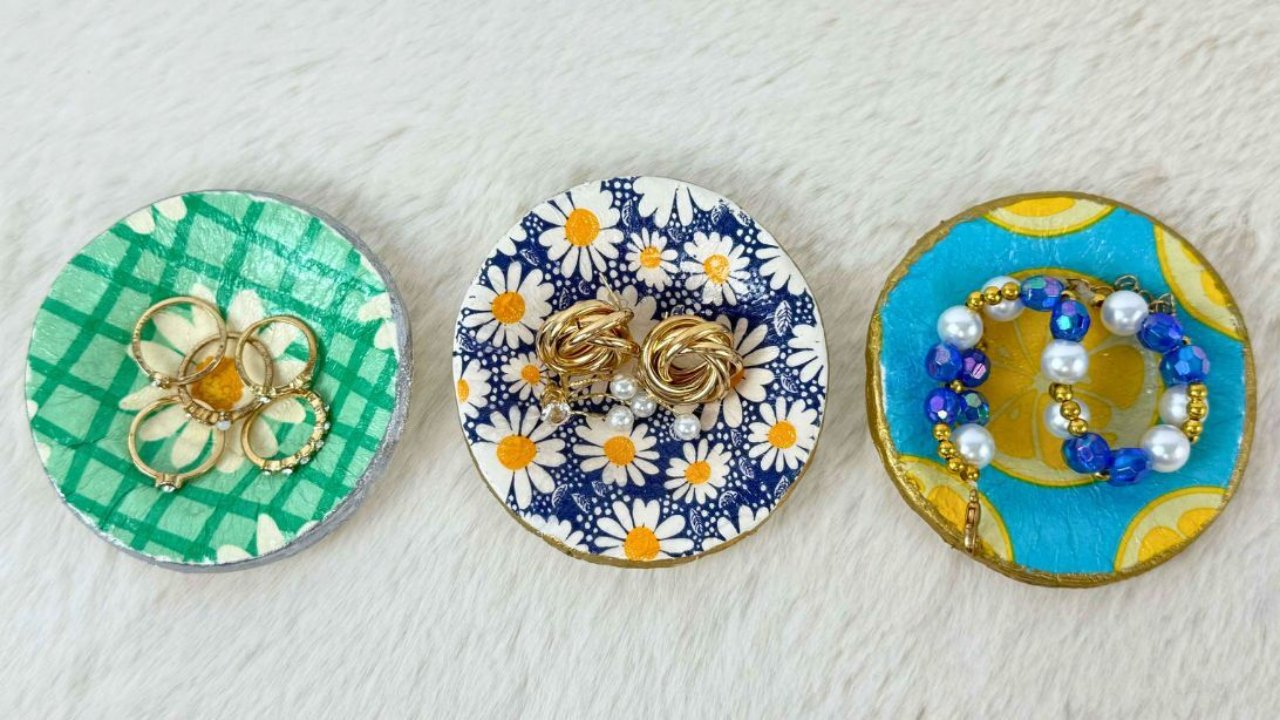
An air-dry clay jewelry trinket dish gets its pattern from a printed paper napkin. Roll out the clay, peel away the napkin’s plain backing layers and press the printed sheet onto the surface. Cut a circle with a cookie cutter or mason jar lid and clean up the edges. Brush on Mod Podge, then press the circle gently into a muffin pan to give it a shallow dip. Let it dry overnight, paint the rim gold and finish with gloss varnish.
Get the full tutorial at DIY JOY.
17. Crate Storage Coffee Table and Stools

A crate storage coffee table and stools set swaps pesky drawers for big wooden crates. The table holds four crates, 18 by 12 1/2 by 9 1/2 inches, two pulling out from each side on simple drawer guides, and it rides on semi-hidden casters for easy vacuuming. Ripping cheap 1×4 boards to exact widths gives straight edges for the face frame. Matching stools have cushioned seats that flip up for even more storage. Outdoor fabric stands up to kids and spills.
Get the full tutorial at Her Tool Belt.
18. DIY Chair Safe
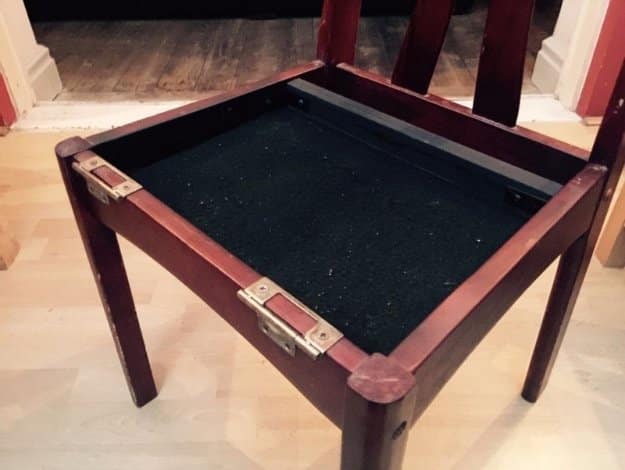
A DIY chair safe hides a secret compartment under a dining chair seat. Pick a chair with support rails deep enough to leave useful space. Unscrew the brackets holding the cushion, then hinge the cushion at the front edge so it lifts like a lid, which also keeps it from being found by accident. Trace the inside profile onto chipboard, cut it out and line it with black felt so things don’t slide. Spray the brackets and inside rails dark so the whole thing blends in.
Get the full tutorial at The Owner Builder Network.
19. Toy Storage Bin Box with Cubby Shelves
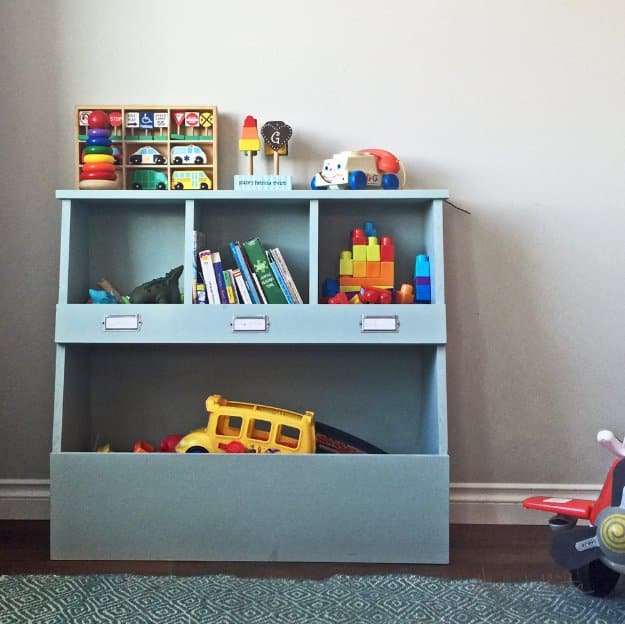
A toy storage bin box with cubby shelves works like a vertical toy box. A big open bin at the bottom takes the bulky stuff, like blocks, trucks and stuffed animals, while three small cubbies up top sort the little toys, books and games. Every part comes from 1x boards, planned so you don’t buy lumber you won’t use. Add label holders to the cubbies so kids know where things go. The free plans include diagrams, dimensions and a full cut list.
Get the full tutorial at Ana White.
20. How to Make a Jute Rope Tray
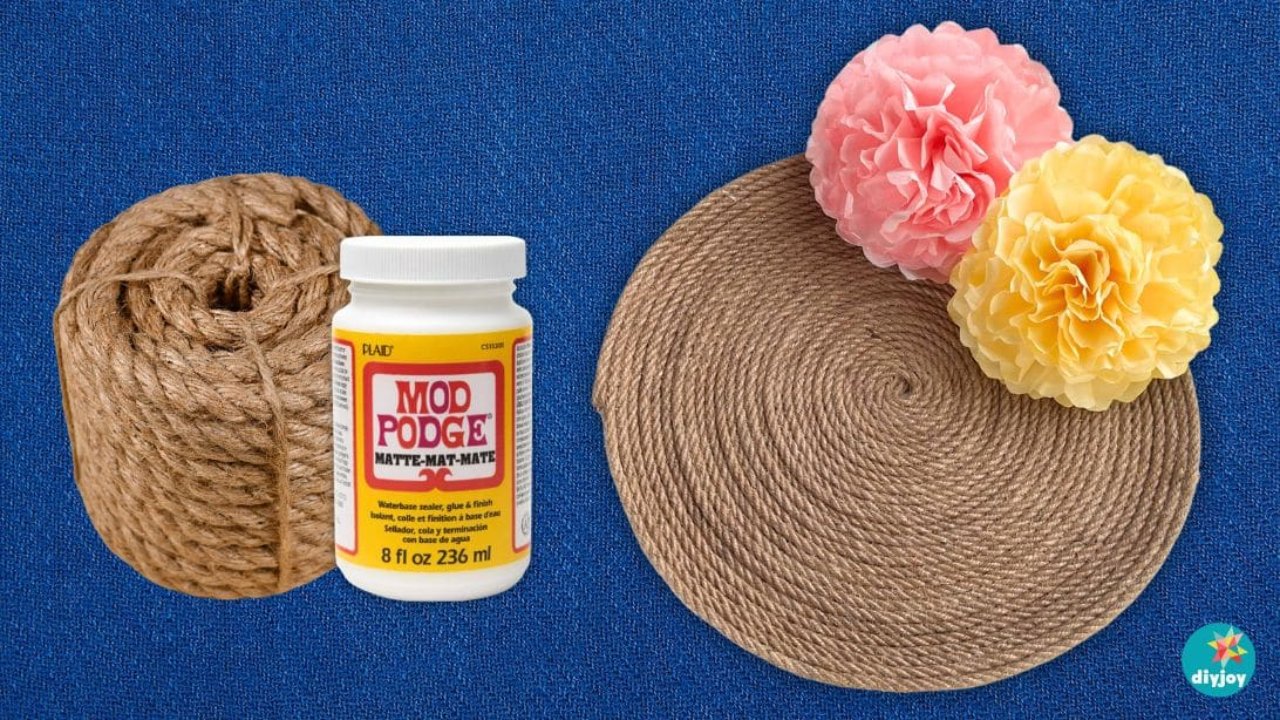
A jute rope tray costs a couple of dollars and needs just rope and Mod Podge. Wrap a tray in cling wrap, brush on a generous layer of Mod Podge and coil the rope end into a tight spiral at the center. Keep coiling outward and up the sides, adding glue as you go and checking that it stays flat. Cut and glue the end, coat everything again and let it dry, pressing down any lifting spots. Peel it off the wrap once it holds its shape.
Get the full tutorial at DIY JOY.
21. Gift Wrap Storage From a Shoe Organizer
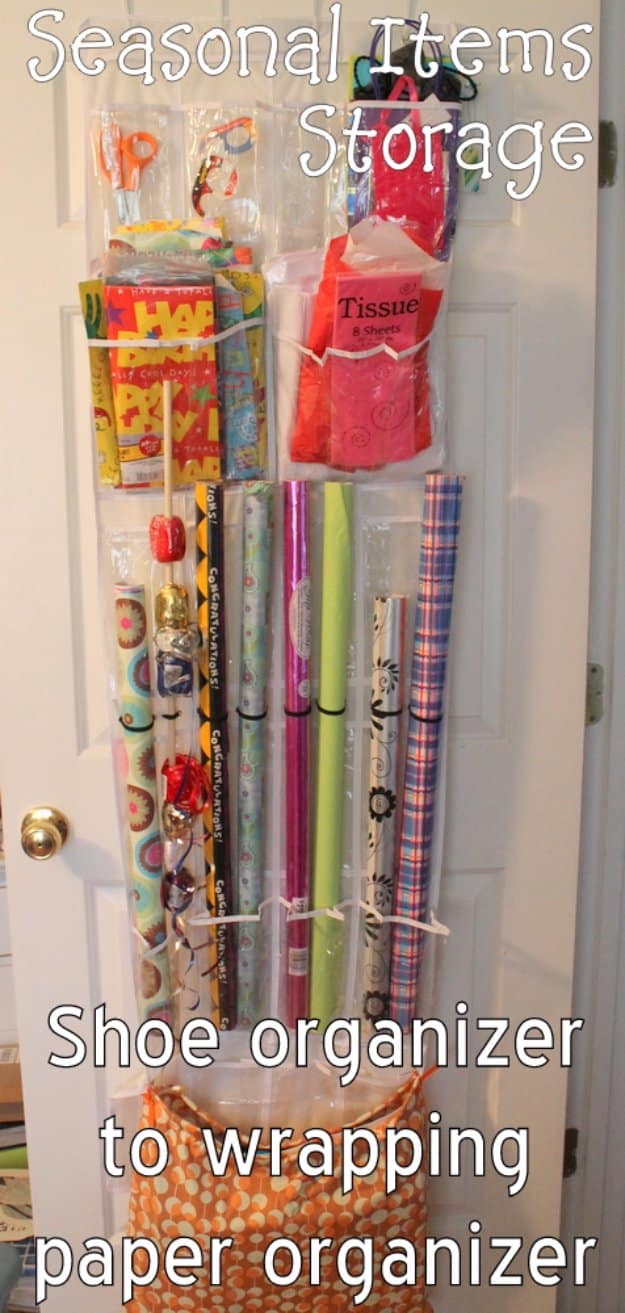
Gift wrap storage from a shoe organizer hangs on the back of a closet door. Start with a plain over the door shoe organizer from a discount store and slip rolls of wrapping paper, ribbon and tape into the pockets. For gift bags, sew a fabric pouch across the bottom row. Cut the fabric 3 inches wider than the organizer, angle the sides and add elastic so the pouch stretches open. The whole thing takes about an hour and keeps the tissue paper tidy too.
Get the full tutorial at The Country Chic Cottage.
22. DIY Air-Dry Clay Decoupage Jewelry Dish
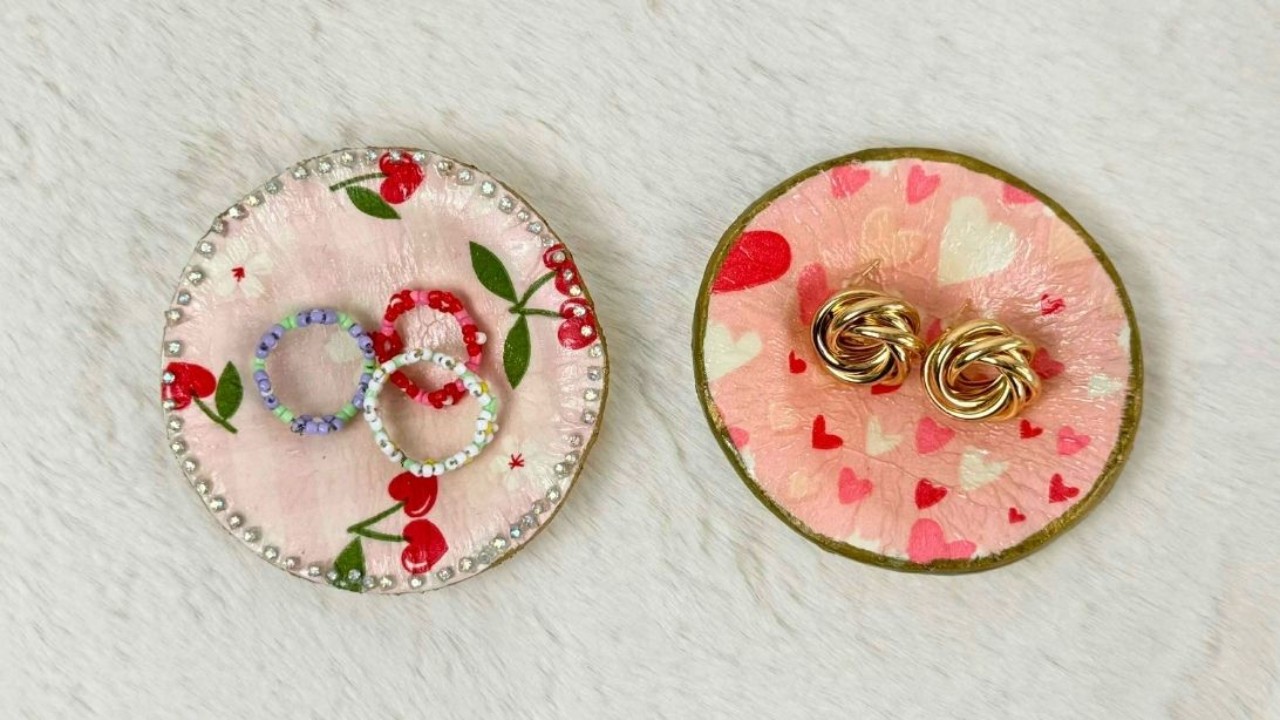
A DIY air-dry clay decoupage jewelry dish is a sweet beginner project with heart and cherry prints that suit Valentine’s Day. Flatten a chunk of clay, separate the printed top layer of a napkin and smooth it onto the clay. Use a jar lid or round cutter to cut out the dish and clear away the scraps. Coat it with Mod Podge, then ease it into a muffin pan for a shallow bowl. Once it dries overnight, paint the edge gold and seal with gloss varnish.
Get the full tutorial at DIY JOY.
23. Upcycled Ferrero Rocher Jewelry Box
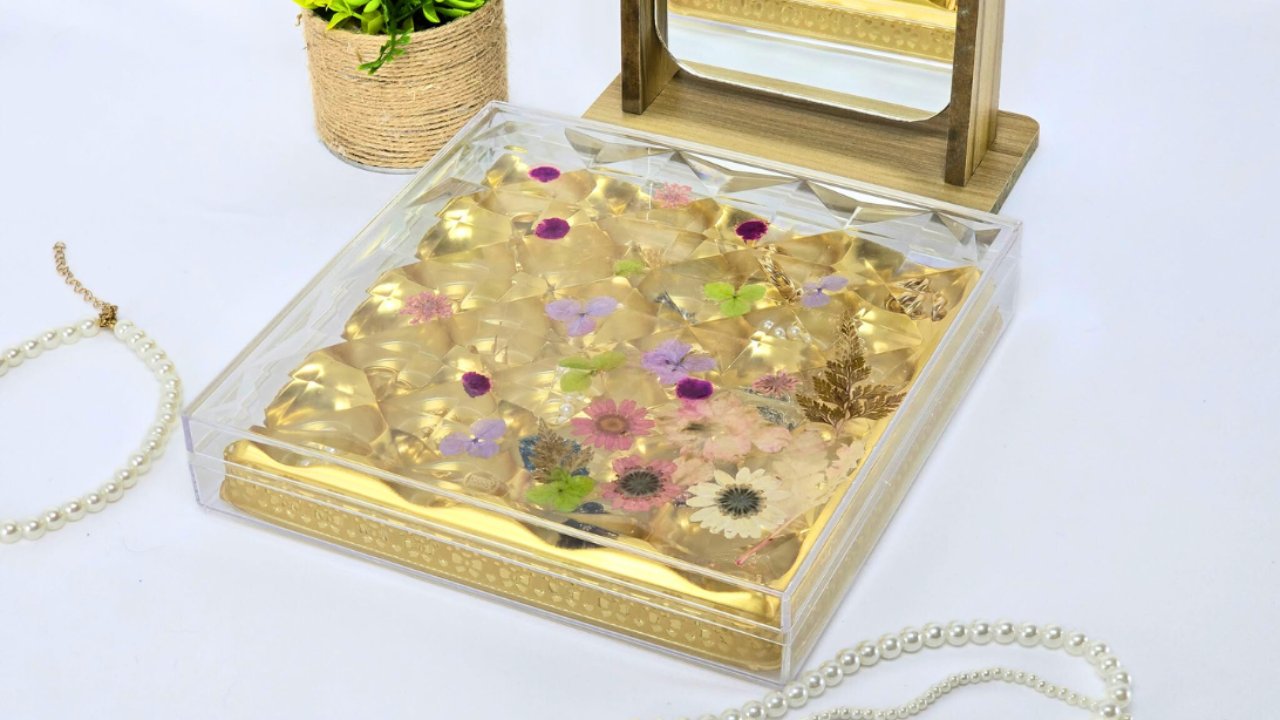
An upcycled Ferrero Rocher jewelry box puts that clear chocolate container to good use. Clean the box, then lift the label off the lid by pressing wide tape over it and peeling it away. Plan a layout of pressed flowers inside the lid and fix them down with Mod Podge, letting it dry completely. Wrap gold washi tape around the inner compartments for a polished edge. Each little chocolate slot becomes a perfect home for a ring, a pair of earrings or a folded necklace.
Get the full tutorial at DIY JOY.