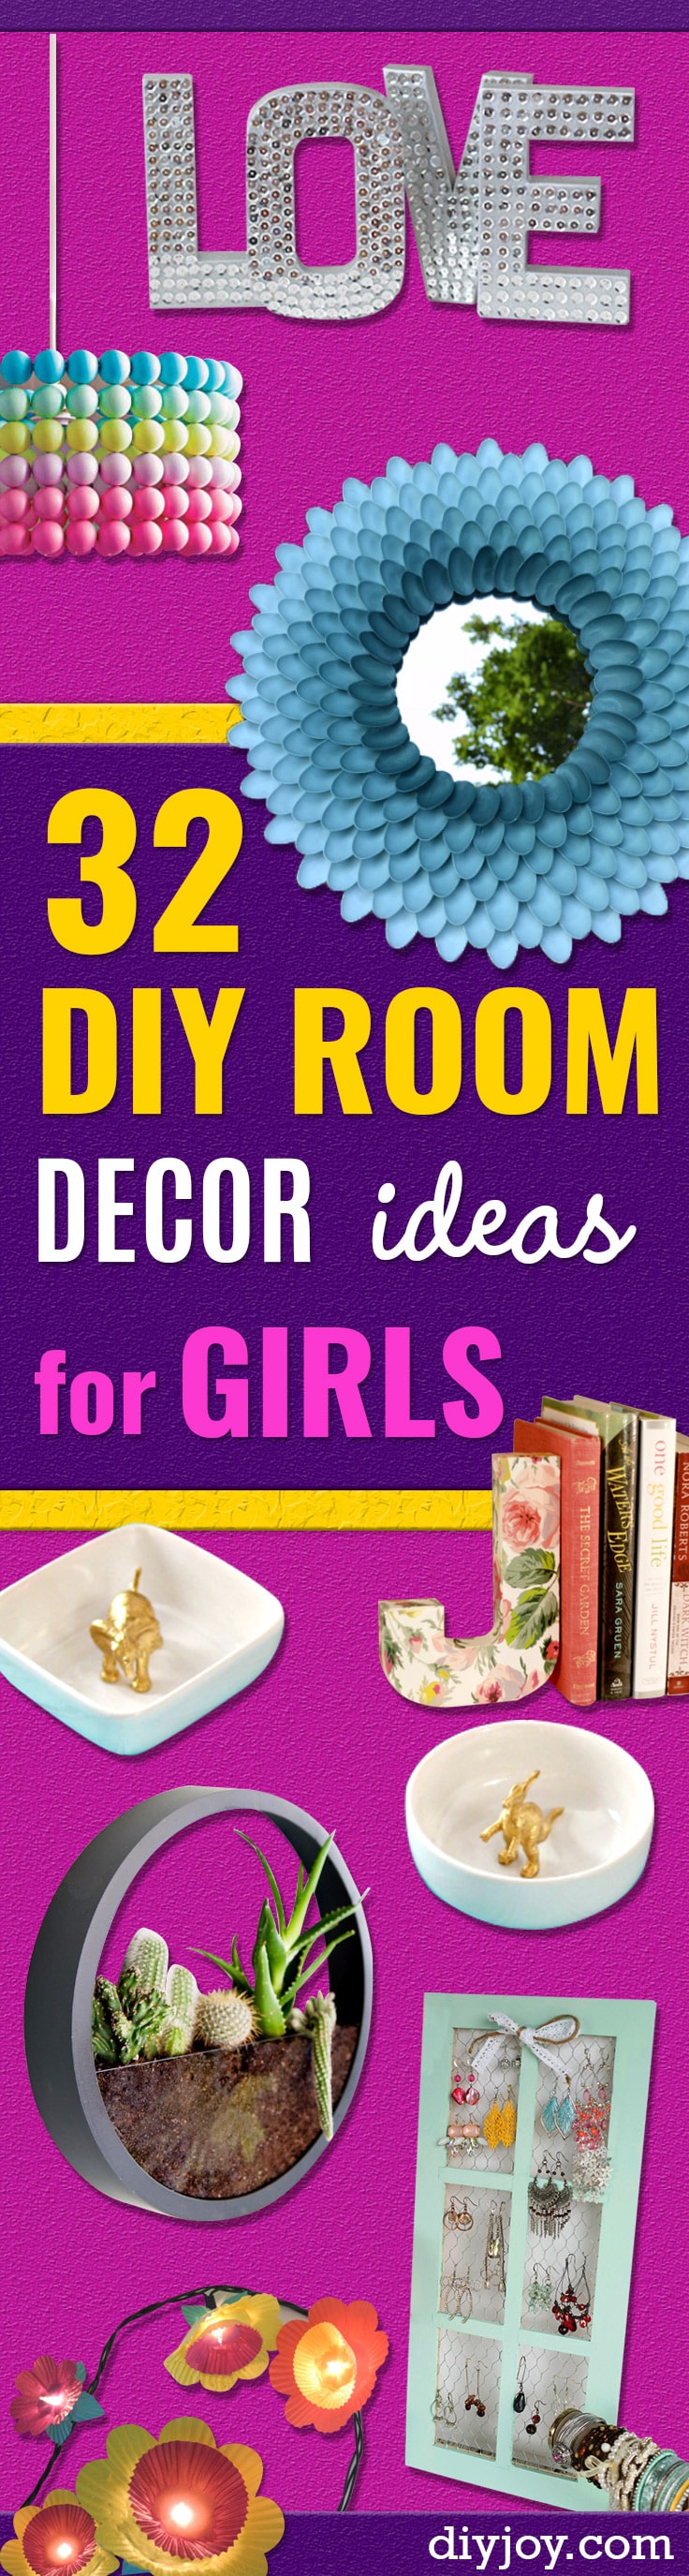
A girl’s bedroom is the one room in the house where the rules loosen up. Nobody is going to tell you the lamp shade is too purple or that a wall of hot pink hexagons is a bit much. That is the whole point of this list. It runs from things you can finish before dinner, like a braided basket or a set of no sew pillows, up to a honeycomb accent wall cut from lengths of one by two. Not all of it is pink, either. There are spray painted animal ring dishes, a mirror built from plastic spoons, a hammock chair that hangs in a window, and a set of bandana pillows you can sew in an afternoon. Every outside project links back to the maker who worked it out, and the DIY JOY originals come with our own video.
DIY Room Decor Ideas for Girls
1. DIY Triangle Mobile
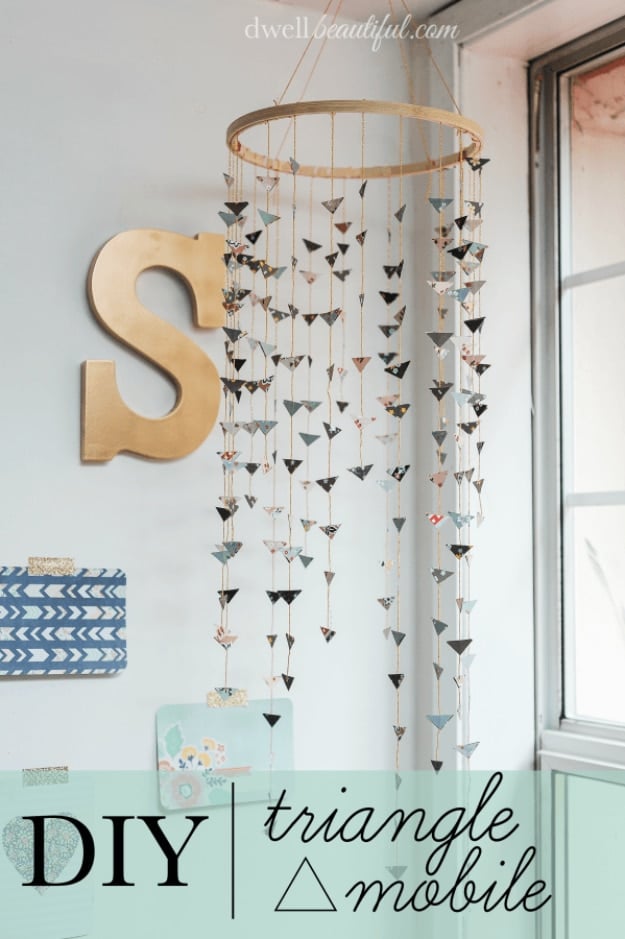
Strands of small paper triangles hang from a wooden embroidery hoop, and the whole thing costs an afternoon of cutting and almost nothing else. Decorative paper gets sliced into three quarter inch strips, then into rough squares, then in half on the diagonal, which is where the pile of triangles comes from. Around eighteen lengths of gold string get cut long, short and everything between, and the triangles are glued in pairs over the string so both faces read as finished. Tape the strings to the inner ring of a nine inch hoop, push the outer ring back on and tighten it. Hang it high if there are cats.
Get the full tutorial at Dwell Beautiful.
2. Bed Canopy DIY
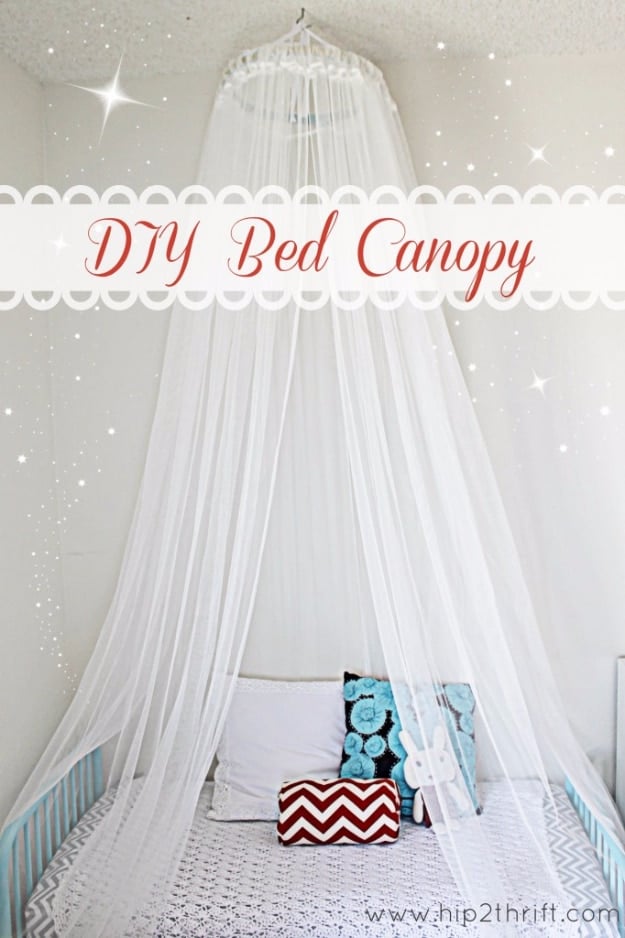
One large embroidery hoop, two sheer curtain panels and a single ceiling hook. Pop the inner ring out, tie ribbon at three evenly spaced points around the outer ring for hanging, then feed the curtains through the ring’s casing, push the inner ring back in and tighten it down. The maker used two sheers and says two to four works depending on how bunched you want the fabric; two gave her the look she wanted. Knot the three ribbons together at whatever height you like, checking they are the same length, then drill and hang. She sourced the hoop for a dollar at a thrift store and the sheers from Ikea’s as-is bins.
Get the full tutorial at Craftaholics Anonymous.
3. DIY Mirror Made With Plastic Spoons
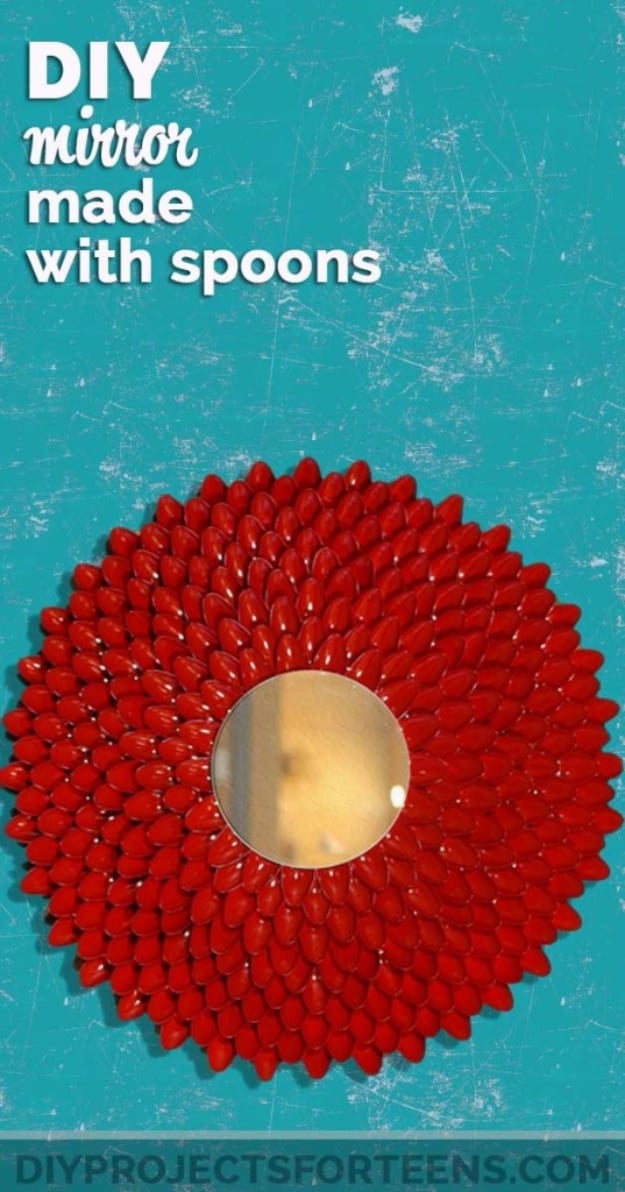
Plastic spoons, a cheap round mirror and a hot glue gun. The bowls of the spoons get snapped or cut off the handles and glued down in overlapping rings that radiate out from the mirror in the center, so the whole thing ends up looking like an enormous flower. The source pitches it at anyone whose craft budget has already run out, which is fair, because party spoons cost almost nothing by the bag. Spray paint is what sells it: a single strong color over the whole surface turns the spoons into petals instead of cutlery. Deep red on a turquoise wall is about as loud as a mirror can get.
Get the full tutorial at DIY Projects for Teens.
4. Rainbow Text Wall Art
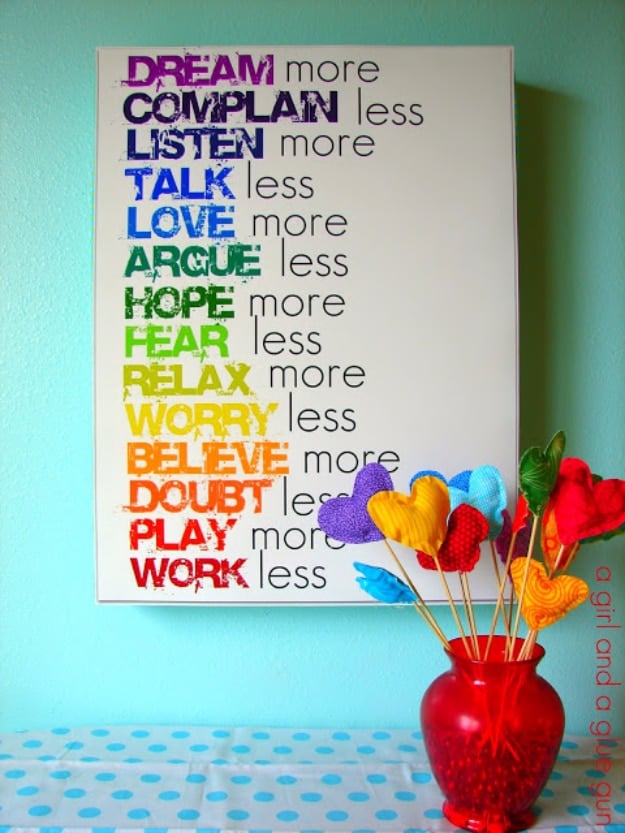
A big canvas of paired instructions, one word in rainbow color and the next in grey, running dream more, complain less, all the way down to play more, work less. The build is not a canvas at all. A sheet of styrofoam gets cut to size, fabric is cut into strips and hot glued around the edges to finish them, then the printed design is sprayed with adhesive and smoothed onto the front. The maker prints at eight by ten for a small version and had a blueprint size copy run at Staples for a large one. Foam core, drywall board or plain scrap wood all work in place of the styrofoam.
Get the full tutorial at A Girl and a Glue Gun.
5. Ping Pong Ball String Lights
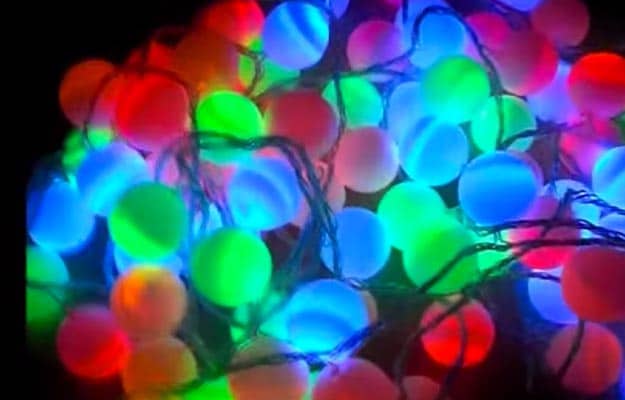
Ping pong balls pushed onto a strand of colored string lights, one ball per bulb, so each light glows through a solid sphere instead of a bare point. A small hole cut or drilled in one side of each ball is all the prep, then the ball presses over the bulb and stays put by friction. The balls come cheap in bulk from a sporting goods aisle and the lights from any craft store, which is why this shows up in so many dorm rooms. The effect is better than it has any right to be: the whole strand reads as a cluster of soft glowing orbs rather than a string of wires.
Get the full tutorial at DIY Projects for Teens.
6. DIY Light Up Headboard
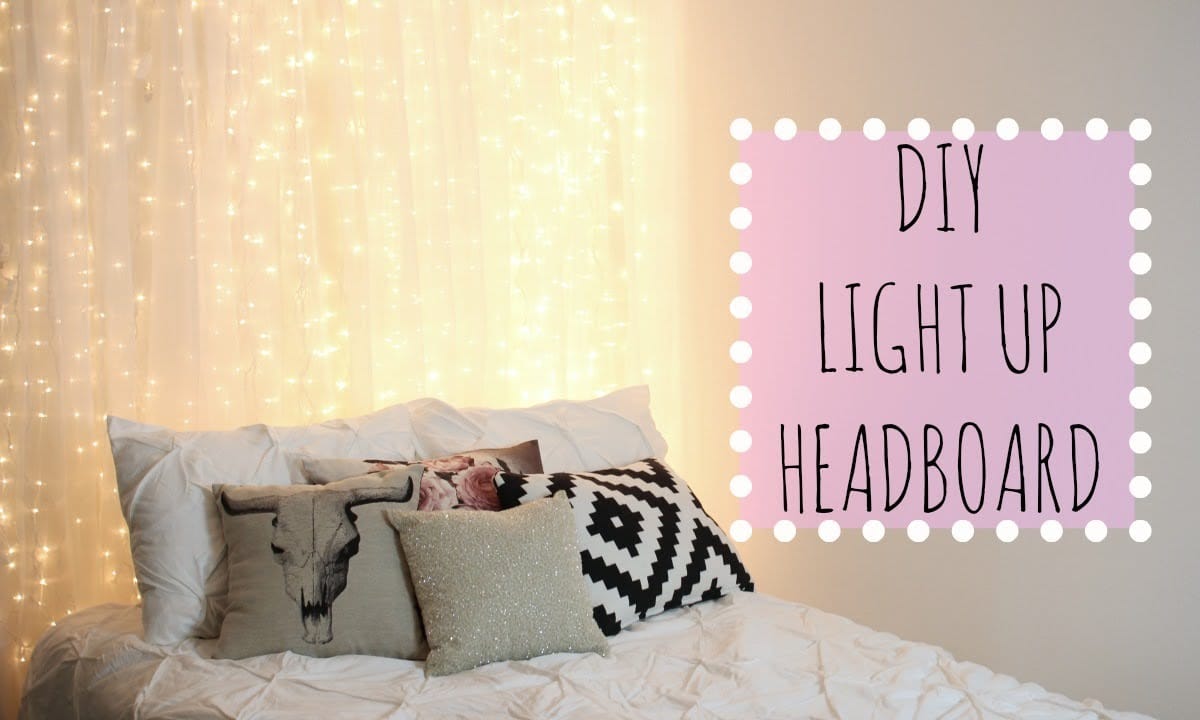
No headboard at all, just a sheer curtain panel on a spare rod with three hundred fairy lights behind it, so the whole wall above the bed glows instead of one hard strip of bulbs. Command hooks hold the lights up with no nail holes, which matters in a rental or a room that changes its mind every year. Sheer curtains, the lights and a pack of eighteen hooks all came from one trip to Walmart, and Target stocks the same three. The sheer fabric is doing the real work here: it diffuses every bulb into a soft haze so the effect reads as starlight rather than as Christmas lights taped to drywall.
Get the full tutorial at DIY Joy.
7. DIY Gold Animal Ring Dishes
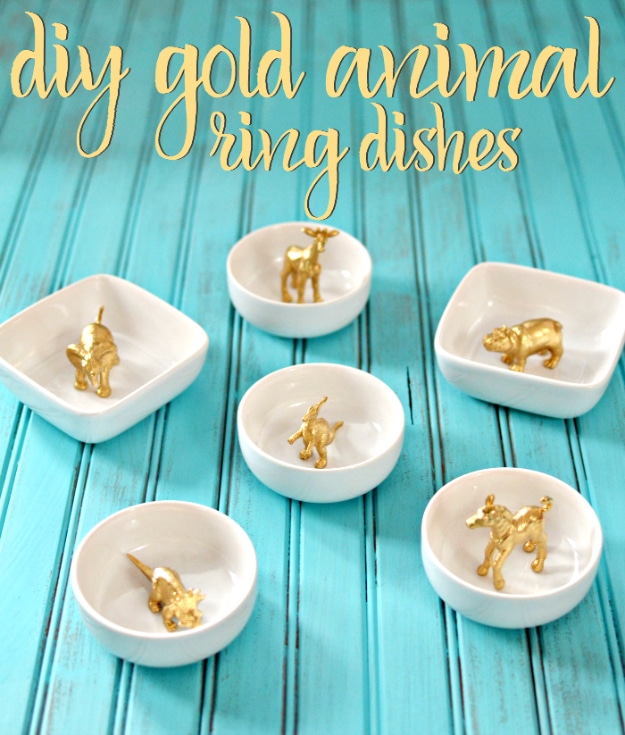
Plain white dishes, plastic toy animals and a can of gold spray paint. Paint the animals first and plan on a couple of coats, because the gold has to reach into every fold and leg gap or the plastic shows through from the side. Once they are dry a dab of E6000 on the feet sticks each animal into the middle of its dish. The maker’s tip is worth taking: choose tall animals over squat ones, because a giraffe peeks up over the rim and looks like it is standing guard over your rings, while a low animal disappears inside the bowl. Nearly all the project time is waiting for paint and glue to dry.
Get the full tutorial at Taylor Bradford.
8. DIY Wall Clock Terrarium
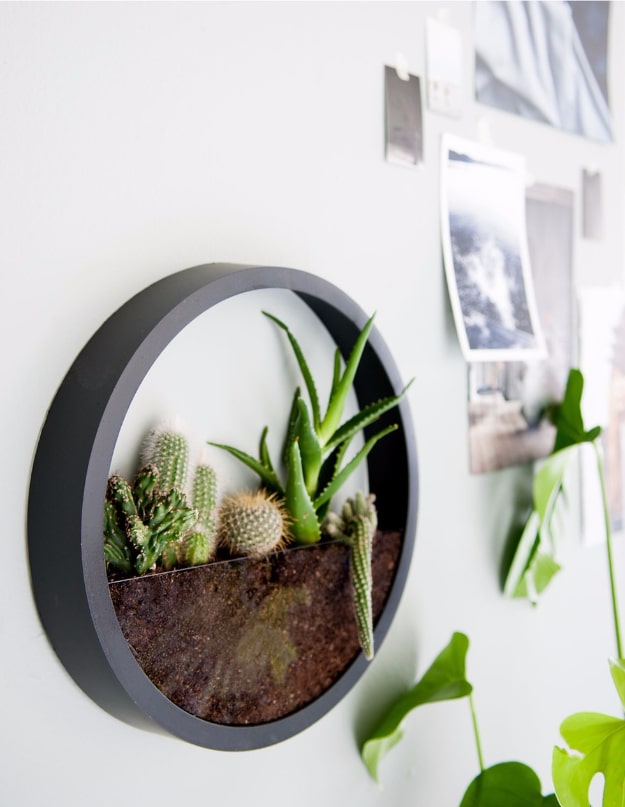
An old round wall clock with the movement pulled out and two pieces of two millimeter acrylic glued inside to make a shallow planting pocket. Trace the outer diameter of the clock’s back onto one sheet and the inner diameter of the front onto another, cut the outer circle on the line, then cut the inner one about half a centimeter outside the line and slice that piece in half to make a semicircle. The semicircle glues in at the front facing inward and the full circle closes the back. Spray the frame in thin coats, let the epoxy harden fully, then fill the pocket with soil and small cacti and hang it.
Get the full tutorial at Bolig Pluss.
9. Honeycomb Wall
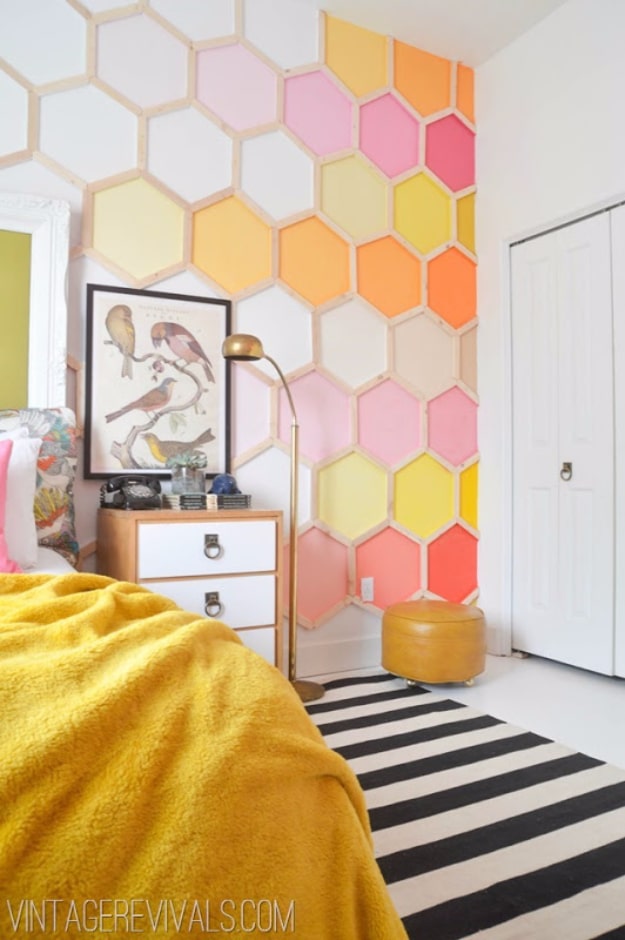
Those hexagons are wood rather than paint. Ten foot lengths of one by two get pushed together in a block and rolled with color first, then cut at thirty degrees on a miter saw over and over, using a jig so every piece comes out identical. She went through thirty seven boards. The wall goes up with painters tape before anything else, because one bad angle throws the whole hexagon out and tape is what lets you fix it. Once a hexagon sits right, a single nail through the center of each piece holds it. Repetitive rather than difficult, and worth every hour of it.
Get the full tutorial at Vintage Revivals.
10. Ping Pong Ball Pendant
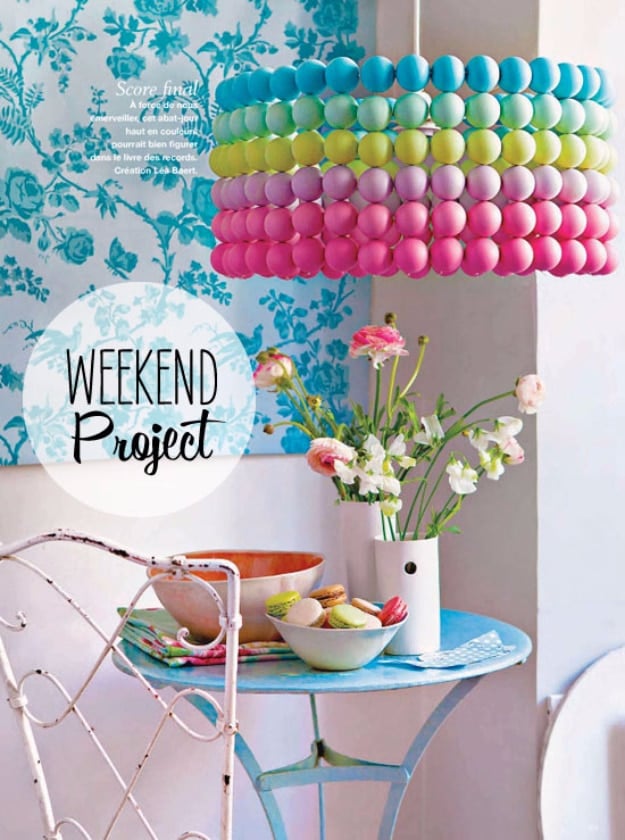
Balls get sprayed in groups, one color to a group, thirty balls a group and six rows for a shade forty five centimeters across, which comes to a hundred and eighty of them. A needle makes a small hole in each end, then nylon thread runs in one hole and out the other so a row strings up like beading. Each finished garland ties around the shade frame and the next goes on beside it until the frame disappears, and the whole thing hangs from a plug in pendant cord. Working one color per row is the difference between a designed piece and a craft accident.
Get the full tutorial at Poppytalk.
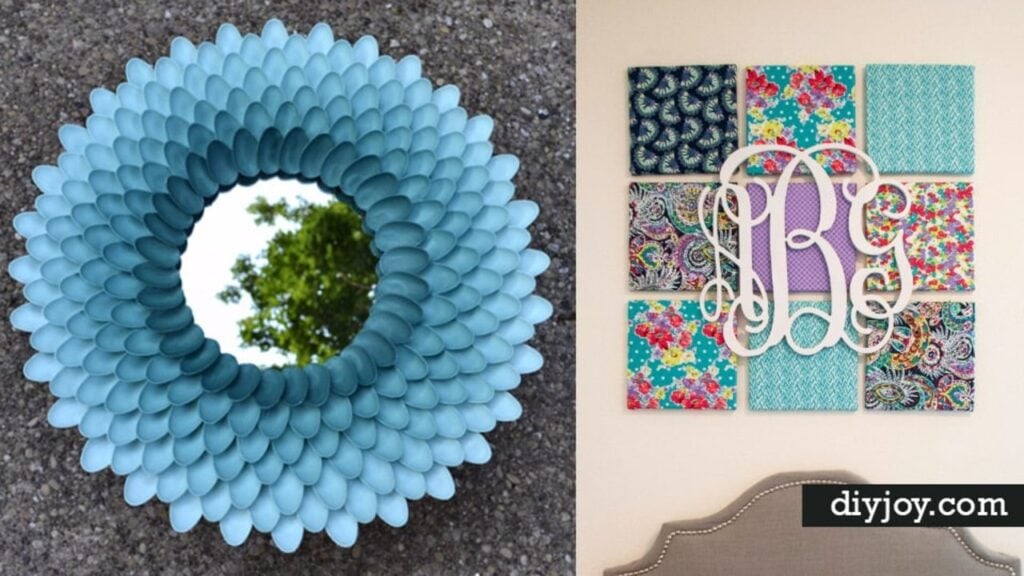
11. Decorative Chrysanthemum Mirror
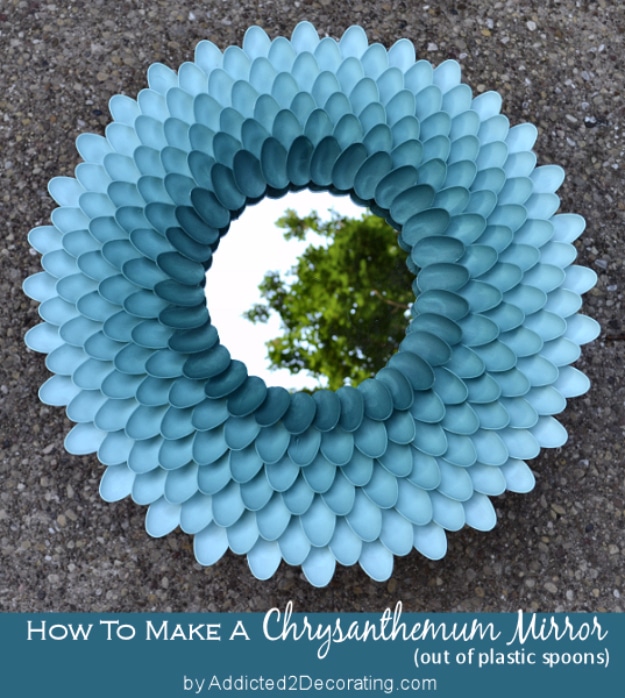
Six packages of forty eight plastic spoons, which is two hundred and eighty eight spoons, and two MDF wreath forms in eighteen inch and twelve inch sizes. Cut every handle off with scissors, glue the two forms together using the cut handles as spacers, then cover the gap with paper. The spoon bowls go down in concentric rings, using the holes already in the wreath form as a spacing guide. After priming, each ring gets hand painted a shade lighter than the last by adding more white to the teal, which is what creates the ombre. A twelve inch mirror goes on the back and the finished piece comes in at about twenty one and a half inches across.
Get the full tutorial at Addicted 2 Decorating.
12. Hammock Chair DIY
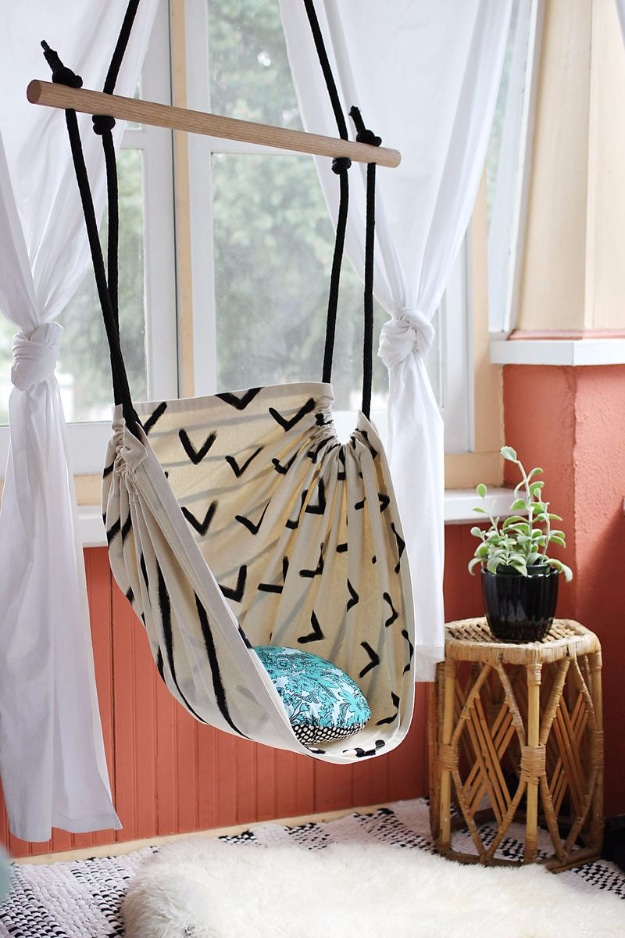
A canvas hammock chair gathered onto a wooden dowel and hung from black rope, with the fabric printed in a hand drawn chevron and stripe pattern in black on natural. Hung in front of a window rather than in a corner, which is the smarter placement, because the point of a hanging chair is reading in daylight. The seat is a single wide panel gathered at both ends and looped over the dowel so the sides rise into arms when someone sits in it. A ceiling joist is not optional for this one, and a small cushion in the base is the difference between a photo prop and a chair anybody actually sits in.
Get the full tutorial at A Beautiful Mess.
13. Creative Yarn Chandelier
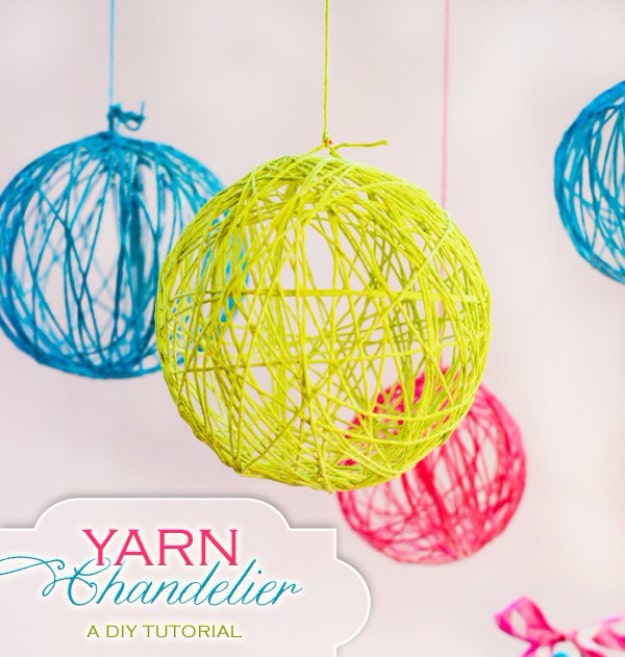
Yarn soaked in glue, wound around an inflated balloon and left to dry into a rigid hollow sphere, then the balloon is popped and pulled out through a gap in the strands. Wind in every direction rather than in neat bands, and leave real gaps, because a solid ball of yarn looks like a solid ball of yarn while an open one reads as a light fitting. Hung in a cluster at different heights in neon lime, turquoise and hot pink, they look like something bought rather than made from a balloon and a skein. Let them dry fully hard before touching them, which takes longer than anyone expects.
Get the full tutorial at Hostess with the Mostess.
14. Disco Love Sign
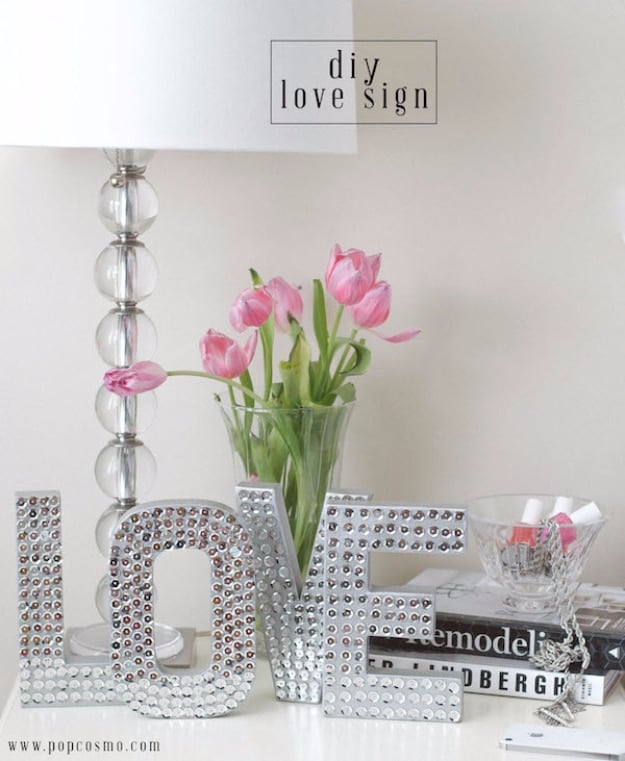
Eight inch cardboard letters, painted first in a color that matches the sequins so any gaps disappear, then covered in sequins pinned on one at a time with sequin pins. A thimble is not optional, it is the only thing standing between you and a very sore thumb. Space them as tight or as loose as you like, and the maker points out that varying the density between letters actually looks better than perfect consistency: her L is packed solid and her E is spread out. Budget about forty five minutes a letter. It is a television project, so put everything in cups on a tray and work through an episode of something.
Get the full tutorial at PopCosmo.
15. Pom Pom Lamp Shade
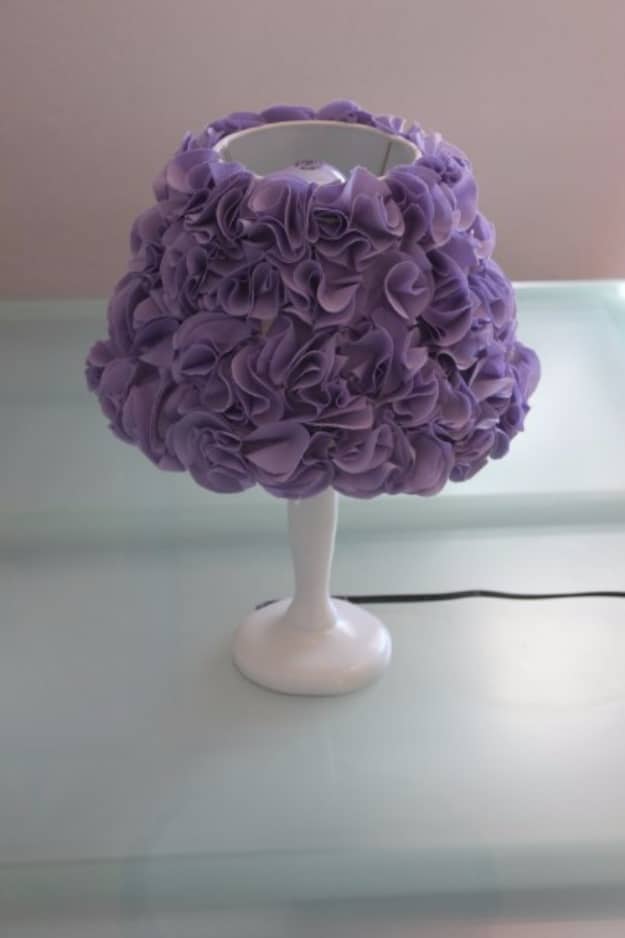
Fabric pom poms hot glued over a plain lamp shade until no shade is visible at all. The maker made hers about two inches across, tracing a Keurig K-cup for the circle template and using roughly five fabric circles per pom pom, out of one to one and a half yards of stretch cotton. The base was a lamp she already had, spray painted white. Total spend was eleven dollars against a one hundred and sixty dollar Pottery Barn Kids lamp she was looking at, which is a hundred and forty nine dollar saving. It took two evenings. Her own verdict is that you cannot mess this up, which is exactly the right kind of project.
Get the full tutorial at Craftistas Inspiration.
16. DIY Braided Basket
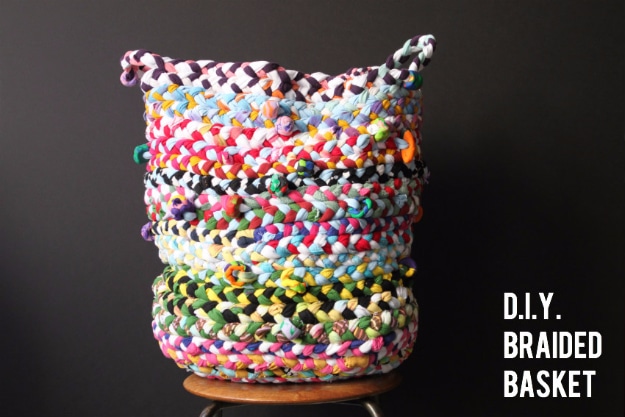
About twenty old t-shirts cut into strips two to two and a half inches wide, plus at least a yard of jersey for braid continuity. Baste three strips together at a time to make lengths long enough to braid, which took the maker roughly three hours on its own. Braid, then coil the unbeaded end flat and sew the coils together to make the base before turning the braid upright and stacking rounds for the walls. Handles come from lifting a section of the braid where you want them. Her warning is the honest part: the sewing takes a surprisingly long time and some fabrics are nearly impossible to push a needle through.
Get the full tutorial at Blogging Corner.
17. Easy DIY 5 Minute No Sew Pillows
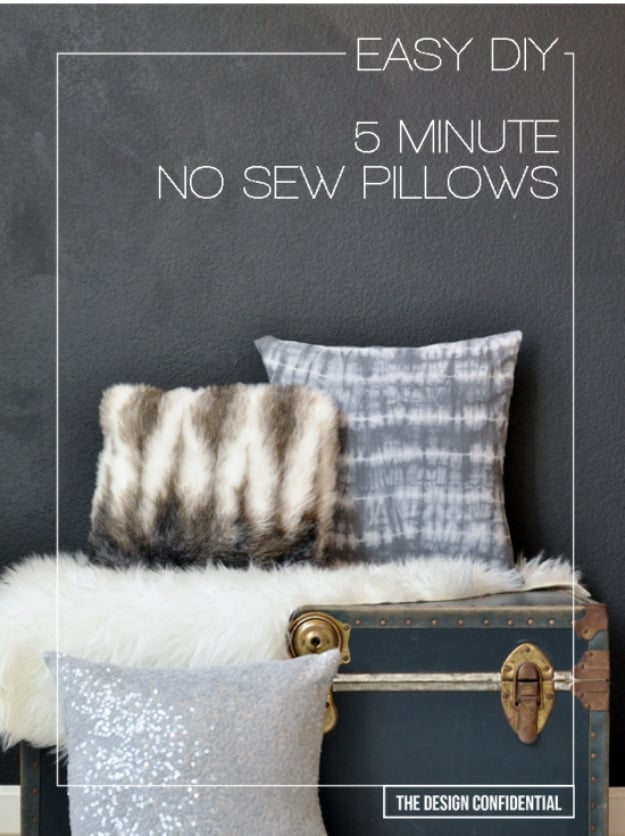
Fabric glue, a pillow insert and either two squares of fabric cut about an inch bigger than the insert or, better, an old shirt. Slide the insert inside the shirt to see where to cut, take it off about half an inch beyond the pillow, then run a thin line of glue along that cut edge between the two layers and let it dry twenty minutes. Turn it right side out, push the corners square with the end of a pencil eraser, stuff the insert in and glue the last side closed in short sections rather than all at once. A tie dye tank ran five dollars, a sequin one was free out of a wardrobe.
Get the full tutorial at The Design Confidential.
18. Easy DIY Fairy Jar Lanterns
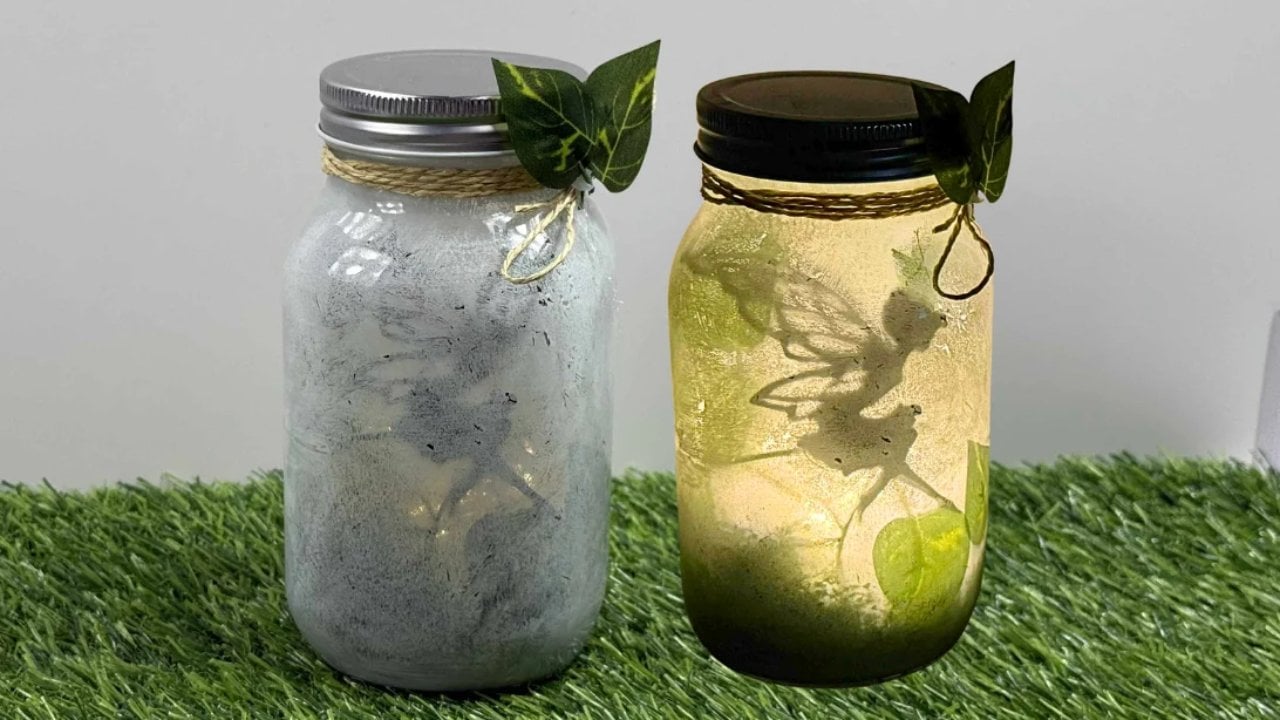
A mason jar, a bit of tissue or vellum, a fairy silhouette and a string of battery fairy lights coiled inside. The silhouette goes on the inside of the glass and the translucent paper goes over the top of it, so when the lights come on the fairy reads as a dark shape suspended in a glowing cloud rather than as a sticker on a jar. Twine around the neck and a fake ivy leaf tucked under it finish the outside. Unlit on a shelf in daylight it is pretty; switched off in the dark it is nothing, which is why these belong on a nightstand rather than a bookshelf.
Get the full tutorial at DIY Joy.
19. Textured Heart Canvas Art Painting
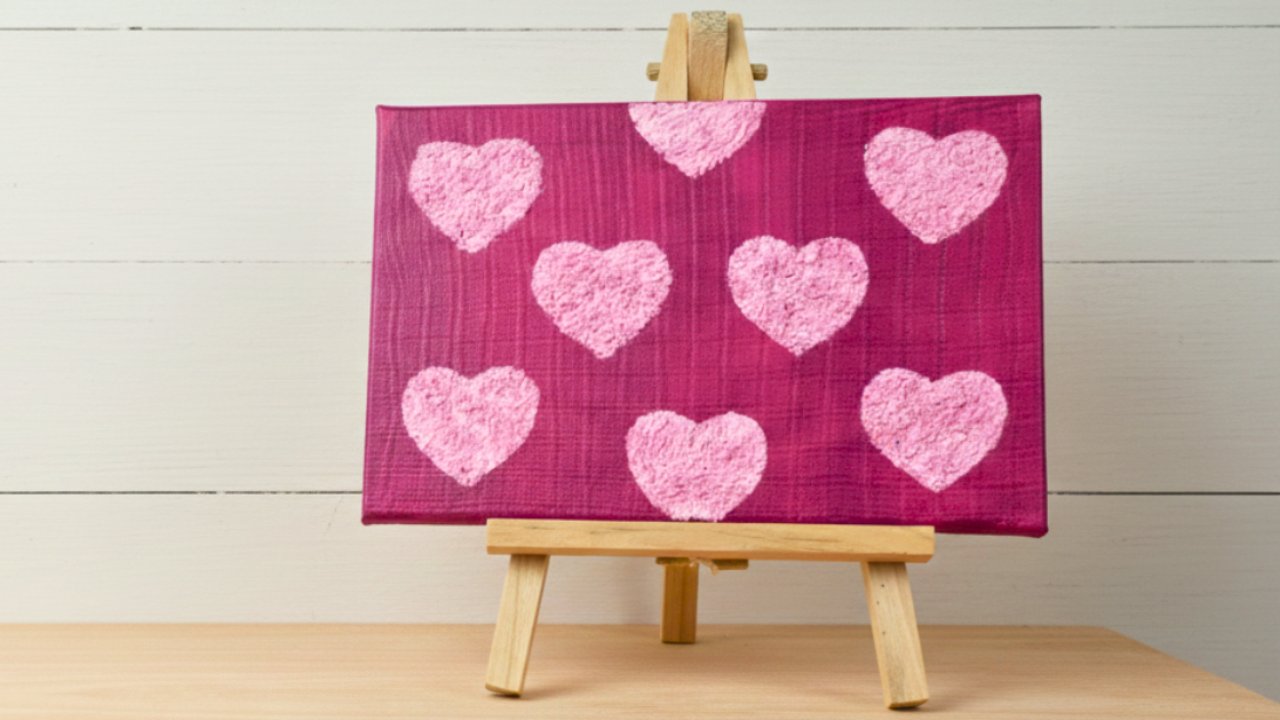
A small canvas painted magenta with pale pink hearts raised off the surface in real texture, so they catch the light from the side instead of sitting flat like a print. The texture comes from tissue paper worked into the paint while it is wet, which gives each heart a crumpled, almost fabric-like surface. Scale is the thing to get right: eight smallish hearts scattered across the canvas at slightly different angles reads far better than three big ones. It is a genuinely cheap piece of wall art and it works in a cluster of three or four canvases in different colors above a desk.
Get the full tutorial at DIY Joy.
20. How to Make Bandana Pillows
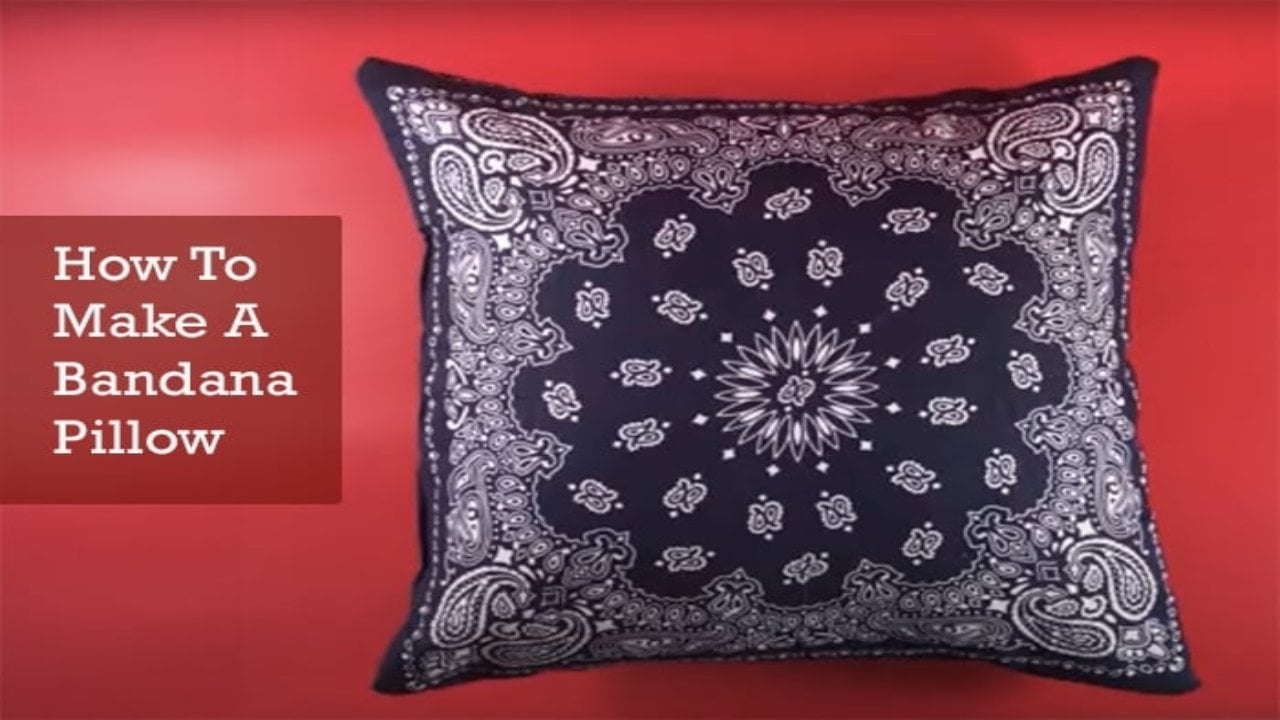
Two bandanas, sewn together around three sides with a pillow form pushed in and the fourth closed. That is the whole build, and there is a no-sew version in the same tutorial for anyone who does not own a machine. Bandanas already come hemmed on all four sides, which is why this is so much faster than any other pillow project: there is no finishing to do and no pattern to cut. Dollar store bandanas mean a finished pillow costs a couple of dollars, and because nobody else has them, they do not look like something off a shelf. They work anywhere, from a bed to a window seat.
Get the full tutorial at DIY Joy.
21. DIY Air-Dry Clay Jewelry Organizer Using Pebbles
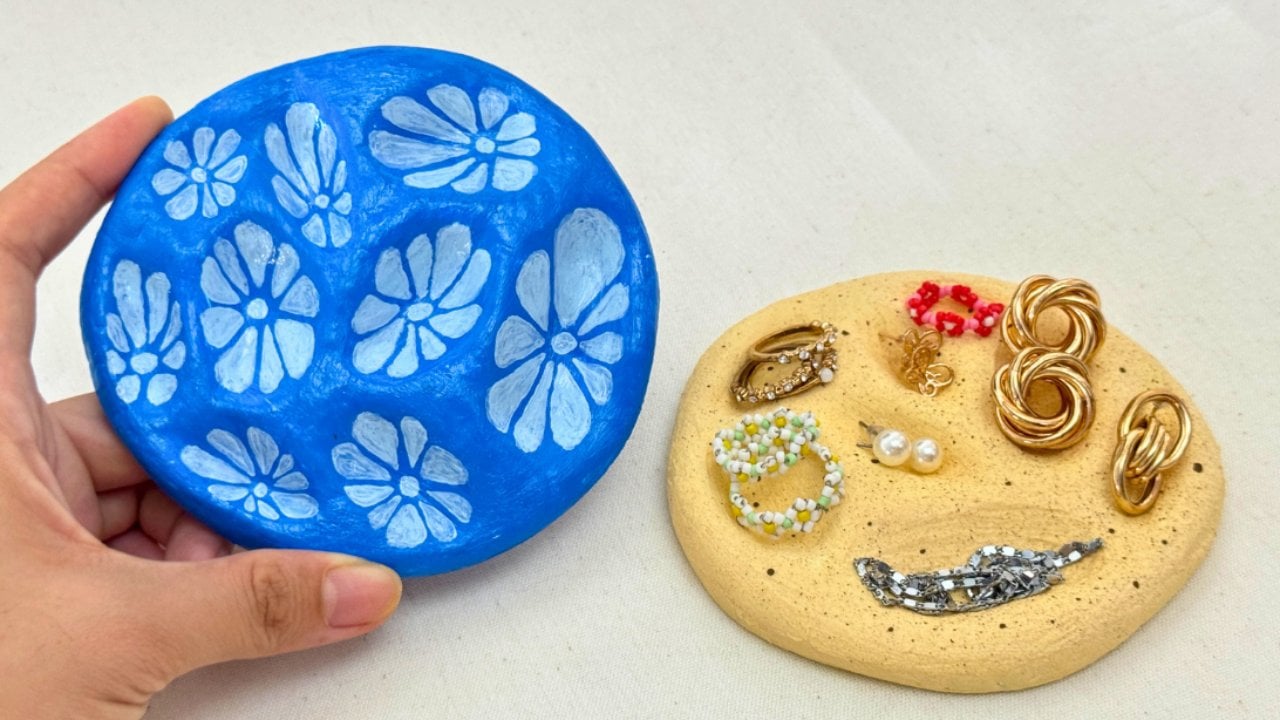
A slab of air dry clay pressed over a handful of pebbles so the surface sets full of shallow dips, each one the right size to park a ring or a stud in. The pebbles come out before it dries and what is left is a dish with a dozen little wells rather than one big bowl where everything slides into a pile. Two versions are worth making: one left in natural sandy clay, one painted blue with white daisies over the dips. Wait for the clay to dry fully before painting, because sealing damp clay traps the moisture and the piece cracks later.
Get the full tutorial at DIY Joy.
22. DIY Denim Jean Organizer
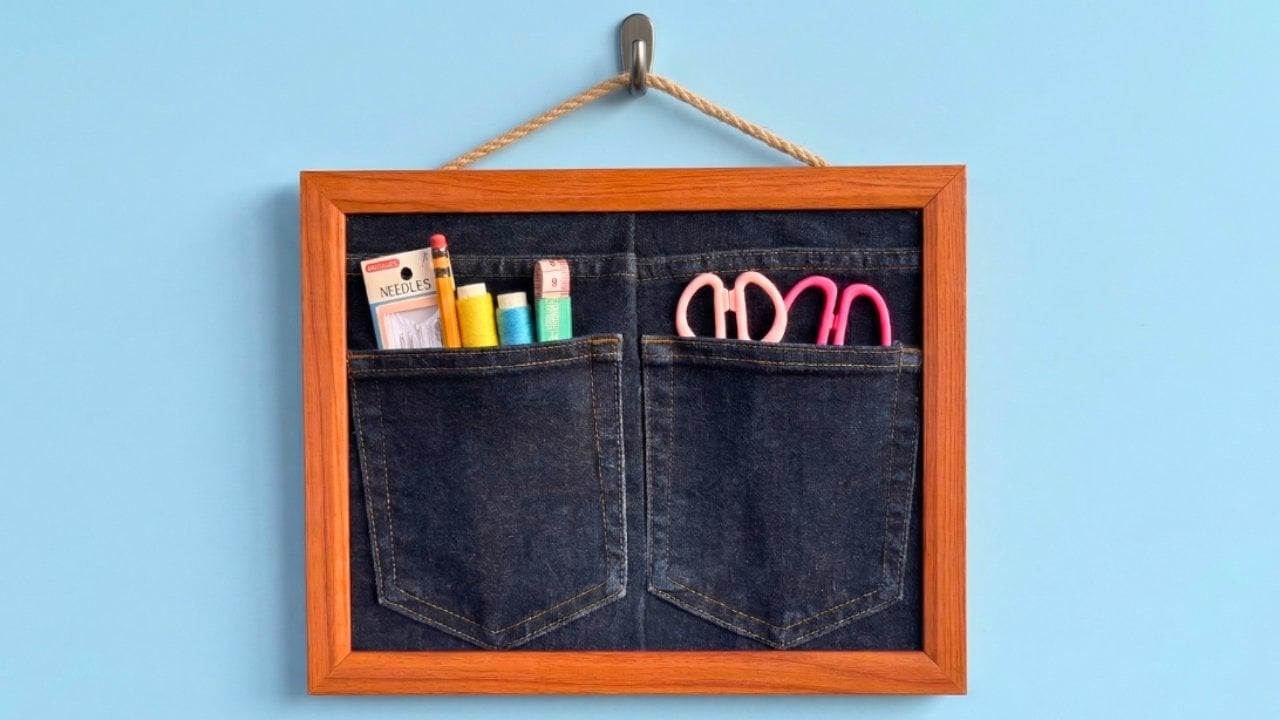
The two back pockets cut off a worn out pair of jeans, mounted on a board and set inside a wooden picture frame so they become wall storage instead of landfill. Cut wide around each pocket so there is a margin of denim to fix down, keeping the topstitching and the rivets intact, because those details are what make it obviously jeans rather than just blue fabric. Rope across the back of the frame hangs it off a single hook. Each pocket holds pens, scissors, brushes or hair things, and it lives on the wall beside a desk where a drawer would swallow all of it.
Get the full tutorial at DIY Joy.
23. Mason Jar Fairy Lights With Pressed Flowers
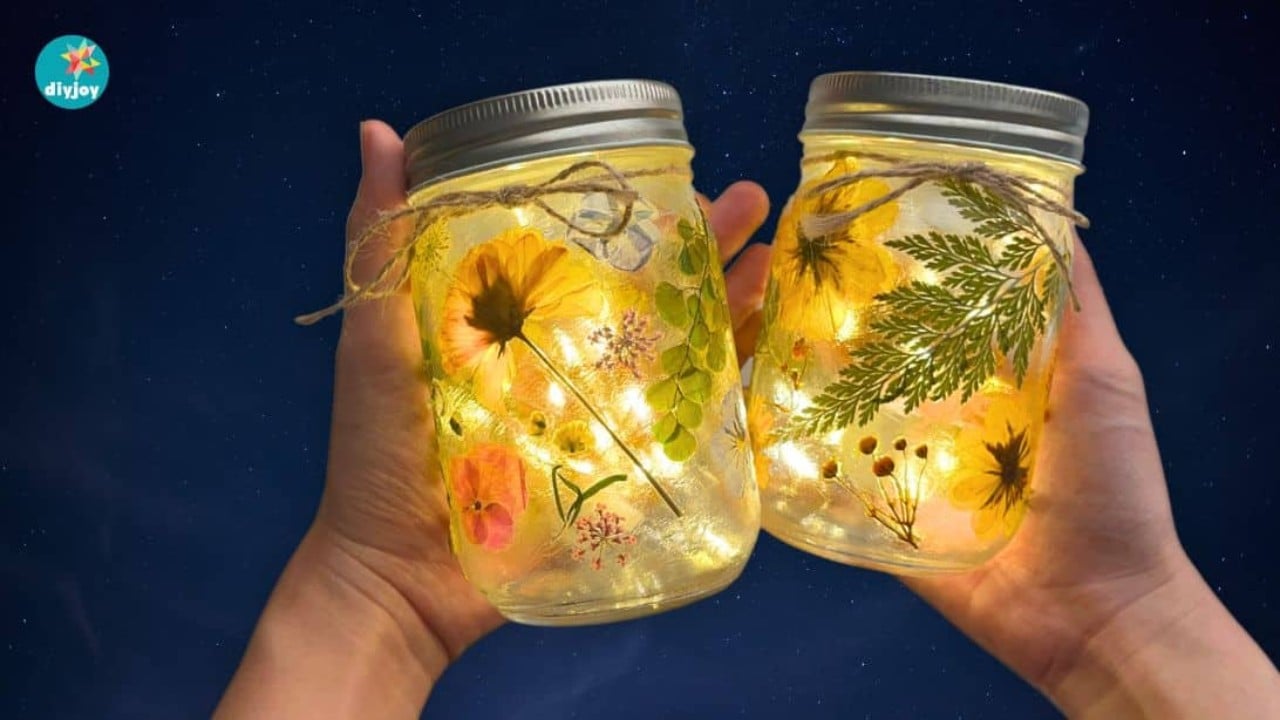
Pressed flowers and leaves decoupaged onto the outside of a mason jar with a string of warm fairy lights coiled inside. Real pressed blooms, not printed ones, which is why the petals go translucent when the light comes through from behind. Press the flowers flat and dry them completely first, then work them onto the glass with a thin sealant and smooth each one down so no air sits underneath. Yellow and orange blooms with a sprig of fern read best against warm white lights. Twine tied round the neck hides the top edge of the paper. Two of these on a windowsill are better than one.
Get the full tutorial at DIY Joy.
24. Easy DIY Beaded Plant Hanger and Lantern
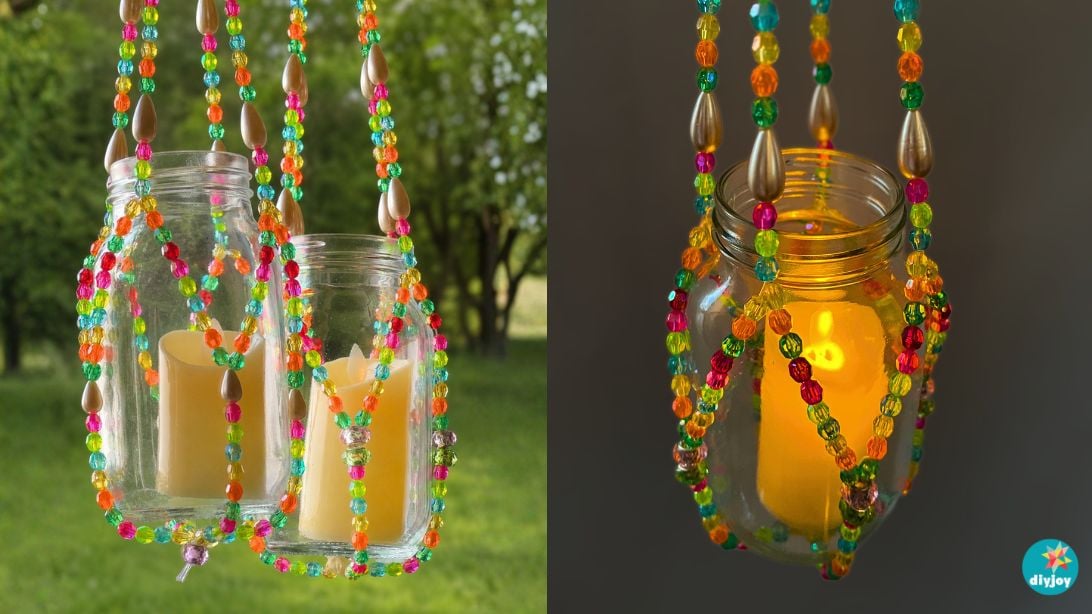
Four five foot lengths of fishing line folded through a small wooden ring and strung with glass beads, so the strands fall away in a cage that holds a jar. Put a candle in the jar and it is a lantern; put a small potted plant in and it is a plant hanger, which is why one of these ends up doing both jobs depending on what the room needs that week. The bead colors are worth thinking about rather than grabbing: bright multicolored beads against clear glass read cheerful, and larger teardrop beads spaced through the strands stop it looking like one long uniform string.
Get the full tutorial at DIY Joy.
25. How to Make a Beaded Potted Plant
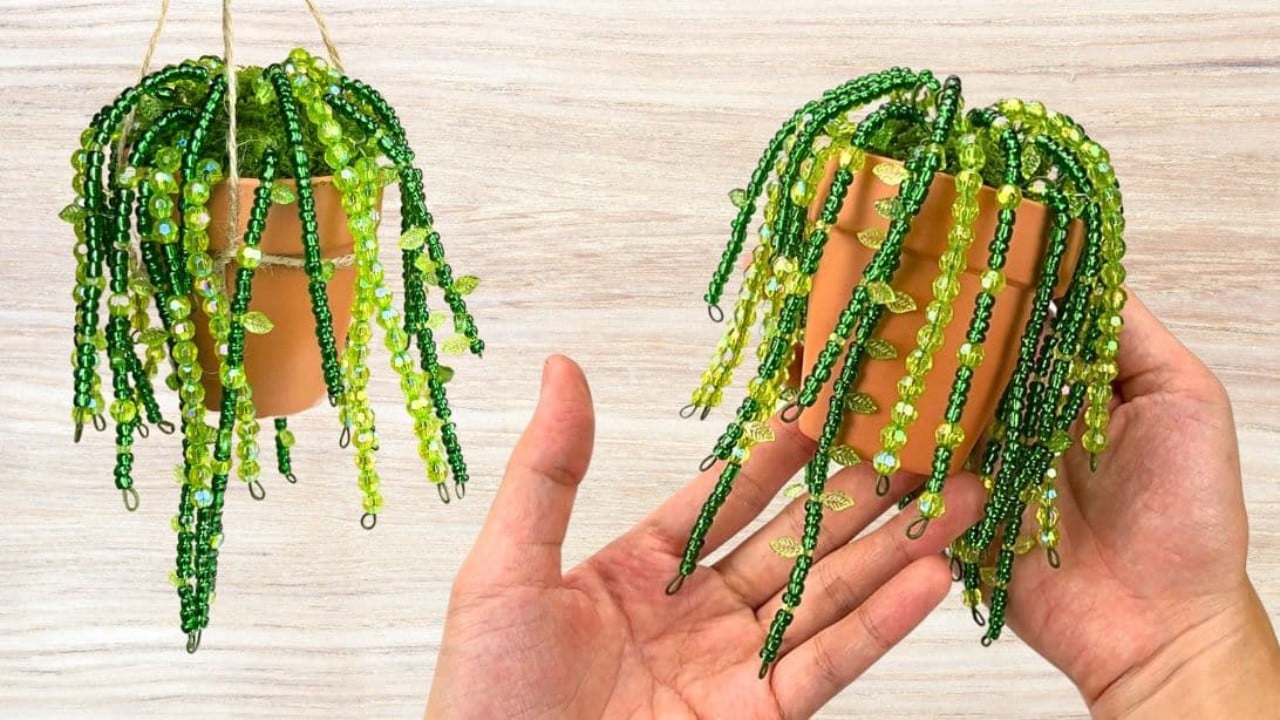
A tiny terracotta pot with a trailing plant made entirely from seed beads on wire, in two greens with little leaf shaped beads threaded through the strands. Each trailing stem is one length of wire strung and then bent, and the finished plant is small enough to sit in a palm. Mixing two shades of green rather than using one is what makes it read as a real string of pearls plant, and the leaf beads break up the line so it does not look like a beaded chain. It hangs on twine or sits on a desk shelf, and unlike the real thing it survives being forgotten about entirely.
Get the full tutorial at DIY Joy.