
Don’t toss those tuna cans just yet, as you can turn them into these adorable DIY Christmas ornaments! They’re easy and fun to make, budget-friendly, and totally customizable. I made them in three different designs: Christmas sweater, Christmas tree and snowman, and gingerbread house. If you want to use the same designs, you can download them below. They are free for everyone. Try making these tuna can ornaments with your family this holiday season!
RELATED: Easy Paper Christmas Ornament

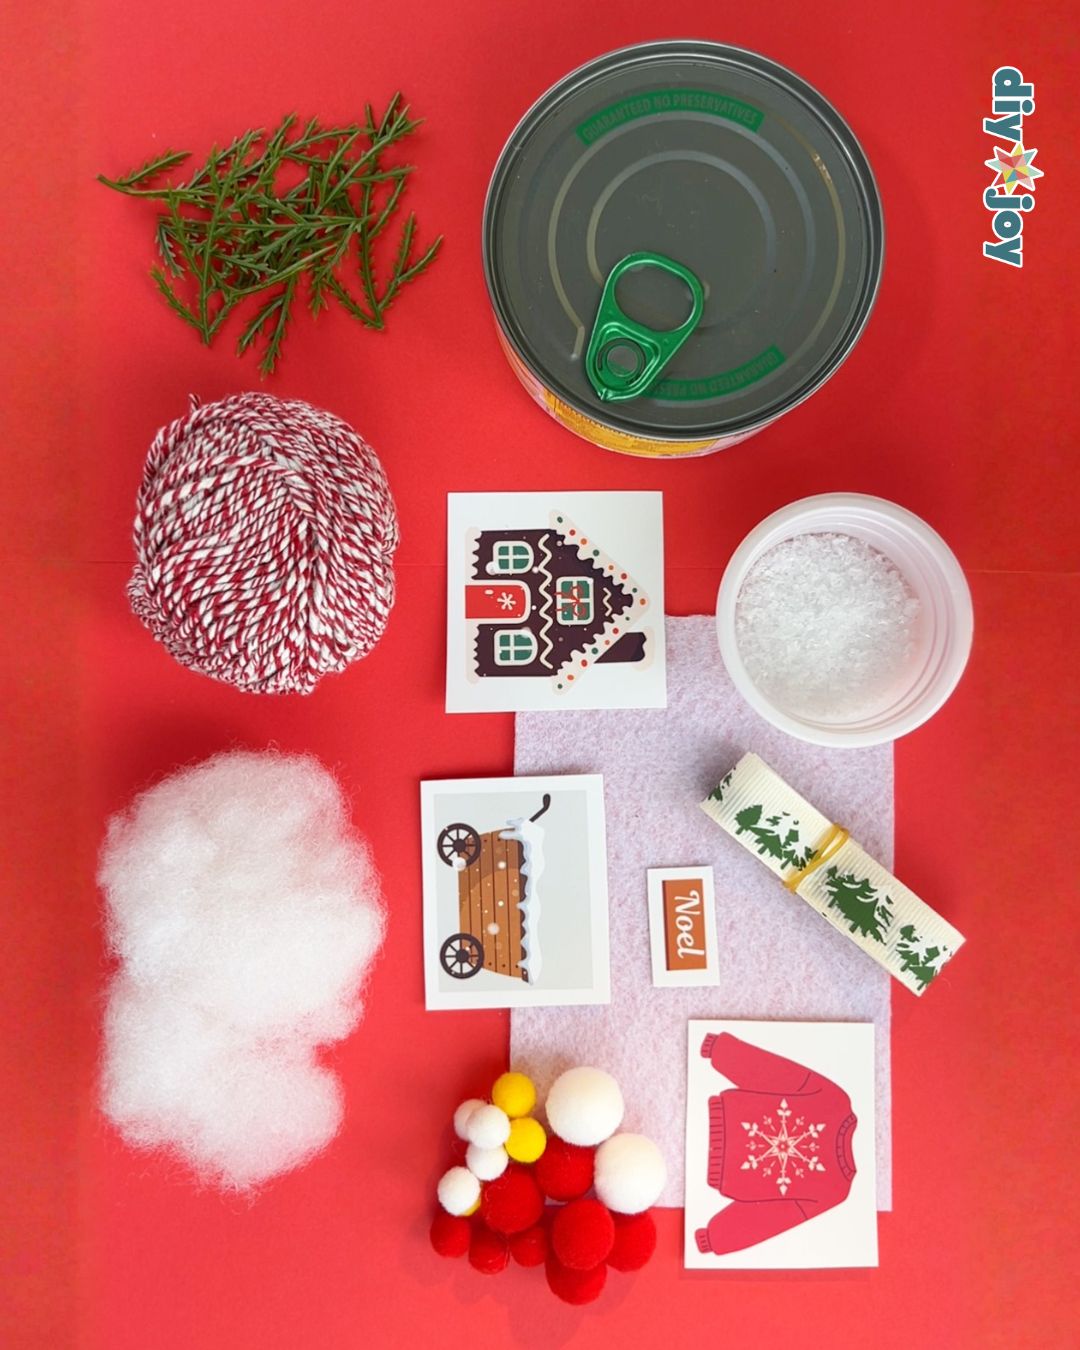
You can find a ton of Christmas decorations online, but if you are looking for something unique and handmade, DIY is the way to go. For this Christmas project, I used artificial snow and fiberfill to mimic snow, pom-pom balls and strings for colors, and faux pine leaves for greenery. Planning to make this Christmas craft with your family? Feel free to customize each ornament for each family member. You can use their favorite colors, add their names, and use different embellishments like beads and glitter.
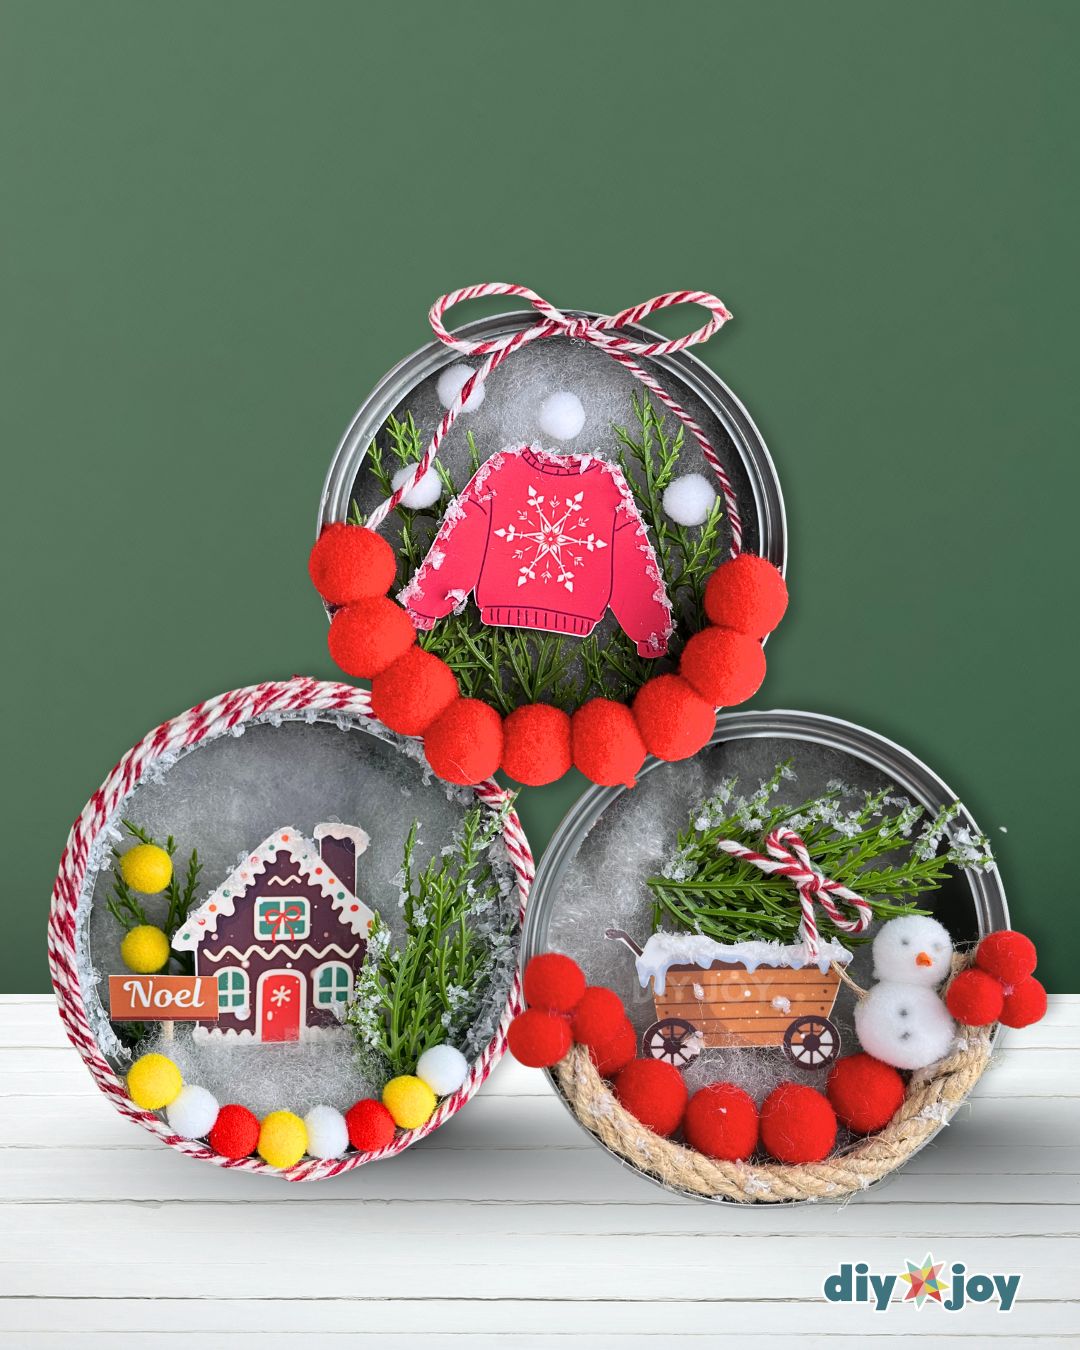
Turning Tuna Cans Into Christmas Ornaments
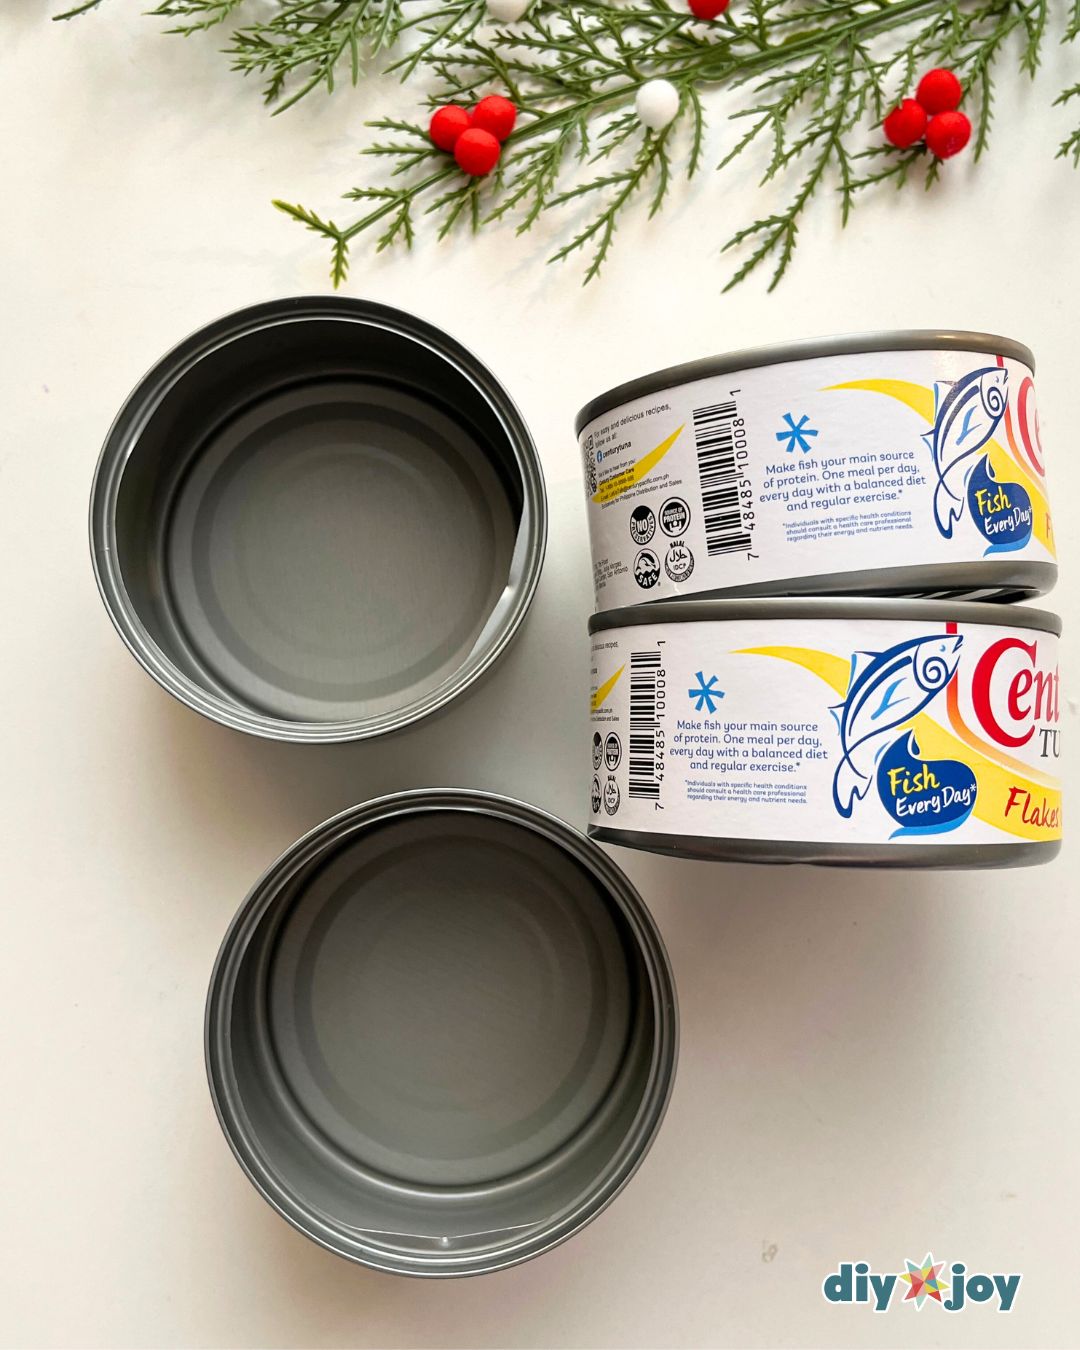
The round shape of tuna cans makes them the best material for ornaments. It is better to use the easy-open can lids so you would no longer have to cut the metal cans. Just make sure to file the edges before using them.
Aside from tuna cans, you can also use cardboard round containers or cardboard tubes. Cut them to your preferred height and cover the back with cardboard if needed.
Christmas Ornament Designs (Free Download)
I made three designs for this Christmas project: Christmas sweater, gingerbread house, and Christmas tree with a snowman. All of these designs are free for download. Click the link below to download.
Note: The paper size is A4.
[Free download] Christmas ornament designs for printing
Feel free to design your own prints. You can also draw or cut photos from old magazines. Just make sure your designs fit perfectly inside the cans.
1 – Christmas Sweater

2 – Gingerbread House

3 – Christmas Tree and Snowman

How to Make Tuna Can Ornaments
Learn how to make ornaments with tuna cans with this easy tutorial.
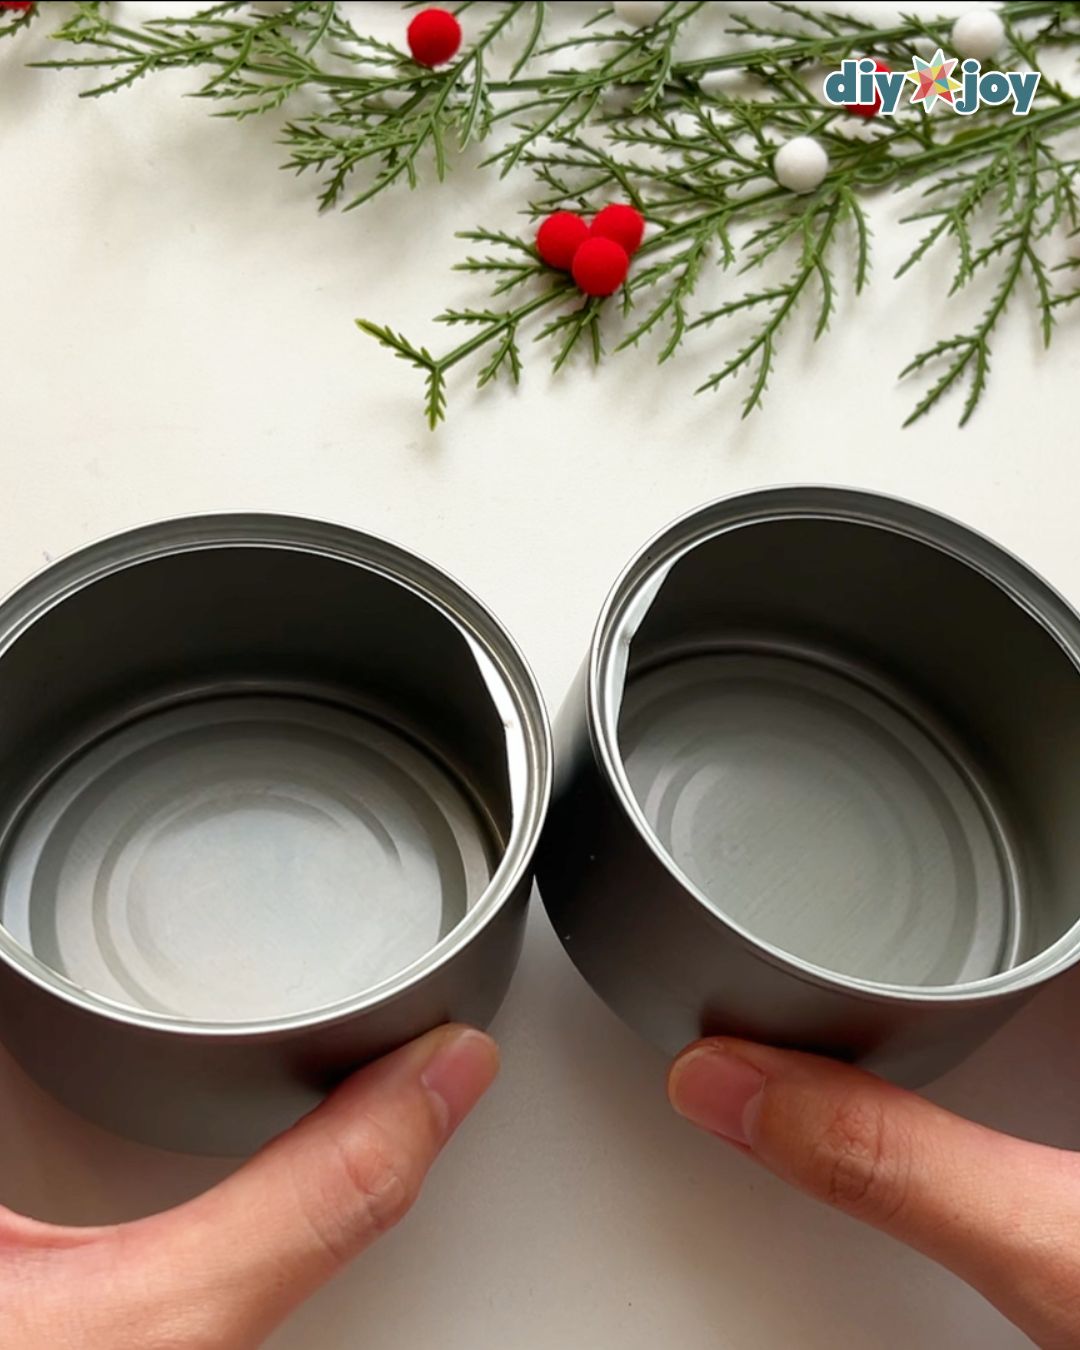
Remove the lids, wash the cans thoroughly, and dry them. Next, file the sharp edges.
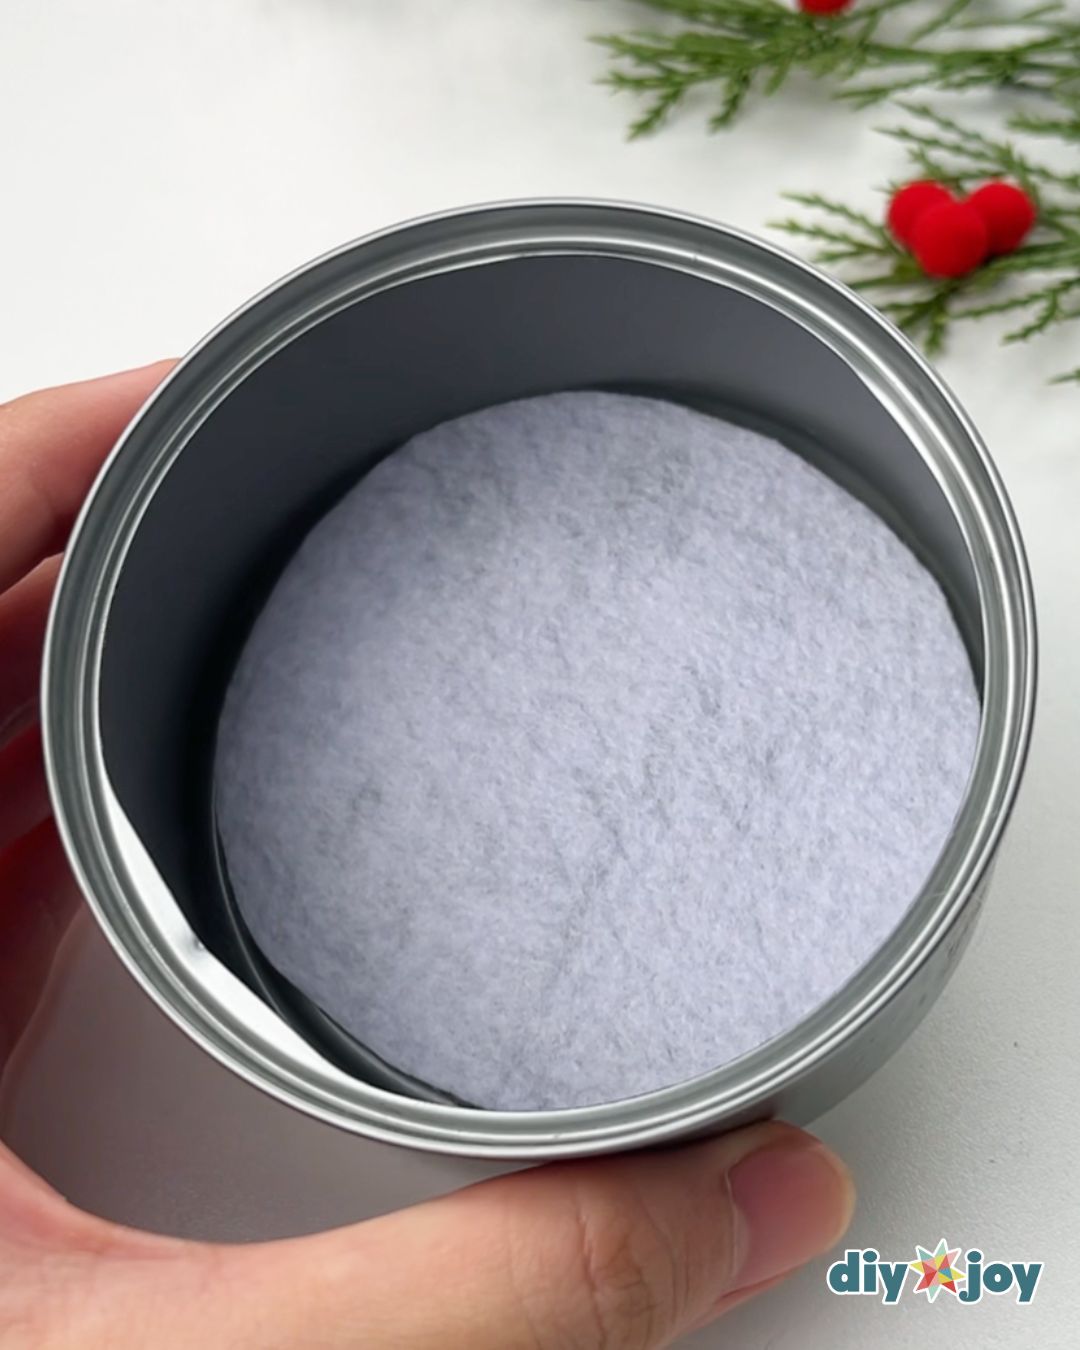
Trace the bottom of the can onto the felt and cut. Fold the circle in half, then trim it a little bit so it fits exactly inside the bottom of the can. Do this step for all 3 cans.
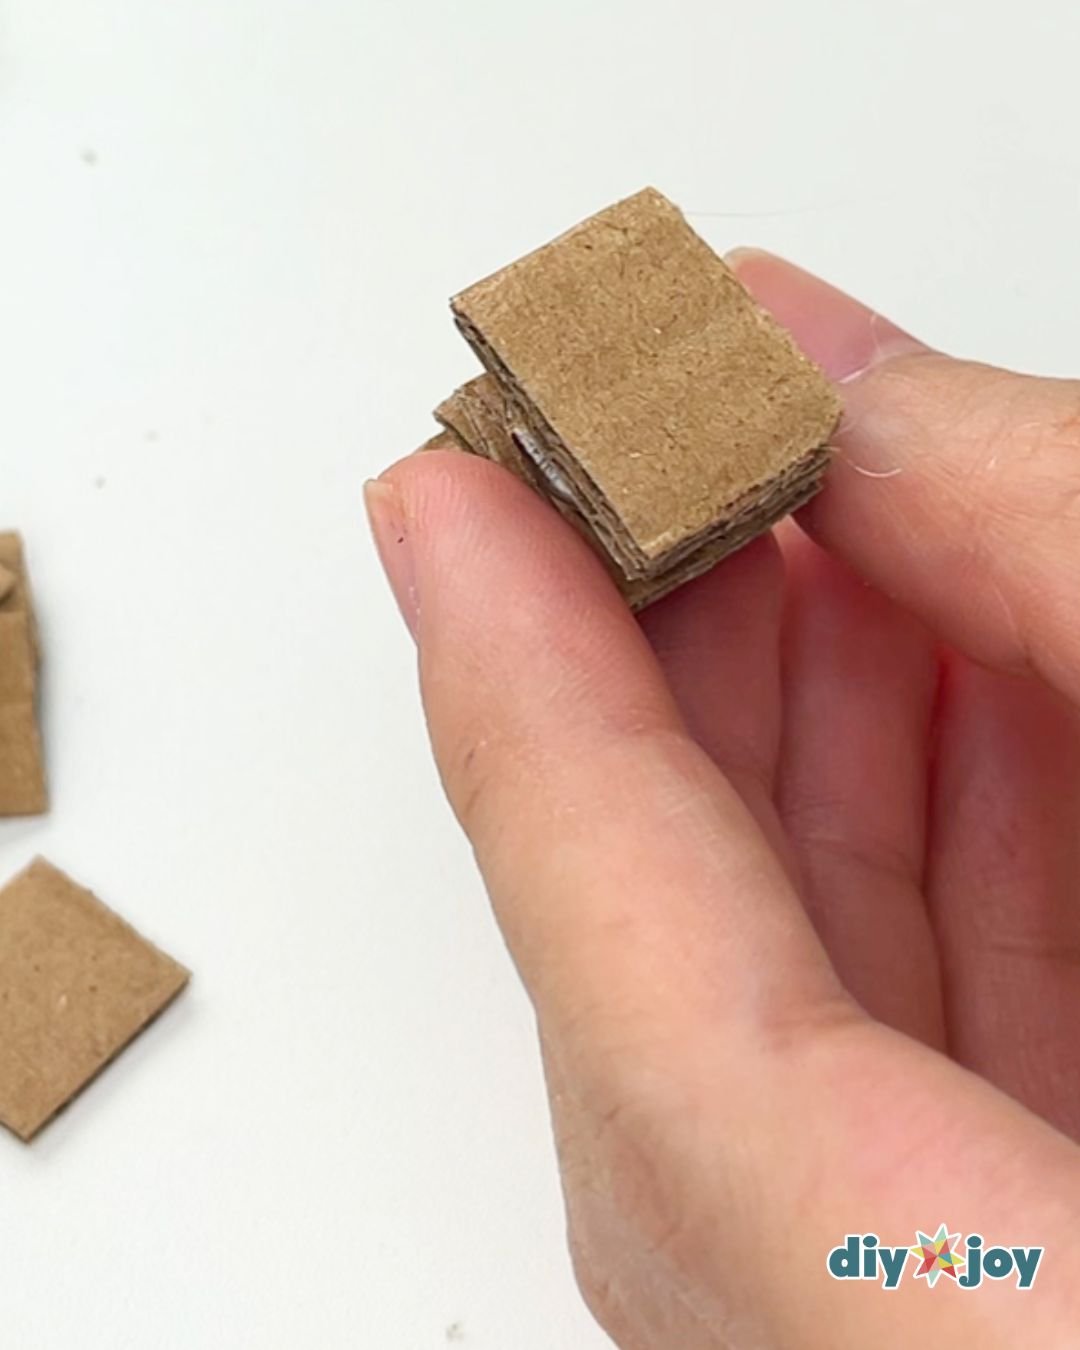
Cut thin strips of cardboard, then cut them into small squares. Stack and glue the pieces together. I used 8 for the gingerbread house, 10 for the sweater, and 8 and 12 for the Christmas tree.
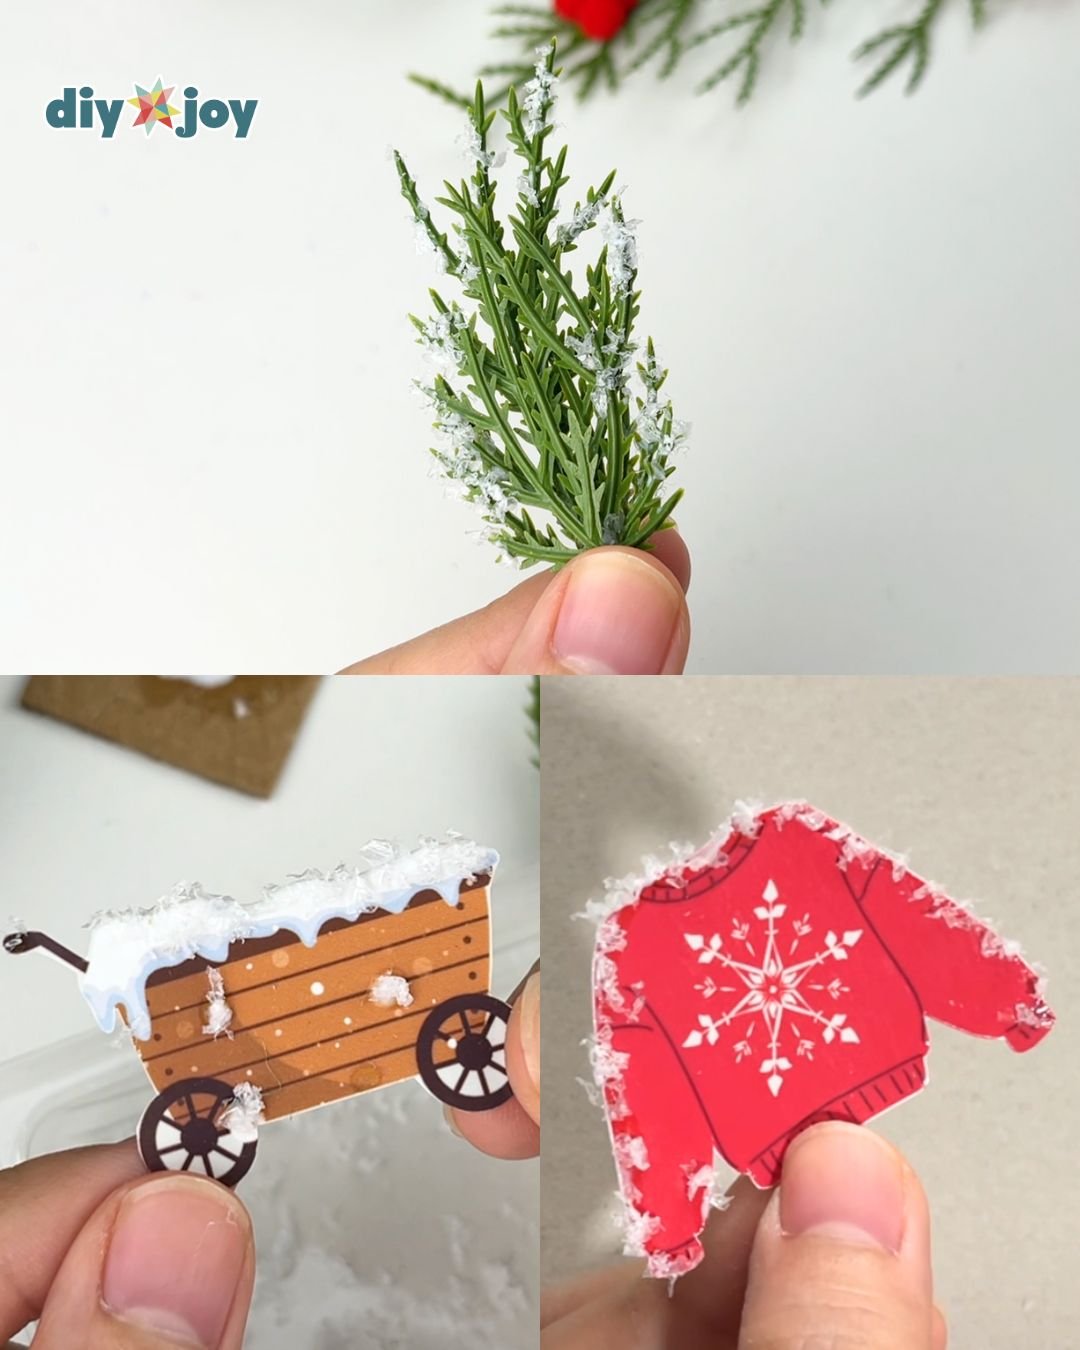
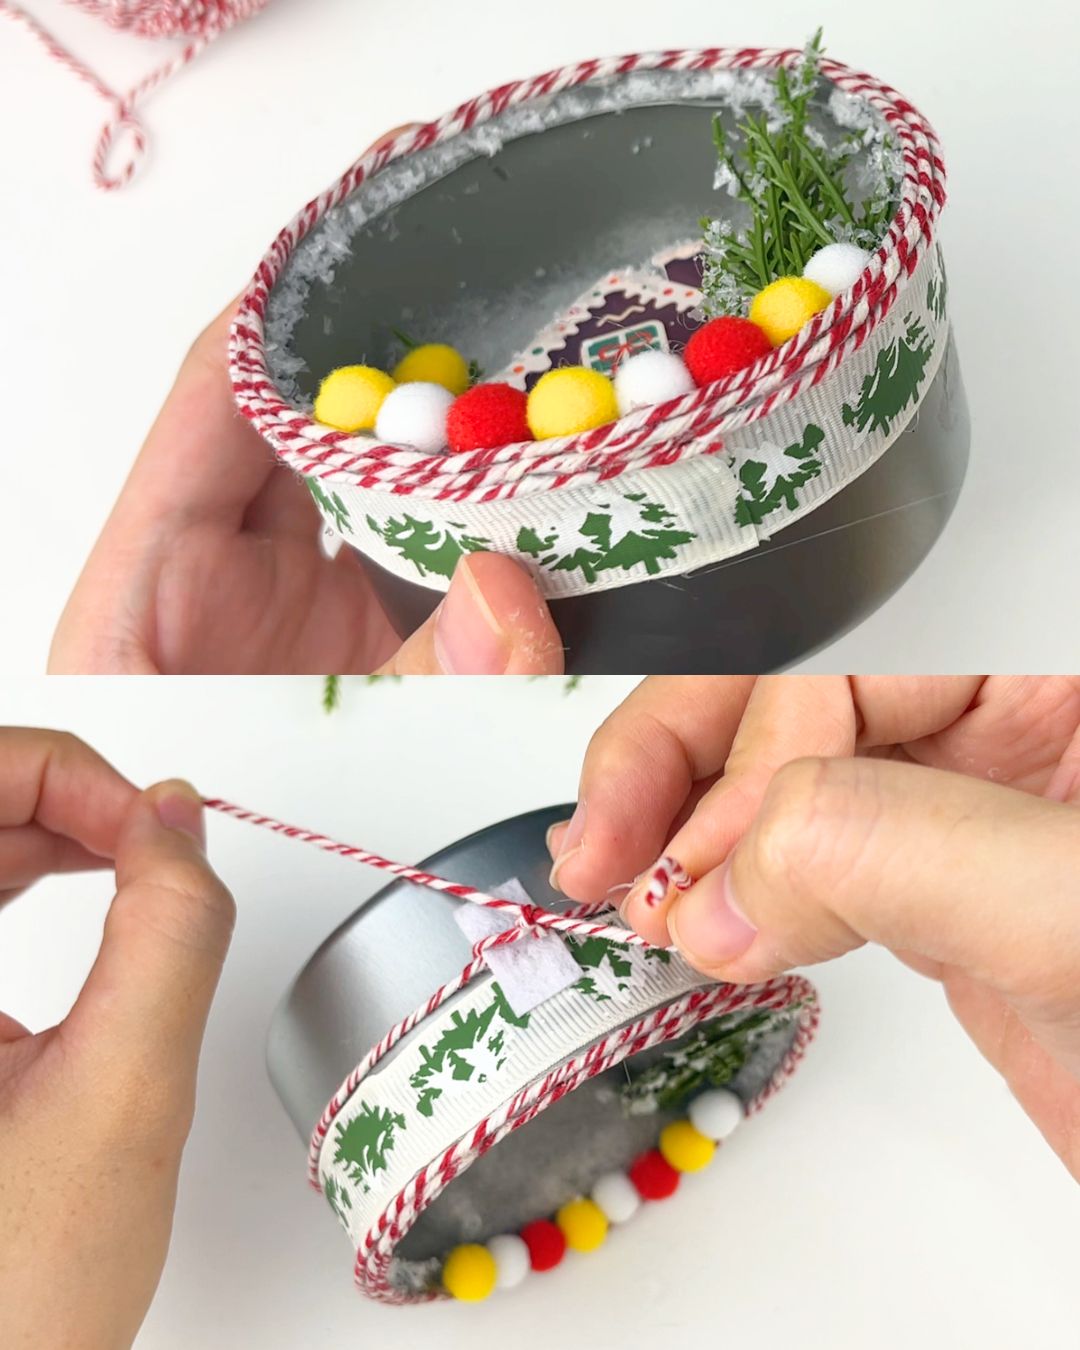
Apply glue on the tips and edges, then cover with artificial snow.
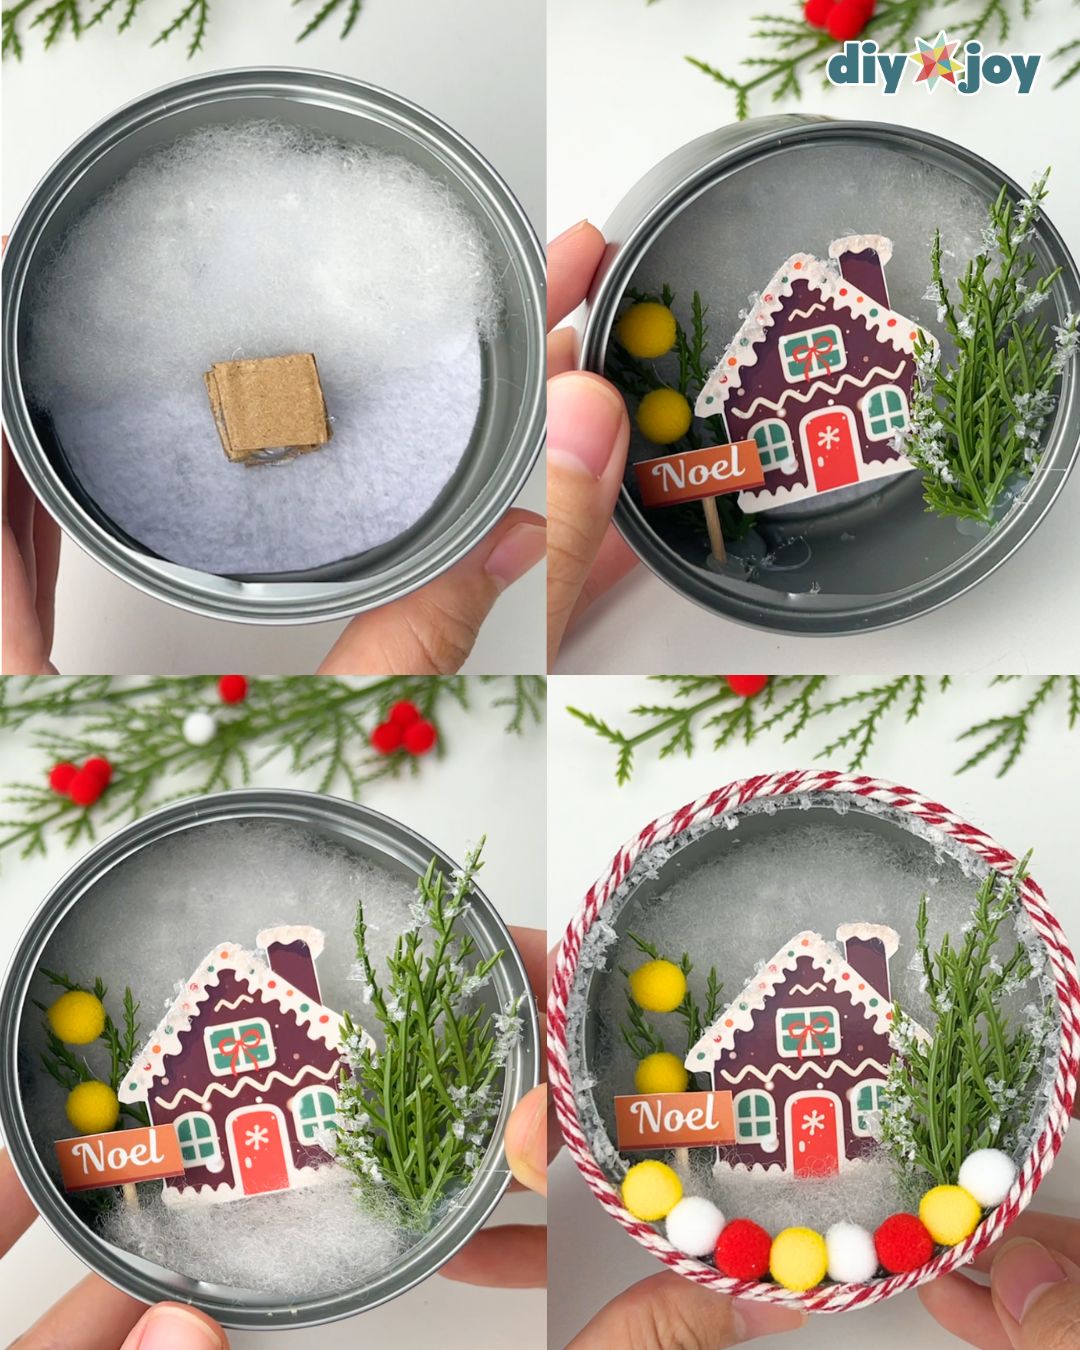
Gingerbread House Ornament
Cover the top part with fiberfill, then glue the cardboard stack onto the center. Next, glue the pieces one by one starting with the gingerbread house. Cover the bottom part with more fiberfill, glue the pom-pom balls, then cover the edges with the string.
Christmas Tree With a Snowman
Glue the cardboard stacks onto the felt. The bottom should be higher than the top. Cover the sides with fiberfill. Glue the Christmas tree, followed by the wheelbarrow, then the bow. Apply hot glue on the bottom edge of the lid, then place the jute rope. Glue the pom-pom balls and snowman.

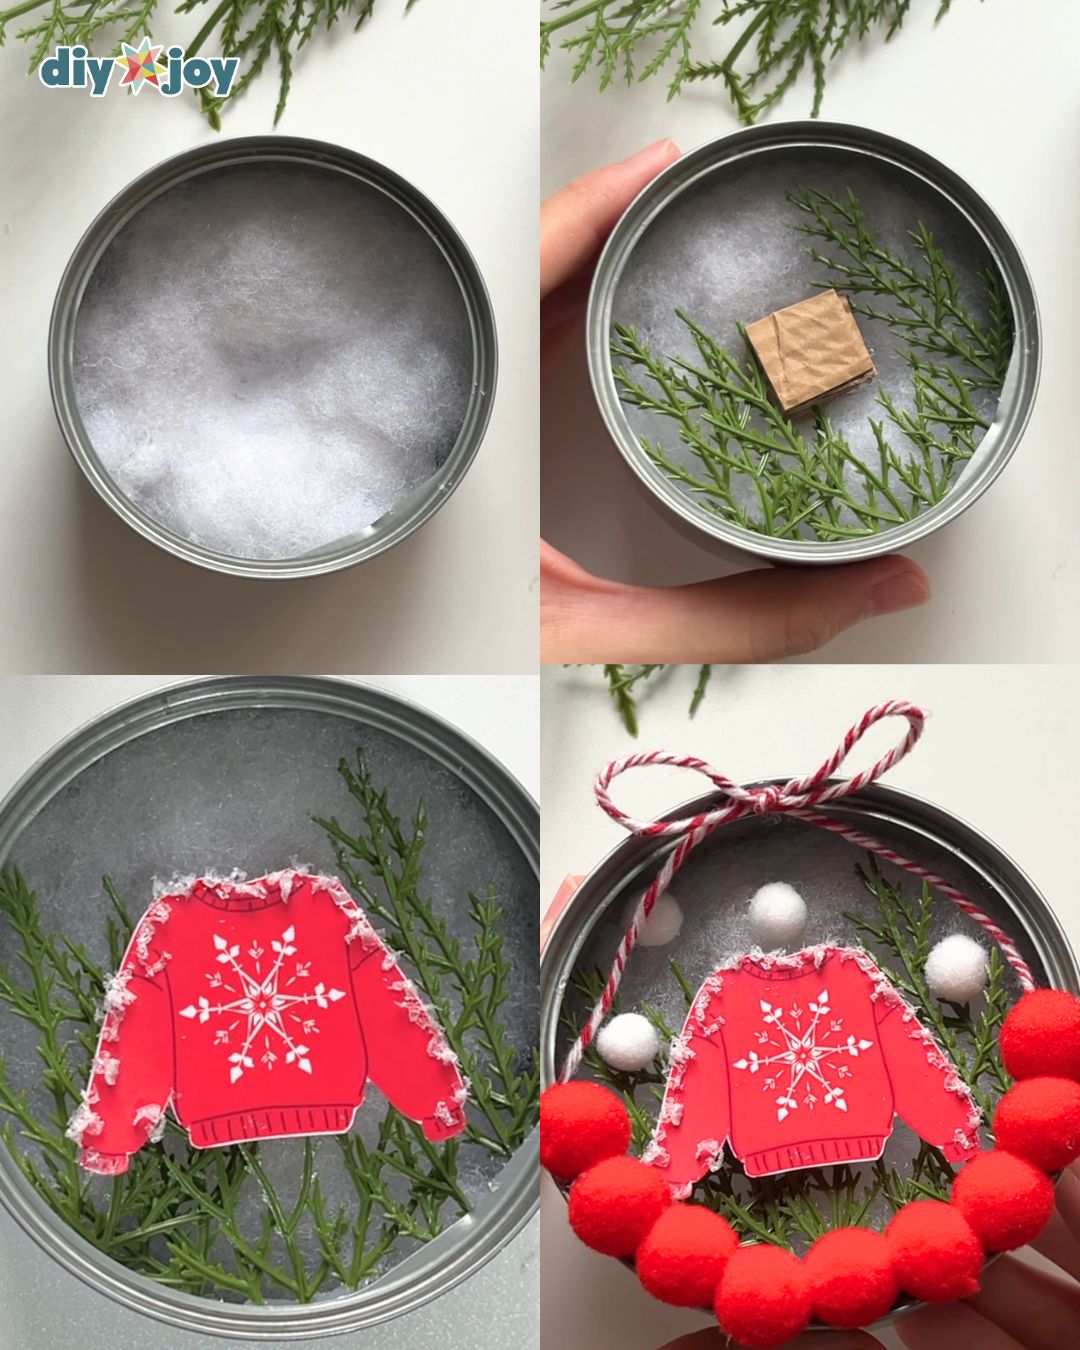
Cover the felt with fiberfill, except for the center. Glue the cardboard stack, then glue the pine leaves one by one at the sides of the can. Glue the sweater, pom-pom balls, and bow.
Glue a thick ribbon around the sides of the can, then tie a string around the can. Glue the top and bottom of the string using hot glue and felt pieces. Tie the end of the strings. Do this step for all the ornaments.
![]()
Crafting Tip
Don’t be afraid to try different designs or materials.
More Christmas Crafts


How to Make Ornaments With Tuna Cans