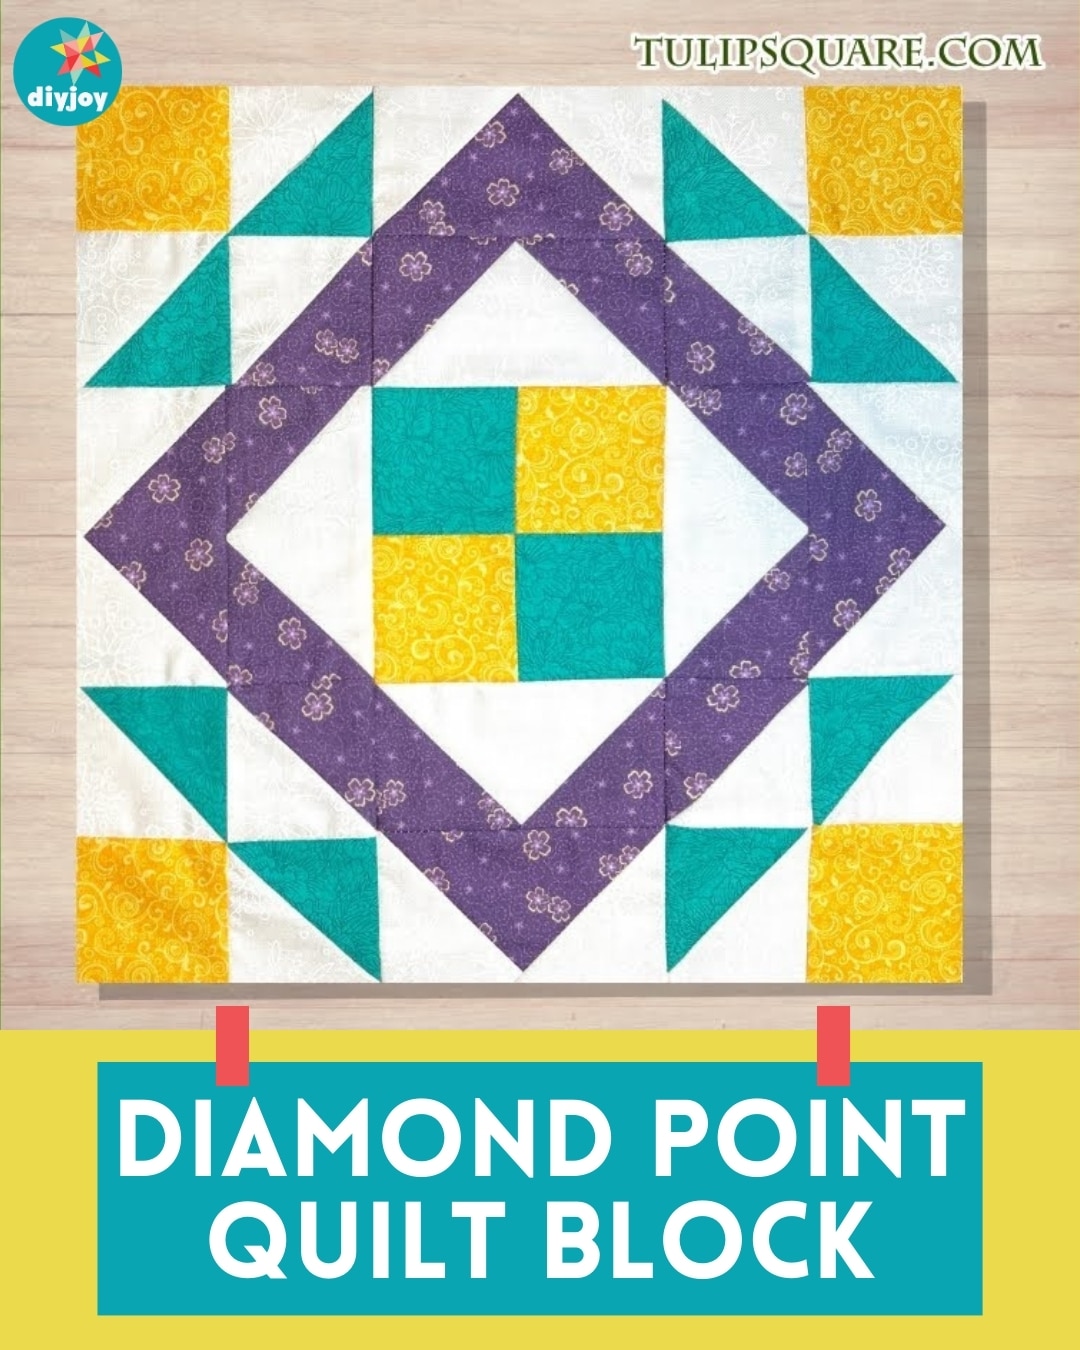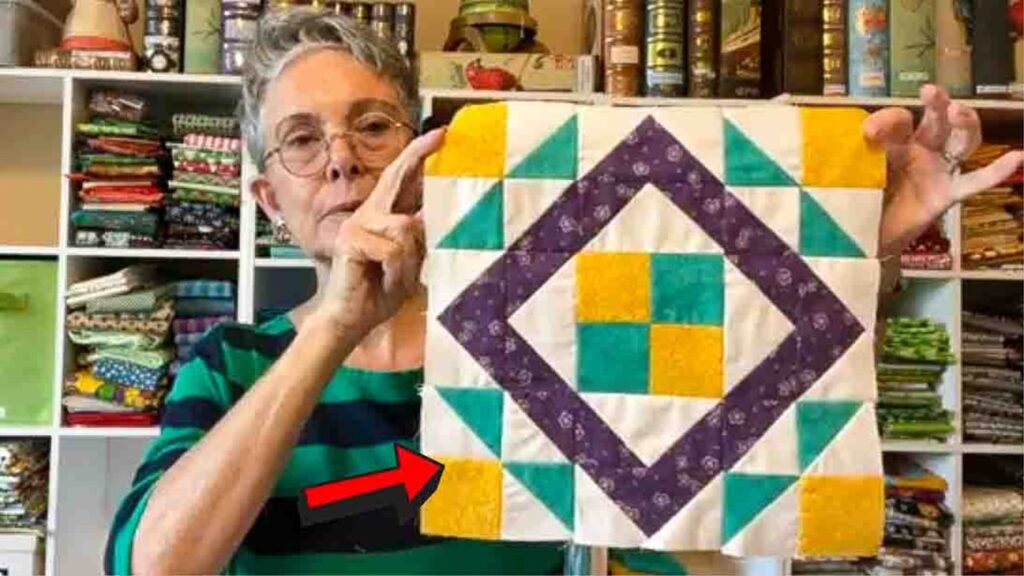
Are you looking for your next quilting project? Try doing this diamond point quit block from Tulip Square on YouTube. This is a quick, easy, and beginner-friendly quilt you can make on a weekend. Try out some different colors and you’ll surely end up with a stunning block.
RELATED: Easy Scrappy Diamonds Quilt Block Tutorial
In this step by step instructions, Tulip Square will teach you how to assemble this gorgeous quilt block. It’s fast and easy, you’ll probably finish a whole quilt in just a day. Watch the video tutorial below to learn the full procedure.
Materials:
White:
- Cut four: 2 1/2″ x 4 1/2″
- Cut six: 2 7/8″ square
- Cut eight: 2 1/2″ square
Color 1 (purple):
- Cut four: 2 1/2″ x 4 1/2″
- Cut two: 2 7/8″ square
- Cut eight: 2 1/2″ square
Color 2 (aqua):
- Cut four: 2 7/8″ square
- Cut two: 2 1/2″ square
Color 3 (yellow):
- Cut six: 2 1/2″ square
Directions:
Step 1
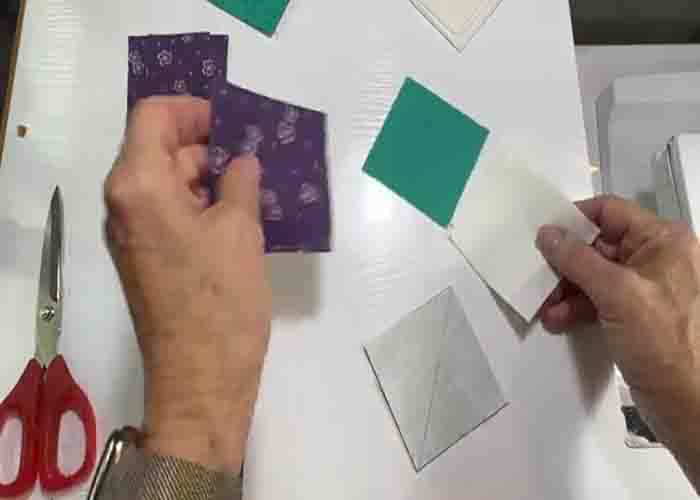
To start, cut all the fabric requirements and set them aside accordingly. Next, pair up one larger aqua square and one white, draw a diagonal line from corner to corner, then sew a 1/4″ on each side of that line. Repeat these steps to all the aqua and purple paired with white. Once done, cut directly on the line, then press open. You should end up with four of the purple & white half-square triangles and eight of the aqua & white half-square triangles. Set them aside.
Step 2
Take the purple rectangles and the white squares and make some flying geese units: put the white squares on each half side of the purple rectangles, sew a diagonal line, then cut off the corner. Press open afterward. Next, put a white square in the opposite corner of each piece and do the same thing. Next, take your white rectangles and this time, sew purple squares on them to make four more flying geese units.
Step 3
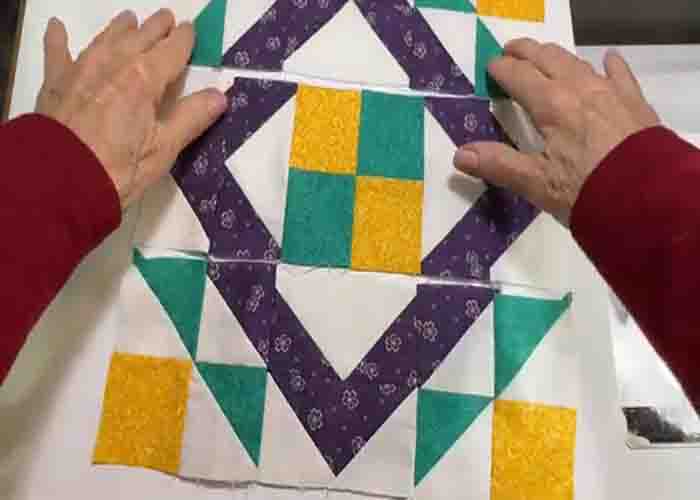
Next, take four yellow squares and then sew one aqua half-square triangle on each yellow square. Press toward the yellow. After this, take the remaining aqua half-square triangles, and sew one purple half-square triangles on each. Now, pair the yellow and aqua unit with a purple and aqua unit and sew them together to make a square. After this, take the purple flying geese and sew them together with the white corners on top. Make four pieces of these. Finally, take the remaining squares and sew them in checkerboard style. Now, assemble the pieces together to complete the diamond point block (refer to the image below for the pieces’ placement).
Diamond Point Quilt Block Tutorial