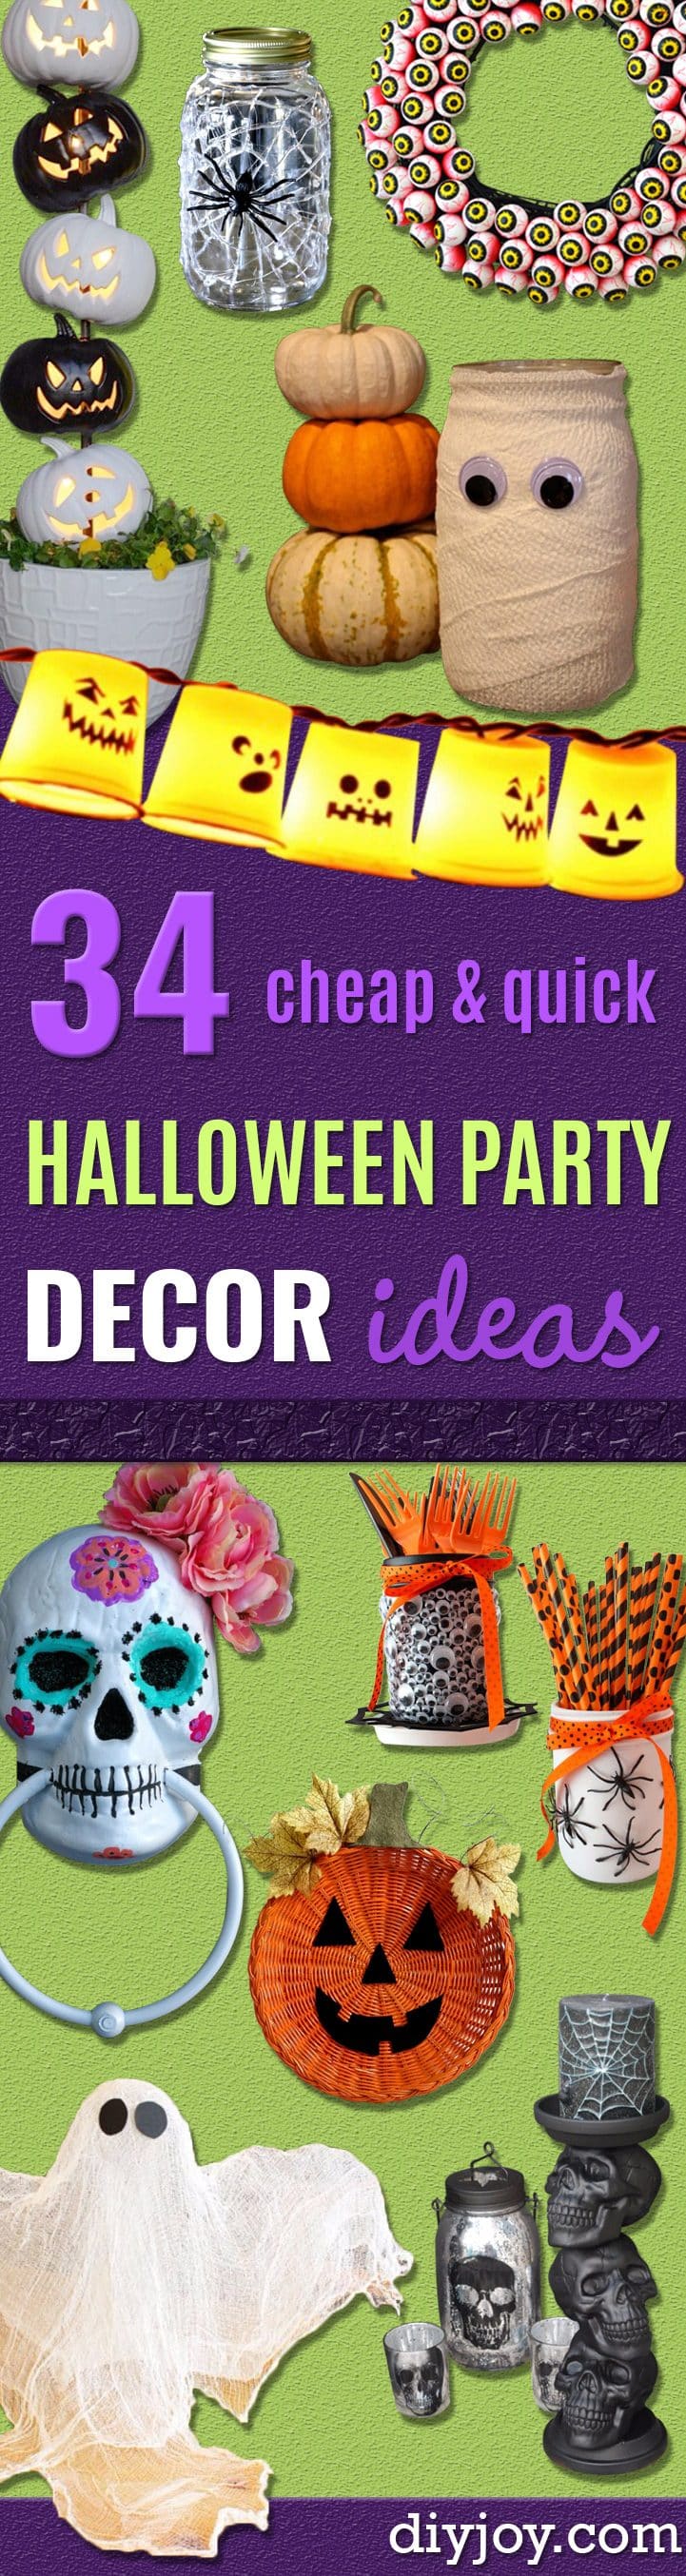
Cheap DIY Halloween decorations can turn paper, recycled containers, paint, yarn and a few craft-store basics into a home full of playful scares. This list brings together 33 projects for doors, walls, tables, porches and party spaces, with each idea linked to its original creator.
You will find glowing ghosts, paper bats, pumpkin projects, monster faces, wreaths and small displays with a wide range of materials and tool levels. Some are family-friendly paper crafts, while others call for adult handling of hot glue, cutting tools, spray paint or glass.
Start with supplies you already have, then choose the projects that fit your space and comfort level. Follow each creator’s complete tutorial for the materials and steps and read the safety notes before you begin.
Table of Contents
- 1. Creepy Hand Luminaries for Halloween
- 2. Hot Glue Spider Web
- 3. Popsicle Stick Witch
- 4. Candy Corn Wreath
- 5. Yarn Pumpkins From Toilet Rolls
- 6. Mummy Hand From a Dish Glove
- 7. Floating Witch Hat Luminaries
- 8. Happy Halloween Toilet Roll Banner
- 9. Mini Skull Halloween Cloche
- 10. Light-Up Ghost Centerpiece
- 11. Origami Flapping Bats
- 12. Glamorous Witch Skull Mason Jar
- 13. Recycled Milk Jug Ghost Luminaries
- 14. Hanging Paper Pumpkin Craft
- 15. Ghosts in Mason Jars
- 16. Halloween Googly Eye Bowl
- 17. Hanging Toilet Roll Ghosts
- 18. Poison Apple Pumpkin Craft
- 19. Glow Stick Broomsticks
- 20. Spooky Eyeball Wreath
- 21. Glow-in-the-Dark Haunted House Canvas
- 22. Halloween Monster Flower Pots
- 23. Hanging Paper Bat Flock
- 24. Wooden Pumpkins From Scrap 2x4s
- 25. Halloween Rocking Monster Craft
- 26. Halloween Eyeball Balloons
- 27. Halloween Balloon Porch Display
- 28. Paper Halloween Lanterns
- 29. Upcycled Jack-o-Lantern Door Hanger
- 30. Dripping Red Wax Crayon Candles
- 31. Bloody Handprint Window Clings
- 32. Metallic Googly Eye Boo Sign
- 33. Glowing Mystic Eye Pumpkin
1. Creepy Hand Luminaries for Halloween
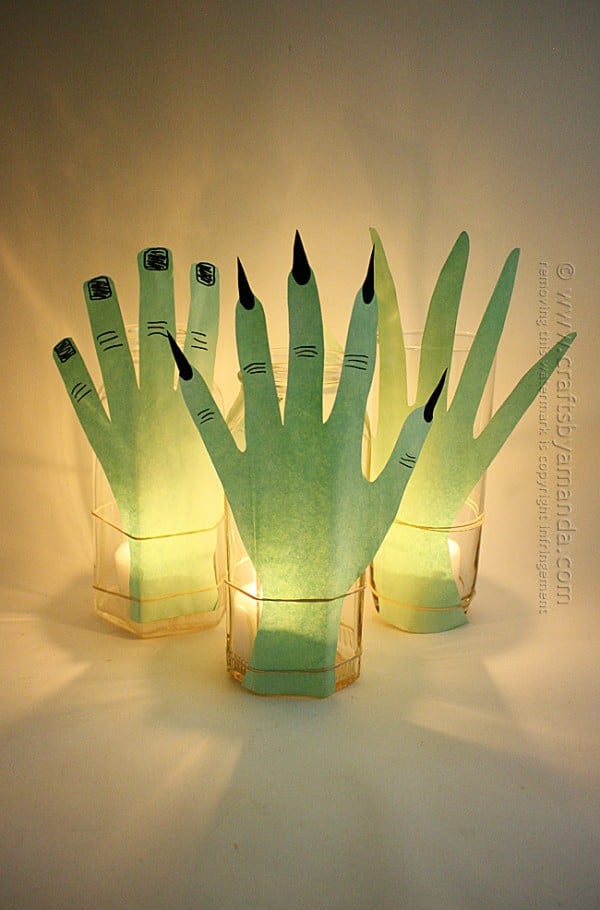
Creepy Hand Luminaries from Amanda Davis at Crafts by Amanda wrap green paper hands around tall glass jars for an eerie tabletop glow. Use only LED tea lights or glow sticks here, and remember that food coloring can stain while scissors need sensible supervision. Visit Crafts by Amanda for Amanda's complete tutorial and more of her inventive Halloween craft ideas.
2. Hot Glue Spider Web
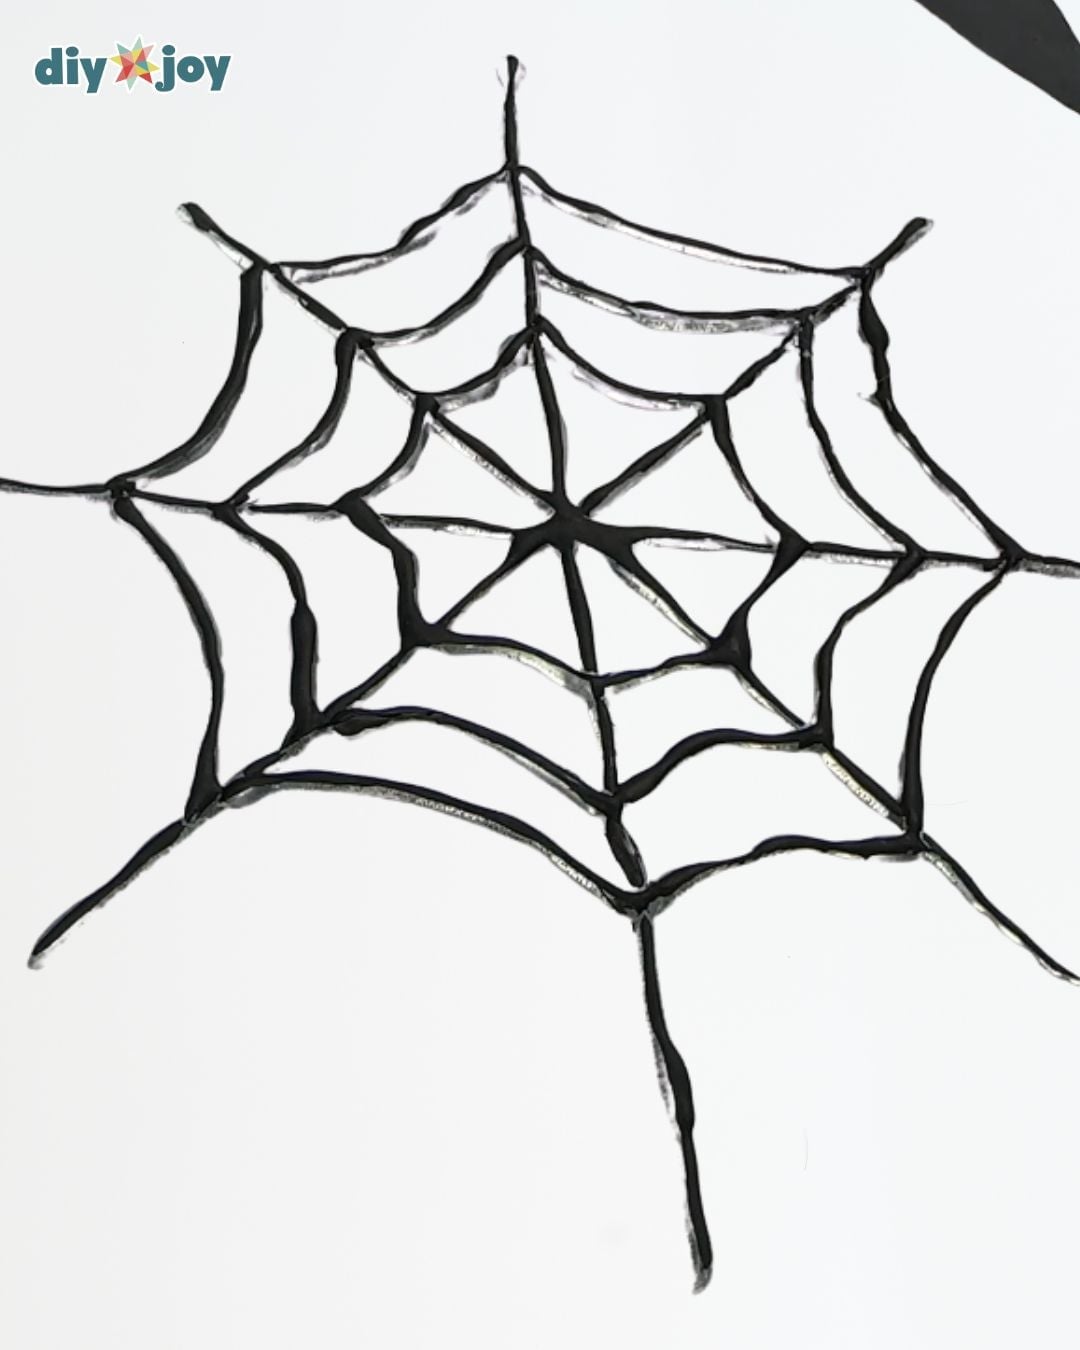
Parchment paper and hot glue are the simple materials behind this lightweight hanging web. The DIY JOY Hot Glue Spider Web follows a traced or hand-drawn guide. The cooled black web hangs from nylon string. An adult should manage the low-temperature glue gun, and the glue must cool completely before peeling or handling. Use the complete tutorial on DIY JOY for every step, then browse more Halloween projects from DIY JOY.
3. Popsicle Stick Witch
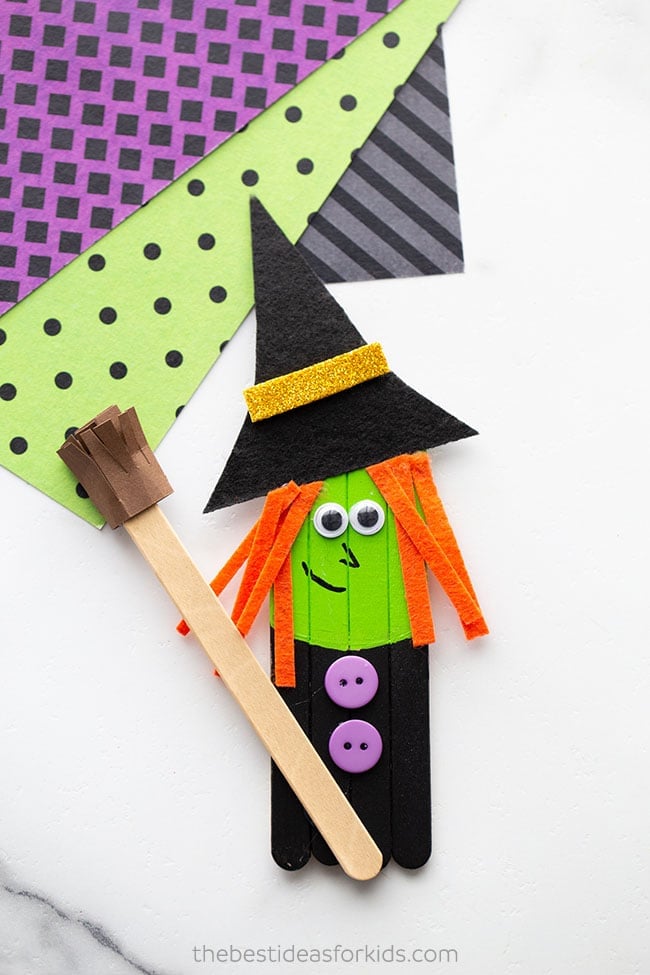
Set this cheerful little witch on a display or add the optional magnet for refrigerator decor. The Popsicle Stick Witch comes from The Best Ideas for Kids. A black hat, orange yarn hair, button details and a tiny paper broom give the craft-stick character its personality. Keep scissors and hot glue with an adult, then visit The Best Ideas for Kids for the complete tutorial and more kids' craft ideas.
4. Candy Corn Wreath
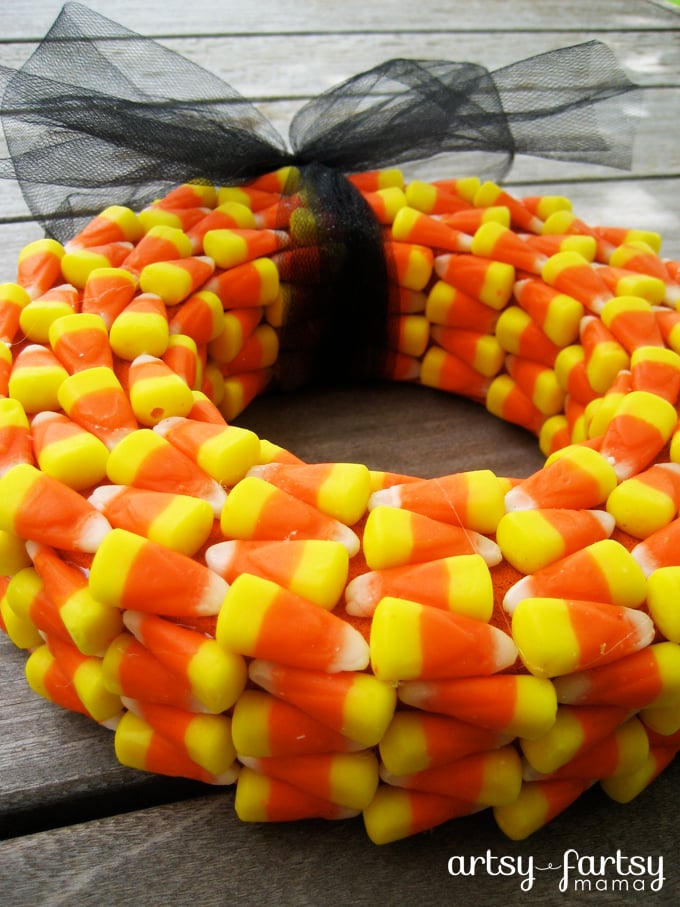
Alternating rows of orange, yellow and white candy give this wreath its crisp graphic shape. Lindsay created the Candy Corn Wreath for Artsy-Fartsy Mama. A painted foam form supports the candy rows, while black tulle wraps the finished piece and forms the bow. The source recorded a $2.98 total in 2012, which is historical rather than a current price. Keep the decorative candy wreath indoors and away from heat because the candy can melt, and do not treat it as edible. For Lindsay's complete tutorial, head to Artsy-Fartsy Mama and stay for more of her colorful seasonal work.
5. Yarn Pumpkins From Toilet Rolls
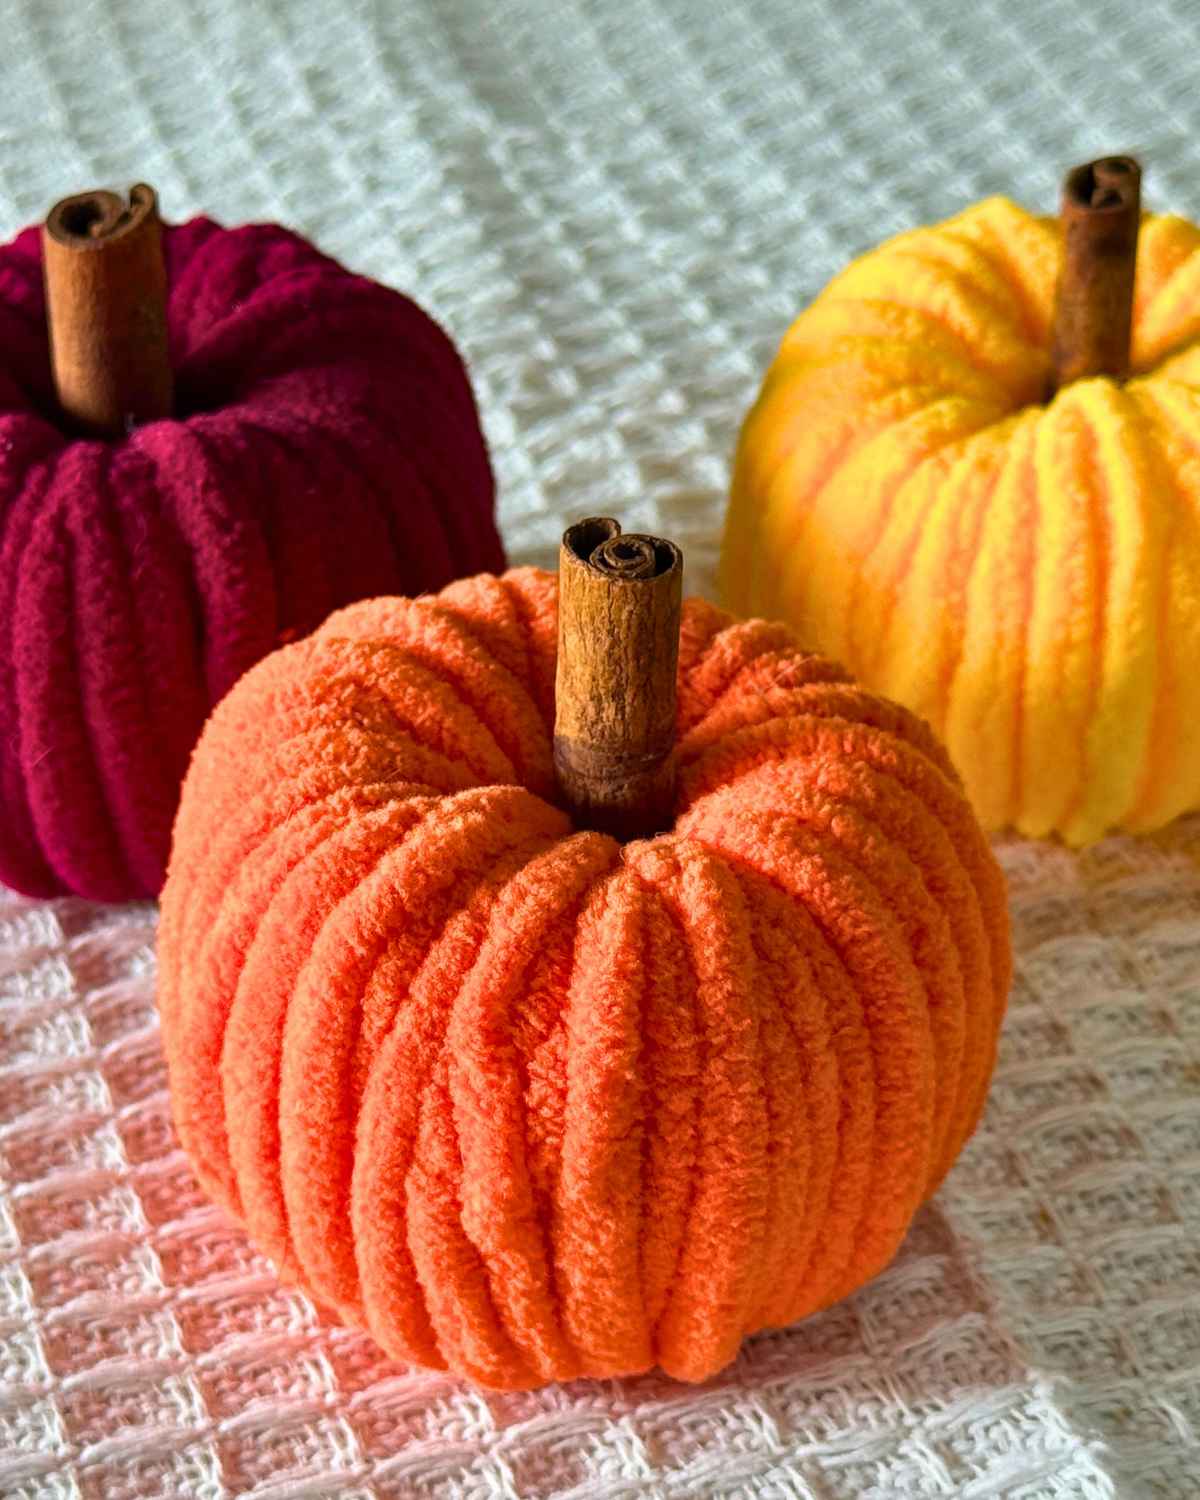
Soft orange yarn pumpkins with cinnamon-stick stems make a warm little cluster for a fall display. Elle Ann created this DIY JOY project from half a tissue-paper roll and chunky chenille yarn. I like their cozy texture beside darker Halloween decorations. Visit DIY JOY for Elle Ann’s complete tutorial, then browse more seasonal craft ideas from DIY JOY.
6. Mummy Hand From a Dish Glove
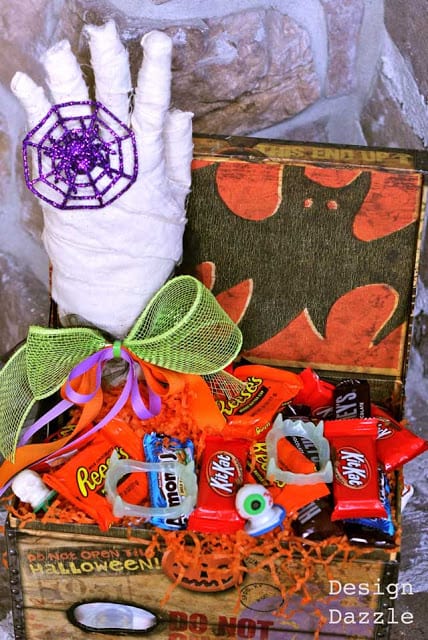
White fabric strips give this upright mummy hand its layered, wrapped texture. A filled rubber dish glove creates the shape, with ribbon or small accents available for the finished display. Toni Roberts created the Mummy Hand project for Design Dazzle. Keep the hot-glue work with an adult, and keep loose filler or embellishments away from children who may mouth them. The source notes that the page may contain affiliate links without naming a project sponsor. Find Toni's complete tutorial at Design Dazzle, then browse more of her Halloween projects there.
7. Floating Witch Hat Luminaries
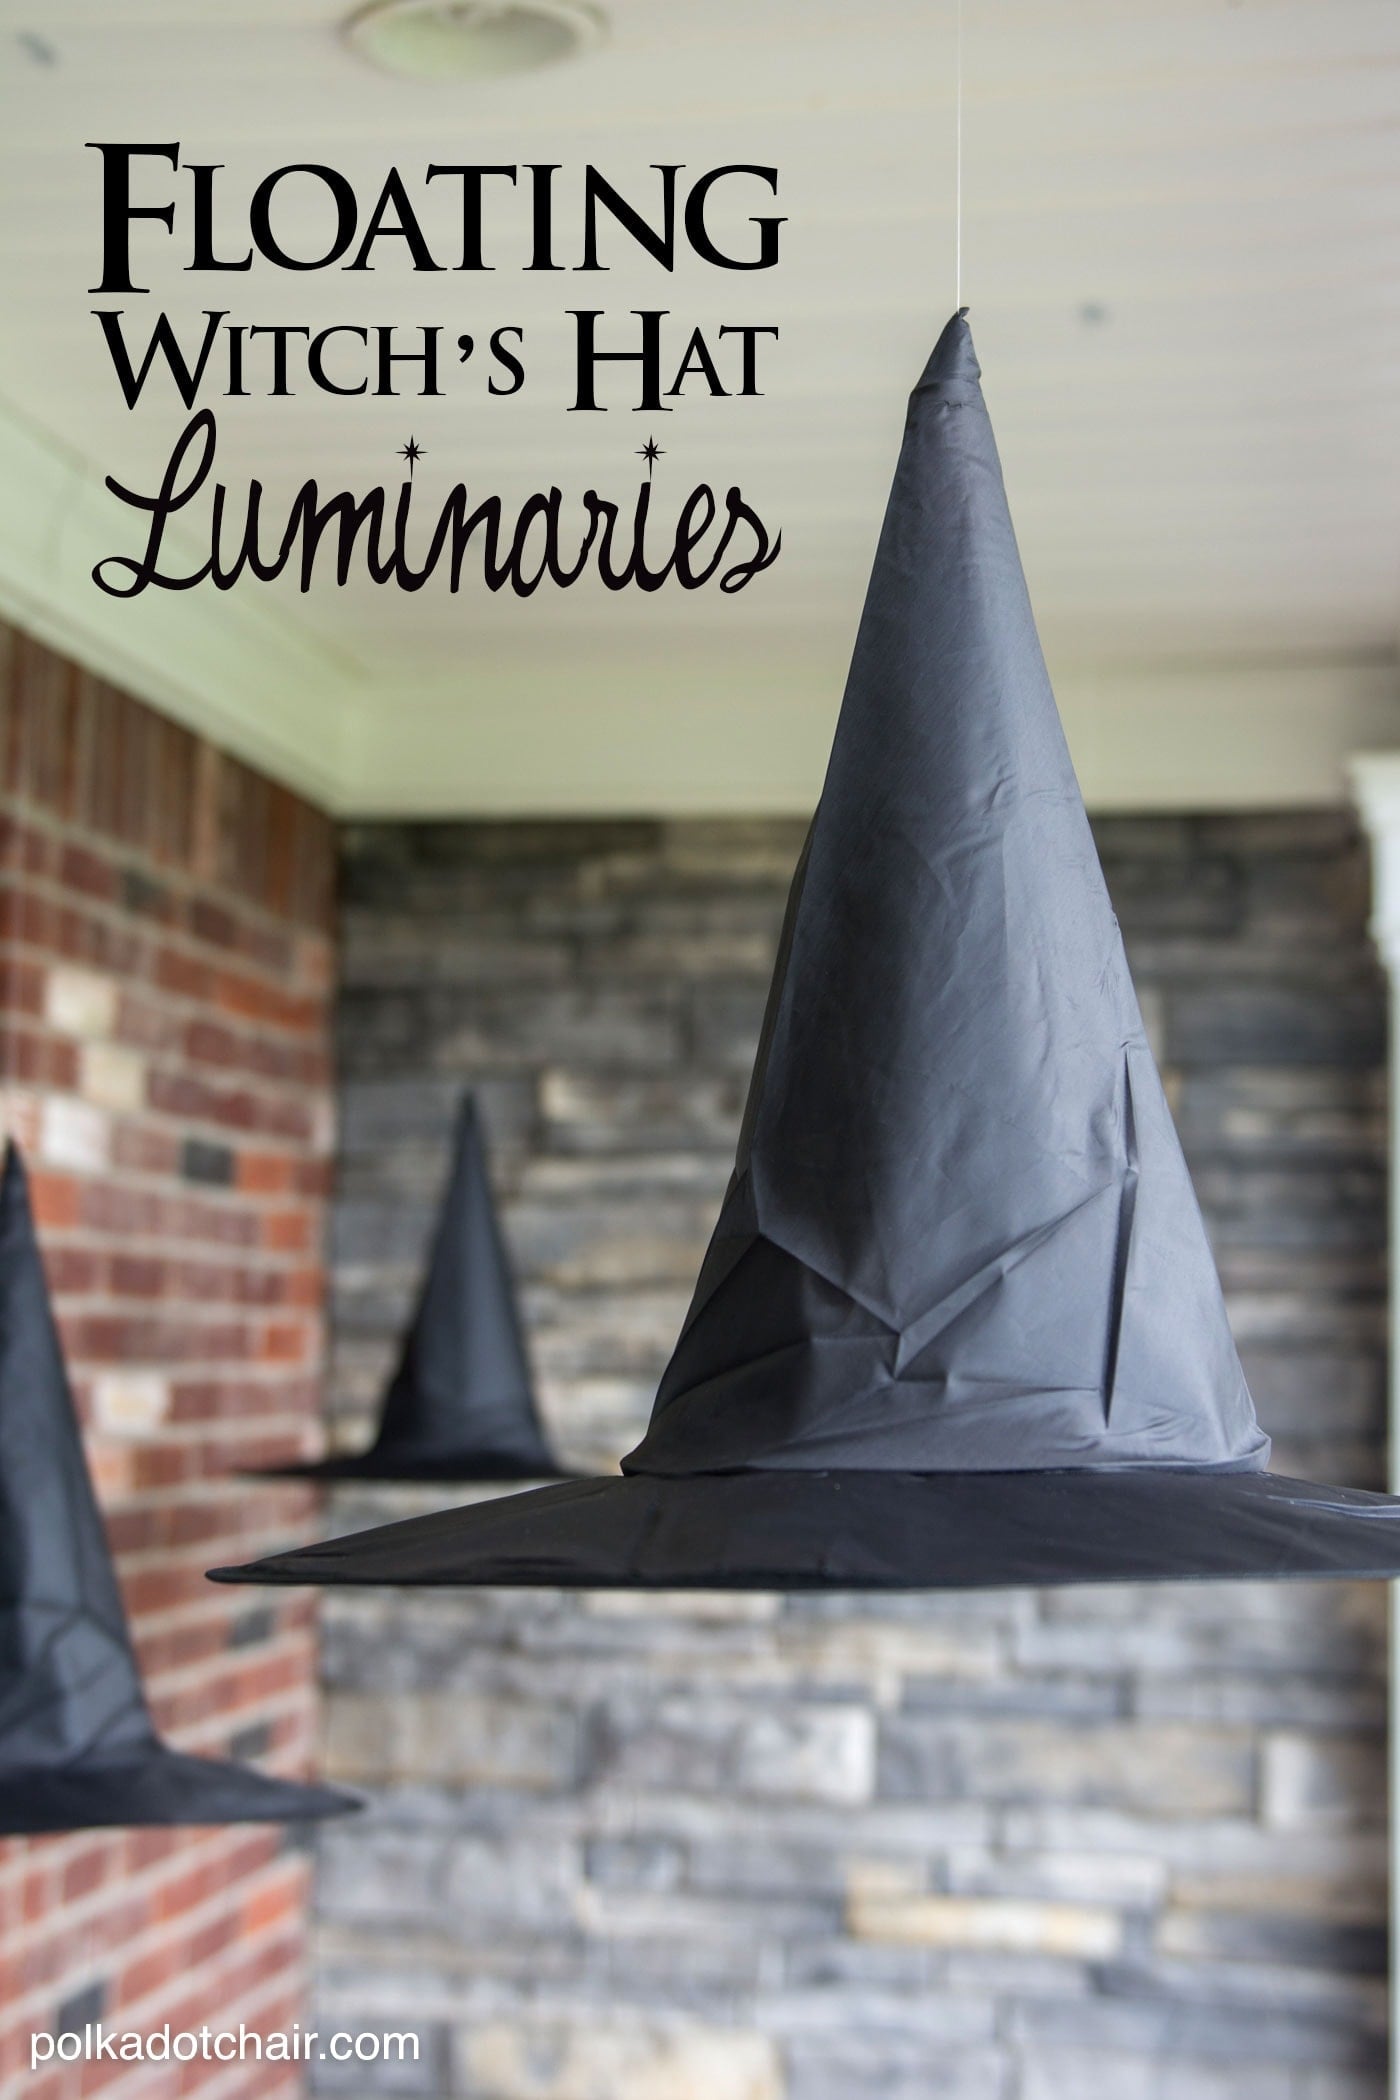
Floating Witch Hat Luminaries from Melissa Mortenson at Polka Dot Chair make black hats appear to glow in midair. Battery LED sticks, pucks, tea lights or glow sticks supply the light, with pucks needing extra weather care. Because hanging the hats may involve a needle and ladder, plan for adult setup. At Polka Dot Chair, open Melissa's complete tutorial before browsing more of her clever seasonal projects.
8. Happy Halloween Toilet Roll Banner
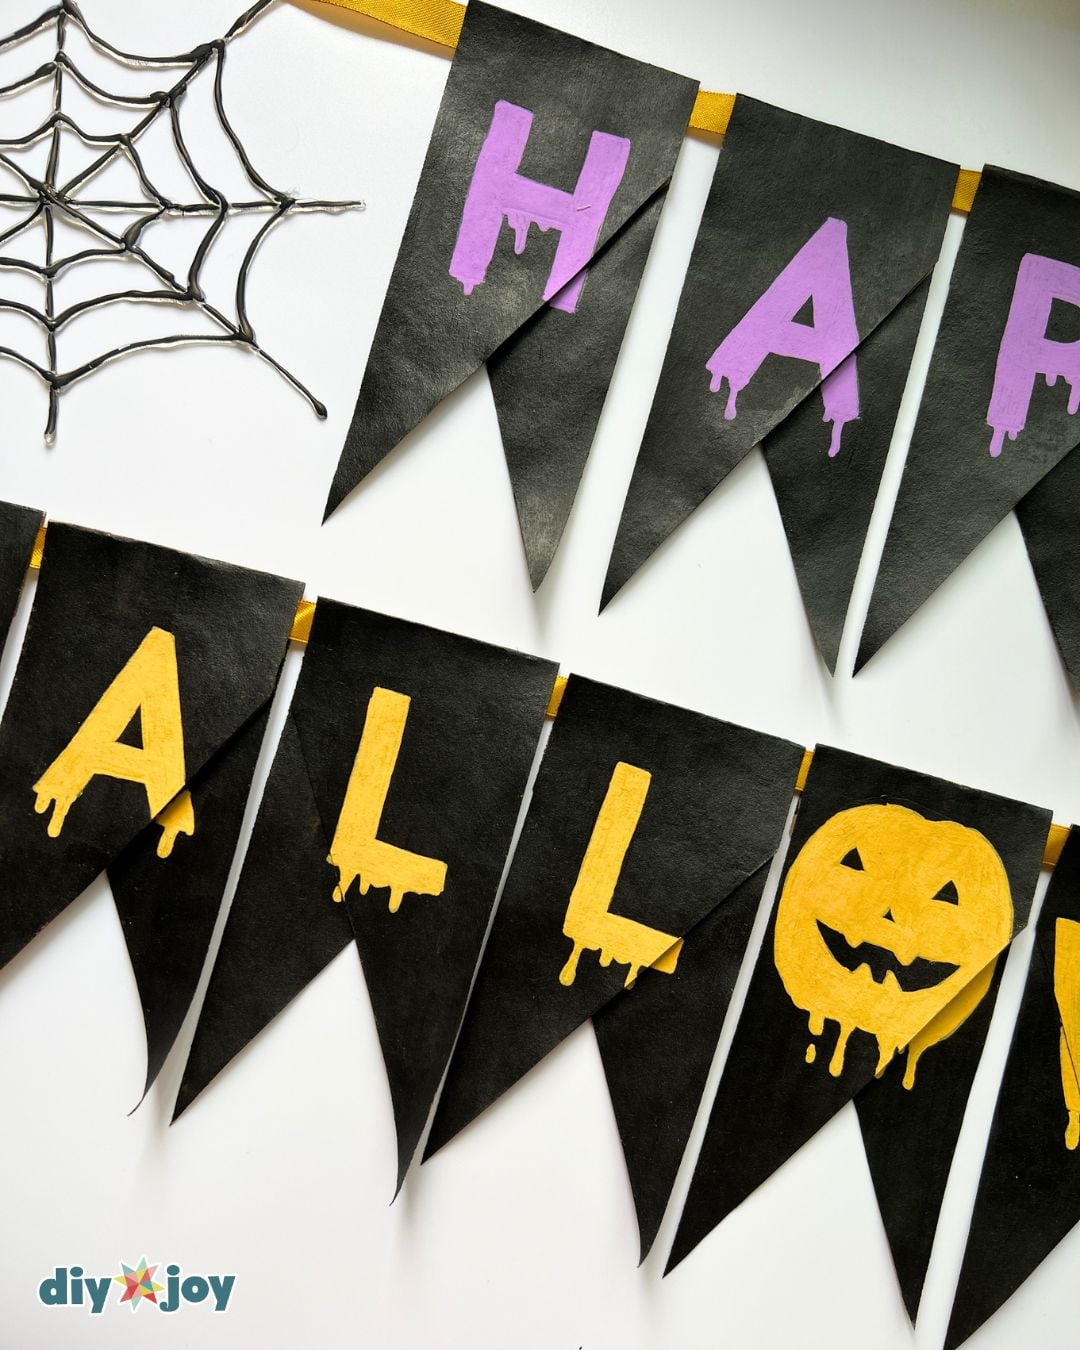
Black folded cardboard pieces hang on ribbon to spell a bold Happy Halloween greeting. Lily Suing designed the Toilet Roll Banner for DIY JOY. Seven soaked and separated tubes dry into forms that can be painted and hand-lettered, with a pumpkin replacing one O. Follow Lily’s complete tutorial on DIY JOY first, then keep browsing DIY JOY for more Halloween craft ideas.
9. Mini Skull Halloween Cloche
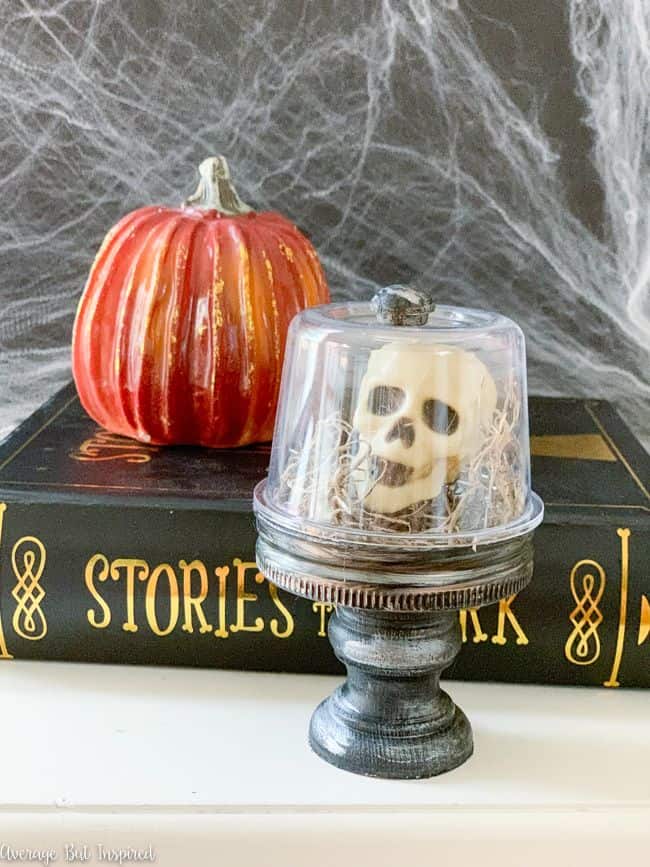
Bre at Average But Inspired created this Mini Skull Halloween Cloche around an inverted baby-food or small mason jar. Black and silver paint finish the compact pedestal before moss and one miniature skull go under glass. The completed piece looks wonderfully odd without taking over a shelf or tabletop. The source discloses affiliate links and does not identify a project sponsor. Glass and high-temperature hot glue need adult care, while E6000-style adhesive requires label-directed ventilation and curing. Return to Average But Inspired for Bre's complete tutorial and more imaginative decorating ideas.
10. Light-Up Ghost Centerpiece
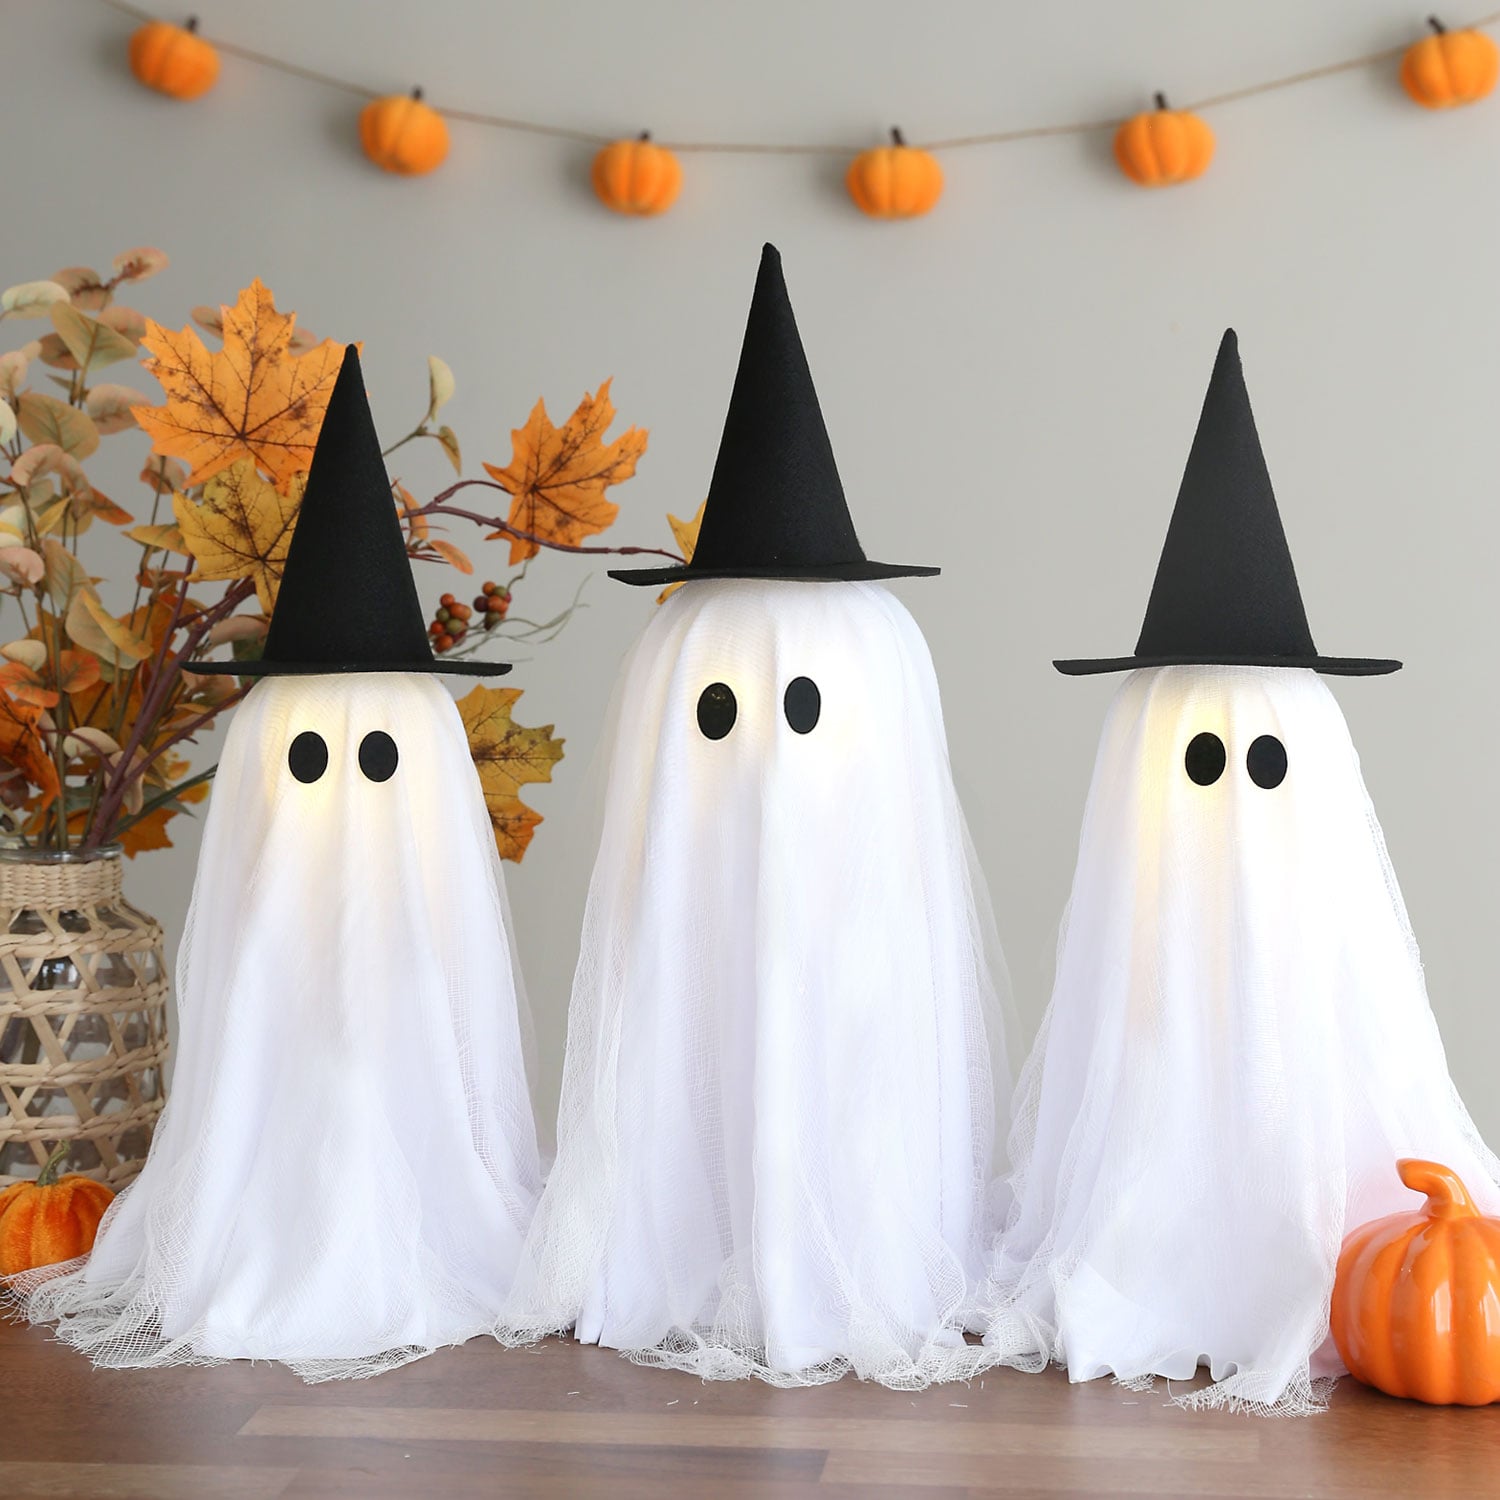
Three lit cheesecloth ghosts with black faces and tiny hats gather beside small pumpkins in the finished centerpiece. Autumn Baldwin created the Light-Up Ghost Centerpiece for It’s Always Autumn, whose tutorial includes Amazon affiliate links; hot glue belongs with an adult, and the string lights should be switched off whenever you leave the room. Find Autumn’s complete tutorial at It’s Always Autumn, along with more seasonal projects from the site.
11. Origami Flapping Bats
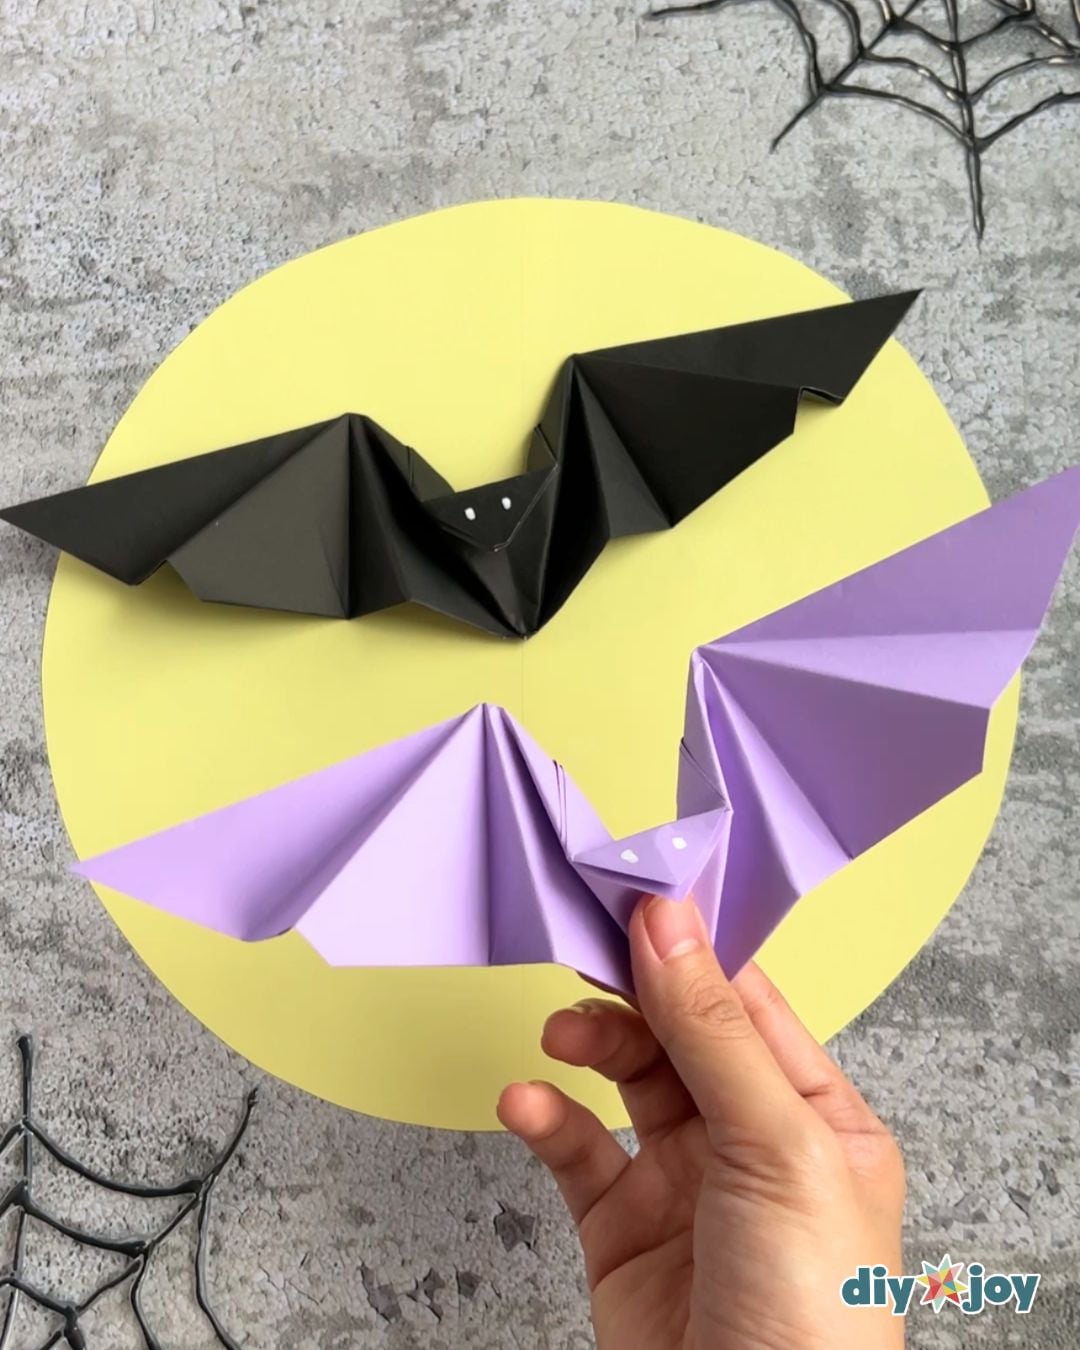
When you want movement without glue or scissors, this folded paper bat brings a clever surprise. Lily Suing created the Origami Flapping Bat for DIY JOY from one paper square. Pressing the folded back while holding the center front makes the dimensional wings move; an optional paper cutter still needs appropriate handling. Open Lily's complete tutorial on DIY JOY for the precise folds, then find more paper craft ideas from DIY JOY.
12. Glamorous Witch Skull Mason Jar
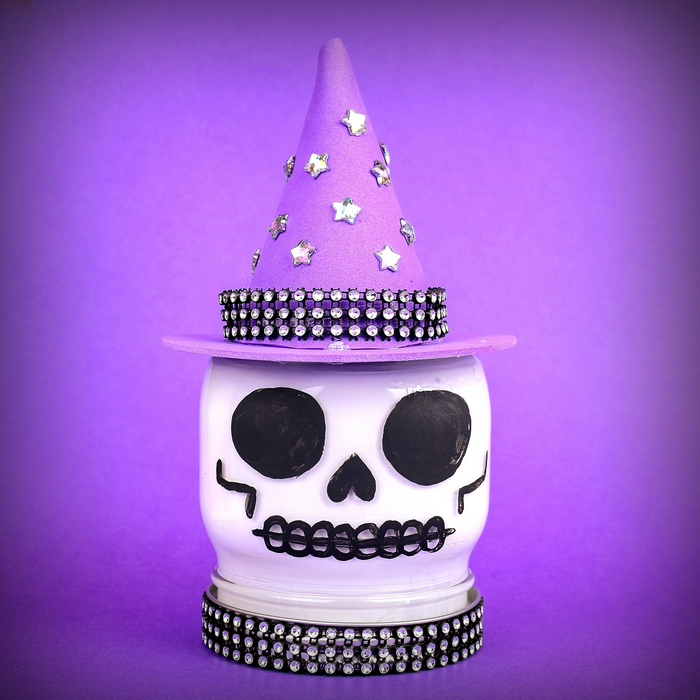
Set this decorated jar where its purple witch hat and sparkling details can catch the eye. A white-and-black skull face, black accents and rhinestones make the Glamorous Witch variation feel theatrical. Jessica Hill created the project for Mad in Crafts, and glass, foam cutting, paint and hot glue all deserve careful adult handling. The source includes affiliate links without identifying a project-specific sponsor. Use Jessica’s Mad in Crafts page for the complete tutorial, followed by more of her creative Halloween ideas.
13. Recycled Milk Jug Ghost Luminaries
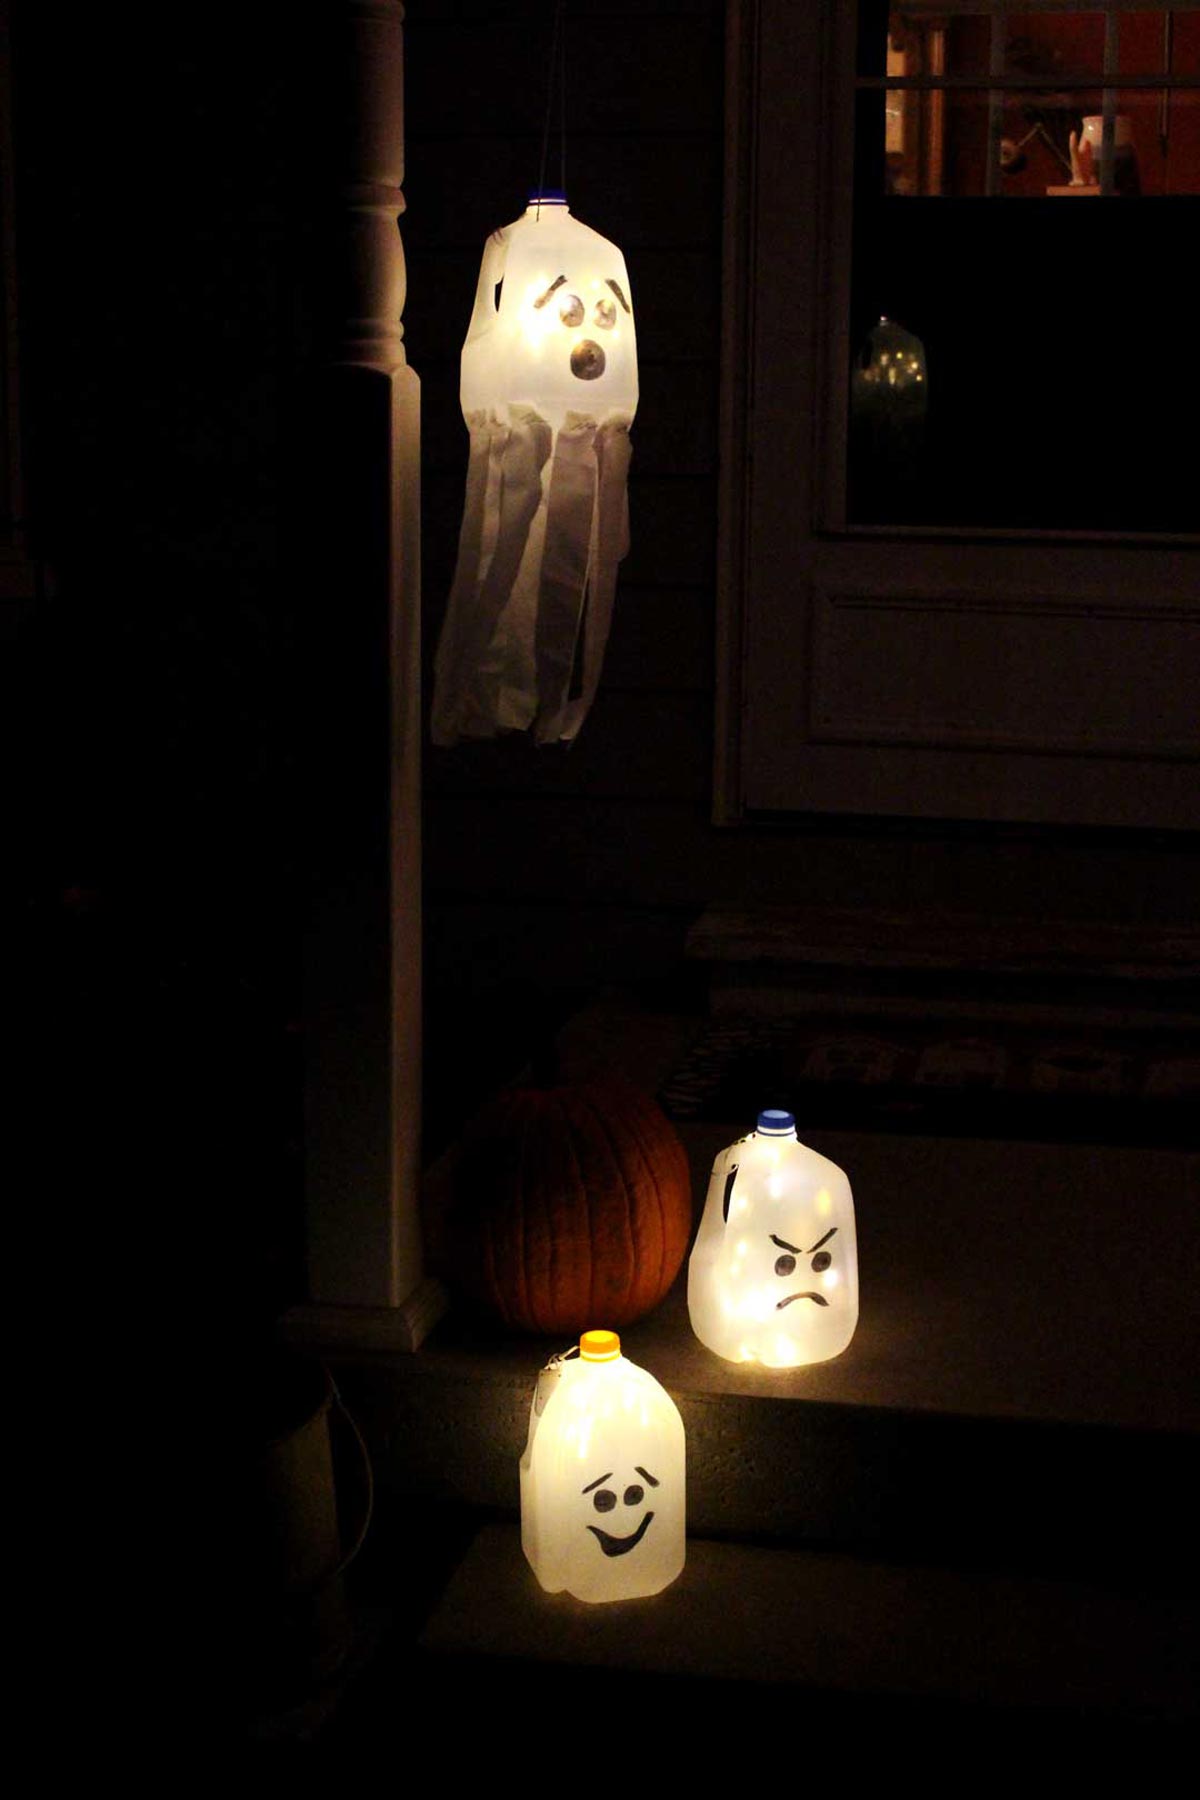
Three recycled milk-jug ghosts glow together at night with different black marker faces. Shelly at Welcome to Nana’s shows a sitting version if you’d rather skip the optional hanging construction. Sand or gravel weights the jugs while battery fairy lights keep each switch accessible at the handle. Use only battery or LED lights inside the plastic jugs, never real candles. Label removal or cutting remains an adult task. The article may contain affiliate links; visit Welcome to Nana’s for Shelly’s complete tutorial and more resourceful family craft ideas.
14. Hanging Paper Pumpkin Craft
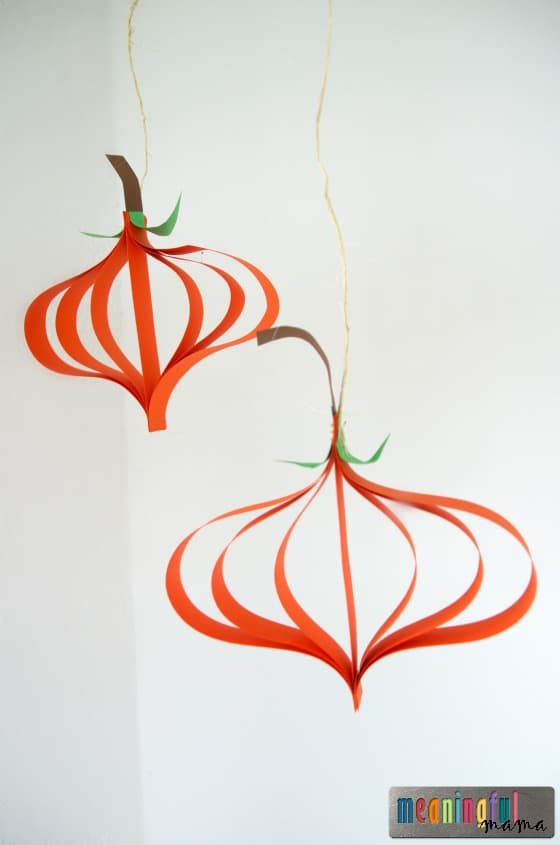
Hanging Paper Pumpkins from Jodi Durr at Meaningful Mama build rounded forms from measured orange paper strips, with curled green and brown details at the top. To me, the airy shape gives a fall or Halloween display a lighter visual note. Scissors, a paper cutter and a stapler require age-appropriate adult help. For the complete tutorial and more thoughtful craft ideas, spend some time with Jodi at Meaningful Mama.
15. Ghosts in Mason Jars
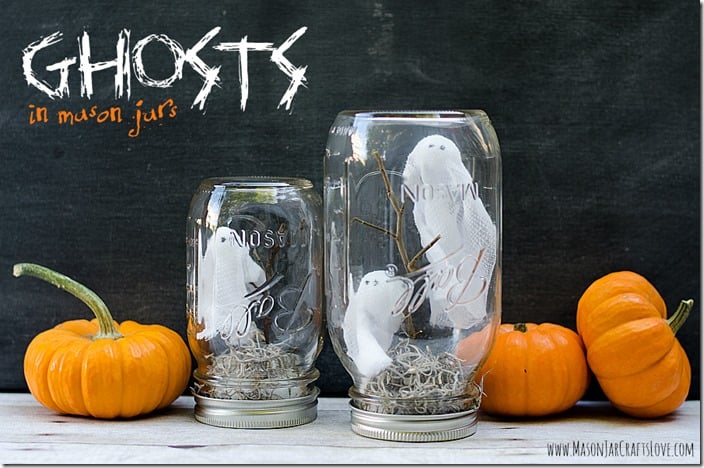
Linda's Ghosts in Mason Jars at Mason Jar Crafts Love suspend wispy gauze figures over twig-and-moss scenes inside inverted jars. Lid-mounted Styrofoam bases support the small figures without painted faces or interior lights. Cutting Styrofoam, handling glass and using hot glue are adult jobs. I like that the tiny ghost scenes stay at the center of the design; the source also contains affiliate links. Linda shares the complete tutorial at Mason Jar Crafts Love; let it guide the details and keep going for more of her mason jar ideas.
16. Halloween Googly Eye Bowl
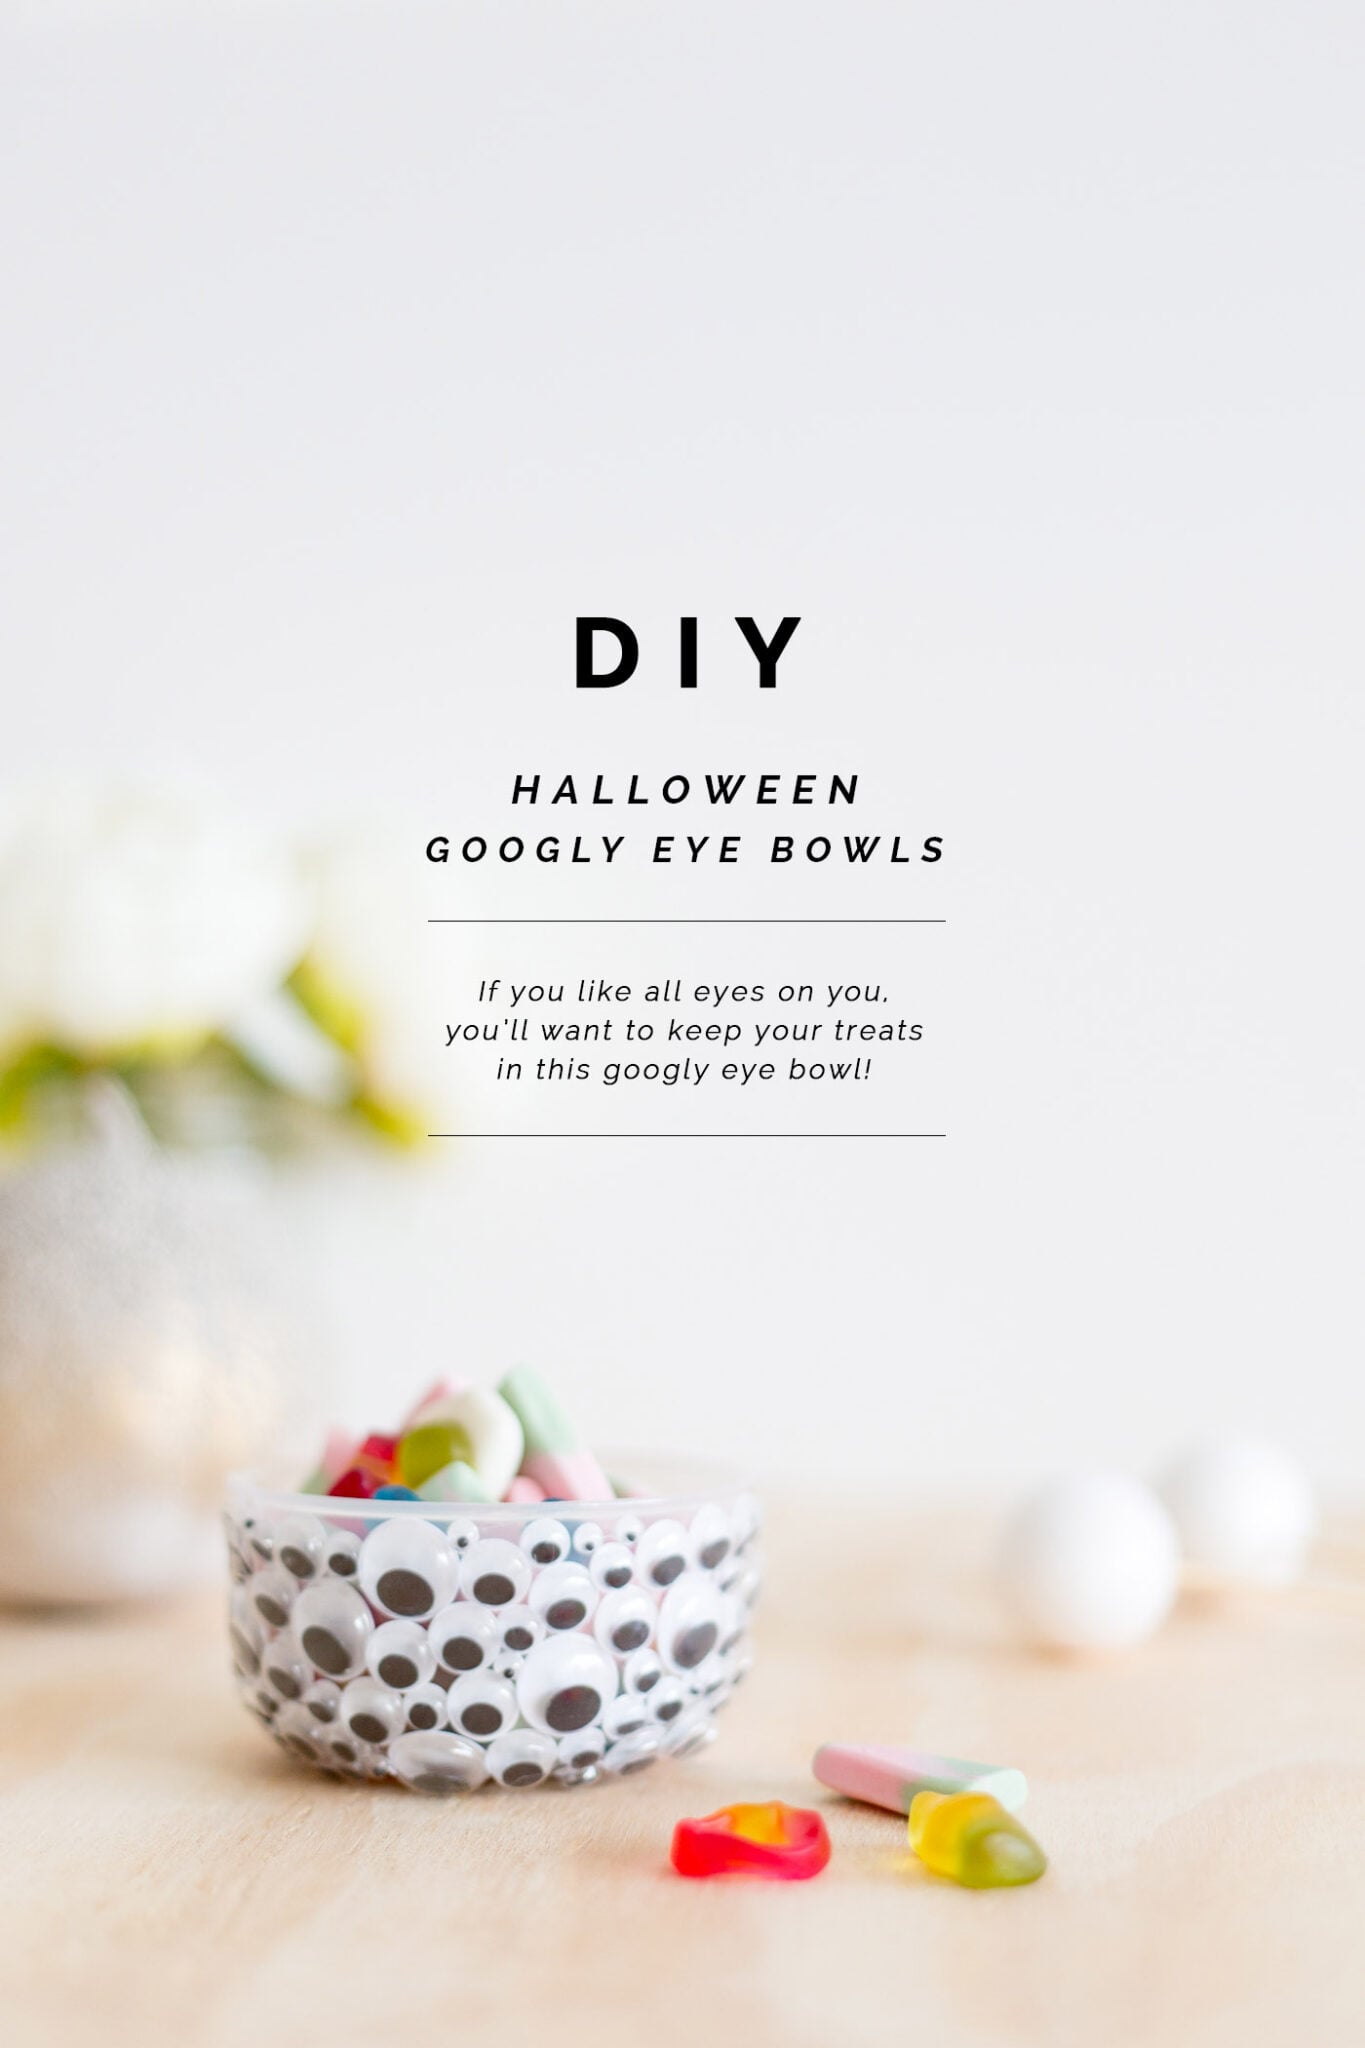
A small bowl covered edge to edge with assorted staring eyes creates a wonderfully busy monster look. Fran created the Halloween Googly Eye Bowl for Fall For DIY. Larger eyes establish the pattern and smaller ones fill the visible gaps on the outside. Because hot glue is involved, an adult should handle assembly, and the source does not establish the bowl as food-safe or break-resistant. Visit Fall For DIY for Fran’s complete tutorial, then explore more playful decorating ideas from the source.
17. Hanging Toilet Roll Ghosts
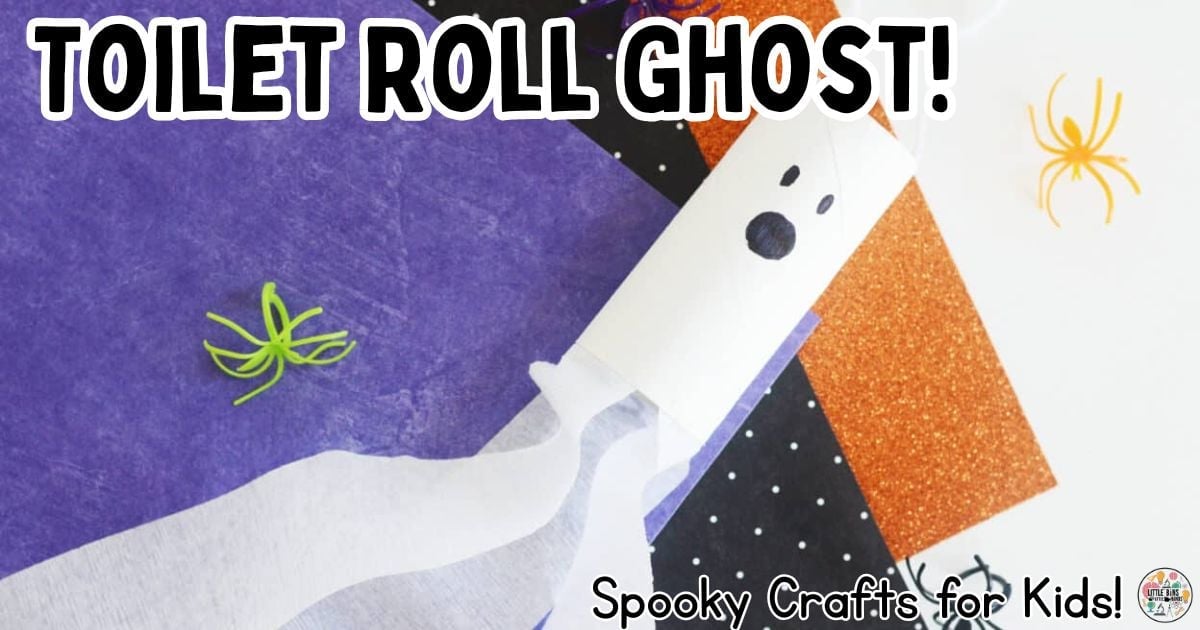
A freehand face and three fluttering paper streamers give this hanging cardboard ghost a long, lively silhouette. I like the movement the yarn suspension adds, with scissors and any optional stapler kept under age-appropriate supervision. Follow the complete tutorial from Sarah McClelland on Little Bins for Little Hands, where you can also discover more of her hands-on designs.
18. Poison Apple Pumpkin Craft
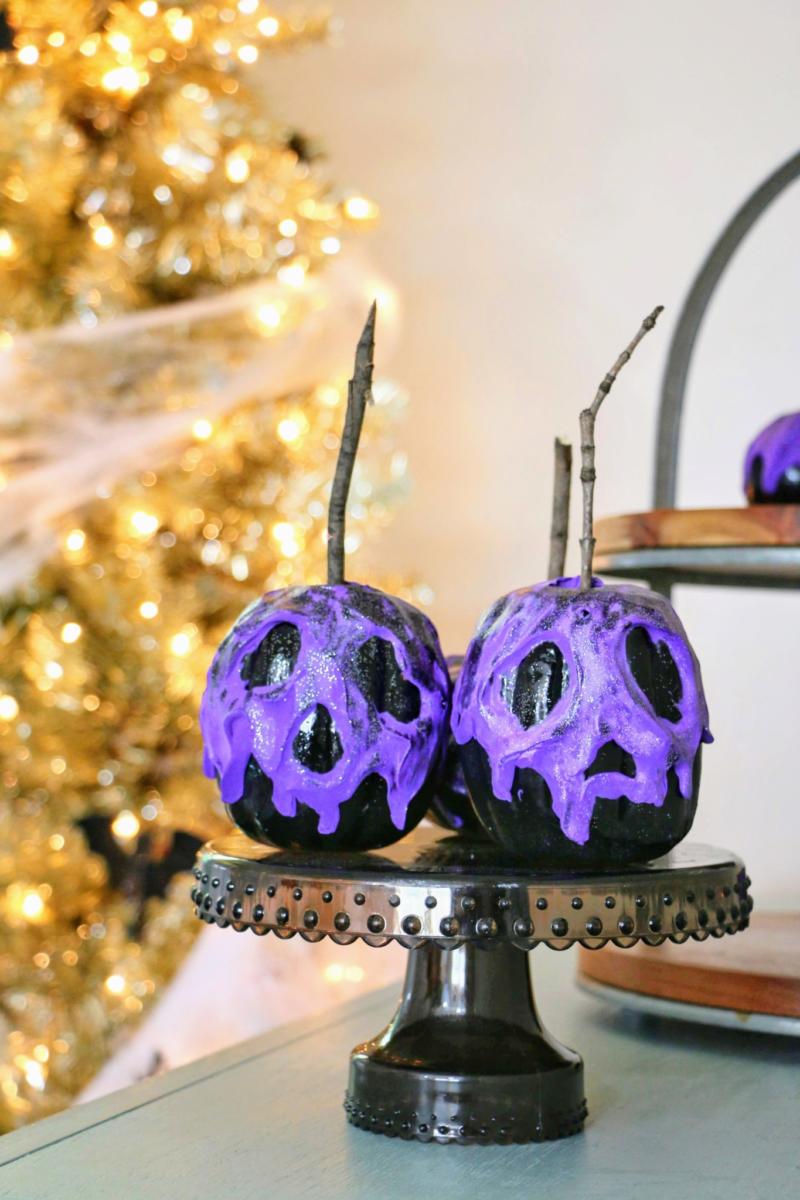
Sarah Lemp’s Poison Apple Pumpkin Craft at All Things with Purpose gives black foam pumpkins dramatic purple faces made with air-dry clay. Glitter glue adds a slick, magical finish after the painted pumpkins have dried. Spray paint needs outdoor or label-directed ventilation, and hot glue belongs with an adult. For Sarah Lemp’s complete tutorial and more seasonal ideas, visit All Things with Purpose.
19. Glow Stick Broomsticks
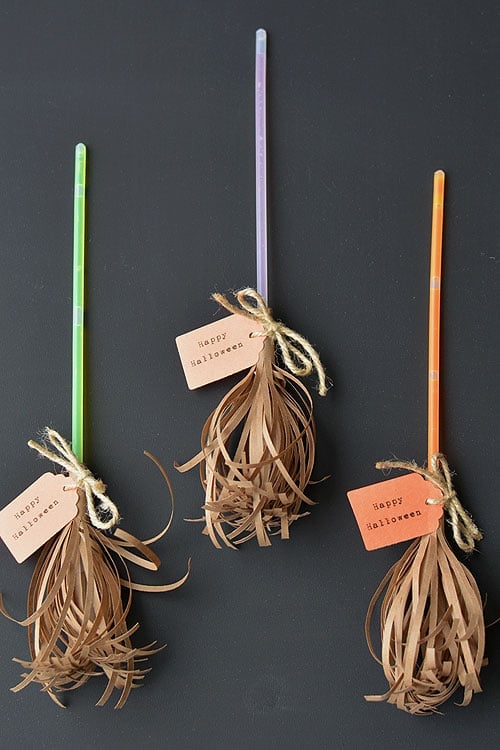
If a table or favor basket needs a small glowing detail, these witchy broomsticks fit the scale. Debbie Chapman created the Glow Stick Broomsticks for One Little Project. Bracelet-style glow sticks, kraft paper, twine and optional tags form the finished favors; scissors and any optional craft knife require adult handling, and thin glow sticks can snap. Find Debbie’s complete tutorial at One Little Project, then browse additional imaginative ideas from the same source.
20. Spooky Eyeball Wreath
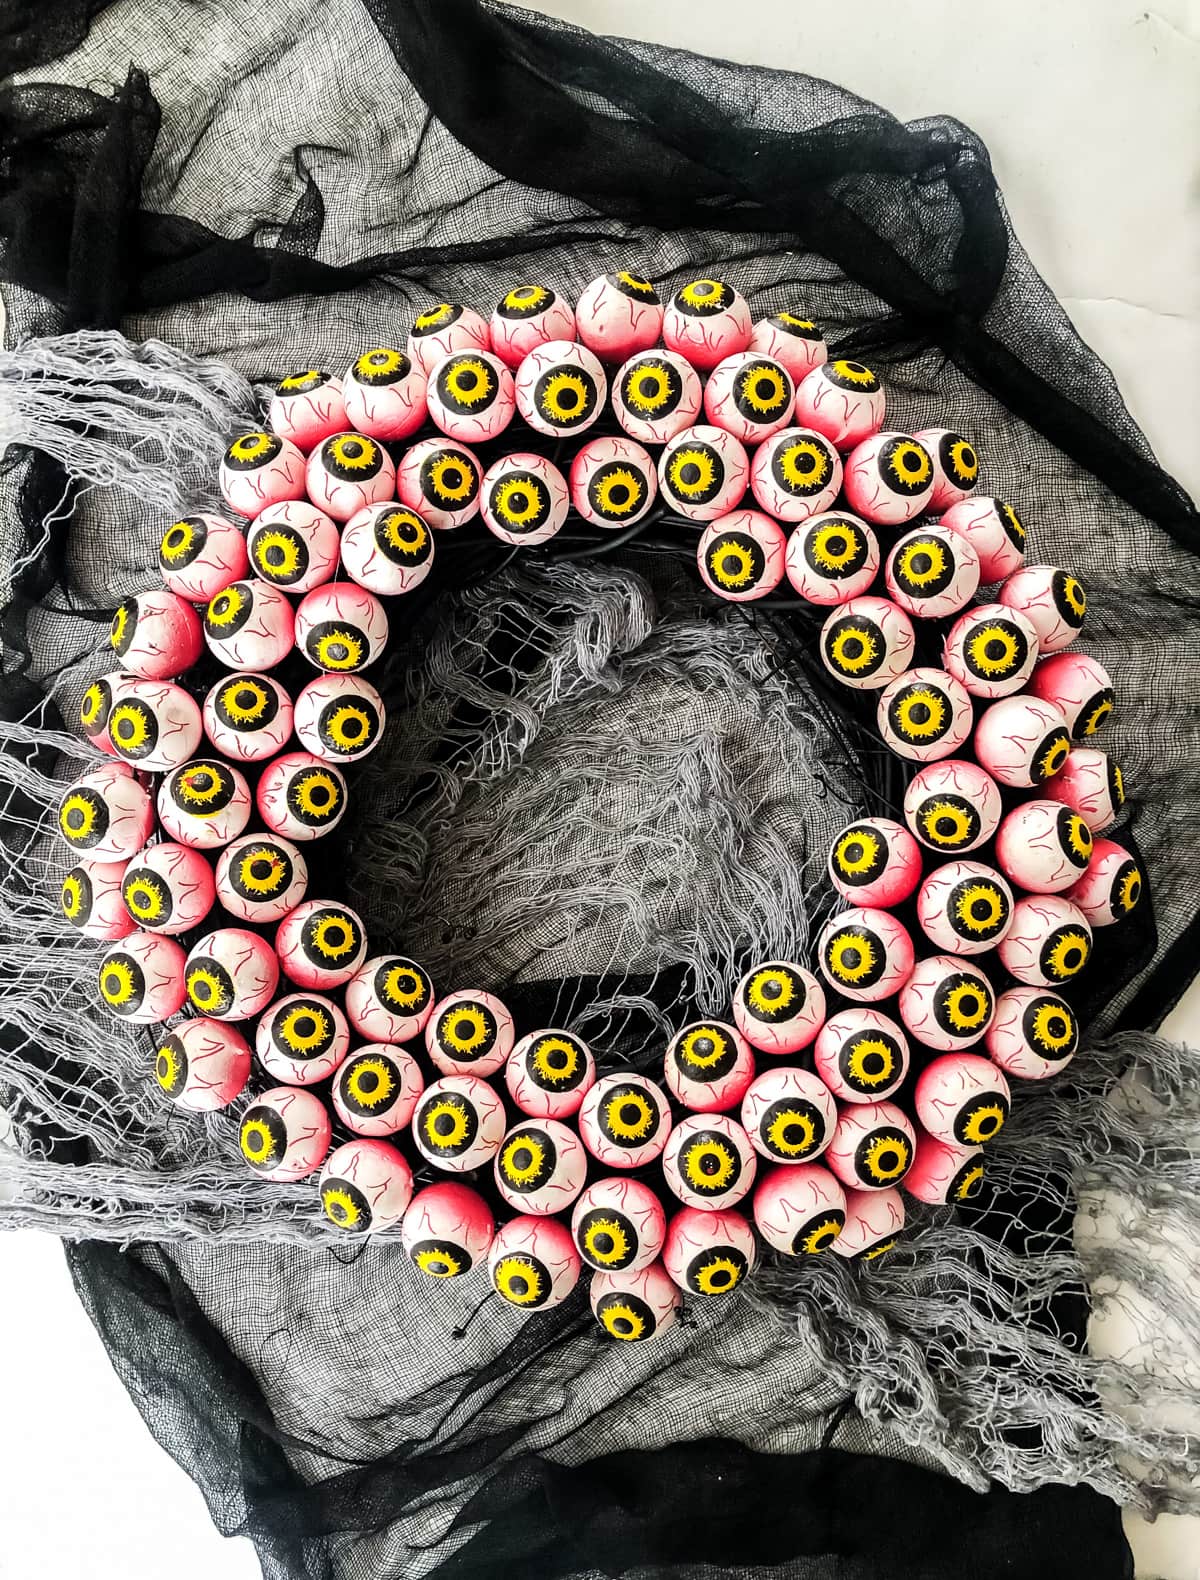
For a classic wreath shape with a stranger stare, this design covers a dark grapevine base in foam eyes. Use spray paint with proper ventilation, let it dry and keep hot-glue work with an adult. Jo-Anna Rooney created the Spooky Eyeball Wreath for A Pretty Life in the Suburbs. Start at A Pretty Life in the Suburbs with Jo-Anna's complete tutorial; explore her other seasonal decorating ideas while you are there.
21. Glow-in-the-Dark Haunted House Canvas
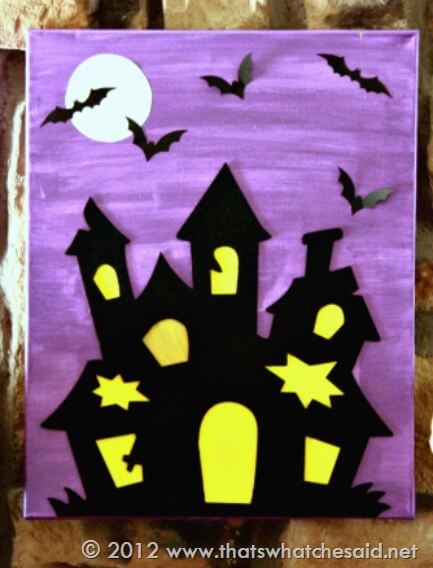
Display this purple canvas where its moon and yellow windows can show the glow-in-the-dark finish. Cheryl Spangenberg created the Haunted House Canvas for That’s What Che Said. If you want dimensional detail, notice the folded black bat wings; keep scissors or the electronic cutter with an adult, follow product labels for paint and decoupage medium and get the cut file from the creator rather than sharing copies. The project page includes affiliate links. That’s What Che Said pairs Cheryl’s complete tutorial with more of her creative ideas, so read through the project and browse the rest of her work there.
22. Halloween Monster Flower Pots
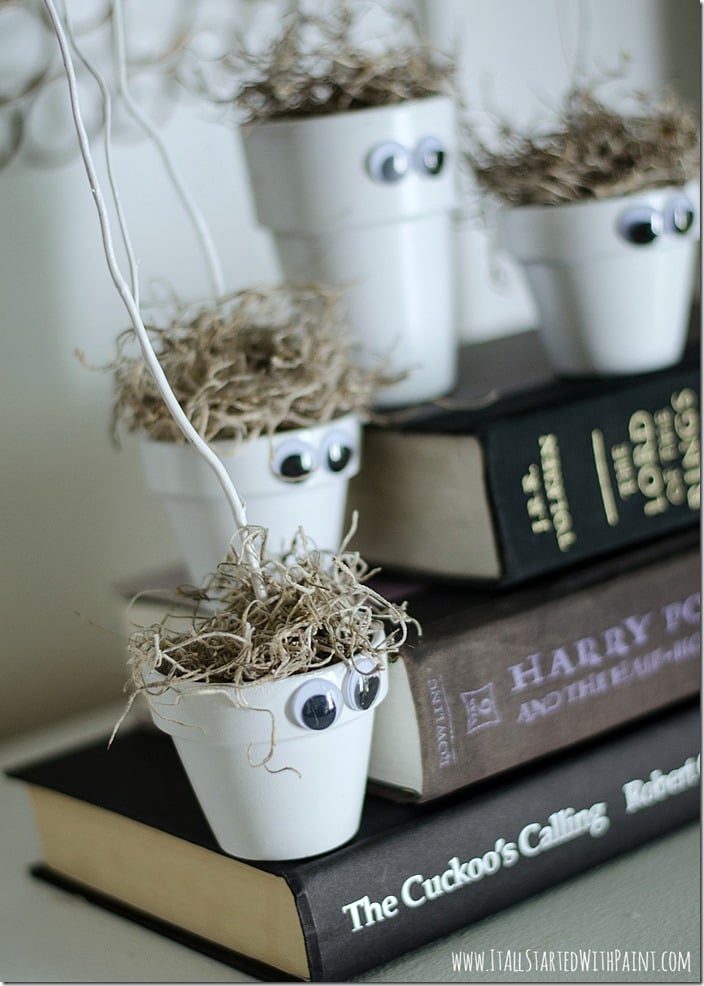
Linda at It All Started With Paint created these Halloween Monster Flower Pots from four white terracotta vessels with googly eyes, mossy hair and tall white sticks. You can use acrylic paint if you’d rather skip spray paint; supervise paint and loose pieces, or reserve outdoor spray painting for an adult. Visit Linda’s complete tutorial at It All Started With Paint, then browse more smart projects on her site.
23. Hanging Paper Bat Flock
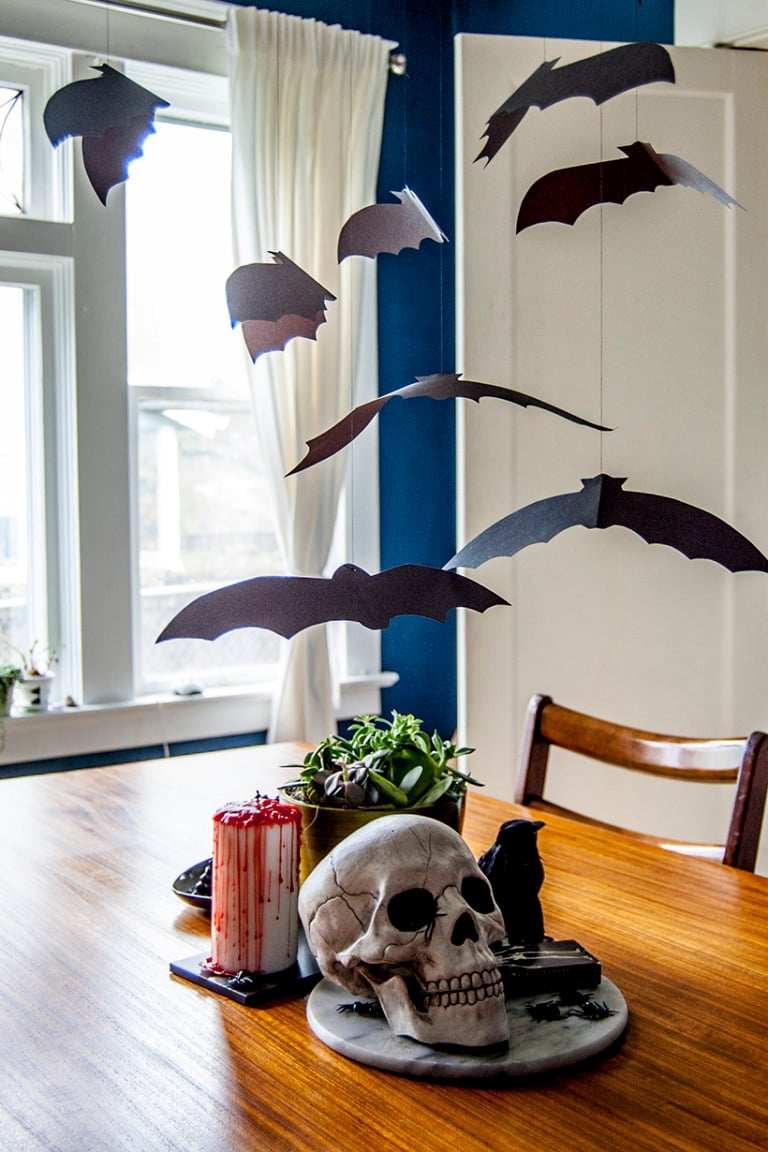
Black folded bats appear to fly through the room when fine thread suspends the finished flock overhead. The source hangs the arrangement from a chandelier or ceiling near a window. Rachel created the Hanging Paper Bat Flock for DIY in PDX. A needle and scissors call for careful adult help. See Rachel's complete tutorial at DIY in PDX for the proper construction, then browse more of her original display ideas.
24. Wooden Pumpkins From Scrap 2x4s
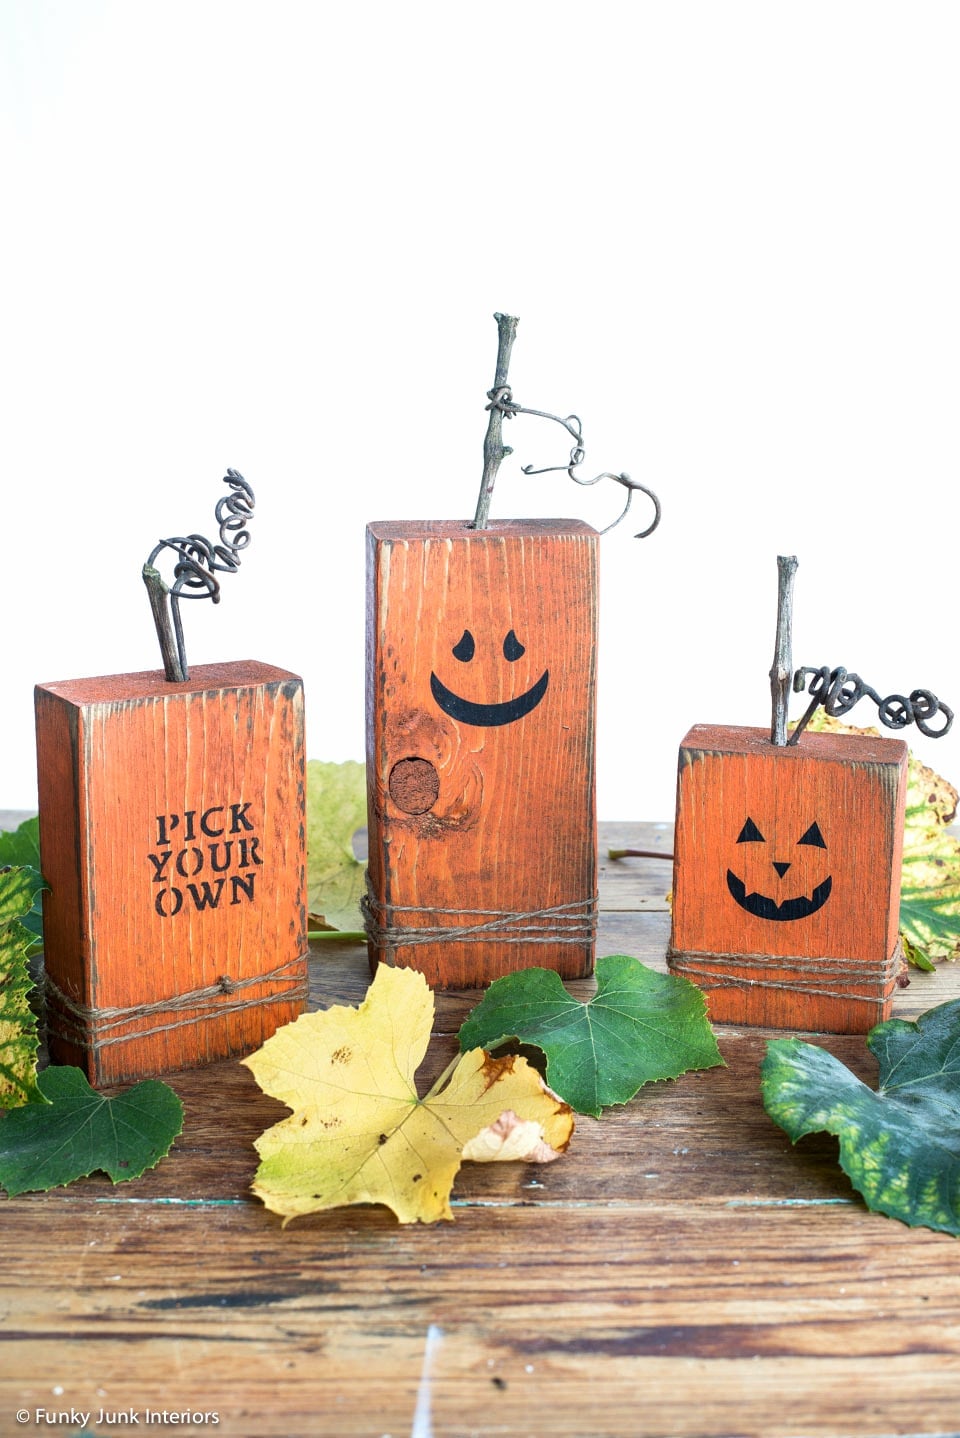
Orange paint, dark faces, branch stems and distressed edges give these three scrap-wood pumpkins their rustic texture. Donna Williams created the Wooden Pumpkins project for Funky Junk Interiors. Reverse-side messages let the blocks shift from Halloween faces to a broader fall display. The method uses scrap 2x4s, paint, a face-and-message stencil and small decorative accents; the source uses Fusion and Amazon Influencer affiliate links. This is an adult power-tool project involving a miter saw, sander and drill, with eye and dust protection required. Visit Donna at Funky Junk Interiors for the complete tutorial, then explore more of her reclaimed-material decor ideas.
25. Halloween Rocking Monster Craft
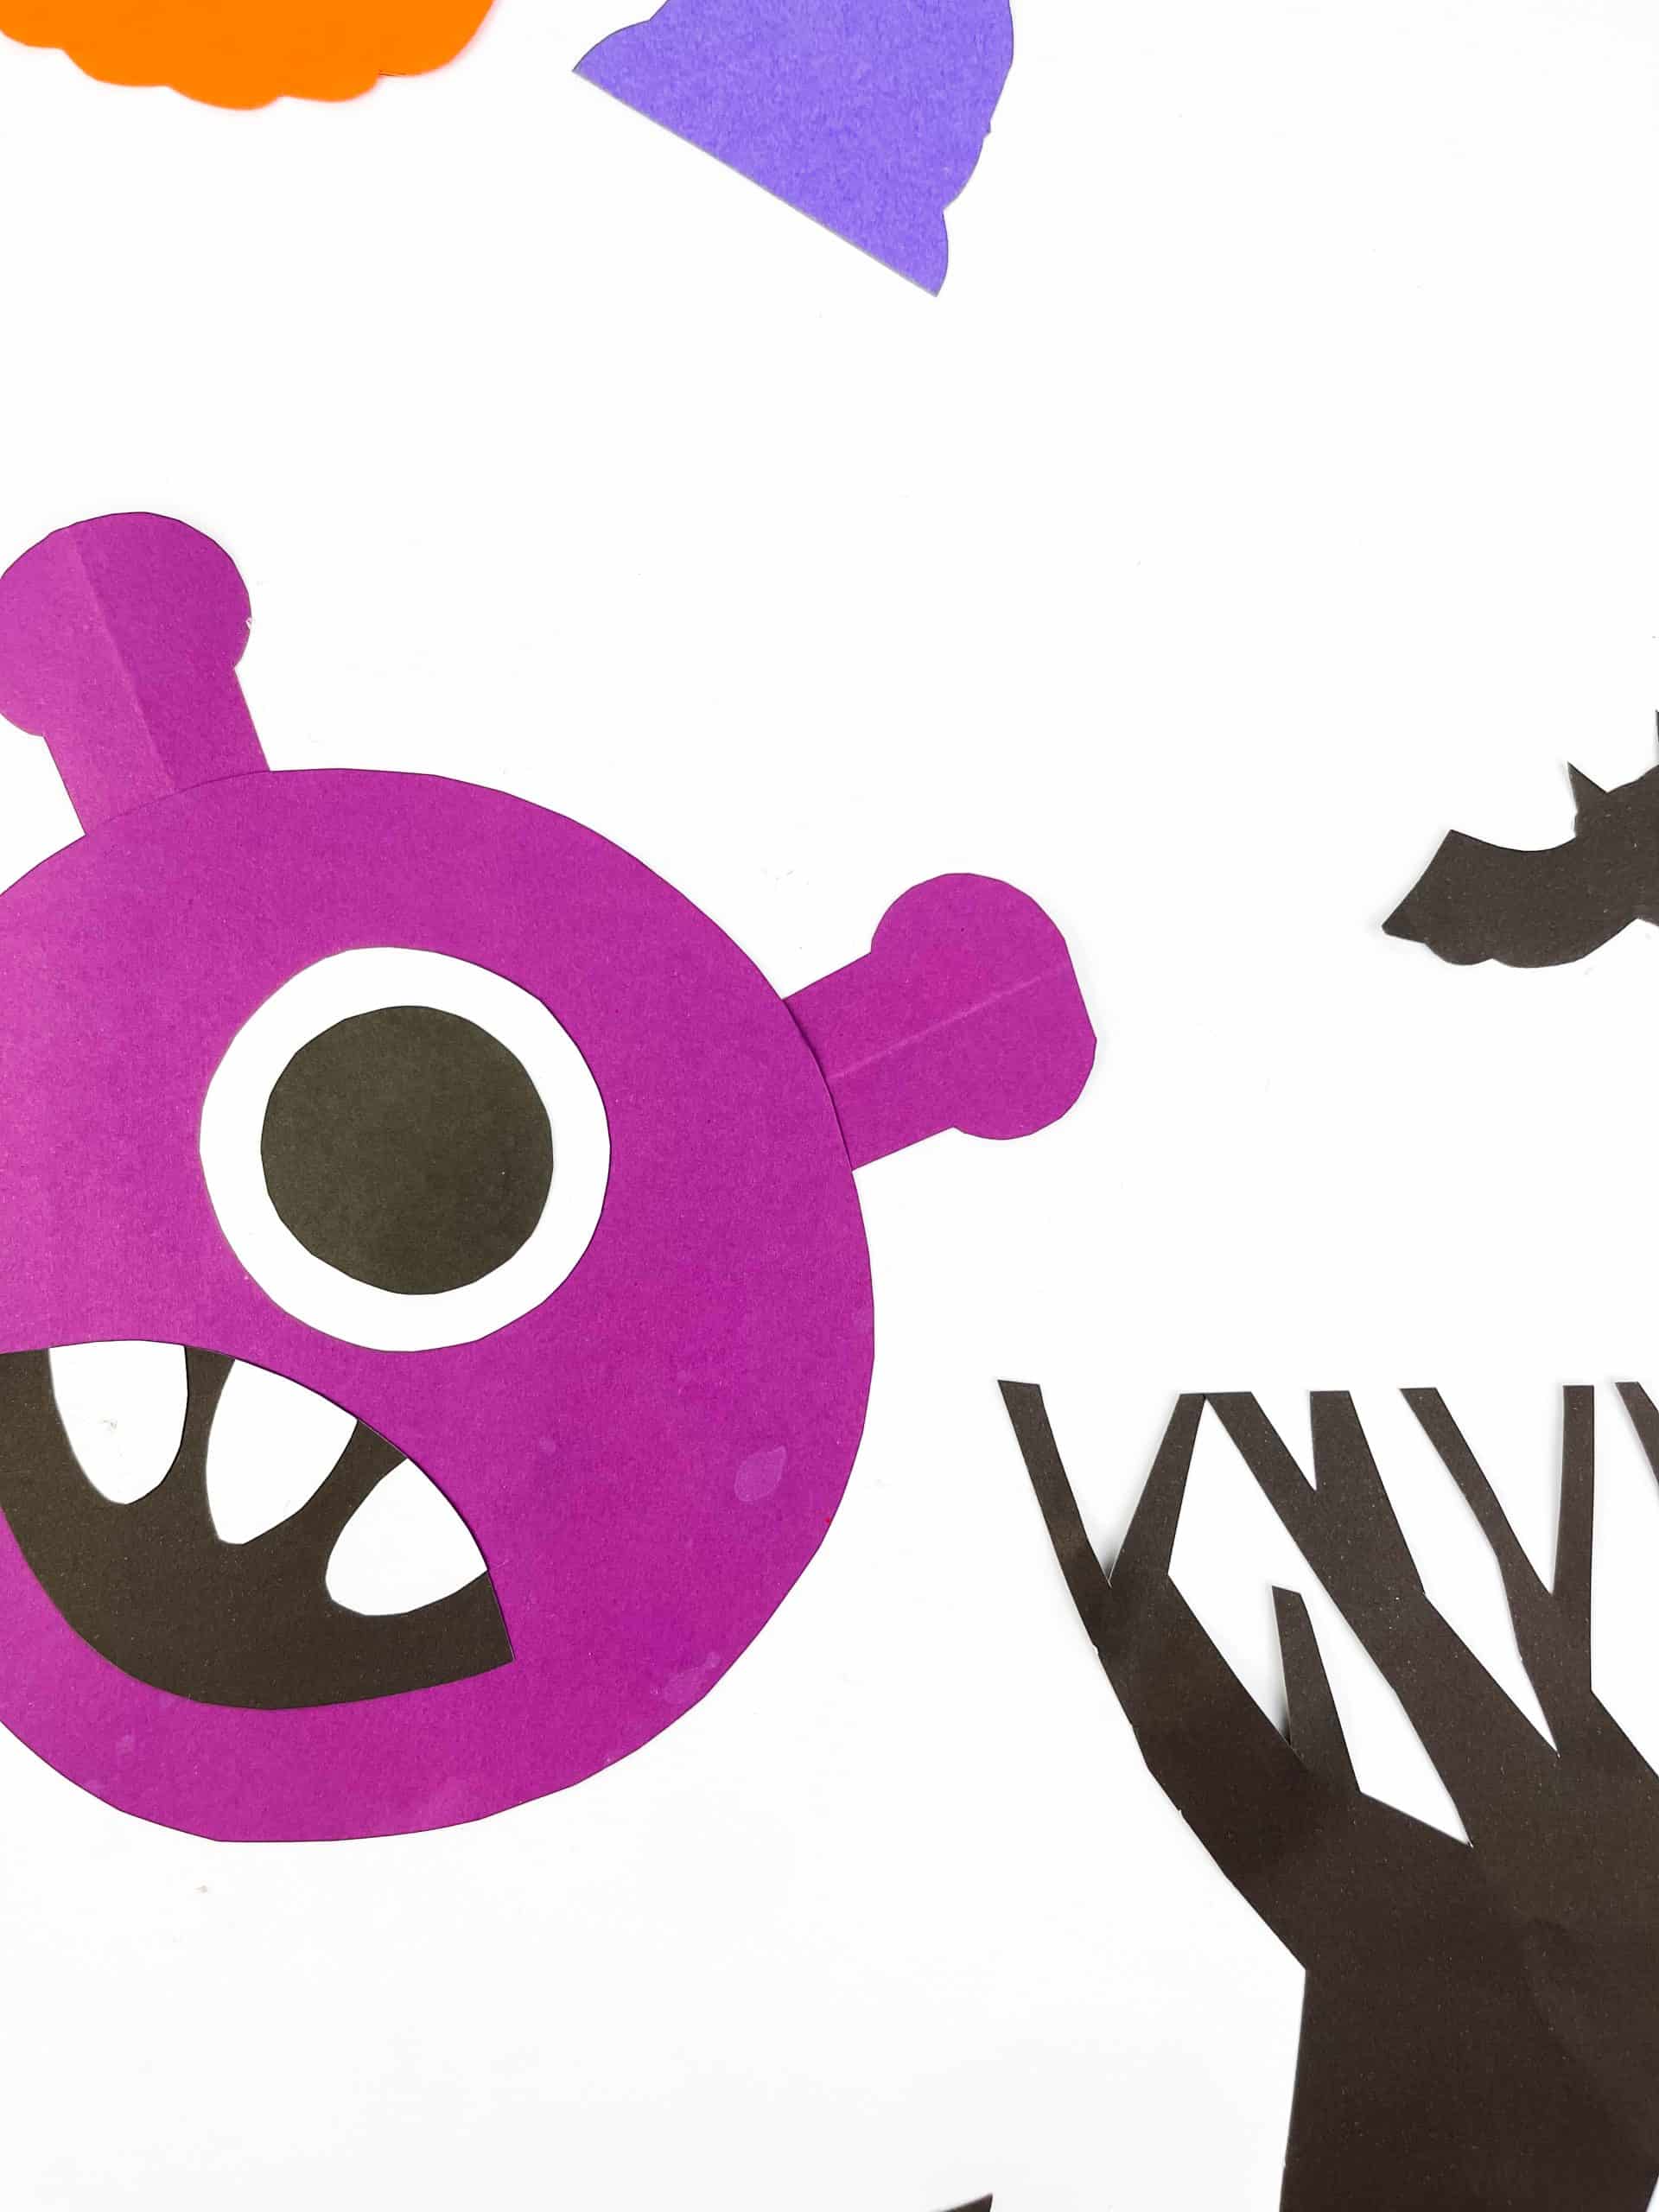
A purple paper monster balances on a folded circular base with horns, teeth and one oversized eye. Scissors need age-appropriate supervision, and loose embellishments should stay away from very young children. In The Playroom created the Halloween Rocking Monster without requiring a printable template. Visit In The Playroom for the complete tutorial and additional playful family craft ideas.
26. Halloween Eyeball Balloons
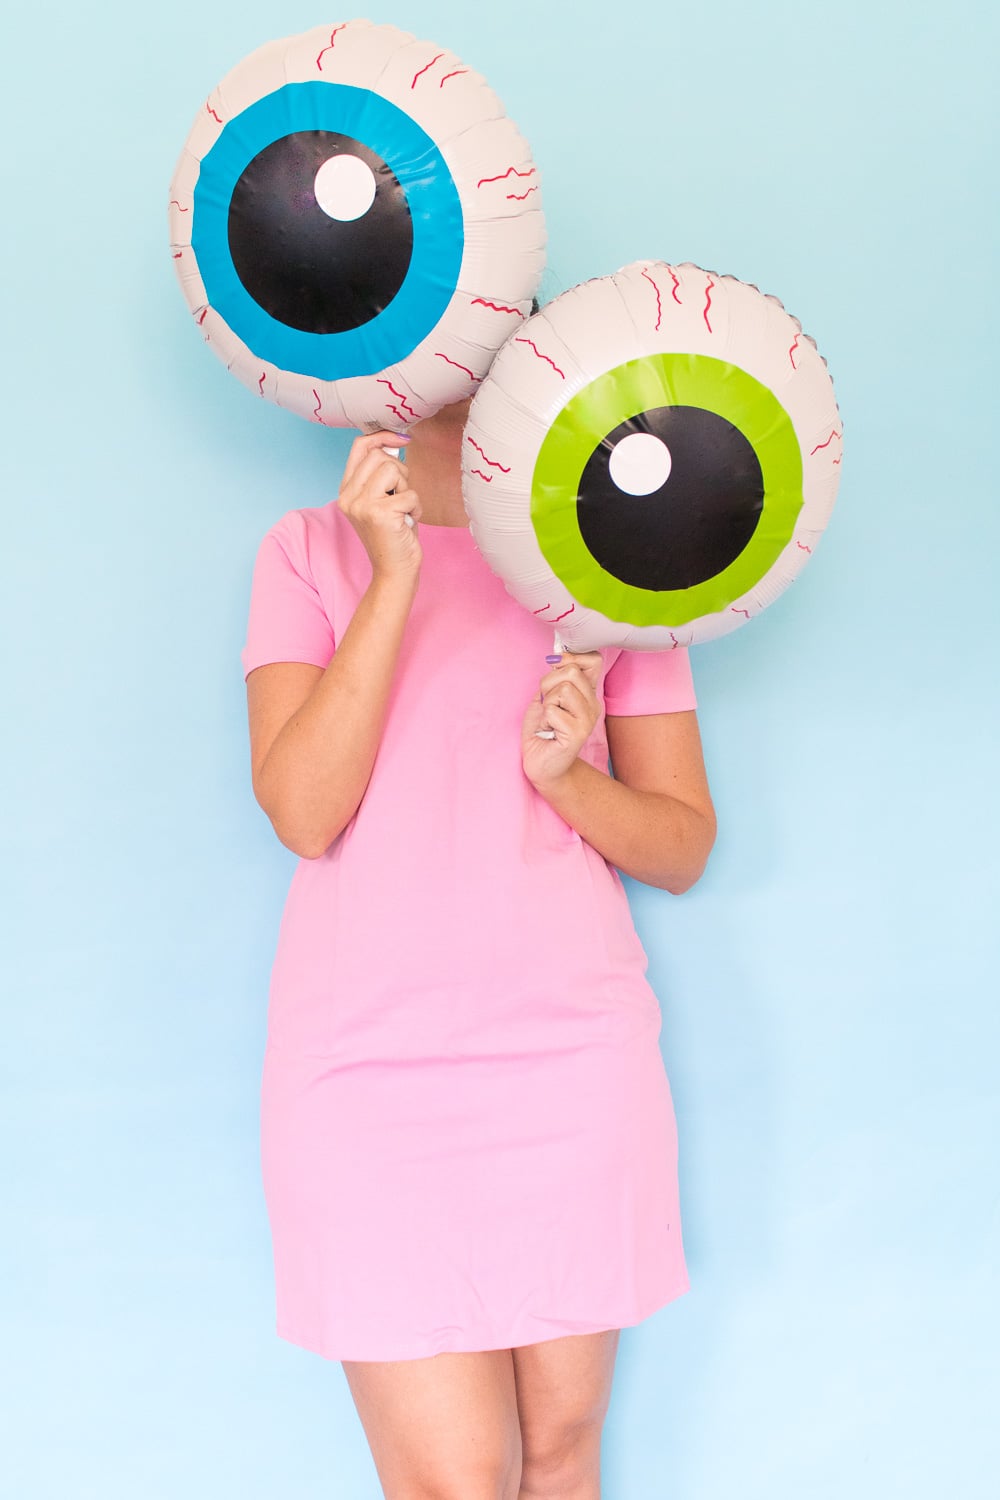
Holly Wade created the Halloween Eyeball Balloons for Club Crafted. Two white mylar balloons stare back with layered blue and green irises, black pupils, white highlights and red veins. Vinyl circles and marker details build the effect on each inflated balloon. I like that the source honestly explains why the added vinyl keeps them from floating normally, making a wall or floor display the better choice. Adults should manage cutting and inflation equipment, and foil balloons must stay away from overhead electrical lines. To see the entire project, use Holly's complete tutorial at Club Crafted and linger over more of her lively celebration ideas.
27. Halloween Balloon Porch Display
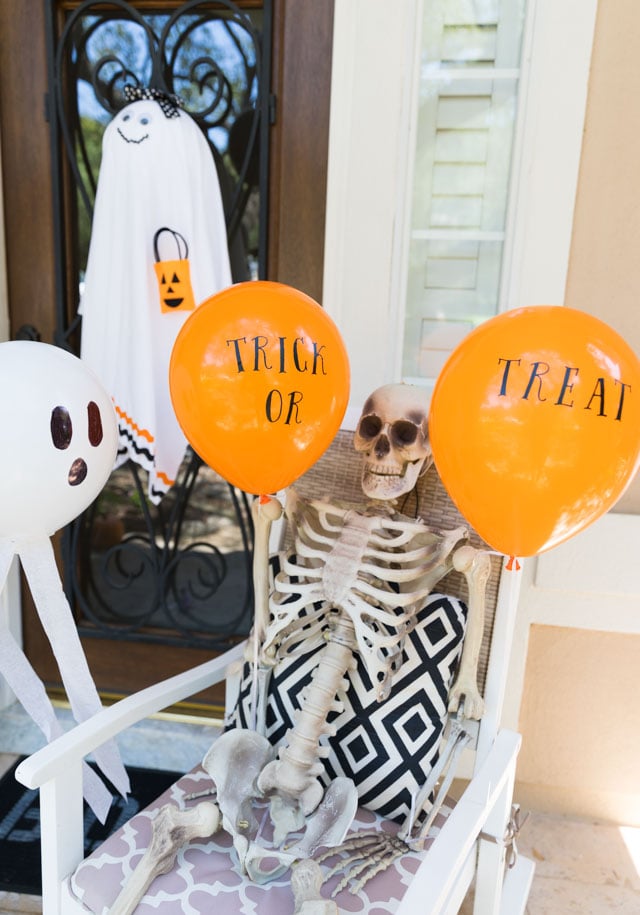
Bat, spider, ghost and Trick or Treat balloons gather around pumpkins and a seated skeleton in this porch display. Haeley reports about four hours of float time, so plan the display for when you want to enjoy it. Haeley Giambalvo created the Halloween Balloon Porch Display for Design Improvised, with weights hidden among the pumpkins. Follow tank directions and keep small pieces contained. The project was sponsored by Balloon Time; find Haeley’s complete tutorial at Design Improvised and more celebration ideas from the same source.
28. Paper Halloween Lanterns
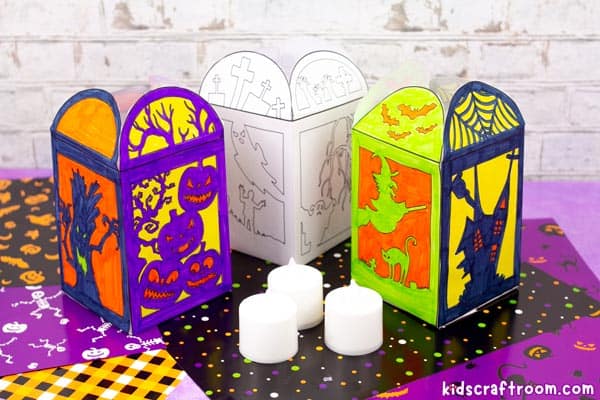
Paper, coloring tools, scissors and glue form three illustrated lanterns with colored and uncolored panels. Use only battery or LED lights with paper and supervise scissors and glue. You’ll need to sign up for the creator’s newsletter to access the printable; don’t redistribute the file. Kids Craft Room discloses affiliate participation; visit Emma there for the complete tutorial, then explore more imaginative kids’ craft ideas from the source.
29. Upcycled Jack-o-Lantern Door Hanger
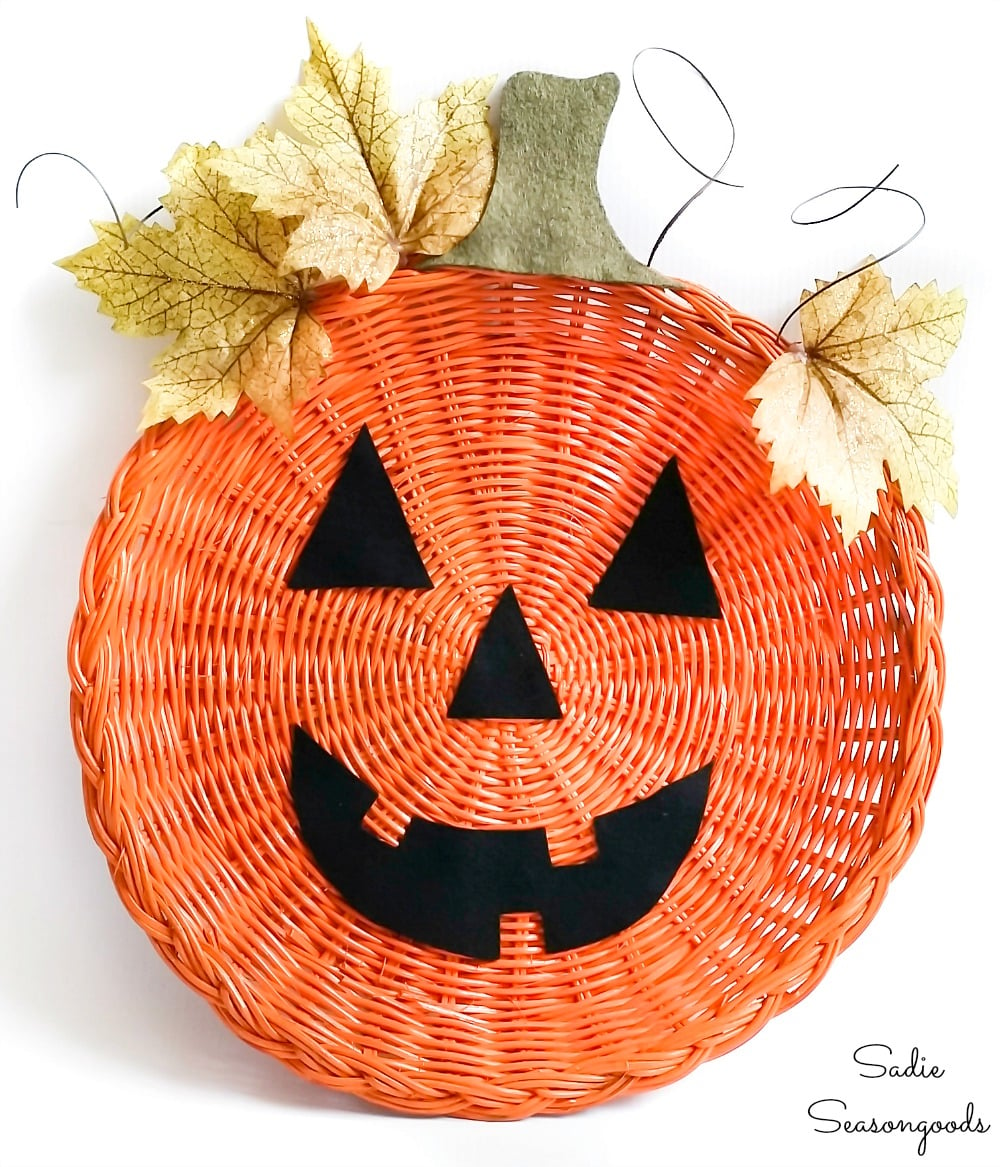
Sarah Ramberg’s Upcycled Jack-o-Lantern Door Hanger at Sadie Seasongoods starts with one thrifted wicker paper-plate holder. Orange paint, felt, greenery, dried grasses and a thread loop give that single found piece a pumpkin face and a door-ready finish. I like how one thrifted piece becomes a whole door decoration. Use spray paint with ventilation and leave hot glue to an adult. Begin your visit to Sadie Seasongoods with Sarah’s complete tutorial before moving into more of her inventive upcycling ideas.
30. Dripping Red Wax Crayon Candles
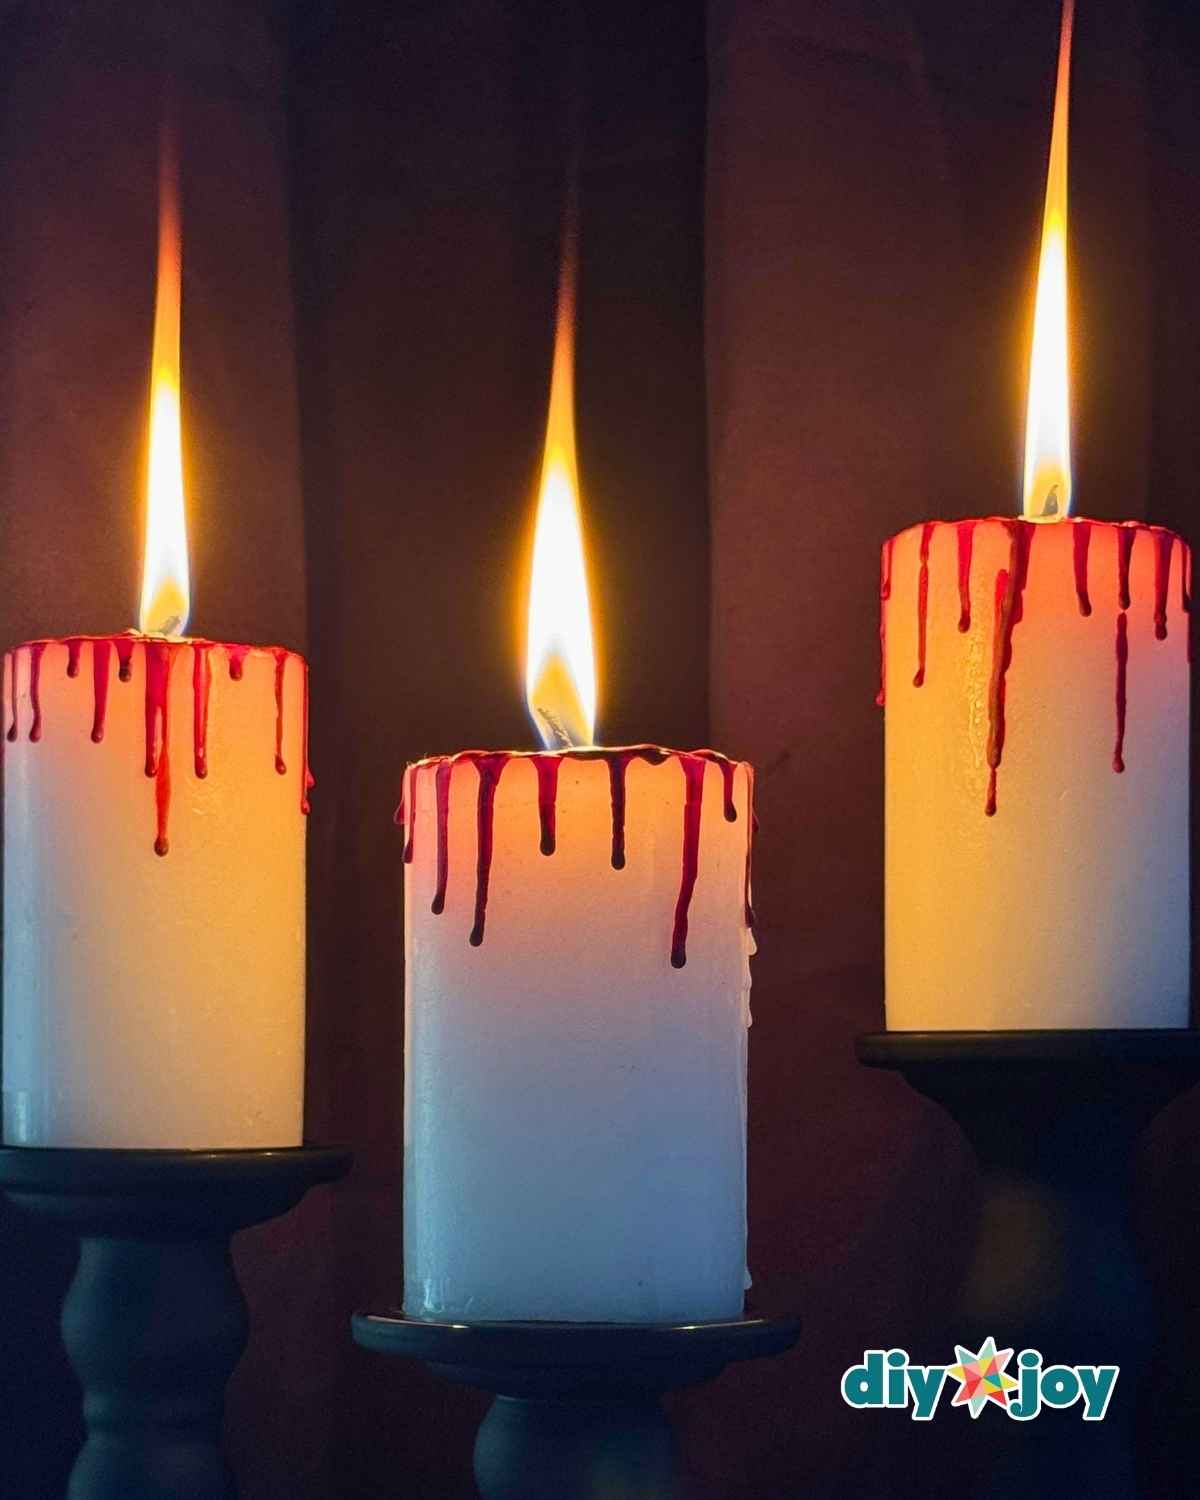
These dripping red wax candles look like they came from a pricey Halloween shop, but the secret is a plain white pillar candle and an ordinary red crayon. Light the candle on a sheet of scrap paper, peel the crayon, hold its tip over the flame until it starts to melt, then move it to the top edge and let the red wax run down the sides. Keep going around the rim until the drips look as creepy as you like. Broken crayons from the bottom of the art bin work perfectly, so this one costs next to nothing and takes about ten to fifteen minutes. Grab a red crayon and follow the full candle tutorial on DIY JOY.
31. Bloody Handprint Window Clings
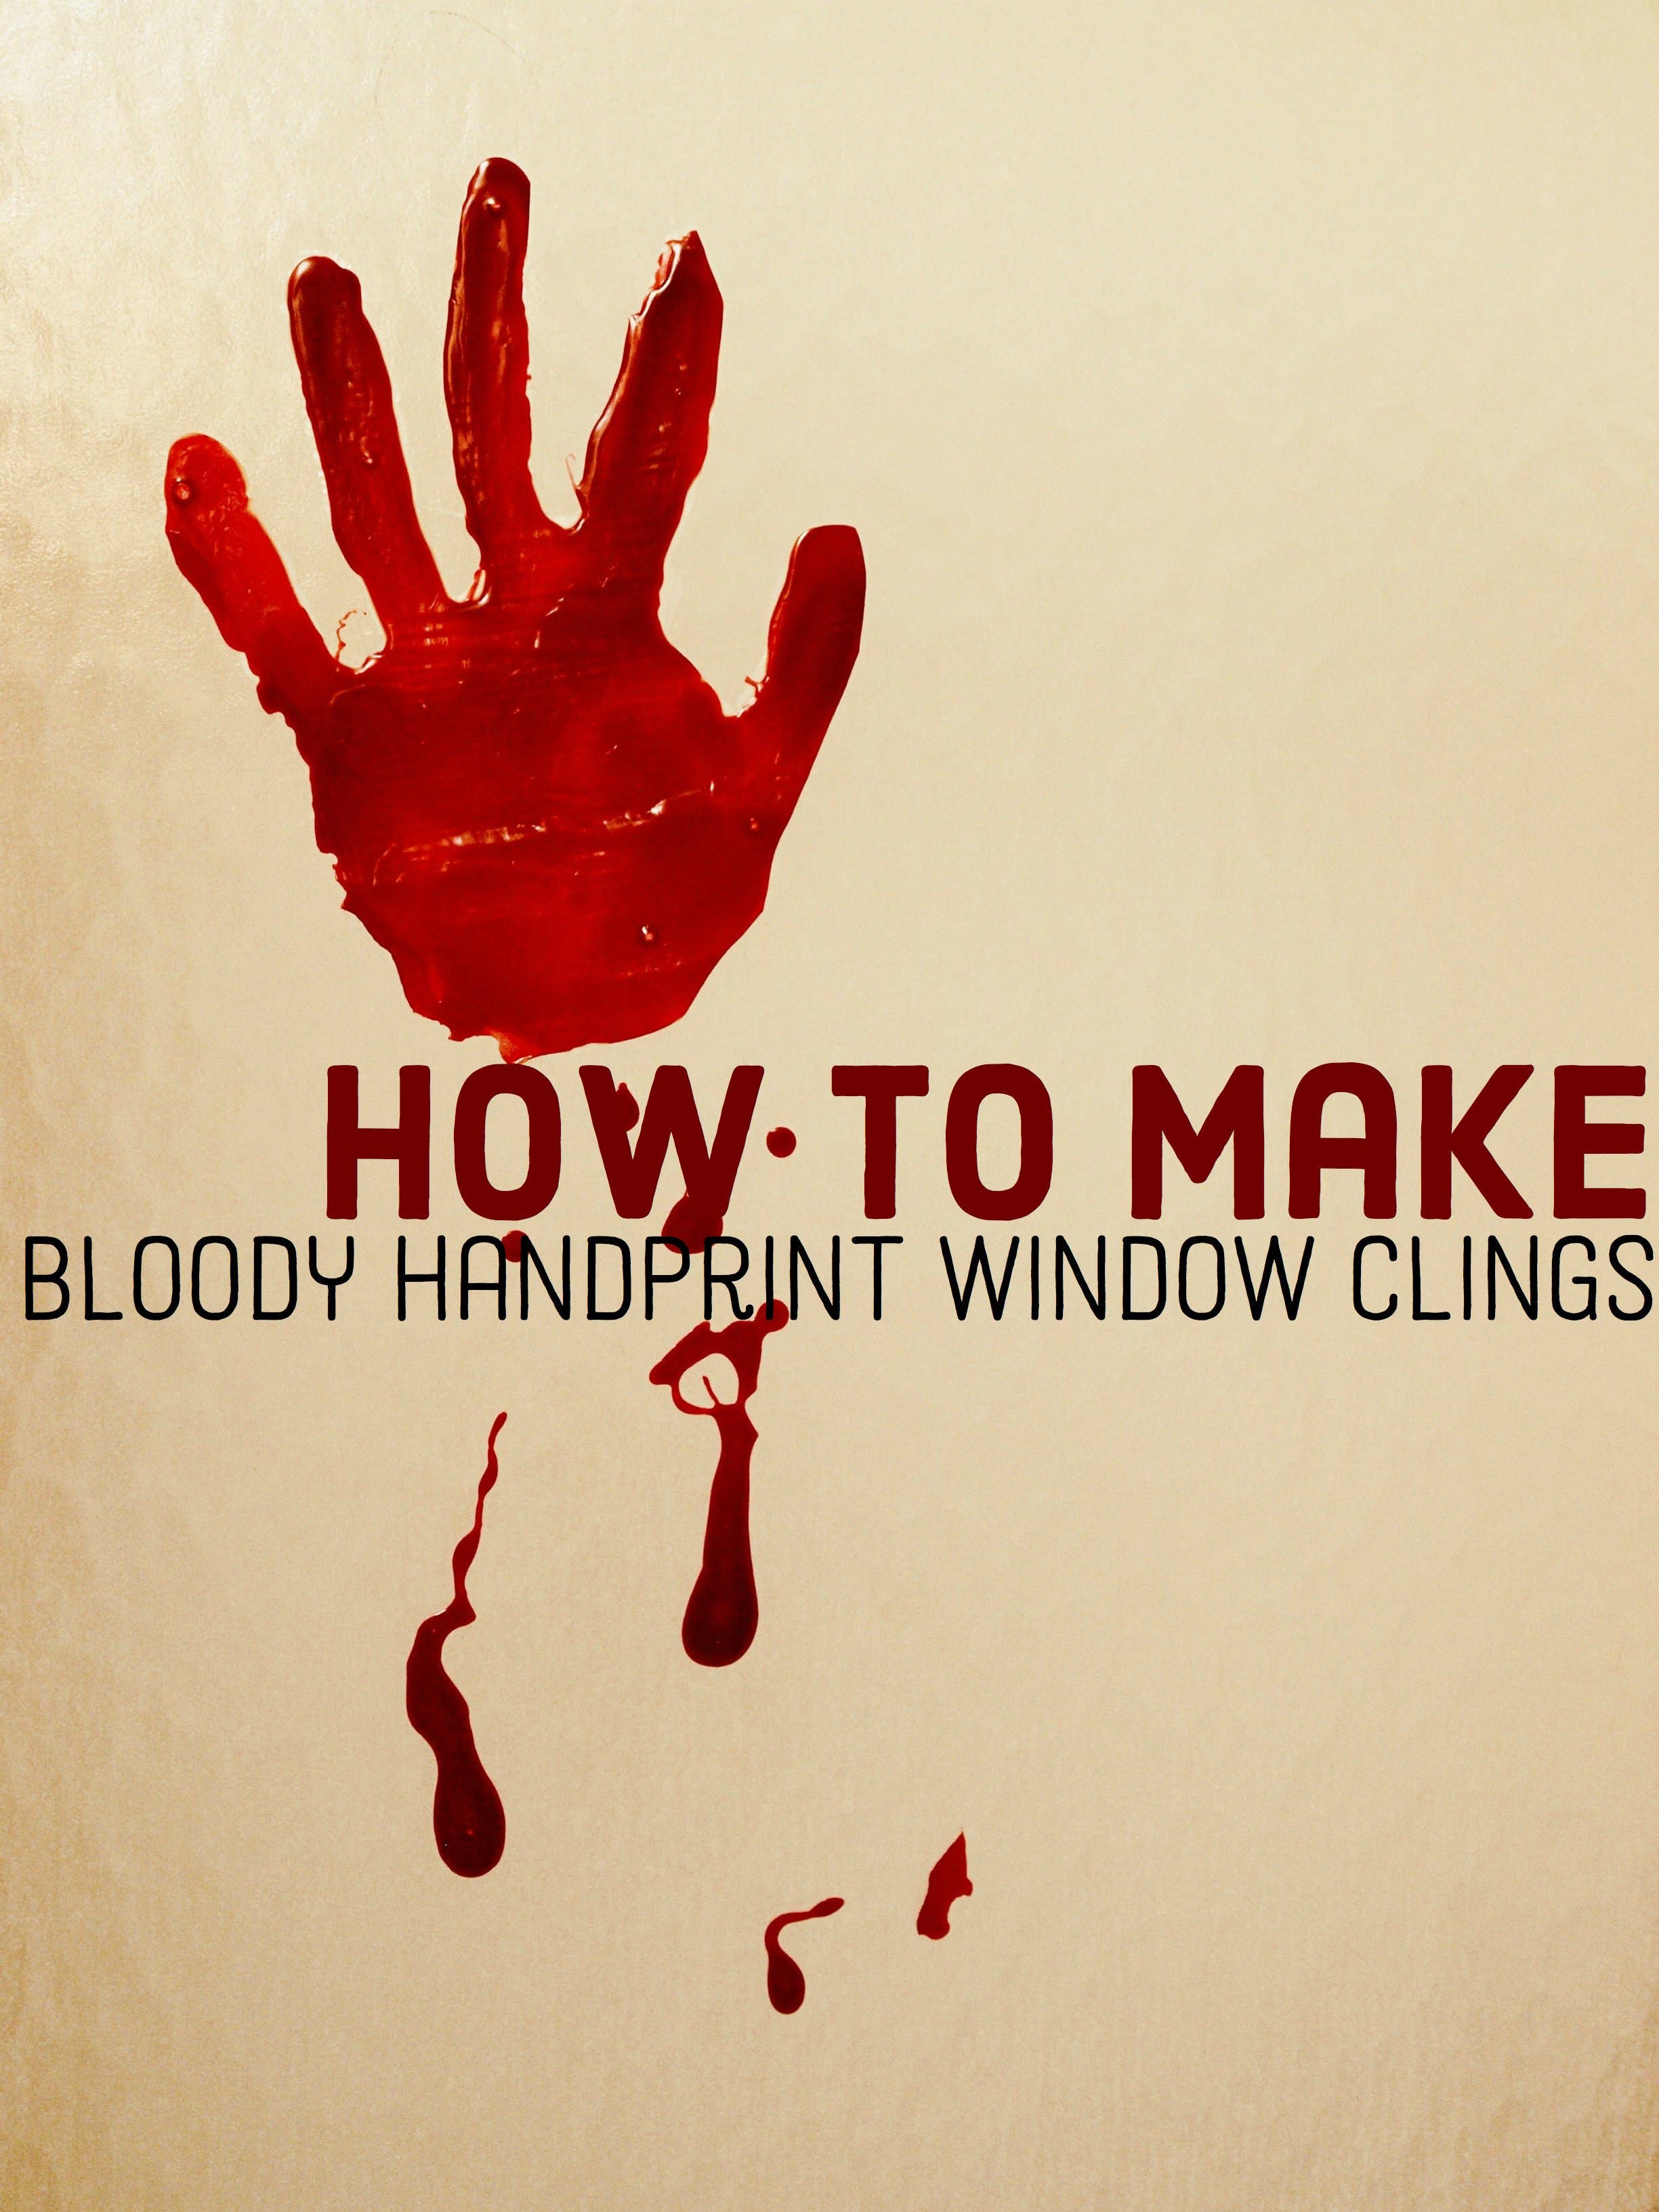
Translucent red handprints spread irregular drips and fingerprints across clear glass. I find the layered white-glue base and red-and-blue food-coloring mixture more interesting than a flat red-glue shortcut; work on a washable surface and protect clothes because dye can stain. Read Kylyssa Shay's complete tutorial from the original FeltMagnet article at its current Discover HubPages home, then explore more ideas published by the author.
32. Metallic Googly Eye Boo Sign
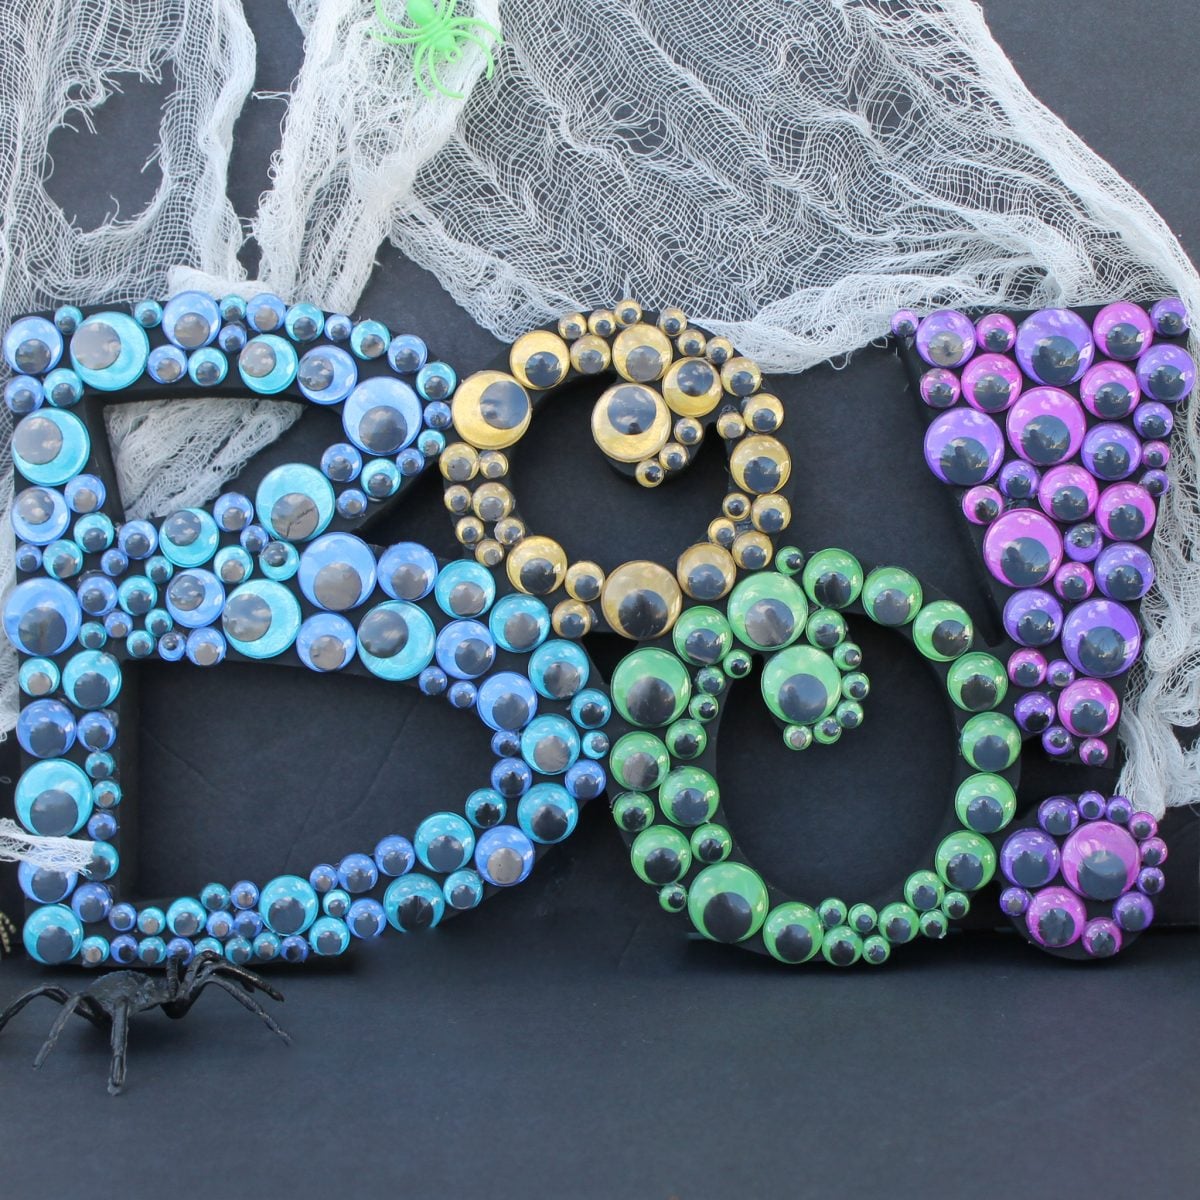
Metallic blue, gold, green and purple eyes cover the face of a bold black BOO sign. Angie Holden created this version for The Country Chic Cottage around a premade word-art base. I like how sorting the eye colors keeps the crowded surface looking intentional. The source discloses affiliate links and possible supplied materials; hot glue and any hair dryer used for glue strings are adult tools, and prolonged heat can melt the plastic eyes. Return to Angie at The Country Chic Cottage for the complete tutorial, then browse more of her seasonal makes.
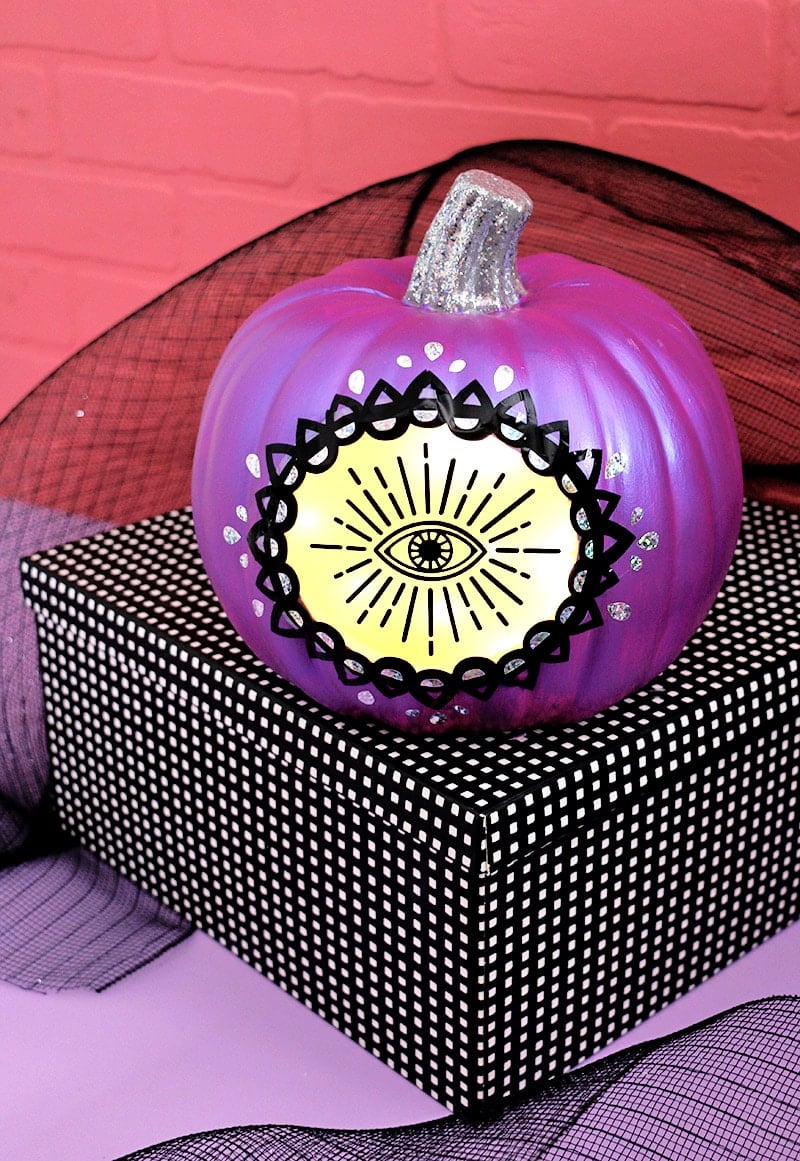
33. Glowing Mystic Eye Pumpkin
Alexis Middleton created the Glowing Mystic Eye Pumpkin for Persia Lou. A luminous layered eye fills the face of the painted carvable craft pumpkin. Vinyl, laminated or cellophane details and battery rice lights build the graphic effect. I like the dramatic finish, though this one calls for detailed cut-file work. The source discloses affiliate links and an Expressions Vinyl received-product relationship; a cutting machine and craft knife require adult handling, while the cut file remains for personal use through Persia Lou. Return to Alexis’s Persia Lou project for the complete tutorial and more of her distinctive ideas.