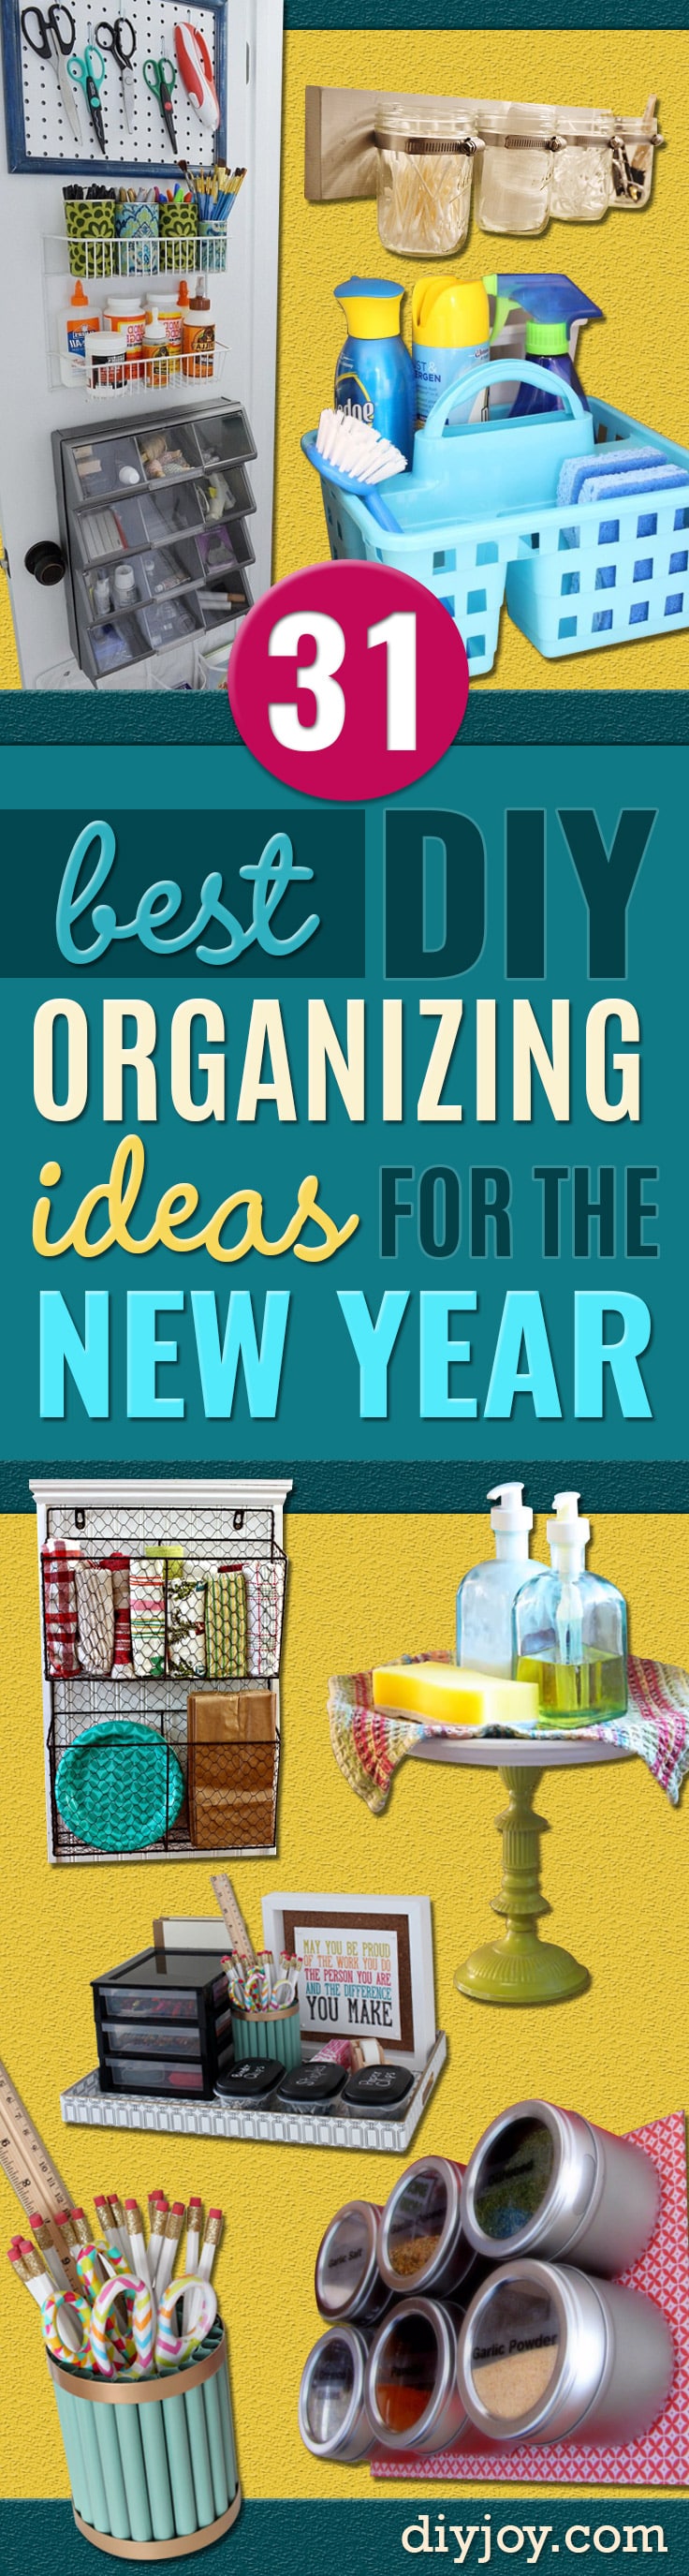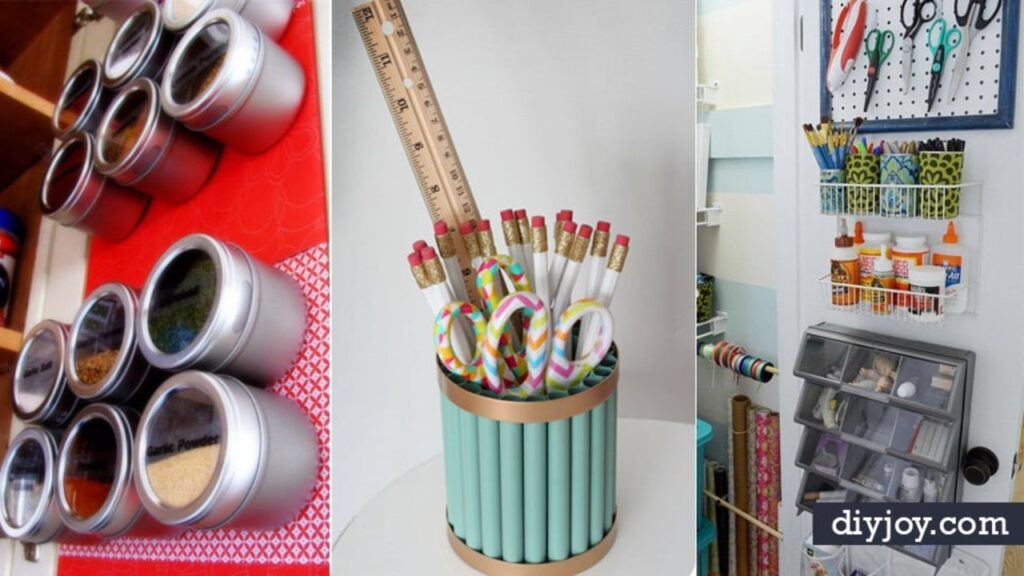
Clutter loves to hide behind closed doors, so the best DIY organization ideas start inside cabinets, drawers and closets. These 21 projects work room by room: a baking cabinet that hangs every measuring cup, a magnetic spice door, a custom utensil drawer built from craft boards, wire baskets for dish towels and library books, and a bathroom mason jar holder for cotton balls. Seven DIY JOY video tutorials are in the mix too, turning tin cans, old jeans, a chocolate box and air-dry clay into desk and jewelry organizers you’ll actually want on display. Pick the one spot that bugs you most and start there. Empty it completely, toss what you don’t use and group like with like before you buy a single bin. Find more storage projects on the organizing ideas hub.
1. Mini Homework Station
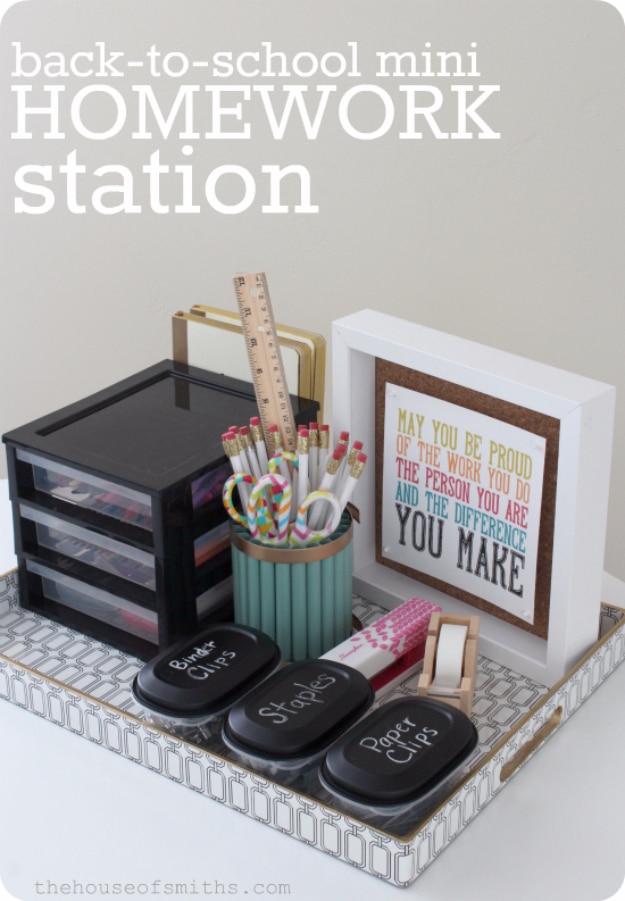
A mini homework station keeps every pencil, clip and glue stick on one tray, so nobody hunts for supplies at the kitchen table. The pencil cup is an empty soup can wrapped in metal rods cut from an old shoe rack, capped top and bottom with dryer duct clamps and sprayed jade with gold trim. Small plastic tubs get three coats of chalkboard spray paint on the lids, so you can label them for staples and paper clips. A shadow box frame lined with cork holds a motivational print, pinned so it floats.
Get the full tutorial at The House of Smiths.
2. Linen Closet Organization
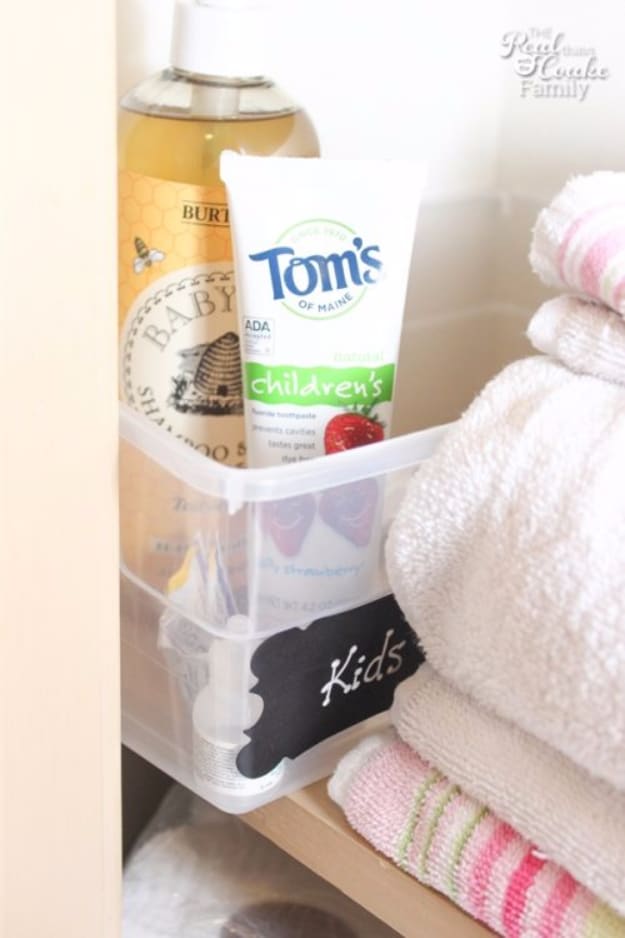
Linen closet organization works best when every shelf has a job. Put the things you reach for least, like beach towels and a humidifier, up top, and keep everyday towels at grown up height so the lower shelves belong to the kids. Clear bins with chalkboard labels corral backup toothpaste, shampoo and nail supplies, and one simple rule keeps them stocked: whoever grabs the last spare adds it to the grocery list. The clever trick is an office file sorter on the shelf, which holds rolled washcloths upright so they never topple into a heap.
Get the full tutorial at Real Creative Real Organized.
3. Organized Baking Cabinet
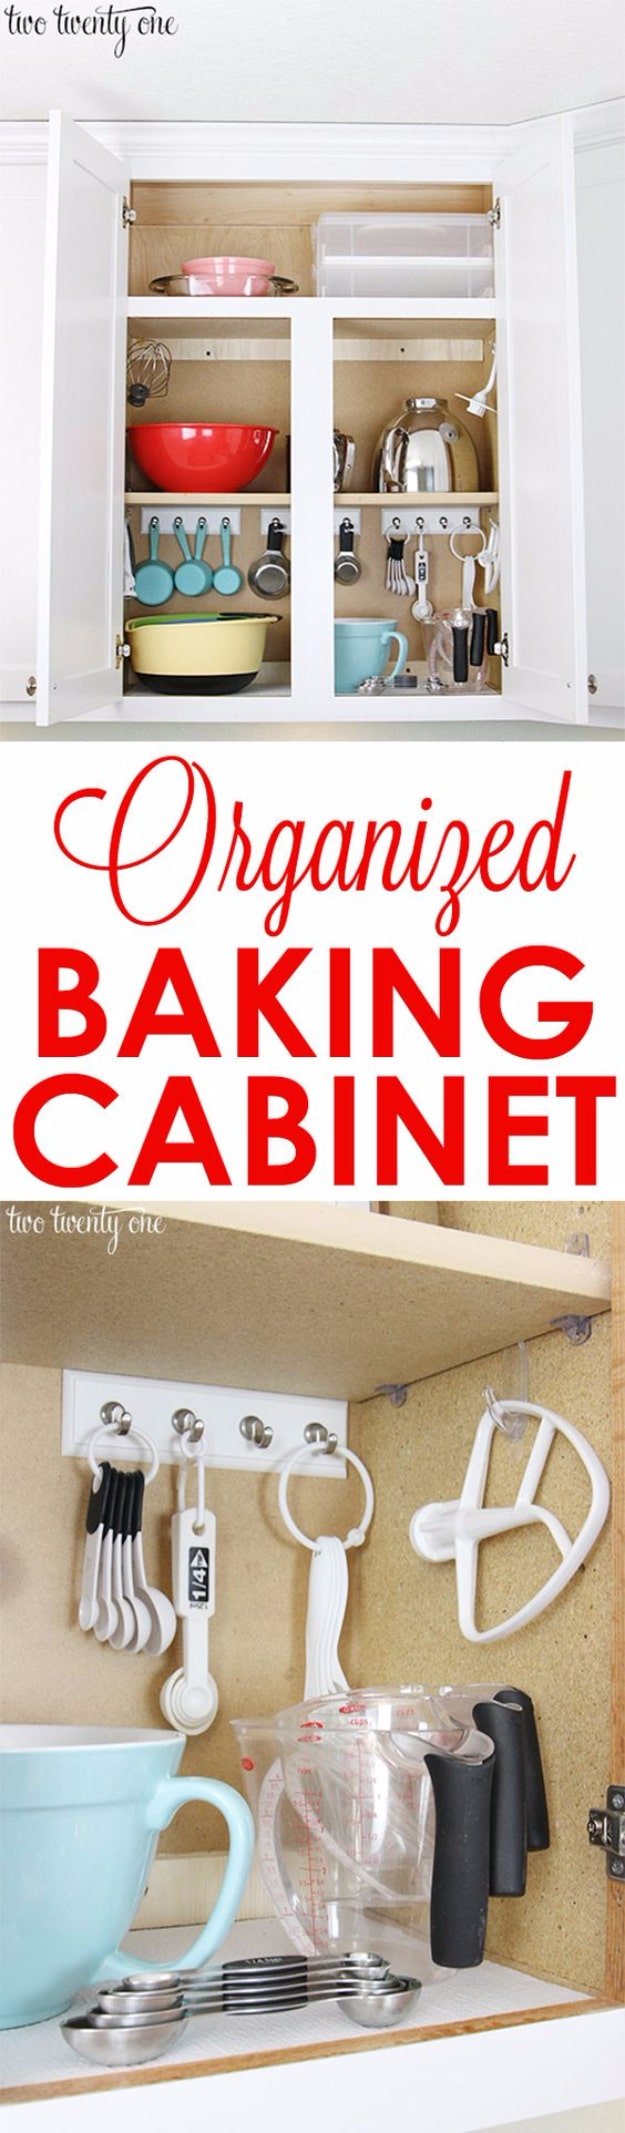
An organized baking cabinet makes Saturday pancakes a lot less chaotic. Instead of digging through a drawer for the right measuring spoon, mount a few adhesive key rails across the inside of the cabinet and hang every set of cups and spoons where you can see them. Clear adhesive hooks on the side walls hold whisks, plastic mixers and the stand mixer paddle. Nest the half and third cups together so they hang neatly. Nothing gets drilled, so it’s renter friendly, and the whole setup takes less than 30 minutes.
Get the full tutorial at Two Twenty One.
4. Wire Baskets To Organize Your Home
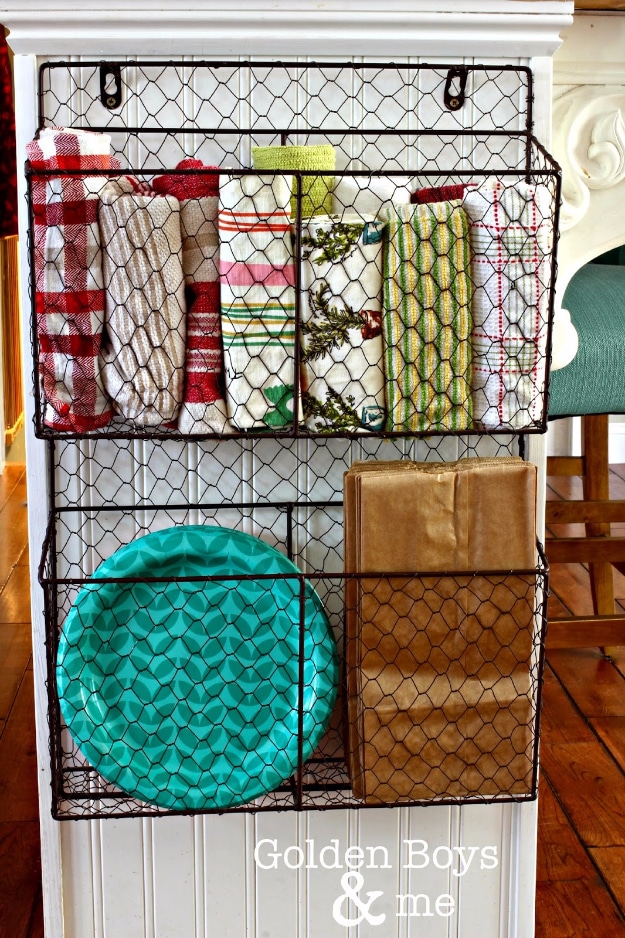
Wire baskets to organize your home are cheap, easy to hang and they let you see exactly what’s inside. Mount a two tier chicken wire basket on the side of a kitchen island and it’ll hold paper plates, lunch bags and rolled up dish towels within easy reach. Give library books their own basket in the mudroom so they never get mixed in with your shelves, and drop the daily mail into another by the front door. In a powder room, one more basket keeps spare hand towels and toilet paper handy for guests.
Get the full tutorial at Golden Boys and Me.
5. Store Your Makeup in a Desk Organizer
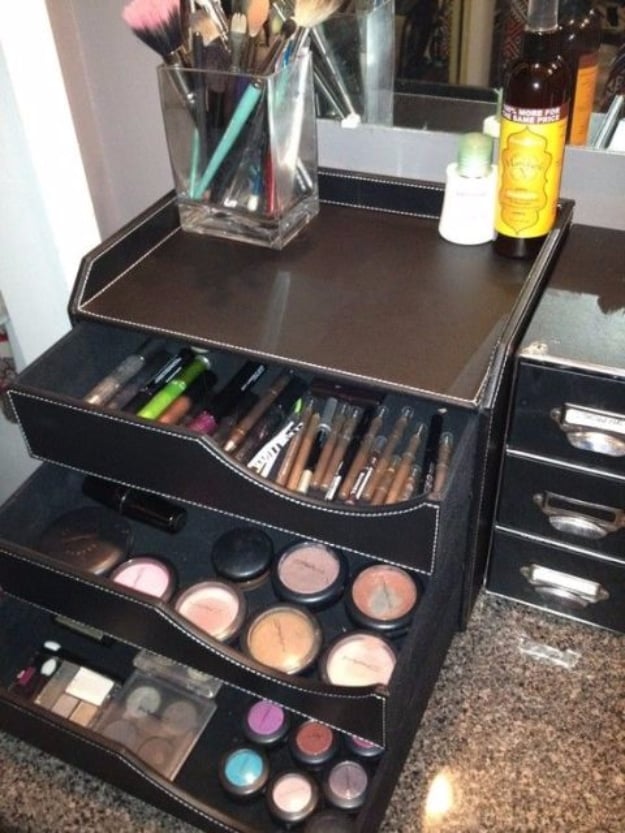
Store your makeup in a desk organizer and the whole collection suddenly fits on one corner of the vanity. Stacking letter trays and small office drawers are inexpensive, look polished and hold palettes, blush and eyeliners in shallow layers so nothing gets buried. A clear glass takes care of the brushes. Before you fill anything, pull out every product, group like with like and be honest about what you actually wear. If a shadow hasn’t been touched in two years, it can go. Label the drawers so everything finds its way back.
Get the full tutorial at Pacific Artistry's Blog.
6. DIY Tin Can Desk Organizer
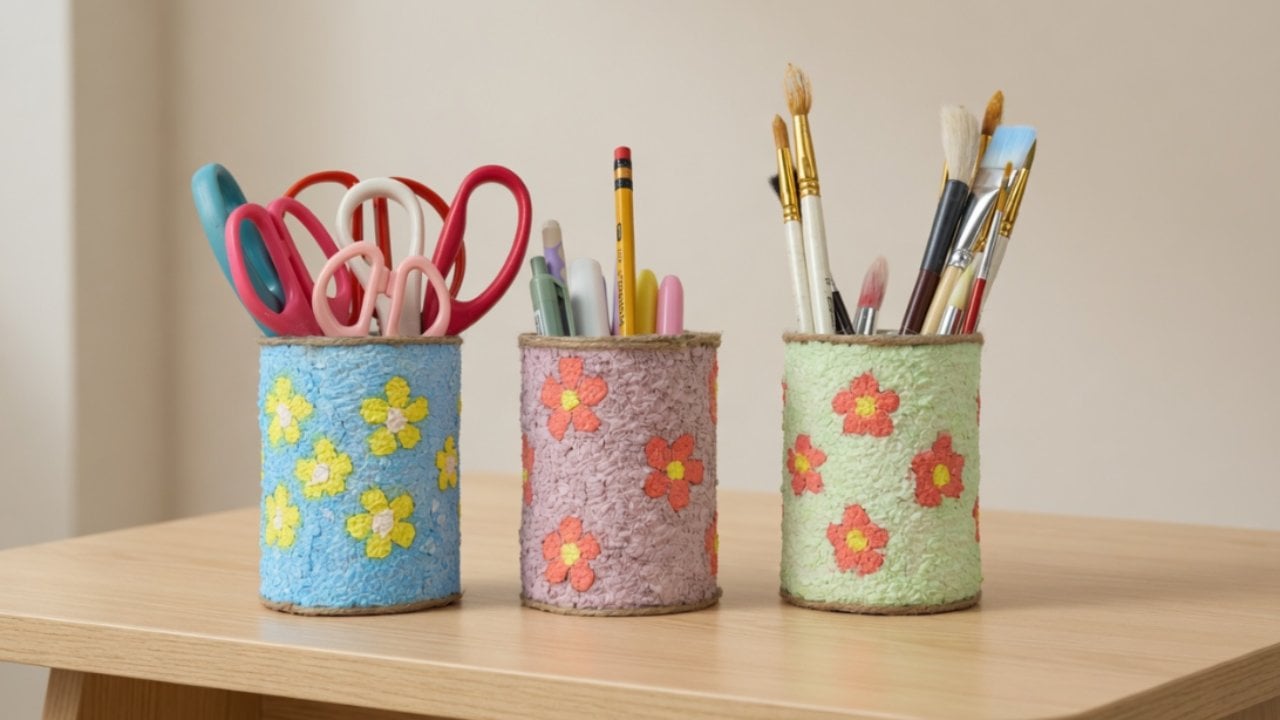
Got a few clean soup cans in the recycling? This DIY tin can desk organizer gives them a soft, textured paper shell that hides every ridge. Tissue paper is torn up, soaked, squeezed and mashed into a pulp, then mixed with glue and acrylic paint until it’s smooth and evenly colored. Sketch a simple flower on the can, press pulp into the petals first and fill in the background after. Let it dry a full day before you load it up. Line up three in different colors for pens, scissors and paintbrushes.
Get the full tutorial at DIY JOY.
7. DIY Colored Paper Pen Holder
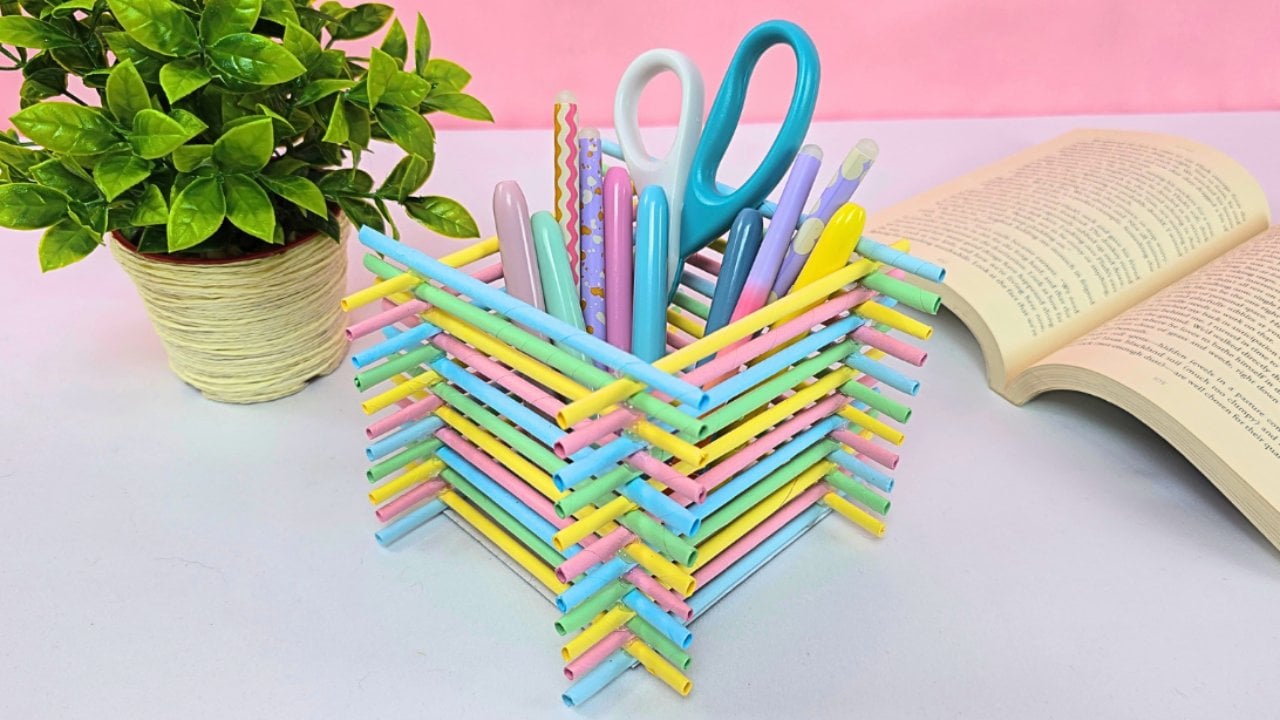
A DIY colored paper pen holder proves a stack of colored paper can be seriously useful. Each sheet is rolled corner to corner around a skewer into a tight tube, glued shut and trimmed. Hot glue two tubes along opposite edges of a small cardboard square, lay the next pair across them log cabin style, and keep stacking until the cup is tall enough for pens. Alternating pastel colors gives it a striped rainbow look. It’s light, surprisingly sturdy and a fun rainy day project for older kids.
Get the full tutorial at DIY JOY.
8. DIY Denim Jean Organizer
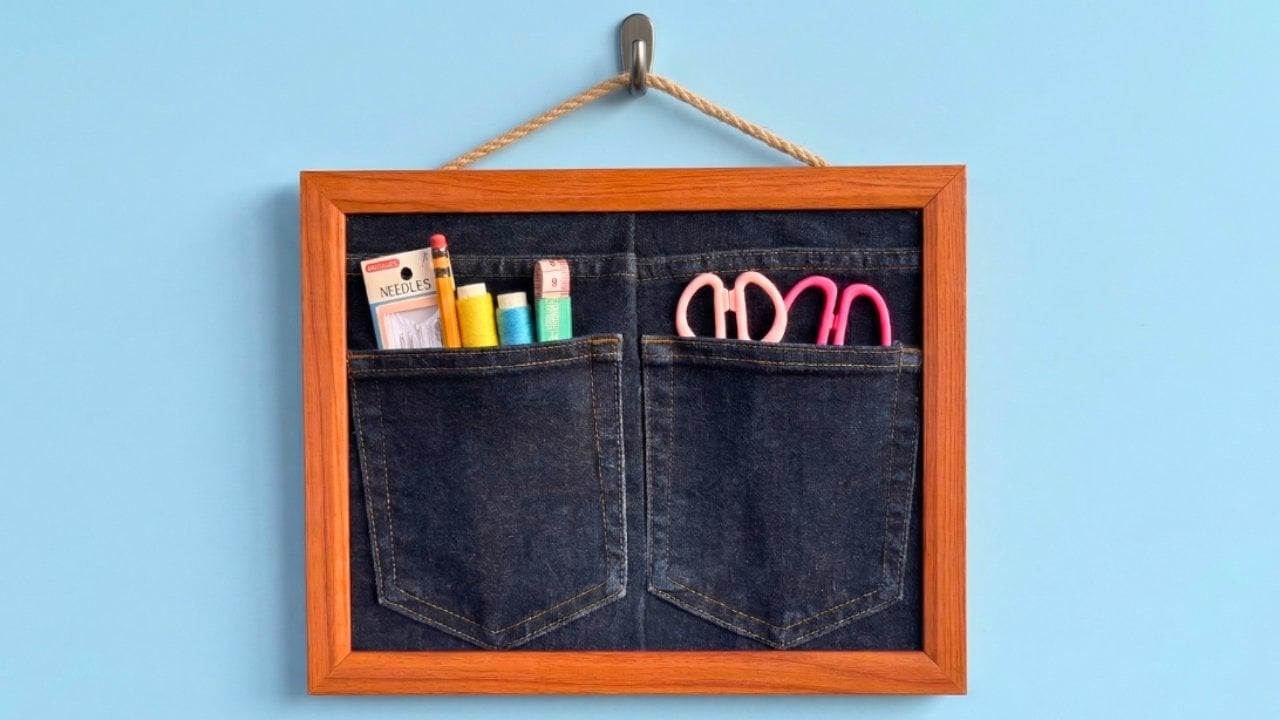
Don’t toss jeans with good back pockets. Pop the glass out of a thrifted picture frame and set the frame on the seat of the jeans as a guide, cutting the denim a little bigger than the outline. Pinch a pleat down the middle so the two pockets sit side by side, and secure that pleat with hot glue. The frame’s backing board goes behind the denim, glued in place, and then everything clicks back into the frame. Knot a piece of jute rope, glue it at the top corners and hang it over a desk or sewing table.
Get the full tutorial at DIY JOY.
9. Organize Your Closet With More Hanging Space
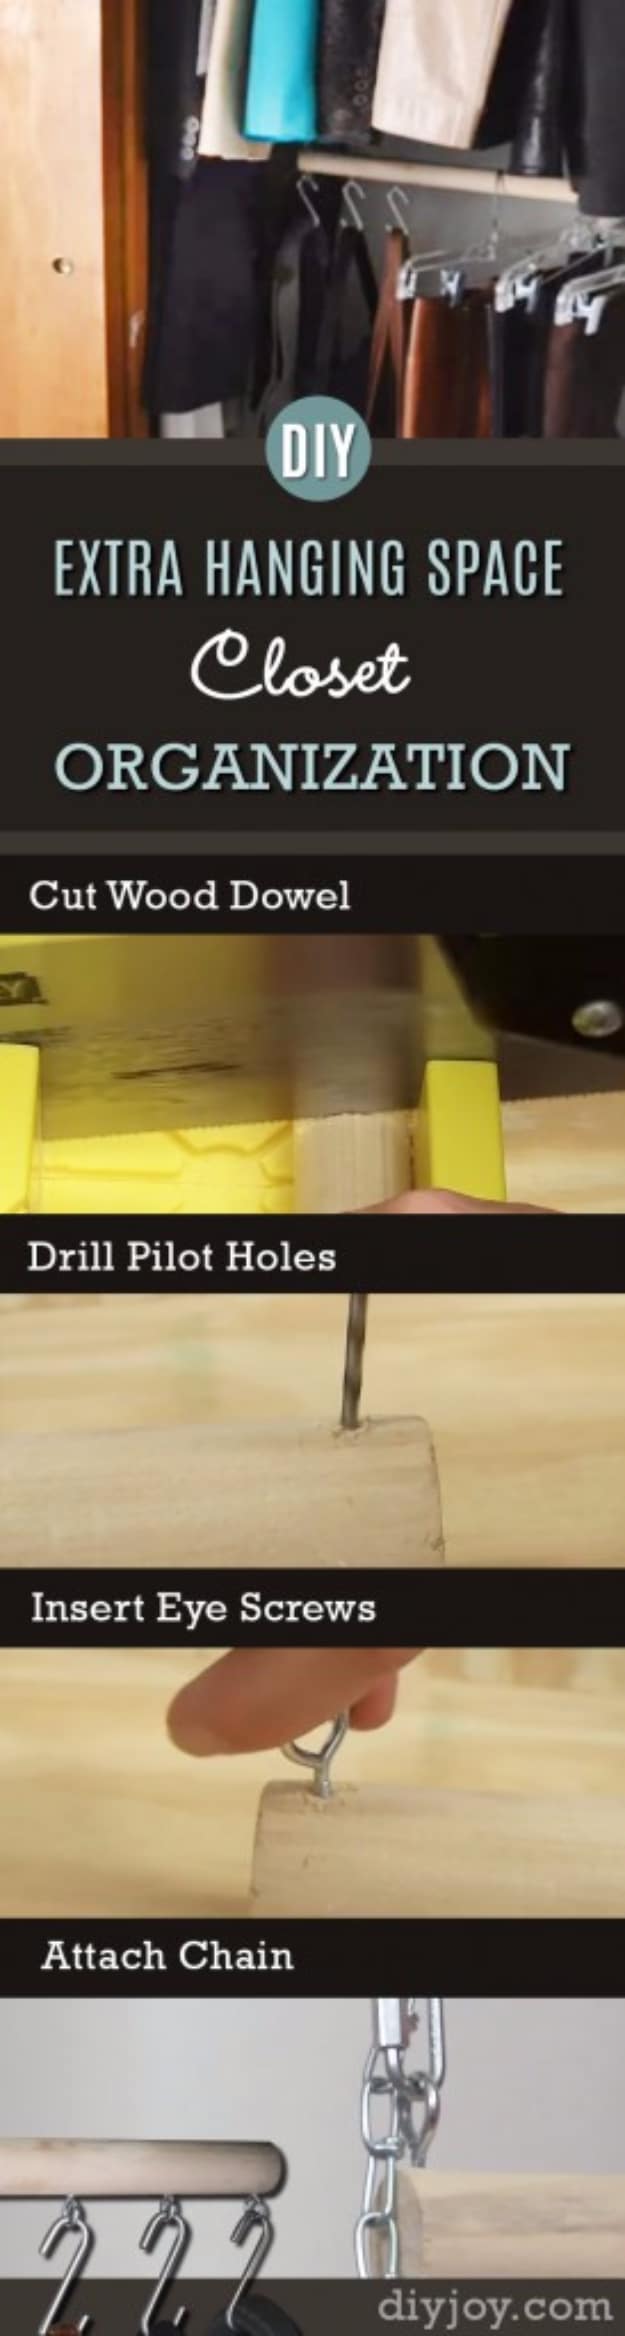
Running out of rod space is a common closet problem, and this fix costs a few dollars. A wooden dowel becomes a second bar that hangs below the one you have. Size it to your closet, add an eye screw at each end (a quick pilot hole helps them go in straight) and clip on two lengths of chain. Loop the chains over the main rod and let the new bar dangle at whatever height suits you. Blouses and jackets stay up top, while skirts, kids’ clothes and folded pants fill the row underneath. No drilling into the walls.
Get the full tutorial at DIY JOY.
10. DIY Air-Dry Clay Jewelry Organizer Using Pebbles
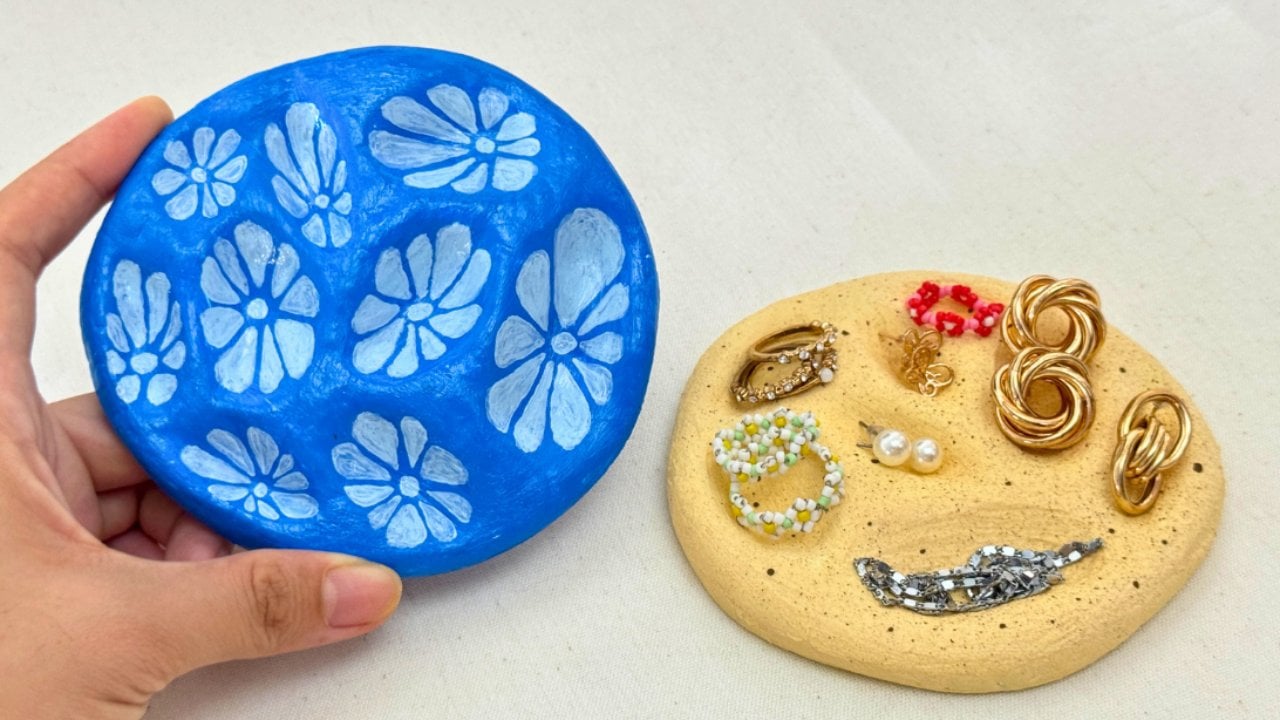
Here’s a clay project where a few smooth stones do the shaping for you. Flatten air-dry clay into a round slab, then push pebbles into it and gently pull them back out. Each one leaves a soft hollow sized for a ring, a pair of studs or a pendant. A quick dip of the stones in water stops them grabbing the clay. Once the dish is bone dry, which can take a day or more, prime it and paint. Try ocean blue with little white blooms in each hollow, or stir baking soda into the paint for a gritty, sandy texture, then gloss it.
Get the full tutorial at DIY JOY.
11. Organized Home Office
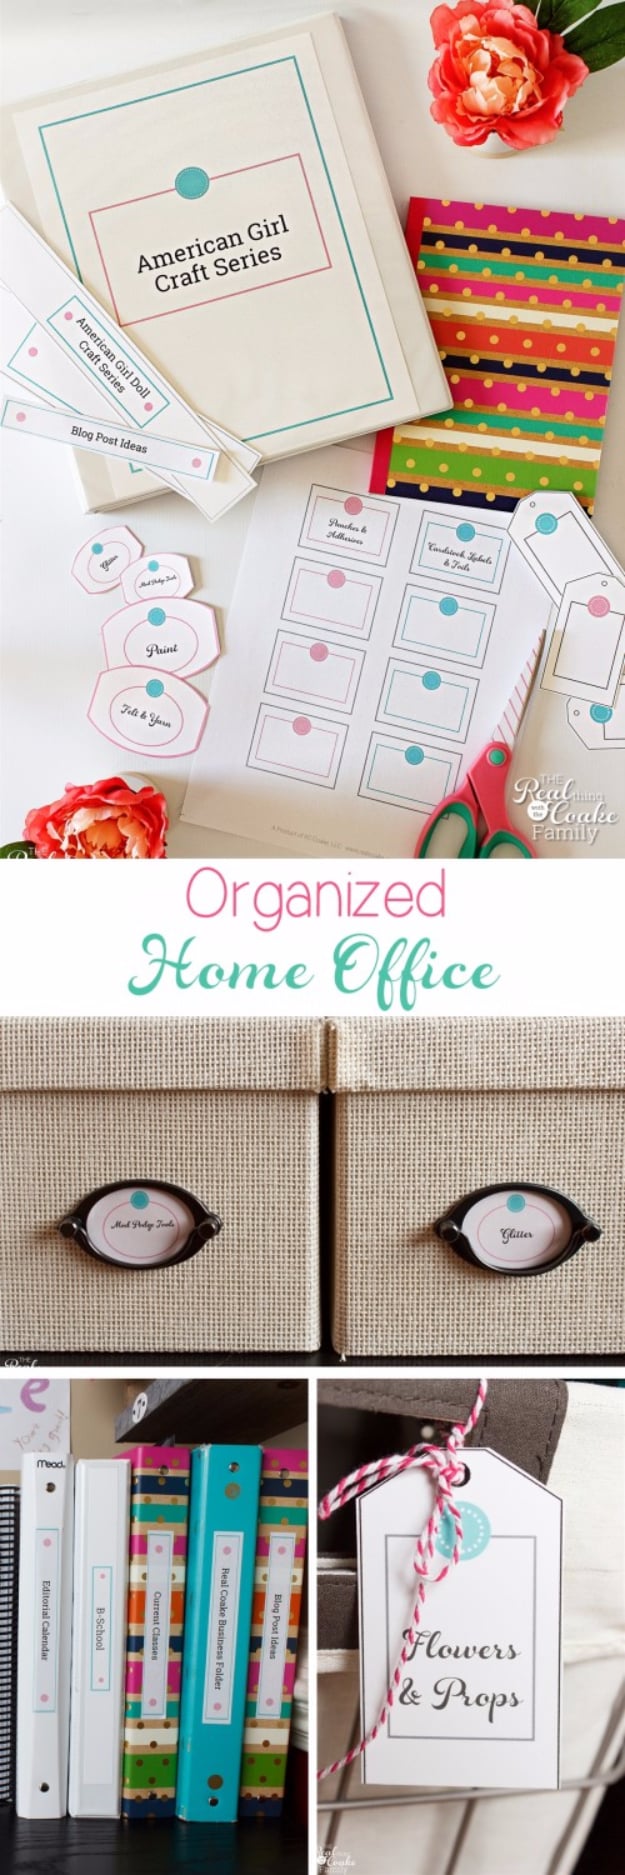
An organized home office starts with a ruthless purge. Pull everything out, toss what you don’t use, then sort like with like. Keep the things you grab every day within arm’s reach of the desk and push the rarely used stuff farther away. Then label everything, even if it feels fussy, because labels tell everyone where things go back. Fabric storage boxes with label plates hide supplies on a bookcase, binders hold papers you need often, and a file sorter handles the ones that rotate. A wall mail sorter catches bills before they spread.
Get the full tutorial at Real Creative Real Organized.
12. Easy Air-Dry Clay Ring Holder
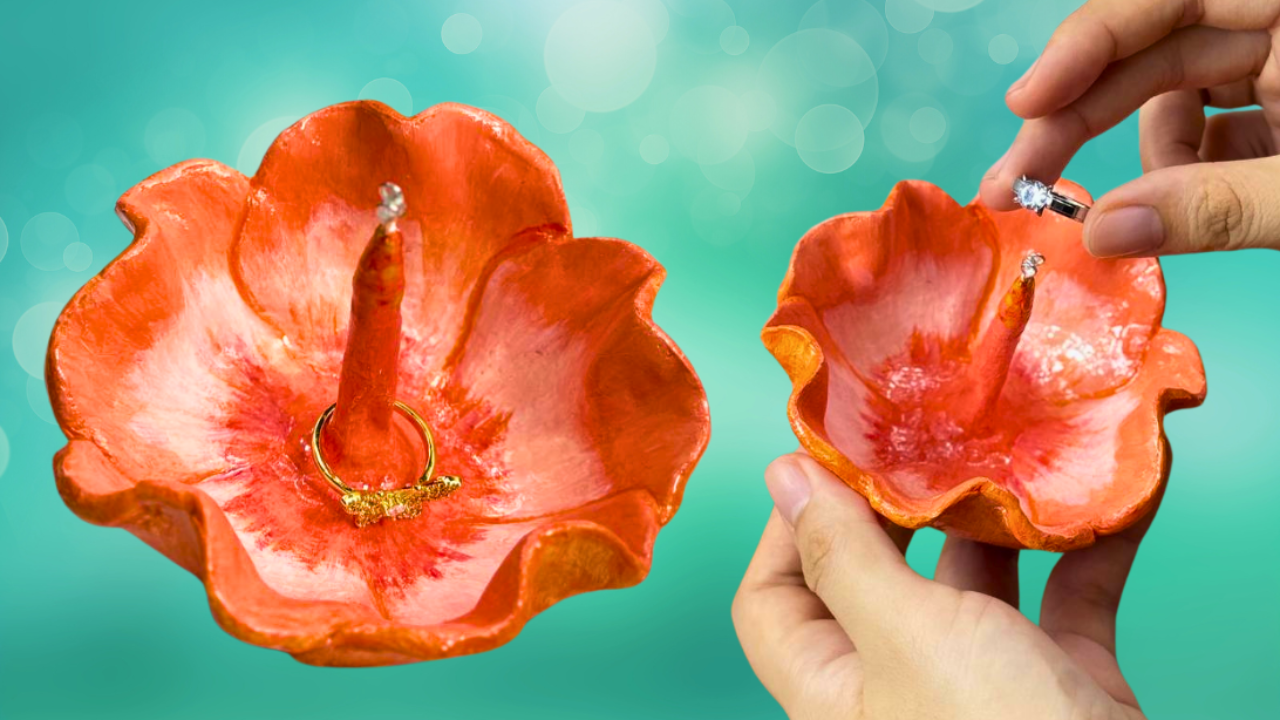
Shaped like an open hibiscus, this easy air-dry clay ring holder sits pretty by the sink or on a nightstand. Roll out the clay and cut a flower using a printed template, slicing between the petals. To give it that cupped shape, lay it in a towel lined bowl and overlap the petals. A skinny clay log pressed into the middle becomes the post your rings slide onto, so blend extra clay around its base to steady it. After priming, shade the petals in two or three tones, darkest at the center, and brush on a thin layer of UV resin for shine.
Get the full tutorial at DIY JOY.
13. Upcycled Ferrero Rocher Jewelry Box
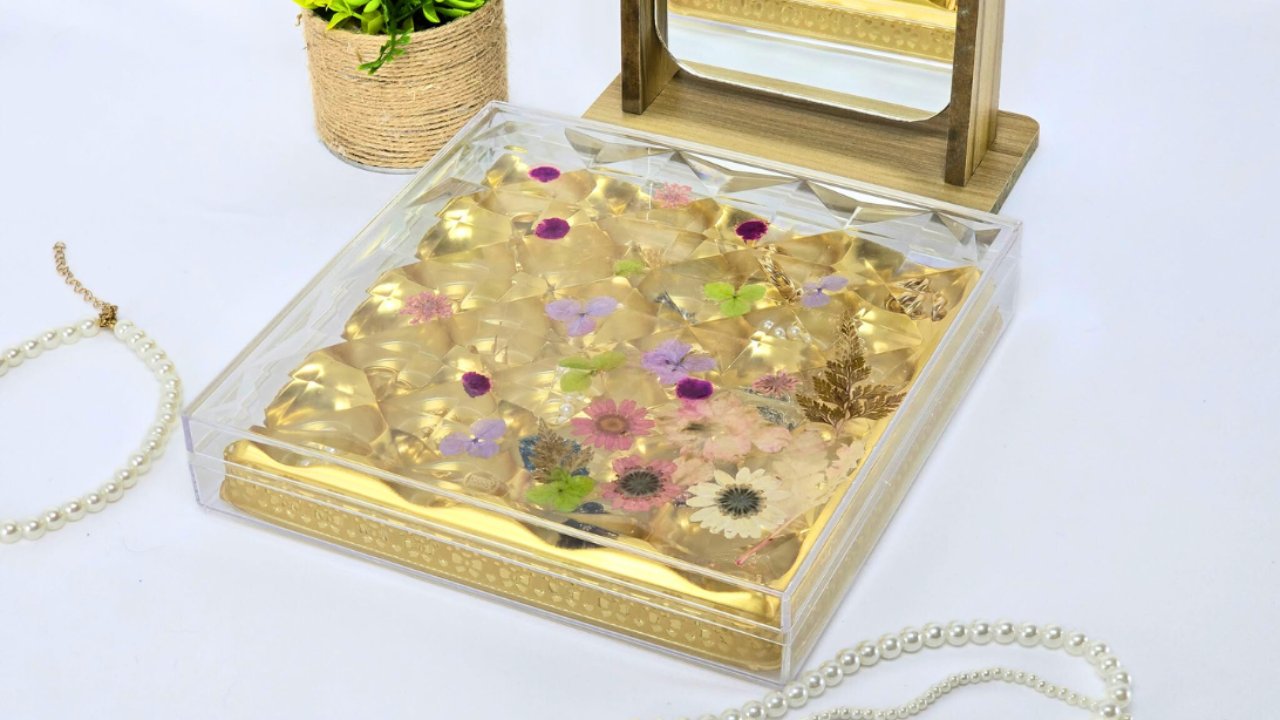
An upcycled Ferrero Rocher jewelry box turns a fancy chocolate box into a clear organizer with built in compartments. Clean the box and lift the label off the lid by pressing wide tape onto it and peeling it away. Arrange pressed flowers on the inside of the lid, then glue them down one at a time with Mod Podge, or a mix of equal parts white glue and water. Wrap gold washi tape around the little dividers. Once it’s dry, drop rings, earrings or a necklace into each section and close the lid.
Get the full tutorial at DIY JOY.
14. Fridge Organization
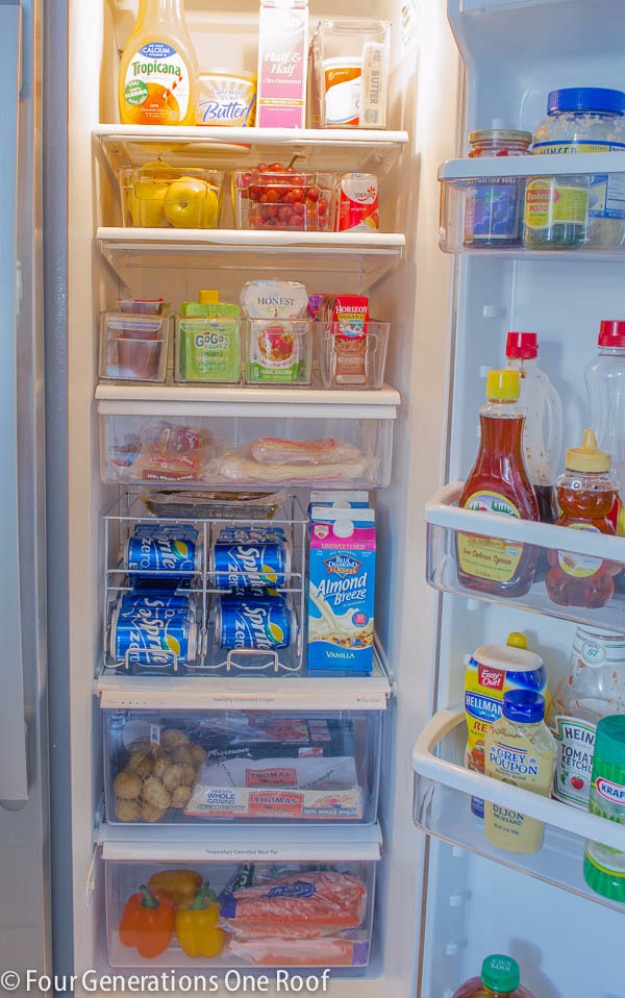
Fridge organization starts with emptying every shelf, tossing anything expired and giving the walls and drawers a good scrub. Then bring in clear, dishwasher safe bins. Small ones corral juice boxes, pudding cups and snack packs, and long pull out bins slide to the back of a deep shelf for fruit or soda cans, so nothing gets forgotten. Take yogurts and drinks out of their cardboard boxes before they go in, because cardboard eats space. Clip on chalk labels help everyone, kids included, put things back in the right spot.
Get the full tutorial at Four Generations One Roof.
15. DIY Mason Jar Holder For Bathroom Organization
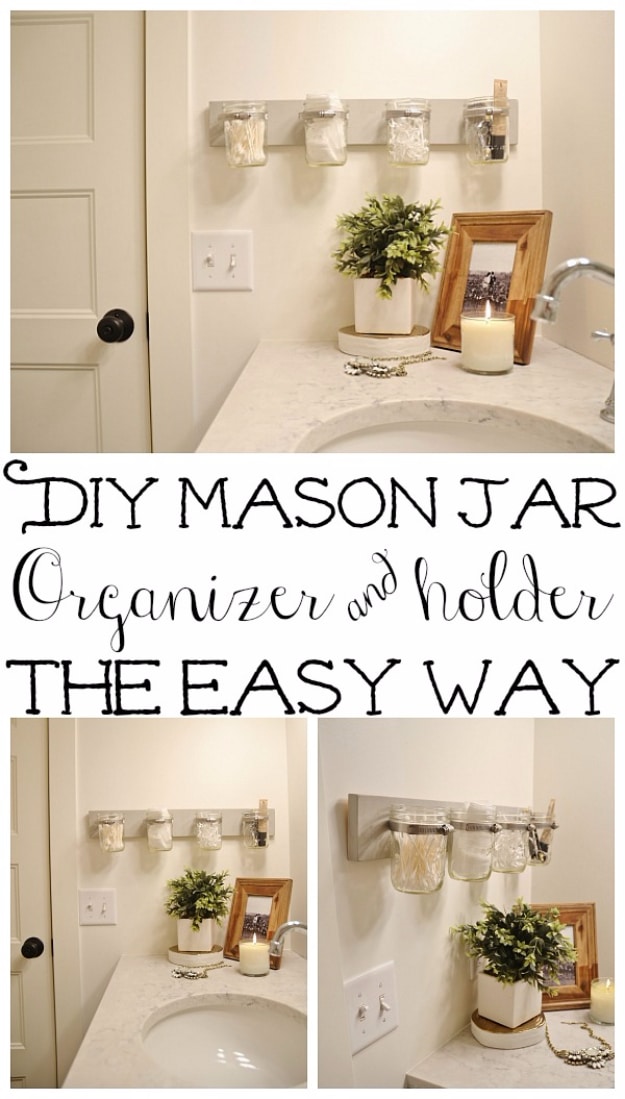
A DIY mason jar holder for bathroom organization keeps cotton balls, cotton rounds, floss and everyday makeup off the counter and right at eye level. Paint a scrap board with gray chalk paint, then fasten metal pipe clamps evenly across the front. Slip a mason jar into each clamp and tighten it down. A standard picture hanger rated for the weight holds it on the wall. Beyond the bathroom, the same holder works for succulents, kitchen utensils or craft supplies, and it makes a nice handmade gift.
Get the full tutorial at Liz Marie Blog.
16. Easy DIY Air-Dry Clay Jewelry Tray
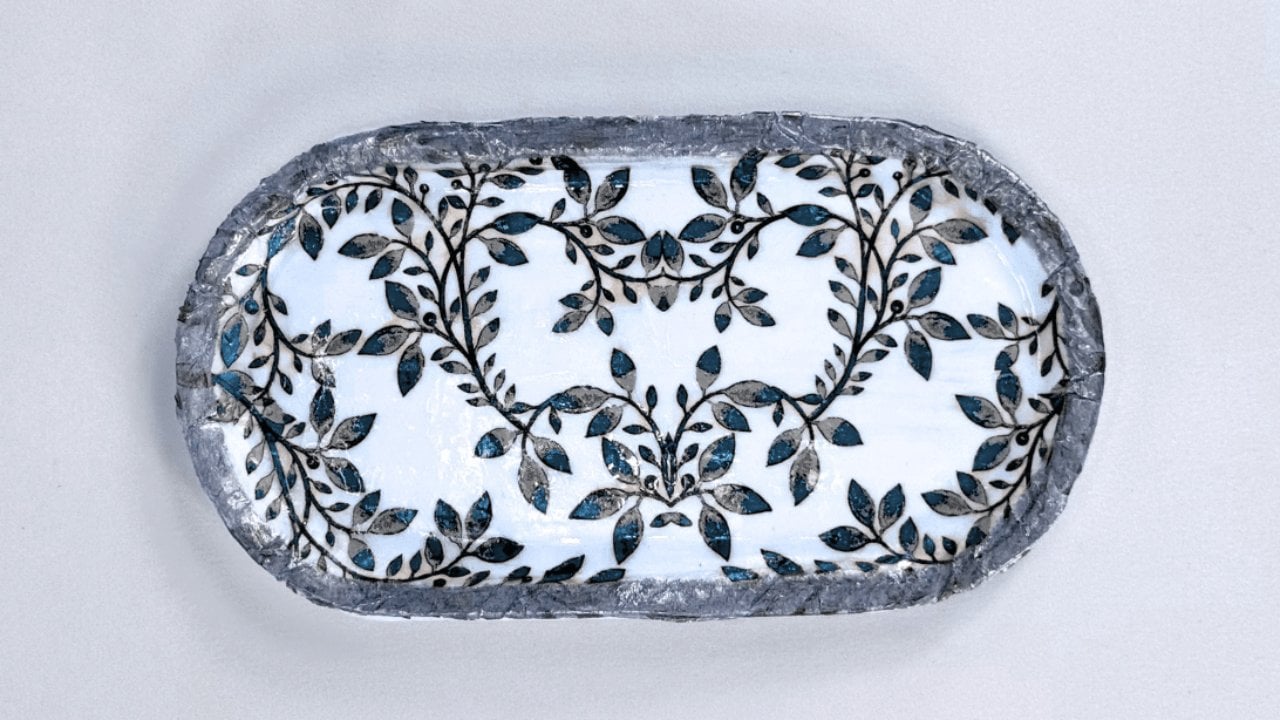
Any small tray or dish in your cupboard can be the mold for an easy DIY air-dry clay jewelry tray. Dust it with a little powder, drape rolled clay over it, smooth it with a damp sponge and cut away the extra. Once the clay has dried hard, it lifts right off. Prime it, then decoupage the top printed layer of a paper napkin onto the surface with Mod Podge. A metallic marker around the rim adds polish, and a thin, even layer of UV resin cured under a lamp gives it a porcelain shine.
Get the full tutorial at DIY JOY.
17. DIY Kitchen Utensil Drawer Organizer
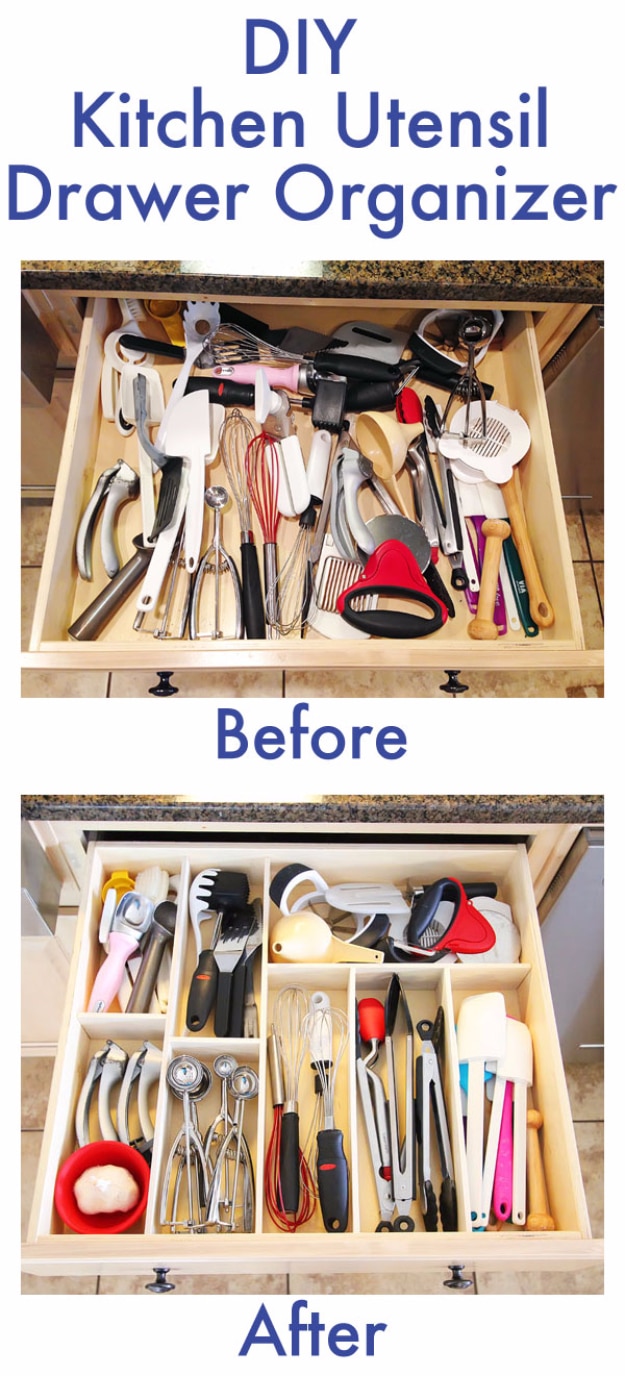
A DIY kitchen utensil drawer organizer built to fit your own tools costs less than $10. Empty the drawer, sort everything by type, then lay it all back in like a puzzle. Use Jenga blocks or tape as placeholders to see where each divider should go. Quarter inch poplar craft boards from the hardware store make the dividers, and the store can cut them if you bring measurements. Glue the pieces to each other right inside the drawer, which keeps everything square, but not to the drawer, so the whole thing lifts out for cleaning.
Get the full tutorial at Kevin & Amanda.
18. Magnetic Spice Rack Organization
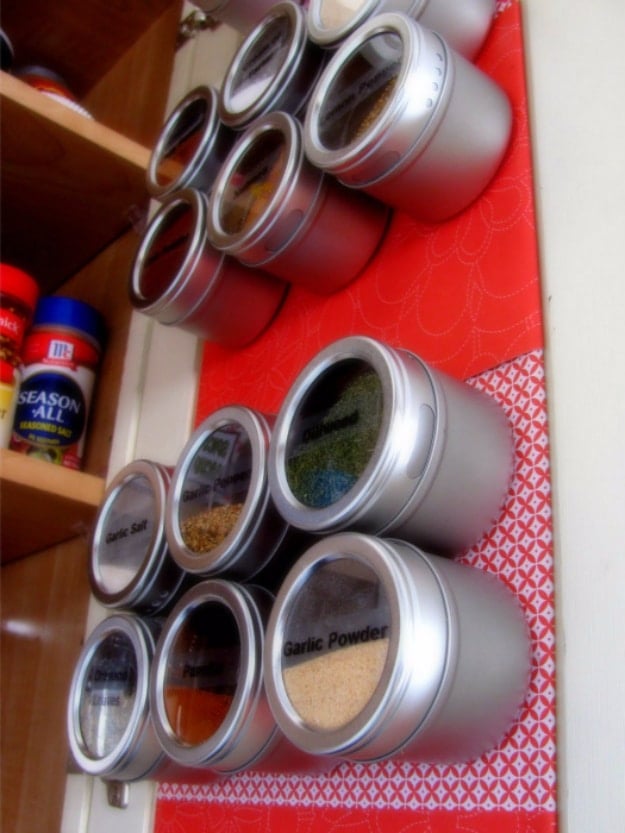
Magnetic spice rack organization frees up a whole shelf by moving your spices onto the back of a cabinet door. Take the door off, sand it smooth and roll on magnetic primer. It goes on dark and needs several coats about 30 minutes apart, so the pull is strong enough to hold a full tin. Paint over it in your cabinet color once it’s dry. Fill clear topped magnetic tins with your spices, label the lids and stick them on in rows. You’ll see every jar at a glance when the door swings open.
Get the full tutorial at IHeart Organizing.
19. Hooks Instead Of Towel Bar
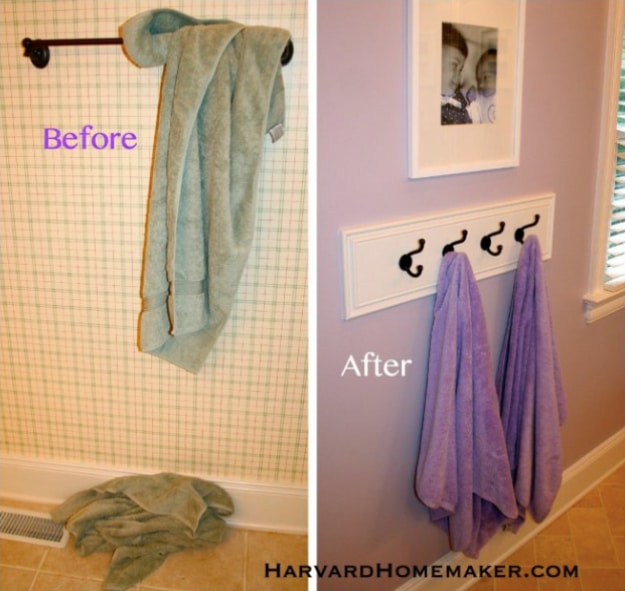
Swapping in hooks instead of a towel bar is one of those small bathroom changes that makes a big difference. Towels slung over a bar slide right to the floor, but a hook takes one quick loop. Mount a painted board with a row of hooks at a height kids can reach and a shared bathroom suddenly holds four towels instead of two. Towels hang open, dry properly and get used again, which means fewer loads of laundry. Add a single hook by each sink for hand towels too.
Get the full tutorial at Harvard Homemaker.
20. Organizing Shoes
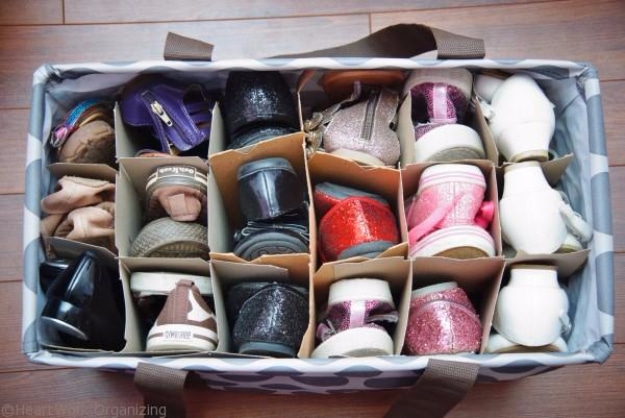
Organizing shoes can take about three minutes with two simple supplies. Start by sorting the pile and letting go of anything that doesn’t fit or never gets worn. Grab a rectangular tote you already own, then ask a wine or liquor store for a few free cardboard case dividers. Nest them inside the tote and slide a pair into each slot. Small kids’ shoes fit a pair per slot, while bigger shoes may need one shoe each. It’s a handy way to store hand me downs or off season pairs.
Get the full tutorial at HeartWork Organizing.
21. Pantry Door Organization
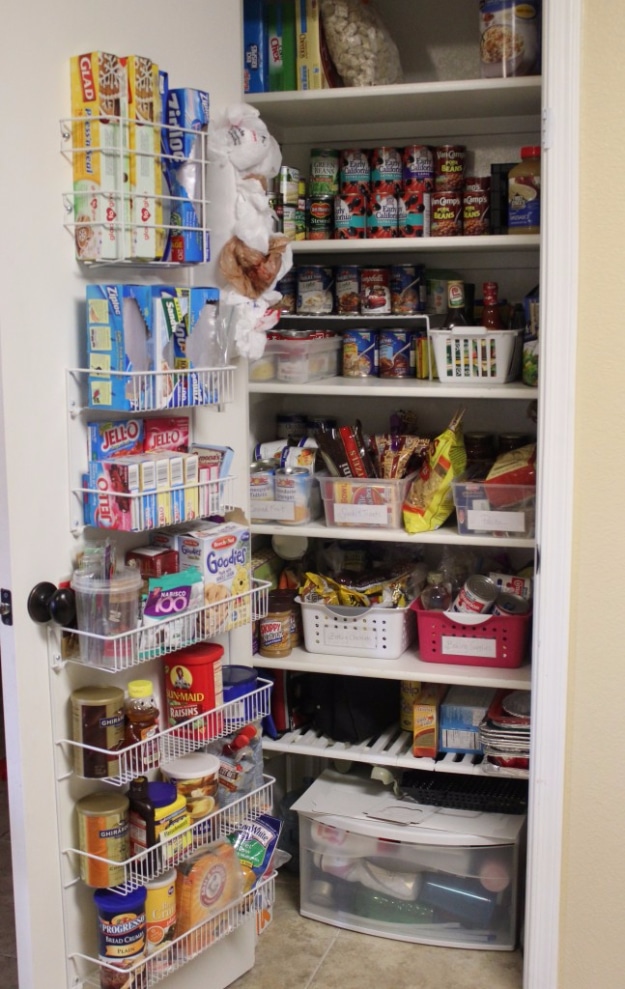
Pantry door organization turns the back of the door into the hardest working storage in the kitchen. Hang an over the door wire rack and fill its shelves with things that usually get lost behind the cans, like kids’ snacks, baking extras, foil and plastic wrap. Inside, a few inexpensive clear bins with labels group the small stuff, so you can see at a glance what’s running low. Start by pulling everything out, using up odds and ends and tossing anything past its date. It doesn’t need matching baskets to work.
Get the full tutorial at Mom Endeavors.