Every seamstress has at least one favorite stitch or two that they would always use on certain sewing projects. But for those who are starting to learn how to sew, it could be hard to learn on your own properly. So, let this tutorial by Homedit on YouTube show you the basics of hand stitching.
Materials:
- Needle and thread
- Scissors
Directions:
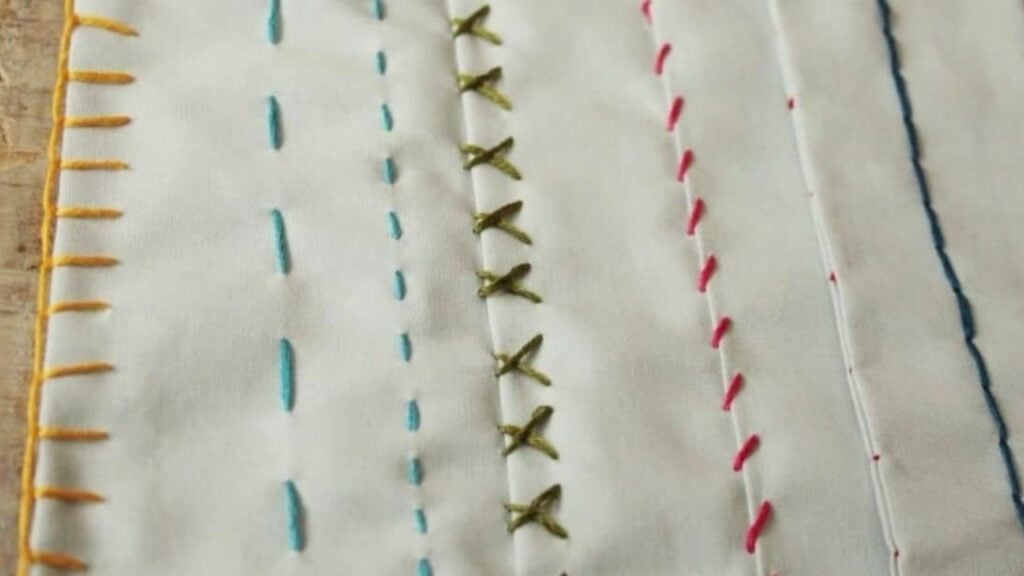
Running baste stitch
Place the tip of your needle on the underside of your fabric and press it upward through the fabric of your starting point. About ½ to ¾ inch away, press the tip of your needle straight down through your fabric. Keeping the needle in the fabric, push the needle forward until the top reaches the same ½ to ¾ inch distance. Pull the needle and thread through the fabric, then pull the thread all the way through and stretch. Press the tip of the needle down through the fabric in another ½ to ¾ inch away from the exit point of your last stitch, and repeat the stitch.
Running stitch
Working in two or three stitch needle lengths, sew a straight seam, pull the needle, and thread through the fabric completely. Then pull it stretched before moving onto the next set of stitches. Keep in mind that the shorter each stitch is, the stronger your overall seam will be.
[social_warfare]
Catch stitch
Your needle and thread should be on the left side of your fabric because you’ll be sewing from left to right. Place the tip of your needle about ½ to ¾ inch above your exit thread (on the other piece of fabric), then move it to the right about 1/8 inch. Pull the whole needle and thread up to the top of your fabric, and pull the thread stretch. To create the “X” signature look of catch stitch, press the tip of your needle about ½ inch to the right of your very first thread exit. Pull the whole needle and thread through and pull it stretch.
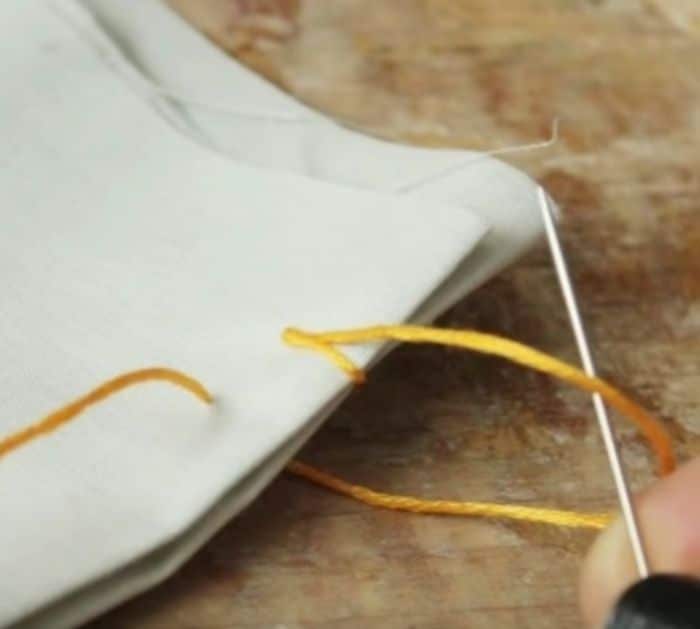
Blanket stitch
Starting on the right end of the seam, pull the entire needle and thread through the top of the fabric until the hidden knot touches the underside of the fabric. Pull the needle and thread through the same hole, then pull the thread but not all the way that it’s stretched. Instead, keep a small loop of thread out then insert the needle through the loop going left to the right. Pull the thread stretch but not so tightly that it scrunches up the end of your fabric. Press the tip of your needle on the underside of your fabric about ½ inch to the left of your original thread exit and also ½ inch away from the hemline. Pull the entire needle through to the top of your fabric and pull your thread until only a small loop remains. Thread your needle through this loop running left to right. Pull the thread stretched until it creates what looks like a square without a top. Essentially in the blanket stitch, each stitch holds the previous one in position and place.
Whip stitch
Sewing the fabric vertically, press the tip of your needle into the other fabric’s top about ½ inch diagonally above-right your original exit point. Pull the whole needle and thread through to the top of the original fabric and pull the thread stretch. Continue this method (diagonal-right, diagonal-left) to create a barbershop pole-looking seam. Keep them consistent as much as possible.
Slip stitch/ Ladder stitch
Press the tip of your needle onto the underside of your fabric up in one of the folds. Press the tip of your needle on the opposite hem directly across from the original exit point. Exit the needle tip from the hem fold about ½ to ¾ inch away from the insertion point. Pull the whole needle and thread out from the folded hem and pull the thread stretch. Now press the tip of your needle onto the opposite hem directly across from the most recent exit point. Thread the tip of the needle through the folded hem about ½ to ¾ inch away from the insertion point, then exit the needle. Pull the whole needle and thread out and pull it stretch. Continue until you’ve completed your slip stitch seam.
Back stitch
Pull the whole needle and thread through to the top of your fabric, and pull the thread so the knot touches the underside of the fabric. Pull the whole needle and thread through to the underside of the fabric and pull the thread stretch. Press the tip of your needle onto the underside of your fabric about ½ inch in front of the original exit point. Pull the whole needle and thread through to the top of your fabric and pull the thread stretch. Press the tip of your needle onto the top of your fabric at or very near the original exit point, aka the top of your last stitch. Pull the thread to create your second back stitch. Continue the “two steps forward, one step back” method until you’ve completed your back stitch seam.

*All these amazing images are thanks to Homedit via YouTube. Do visit her channel to see more tutorial like this!
7 Basic Hand Stitches For Beginners


