DIY Sewing Machine House
Sonali's Creations / YouTube
If you don’t have a sewing machine cover, you seriously need one. They prevent dust and debris from getting into the machine and causing damage, they prevent accidental breakage from messing with things nearby, and in some cases, they make an adorable decoration!
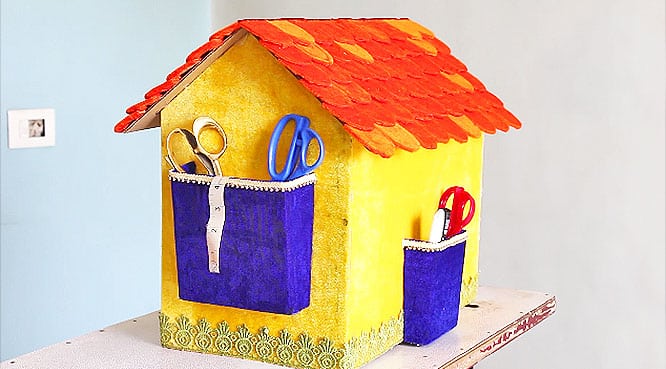
This is one of those cases. Sonali with YouTube channel Sonali’s Creations uses extra cardboard and some felt to create the most adorable little home for her sewing machine– literally! I love the little pockets you can store your supplies in on the sides
Here’s what you’ll need:
- 2 11×17 inch pieces of cardboard.
- 1 16×19 inch piece of cardboard that you can easily fold in the middle (this will make 2 8x19s).
- 2 house-shaped pieces of cardboard. Center height= 16in., corner heights= 11 in., & width 10 in.
- Extra cardboard to make roof tiles, more than the 16×19.
- 1 or 2 T-shaped pieces of cardboard for pockets (6×6 inch square + 1x6inch rectangle added to the length only and 2 2inch rectangles added to the width only, a diagram of this is shown at the 5:49 mark).
- Fabric, felt, or paper to cover the house, roof tiles, and pockets. Make sure there is more fabric than cardboard.
- Optional trim
- Glue
First, take your pieces of cardboard and glue one side of each piece completely with the fabric/paper of your choice. Once those pieces dry, you can glue your pieces together, glue your covered roof tiles on your roof, and glue your cardboard pockets on to the walls. Then, you can glue on your trim. Once that dries, you’re all done and ready to use your machine cover!
I guarantee you won’t have a cuter sewing machine cover than this one. Be sure to share this with your friends so they can protect their machines too!
