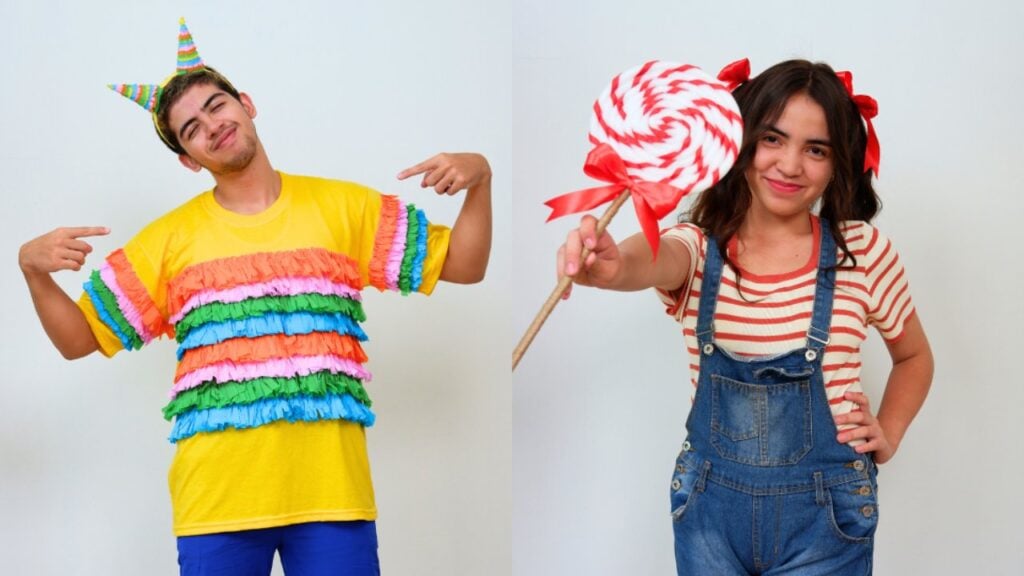
Who are you talking into a piñata and candy costume this year? It works for a couple, two friends or a whole group, and the main ingredient is crepe paper, which is the cheapest and most forgiving thing on the craft store shelf. As easy Halloween costumes go, this one is mostly just fringing: you cut and layer the rows until you’re covered in color, and the candy half comes together just as fast. My kids grew up in craft land and are a bit past it now, so all that party-craft energy has to go somewhere.
This DIY piñata and candy costume is the perfect last-minute Halloween idea that’s both fun and affordable to recreate. The materials you’ll need are simple and easy to find, and the finished look is guaranteed to get everyone’s attention.
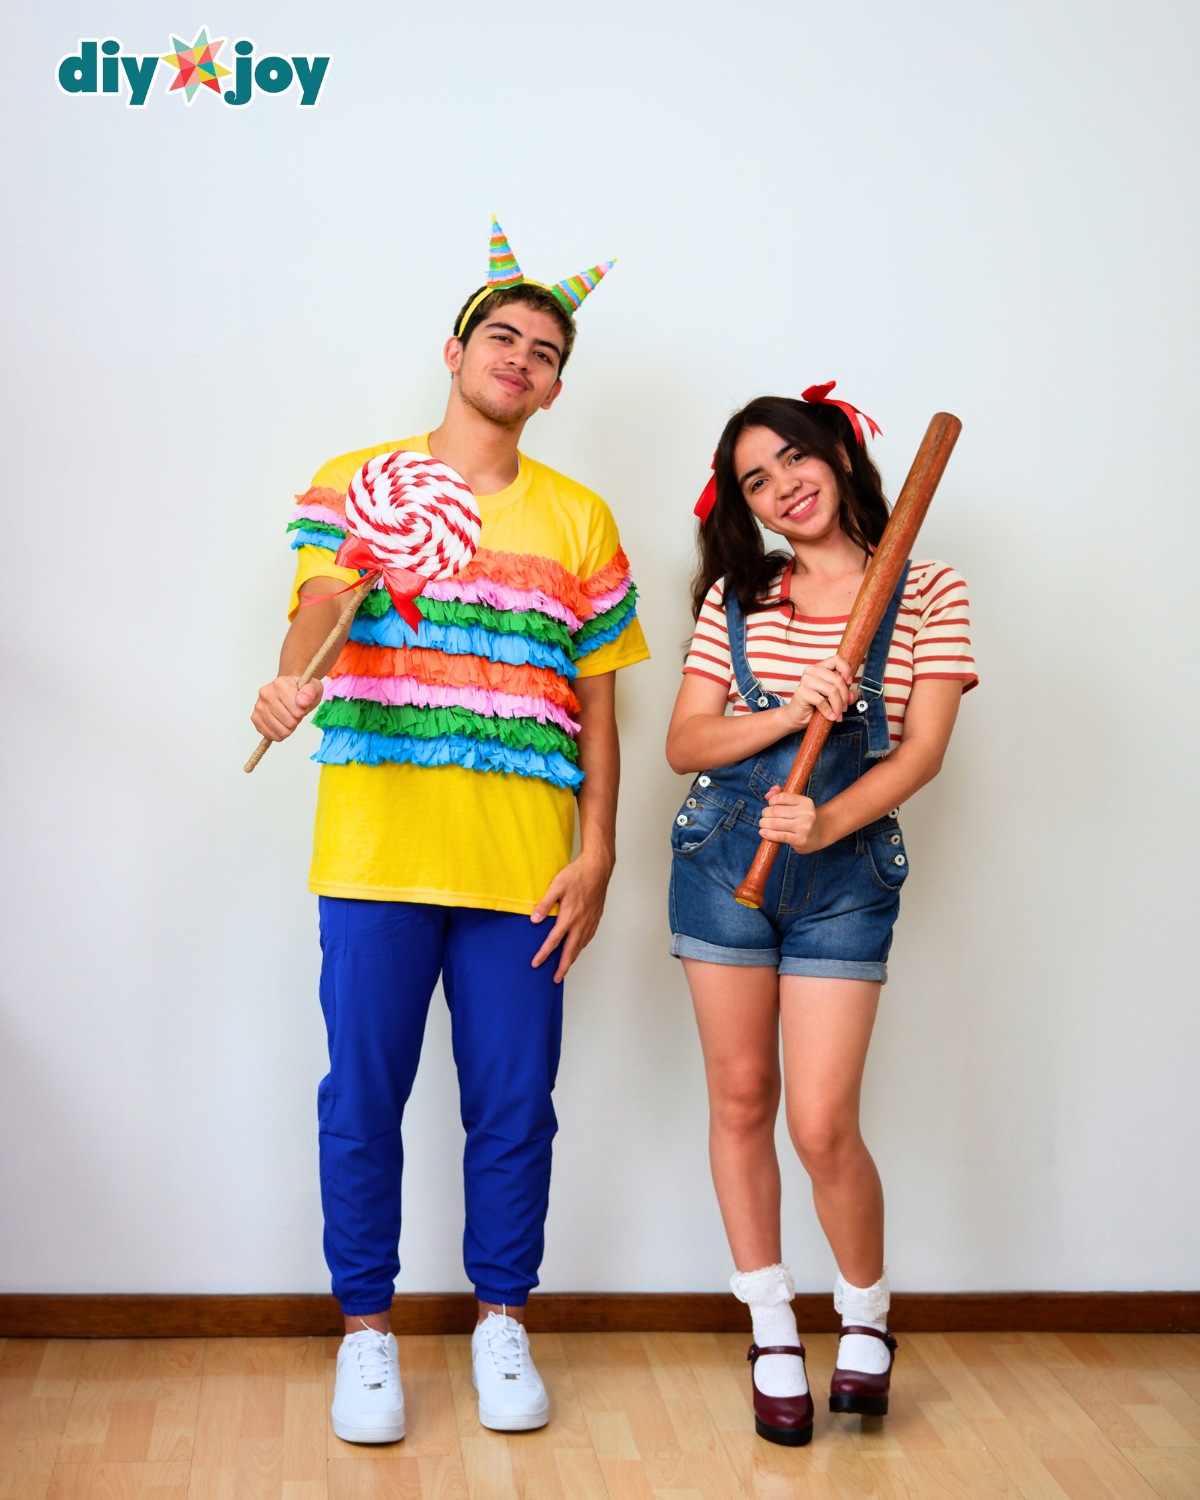
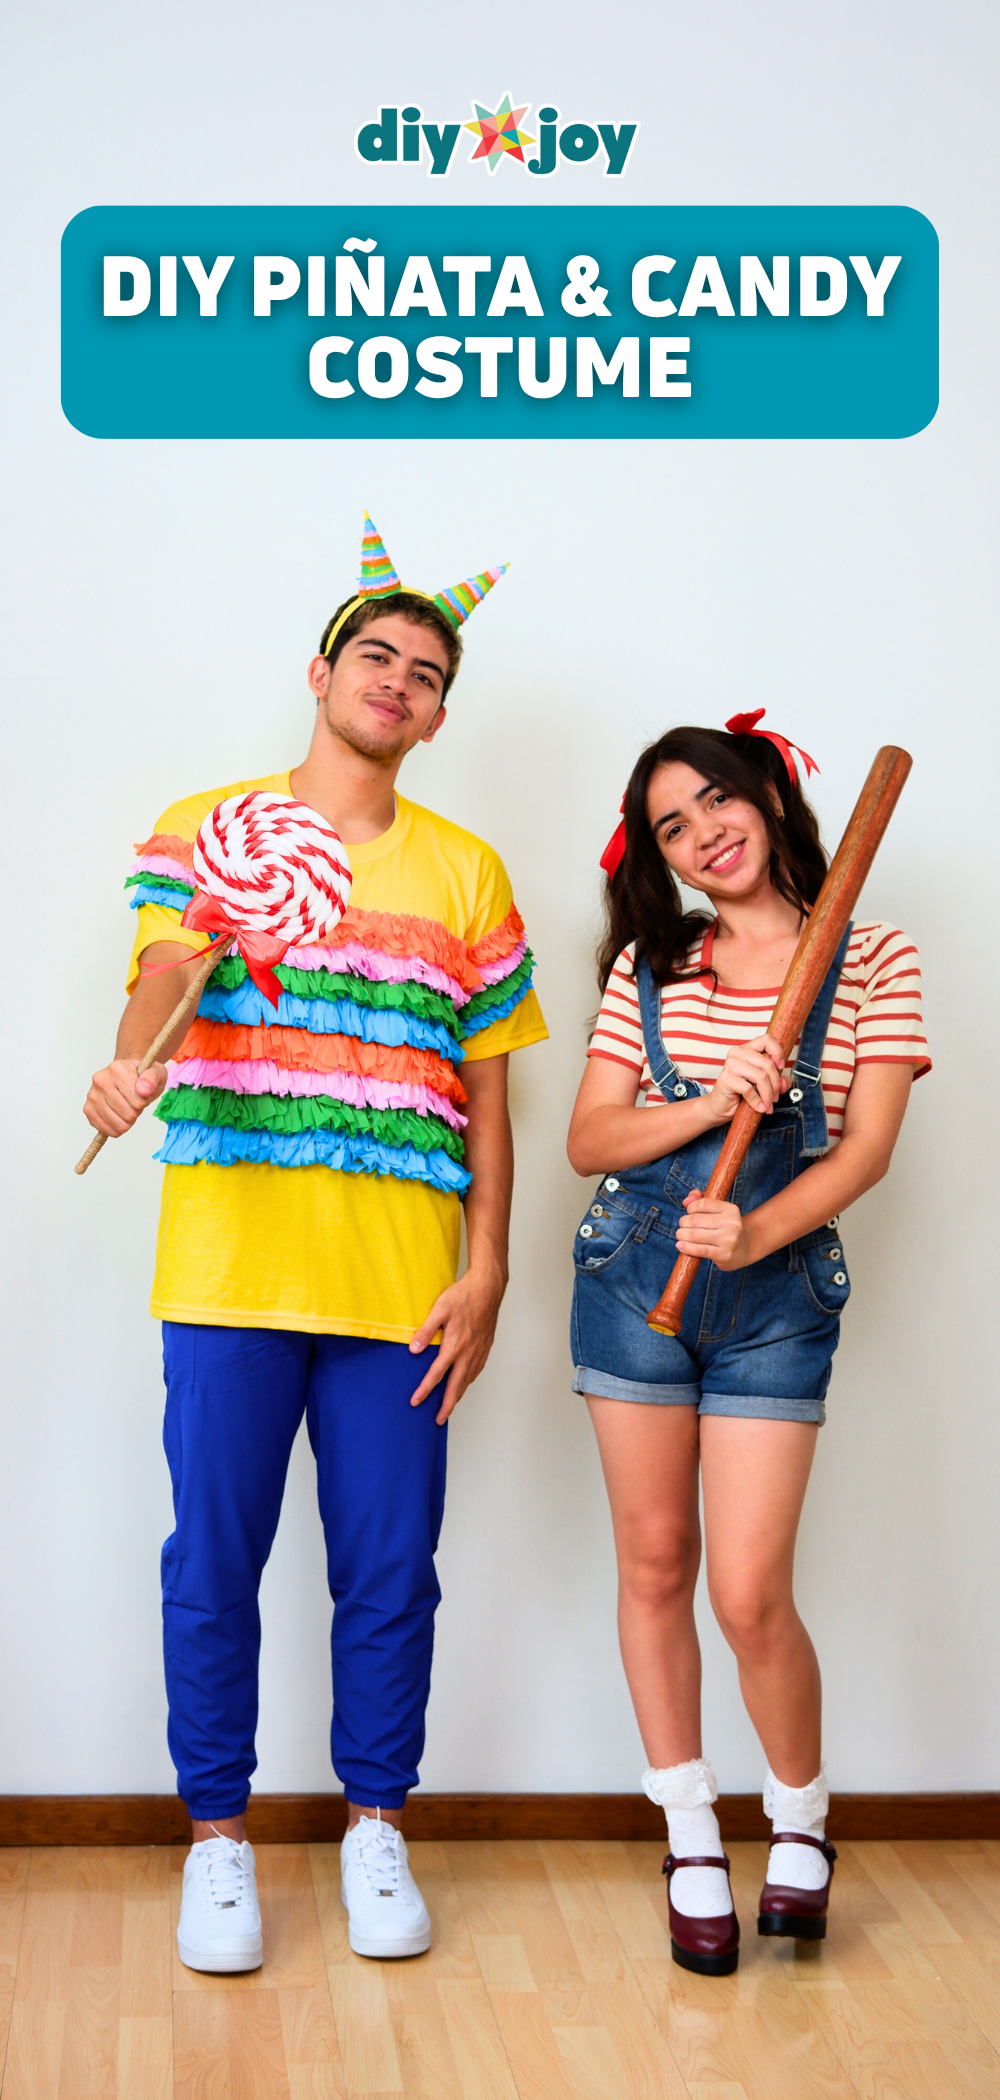
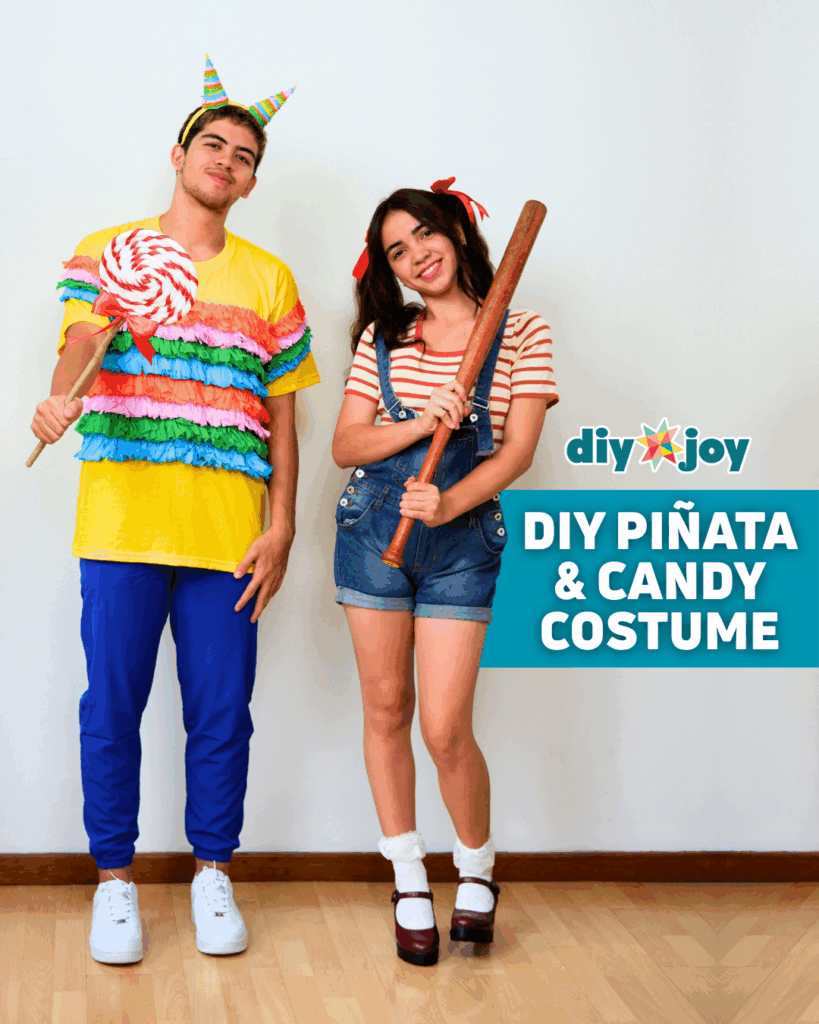
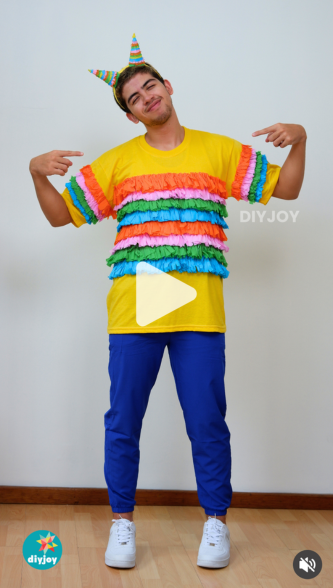
The piñata costume features bright crepe paper fringes that you can easily attach to a masking paper base, making it sturdy enough to dance and party in all night! The best part? You don’t have to ruin your shirt to make it. The paper backing peels off effortlessly when you’re done celebrating, leaving your outfit perfectly intact.
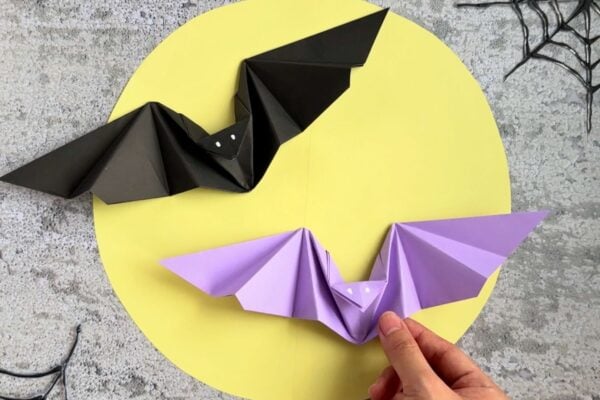
Here’s another cute Halloween costume idea to try:
another no sew Halloween costume made from cardboard and paint
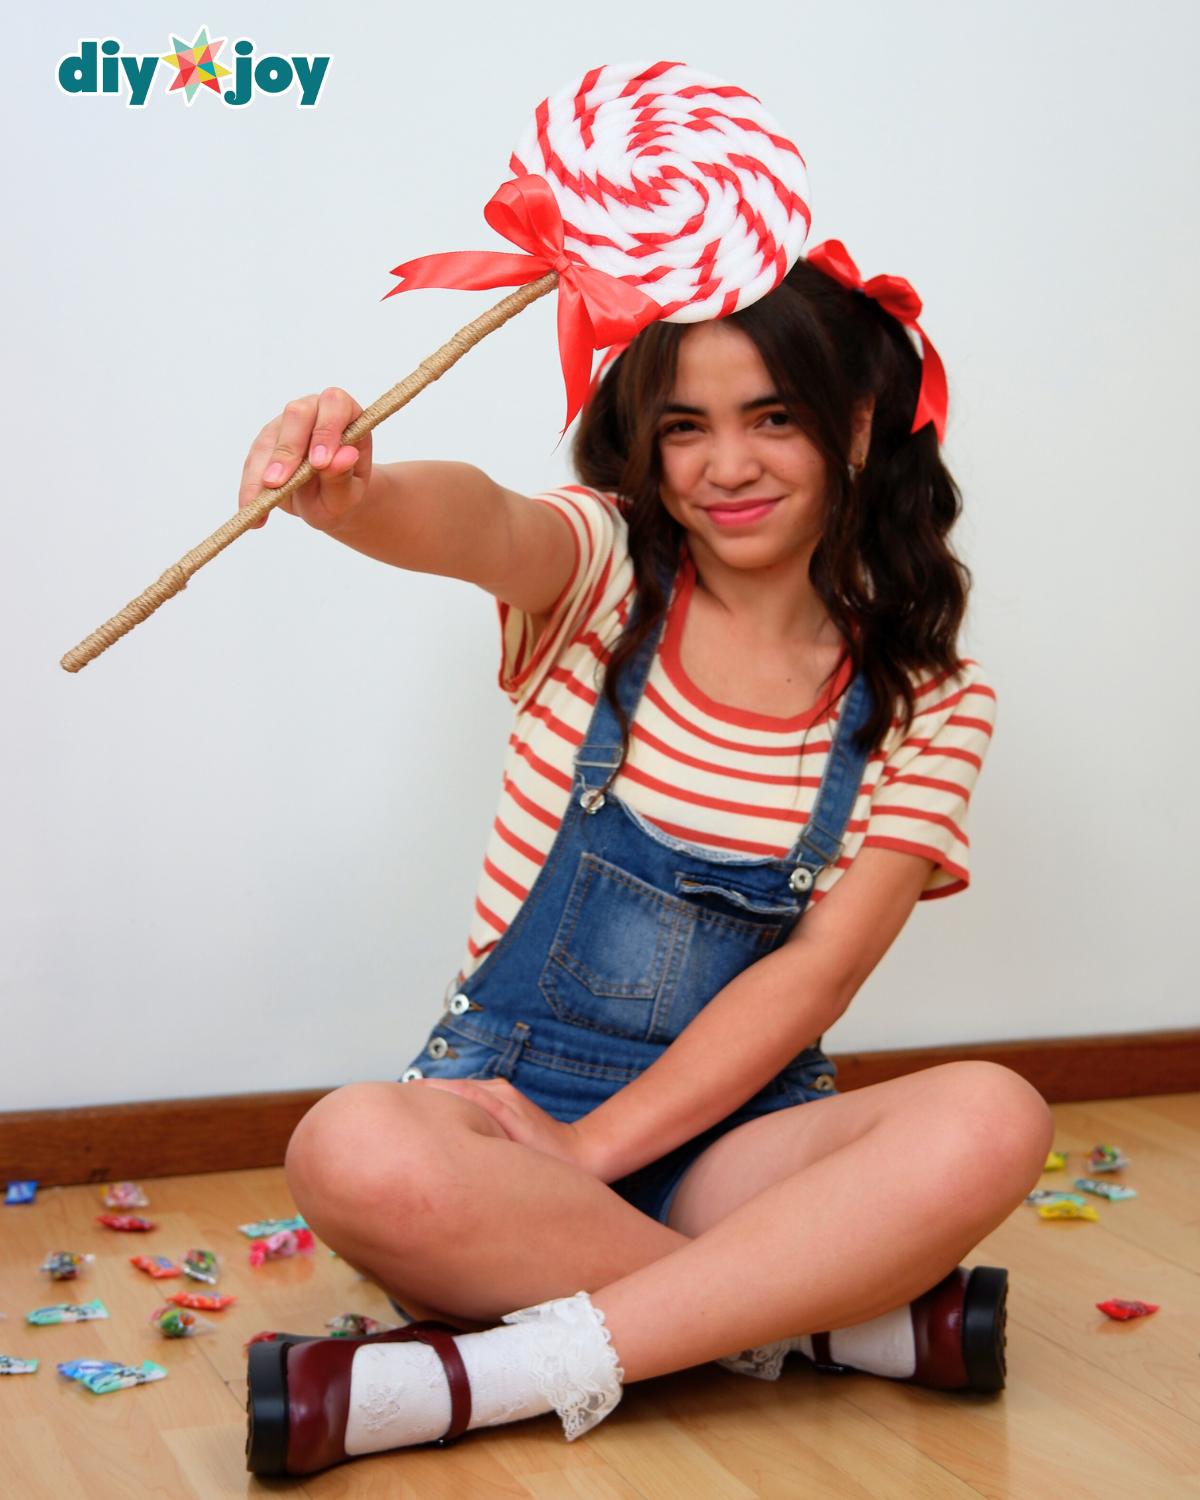
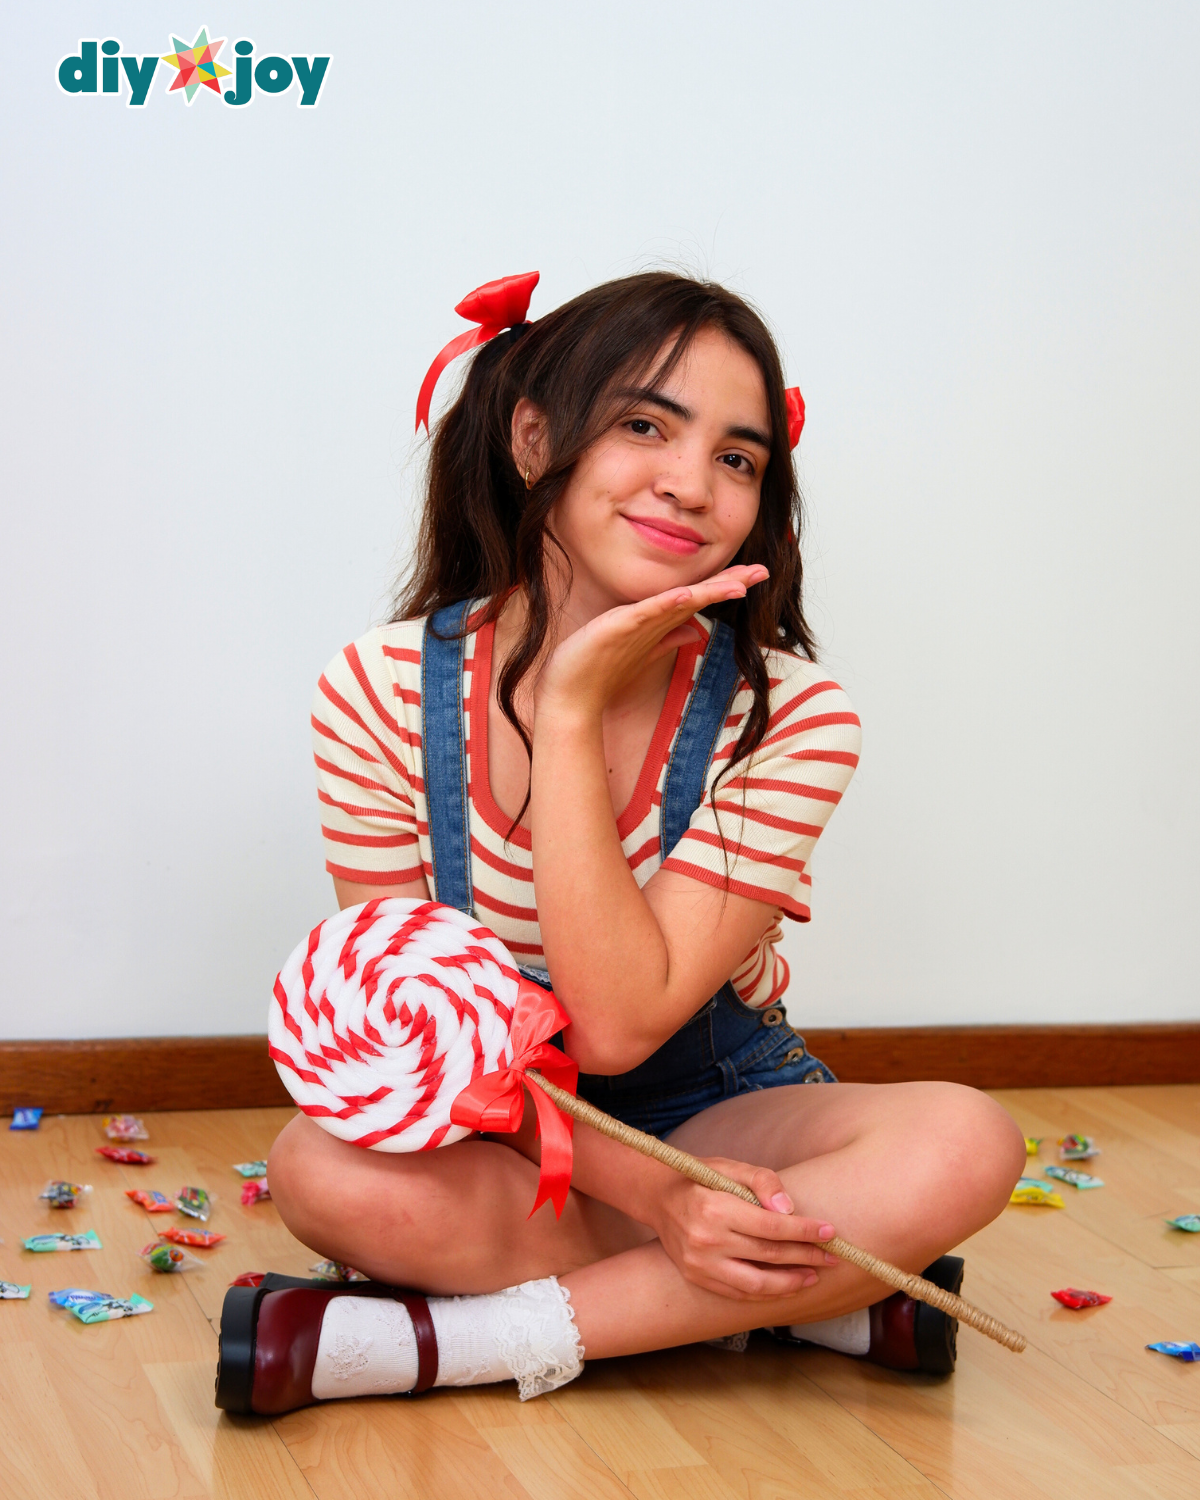
The matching candy costume is equally adorable. Its highlight is a giant swirl lollipop prop that completes the sweet and playful vibe. To make it even more fun, the candy costume wearer can carry a baseball bat as a prop—ready to “hit” the piñata for a comic touch!
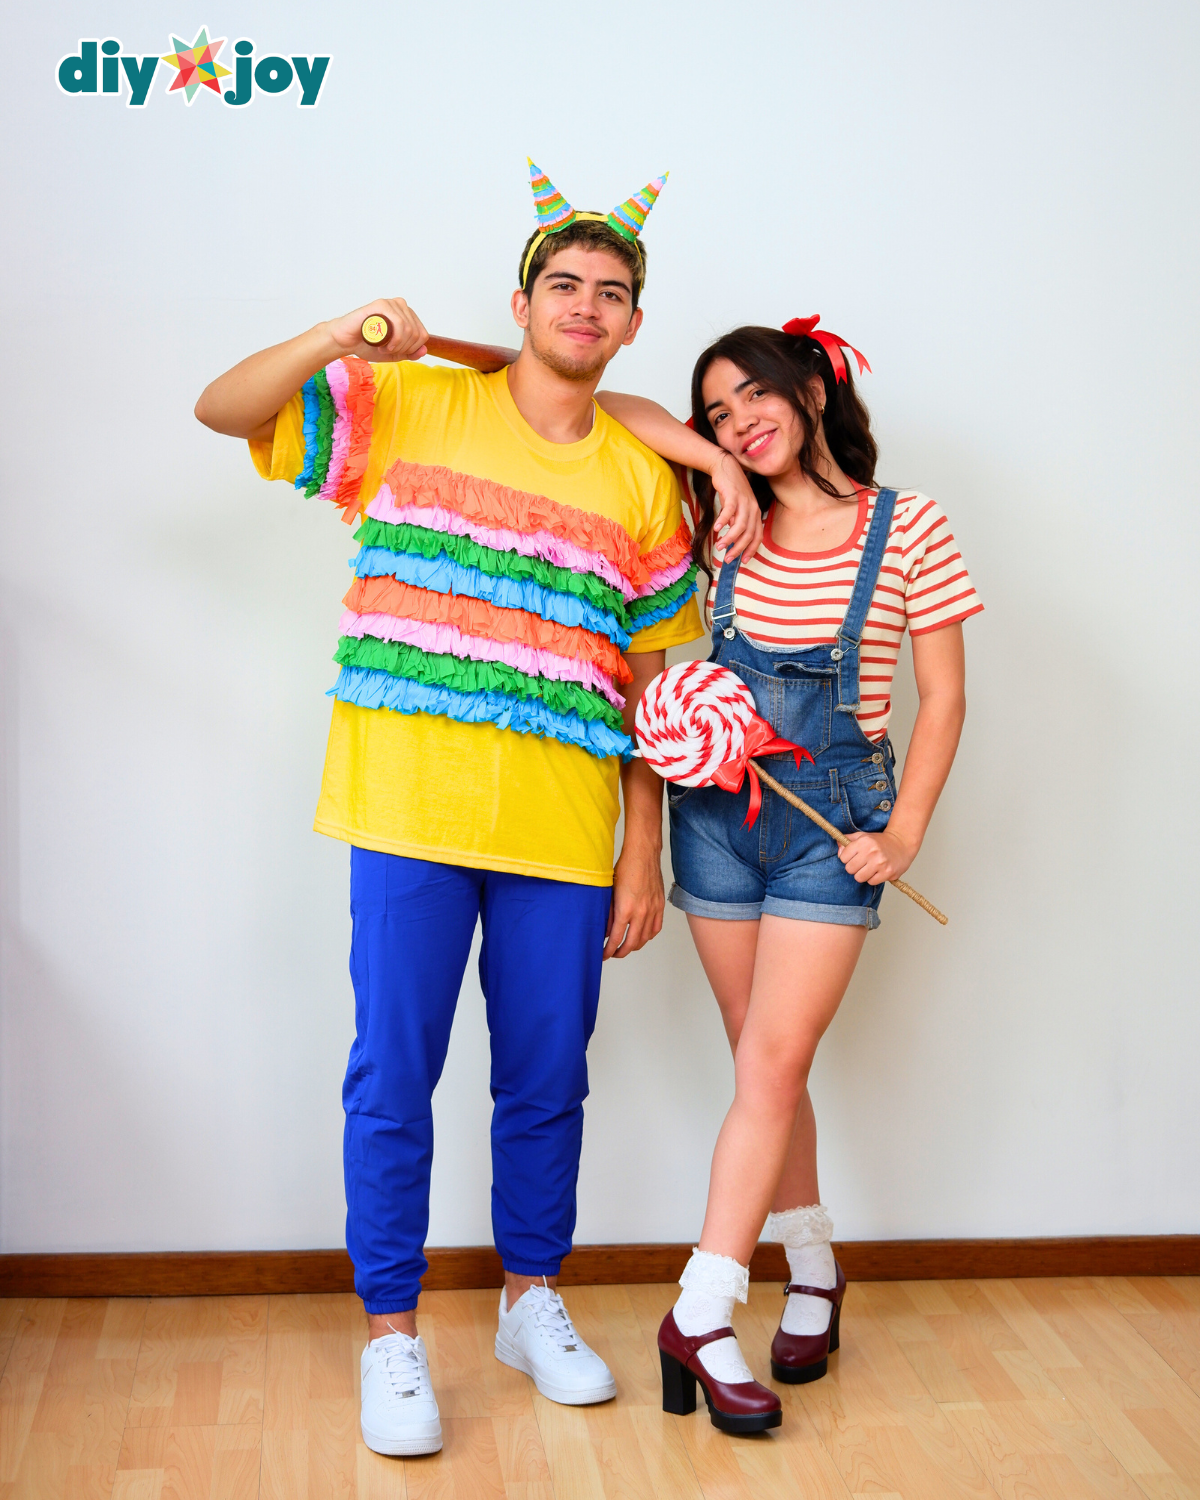
This costume pair works perfectly for couples, siblings, or best friends, and you can easily switch it up to fit anyone. Turn overall shorts into pants, or swap bright blue joggers for shorts or a skirt—it’s completely customizable depending on who’s wearing it.
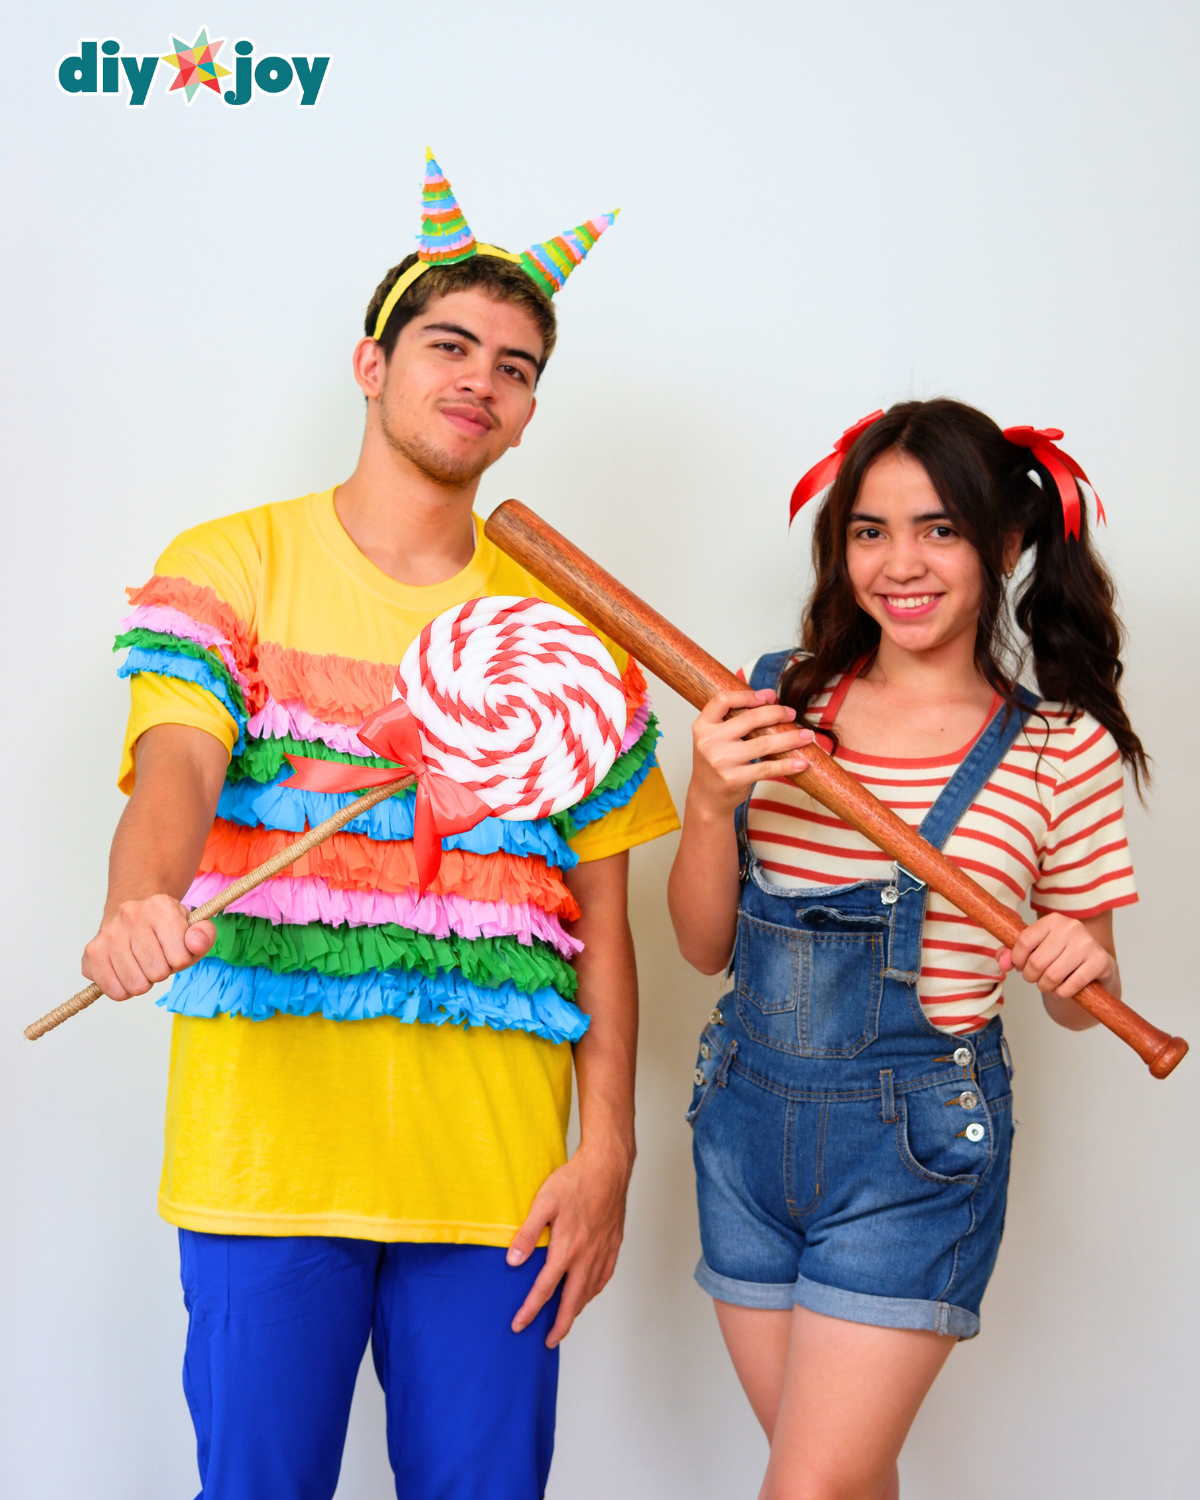
Follow the step-by-step tutorial below to learn how to make both the piñata and candy costumes from scratch. I promise, the results will be irresistibly cute and guaranteed to make you the hit of any Halloween party. You can read along or craft as you go while watching the video tutorial below.
Craft Supplies Needed:
For the Piñata Costume
- Yellow Shirt
- Crepe Paper Rolls
- Scissors
- Masking Tape
- Plain Headband
- Hot Glue Gun and Glue Sticks
For the Candy Prop
- Thin Foam Stick Gap Fillers
- Felt Fabric
- Scissors
- Hot Glue Gun and Glue Sticks
- Stick
- Jute Twine (optional)
- Ribbon
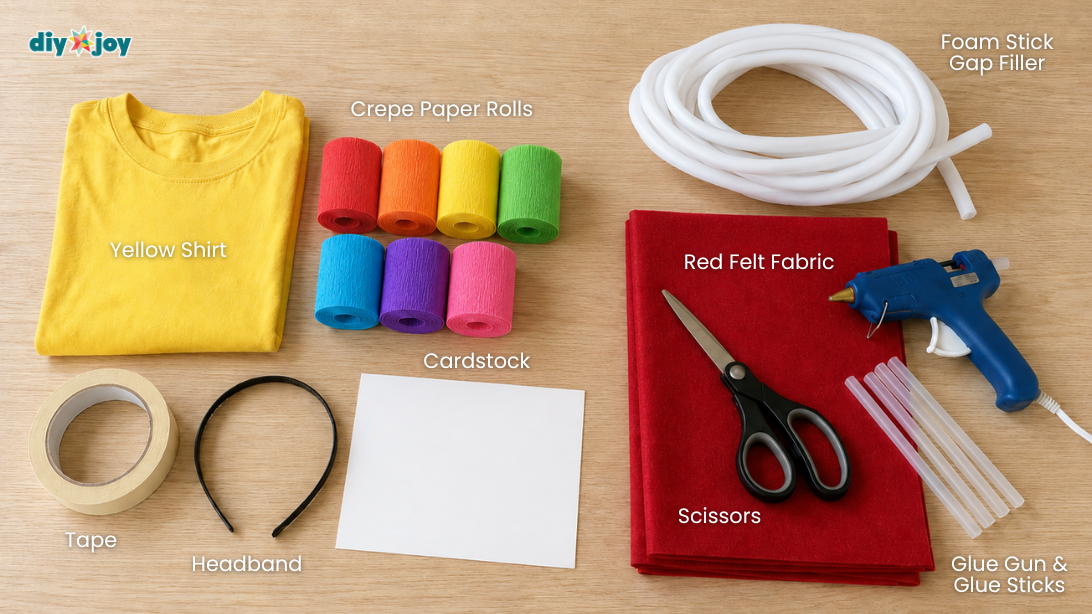
One note before you buy anything: get the shirt a size up. Crepe paper fringe adds bulk across the chest and shoulders, and a fitted tee ends up looking like a rainbow sausage casing. An oversized shirt also gives you flat working room, which matters when you are gluing rows on a table.
The foam gap filler tubing is the one item people can’t picture. It lives in the weatherproofing aisle at the hardware store, not the craft store, and it costs a few dollars for a long coil. It bends without creasing and weighs nothing, which is exactly why the finished lollipop is comfortable to carry around all evening.
How to Make a Piñata Costume
Worth knowing while you are gluing fringe: the piñata’s long history runs back through Spanish and Mexican celebration long before it turned up at birthday parties, which is a nice thing to have in your pocket when someone at the party asks.
Step 1: Make the Crepe Paper Fringes
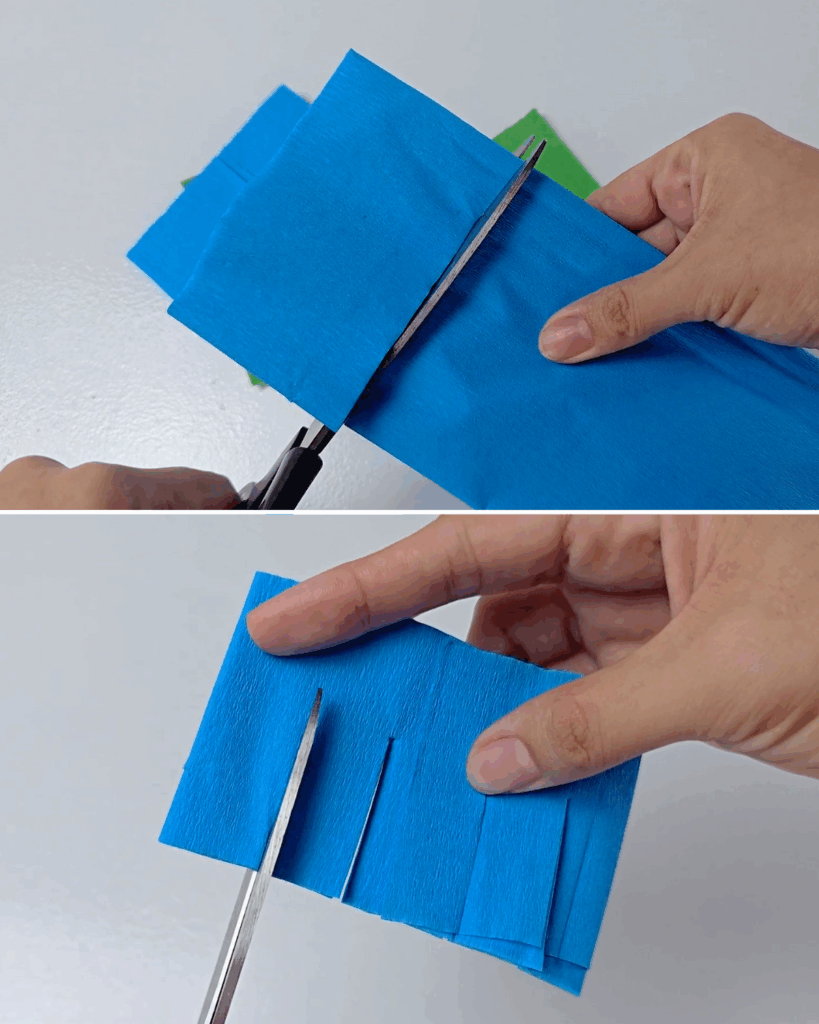
Gather your assorted crepe papers and cut them into 5-inch-wide strips. Then, cut fringes or small notches along the bottom edge to create texture and movement.
Step 2: Mark and Gather the Crepe Paper Fringes
Use masking tape to mark where each fringe layer will go on the front of your shirt. Then, unfold the crepe paper strip and gently gather it along the top edge to prepare it for attaching.
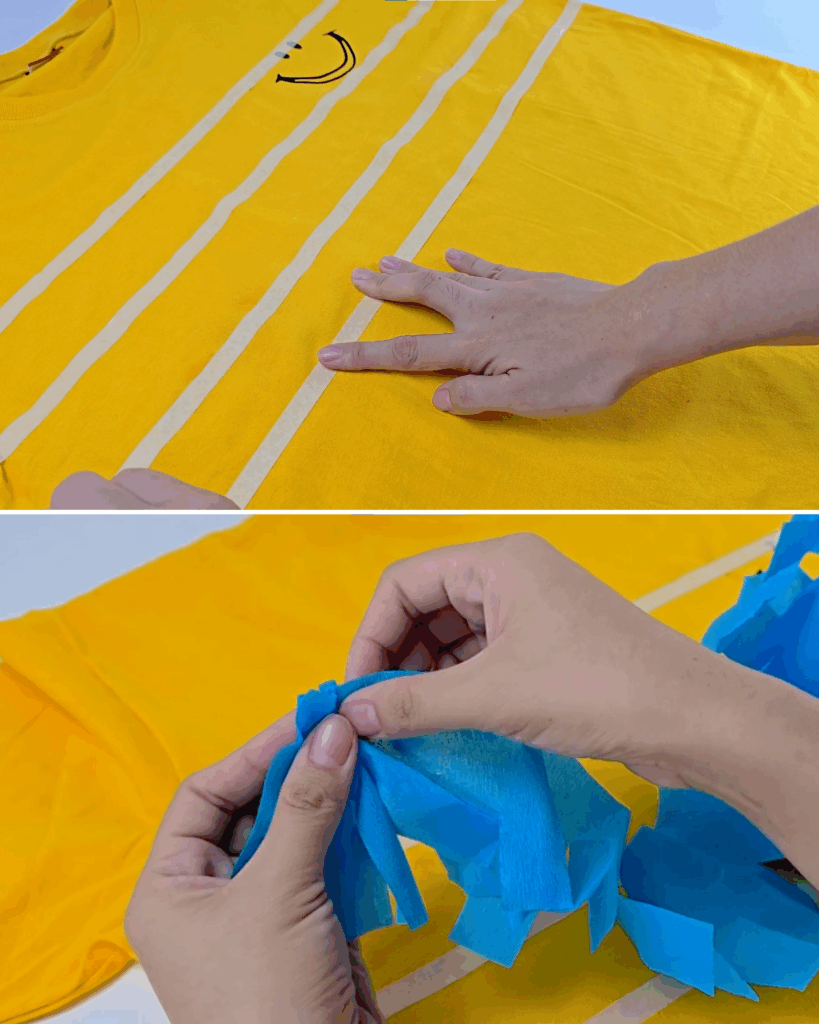
Step 3: Attach the Crepe Paper Fringe Layers
Apply hot glue in small sections over the masking tape, then carefully press the gathered crepe paper onto the shirt. Continue this process from the bottom layer up to the top. For the next layer, use a different color of paper to create a colorful, layered effect
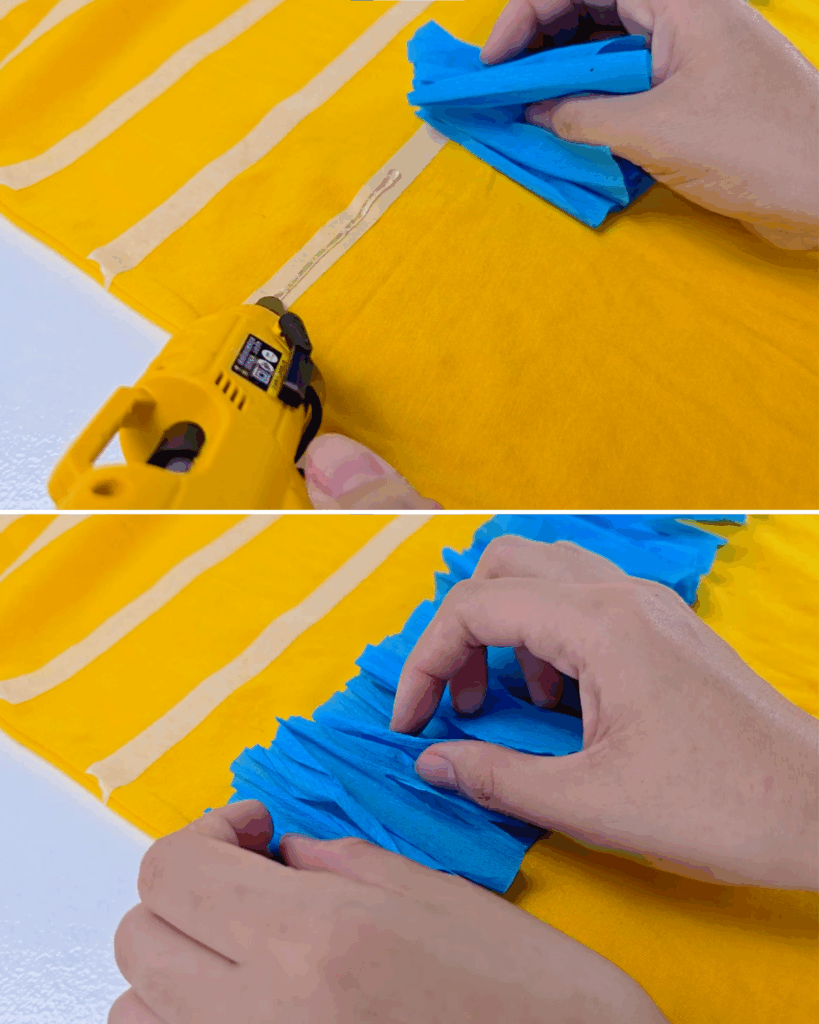
Here’s what it should look like when done!
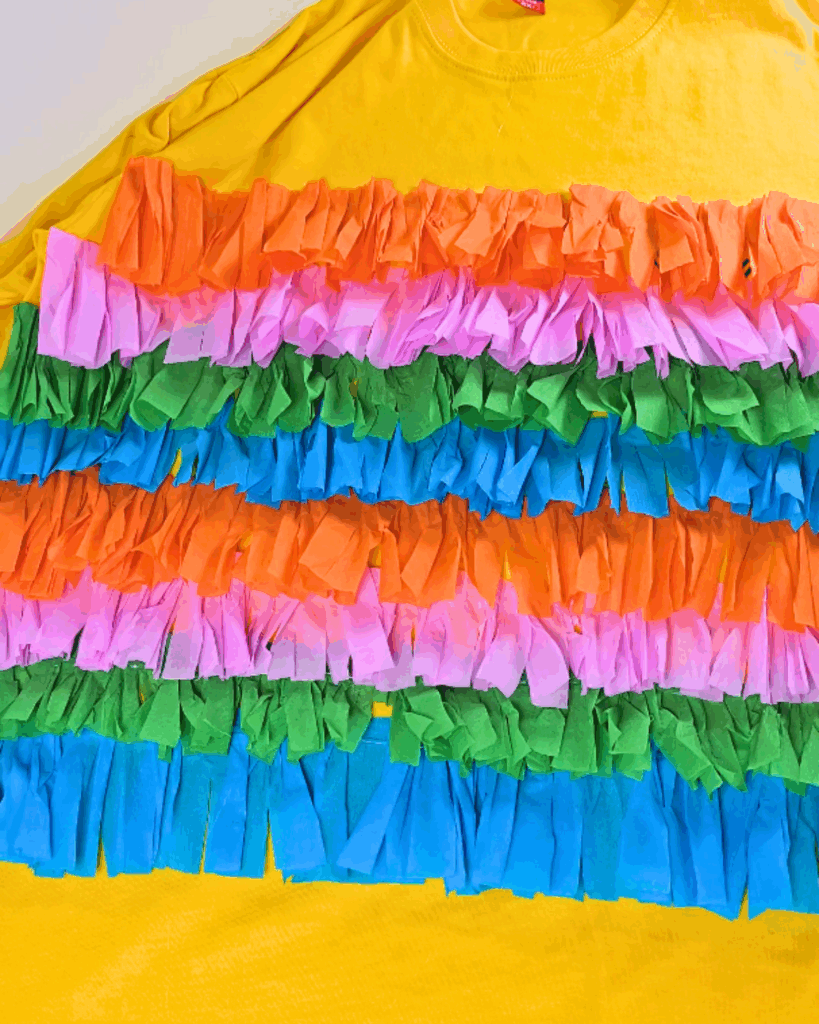
Step 4: Add Fringe to the Sleeves
Follow the same process as the front of the shirt, but cut the crepe paper shorter—about half of the original 5-inch width.
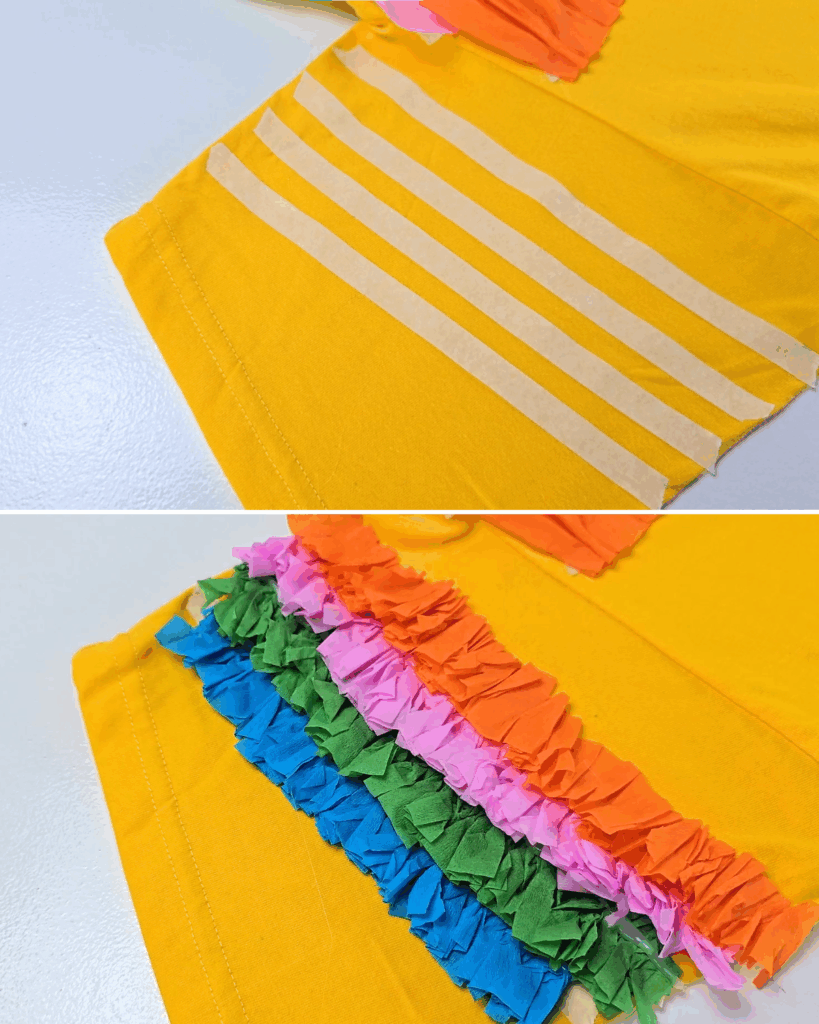
Note: Mark the Sleeve Fringe Placement – Since the fringes are shorter, mark the sleeve with masking tape at closer intervals to ensure even spacing for each layer.
Step 5: Cut the Cardboard for the Headdress
For the matching headdress, cut the cardboard into two right-angled triangles.
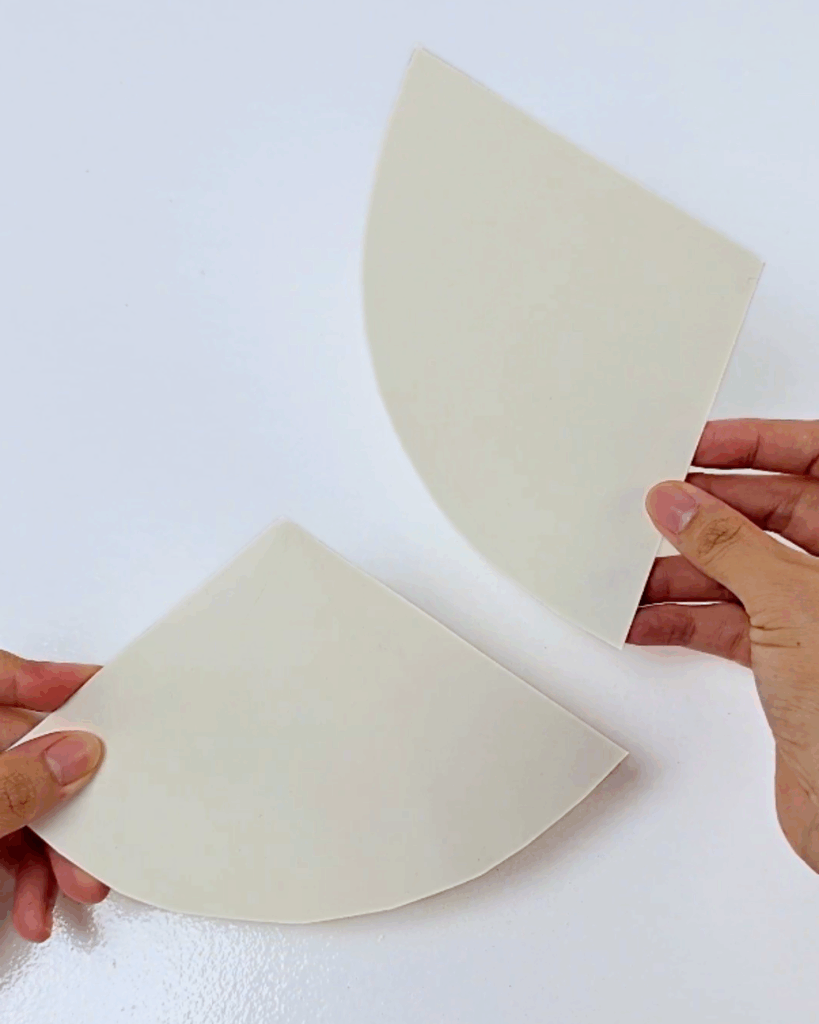
Step 6: Form the Cone Shape
Fold each triangle so the edges meet, creating a cone shape for the headdress. Secure the edges together with hot glue.
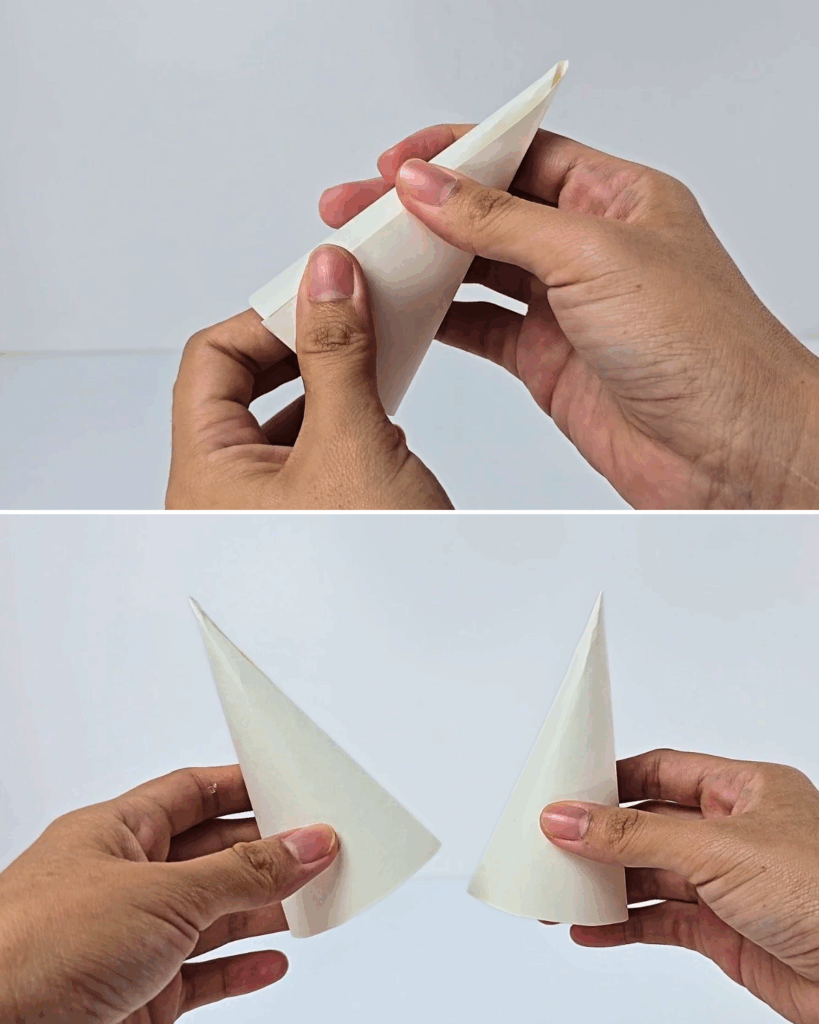
Step 7: Attach Layered Fringes to the Cone
Add crepe paper fringes all around the cone, layering them from the bottom up for a full, textured look.
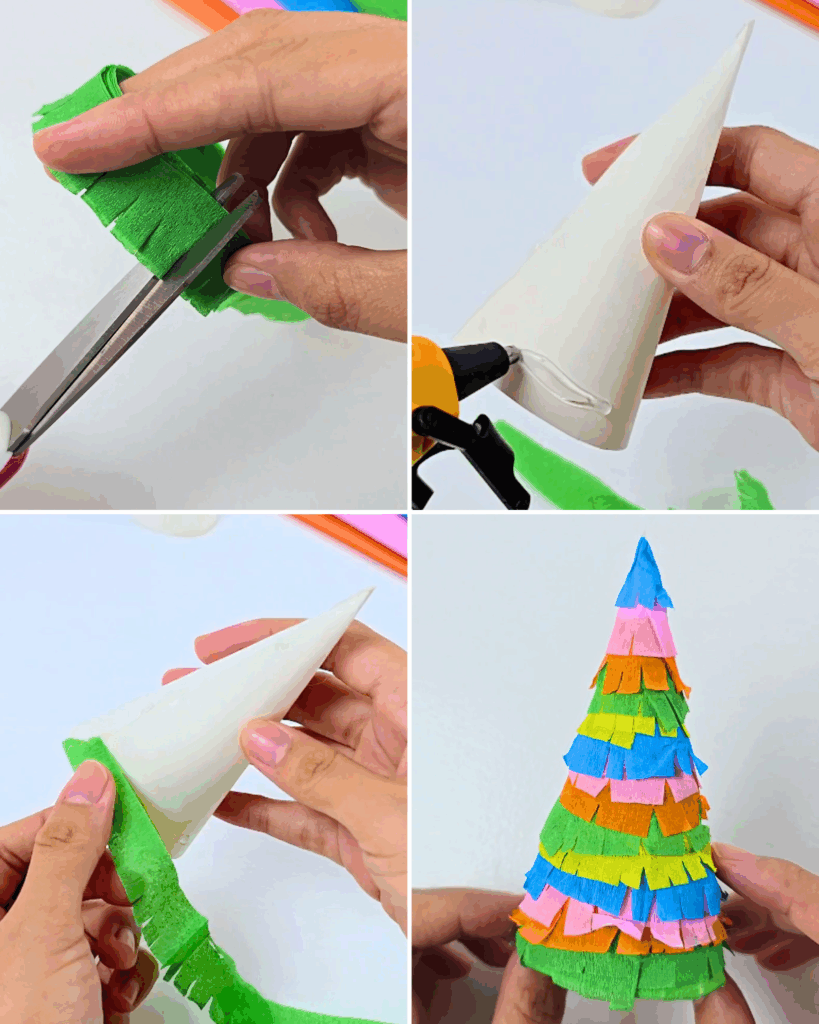
Step 8: Attach the Cones to the Headband
Apply hot glue to the base of each cone, then press them onto a plain headband, spacing them evenly for a balanced look.
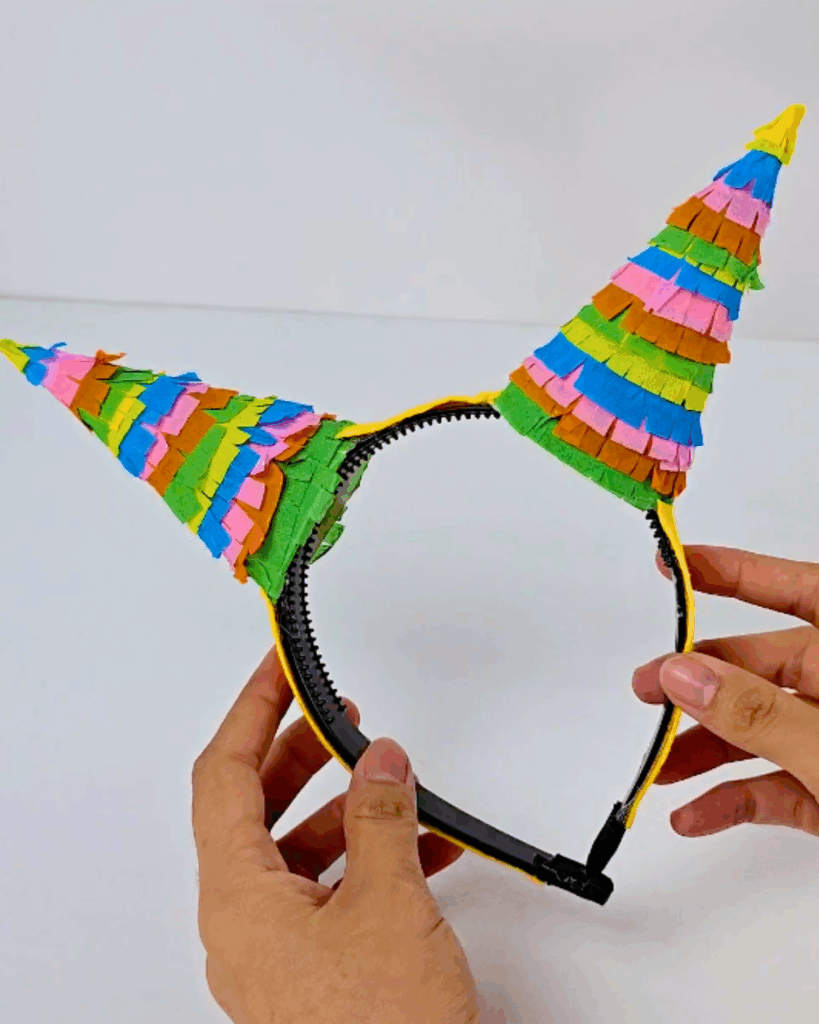
Here’s What It Looks Like When Finished!
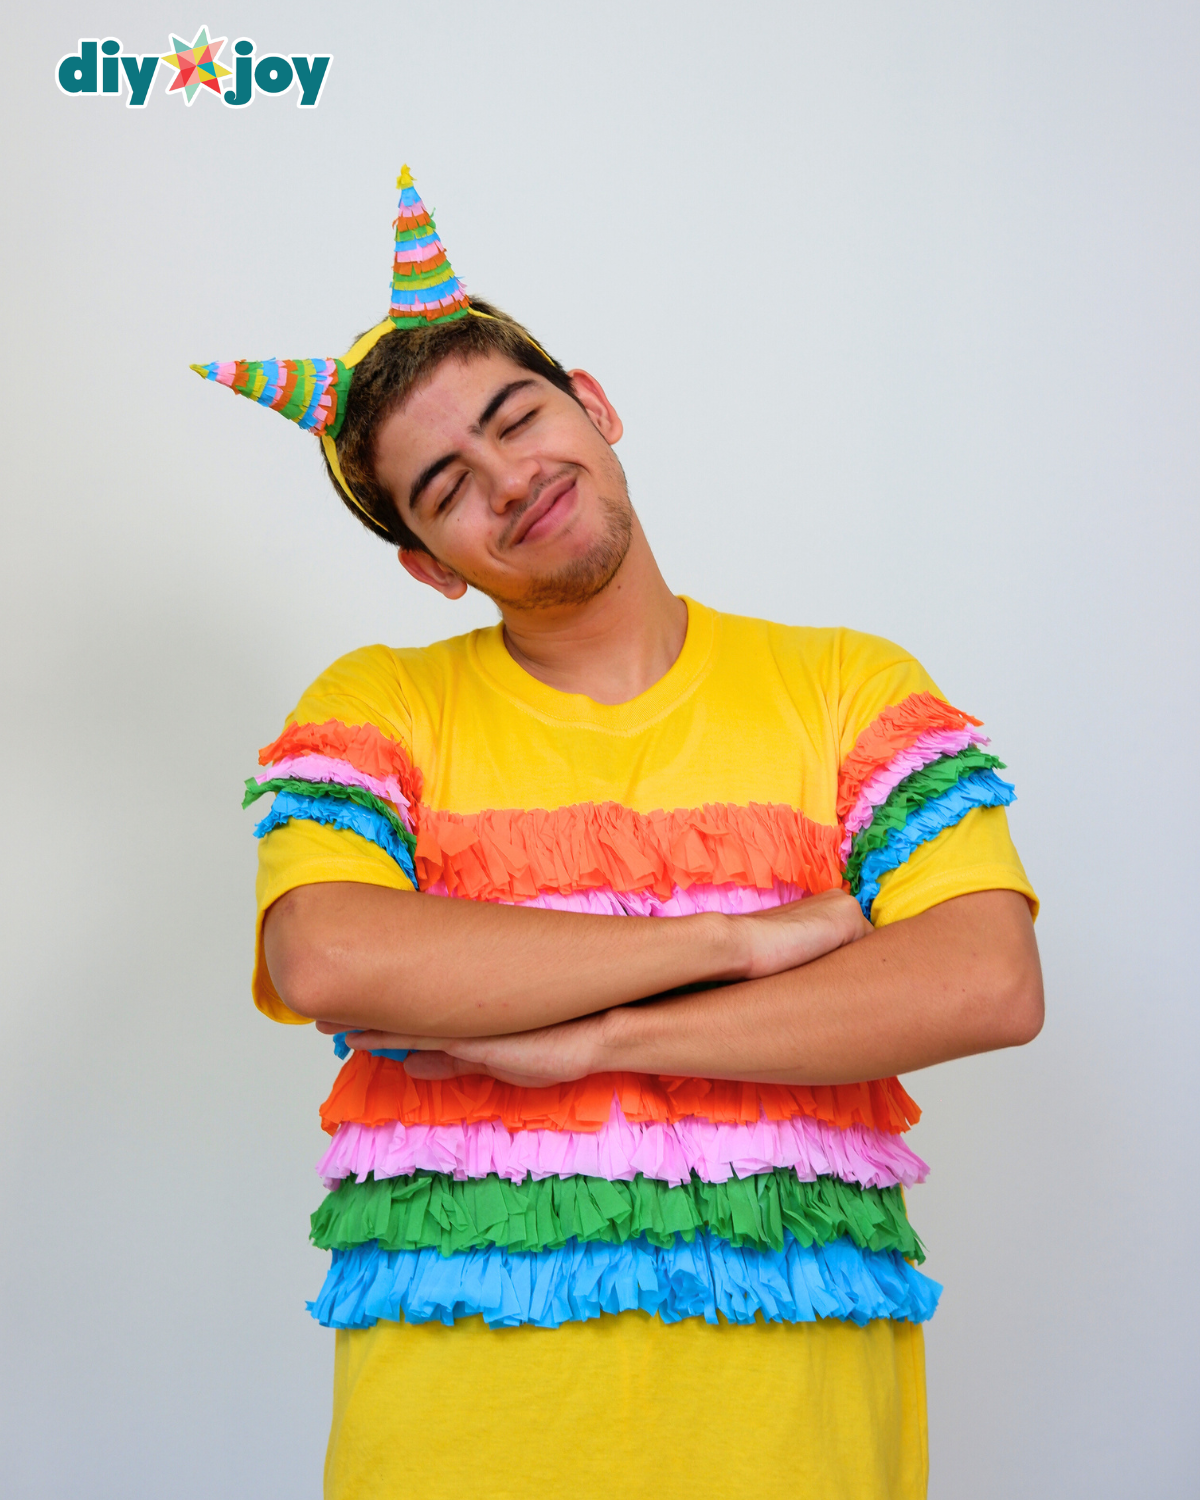
Here is why the masking tape step is not optional. Hot glue soaks straight into knit cotton and cools hard, so gluing fringe directly to the shirt means the shirt is a costume forever. Glue onto tape instead and the whole fringe layer peels off in one piece in November. Peel the tape off and the shirt goes back into the regular laundry.
Work bottom row first and go up. Each new row of fringe hangs over the glue line of the row below it, so the seams disappear on their own. If you start at the shoulders you will see every glue line, and there is no fixing that later without starting over.
How to Complete the Piñata Look
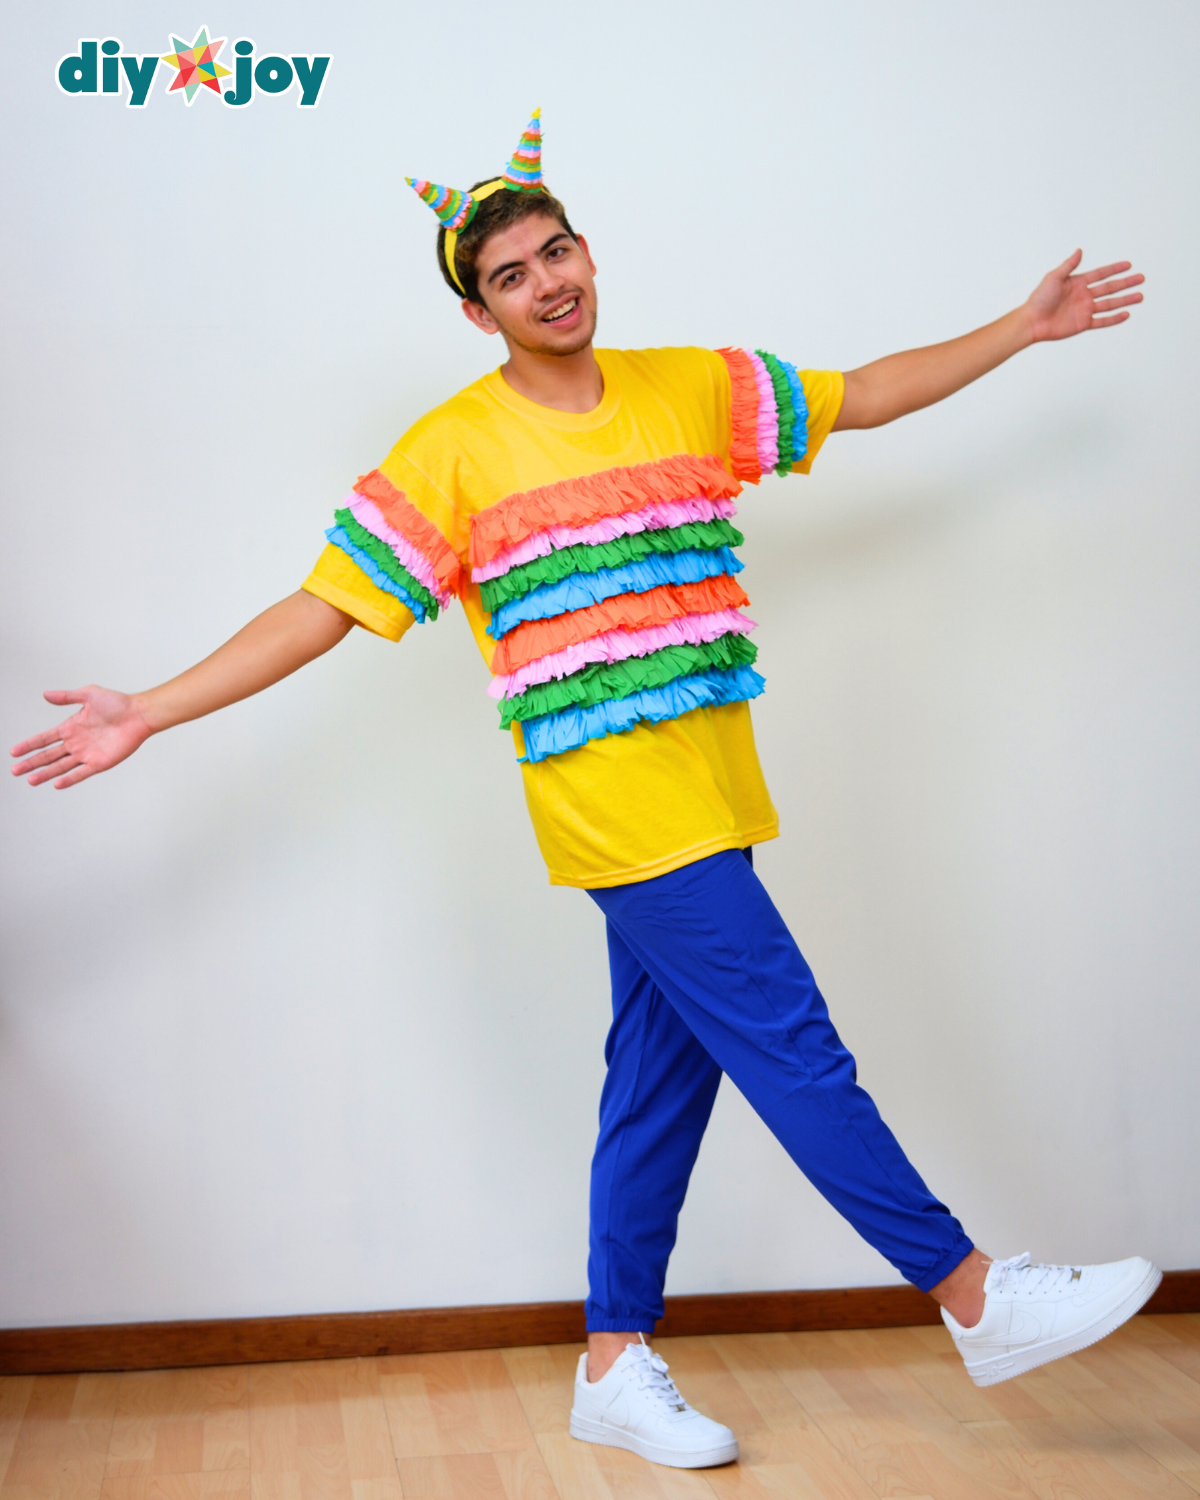
Pair your Piñata shirt with bright blue joggers, shorts, or a skirt. White shoes work best, but any pair you have will do!
Colors are the easy place to make this yours. Repeating four colors in the same order reads as a classic piñata. Two colors on repeat reads graphic and a bit more grown up. If you want it loud, use every roll in the pack and don’t repeat any order at all.
No crepe paper in the house? Tissue paper cut into strips works, though it tears more while you gather it, so cut wider strips to compensate. Cheap plastic table cover from the party aisle also fringes well and shrugs off drizzle, which crepe paper absolutely does not.
How to Make a Giant Candy Prop
Step 1: Prepare the Lollipop Stick and Strips
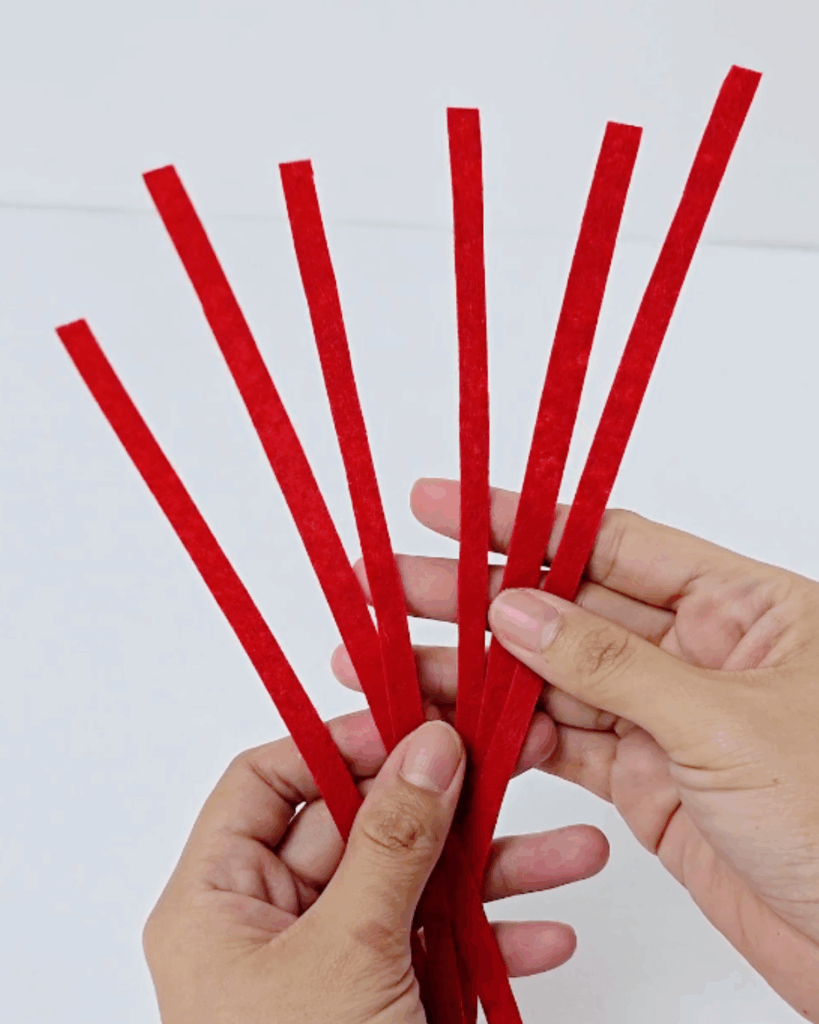
Measure the required length of a 12mm foam stick by rolling it around to test the size of your lollipop, then cut a few thin strips of red felt or electrical tape to use for wrapping.
Step 2: Wrap the Foam Stick
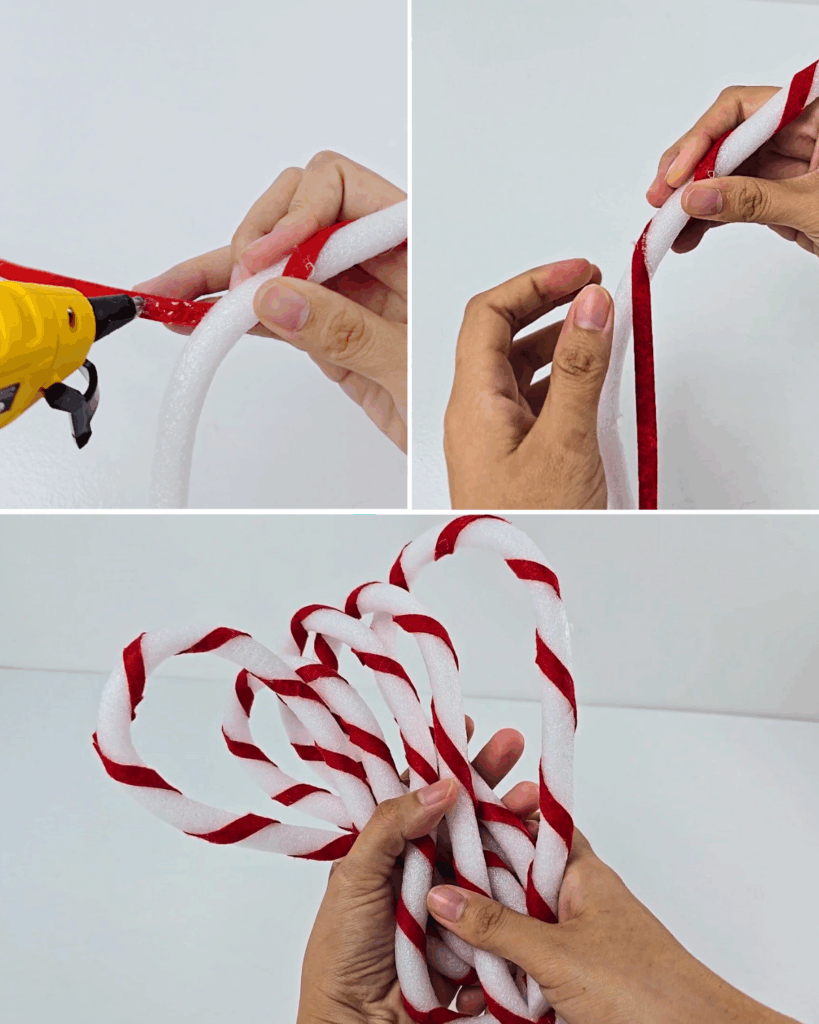
Apply hot glue to a strip, then place it diagonally on the tip of the foam stick. Continue wrapping the strip around the stick until the entire length is covered.
Step 3: Form and Secure the Foam Base
Fold down one end of the foam about 2 to 3 inches and secure it with hot glue. Continue wrapping the foam around itself, adding hot glue along the sides as you go, so it forms a swirl that resembles a lollipop by the end.
Attach a stick to the bottom of your lollipop swirl, then cover the base with a ribbon bow to hide where the stick is attached.
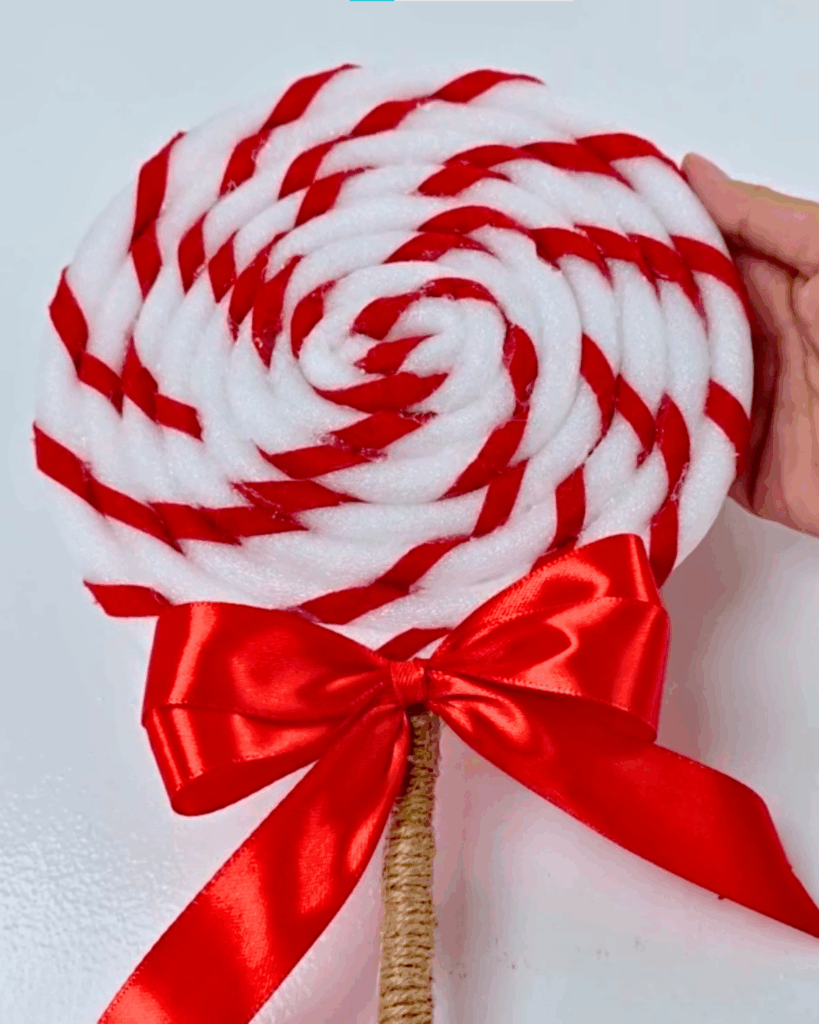
Here’s What It Looks Like When Finished!
The swirl is the step where patience pays. Coil two or three inches at a time, run glue along the side of the foam rather than the face of it, and hold each turn until it sets before adding the next. Rush it and the coil springs open behind you like a party horn.
If you would rather skip the wrapping entirely, red electrical tape gives you the same candy stripe faster than felt does and sticks to foam without glue. Felt looks softer in photos, tape is quicker and survives being knocked into doorframes. Both are in the tutorial for a reason.
How to Complete the Candy Look
Wear a striped shirt or top under overall shorts or pants, then add matching hair ribbons for pigtails or wear a hat instead. Complete the look with baby doll pumps and lace socks, or go for cute, simple sneakers.

Pro Tips 💡
- Use an oversized shirt so you have enough room for the fringe without making the costume feel tight or stiff.
- When forming the giant swirl lollipop, coil and glue the foam a little at a time. Hold each section in place until the glue sets so the swirl does not spring back open.
- Keep the finished costume away from rain, drinks, and open flames. Crepe paper looks great at a party, but it has very little patience for moisture.
Storing it is simpler than you would think. Hang the fringed shirt on a hanger rather than folding it, because folds crush the crepe flat and it never fully recovers. The lollipop can stand in a corner or lie flat under a bed. Keep both away from radiators and damp basements.
This also scales down for kids. A child’s shirt needs narrower strips, roughly 3 inches instead of 5, and fewer rows to look full. Let them do the fringe cutting and the color picking, then handle the hot glue yourself. And it works as a solo costume too: the piñata shirt alone is a complete look, lollipop optional.
Yes. Apply the hot glue over strips of masking tape instead of directly onto the fabric. Once the party is over, carefully peel away the tape and attached crepe paper.
Absolutely. Change the crepe paper colors, clothing, and accessories to fit kids, adults, couples, siblings, or friends. You can also make the fringe longer or shorter depending on how full you want the costume to look.
You can make it several days in advance. Store the piñata shirt and headdress in a dry place where the crepe paper will not be crushed. Keep the giant lollipop prop lying flat so the foam swirl holds its shape.
It depends on how densely you row the shirt, but plan on several rolls rather than one or two, since the front, back and both sleeves all get covered. Buying a multi color pack is usually cheaper than single rolls, and leftovers go straight into the cone horns.
Have you seen our TikTok & Instagram yet?
Our viral videos are super popular and fun to watch. Here’s the Piñata and Candy Costume Instagram craft video, but the YouTube tutorial is also in this post so you can watch the complete project step by step. Links below for all our socials. Follow and be the first to see our latest crafts. ⬇️
Must-Try Crafts:


*If you love this craft, then visit our official website, follow our Facebook page, and subscribe to our YouTube channel for more!
DIY Piñata and Candy Costume