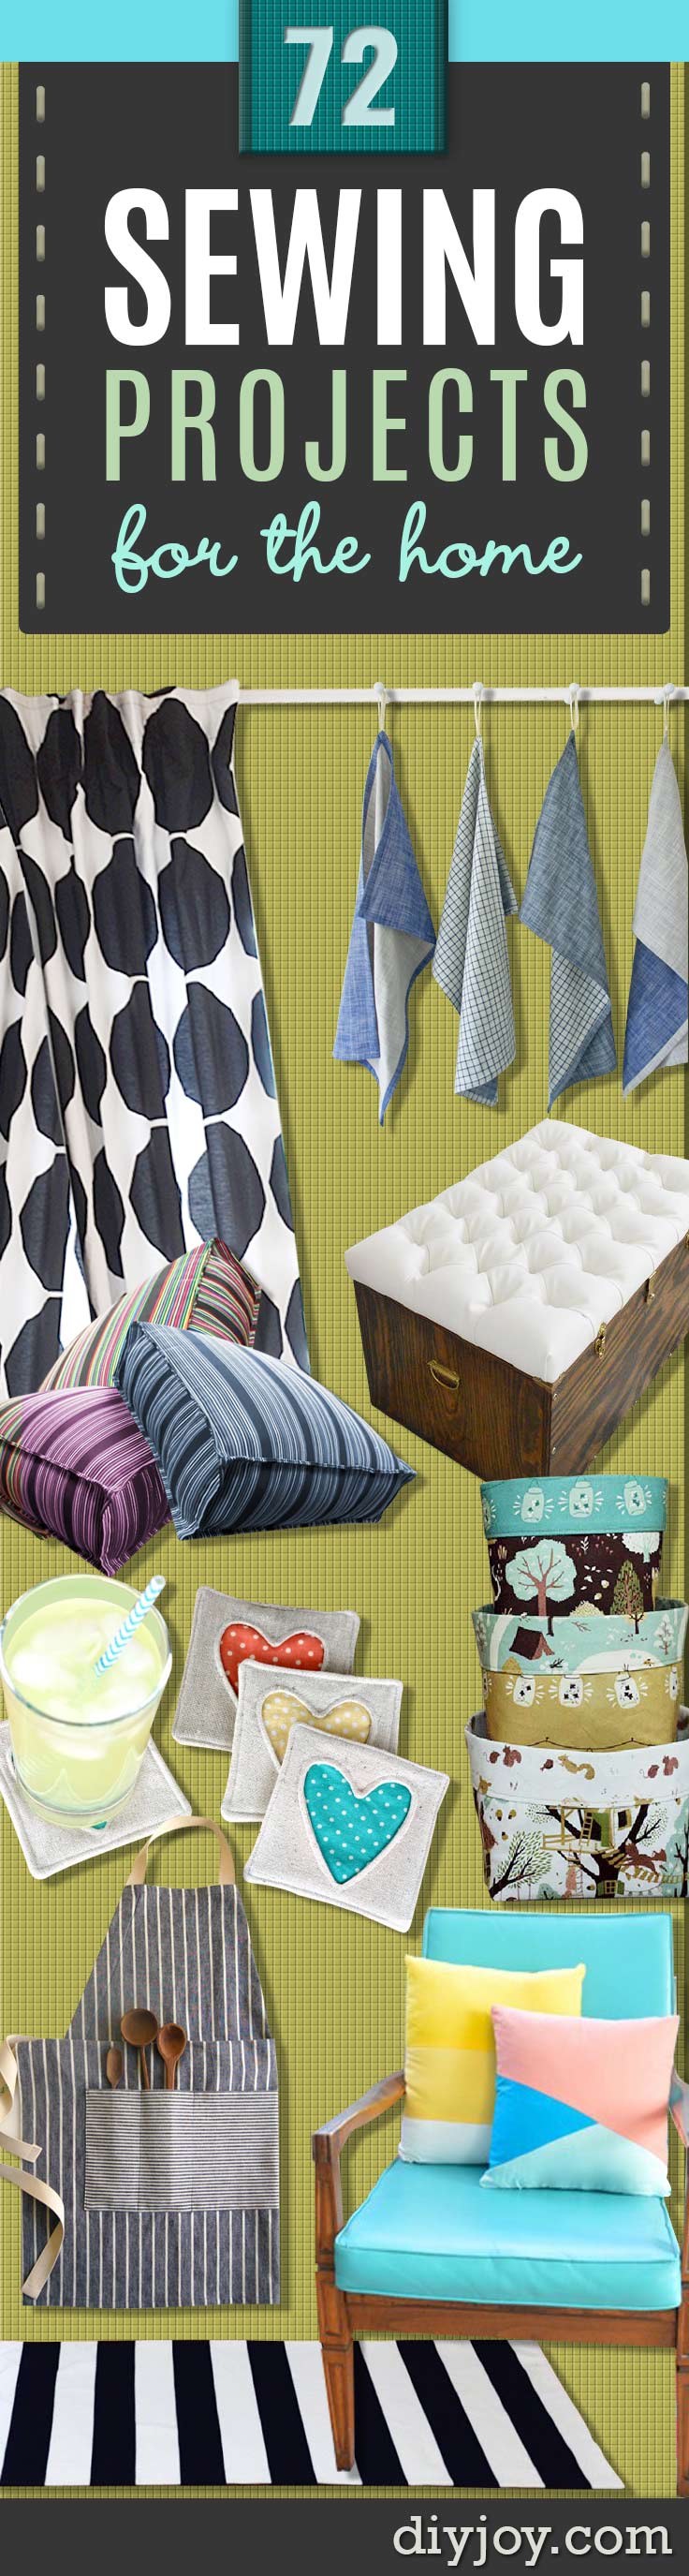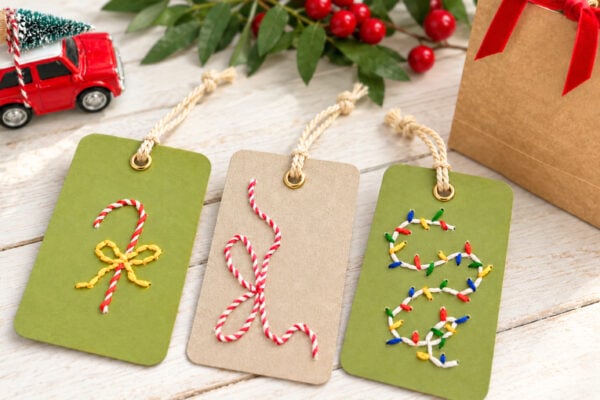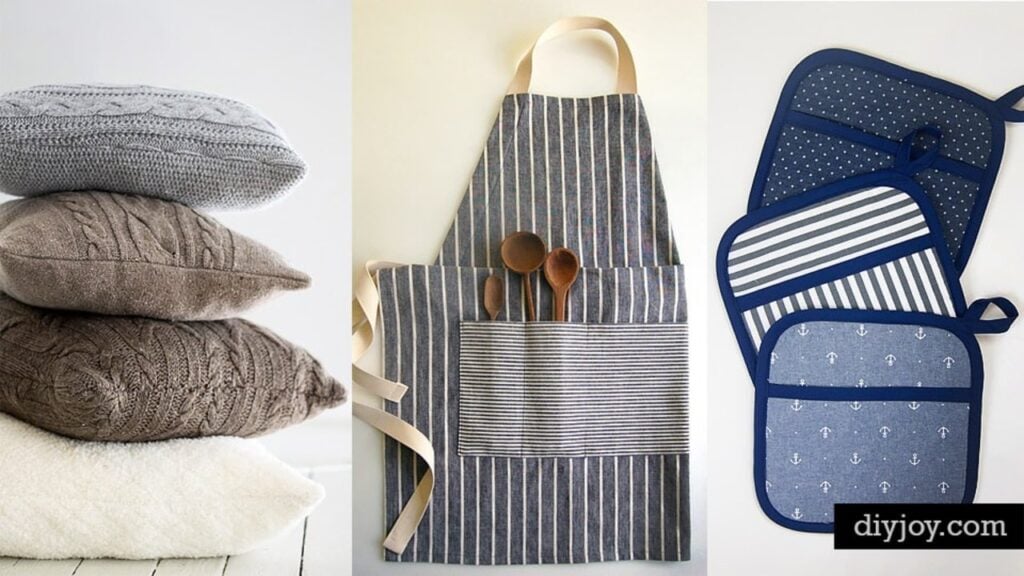
Want your home to feel cozier without spending a fortune? Grab some fabric, because these 89 easy sewing projects for the home cover every room in the house. You’ll find pillow covers of every kind, from envelope and zippered covers to sweater and bandana pillows, plus curtains, roman shades and blackout shades you can make for a fraction of store prices. There are floor cushions, poufs, chair cushions and slipcovers that give tired furniture a fresh start, along with napkins, placemats, table runners and coasters for the dining table. Kitchen towels, bowl covers, fabric bins and organizers round it out. Most are simple straight-line sewing, and a few are no-sew. These projects are perfect for:
- Beginners learning to sew a straight seam
- Refreshing a room on a small budget
- Using up fabric scraps and old jeans or sweaters
- Handmade housewarming and hostess gifts
Pick one and get sewing this weekend!
1. How to Make a Basic Pillow and Pillow Sham
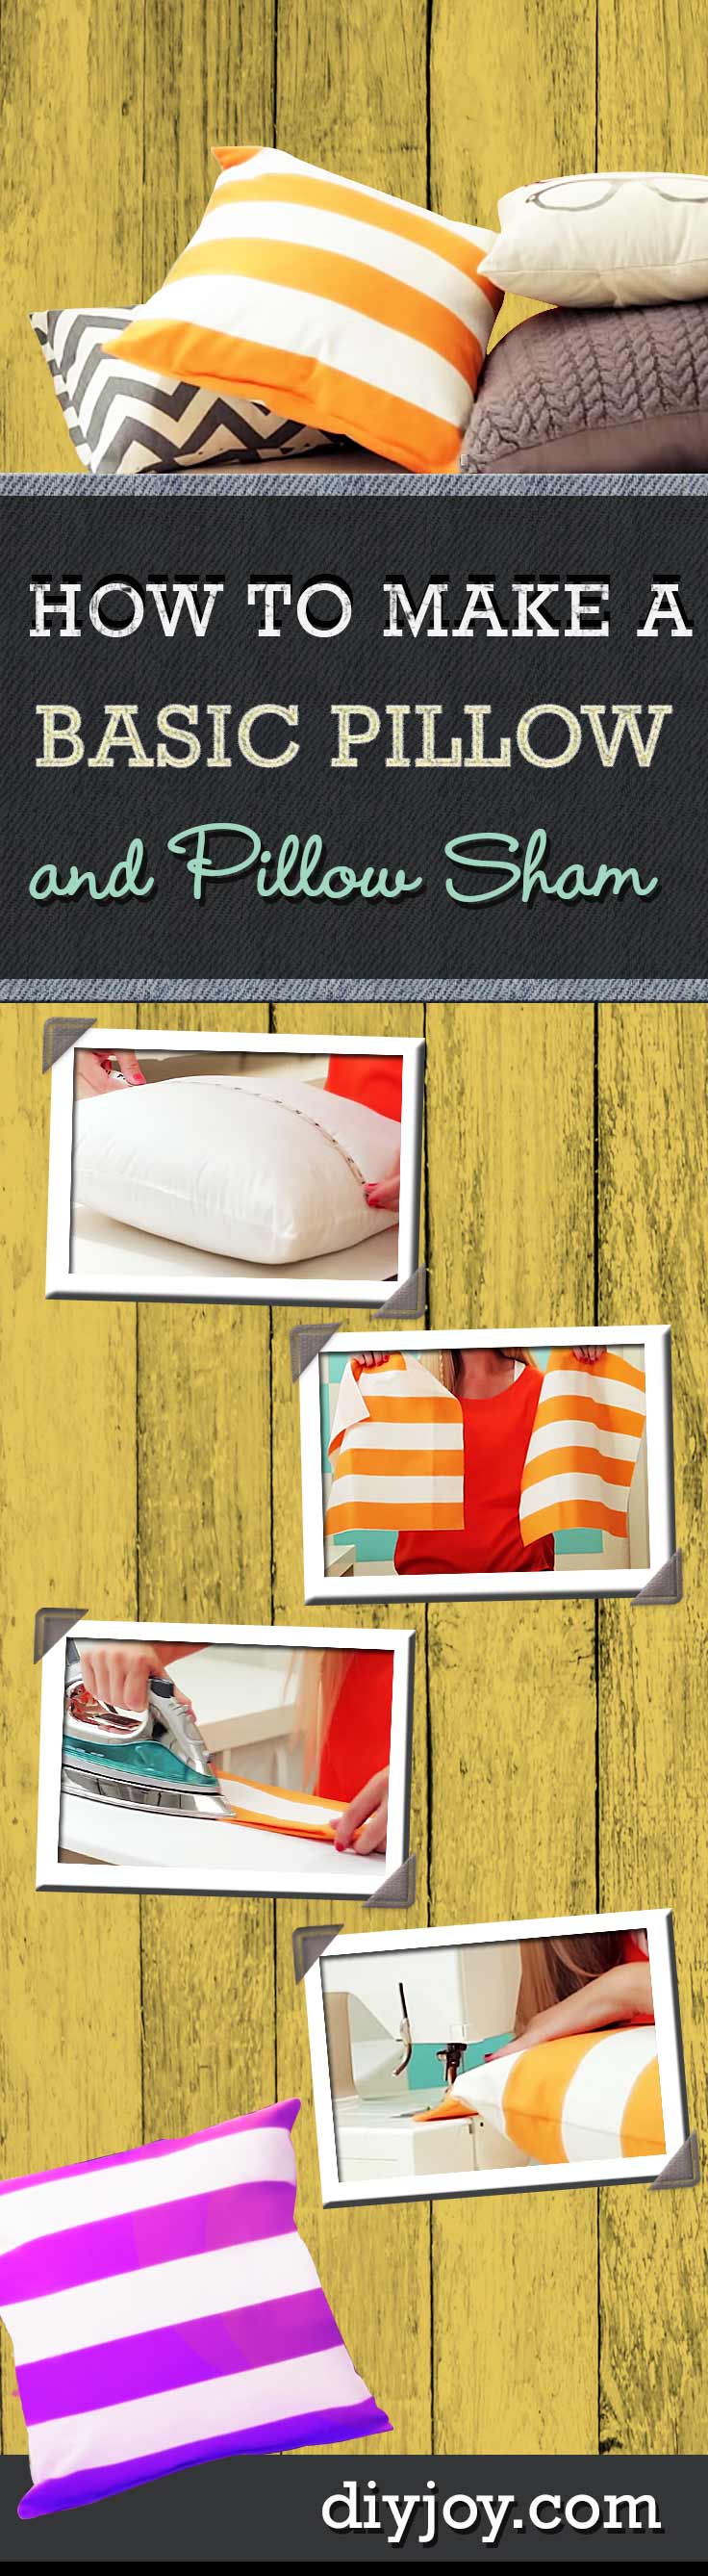
New to sewing? Start right here! A basic pillow and a matching sham teach you the two skills behind almost every project in this list: sewing a straight seam and turning a neat corner. You’ll cut two squares of fabric, stitch around the edges with right sides together, leave a gap to turn and stuff, then close it up by hand. The sham works the same way with an overlapping back so it slides on and off. Bright stripes in orange, pink and yellow make it a cheerful first project for a bedroom or reading nook.
Get the full tutorial at DIY JOY.
2. DIY Bandana Pillows
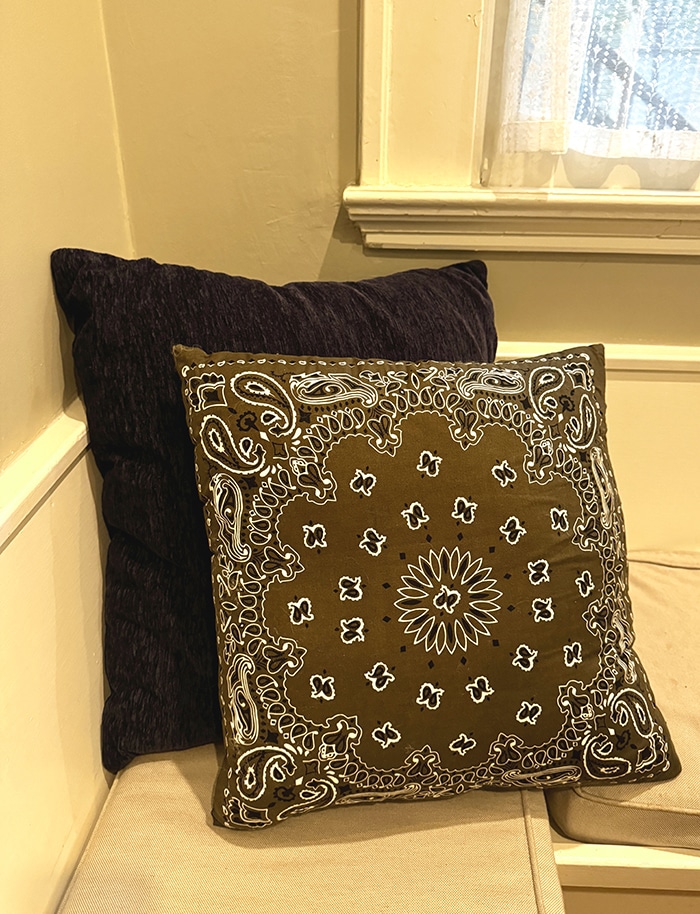
Bandanas are already the perfect size for a throw pillow, so half the work is done for you! Pick two matching bandanas, place them face to face and mark your seam line with chalk all the way around. Sew three sides, turn the cover right side out, stuff it and close the last edge. There’s even a no-sew option with fabric glue and clips if you don’t have a machine handy. Mix brown, red and navy bandanas on a window seat or porch bench for an easy farmhouse look that costs just a few dollars.
Get the full tutorial at DIY JOY.
3. How to Make an Envelope Pillow
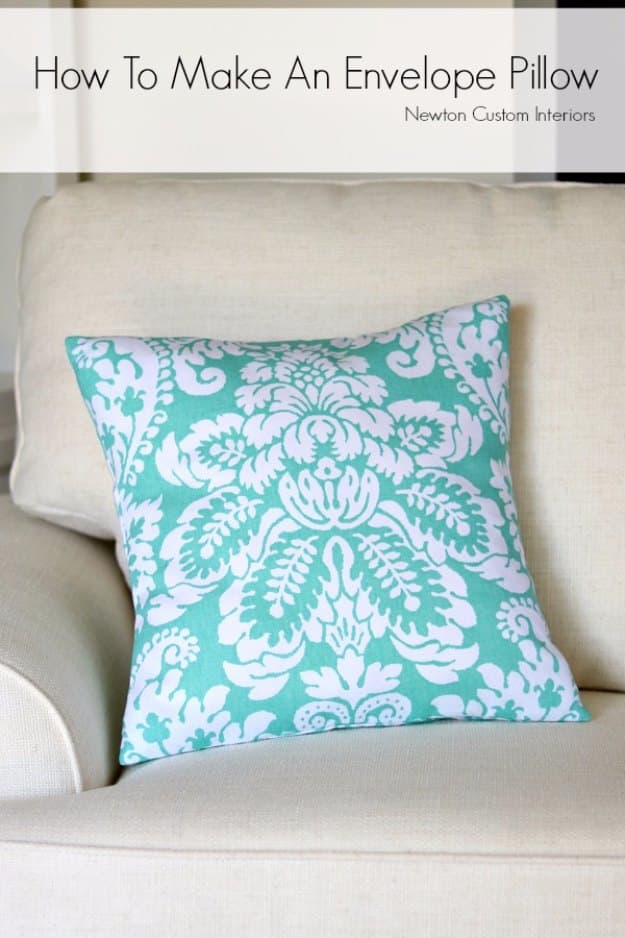
An envelope pillow cover is the easiest way to change up your decor without storing a closet full of pillows. The back is made from two overlapping panels, so the cover slips right off for washing or a seasonal swap and there’s no zipper to fight with. This tutorial uses three pieces of fabric, which is handy when you’re working with smaller cuts or want a different print on the back. Hem the two back edges, layer everything right sides together, sew around the square and turn. A bold aqua damask makes it pop on a cream chair.
Get the full tutorial at Newton Custom Interiors.
4. How to Sew a Pillow With a Zipper
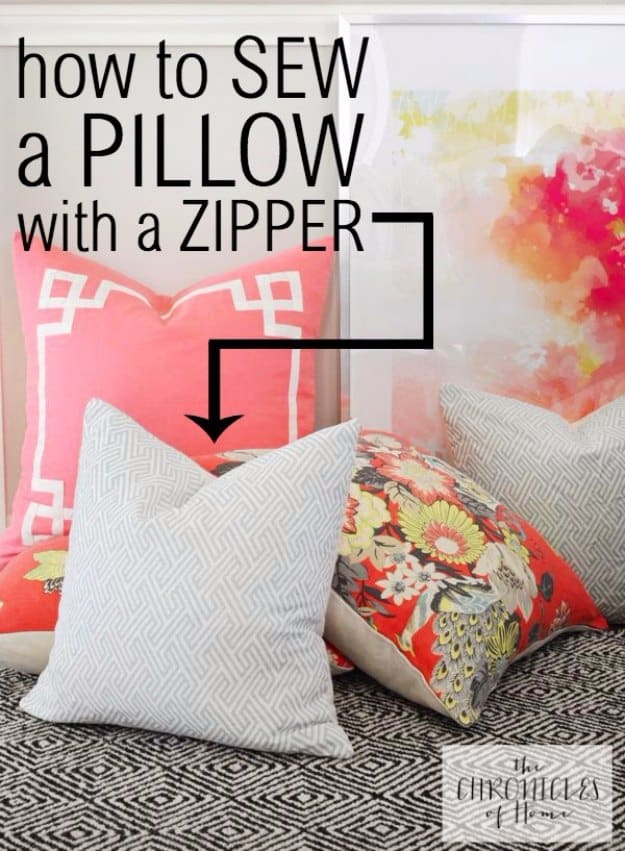
Scared of zippers? This tutorial will change your mind! The trick is sewing the zipper into a seam you’ve already basted closed, then opening it with a seam ripper afterward. That keeps everything lined up and makes it nearly foolproof. Cut your front and back squares one inch bigger than the finished pillow, sew the bottom seam, press it open and pin the zipper face down over it. Stitch both sides with a zipper foot, rip the seam open and finish the other three sides. You’ll wonder why you were ever nervous.
Get the full tutorial at The Chronicles of Home.
5. Pillow Cover With an Invisible Zipper
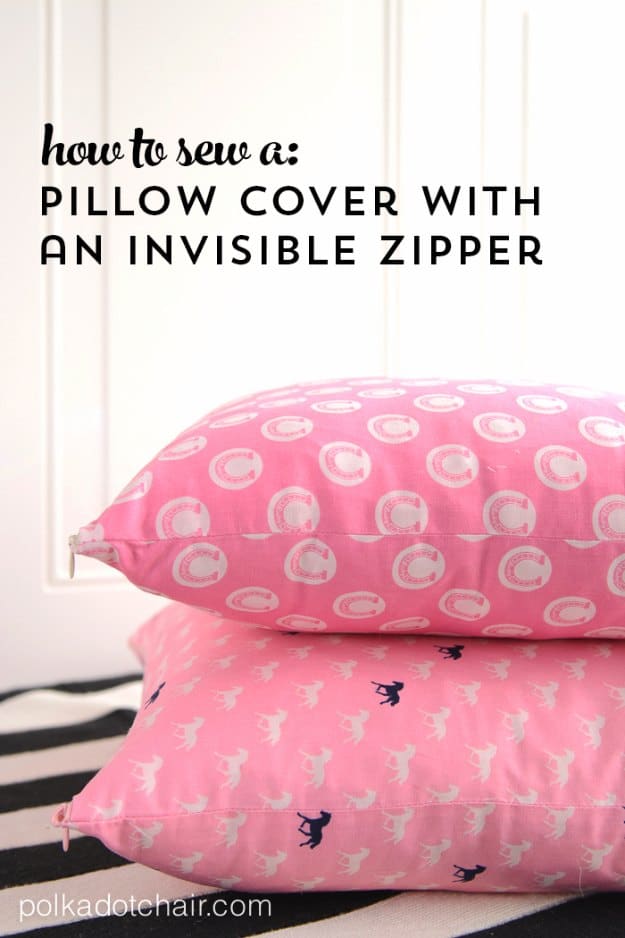
Want a pillow cover where the zipper disappears completely? An invisible zipper hides inside the seam, so all you see is fabric. This tutorial shows you how to pin the zipper to the bottom edge of one cover piece, stitch it with an invisible zipper foot and then attach the second side so everything matches up. Go one step at a time and expect to unpick a seam on your first try, which is totally normal. Sweet pink prints make this one perfect for a girl’s room or a cozy bedroom.
Get the full tutorial at Polka Dot Chair.
6. Easy Envelope Pillow Sham
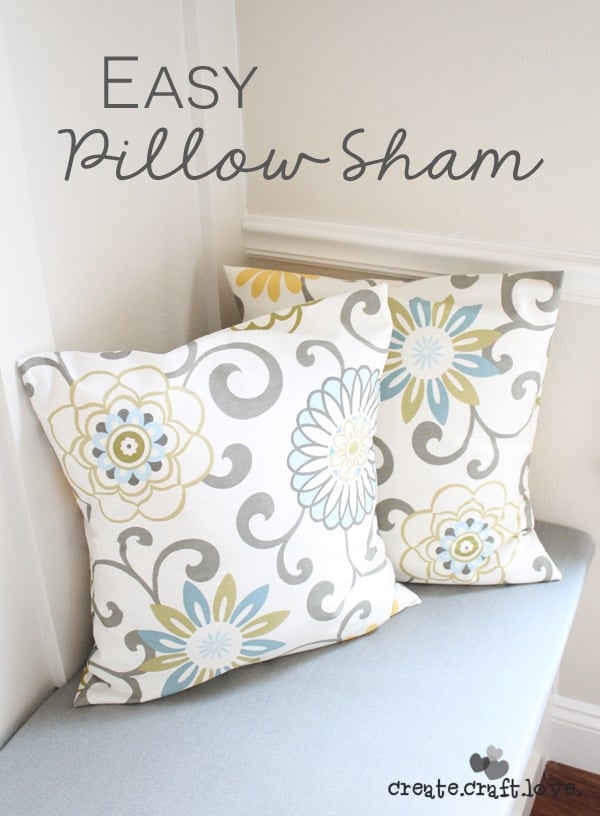
If you can sew four straight lines, you can make this! This easy pillow sham starts with one piece of fabric cut 19 by 44 inches. Fold and stitch the short ends, then overlap them in the middle so the piece measures 19 inches square. Sew the two open sides, turn it right side out and stuff in your insert. The back closes like an envelope, no zipper needed. Four shams in under an hour!
Get the full tutorial at Create Craft Love.
7. Sew Euro Pillow Shams
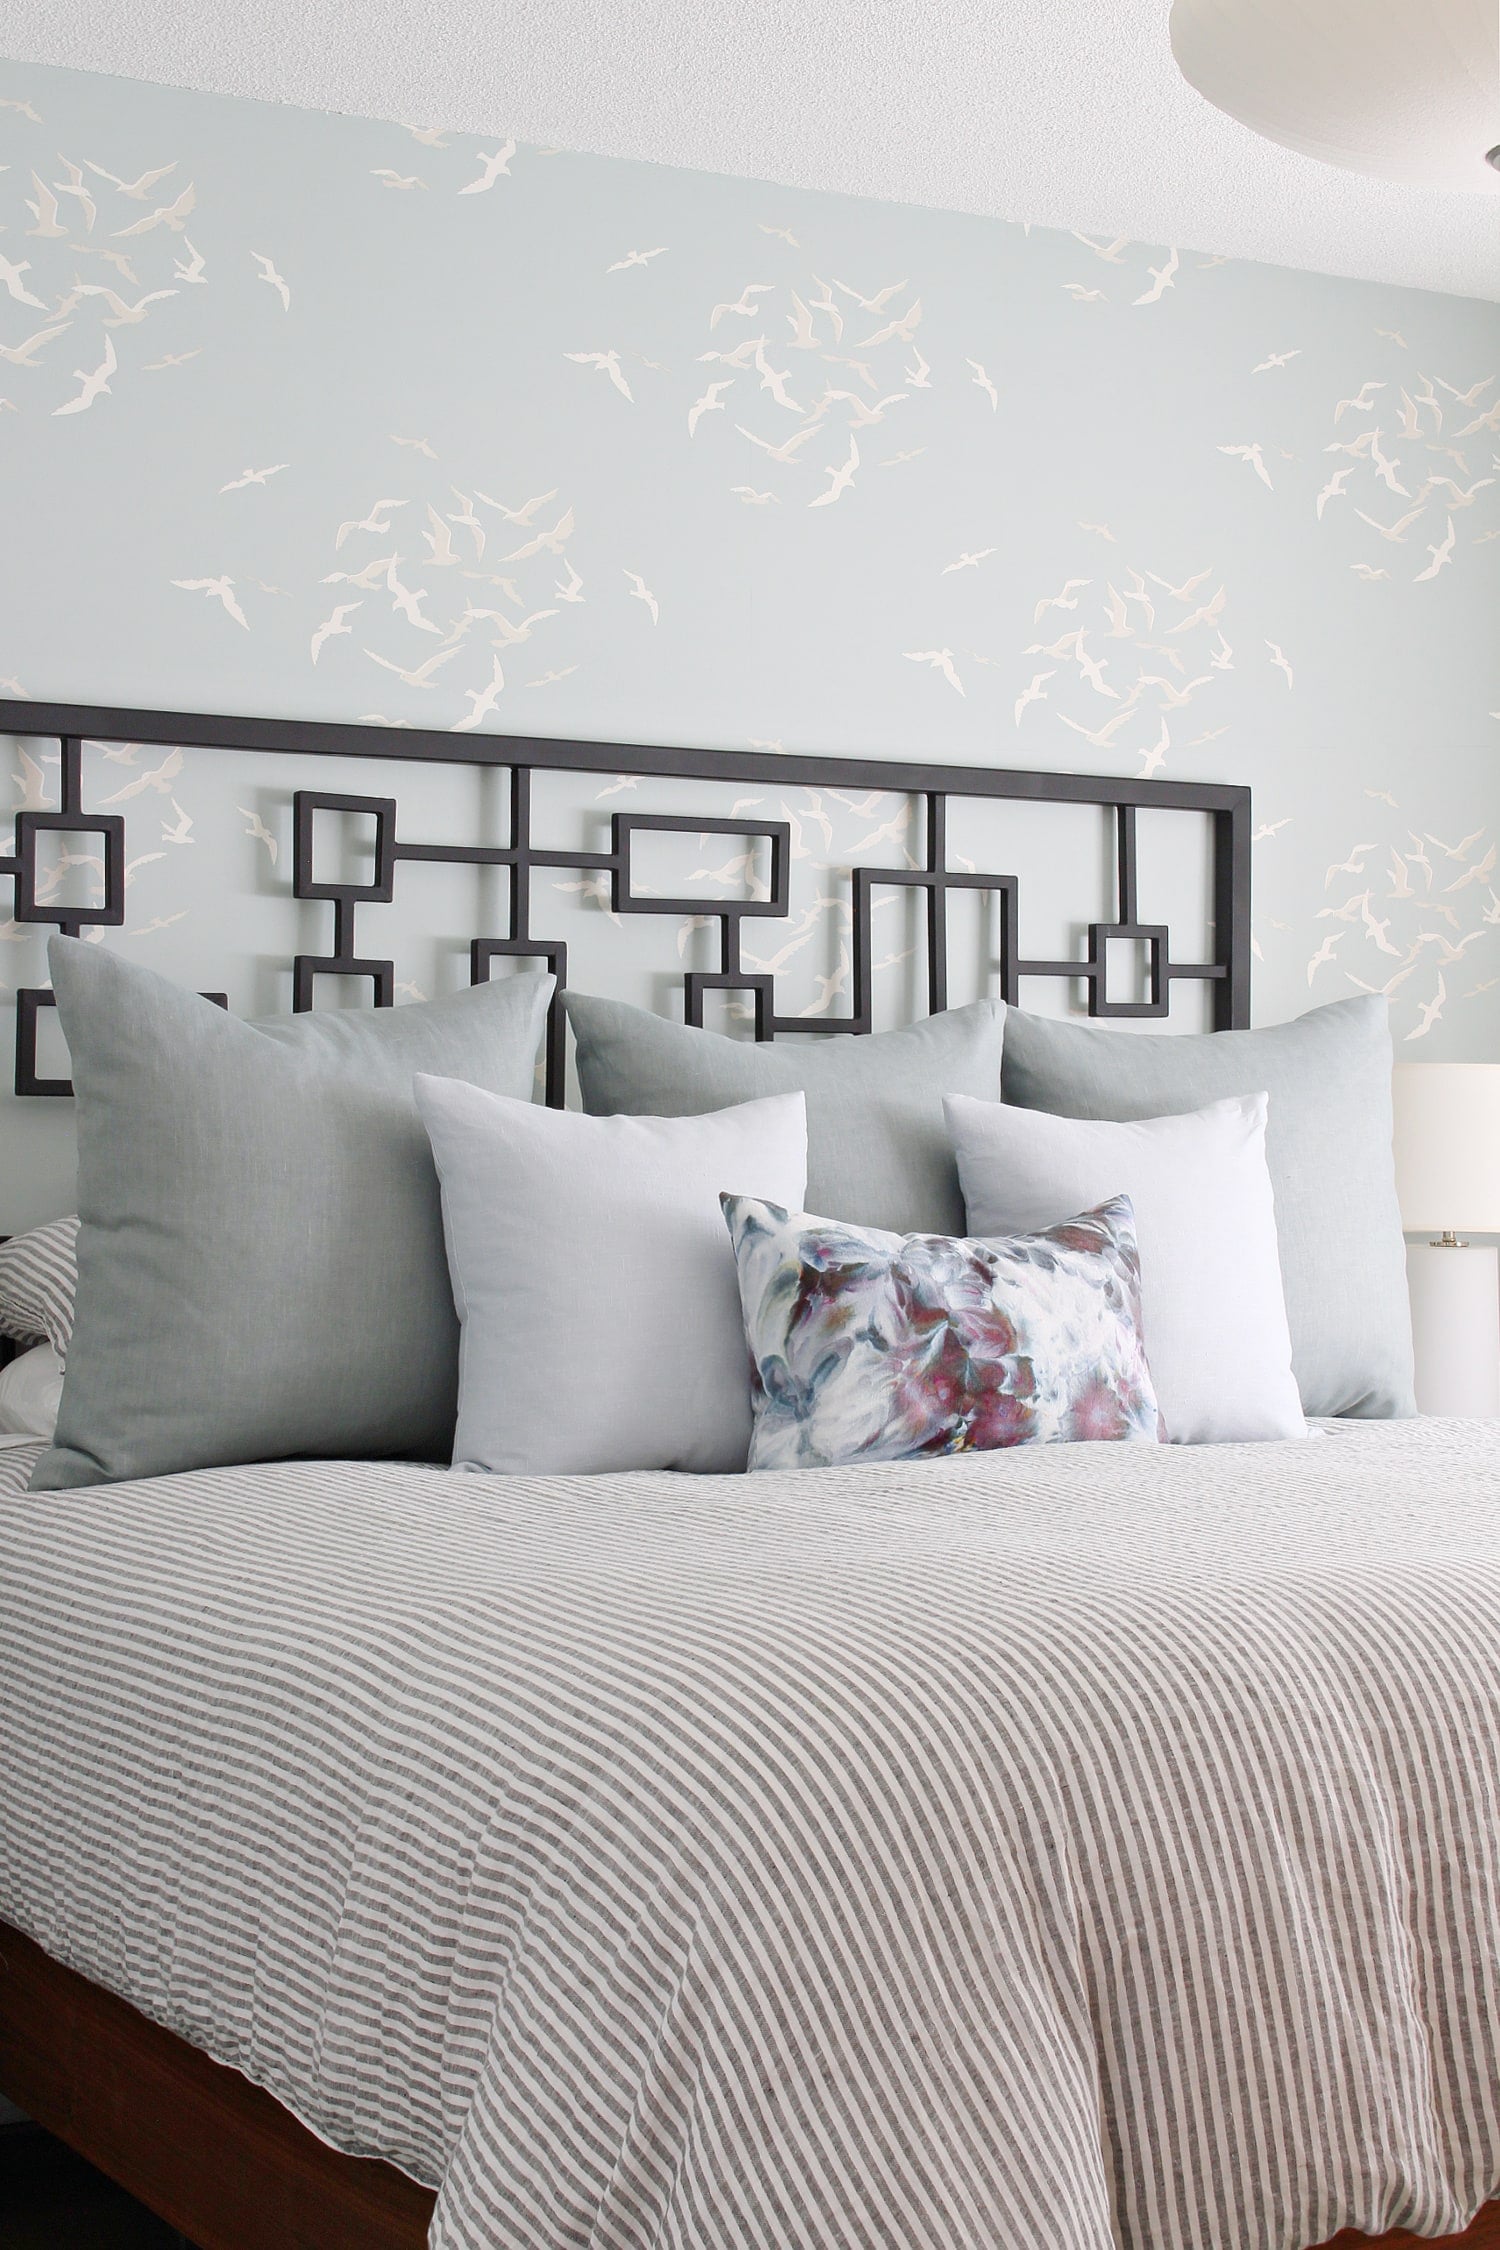
Tired of buying Euro shams to match your bedding? Make your own! A Euro sham is the big 26 inch square pillow at the back of the bed, and three fill a king perfectly. This tutorial shows how to cut two squares of linen with a generous seam allowance, then sew in a zipper so the cover comes off for washing. Watery blue linen gives the whole bed a relaxed, beachy feel. Such an easy bedroom refresh!
Get the full tutorial at Dans le Lakehouse.
8. Gathered Decorative Pillow
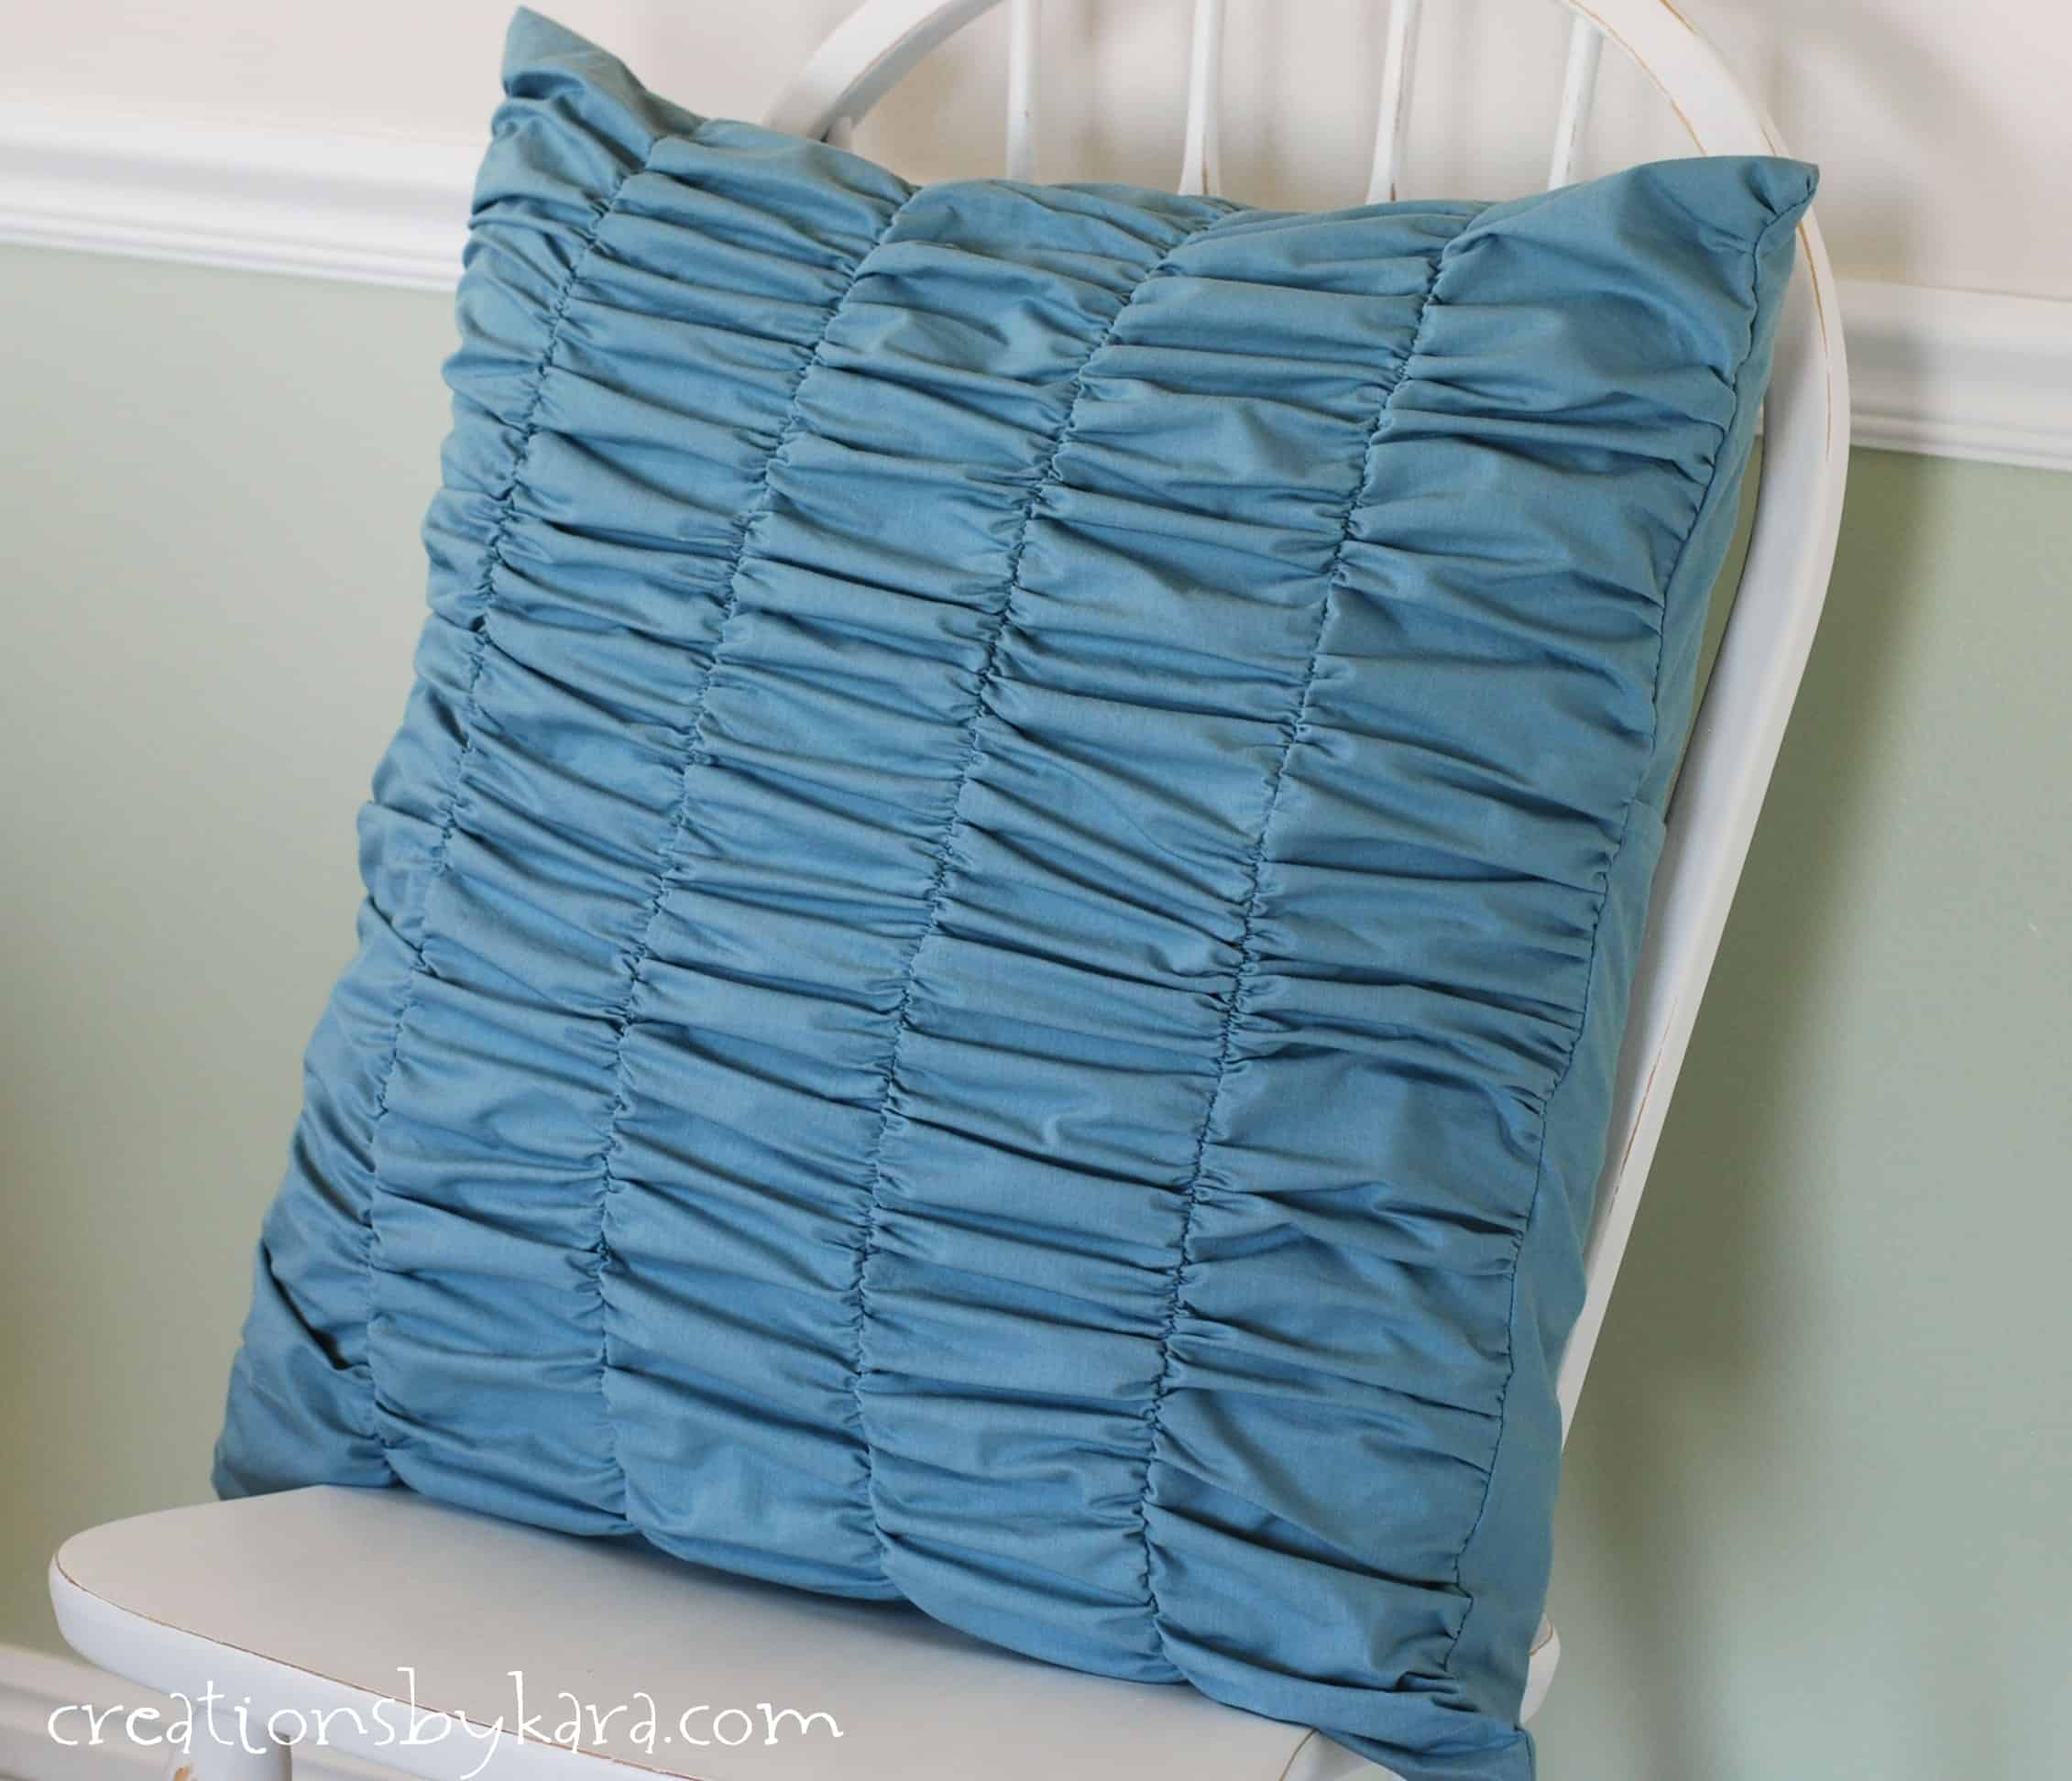
Fell in love with a fancy ruched pillow in a shop? Make it yourself for a fraction of the price! This gathered pillow cover fits a 24 inch pillow form and uses about 1 2/3 yards of fabric. Mark evenly spaced lines on the front panel, fold and stitch along them, then gather the fabric into those soft ripples before sewing the cover together. It looks so high-end on a bed or chair!
Get the full tutorial at Creations by Kara.
9. Easy Colorblock Throw Pillows
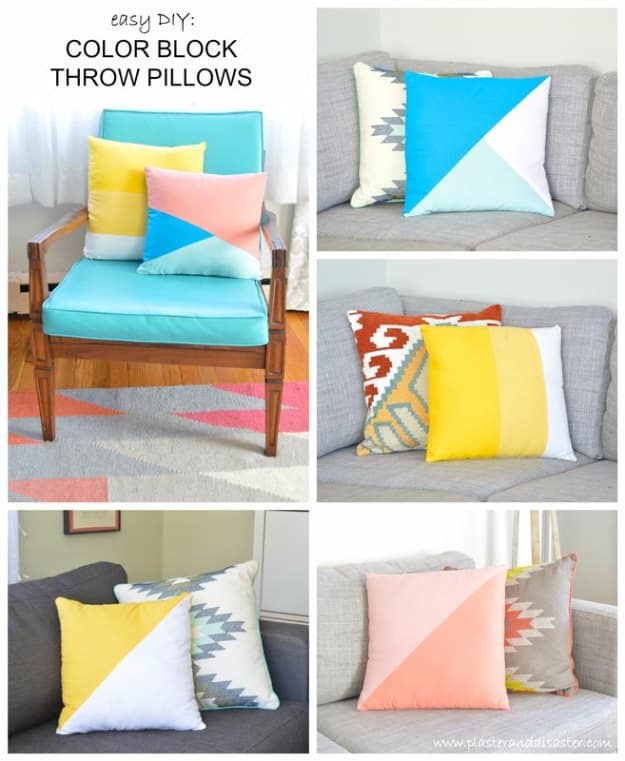
Throw pillows get pricey fast, so why not sew a whole set in your favorite colors? These colorblock pillows use solid cotton fabric pieced together in simple shapes: diagonal halves, stripes and offset blocks. Pull colors from a rug or piece of art in the room and every pillow will tie the space together. Mix a few colorblock covers with a patterned one for that collected look. Solid quilting cotton is cheap by the yard, so you can try several combinations and keep your favorites. Such an easy way to add a pop of color!
Get the full tutorial at Plaster and Disaster.
10. DIY Gold Arrow Pillows
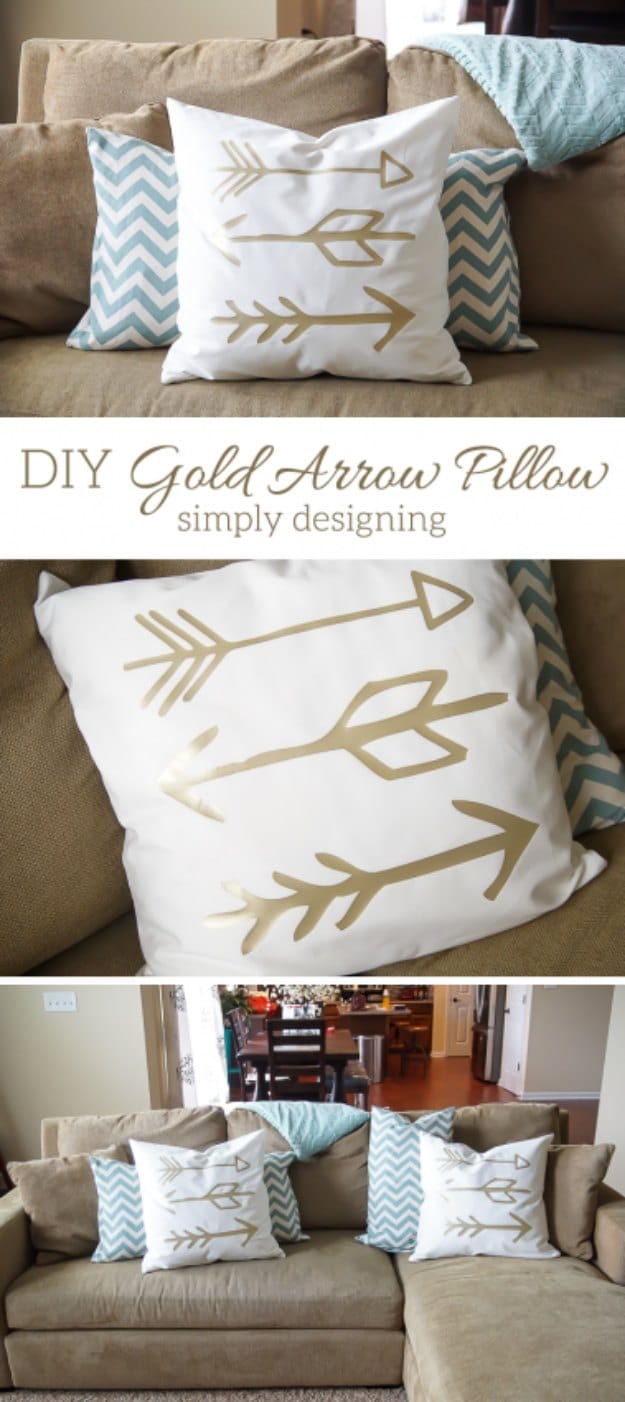
Can’t find pillow covers in the right size? Sew your own and dress them up with metallic vinyl! These pillows start as simple white twill covers, two squares sewn together on three sides with an invisible zipper on the fourth. Then gold heat transfer vinyl arrows are cut on a cutting machine and pressed onto the front. The crisp white and gold look so pretty mixed with chevron and solid pillows on a neutral sofa. Swap the arrows for any shape you love, like stars, hearts or your family initial.
Get the full tutorial at Simply Designing.
11. 5-Minute Woven Pillow From a Rug
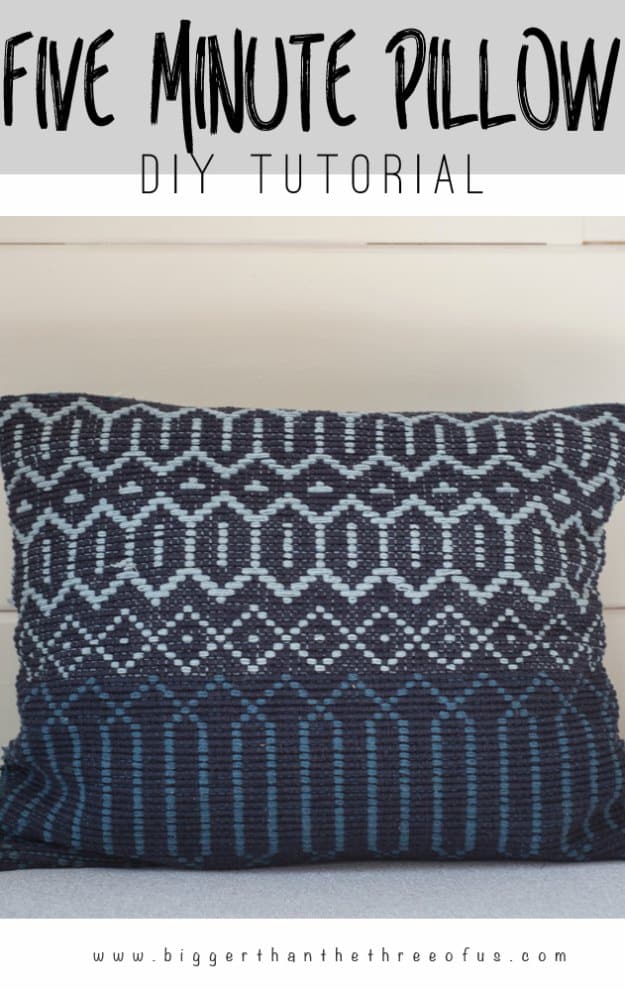
Here’s a sneaky shortcut: make a pillow cover from a small accent rug! Woven cotton rugs are thick, washable and come in great patterns, often for less than a pillow cover. Wrap the rug around a pillow form so the two ends overlap like an envelope, then hand stitch the side seams closed with an upholstery needle. If the overlap is too long, trim it and stitch the edge. Five minutes later you’ve got a textured pillow that looks like it came from a pricey boutique. A clearance rug makes it even cheaper!
Get the full tutorial at Bigger Than the Three of Us.
12. Re-Purposed Sweater Pillows
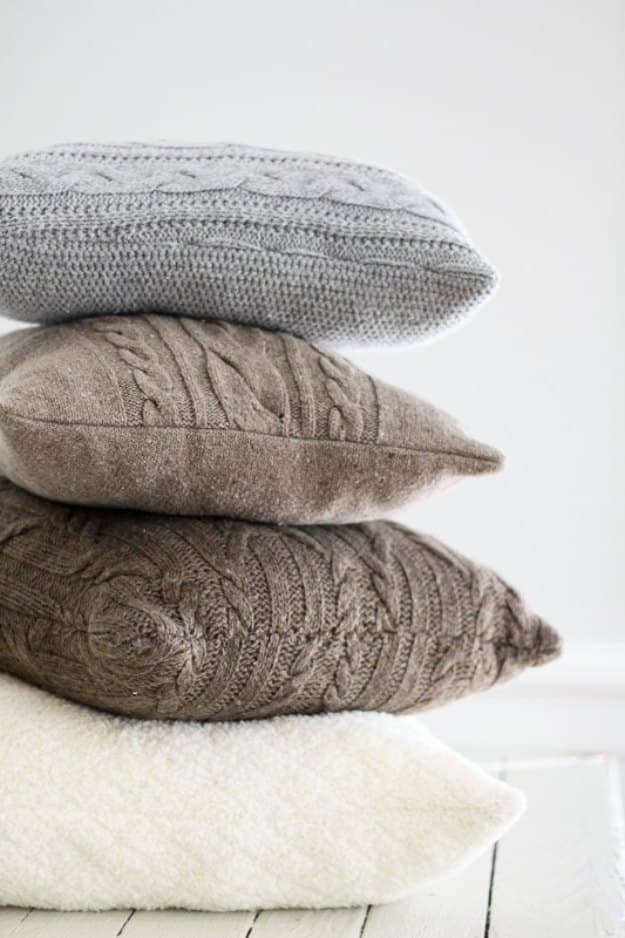
Got a stack of cozy sweaters you don’t wear anymore? Turn them into pillow covers! Knits can be tricky because they stretch and the seams go wavy, but this tutorial shares a simple trick that makes sweater fabric behave like a woven. Once you’ve got that down, you just cut the front and back and sew them like any pillow cover. Cable knits in gray, taupe and cream look so snug on a sofa all winter. It’s a great thrift store project too, since big wool sweaters are cheap and plentiful.
Get the full tutorial at Tidbits.
13. Faux Fur Pillow
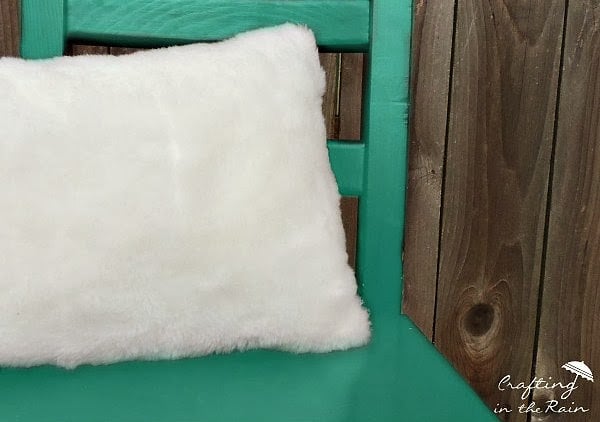
Want a soft, fluffy pillow for winter? This faux fur pillow is easier than it looks! The big trick is cutting the fur from the back with a craft knife, so the front stays full and fluffy. Make a simple muslin pillow form first, especially if your fur is a little see-through, then sew the fur cover around it. Leftover fur from another project is perfect for this. So cozy on a bed or chair!
Get the full tutorial at Crafting in the Rain.
14. Pillow Made From a Shirt
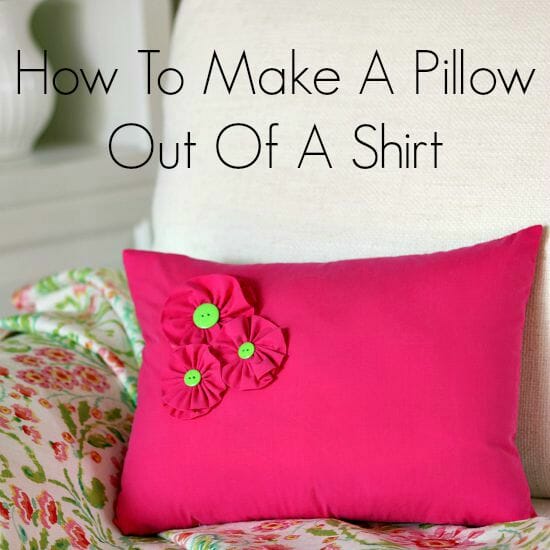
Fabric can be pricey, so grab a shirt instead! This pillow uses a thrifted button-down, and the buttons become the closure, so there’s no zipper to sew. Make a paper pattern the size of your pillow form and cut both layers from the shirt front and back. Extra fabric becomes little fabric flowers with button centers for the front. Sew it up, clip the corners and button it closed. So cute and so cheap!
Get the full tutorial at So Sew Easy.
15. Patchwork Quilted Pillow
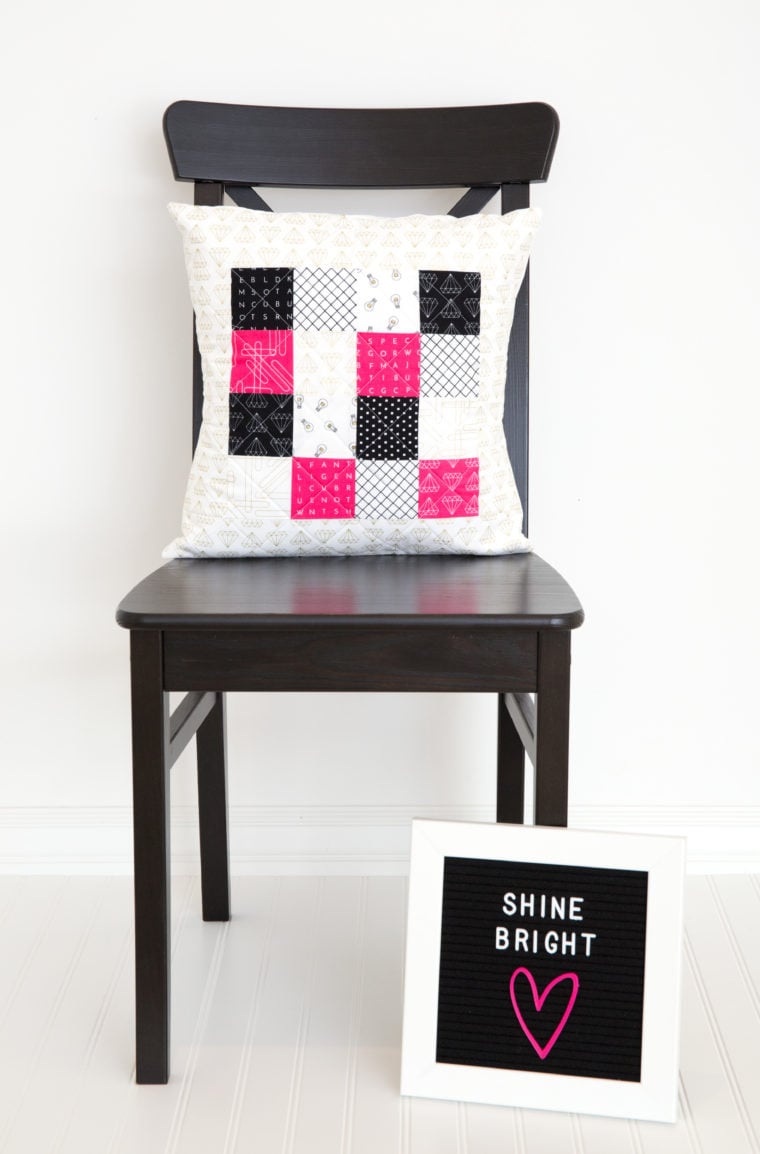
Got a pile of fabric scraps? This quilted pillow is the perfect way to use them! Cut 16 squares of 3.5 inches and stitch them into four rows of four, then add border strips to the top, bottom and sides. Spray baste the front to batting and quilt it, then finish with an envelope back. It makes an 18 inch cover and comes together quickly. A lovely handmade gift too!
Get the full tutorial at Simple Simon and Company.
16. Stenciled Number Pillow With Cording
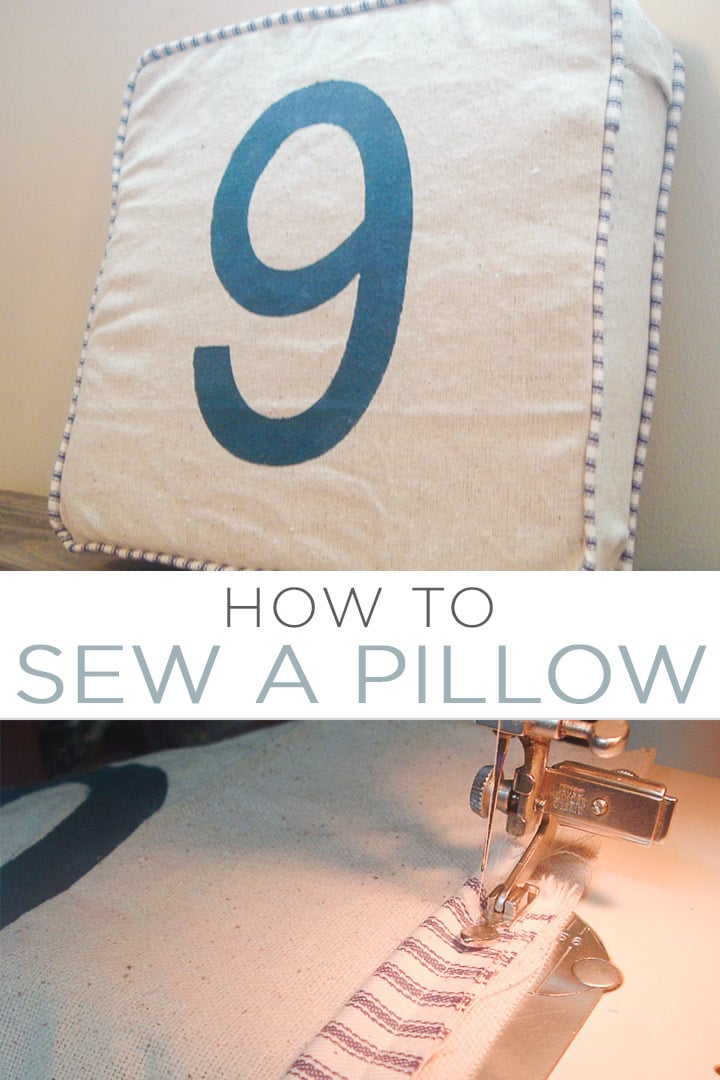
Ready to learn how to sew a boxed pillow? This one starts with a stenciled number on drop cloth canvas, cut with a cutting machine and filled in with fabric paint. While it dries, wrap cording in ticking strips and sew it to the front and back squares with a zipper foot. A side band of canvas joins them into a box around a foam square. The striped piping makes it look so polished!
Get the full tutorial at Angie Holden The Country Chic Cottage.
17. No-Sew Placemat Pillow
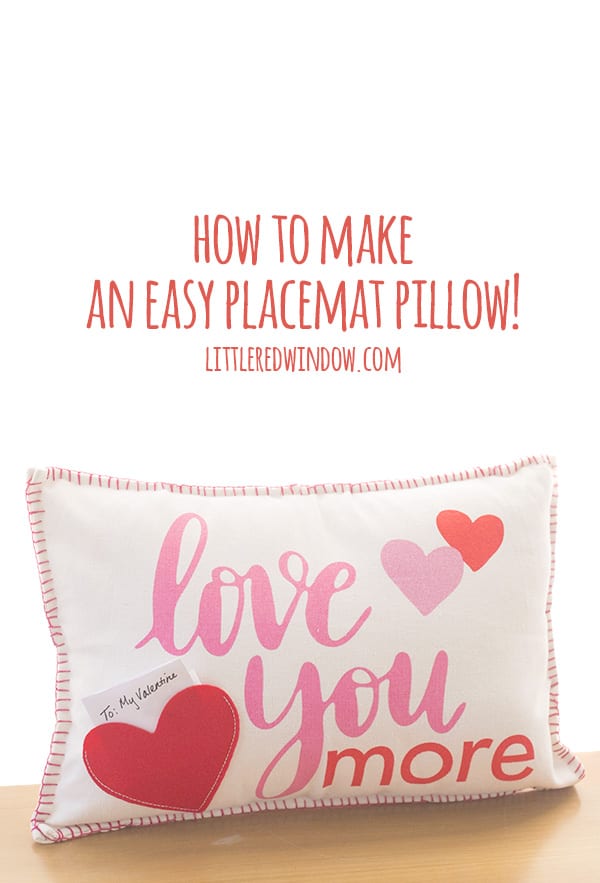
Here’s a pillow where 80% of the work is already done! Grab a cute printed placemat and turn it into a decorative pillow, no sewing machine needed. The print does all the decorating, so there’s no stenciling, vinyl or painting. This Valentine’s version even has a little heart pocket for leaving sweet notes. No pocket? Cut one from felt in about five minutes. Swap it out for every holiday!
Get the full tutorial at Little Red Window.
18. Open Road Pillow
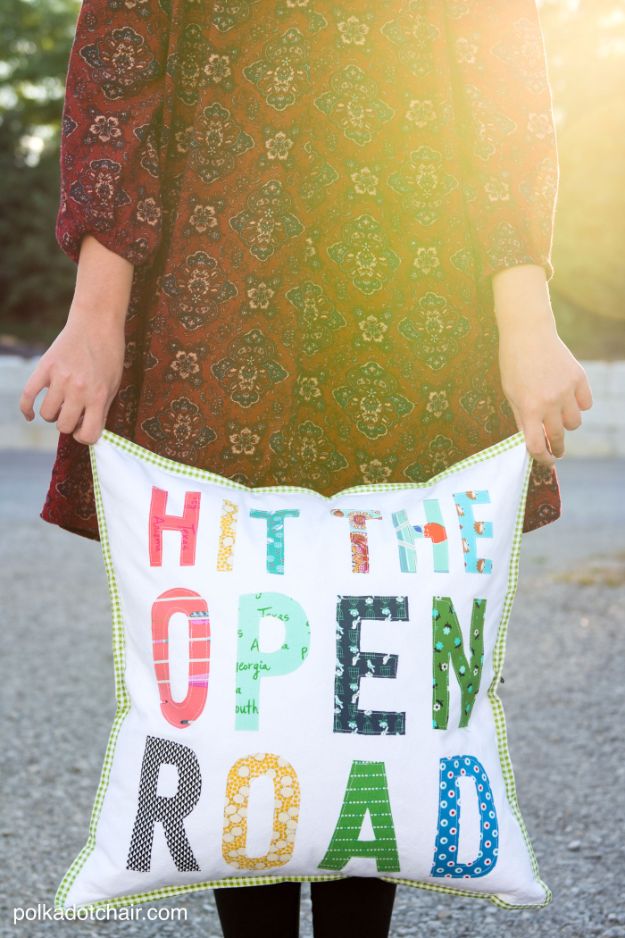
The Hit the Open Road pillow is made for an RV, a camper or any room with a little wanderlust. Each letter is cut from a different fabric scrap and fused onto a 20 inch canvas pillow front with Heat N Bond Lite, then stitched around the raw edges for a relaxed look. A free lettering template comes by email, the back closes with an exposed zipper and the edges get a binding. For a no-sew version, use a ready-made pillow cover and Heat N Bond Ultra Hold instead.
Get the full tutorial at The Polka Dot Chair.
19. Make a Travel Pillow
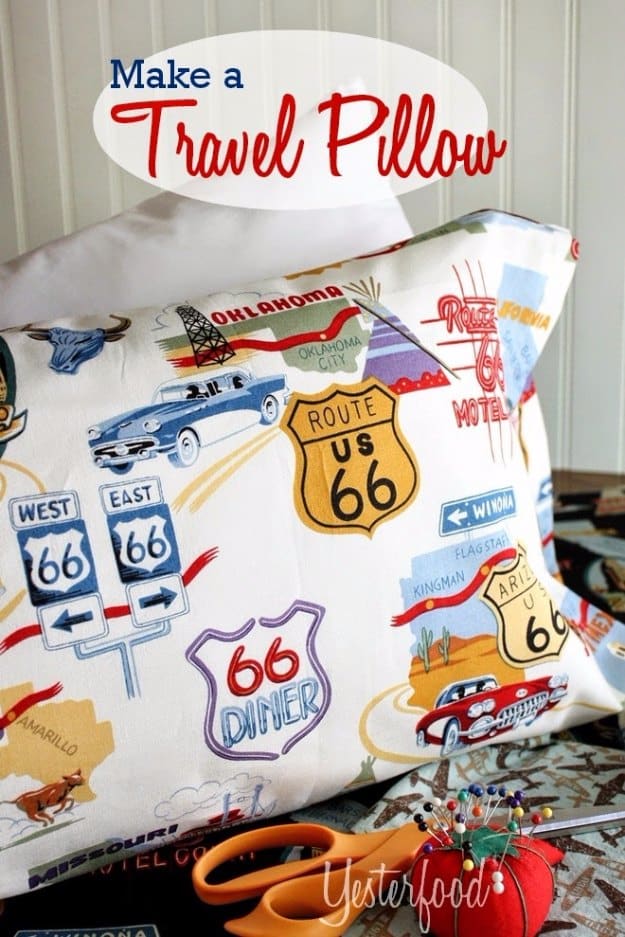
A small travel pillow is so handy for road trips, flights and naps on the couch. This tutorial shows you how to sew the pillow insert itself, stuff it to the firmness you like and stitch it closed, then make a pillowcase to fit. A half yard of fabric gives you a case, and you can cut three cases from just over a yard if you want spares. Pick a fun print like this Route 66 map fabric and it becomes the cutest road trip companion. Make one for each member of the family!
Get the full tutorial at Yesterfood.
20. DIY Vintage Style Pillow Cases
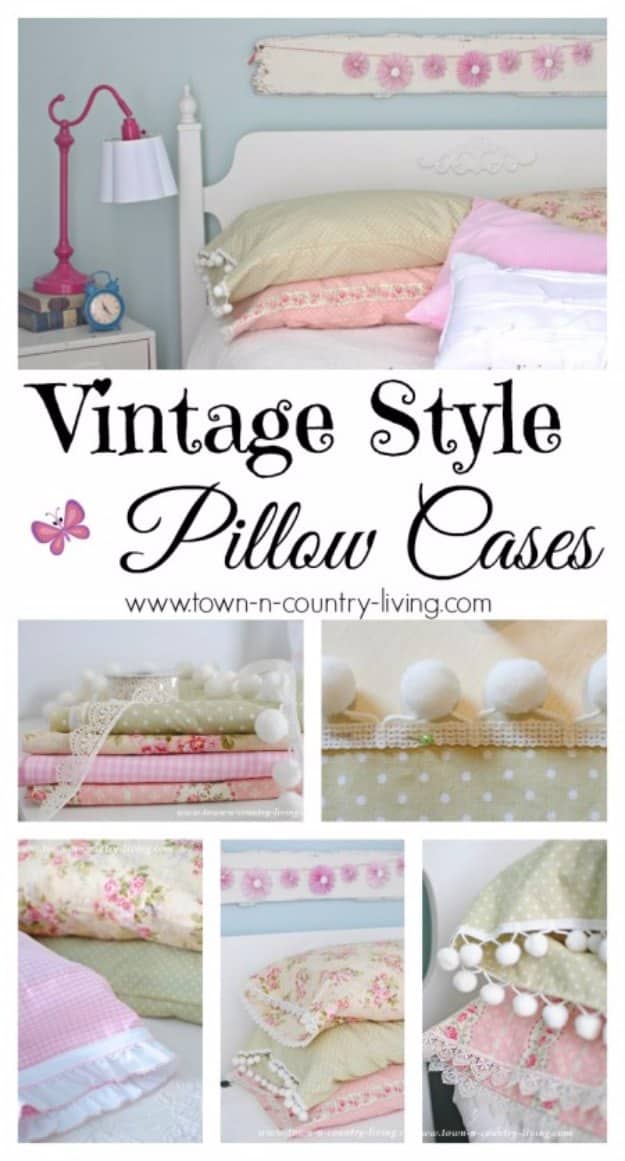
Making your own pillowcases is one of the easiest ways to customize your bedding without spending a fortune. You don’t even need a pattern: lay an existing pillowcase on your fabric and use it as a guide. Each case takes about one yard of fabric and roughly 42 inches of trim. Soft calico prints feel lovely against your skin, and woven lace, ruffles or ball fringe give them that sweet vintage look. Mix pinks, creams and florals on one bed for a cottage style room. Wash your fabric first so nothing shrinks later.
Get the full tutorial at Town and Country Living.
21. How to Make a Pillowcase Burrito Style
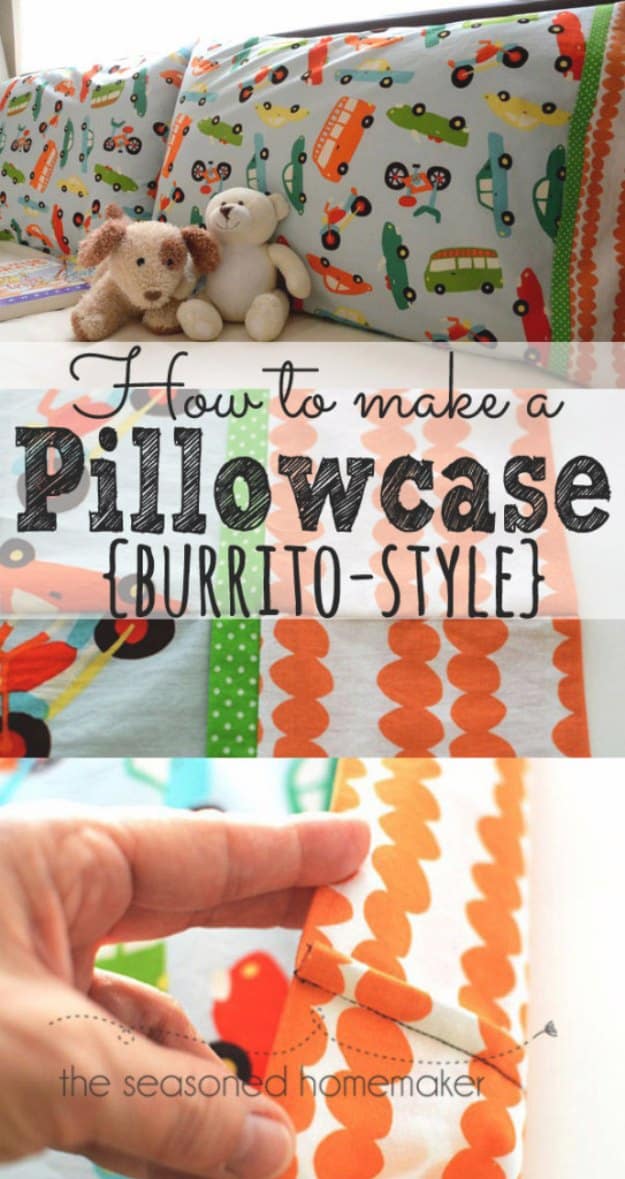
The burrito method is the magic trick of pillowcase sewing! You roll the main fabric up inside the cuff, sew one seam, then pull it all out through the end to reveal a pillowcase with no raw edges showing at the cuff. It’s fast, tidy and great for beginners, and you can add a skinny accent strip or rickrack between the cuff and the body for extra fun. Kids love picking their own fabric, so set up a little pillowcase party. Fun cars, animals or florals all work beautifully.
Get the full tutorial at The Seasoned Homemaker.
22. Easy Duvet Ties
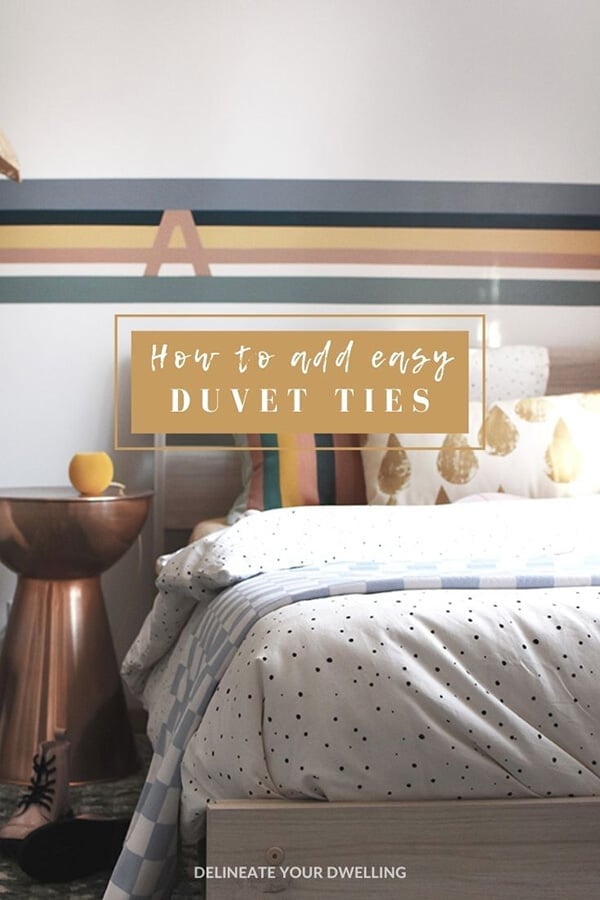
Does your comforter slip and bunch up inside the duvet cover? Duvet ties fix that for good! This quick hand-sewing project adds simple twine loops to the inside corners of the cover so you can tie the comforter right in place. All you need is a needle, thread, twine and scissors. No sewing machine, and it takes just a few minutes. Your bed will look neat and smooth every single day!
Get the full tutorial at Delineate Your Dwelling.
23. Pleated Bed Skirt
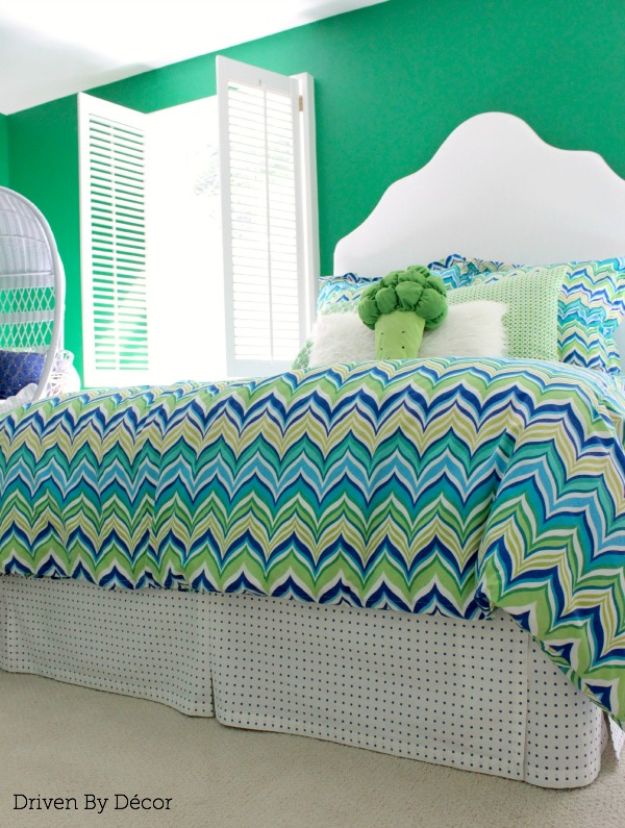
A pleated bed skirt made from a flat sheet needs very little sewing, because the sheet’s finished hem becomes the bottom edge. Wash, dry and iron the sheet first so it won’t shrink after you cut. Measure your box spring, then cut two side panels and a foot panel, adding 5 inches to each side for the corner pleats. Fold in the pleats, stitch the panels to a fitted base and slide it between mattress and box spring. A polka dot sheet looks custom and goes right in the washer.
Get the full tutorial at Driven by Decor.
24. Easy Flannel and Sherpa Blanket
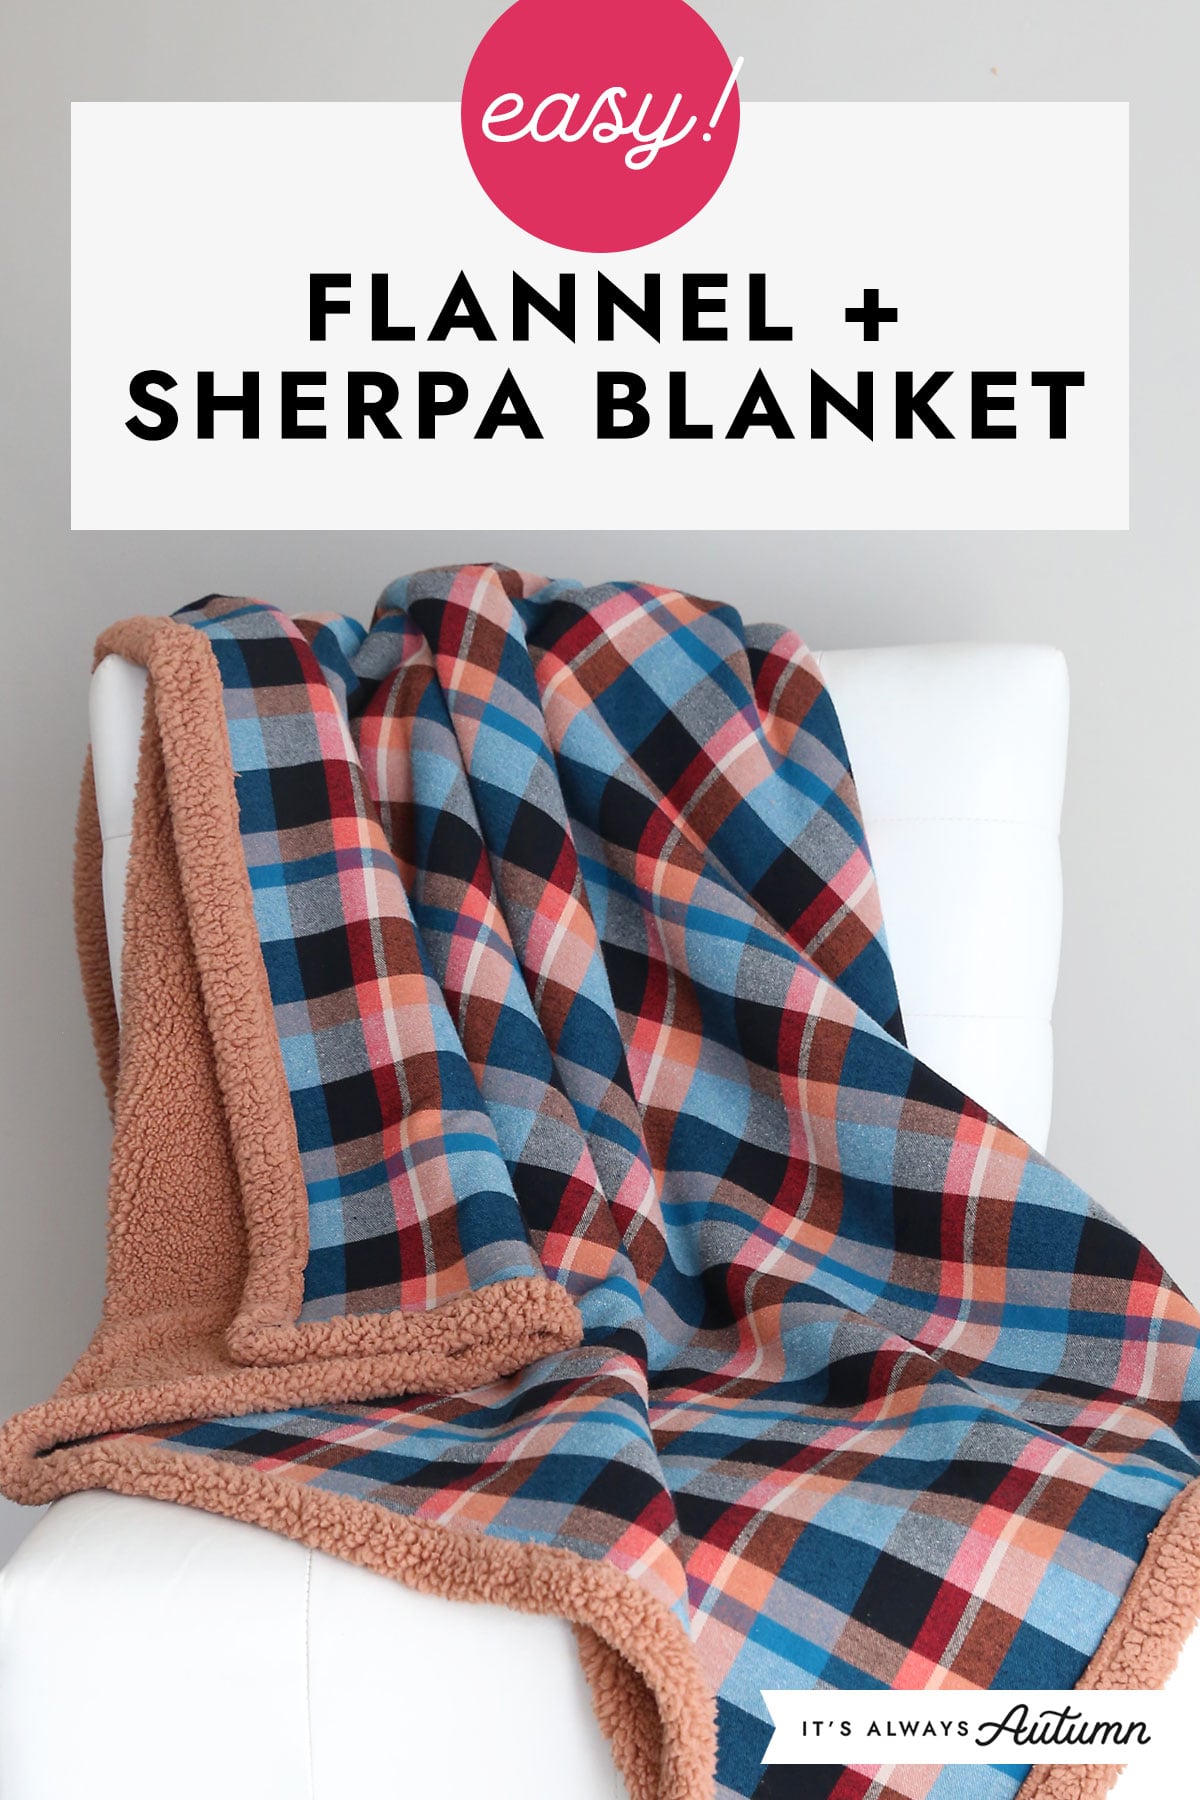
This might be the easiest blanket you’ll ever make! Sherpa backed flannel already has two layers bonded together, so all you do is finish the edges. Trim the cut ends straight, turn under all four sides about an inch and a half and sew a couple of long straight seams. About two yards of 55 inch fabric gives you a throw roughly 50 by 64 inches. A plaid flannel with cozy sherpa on the back is perfect for movie nights, and it takes about an hour. It’s a fabulous last minute gift too!
Get the full tutorial at It’s Always Autumn.
25. Sew Simple Curtain Panels
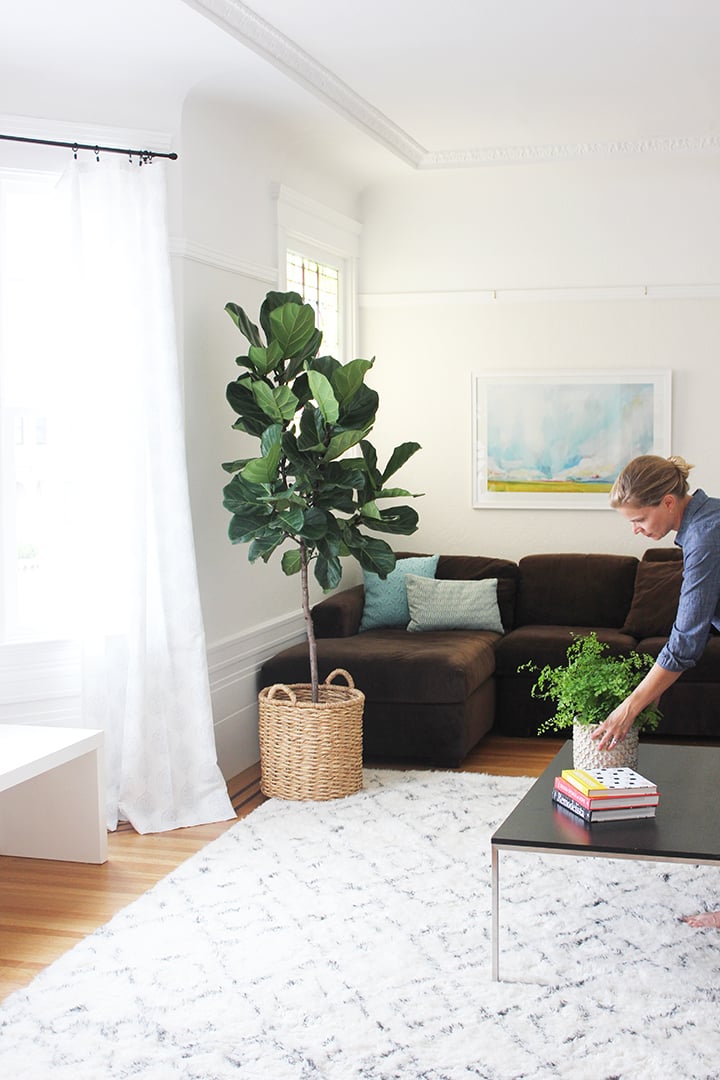
Can’t find curtains you love? These simple curtain panels are a perfect first sewing project! Measure from the rod to the floor and add 12 inches for hems, then use the full width of the fabric so the side edges only need a quick double fold. Here’s a smart trick: order your fabric in yard lengths that match your finished height so you barely have to cut. Press, pin, stitch and hang with clips!
Get the full tutorial at Alice and Lois.
26. Lined Grommet Top Curtain Panels
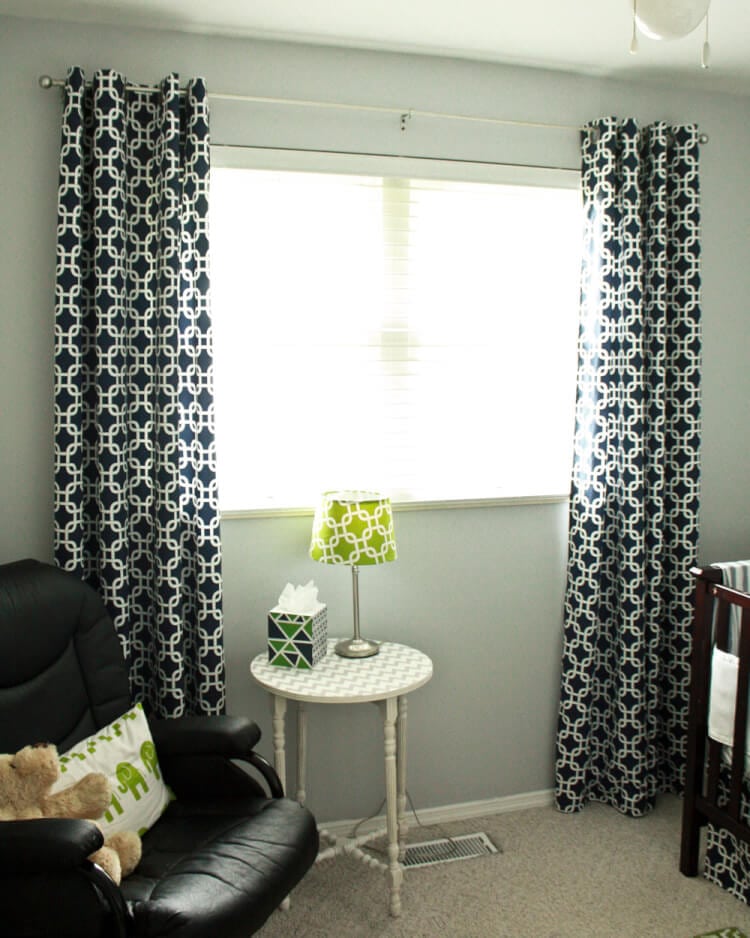
Can’t find curtains in the exact print you want? Make lined grommet top panels yourself! If you can sew a straight line, you can do this. Measure for your length, sew the lining to the main fabric, then add a grommet kit along the top so the panels slide right onto the rod. The lining gives them weight and blocks light, perfect for a nursery or bedroom. Lots of steps, but every one is easy!
Get the full tutorial at That’s What {Che} Said….
27. Easy to Make Back Tab Curtains
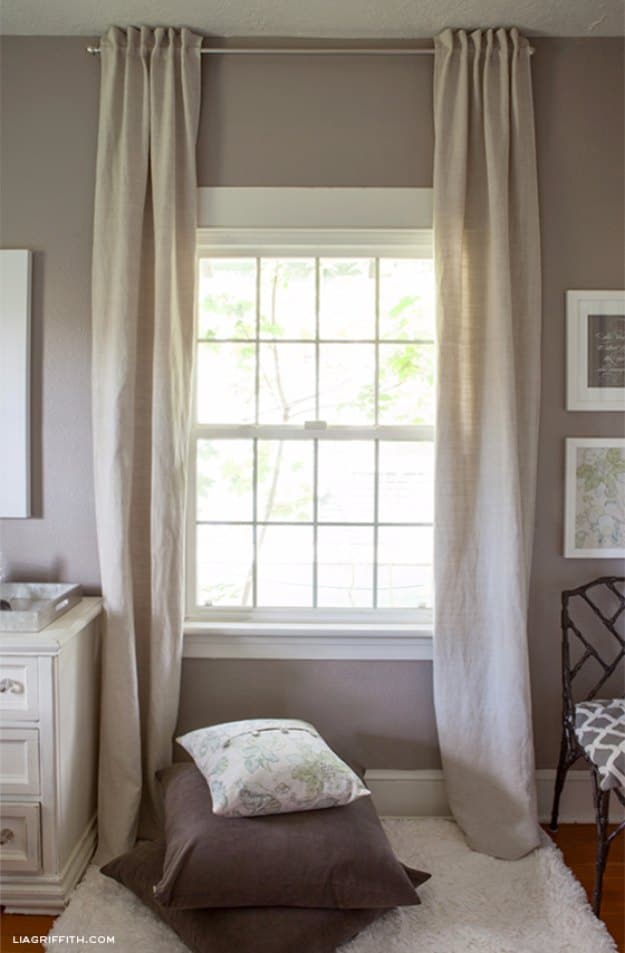
Back tab curtains have that tailored, pleated look you see in designer rooms, but they’re surprisingly simple to sew. Little fabric tabs are stitched across the back of each panel, so the rod hides behind the curtain and the top edge stands up neatly above it. This tutorial walks you through measuring from rod to floor, adding extra length for the top detail and sewing the tabs evenly. Hang them close to the ceiling and let them puddle slightly on the floor, and your room will feel taller and brighter.
Get the full tutorial at Lia Griffith.
28. Bay Window Curtain Rod and Back Tab Curtains
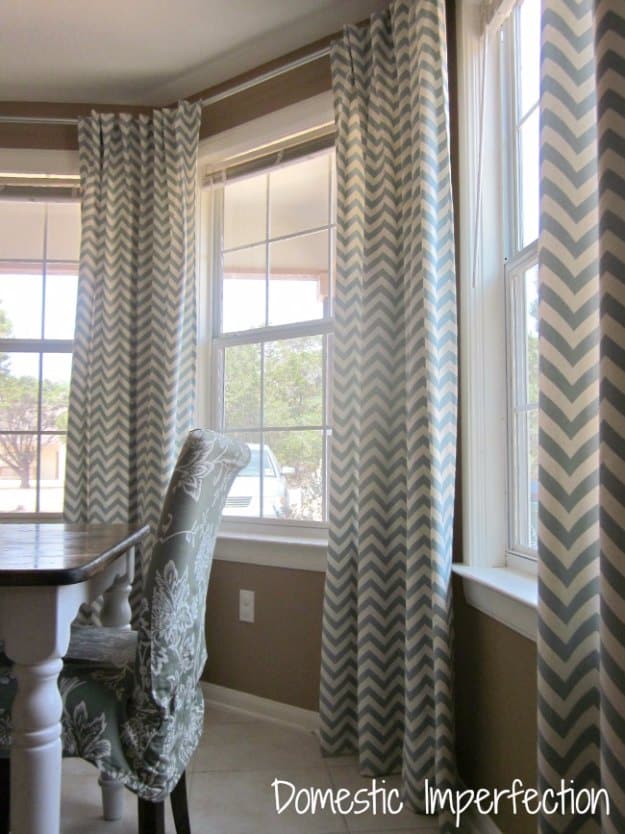
Bay windows are beautiful, but finding curtain hardware for those angles can cost a fortune. This clever tutorial builds a custom bay window rod from electrical conduit, curtain brackets and plastic tubing for the corners, then dresses it with sewn back tab curtains. Cut the conduit to fit each window, connect the pieces with tubing so the panels slide around the corners and spray paint it to match. The whole window came in around $100 including fabric. Gray and white chevron panels look crisp and modern in a breakfast nook.
Get the full tutorial at Wildfire Interiors.
29. Outdoor Gingham Curtains With Cable Rods
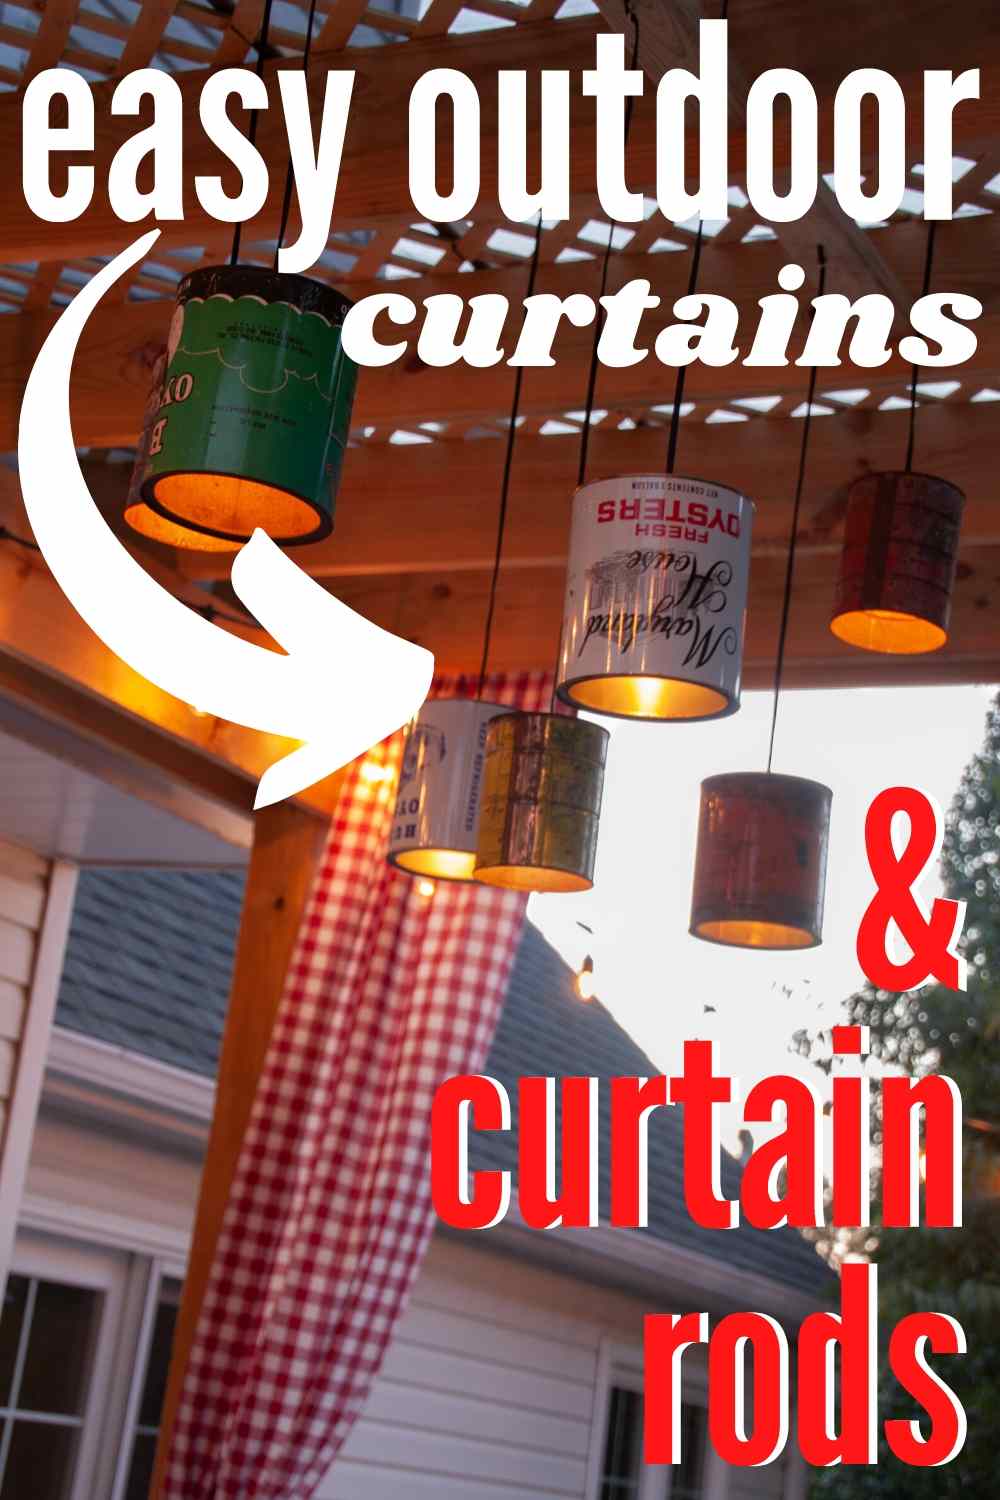
Have you seen the price of outdoor curtains? Make your own for a fraction! These patio curtains use inexpensive red gingham polyester with simple hems, and the curtain rods are just cable wire. Screw hooks go into the pergola, a turnbuckle and looped cable ends make it tight, and the curtains slide right on. It softens all the hard lines of a deck and makes it feel like a cozy outdoor room!
Get the full tutorial at The Heathered Nest.
30. Lined Valance Curtains From a Crib Sheet
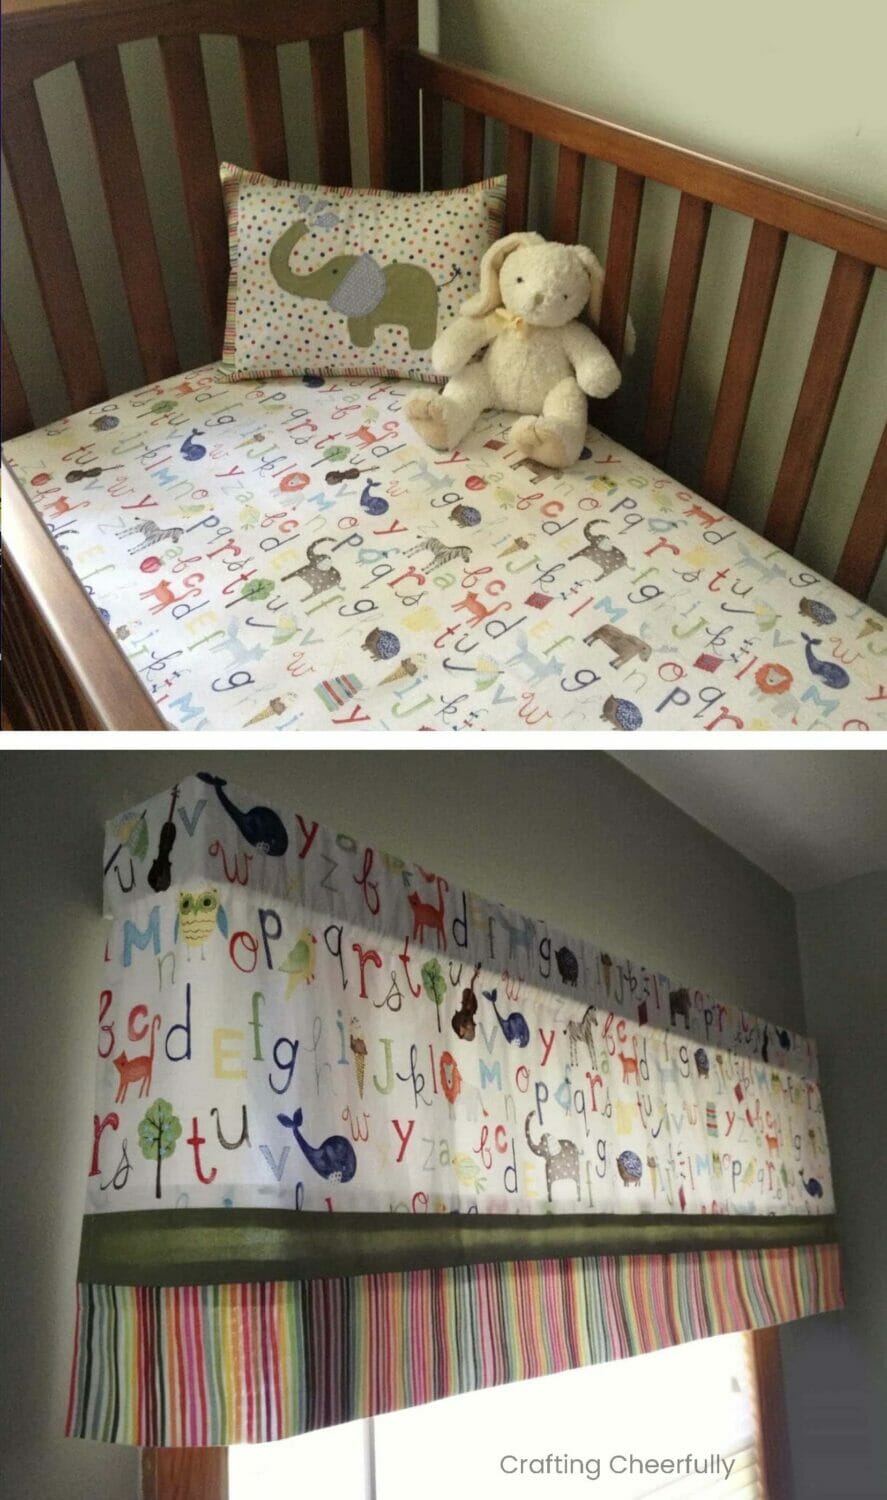
Want curtains that match the crib bedding perfectly? Use an extra crib sheet! This tutorial turns a sheet into fully lined valances with a coordinating middle stripe and bottom band. There’s a diagram with the measurements for a 17 inch finished valance, and every seam is a straight stitch. Double your window width for a soft, full look. So sweet in a nursery or kids’ room!
Get the full tutorial at Crafting Cheerfully.
31. Pom Pom Trimmed Valance
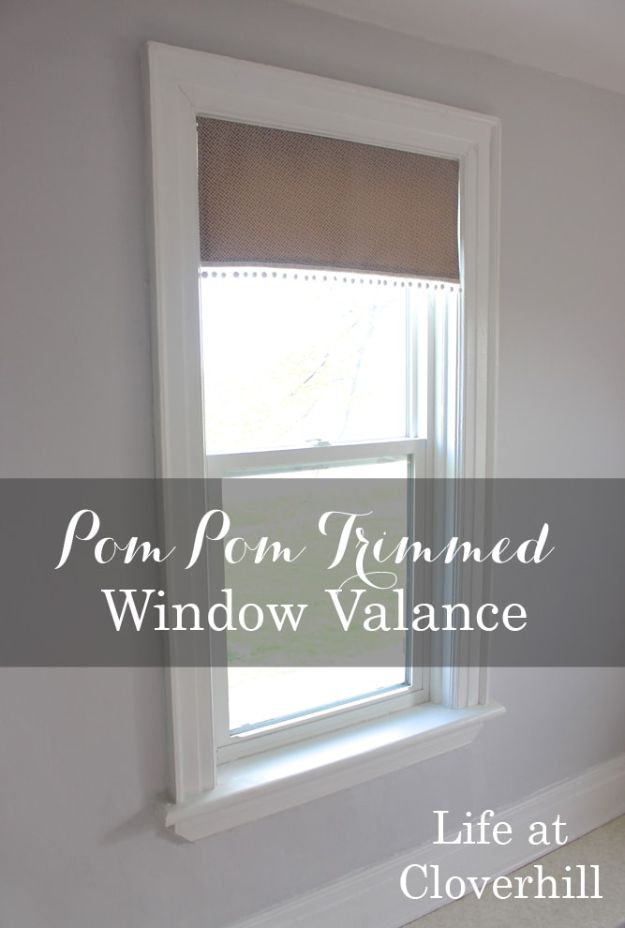
A pom pom trimmed valance hides a roller blind and adds a playful edge to a nursery window. Cut plain canvas just smaller than the finished size, about 27 1/2 by 12 inches here, and cut upholstery fabric 1 inch bigger on every side. Fold the fabric over the canvas on three sides, press and pin. Stitch at 1/4 and 1/2 inch for structure, then sew pom pom trim along the bottom. Staple the top to a thin wood strip cut to fit inside the window frame. Each one costs under $12.
Get the full tutorial at Ideas for the Home by Kenarry.
32. DIY Ribbon Trimmed Roman Shades
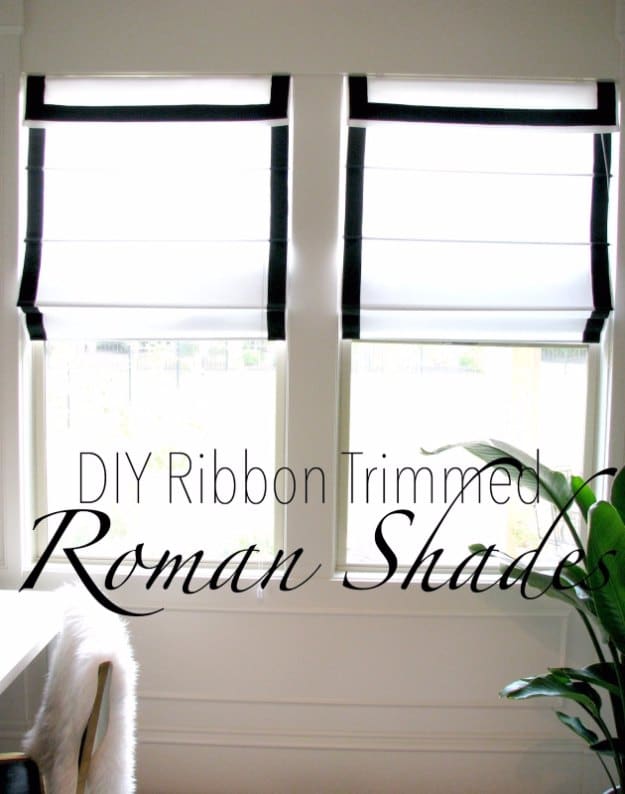
Love the look of designer banded roman shades but not the price tag? Make your own with a plain shade and grosgrain ribbon! Wide black ribbon is fused around the edges with iron-on hem tape, so there’s no sewing at all. Use the side seam of the shade as your guide, cover the ribbon with a damp cloth and press with a hot iron. Each shade cost about $32, compared to nearly $200 for the store version. The black trim against white looks crisp and timeless in an office, bedroom or kitchen.
Get the full tutorial at Life Love Larson.
33. $12 DIY Roman Shade Made From a Mini Blind
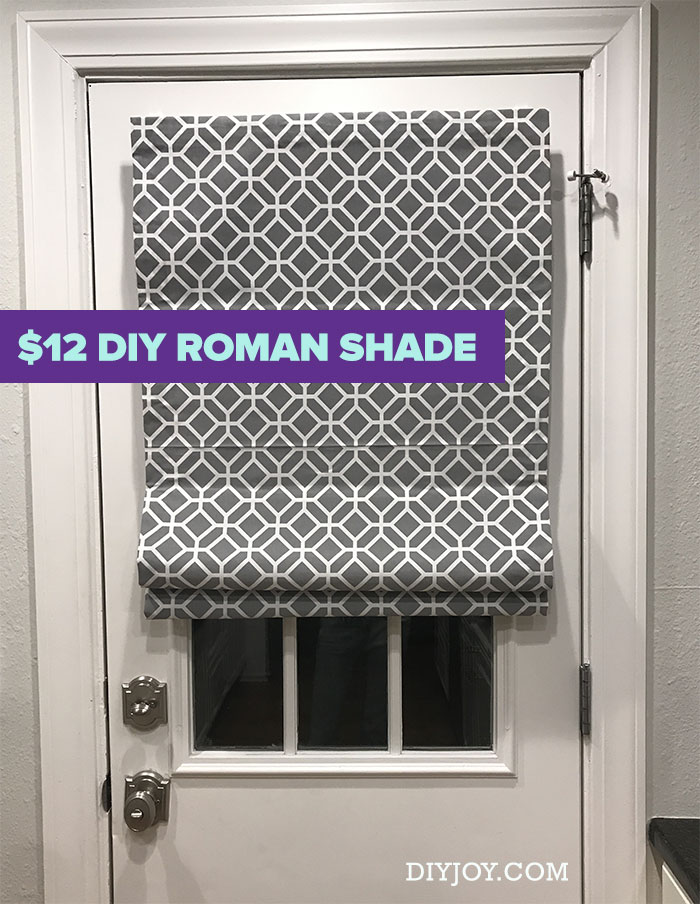
Turn a cheap vinyl mini blind into a custom roman shade for about $12! You’ll measure your window, cut the fabric to size and remove most of the slats, keeping just a few evenly spaced. Glue those slats to the back of the fabric and they create the soft folds when you pull the cord. There’s barely any sewing involved, and the video walks you through every step. A bold gray and white geometric print makes a front door window look so polished. It’s a great renter friendly upgrade too!
Get the full tutorial at DIY JOY.
34. Simple Roman Shades
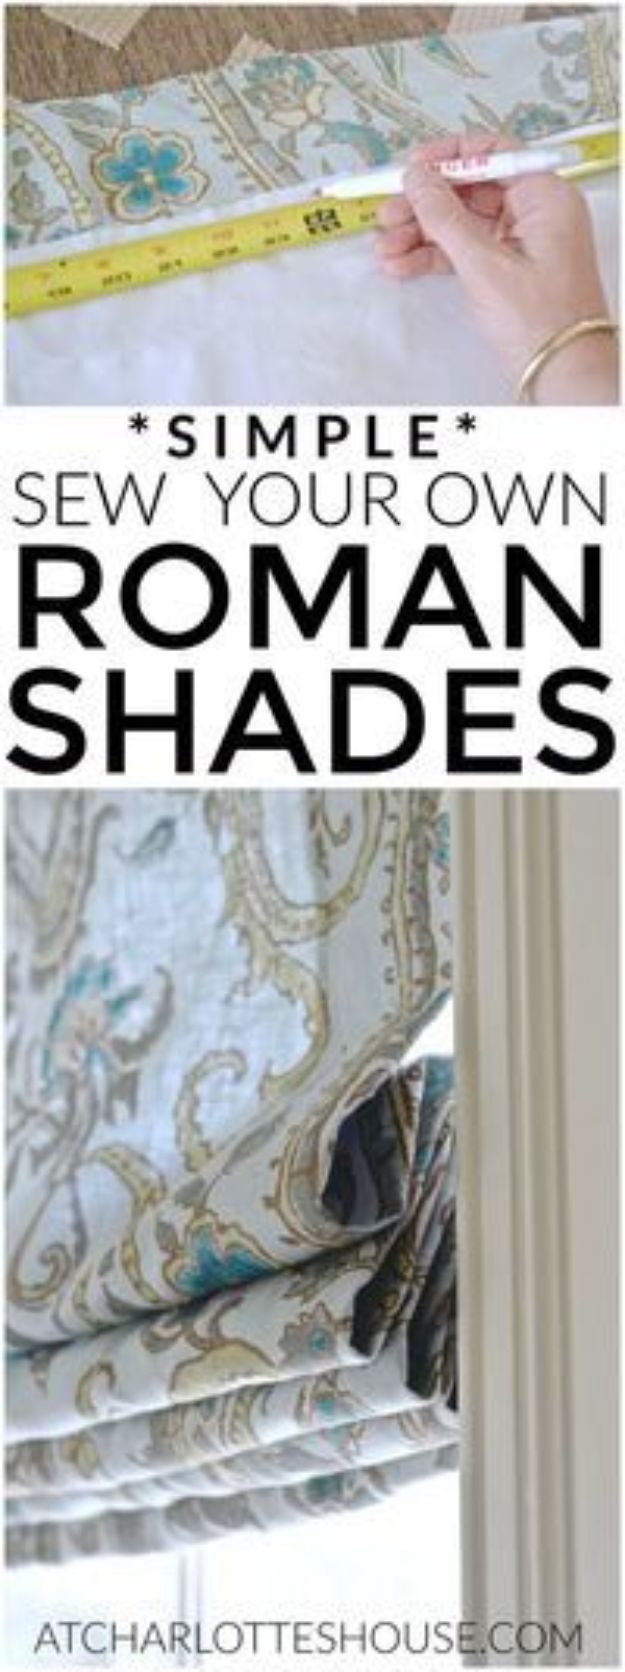
Simple Roman shades soften a window without the bulk of curtains. For an inside mount, measure inside the frame and cut your fabric 6 inches wider and 12 inches longer. Fold the side edges under 1/2 inch, then 2 1/2 inches, and press well. Tuck cotton lining under those folds. Hem the bottom about 3 inches and sew a second seam an inch below it to make a pocket for a dowel. Hand sew plastic rings in rows on the back, then string the cord through them.
Get the full tutorial at At Charlotte’s House.
35. Faux Roman Shade
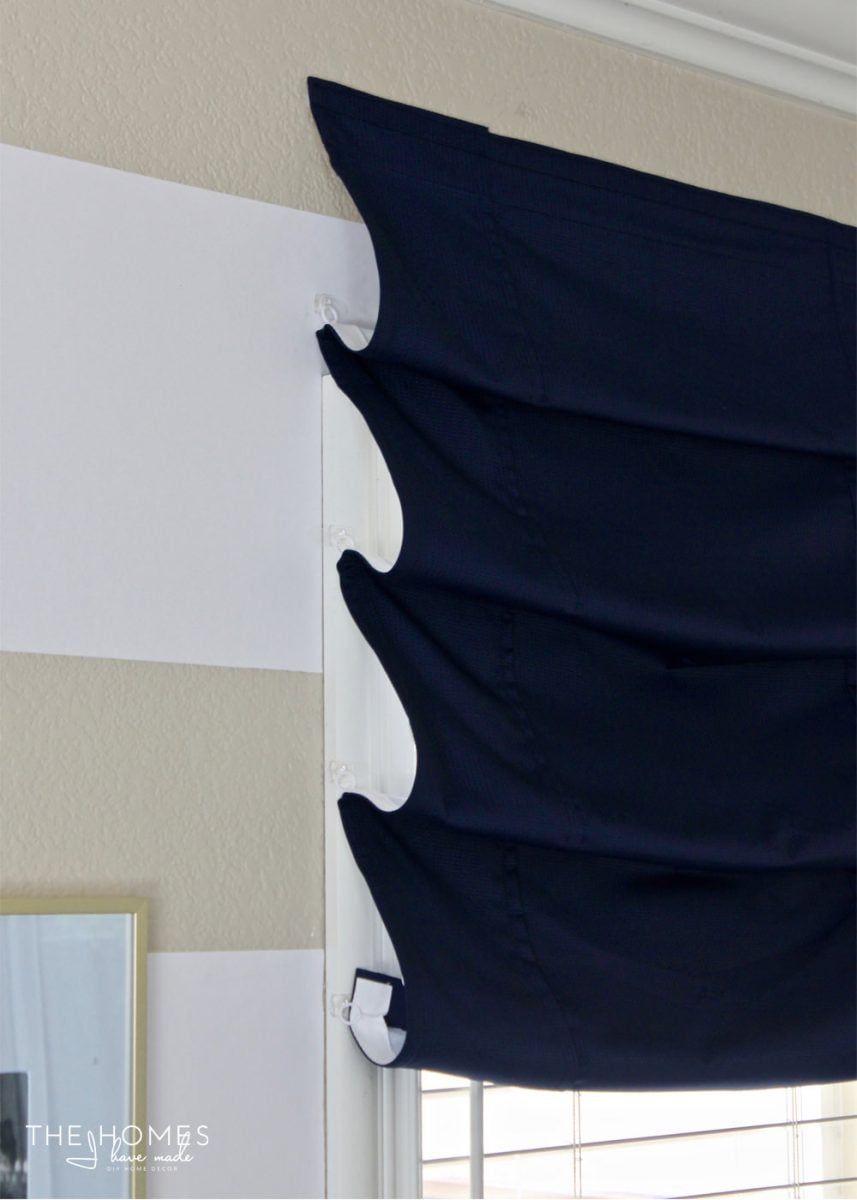
Love the look of Roman shades but not the price or the cords? This faux Roman shade is a renter-friendly cheat! Cut a blackout curtain panel to your window width, adding length for every fold you want. Hem the edges by machine or with iron-on hem tape, then sew Roman shade hook tape down both sides. Velcro holds it at the top, and tiny clear Command hooks catch the tape to set the folds. It doesn’t raise or lower, so it’s purely decorative, but it looks so polished!
Get the full tutorial at The Homes I Have Made.
36. DIY Thermal Insulated Blackout Shades
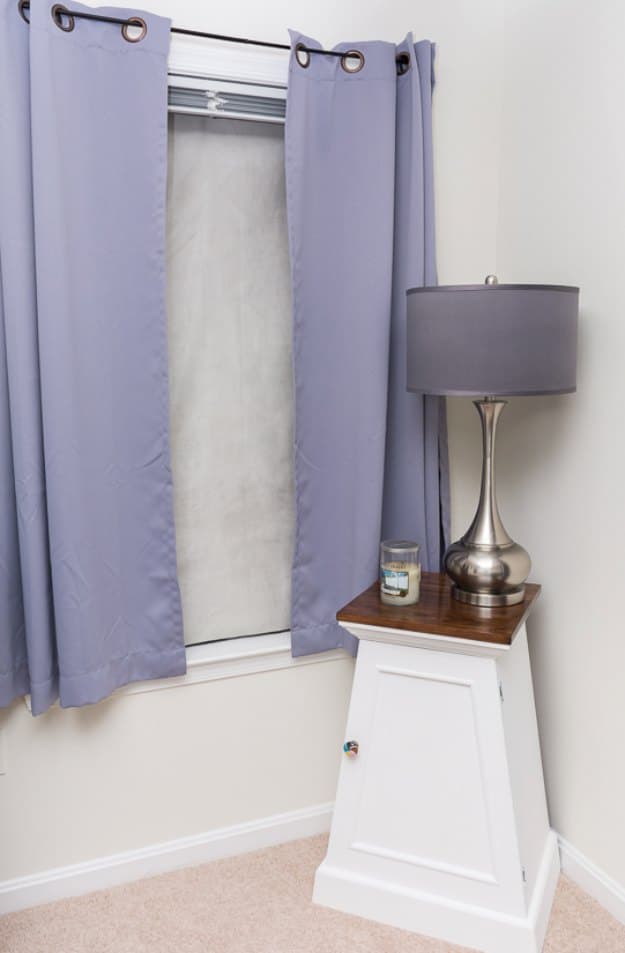
Drafty windows and early sunrises? These thermal blackout shades solve both. Think of them like a giant potholder for your window: a layer of blackout fabric, a decorative fabric and a heat reflective insulated lining sewn together so they block light and keep the cold out. Measure your windows, cut the layers, sew the blackout and decorative fabric together, then add the insulated lining. Basic straight seams are all you need. Hang them behind your existing curtains for a dark, cozy bedroom and a lower heating bill this winter.
Get the full tutorial at Brittany Goldwyn.
37. Ruffle Shower Curtain Tutorial
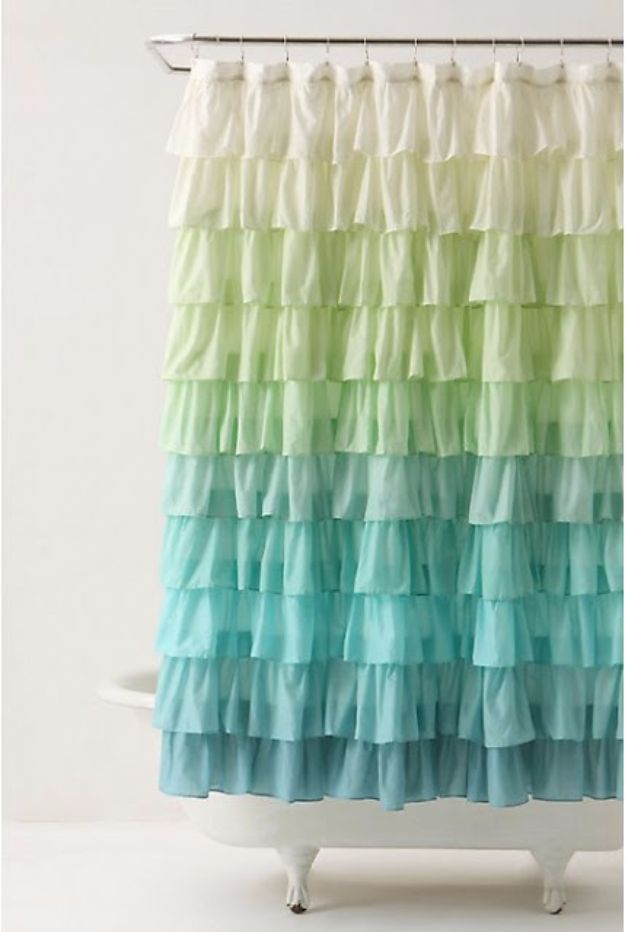
This ombre ruffle shower curtain is a showstopper, inspired by a much pricier boutique version! Rows of lightweight cotton ruffles are sewn onto a base curtain, shading from white at the top down to a deeper color at the bottom. You’ll need several fabric shades and a lot of patience, since it’s a long project. A ruffler foot makes the gathering so much faster, so borrow one if you can. The skills are simple, just straight seams and gathering. The finished curtain makes a plain bathroom feel dreamy.
Get the full tutorial at Leanne Barlow.
38. Easy Bench Cushion With Piping and a Zipper
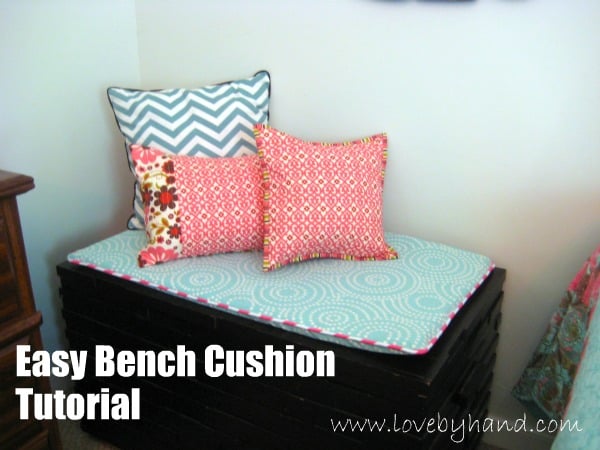
Got a trunk or storage chest that could double as a seat? This easy bench cushion takes about an hour and around $20! Cut foam to the size of your bench, then cut two pieces of home decor fabric an inch bigger each way. Make your own piping from contrast strips wrapped around cording, sew it to the top piece, then add a zipper along the back seam so the cover comes off for washing. Stuff in the foam, zip it closed and pile on the pillows. Perfect for a guest room!
Get the full tutorial at Craftaholics Anonymous.
39. Box Cushion for a Window Seat
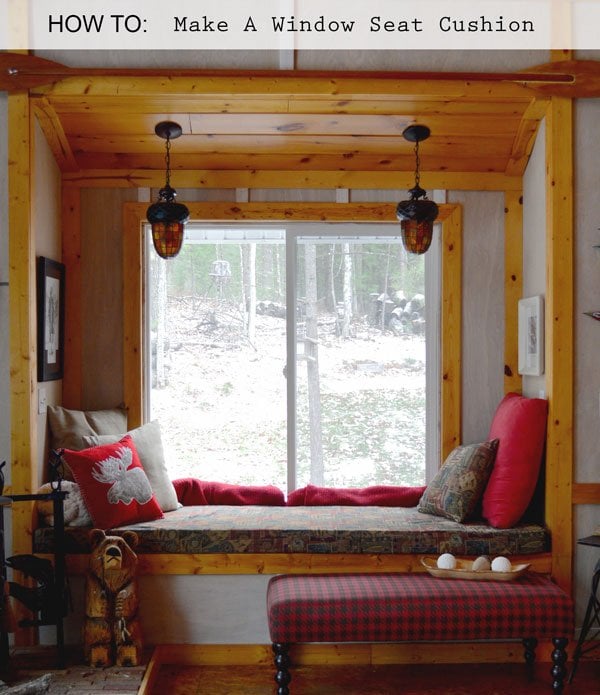
Custom window seat cushions cost a fortune, so why not sew one? This tutorial makes a box cushion cover with a zipper in the back so you can slide in thick, firm foam. Pick a heavy home decor fabric that holds up, and size the zipper section so stuffing in the foam is easy. A fun themed print or a solid with accent pillows both look great. Hello, perfect reading nook!
Get the full tutorial at Rustic Crafts & DIY.
40. DIY Tufted Daybed Cushion
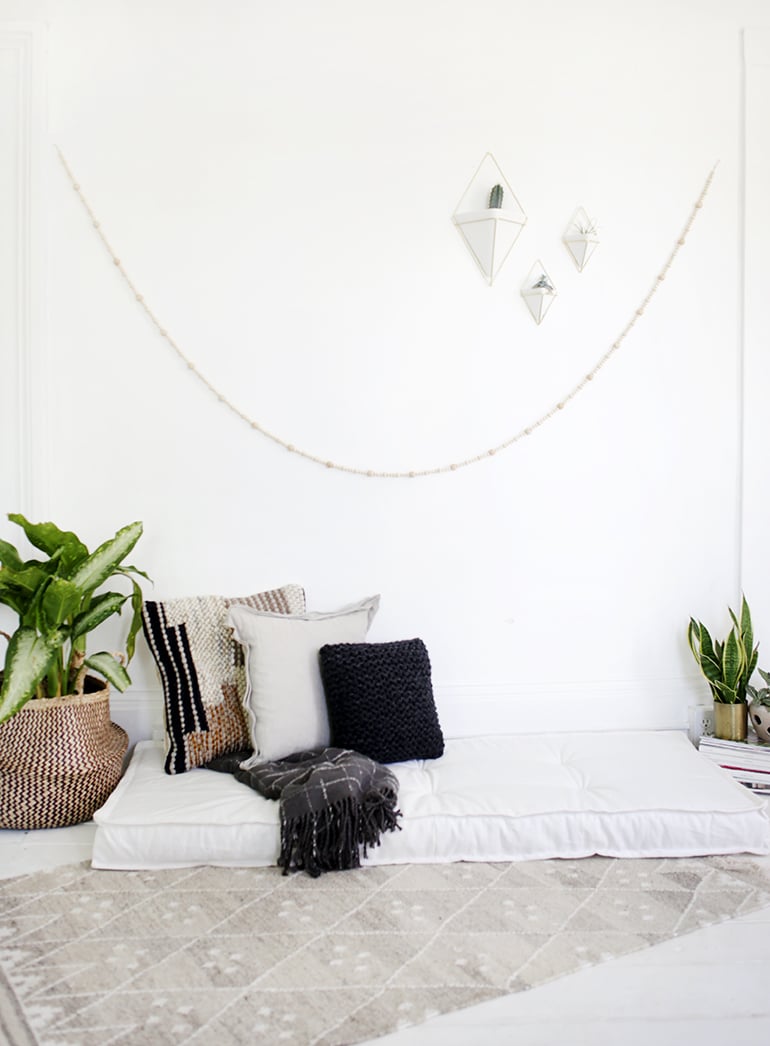
Ready-made daybed cushions can top $120, but you can make one for under $60! Cut 3 inch foam to size, wrap it in batting and hand stitch the corners. Sew four side strips into a long rectangle, stitch on the top and bottom panels, slide in the foam and slip stitch it closed. A running stitch with heavy upholstery thread along the edges gives it a crisp, tufted look. So cozy for a reading corner!
Get the full tutorial at The Merrythought.
41. How to Make a Chair Cushion
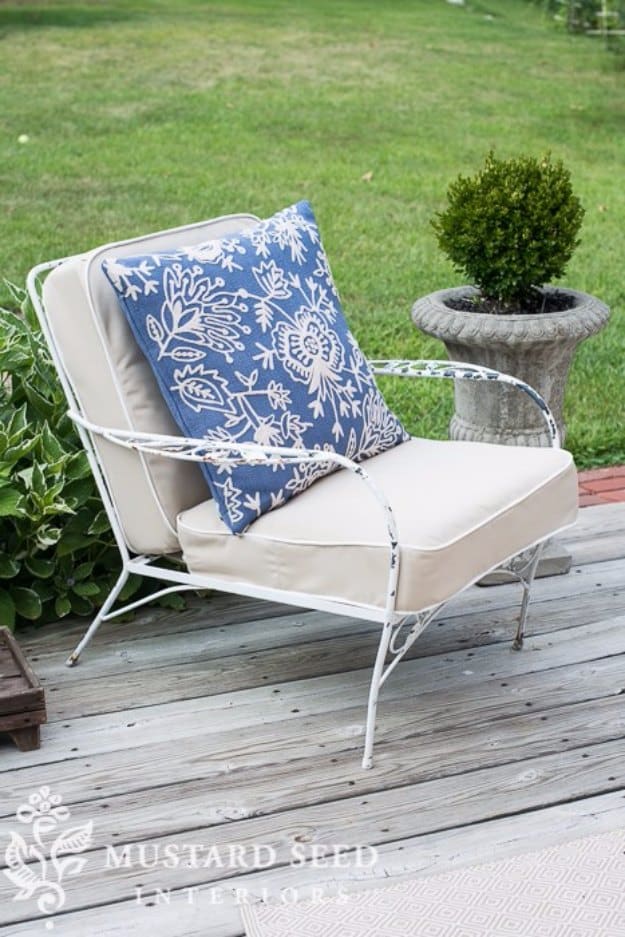
Give a vintage metal patio chair new life with a custom box cushion! This tutorial shows you how to measure the seat, cut a foam insert and sew a fitted cover with boxed sides so it looks crisp and tailored. A natural canvas or outdoor fabric holds up well on the deck, and a patterned throw pillow adds a pop of color. Here’s a handy tip: wrap the foam in a plastic bag before sliding it into the cover and it slips right in. Your porch will feel brand new.
Get the full tutorial at Miss Mustard Seed.
42. Simple Tie-On Chair Cushion
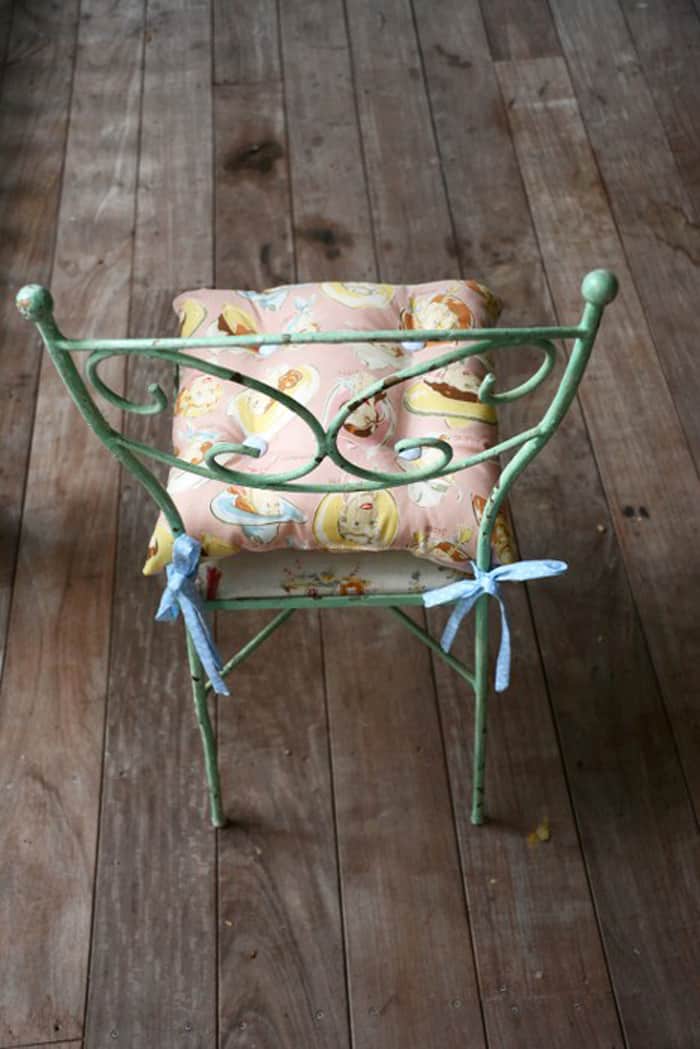
Got a pretty chair with a seat that’s flat as a pancake? This tie-on cushion fixes it in an hour or two, no pattern needed! Measure the seat and add two inches each way, cut a front and back, and round off the front corners. Sew four ties and pin them between the layers along the back edge, then stitch around and leave a gap for stuffing. Fill it with fiberfill, close it up and add covered buttons for that tufted look. A fun way to use a vintage print!
Get the full tutorial at DIY Candy.
43. Leather Chair Cushion
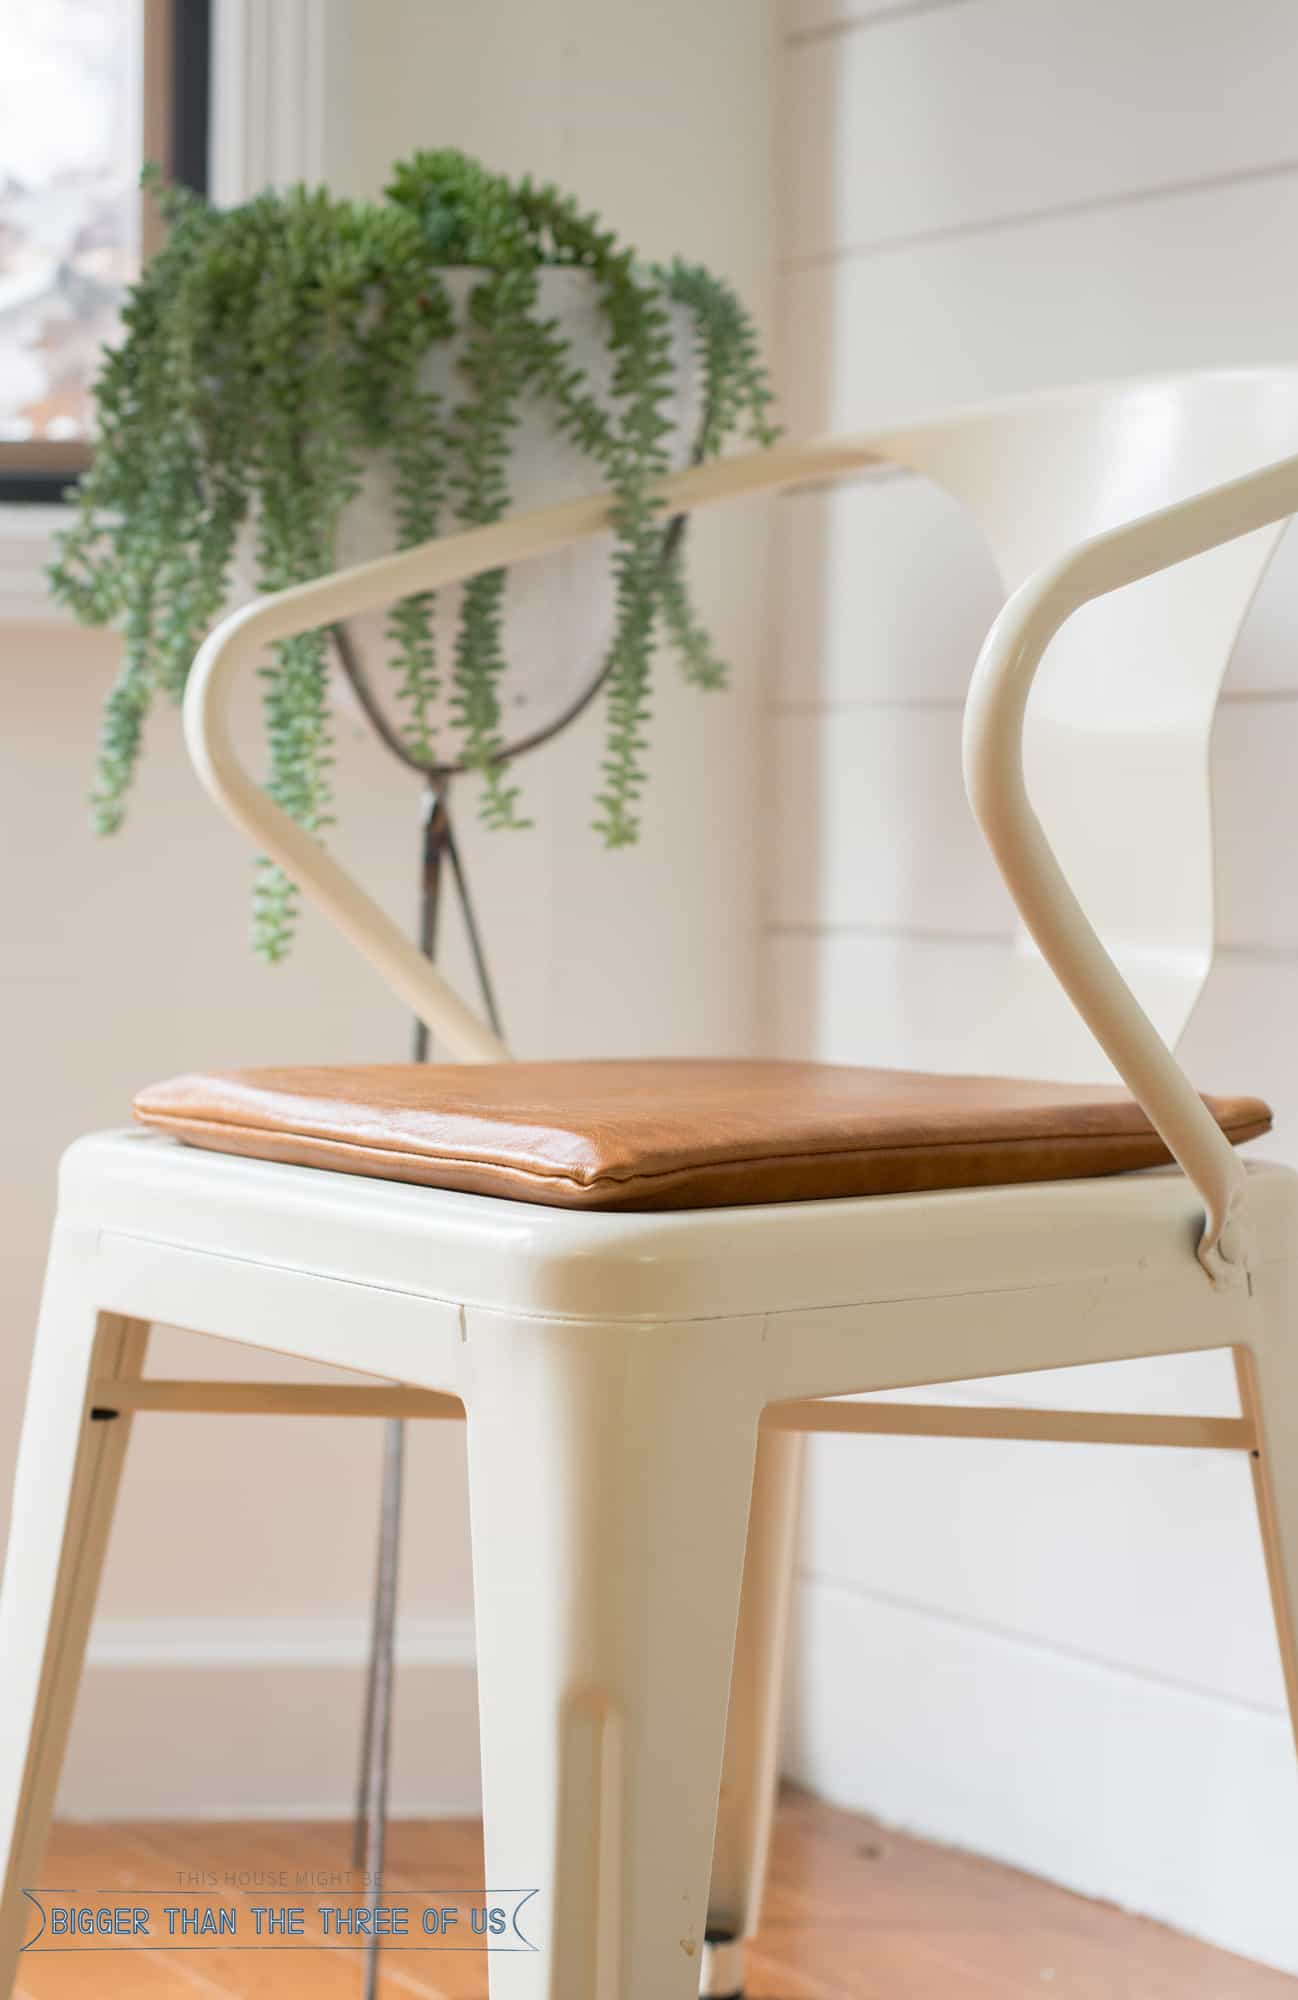
Metal chairs look great but they sure aren’t comfy! These modern leather seat cushions fix that in about 30 minutes per chair. Trace the seat, cut upholstery leather and a thin foam pad to size, then stitch it together into a simple pad. A leather with a little natural wear hides scratches, so it’s great for busy families. Beginner sewers can absolutely do this one!
Get the full tutorial at Bigger Than the Three of Us.
44. Quilted Floor Cushion
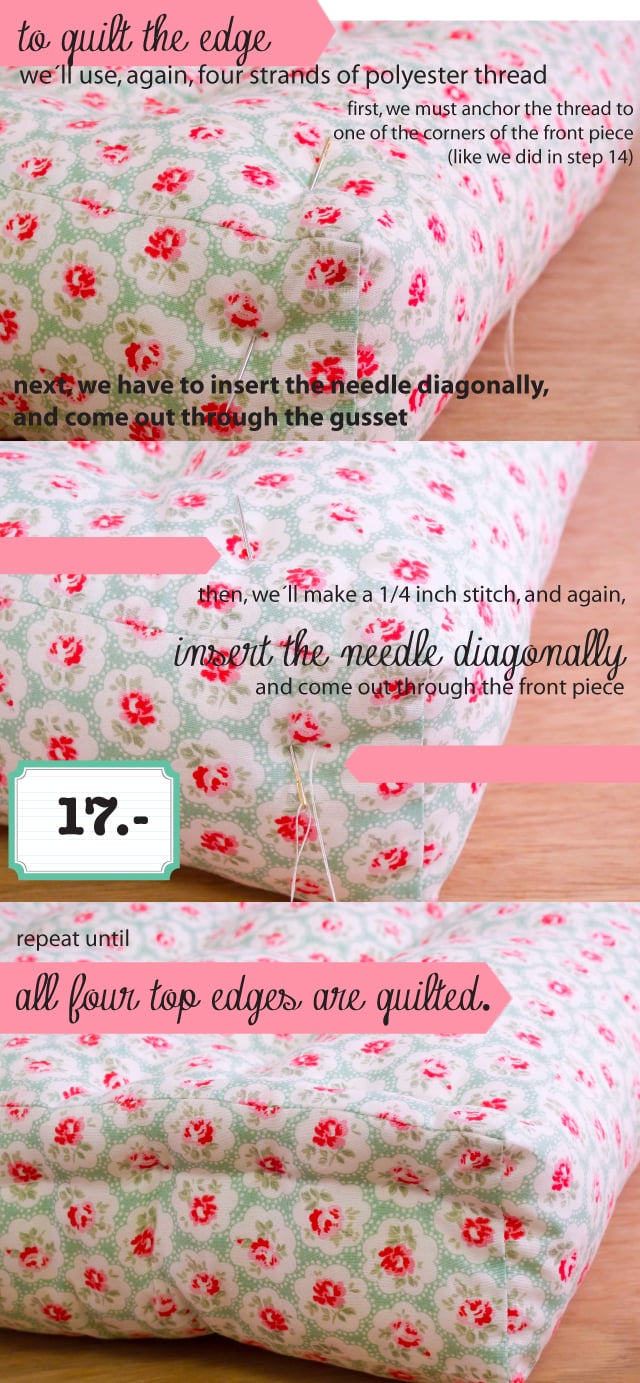
A thick, tufted floor cushion is the coziest seat in the house, and this tutorial shows you exactly how to get those professional quilted edges. You’ll sew a top, a bottom and a boxed gusset, fill it firmly, then hand stitch diagonally through the corners and along the top edges to shape it like a French mattress cushion. It takes patience, but the photo steps make each stitch clear. A sweet red and aqua floral print is perfect for a reading corner or a kids’ play space.
Get the full tutorial at Dobleufa.
45. DIY Floor Cushion
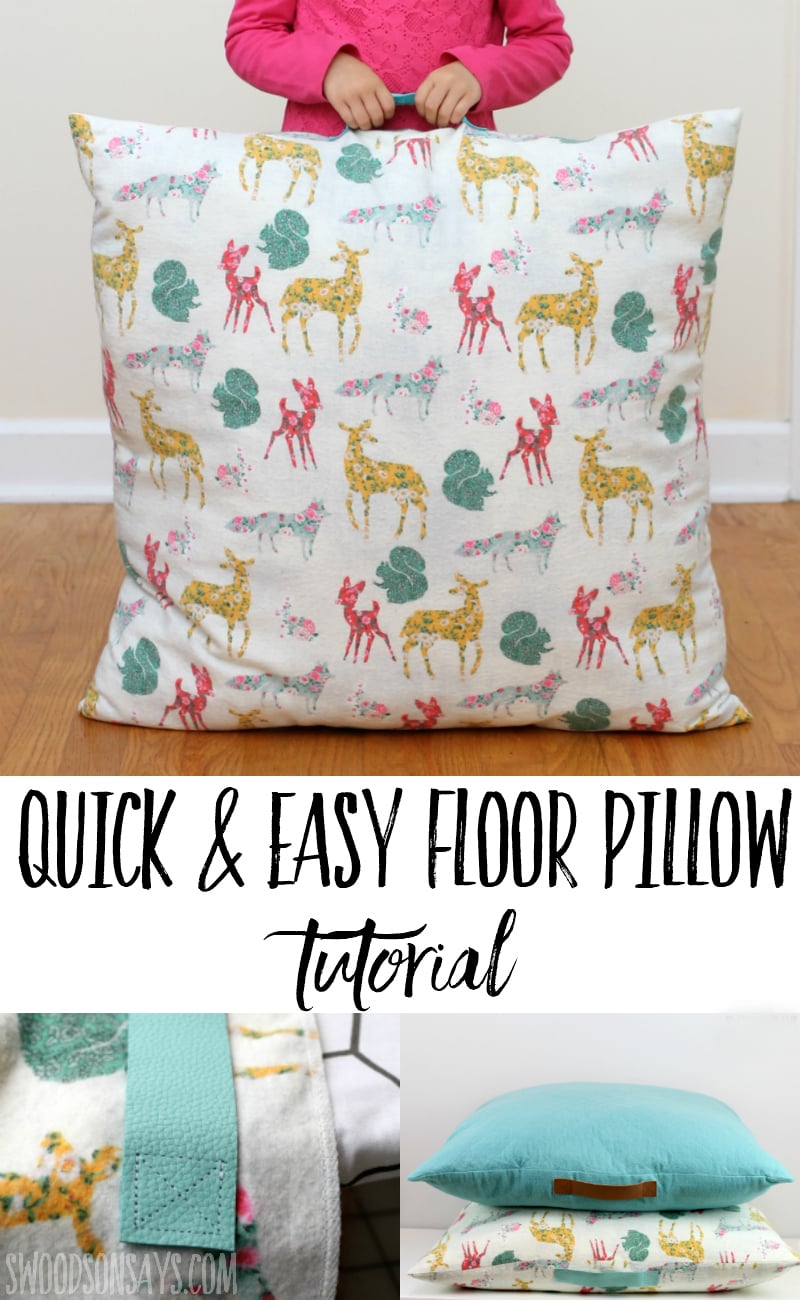
Need extra seating for movie night? A big floor cushion is the answer! This tutorial starts with a 27 inch pillow insert and two yards of soft flannel per cushion. Cut two 28 inch squares, finish the edges since flannel frays, and add a leather handle so it’s easy to carry. You can add an invisible zipper so the cover comes off for washing, which is so handy with kids. There’s a quilted option too if you’d like a more tailored look. Make a whole stack and keep them in a basket.
Get the full tutorial at Swoodson Says.
46. Round Floor Pouf With Star Piecing
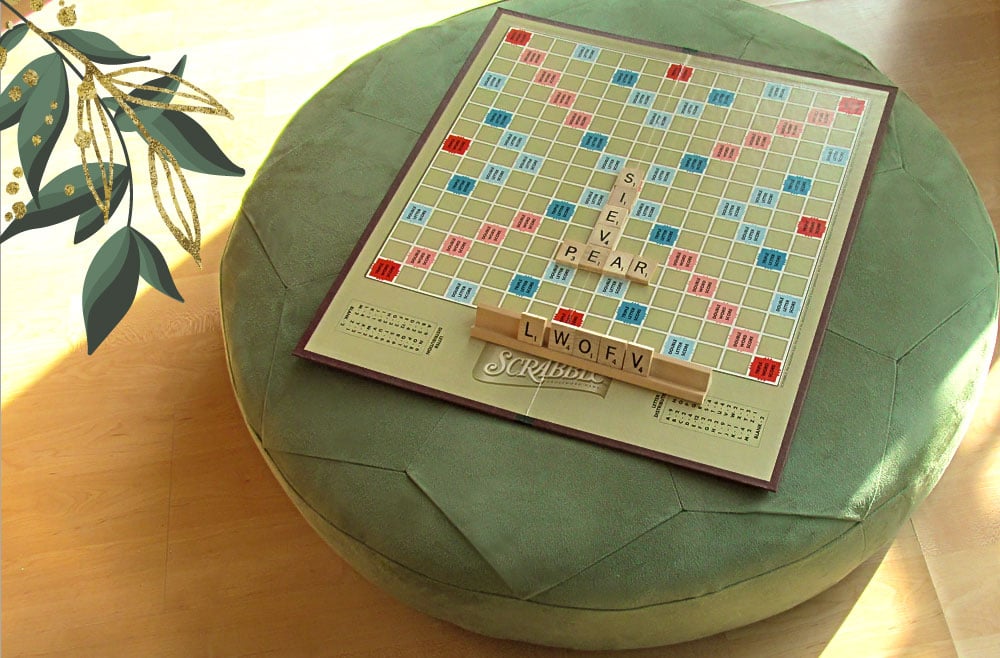
This round floor pouf has a smooth, upholstered look that’s a little more polished than a typical bean bag pouf. Mid-weight faux suede is pieced into a radiating star design on the top and bottom, and each seam sinks into the nap to show off the pattern. The inside is high density foam wrapped in batting, which you can cut yourself from a square block or have cut at an upholstery shop. The step by step photos make it doable for a confident beginner. Sage green works in almost any room.
Get the full tutorial at Sew4Home.
47. Log Slice Pouf
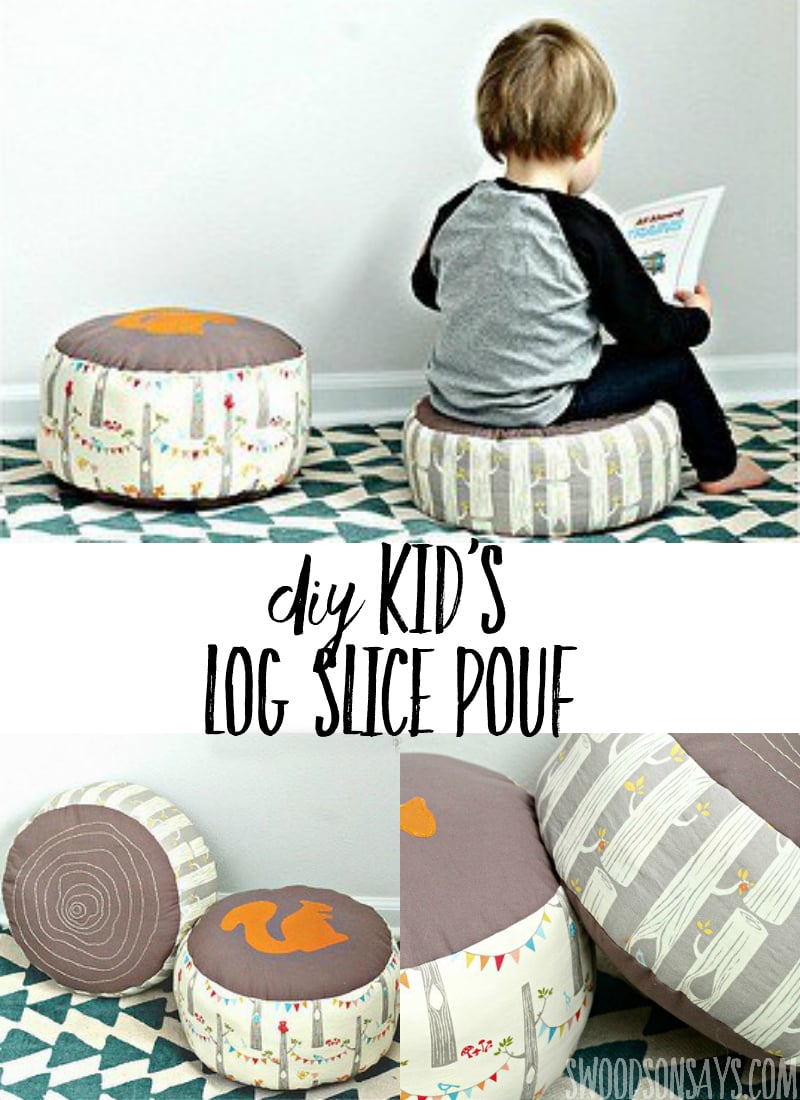
These kids’ log slice poufs look just like cut tree stumps, and they’re so fun in a playroom or reading corner. The tutorial includes a free pattern for the round top, the side band and a wood grain design, and you can add a little appliqued animal like a squirrel or fox. Stuff them firm with fiberfill or scrap fabric so they hold their shape for sitting. Birch and woodland prints make the whole set feel like a cozy forest. They’re light enough for little ones to move around themselves.
Get the full tutorial at Swoodson Says.
48. Stuffed Animal Storage Pouf
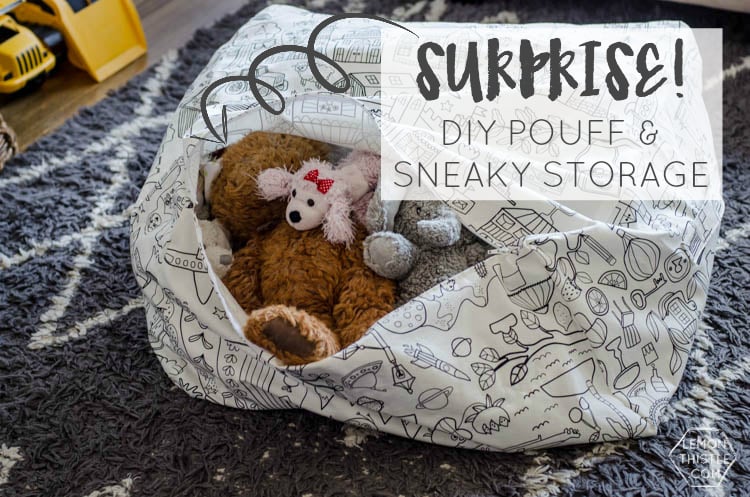
Drowning in stuffed animals? Hide them inside a comfy floor pouf! Cut a top and bottom square plus four side panels from a sturdy home decor fabric, any size you like. Sew the zipper in first along one bottom edge, using a basting stitch so it opens neatly, then sew the sides together and add the top and bottom. Unzip, stuff it full of plush toys and you’ve got a soft seat that doubles as storage. Perfect for a playroom or a reading corner!
Get the full tutorial at Lemon Thistle.
49. DIY Slipcovered Ottoman
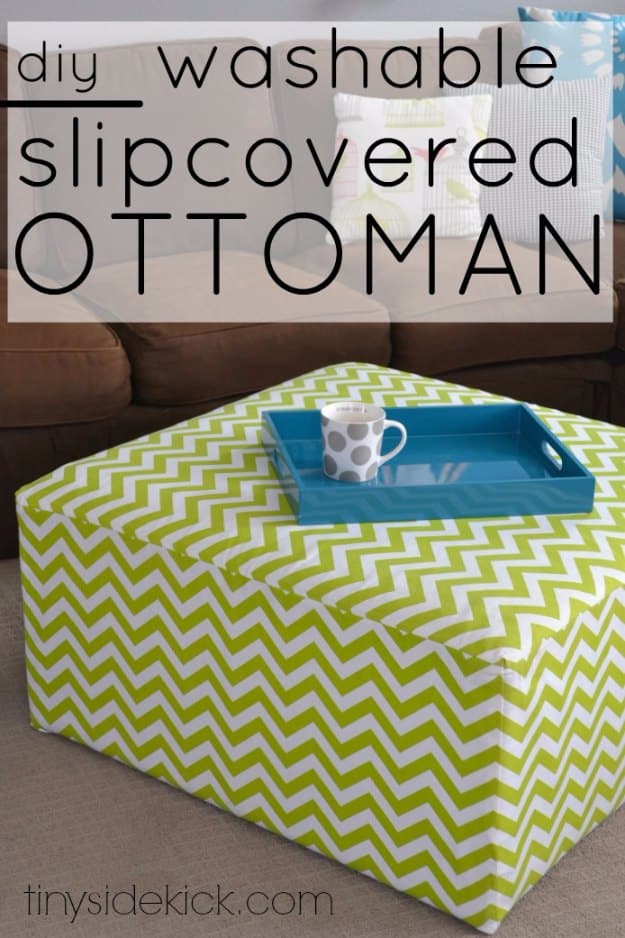
Got a sad old ottoman or a plain storage cube? Give it a washable slipcover! This tutorial shows you how to measure each side, cut a top panel and a long skirt piece, and sew them together into a fitted cover that slides right on. Because it comes off, you can toss it in the wash after spills, which makes it perfect for family rooms. A bright green chevron print turns a boring footstool into the star of the room. Add a tray on top and it doubles as a coffee table.
Get the full tutorial at Hey There Home.
50. Chic Ottoman Slipcover
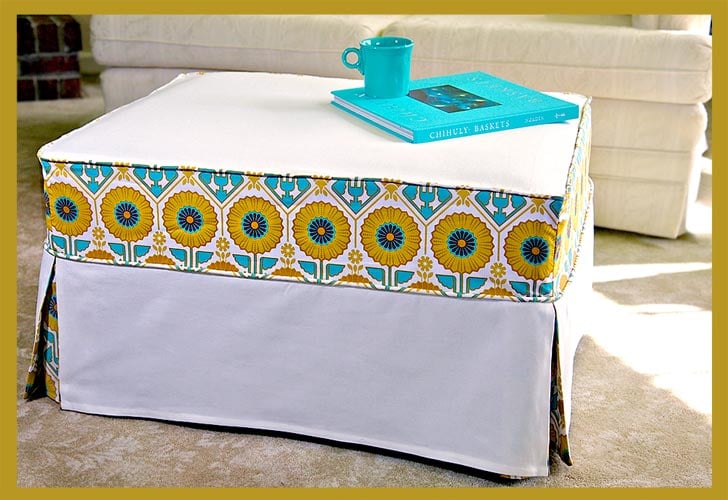
This tailored ottoman slipcover has crisp piping, a pleated skirt and a bold patterned band around the top. Heavy cotton duck in natural white makes the main body, and a striking quilting cotton print adds the accent. It’s a bit more advanced, but the step by step photos and measuring guide help you figure out cuts for any size ottoman. Read through all the steps once before you start. Make a couple of covers and swap them out for the seasons. Your old ottoman will look brand new!
Get the full tutorial at Sew4Home.
51. How to Sew a Slipcover for a Couch or Chair
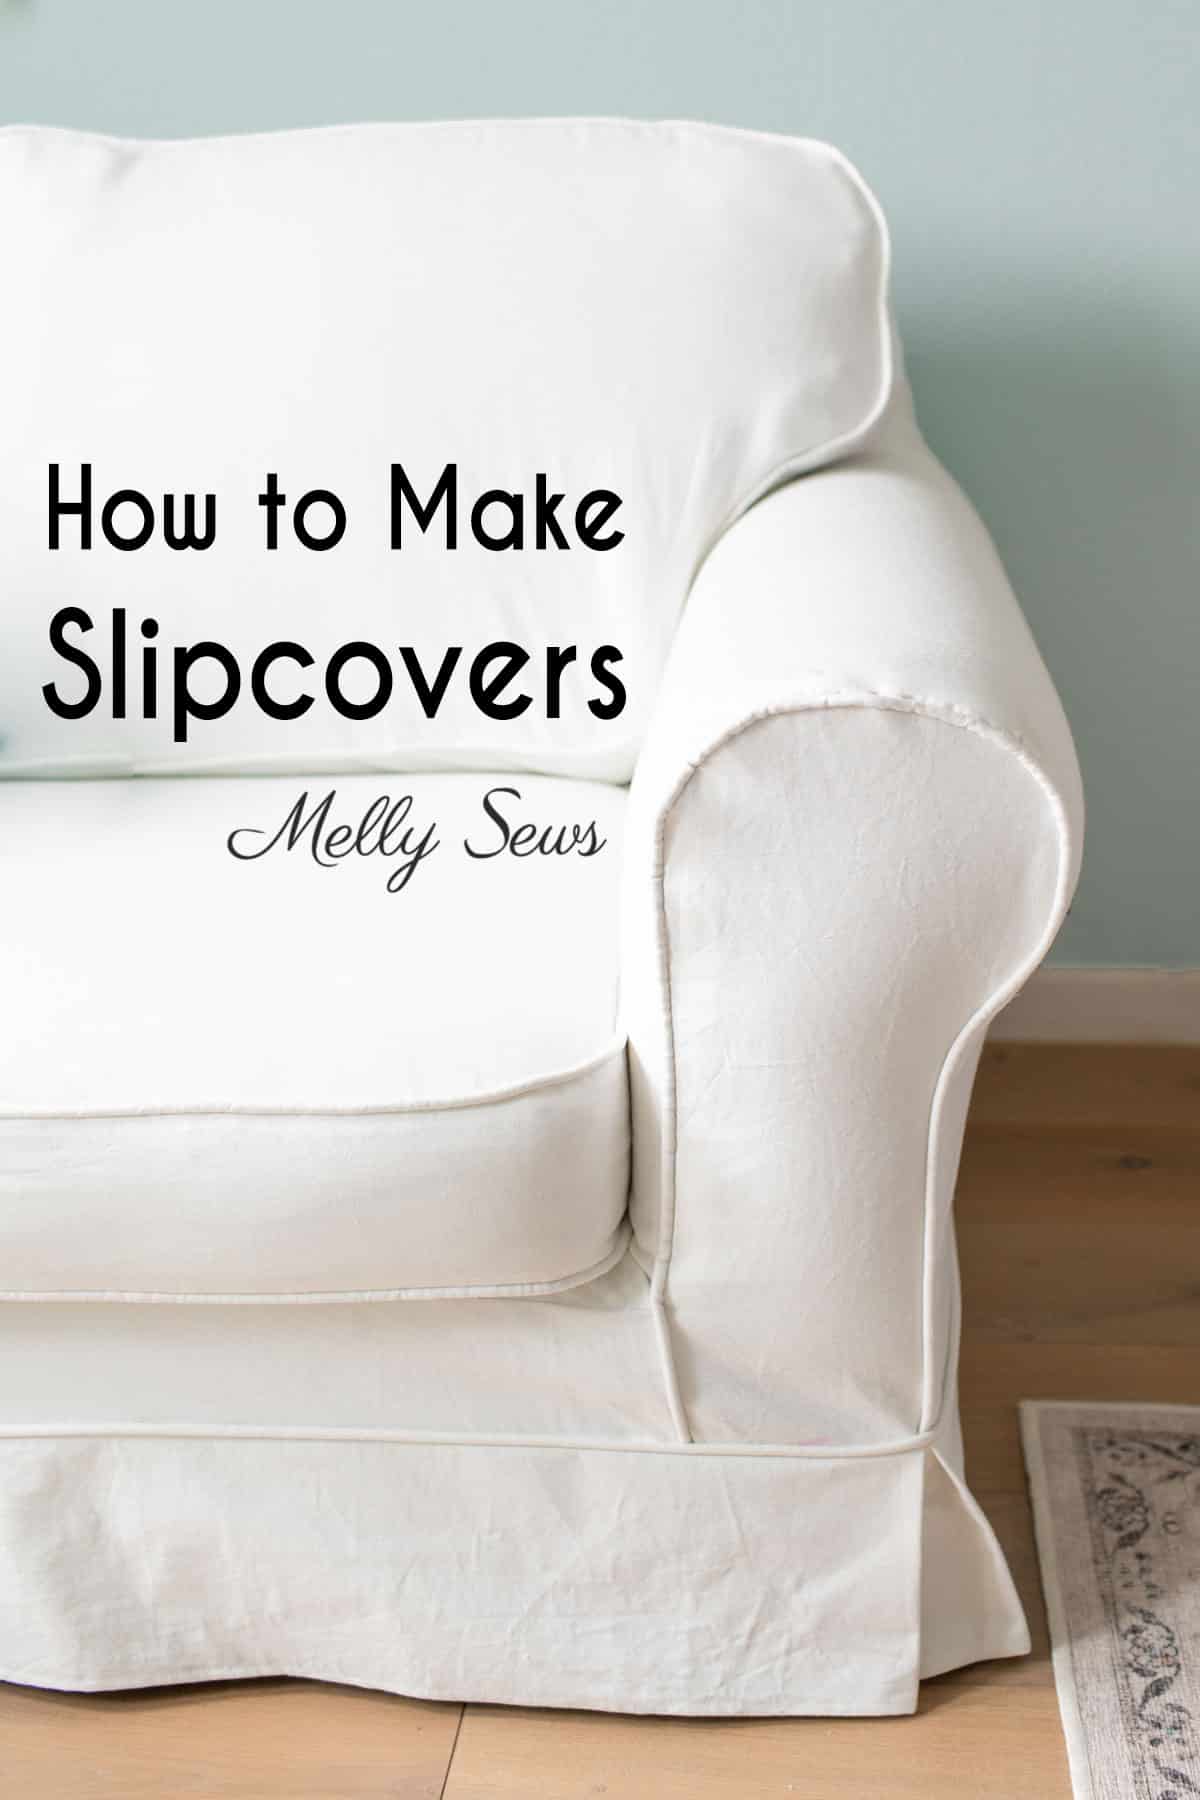
Ready to give a stained couch a fresh start? This slipcover tutorial breaks the whole job into five steps that work for a couch, a chair or even a sectional. Estimate your yardage, then trace the removable cushions to make patterns. Drape the fabric over the frame, pin the seams right on the furniture and baste to check the fit before sewing it all with piping in the seams. Cotton canvas or twill holds up well, and white can be bleached! Perfect for homes with kids and pets.
Get the full tutorial at Melly Sews.
52. Slipcover For A Wingback Chair
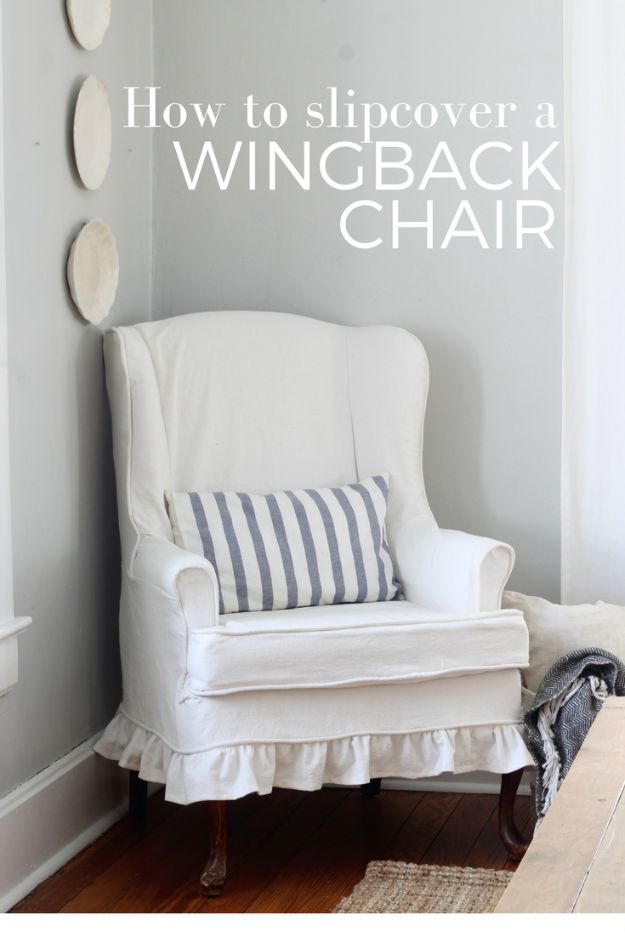
Wingback chairs are gorgeous, but worn upholstery can make them look tired. A fitted slipcover gives yours a fresh, farmhouse look you can toss in the wash! This tutorial uses bleached cotton painter’s drop cloth, which is sturdy and inexpensive. The secret is following the chair’s original seams: drape and cut the pieces, pin them tightly right on the chair and sew a little at a time, checking the fit as you go. Add piping where the original chair had it and finish with a ruffled skirt. It’s challenging but totally doable.
Get the full tutorial at Farmhouse on Boone.
53. Simple Slipcover Chair Covers
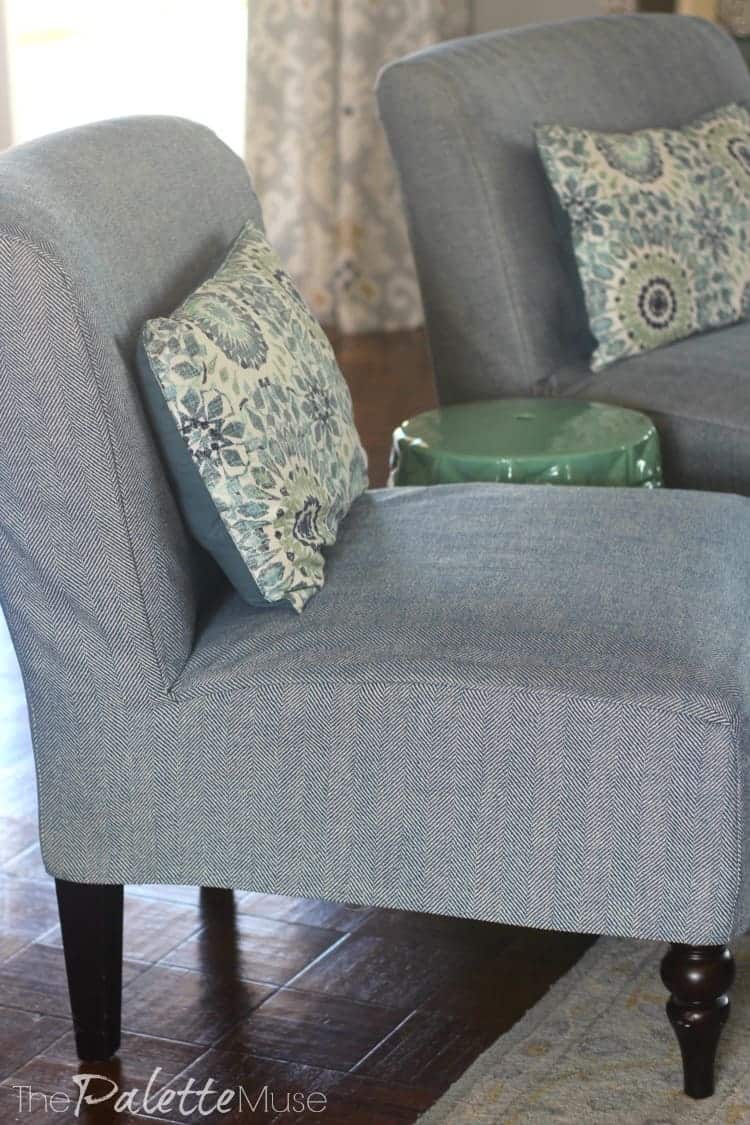
Love your chairs but not the upholstery? Slipcover them instead of calling an upholsterer! This tutorial shows how to measure an L-shaped chair, make your own pattern and sew a simple fitted cover that slips right over the old fabric. It works great on parsons-style dining chairs too, and you can always take it off later. If you have a big pattern, buy extra to line up the repeat. So doable!
Get the full tutorial at The Palette Muse.
54. Hammock Chair DIY
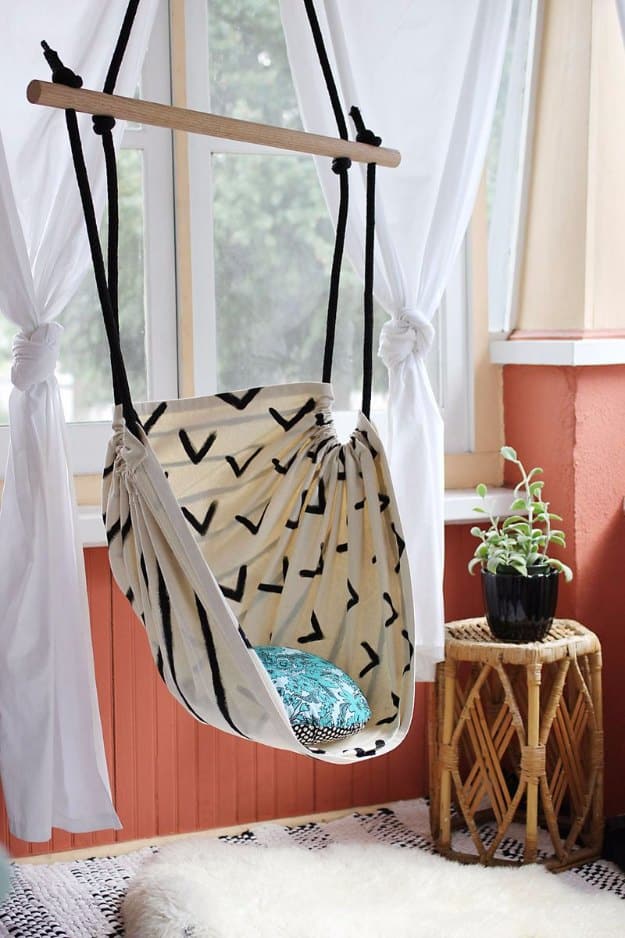
A hanging hammock chair makes the coziest spot for reading on a porch or sunroom. This one is made from two yards of plain canvas sewn into a sling, with a sturdy oak dowel at the top and braided rope threaded through. Paint a simple black pattern on the canvas with fabric friendly paint for a modern look. Use rated hardware like a stainless steel spring snap and quick link, and check the weight limits before anyone climbs in. You’ll need a drill, a sewing machine and an afternoon.
Get the full tutorial at A Beautiful Mess.
55. Easy Linen Dinner Napkins
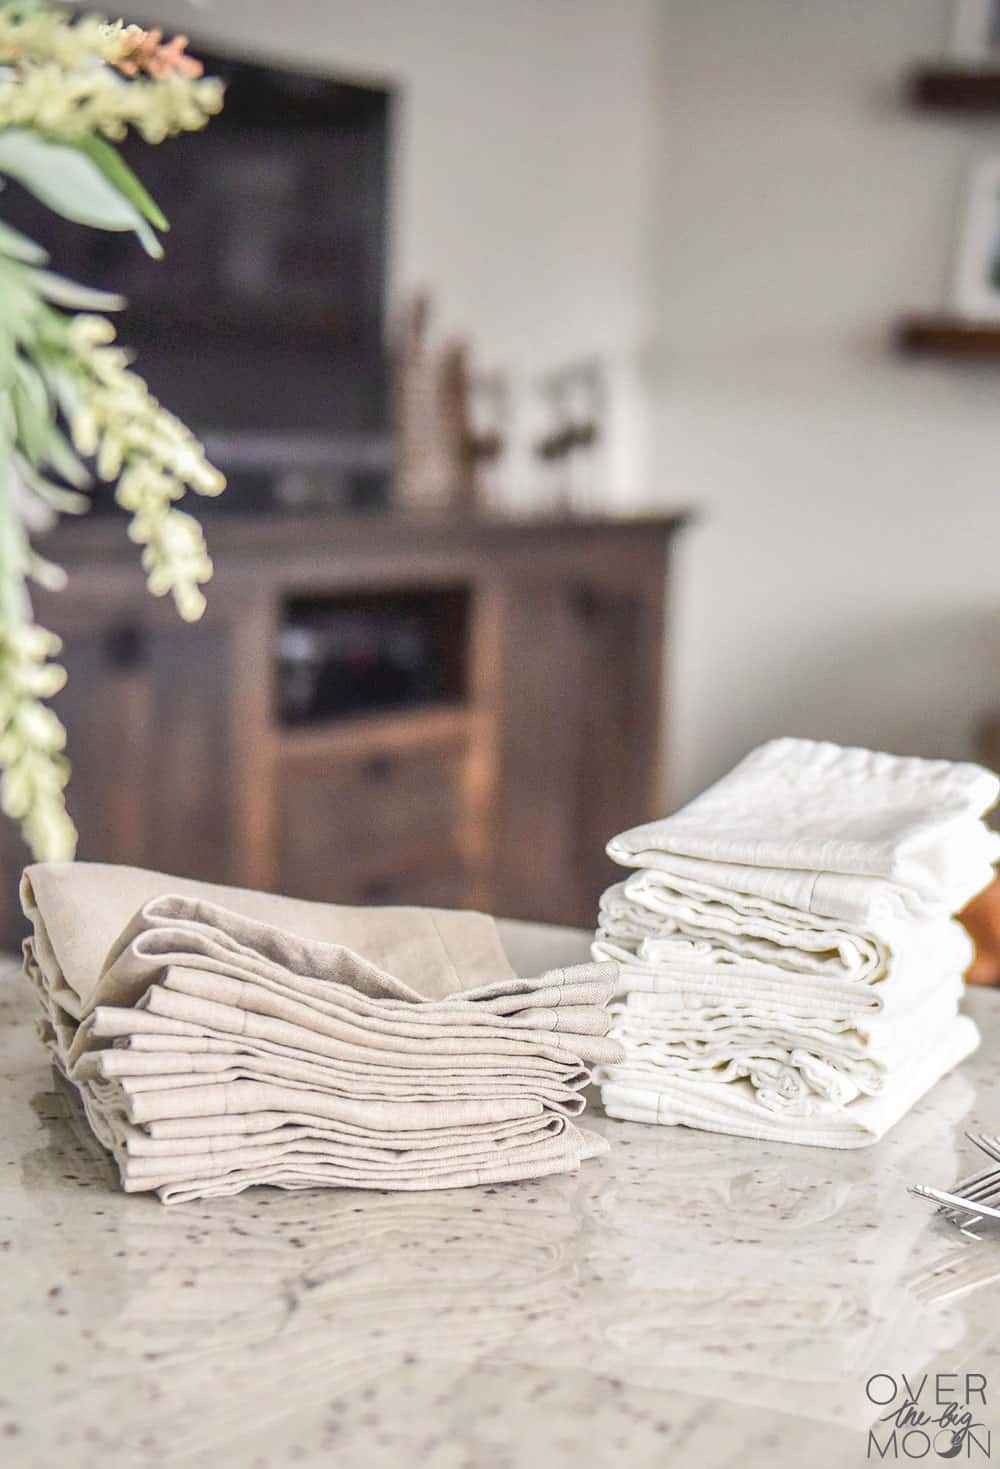
Cloth napkins make any dinner feel special, and these linen ones are about as easy as sewing gets. Wash and dry the linen twice so it’s soft and preshrunk, cut it into rectangles, then fold each edge under twice, press and stitch close to the fold. Standard dinner napkins finish around 20 by 20 inches, but you can size them however you like to get the most out of your fabric. Little wobbles just add character! Natural linen and white make a relaxed, farmhouse table that works for every season.
Get the full tutorial at Over the Big Moon.
56. 5-Minute Cloth Napkins
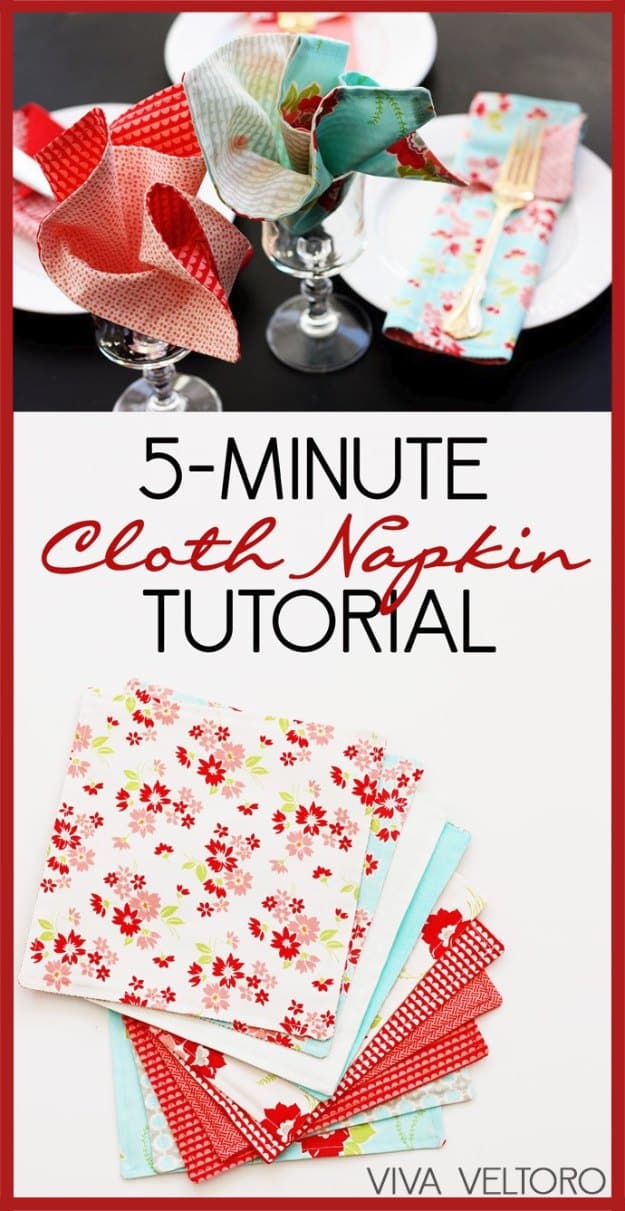
Want a whole set of cloth napkins in one evening? Start with a layer cake! Those precut 10 inch squares come in coordinating prints, so the cutting and color matching are already done for you. Place two squares right sides together, sew around the edges leaving a small gap, turn and press, then topstitch all the way around to close it. Prewash the fabric first since napkins get washed a lot. They’re reversible, so you get two looks in one. Bright reds, aquas and florals make a cheerful table.
Get the full tutorial at Viva Veltoro.
57. Frayed Drop Cloth Napkins
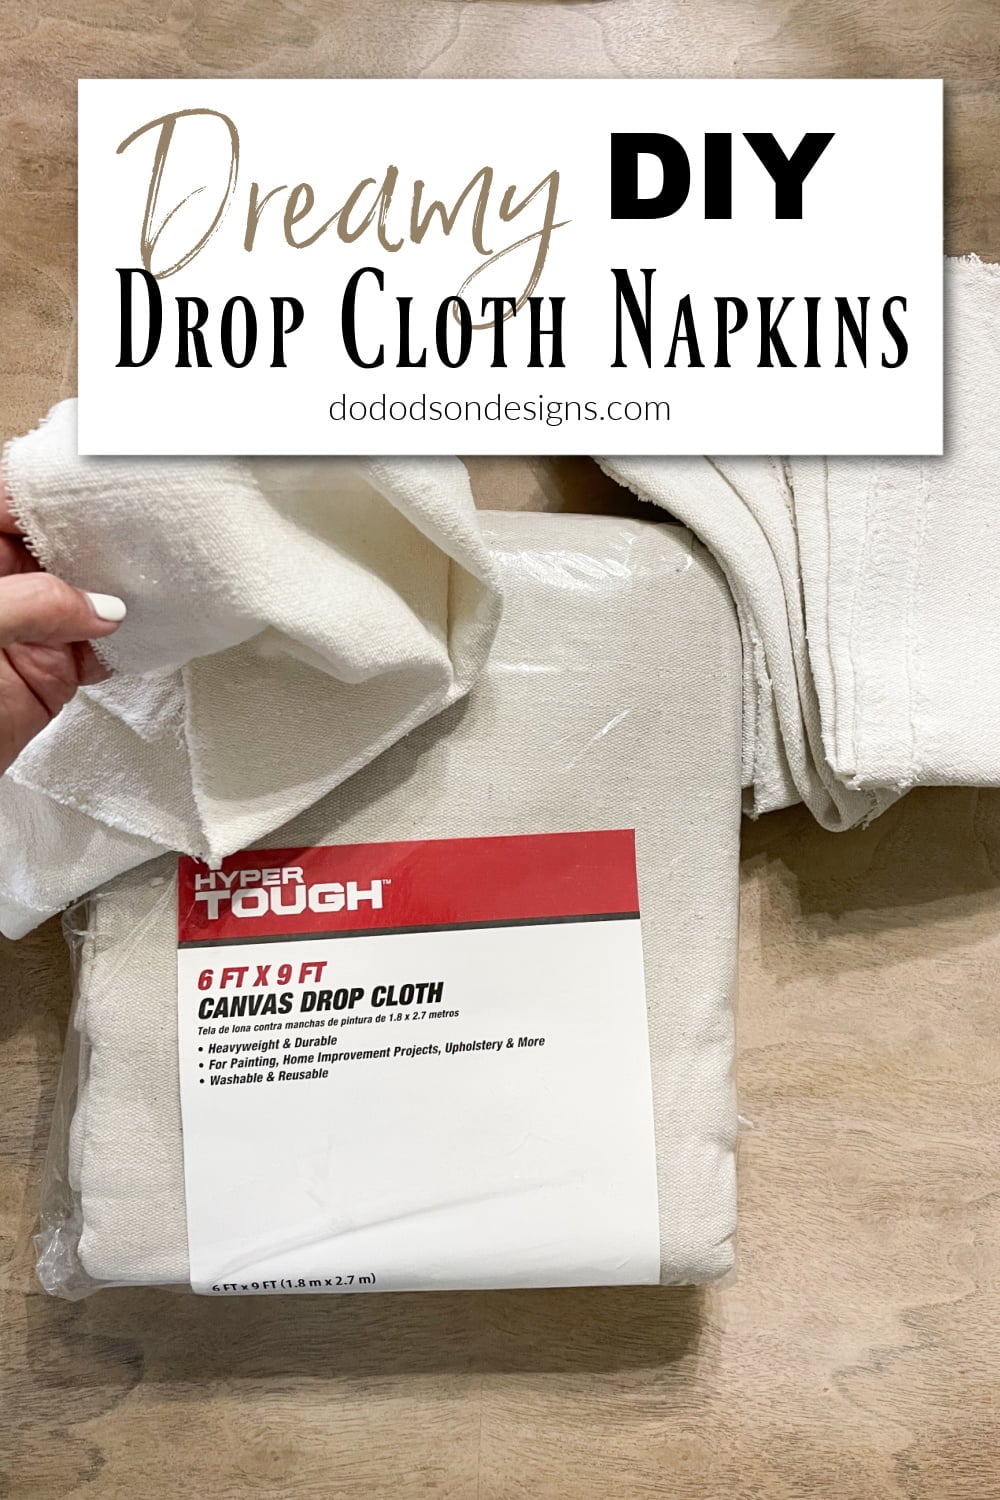
Looking for a use for leftover drop cloth? Make cloth napkins! Wash and bleach the drop cloth first so it softens up, then cut 18 inch squares using one napkin as the pattern for the rest. A row of stitching in from the edge keeps the fringe from unraveling, then you pull threads for a pretty frayed edge. The no-sew version didn’t hold up, so this one is worth the few minutes of sewing. Farmhouse perfect!
Get the full tutorial at Do Dodson Designs.
58. How to Make Reversible Placemats
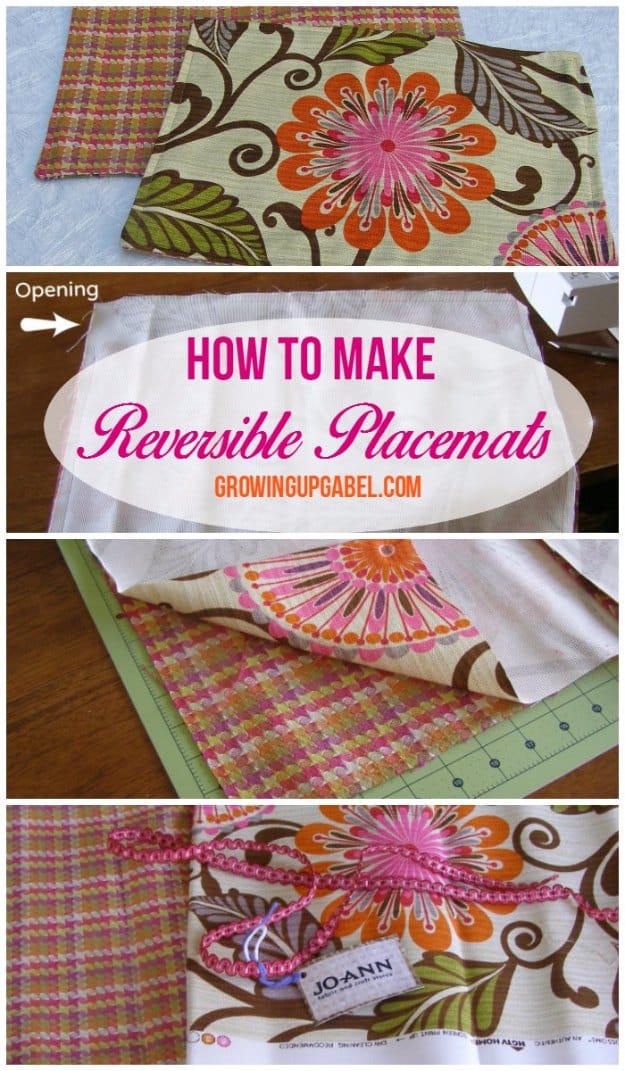
Reversible placemats give you two looks for the price of one. Pair a bold print with a coordinating plaid or solid, sew them right sides together, leave an opening to turn and topstitch all the way around for a crisp edge. Add a layer of batting or interfacing inside if you’d like them a little thicker. Flip them for different seasons or a dressier dinner. A big orange and pink floral with a woven plaid on the back feels so happy on the table. It’s a quick project with straight seams.
Get the full tutorial at Growing Up Gabel.
59. Jeans Pocket Placemats
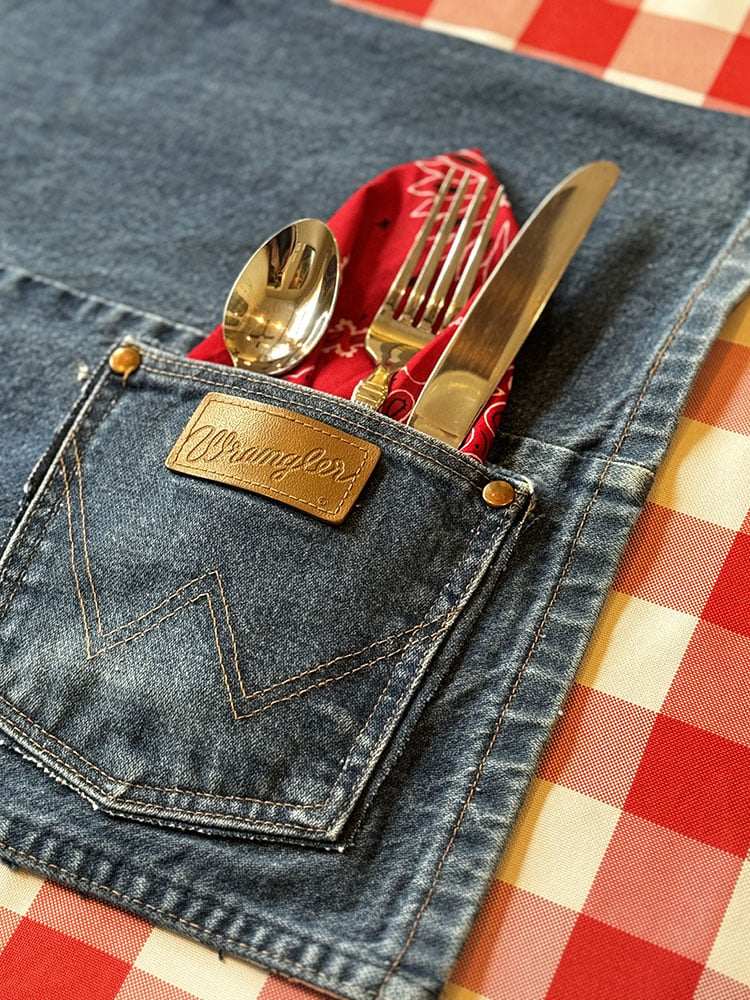
Don’t toss those worn out jeans! Cut the back leg and pocket from an old pair and turn them into placemats with a built in pocket for silverware. Trim the denim into a rectangle that keeps one back pocket intact, then finish the edges. Tuck a napkin, fork, knife and spoon into the pocket and your table is set. Red gingham underneath gives it a fun picnic feel. They’re perfect for summer cookouts, country themed parties or a farmhouse kitchen. Each pair of jeans makes about two.
Get the full tutorial at DIY JOY.
60. Easy DIY Table Runner
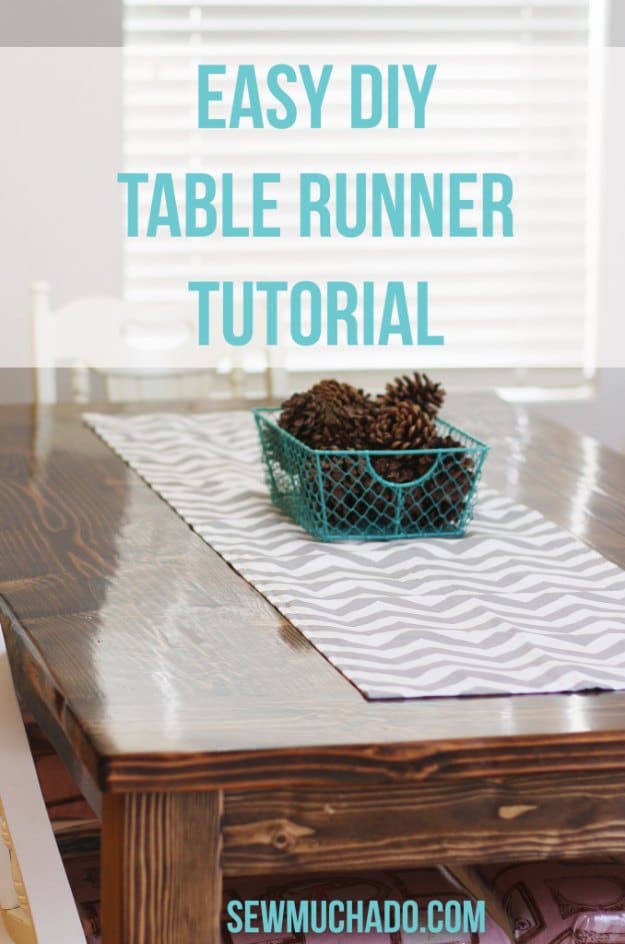
If you can sew four straight lines, you can make a table runner! This tutorial walks you through choosing fabric, figuring out how much you need and sewing a main fabric to a backing in just a few steps. Use a size 14 needle if you’re working with home decor weight fabric, and clips help keep long seams lined up. A soft gray and white chevron looks fresh on a rustic wood table. Make a few in different prints to switch out for holidays and seasons. There’s a video too!
Get the full tutorial at Sew Much Ado.
61. Two-Sided Table Runner
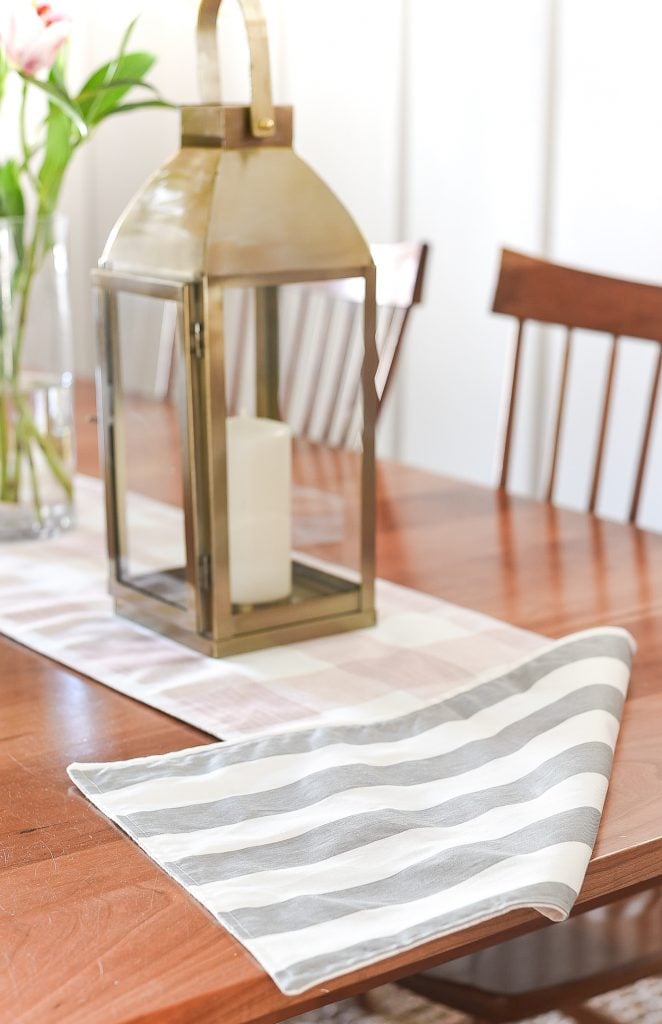
Why have one table runner when you can have two in one? This two-sided table runner pairs a pink buffalo check with a gray and white stripe, so you just flip it when you want a new look. Cut both fabrics to the same size, sew them right sides together, leave a gap to turn it, then press and topstitch. It’s a quick sew and a sweet way to refresh your table for every season!
Get the full tutorial at It All Started With Paint.
62. DIY Cornered Tablecloth
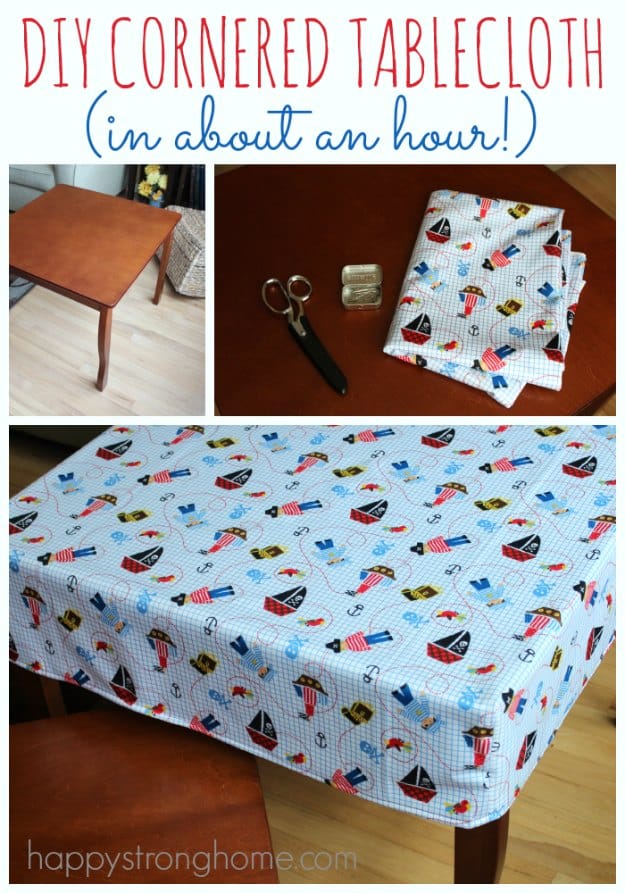
Need to protect a play table or craft table from spills? A cornered, fitted tablecloth stays put where a regular one slides off. This tutorial shows you how to measure your tabletop, cut the fabric and sew boxed corners so the cover hugs the table like a fitted sheet. It takes about an hour, and laminated cotton or oilcloth wipes clean after paint and crayons. A cute sailboat print is perfect for a kids’ table. It works on a small dining table or patio table too.
Get the full tutorial at Happy Strong Home.
63. Easy DIY Bandana Tablecloth
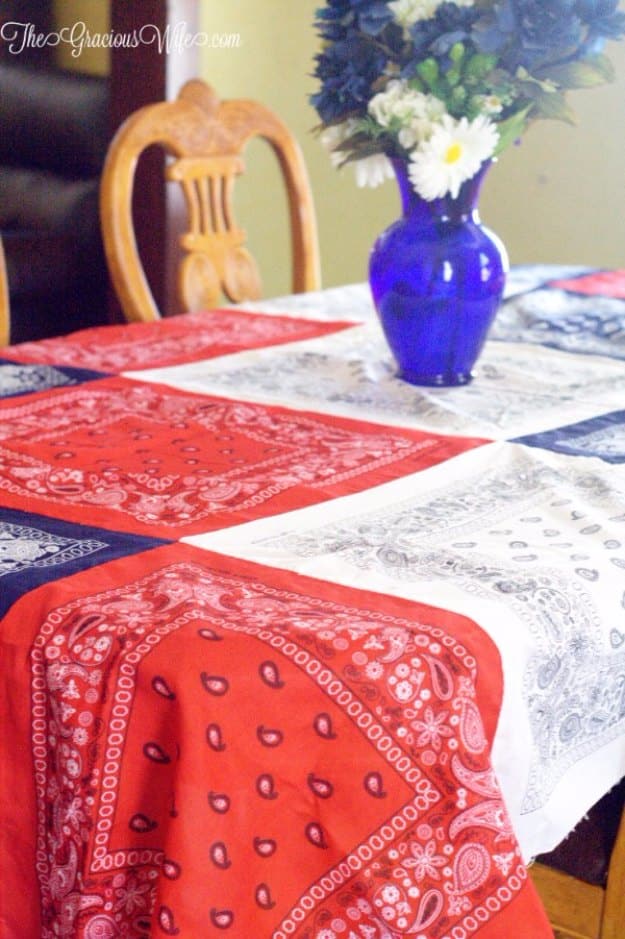
Bandanas aren’t just for pillows! Sew a patchwork of red, white and blue bandanas together and you’ve got the cutest tablecloth for summer. Lay them out in a checkerboard, sew them into rows with simple straight seams, then join the rows and hem the edges. It’s perfect for the Fourth of July, a backyard barbecue or a picnic. Because bandanas are already hemmed and so inexpensive, the whole project comes together quickly. Add a vase of fresh flowers and you’re ready to party.
Get the full tutorial at The Gracious Wife.
64. Simple Fabric Heart Coasters
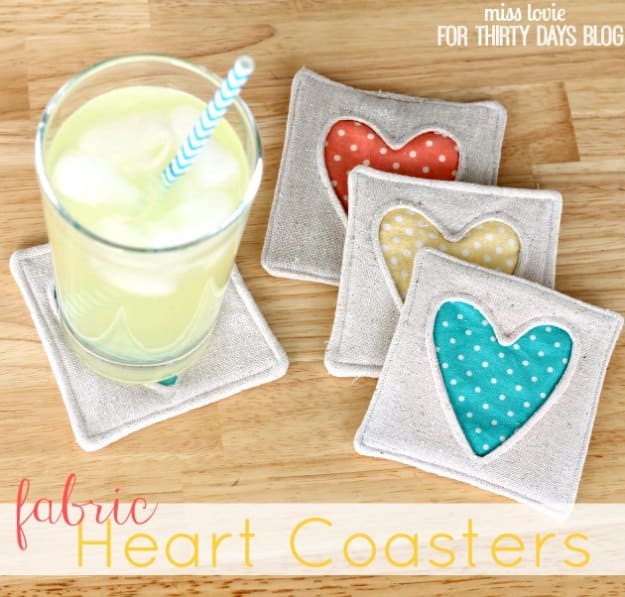
These fabric heart coasters use a clever inverse applique: you cut a heart window in the top layer, then let a pretty print peek through from underneath. Each coaster uses three squares of main fabric plus scraps for the heart, so it’s a great way to use up your stash. Stitch around the heart and the outer edge for a neat finish. Linen with red, mustard and aqua polka dots looks so sweet under a glass of lemonade. Bundle a set with ribbon for a teacher, hostess or Valentine’s Day gift.
Get the full tutorial at 30 Days Blog.
65. Easy Acorn Coasters
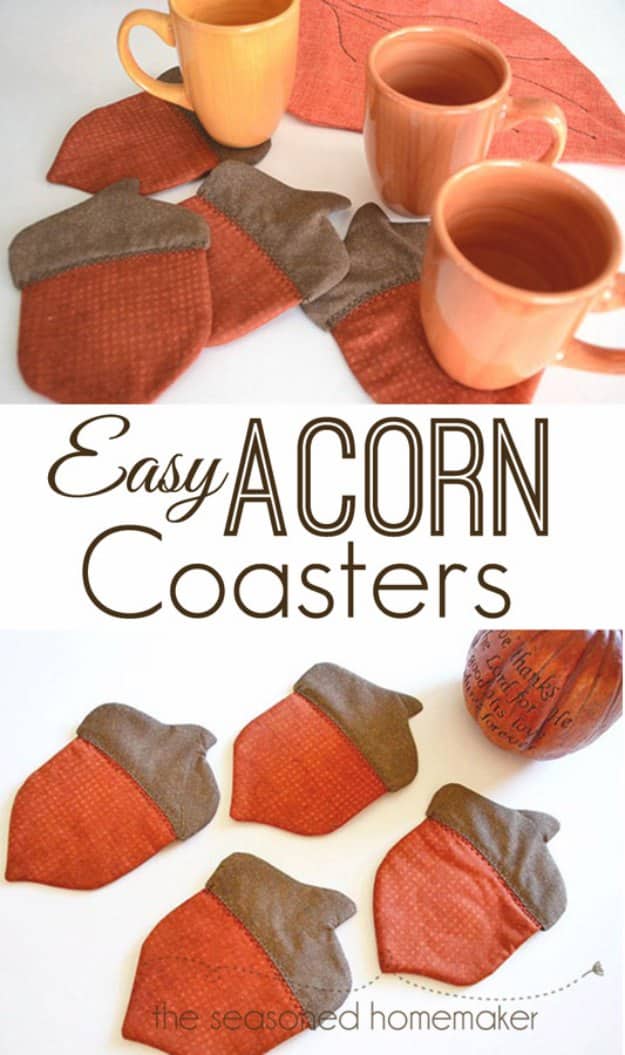
These acorn shaped coasters bring a little fall into your home, and they’re a perfect afternoon project for using up scraps. Download the free template, cut the acorn top and bottom from fall colored fabrics, then quilt the front, applique a few oak leaves and add a little stem. Layer it with batting and backing fabric and stitch everything together. Rusty orange and brown prints look so cozy next to a mug of cider. Make a set for your own table or tie them together as a hostess gift.
Get the full tutorial at The Seasoned Homemaker.
66. Easy No-Sew Felt Fruit Coasters

No sewing machine? No problem! These felt fruit coasters are made with layers of colorful felt and a little glue, so they’re quick enough for an afternoon and easy enough for beginners. Cut circles in bright neon felt, then add slices, seeds and rinds to turn them into lemons, limes, oranges, grapefruit, watermelon and apples. They’re so cheerful under a glass of iced tea on a summer porch. Make a full fruit bowl set for your own kitchen or a hostess gift. The video shows every step!
Get the full tutorial at DIY JOY.
67. DIY Citrus Print Tea Towel
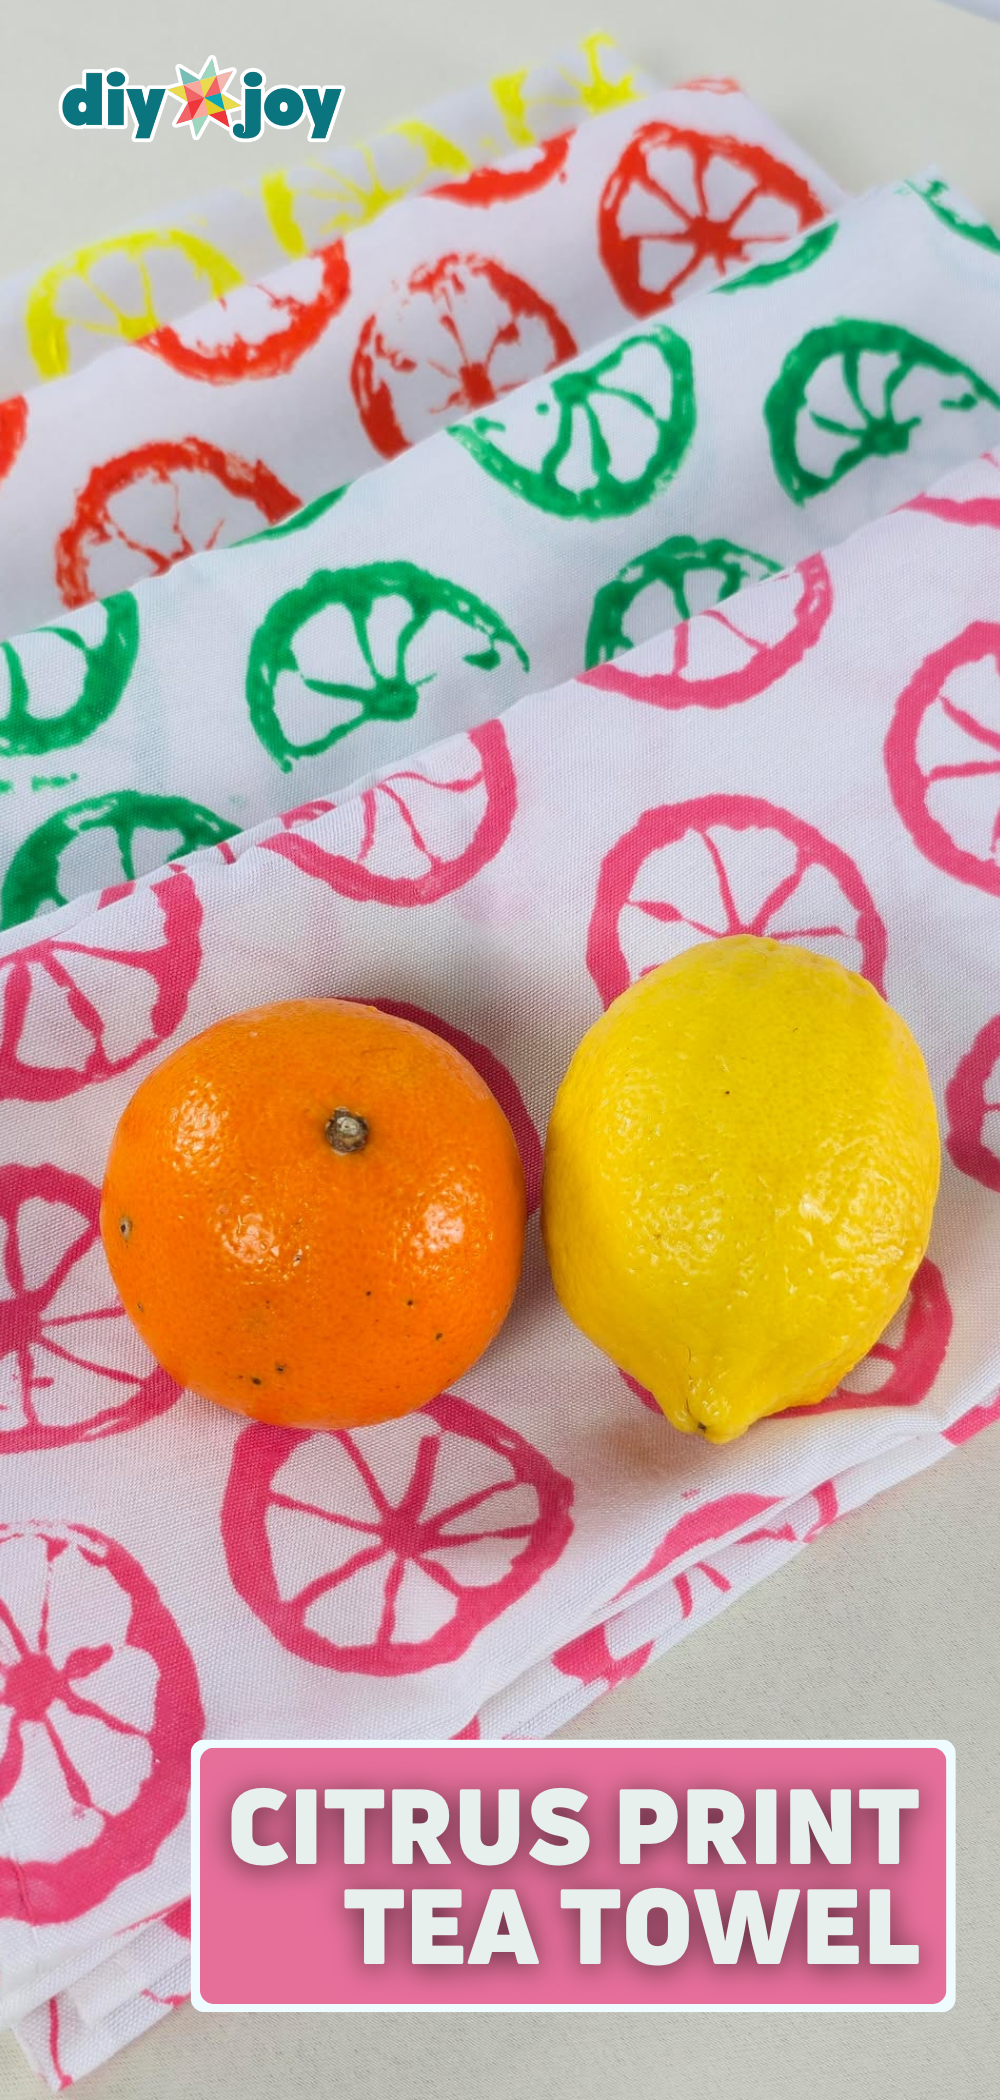
Here’s a no-sew way to make kitchen towels you’ll actually want to show off! Cut a lemon or orange in half, dip it in fabric paint and stamp it onto plain cotton tea towels for a bright citrus print. Pink, green and yellow slices look so fresh, and every stamp turns out a little different. Let the paint dry and heat set it with an iron so it survives the wash. Tie a stack with twine for a hostess gift or a summer housewarming. The video shows the whole process!
Get the full tutorial at DIY JOY.
68. Stay-Put Kitchen Towel
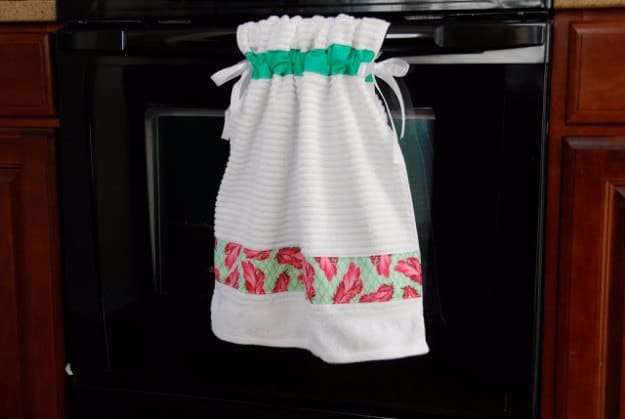
Tired of your kitchen towel ending up on the floor? This stay-put towel ties onto your oven handle with ribbon so it stays right where you need it. Cut three strips of fabric, fold under the raw edges and stitch them across the towel, then sew ribbon ties into the top strip spaced to fit your oven handle. Measure your handle first so the ties land in the right spot. It’s a fun way to show off a favorite fabric on a boring kitchen basic. Make a few for gifts!
Get the full tutorial at Pin. Sew. Press..
69. Easy Button Hanging Kitchen Towel
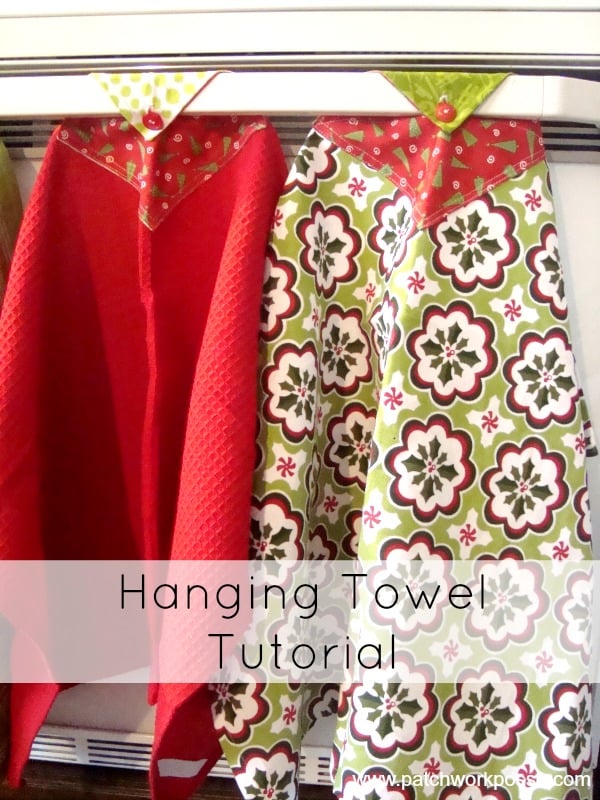
Tired of picking dish towels up off the floor? This hanging towel stays put on the oven handle! Start with a store-bought tea towel and two 6 inch squares of fabric. Sew the squares right sides together, leaving a small gap, then clip the corners, turn and press. Pin the square point-up at the center of the towel, stitch the sides and sew across on the line of the towel’s hem. Add a buttonhole at the tip and a button to match. Perfect for housewarming and holiday gifts!
Get the full tutorial at Skip To My Lou.
70. Oven Mitt and Hot Pad DIY
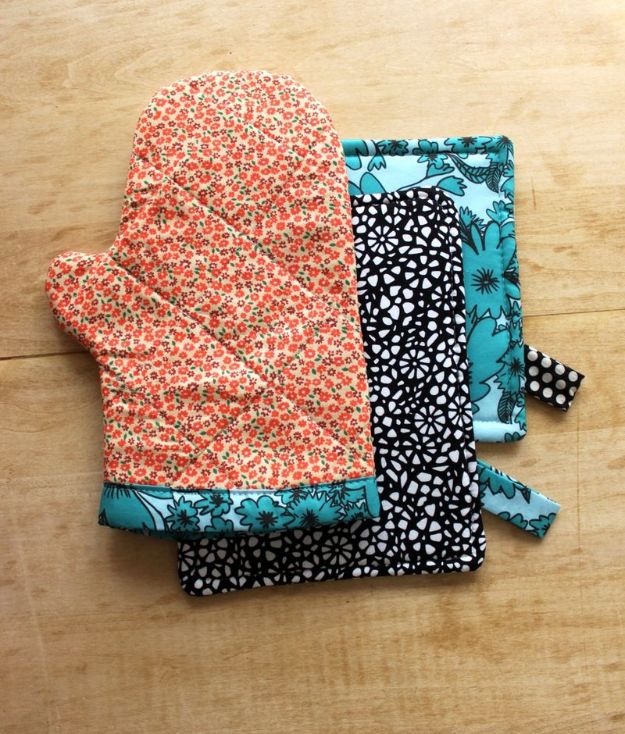
An oven mitt and hot pad set is a fun next step after your first pillowcase. For the mitt, cut outer fabric, inner fabric and insulated lining about 14 by 8 inches each, then quilt each fabric sandwich with diagonal lines stitched from the center out so nothing bunches. Trace around a mitt you already own, stitch the two sides together and trim. A folded 3 by 17 inch strip finishes the bottom like binding. The hot pad is quicker still, roughly 8 by 10 inches with a little hanging loop.
Get the full tutorial at A Beautiful Mess.
71. DIY Bowl Pot Holder
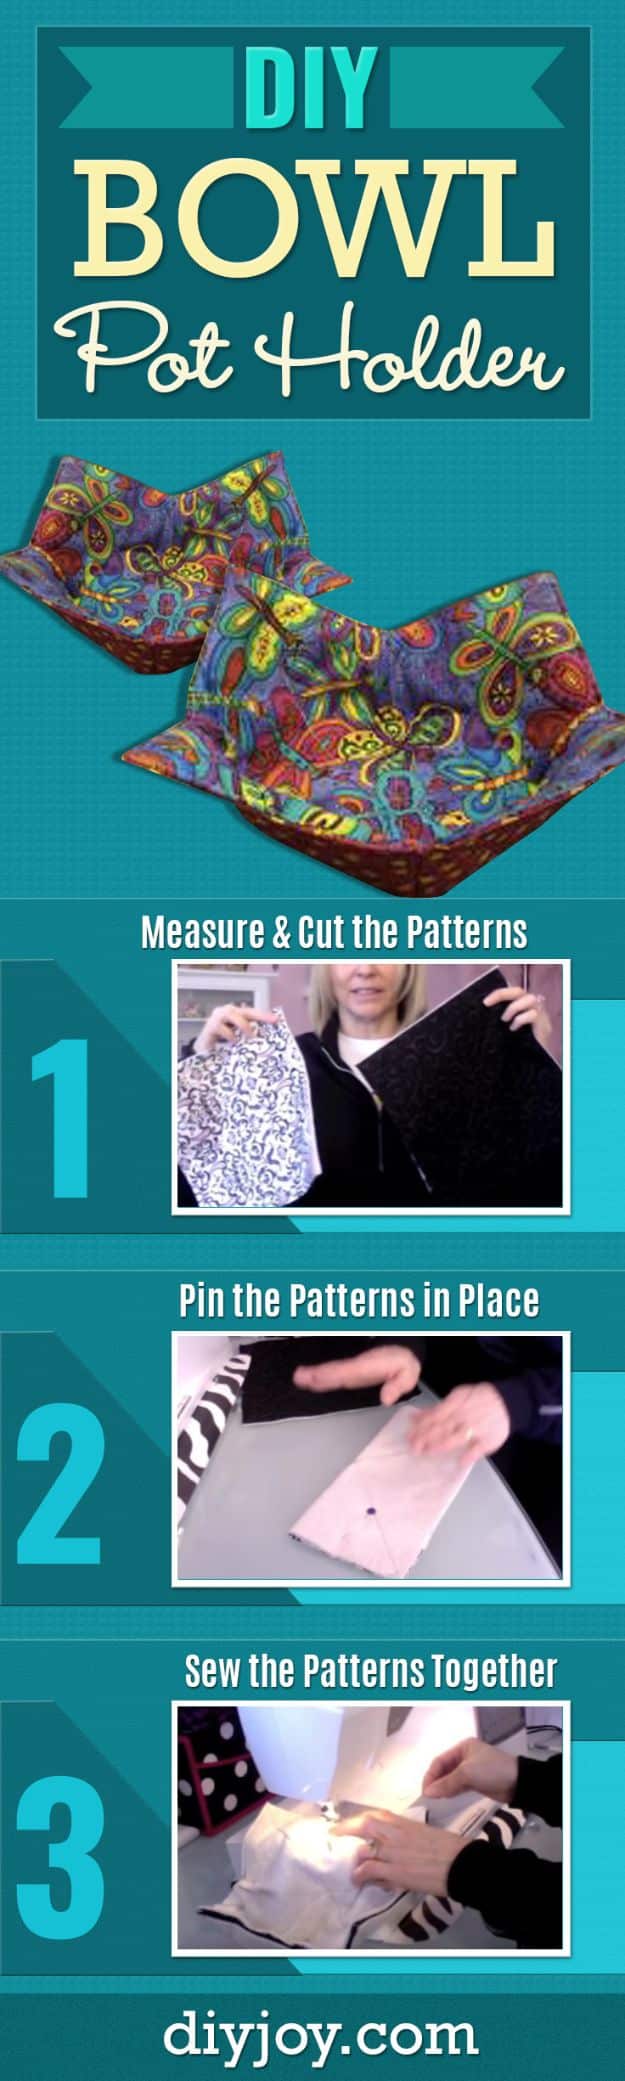
A DIY bowl pot holder is the answer to soup bowls that come out of the microwave way too hot. This fabric cozy cups the bottom of the bowl, so you can carry it to the table without burning your fingers or sloshing soup. Sew it from 100% cotton fabric and cotton batting only, because polyester can scorch in the microwave. Measure, cut and pin the pattern pieces, then stitch them together. Size it up for casserole dishes or down for cereal bowls, and toss it in the wash when it’s messy.
Get the full tutorial at DIY JOY.
72. Skillet Handle Cover
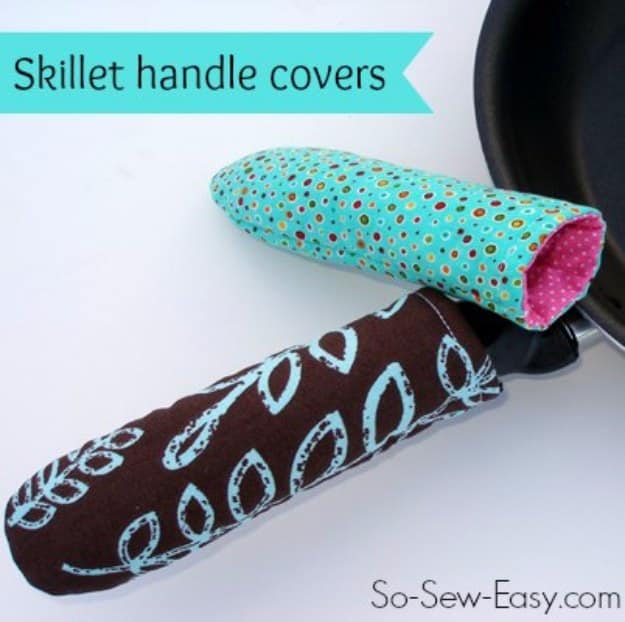
Cast iron handles get hot fast, and a fabric skillet handle cover keeps your fingers safe. This quick project uses two fabrics and a layer of insulated batting sewn into a little sleeve that slides over the handle. Cut the pieces to fit your pan, stitch the layers together, turn and topstitch. A fun print on the outside with a contrasting lining looks so cute hanging by the stove. They’re a great scrap project and a perfect gift to tuck in with a new skillet or a favorite cornbread recipe.
Get the full tutorial at So Sew Easy.
73. Washable Reusable Bowl Covers
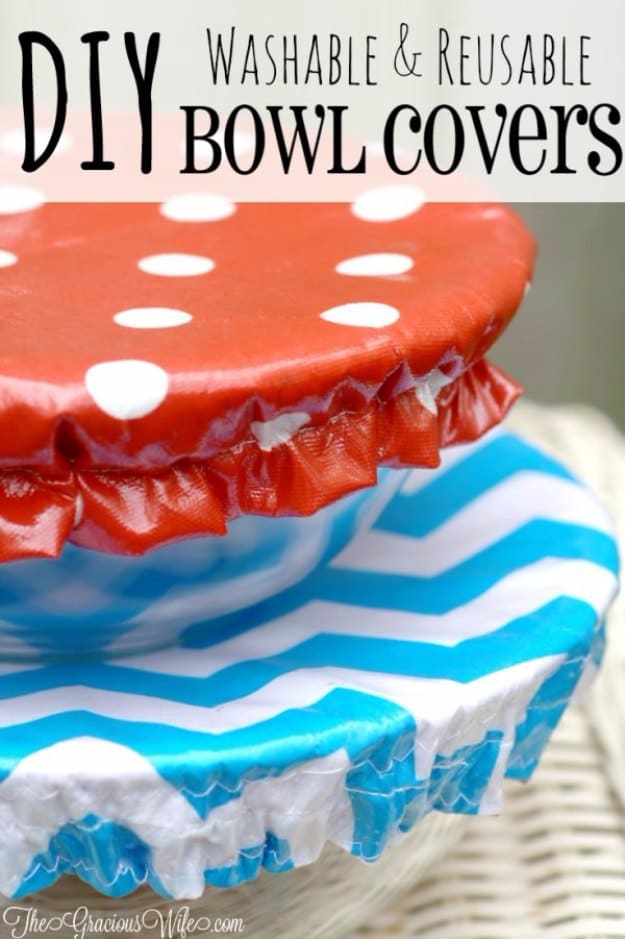
Skip the plastic wrap and sew a set of washable bowl covers! A circle of laminated cotton or oilcloth gets a channel of elastic around the edge so it stretches over bowls of salad, dough or leftovers. Cut a circle a few inches bigger than your bowl, finish the edge to make a casing and thread the elastic through. A bit of ruffle at the edge makes them extra cute. Polka dots and chevrons are fun for summer picnics. Make a set in different sizes for every bowl you own.
Get the full tutorial at The Gracious Wife.
74. Vintage Bandana Bowl Covers
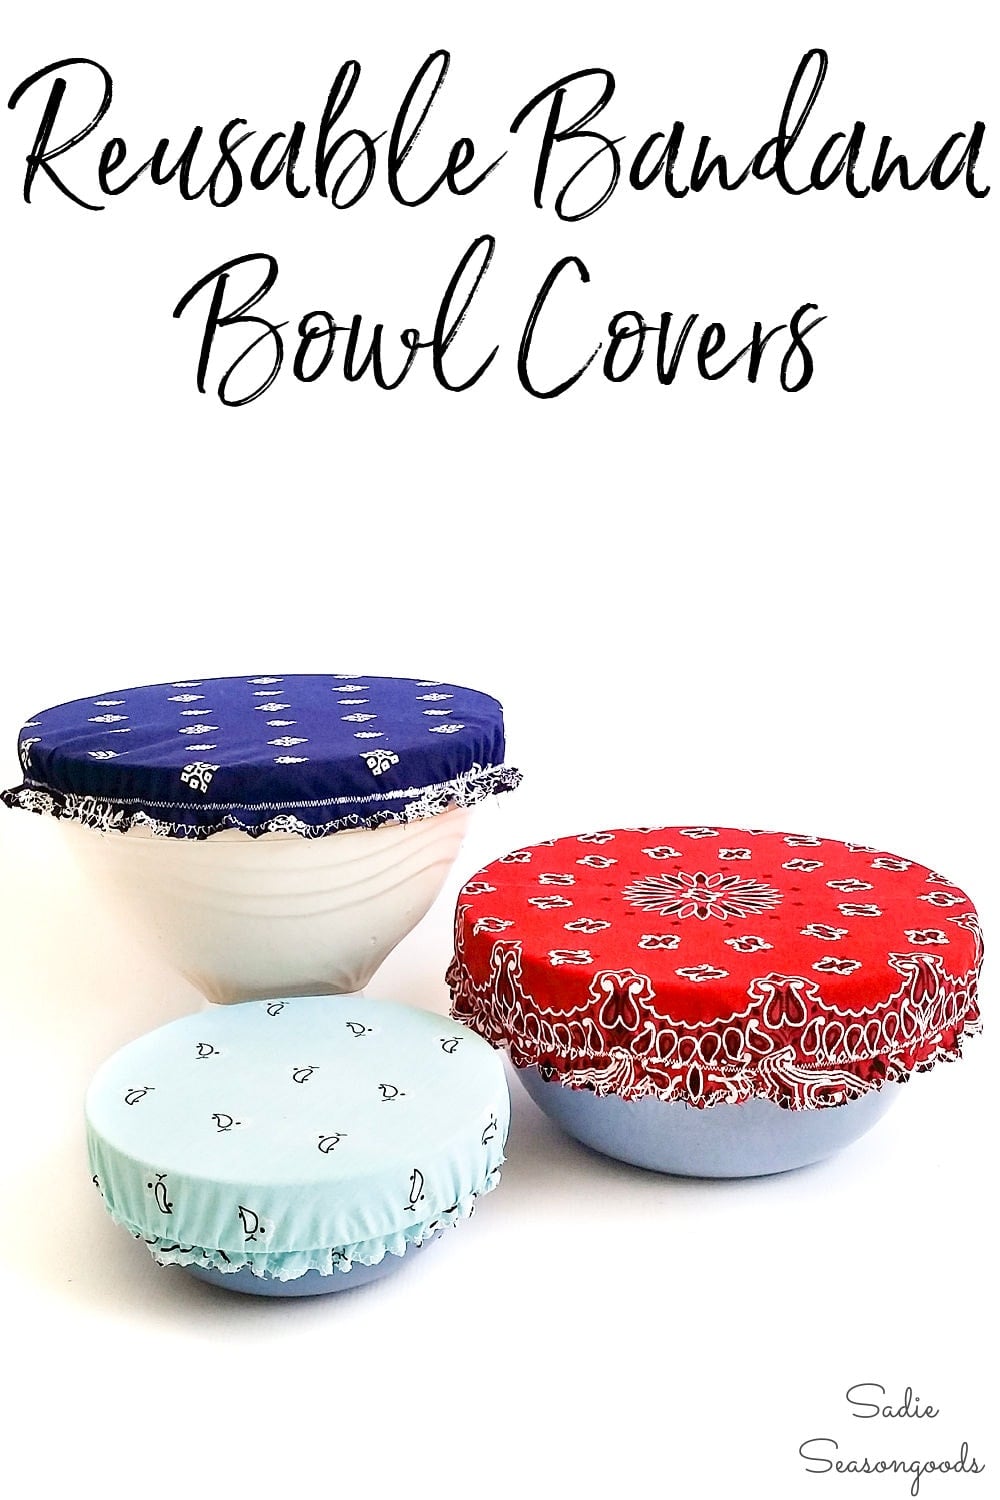
Thrifted bandanas make the cutest bowl covers! This tutorial turns vintage bandanas into stretchy covers with an elastic edge, perfect for keeping bugs off food at a picnic or covering rising bread dough. Cut a circle from the bandana, finish the edge into a casing and thread elastic through so it hugs the bowl. Red, navy and pale blue prints look so charming on stoneware bowls. They wash beautifully and fold flat in a drawer. Make a set in a few sizes to cover everything from salsa to salad.
Get the full tutorial at Sadie Seasongoods.
75. Reversible KitchenAid Mixer Cover
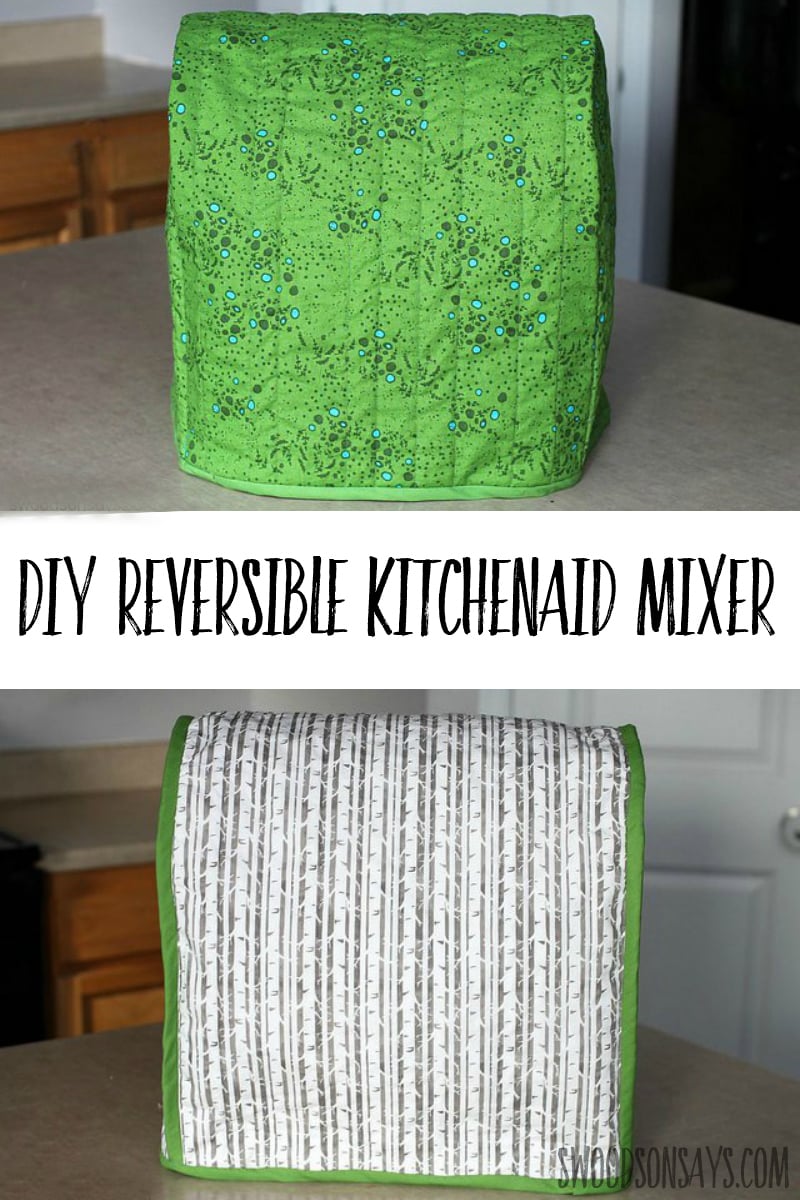
Keep your stand mixer dust free with a quilted cover you can flip for a new look. This tutorial shows you how to measure the mixer, quilt two fabrics with batting in between and bind the edges in a coordinating color. One side is a bright green floral and the other a soft gray print, so you can switch it out whenever you like. The quilted layers give it nice structure so it stands up on the counter. It makes a fantastic gift for a baker in your life!
Get the full tutorial at Swoodson Says.
76. DIY Reversible Fabric Storage Bin
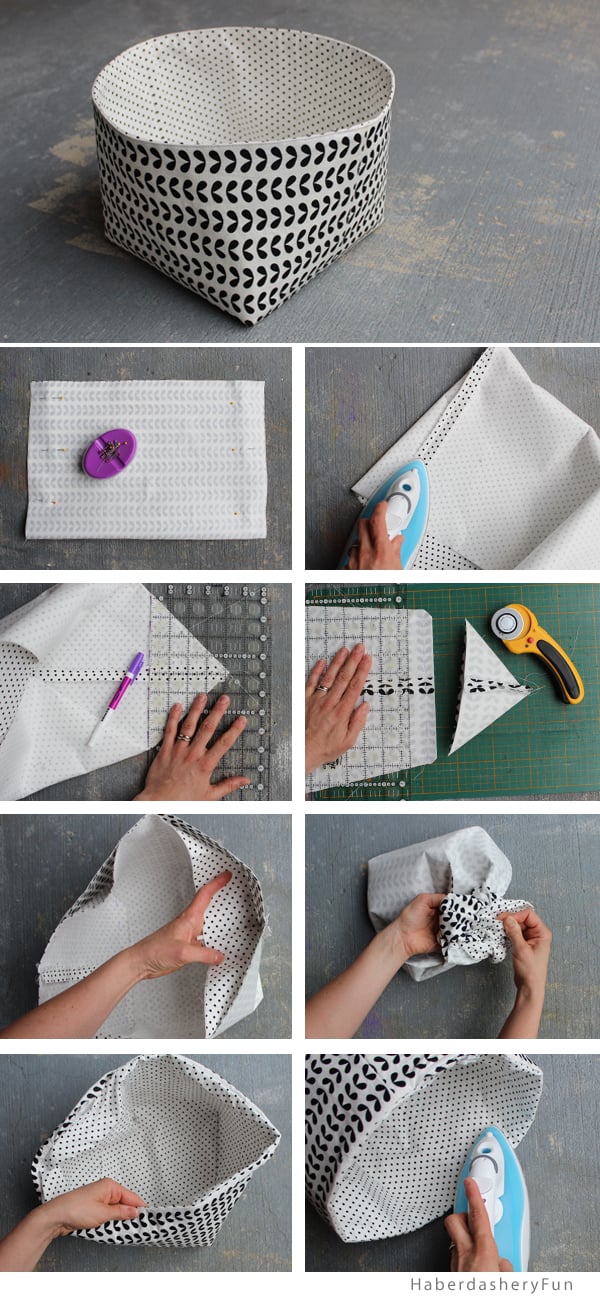
Fabric bins are addictive, and this reversible version is one of the easiest you’ll find! You need just a half yard each of outside and lining fabric plus some fusible decor weight interfacing. Cut 18 by 24 inch rectangles, fuse them, fold and sew the side seams, then box the corners by measuring 4 inches up from the tip. Do the same with the lining, slip one inside the other and fold the top down for a soft cuff. The finished bin is about 9 inches square, perfect for toys, yarn or towels.
Get the full tutorial at Haberdashery Fun.
77. Never Full Fabric Bucket
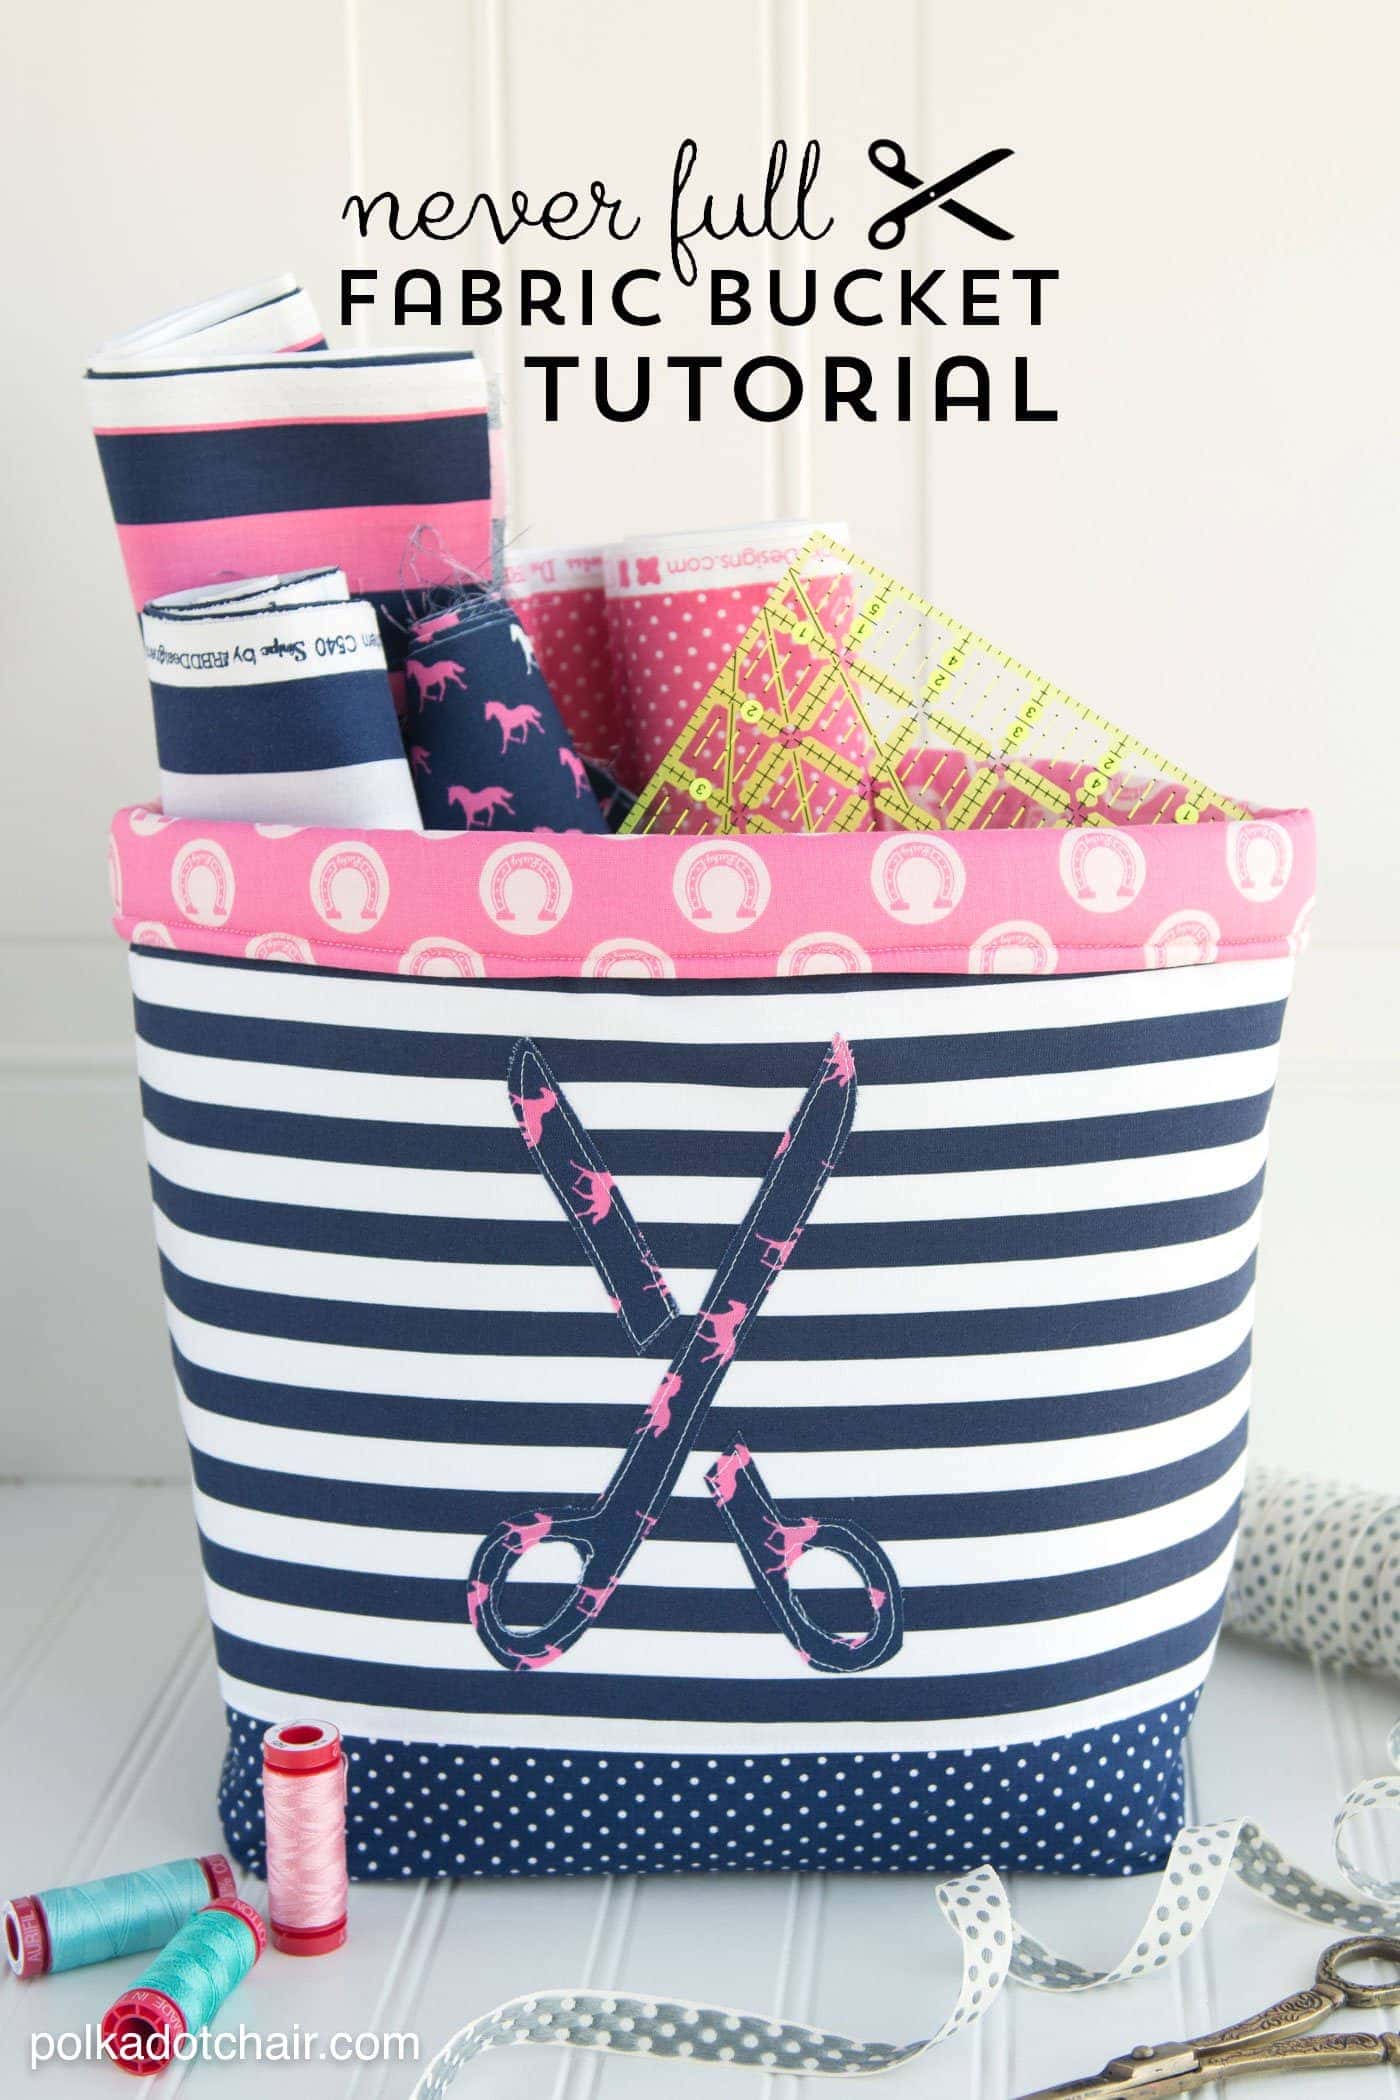
This large fabric bucket is so roomy, it’s a great catch all for fabric, toys or blankets. You’ll sew the outside panels to a contrast bottom, add a scissors applique with paper backed fusible web, then sew the lining and slip it inside. Foam interfacing gives the bucket structure so it stands up on its own. Cut 3 inch squares from the bottom corners to box them neatly. Navy stripes with a pink lining look fresh in a sewing room. Swap the applique for an initial or any shape you love.
Get the full tutorial at Polka Dot Chair.
78. Simple and Sweet 30 Minute Fabric Basket
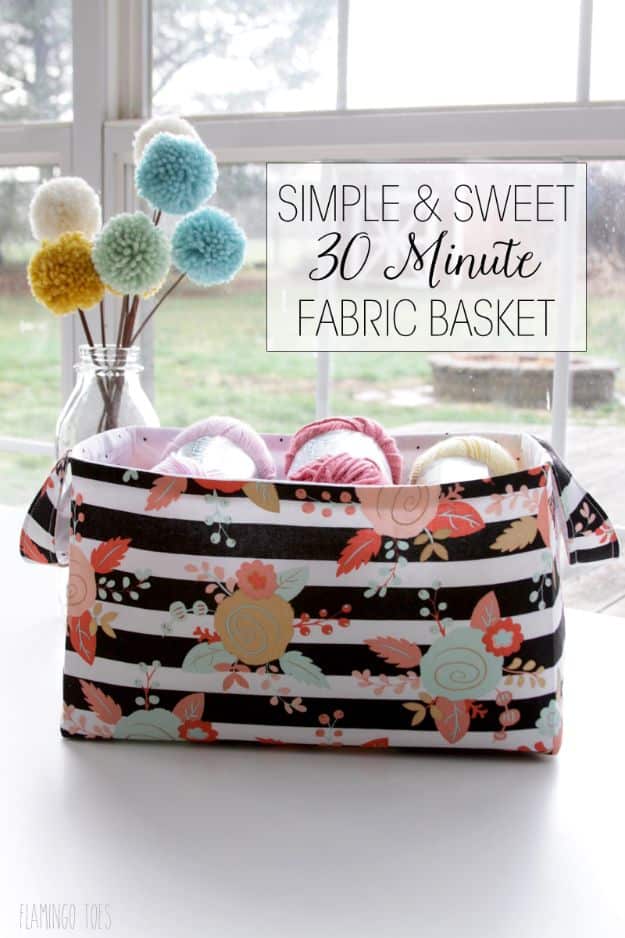
This simple and sweet fabric basket goes together in about half an hour with straight seams only. You’ll need 1/3 yard each of outer and inner fabric plus Craftfuse interfacing to help it hold its shape. Cut two 11 by 22 inch pieces from each, fuse, sew the sides and bottom, then box the corners at 6 inches. Make two 2 by 10 inch handles, baste them 2 inches from the center seam, add the lining and turn through a gap. Fold the top down for a structured look.
Get the full tutorial at Flamingo Toes.
79. Stenciled Fabric Nesting Trays
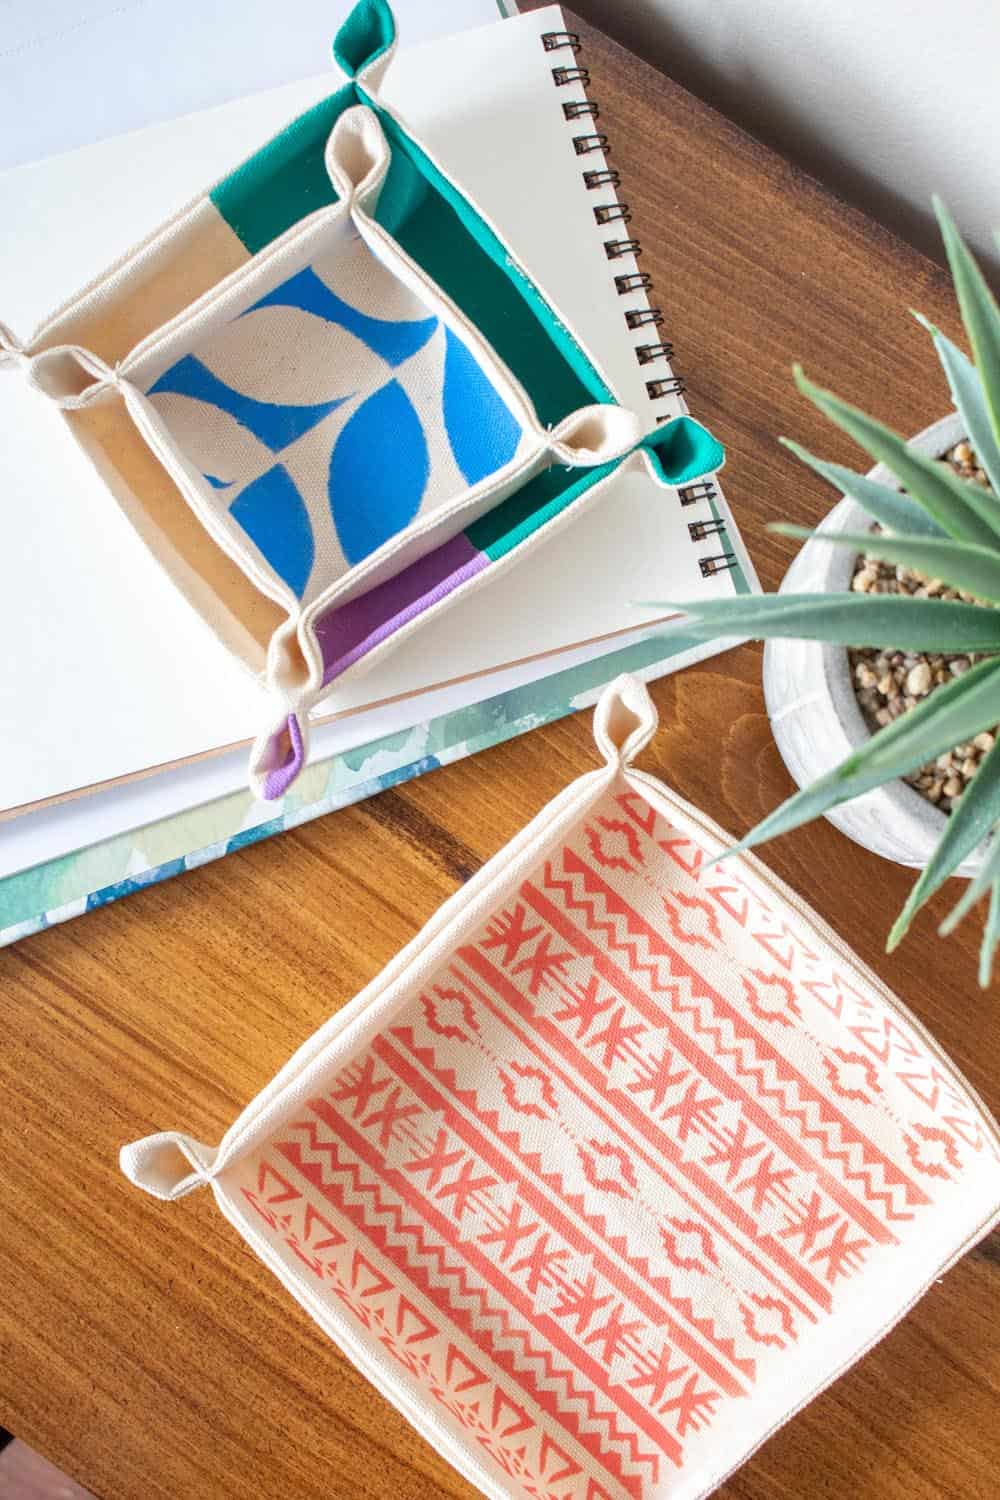
Need a pretty catch-all for keys and jewelry? These fabric nesting trays look tricky but they’re so simple to sew! Cut canvas squares in three sizes, stencil fun patterns with acrylic paint, then stitch two layers together and pinch the corners into little tabs. Make the whole set of three or just one. They’re perfect on a dresser, entry table or desk, and they make a sweet gift filled with treats!
Get the full tutorial at Single Girl’s DIY.
80. DIY Denim Jean Organizer
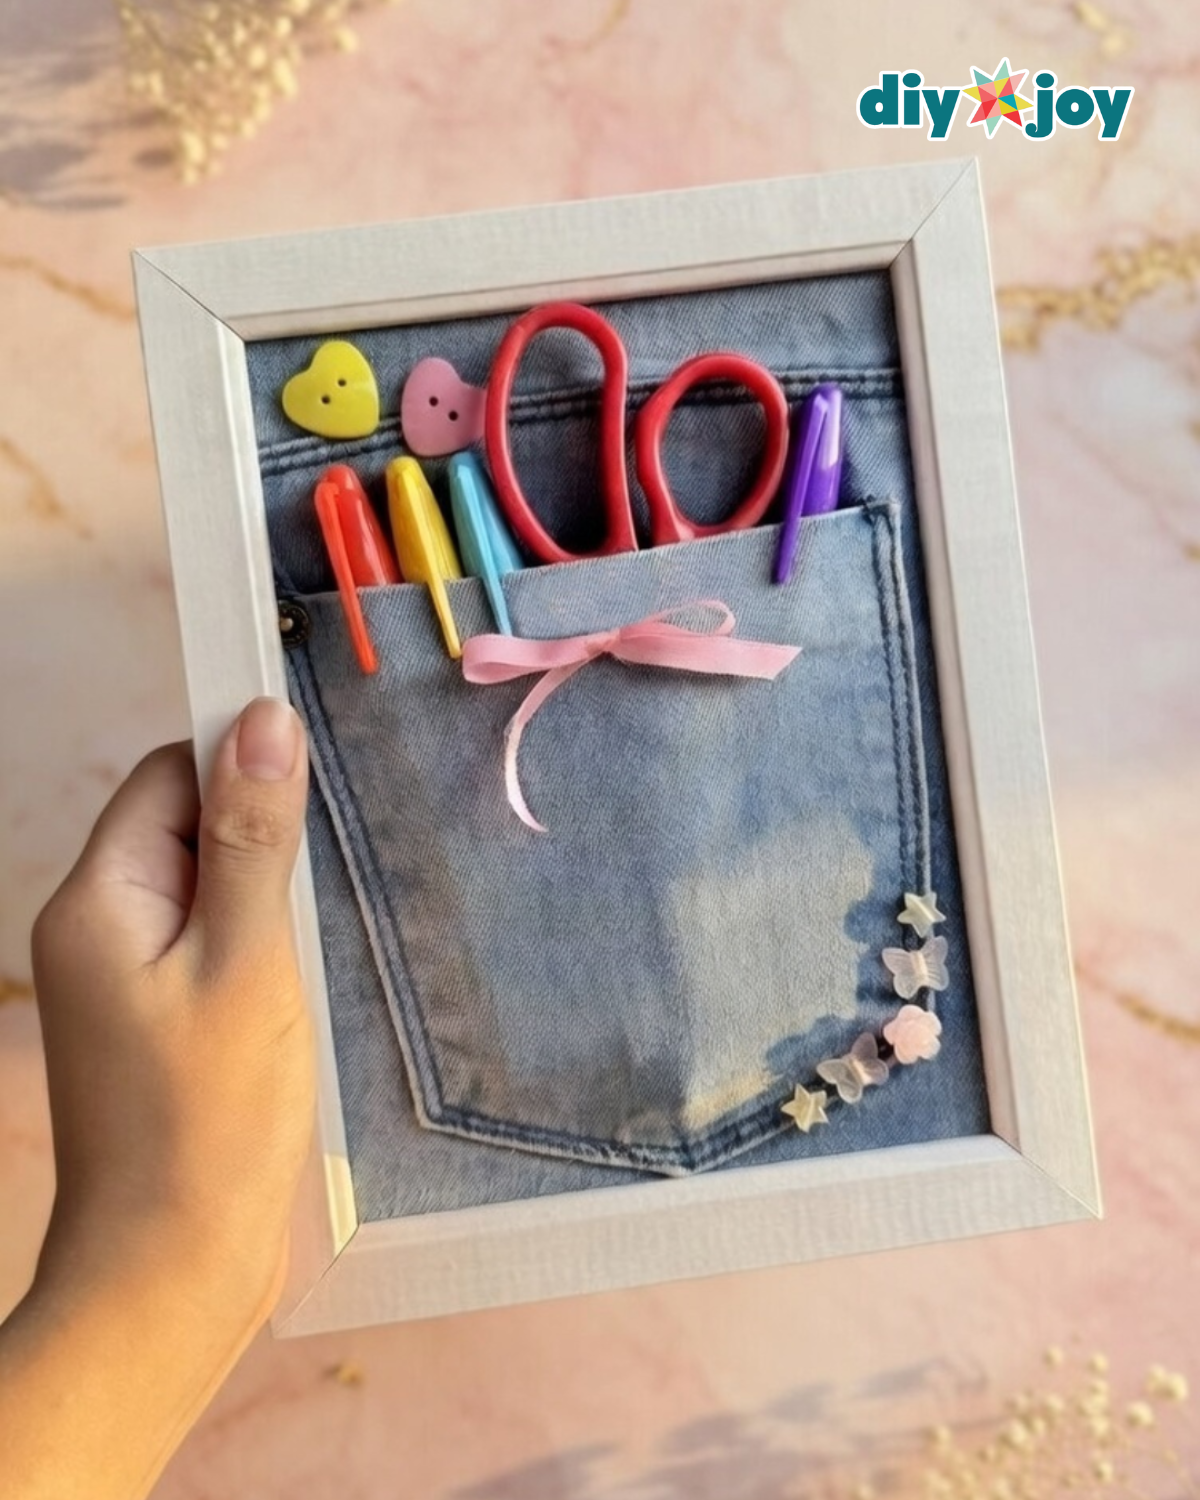
Got old jeans in the donation pile? Turn the back pockets into a framed organizer for your craft desk! Cut a pocket from the jeans, leaving some denim around it, and mount it inside a simple picture frame. Tuck in pens, markers, scissors and hair clips, and add a ribbon bow or a few buttons for decoration. It hangs on the wall or stands on a desk, so supplies are always within reach. It’s a super quick upcycle that needs almost no sewing. The video shows every step!
Get the full tutorial at DIY JOY.
81. Hanging Jewelry Organizer
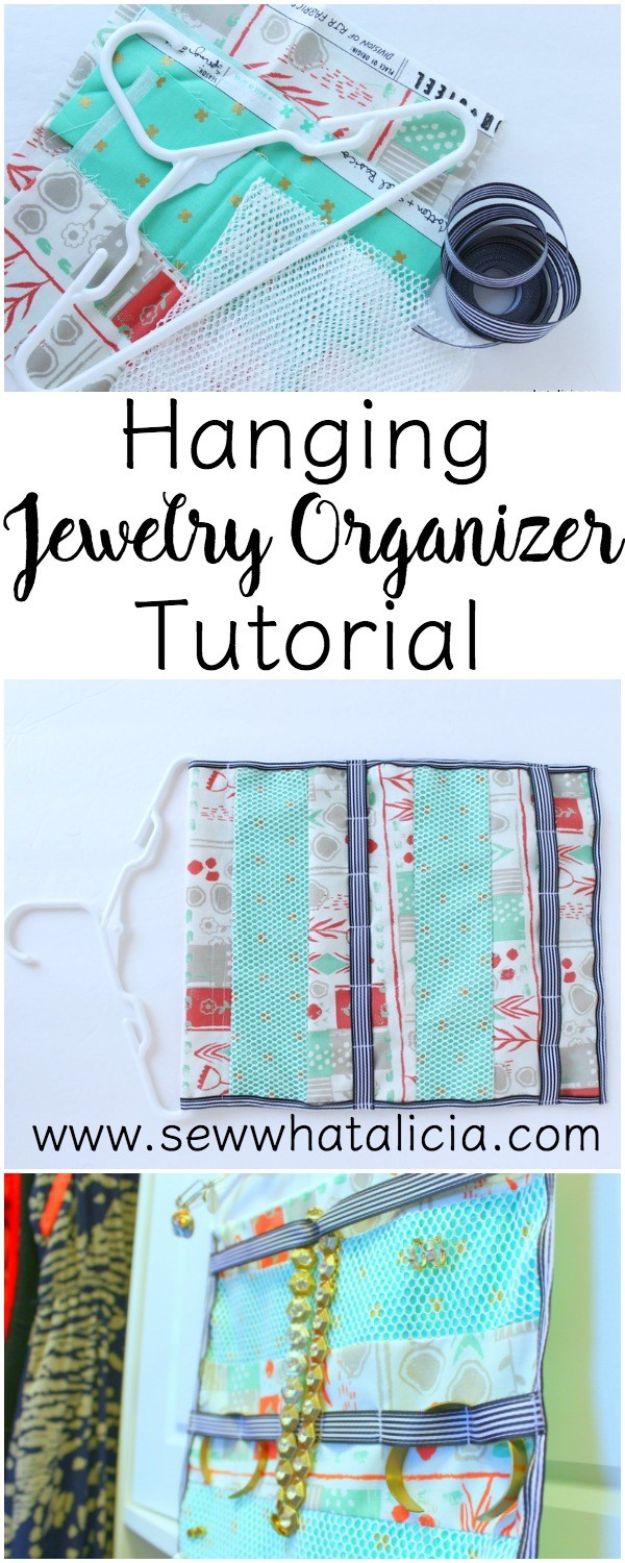
A hanging jewelry organizer keeps necklaces untangled and earrings where you can see them. Cut two mesh strips and two solid strips, each 11 by 3 inches, plus three 11 by 4 inch print strips. Topstitch the mesh onto the solid pieces to make see-through pockets, then piece everything together in a row. Back it with a fat quarter, bind three sides in grosgrain ribbon and sew ribbon bands across the front to hold hanging pieces. Fold the top over a hanger. Use a pretty wood or velvet one.
Get the full tutorial at Sew What, Alicia?.
82. Mesh Laundry Bag
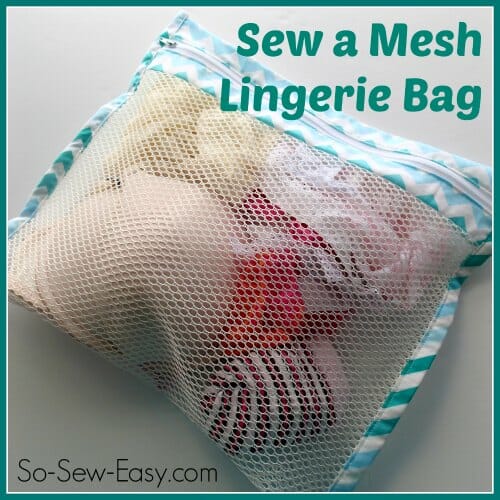
Protect delicates in the wash with a handmade mesh laundry bag. This tutorial uses sturdy polyester mesh, a zipper across the top and bias binding around the edges so the seams don’t fray. Measure the size you want, cut two pieces of mesh, bind the edges and sew in the zipper, then stitch around the sides. They’re perfect for lingerie, baby socks or anything that likes to disappear in the dryer. Aqua binding makes them easy to spot. Sew a few in different sizes for the laundry room.
Get the full tutorial at So Sew Easy.
83. Quilted Tablet Cover With Zippered Pocket
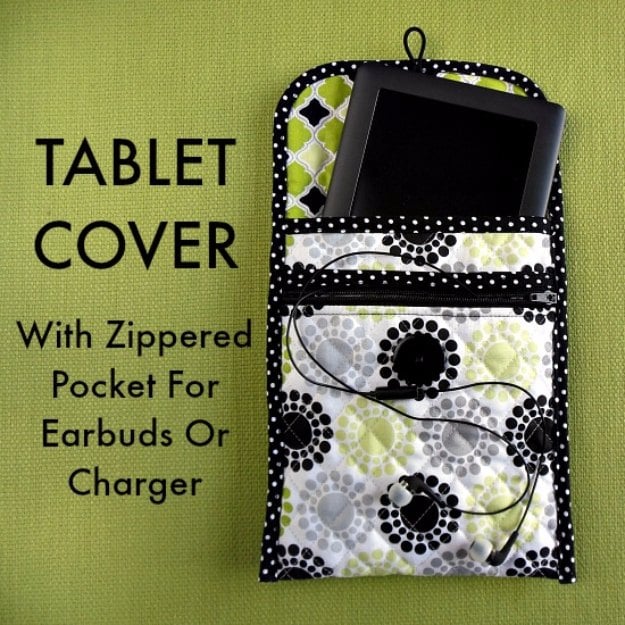
Keep your tablet or e-reader safe with a quilted cover that has a handy zippered pocket for earbuds or a charger. You’ll measure your device, cut a rectangle a little wider and twice as long plus a few inches, round the corners and quilt your fabrics with batting in between. Bind the edges with bias tape, sew in a short zipper for the pocket and close it with a hair elastic and a button. Black and white prints on bright green look so modern. Make one for every reader in the house.
Get the full tutorial at So Sew Easy.
84. Pretty Fabric Envelopes
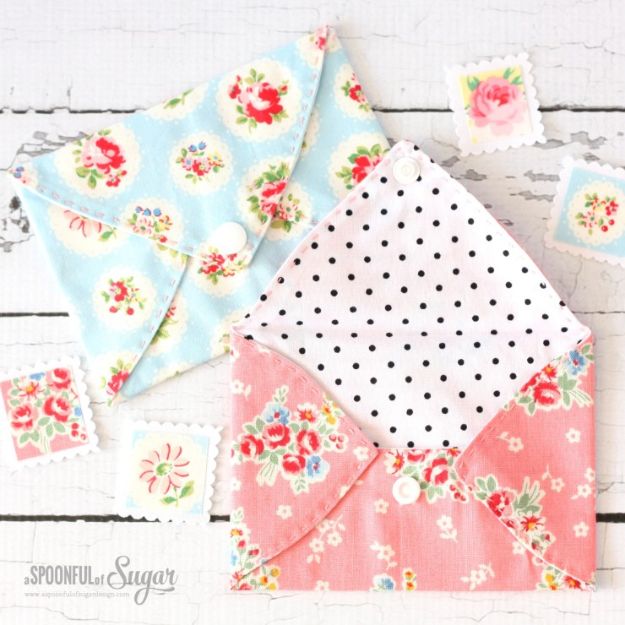
Pretty fabric envelopes turn a gift card into a present all on their own. Open up a paper envelope and use it as your template on fat quarter fabric, adding a 1/4 inch seam allowance, and cut a lining to match. Fuse little fabric stamps, trimmed with pinking or scallop shears, plus a printed address label onto the front and stitch around them. Sew the outer and lining together, turn and press, then add a snap to close the flap. Each one takes under an hour.
Get the full tutorial at A Spoonful of Sugar.
85. Makeup Roll
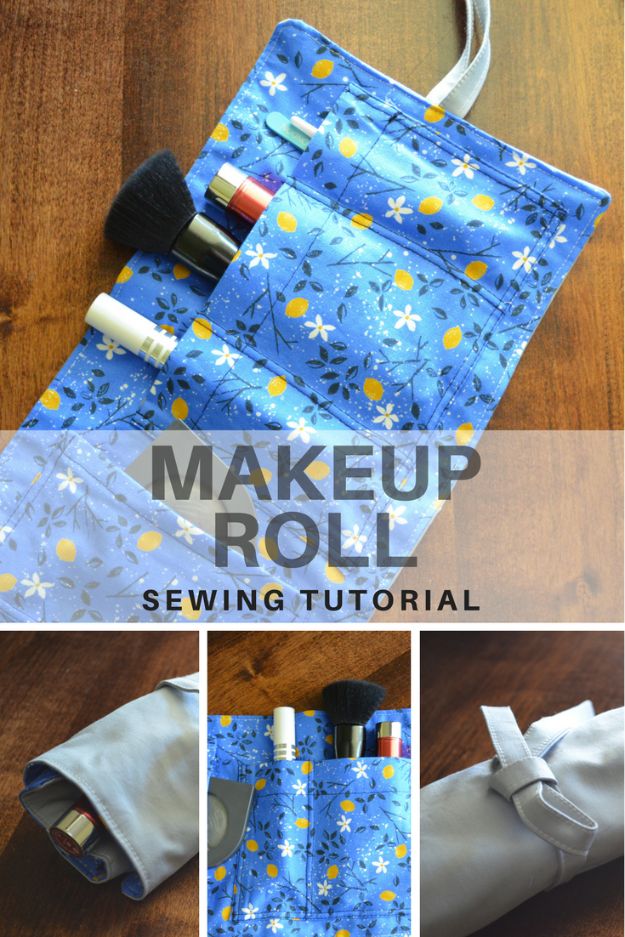
A makeup roll keeps brushes, lipsticks and pencils tidy in a drawer or a weekend bag, and it’s a 30 minute scrap buster. Cut outer and inner fabric at 14 by 8 inches, a big pocket, a small pocket and two 13 by 2 inch straps, plus lightweight fusible interfacing. Fold and press the straps, then edgestitch them. Hem the pockets, place them 3/4 inch from the edge and stitch them on with a twin needle. Sew outer to inner, turn, press and topstitch all around.
Get the full tutorial at On the Cutting Floor.
86. Travel Organizer For the Car
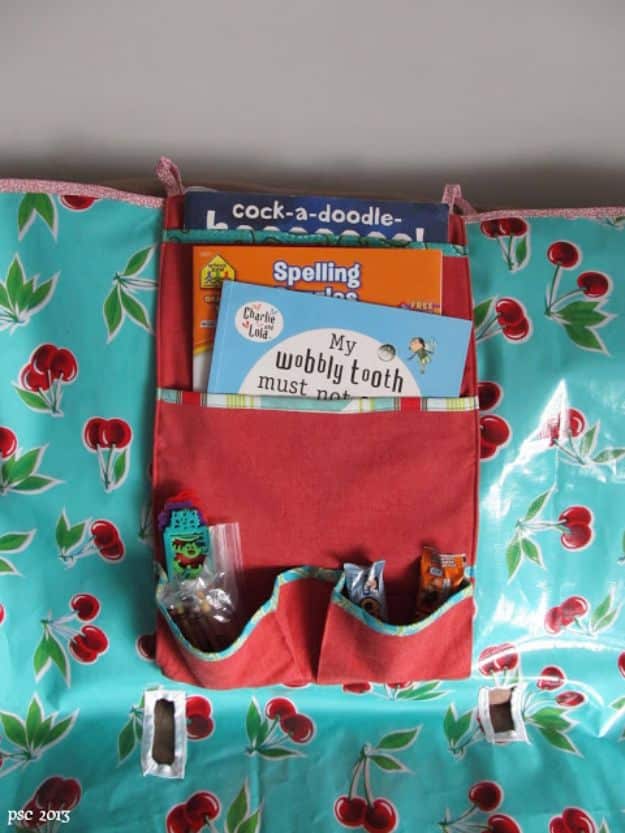
A back seat travel organizer keeps books, snacks and small toys in reach on long drives. You’ll need half a yard of home decor weight fabric, half a yard of fusible fleece and about a yard of 2 inch bias tape. Cut two 12 by 19 inch main pieces, two flat pockets and a strip for pleated pockets. Bind the pocket tops, stitch the flat pockets on, then fold and stitch pleats for roomier ones. Topstitched bias tape straps buckle it between car seats, so measure your car first.
Get the full tutorial at Pickup Some Creativity.
87. DIY Travel Diaper Changing Pad & Playtime Mat
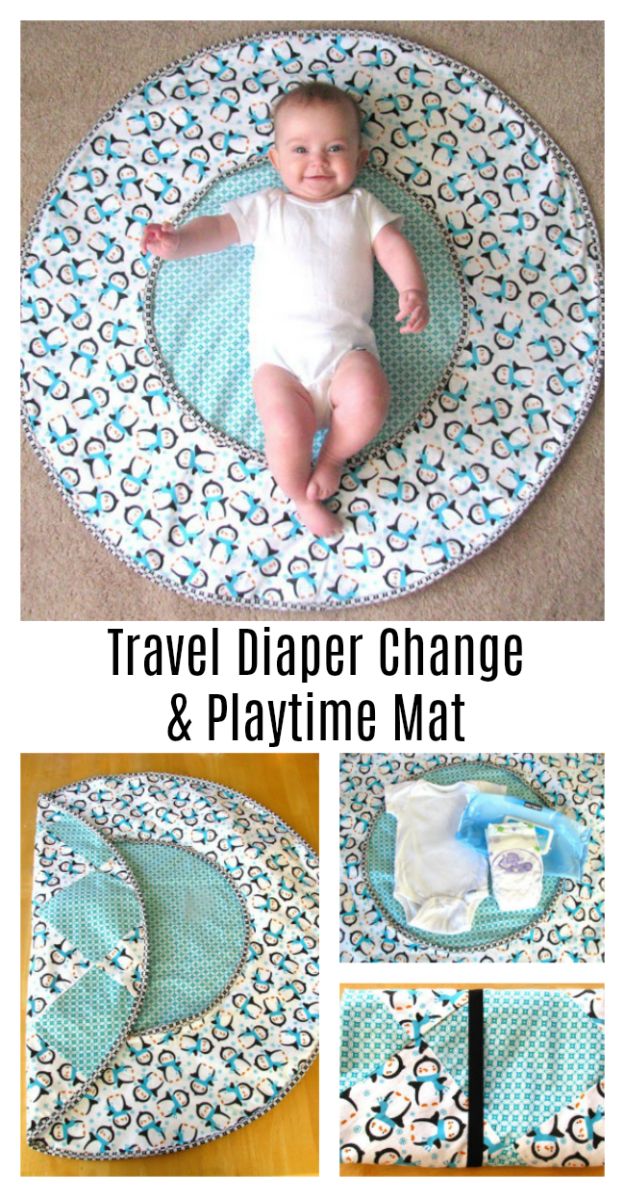
This travel changing pad doubles as a play mat, so it earns its spot in the diaper bag. You’ll need 1 yard each of three coordinating fabrics and about 5 1/4 yards of bias tape. Tie a 15 inch string to a marker to draw a 30 inch circle, then cut three. Cut a center opening from one circle to make a donut shape, which forms the storage pocket for diapers and wipes. Layer, bind the edges and it folds into a compact bundle. The whole mat cost about $6.
Get the full tutorial at Gluesticks Blog.
88. DIY Handkerchief
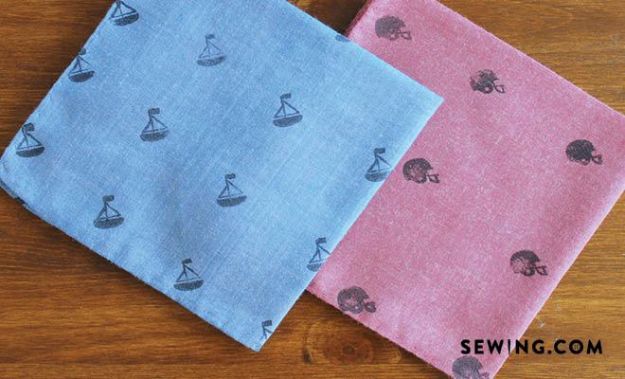
A DIY handkerchief is about as beginner-friendly as sewing gets, and it’s a nice swap for disposable tissues. Start with an 11 1/2 inch square of soft cotton, linen or flannel and press it smooth. Mark a 10 1/2 inch square inside it, leaving a 1 inch allowance, then fold along your markings and trim. Turn under all four edges and sew around with a straight stitch. Don’t tug the corners as you go, or they’ll pucker. Stamp or embroider a few, and you’ve got a sweet gift.
Get the full tutorial at Sewing.com.
89. Easy Scrap Fabric Pumpkins
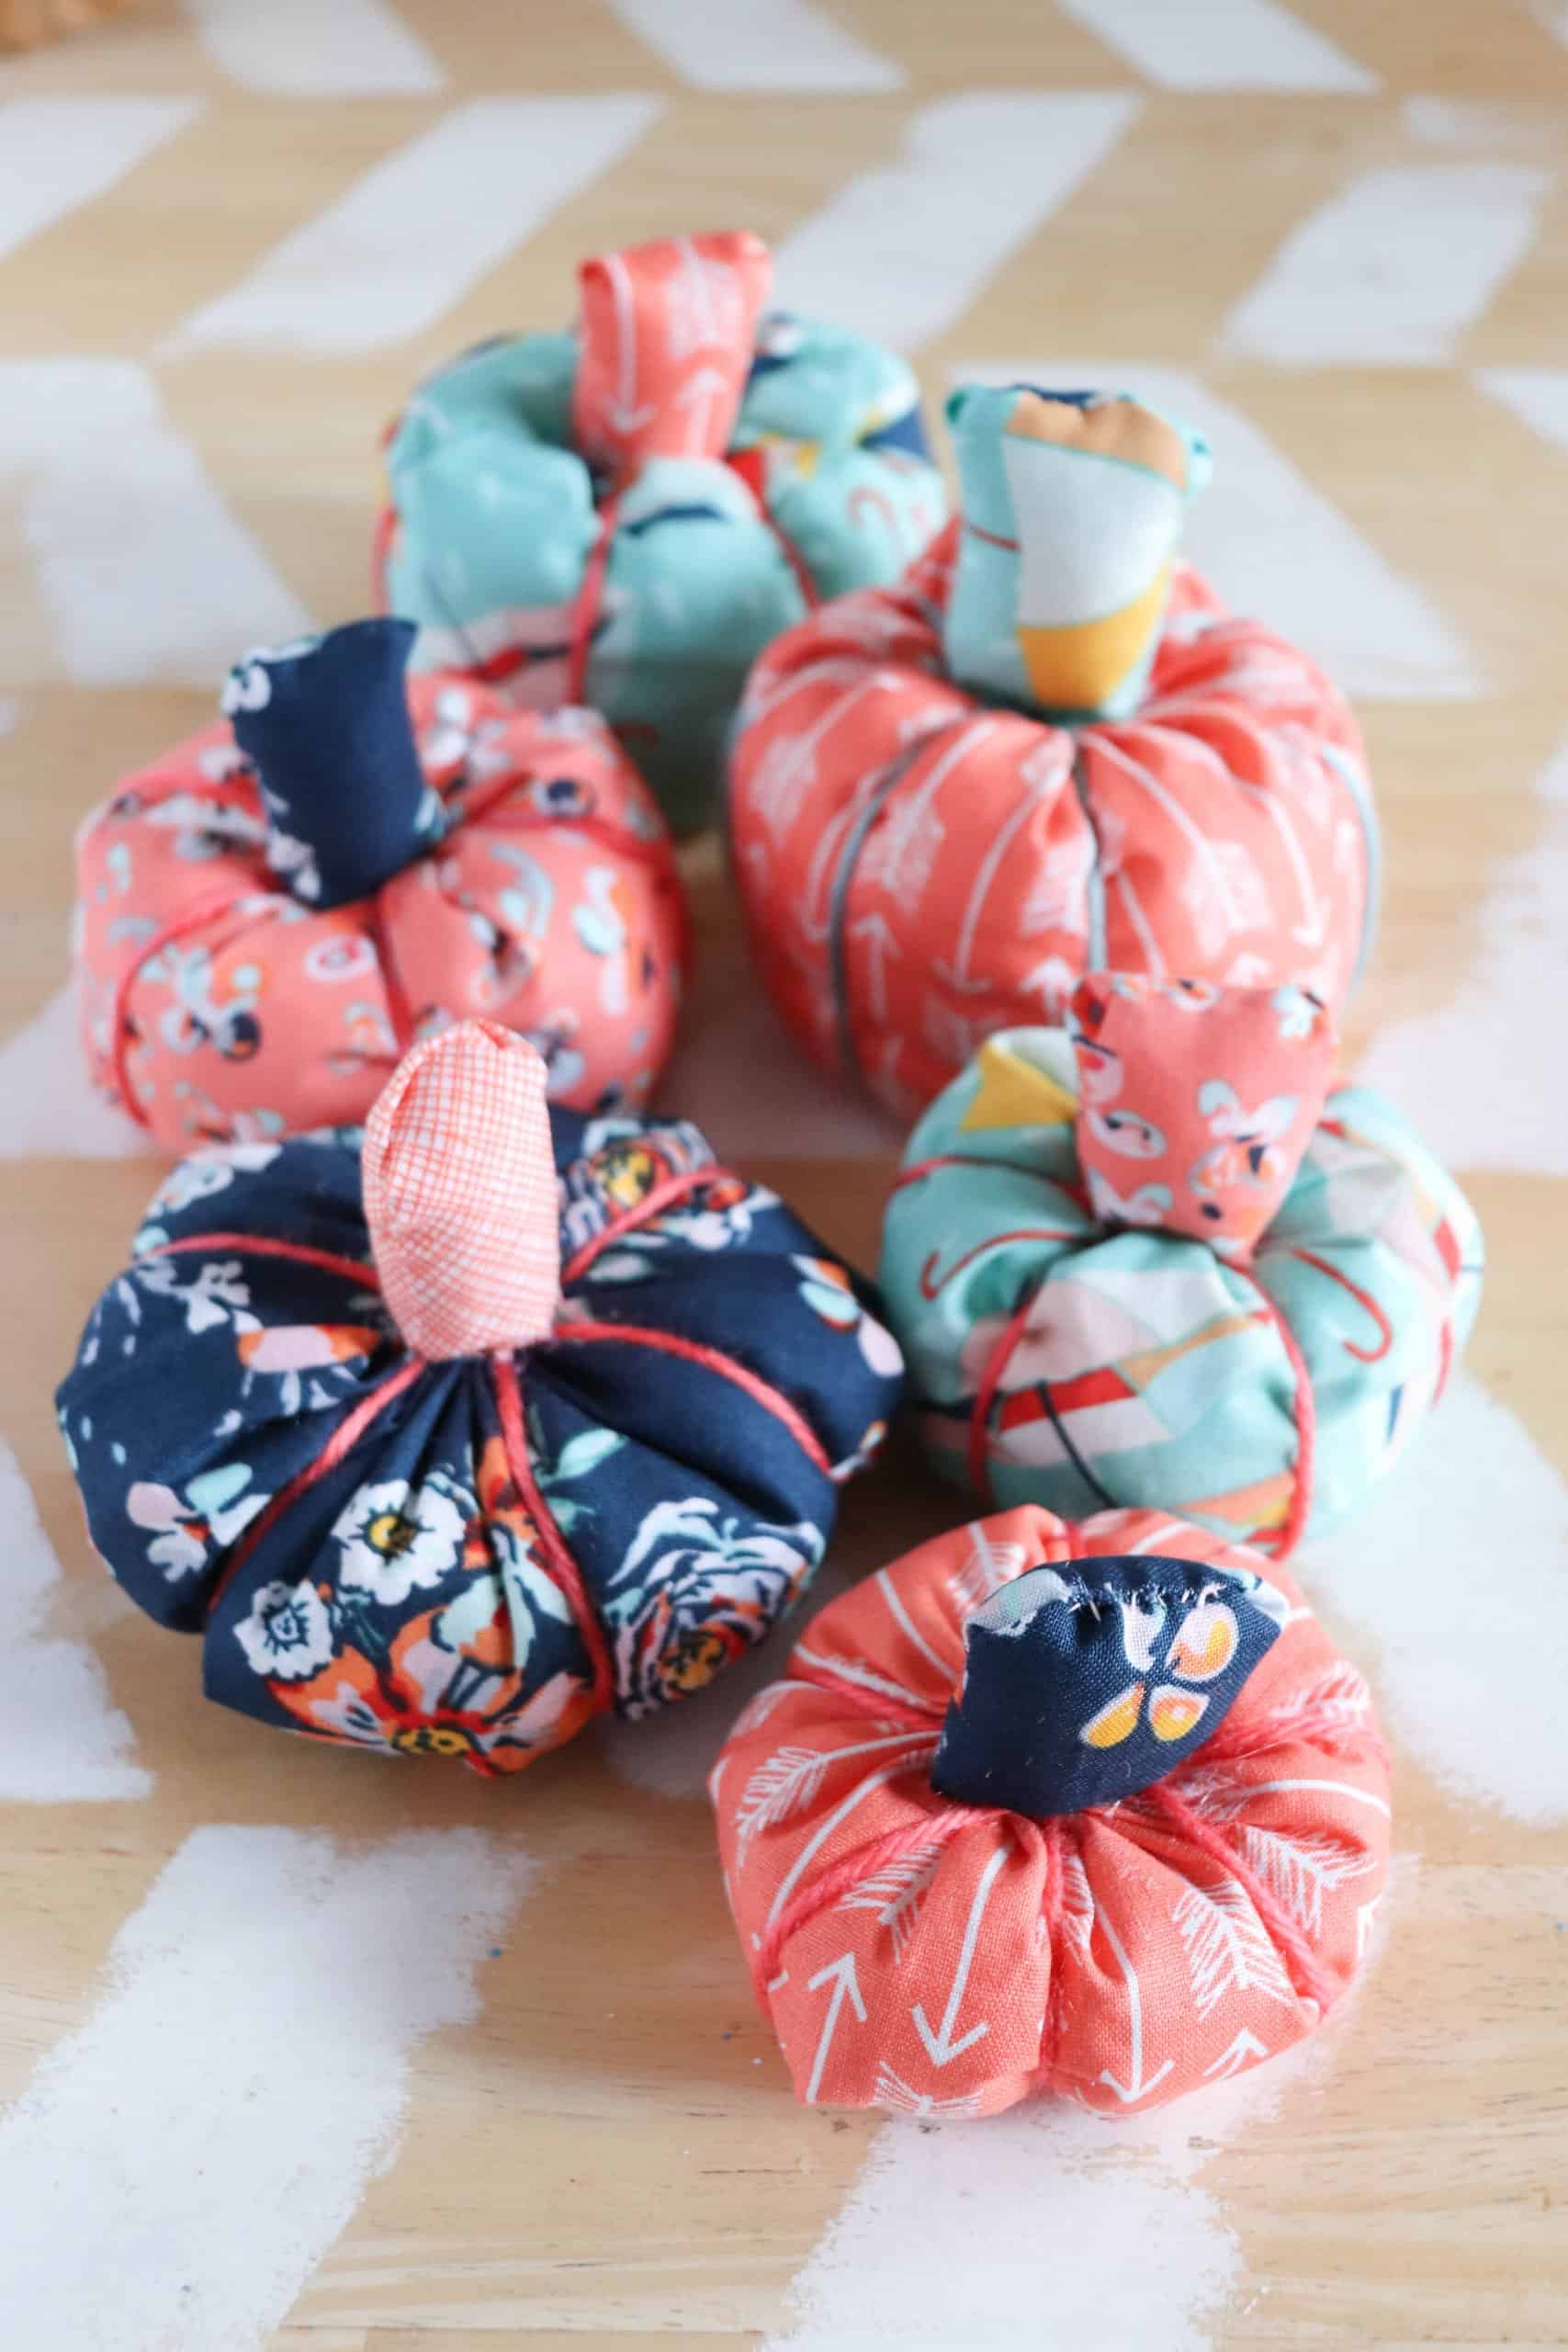
Got a stash of fabric scraps? Turn them into the cutest fall pumpkins! Cut a rectangle twice as long as it is wide, sew the short ends into a tube, then gather the bottom closed with a basting stitch. Turn it right side out, stuff it with fiberfill and pull the top closed with a running stitch. Wrap yarn through the center six times and pull it tight to make the pumpkin sections. A little stuffed fabric stem finishes it. Perfect for a fall mantel or a craft night with friends!
Get the full tutorial at Homemade Heather.