

These tin can crafts turn the cans you were about to recycle into bunnies, pumpkins, scarecrows and toys the kids will actually fight over. You’ll find a white bunny planter with pom pom cheeks for Easter, orange jack o’lantern treat holders for Halloween, red, white and blue flower cans for the Fourth of July and a coffee can scarecrow in a straw hat for fall. Little ones can clomp around on homemade tin can stilts, and there’s a fairy lighthouse that feeds the birds. Grab some paint and a glue gun, because every season gets a project here! If you want planters, storage and lighting for around the house, browse our tin can ideas.
1. DIY Tin Can Cutlery Holder

Hosting a barbecue or a big family dinner? This tin can cutlery holder keeps forks, knives and spoons out on the table where guests can find them, so nobody goes digging through your drawers. Six tall cans, like peeled tomato cans, get their rims sanded smooth and a coat of enamel paint inside and out, which helps keep rust away. A painted piece of wood runs down the middle, and each can is screwed onto it through a hole made with a hammer and nail. A handle screwed on top means the whole caddy travels from kitchen to table in one trip. Afterward it holds pencils, scissors or craft tools.
Get the full tutorial at Madame Criativa.
2. DIY Tin Can Desk Organizer
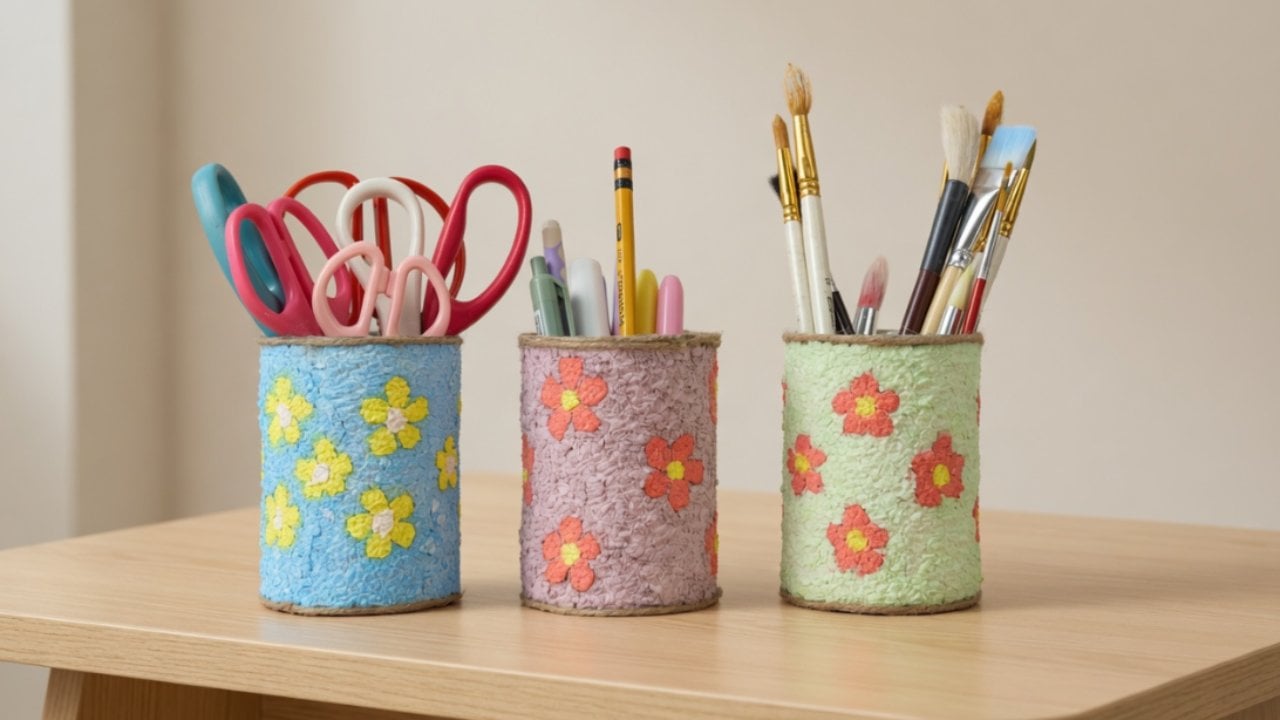
This DIY tin can desk organizer gets its flowers from an unexpected material: wet tissue paper. Tear tissue into small pieces, soak it until soft, squeeze out the water and mash it into a pulp. Mix in glue and paint until it turns smooth and evenly colored. Draw a big, simple flower on the can, then press the colored pulp into the petals and the background. Fill the background first and let it dry before adding the flowers so the colors stay crisp. Drying can take up to 24 hours. The result has a textured, paper mache look that holds pens, scissors and paintbrushes.
Get the full tutorial at DIY JOY.
3. DIY Tin Can Lanterns

Punched tin can lanterns glow with tiny pinpricks of light, and the trick to clean holes is ice. Fill a clean can with sand, top it with water and freeze it overnight so the metal holds its shape while you hammer. Tape a paper design around the can, rest it on a sandbag and punch the pattern with masonry nails, popping it back in the freezer for about 30 minutes after every 10 minutes of work. Add two holes near the rim for a wire handle cut from a coat hanger, then spray paint the outside. Larger cans can hold a small glass jar to shield the candle from wind.
Get the full tutorial at Craftfoxes.
4. DIY Tiered Vase Of Tin Cans

A tiered vase built from three tin cans in graduated sizes makes a sweet centerpiece for fresh flowers. Give each can one coat of white oil based paint, then two or three coats of water based craft paint in the colors you love. Once everything is dry, glue an 8 inch wooden rod inside the bottom of the largest can with epoxy, then glue the middle can on top of it. A 5 inch rod joins the middle can to the smallest one. Fill each tier with water and short stems, like sweet peas, for a cheerful stacked arrangement.
Get the full tutorial at Shelterness.
5. Tin Can Drums

These tin can drums make a darling handmade gift for little ones. Glue decorative fabric around a clean can, then trace the can onto leather and cut a circle 1 inch larger all around. Mark holes around the edge and punch them with a Crop-a-dile or a large needle. Lace a leather cord through the holes and cinch it tight over the top, repeat on the bottom, then run another lace diagonally between the two so the drumheads stay taut. For drumsticks, push a wooden dowel into a wooden ball and glue cotton over the ball. Fabric paint adds a personal design.
Get the full tutorial at A Beautiful Mess.
6. Tin Can Herb Garden

When cold weather is on the way, a tin can herb garden lets you bring a few favorites indoors before the frost. Save a few cans from the week’s cooking, give them a wash and pot up herbs that would not survive outside, like rosemary, along with small pieces of prolific growers such as thyme and oregano. Simple tags cut from wood veneer, tied on with twine and labeled with a permanent marker, name each one. Set the cans on a sunny windowsill and enjoy fresh snips for as long as the herbs last indoors.
Get the full tutorial at Life is a Party.
7. Tin Can Lamp

This tin can lamp stacks two large cans into a glowing bedside light. Poke holes all over both cans with an ice pick and a hammer, skipping the bottom of one can, which becomes the base. Make a larger hole near the bottom of the base can for the cord, then spray paint both cans to hide the label printing. Thread the light kit through the hole, screw in the bulb from inside, then run a bead of construction adhesive along the rim of the base can and set the top can on it. Let it set overnight. Expect sore arms from all that hammering.
Get the full tutorial at A Little Craft In Your Day.
8. DIY Birch Bark Vases

Birch bark vases bring a woodsy, cottage feel to plain vegetable cans. Wrap a strip of birch bark around each can and hot glue it in place, then tie twine around the top and bottom for a layered, rustic finish. Leather cord works well too. For a personal touch, pencil a heart and initials onto the bark, then trace over the lines slowly with a wood burning pen until they darken. A stencil and paint is a good option if you do not own a wood burner. Fill them with tulips or hydrangeas for spring and summer tables.
Get the full tutorial at Jennifer Rizzo.
9. Tin Can Hanging Planter

A painted tin can makes the perfect pot for a hanging planter tied from fabric strips instead of macrame cord. Cut four strips about 1 inch wide and 2 yards long, fold them in half through a metal ring and pull the ends through the loop. Knot the strips into four pairs about 15 inches below the ring. Then knot one strand from each neighboring pair together about 2 1/2 inches lower, repeat once more and finish with one big knot. Paint a tin can a bright color and set it in the hanger with a succulent. It is a smart way to use up a fabric stash.
Get the full tutorial at Gleeful Things.
10. Tin Can Portable Rocket Stove

A tin can rocket stove can boil water with just a few small sticks, which makes it a fun project for campers and backyard cooks. You need a gallon can with both ends, a juice can, two bean sized cans, tin snips, a hammer, a big nail, pliers, gloves and eye protection. One bean can, open at both ends, passes through holes cut in the side of both larger cans to form the feed tube. Ashes fill the space between the cans as insulation, and a flattened bean can makes a shelf for the fire. Always light it on a fireproof surface.
Get the full tutorial at Log Cabin Cooking.
11. DIY Tin Can Table Numbers

Tin can table numbers glow from inside, so guests can find their seats by candlelight. Ask a local restaurant for empty commercial cans, which are much bigger than grocery store cans. Tape off the inside, then spray the outside gold, holding the nozzle back so the paint does not drip. Wrap a printed number stencil around each can and drill the outline of the number first, then fill it in with more holes. Trim colored paper to fit and spray mount it inside, opposite the number, then add a candle. Test one can at night first to check the color.
Get the full tutorial at 100 Layer Cake.
12. DIY Pendant Lights Of Tin Cans

Big vegetable cans make fun industrial pendant lights to hang over a dining table. Drill a hole in the bottom of each can for the cord, feed the wire through and fit a light socket inside the can. Paint the cans in bright colors that match your room, then hang them at the height you like. A pair in lavender or a row in mixed colors brings a playful touch to a kitchen or breakfast nook. If wiring is new to you, have an electrician check the finished lights before you install them.
Get the full tutorial at Shelterness.
13. Rustic Twine Wrapped Vase

A rustic twine wrapped vase needs only an empty soup can, paint, twine and a scrap of sandpaper. Paint the clean can with two coats of ivory acrylic followed by one coat of white. Layering the two shades gives a slightly aged, worn look. Hot glue twine around the middle of the can, building it up to whatever height you like. Finish by sanding the paint gently so a bit of metal peeks through for a chippy farmhouse finish. Fill it with faux ranunculus or fresh flowers for a nightstand, or line several down a long table.
Get the full tutorial at Live Laugh Rowe.
14. Tin Can Shelf

Tin can shelves turn short, wide cans into tiny wall cubbies for little figures and treasures. Paint each can inside and out with water based enamel or runny bottle acrylic, which dries fast with a slight shine. Three coats is usually enough, and white acrylic keeps the inside bright. Once dry, fix the can to the wall with a small tack through the back. Cut a circle of patterned paper to fit the back of the can. It does not need glue, so the backdrop can change whenever the display does. Hang a cluster at different heights.
Get the full tutorial at Blue Bear Wood.
15. DIY Artsy Caddy

An artsy caddy gathers tins and jars of every size onto a lazy Susan, so every pen, marker and brush is one spin away. Cut pretty paper or scrap fabric to size and glue it around each can, lining about a third of the inside with the same paper for a polished look. Taller jars hold paintbrushes and rulers, while wide coffee or oat cans fit glue and big markers. Glue plastic bottle caps upside down under the center cans to give them a lift. Repositionable glue dots keep cans from tipping while still letting you lift one out.
Get the full tutorial at Craft A Doodle Doo.
16. DIY Tin Can Snowman

This DIY tin can snowman stacks three empty cans in large, medium and small sizes, and it’s one of the easiest Christmas decorations you’ll make this winter, no snow required. Paint each can white, adding a second coat for full coverage, then stack them from biggest to smallest. Buttons do most of the work: two big black ones for eyes, a carrot button nose, a curve of small black buttons for the smile and green buttons down the front. A plaid ribbon scarf with mini bells, skewer arms and a glitter foam top hat finish him off. Dab on pink cheeks for extra charm. It’s a fun one to make with kids!
Get the full tutorial at DIY JOY.
17. DIY Tuna Can Christmas Ornaments

Don’t toss those tuna cans, because they make the cutest little shadow box Christmas ornaments. Remove the lids, wash and dry the cans and file the sharp edges. Line the bottom with a felt circle, then glue small stacks of cardboard squares inside to give the scene some depth. Fiberfill and artificial snow make the snow, faux pine sprigs add greenery and pom poms bring the color. Pick a Christmas sweater, a gingerbread house or a tree with a snowman, using the free printable designs in the post. Wrap the rim in twine or jute and add a hanging loop. Perfect for a family craft night!
Get the full tutorial at DIY JOY.
18. Bunny Tin Can Planter
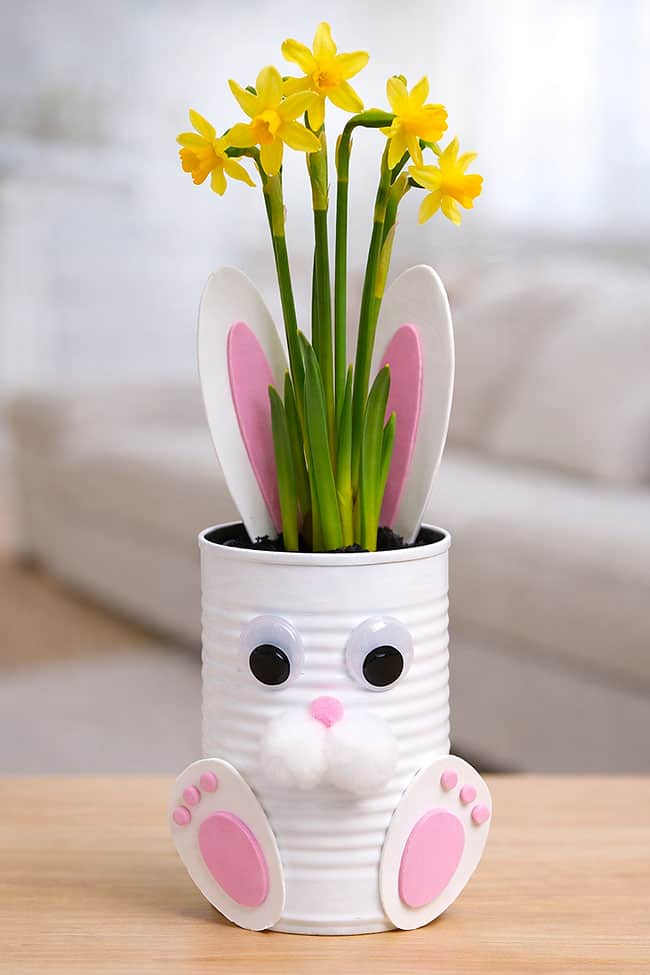
This Easter bunny started life as an 18 ounce can! Paint it white with multi surface acrylic, then cut ears and feet from white and pink craft foam using the free printable template. Two white pom poms make the cheeks, a tiny pink pom pom becomes the nose and big googly eyes finish the face. Pop in a potted flower, fill it with treats or set it on the Easter brunch table. It’s a sweet craft for kids and grownups alike.
Get the full tutorial at One Little Project.
19. Tin Can Pumpkin Treat Holders
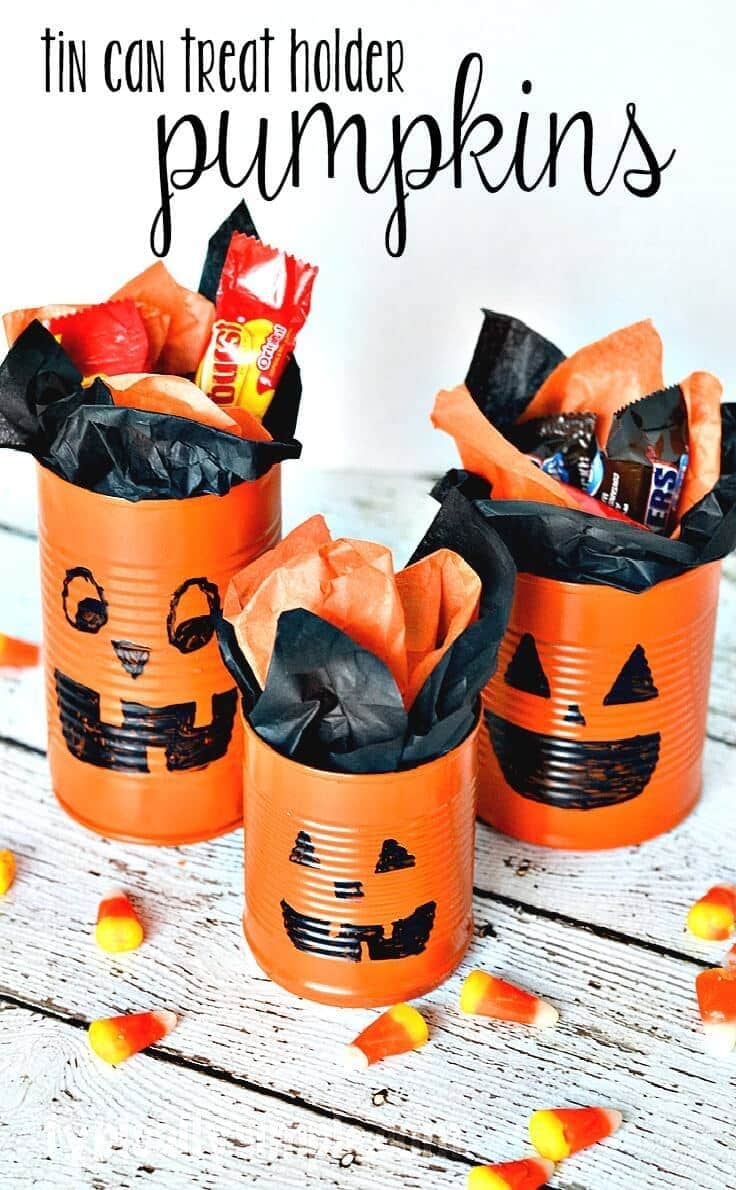
Orange spray paint turns plain tin cans into jack o’lanterns in about two coats. Draw the faces with a black permanent marker, or let the kids cut faces from black construction paper and glue them on, which makes it easy for little hands. Stuff the cans with tissue paper and candy for a Halloween gift, or group them on the table with candy corn scattered around for an instant centerpiece. Simple, cheap and so cute.
Get the full tutorial at Ideas for the Home.
20. Patriotic Painted Tin Can Centerpiece
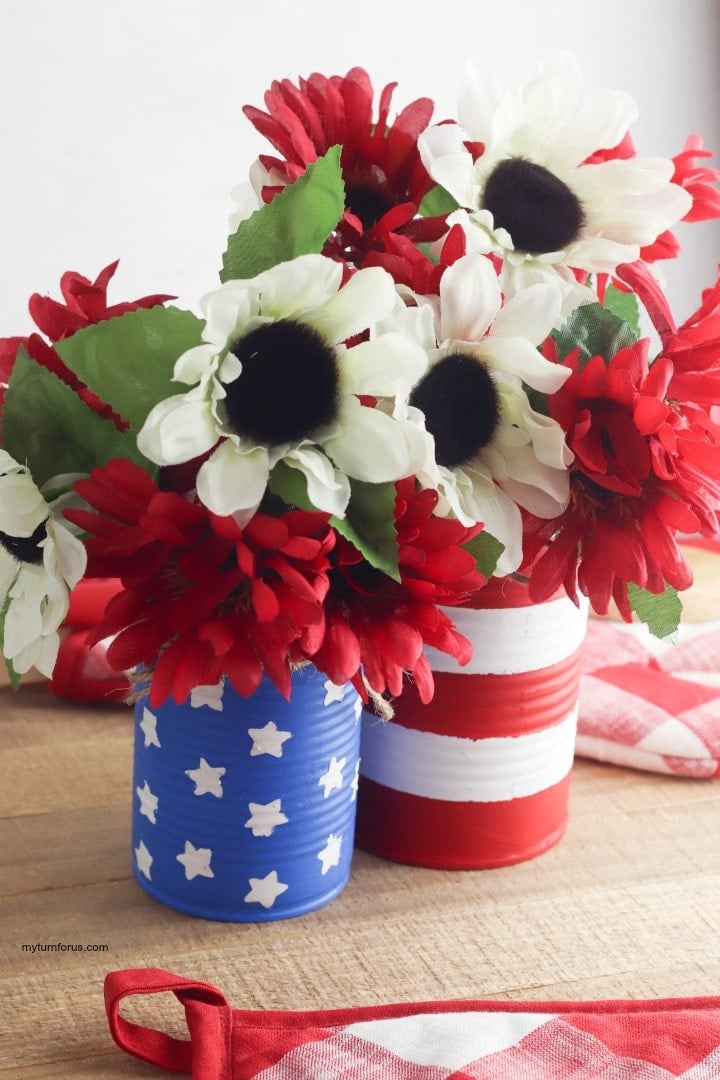
Two recycled cans and some craft paint make a red, white and blue centerpiece for the Fourth of July. Paint both cans white, then mask stripes with tape on one and add star stickers to the other before painting over them in red and blue. Tie on jute twine and fill them with fresh or silk flowers. Heading outside? Drop pebbles or marbles inside so the wind can’t tip them over.
Get the full tutorial at My Turn for Us.
21. Tin Can Stilts

Remember these? Tin can stilts are a classic for a reason, and kids get great balance practice while clomping around. Use big cans like a 29 ounce fruit can or a coffee can (smaller ones are too tippy). Open them with a traditional can opener so the rim stays strong, hammer two holes opposite each other near the top with a nail, then thread through a cord long enough for little hands to hold. Hammering the holes is half the fun.
Get the full tutorial at Welcome To Nana's.
22. Fairy Lighthouse Bird Feeder
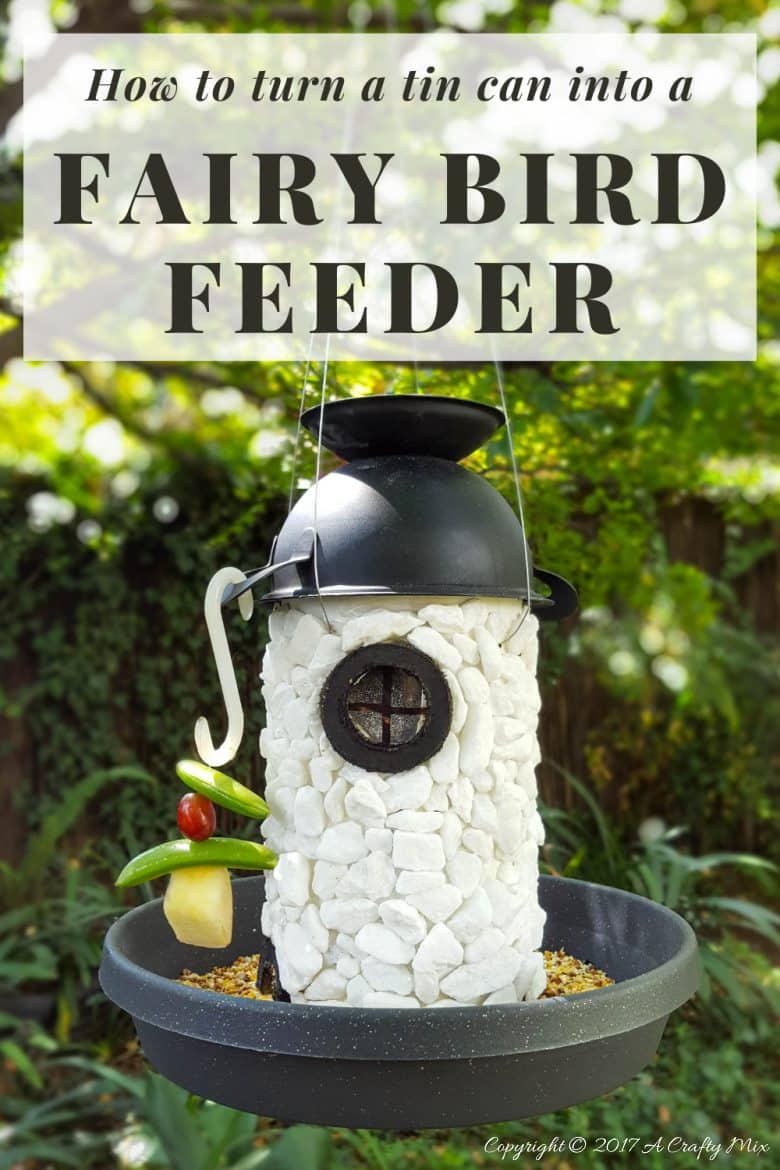
A fairy lighthouse that doubles as a bird feeder? Absolutely. A large tall tin can becomes the tower, with small holes drilled near the base so seed flows out into a drip tray twice the can’s width. A half round object, like an old sugar bowl, forms the roof, small stones add texture and galvanized wire makes the hanger. Outdoor glue holds it all together. The birds get dinner and the garden fairies get a new landmark.
Get the full tutorial at A Crafty Mix.
23. Coffee Can Scarecrow
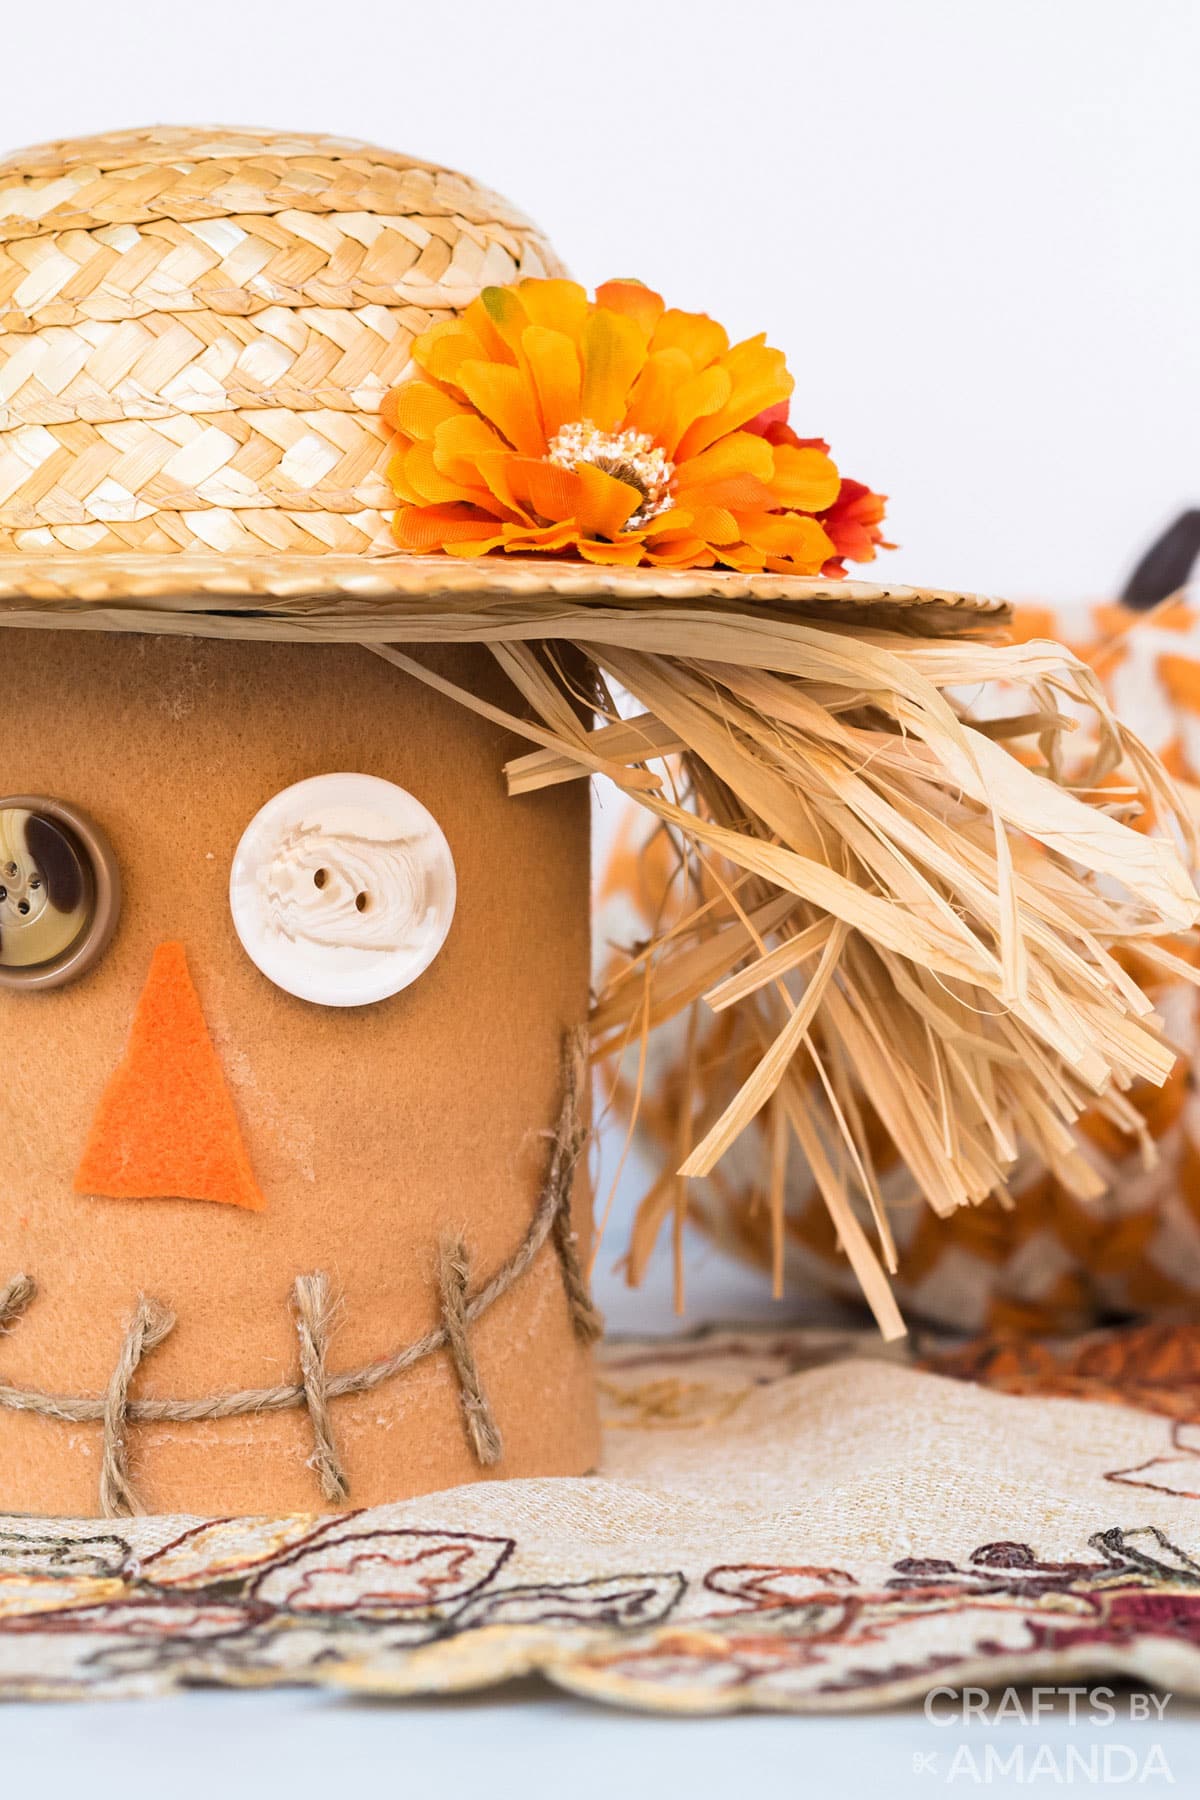
Your empty coffee can wants to be a scarecrow for your fall mantel. Cover it in tan felt, glue a twine smile with little stitch marks, an orange felt triangle nose and two button eyes, then top it with a little straw hat and raffia hair. It takes under 20 minutes, and most of the supplies are probably in your craft stash already. It’s meant for grownups, though kids 7 and up can help.
Get the full tutorial at Crafts by Amanda.






