

These tin can ideas prove that the cans in your recycling bin are free planters, lanterns and organizers just waiting for a little paint. You’ll find coffee can herb gardens to hang on a fence, punched tin lanterns that throw pretty patterns once the tea lights go in and a faux rusty barrel bag planter that looks like it spent years in a farmhouse garden. There are practical ones too, like a three can picnic caddy for forks and straws, a towel holder for the bathroom and desk organizers that finally corral the pens. Most need nothing fancier than paint, glue and twine, so you can start tonight! Looking for kids projects and holiday makes instead? Hop over to our tin can crafts.
DIY Ideas With Tin Cans
1. Tin Can Hanging Planters

Plain tin cans plus a ball of wool equal a trio of hanging planters, and this is a lovely first macrame project if knots have always intimidated you. Paint the cans in two coats (a fresh spring green looks great), let them dry completely, then tie a simple macrame cradle from wool so each can hangs at its own height. Pop in small plants and hang them in a sunny window. Cheap, cheerful and easy to change up with a new paint color next season.
Get the full tutorial at makesbakesanddecor.
2. Tin Can Herb Garden Planters

Grow thyme, rosemary and mint right on the kitchen windowsill in cans you were about to recycle. Two thin coats of gunmetal gray paint let a little shiny metal peek through for a rustic look. Skip drilling by layering about an inch of pebbles in the bottom for drainage, then plant grocery store herbs so you can snip them the same day. Wood burned labels made from scrap wood shavings keep everyone straight on which herb is which (and please, don’t overwater).
Get the full tutorial at Rustic Crafts.
3. Tin Punched Votive Candles

Remember punching tin in third grade? These grown up votives use the same trick with a smart twist. Fill each can with rice and water and freeze it solid so it won’t dent, then tape a printed template on and hammer nail sized holes along the letters or pattern. Thaw just enough to dump out the rice ice, then paint with gold and white. Punch both sides if they’re going down the middle of a table so the design glows from every seat.
Get the full tutorial at abeautifulmess.
4. Scrapbook Paper Tin Can Pencil Holders

This might be the easiest desk upgrade around: you can literally open something from the pantry and start. Save the can’s label and use it to trace a perfect rectangle on the back of patterned scrapbook paper, cut it out and wrap it around the clean can. Spray paint the can first if you want a different color peeking out at the rim. They’re great for pens and markers on a kid’s desk, and just as handy for utensils at a barbecue or screws in the garage.
Get the full tutorial at myfrugaladventures.
5. Decoupage Tin Can Planters

Soup cans plus scrapbook paper equal the sweetest little succulent planters. Peel the labels, wash and dry the cans and make sure the edges aren’t sharp. Measure the can from top to bottom, cut scrapbook paper to fit and brush on Mod Podge with a foam brush to wrap it smoothly around the can. Fill with cactus and succulent soil and tuck in tiny succulents. Mix a few patterns and line them up on a shelf for a mini indoor garden.
Get the full tutorial at diyarta.
6. Rustic Centerpiece

These corn cans look like pricey enamelware, and the ridges actually add to the charm. Spray them matte black, press on alphabet stickers, then dab petroleum jelly around the edges and a few spots in the middle before a coat of white. Peel the stickers and wipe the jelly away and you get black letters plus a chippy, timeworn finish. Little glued pine sprig wreaths finish the look. It runs about $14 and roughly 40 minutes, depending on how fast your paint dries.
Get the full tutorial at lilyardor.
7. Make Your Own Flower Pot

Five ways to dress a tin can flower pot, and four of them come together in about half an hour. Wrap one in twine over lines of glue, layer burlap and ribbon on another, glue on stained popsicle sticks or wrap one in adhesive moss with a twine tie. Planting real flowers? Tap three or four drainage holes in the bottom with a hammer and nail. Goo Gone gets off that stubborn label glue, and the rest is your pick.
Get the full tutorial at morelikegrace.
8. Tin Can Towel Holder

Roll up your towels and tuck them into a wall of flowered tin cans, and suddenly the bathroom looks like a cottage. Prime the cans white, glue on flowers cut from patterned fabric and add stenciled blooms and painted leaves around them. Seal everything with waterproof lacquer (it’s a bathroom, after all) and glue red checked bias tape around each rim. Mount the cans on a painted MDF board to hang them on the wall. Charming and very practical.
Get the full tutorial at diy-enthusiasts.
9. Colourful Tin Can Planters and Pallet Holder

A whole rainbow of tin can planters, and the paint is whatever odds and ends are hiding in your DIY cupboard. Paint twelve cans each a different color (latex, chalk, spray or sample pots all work), then seal them with acrylic varnish spray. An old pallet, a saw and some nails turn into a holder that keeps the whole rainbow lined up. It’s a cheerful way to brighten a small garden corner and costs next to nothing.
Get the full tutorial at pillarboxblue.
10. Outdoor Drink Holders From Tin Can

Drinks that won’t tip over in the grass? Yes, please. A clean soup can gets a fabric wrap, using the can’s own label as the pattern so you can fussy cut a favorite print. One wider and one thinner strip of fabric dress up the outside, and the tutorial deals with that sharp inside edge too. Add a stake and push it into the ground beside your outdoor seating or fire pit. Make one for everyone (and maybe match the patio cushions).
Get the full tutorial at positivelysplendid.
11. Cork Covered Pencil Cups

Turning cans into pencil cups is a childhood classic, and a cork wrap gives it a clean, modern update. Scrub the cans, spray paint the inside first and then the outside (black looks sharp under cork), then cut a strip of sheet cork as wide as the can is tall and wrap it on. Any thin flexible material works the same way, like paper or fabric. Paint the can white first if your wrap is thin enough to show through.
Get the full tutorial at the3rsblog.
12. Painted Tin Cans

Here’s a Mother’s Day gift you can finish in about ten minutes. Brush a tin can with chalky paint in a soft color, then dress it up with washi tape and a tiny printed tag cut with a scalloped paper punch. Slip in a little potted rose from the grocery store and you’re done. It’s sweet for moms, grandmas and teachers, and you can make a whole batch in one go while the kids help pick the tape.
Get the full tutorial at housebyhoff.
13. DIY Bird Feeders

Small paint cans make the brightest little bird feeders, and the kids can help with every step. Paint the cans in bold colors like red, blue and green, then cut a wooden dowel into 4 inch pieces for perches. Hot glue a dowel into the lid groove at the top of each can, tie on colorful ribbon for hanging and add a dab of glue under the ribbon. Fill with finch food and hang them by the garden.
Get the full tutorial at momendeavors.
14. Tin Can Desk Organizer
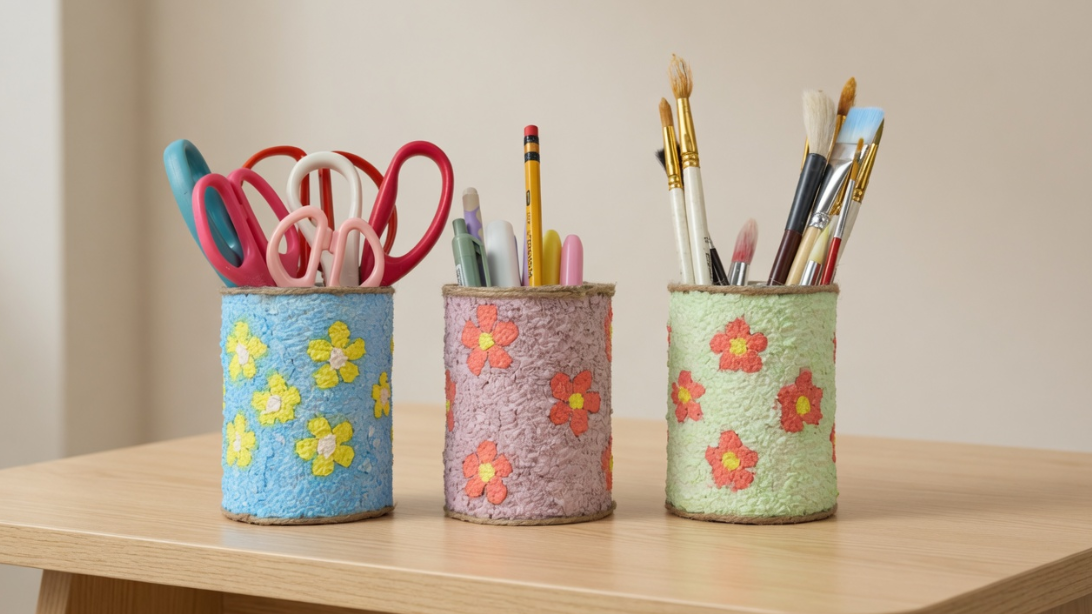
This desk organizer gets its texture from a surprising place: tissue paper pulp. Soak torn tissue in water, squeeze it out and mash it into a pulp, then mix in glue and paint and press it onto empty tin cans paper mache style. The floral theme in the tutorial is adorable, but any colors or designs work. It’s lightweight, finishes in one sitting and makes a thoughtful handmade gift. There’s a video to follow along.
Get the full tutorial at DIY JOY.
15. Tin Can Tinker

Give your garden some vintage farmhouse charm with tin cans dressed in antique seed packet labels. Print free seed label printables onto kraft adhesive paper sized to your cans, cut them out and age the edges with distress ink. Burnish the labels on with your thumb to smooth out bubbles, then seal with Mod Podge. Hammer a few drainage holes in the bottom and plant something sweet, like pansies. Done in a day!
Get the full tutorial at raggedy-bits.
16. Upcycled Tin Can Organizer

Tin cans on a board make a modern desk organizer, and you can mix can sizes and lay them vertical or horizontal. Tape off triangles for a little abstract mountain look, spray paint the cans gold and peel the tape once it’s dry. Paint the bottoms white for contrast if you like, paint or stain a piece of scrap wood, then hot glue the cans on and finish with clear sealer. Easy, nearly free and very pretty on a desk.
Get the full tutorial at mountainmodernlife.
17. Tin Can Wind Chime

A week of cans (baked beans, green beans, a few spaghetti cans) becomes a bright wind chime the kids can decorate. Spray paint the cans, let the kids hammer a hole in the top of each one with a big nail (cheap entertainment!), then paint on bumblebees and other designs. Seal with clear spray for outdoor weather. Thread thin rope through each hole, knot it and tie each one to a metal hoop, a little longer than the last.
Get the full tutorial at agirlandagluegun.
18. Hanging Hairbrush Storage from Tin Cans

No drawer for your hairbrush? Little tomato paste cans fix that. Take off the top and the bottom with a can opener, wrap the can in scrapbook paper, tape it and seal with Mod Podge. Then attach it to the inside of a bathroom cabinet door with Command strips and strong adhesive. Your brush slides right in, handle first, so it’s always waiting instead of buried under the sink.
Get the full tutorial at thecreativeimperative.
19. Tin Can Windsock
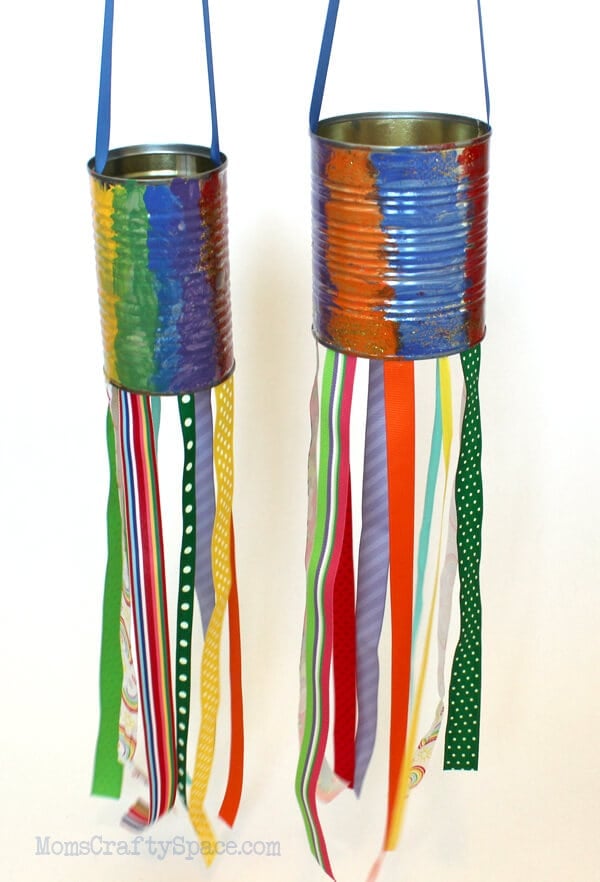
That empty can in the recycling bin is about to become the happiest thing in the yard. Paint a clean can any colors you like (rainbow stripes are hard to beat), let it dry, then glue a bunch of ribbons around the bottom rim so they flutter in the breeze. Add one more ribbon at the top for hanging. Line the inside rim with masking or duct tape first to cover any sharp edges, which makes this a great craft for the kids. Glitter and stickers are optional but encouraged.
Get the full tutorial at Happiness is Homemade.
20. Tin Can Snowman

Stack a large, medium and small can and you’ve got the start of a snowman that never melts. Paint the cans, give him a face, button eyes and a carrot button nose, then wrap a Christmas ribbon scarf around his neck. A glitter foam hat, mini bells and skewers finish him off. Most of it is craft drawer stuff you already own, and it’s a fun one to make with kids, friends or family.
Get the full tutorial at DIY JOY.
21. Tuna Can Christmas Shadow Box Ornaments

Little tuna cans are just the right size for a tiny Christmas scene, and easy open lids mean there’s no can cutting at all. Just file the edges smooth. Each ornament gets a felt base, cardboard stacks to push pieces forward for depth, fiberfill snow, faux pine and pom poms. Choose the sweater, the gingerbread house or the snowman beside his tree from the free printables, then finish the rim with twine and a hanging loop. Make one for every person in the family in their favorite colors (names optional, but highly encouraged). There’s a video to follow along, too.
Get the full tutorial at DIY JOY.
22. Coffee Can Herb Garden on a Fence
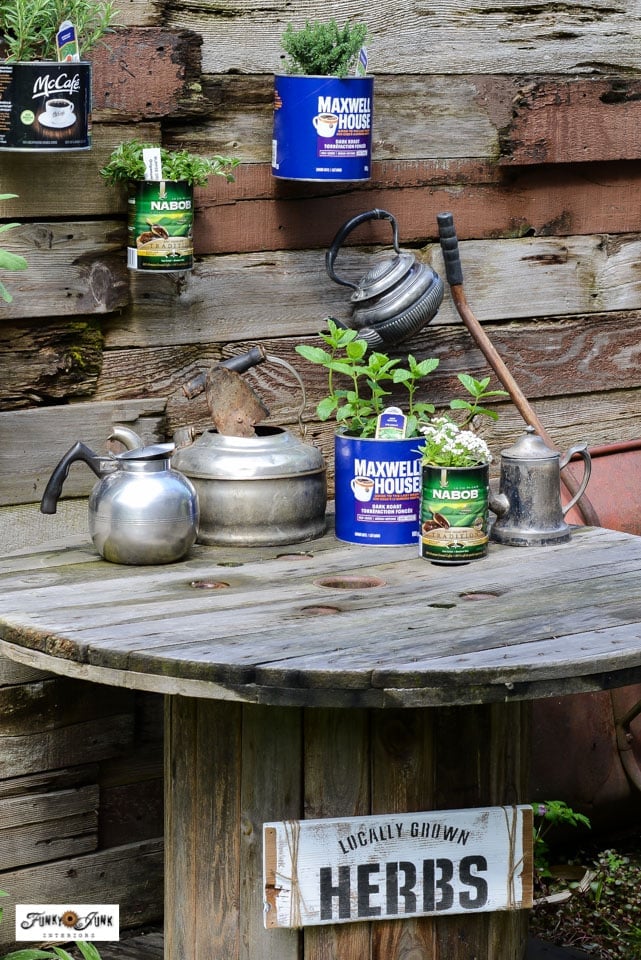
Here’s a vertical herb garden that keeps the coffee can labels right where they are, and honestly that’s half the charm. The cans get planted with a full range of kitchen herbs and mounted along a garden fence, so the whole thing reads like a cheerful little pantry shelf outdoors. It’s a smart way to grow fresh basil and parsley when you’re short on ground space, and the tutorial pairs it with stenciled cedar garden labels so you always know which herb is which.
Get the full tutorial at Funky Junk Interiors.
23. Punched Tin Can Lanterns with Beaded Handles
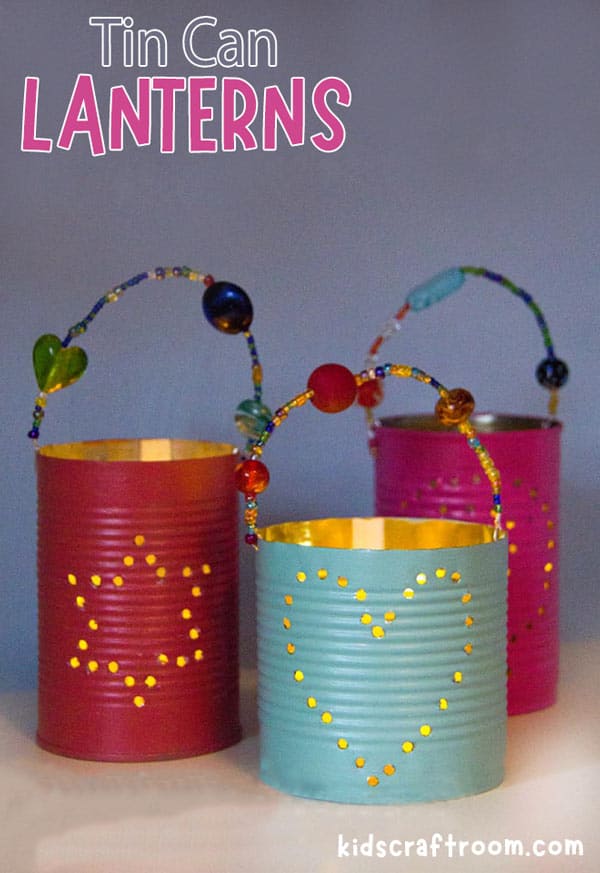
These painted tin can lanterns glow with a punched heart, star or spiral once a battery tea light goes inside. Paint the cans in two coats of acrylic, tape a simple dot design to the front and drill along the dots, then thread seed beads and glass beads onto jewelry wire for the handle. The tutorial has a clever tip for holding the can steady without a vise (play dough!). Keep the design simple, because every line means more holes. Use waterproof paint or a coat of varnish if they’re headed outside.
Get the full tutorial at Kids Craft Room.
24. Hanging Tin Can Flower Vases
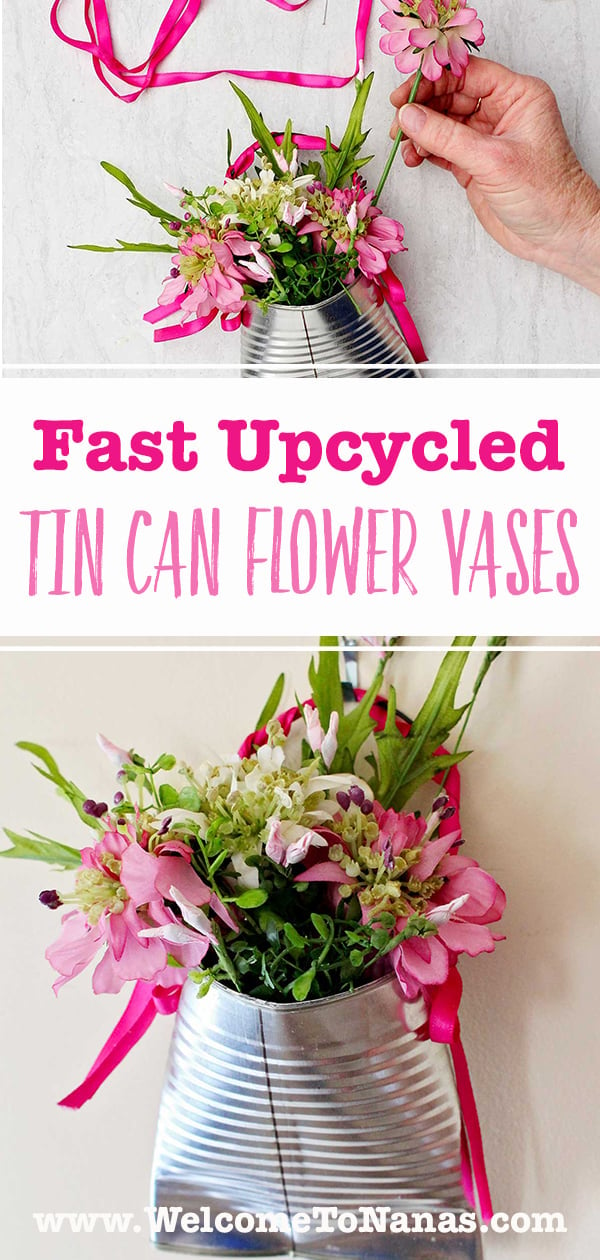
This hanging tin can vase is one of the fastest upcycles around. Take the top and bottom off the can, squash the bottom edge flat with your foot (very satisfying) and add a handle of wire, ribbon or twine. Fill it with real blooms or artificial ones and hang it on a door or a fence. Line it with a plastic bag if you want to water fresh flowers. Rather it stand on a table? Leave the bottom on and skip the squashing.
Get the full tutorial at Welcome To Nana's.
25. Painted Tin Can Utensil Caddy
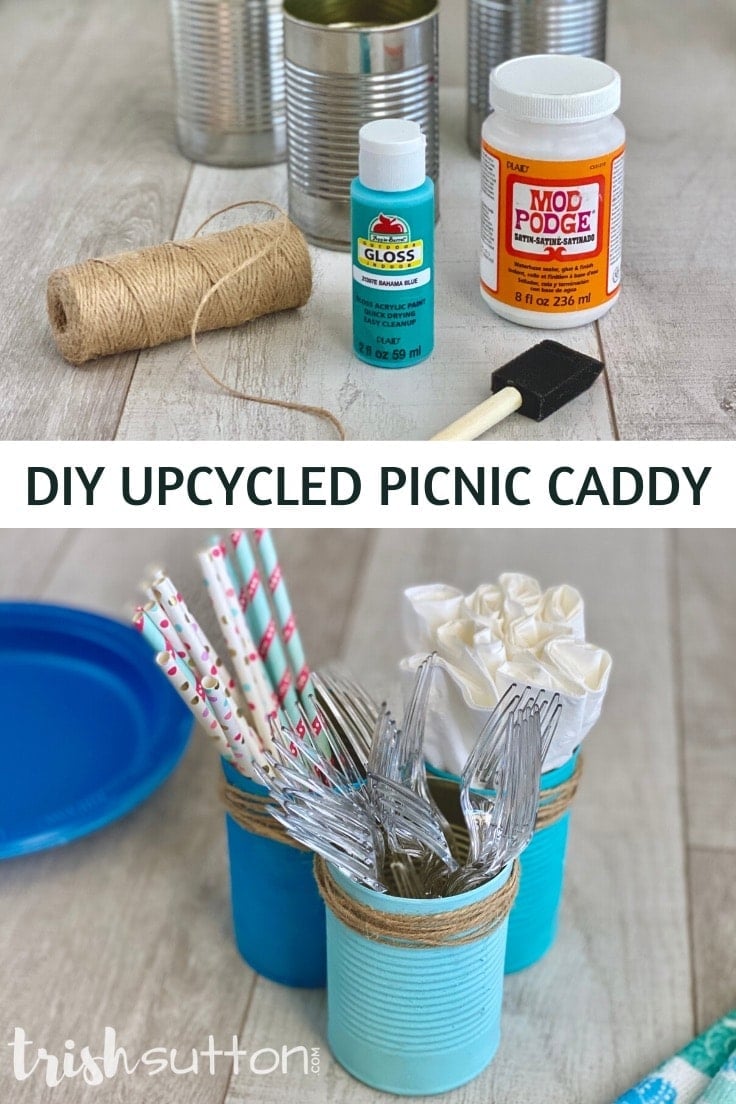
Three vegetable cans become a tabletop caddy for backyard barbecues and picnics. Mix equal parts acrylic paint and Mod Podge for a paint that grips the metal, sponge it on and let it dry. Then glue jute to the first can and wrap it in a figure eight to tie all three together. Fill the cans with forks, knives and straws and the table is set. Pick colors to match your party (or your patio cushions).
Get the full tutorial at Ideas for the Home.
26. Faux Rusty Barrel Bag Planter
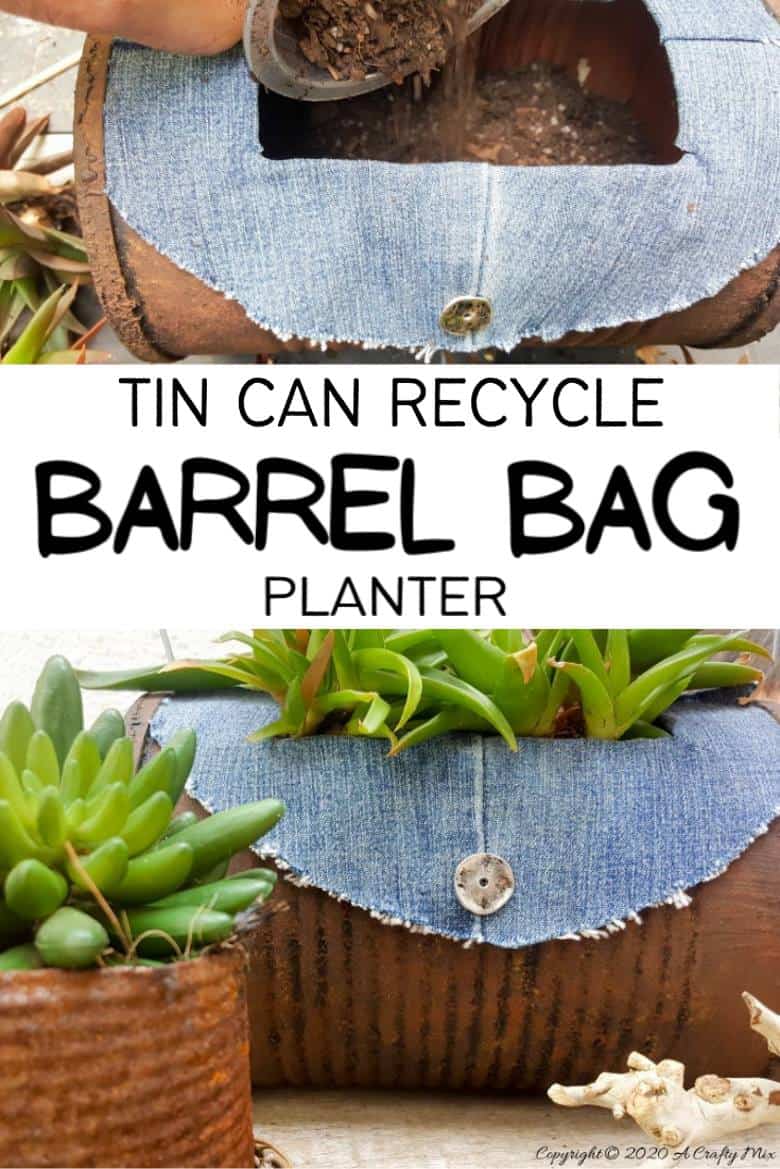
A tin can planter shaped like a handbag? Yes, and it looks like it came out of an old barn. Brown and black craft paint plus coarse spice give the can a convincing faux rust texture, sealed with outdoor Mod Podge. Scrap fabric makes the strap, and two silver buttons are the finishing touch. Fill it with soil and succulents for a statement planter that costs almost nothing to make.
Get the full tutorial at A Crafty Mix.






