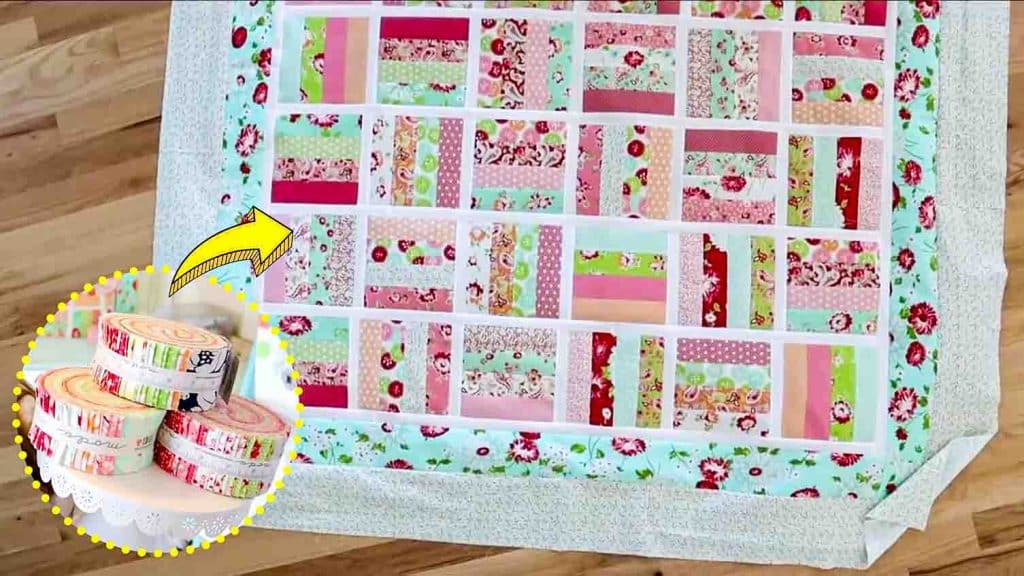
If you’re looking for an easy quilting project, this jelly roll quilt pattern from Erica Arndt on Youtube is a fantastic quilting exercise. Jelly roll quilting is an ideal project for beginners, and this tutorial is super easy to follow. Watch the video tutorial below to learn the step-by-step process.
Materials:
- 1 Moda jelly roll (or 42- 2.5″ x 42″ strips)
- 1-yard sashing fabric (white)
- 1 yard – border 1 fabric
- 1-1/8 yard – border 2 fabric
- 5/8 yard – binding fabric
- 4-3/4 yards – backing/batting
Directions:
Step 1
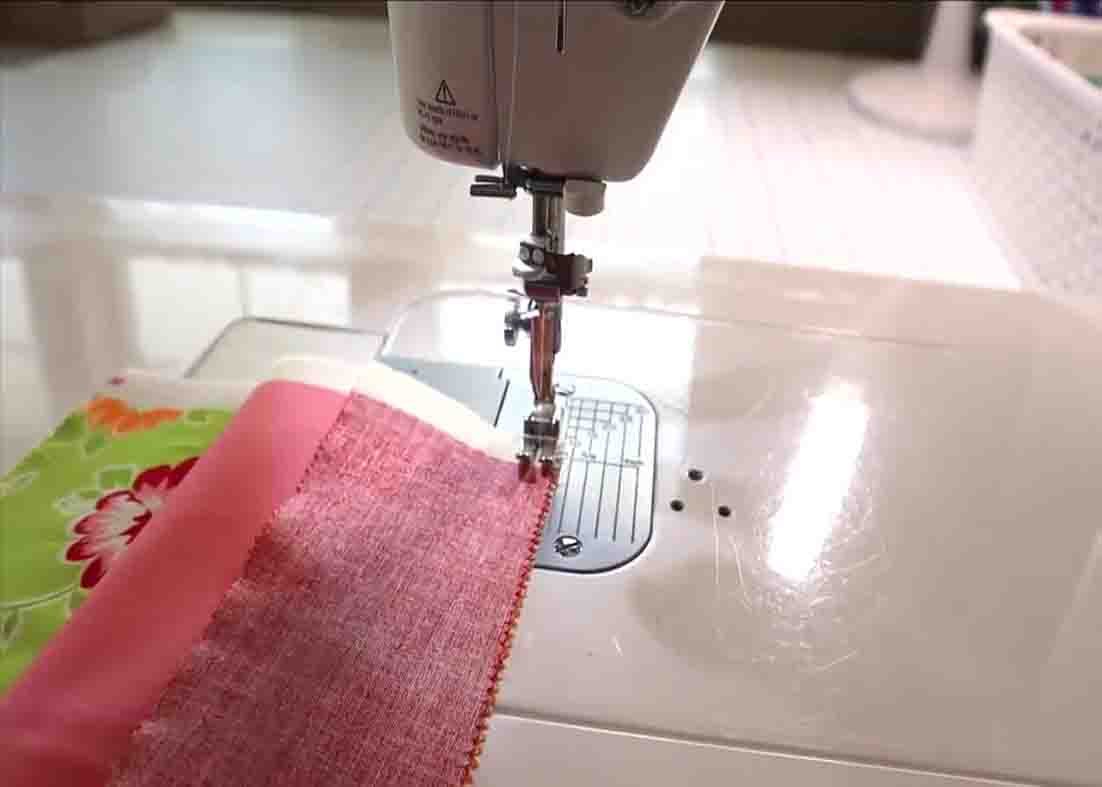
Pick 4 strips that you like from the jelly roll and sew them together. Repeat this process for all of the remaining strips in the jelly roll and by the time you’re done, you should have 8 sets that are 4 strips wide. Press them in one direction. Next, take one of your strip sets and fold it in half, then trim off the selvage edges. After this, cut it into 8 & 1/2″ x 8 x & 1/2″ squares. Repeat this to the rest of the jelly roll strip sets. (You should be able to get 4 pcs.) Next, cut your sashing strips into 1 & 1/2″ x WOF strips. (You should have 17 pcs.) Trim off the selvage edges, take just half (6 pcs.), and set the other half aside, line them all up nicely along your cutting board, then cut them into 8 & 1/2″ long sections. (Cut 30 pcs. of these sections.) After this, cut the remaining sashing end to end. Cut into 7 pcs. 1 & 1/2″ x 54 & 1/2″ strips and 2 pcs. 1 & 1/2″ x 56 & 1/2″ strips.
[social_warfare]
Step 2
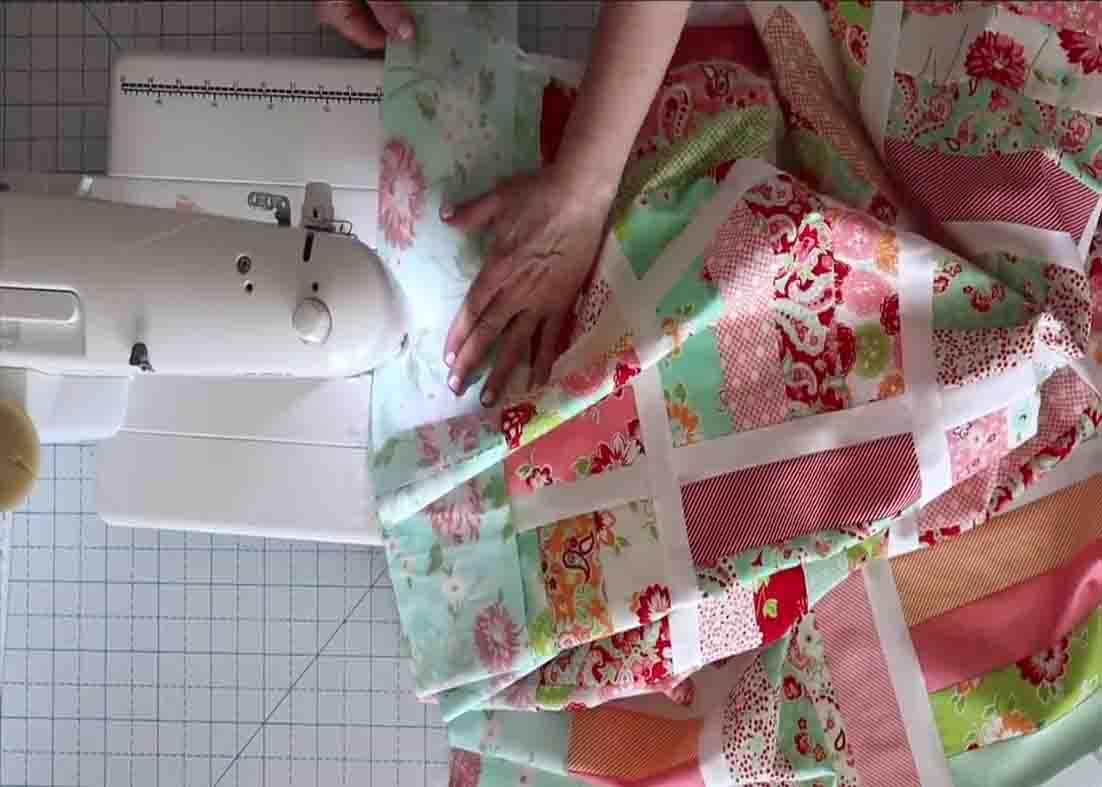
Start laying 6 quilt pieces, turning each one in the opposite direction, then put the sashing in between. Sew each of those blocks together with the sashing using a 1/4″ seam allowance. Next, press one of those sashing strips, then add the next block and continue doing this until you have your entire strip set. (Make 6 of these strip sets.) Once you have your 6 strip sets sewn, add the horizontal sashing. (Make sure to flip the strips so they are going in opposite directions.) Add one of those longer sashing strips in between each of your rows, then sew it with a 1/4″ seam allowance. Once you’re done adding the horizontal sashing strips, sew all of your rows together, then sew one extra to the top and bottom of the entire unit. Now you have completed the quilt center.
Step 3
For the borders, cut 6 pcs. 4 & 1/2″ x WOF strips for border 1 and 7 pcs. 6 & 1/2″ x WOF strips for border 2. Line the borders up nicely and trim off the selvage edges. Take these to the sewing machine and sew them, right sides together, end to end. Repeat this process to both border fabrics. Next, sew the borders on, adding to the sides first of the quilting project. (Sew side borders first, then sew on top and bottom borders.)
Jelly Roll Jamboree Quilt Pattern Tutorial