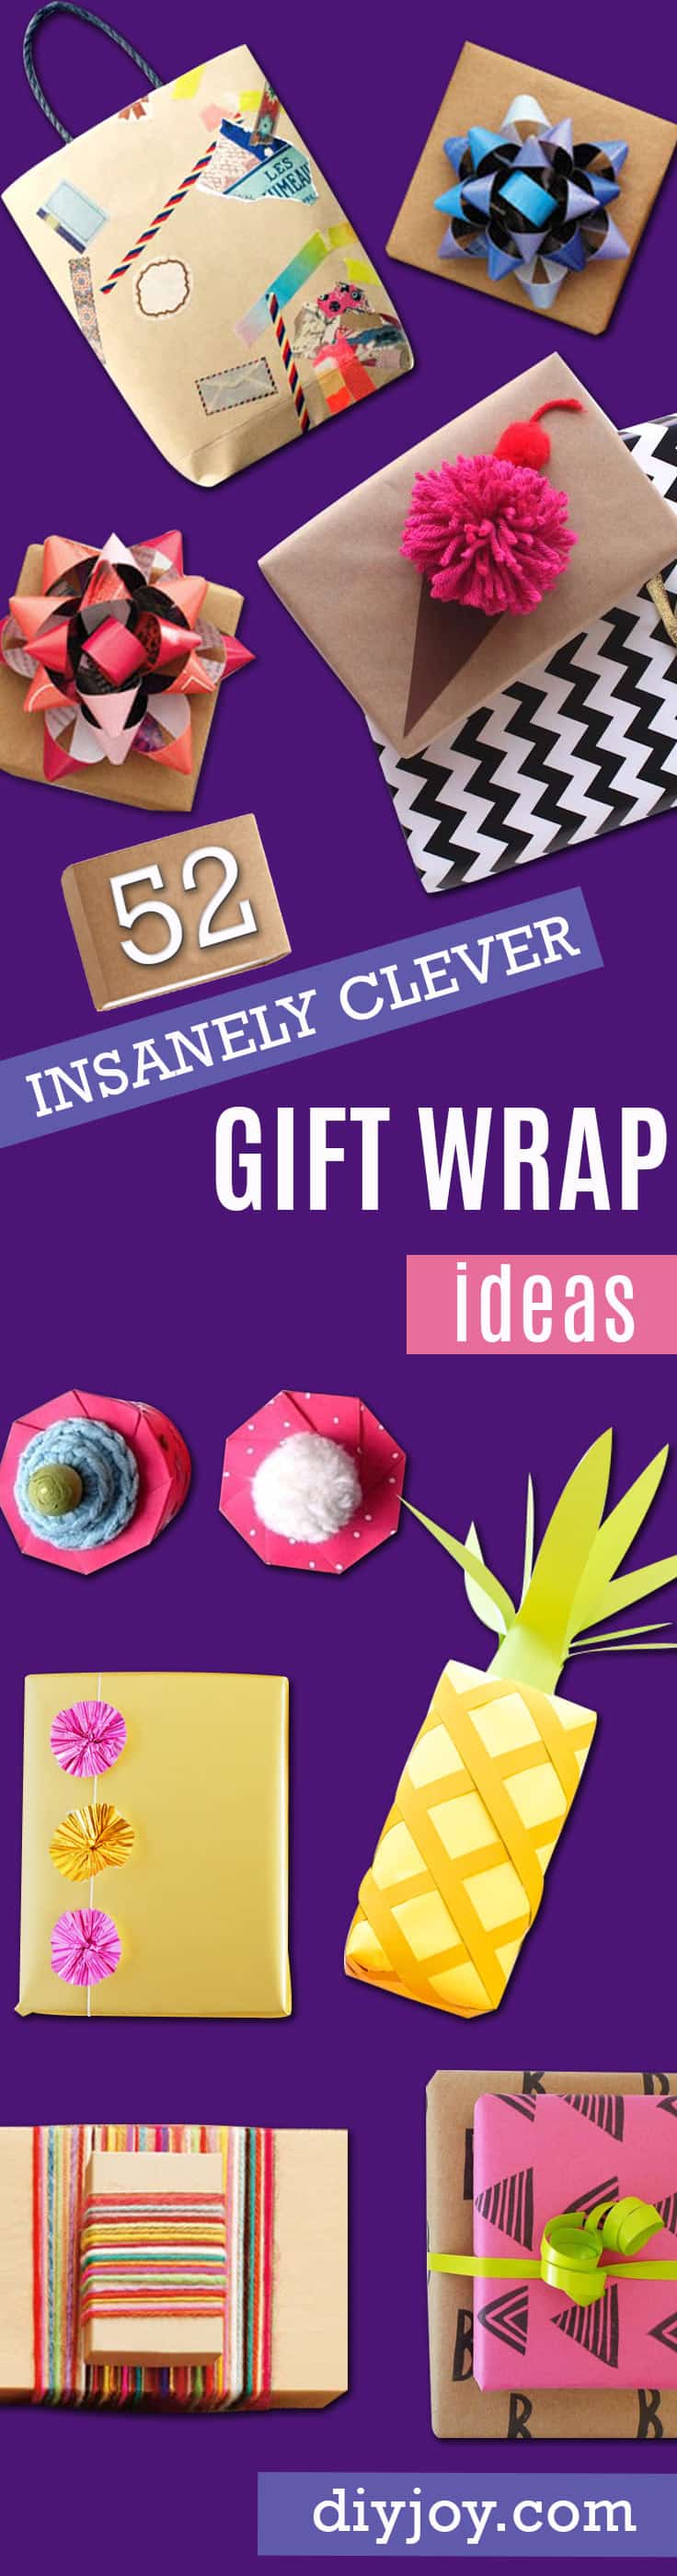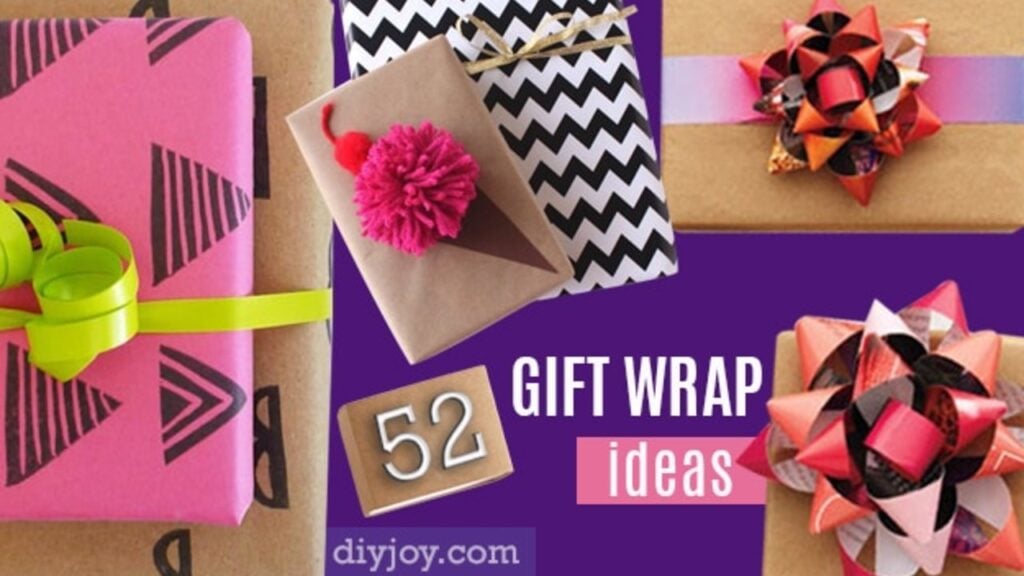
Do you need a way to wrap a mountain of presents that doesn't end with you hiding the messy ones at the back of the tree? These gift wrapping ideas cover the basics and the showing off, from folding clean corners on a box to printing your own DIY gift wrap with a stamp you cut out of an old cereal box. There are hand-tied yarn bows, tags made from a dollar aisle garland, gift bags folded out of a flat sheet of paper, and boxes for the gifts that never fit a box. Perfect for Christmas, birthdays and the presents you wrap at eleven at night.
1. DIY Stenciled Wrapping Paper
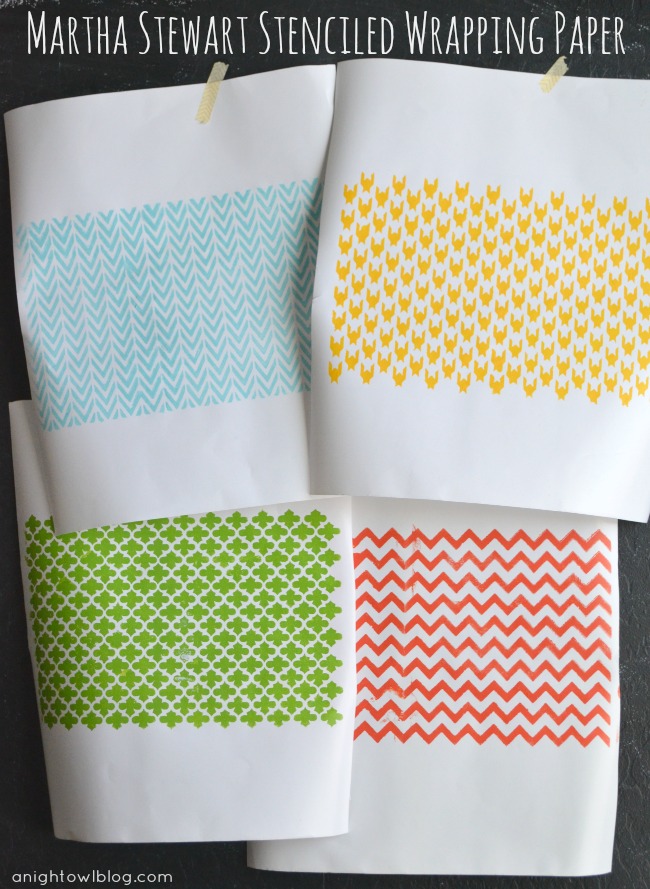
One plain white roll plus a stencil beats a closet full of half used paper, and you get to match the pattern to the person opening it. Kimberly tapes the paper down flat, tapes the stencil securely on top and fills it in with a foam pouncer, then waits for the paint to dry before sliding the stencil along to the next section. Load that pouncer lightly, because a soaked one creeps under the edge of the stencil and blurs every line. A Night Owl has the full walk through.
2. How to Wrap a Gift with Short Paper
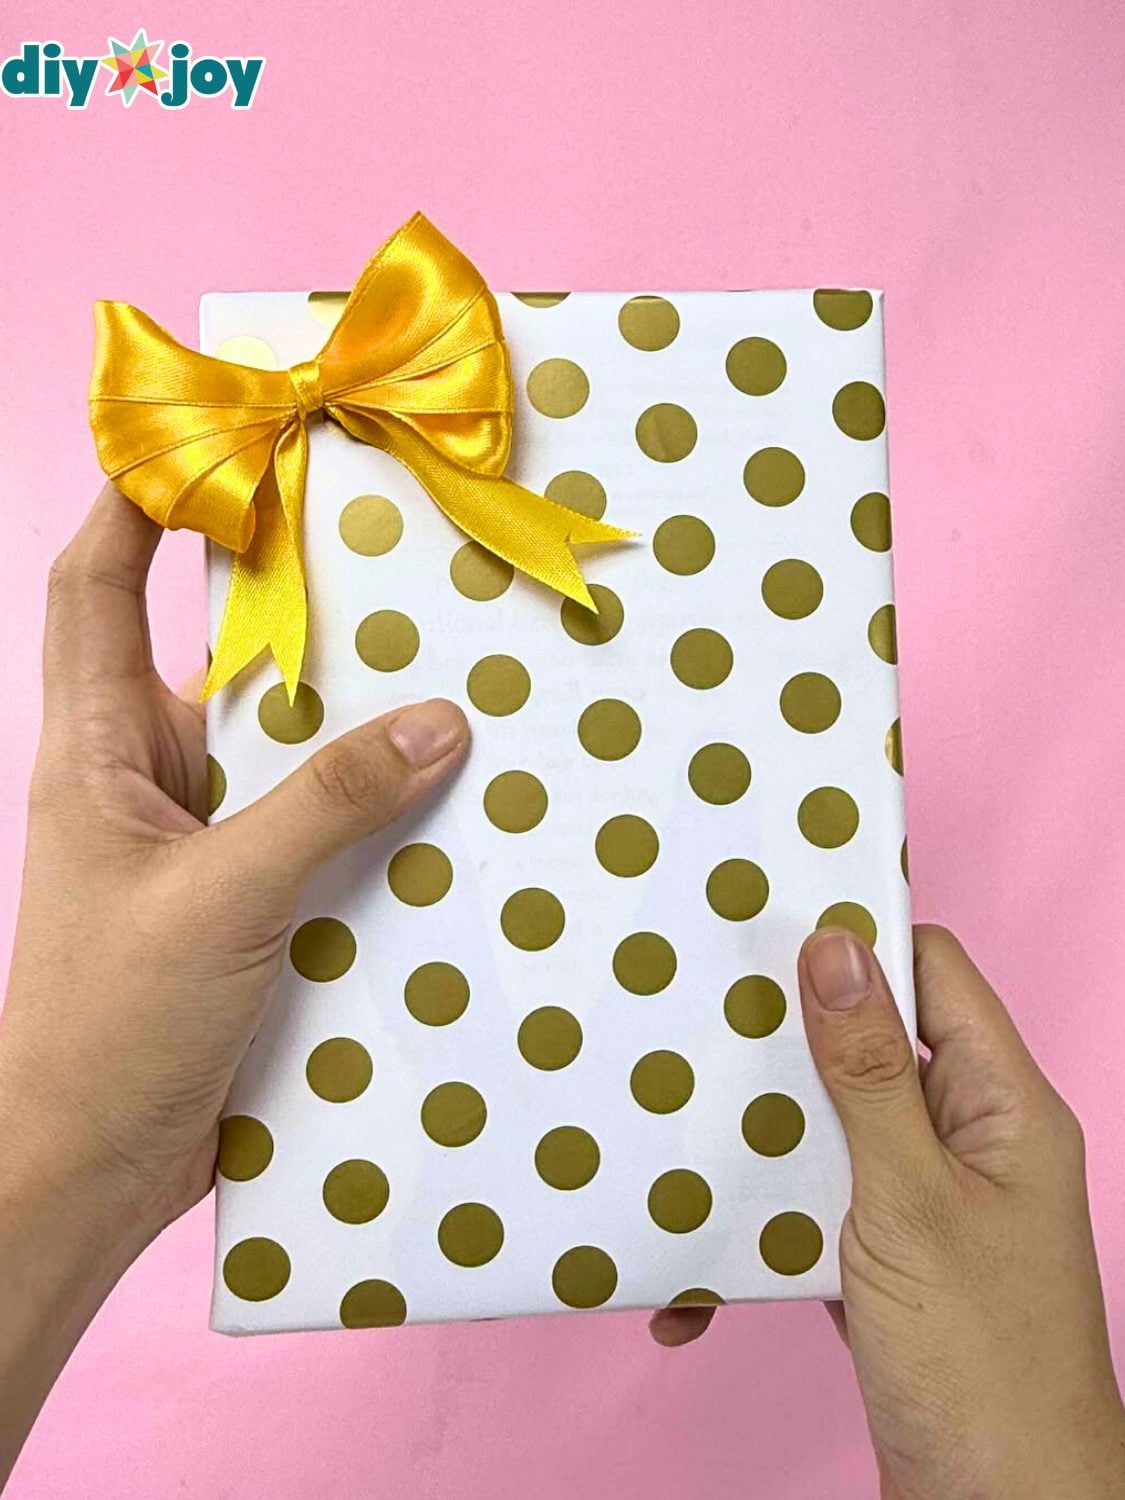
Short paper is the classic Christmas Eve problem, and the fix is to stop squaring the box to the sheet. Lay the paper on the diagonal with one corner pointing at you, set the gift in the middle, then bring the left and right corners in and fold the rest up over the top. The seams land on top and read like a decision instead of a patch. This one is ours, so I can promise it's easier than it looks. The video is on DIY Joy.
3. DIY Splatter Paint Wrapping Paper

Kraft paper plus a brush and about four minutes of flicking gives you wrapping paper nobody else has. Rachel at DIY in PDX puts a few drops of acrylic craft paint in a cup with a few drops of water, dips her brush, then holds it over the paper and taps the handle with her other hand. More paint and a harder tap makes big blobs, thinner paint makes a fine spray. Leave it overnight to dry. Her post walks through both colors.
4. Professional Looking DIY Gift Bags

Every gift bag you buy comes back looking sad after one use, so building your own out of paper you already have is a genuinely good skill. Mandi at A Beautiful Mess uses a box as a form, traces it onto non corrugated cardboard for a base stabilizer, then folds the paper around the box, punches holes and threads ribbon handles. Light gift, skip the reinforcing steps entirely. One box makes as many matching bags as you need.
5. Christmas Gift Wrap With Pom Poms

A cookie cutter is the secret weapon here, and I did not see that coming. Heather at The Heathered Nest wraps the gift first, then traces a cookie cutter shape straight onto the paper and glues pom poms inside the outline until the shape fills in. A tree, a star, whatever cutter is in the drawer. Kraft paper and a bag of craft pom poms is the whole materials list. Her post has the video if you want to watch it happen.
6. Kraft Paper Gift Wrap with Buffalo Check Ribbon
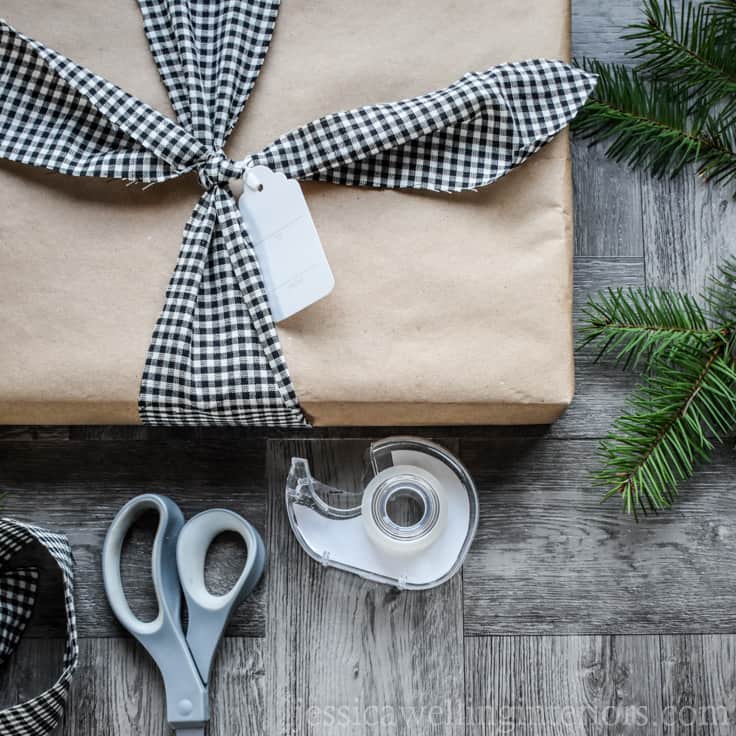
Ribbon is where a wrapping budget quietly disappears, so strips of quilting fabric are a very happy swap. Wrap the box in plain white or kraft paper, cut your fabric anywhere from an inch and a half to four inches wide without measuring, tie two knots and trim the tails at an angle. Jess, writing for Kenarry, warns that quilting cotton only has one good side, so you will flip the tails before you trim. Her other tip: check the postal section when the wrapping aisle disappoints you.
7. Easy Finger Crochet Yarn Bow
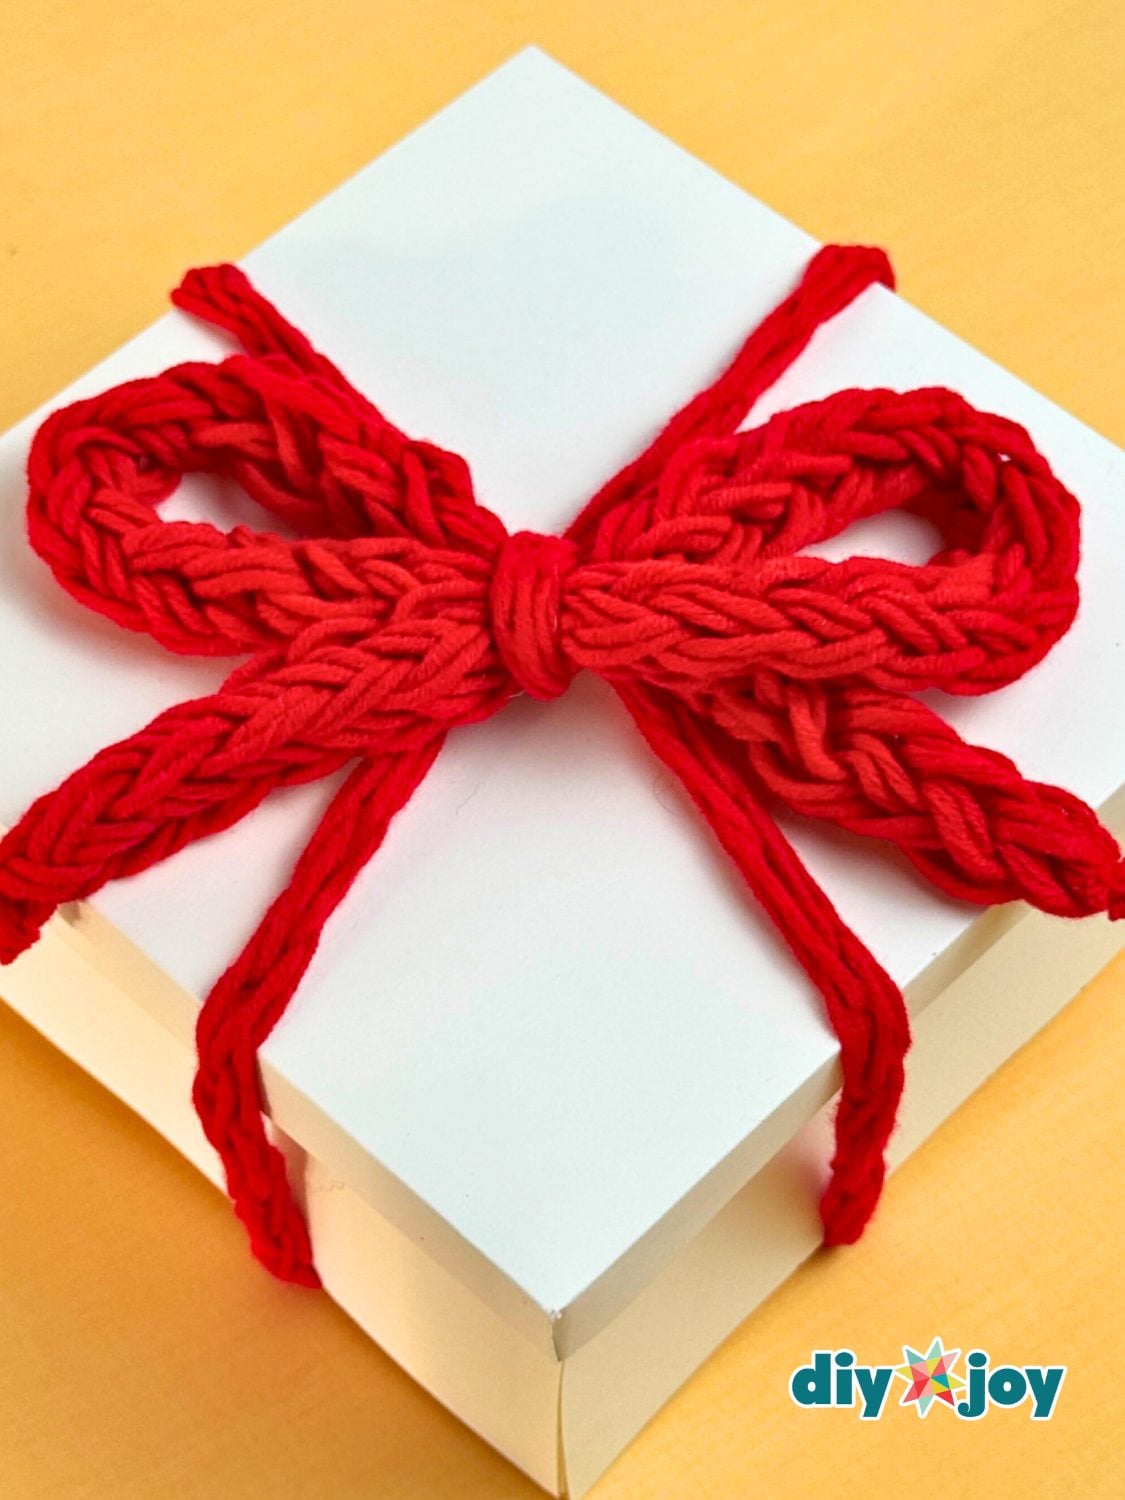
Yarn bows sound fussy right up until you find out there is no hook involved anywhere. Wrap the yarn around your thumb three times, then weave it to the front of your index finger, behind the middle, in front of the ring and behind the pinky, and build a second row back over the first. Your hand is the loom. It is a good thing to have in your hands on a cold evening, and leftover yarn costs nothing. Ours is photographed step by step on DIY Joy, video included.
8. Glitter Paper Gift Bows
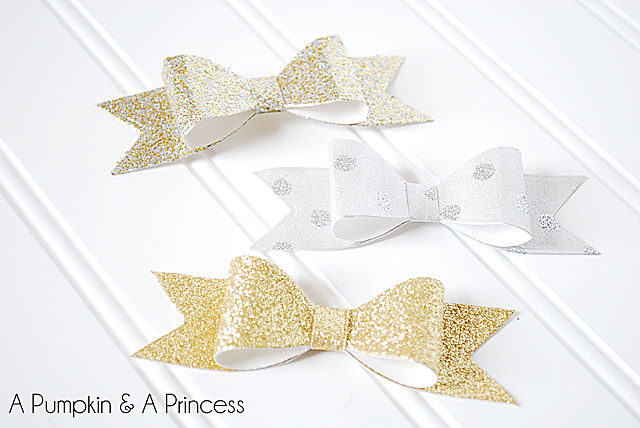
Paper bows in gold glitter, silver glitter and dotted white, and the best part is they do not squash in the drawer the way a store bow does. Crystal at A Pumpkin and a Princess cuts hers from glitter cardstock and folds the tails into points, so each one sits flat on a plain kraft box and does all the work. Glitter cardstock is heavier than plain, which is why they hold their shape. She has the how to.
9. DIY Gift Box with Lid
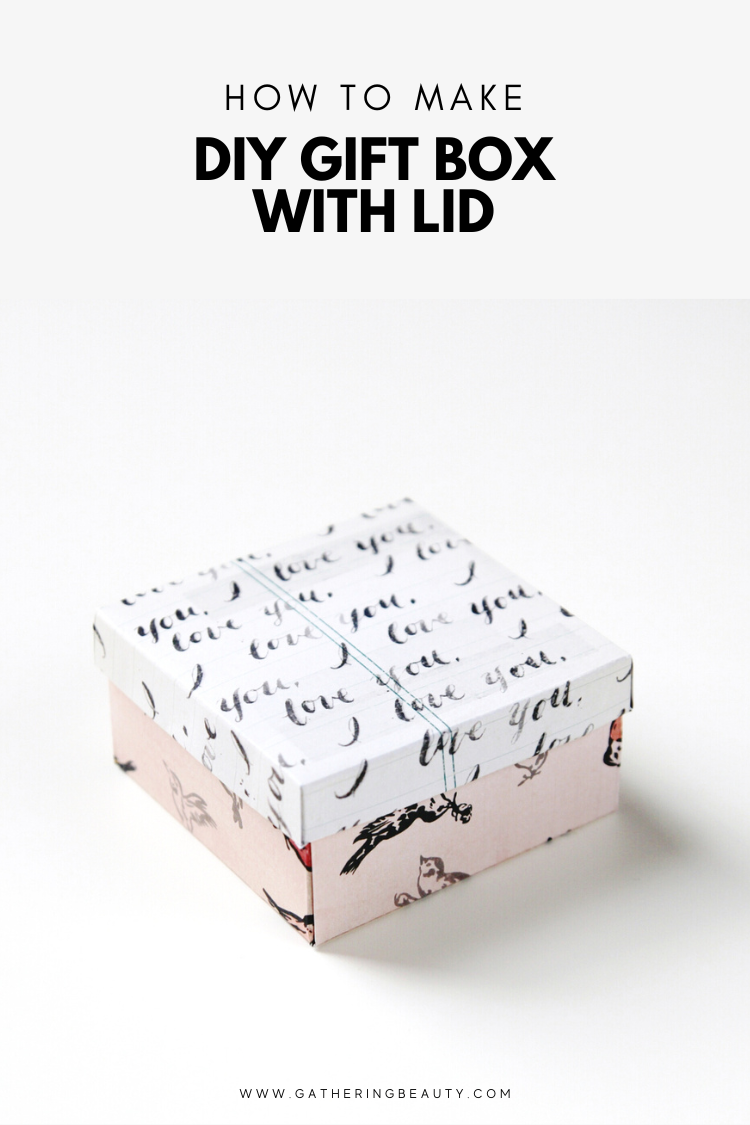
No novelty shape here, just a plain square box with a lid that fits, which is the one you always need and never have. Emma at Gathering Beauty cuts two squares of scrapbook paper, 5 inches for the lid and 5 and 7/8 for the base, so the lid slides on instead of sticking. Score your folds with a scoring board, or a ruler and an embossing tool. About 20 minutes, and she adds extra tabs since scrapbook paper is pretty, not sturdy.
10. DIY Wrapping Paper Gift Bag
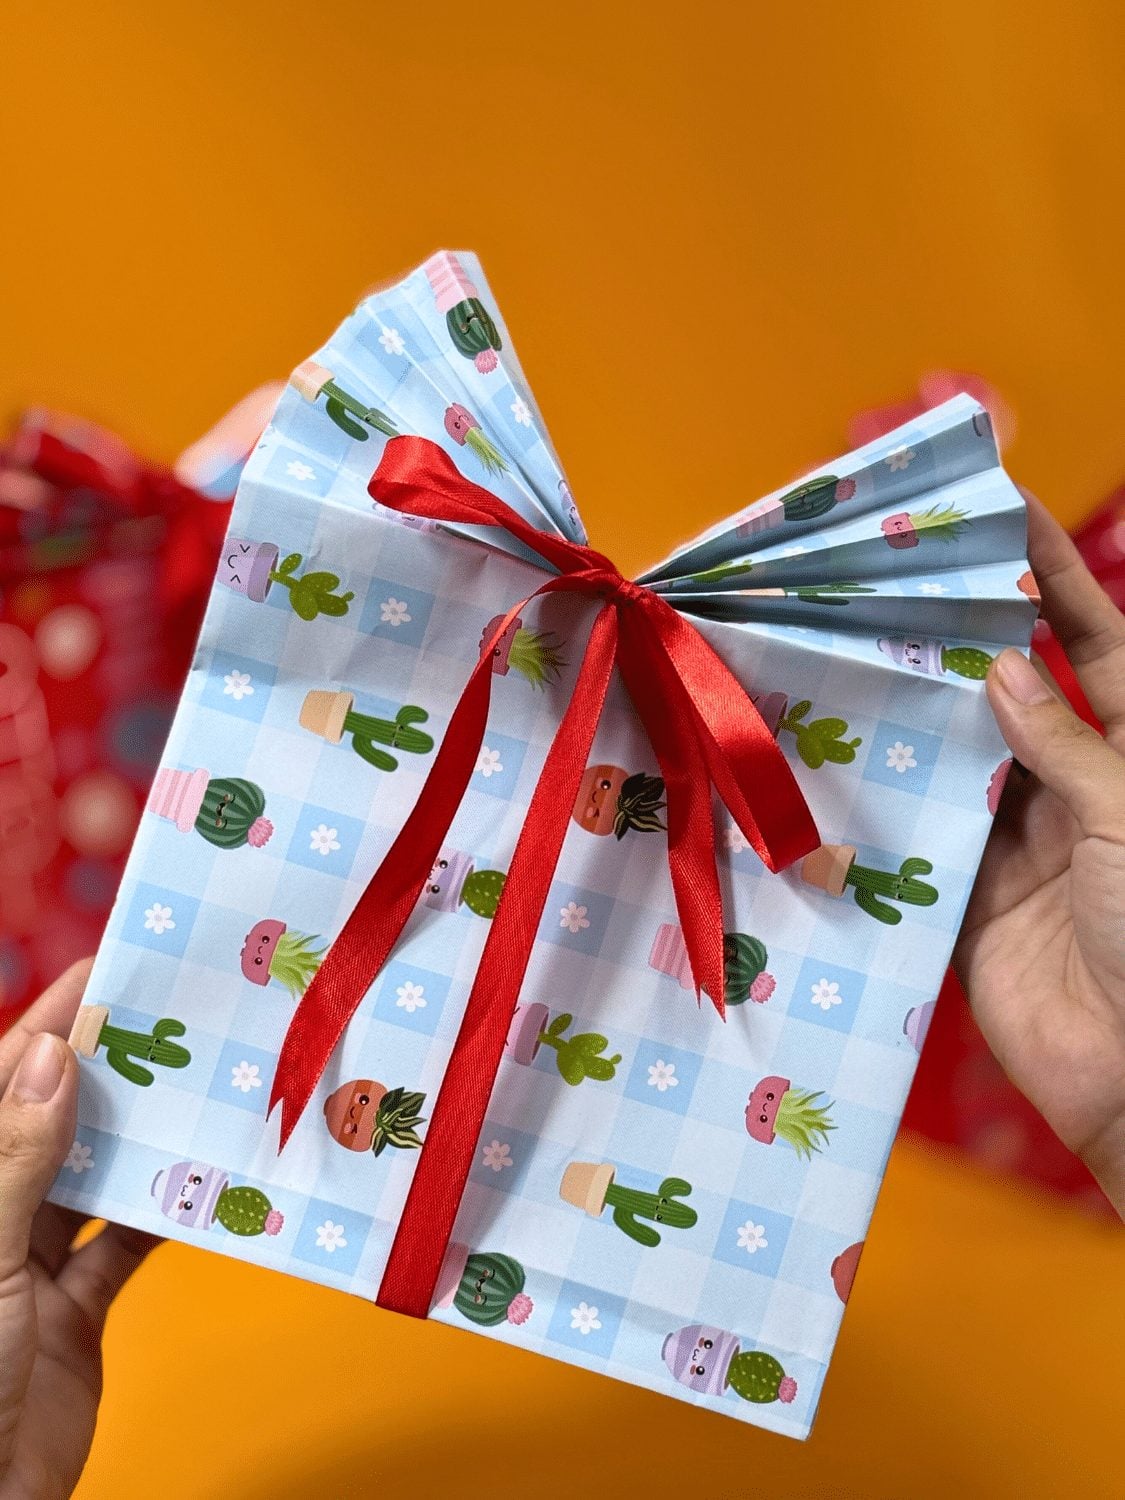
A flat sheet of wrapping paper turns into a real gift bag in four folds, and this one is ours, so I can tell you how it goes. Glue the side seam, fold the bottom up three inches and tuck the corners into triangles for a flat base, then accordion fold the top and fan it open before the ribbon goes on. There's a second version where you fold the top down and punch two holes for handles. Bigger paper makes a bigger bag. The video is on DIY Joy.
11. Punched Polka Dot Gift Wrap
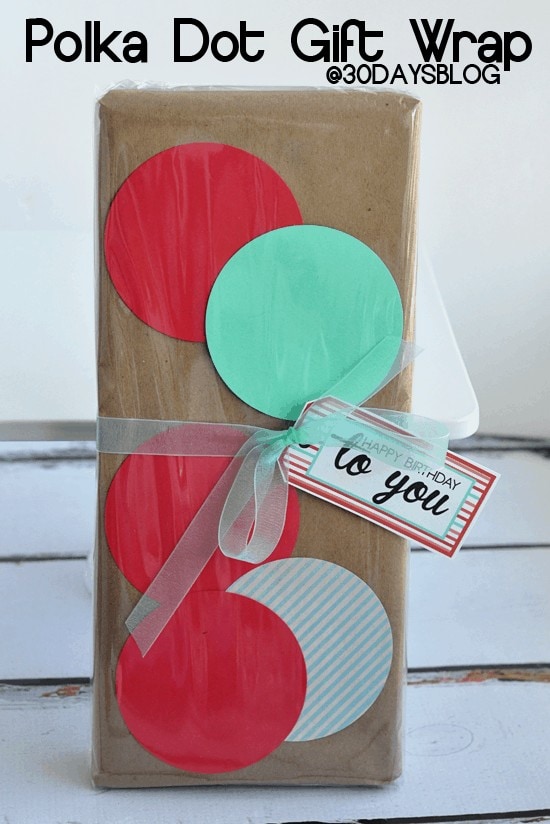
Here is the trick that had me staring for a second: the dots aren't glued to anything. Wrap the box in kraft paper, scatter big punched circles over it, then pull a tight layer of clear cellophane around the package and tape it at the back, which traps the dots and lets you shuffle them until the layout looks right. Mique of Thirty Handmade Days shared it over on The Polka Dot Chair. Keep the cellophane snug, because loose cello wrinkles and you see every bit of it.
12. DIY Star Garland Gift Wrap
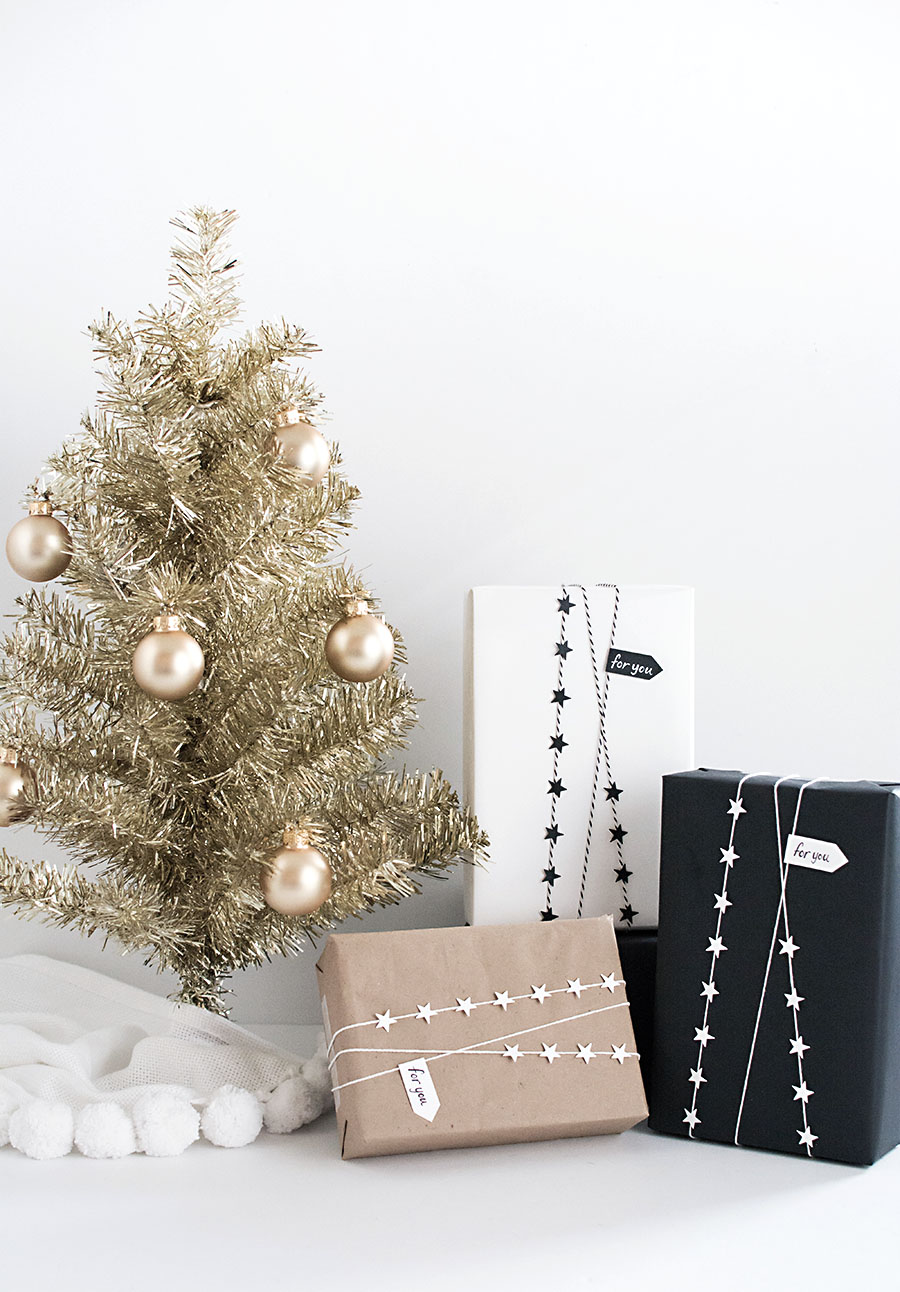
Wrap the gift, run a long piece of string around it three times, then punch stars out of card stock and dab tacky glue on the back of each one so they sit along the string like a tiny garland. That is genuinely the entire project. Amy at Homey Oh My cuts a little pennant from the same card stock for the tag and glues it onto the string too. White, kraft and black paper keeps it modern instead of cute.
13. Santa Suit Jar for Food Gifts
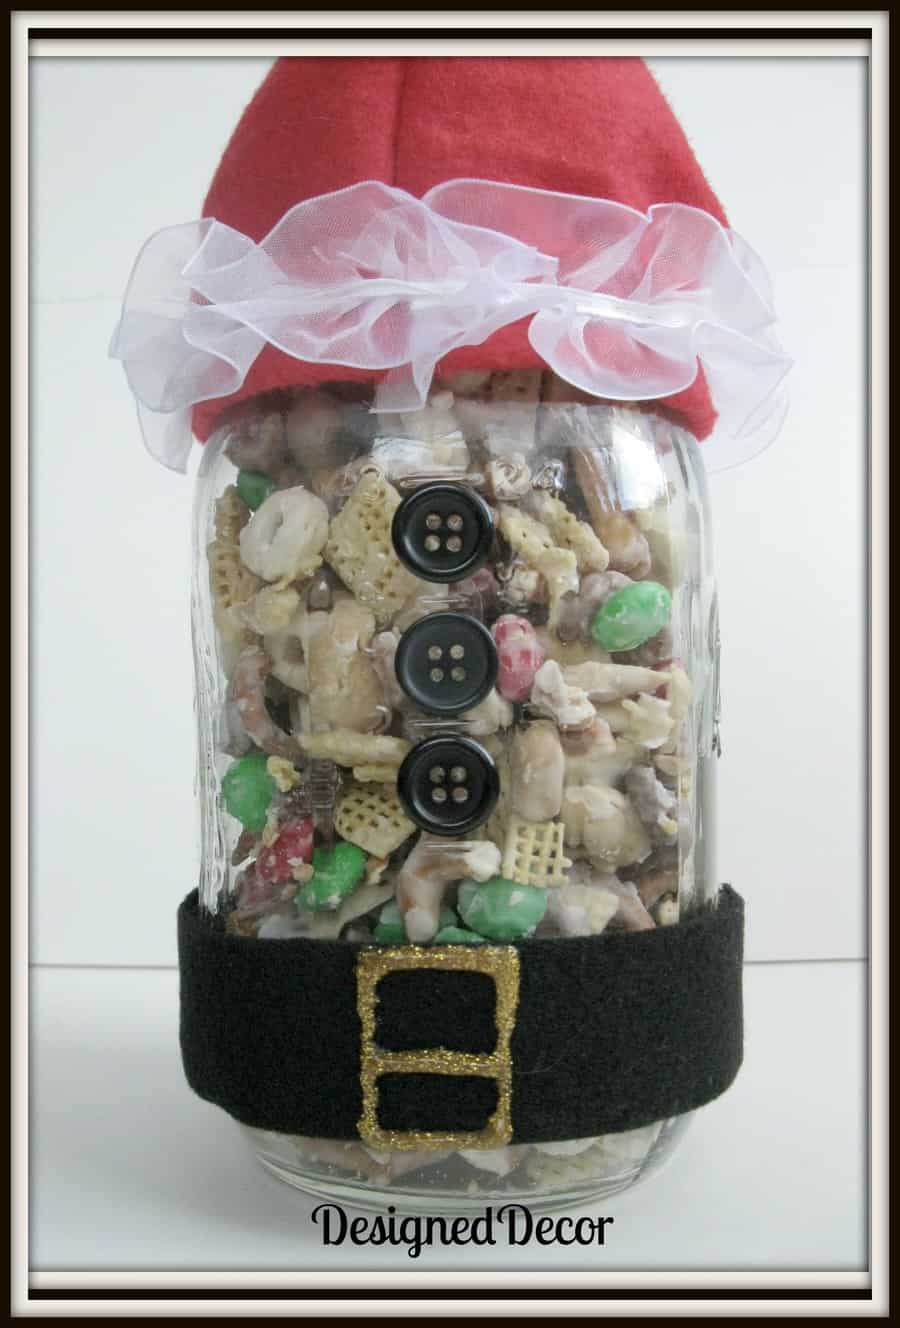
Snack mix in a jar is a lovely thing to receive and a dull thing to look at, so dress the jar as Santa. A band of black felt around the middle with a glitter glue buckle and three black buttons up the front does most of it, and a red felt hat with a ruffle trim finishes the top. Angie at Designed Decor sewed hers from leftovers, and the felt is stiff enough to hold the pom pom up. Her post has four more food wraps.
14. Easy Reindeer Gift Bags
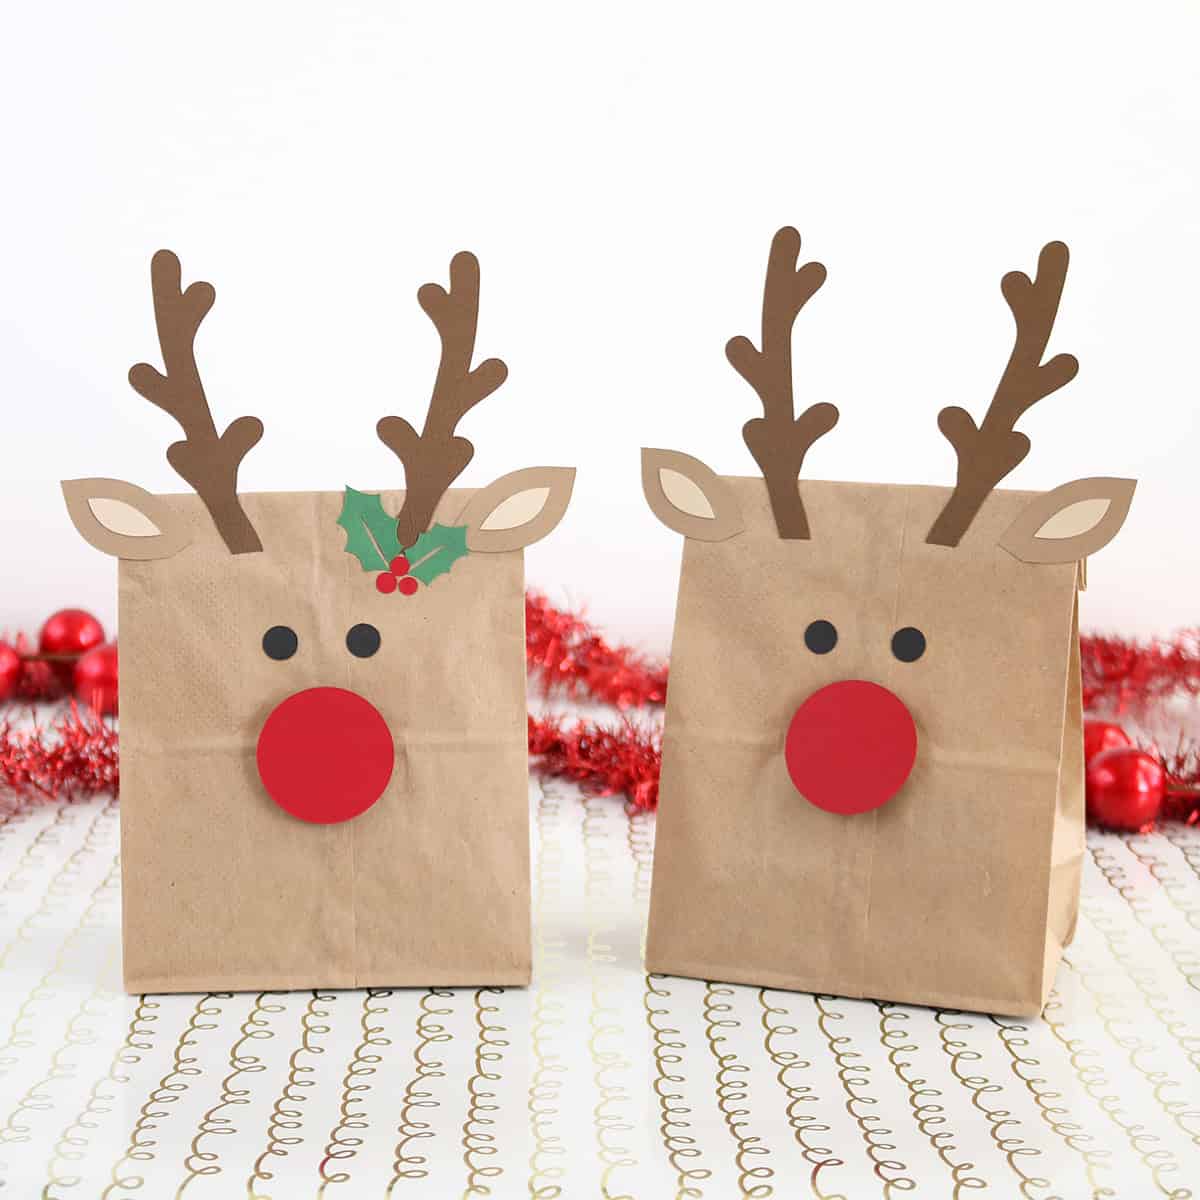
Plain brown lunch bags become reindeer with four cardstock shapes, which is the kind of math I like. Fold the top of the bag down three times so it sits shorter, then glue on antlers first, ears next, then the eyes and the big red nose. Aubree cuts hers on a machine, and every piece is a shape you could cut freehand if you had to. Googly eyes are an option and honestly they are the right call for a kids table.
15. Easy Candle Jar Gift Wrapping Hack
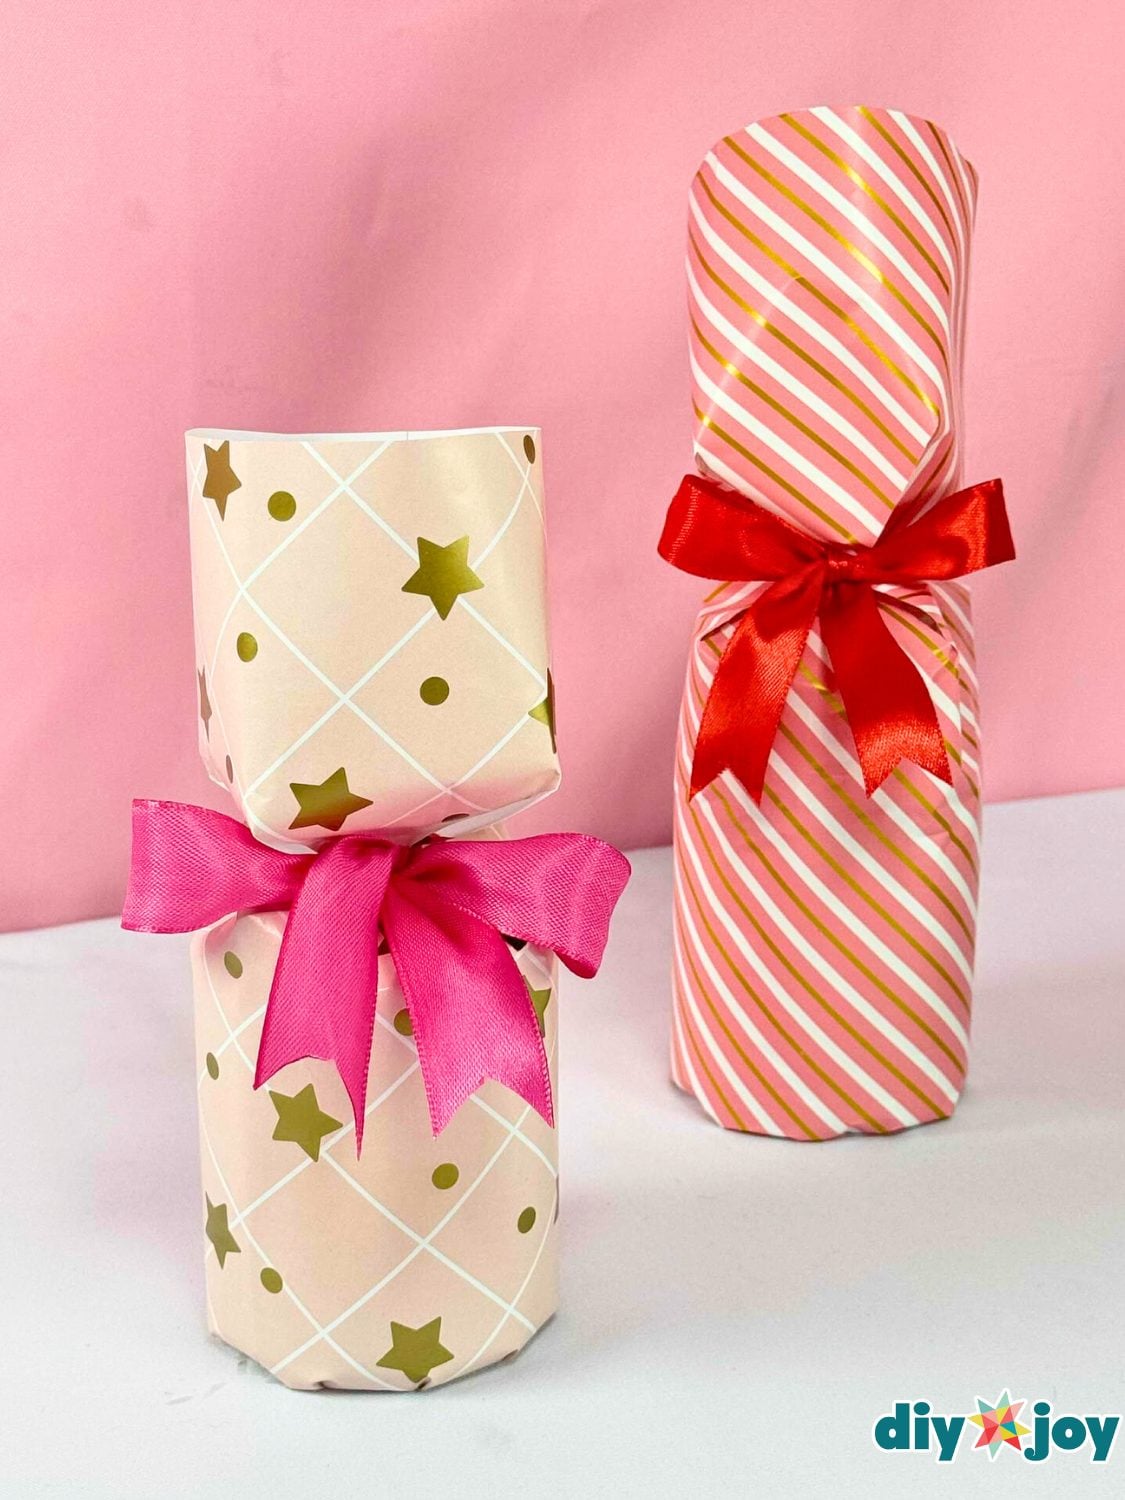
Round jars are the gifts that defeat a box, and a heavy glass candle is the worst offender of all. Cut your paper wide enough to go around the jar with a little overlap, and long enough to run about twice the jar's height plus some allowance, then lay a strip of double sided tape down one edge before you start rolling. That extra length is what gathers at the top. It's my go to for candles and pantry mixes in jars. Ours is on DIY Joy.
16. Hand-Stamped Wrapping Paper

Draw a Christmas tree freehand on a piece of old cardboard, cut it out and glue it to a second piece so you have something to hold onto. That is the entire stamp. Brush acrylic paint over the shape, press it onto brown parcel paper for a few seconds and lift slowly, then keep going until the sheet is full. Alicia of Arty and Crafty Little Things made these for Persia Lou, and a biscuit cutter helps if drawing freehand makes you nervous. She covers a carved version too.
17. Mini Wreath Gift Tags
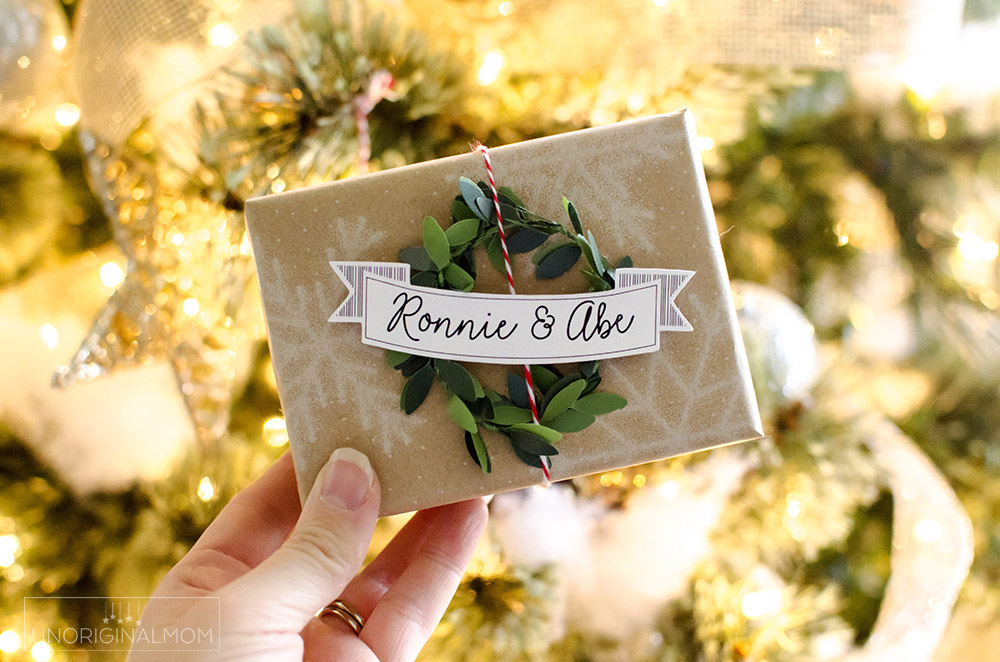
Cut short lengths of mini garland, twist them into little rings and hot glue them onto a banner shaped tag, and the finished thing looks like it came with the paper. unOriginal Mom sketches and cuts her tags on a Silhouette so the lettering is drawn by the machine, then threads baker's twine between the tag and the wreath to tie them on. Size the wreath against the tag before you glue, since the two need to overlap for the glue to grab. One dollar aisle garland makes a treeful.
18. Crystal Point Gift Topper
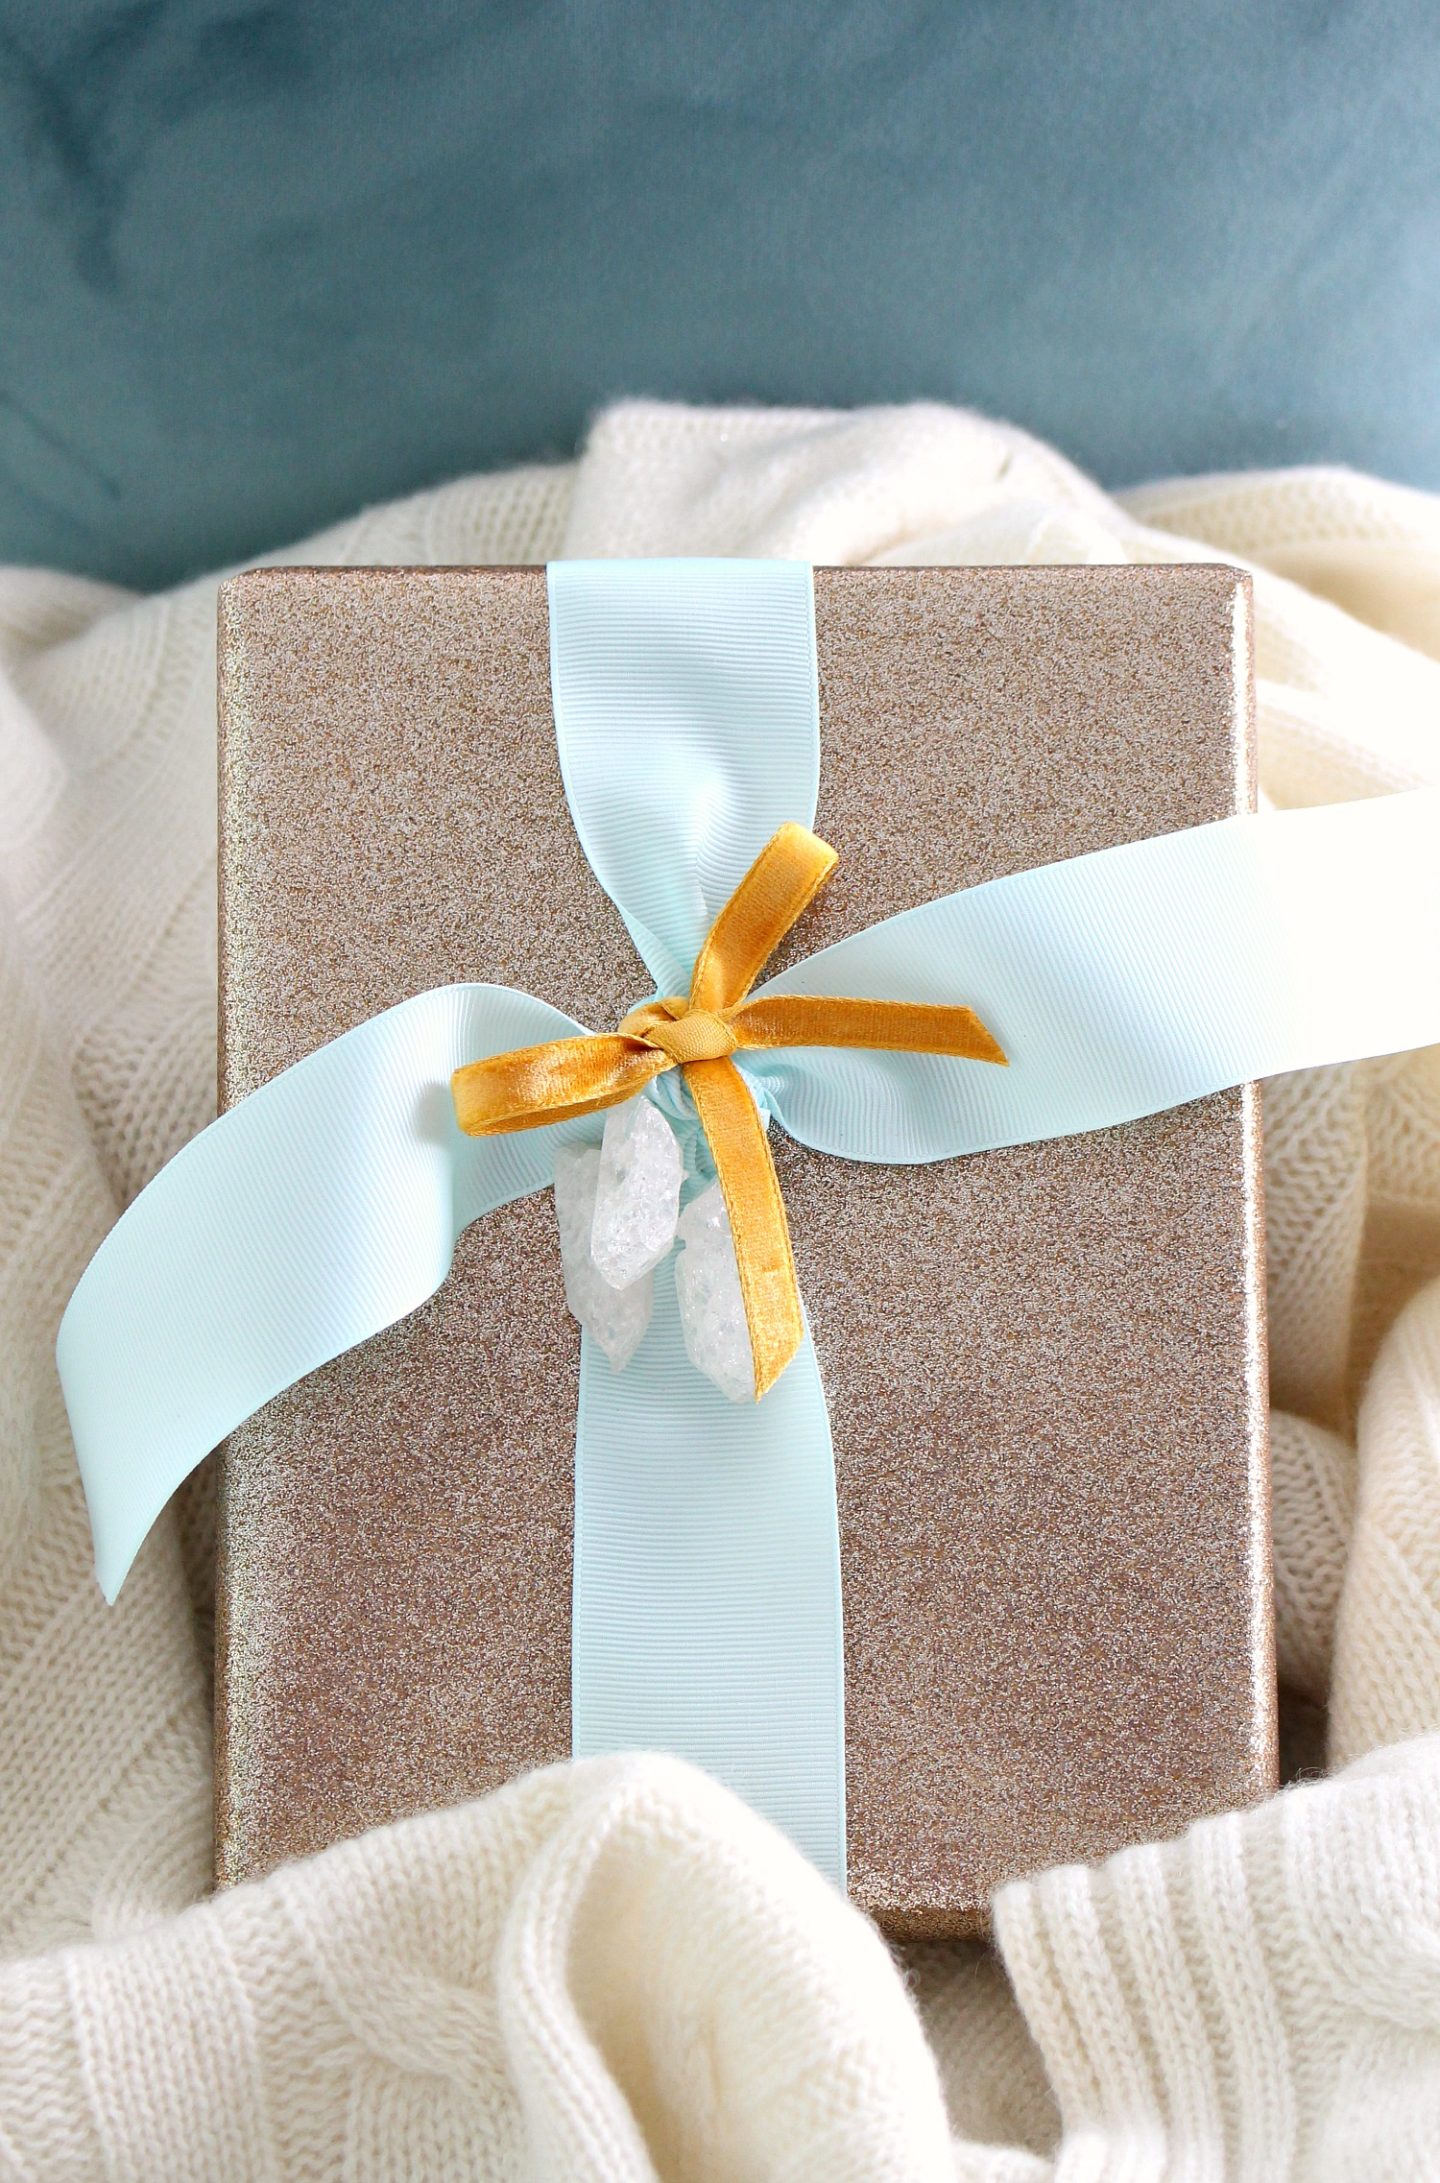
This is the one that makes people hold the package for a second before they open it. Gold glitter paper, a scrap of pale aqua grosgrain, a knot of gold velvet ribbon, then raw quartz points sewn on with doubled thread through the drilled holes. Tanya at Dans le Lakehouse uses a needle because the holes are small, and she points out the crystals become a necklace afterwards if you tuck a chain in the card. The topper outlives the wrapping, which I love.
19. Present Wrapping Tips That Hide Every Seam

The trick to a package with no visible tape is double sided tape everywhere the regular kind would show. Set the box upside down on the paper, tape the first edge down normally, trim the loose end so it reaches halfway across, then run double sided tape along that edge and smooth it over. Ginnie at Hello Little Home creases each end into two sharp triangles and tapes them on the inside. Sharp creases are doing as much work as the tape.
20. Easy 2-Minute DIY Ribbon Rose
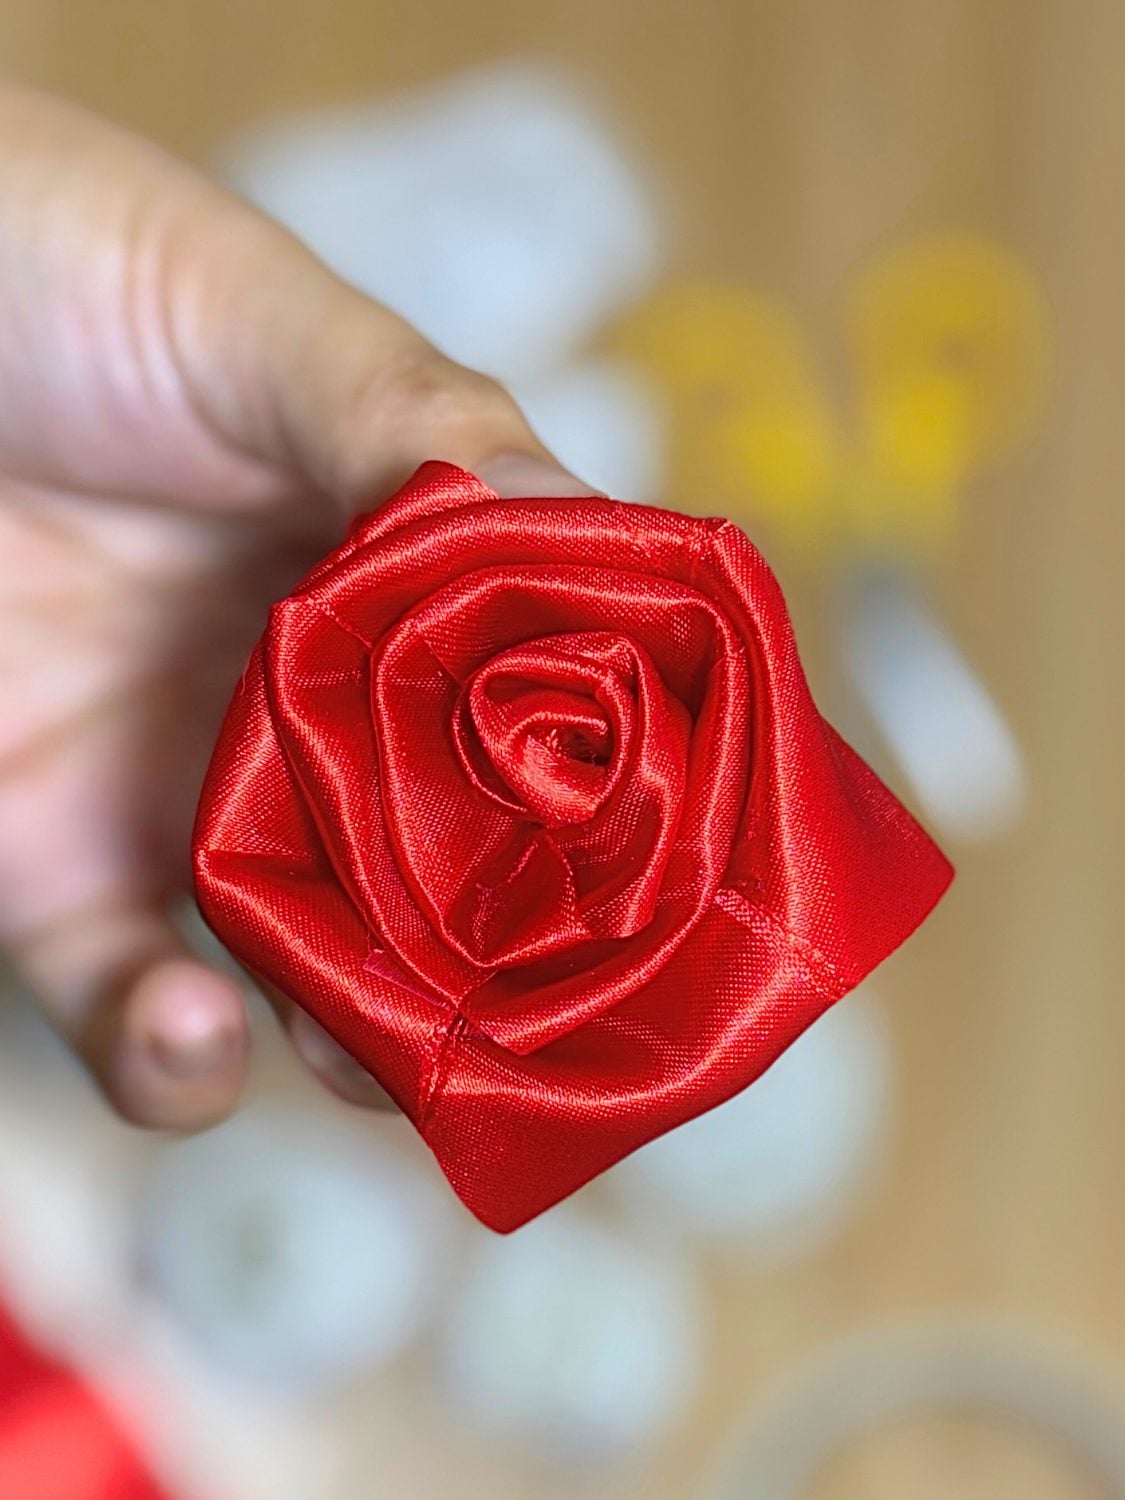
Two minutes is not a marketing number here, it is roughly the actual time. Wrap ribbon diagonally around a ruler until the ruler is covered, run a length of double sided tape along the bottom edge, peel the backing, then slide the ruler out and roll the ribbon up from one end, sticking as you go. The ruler is quietly doing the job of a florist's fingers. These are the toppers I reach for when a bow feels like too much. Ours is on DIY Joy with the video.
21. Bottle Brush Car Gift Wrap
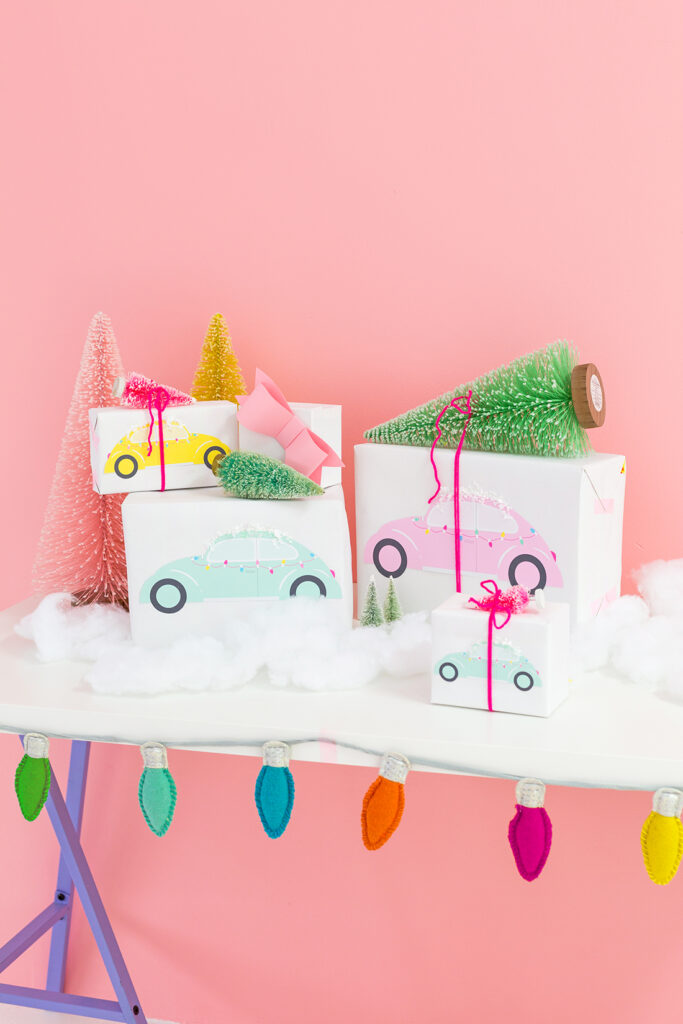
Every one of these packages is a little car driving a tree home, and I dare you not to smile at it. Print the retro car, cut it out and glue it to the front of a rectangular box, then dab craft glue along the roof and sprinkle fake snow over it. Once that is dry, tie a small bottle brush tree on top with yarn. Sam at Aww Sam includes a line drawing version so kids can color their own car first.
22. Stenciled Fabric Gift Bags
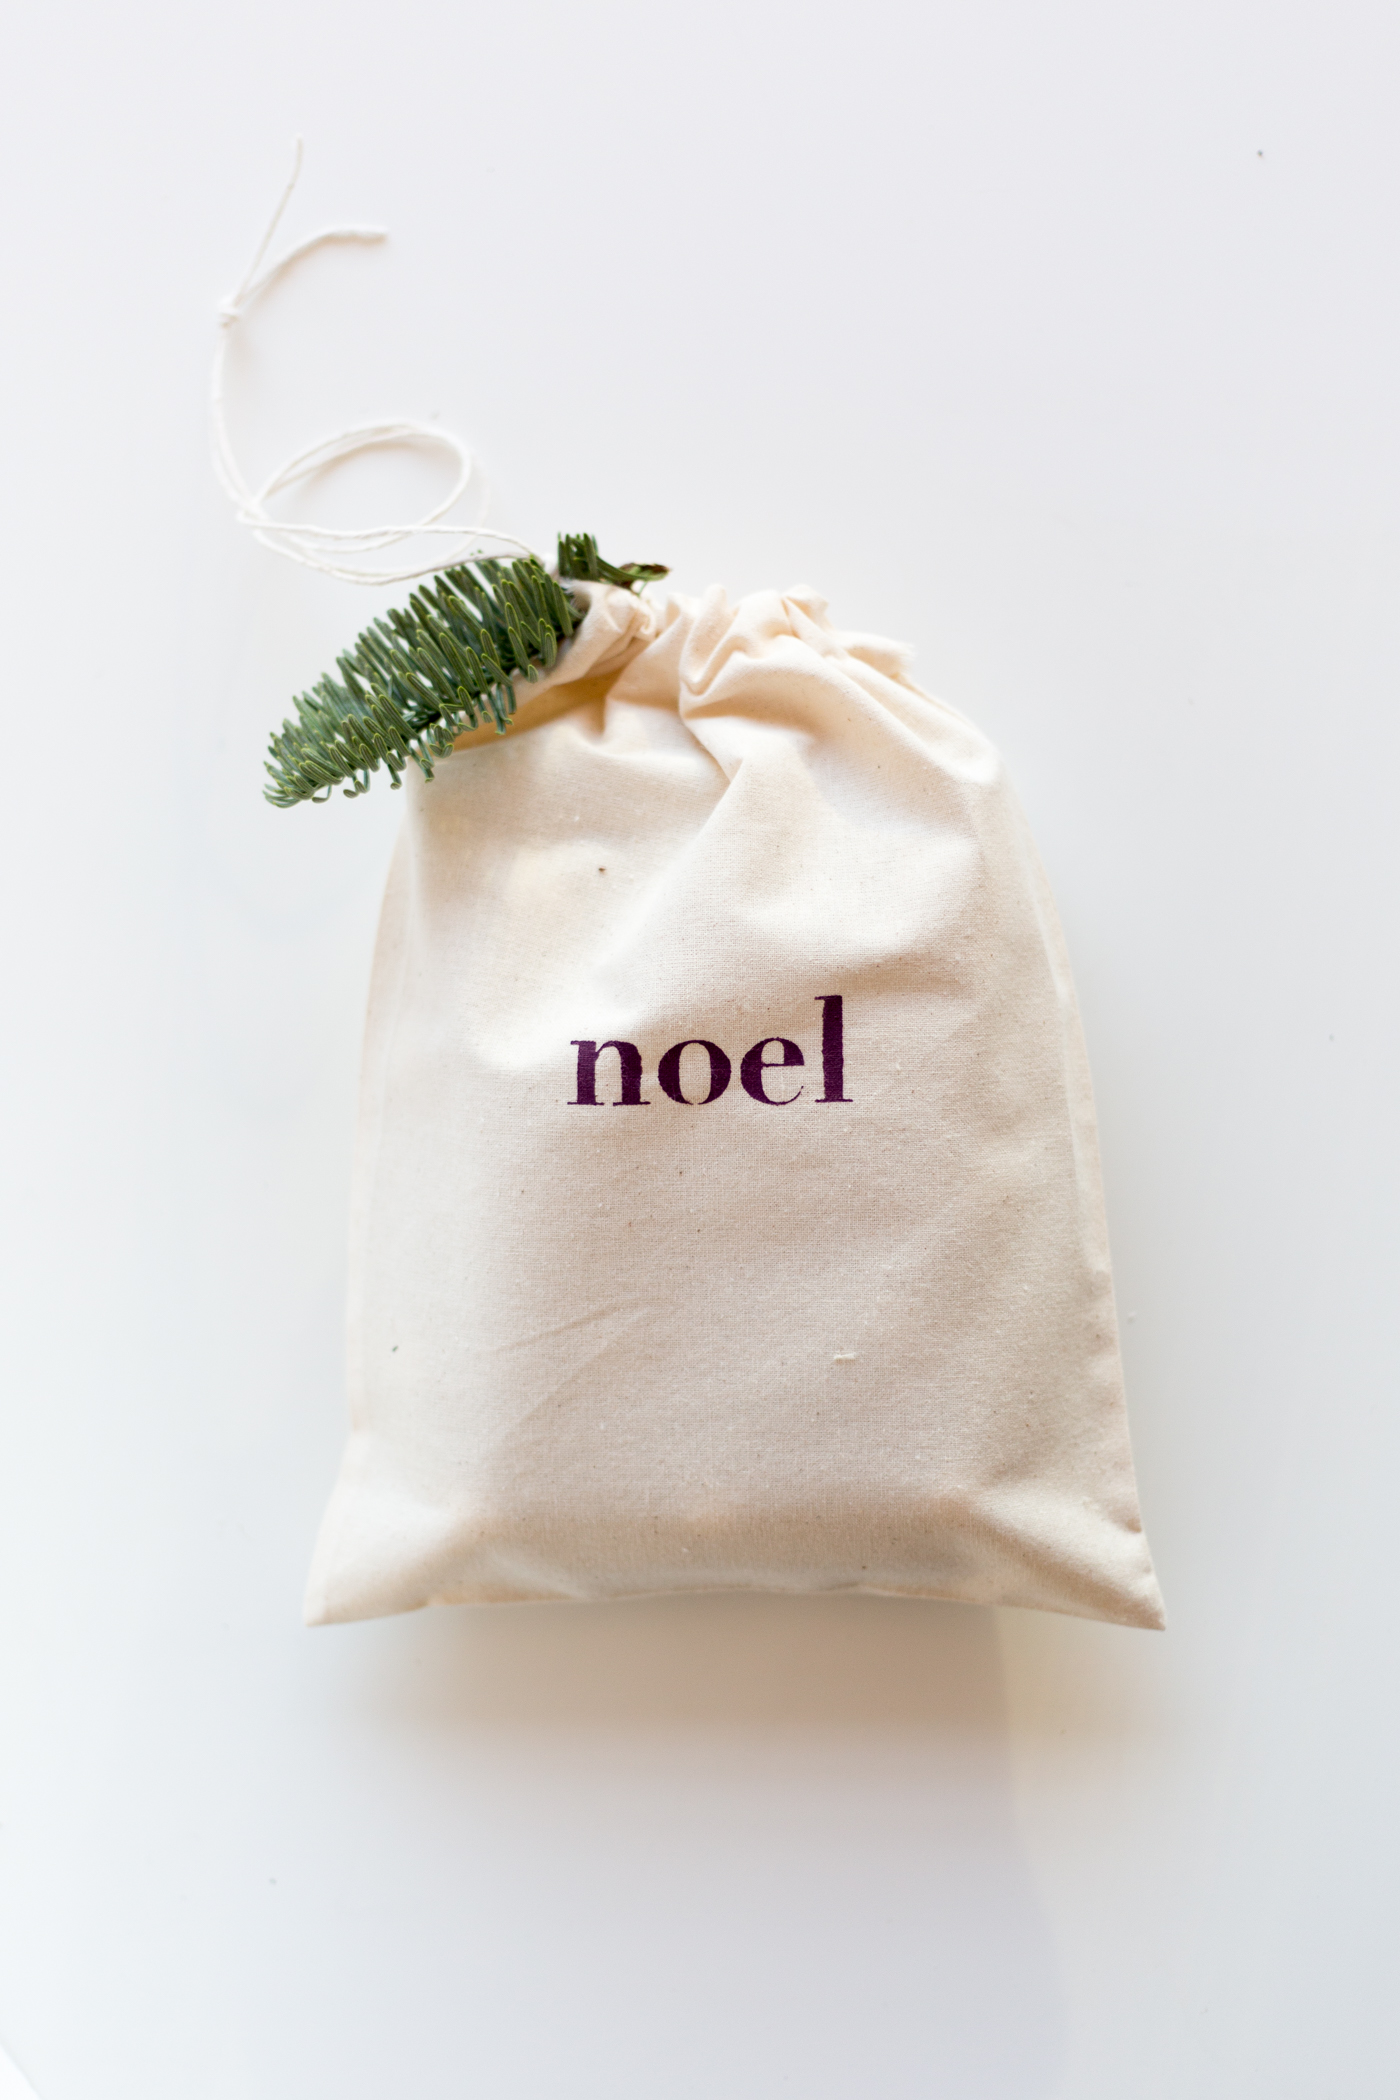
Plain cotton drawstring bags, one stencil and a sponge dabber, and the gift is wrapped in something the person keeps. Slide scrap paper inside the bag first so the paint cannot bleed through to the back, lay the stencil down, then dab small amounts of paint over the open areas until the coverage is even. Peel the stencil off before the paint dries. Fran at Fall For DIY uses adhesive stencils, which stop the bleed at the edges on fabric.
23. 5-Minute Ribbon Tying Hack
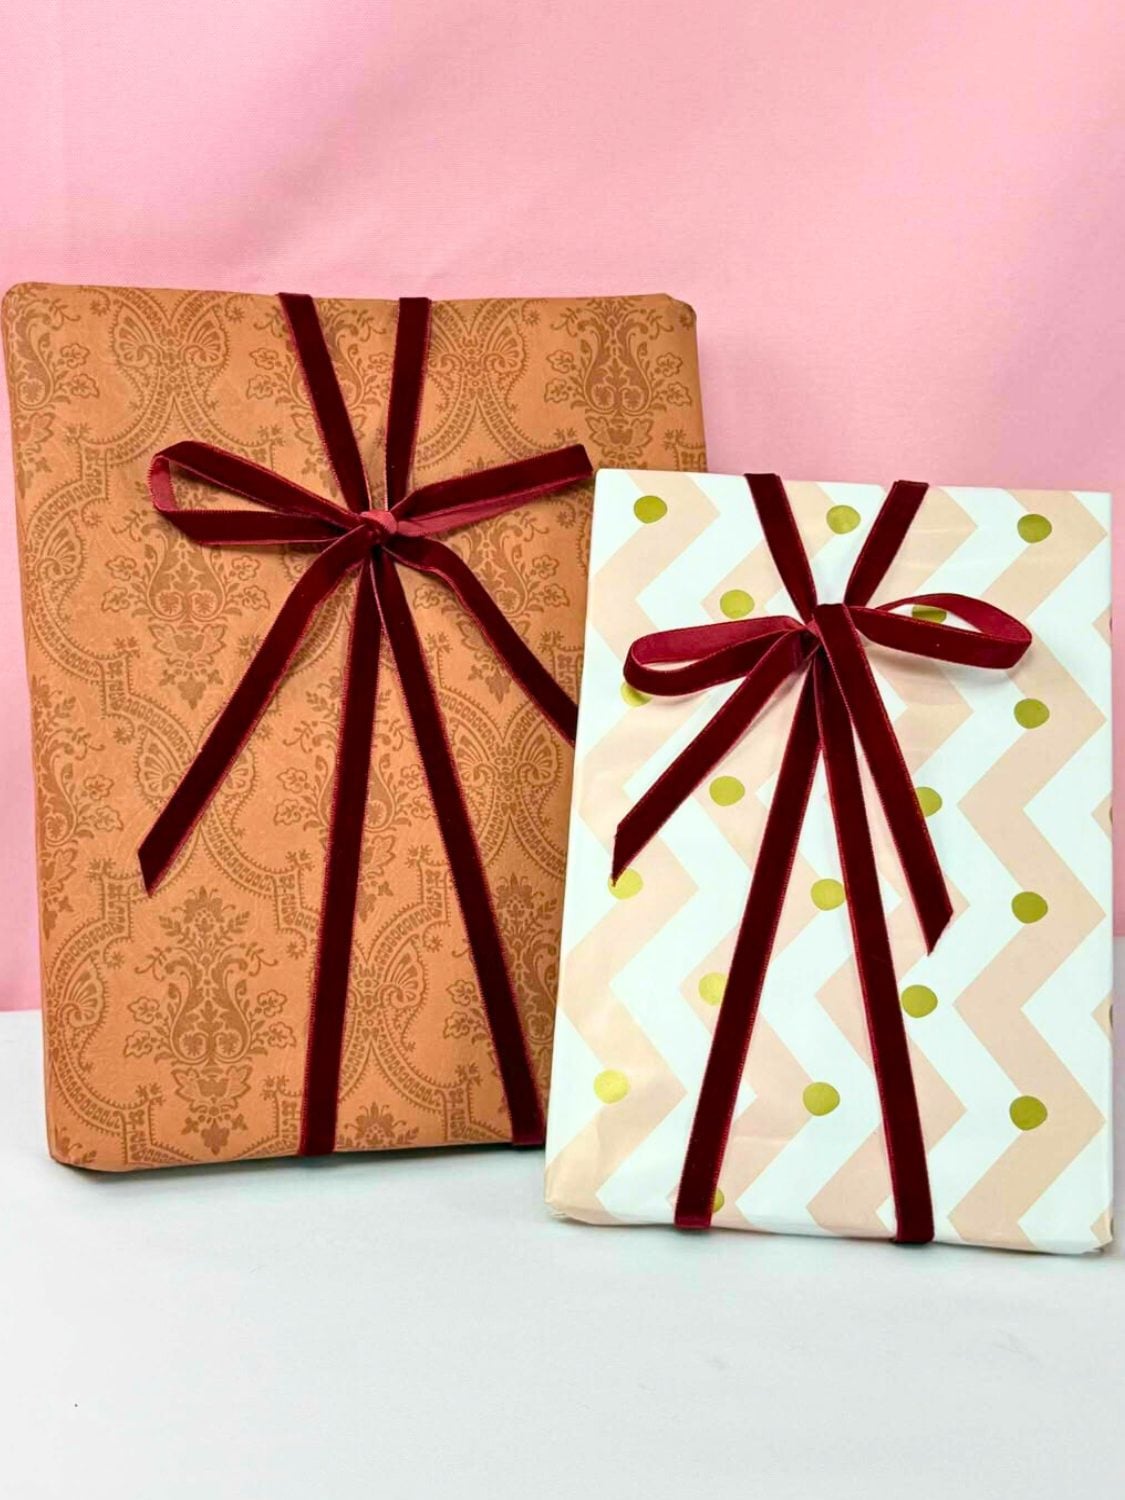
Getting a ribbon to sit dead center used to take me more attempts than I'll admit to. Cut a long piece, fold it in half, lay it out and set the present on top with a gap between the loop and the box. Thread the tails through the loop, slide them about a quarter of the way down from the top, then bring the right tail around the back and tie the two together. Thin velvet ribbon is the prettiest version. Ours walks the whole thing on DIY Joy.
24. Fabric Gift Pouch
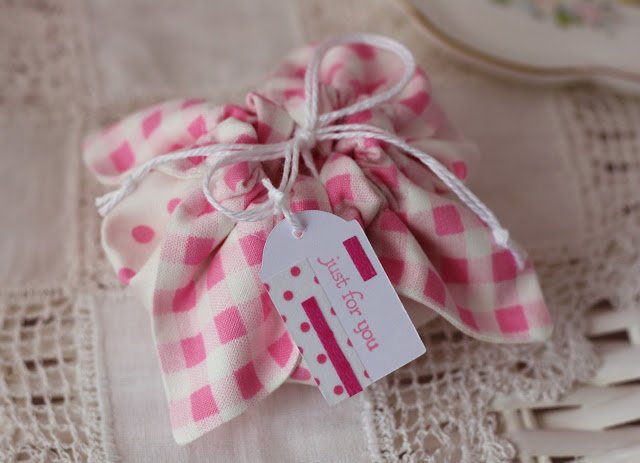
Two squares of cotton and a length of crochet cotton make a little drawstring pouch, which is the answer for jewelry and anything else that disappears inside a box. A Spoonful of Sugar took the idea from a Japanese magazine, and the shape is the appeal: the corners fold in and the twine gathers the whole thing up into a soft bundle. They are quick, and unlike paper they come back. Their post carries the measurements and the stitching order.
25. Brown Paper Parcel Packaging Ideas

Brown paper is the plain white t shirt of wrapping, and Michelle at A Crafty Mix gives it five different jobs. The one in this photo is dressed like a shirt, with a folded paper collar, a cuff and real buttons down the front, scattered with paper stars cut from old book pages. Brown paper takes paint, stitching, buttons and cut paper equally well, which is why one plain roll goes this far. Five ideas on her post, all off the same roll.
26. Santa Sock Wine Bottle Wrap
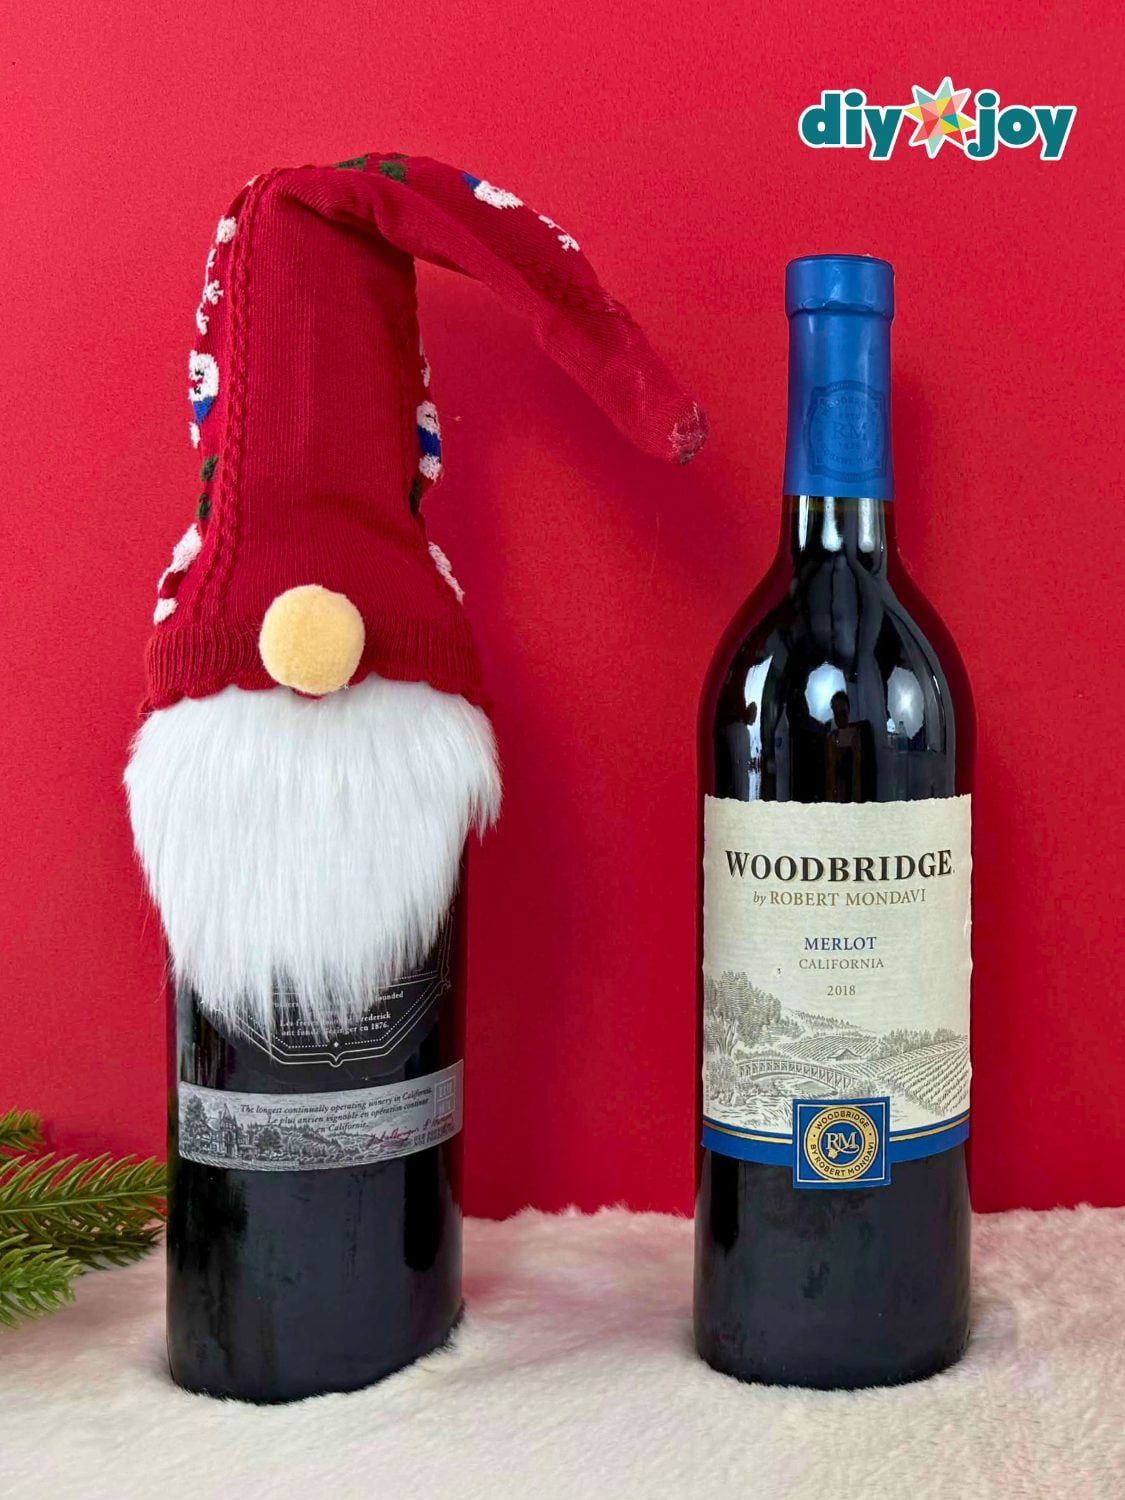
A wine bottle needs no paper when a Christmas sock and a scrap of faux fur can turn it into Santa. You cut the sock so the long section becomes the hat, glue the cut edges inside out so nothing frays, cut a beard from faux fur (from the fabric side so it stays fluffy), glue it around the neck, pull the hat on and add a pom pom nose. Ours took ten minutes and was the table centerpiece before anyone opened it. The video is on DIY Joy.
27. Cupcake Liner Gift Bows
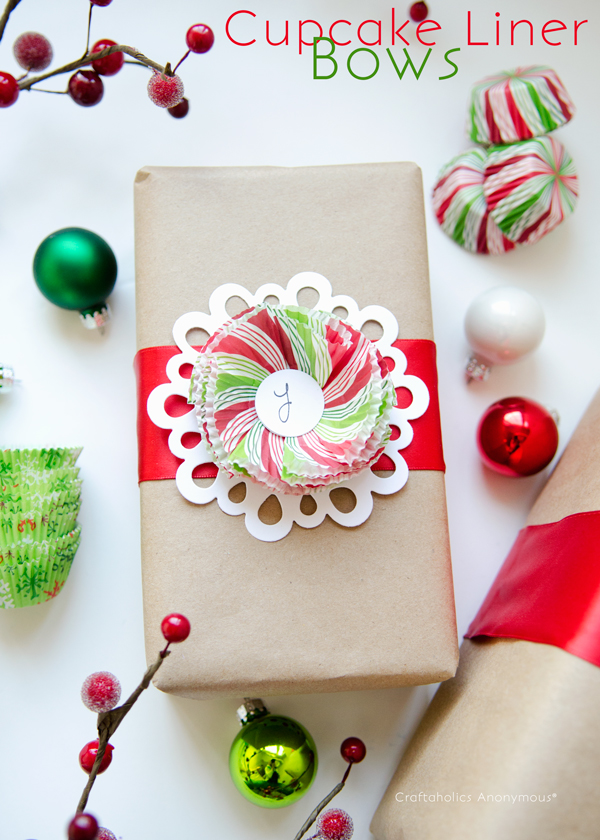
Christmas cupcake liners come in patterns nobody actually bakes with, so put them on the packages instead. Linda at Craftaholics Anonymous layers the liners into a rosette, mounts the stack on a white paper doily so there is a scalloped edge behind it, then sets the whole thing on a wide ribbon already wrapped around the box. A hand lettered initial in the center turns it into the tag as well. Cheaper than a bought bow, and prettier.
28. Layered Black, White and Gold Gift Wrap

More is more, and Heidi at Happiness is Homemade is not apologizing for it. Black and white striped paper with gold foil dots, a band of glittery gold ribbon, a strip of rhinestone trim, gold curling ribbon and a rhinestone letter slipped under the bow. The layering is the technique: every element sits on top of the one before it instead of beside it. Pull it apart and it is four cheap things from the party aisle stacked in the right order.
29. Hand Painted Kraft Wrapping Paper
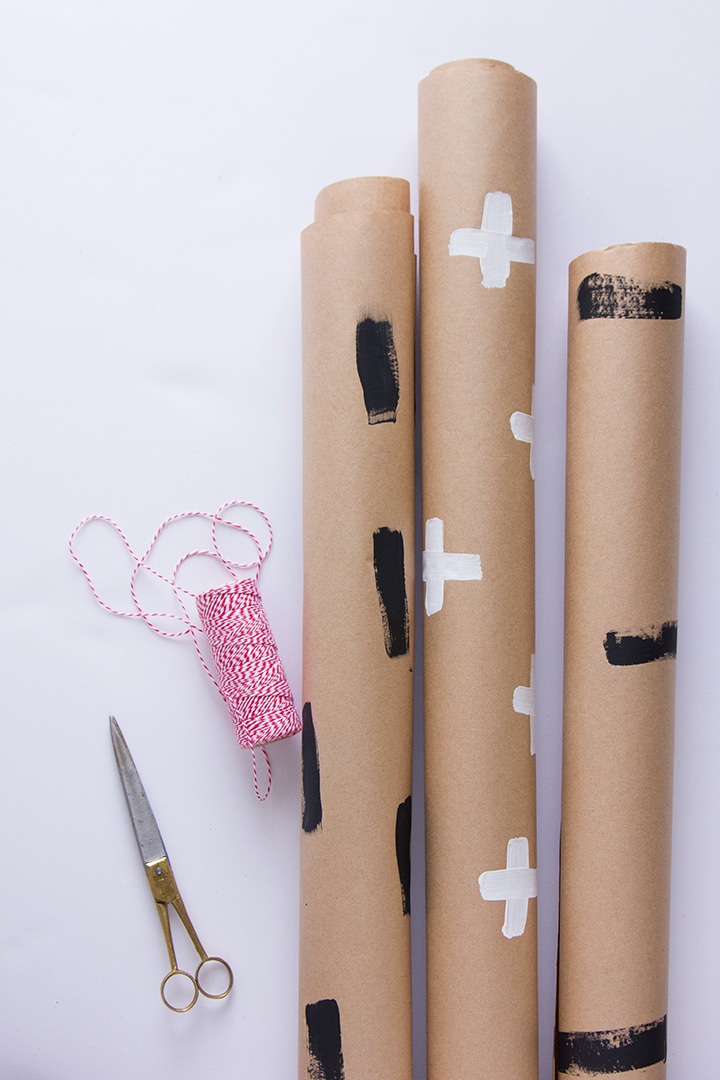
Big confident brush marks straight onto a roll of kraft paper, and the less careful you are the better it looks. Sara at Alice and Lois paints black dashes on one roll, white crosses on another and thick black blocks on a third, so the three coordinate without matching. Nothing here needs a steady hand, which is exactly why it works on a night when you have twelve gifts left. Red and white twine ties it all together.
30. Giant Paper Gift Bow

Two feet across, made of wrapping paper, and it costs whatever a roll costs. Allison at Dream a Little Bigger cuts three strips for every round of the bow, starting at 46 inches long by 4 inches wide and stepping down to 42, 38 and 34, plus one 20 inch strip for the center. A cheap single hole punch lines every strip up identically, and that is the reason hers comes out round instead of lopsided. Six inch strips give a 34 inch bow.
31. Old Sweater Gift Sack
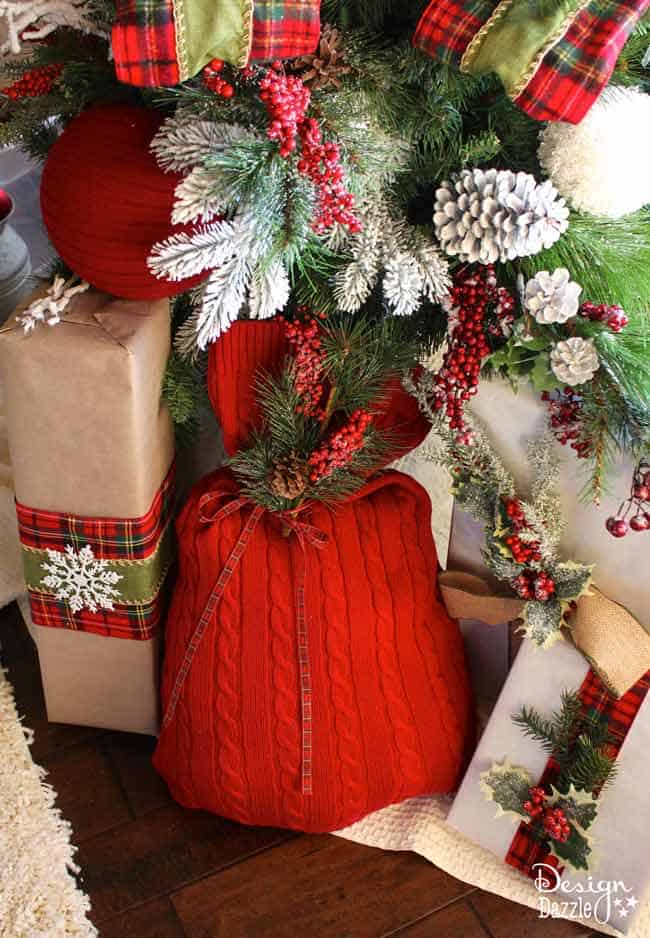
A thrift store sweater turns into a sack big enough for the awkward gift, and the bottom hem becomes the top of the bag, which is the part that makes it look deliberate. Toni at Design Dazzle turns the sweater inside out, closes the arm holes and the neck, then ties the open end with ribbon and tucks in a sprig of pine. She hot glued hers because it is for display. Sew it if you want it back next year.
32. Leather Scrap Gift Tags
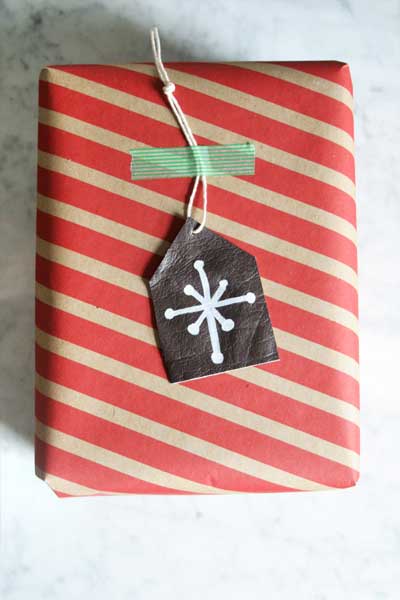
Fifteen minutes, and the tag outlives the gift. Cut 2 inch wide strips from scrap leather, cut those into 3 inch pieces, then slice two small triangles off the top corners with a straight edge so each one comes to a point. Punch a hole, thread cotton twine, write on it with a paint marker. Lora at Craftivity Designs buys scrap leather or cuts up a thrifted jacket, which is the cheapest leather anybody ever bought.
33. DIY Christmas Stamped Wrapping Paper
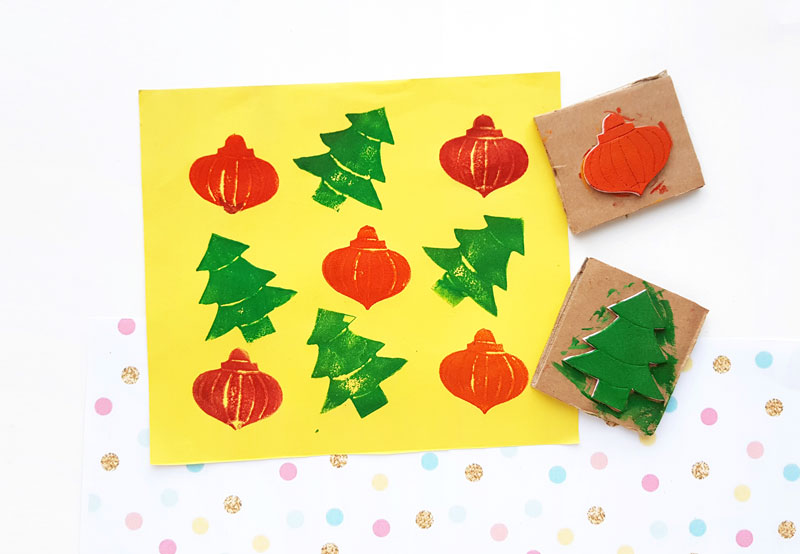
Craft foam prints softer than cardboard does, which is the whole reason to keep both kinds of stamp in your drawer. Menucha at Moms and Crafters turns a foam sheet and a scrap of cardboard into reusable Christmas stamps, then runs off a full sheet of handmade wrapping paper with them. Five supplies, and you almost certainly own all five already. Her printable template is offline at the moment, which matters less than you would think. Moms and Crafters has the method, and it is worth the click.
34. Stained Wood Holiday Gift Tags
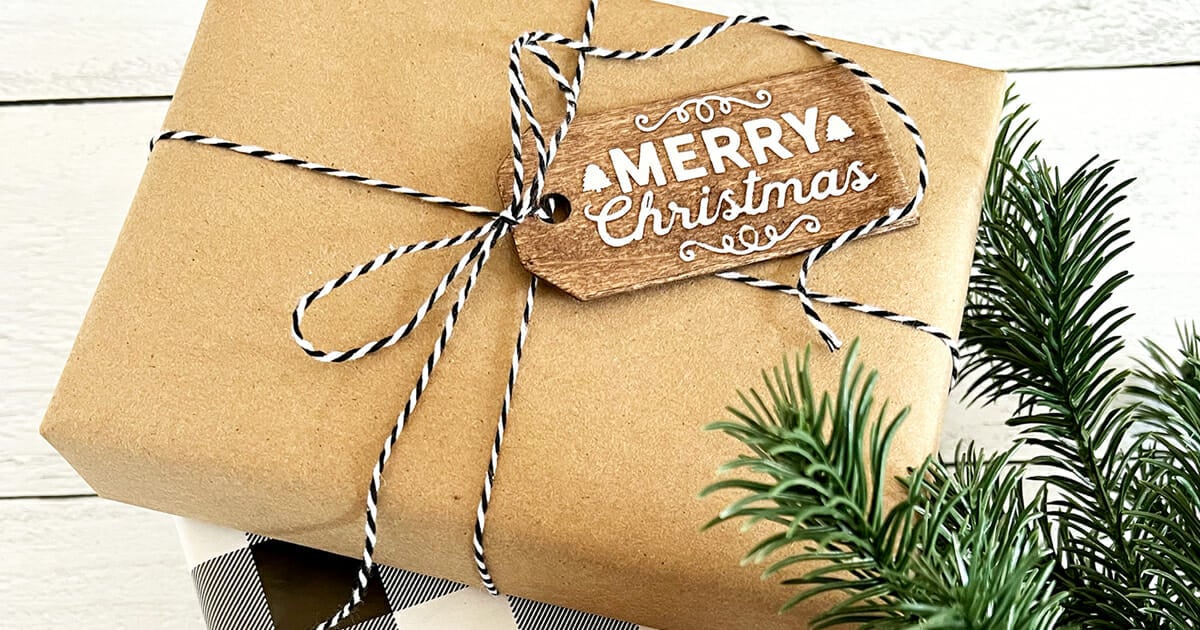
Small wooden tags, three gel stains and a reverse stencil, and the lettering stays bare wood while everything around it goes dark. Kim at Crafting Cheerfully brushes gel stain on and wipes it straight back off with a paper towel, so one pass reads light and a second pass goes deeper. Stain the back and the sides too. Then peel the stencil, seal with satin varnish and tie them on with black and white twine.
35. Gingerbread House Paper Gift Bags
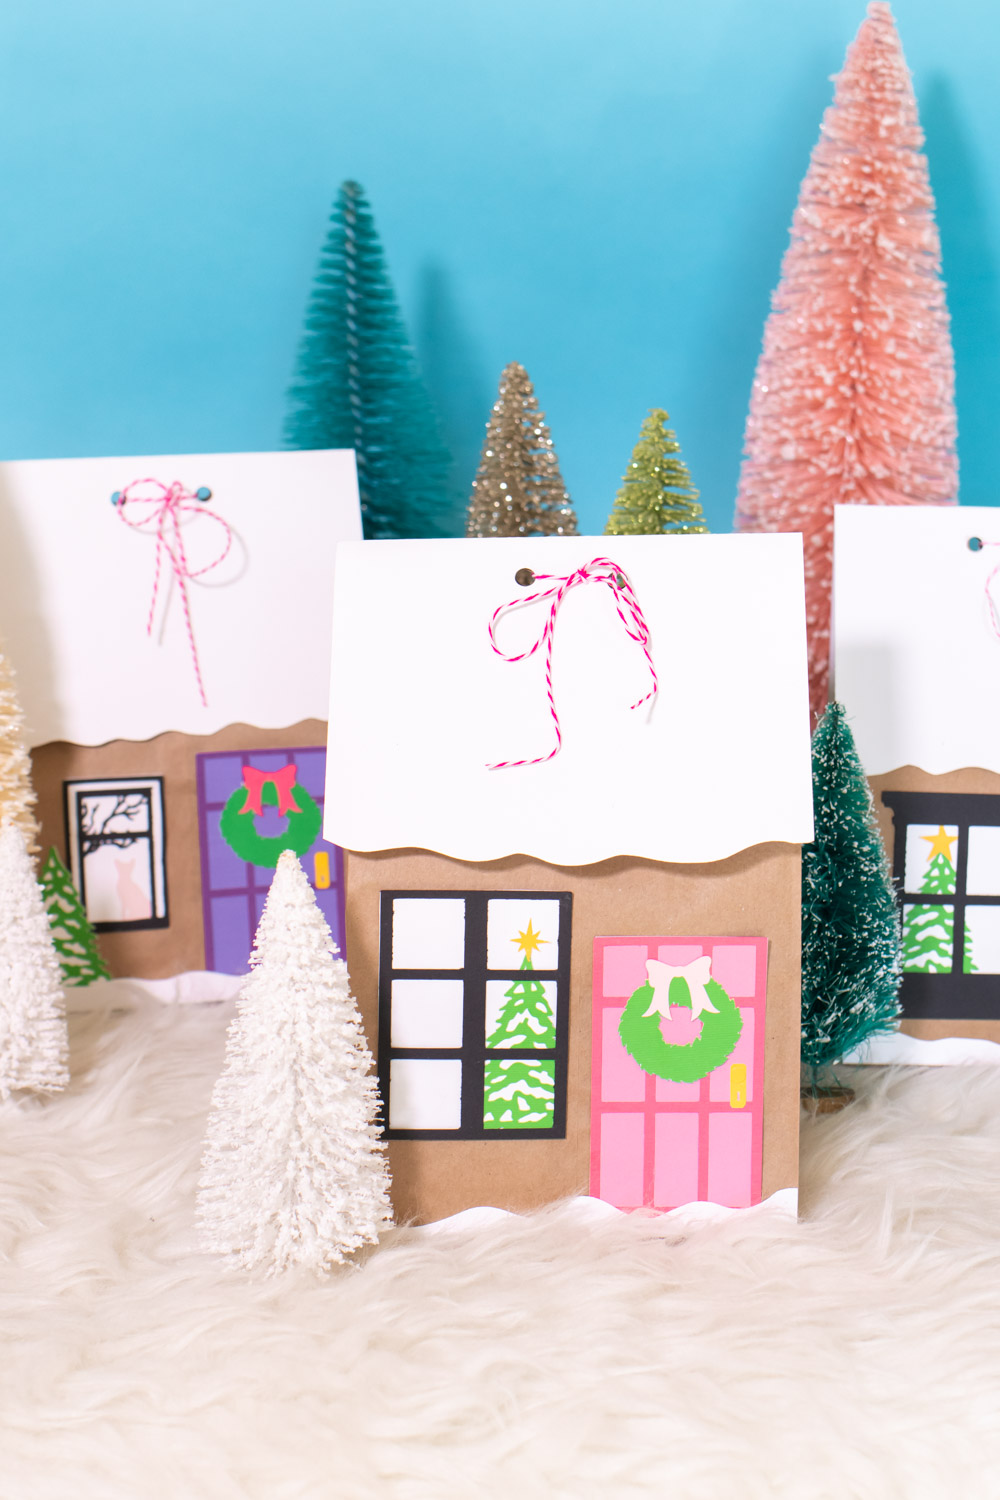
Brown paper lunch bags become a little snowy street, and the roof is the clever part. Fold the top of the bag down about four inches, cut a piece of white cardstock in half and give the bottom edge a wavy line so it reads as snow, then sit it over the fold. Add a door, a window and a wreath in cut paper. Club Crafted punches two holes through every layer and ties it shut with twine, so the roof holds itself on.
36. Embroidered Holiday Gift Tags
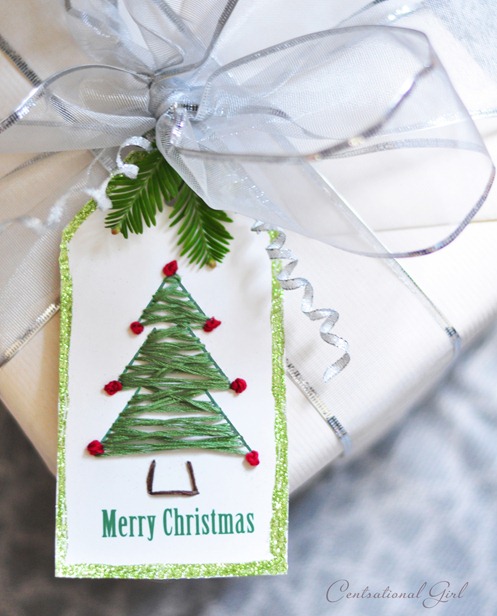
Green thread criss crossed over a printed tree outline, with red French knots at the points for the ornaments. Kate at Centsational Style says precision is not the goal here and random crossings look better, which is the most relaxing instruction on this whole list. A glitter border around the edge and a length of ribbon finish it. If you have somebody in the house who is learning to stitch, hand them this one.
37. Shrink Plastic Gift Tags

Shrink plastic is one of those supplies that looks like nothing at all until it goes in the oven, and a gift tag is the perfect excuse to buy a pack. You draw on it with markers, punch a hole, bake it and it comes out a third the size and several times thicker, with the color deepened. Adrianne at Happy Hour Projects lets the whole family draw their own. Her terms ask me not to run the method here, so go and read hers.
38. Duck Tape Christmas Gift Tags
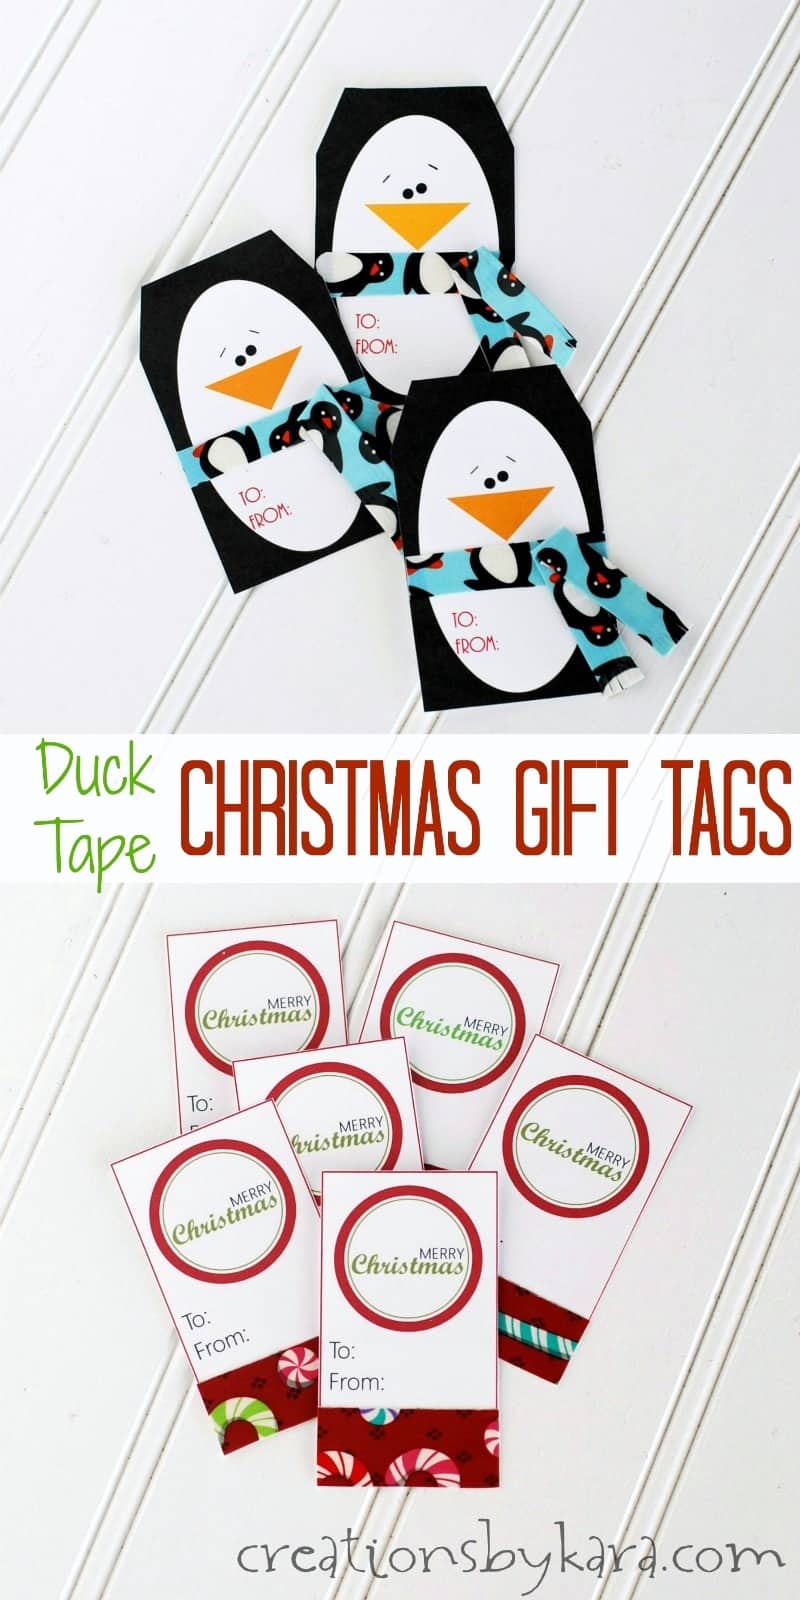
Print a plain tag, run a strip of patterned tape across the bottom, done. Kara at Creations by Kara found it works best to lay the tape's straight factory edge across two tags at once and trim the excess from the back, which saves you fighting a wobbly cut line. The penguin version gets a little scarf built from folded tape with snipped fringe at the ends. Non stick scissors, if you own them, will thank you.
39. Reusable Santa Sacks
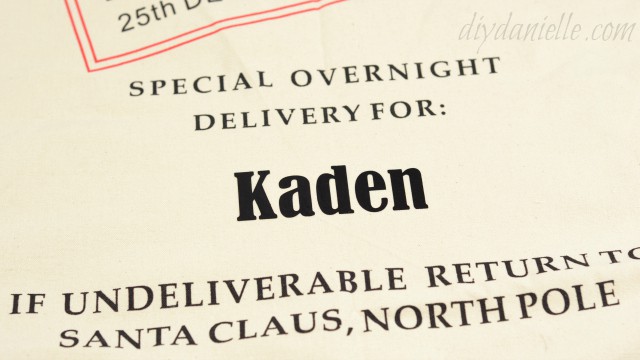
One sack per person, their name on it, and Christmas morning cleanup stops being a bin bag situation. Danielle at DIY Danielle buys blank canvas Santa sacks and adds the names in black heat transfer vinyl, which means cutting the name mirrored, laying the vinyl face down on the mat and ironing it on. She has sewn her own before and says buying the blanks came out cheaper. They store flat and come back every year.
40. Upcycled Oatmeal Canister Gift Holder

Bottles, candles and anything breakable are the gifts that defeat wrapping paper, and this is the fix for all three. Single Girl's DIY covers an empty 18 ounce oatmeal canister with a 14 inch square of plaid fabric, glues the hems down on three sides, then threads one inch satin ribbon through the top hem so the fabric gathers up and ties into a big bow. There is no sewing in it anywhere. The cardboard tube protects whatever is inside on the drive over.
41. DIY Paper Gingerbread Man Gift Tags
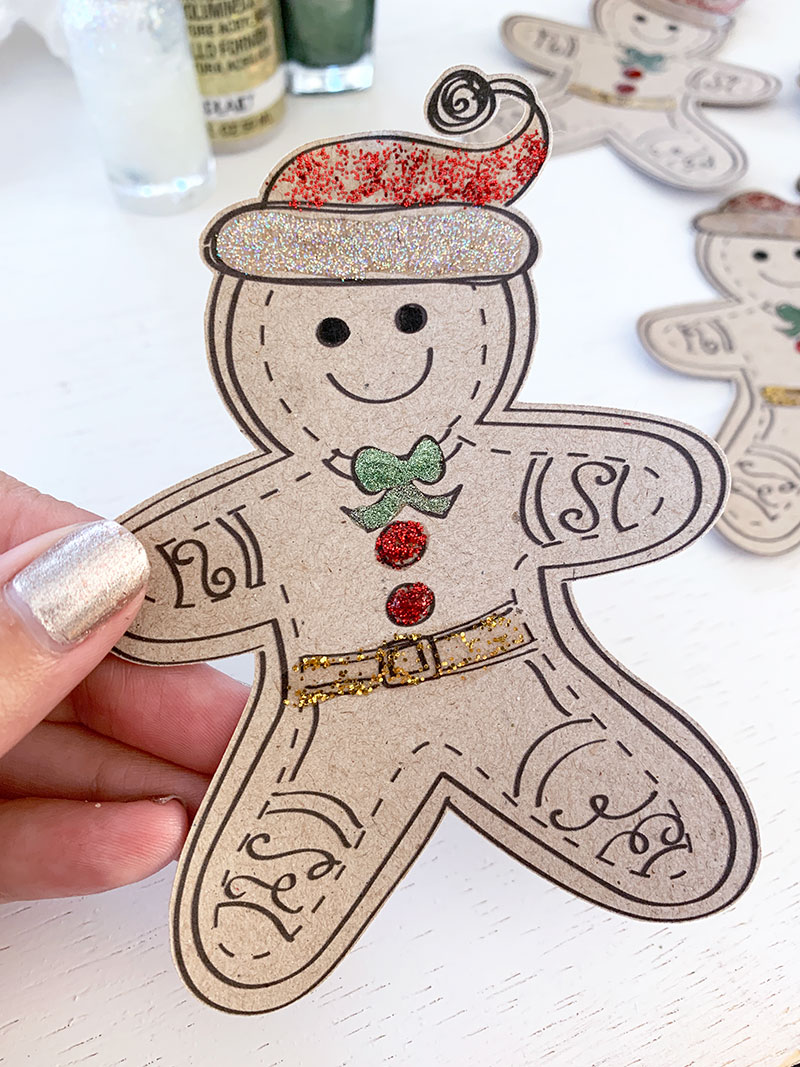
Jen Goode drew this gingerbread man as a coloring page first, which is why he prints onto plain brown craft paper and still looks finished. Print, cut him out, go over him with glitter glue or craft paint, then punch a hole and thread twine. He's published as Christmas decor on The Country Chic Cottage, but a hole punch turns him into the largest gift tag under the tree. I've run the craft table at more events than I can count, and this works on a whole group at once.
42. Fresh Greenery Gift Wrapping
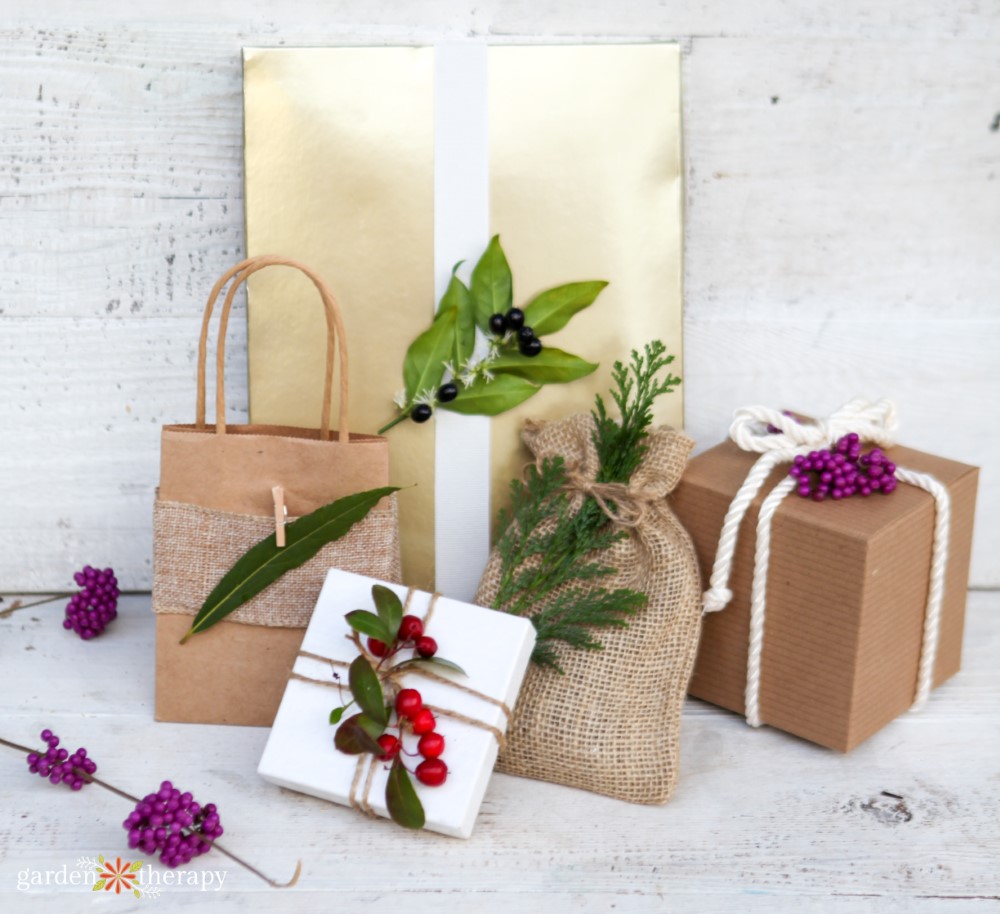
No glue, no tape and nothing you have to buy. Wrap string, jute twine or ribbon around the package at least once, then tuck the greenery in underneath at the center and let the leaves hold themselves in place. Layer the sturdiest clippings first and save the smallest, most delicate stems for the top. Garden Therapy rates cedar highest because it lasts, and warns off anything that wilts the moment you cut it.
43. Recycled Bread Tag Snowman Gift Toppers
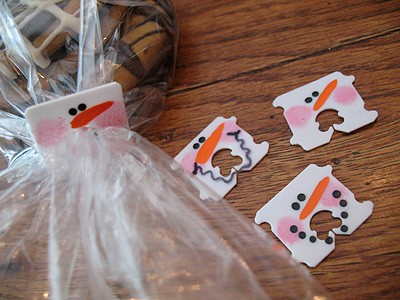
Save the little plastic clips off your bread and bagel bags, because Amanda Formaro paints them into snowman faces that finish a treat bag better than a bow does. Dab the pink cheeks on with an old scruffy brush, add the orange nose, then dot the eyes with the handle end of a small paintbrush, not the bristle end, which is the trick to two dots the same size. If you draw the mouth with a Sharpie, let it sit several hours before the sealer goes on.
44. Felt Christmas Gift Card Holders
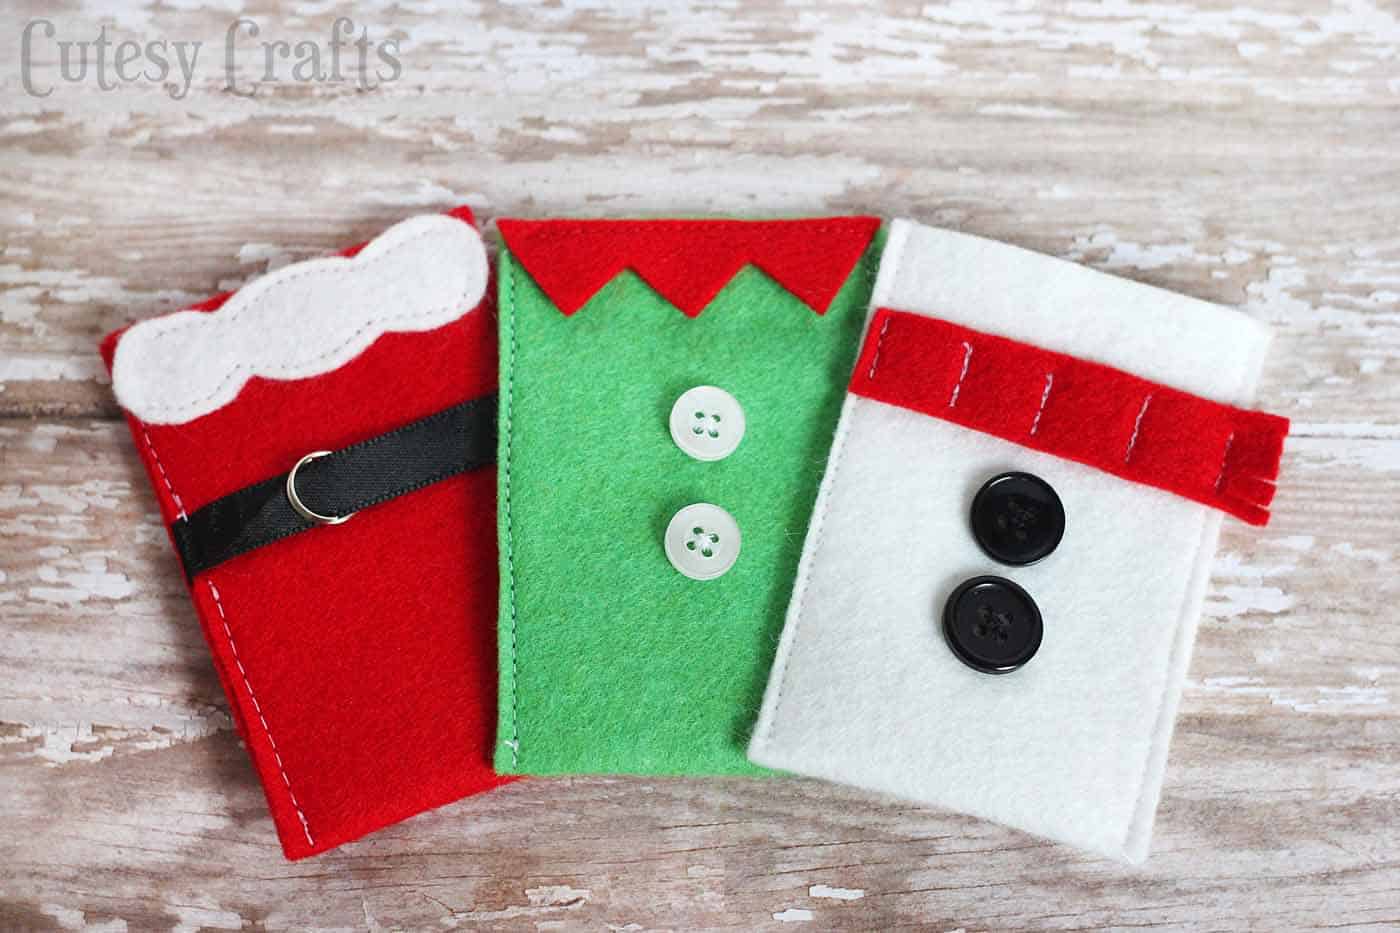
Three tiny felt envelopes, a Santa, a snowman and an elf, and each one hides a gift card behind the buttons. The Santa is the fussiest: sew the white trim to one short end first, thread a half inch of ribbon through a small split ring and sandwich the ends inside before you sew the sides. Switch your top thread to black over the belt. Cutesy Crafts wrote it for DIY Candy, and the elf and snowman are easier.
45. Reusable Monogram Gift Tags
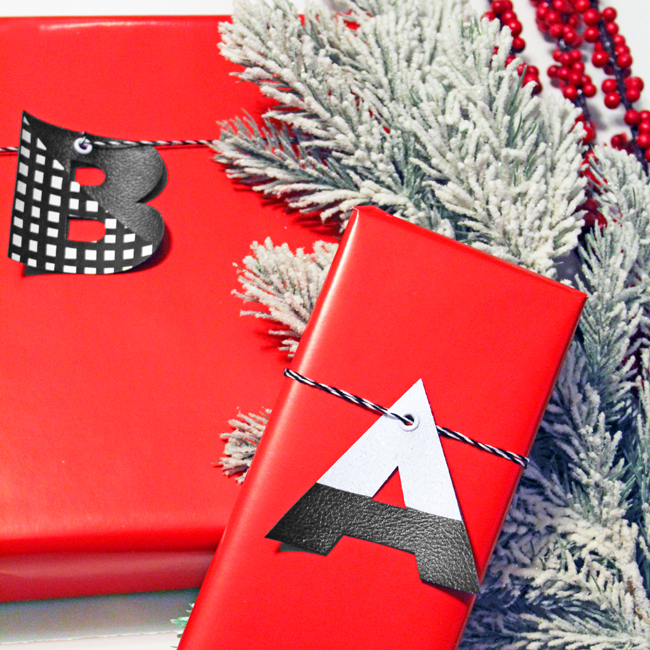
One big initial per person, cut once and used every year, which quietly ends the annual hunt for a pen. Blue i Style sets the letters three inches tall in a heavy font, drops a 3/16 inch circle over the top of each one and uses the slice tool to punch the hole before cutting. Faux leather is the material, and a second layer of patterned iron on vinyl gives the color blocked look. Big tags carry a plain box.
46. Make Your Own Wired Ribbon

Wired ribbon in the pattern you actually want costs a fortune, so make it out of fabric you already like. Fold a quarter inch along each long edge, straighten a length of wire and lay it inside the fold, pin the first few inches and sew down the seam with the wire held deep in the fold so the needle never hits it. Trim the wire, fold the ends under and backstitch. Kimberly at A Wonderful Thought uses it on the tree and on packages both.
47. Letter Stamped Gift Wrap With Rosemary

Plain white paper, one letter stamp and a sprig of rosemary from the porch make wrapping that doubles as the gift tag. ChiWei at One Dog Woof stamps the recipient's initial across the paper in loose diagonal rows about two and a half inches apart, wraps the box, winds green yarn around it a few times and tucks a rosemary sprig under the yarn. Her little one couldn't read yet but could spot his letter, so opening presents became a matching game. It solves the no gift tags problem too.
48. Painted Phonebook Wrapping Paper

Old phonebook pages painted with bold zigzags, dots and color blocks turn into wrapping paper that looks like a design shop print, and the kids do the painting. Amanda Eldridge at Barley and Birch was low on brown paper and high on dusty phonebooks, so she handed out tempera and let the columns of tiny type become the pattern under the color. Tape pages together for bigger boxes, tie with twine and add a sprig of greenery. It's free, it recycles a doorstop and it's a good rainy afternoon project.
49. Wrapping Paper Gift Bag From One Sheet
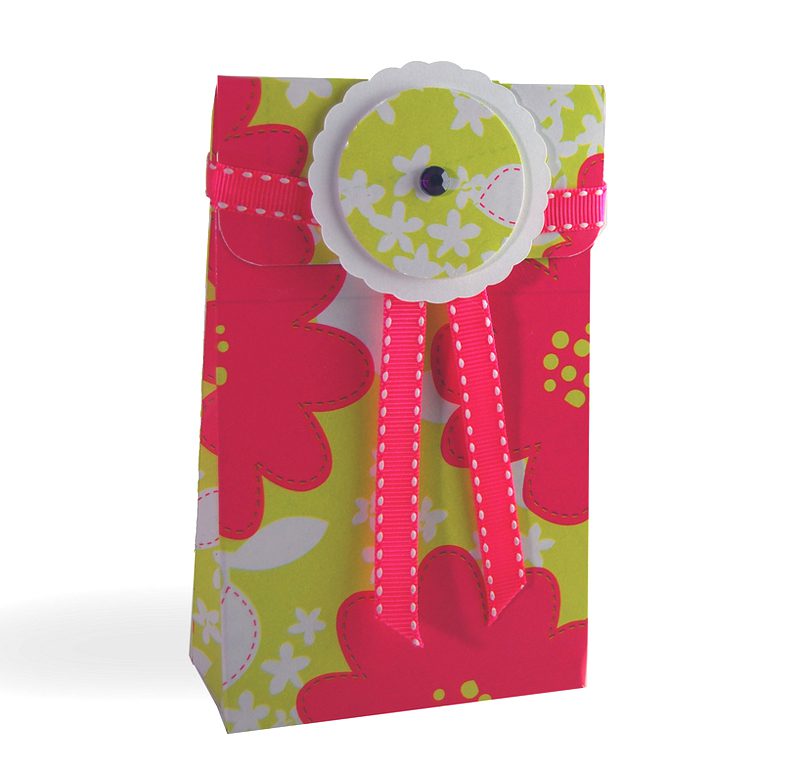
A roll of pretty wrapping paper from the grocery store becomes a sturdy little gift bag once it's spray glued to a 12 by 12 sheet of cardstock. Easy Paper Crafts cuts the free template with a craft knife and ruler, scores the folds with a bone folder, glues the tabs and finishes it with ribbon and a scalloped circle of white cardstock topped with a single gemstone. Wrapping paper is flimsy on its own, which is why the cardstock backing matters. The template is at Easy Paper Crafts.