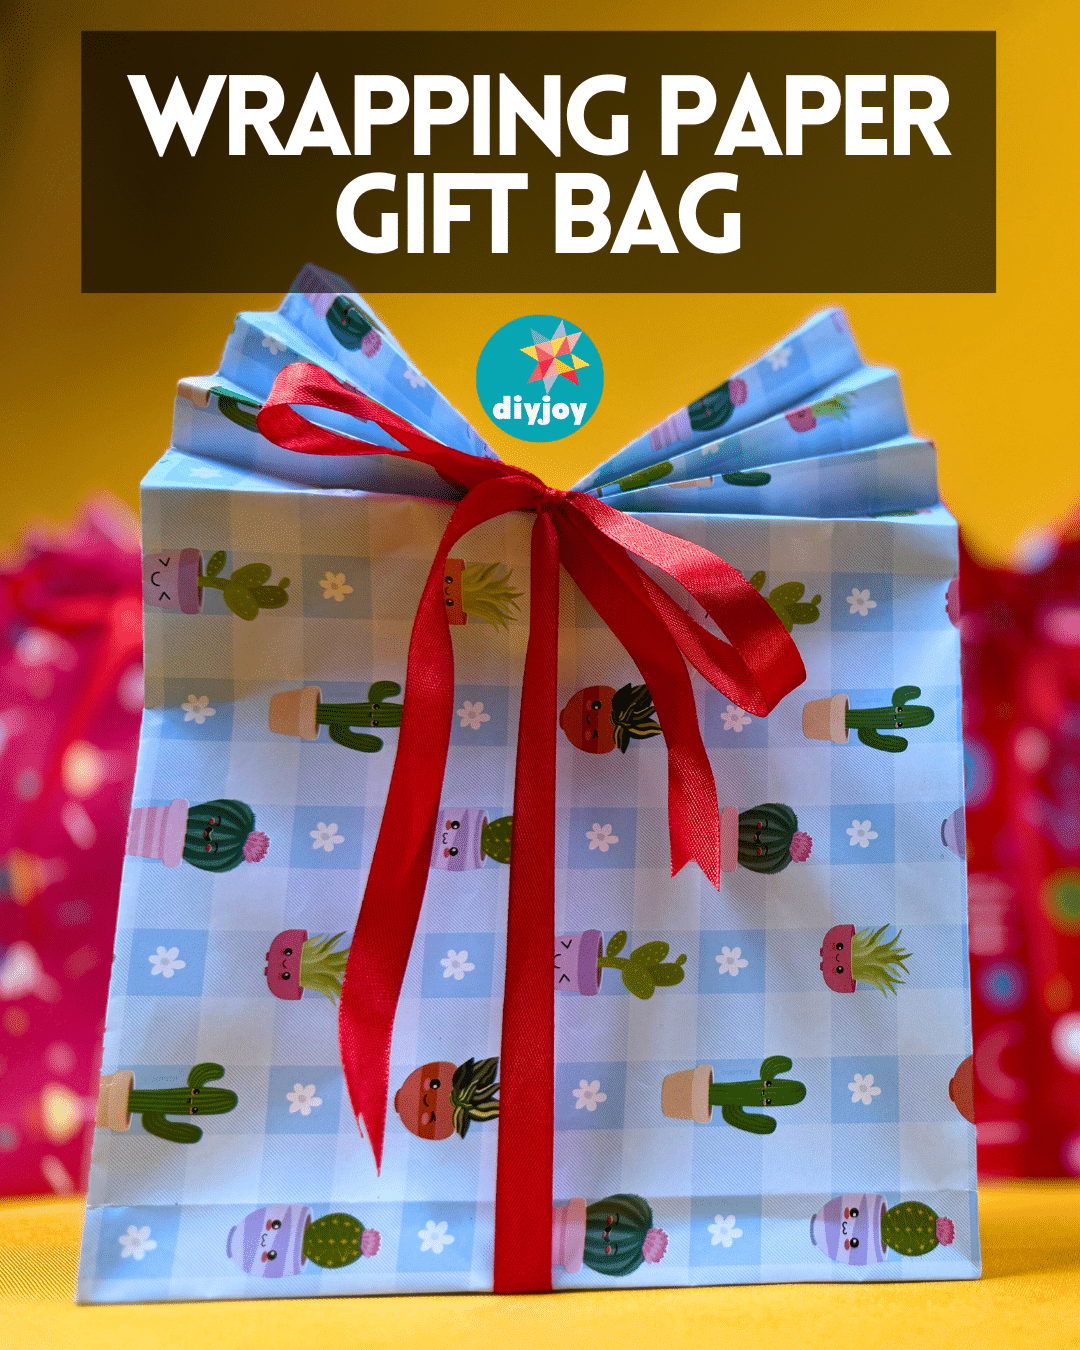
Make special events even more memorable by giving heartfelt gifts. The cost of the gift doesn’t matter; what truly counts is the thought and effort put into choosing it. Additionally, it’s important to consider how you present or wrap your gifts. You don’t need to spend a lot of money to make your presentation special.
Wrapping Paper Gift Bag YouTube Video Tutorial
RELATED: How to Make a Paper Bow
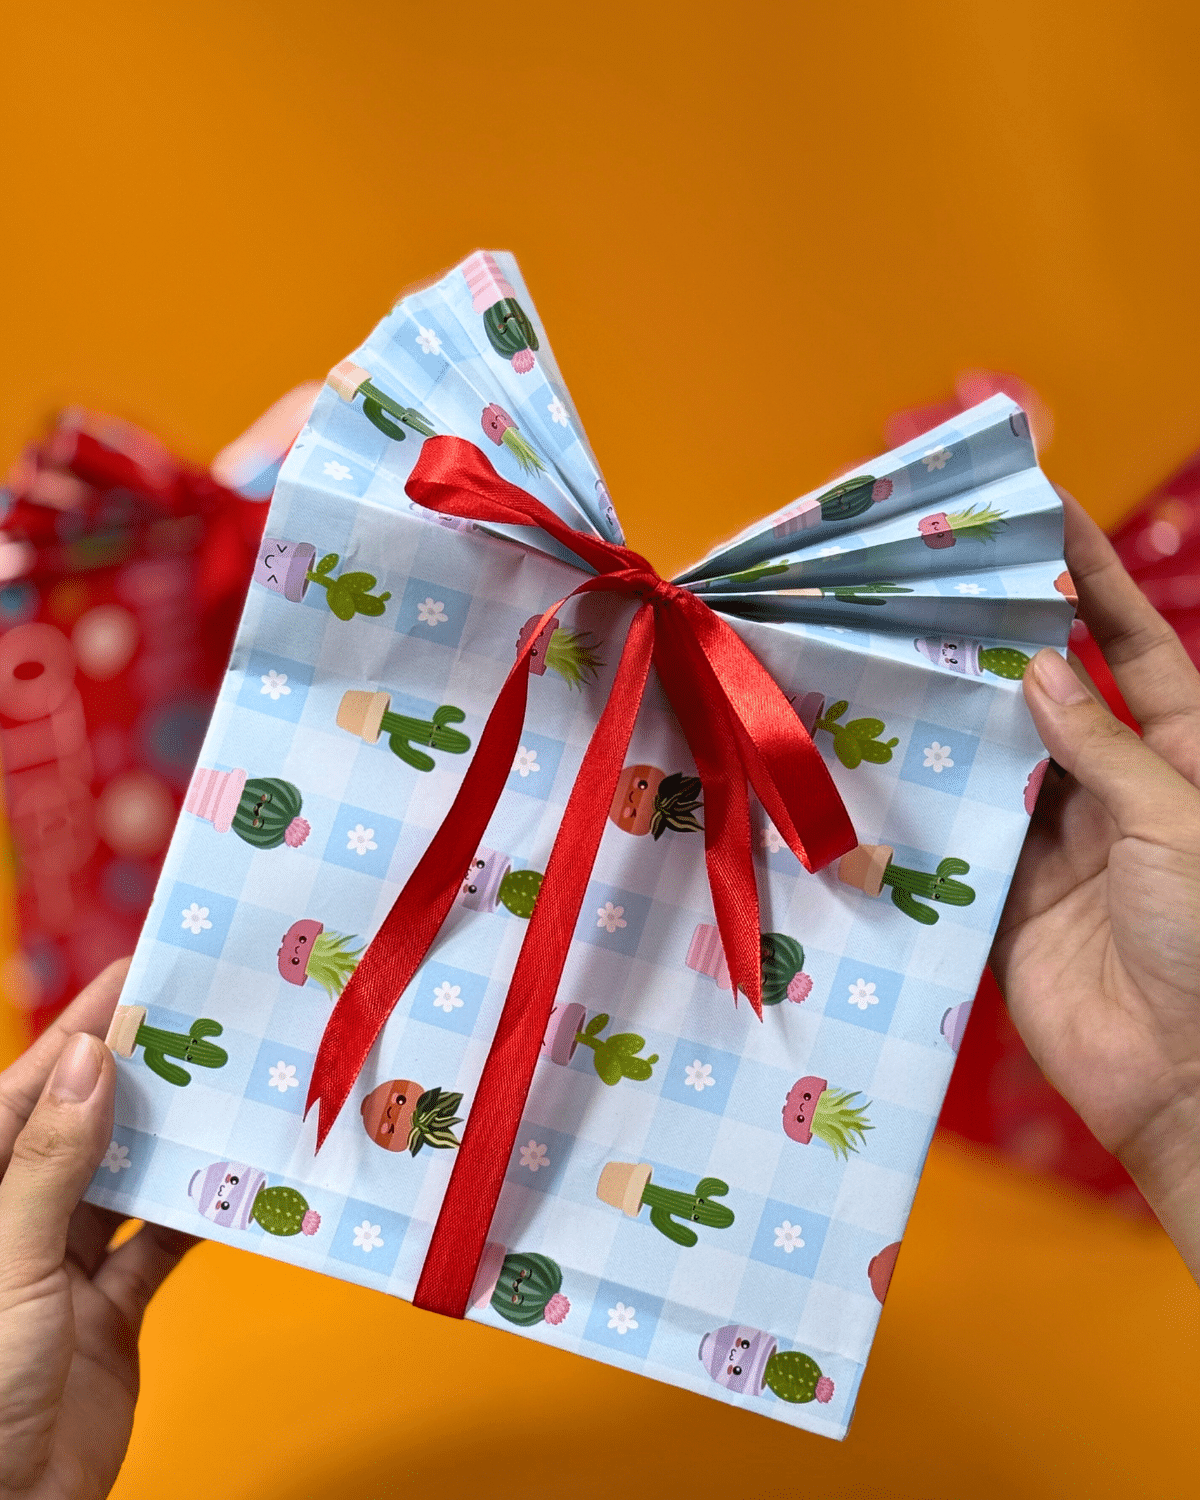
This tutorial will show you how to add flair to wrapping paper with only a few simple steps—in fact, it’s so easy that anyone can do it perfectly, even on the first try. I bet you’d never want to wrap presents any other way once you’ve learned this method. There are even two ways of preparing a wrapping paper gift bag that you can learn in this video tutorial. Go ahead and see the steps below now!
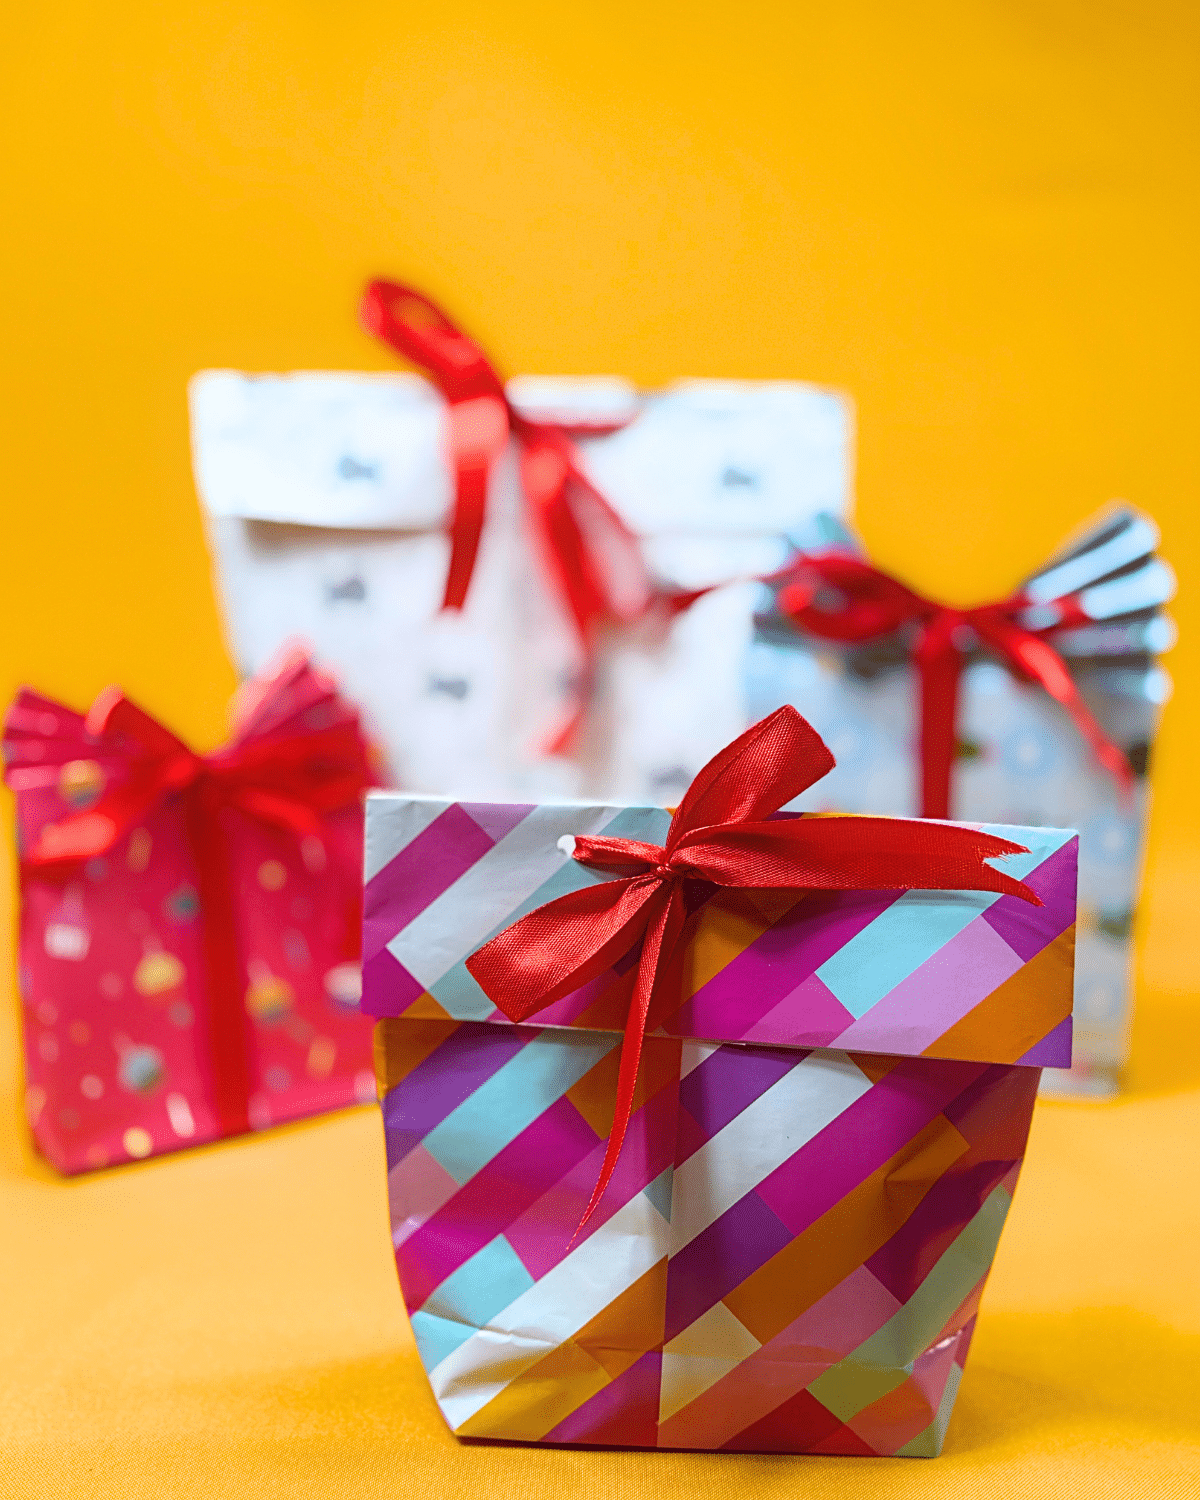
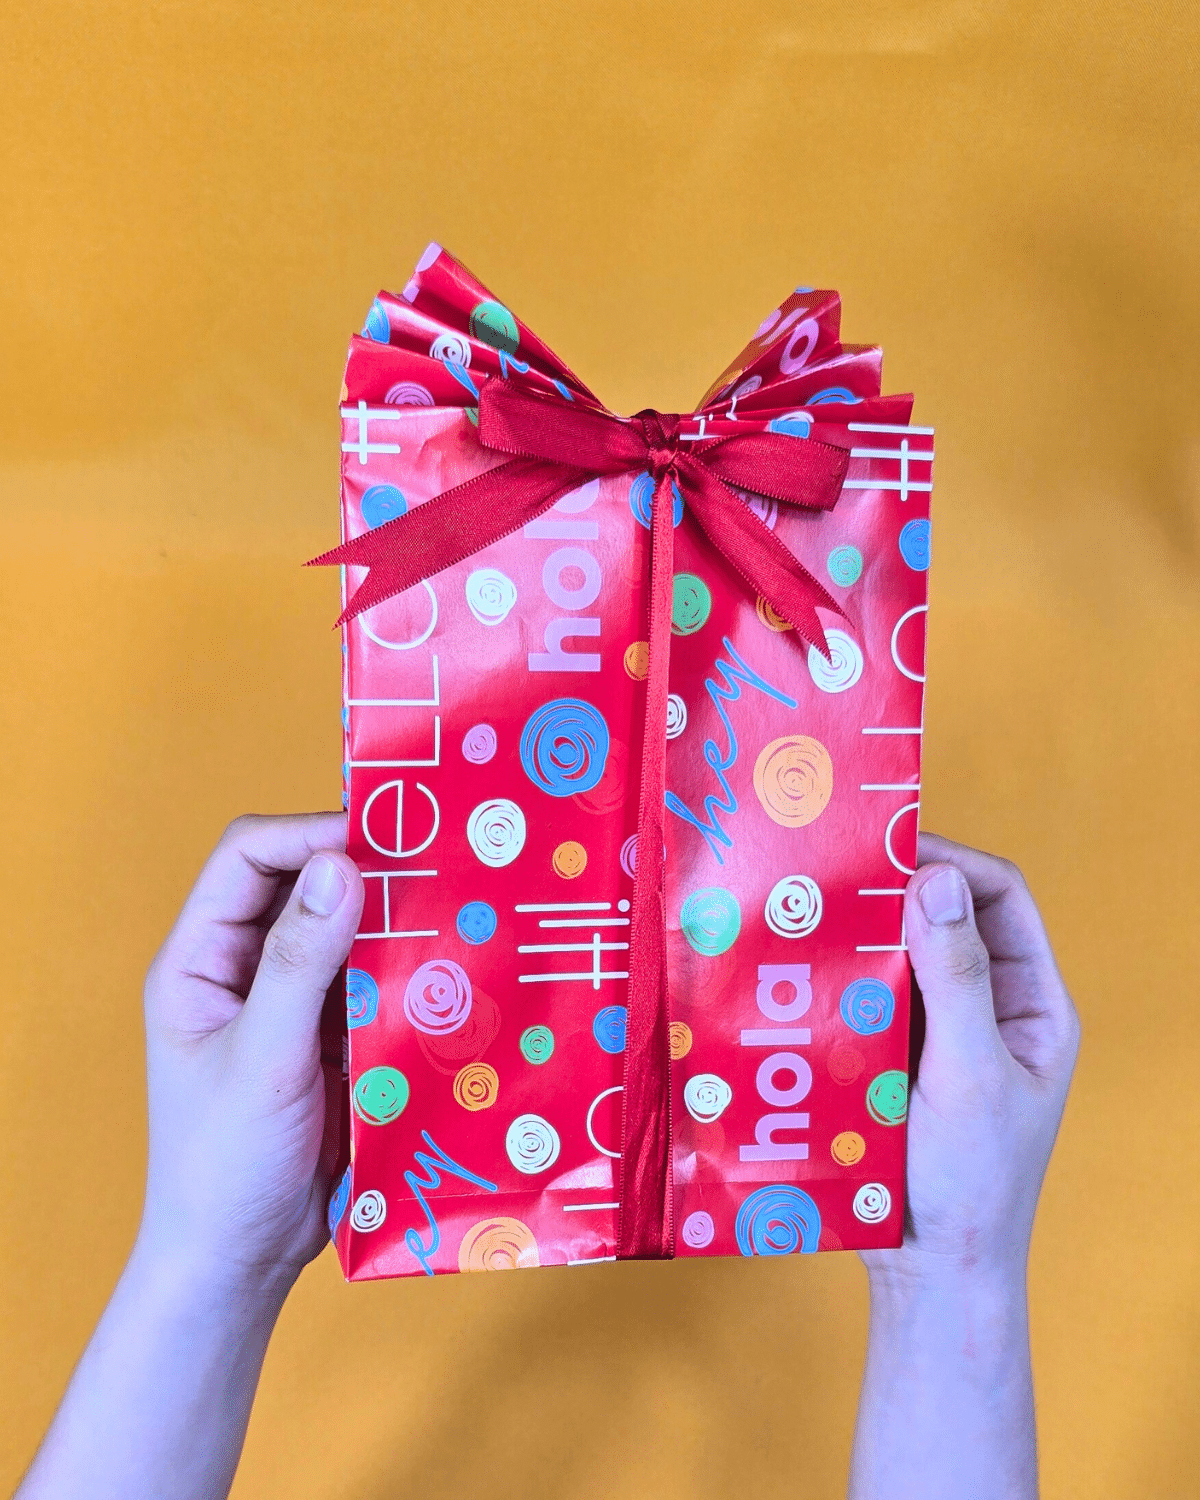
I keep a couple of rolls of wrapping paper in the hall closet at all times, and it turns out that’s everything you need to skip the gift bag aisle for good. This fold turns a flat sheet into a real bag with a flat bottom and a soft pleated top. Once the ribbon goes on, nobody guesses it started as a roll of paper.
The other reason I love it: one roll makes more than one bag. If you already have paper left over from the holidays, this is a free way to wrap a gift, and it’s a good project to hand a kid who wants to help.
You can make it in any size. Bigger paper makes a bigger bag, so the same steps work for a candle, a sweater, or the pair of sunglasses I used in the photos.
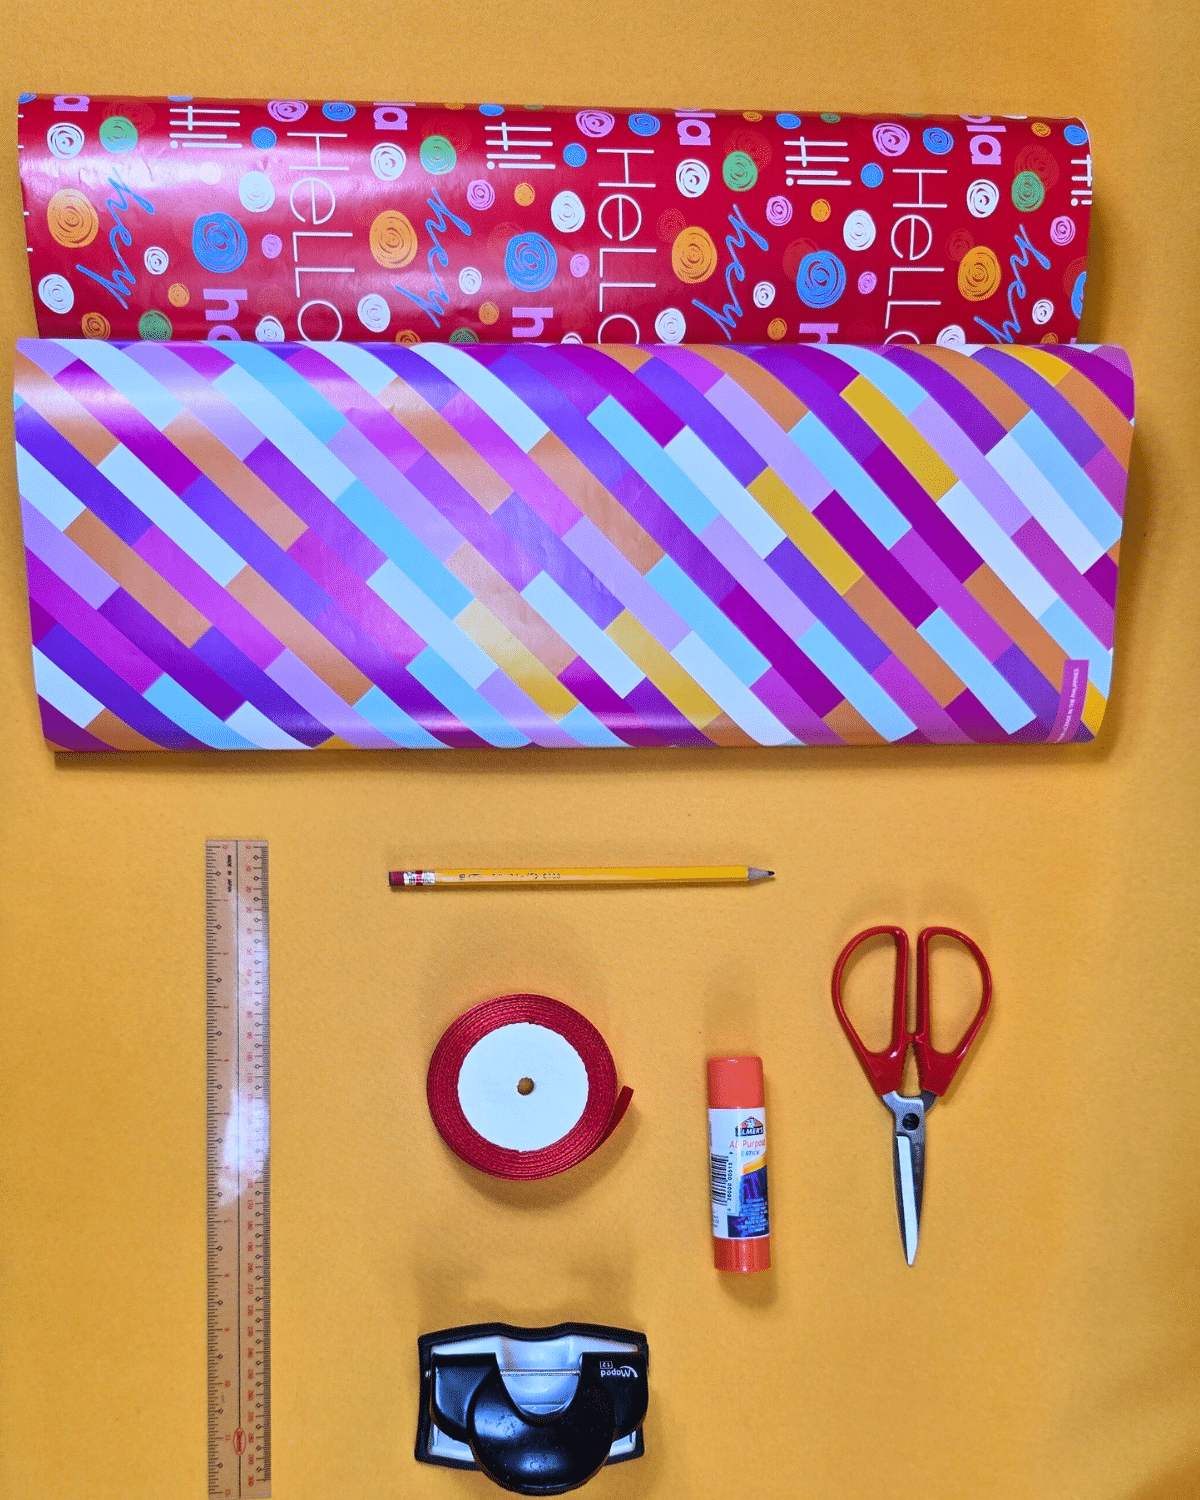
Craft Supplies Needed:
Nothing here is special. It’s a roll of wrapping paper and the basic craft drawer stuff you probably already own.
- Wrapping Paper
- Ribbon
- Puncher
- Scissors
- Ruler
- Pencil
- Glue
▶ Watch this tutorial on TikTok
How to Make a Gift Bag
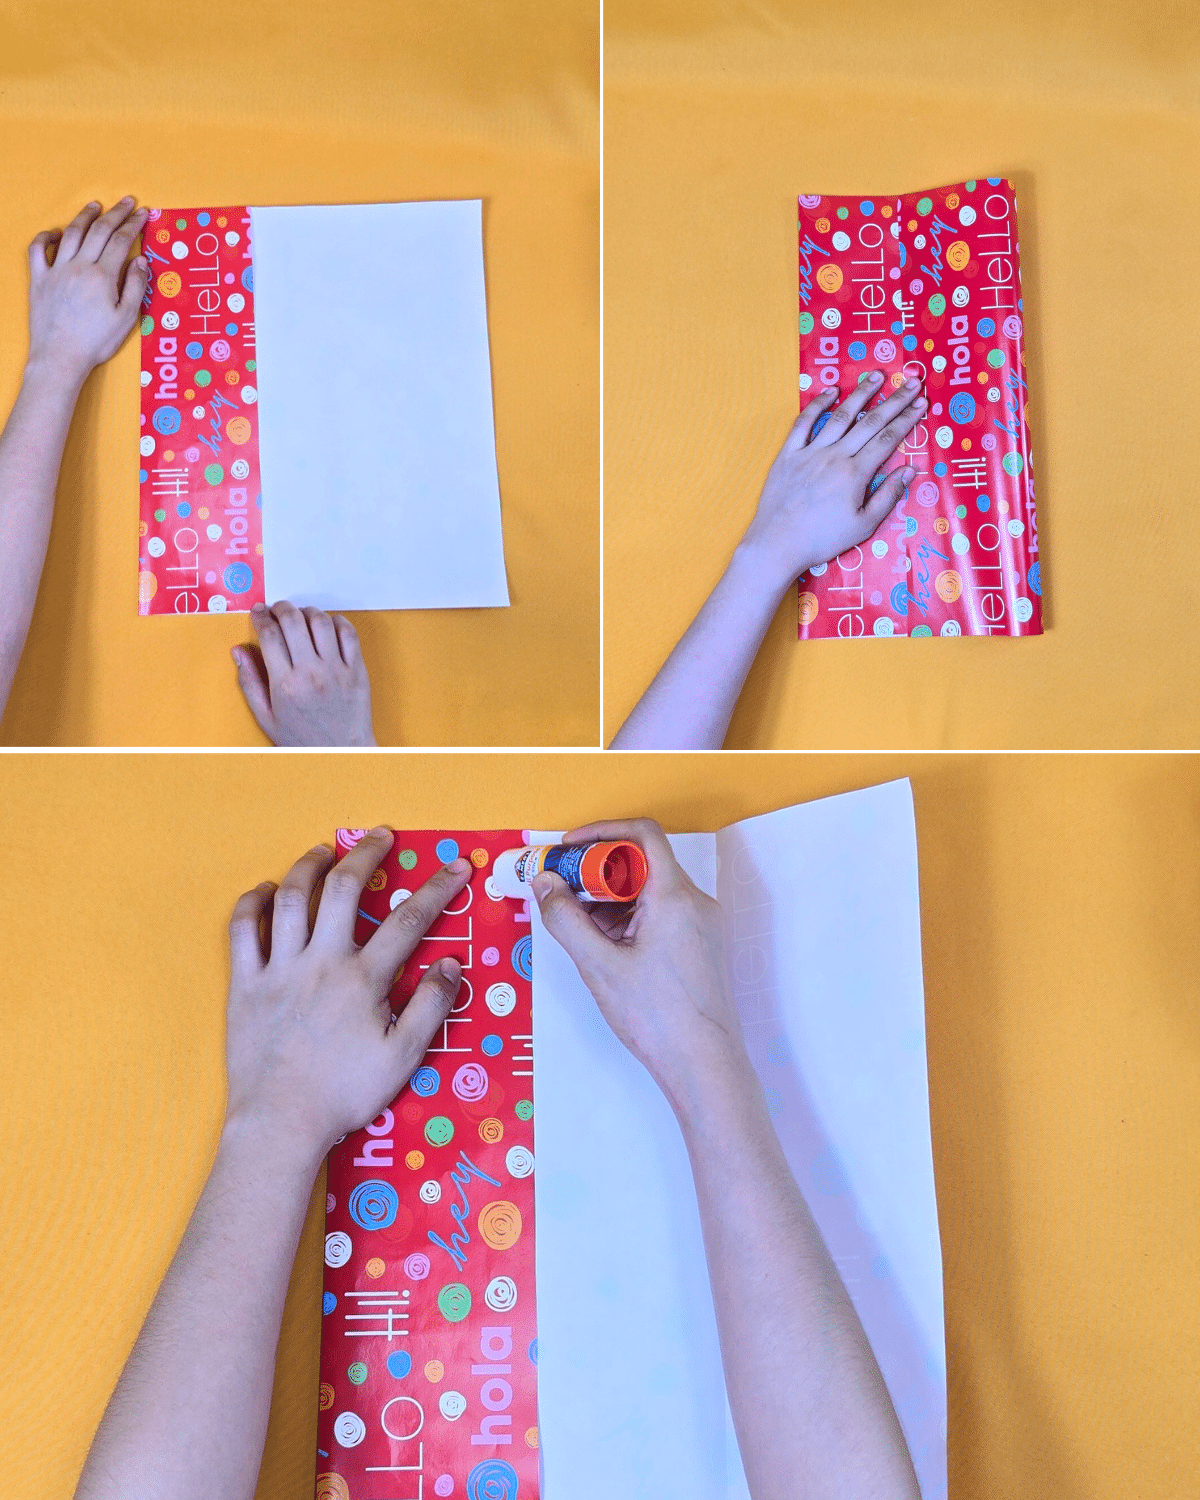
Step 1: Fold in both edges toward the center, ensuring one side overlaps the other, then secure it with glue.
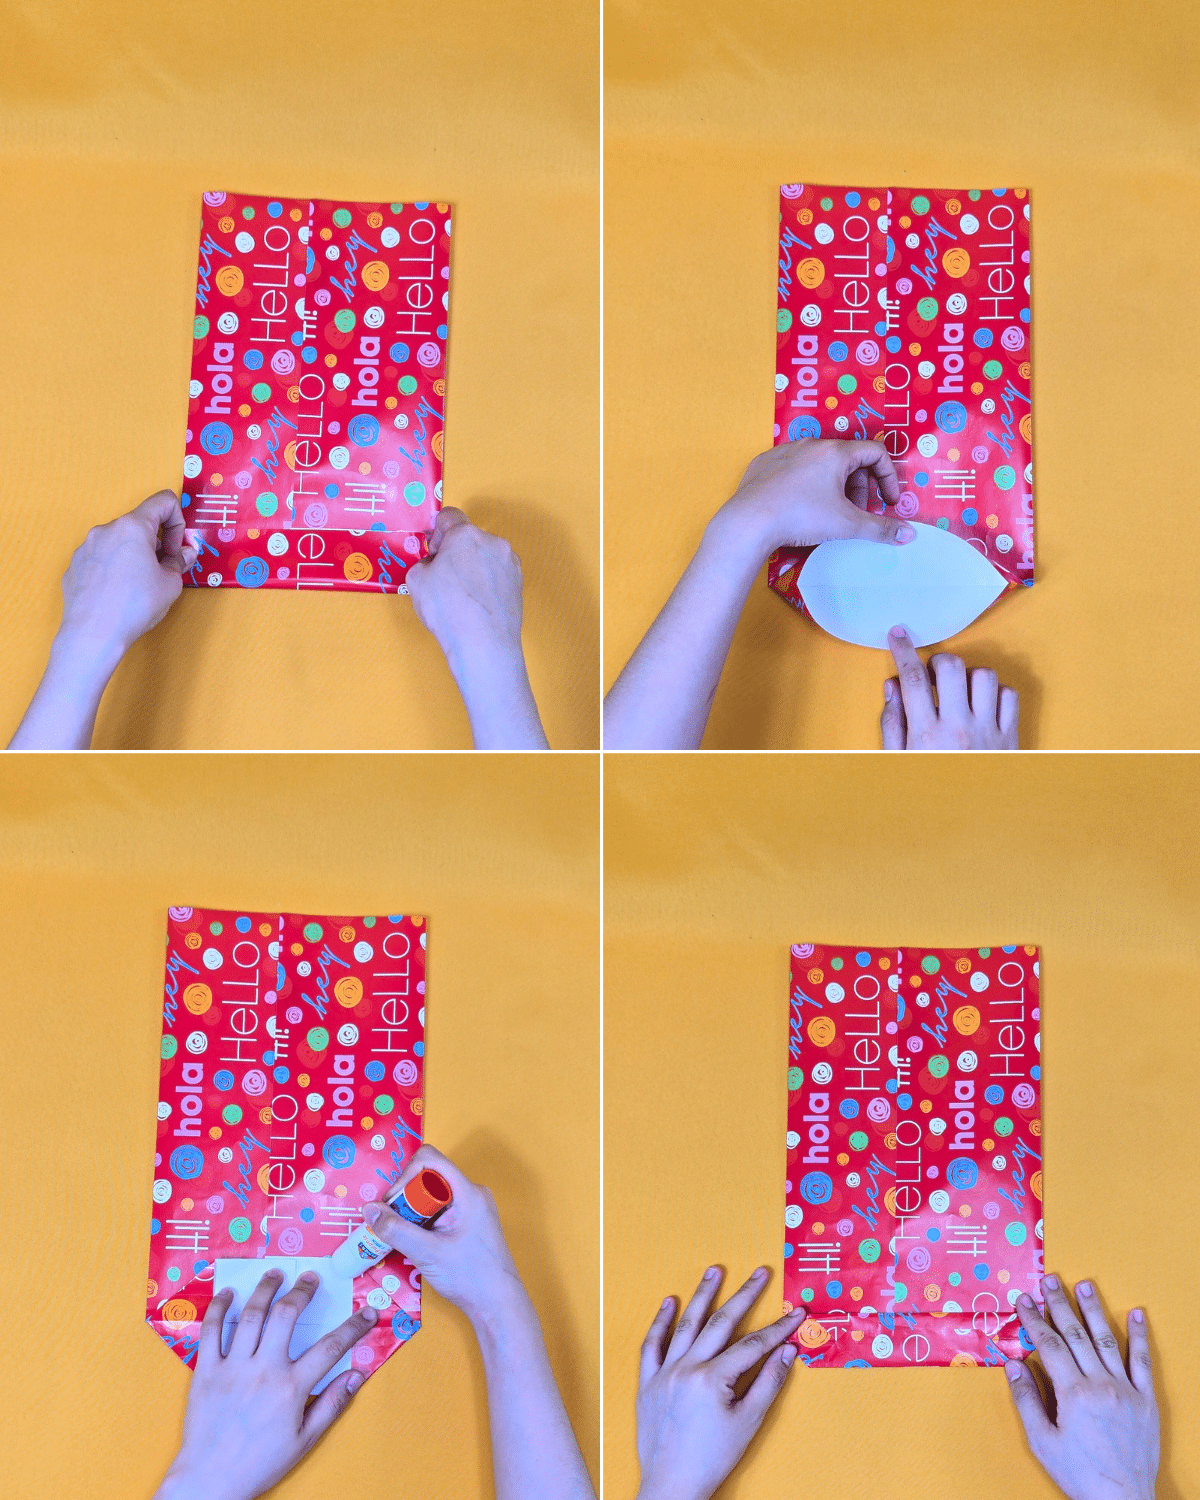
Step 2: Fold the bottom upward to form the base of the bag about 3 inches. Open it, then fold each side inward to create a triangle shape. Secure the top and bottom of the base with glue.
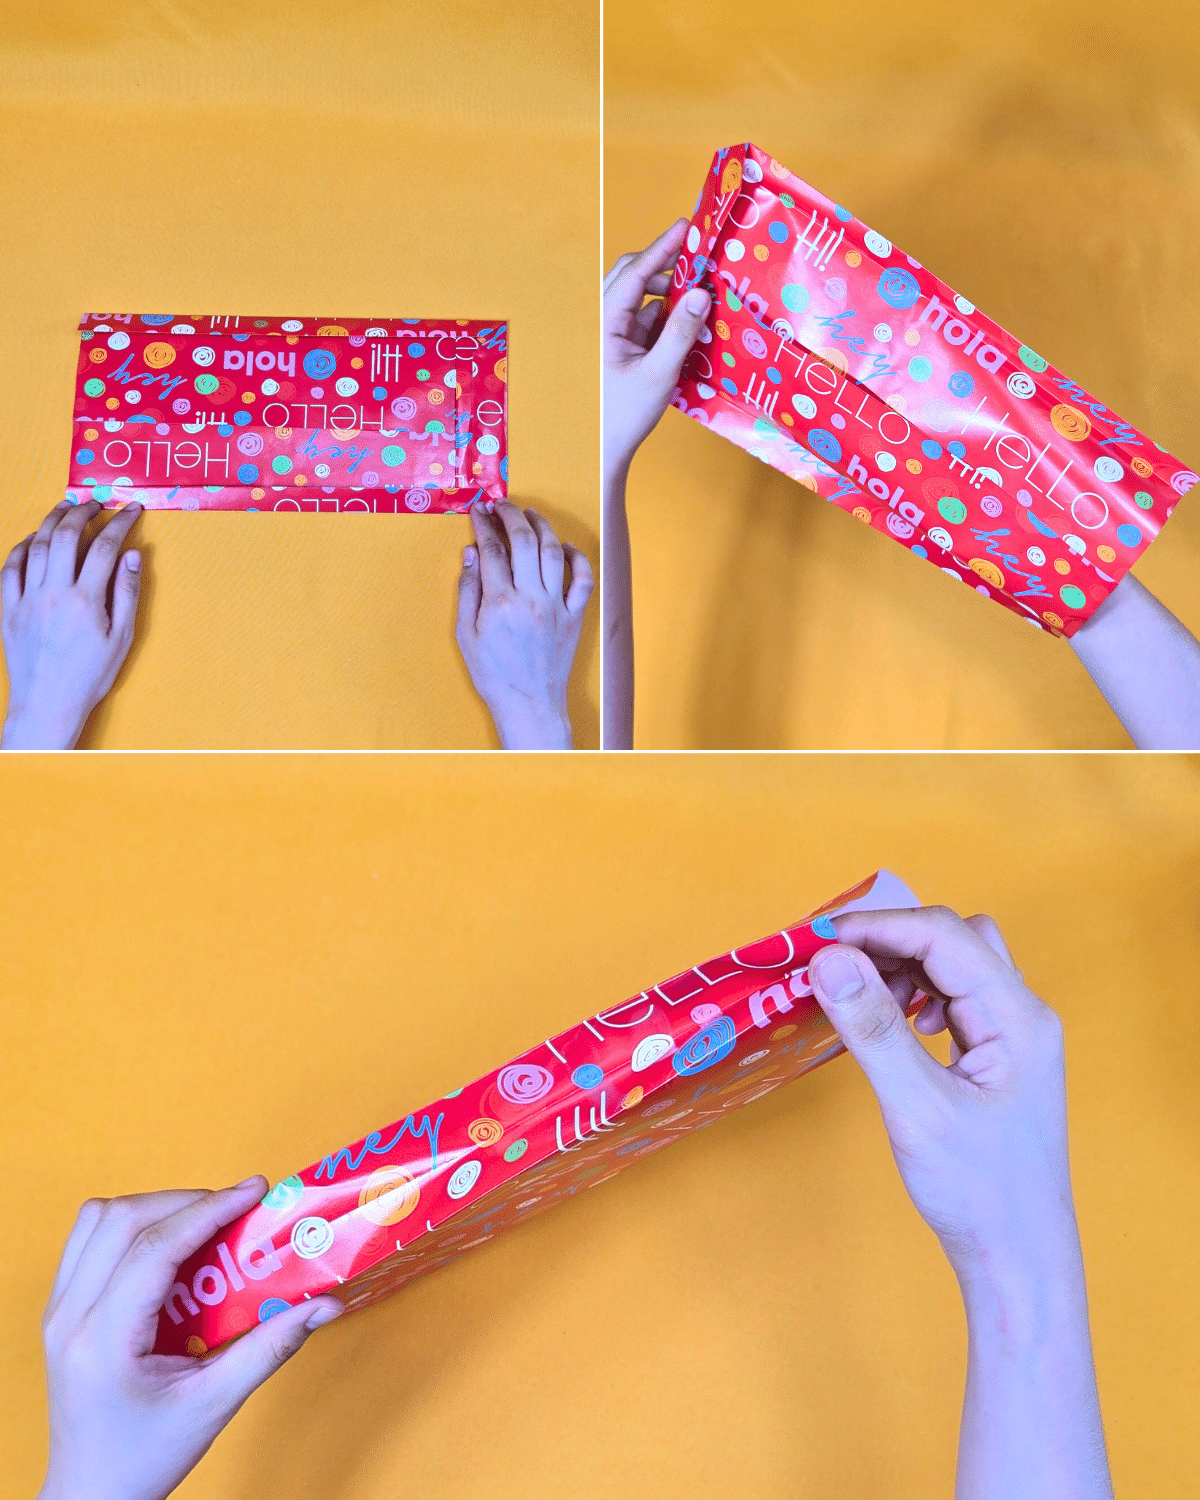
Step 3: Fold both sides inward. Open the bag using your hand, and push the side crease inward to shape.
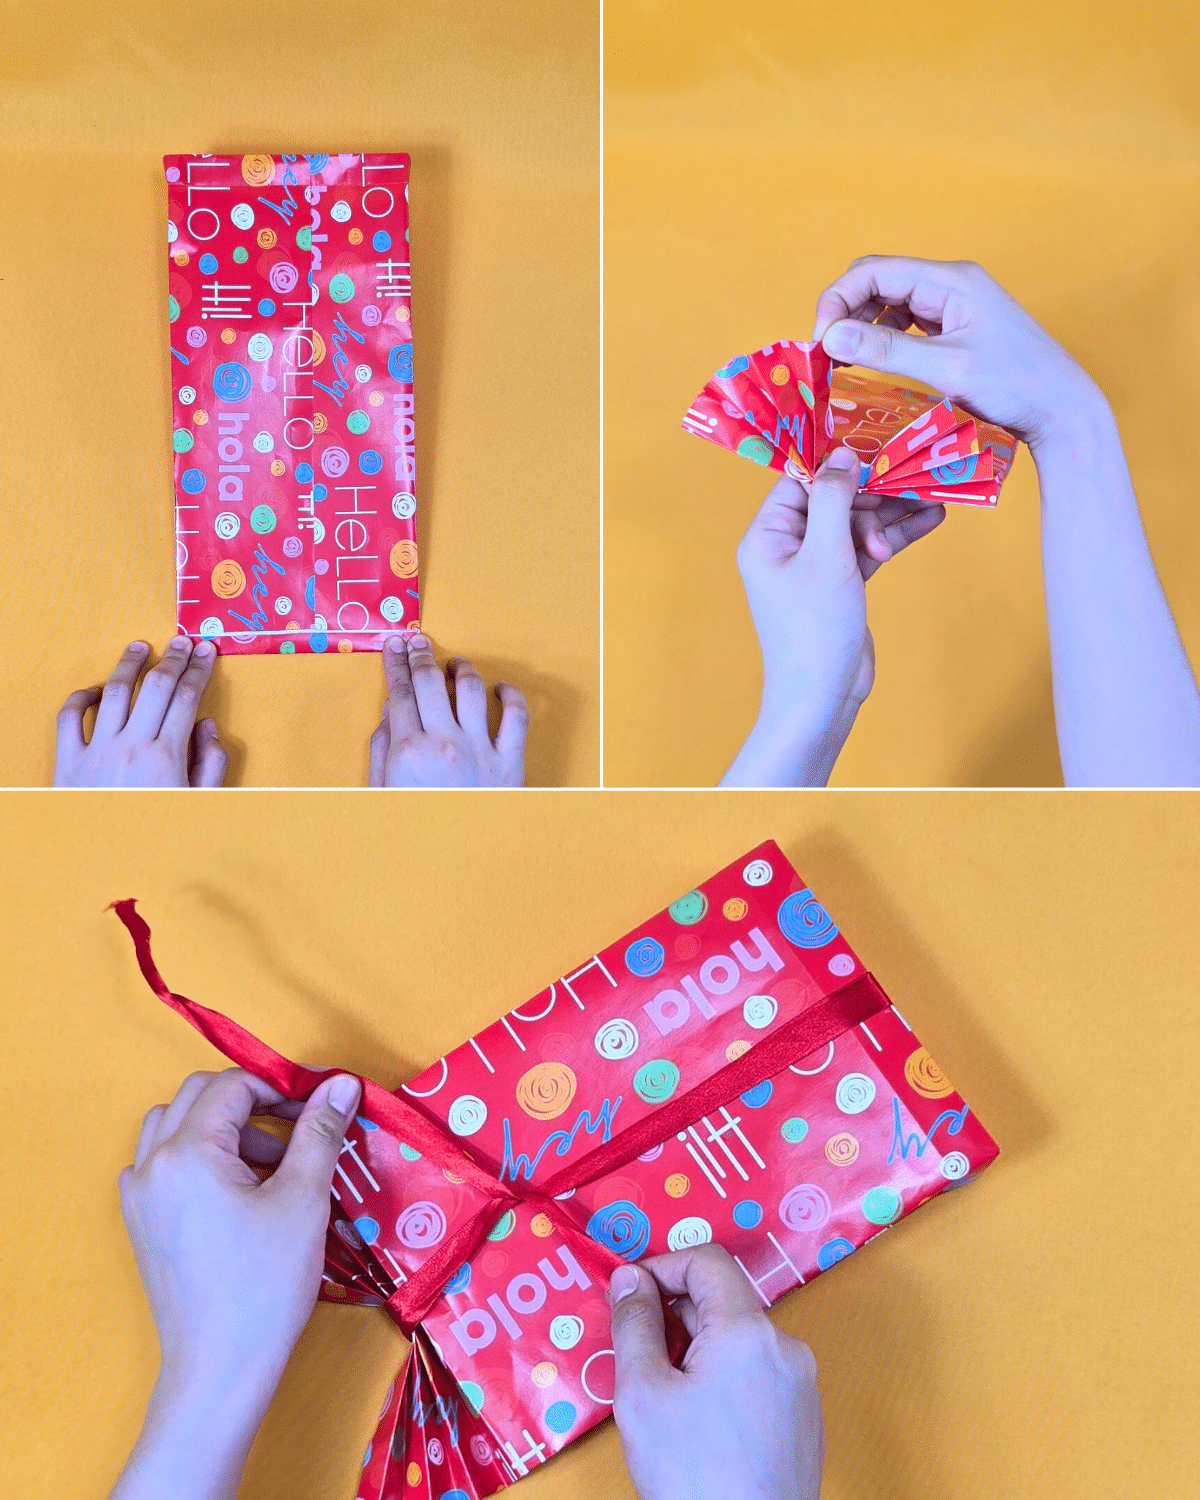
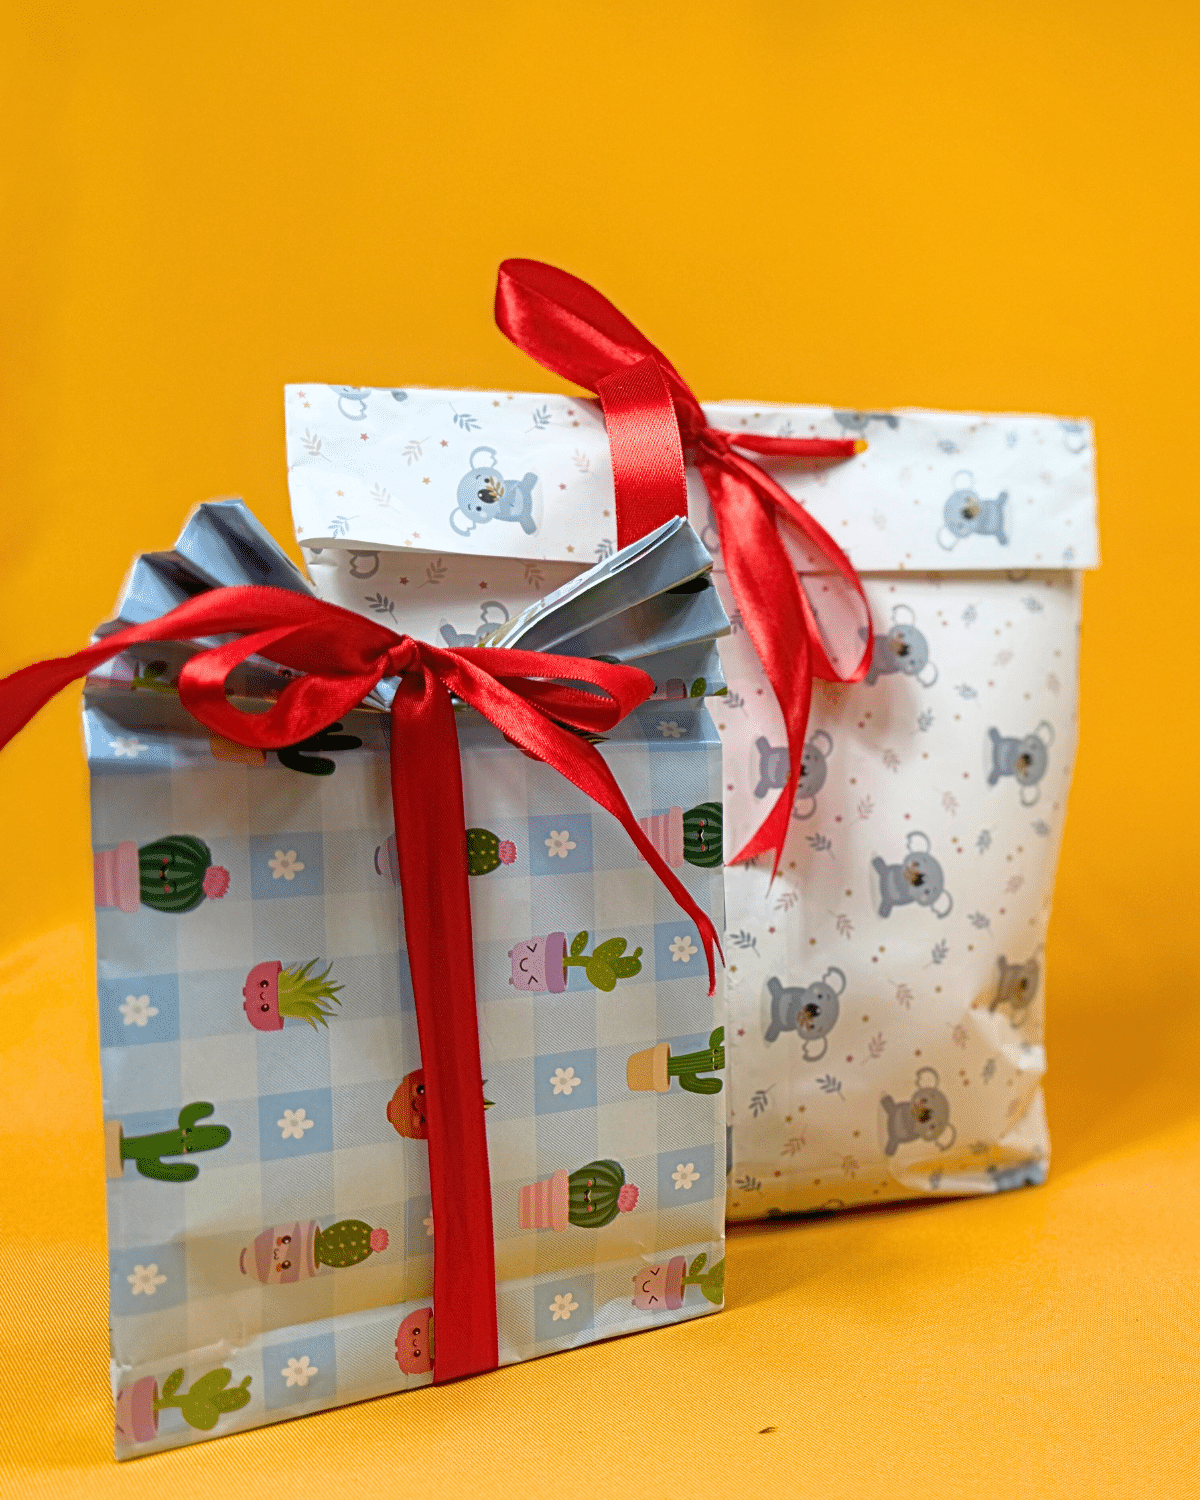
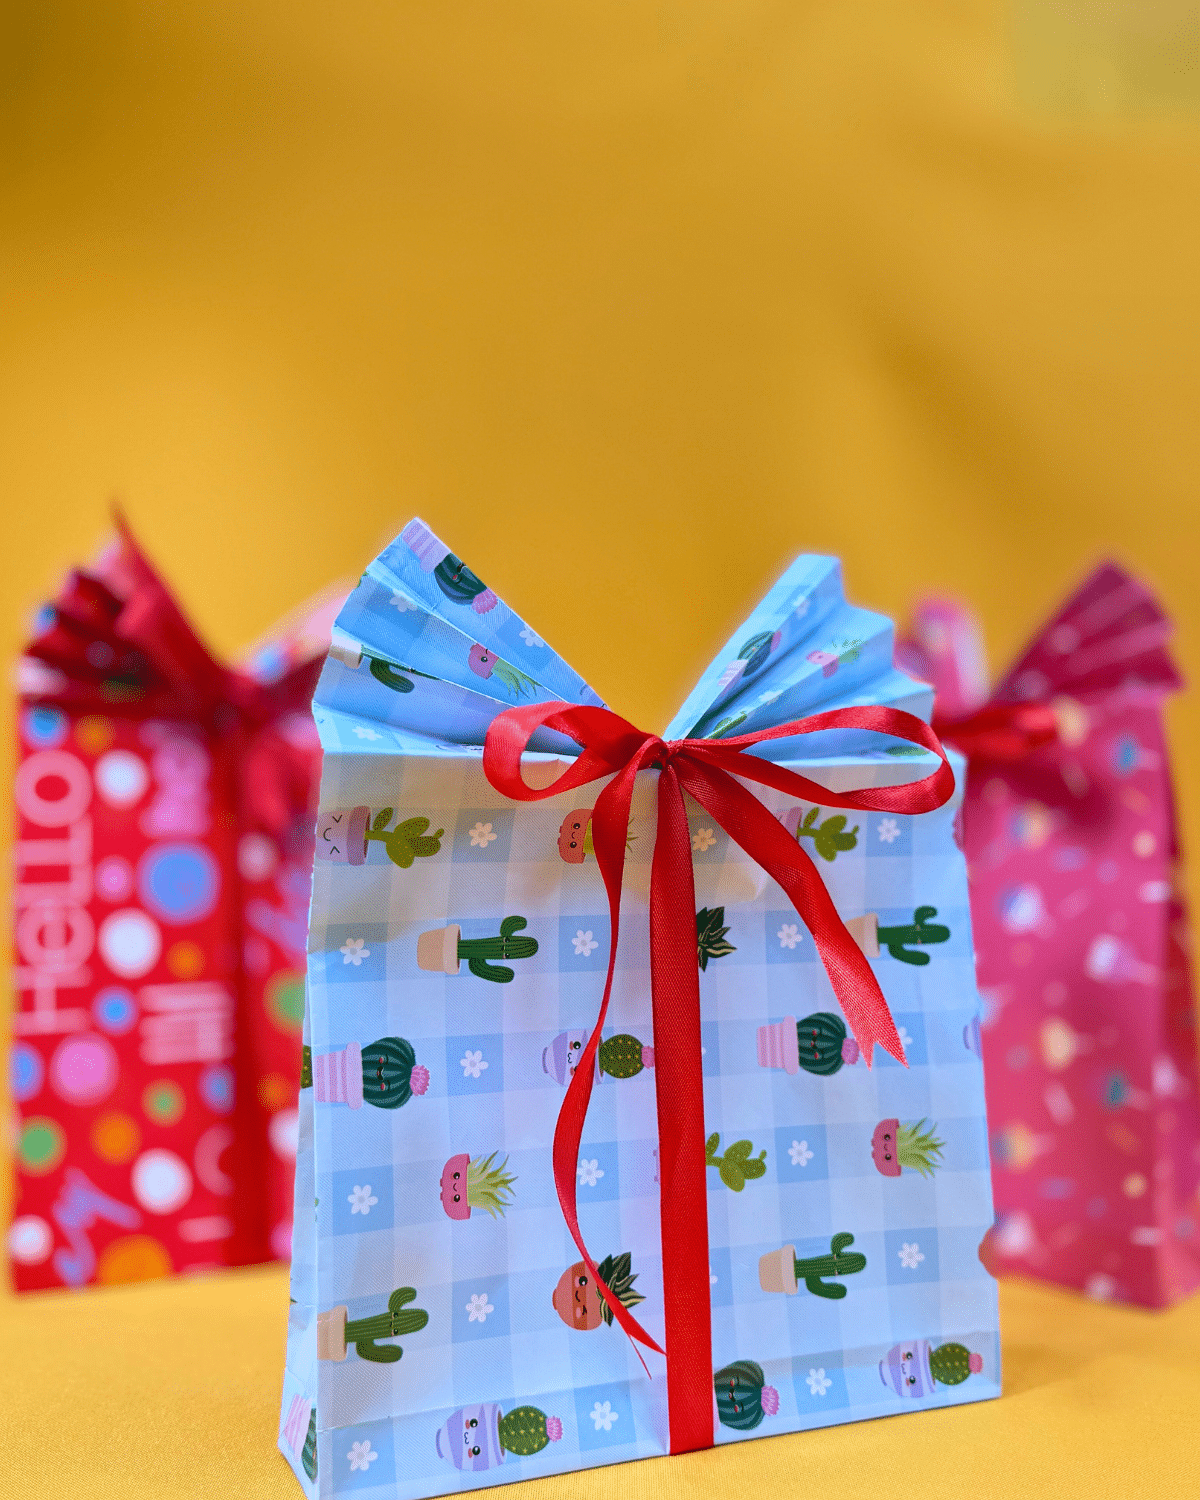
Step 4: Fold the top of the bag into an accordion ( 8 times ). Lift the folded paper and gently shape it into a fan. Tie the ribbon around the bag.
1st Gift Bag Done!
BONUS: 2ND METHOD
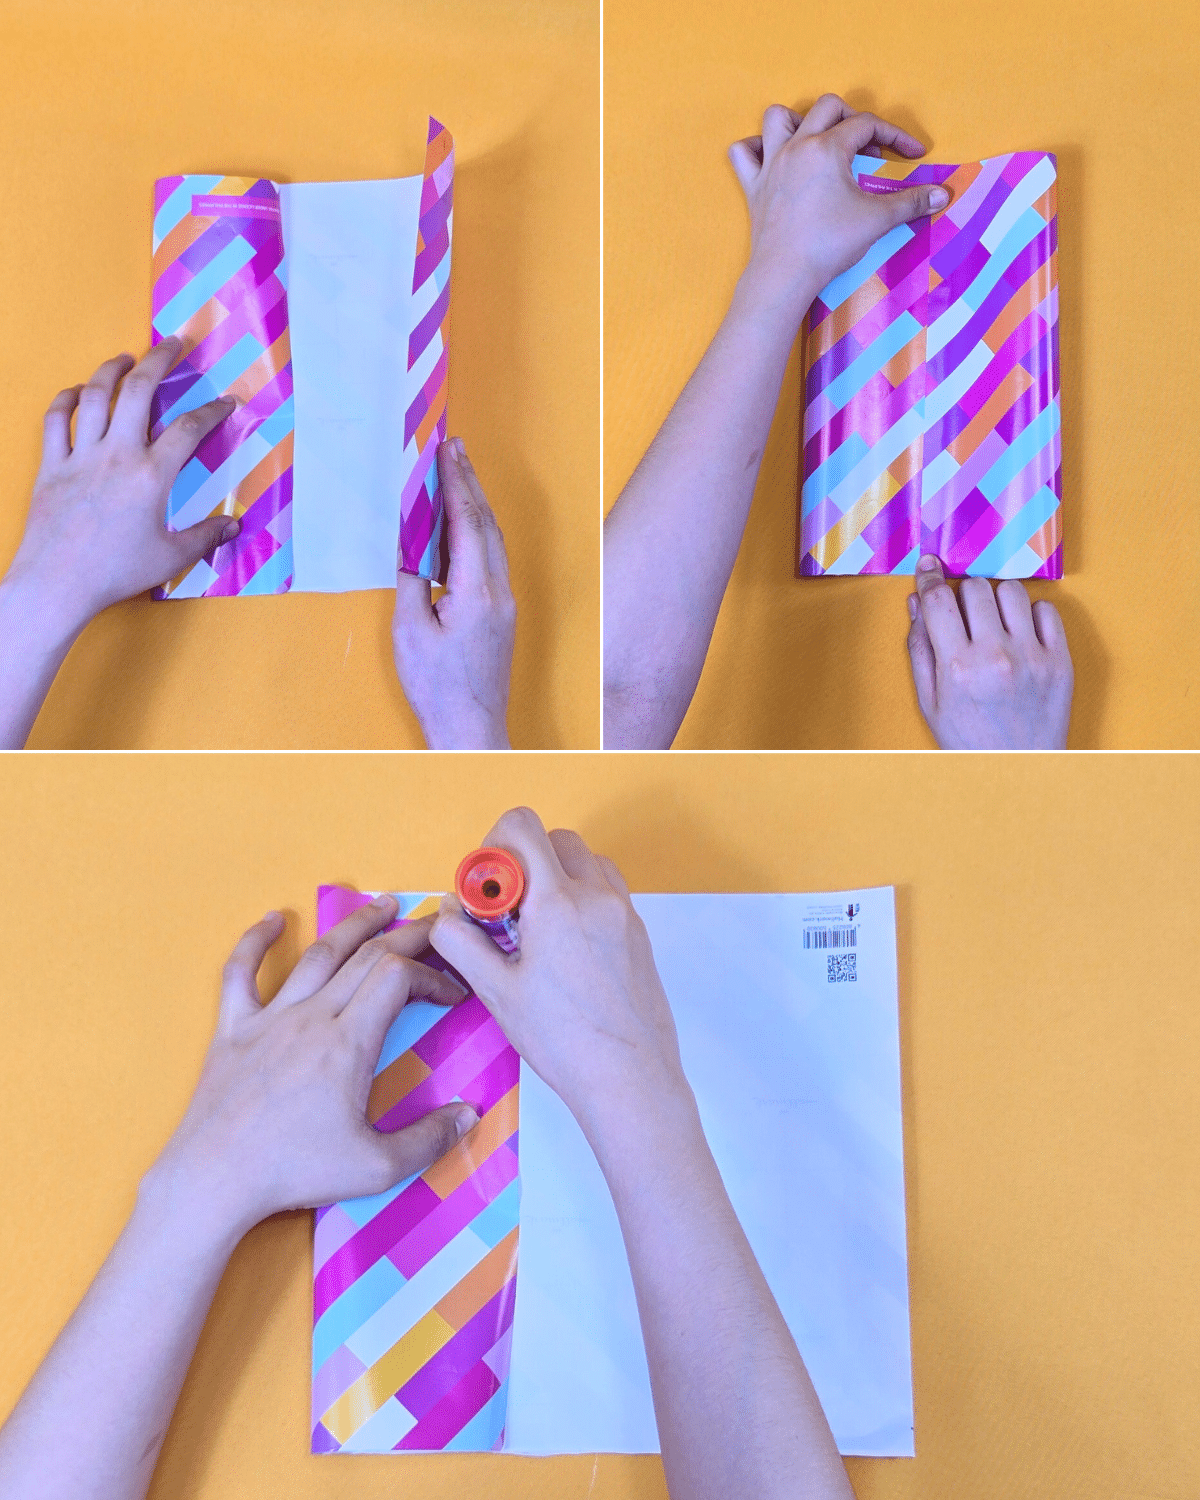
Step 1: Fold in both edges toward the center. Secure with glue.
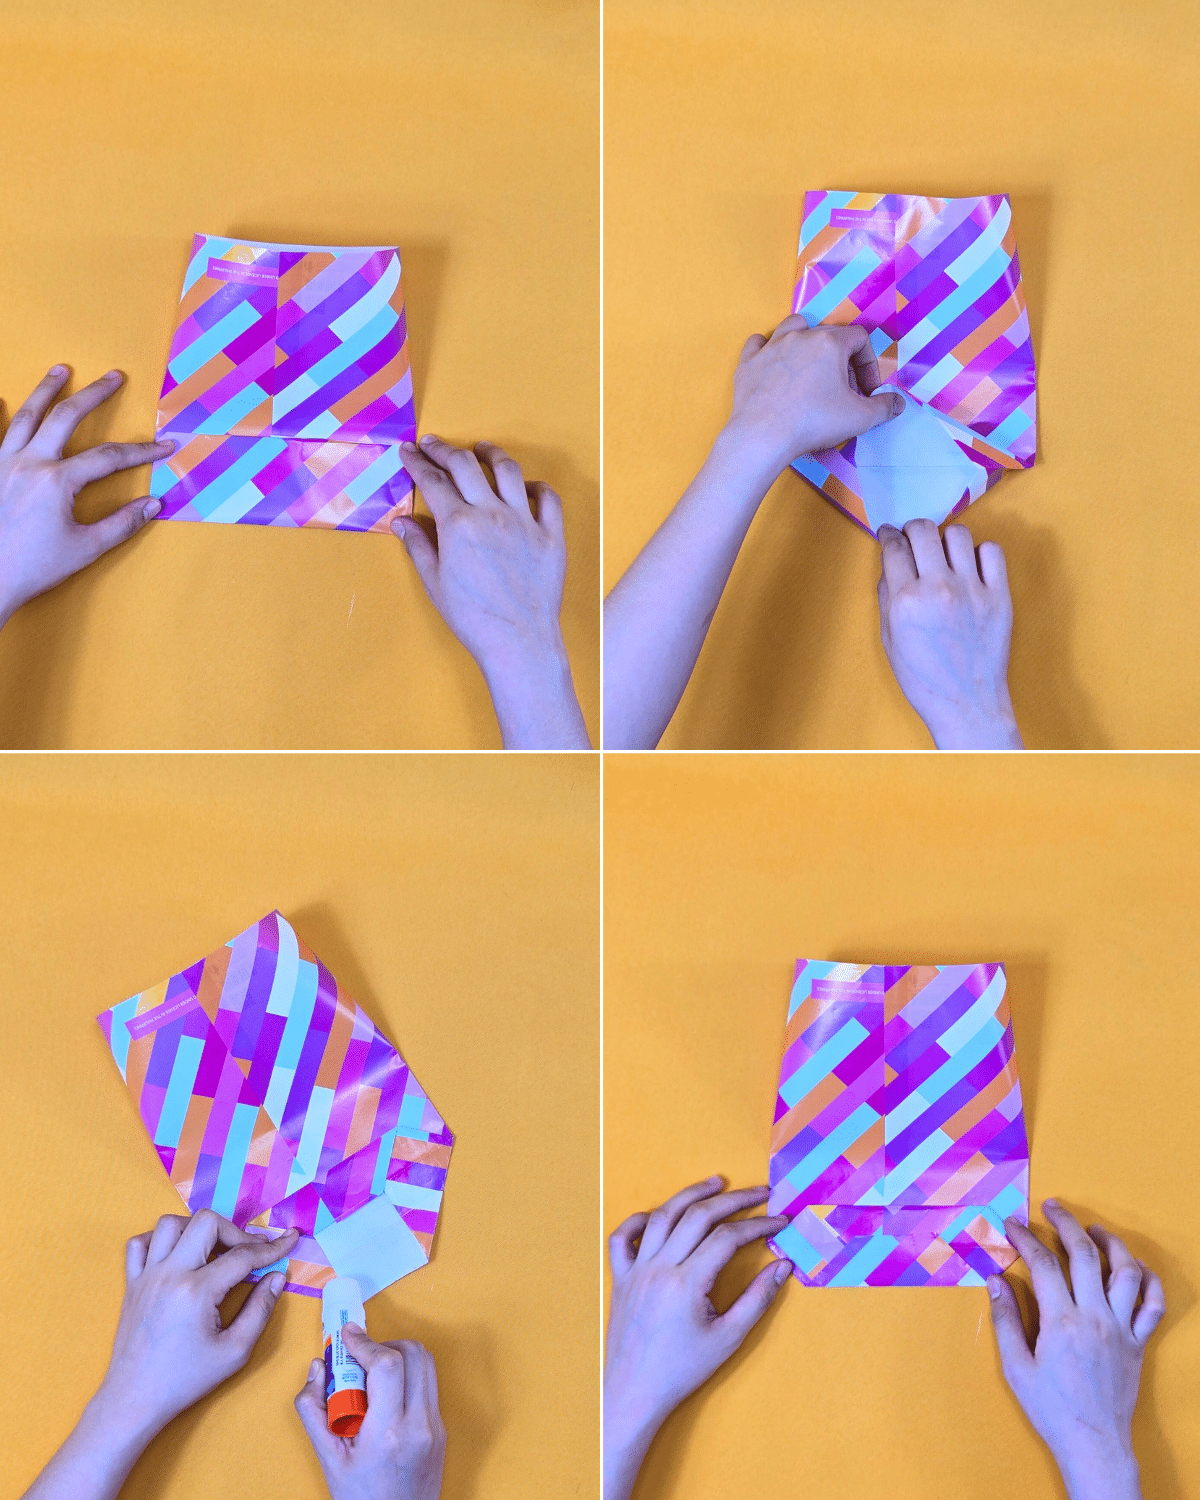
Step 2: Fold the bottom upward to form the base of the bag about 3 inches. Open it, then fold each side inward to create a triangle shape. Secure the top and bottom of the base with glue.
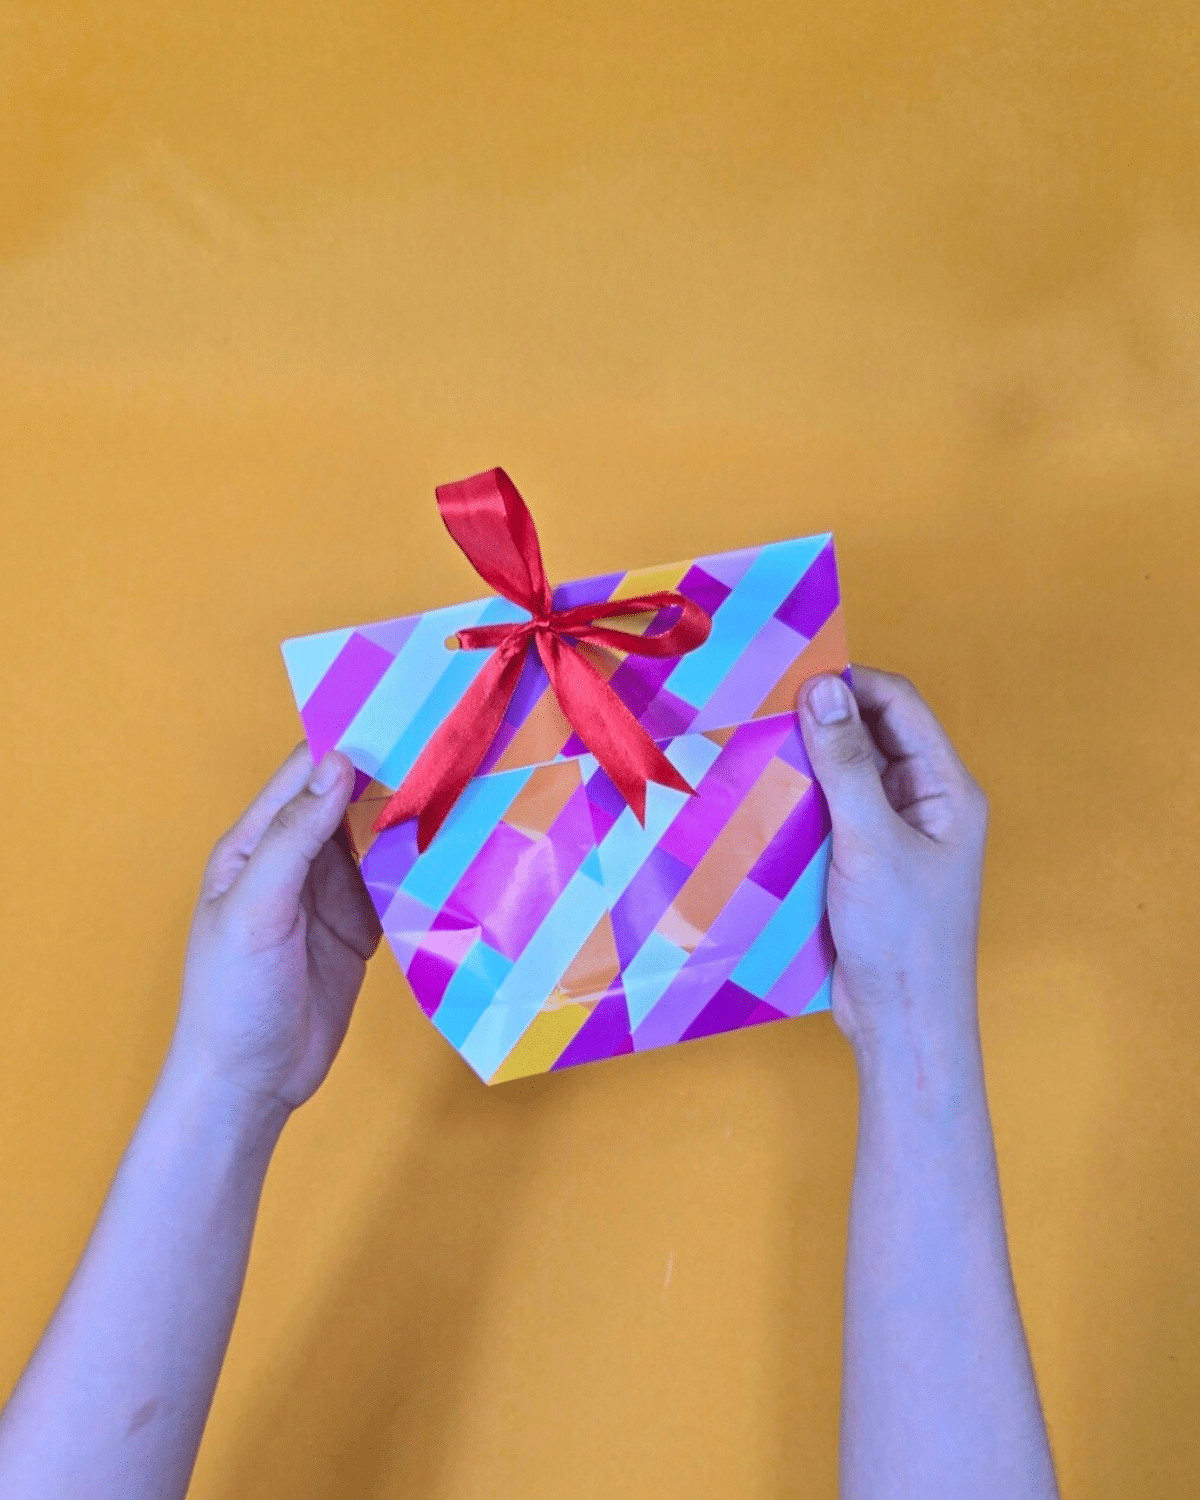
Step 3: Fold down the top of the bag, then punch two holes in the middle of the folded top. Insert a ribbon through the holes and tie it into a bow.
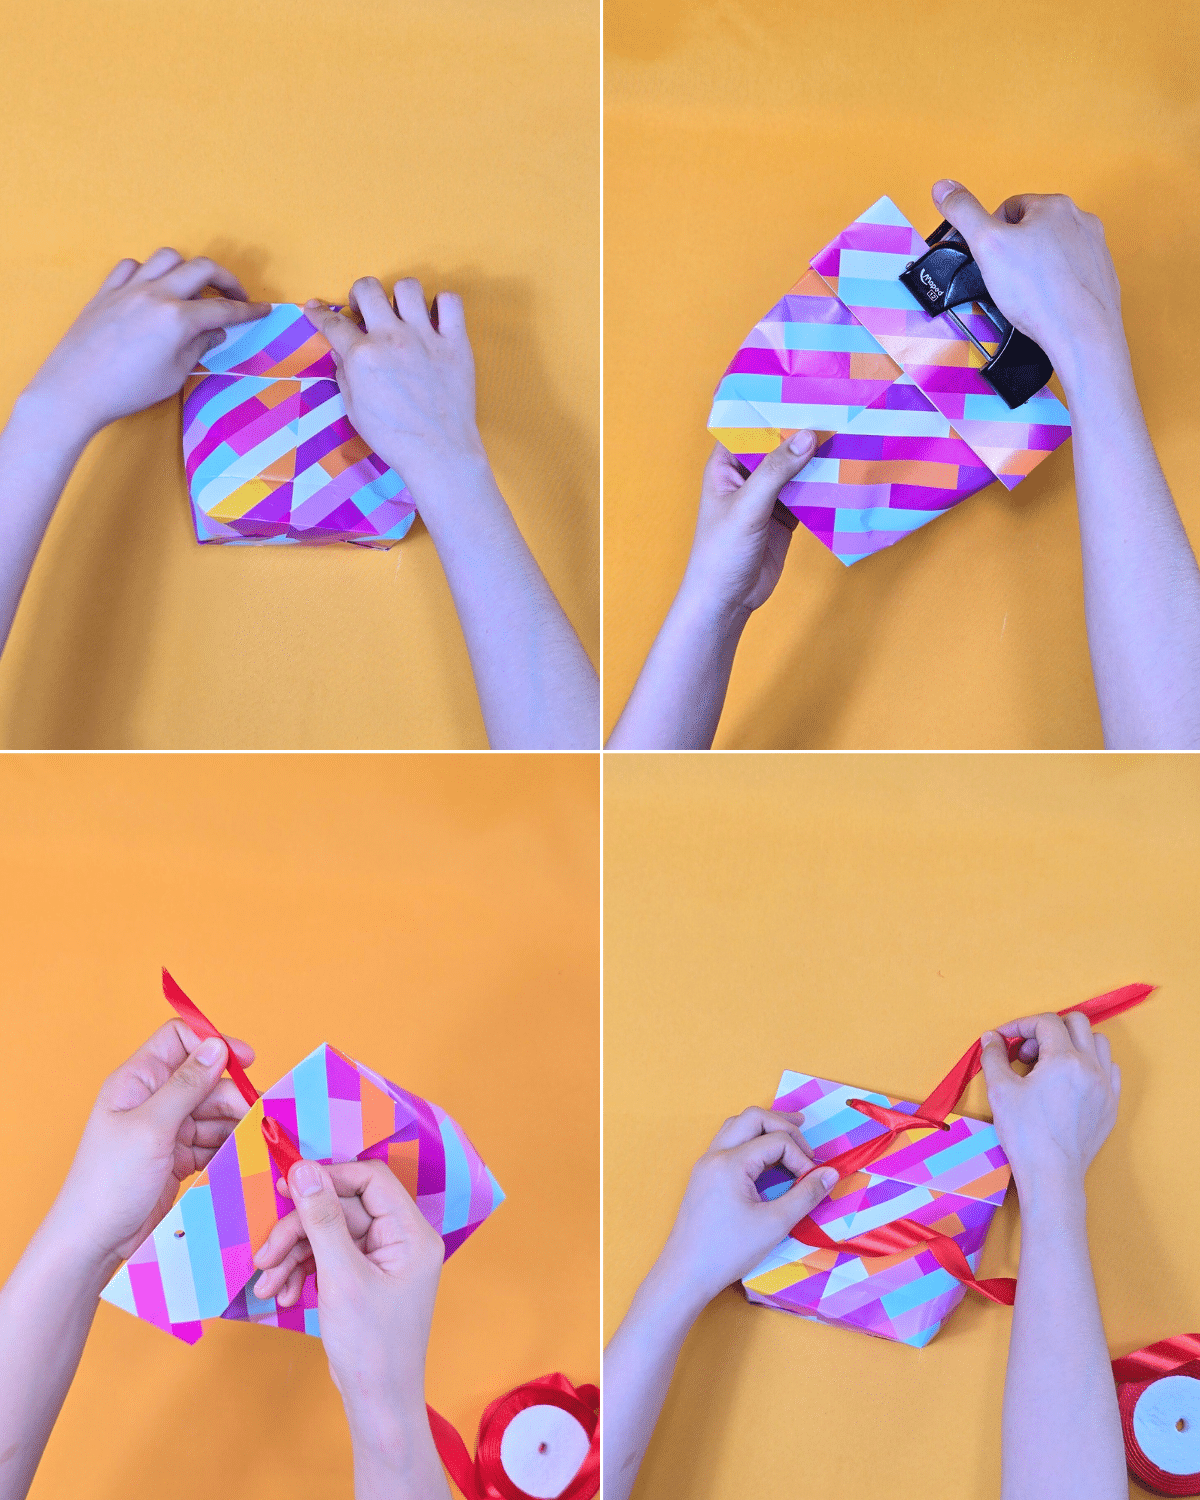
Your 2nd Bag is Complete!
Tips for a Neater Wrapping Paper Gift Bag
The difference between a homemade bag and one that looks store bought is almost all in the creases. Run the flat edge of your ruler along every fold instead of using your fingers. Sharp lines are what make the paper hold its shape.
Reach for the heavier paper if you have a choice. Thin, shiny paper tears right at the glued seam, and a slightly thicker roll folds cleaner and stands up on its own.
Give the glue a second to grab before you move to the next fold. If you rush the base, it pops open when you set the bag down, and then you’re holding it together with one hand while you tie the ribbon.
One more small thing: cut the fanned top piece from the same roll so the pattern matches. That little pleated accent is what sells the whole bag, and matching paper makes it look intentional rather than patched together.
Easy Ways to Change It Up
Christmas paper is the obvious one, and it’s why I make a stack of these every December. Plain kraft paper works too, and it gives you a blank bag you can stamp, doodle on, or leave alone with a big bow.
Swap the ribbon for twine or a strip of fabric, tuck a little tissue paper inside so the top stays open and full, and punch a hole for a gift tag if the bag is going under a tree with a pile of others. Same fold, completely different look.

Level Up Your Gift Bag
- Swap the ribbon with twine and use burlap for the bag itself for a more rustic vibe.
- Insert a paper to nestle the gift inside and to make the bag more sturdy and help it hold its shape better.
- Add a handwritten note, a sachet of lavender, chocolates, or a mini candle for extras.
Frequently Asked Questions
What kind of wrapping paper works best for a DIY gift bag?
A medium to heavy weight paper is the easiest to work with. Thin foil and glossy papers crease unevenly and can split along the glued seam, while a sturdier roll holds a sharp fold and lets the finished bag stand on its own. Any pattern works, so use whatever roll you already have open.
Can I use tape instead of a glue stick?
I use a glue stick because it keeps the seams flat and invisible, which is most of the reason these look store bought. Double sided tape is a fine swap if that’s what’s in the drawer. Regular clear tape works in a pinch, it just shows a little more on the folded base.
How do I size the bag for my gift?
Set your gift on the paper and wrap it around loosely before you cut anything, then add a few extra inches for the side seam and the folded bottom. More paper makes a bigger bag, and the folds are exactly the same at any size. When in doubt cut generously, since you can always trim the top down.
Is this a good craft to make with kids?
Yes, with a little help. Folding and gluing are easy for most kids to handle, and an adult can take over the cutting and the ribbon. It’s a nice one for the days before a birthday or Christmas when everyone wants a job.
*If you love this craft, then visit our official website, follow our Facebook page, and subscribe to our YouTube channel for more!
How to Make a Gift Bag from Wrapping Paper