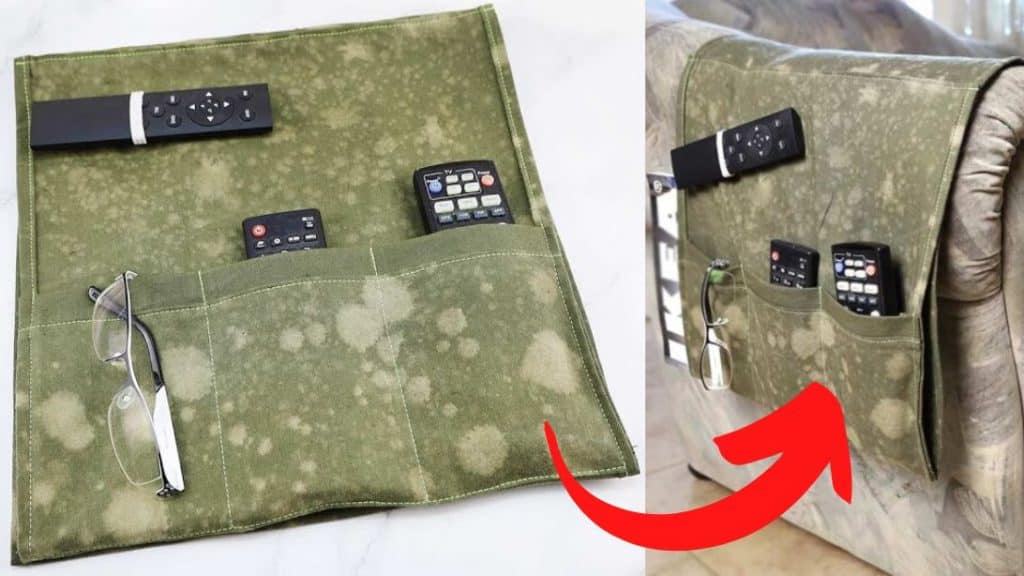
Have your remote, eyeglasses, or magazines easy to find and all in one place with this sewing project idea by Hello Sewing on YouTube. This fun project is super handy and is perfect for organizing your remote controls. Plus, you can hang this in your armchair or anywhere you like.
Materials:
- 1 yard of fabric, mid-weight home décor fabric without a clear wrong side
- ½″ flat and 4″ long elastic, optional
- Matching thread
- Scissors or rotary cutter and a cutting mat
- Ruler or measuring tape
- Iron and ironing board
- Sewing clips or pins
- Sewing machine
Directions:
Step 1
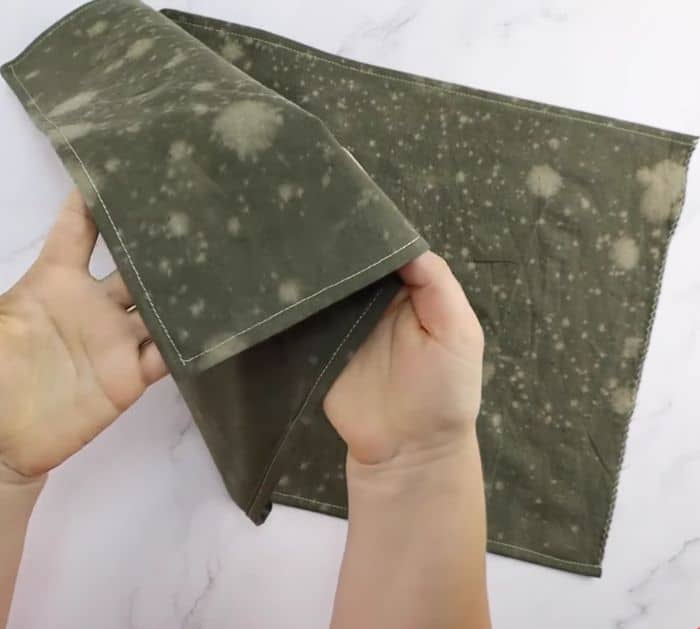
Once you have cut your main piece of fabric (50*14″), your pocket piece (14*6″), and pocket edging (14*2″), take the pocket edging and fold it in half lengthwise with their wrong sides facing. Line up the corners and press the piece nicely. Place the folded edging’s raw edges to the raw edge of the top of the pocket, with the edging on top of the right side of the pocket piece, then pin or clip into place, and sew a straight line with a ¼-inch seam allowance. Press the seam down towards the main pocket, then finish with a top stitch along the edge where the seam for the edging joins the main pocket piece. Fold over ¼ inch all the way around the rectangle toward the wrong side, press nicely, then fold over again ¼ inch all the way around so the raw edges are hidden. Pin them into place, then stitch them all the way around on the right side ¼ inch from the edge, and zigzag the short right side.
[social_warfare]
Step 2
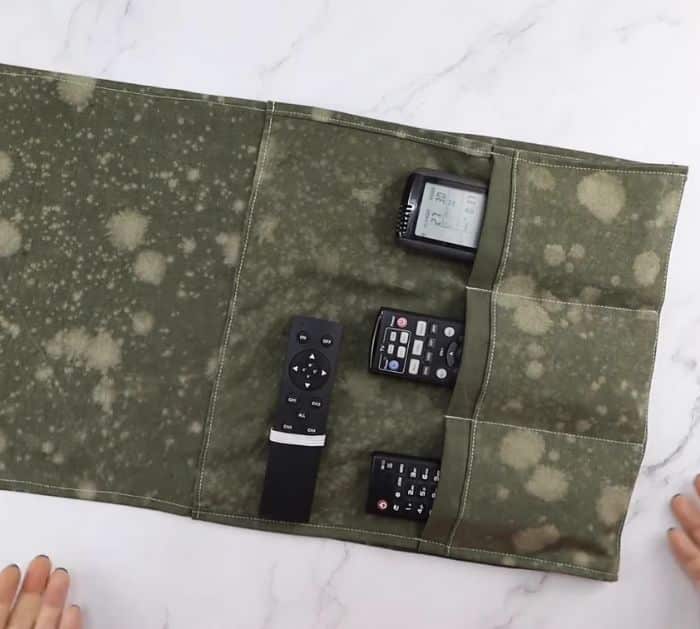
Lay the main fabric with its wrong side facing up, the long side running along the length of the worktop, and the zig-zagged edge on the left. Measure 13 inches from the short left side edge and mark in 3 spots to ensure a straight line. Take the pocket piece with the wrong side up and align the raw edge with the marks and pin along the line you have marked on the main piece, then stitch them with a ¼” seam allowance. Fold in the short raw edges of the pocket and press, then flip the pocket to its right side and pin the top corners. Top stitch right at the edge of the pocket sides and base. Lay out your remotes on top of the pocket so you can judge where to divide the pocket, mark them accordingly, and pin a small piece of elastic above the other remotes. Stitch down the lines as well as the elastic, then create a loop with the extra fabric below the pocket, and fold up the fabric towards the right side, so it is in line with the base of the pocket. Fold the top zig zagged edge of the base ¼ under and pin in place, then run a line of stitching parallel to the topstitching on the pocket.
*All these images are credited to Hello Sewing via YouTube. Give her channel a visit and subscribe for more!
Easy Remote Control Holder Sewing Tutorial


