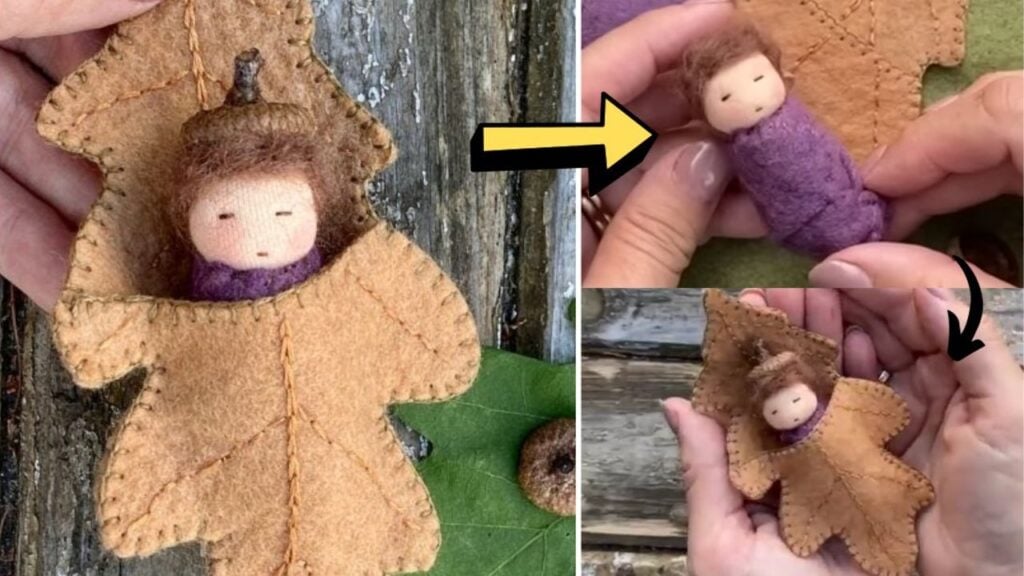
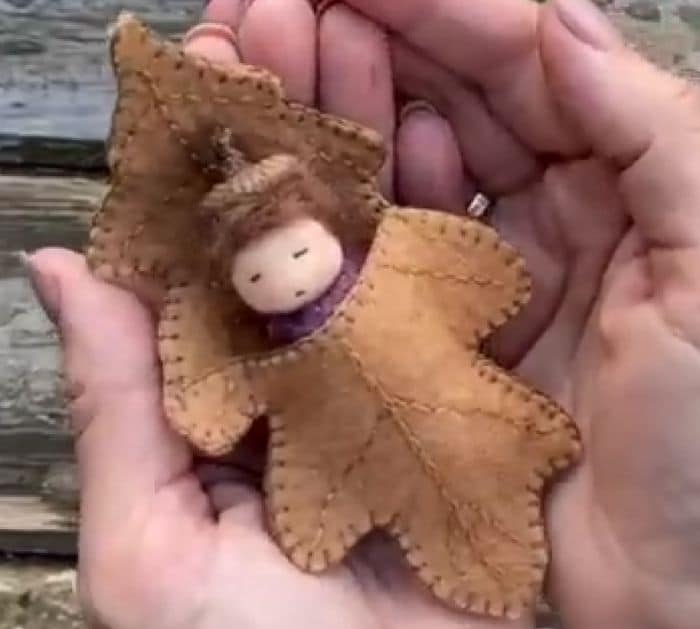
This darling doll makes a cute gift for a loved one or you can use this for your decor as an ornament. Whichever it is you decide on, this sewing project will surely put a smile on your face and onto the face of the person you’re giving it to. You can easily sew a few pieces of this when you follow these easy and simple steps by The Everyday Artisan at Wingfelder Fiber Studio on YouTube.
Materials:
- Oak leaf
- Scissors
- Marking pen or pencil
- Felting needles
- Sewing needles
- Fabric pins
- Embroidery thread
- Felting surface
- Felt
- Skin fabric
- Core wool, for doll making
- Skewer
- Hot glue gun and glue sticks
Directions:
Step 1
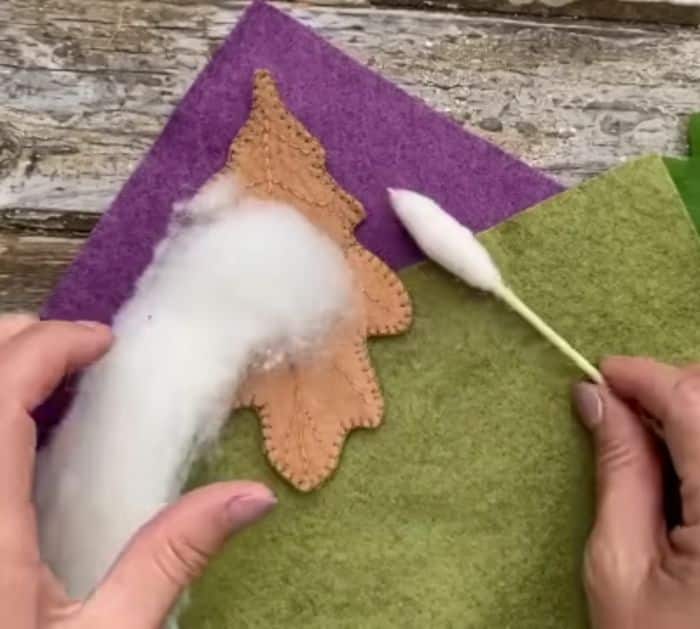
Pin the oak leaf on top of the wool felt, then carefully cut around the leaf or you can trace its shape first, and cut it out after. Place the cutout piece on top of the wool felt again, then trace and cut out, or cut it out directly, make sure that the second piece is only halfway up the first piece, and curve the top edge of the half piece for a pocket. Draw the veins of the leaf on both pieces, then start sewing the center vein using a chain stitch, and the side veins with a back stitch. Using a darker thread, sew the outer edges of the top of the pocket leaf piece with a blanket stitch, then pin the 2 pieces together lining them up nicely, and continue to sew the outer edges with a blanket stitch. Set the piece aside, then wrap some wool around the skewer making sure it’s nice and tight, and keep going until you have a pod or cigar shape that’s 2 inches long and about ¾ inch thick.
[social_warfare]
Step 2
Poke the wool piece around with a needle to tighten the shape up, then remove the skewer, and continue poking. Create a neckline on the wool piece by sewing and pulling the thread tightly before making a knot, then sew the skin fabric around the wool, and create the neckline again by sewing a tight thread around. Cut a piece of felt, then wrap it around the body of the wool piece, and sew it nicely. Dab a small fabric scrap on a red crayon, then use it to add blush to the cheeks of the doll and proceed to sew the eyes and mouth using 2 strands of thread. Lastly, for the hair of the doll, you can either embroider it or use wool roving, then adhere the acorn cap on top of the head using hot glue, and insert the doll nicely into the leaf pocket.
*All image credit belongs to The Everyday Artisan at Wingfelder Fiber Studio via YouTube. Follow and subscribe to their channel for more!
Easy Oak Leaf Doll Sewing Tutorial


