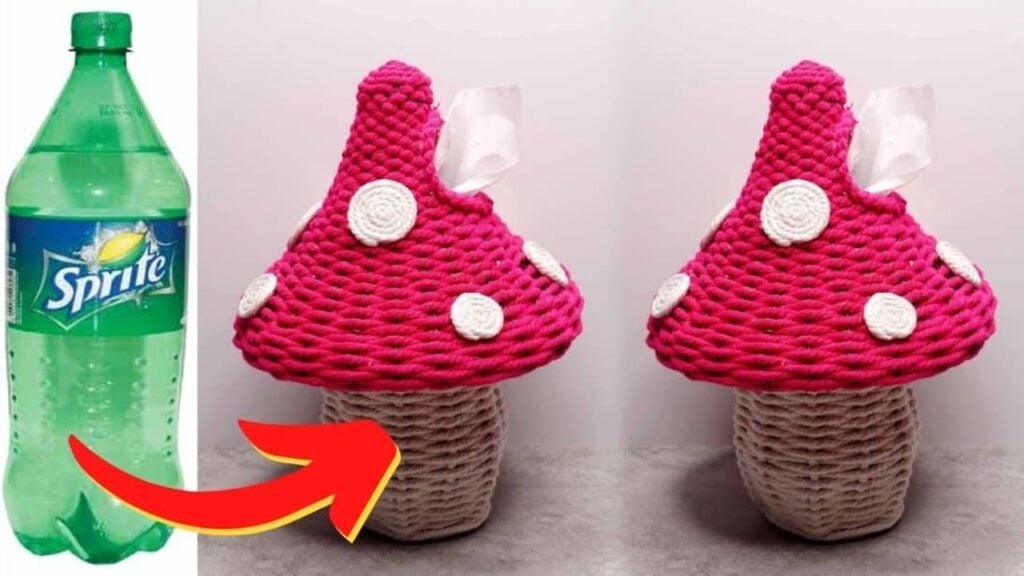
Instead of buying a tissue holder from the store, try making one using an old plastic bottle. It’s very easy and cheap to make, it looks incredibly adorable too. So stop throwing some of your plastic bottles into the trash and instead recycle them into this adorable DIY project by Lista Tsurayya on YouTube.
Materials:
- Plastic bottle
- Cardboard
- Felt sheet
- 4mm cotton rope, white and pink
- Wire
- Scissors
- Cutter
- Marker pen
- Glue gun and glue sticks
Directions:
Step 1
Start by removing the label of the plastic bottle, then cut the body around the middle. Cut out around cardboard with about a 3 inches radius, spread hot glue around the back then attach the felt sheet that’s about 1 inch wider around the cardboard, make notches then hot glue around those notches, and press them inward, trim off the excess ends. Cut a white cotton rope into 9 pieces about 7-8 inches long, unbraid the ends then attach to the back of the cardboard with about 1 inch of space in between. Cover the back with a smaller round felt sheet to hide the place with all the glued ropes. Dab a hot glue at the bottom of the lower part of the plastic bottle and attach the round cardboard underneath, then wrap a rope at the bottom and glue along the way, then once you’ve reached the end, weave the rope alternately until you reached the top, cut the excess rope ends.

[social_warfare]
Step 2
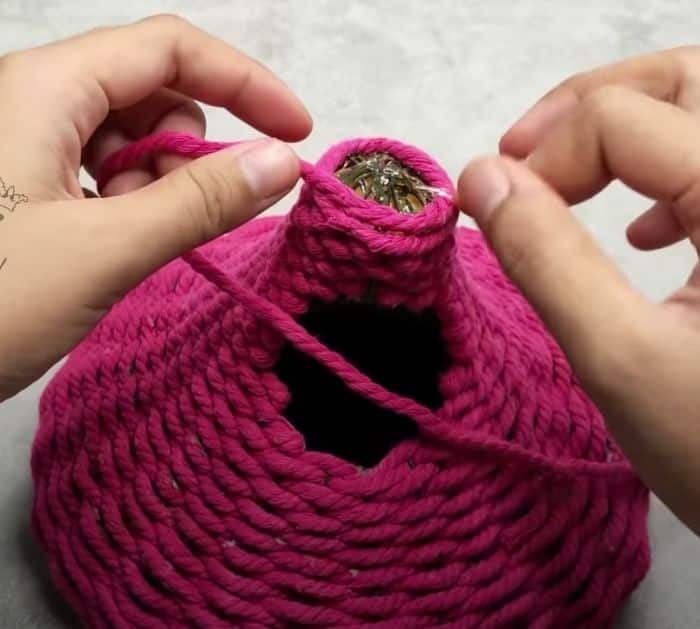
Cut three long ropes and join their ends at the top together with hot glue, then braid and glue the ends securely, wrap the braid at the top to hide the raw edges of the bottle. Take the upper body of the plastic bottle and cut around to remove the pointed top, using the pointed top, trace a 2-3 inches radius circle on the front of the plastic, cut the hole, then glue a wire around the bottom at about 1-inch gap, rap a pink rope around the bottle starting from the top of the wires ends, continue until you reached the bottom, then change the rope to white and spread the wire open wide. Continue wrapping the white up to 2 inches thick, then change back to pink then weave through the wires until 2 inches thick, fold the wires upward and curve according to the shape of the bottle, then proceed to weave upwards, cut the wires that’s directly in front of the hole, then proceed to weave, once you’ve reached the cap, trim the wires a bit and fold them slightly then twirl the yarn around with glue, cut the excess. Put glue around the hole then attach a braided rope around it, for the mushroom details, twirl a white rope around and hot glue the sides as you go to about an inch wide, then cut. Make several pieces of different sizes, then decorate them around the mushroom head.
*All image credit belongs to Lista Tsurayya via YouTube. Follow and subscribe to her channel for more!
DIY Mushroom Tissue Holder Using An Old Plastic Bottle


