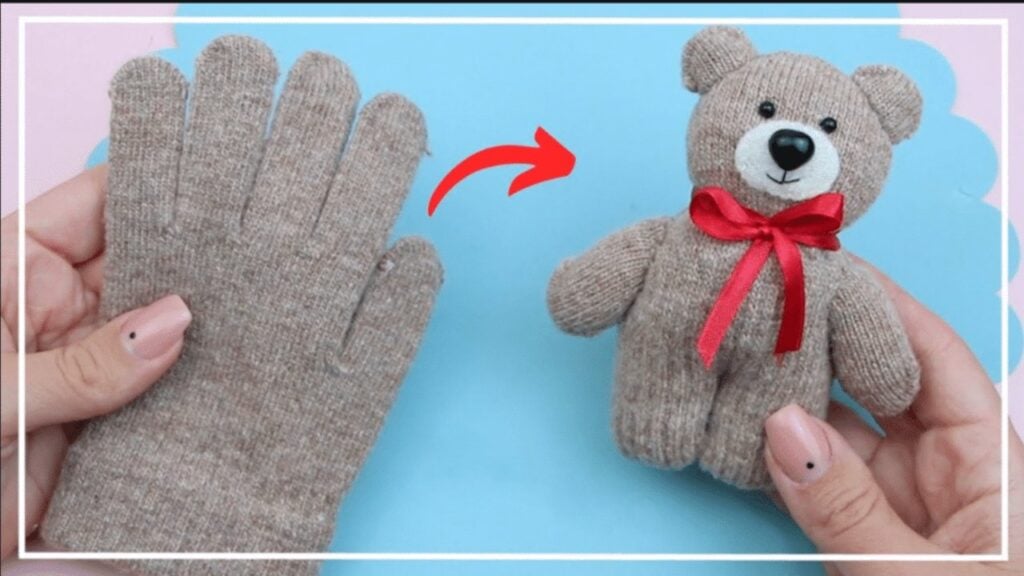
Looking for an easy DIY project that you can make using items that you may already have around your house? Try this repurposed glove teddy bear by NataliDoma DIY on YouTube. It’s super cute and easy to make and it’s the perfect gift to give to your loved ones, too.
RELATED: How to Make a Teddy Bear Out of Yarn
This is such a fun DIY project idea and a budget-friendly one because all you will need is old gloves, some filling of your choice, and a few basic sewing supplies. Learn how now by watching the video tutorial below and give it a try. I’m sure you will love this project.
Materials for Glove Teddy Bear:
- Children’s glove
- Poly-fill fiberfill
- Beads, for the eyes
- Plastic bear nose
- A small piece of felt, for the muzzle
How to Make a Glove Teddy Bear:

Step 1
Turn the gloves inside out, then remove the stitching of the cuff, and draw the pattern as shown in the video. Stitch along the drawn line, then cut off outside the stitching, and turn it right side out along with the cut-off glove fingers.
Step 2
Stuff the largest piece with poly-fil fiberfill, then stitch about 2 inches from the curved top with a running stitch and pull it before wrapping the thread around a couple of times and locking it in place.
Step 3
Trim off the excess thread, then gather the ends of the opening with a running stitch, pull the thread, and stitch vertically along the middle of the body to shape the legs.
Step 4
Knot and lock the thread in place, then trim off the excess and proceed to prepare the small glove fingers for the arms, ears, and tail of the bear.
Step 5
Attach them to the body accordingly as shown in the video, then cut an oval-shaped piece of felt, and sew it onto the face of the bear.
Step 6
Next, sew the bead for the eyes, then attach the bear’s nose, and stitch the mouth as shown in the video. Wrap a small piece of ribbon around the neck and you’re done!


*All these images are credited to NataliDoma DIY via YouTube. Give her channel a visit and subscribe for more!
Easy DIY Repurposed Glove Teddy Bear


