

DIY party decorations are where I get a little carried away, and after years of themed birthday parties for my kids (they grew up in craft land and are now a bit past it), I can tell you the homemade pieces are the ones people remember. These 46 ideas cover birthdays, showers, holidays and every celebration in between. You’ll find paper flower garlands, tissue paper pom poms, honeycomb balls and a balloon garland, plus light-up marquee numbers, a felt birthday crown, a shooting star cake topper and confetti you punch out in minutes. Most of them start with tissue paper, cardstock or the toilet paper rolls you were about to toss. Taking the party outside? Our backyard party decor ideas have the string lights and patio projects covered. Perfect for birthdays, baby showers and last-minute hosts!
1. DIY Popsicle Party Invitations

DIY popsicle party invitations take a few minutes and cost pennies, and little hands can help. Pick up wide paint samples in a variety of colors from a home improvement store. Draw a popsicle shape on the back of each sample and cut it out, trace it onto white cardstock for the back, then tape the two sides together with a jumbo popsicle stick slid in between. Write or print the party details on the back. Skip the cardstock for a simple summer craft.
Get the full tutorial at So Festive!.
2. Marigold Garland Using Crepe Paper Streamers

Crepe paper streamers make marigold flowers fast because the strip is already the right width. Cut 60 to 70 inches of streamer, fold it in half four times and snip thin slits along both edges. Unfold it, sew a running thread from end to end, push the folds together and twist each one to fluff. Tie the ends into a donut shape, then glue a small green paper tube into the center. String the flowers on jute twine for Diwali, birthdays, fall or Day of the Dead.
Get the full tutorial at DIY JOY.
3. Paper Fan Garland

A paper fan garland adds a burst of color to a party wall or a bedroom. Cut scrapbook paper squares from about 3 to 6 inches, three per fan. Score every half inch on larger squares and every quarter inch on smaller ones, fold accordion style, bend in half and glue into thirds, then join three thirds into a full fan with a 1 inch punched circle at the center. Glue the fans to ribbon, layering some for depth. It gets heavy, so add a backing ribbon.
Get the full tutorial at Craftaholics Anonymous.
4. DIY Marigold Paper Flower Garland
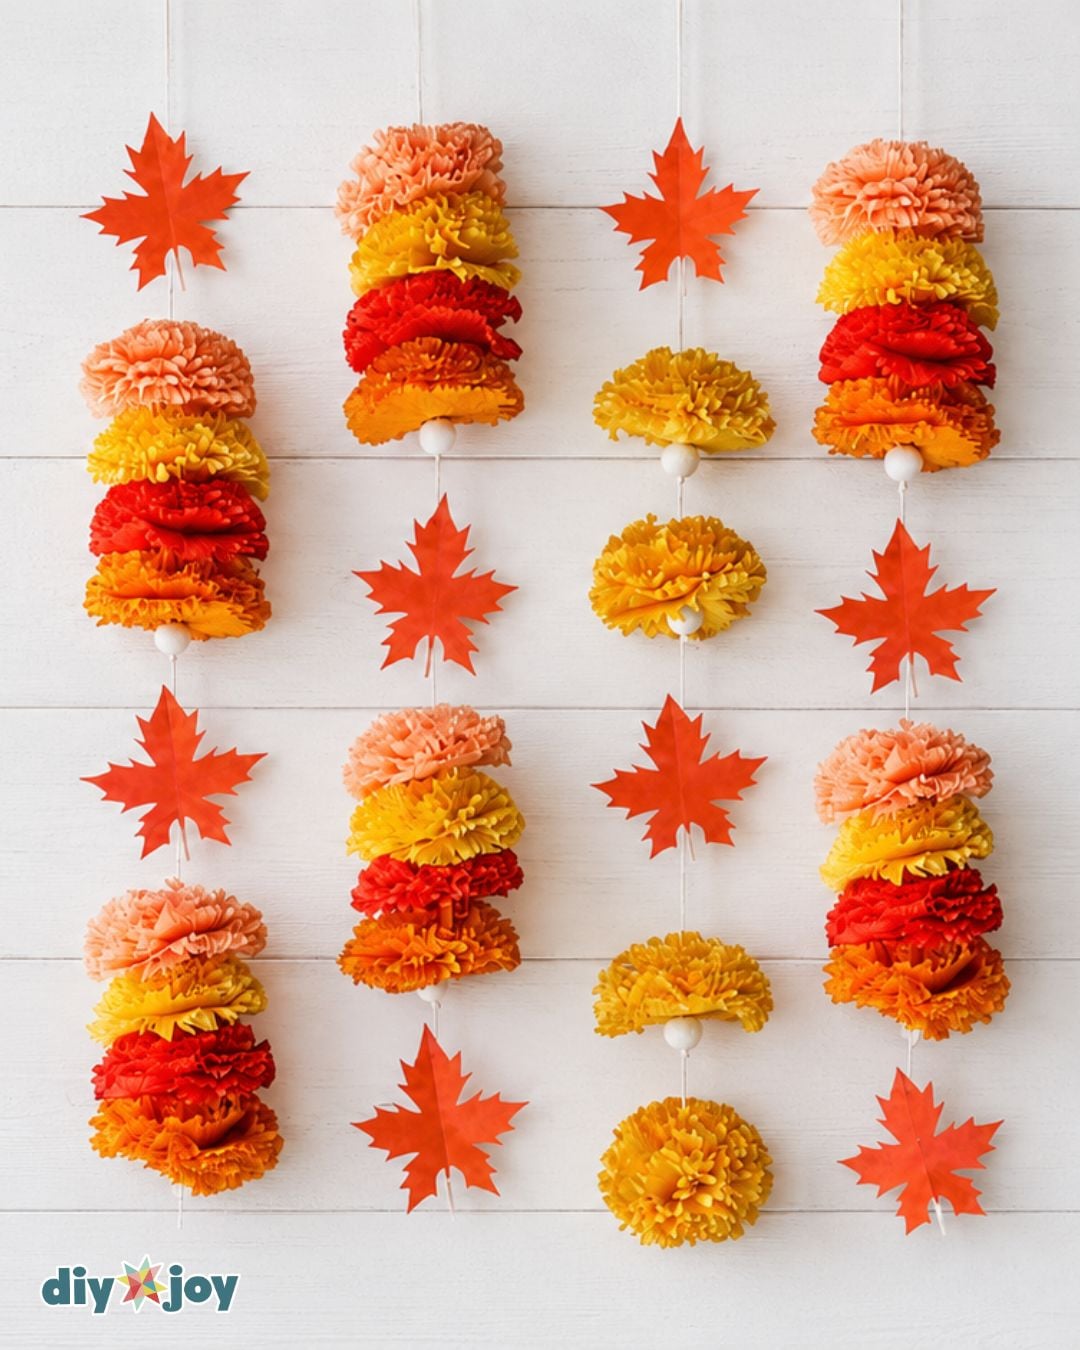
This marigold paper flower garland uses crepe paper, a stapler and string for warm decor on a wall, desk or staircase. Cut six 2 1/4 inch paper circles, stack and staple them at the center, then cut fringe around the edge. Separate each layer and scrunch it toward the center, varying the direction for a fluffier bloom. Thread four flowers at a time onto string with a large needle, adding a small white pom-pom between groups as a stopper. Multi-blade scissors speed up the fringing.
Get the full tutorial at DIY JOY.
5. DIY Coffee Filter Number

A giant coffee filter number makes a showstopping birthday decoration for about $8. Cut the number from foam board or recycled cardboard, then dye coffee filters with acrylic paint dissolved in a little water. Too much water means very slow drying, so go light. Once they dry, glue the filters over the number to cover it in ruffly blooms. It is time consuming but worth it. Crepe or tissue paper circles in different tints skip the dyeing step.
Get the full tutorial at Avanti Morocha.
6. DIY Paper Rosettes

Paper rosettes are an inexpensive way to dress up a wall for a birthday or a kids room. Cut wrapping paper or decorative paper as wide as the rosette diameter you want, and about 2 1/2 to 3 times as long, taping two sheets together if needed. A 14 inch rosette needs paper about 14 by 36 inches. Accordion fold the strip along its width in 1/2 to 3/4 inch folds, flipping the paper after each crease so the folds stay even, then fan it into a circle.
Get the full tutorial at Driven by Decor.
7. DIY Birthday Party Banner

This DIY birthday banner uses a free printable template, scrapbook paper or cardstock, scissors and markers, and it can match any party theme. Trace the flag template onto the back of the paper, then trace circles onto a coordinating paper. Cut out 13 flags to spell Happy Birthday, plus the circles. Write the letters on the circles, attach them to the flags with adhesive mounts, punch holes and string them on ribbon. Each 12 inch sheet gives about two flags.
Get the full tutorial at Rain on a Tin Roof.
8. DIY Birthday Banner With Toilet Paper Rolls

Empty toilet paper rolls turn into a sweet DIY birthday banner with no cutting at all. Soak seven rolls in water for 2 to 3 minutes until the layers separate, which gives two banner pieces per tube. Fold each piece in half to make a flag, 13 in all, and let them dry under something flat and heavy so they do not curl. Paint them, trace and color the letters with acrylic markers, draw a dashed border and hang them on ribbon.
Get the full tutorial at DIY JOY.
9. Easiest Ever Balloon Garland

This might be the easiest balloon garland ever, and it needs no knots or glue. Cut yarn or smooth string to the length you want plus extra for tying, thread it through a yarn needle and push the needle through the neck of each balloon just below the knot. The rubber grips the string, so balloons stay put but can slide along to adjust the spacing after hanging. Thread several close together to make clusters for a high chair or chair back.
Get the full tutorial at Joyful Abode.
10. Turn Empty Rolls into a Heart Garland

Empty toilet paper rolls make a budget friendly heart garland for Valentine’s Day or any love themed party. Flatten a roll, trace a heart pattern on top and cut it out. Paint both sides white, let it dry, then paint the hearts in pastels or any colors you like. Poke a hole on each side of every heart and thread twine or string through to link them together. Try two heart sizes, stripes or polka dots, or words like XO and Love.
Get the full tutorial at DIY JOY.
11. DIY Cotton Candy Balloons

Cotton candy balloons look good enough to eat. Spray paint polyester fiberfill pink and let it dry while you inflate 11 inch latex balloons, leaving off the string. Roll white or patterned paper into a cone, thread the string through it and tie it to the balloon, then hot glue the cone to the bottom with the gun on low. Glue the pink fluff around the balloon, but go light on glue and stuffing, or the balloon will not float.
Get the full tutorial at Aww Sam.
12. Cactus Balloons

Cactus balloons take minutes and suit a cactus themed birthday or baby shower. Each one uses a 12 inch green balloon for the main body plus two or three 9 inch green balloons for the arms, hot glued on with the glue gun on low, then topped with six to eight half inch pink pom-poms. Draw the spines with a Sharpie. Helium balloons last about six hours, so make them right before the party, or fill with air and mount them on balloon sticks to last for days.
Get the full tutorial at Design Improvised.
13. Colorful DIY Photo Booth Props
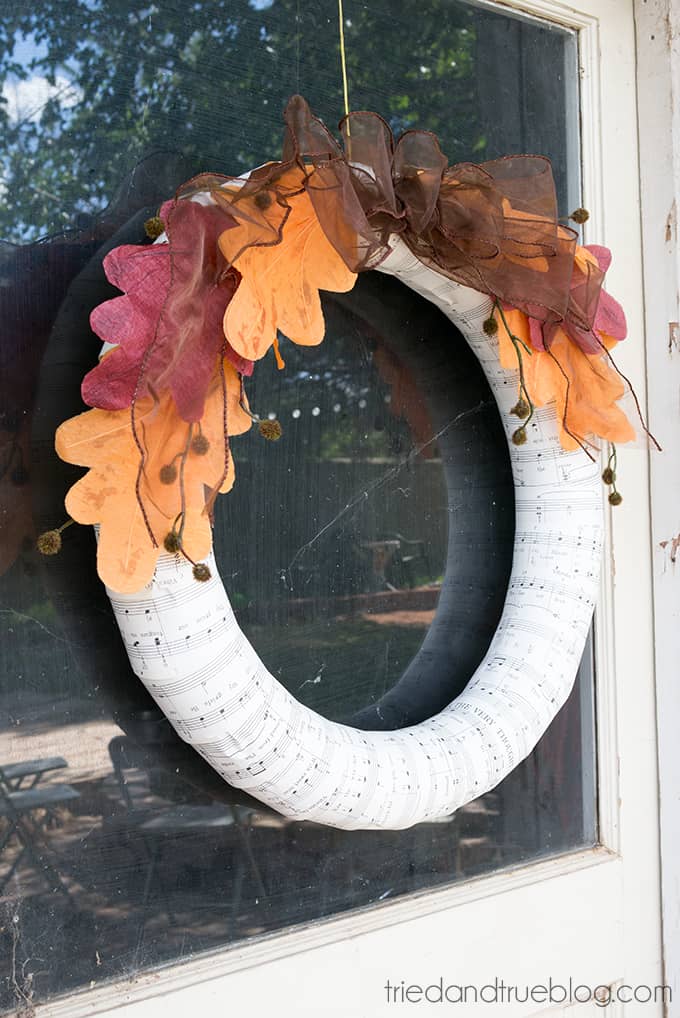
Colorful DIY photo booth props add fun to a wedding, birthday or family gathering, and no crafting skills are required. Start with wood photo prop blanks, or make your own from wood shapes and dowel rods. Paint them with acrylic paint, then add glitter paint, chalkboard paint, ribbons, brads or other embellishments, using craft glue or a hot glue gun. It is a great way to use up odds and ends from the craft drawer, and patience matters more than skill.
Get the full tutorial at DIY Candy.
14. Tulle Pom Poms

Tulle pom poms take just a roll of tulle and scissors, and they make sweet favor toppers or a garland. Cut a 10 inch strand of tulle and set it aside. Wrap the tulle around your hand about 20 times, or around a book for a bigger pom, then cut it free and slide it off, keeping the loops together. Tie the center tightly with the 10 inch strand like a bow, cut through the loops on both sides, fluff it out and give it a trim.
Get the full tutorial at The Melrose Family.
15. Giant Lollipop Decorations

Giant lollipop decorations add whimsy to a candy party, indoors or lining a front walkway. Spray paint wooden dowels white, let them dry and cut them to different lengths. Wrap styrofoam circles in colored tissue paper, which does not need to be perfect, then push a dowel into each one. Cover the circle with a piece of cellophane, gather it around the dowel and tie it with a ribbon bow. Large styrofoam circles can cost about $5 each, so plan for that.
Get the full tutorial at Glorious Treats.
16. Tissue Paper Pom Poms

Tissue paper pom poms cost a few dollars, match any color scheme and take only four steps. Stack eight to ten sheets of tissue paper in one color and accordion fold them in 1 1/2 inch pleats, creasing well. Twist a folded 12 to 18 inch piece of floral wire around the center, leaving a loop for hanging. Trim both ends round for a soft pom or pointed for a starburst, then gently pull each layer up and away from the center to fluff. Hang with fishing line.
Get the full tutorial at Thoughtfully Simple.
17. Cupcake Liner Paper Flowers

Did you know a stack of cupcake liners turns into a bouquet? Our cupcake liner paper flowers need only 12 liners per bloom, scissors and a stapler. You staple the stack in the center, cut the edges into eight petals and scrunch each layer up toward the middle. One flower takes about five minutes, and since liners come already cut into circles and often two-toned, they look fancier than the effort involved. Scatter them down a party table or string a few into a garland!
Get the full tutorial at DIY JOY.
18. Rose Cloth Napkin Fold

Want your party table to look like you hired someone? Our rose napkin fold turns one square cloth napkin into a rose in a few minutes, with no napkin rings or ribbon needed. You fold it into a triangle, roll it from the long edge, tuck the end in and peel the top layers down into petals. It has to be cloth (paper napkins are too thin to hold the shape), and a loose roll looks more like a real rose than a tight one. So pretty for showers and birthday dinners.
Get the full tutorial at DIY JOY.
19. Paper Candy Favor Packages
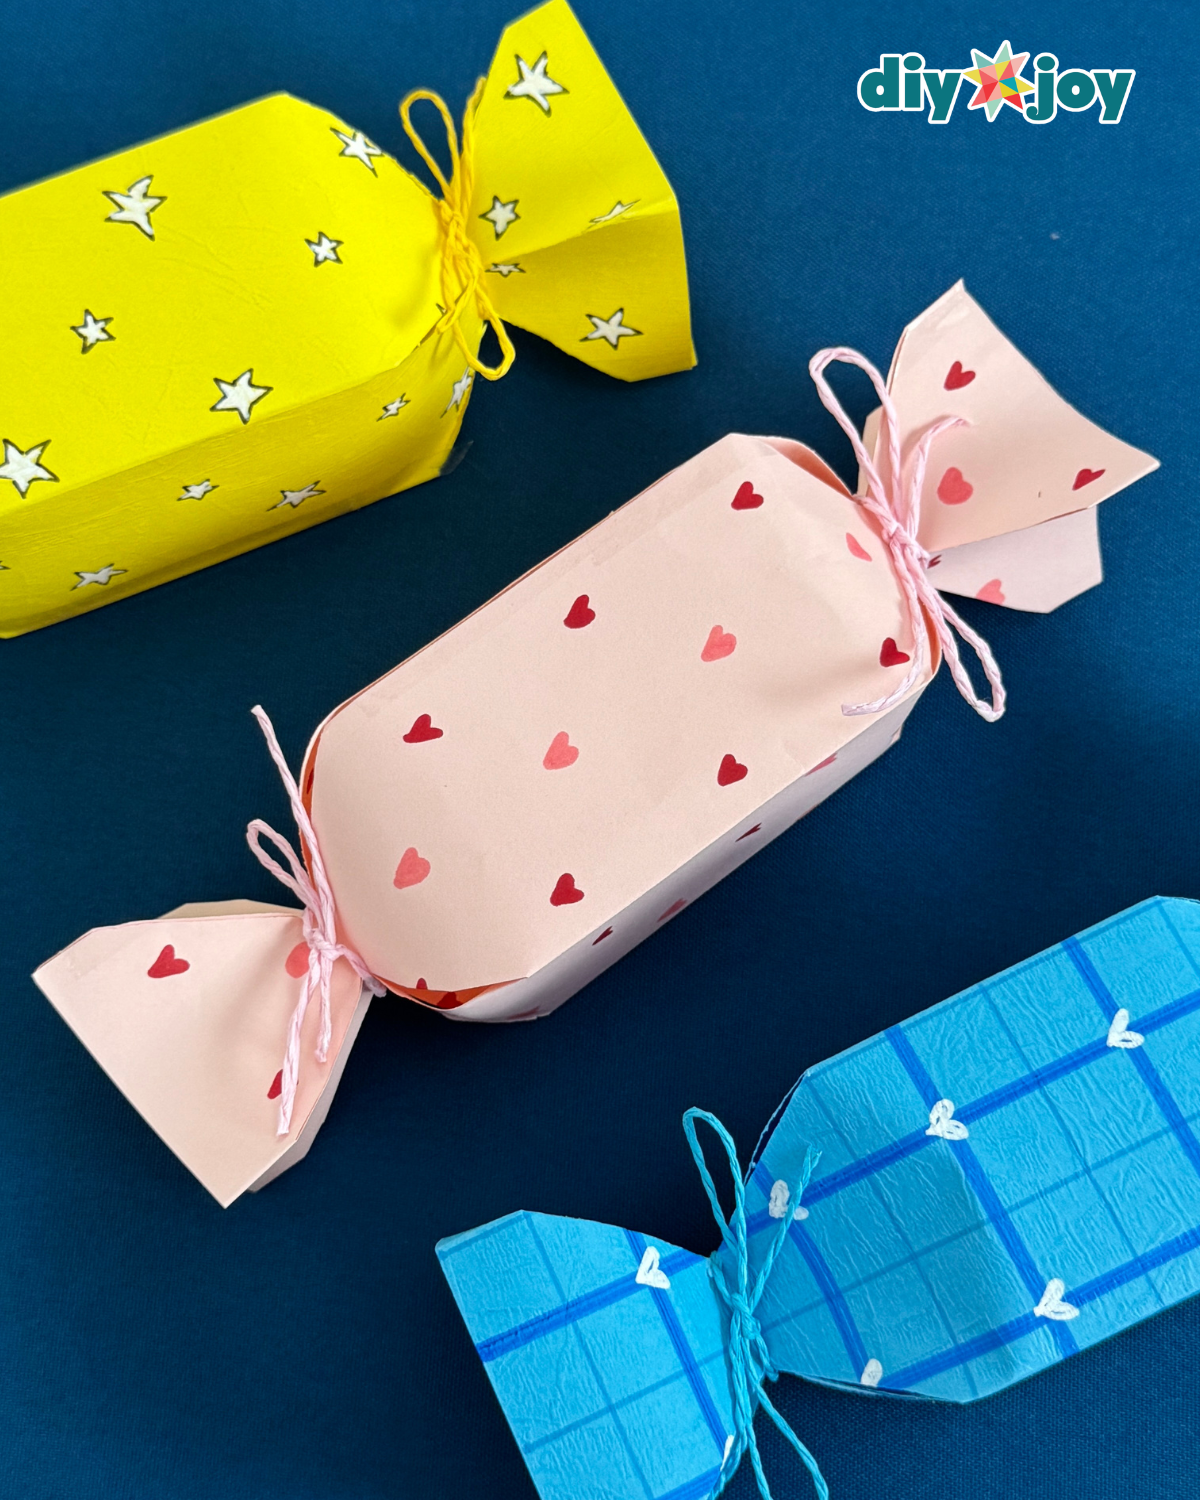
Need party favors that look like more effort than they are? These paper candy packages start as a square of colored paper you doodle on with a Sharpie. A few folds and a strip of tape make the tube, then you snip the folded corners, tie one end with string, fill it with candy and tie the other end. Thicker textured paper holds the wrapper shape best. They are just as cute holding a small gift or cash as treats, and they double as table decor until guests take them home.
Get the full tutorial at DIY JOY.
20. Halloween Paper Roll Banner
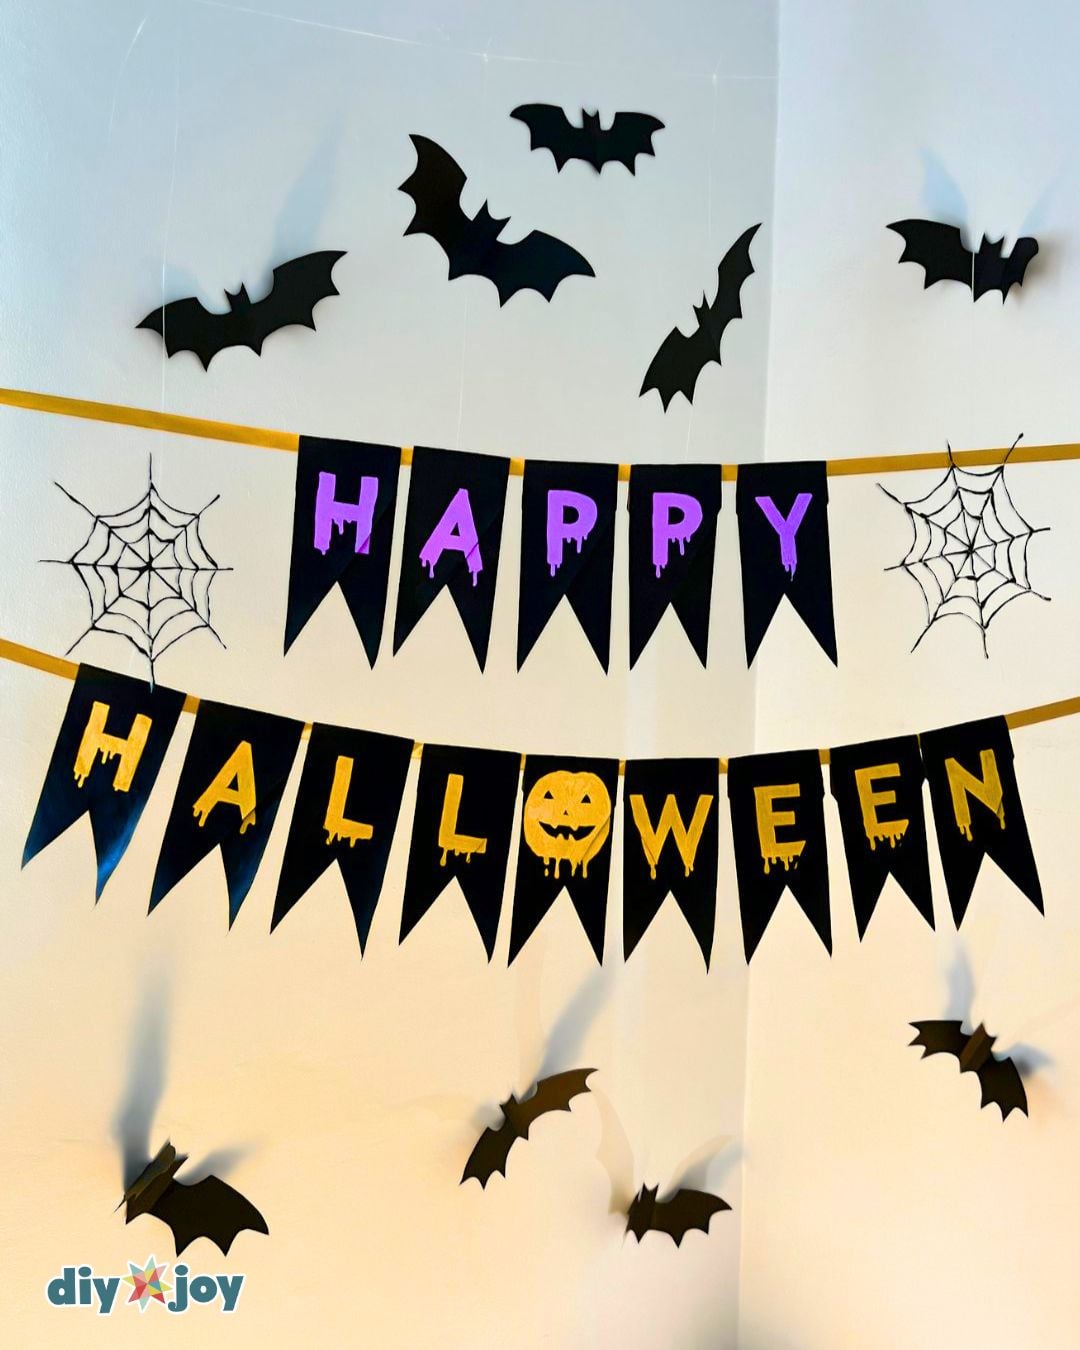
Hosting a Halloween party on a budget? Our Halloween banner is made from seven empty toilet paper rolls. You soak the tubes for a minute or two until they split, fold each piece into a pennant and let them dry, then paint them black and letter “Happy Halloween” with acrylic paint markers. A pumpkin stands in for the letter O, and the drippy lettering gives it that homemade charm. String it on ribbon across a mantel, doorway or the snack table. Start saving rolls now!
Get the full tutorial at DIY JOY.
21. Christmas Paper Roll Banner
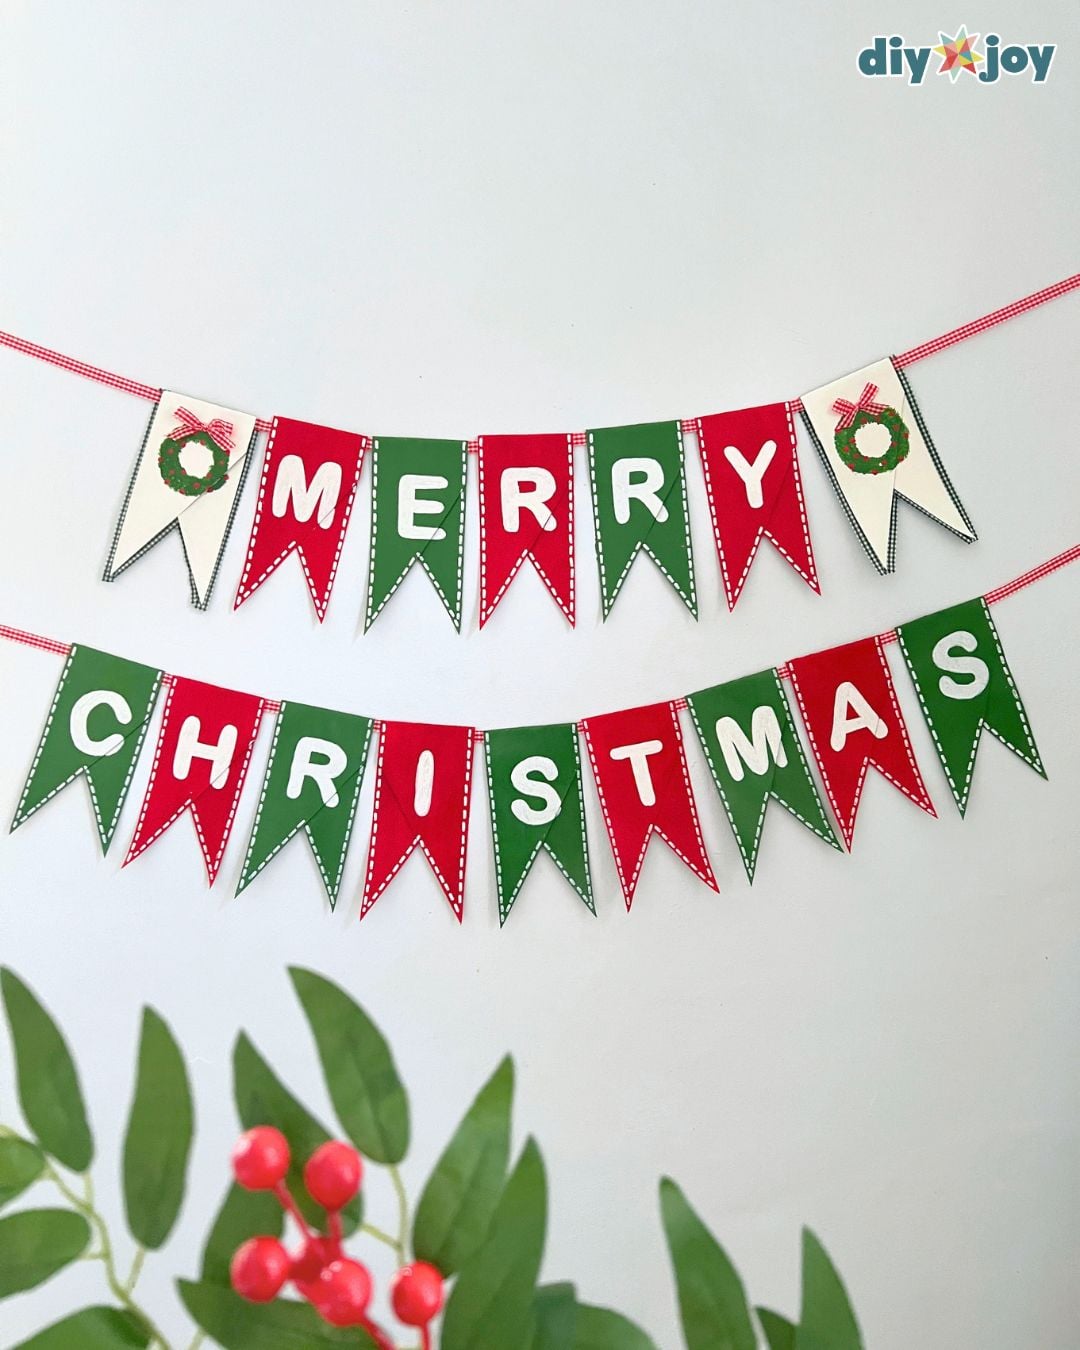
Your Christmas party decor can start in the bathroom trash. Our Merry Christmas banner turns cardboard tubes into pennants: soak them so the glued layers come apart without tearing, fold each piece in half and paint seven red, seven green and two white. The white ones get a little painted wreath with red berries, and the rest get bold lettering. Hang it on gingham ribbon over a mantel, window or dessert table, and swap the colors to match whatever your tree is wearing this year.
Get the full tutorial at DIY JOY.
22. Easter Paper Roll Banner

Easter brunch coming up and nothing on the walls? This Happy Easter banner takes six toilet paper tubes, soaked for two or three minutes until they separate, folded in half and dried. Paint each piece a bright color, then trace printed letters and fill them in with acrylic markers, finishing with a dashed border. One tip from our tutorial: use rolls from the same brand so every pennant comes out the same size. Change the word and it works for birthdays, graduations and summer parties too!
Get the full tutorial at DIY JOY.
23. Glowing Flower Lights

Want a party centerpiece that glows? Our flower light takes apart one large faux rose and rebuilds it around a battery tea light. The petals get glued onto the backs of clear plastic spoons (handles cut off), the spoons go around the tea light, and the sepals and leaves finish the base. Flip the switch and the whole bloom lights up from inside. Make a few in different colors for a wedding or birthday table, or tuck one under a glass cloche as a gift.
Get the full tutorial at DIY JOY.
24. Hanging Flower Heart

Need a showstopper for a shower or a Valentine’s party? This hanging flower heart is cut from sheets of styrofoam, glued into one heart shape and covered in faux flowers pulled off their stems. About 12 bunches fill it, and bigger blooms fill it faster. Placing the lightest pinks across the top third and the darkest across the bottom before filling the middle gives that pretty ombre fade. It hangs from cup hooks with clear fishing line, so it looks like it’s floating.
Get the full tutorial at A Beautiful Mess.
25. Giant Geometric Heart Backdrop

Tired of the same paper fans behind every dessert table? This giant geometric heart backdrop is built from about 100 printed paper triangles, scored, folded and glued onto foam board around the outline of a heart. Lining the flat side of each triangle up with your pencil line is what keeps the heart crisp. It works for Valentine’s parties, engagement parties and showers, and it’s colorful enough to hang as art afterward. Print the templates on every bright paper you own.
Get the full tutorial at Bespoke-Bride.
26. Tissue Paper Honeycomb Balls
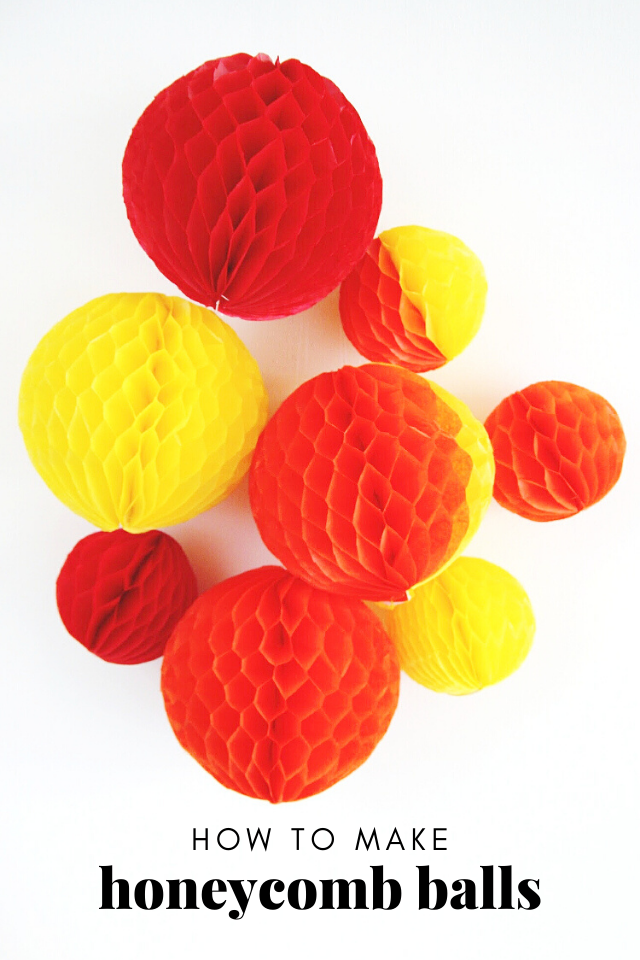
Honeycomb balls are a party classic, and the store-bought ones add up fast when you need a dozen. This tutorial shows how to make them from plain tissue paper: about 50 sheets for each 8-inch ball, glued in alternating lines so the layers pop open into a honeycomb. It takes a while, so it’s a good one for an evening with a movie on. You can go striped, half-and-half or rainbow, and the leftover scraps make smaller balls. Prefer a shortcut? Ready-made honeycomb paper pads work too.
Get the full tutorial at Gathering Beauty.
27. Party Plate Wall Backdrop
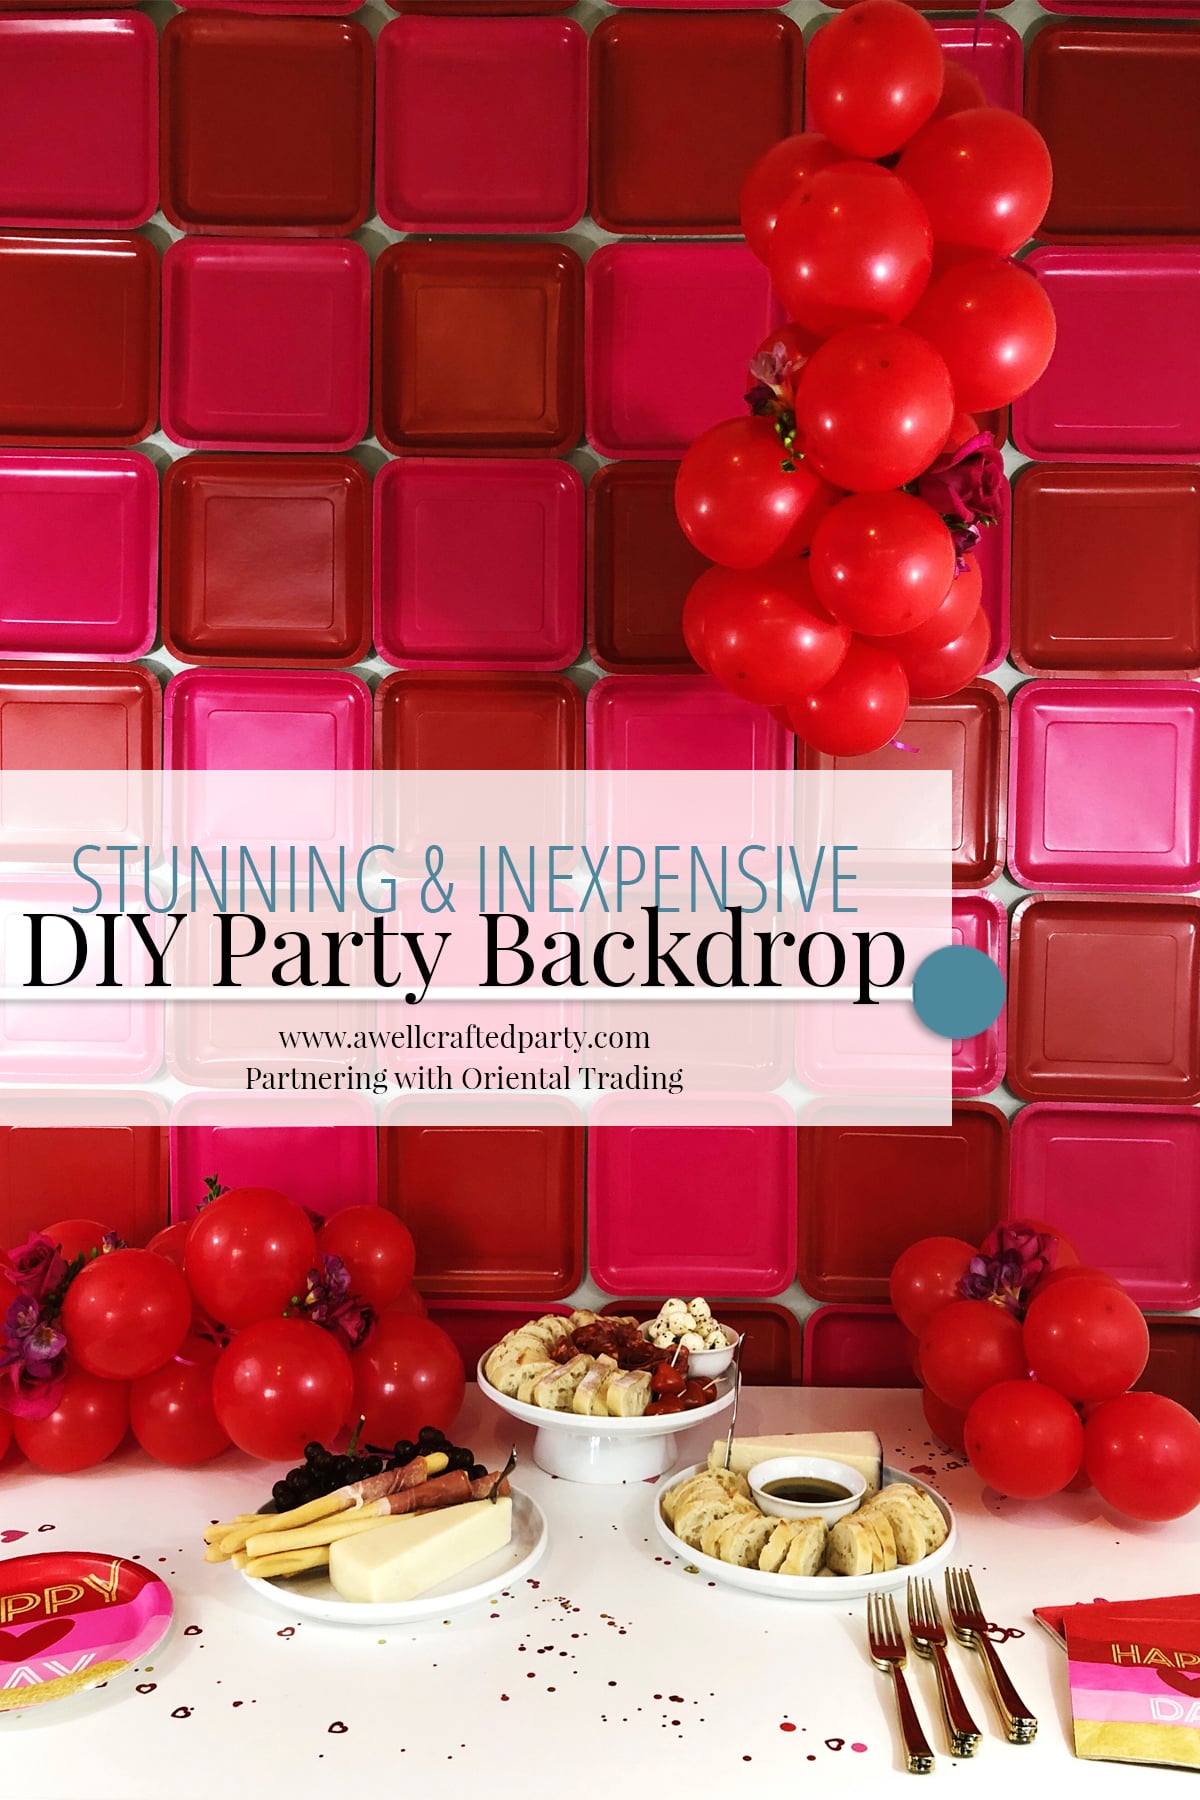
Here’s a party backdrop you can put up in about 10 minutes. Square paper plates get taped straight onto the wall in a grid with doubled-up painter’s tape, four pieces per plate. A 5-foot-wide wall took 42 plates, and a 6-by-6-foot backdrop needs about 64, so measure your wall and your plates before you shop. Mix two or three shades for a checkerboard and add a balloon cluster in the corner. When the party’s over, take them down and use them as actual plates!
Get the full tutorial at A Well Crafted Party.
28. Giant Paper Wall Flowers
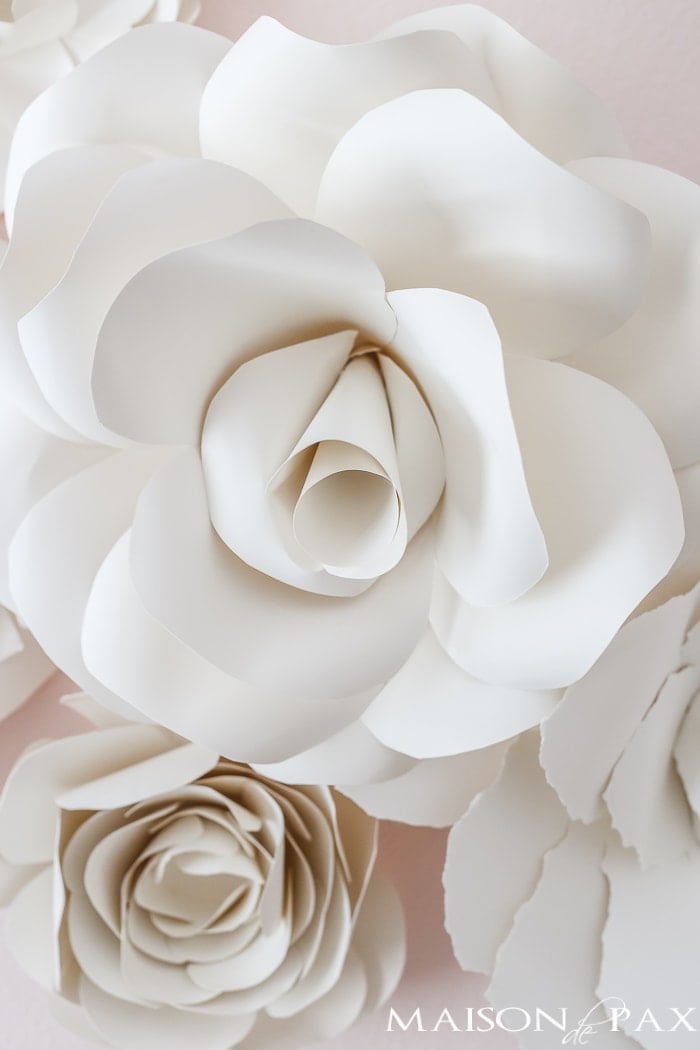
Want a backdrop that looks like a bridal shop window? These giant paper wall flowers are cut from 12-by-12 French cotton paper, which is basically cardstock and holds a curl beautifully. You choose a size, cut petals, curl them around a pipe for depth, glue them in stacks and finish with a center. The tutorial walks through three sizes, up to a 12-inch radius. A cluster behind a cake table or a shower gift table is stunning, and they live on as wall decor long after the party.
Get the full tutorial at Maison de Pax.
29. Custom Birthday Balloons
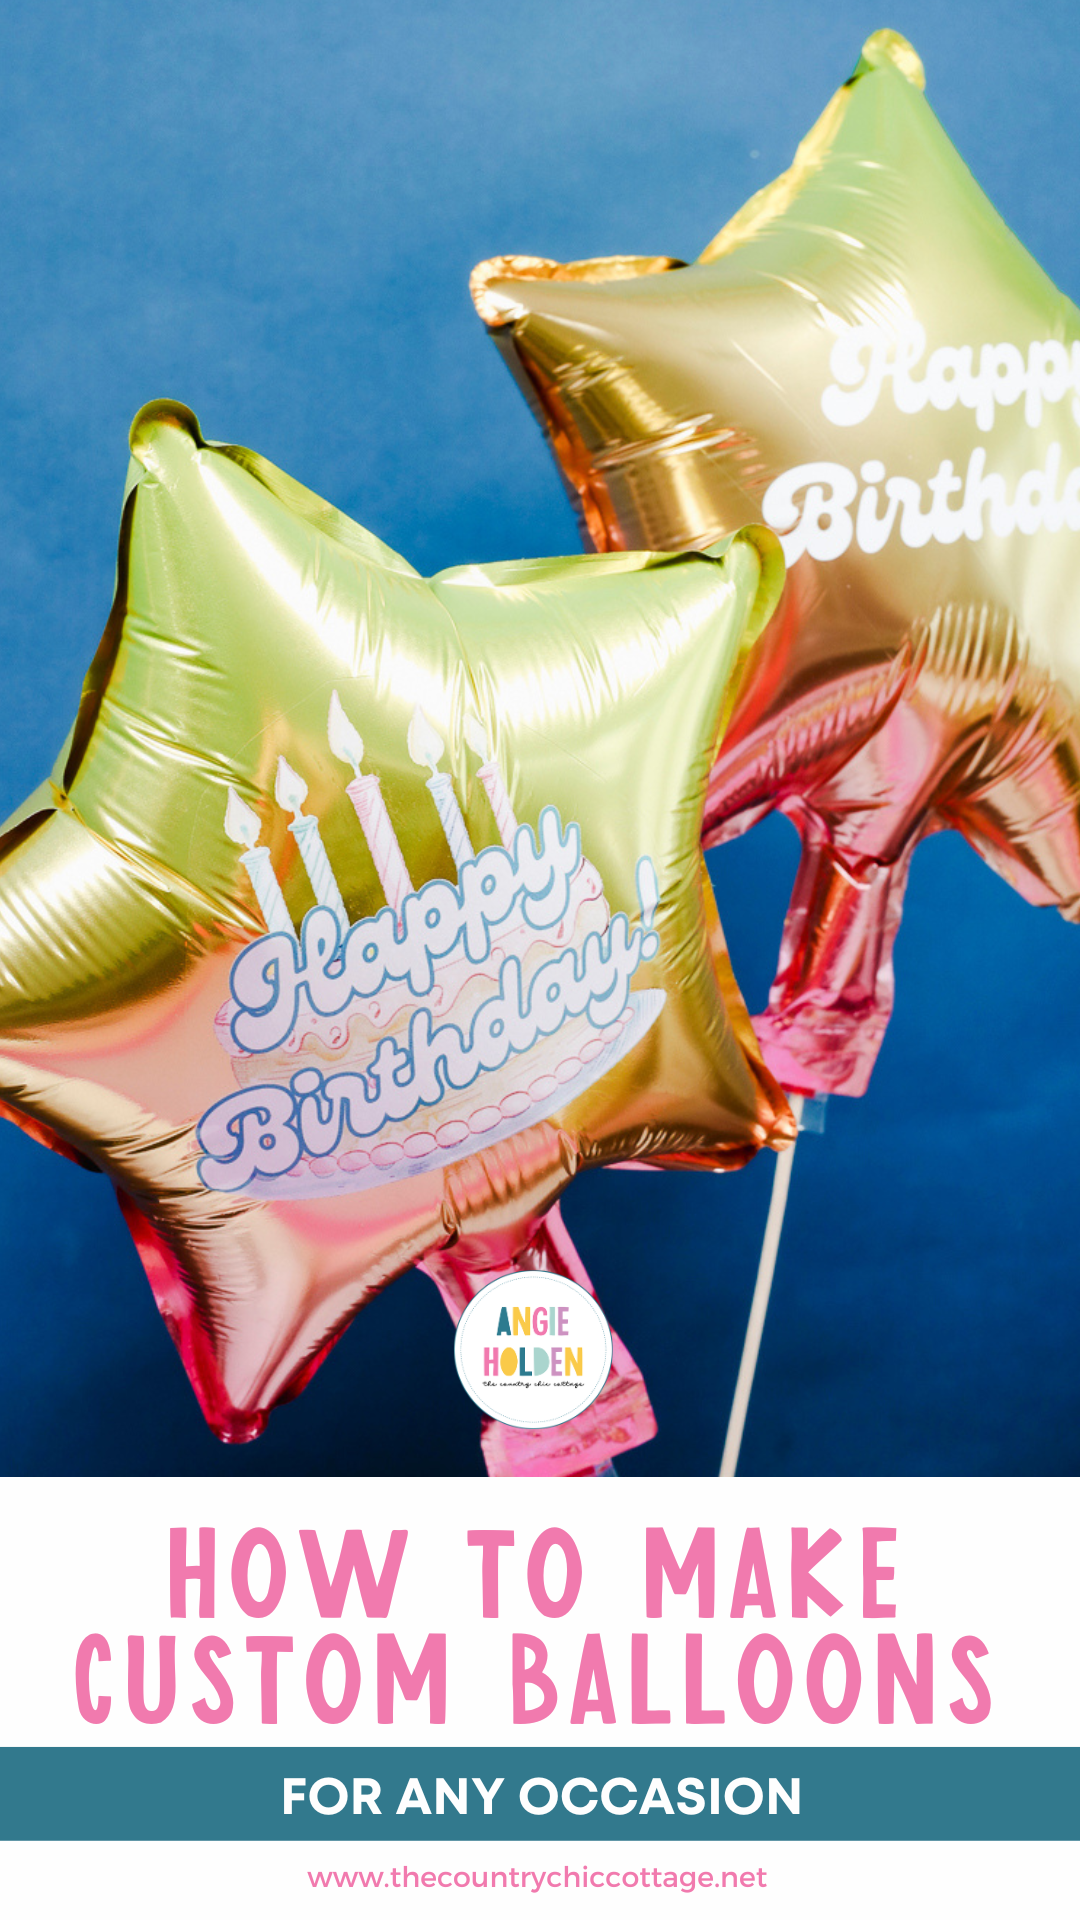
Plain mylar balloons are fine, but a personalized one feels like a real party. This tutorial shows two ways to customize them: cut a Happy Birthday design from permanent vinyl on a Cricut, or use a white toner print for multicolor designs. The tip that saves a balloon is sizing the design while the balloon is still flat, because it looks much smaller once it’s inflated. Add a name, an age or a theme and you’ve got DIY party decorations and the gift in one.
Get the full tutorial at The Country Chic Cottage.
30. Easy Party Centerpieces
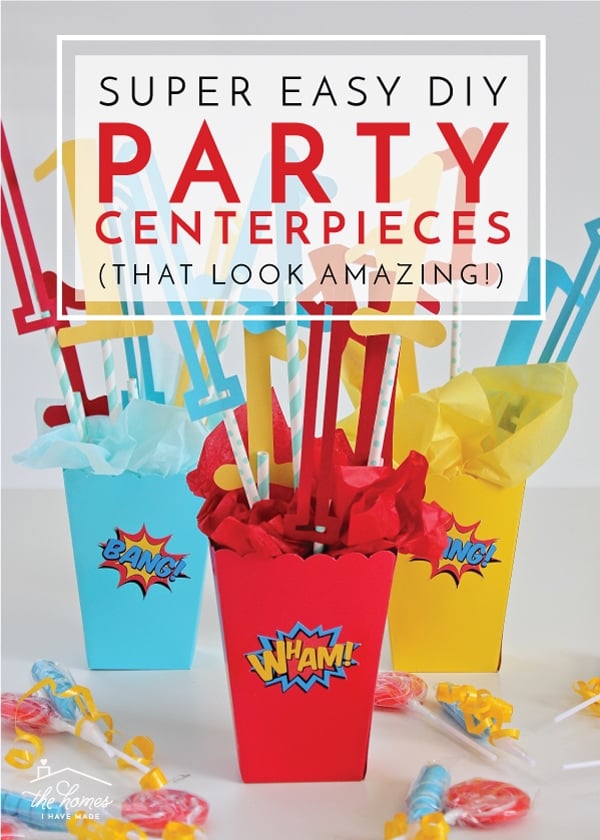
Short on time before a party? Do the centerpieces. This formula works for any theme: a container at least 6 inches tall (popcorn boxes, buckets, tins, jars), styrofoam inside, tissue paper to fill the top, then patterned straws, skewers and cardstock cutouts in your party colors. Dress the container with stickers, ribbon or decals and they come together in minutes. They travel well too, so they work at the park or a bowling alley. One per table makes the whole room look themed.
Get the full tutorial at The Homes I Have Made.
31. Shooting Star Cake Topper
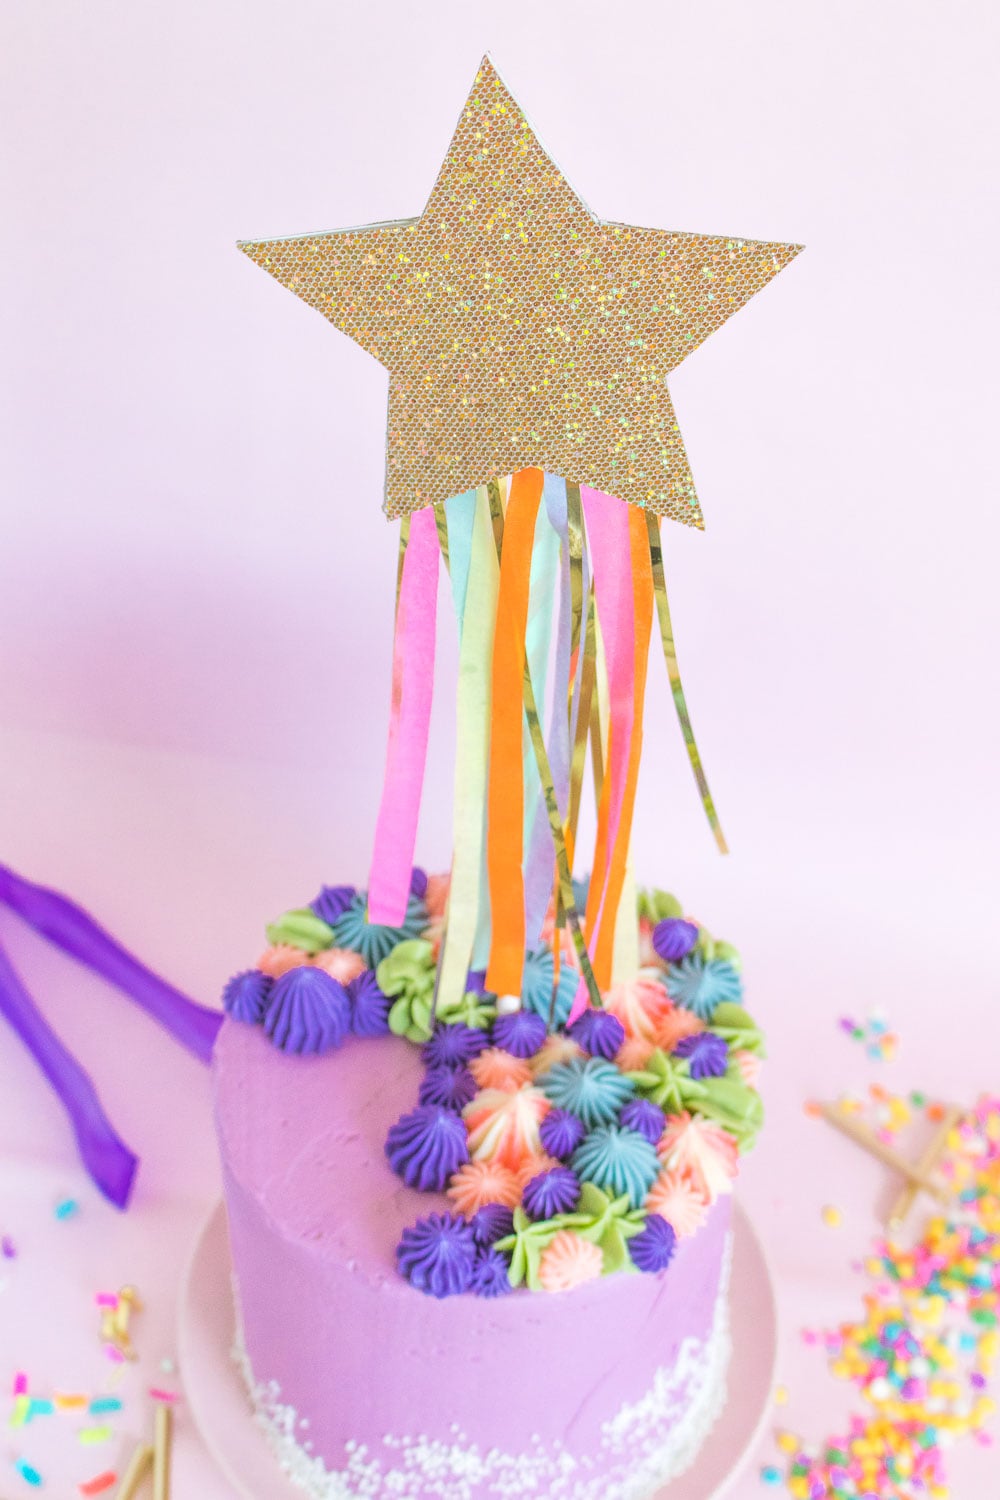
A homemade cake gets a big upgrade from a 10-minute cake topper. Two stars about 3 to 4 inches wide are cut from glittery gold cardstock, and half-inch strips of tissue paper plus gold tinsel are glued across the back of one. A long paper straw or dowel goes over the strips, then the second star sandwiches everything together. Trim the streamers to fit, push it into the cake and watch the tinsel catch the light. So cute for a birthday or a baby shower!
Get the full tutorial at Club Crafted.
32. No-Sew Paper Circle Garland
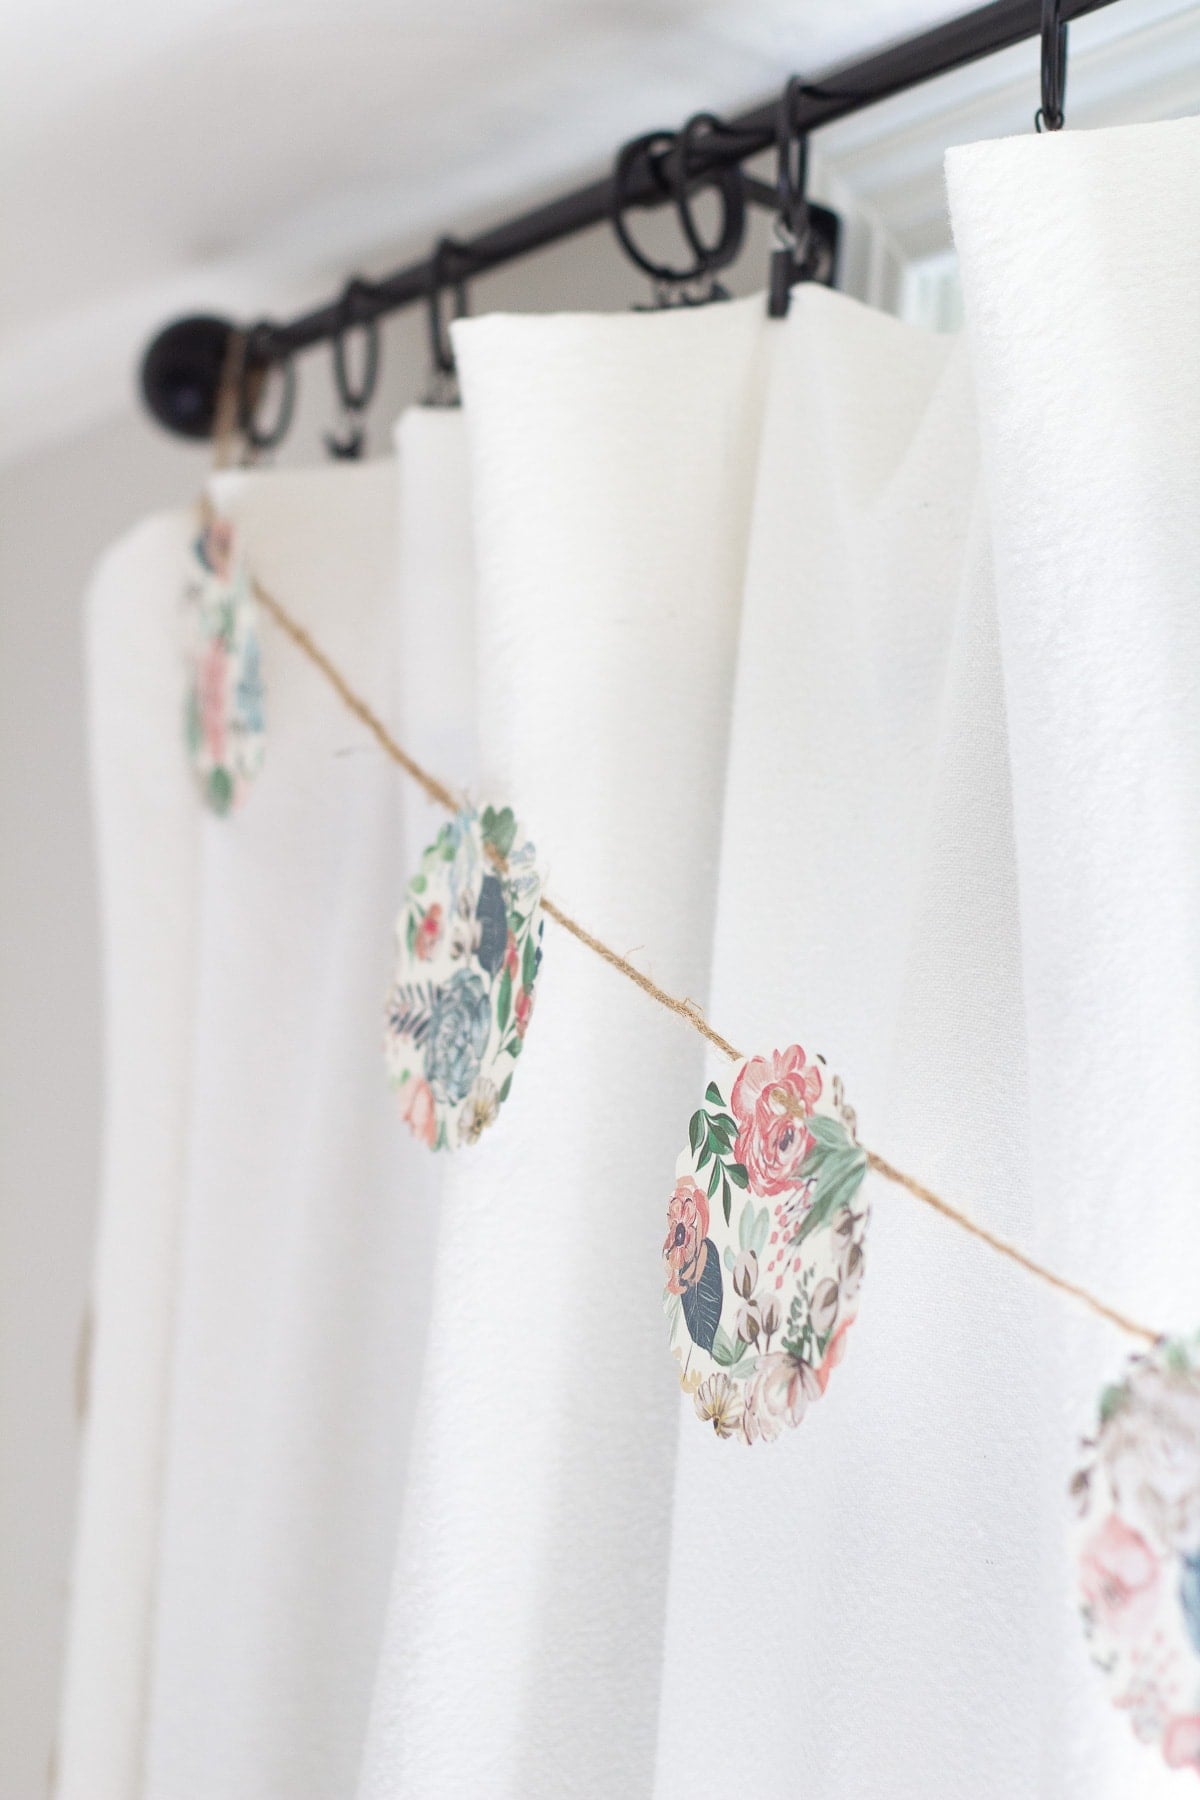
This no-sew paper garland takes about 10 minutes, and you don’t need a cutting machine. Two sheets of 12-by-12 scrapbook paper, a 3.5-inch scalloped punch, a 1/4-inch hole punch and 12 to 14 feet of twine are the whole list. Punch the circles, punch two small holes in each and thread them onto the twine. Floral paper gives it a soft shower look, but metallic or solid cardstock works too. Hang it securely and out of reach of little hands and pets.
Get the full tutorial at Bellewood Cottage.
33. Mini Fruit Pinata Garland
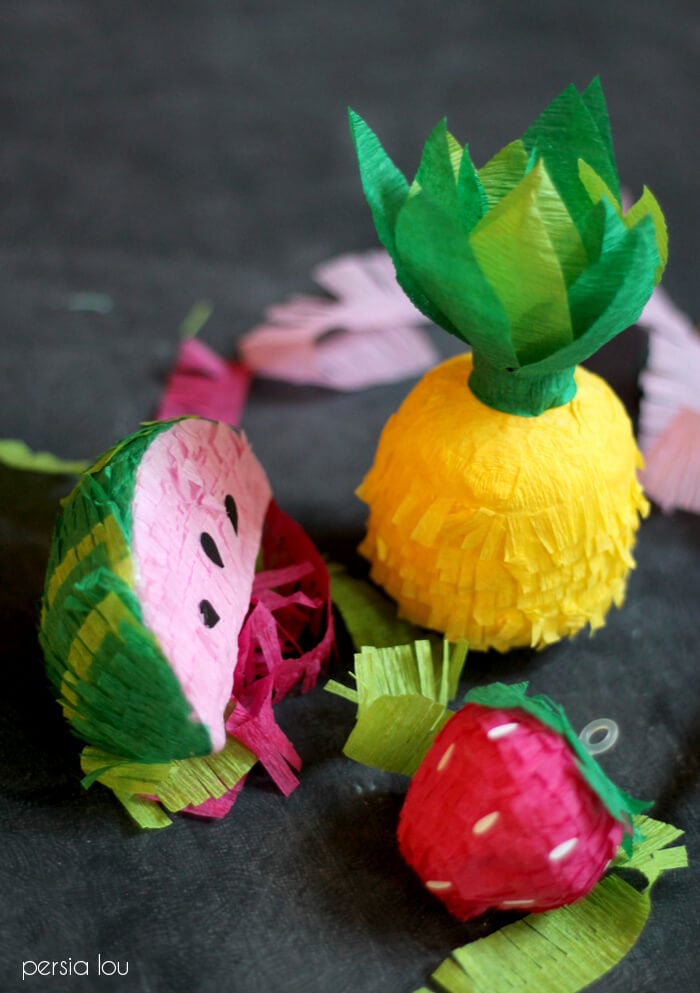
Planning a fruit-themed party? These mini fruit pinatas are foam balls shaped with a foam tool and wrapped in crepe paper fringe. A 4-inch ball cut into wedges becomes watermelon slices with cardstock seeds, a 3-inch ball filed into a cylinder becomes a pineapple with a crepe paper crown, and 2-inch balls get a point for strawberries. Folding the crepe paper before you snip the fringe speeds things up a lot. String them into a garland for a “Two-tti Frutti” birthday or a summer shower.
Get the full tutorial at Persia Lou.
34. Light-Up Marquee Numbers
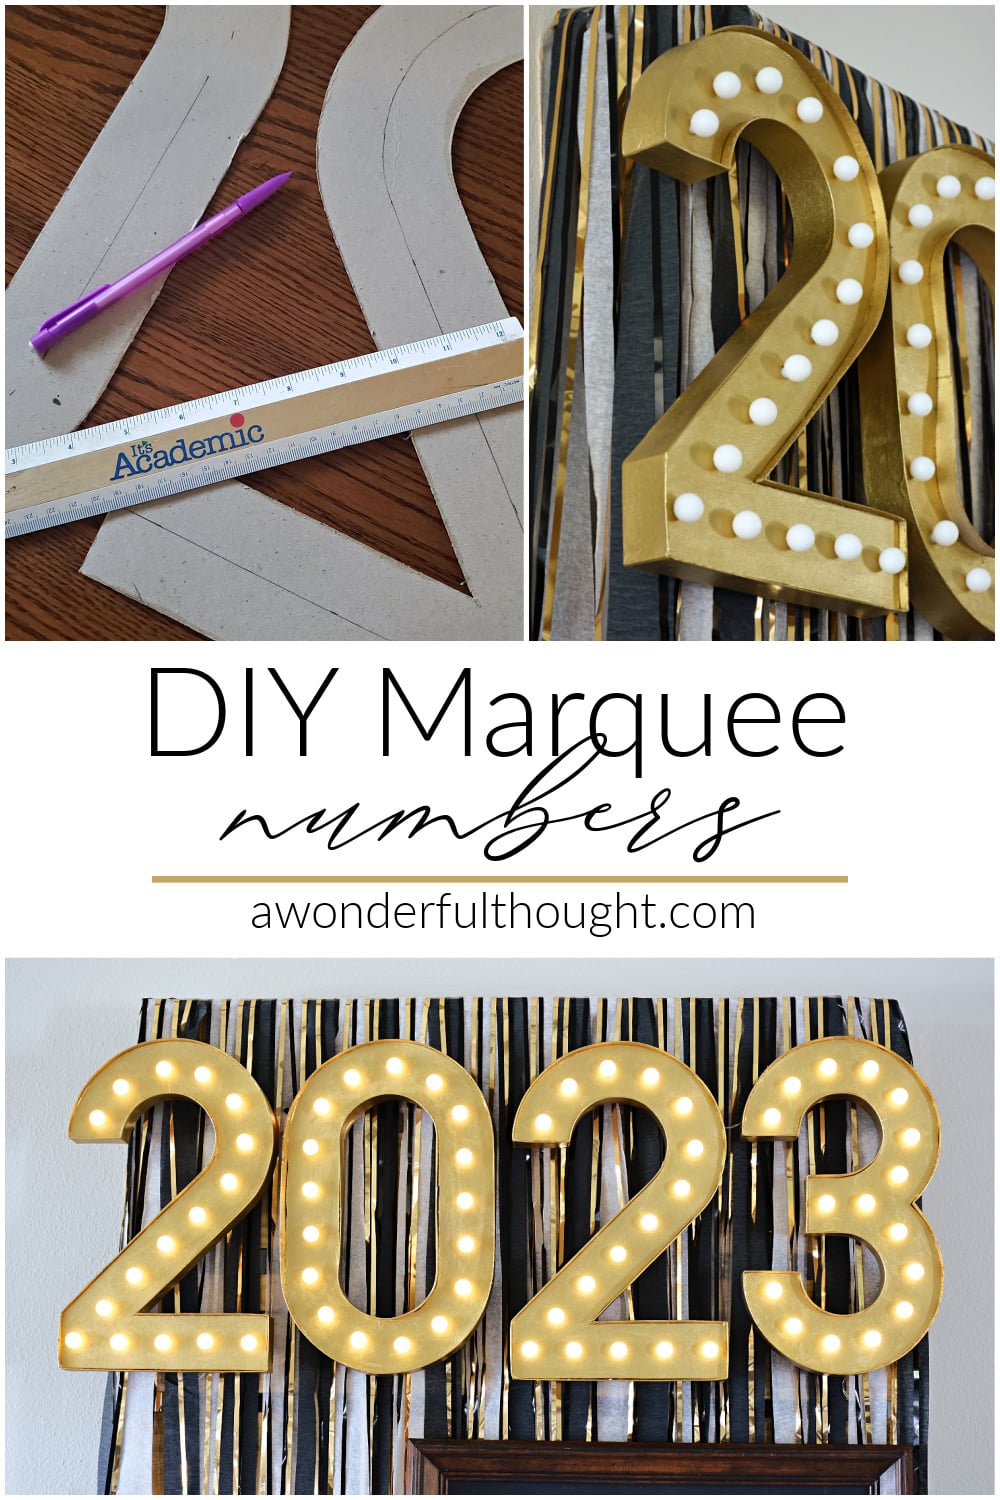
Light-up marquee numbers make any milestone birthday or New Year’s party look professional. These start as 16-inch paper mache numbers from the craft store. The face gets cut off with a pen knife, the inside is cleared out, and holes are marked down the center line for battery globe lights before everything is spray painted gold. Take breaks while cutting, because the knife work tires your hand. Spell out an age, a year or a graduation date and they’re ready for photos.
Get the full tutorial at A Wonderful Thought.
35. Paper Party Hats
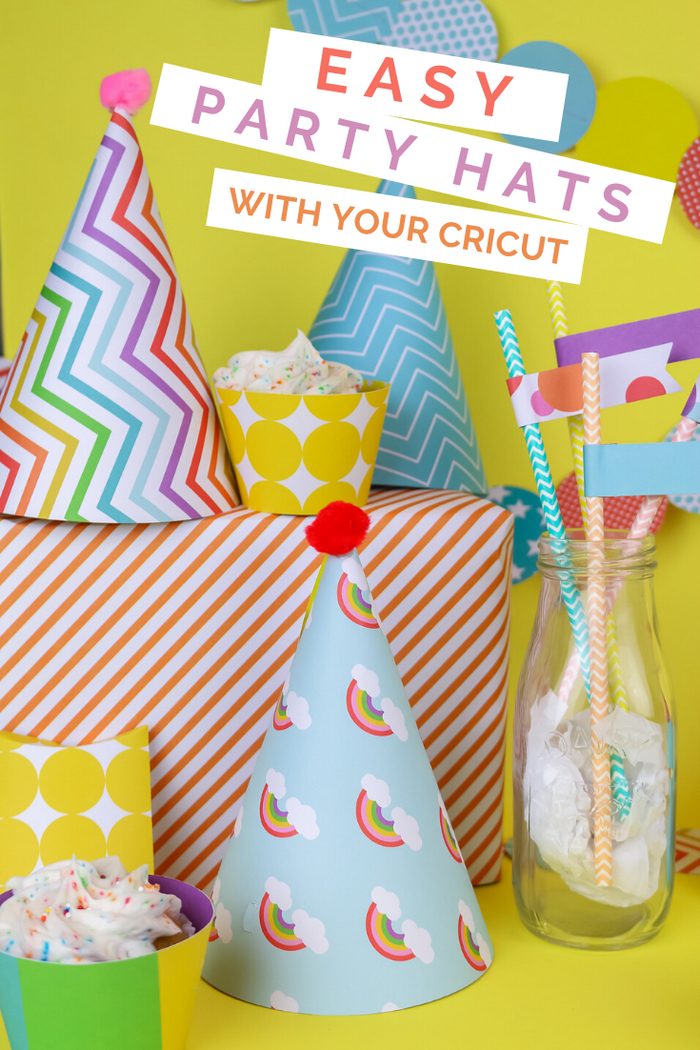
Party hats are completely silly, which is exactly the point. This tutorial cuts coordinated paper party hats from double-sided scrapbook paper with a Cricut, using a LightGrip mat and a scoring wheel for clean folds. The same paper pack also makes the cupcake wrappers, straw flags and garland circles, so everything on the table matches without a party-store bill. Pick a rainbow, polka dot or chevron pack, add a pom pom on top and hand them out at the door.
Get the full tutorial at Mad in Crafts.
36. Paper Lanterns With Tassels
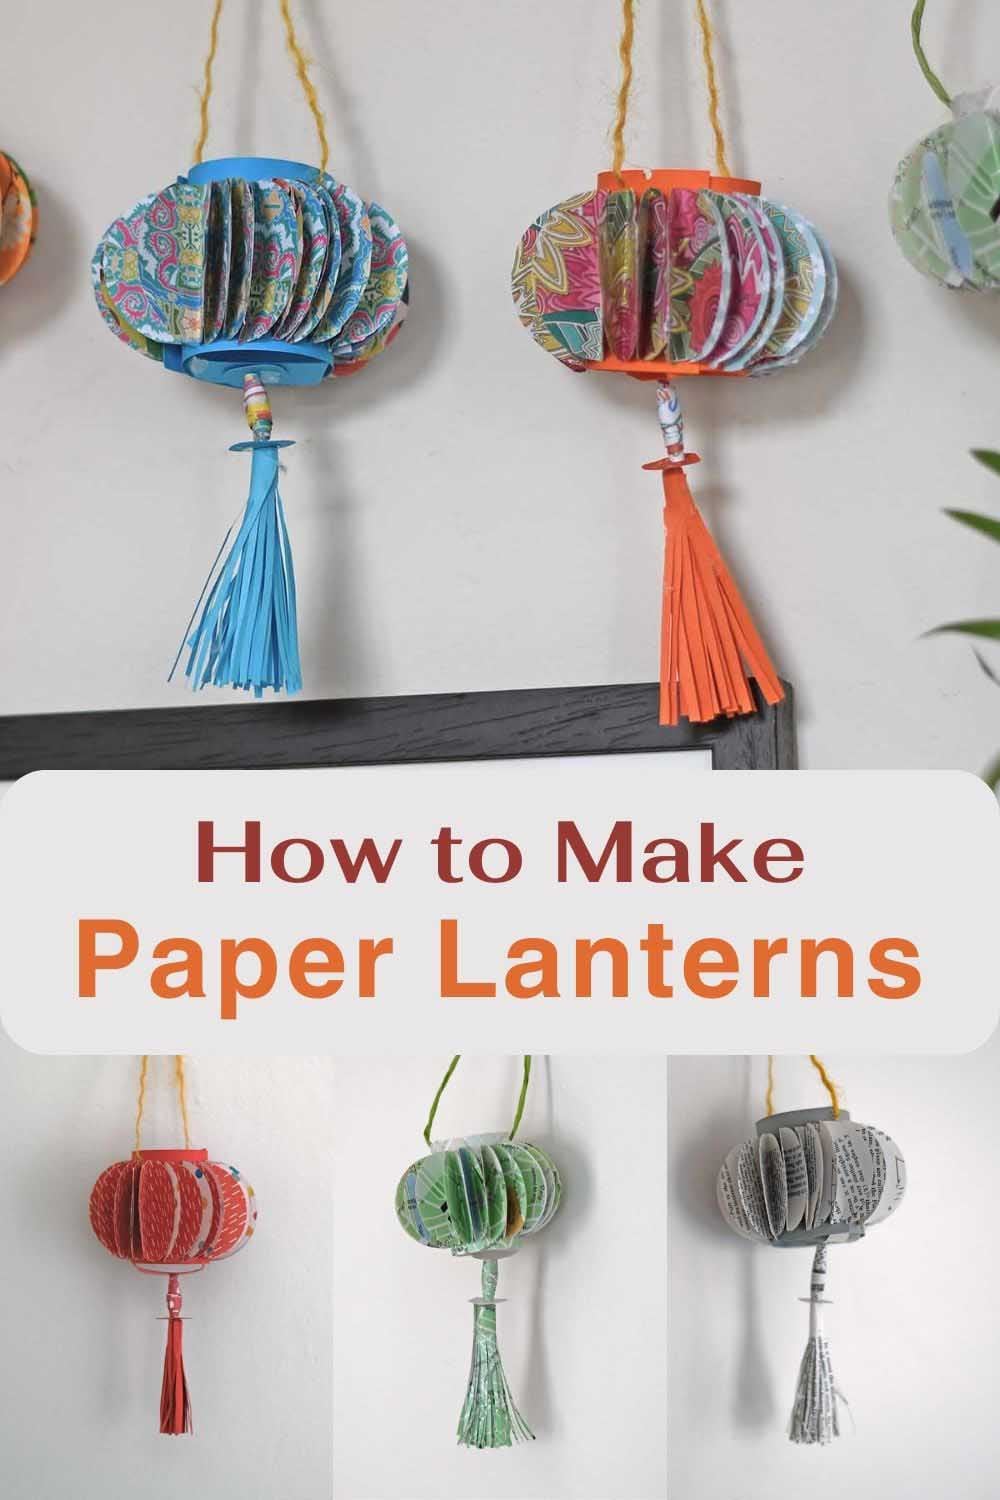
These decorative paper lanterns are made from one sheet of patterned paper each, plus cardstock for the frame. Old book pages and maps work too, so they’re a nice way to use up pretty scraps. Each lantern gets a hanging paper tassel and bead underneath, and it all goes together with a round punch, a skewer, hot glue and double-sided tape. They’re traditional for Lunar New Year but look just as good over a birthday table, and a small LED tea light inside makes them glow.
Get the full tutorial at Pillar Box Blue.
37. Tissue Paper Circle Confetti
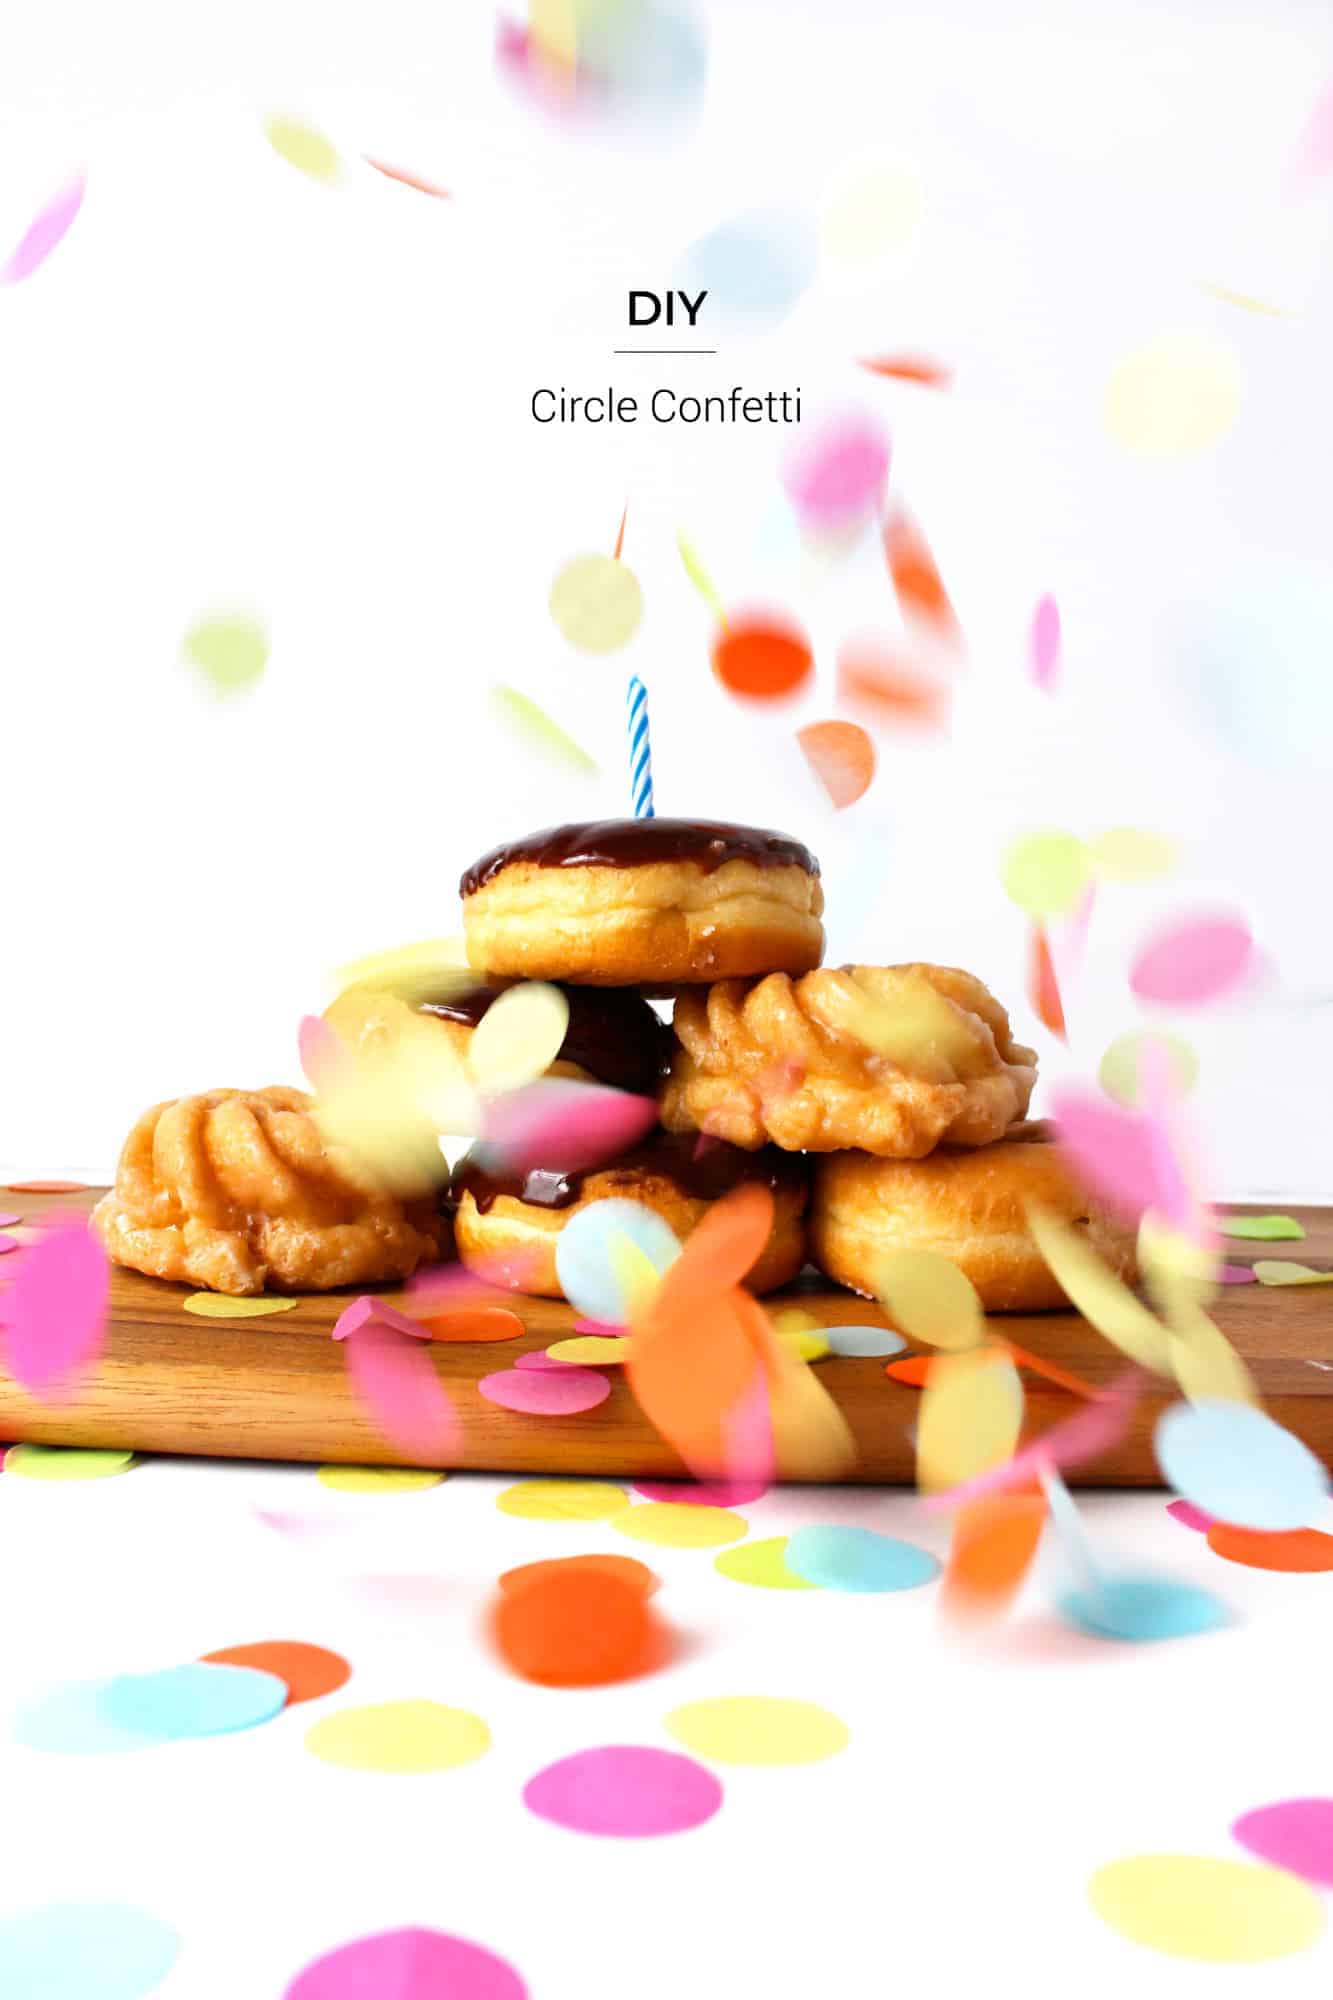
Confetti is the quickest way to make a table look like a party. This version uses tissue paper and a 1-inch circle punch. Layer up to eight sheets (any more jams the punch), then sandwich them between plain printer paper so the thin tissue cuts cleanly instead of snagging. A small bowl took about 15 minutes, so it’s a good one to punch in front of the TV the night before. Dollar store tissue or leftover gift wrap in any color combination works. Toss it everywhere!
Get the full tutorial at Fish & Bull.
38. DIY Wood Cake Stand
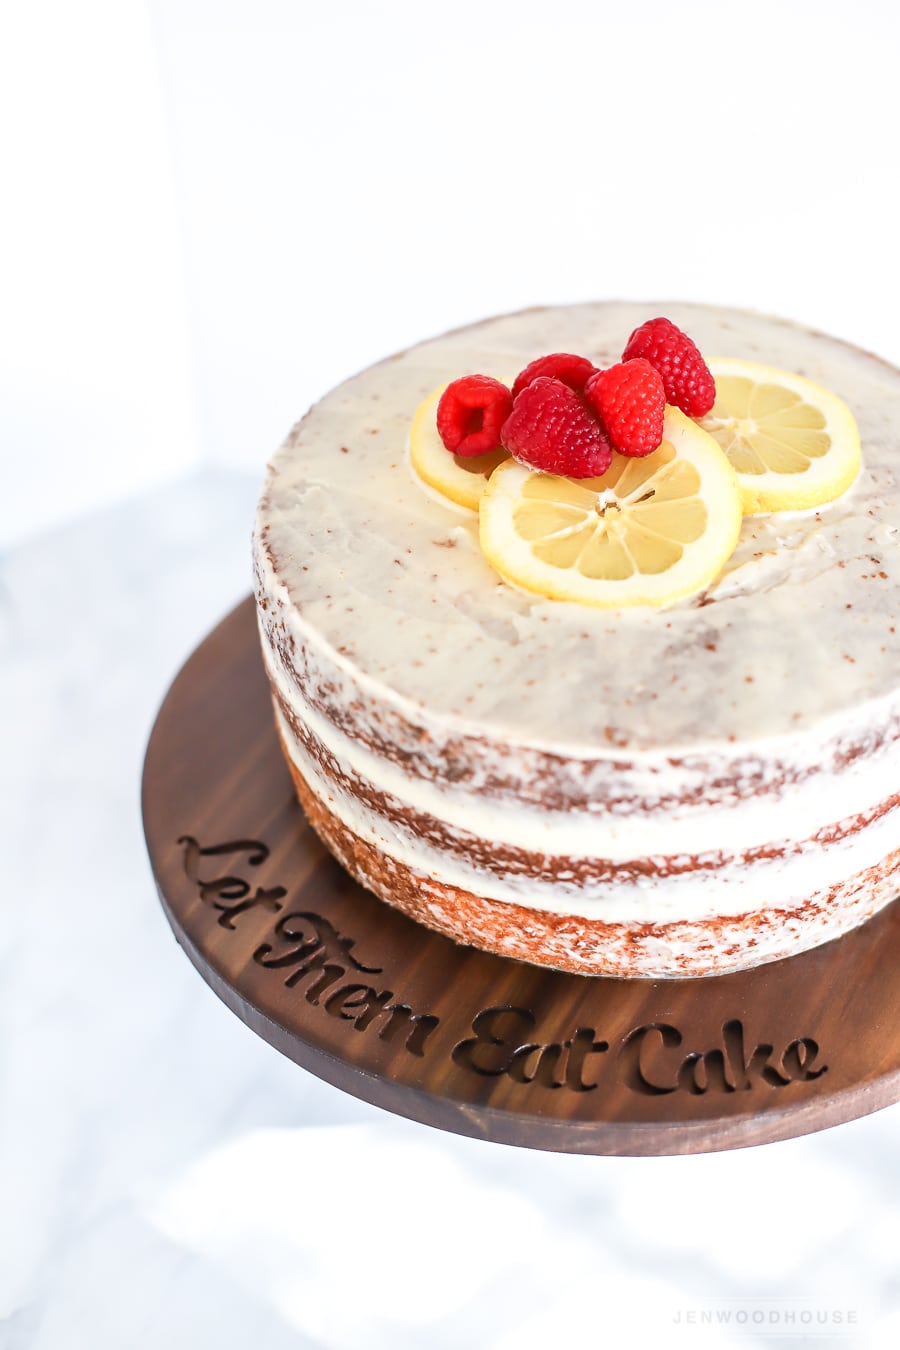
Every party table needs height, and this DIY cake stand gives you that and a keepsake. Scrap hardwood (poplar here) is glued up into a 13-inch square, then cut into a 12-inch circle with a jigsaw. A furniture bun foot, with its hanger bolt pulled out, gets stained, glued to the center and weighted with heavy books until dry. A food-safe finish like beeswax, mineral oil or salad bowl finish goes on last. The carved lettering is a bonus if you have a carving machine.
Get the full tutorial at Jen Woodhouse.
39. Disco Ball Drink Stirrers
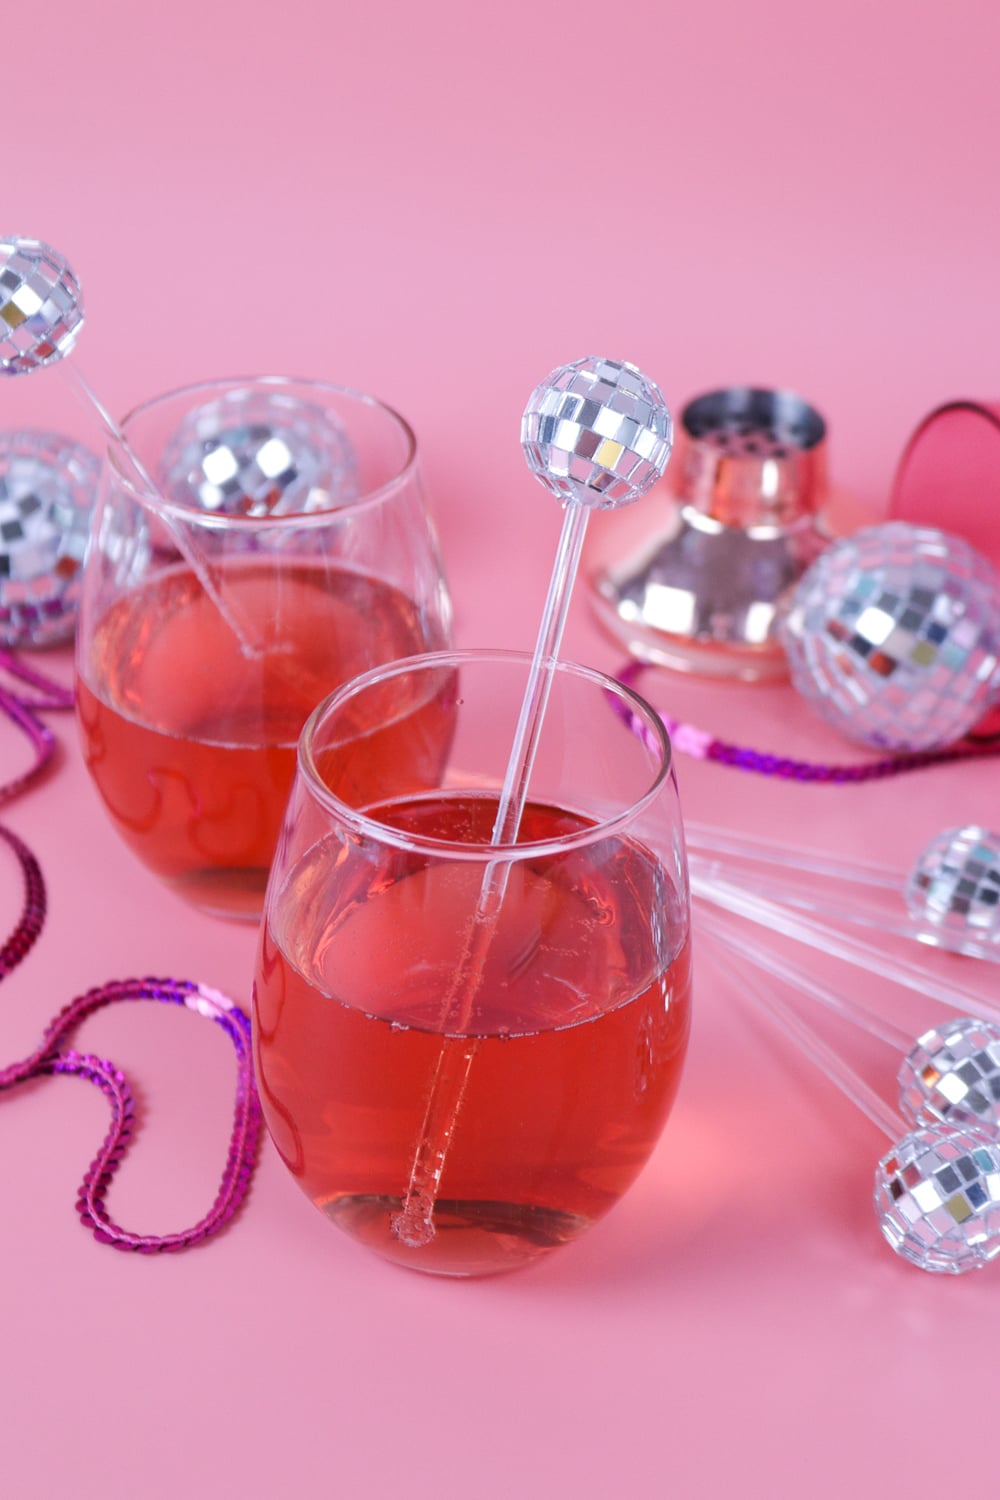
Disco is everywhere right now, and these drink stirrers are the easiest way in. You need mini 1-inch disco balls, plastic drink stirrers and a hot glue gun. Glue a ball to the plain end of each stirrer and hold it a few seconds until it sets. Styrofoam disco balls without a hanging hole work best, because you can push the stick right in for a sturdier fit. Pick off the glue strings, pop one in every glass and your New Year’s, birthday or bachelorette drinks are dressed for the party.
Get the full tutorial at Club Crafted.
40. 3D Paper Stars
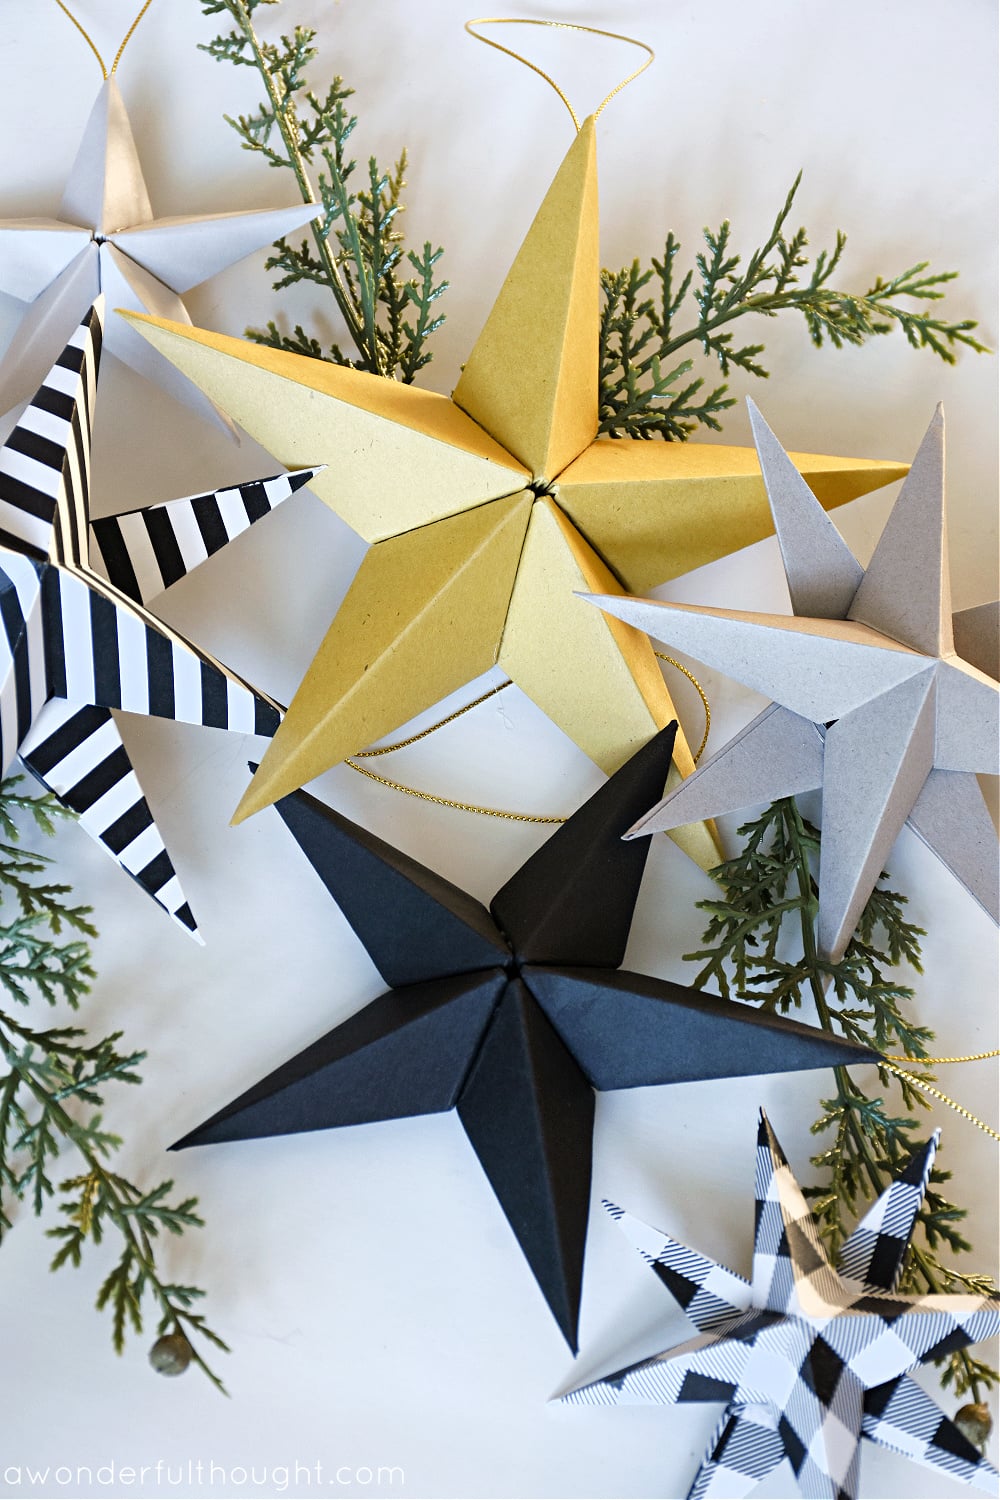
Paper stars look complicated, but they are just squares folded along creases and glued. This tutorial shows two kinds: a single-square star and a fuller one made from two squares (4.5-inch squares make about a 6-inch star). Cardstock or scrapbook paper, a bone folder for crisp creases and a little hot glue are all you need, and gold cord hangs them. Black, gold and stripes look modern for New Year’s, and bright colors suit birthdays and weddings. Hang a cluster at different heights.
Get the full tutorial at A Wonderful Thought.
41. Light-Up Present Decor
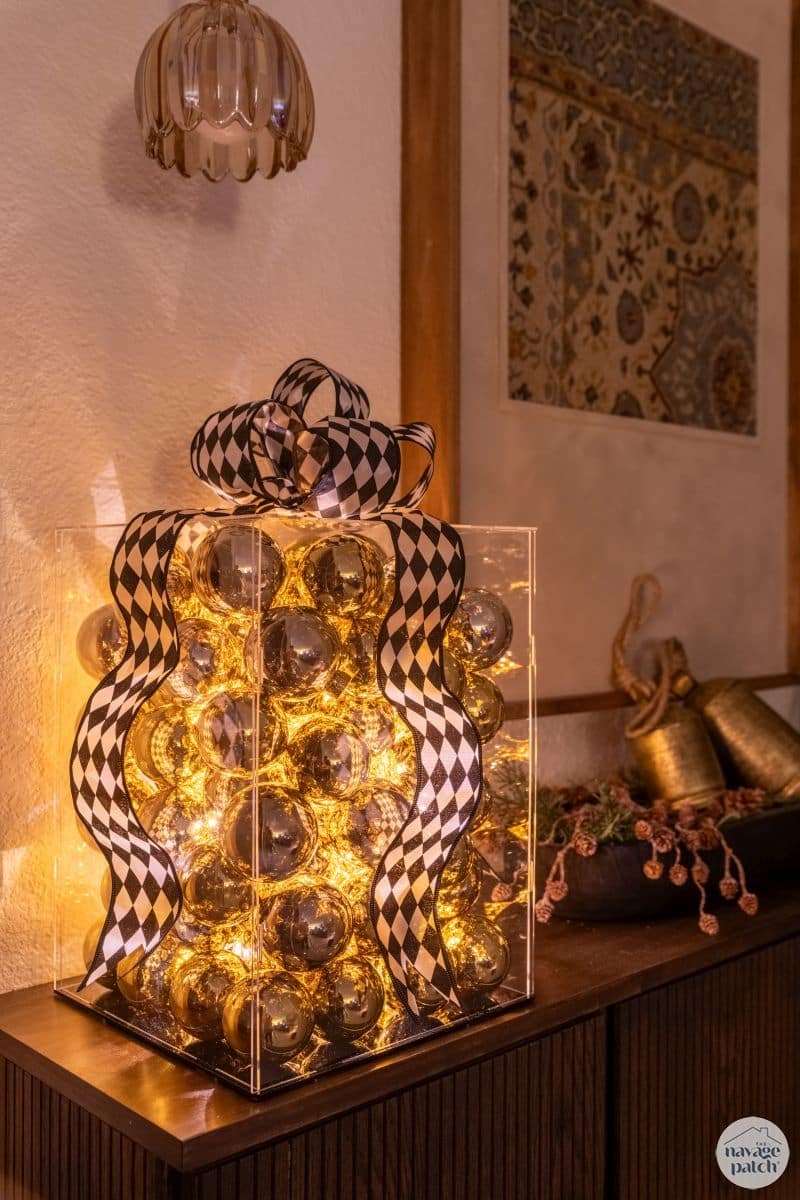
Want a holiday party centerpiece that twinkles? This oversized present is a clear acrylic box (it snaps together with little rubber bands) filled with shiny ornaments in two sizes and remote-controlled fairy lights. The smaller ornaments go around the edges first, leaving room in the middle for the lights, then the rest fill in around them. A big harlequin ribbon bow on top finishes it. Set it on a sideboard or the gift table at a Christmas party and turn the lights on when guests arrive.
Get the full tutorial at The Navage Patch.
42. Gold Paper Disco Balls
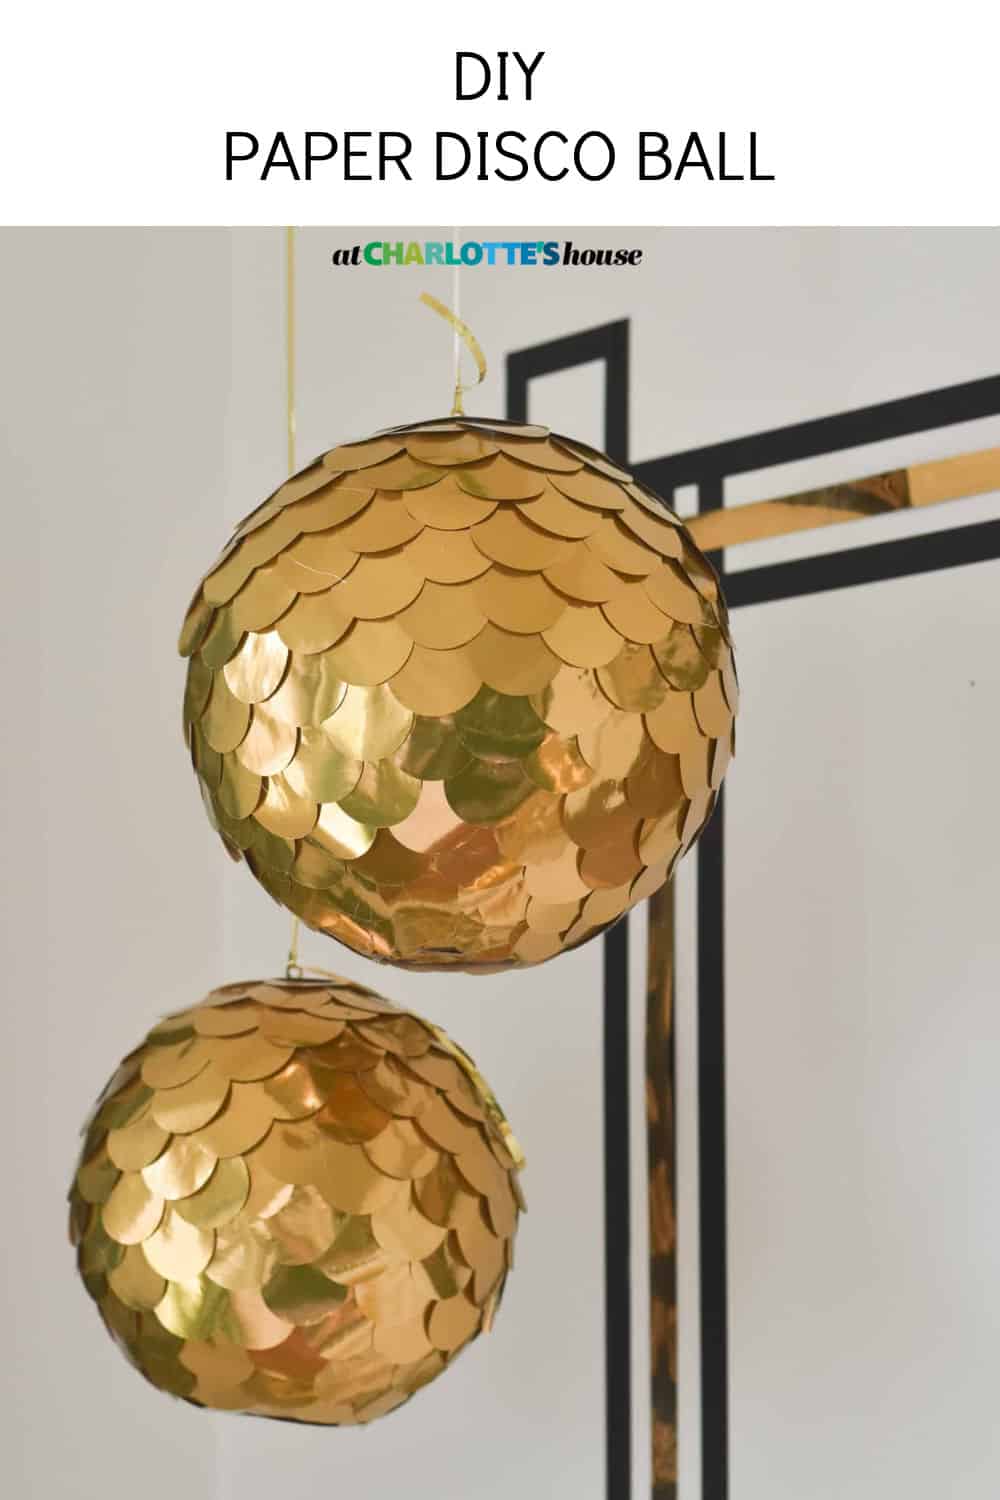
Ringing in the new year? These gold paper disco balls are styrofoam balls covered in punched circles of gold wrapping paper. Cutting the paper into strips first makes it easier to feed into a 1.5-inch circle punch. Starting from the flat edge at the bottom, each row of circles gets a small bead of hot glue, overlapping like scales as you work up. Not all metallic wrapping paper punches cleanly, so test yours first. Hang a few at different heights for New Year’s Eve or a disco birthday.
Get the full tutorial at At Charlotte's House.
43. Scrappy Fabric Garland
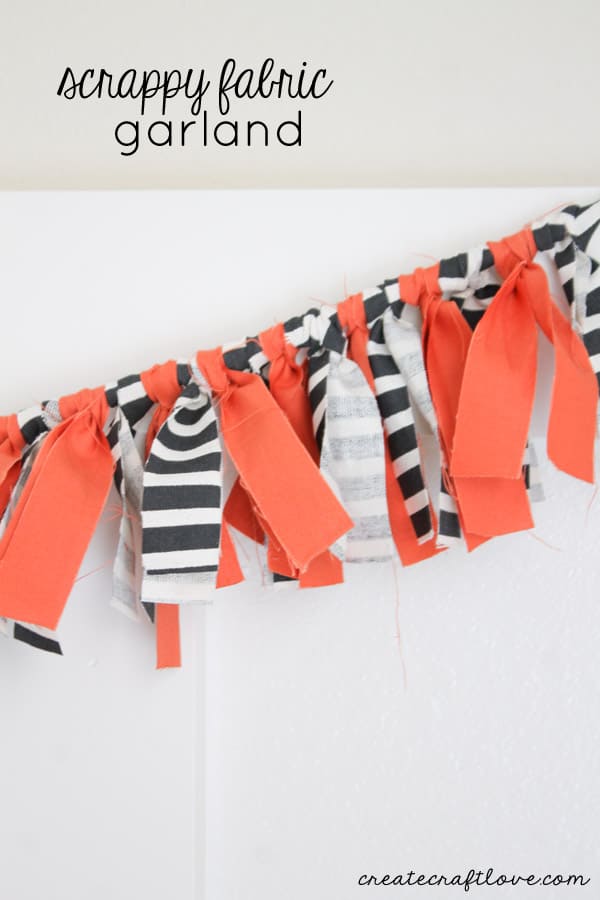
Got a fabric stash? This scrappy fabric garland is no-sew and goes together fast. Half a yard of coordinating fabrics is cut into 1-inch strips with a rotary cutter, then into 10-inch pieces, and each one gets tied onto hemp rope with a lark’s head knot. Push the knots close together for a full, fluffy look. The one pictured is orange and black for Halloween, but any colors work for a birthday, a baby shower or a holiday. It’s a great way to use up leftovers.
Get the full tutorial at Create Craft Love.
44. Photo Place Cards
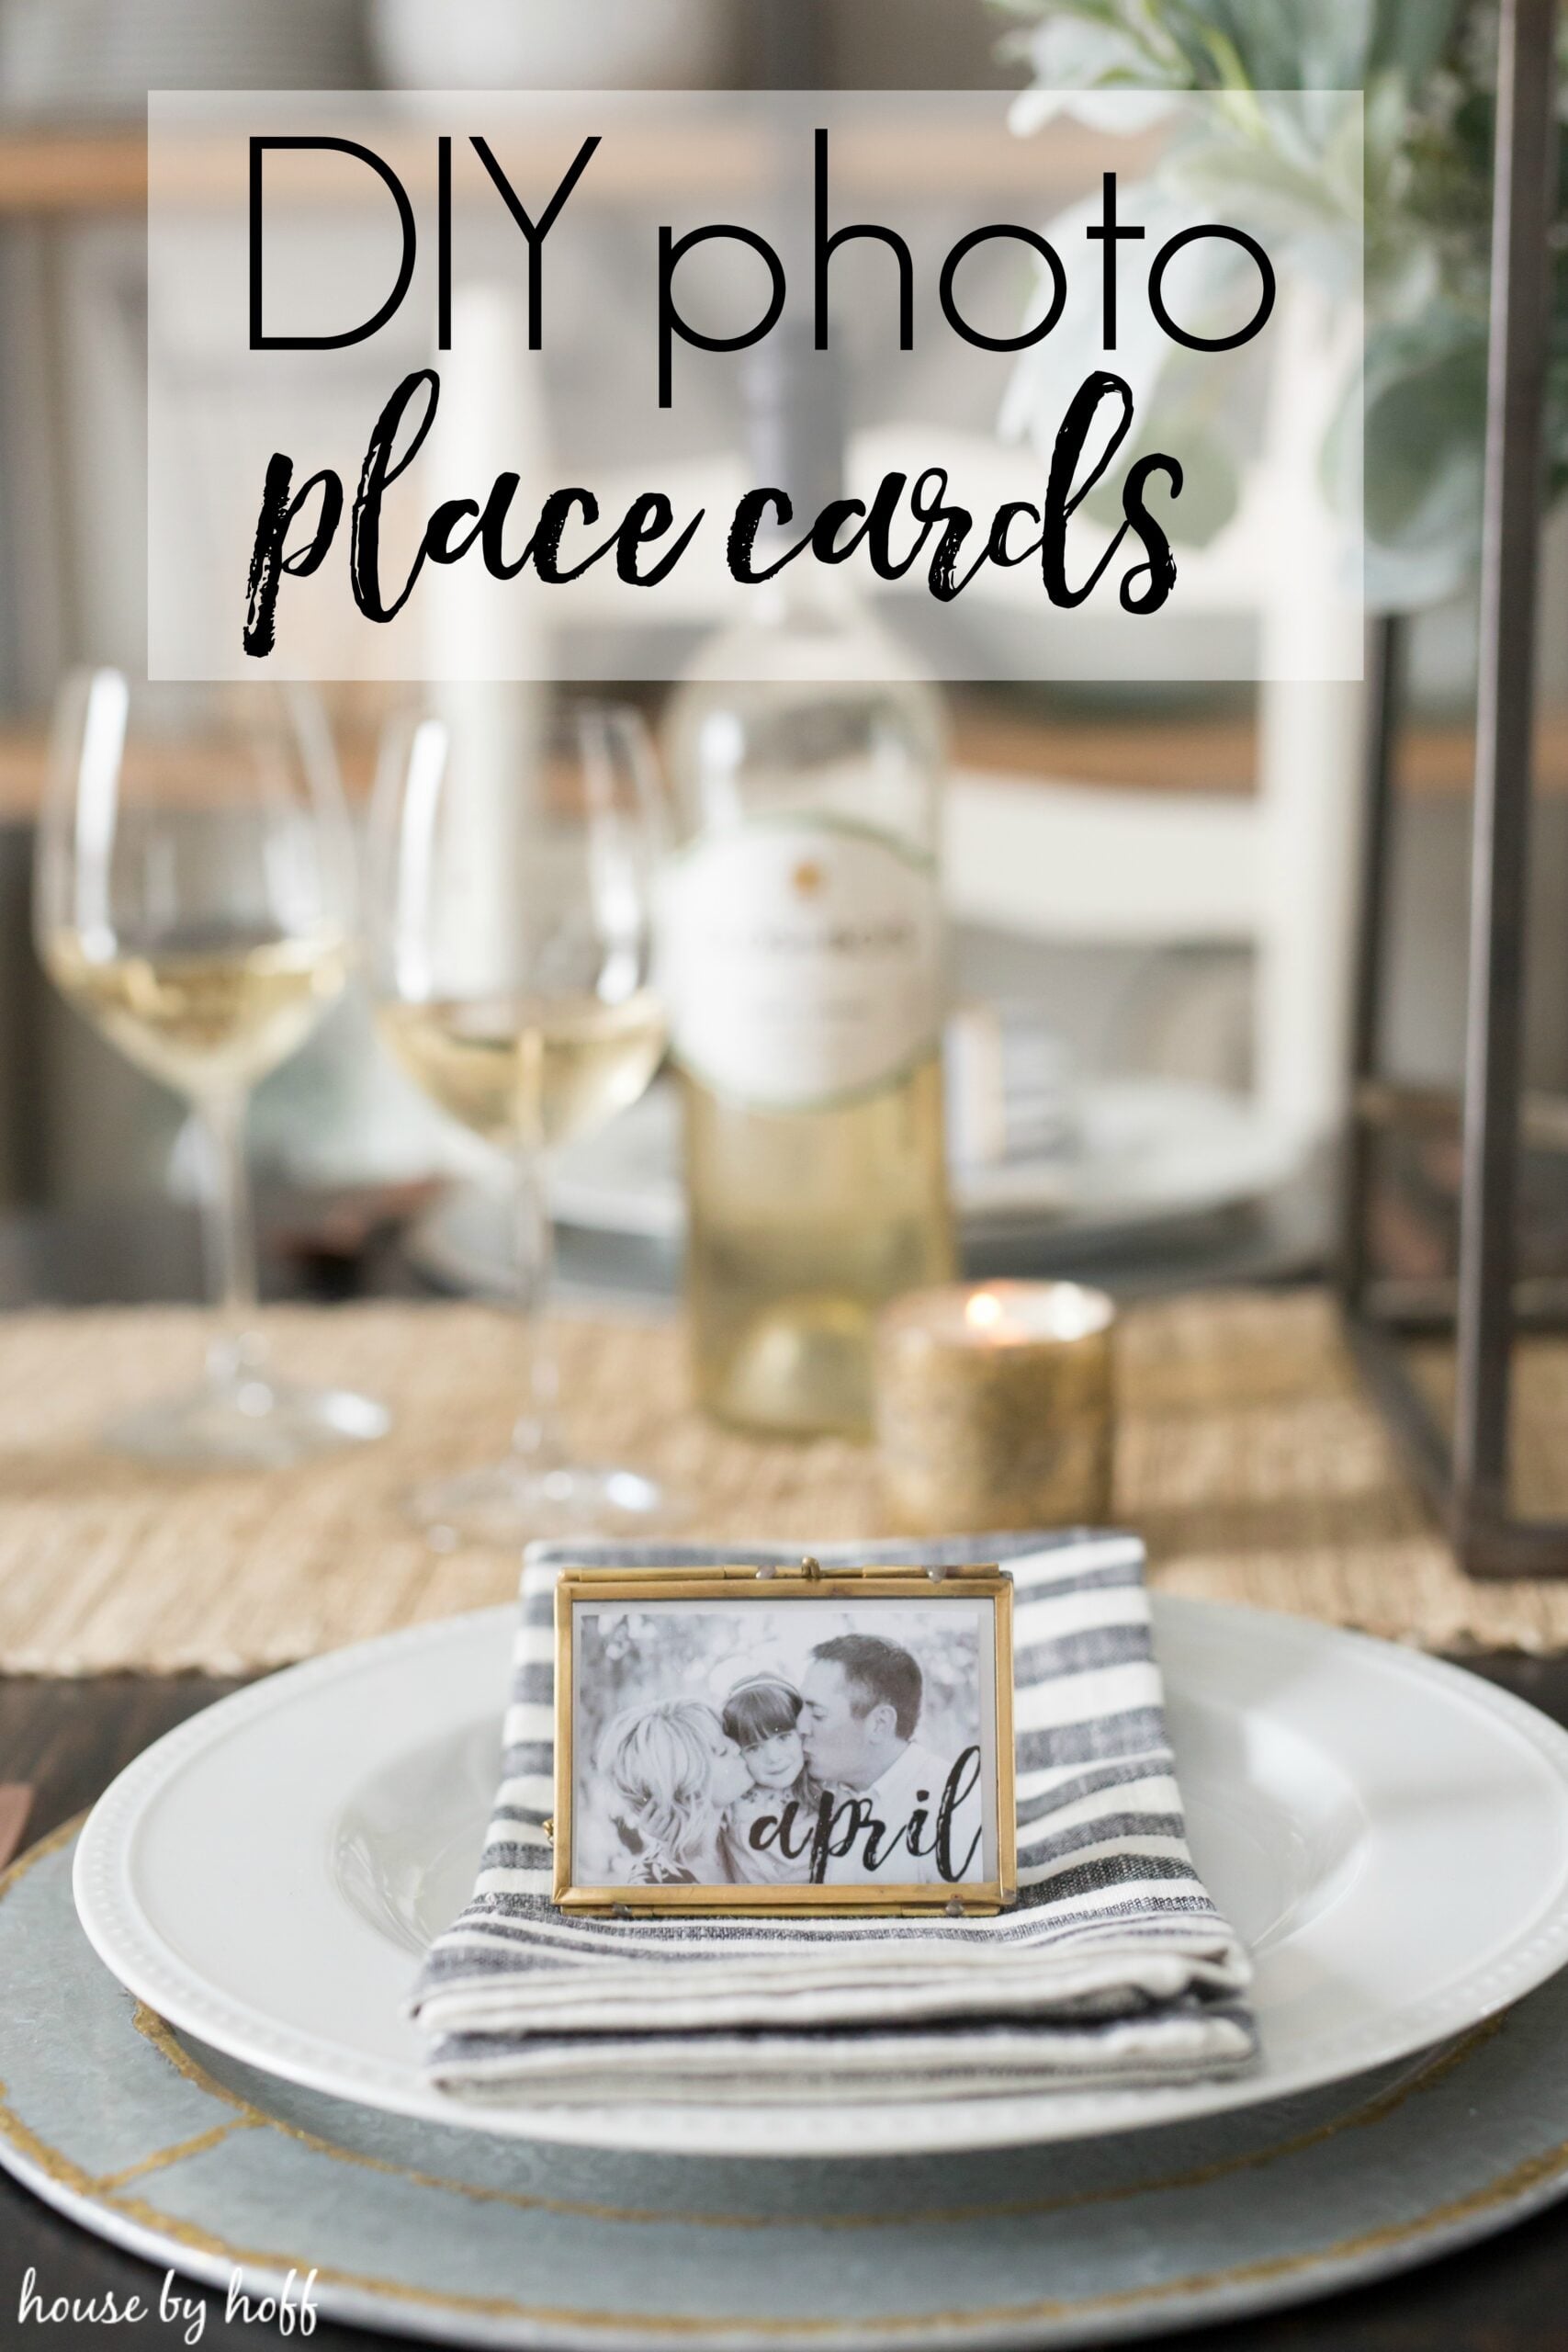
Place cards with a photo of each guest are the kind of detail people talk about after a dinner party. These use small metal place card holders with a printed photo and a hand-lettered name slipped in, set on a folded napkin on each plate. Any place card holder works, or you can fold your own tri-fold from cardstock. They’re great for birthday dinners, holidays, showers and anniversary parties, and guests usually take them home. Old family photos make them extra fun.
Get the full tutorial at House by Hoff.
45. Reversible Birthday Crown
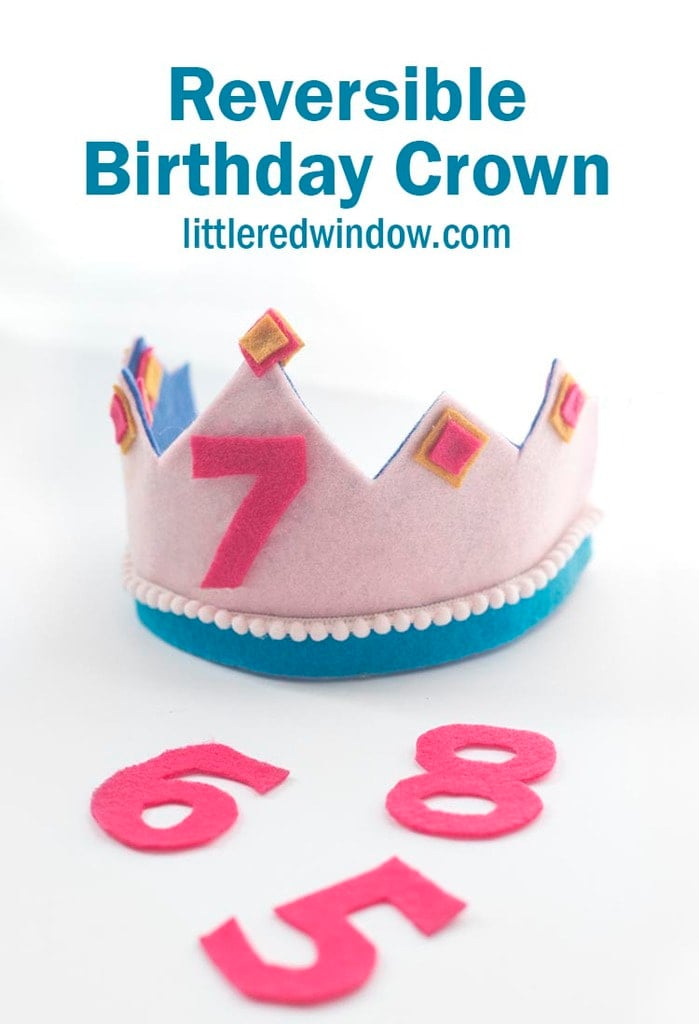
Tired of making a paper crown the night before every birthday? This reversible felt crown takes about 20 minutes and around $5 in materials. You make a paper template (folding it into eighths keeps the peaks even, with a taller front peak for the number), cut two crown shapes from different felt colors and decorate each side with hot glue. The two pieces are stitched together with elastic at the back, so it fits year after year. Use small pom pom trim, since big ones feel odd to wear.
Get the full tutorial at Little Red Window.
46. Crepe Paper Flowers
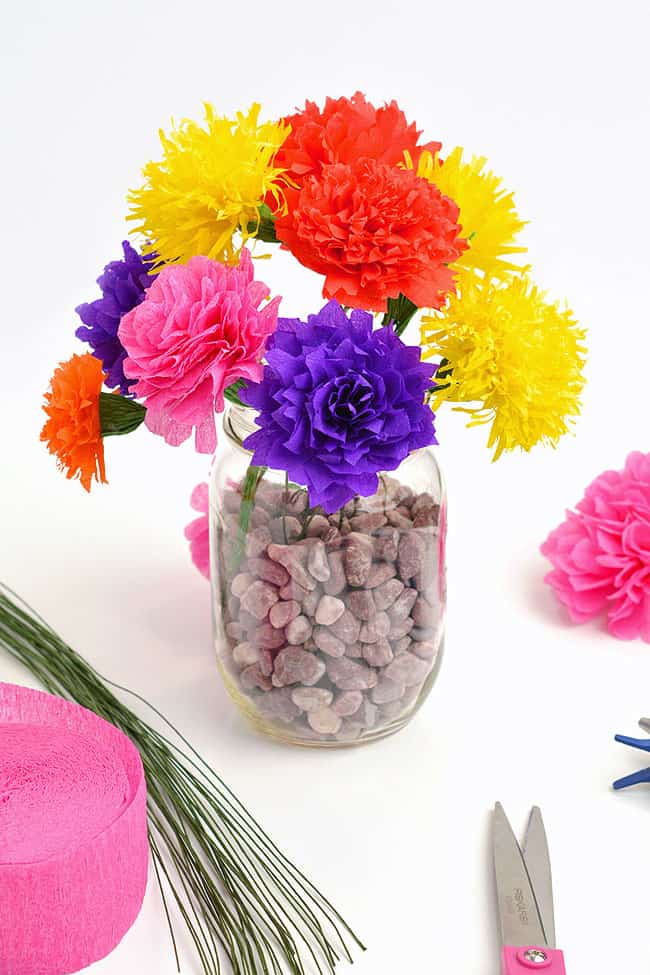
Party streamers can become flowers that look surprisingly real. This crepe paper flower tutorial uses ordinary crepe paper streamers with floral wire, masking tape and a glue gun, and it shows five different flower styles, so a whole bouquet can come together in under an hour. Bright purples, pinks, reds and yellows make a cheerful centerpiece in a jar, and you can tie a few blooms along a ribbon for a garland. Unlike fresh flowers, they’ll still look good the morning after the party.
Get the full tutorial at One Little Project.






