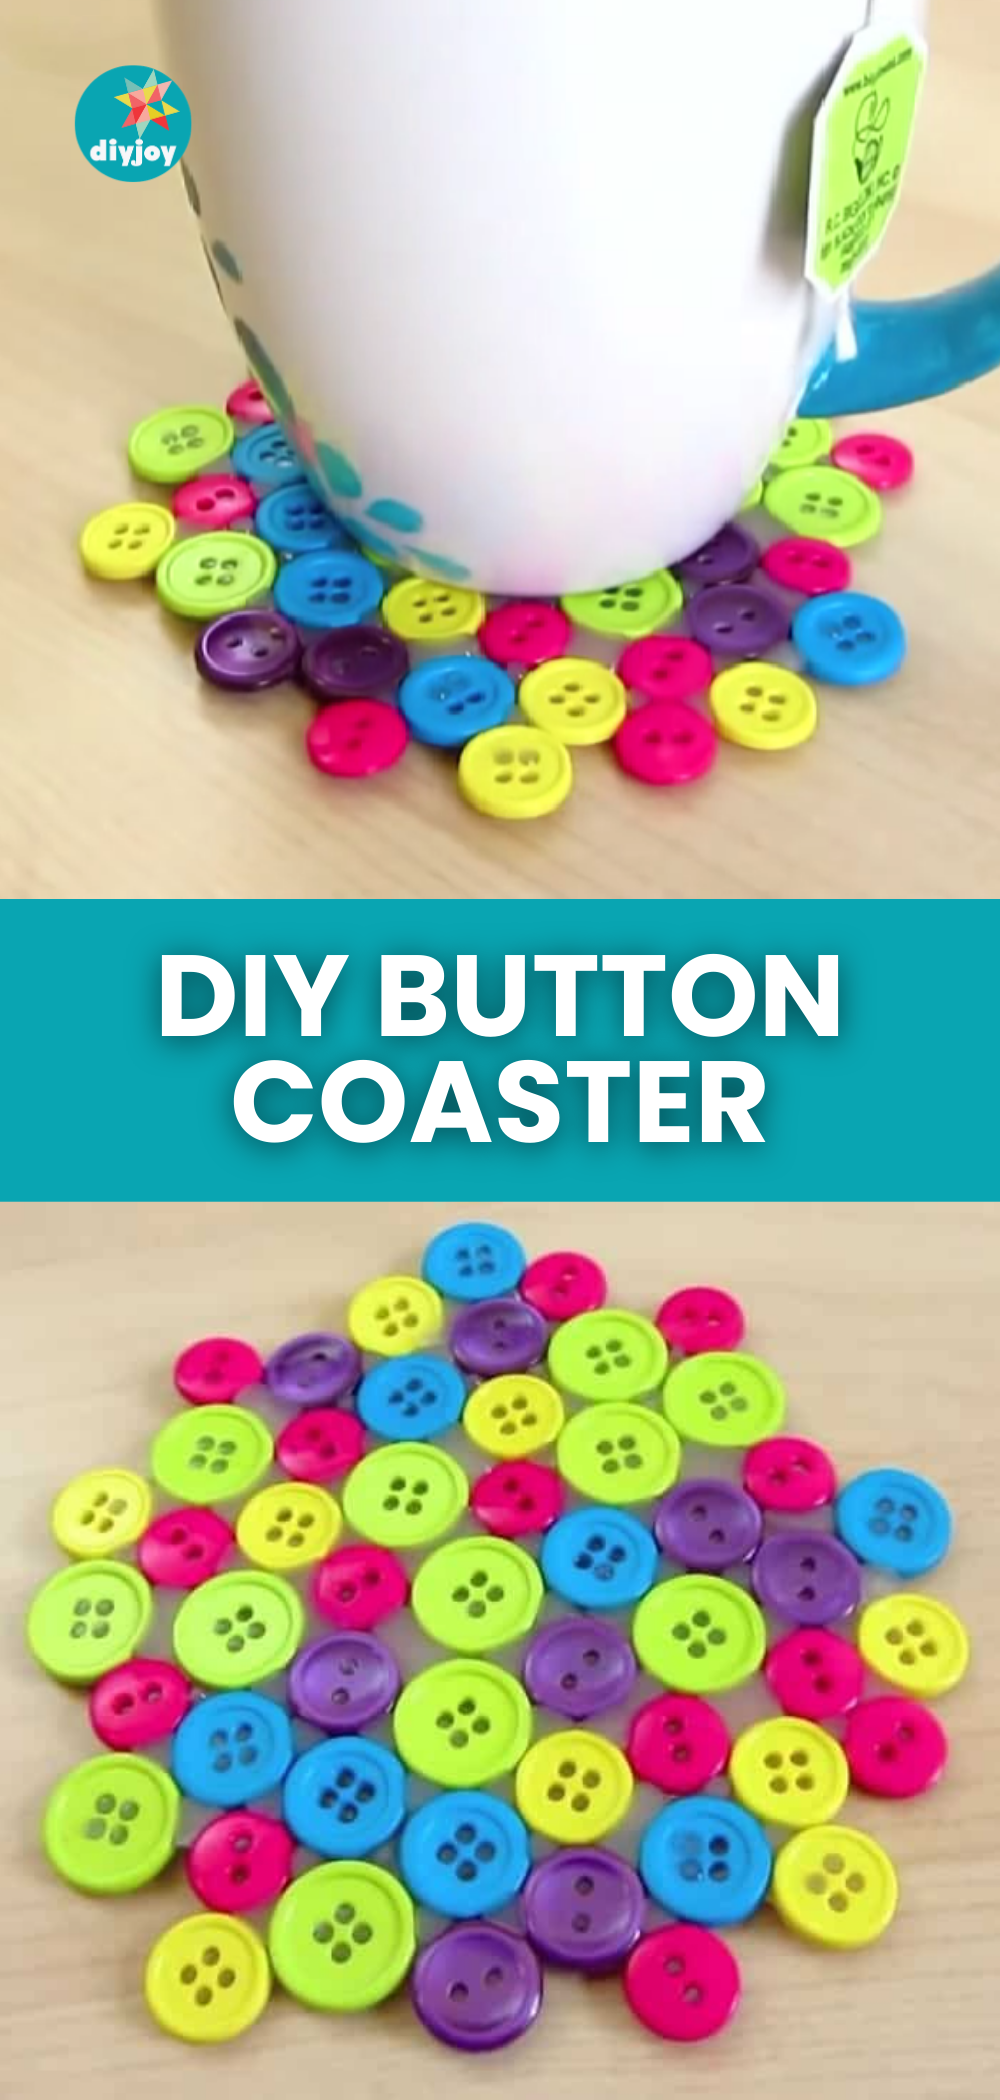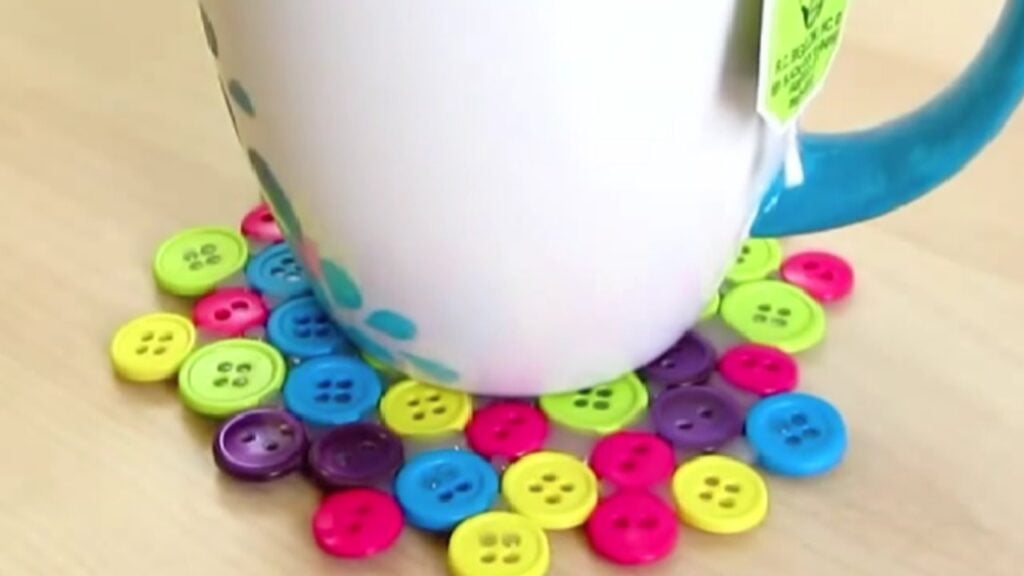
I found this video tutorial by Sea Lemon on YouTube about a nice project using cute buttons that you may have laying around the house. In my case, I have a few assorted colored buttons in my sewing kit but I decided to purchase some more in order to create more than one coaster. This DIY project idea was so easy to make and rather quickly too. I made a couple of them and gave them to my parents, they absolutely loved them!
Materials:
- Painter’s tape
- Glue gun and glue sticks
- 50 small buttons
- Paper
Directions:
Step 1
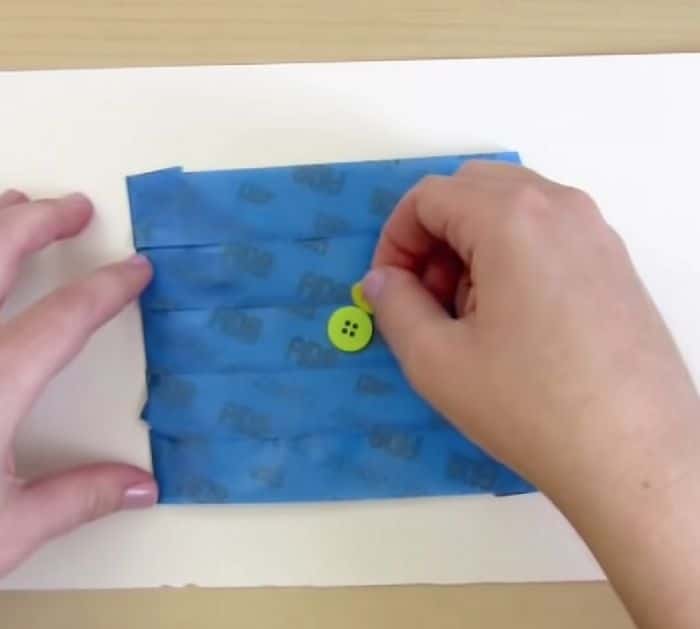
Lay a piece of paper on a flat surface, then grab a tape that’s not that sticky, or in this case, a painter’s tape. Cut a piece of tape and fold over both ends, then stick it down on the paper. Overlap the rows of tape with the sticky side up, then form the area into a square, it should be about 5*5 inches or 13*13 centimeters.
[social_warfare]
Step 2
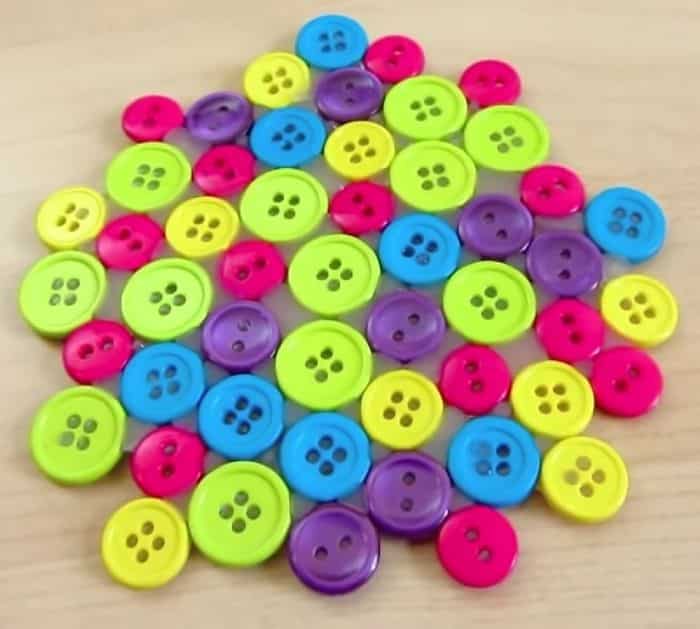
Starting from the middle of the rows of tape, place the buttons right side facing down, and continue to stick them around in whichever or however you want, but make sure that the surface is big enough for your cup or it’s about 3.5 inches or 9 centimeters. Once you’re happy with how it’s arranged, use your glue gun and start filling in the gaps, then apply glue on each button, and try to even out the surface with layers of glue. After the glue has dried off completely, peel the coaster off from the tape.
*Thanks to Sea Lemon via YouTube for all images used here. If you loved this video tutorial, then you’ll surely love their other content too, so give their channel a visit and subscribe!
Easy DIY Button Coaster Tutorial