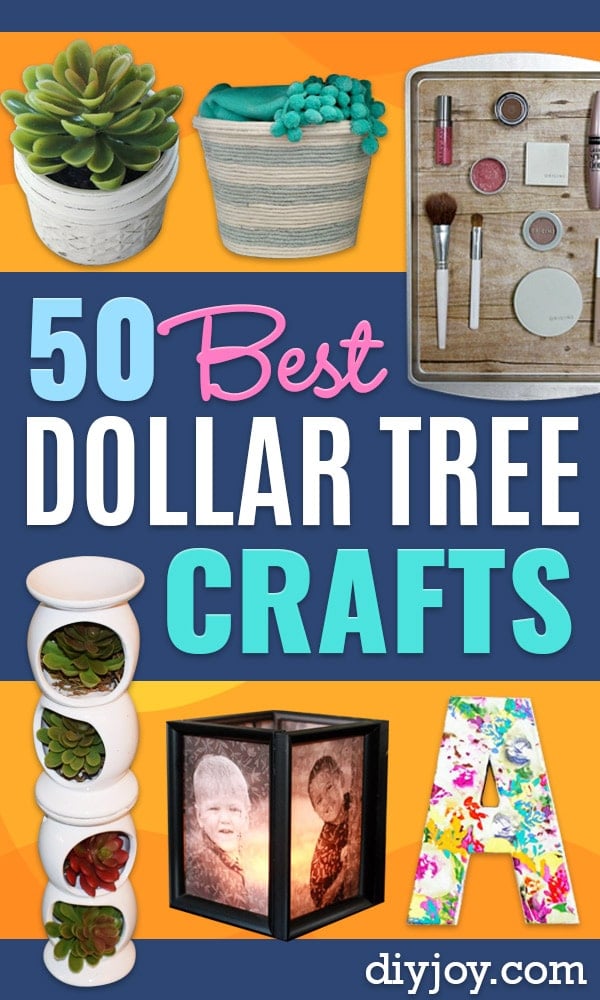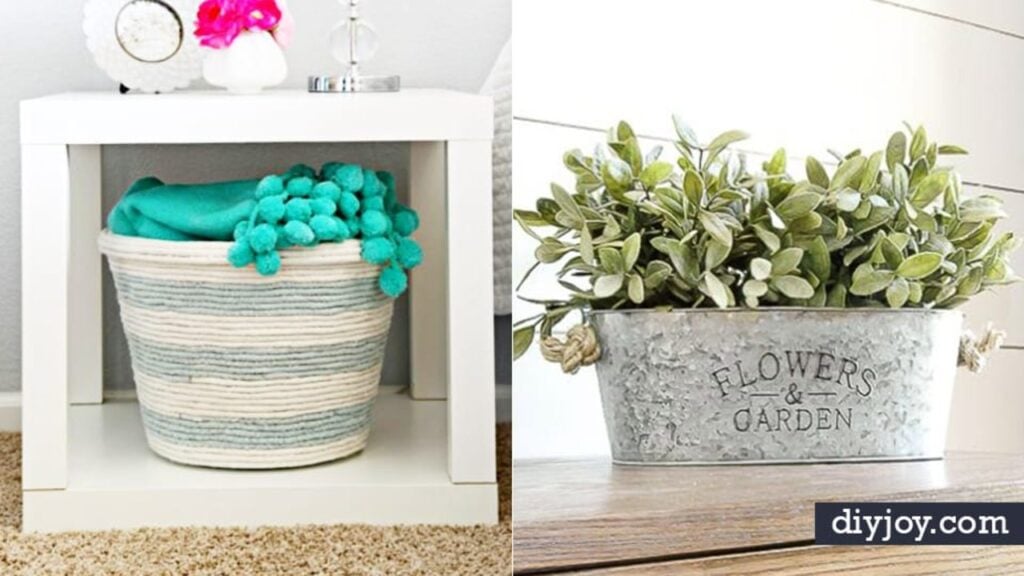
Four dollars. That is the entire supply list for the succulent tower further down this page, and it is the reason a dollar store aisle is worth more of your attention than a craft store one. Dollar Tree crafts have a reputation for looking like dollar store crafts, which is fair, and also completely avoidable. A vase wrapped in nautical rope costs about two dollars and sits next to fourteen dollar versions at the home store. A galvanized bucket aged with salt, vinegar and hydrogen peroxide passes for old metal. Glass jars, ceramic oil warmers, picture frames, compact mirrors and pool noodles all show up here doing jobs nobody expects of them. Here are 30 projects, each one linked to the tutorial that shows you the steps, plus a few more cool DIY ideas along the way.
1. Dollar Store Galvanized Planters
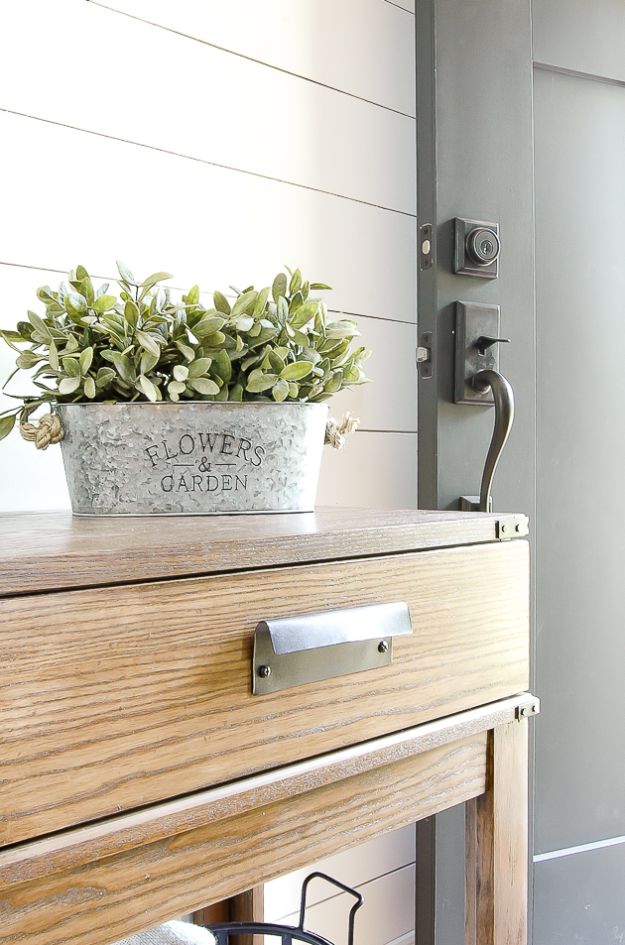
A plain metal bucket ages into something that looks like it came out of a barn, and it takes three things you already have. Mix about a tablespoon of salt with roughly three tablespoons each of vinegar and hydrogen peroxide, pour it over the metal so the salt actually sits on the surface, then rub it in with paper towels and an old rag. Repeat until the finish looks right, because the longer the mixture sits the better the result. Trace any embossed lettering with an oil-based marker and rub it back for a worn look.
Get the full tutorial at Little House of Four.
Check out all of the DIY ideas from Dollar Tree stores all in one place in this YouTube video, then come back and visit the top DIY sites listed here in this article for the step by step how tos from our favorite DIY bloggers to learn how to make these projects.
2. Dollar Tree Twine Wrapped Vase
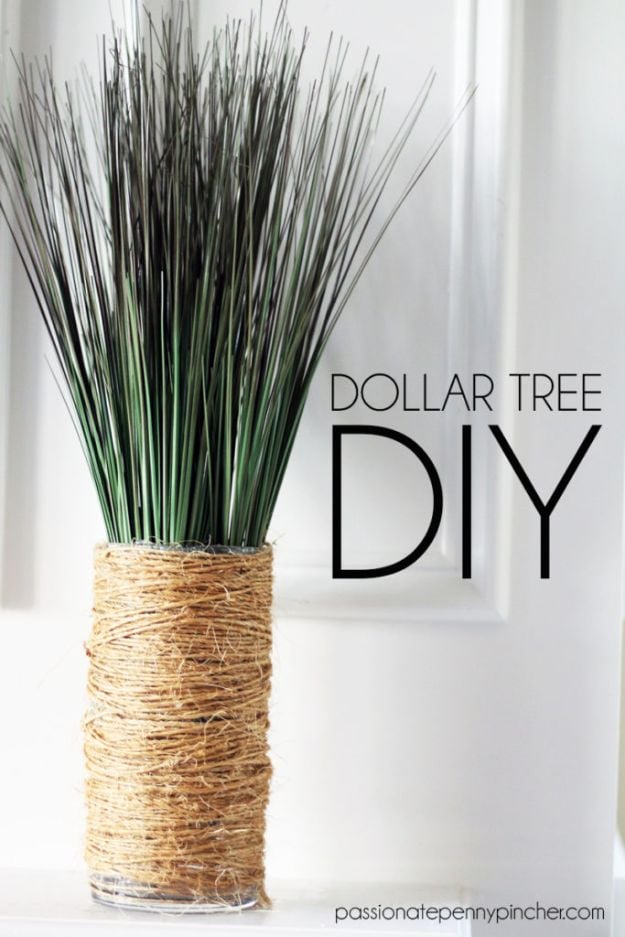
A glass jar, a roll of twine and a glue gun, and the whole thing runs two dollars. Run a bead of hot glue, press the twine into it, and keep wrapping so every row sits tight against the one below it. Gaps are the only thing that makes this look homemade, so push each row down as you go. Fill it with tall dried grasses like the photo and it reads as a florist’s centerpiece. Buy more glue sticks than you think you need, because a full jar eats through them faster than you expect.
Get the full tutorial at Passionate Penny Pincher.
3. DIY a Magnetic Organizer From a Dollar Store Cookie Sheet
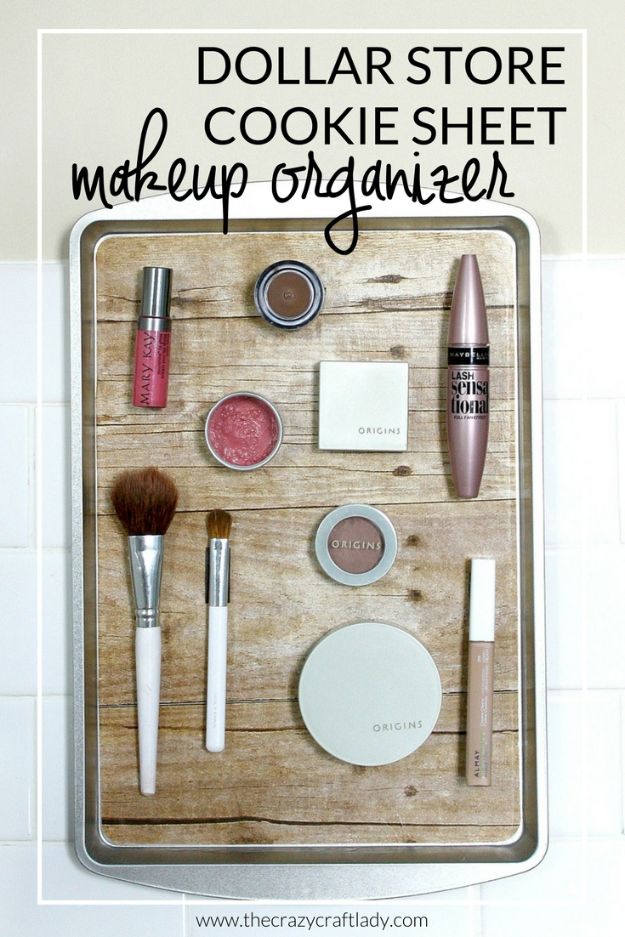
A dollar store cookie sheet is already a magnet board, it just needs to stop looking like a cookie sheet. Trim decorative paper to the tray and round the corners, brush a thin layer of Mod Podge onto the metal, smooth the paper down and seal it with another coat, pushing bubbles out with your fingers. Then stick magnetic tape to the backs of your makeup or your pens. The maker’s own warning is the useful part: that tape’s adhesive is not strong enough on its own, so reinforce it with hot glue. Command velcro strips hang it without a single hole.
Get the full tutorial at The Crazy Craft Lady.
4. DIY Dollar Tree Rope Vase
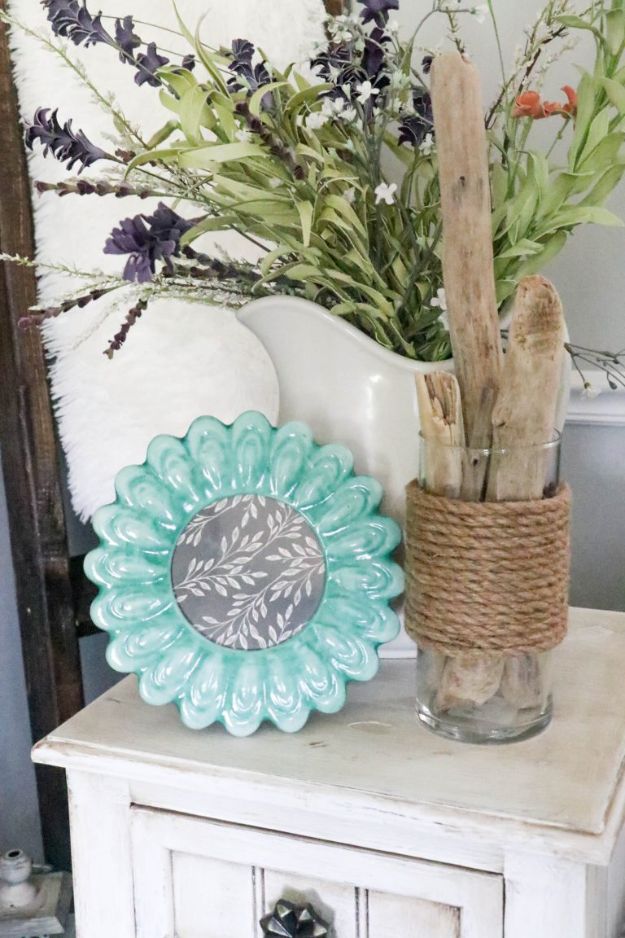
One package of nautical rope, one hurricane vase, both from Dollar Tree, and the finished thing sits next to fourteen to ninety dollar versions at the home store. Glue the end of the rope down wherever you want to start, then wind tightly so each pass presses against the last. The smart move is leaving bare glass showing at the top and the bottom rather than covering the whole vase, which is what keeps it looking designed instead of merely wrapped. Fill it with sand, pebbles or dried stems, and add a piece of driftwood if you want it beachy.
Get the full tutorial at Re-Fabbed.
5. Farmhouse Candle Holder
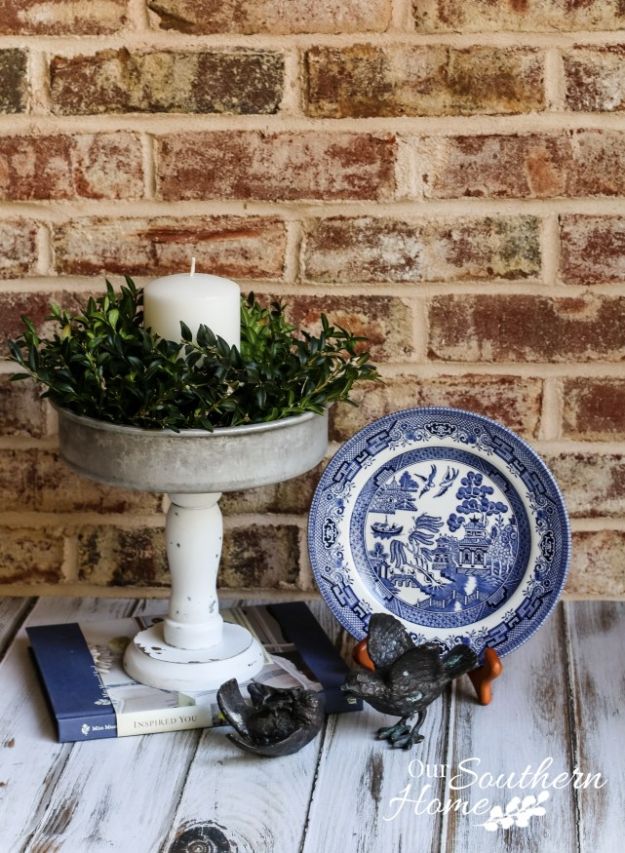
A dollar store candlestick glued to the back of an old cake pan, which turns two cheap things into a pedestal that works as a candle stand, a cheese board or a catch-all. Three light coats of Rust-Oleum satin spray, turning the pieces upside down for the last coat so the paint reaches the crevices, then E6000 on the top rim of the candlestick. Set the pan upside down on your work surface and center the candlestick onto it, which is far easier than the other way around, and then walk away and let the adhesive fully cure before you flip it.
Get the full tutorial at Our Southern Home.
6. Plastic Elephant Book Ends
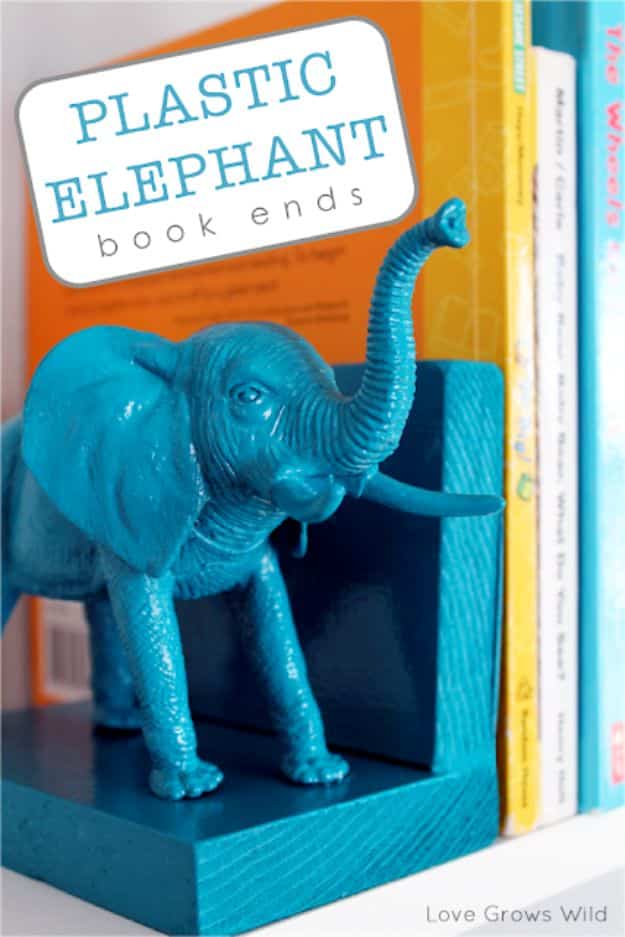
Two plastic animal figurines from the dollar store, a can of teal spray paint and four five inch pieces of 1×4, and you have the bookends that cost real money at a teen furniture store. Glue two wood blocks into an L shape for each base, prime and paint everything including the elephants, seal with clear gloss, then E-6000 the feet to the base. The honest question everyone asks is whether hollow plastic can hold books up, and the maker’s answer is that it does, because the weight is in the wood base and not the animal.
Get the full tutorial at Love Grows Wild.
7. Picture Frame Luminaries
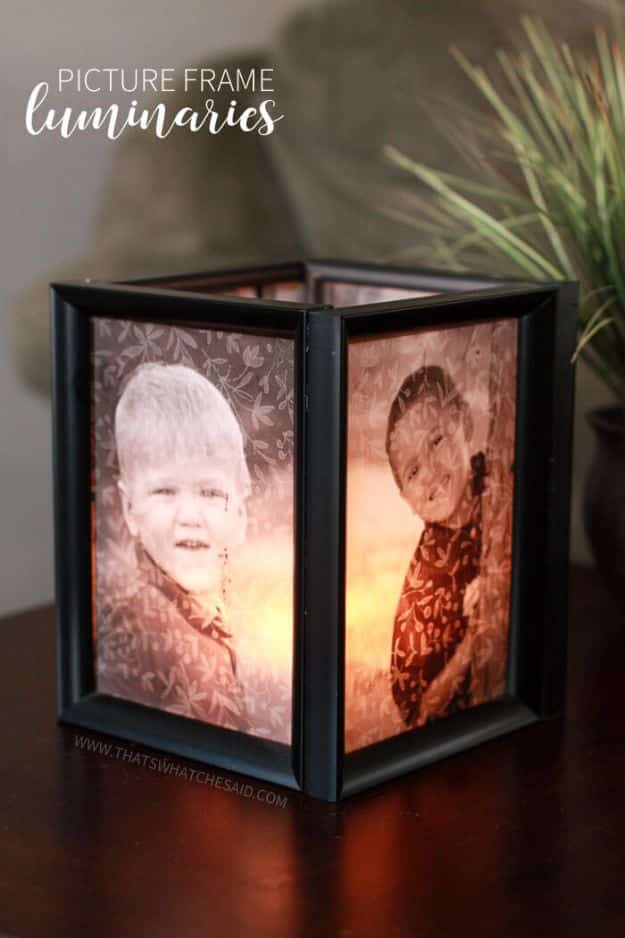
Four five by seven frames glued into a cube, with family photos printed onto vellum so the light comes through them. Assemble each frame face down with the vellum photo next and the glass last, which puts the glass on the inside between the flame and the paper. Leave the original cardboard backing out entirely, since it blocks the light. Use a thin line of glue set toward the inside of each joint because the adhesive expands. Stand the finished cube on a small square mirror and drop in an LED votive, and the mirror bounces light back up through the photos.
Get the full tutorial at That's What Che Said.
8. Quick and Easy Dollar Store Succulents
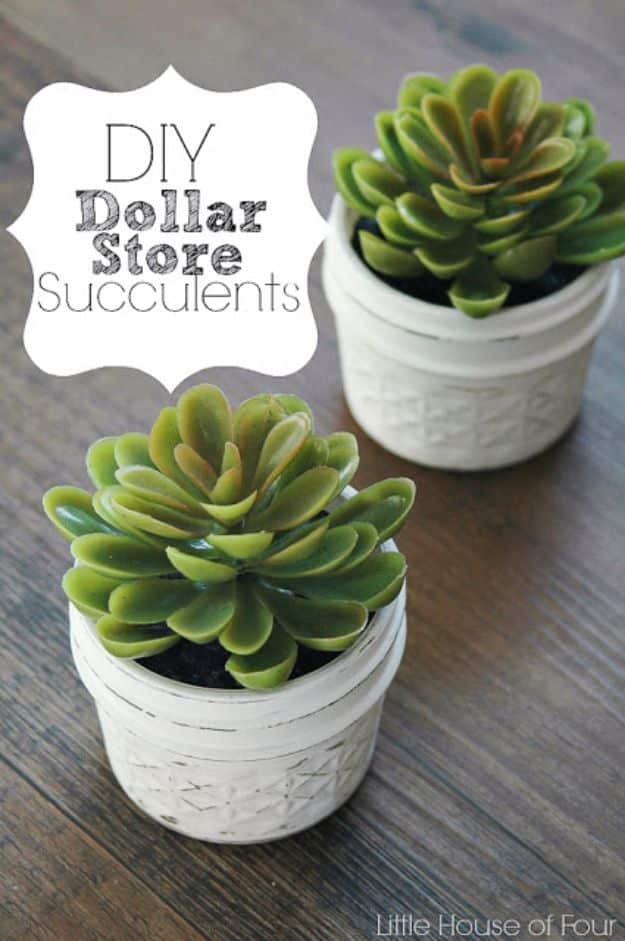
Faux succulents from Dollar Tree, moved out of their plastic pots and into painted jelly jars. Give each jar a few coats of chalk paint, sand the edges back lightly so it reads as old, then cut the styrofoam plug out of the plastic pot and drop it straight into the jar. The plug happens to be the right diameter, so there is no cutting or wedging involved. These are the plants for anyone who has killed a real one: nothing to water, nothing to brown, and they look exactly the same in February as they do in June.
Get the full tutorial at Little House of Four.
9. DIY Mirror Boxes
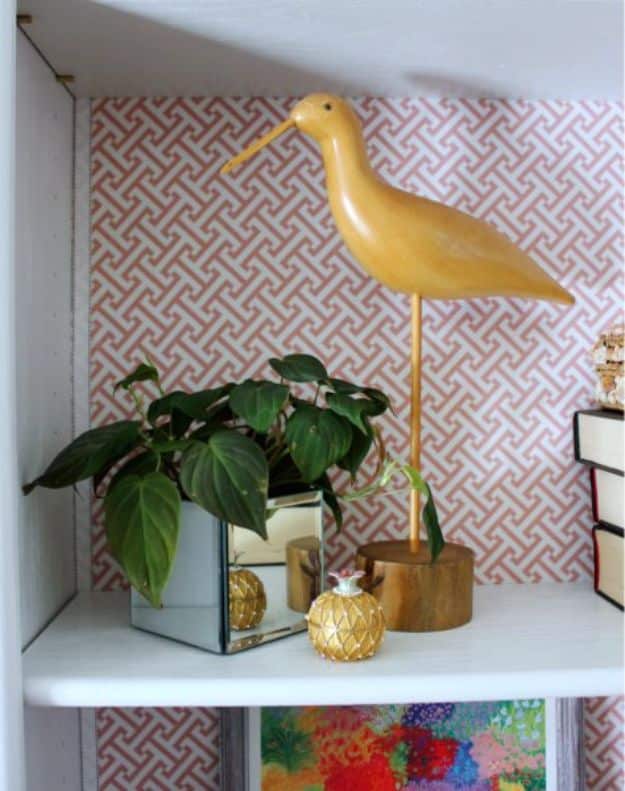
Five square mirrors, a glue gun, and about two minutes. A flat mirror is the base and four beveled ones are the sides: run a thin line of hot glue along the back edge of a side mirror, line it up with the outside edge of the base, and hold it for a few seconds. Work fast, because if you set one crooked you have about a second to peel it off and start over. Add glue to the inside corner seams for strength, stick cork feet underneath, and scrape off the black backing pads first if they will show.
Get the full tutorial at Hi Sugarplum.
10. Dresser Mirror From Dollar Store
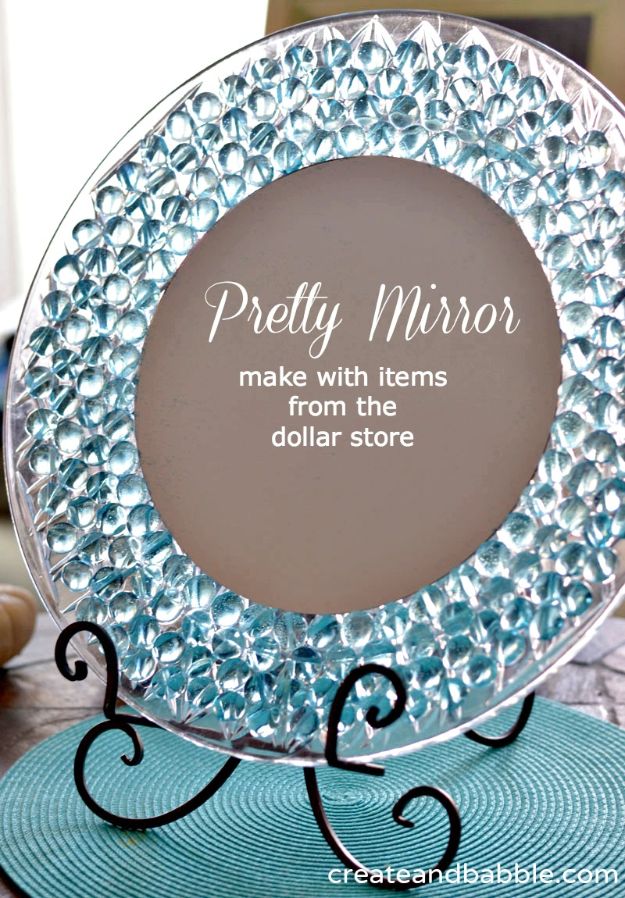
A round mirror set into a dollar store acrylic tray, with two or three bags of flat-backed glass gems filling the ring around it in about four concentric rows. Use an adhesive made for non-porous surfaces, E6000 or Glu6, or the gems will slide while they set and pop off later. Let the whole thing cure overnight before you move it. Then display it on a sturdy plate stand rather than hanging it, because a trayful of glass is heavier than it looks and this is not a job for a picture hook.
Get the full tutorial at Create and Babble.
11. DIY Topiary Trees From Dollar Store
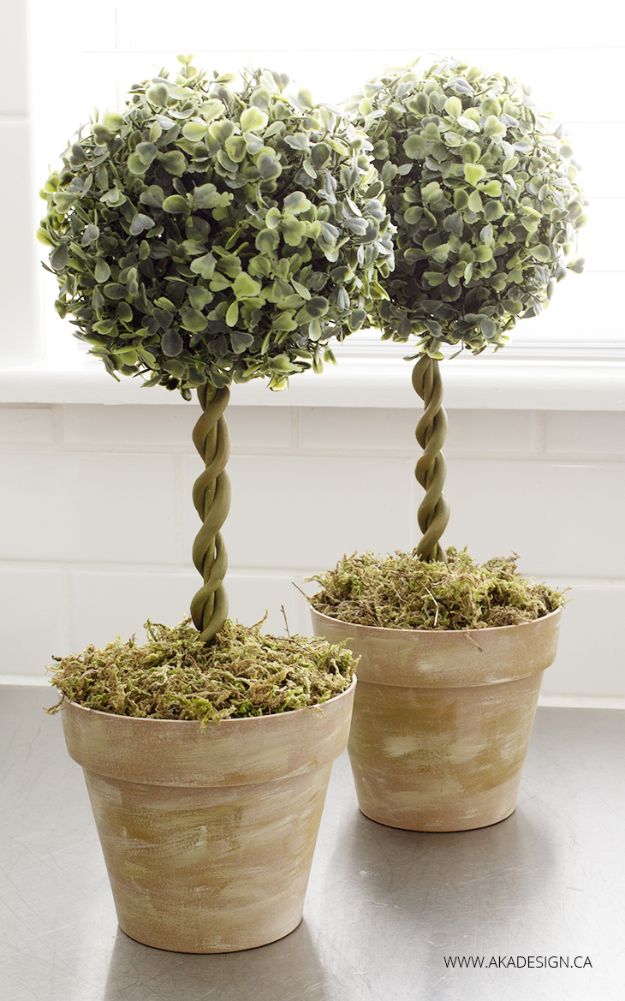
A faux greenery ball on a skewer, stuck into floral foam inside a pot, for about five dollars and thirty five minutes each. Cut the foam so it wedges into the pot and hot glue it down, push the skewer into the center, glue the top of the skewer and press the ball on. Paint the bare skewer mossy green so it stops reading as a kitchen tool. The detail that sells the whole thing is rolling modeling clay into thin ropes, twisting them around the skewer like vines and painting them to match, then covering the foam with moss.
Get the full tutorial at Homemade Lovely.
12. Personalized Glass Bead Necklace
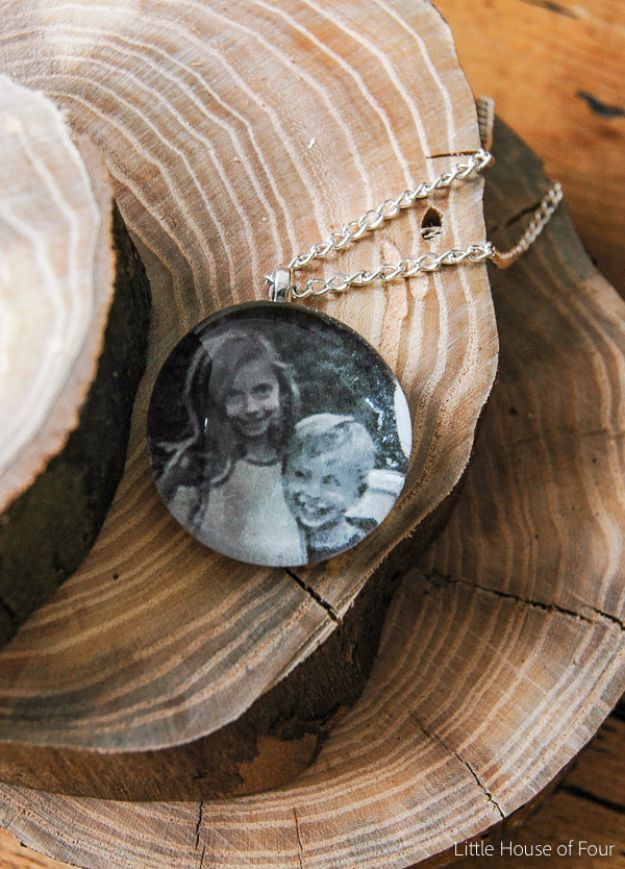
The flat glass gems in the floral aisle turn into photo pendants. Resize a picture to fit the gem, around 75 by 109 pixels, and convert it to black and white so it stays readable at that size. Mod Podge the photo to the flat back of the gem and press hard enough to push every bubble out. Then cover the back of the photo with scrapbook paper, and do not skip that layer, because it is what stops the glue for the bail bleeding through and ruining the image. Gorilla Glue the bail on, add a jump ring, chain and lobster clasp.
Get the full tutorial at Little House of Four.
13. Dollar Store Bandana Pillows
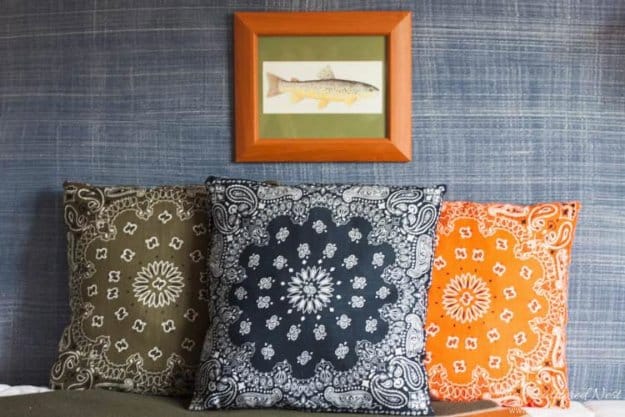
Bandanas run about a dollar and they are already hemmed twenty two inch squares, which is why they make such good pillow covers. The simple version is two bandanas, good sides together, stitched around three and a half sides, turned right side out, stuffed with poly-fil and hand stitched shut. Three bandanas make an envelope back instead, which means you can pull the cover off and wash it, and that is the version worth making for anything a kid or a dog sits on. There is a no-sew route too, using fabric adhesive along the same seams.
Get the full tutorial at Heathered Nest.
14. DIY Dollar Tree Succulent Tower
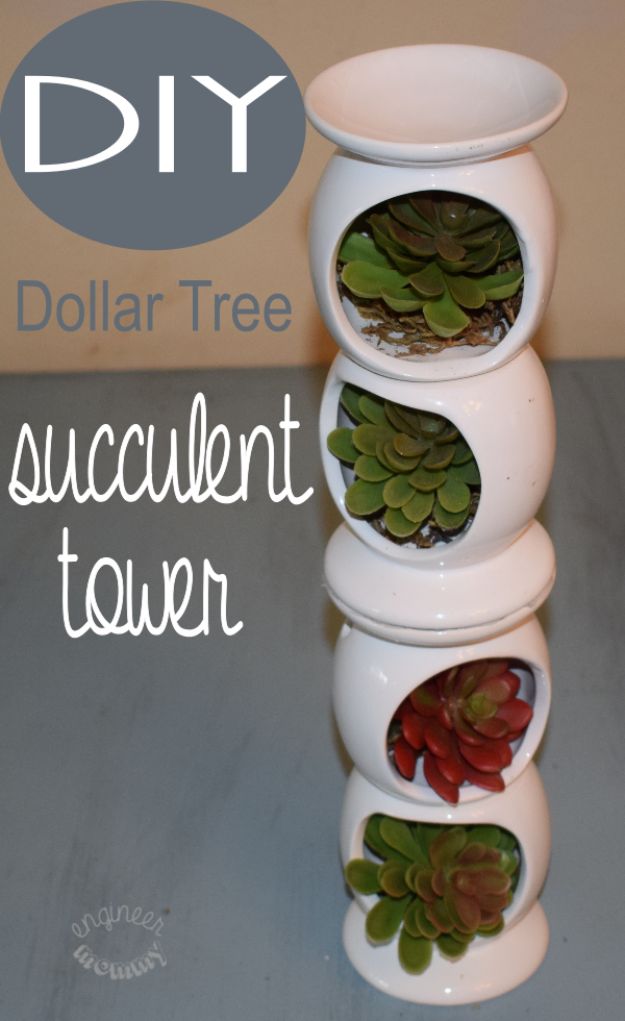
Four white ceramic oil warmers from Dollar Tree, stacked and glued into a tower, with Spanish moss and a small faux succulent tucked into each dome. Four dollars for the warmers, and that is the whole build. The one trick is alternating which way each warmer faces as you stack, so the domes step around the tower instead of lining up in a column and the joins read as intentional. Hot glue holds it, though E6000 is the better call if it is going somewhere a cat walks.
Get the full tutorial at Engineer Mommy.
15. DIY Wall Mirror From Dollar Store Compacts
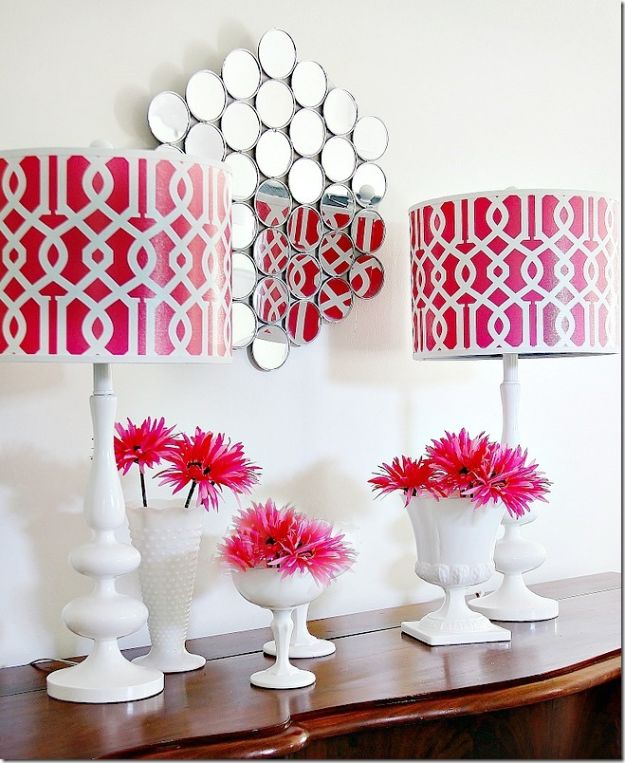
The knock off of a two hundred and forty eight dollar mirror, built out of Dollar Tree compacts for nineteen. Put safety glasses on, then clip each compact apart with pliers and trim the plastic away until you have two clean mirrored circles. Lay the circles out into the shape you want, a central row of seven with rows of six and five stepping out from it, then trace around the whole arrangement and cut that shape out as your base. Spray the circles, hot glue them down, and run a painted bead of glue between them so it reads as soldering.
Get the full tutorial at Thistlewood Farms.
16. DIY Mirror Jewelry Wall Hangers
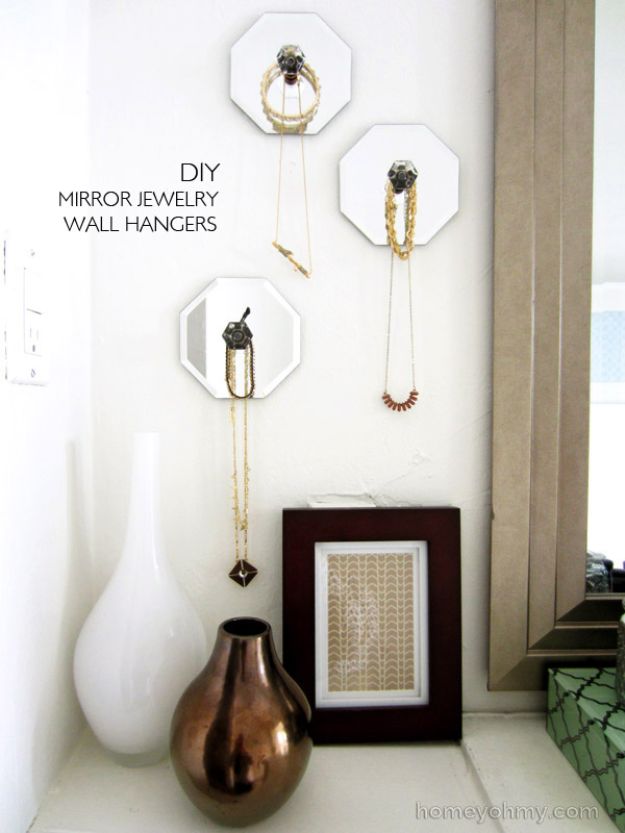
Octagonal dollar store mirrors with a single decorative knob glued to the face of each one, hung in a loose group so necklaces stop living in a tangle in a drawer. E6000 on the base of the knob, hold it until the glue grabs, then leave it overnight before you hang anything, and leave it overnight before you hang the mirror too. One centered adhesive hanger holds a mirror; two hold a mirror plus the weight of what goes on the knob, which is the version to build if you own anything heavier than a chain.
Get the full tutorial at Homey Oh My.
17. DIY Gold Leaf Vase
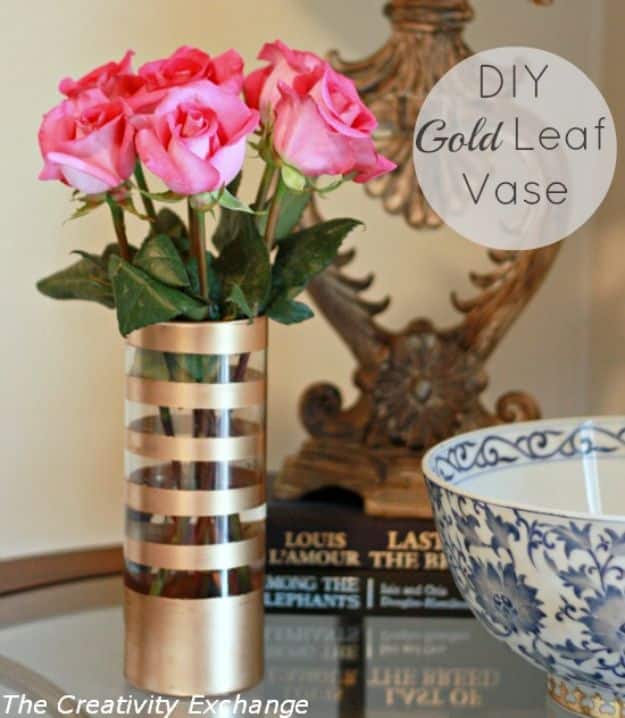
Gold stripes painted straight onto a glass vase, and the product choice is the whole tutorial. Clean the glass with rubbing alcohol first so the paint grips, tape your stripes with blue tape or Frog Tape rather than masking tape, and press the edges down hard with a credit card, since seepage under the tape is the only way this goes wrong. Then paint thin coats of Testors model enamel, the little jars in the model section for about two dollars. Two hours between coats, pull the tape at two to three hours, and give it a full day to cure.
Get the full tutorial at The Creativity Exchange.
18. Dollar Store Farmhouse Decor
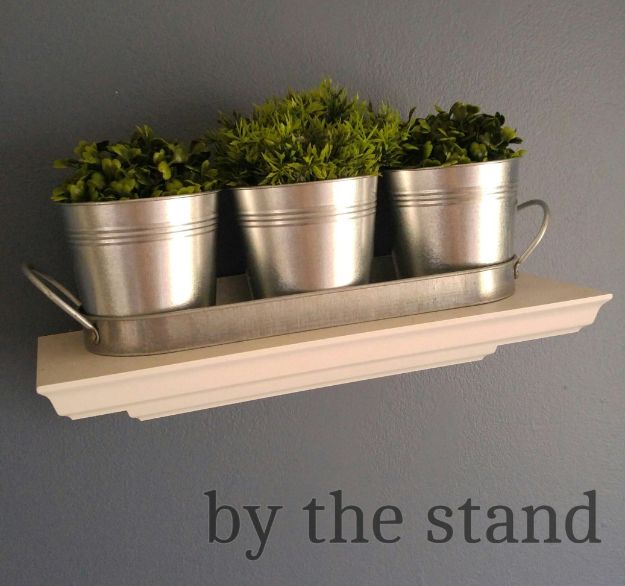
Three small galvanized buckets of greenery lined up in a tray on a narrow wall shelf, which is a whole styling idea rather than a build. The lesson in the photo is repetition: one bucket on a shelf looks like a leftover, three identical ones in a row look like a decision. Faux boxwood keeps the shapes tight and needs nothing from you. Set the tray on a picture ledge or a slim floating shelf rather than a deep one, so the buckets sit near the front edge and cast a shadow line.
Get the full tutorial at Holly Grace.
19. Dollar Store Book Topiary DIY
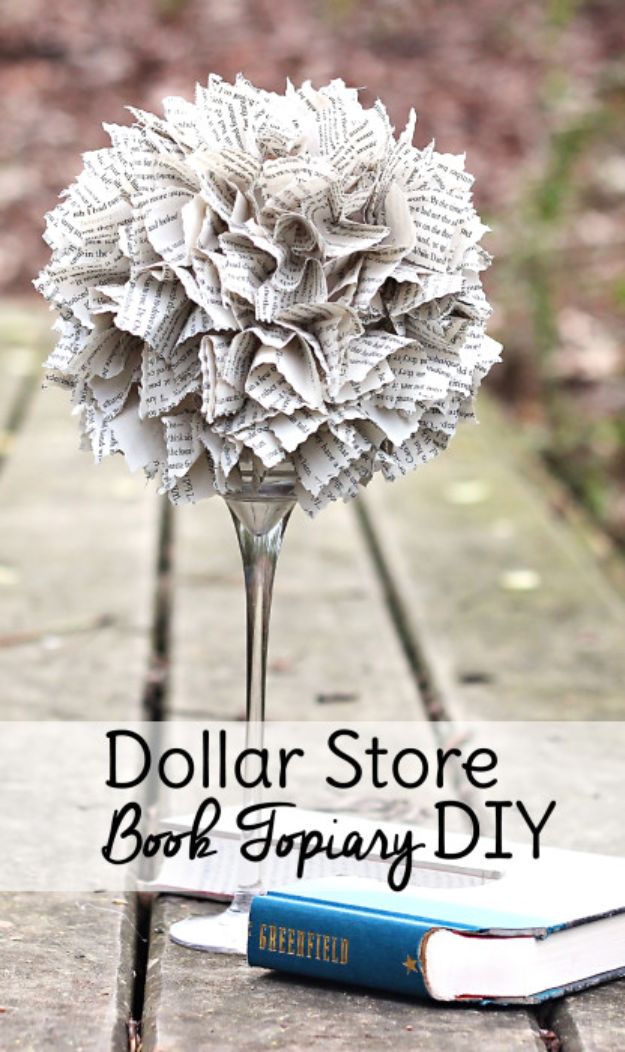
A styrofoam ball covered in folded book pages, mounted on a dollar store candleholder. Pull about fifty pages, skipping chapter openings and endings because of the white space, trim them into two and a half by three inch rectangles, and cut the edges with pinking shears. Fold each piece twice, open it and pinch the center so it flowers. Then hot glue them onto the ball close enough that no foam shows through. Budget two hours and put something on that you do not need to watch closely, because this is a hands-busy, eyes-free project.
Get the full tutorial at Sweet T Makes Three.
20. DIY Lighted Letters Sign
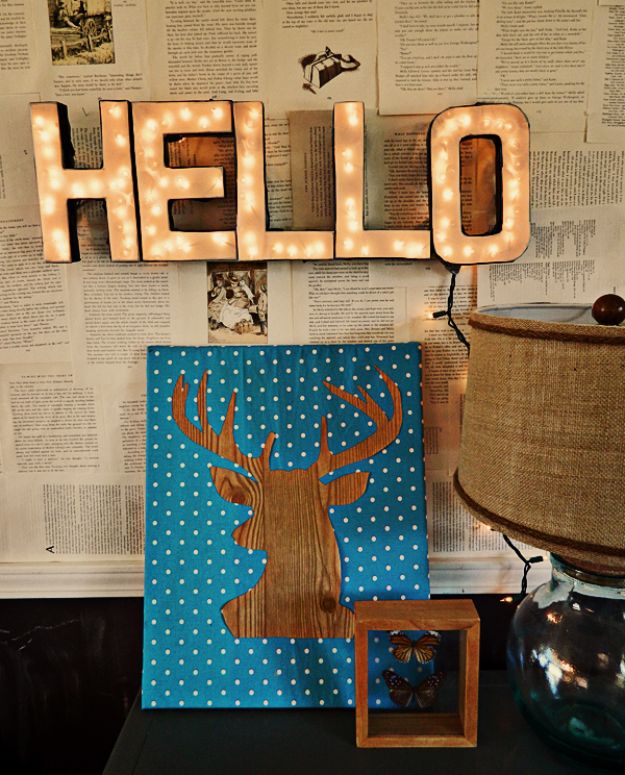
Cardboard craft letters, hollowed out and lit from inside with a strand of twinkle lights, about ten minutes each against hundreds of dollars for a bought marquee sign. Cut the face off the letter with a craft knife and pull the cardboard guts out, trace the letter onto tracing paper and tape that over the front as a diffuser, then cover the outside edges in colored electrical tape. Poke holes in the back, push the lights through and tape them in place. Tape the letters to each other before hanging, because a word is far steadier than five loose letters.
Get the full tutorial at Home Heart Craft.
21. Giant Pool Noodle Flowers
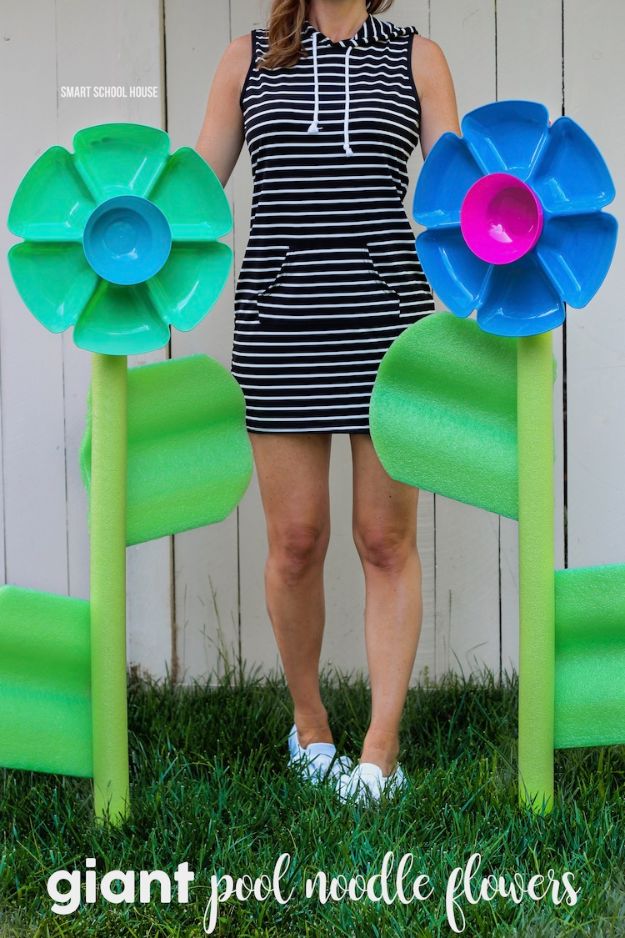
Flowers as tall as a person, built from a pool noodle stem, a plastic chip and dip tray for petals and a bowl glued into its center. Cut more noodle into leaf shapes and glue them to the side of the stem. To stand them up outdoors, drive a five eighths inch wooden dowel into the ground and slide the hollow noodle down over it, which is the part that keeps them upright in wind. The maker’s own note is the right attitude here: any chip tray and any bowl work, and none of them will match anybody else’s.
Get the full tutorial at Smart School House.
22. DIY Hanging Planter Project With Dollar Tree Supplies
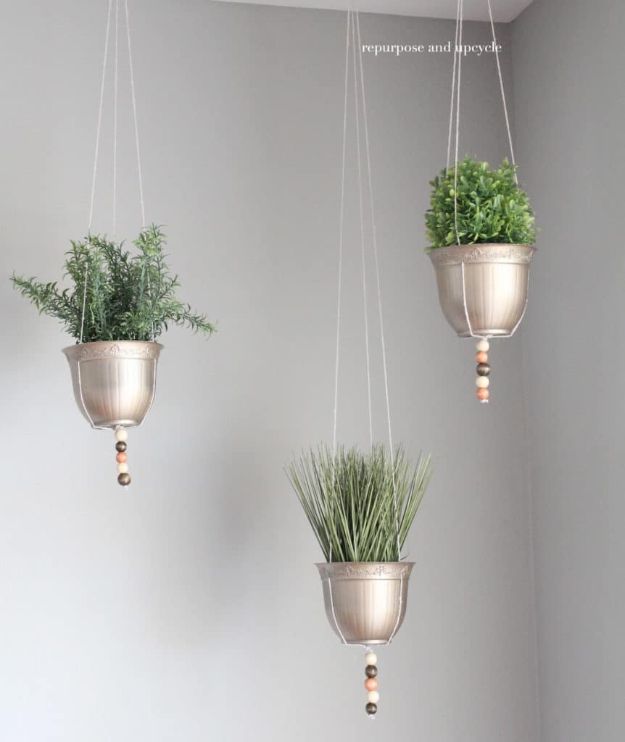
Three small planter pots for a dollar, sprayed a soft metallic and hung on lengths of cotton twine. Make three holes near the rim of each pot with a drill bit, thread the twine through, knot or hot glue the ends underneath, and slide a few wooden beads onto the strands before you tie them off at the top. They weigh so little that a thumbtack will hold one. If you want real plants rather than faux, drill drainage holes in the bottom and hang them outside, because there is no saucer in this design.
Get the full tutorial at Repurpose and Upcycle.
23. DIY Rope Basket

A dollar store basket wrapped in cotton filler cord, standing in for a seventy to hundred dollar store bought one. Prime and spray the basket white inside first, since the outside disappears under the rope, and give it a couple of days to cure. Then hot glue the rope down along every inch rather than at intervals, because a dollar basket has no structure of its own and the rope is what makes it rigid. Start under the lip so the first row is straight. Five packages of rope covered one basket, and the total landed near twenty dollars.
Get the full tutorial at IHeart Organizing.
24. Dollar Tree Buckets to Chic Decor

Bright plastic buckets in the party aisle, sprayed white and given an oversized number on the front. Rust-Oleum protective enamel covers the loud green, blue and coral underneath, and the numbers are cut from vinyl on a cutting machine. No machine is no obstacle: stencil the numerals or use an image transfer, since a single large number is about as forgiving a shape as exists. The before and after in the photo is the argument for this one, because the same three buckets go from birthday party to entryway storage on one can of paint.
Get the full tutorial at Just Vintage Home.
25. DIY Framed Moss Shamrock on Glass

Sheet moss cut into a shamrock and glued to the glass of an old frame with no backing, so the shape appears to float. Glue the glass into the back of the frame first and let it dry, clean both sides, then tape a printed shamrock to the back of the glass as a template to work over. Cut five pieces, a small center, a stem and three leaves, each slightly larger than you need, and pinch the edges so they fringe and read as natural. Glue the center first, then the stem, then the leaves, using a toothpick to get adhesive underneath.
Get the full tutorial at Stow and Tell U.
26. DIY Dollar Tree Hanging Ribbon Chandelier

A wreath ring, a lot of ribbon and a glue gun, and you have party decor that costs almost nothing per piece. Wrap each ring in one color of ribbon or in burlap, gluing as you go, so the base reads as one finished object before anything hangs off it. Then knot and drape ribbon in mixed colors and lengths right around the hoop until it is covered, which is what gives you the waterfall. Trim the ends, tie twine to the ring to hang it, and make several in different ring sizes rather than one.
Get the full tutorial at Dollar Tree.
27. Dollar Store Cotton Wreath

A grapevine wreath with a cotton boll sprig and a fall berry sprig worked into it, and the restraint is the point. Take the big sprigs apart into individual stems first, then push each one into the grapevine and wrap the wire around itself to lock it. Decorate only the lower right third of the wreath rather than the whole ring, which is what makes it look styled instead of stuffed. The photo shows a pair of them hung on old window frames, which doubles the effect for the same number of stems.
Get the full tutorial at The Crazy Craft Lady.
28. Easy Dollar Tree Galvanized Decor

Be honest about what this one is: the galvanized pots are the project and the plant never leaves its plastic nursery pot, it just drops inside. That is not a shortcut, it is the reason it works, because you can lift the whole plant out to water it in the sink and set it back without disturbing anything. An orchid in a Flowers and Garden pot next to a candle and a shell is a two dollar shelf that looks bought. Keep a saucer under the plastic pot inside the metal one so nothing pools where you cannot see it.
Get the full tutorial at Crafts by Courtney.
29. Hanging Solar Mason Jar Lights
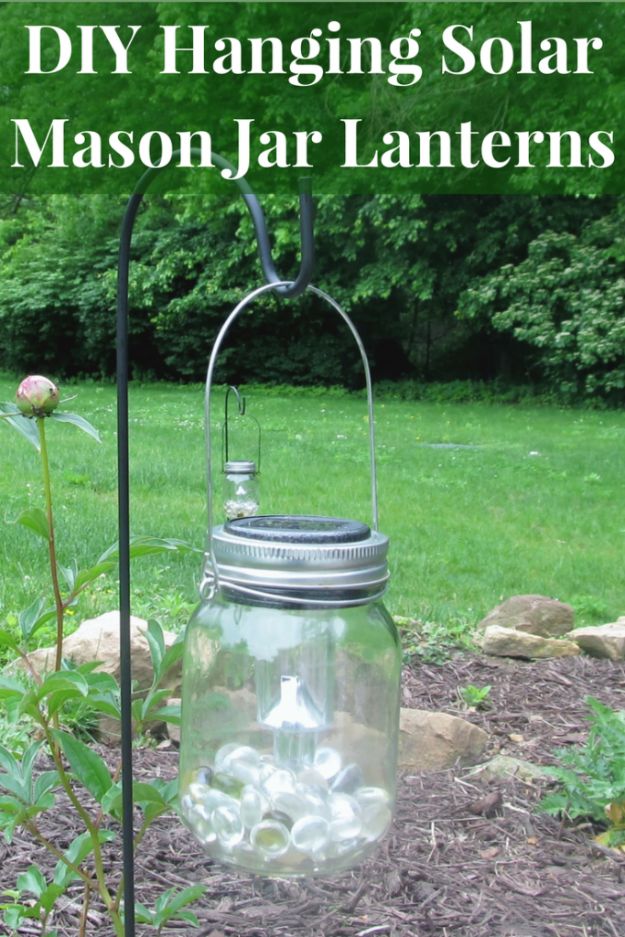
A garden light with no wiring and no outlet: pull the stake off a solar path light, remove the paper tab from the battery, press the solar disc into a canning rim until it sits almost flush and seal around it, then screw the rim onto a mason jar with a handle. Drop a handful of glass pebbles in the bottom to throw the light around, and hang the jars from shepherd’s hooks. The maker’s own correction matters here, hot glue lets go in heavy rain, so use silicone caulk if these are staying outside past the first storm.
Get the full tutorial at Joyfully Treasured.
30. How to Make a Jute Rope Tray
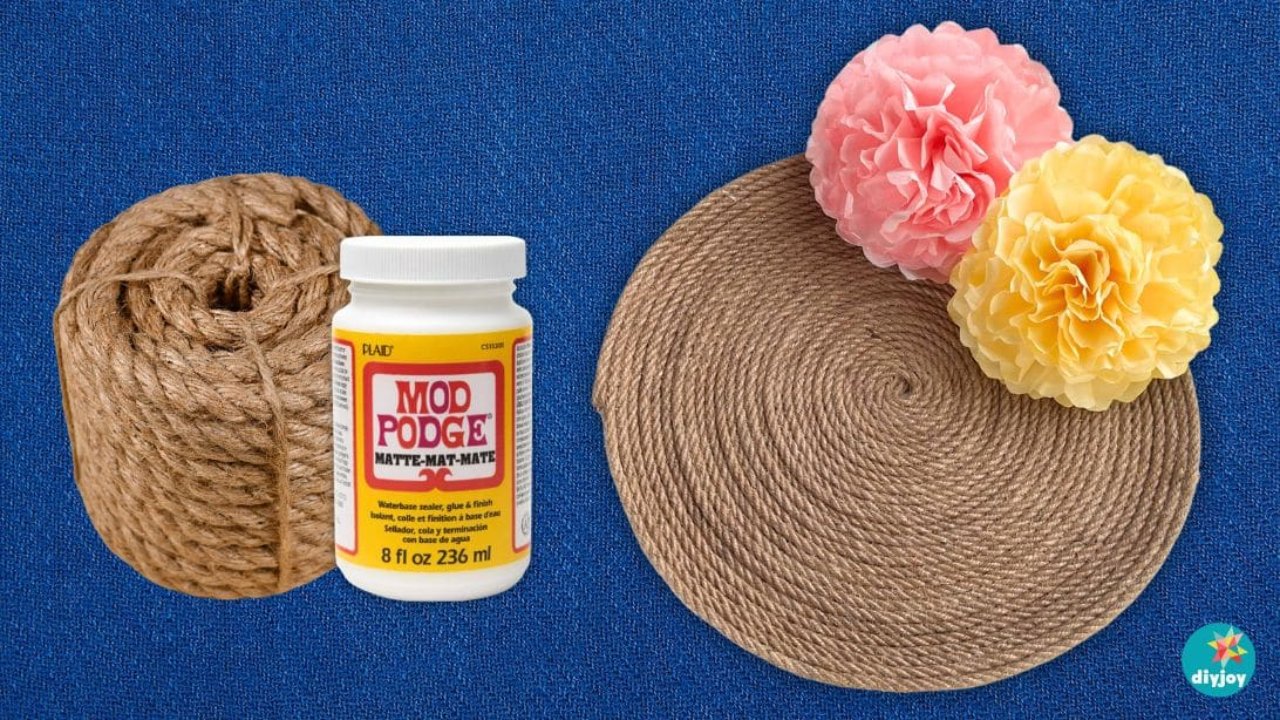
A boho jute tray costs real money in a shop and about two dollars in rope here, and the build is nothing but Mod Podge. Cover a tray you already own in cling wrap, spread a generous layer of glue over it, then coil the rope from the center outward in a spiral, adding more glue as you go and stopping now and then to press everything flat. Keep the sides low, because a tall rim will not hold its shape while it dries. Coat the whole thing again, press it flat, and let it dry somewhere with air moving.
Get the full tutorial at DIY Joy.