
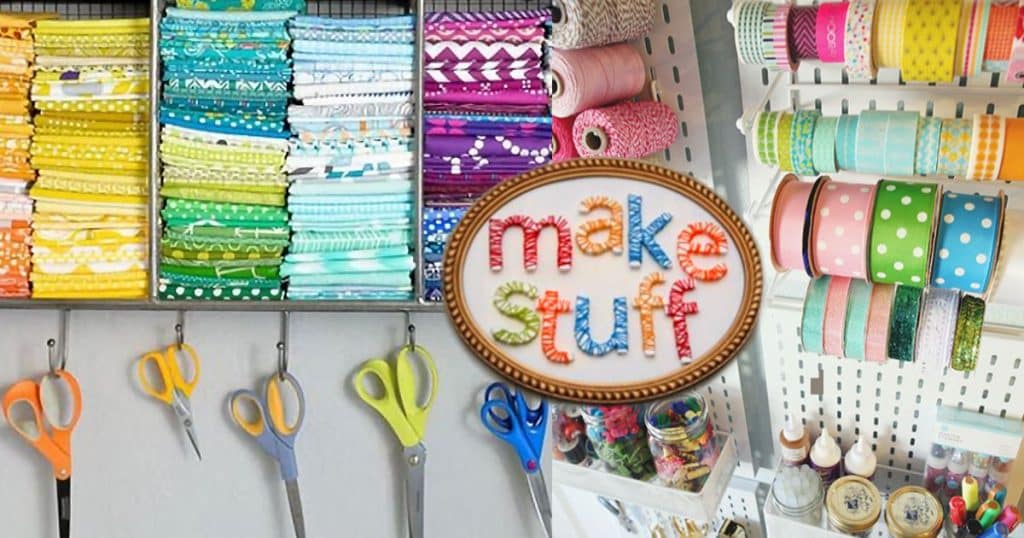
Is your craft room more chaos than creativity right now? These 41 DIY craft room ideas will help you organize every supply and make the space feel like yours. You’ll find wall storage like pegboards, metal grids and a rainbow yarn shelf, plus clever fixes for wrapping paper, ribbon, paint and buttons. There are furniture flips too, like a sewing machine table desk and a dresser turned paint storage, and pretty touches like a fabric bulletin board and painted art for the walls. Perfect for a spare room, a closet corner or a sewing nook!
1. Craft Room Chalkboard
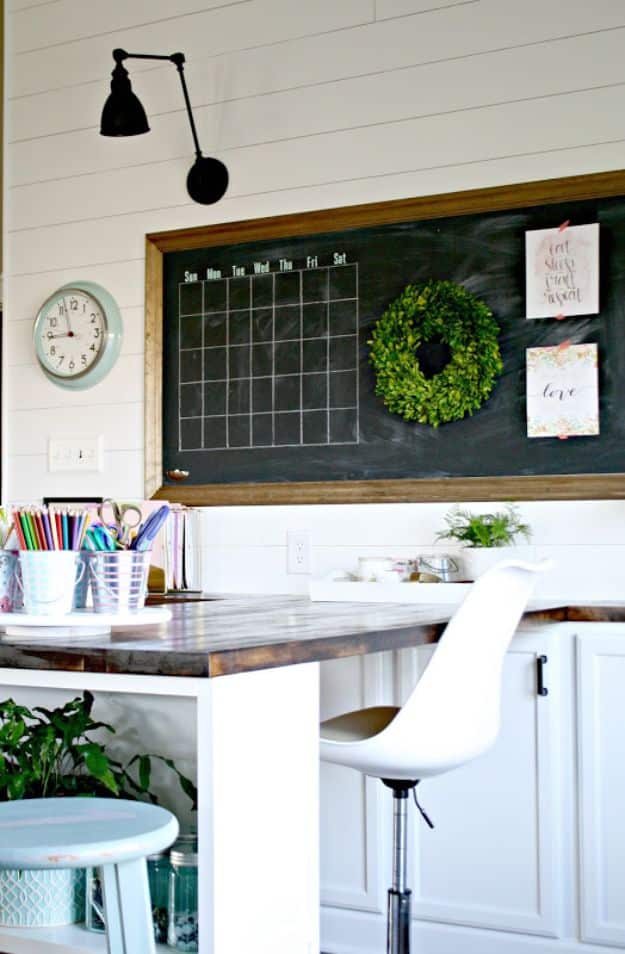
A giant chalkboard calendar turns one blank wall into the command center of a craft room and office. This one is framed in warm wood and hangs over a built-in desk made from butcher block, cut into a three by six foot top so two people can work side by side. Cabinets underneath hold seasonal supplies you don’t need every day, and a spinning caddy keeps the everyday tools within reach. Chalk a grid for the month, then add notes, deadlines and doodles as you go.
Get the full tutorial at Thrifty Decor Chick.
2. DIY Tin Can Desk Organizer
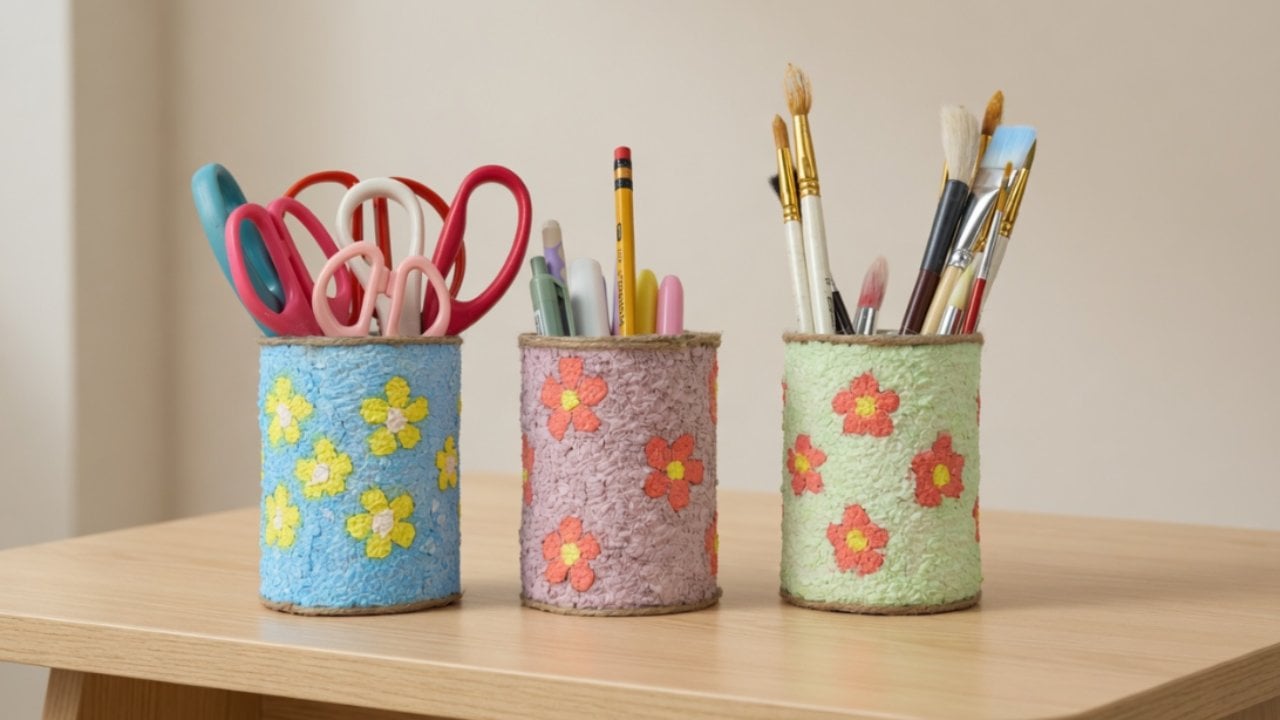
Empty soup cans make the sweetest pen cups once they’re dressed in tissue paper pulp. Soak torn tissue until it’s soft, squeeze it out and mash it, then stir in glue and paint so the color runs all the way through. Sketch a big, easy flower on the can, press the colored pulp into the petals first and fill the background after. Give it a full day to dry. Make a set in soft blue, pink and green for scissors, pencils and paintbrushes.
Get the full tutorial at DIY JOY.
3. DIY Colored Paper Pen Holder
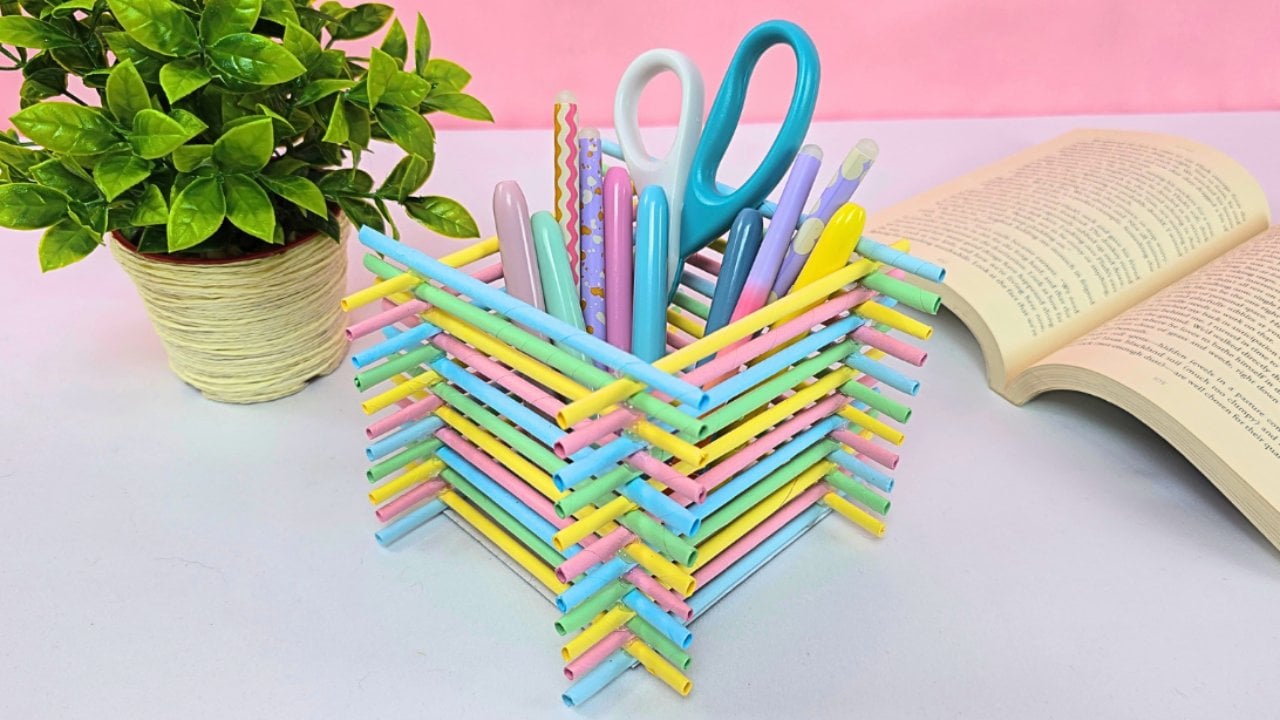
A pen holder built from rolled paper tubes is light enough to carry anywhere and sturdier than you’d guess. Wrap each sheet of colored paper tightly on the diagonal around a thin skewer, glue the last corner down and snip off the pointy end. Once you have a stack of tubes, hot glue a pair to opposite sides of a 4 inch cardboard square, then lay the next pair crosswise on top. Keep stacking and switching colors until it’s tall enough for your markers.
Get the full tutorial at DIY JOY.
4. DIY Upcycled Denim Jean Organizer
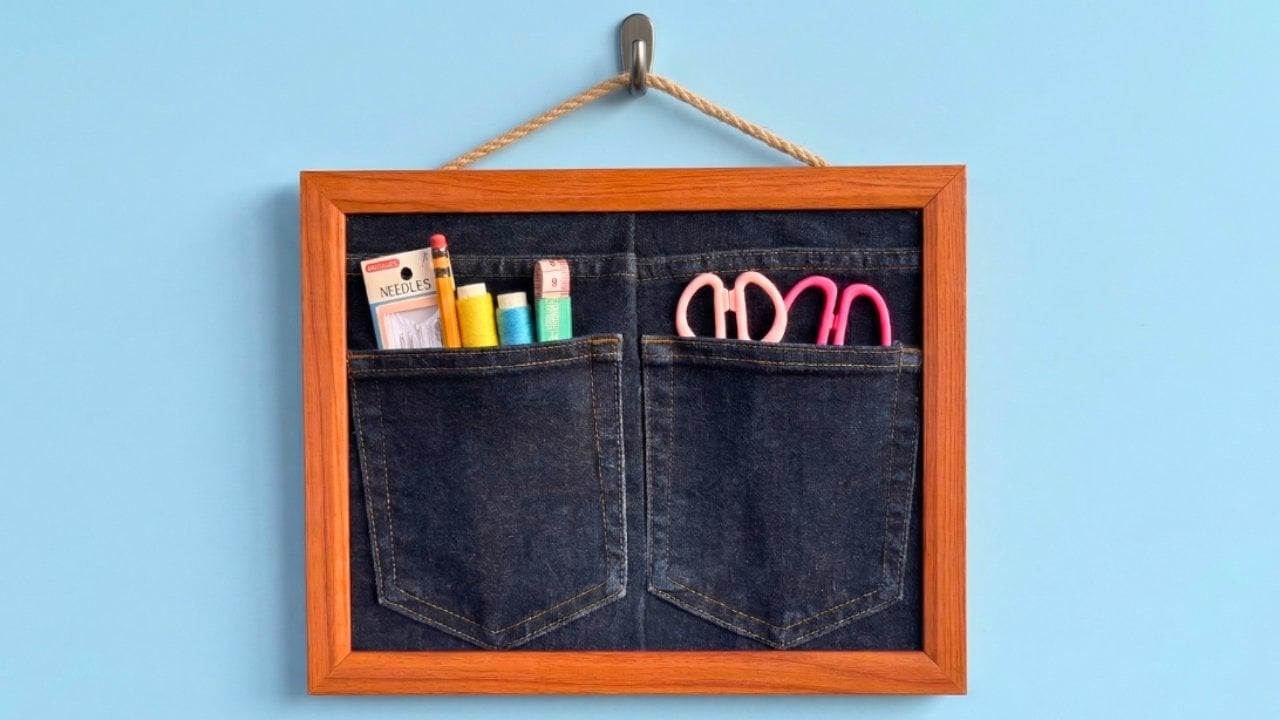
Those jeans you’ll never wear again have two perfect pockets for craft tools. Take the glass out of a picture frame and keep only the frame and backing. Trace the frame onto the back of the jeans and cut it out, then fold the denim so the two back pockets sit close together in the middle and hot glue the fold. Glue the backing behind the denim, lock it into the frame and add a jute hanger with a knot at each corner. Fill it with scissors and notions.
Get the full tutorial at DIY JOY.
5. DIY Painted Cross Stitch Art
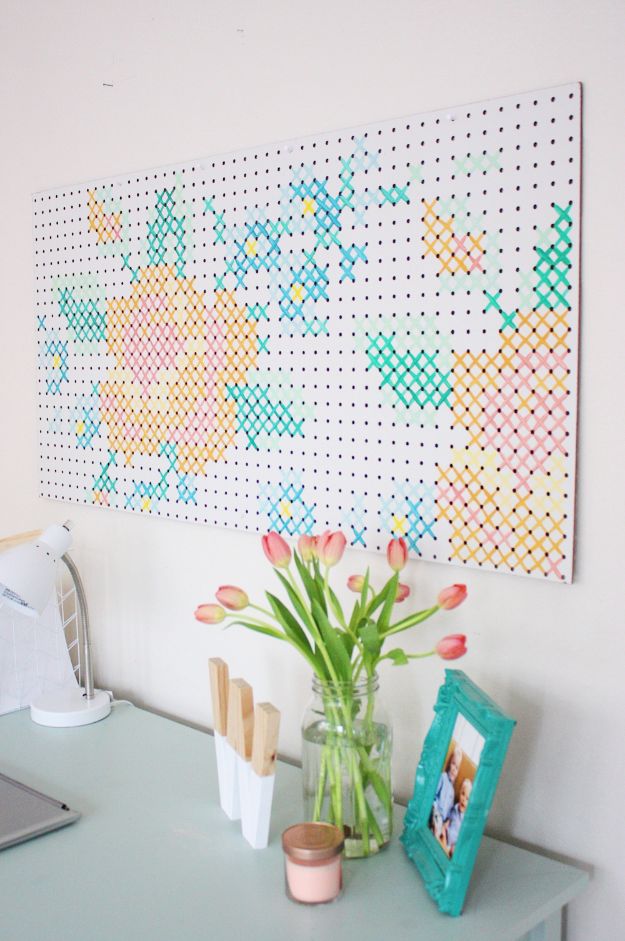
Painted cross stitch art gives you giant embroidery without a single thread. The trick is a sheet of pegboard: the holes act as your grid, so there’s nothing to measure. Pick a rose cross stitch pattern, choose a few light and dark shades of acrylic, and pencil a mark where the center of the main flower will land. Then paint little x’s, counting from the pattern as you go. It’s slow for the first few rows and quick once you find your rhythm.
Get the full tutorial at The Pretty Life Girls.
6. Acrylic Wall Calendar
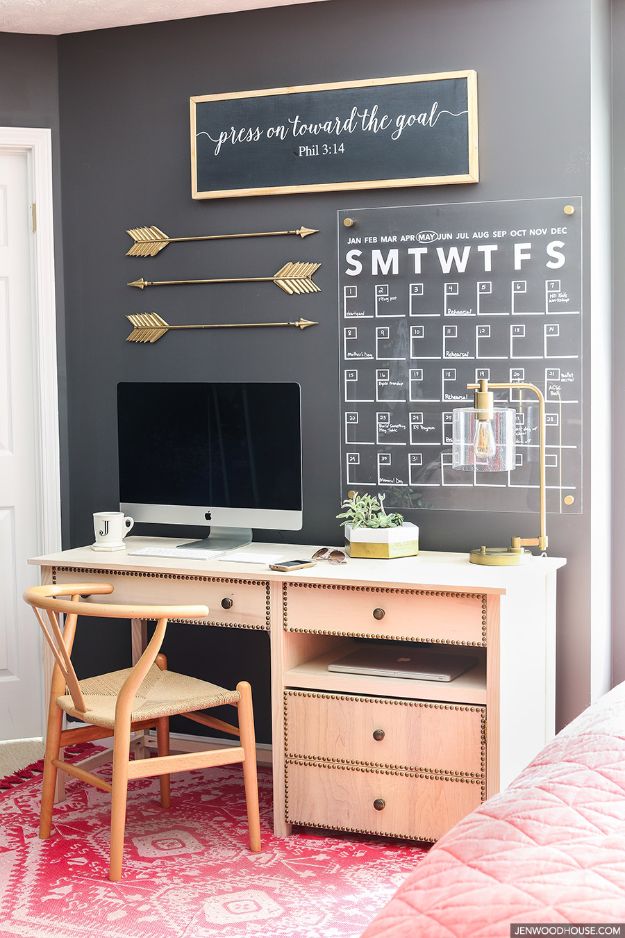
An acrylic wall calendar looks like a pricey boutique buy and costs a fraction to make. Clamp a 30 by 36 inch acrylic sheet down, tape each corner and drill a hole about an inch and a half in. Cut the month grid, days and numbers from adhesive vinyl, mirrored so they go on the back, which lets the front wipe clean every month. Tape a guide grid to line them up. Hang it on four gold standoffs and write on it with a chalk marker.
Get the full tutorial at The House of Wood.
7. DIY Inspiration Board
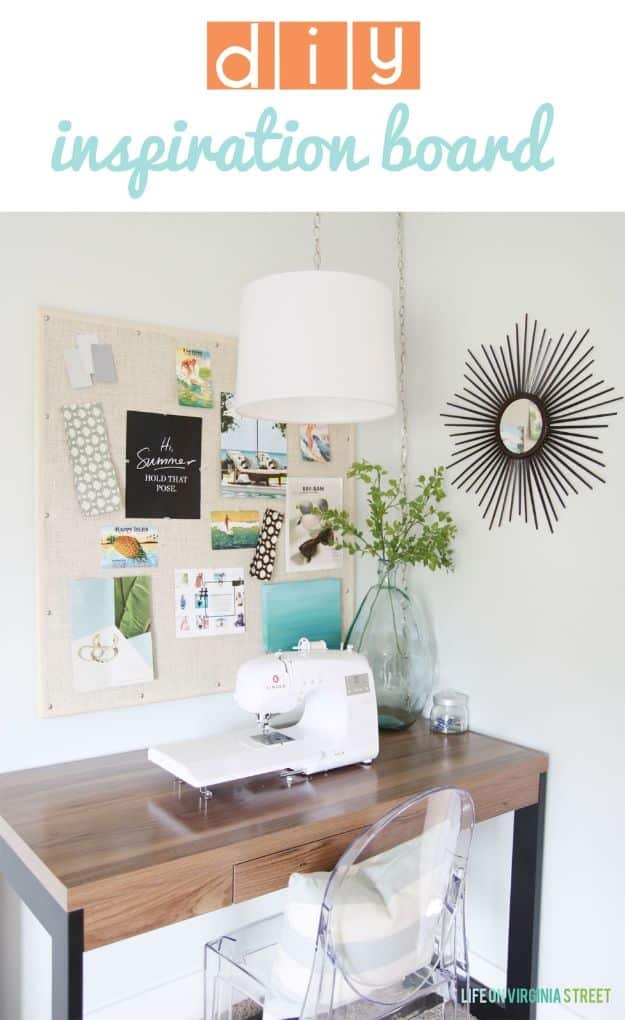
A burlap inspiration board takes about 20 minutes and costs under $20. Start with a framed cork board, lay burlap over the top and push an upholstery tack through at one corner, right on the inner edge of the frame. Pull the fabric snug, tack the next corner, then fill in between, one side at a time. Flip it, fold the corners under and add tacks on the back to hold the fabric tight. Pin up paint chips, fabric scraps and photos you love.
Get the full tutorial at Life On Virginia Street.
8. Craft Room Organization Under $100
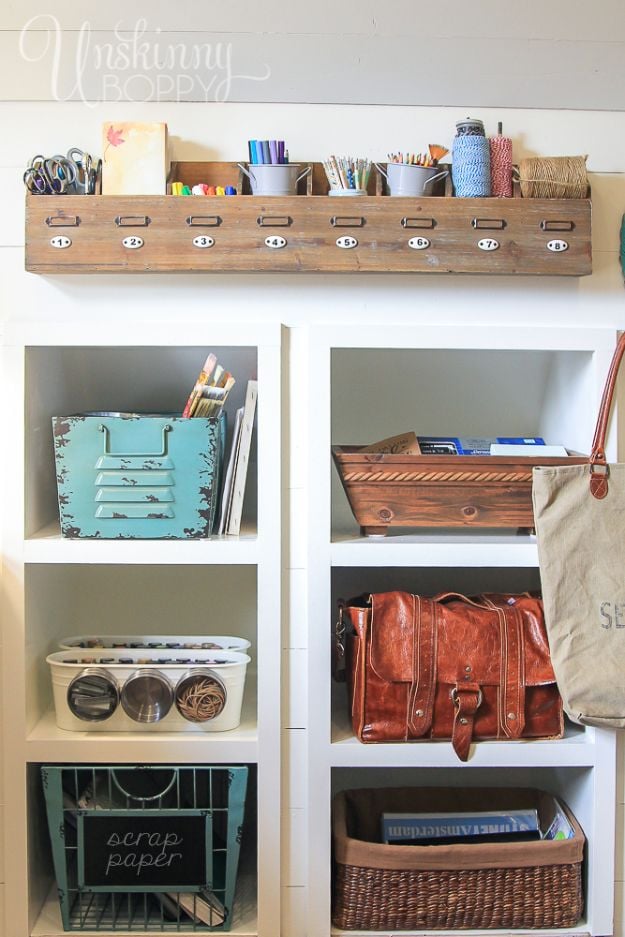
This craft room organization under $100 tucks supplies into the cubbies of an attic office. A wooden divided organizer with numbered bins holds pencils, markers, twine and envelopes, plus a whole drawer of scissors that turned up while sorting. Small gray metal buckets slide into the open cubbies for lettering markers and watercolor pencils, while a turquoise crate and woven baskets hold paper scraps and bigger tools. Stick to the budget by buying the organizer first and filling in from there.
Get the full tutorial at Beth Bryan.
9. Organize a Craft Closet
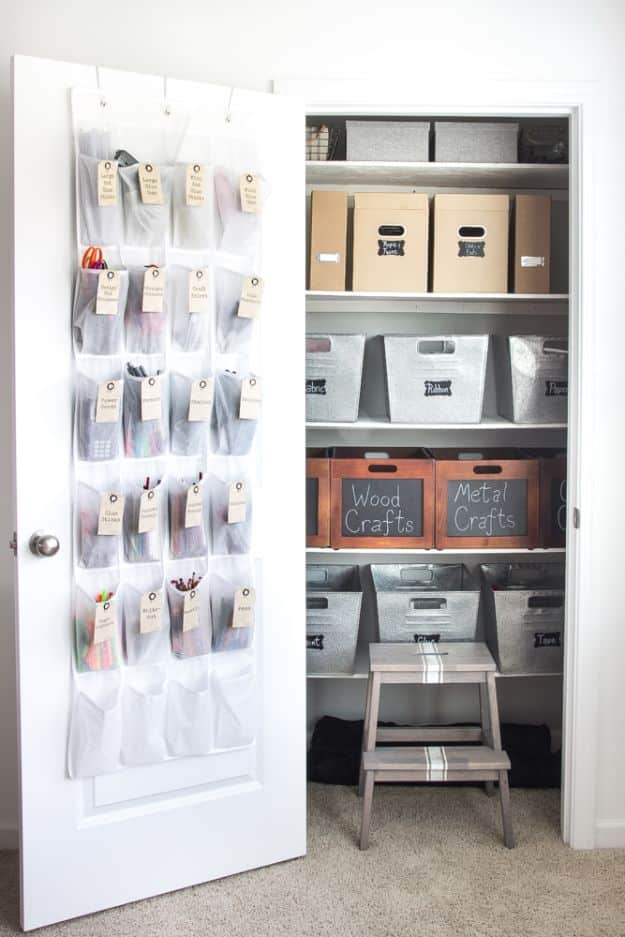
A cluttered catch-all closet becomes an organized craft closet with sturdy shelves and the right bins. Galvanized metal bins and wooden crates, about $12 each, hold the bulky supplies, and chalkboard labels tell you what’s inside each one. An over-the-door shoe organizer stashes office supplies, markers and glue where you can see every little thing. File boxes and magazine holders corral paper, and a small step stool makes the top shelf easy to reach. Skip DIY bins when buying is cheaper.
Get the full tutorial at Bless'er House.
10. DIY Metal Wall Grid
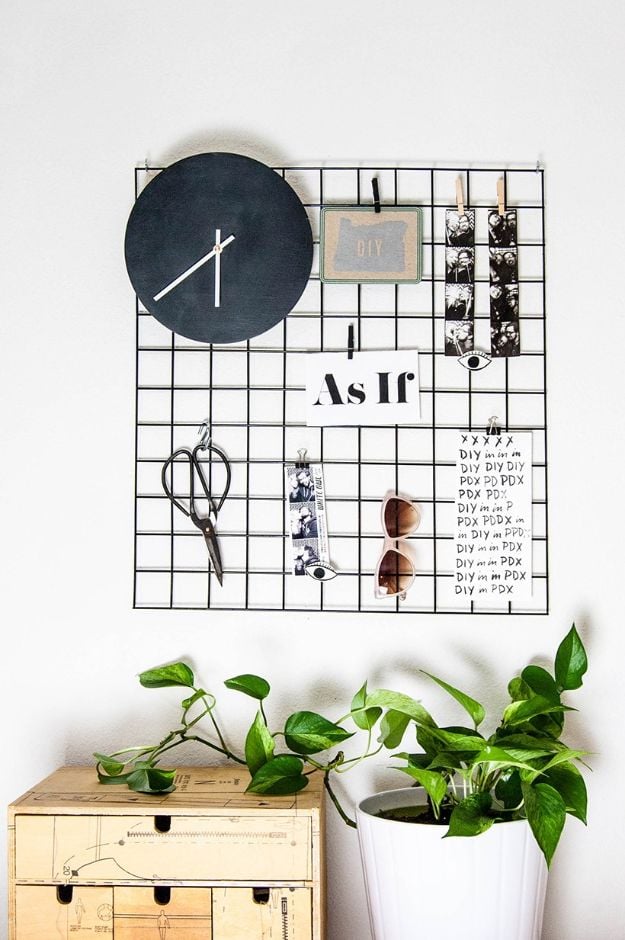
A DIY metal wall grid started as a $3 salvage find from a building reuse center. Pry off any old brackets with pliers and a screwdriver, sand away the rust and wipe it down. Several light coats of black appliance epoxy spray give it a smooth finish; spray it outside, because the smell is strong. Let it cure for 24 hours, then hang it from two cup hooks. Wire remesh, hog panels and cattle panels from farm stores work too, with 2 inch squares.
Get the full tutorial at DIY in PDX.
11. File Cabinet Makeover
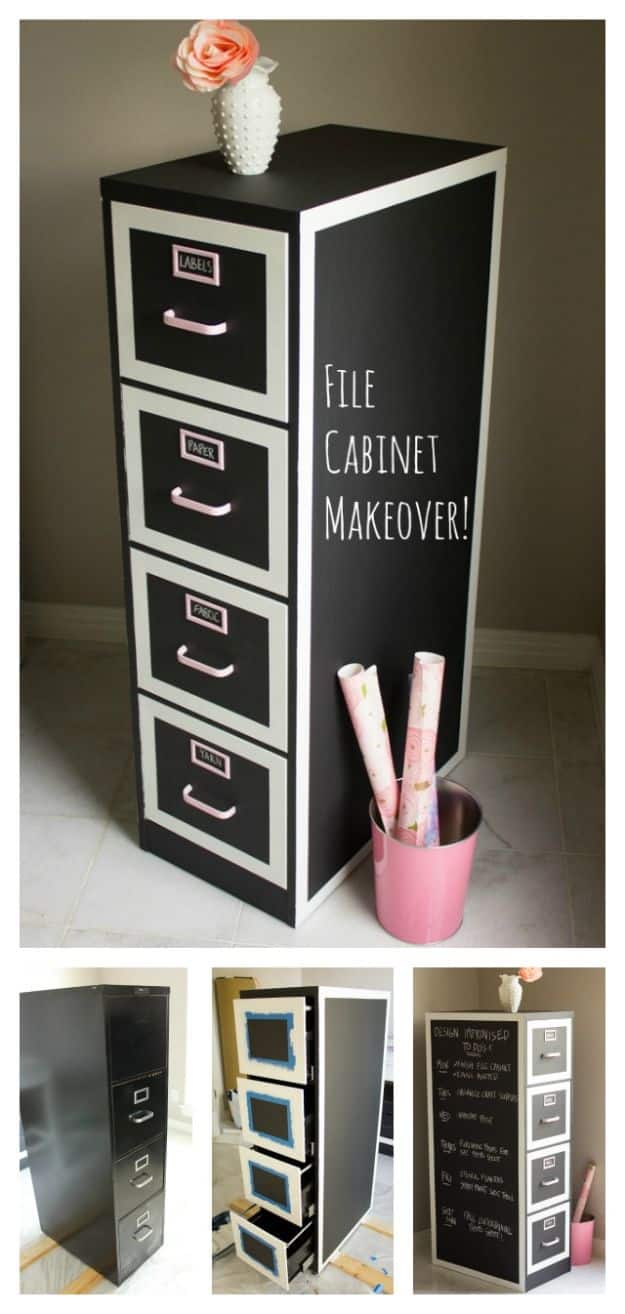
A $50 metal file cabinet from a Habitat for Humanity ReStore becomes craft storage you can write on. Remove the hardware, sand any rust and lightly scuff the whole thing, then vacuum and wipe it clean. Prime with a latex-friendly metal primer and roll on chalkboard paint, taping off white borders around each drawer. The pulls and label holders get a soft pink coat sealed with spray polyurethane. Deep drawers hold fabric and yarn, and hanging folders sort papers and stickers.
Get the full tutorial at Design Improvised.
12. DIY Framed Dry Erase Board
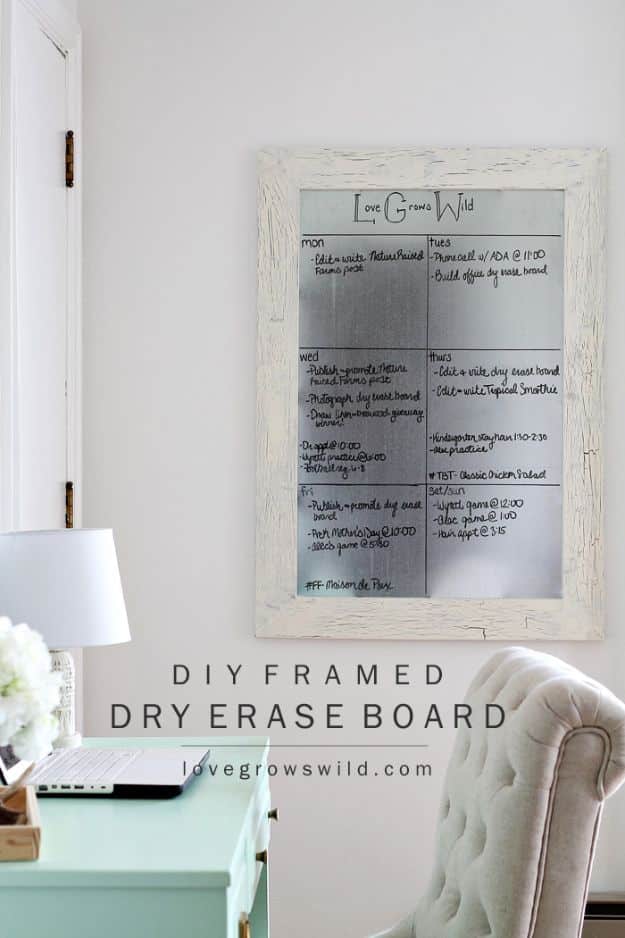
A framed dry erase board made from flat sheet metal keeps a busy family’s schedule on one wall without chalk dust. Cut 1 by 4 boards into two 42 inch and two 30 inch pieces with mitered ends, and join them with pocket holes into a frame. Fasten a 36 by 24 inch sheet of metal to the back with short sheet metal screws, so nothing pokes through the front. Finish the frame in chippy white paint over dark stain and hang it with Command strips.
Get the full tutorial at Love Grows Wild.
13. DIY Spring Craft Room Decor
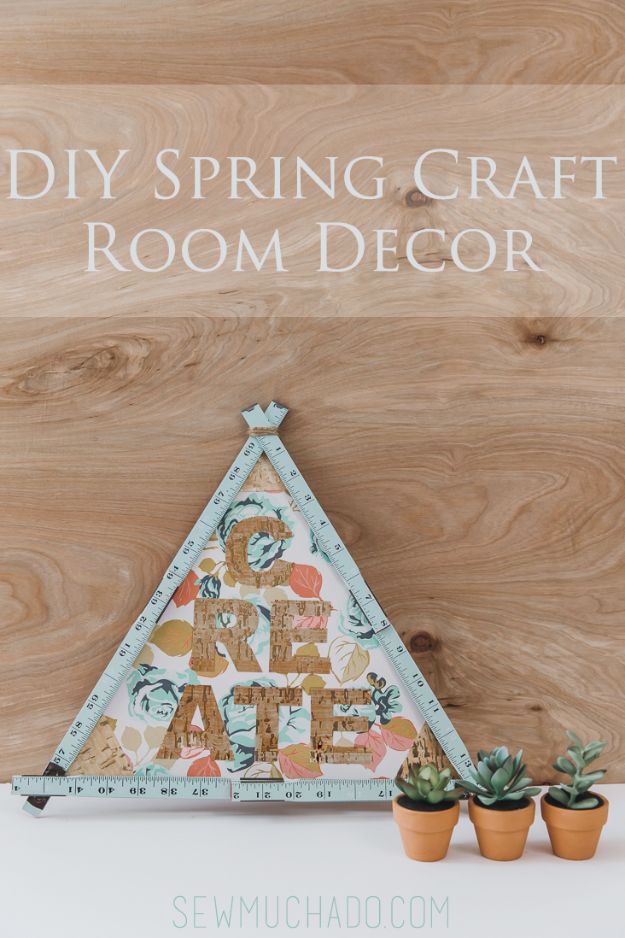
This spring craft room decor is a triangle sign built from a foldable wooden ruler. Fold the ruler into a triangle and trace the inside onto cardstock, then cover it with floral scrapbook paper. Cut the letters for CREATE from faux cork paper, either by hand from a printable or on a die cutting machine at 2.5 inches tall. Stick everything down with double sided tape and add a loop of twine or yarn for hanging. It’s done in an afternoon.
Get the full tutorial at Sew Much Ado.
14. Craft Room Storage Organization
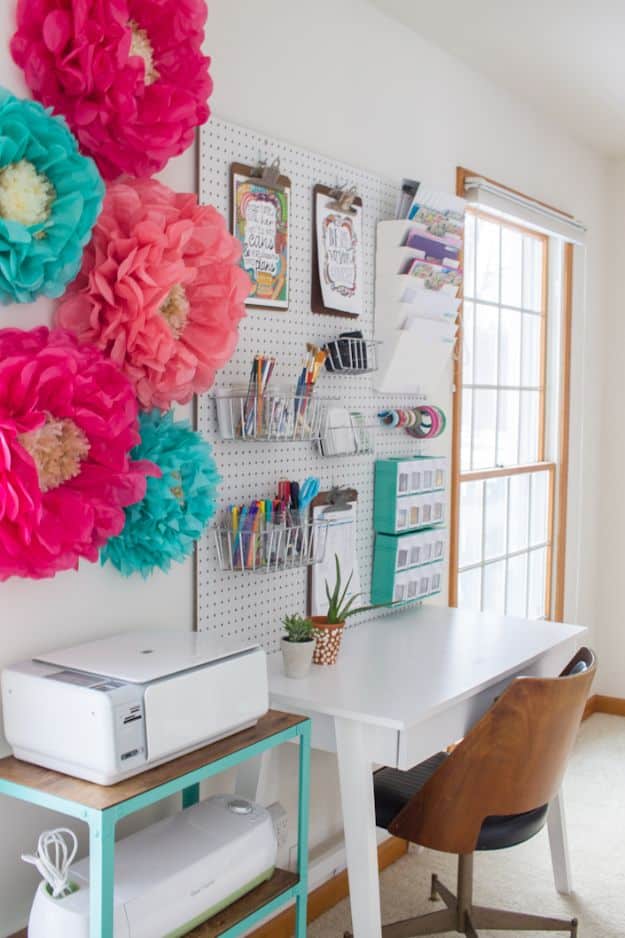
A narrow office the width of a crib still fits a full craft station with the right storage. A garage sale desk sits between two windows to catch the light, a pegboard above holds clipboards, baskets and a hanging file, and two pegboard hooks plus a rod make a washi tape holder. A rolling turquoise cart carries the printer and cutting machine, and a tiny drawer unit hangs on pegboard hooks for tacks and stamps. Big tissue paper flowers bring the color.
Get the full tutorial at White House Black Shutters.
15. Mason Jar Button Organizer
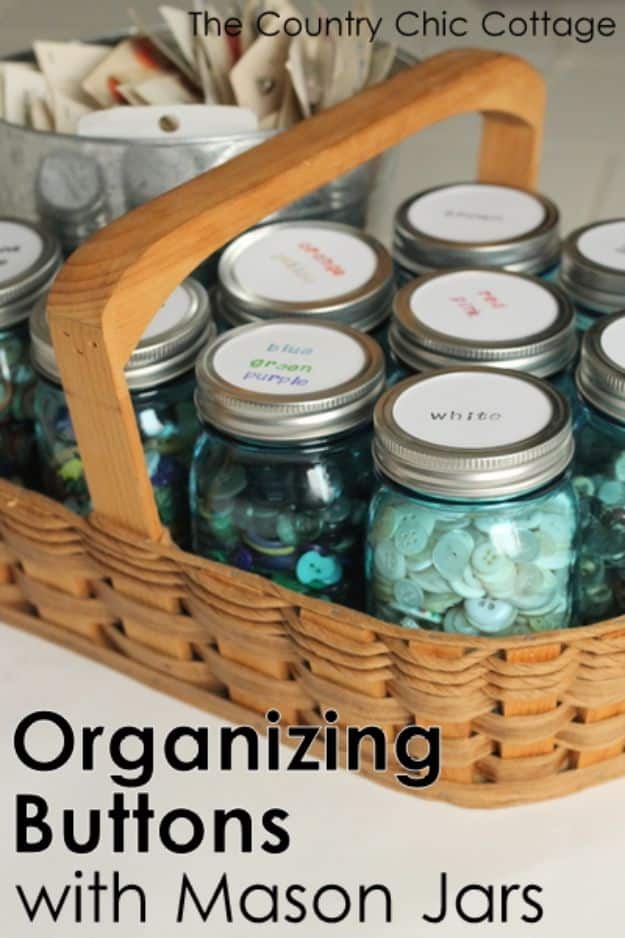
Mason jar button storage makes a messy tub of buttons easy to search. Sort buttons by color, or any way that suits how you sew, and pour each group into its own jar, saving a jar or two for special vintage cards. Cut circles of white cardstock to fit the lids and label them with stamps or markers, or let a cutting machine cut and write them. Hot glue the labels to the lids and line the jars up in a basket.
Get the full tutorial at The Country Chic Cottage.
16. Markers And Twines Organizer
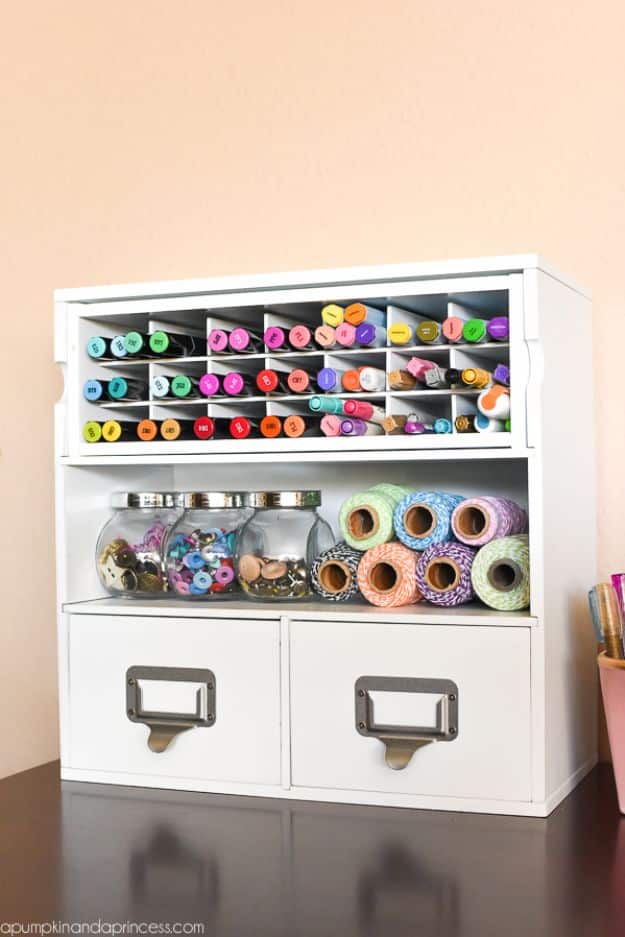
A markers and twine organizer keeps a craft desk tidy when your whole room is one corner of a bedroom. This white unit stacks a rack of small open cubbies for markers on top, a shelf with glass jars and spools of baker’s twine in the middle, and two drawers with label pulls at the bottom. Decluttering first makes all the difference here, so keep only what you use. Everything is visible and within reach of your chair.
Get the full tutorial at A Pumpkin And A Princess.
17. Craft Room Curtain
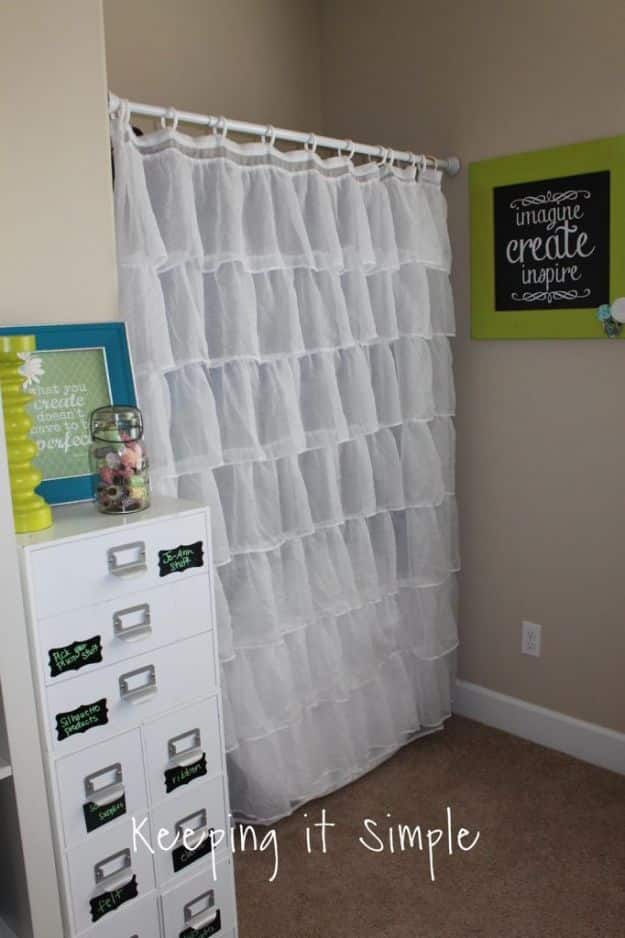
A ruffled shower curtain is the easiest way to hide a messy craft nook. Measure the opening, fit a tension rod across it and hang a white ruffle curtain with rings. Behind it, a shelving unit holds the bulky things like vinyl rolls stored flat, foam board and a photo tent, and nobody has to see it. Next to the curtain, a magnetic chalkboard and a short file cabinet with chalkboard labels keep the everyday supplies close.
Get the full tutorial at Keeping it Simple.
18. Wow Factor Craft Closet
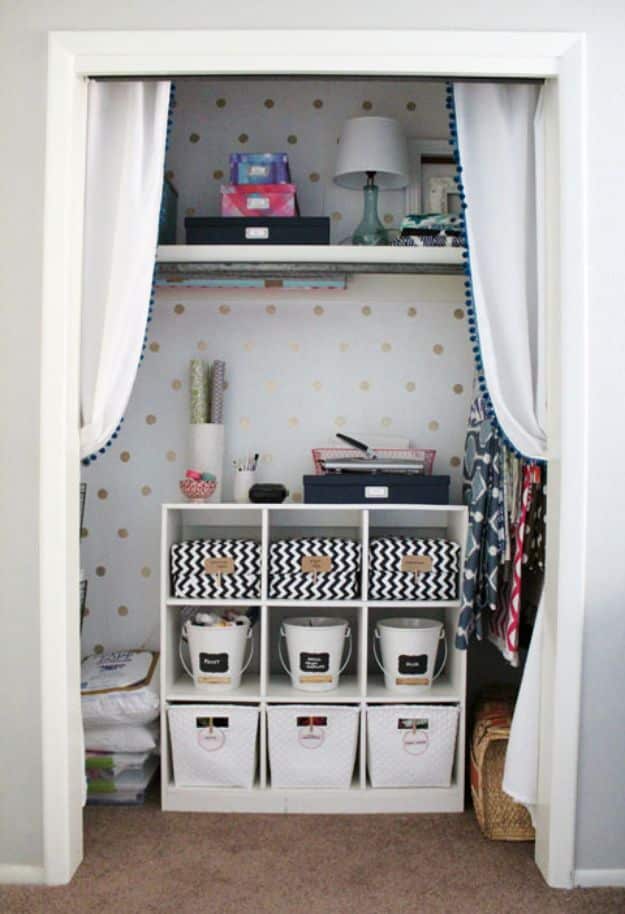
This wow factor craft closet turns a guest room closet into a shared office with room for overnight visitors. The doors come off so you can see everything at once, and a 9 cubby bookcase does most of the work with bins, buckets and baskets. Fabric hangs from the closet rod by color, printer paper sits on a wire rack and wrapping paper slides under a shelf. Polka dot walls and curtains at the opening make it feel like a room of its own.
Get the full tutorial at IHeart Organizing.
19. Paint Storage Box
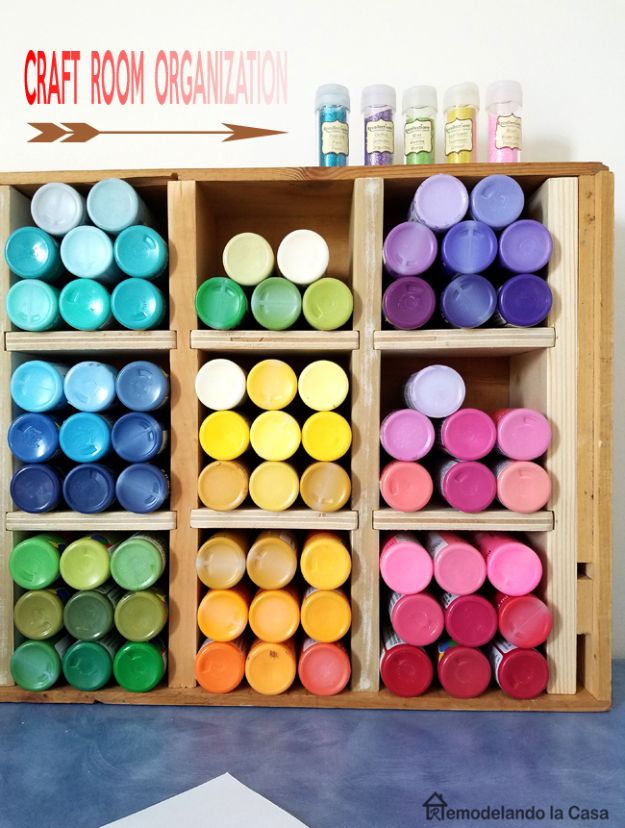
A shallow wooden wine crate becomes a paint storage box that holds every little bottle in the house. Cut scrap 1 by 4s to fit the crate, clamp them and rout dado grooves so the small shelves slide in snugly. Use a bottle as your measuring guide for the spacing. Glue and sand the pieces, then nail the ends through the crate sides. This one has twelve slots holding about nine bottles each, with room on top for glitter jars.
Get the full tutorial at Remodelando la Casa.
20. Store Craft Supplies In A Small Space
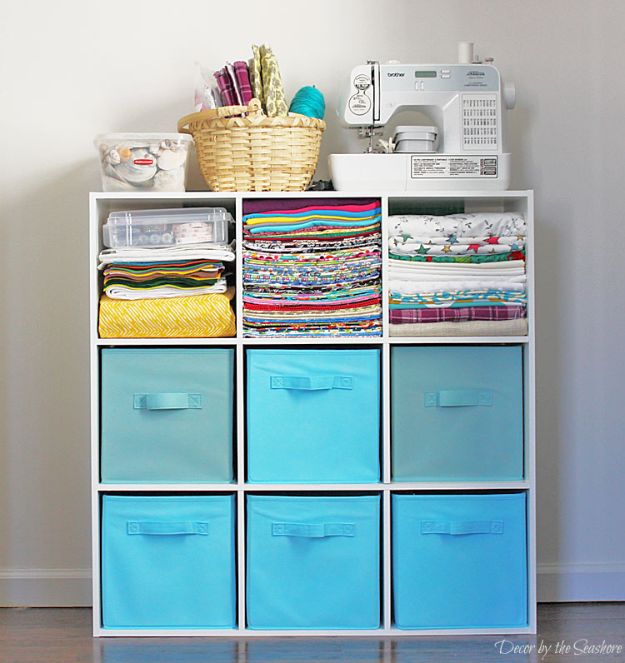
Storing craft supplies in a small space starts with a hard declutter: make the supplies fit the space, not the other way around. Measure the spot you have, even inside a closet, and choose a system to match. A nine cube organizer is a great choice since it moves easily and takes fabric drawers, bins or baskets. Clear plastic bins tuck into nooks if a shelf won’t fit. Then arrange everything so the things you use most sit at eye level.
Get the full tutorial at Decor by the Seashore.
21. Metal Slat Wall Pack
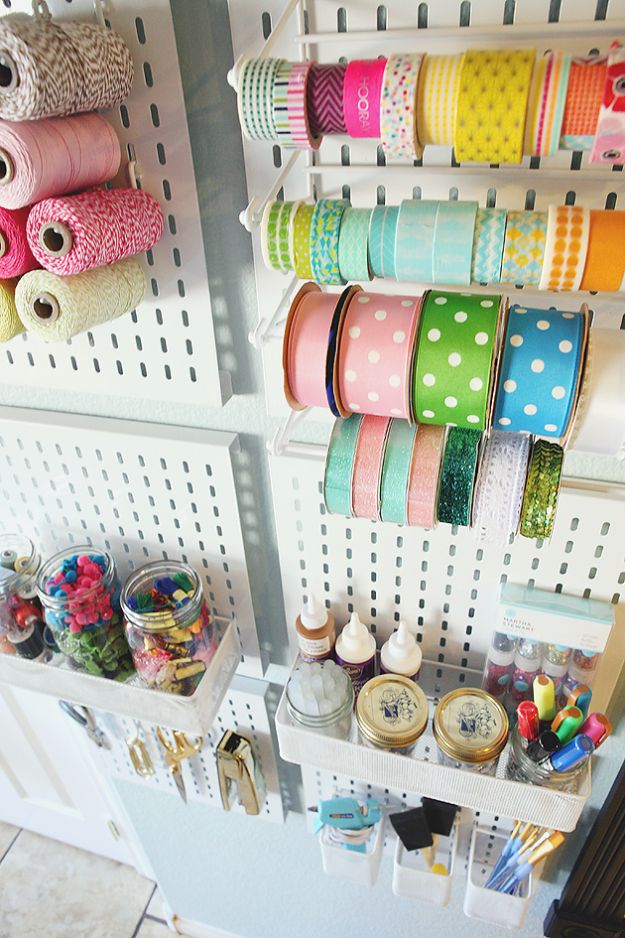
A metal slat wall pack moves craft supplies off the counter and onto the wall, which is ideal when your craft area is the kitchen. Six slats make a panel about as tall as a dry erase board. Twine spools sit on peg hooks, washi tape and ribbon slide onto a removable ribbon bar, and J hooks hold the hole punch, scissors and stapler. Mason jars go in large metal baskets, while pencil baskets catch brushes and the glue gun.
Get the full tutorial at Eighteen25.
22. Measuring Tape On Your Craft Desk
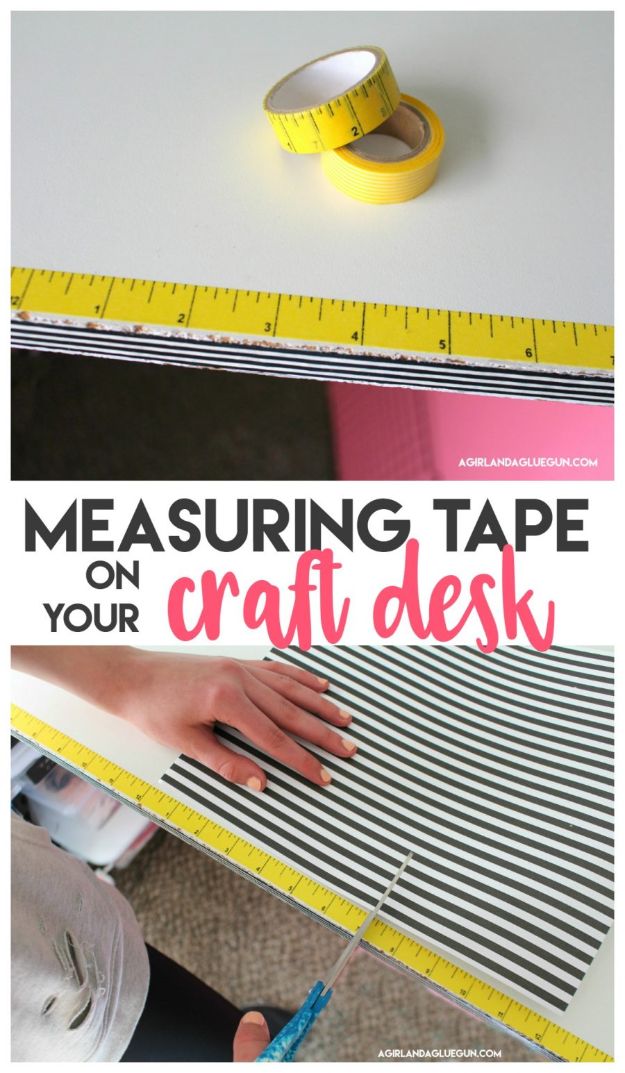
Putting a measuring tape on your craft desk takes about thirty seconds with ruler print washi tape. Run a strip along the front edge of your desk, right where you cut vinyl, paper and fabric, and you’ll always know how big a piece is without hunting for a ruler. Before you stick it down, check the marks against a real ruler, since some decorative tapes aren’t truly an inch apart. Striped washi down the side adds a fun finish.
Get the full tutorial at A girl and a glue gun.
23. DIY Striped Doorway
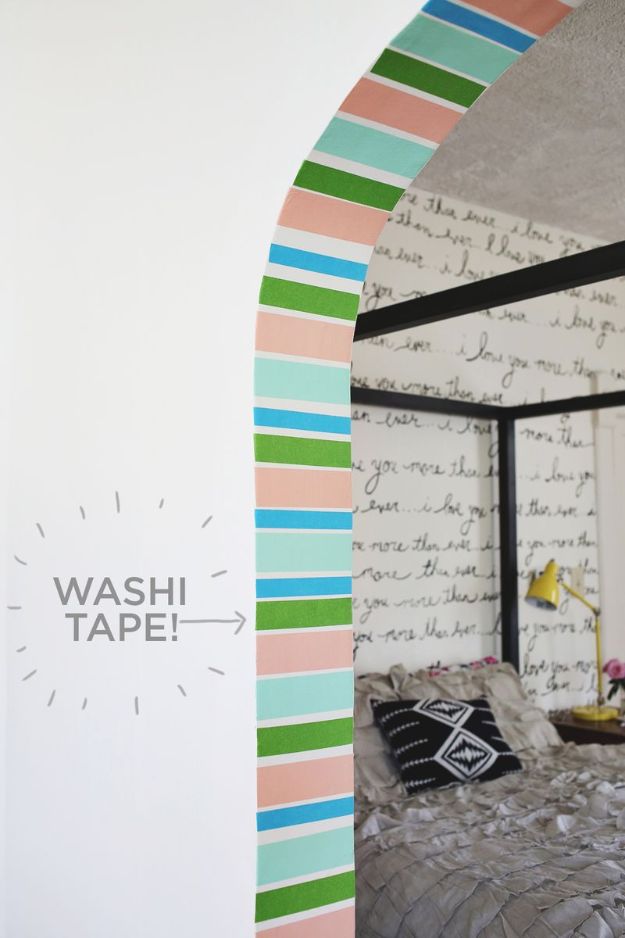
A DIY striped doorway uses extra wide washi tape to add color around an arch, and it’s totally renter friendly. Pick two or three colors, like salmon and mint, plus some painter’s tape for a neutral stripe. Cut pieces long enough to wrap the depth of the doorway and lay them side by side, alternating colors and trimming the edges with scissors. Plan on a few hours and nearly a full roll of each color. It peels off whenever you want a change.
Get the full tutorial at A Beautiful Mess.
24. Storage Hutch Makeover
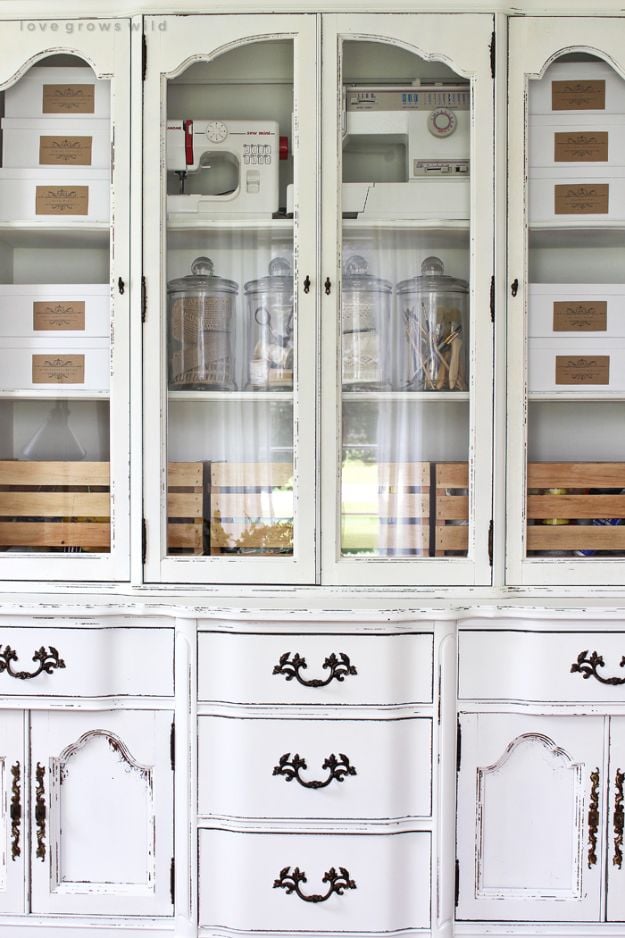
A dark, dated china hutch becomes bright craft and office storage with a paint sprayer and chalky paint. Spraying is far faster than brushing all those curves and grooves, and a detail sprayer gives a smooth finish on furniture. Thin the chalk paint a little if it struggles to flow, and test on scrap first. Once it’s white and distressed, fill the glass cabinets with jars and labeled boxes, and use the drawers for sewing notions.
Get the full tutorial at Love Grows Wild.
25. Guest Room and Craft Room Combo
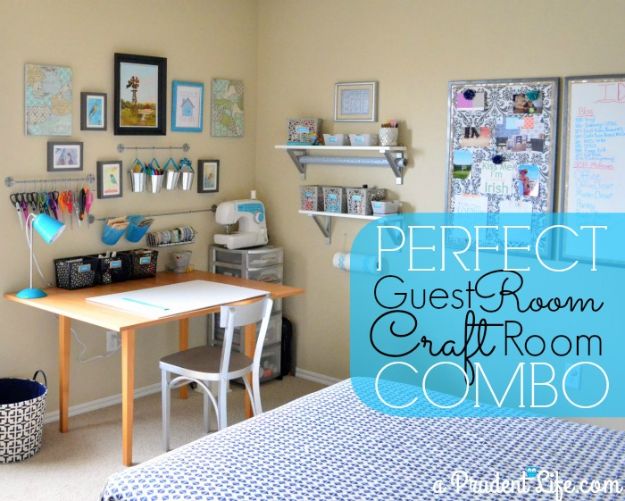
A guest room and craft room combo works when the supplies you use most stay neat and easy to grab. Two small wall shelves with dollar spot baskets hold acrylic paints sorted into neutral, light and dark bins, with labels in silver bookplates. A bucket gathers every kind of glue in one place. Spray paint the frame of a plastic drawer unit silver for brushes and tape, and hang a rod with pails for scissors and punches.
Get the full tutorial at Polished Habitat.
26. Craft Closet Makeover
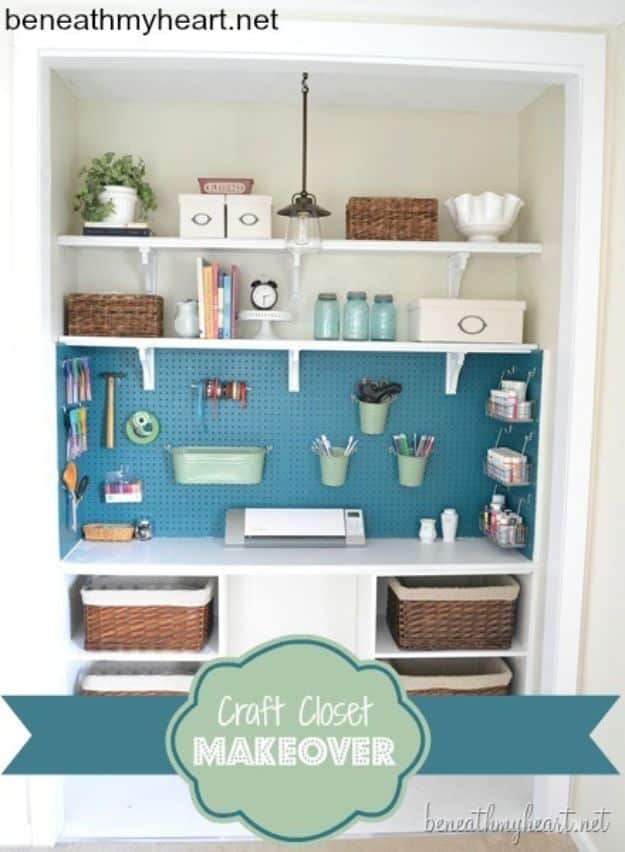
This craft closet makeover opens up a regular bedroom closet by taking off the header, so the top shelf is easy to reach and it feels less like a closet. Paint the walls to match the room, then line the back and sides with pegboard in a bold color like Caribbean blue. Build shelf frames on each side to hold baskets, set a shelf on top of the pegboard with white corbels and add a pendant light. A pegboard kit holds the tools.
Get the full tutorial at Beneath My Heart.
27. Framed Peg Board
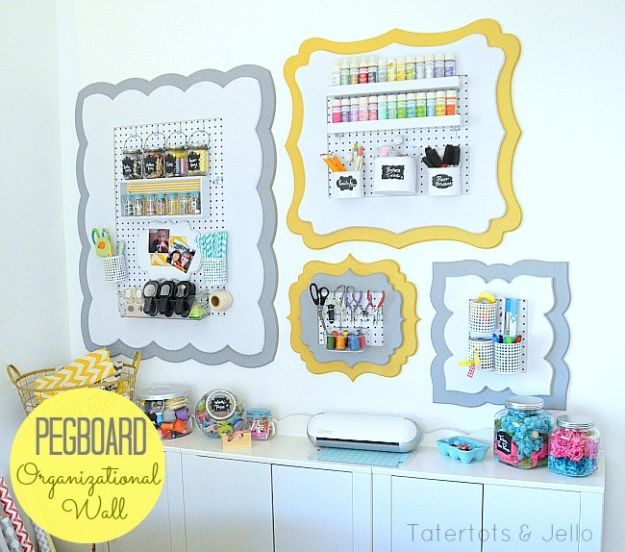
A framed peg board wall mixes plain pegboard with curvy decorative frames for something much prettier than a garage tool wall. Trace the frames onto paper and tape the paper to the wall to plan the layout before drilling. Paint the frames in gray, white and yellow, have the hardware store cut white pegboard to size and pop it into each frame. Add hooks, little wood shelves for paint, white painted pails with chalkboard labels and ceramic knobs.
Get the full tutorial at Tatertots and Jello.
28. DIY Yarn Shelf
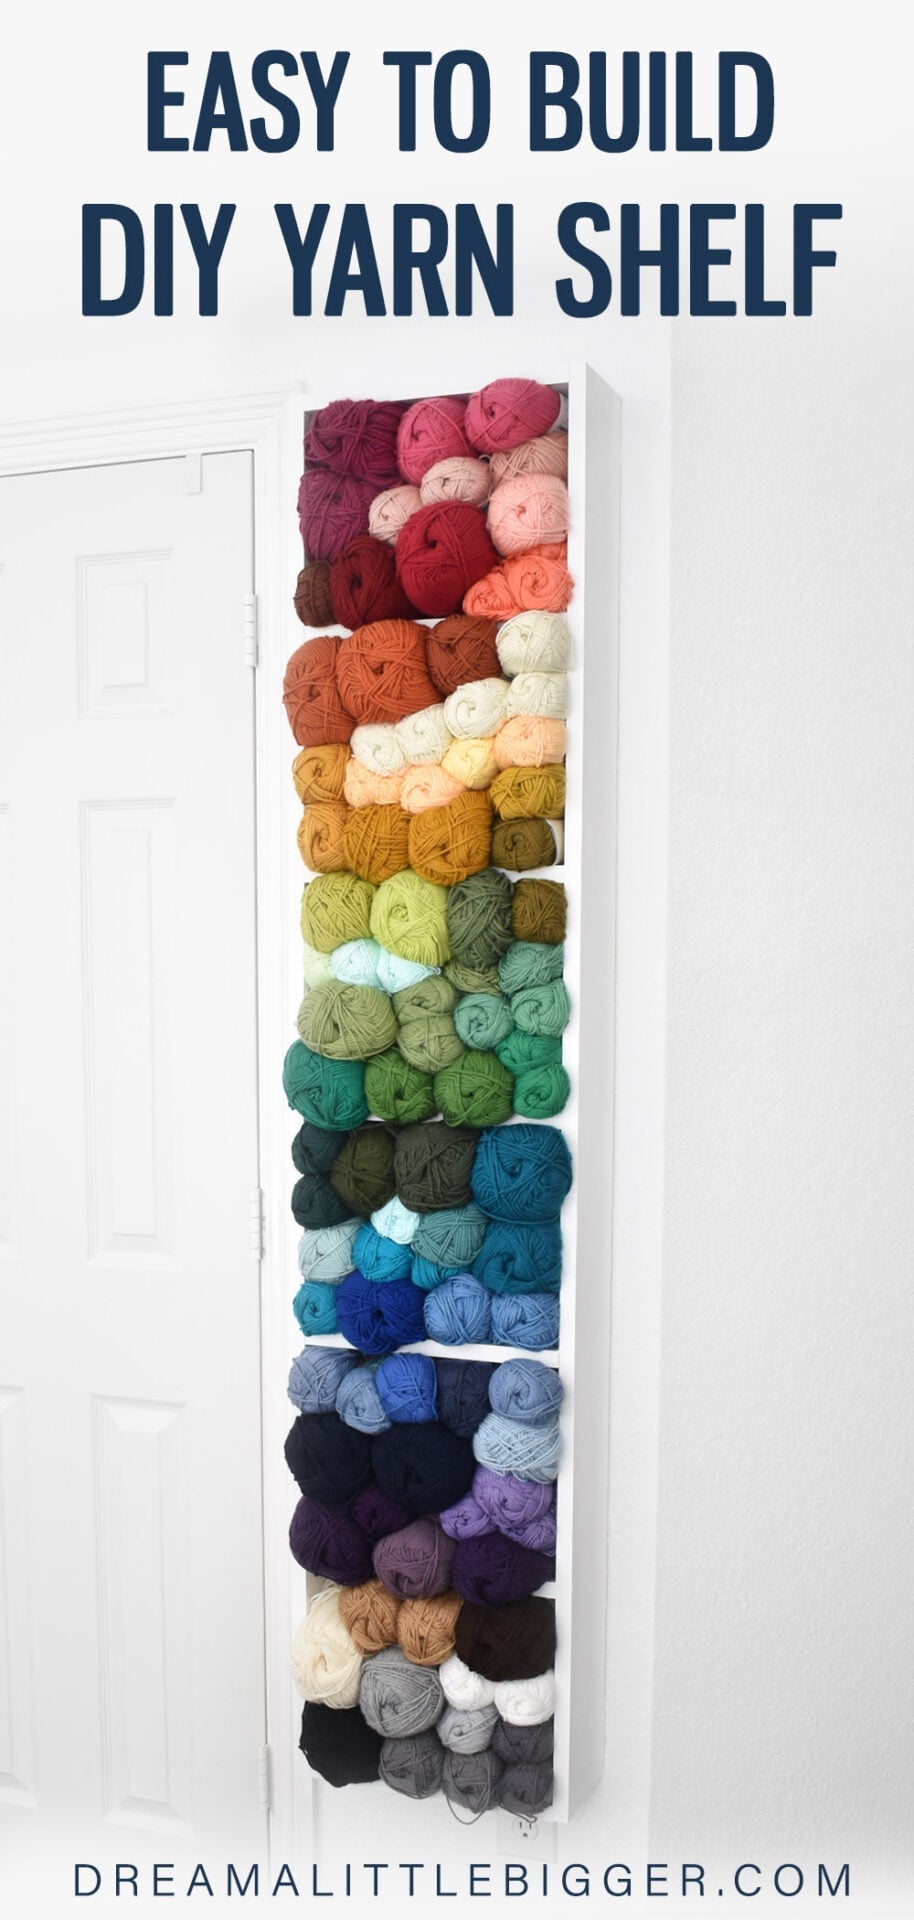
Is your yarn stash hiding in plastic tubs where you forget what you own? This wall-hung yarn shelf puts every skein front and center, so you stop buying colors you already have. It’s 65 inches tall, 14 inches wide and just under 6 inches deep, built from 1×6 boards with five shelves glued and screwed in place. Two 1×3 supports on the back let you hang it on the wall, even on your own. It takes a little over an hour of hands-on time. Perfect for crocheters and knitters with a rainbow stash!
Get the full tutorial at Dream a Little Bigger.
29. Vertical Wrapping Paper Storage
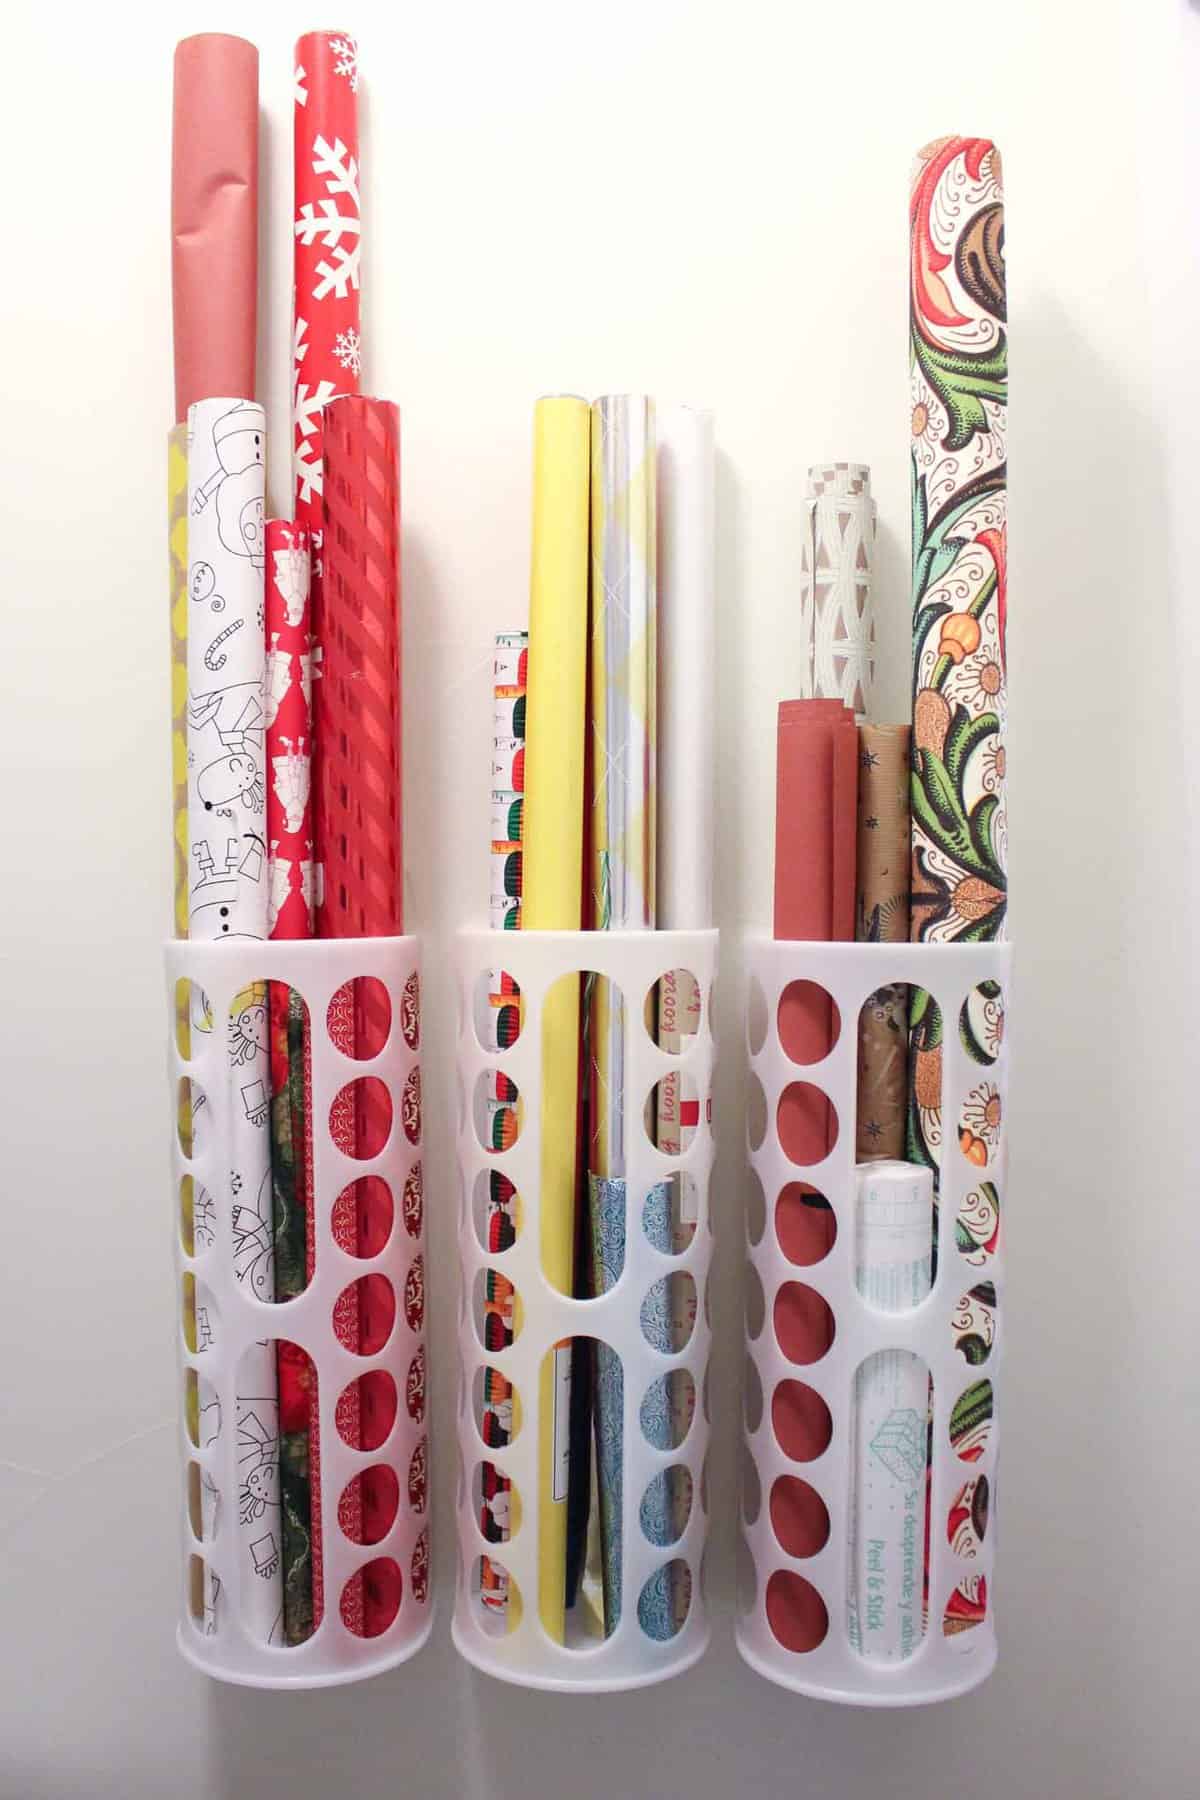
Tired of wrapping paper rolls tipping over every time you open the closet? Here’s a fix that takes just a few minutes. The trick is IKEA’s VARIERA plastic bag dispensers mounted on the wall. Mark your screw spots 3.75 inches apart for each one, leave room so the dispensers fit side by side, then drill and hang. Each dispenser holds about seven regular rolls standing upright. You can tuck it behind a door or in a small closet nook, and it works for dowels and other tall craft supplies too!
Get the full tutorial at Make and Do Crew.
30. Thrift Store Ribbon Holder
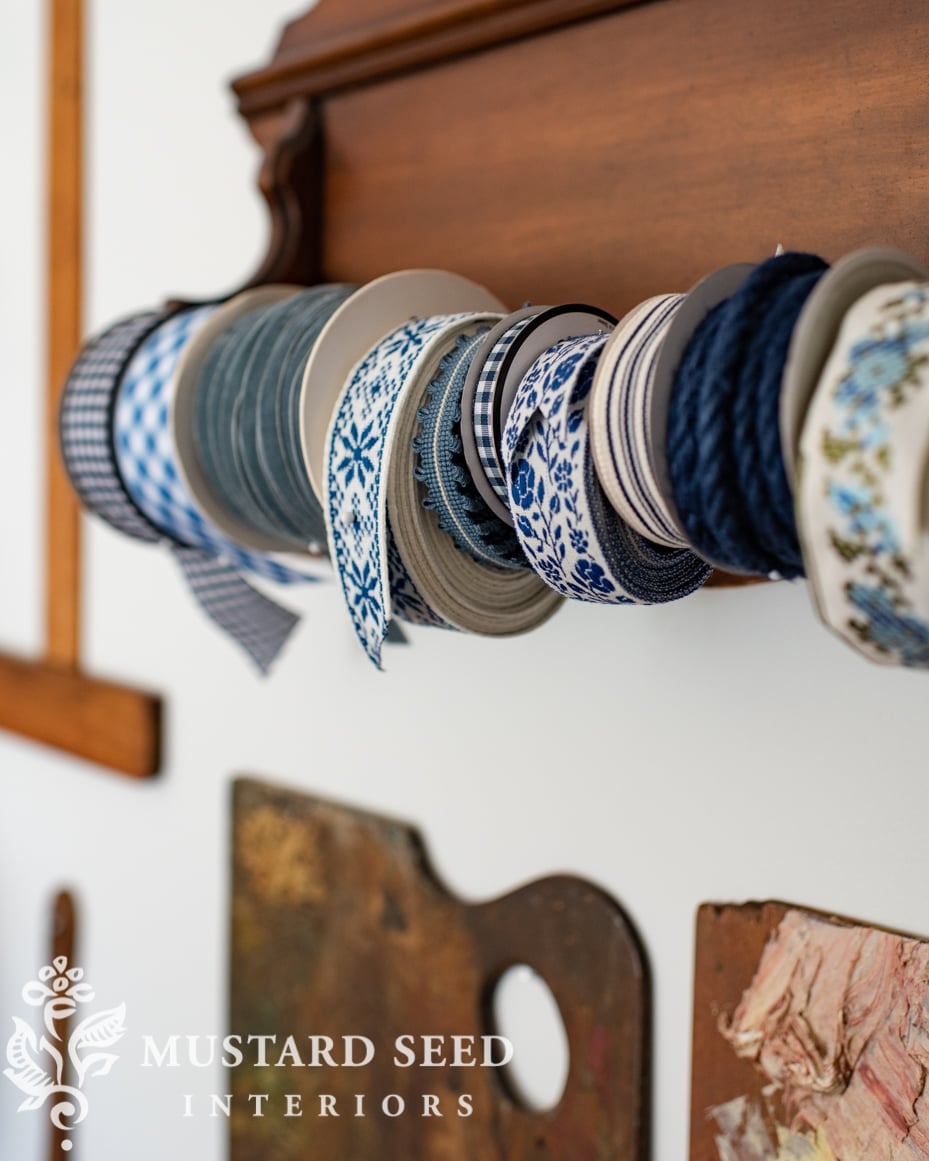
Ribbon that comes wrapped on a flat card is so hard to store, right? This clever idea turns a thrifted wooden towel rack into a pretty ribbon holder. Make your own spools by cutting slices of an empty paper towel roll to the width of each ribbon, wind the ribbon on and pin the end so it won’t unravel. Then slide the spools onto the rod and hang it on the wall. It’s quick, it’s free with things you already have, and it shows off your favorite patterns!
Get the full tutorial at Miss Mustard Seed.
31. Fabric Covered Bulletin Board Cabinet Doors
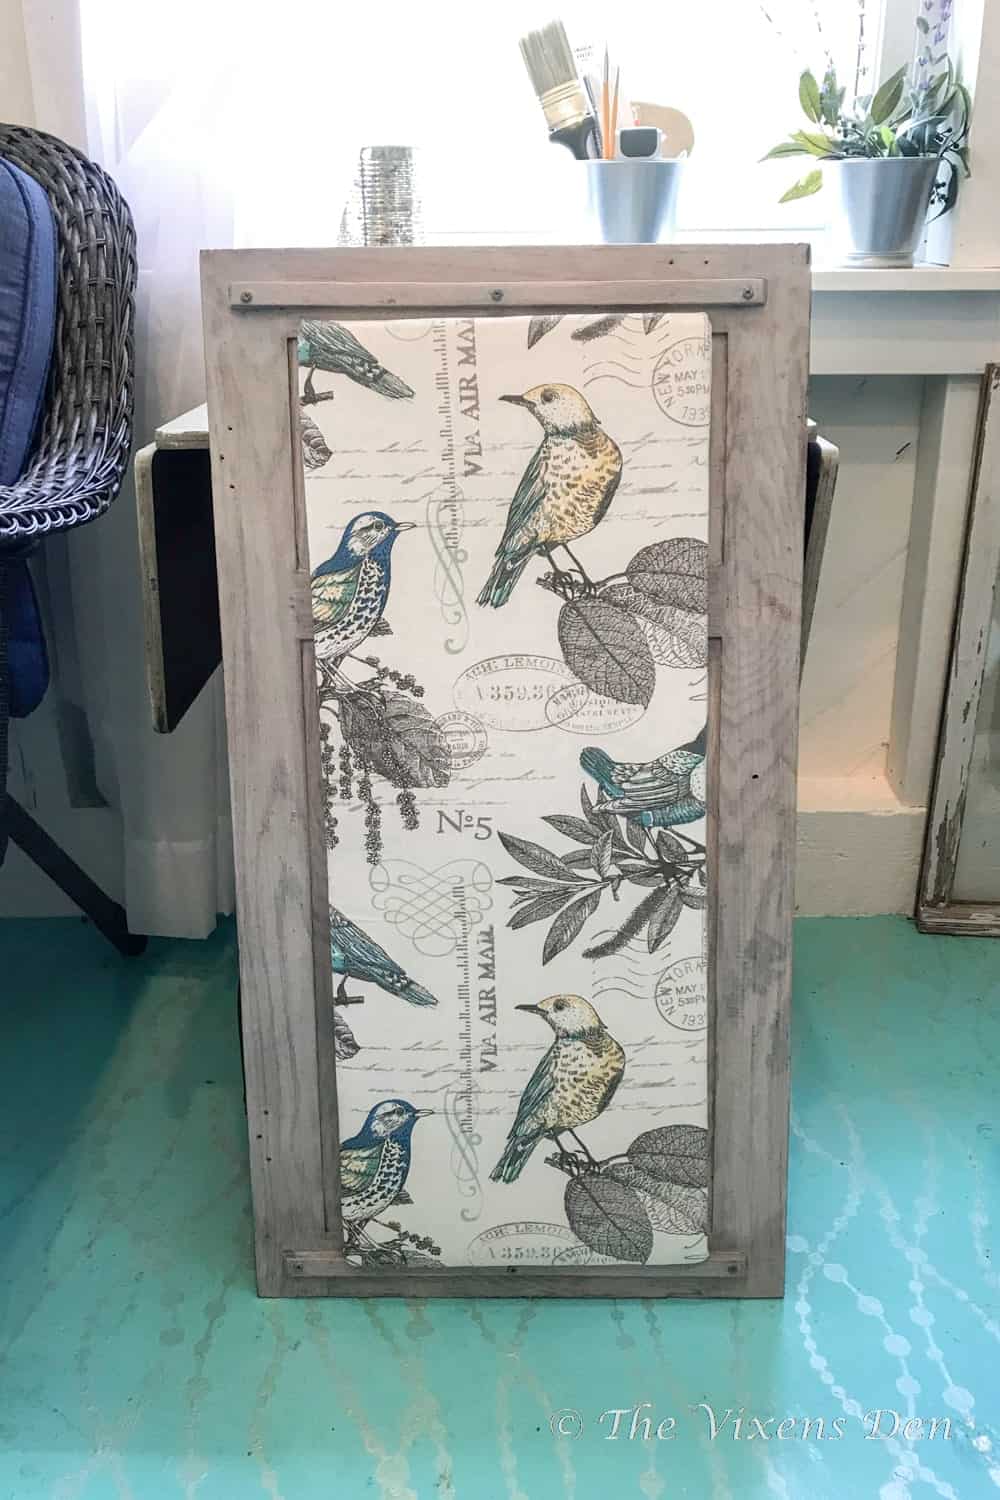
Got an old corkboard from the thrift store? Give it a glow-up and mount it inside your craft cabinet doors! Cut the corkboard to fit, glue it to a backing of 1/4 inch craft plywood, then add a layer of quilt batting. Wrap pretty fabric around it, folding the edges twice before stapling so it stays snug. Upholstery tacks and crisscrossed hemp cord make a spot to tuck photos and paint swatches. Brad nails hold it in the door frame and disappear into the fabric. Pins and notes finally have a home!
Get the full tutorial at The Vixen's Den Studio.
32. Sewing Machine Table Desk
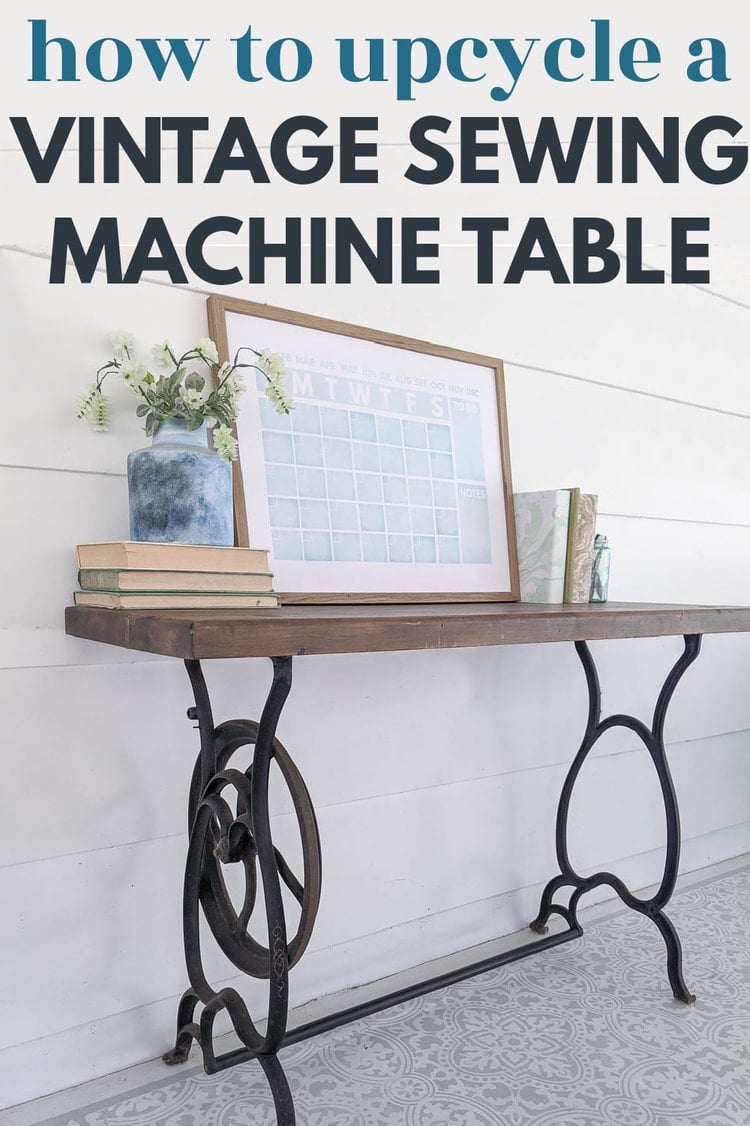
Spotted an old sewing machine table at a yard sale? Those cast iron legs make a gorgeous base for a craft desk! Take off everything except the legs, then add a new top. An old bench, a coffee table top, butcher block, live edge lumber or even plywood all work. Sand off the old finish, stain it and seal it, then screw the legs on through the original holes. A 1 inch dowel painted black adds a crosspiece if it wobbles. Perfect for a laptop, a sewing corner or an entryway!
Get the full tutorial at Lovely Etc.
33. Paint Storage Dresser
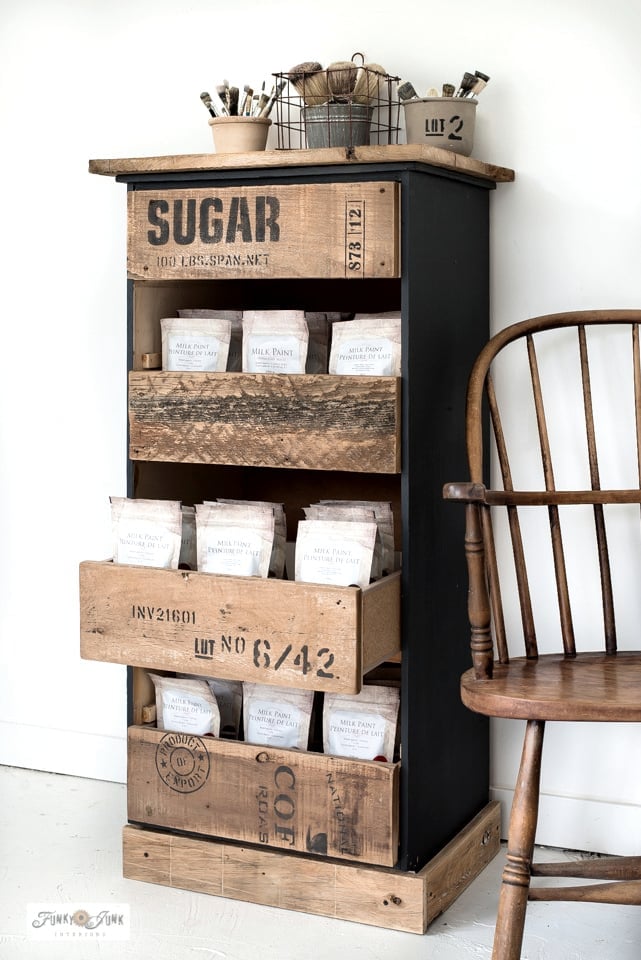
Need a spot for tall bags or jars of paint that keep tipping over? A tall, skinny curbside dresser becomes paint storage here. Remove every other drawer and the wood strips above them so tall bags stand upright. Screw reclaimed wood planks onto the remaining drawer fronts, add more wood trim along the top and bottom, then paint the frame a deep gray. Finish with crate and pallet stencils on each drawer front. It works for any supplies you want to keep in sight and looks like stacked vintage crates!
Get the full tutorial at Funky Junk Interiors.
34. Sewing Mat Organizer
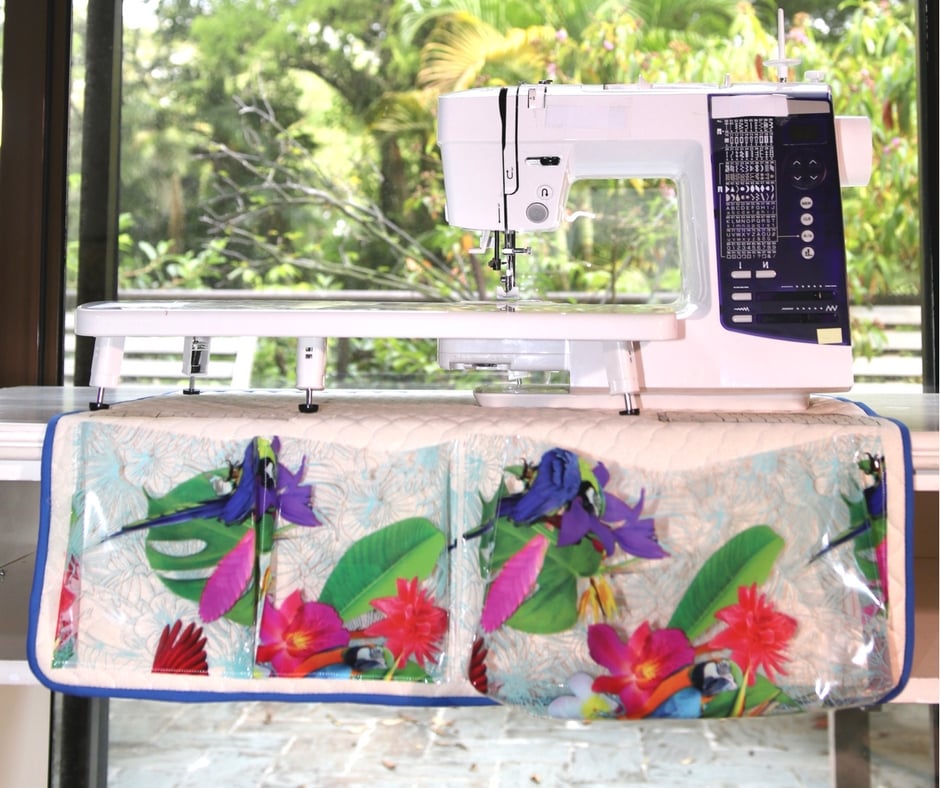
Always hunting for bobbins, presser feet and seam rippers? This sewing mat sits under your machine and keeps it all in reach. It’s made from 3/4 yard of quilted cotton, bias tape and clear vinyl. One vinyl pocket stays open as a scrap catcher, and a pleated pocket holds your scissors and tape measure. A ruler and a needle chart are ironed on with T-shirt transfer paper so you always know which needle is which. The free pattern download and the sewing steps are right on the page!
Get the full tutorial at So Sew Easy.
35. Vintage Soda Crate Washi Tape Storage
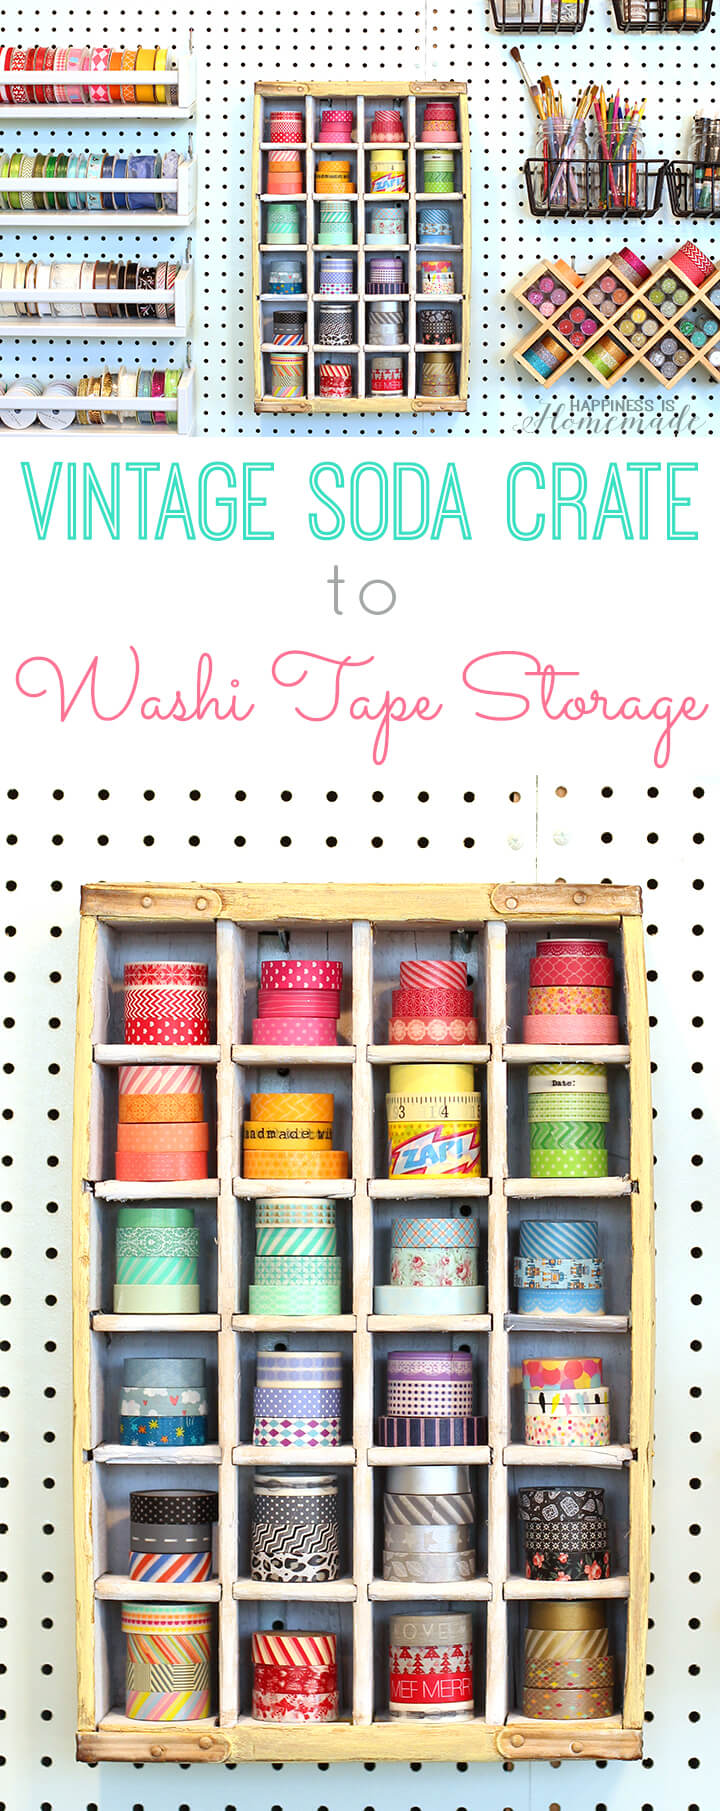
Got a pile of washi tape rolling around your craft desk? An old wooden soda crate is the answer! Those little cubbies are just the right size for a roll of tape each. Clean the crate well, sand it smooth, then spray paint the inside white so your colors pop. Repaint the outside with chalky paint and rub on a dark wax to bring out the old lettering. Hang it on a pegboard or the wall and your whole collection is on display. A yard sale find turned into the cutest storage!
Get the full tutorial at Happiness is Homemade.
36. Upcycled Desk Organizers
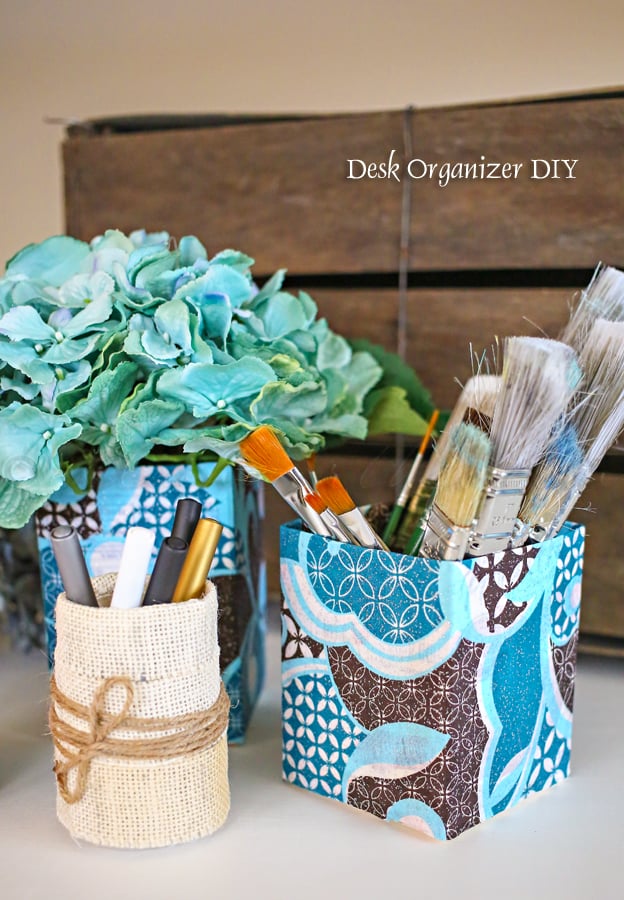
Don’t toss those empty creamer bottles and cartons! They make the best desk organizers for paint brushes, markers and pencils. Cut the tops off, then hot glue burlap around the round bottles and finish them with a few wraps of sisal twine. For the square cartons, brush on Mod Podge, press fabric all the way around, fold the top edge in and seal it with another coat. Mix and match a few sizes and your craft table instantly looks tidier. Free storage made from recycling!
Get the full tutorial at Yummi Haus.
37. String Art Office Organizer Board
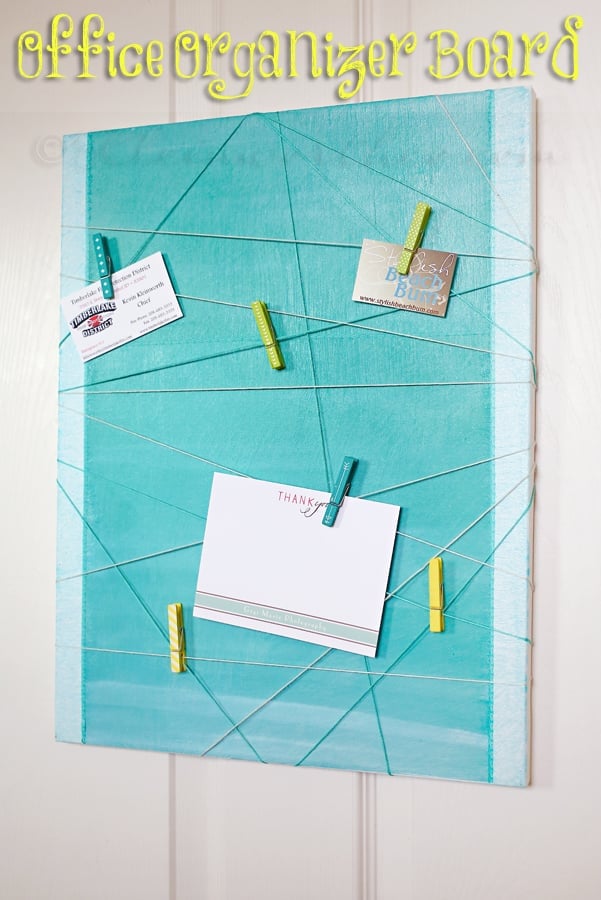
Need a pretty spot for notes, photos and paint swatches? This organizer board starts with a plain canvas. Mod Podge two sheets of scrapbook paper onto the front, trim the edges and seal it with a tinted Mod Podge for a watercolor look. Tape over the seams, then tap small finishing nails around the back edges. Tie on embroidery floss and zigzag it from nail to nail in a random pattern. Clip everything on with mini clothespins. It’s colorful, cheap and so easy to change up!
Get the full tutorial at Yummi Haus.
38. Wall Mounted Ribbon Rack
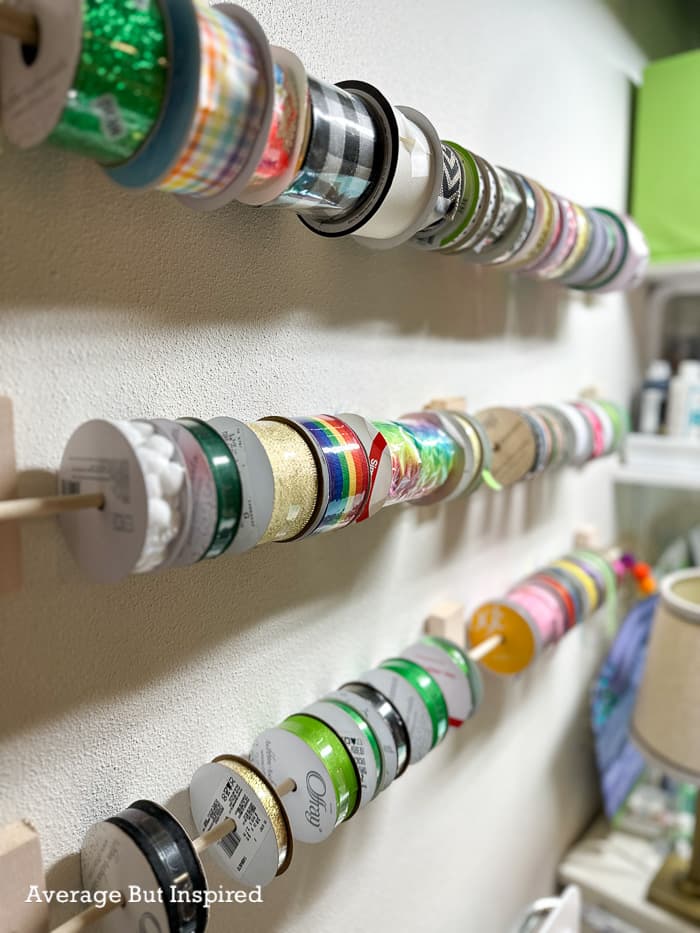
Is your ribbon stash one big tangle in a box? This wall rack fixes that fast! Cut long wooden dowels to fit your wall space and cut a 1×2 board into small 3 inch blocks. Paint the blocks first, then screw an eye hook into each one. Slide your ribbon spools onto the dowels, thread the ends through the hooks and stick the blocks to the wall with picture hanging strips. Pick dowels that fit your smallest and largest spool holes. Every color is right there when you need it!
Get the full tutorial at Average But Inspired.
39. Spinning Art Supply Caddy
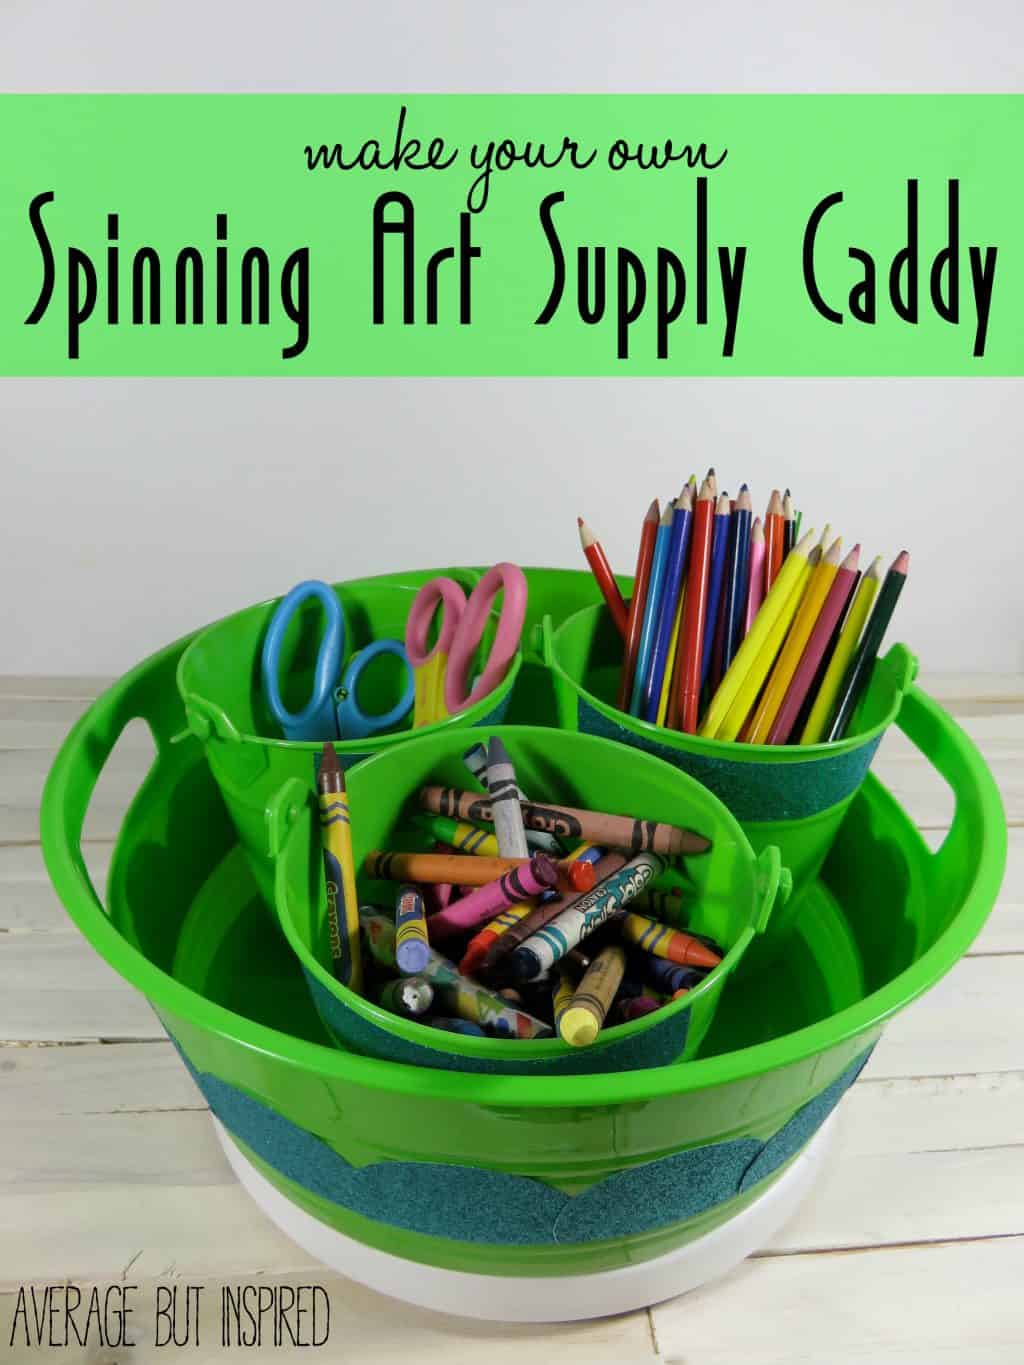
Want crayons, markers and scissors within reach for everyone at the table? Make a spinning caddy! Start with a wide dollar store bucket and a few small buckets that sit inside it. Dress up the outside with glitter tape cut into scallops with a circle punch. Stick hook and loop dots around a lazy Susan and press the bucket on top, so you can lift it off any time. Now everyone just spins to grab what they need. Perfect for a family craft corner or homework station!
Get the full tutorial at Average But Inspired.
40. Cardboard Box Fabric Wall Organizer
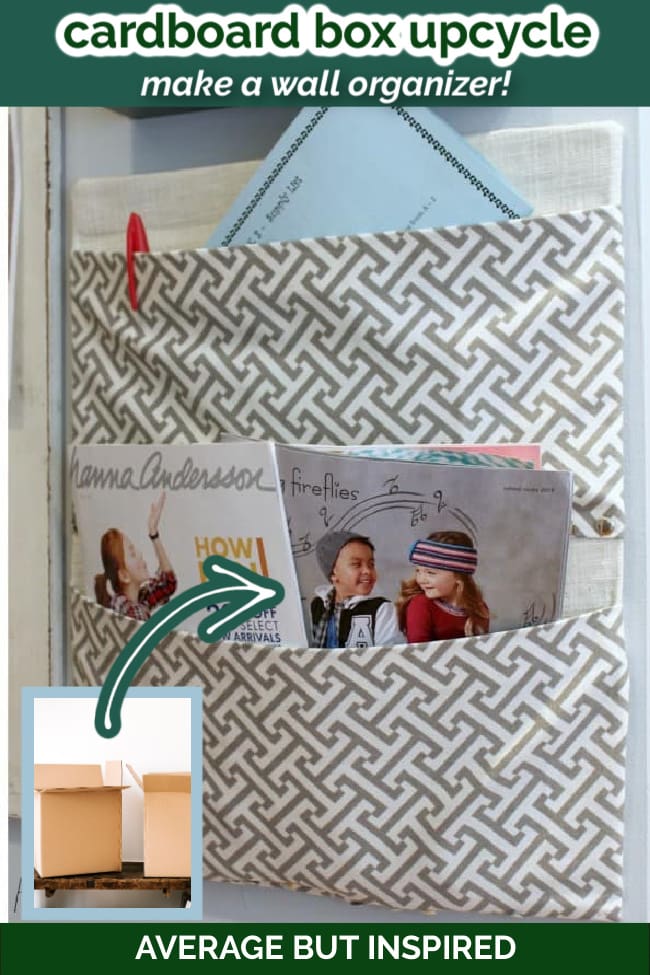
Drowning in shipping boxes? Turn one into a fabric wall organizer! Cut a flat piece of cardboard for the base, spray it with adhesive and smooth fabric over it, then snip the corners and hot glue the extra fabric to the back. Fold and iron the edges of two fabric strips to make pockets, glue them across the base and hang it with picture hanging strips. It’s great for patterns, papers, catalogs and notebooks in a craft room. Cute, free and so simple!
Get the full tutorial at Average But Inspired.
41. Wooden Crate Yarn Storage Shelves
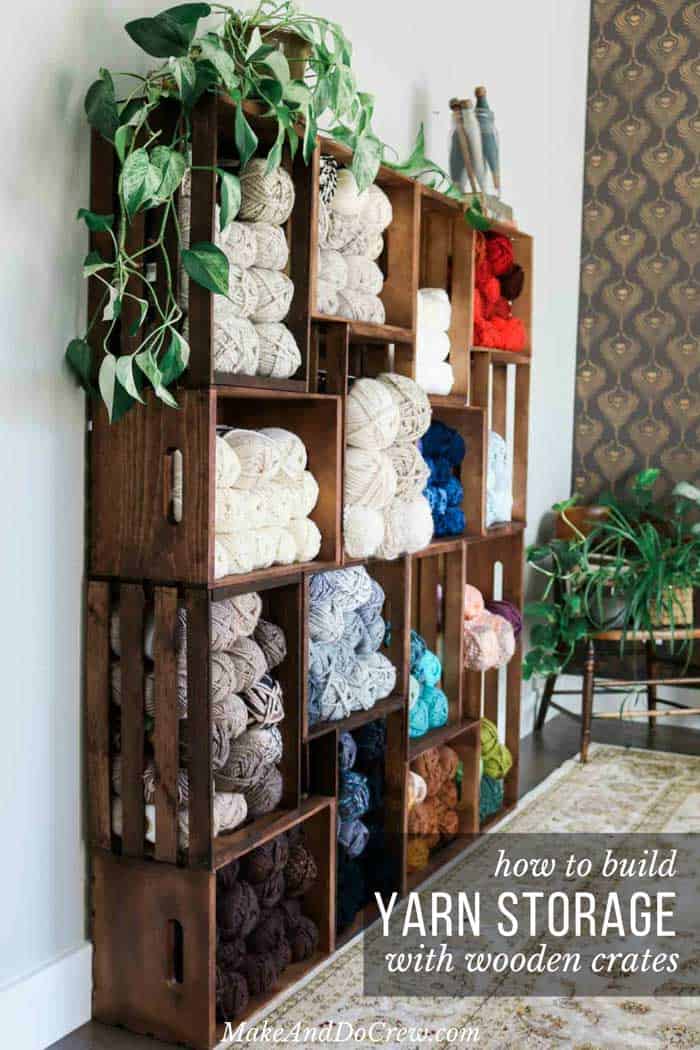
Is yarn taking over every room in your house? Stack wooden craft store crates into a custom shelf! Arrange the crates in any layout that fits your wall, then join them with zip ties for the quick version or screws for a sturdier one. Anchor the finished shelf to the wall so it can’t tip. Fill each crate with skeins sorted by color or weight and you’ll see your whole stash at a glance. It works just as well as a bookshelf too. So pretty and so practical!
Get the full tutorial at Make and Do Crew.






