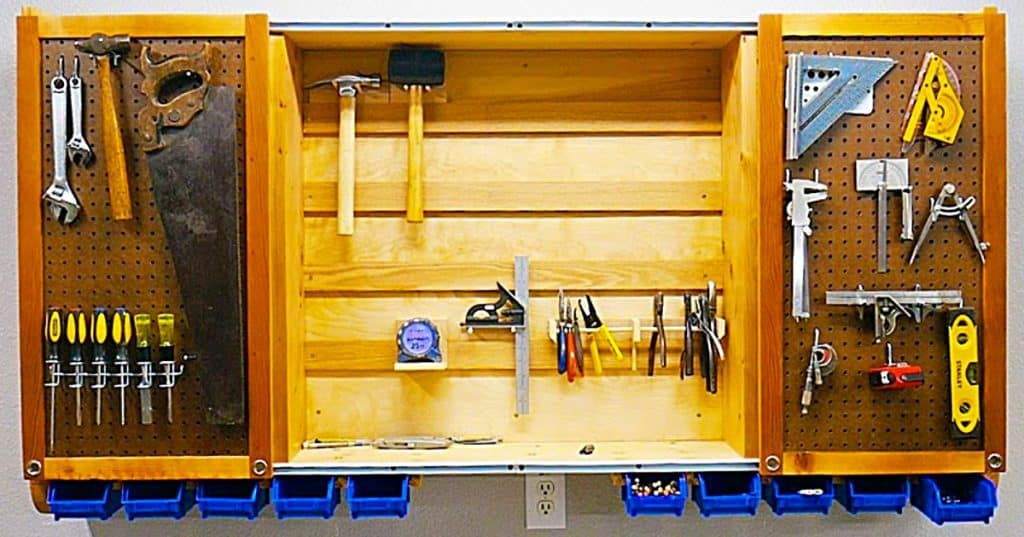
My husband had a huge array of tools in the garage and had them sorted in nifty tool chests and I really wanted a separate tool area where I could just house my crafting tools that would be completely separate from his tools so there would never be any confusion over who used what tools and did not put them up in the correct location. When I saw this awesome wall mounted sliding door tool cabinet idea on Youtube, I realized I had found the perfect answer to this age-old dilemma and I couldn’t wait to get started on this project. I started by collecting everything I was going to need to build this awesome wall mounted sliding door tool cabinet.
Materials:
- Wood (2 x 4″) and (1 x 4) planks
- A Drill
- A Saw
- Wood glue
- Peg Board
- Hinges
Directions:
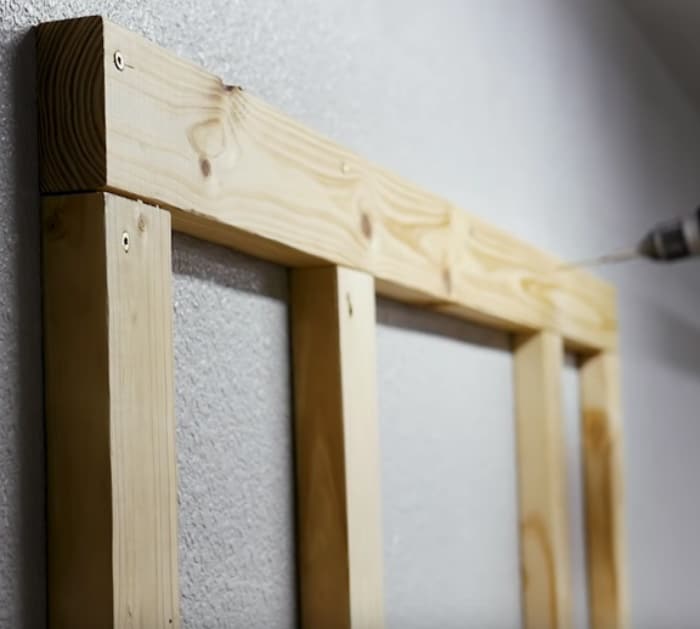
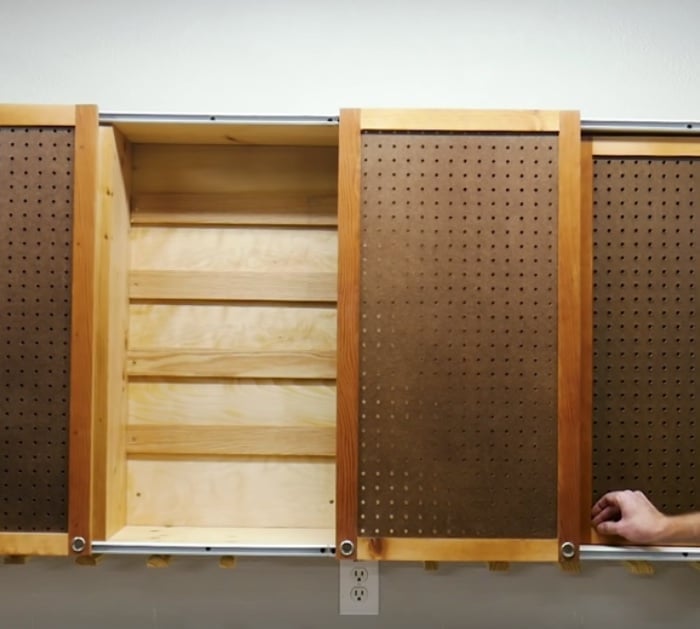
First, mount your (2 x 4″) frame onto the wall space you have designated for your sliding door tool case cabinet.
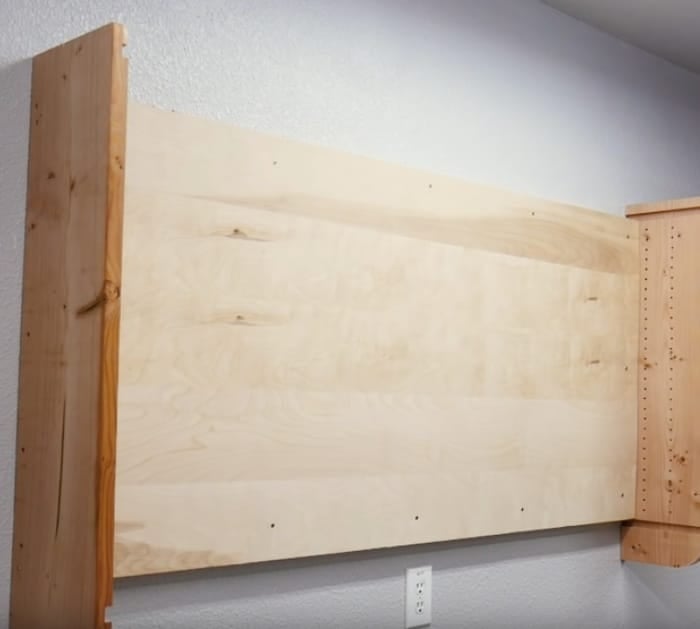
Then mount plywood backing and sides with pre drilled holes.
Then make your doors with pegboard inserts as per instructions in the video and attach them to your wall unit with these double sided hinges.
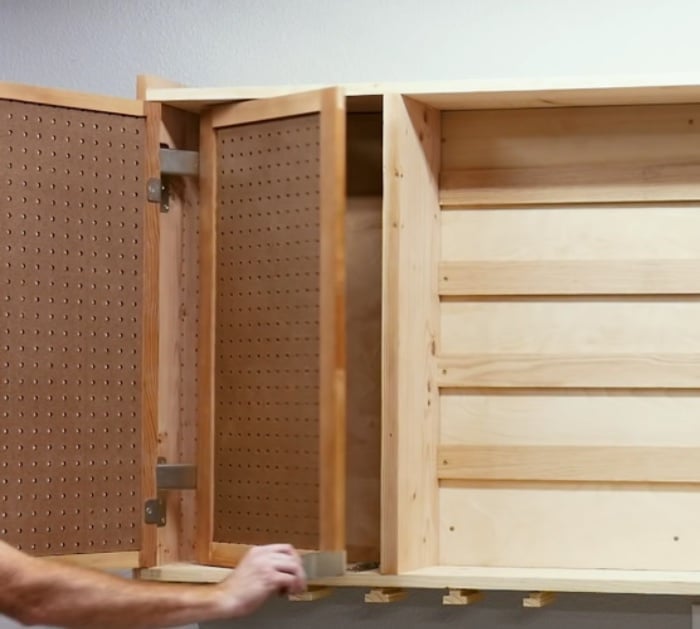
Then attach your rods at the top and bottom to accommodate your nifty sliding doors.
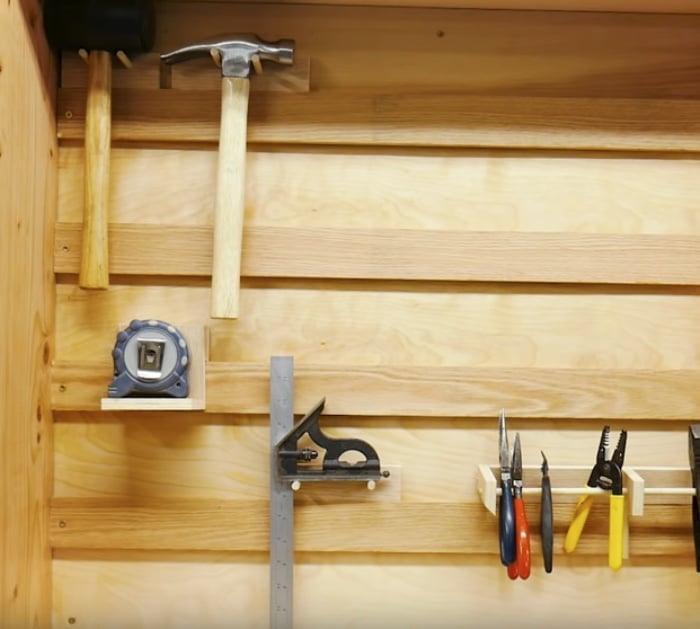
Then attach your smaller pieces of wood and tool hangers to neatly store your tools.
This DIY Sliding Door Tool Cabinet with pegboard was the answer to all my problems. The instructions were easy to follow and I now have my crafting tools completely separate from the husband’s and I don’t go near his tools and he doesn’t come near mine.
DIY Sliding Door Tool Cabinet


