
Are you looking for a gift idea to give to your friends or family? Try this DIY photo printing on a mug from Globe Studio One on Youtube. You can personalize this by transferring any image you like into a mug. But if you don’t like personal images, you can basically print out any design you want – whether it’s food, place, or even names! You don’t have to buy expensive mugs anymore; this easy-to-follow tutorial is a total game-changer.
Materials:
- white blank sublimation mug
- electric iron
- Epson eco tank et-3760
- sublimation photo transfer paper
- heat transfer vinyl
Directions:
Step 1
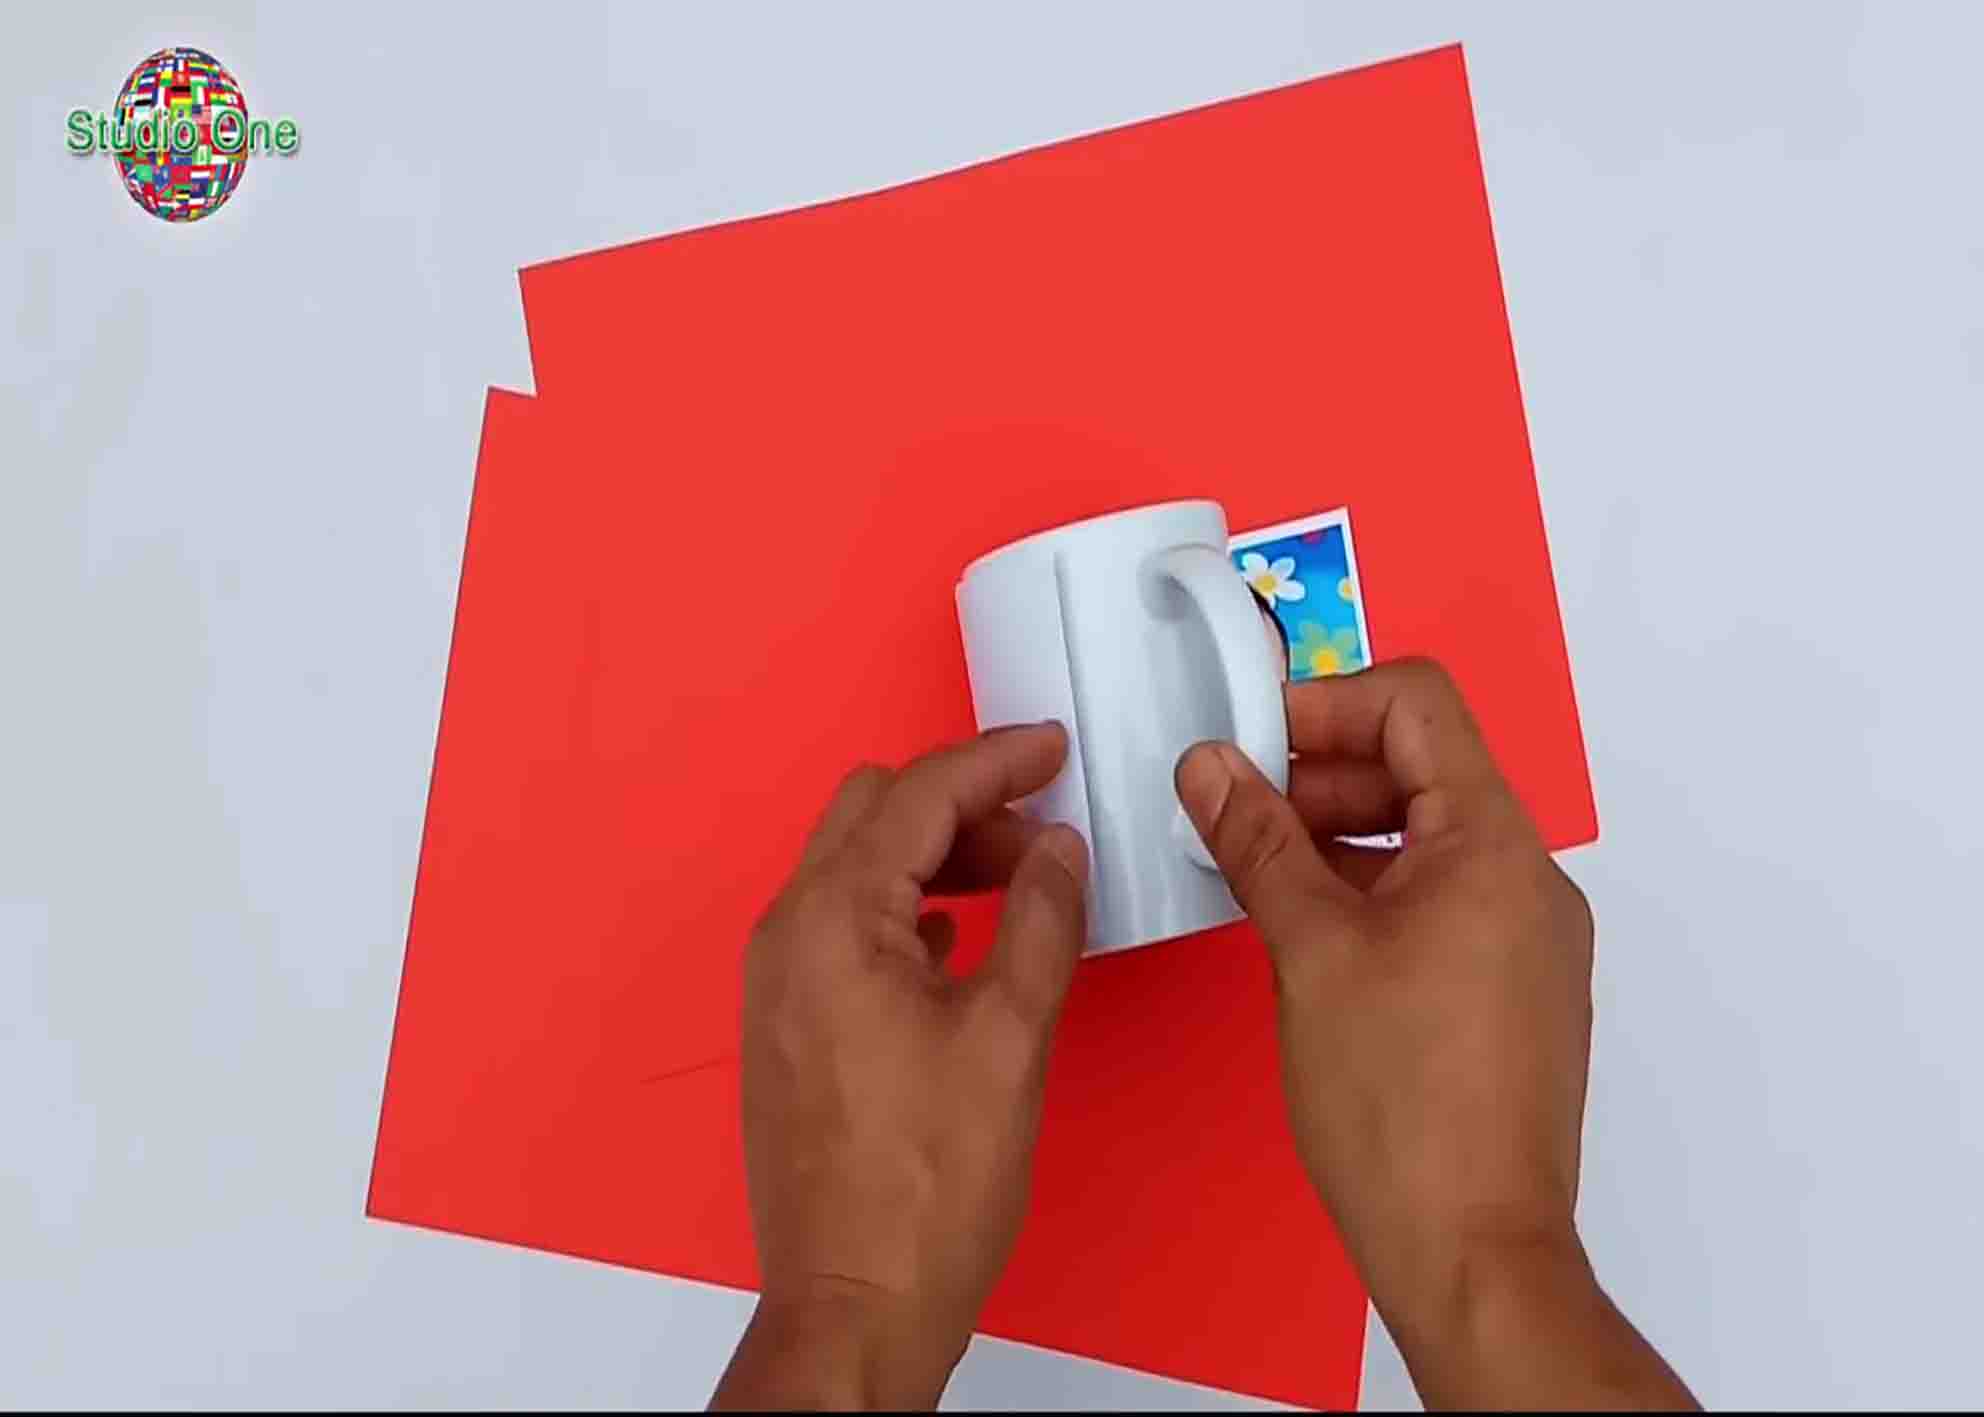
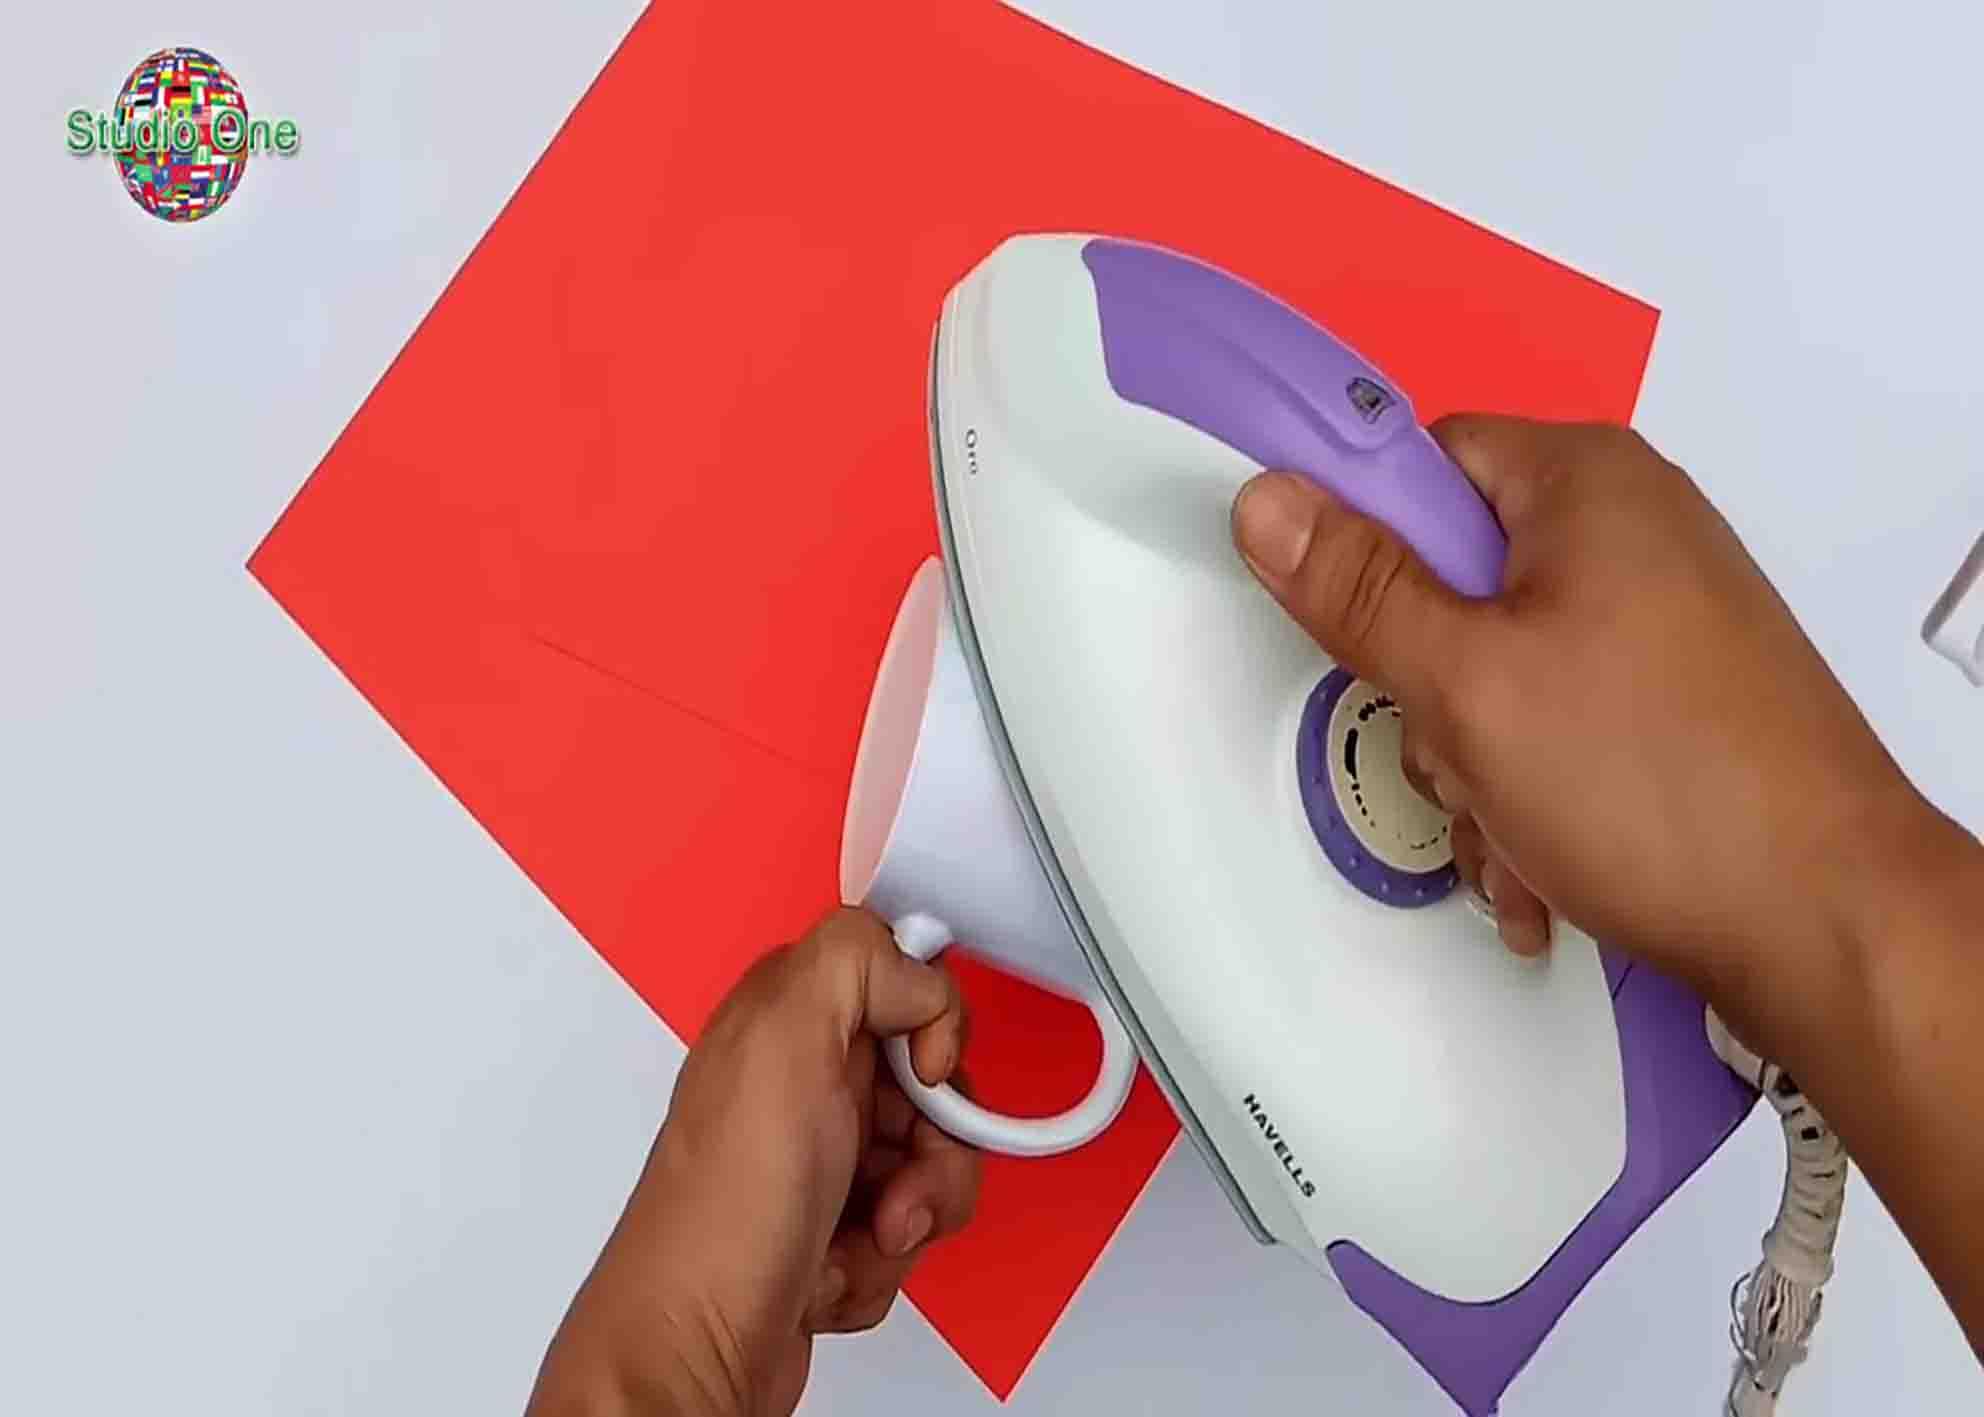
To start, print the photo you like on the sublimation transfer paper. Wrap the photo (the photo should be placed facing the mug) around the sublimation mug. Secure it with a vinyl adhesive sticker. Next, iron it for about 35 – 40 minutes. Make sure to iron the photo into the mug evenly.
[social_warfare]
Step 2
After this, slowly peel the photo paper off the mug. You will see that the photo is nicely transferred into the mug.
DIY Photo Printing On A Mug Tutorial


