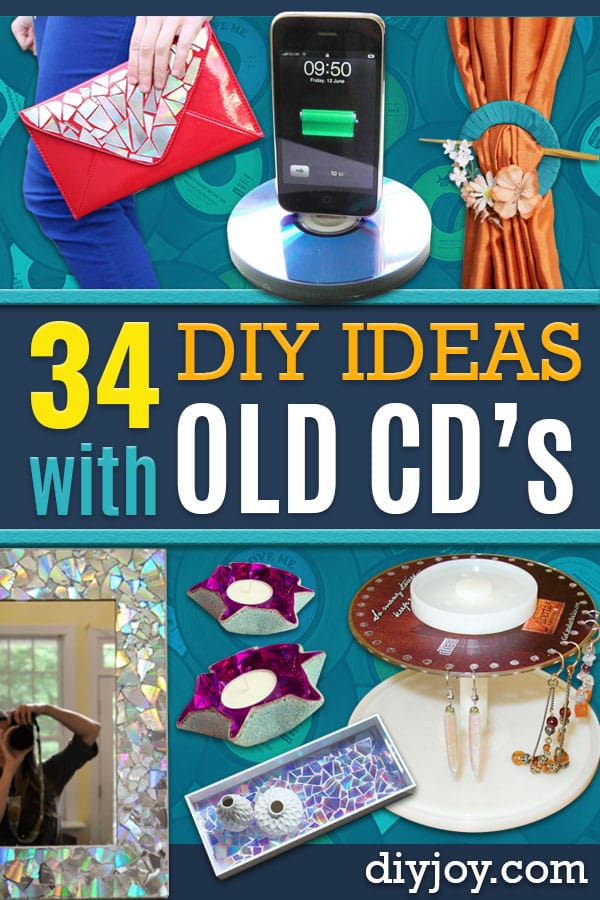
Nobody has a CD player anymore and everybody still has the CDs, which is a strange, specific kind of clutter. These 25 DIY ideas with old CDs solve it, and the ones worth your afternoon are the ones that use the thing a disc is actually good at: throwing rainbow light. Snapped into pieces, a CD is free iridescent mosaic tile, and it turns up here as a resin tray, a bathroom mirror frame, a house number that catches headlights, and a coffee table that took the maker a month. Whole discs become clock faces, photo coasters, wall pouches and a padded jewelry box. Cutting them is easier than you think, though a few tricks below will save you a bleeding thumb.
1. How to Make a Jewelry Box Using CDs
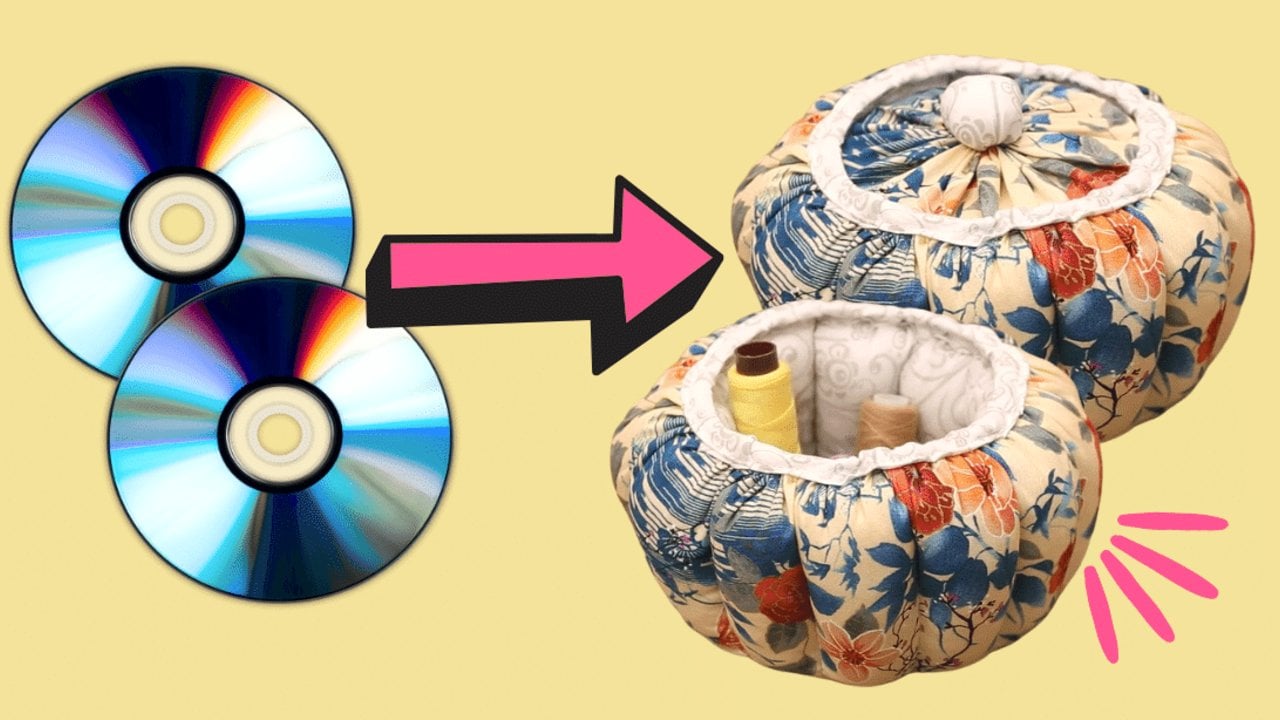
Two CDs give this padded jewelry box its rigid base and lid, which is the only reason a fabric box holds its shape. Trace a circle on your fabric, fold it in half and mark the center on both sides, then fold into quarters and mark again so you can rule twelve equal segments. Lay a second piece of cloth behind it and stitch along those lines, then trim the excess, stuff each segment and close the edges into a round, puffy organizer. Each disc gets sewn fully inside its own fabric circle, one in the lining fabric and one in the outer, and a small stuffed ball becomes the lid handle.
Get the full tutorial at DIY Joy.
2. Moon And Star Hanging Decor Made Out Of Old CD
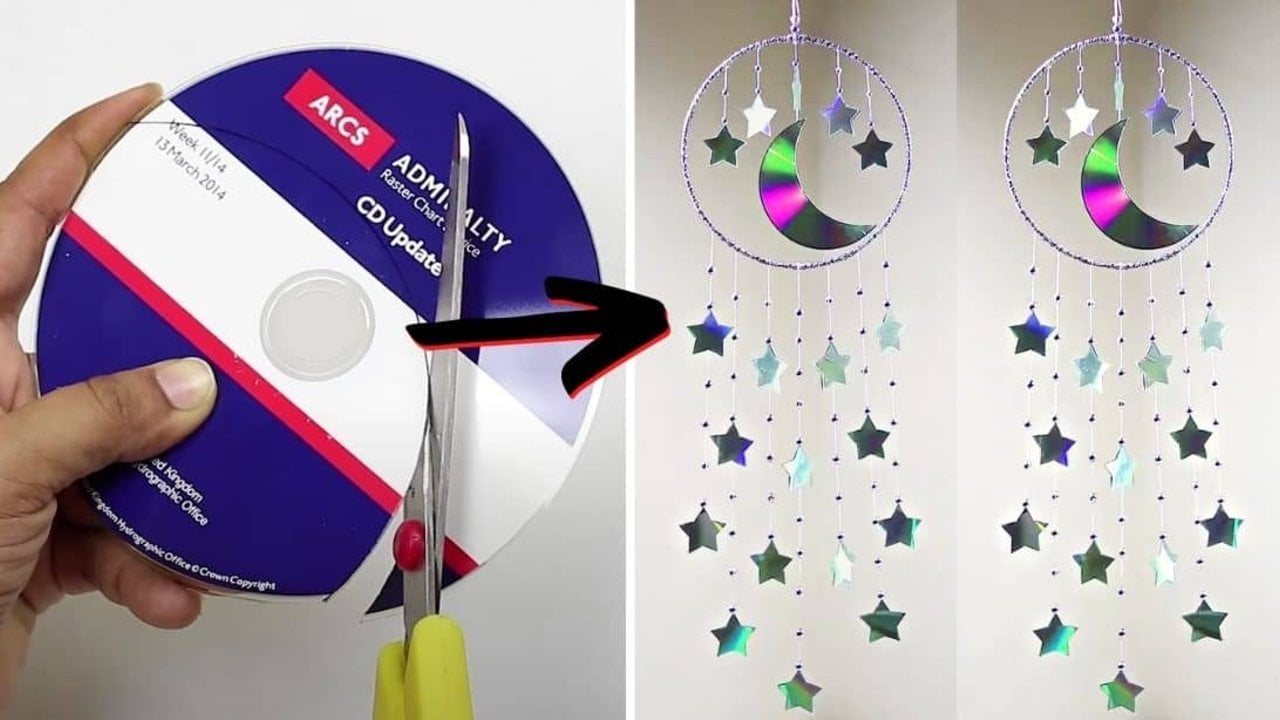
Ten old discs become a hanging mobile of stars and crescent moons, and the cutting trick is heat. Make two paper star templates, one at about an inch and a half square and one a shade larger, trace them onto the discs, warm the underside briefly with a lighter and then cut, which stops the plastic cracking. You need fourteen large stars and ten small ones, plus two crescents traced across a pair of overlapped discs. Glue each star back to back around a thread, thread silver beads an inch apart between pairs, then tie the finished strands to a large metal ring wrapped in silver lace.
Get the full tutorial at DIY Joy.
3. DIY Kaleidoscope Earrings
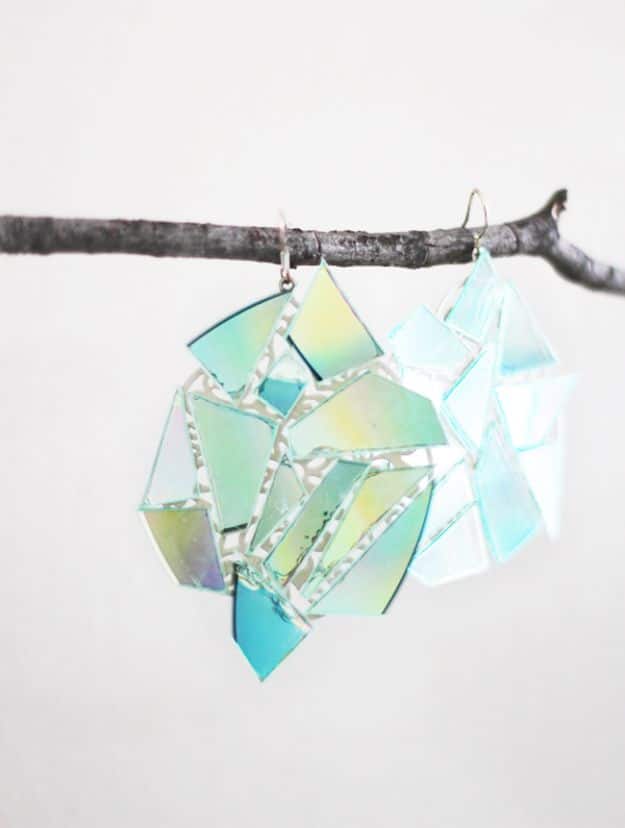
A blank disc and a pair of flat earring bases, about thirty minutes. Cut the disc into big chunks first and then break those down into smaller shards, which is far easier than trying to snip small pieces off a whole disc. Arrange the pieces on the base before you glue anything, then hot glue them down one at a time. The heat of the glue melts a little of the silvery film at the edges, and the maker liked that enough to leave it, because the roughened edge plays against the clear plastic. Trim anything genuinely sharp and wipe the sticky residue off at the end.
Get the full tutorial at The Kipi Blog.
4. Curtain Pull Backs From Old CD

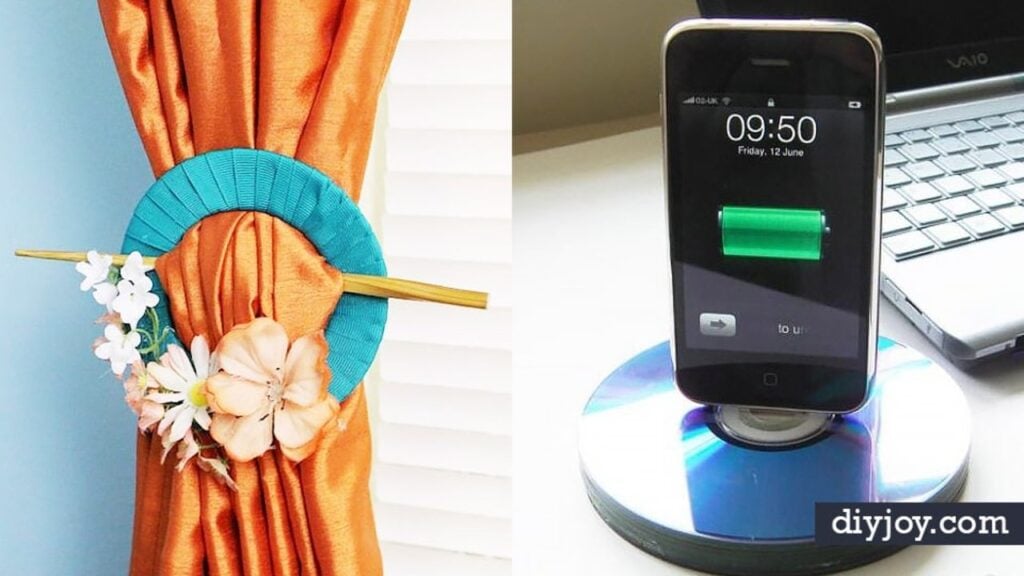
The disc becomes a ring rather than a disc. Trace a circle in the center using a can as a template and cut it out with a utility knife, working round several times rather than trying to go through in one pass, then pop the middle out and throw it away. Wrap the remaining ring in ribbon, overlapping slightly as you go and gluing the ends down, then hot glue artificial flowers on. A chopstick or a painted dowel pushed through holds the gathered curtain against the wall. Honest limitation from the maker: it suits sheers and light fabrics, because a heavy curtain can bow or snap the plastic.
Get the full tutorial at Craft Your Happiness.
5. DIY Vintage Farmhouse Clock Faces
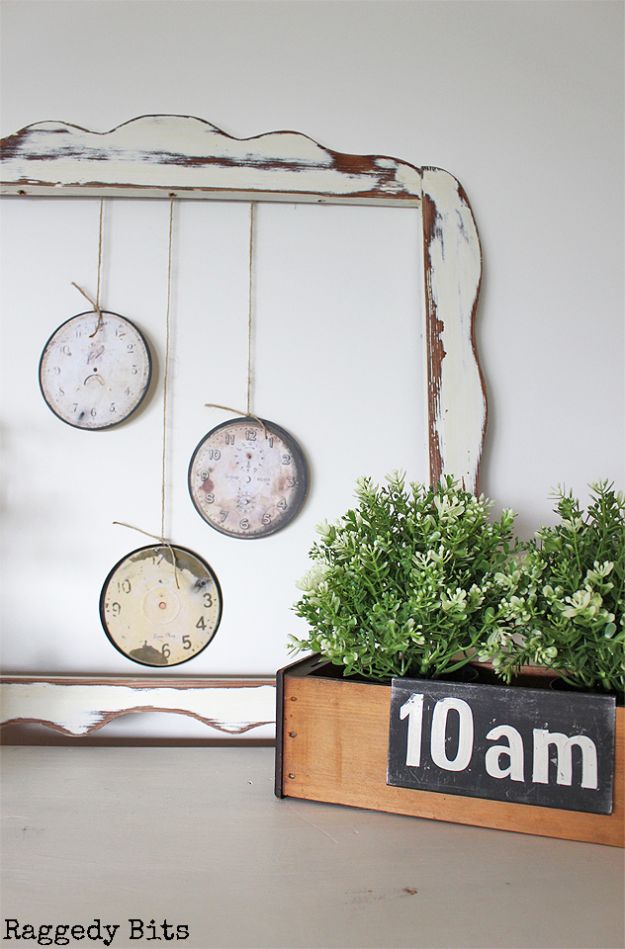
Old discs and printed clock faces, and the disc is doing the job a wooden round would usually do. Print the clock faces onto cardstock and cut each one out carefully around the edge. Paint a ring of black around the rim of every disc and let it dry, which is what gives the finished face its dark border and hides the plastic edge completely. Brush a layer of top coat over the whole disc and over the back of the paper, lay the face down from the center out to push the air bubbles clear, then seal the front with another coat.
Get the full tutorial at Raggedy Bits.
6. Old CD Mosaic High Gloss Resin Tray

Nine discs covered an eighteen by eight inch tray, which is about three times what anyone guesses. Cut each one in half with strong scissors or clippers, then pry the two layers apart with your fingers to expose the metallic foil between them, which is the surface that throws real rainbow color. Cut those halves into irregular tiles, shiny side up, and try not to touch the face because fingerprints show. Hot glue them into the tray leaving even gaps, since the resin filling those gaps reads as grout. Mix eight ounces of clear casting resin exactly to the packet, pour, pop the bubbles with a heat gun on low, and leave it a full day.
Get the full tutorial at Resin Crafts Blog.
7. Turn A CD Into A Clock
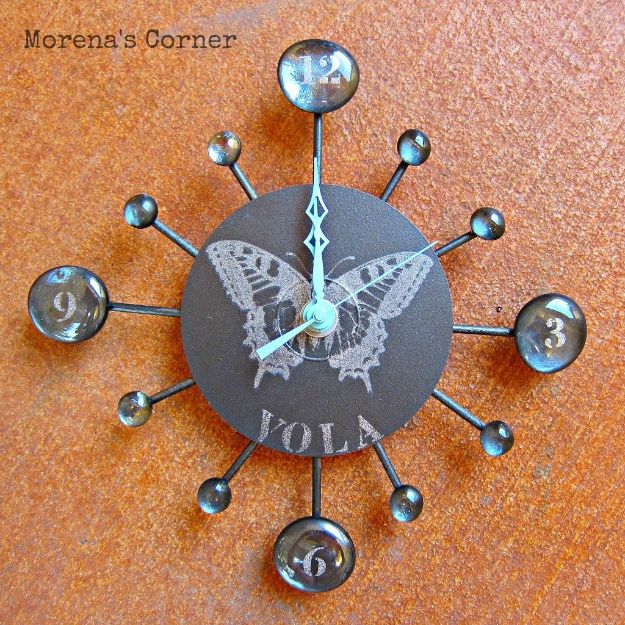
A scratched disc, a short stemmed clock kit and a handful of flat glass gems from a dollar store. The disc is painted a flat dark color so it stops reading as a disc, then stenciled with a butterfly and a word in silver. The clever part is the numbers: the glass gems are sprayed on the back and stenciled on the front, so they still look like glass rather than painted stones, and they sit at the end of thin spokes radiating out from the face. The short stem matters, because a standard clock movement is built for a thicker surface than a compact disc.
Get the full tutorial at Morena's Corner.
8. DIY Faux Mosaic Frames
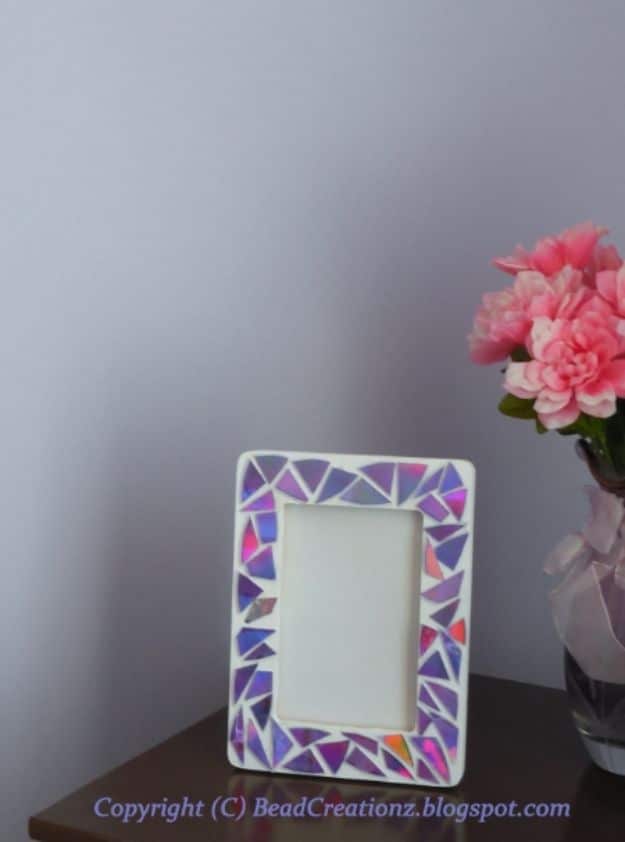
Two or three discs cover one small unfinished wood frame, and the maker used four or five across a pair. Cut the discs into squares or triangles, whatever shape you prefer, but stop before the pieces get tiny: below a certain size the two layers of the disc start separating on their own, which ruins the piece. Lay them out on the frame first to check you have enough. Paint the frame and let it dry completely before any gluing starts, because the color underneath shows in the gaps. White was chosen here deliberately, to push against the faint purple cast the discs carry.
Get the full tutorial at Bead Creationz.
9. Decoupaged CDs

Plain paper first, design second, and the base layers are what makes this look like painted porcelain instead of a covered disc. Glue a smooth white sheet to the face, then cut a circle slightly larger than the center hole and glue it over on both sides so the hole fills flush. Add one more full sheet on top and you have a flat, opaque, paintable surface. Soak a printed napkin in water, lift it out, let it drain and peel away the backing layers so only the tissue with the design survives. Lay that on and seal it with decoupage medium. Finish the edges with watercolor, then lacquer and add a hanger.
Get the full tutorial at Guía de Manualidades.
10. Sparkly Clutch
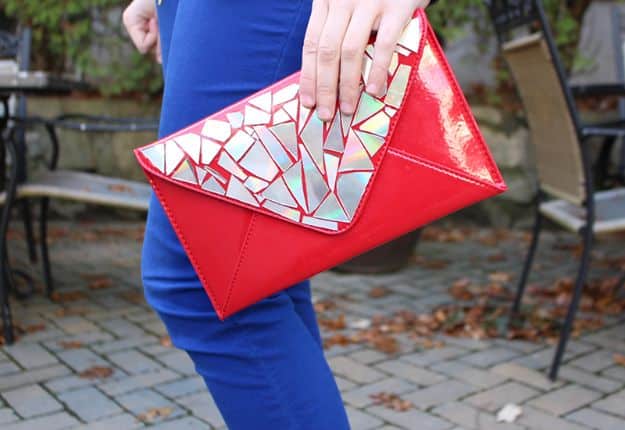
Three supplies, and one of them is a bag you already own. A freebie patent envelope clutch gets its flap tiled with pieces cut from three discs, and that is genuinely the whole build. Cut the discs into varied sizes rather than uniform ones, which reads as mosaic instead of pattern, and fix them on with super glue rather than hot glue, because hot glue leaves visible ridges under the edges on a smooth leather or patent surface. A bold base color under all that silver is doing real work here: the red showing between the shards is what stops it looking like tinfoil.
Get the full tutorial at That Cheap Bitch.
11. Pretty As A Picture Photo Stand
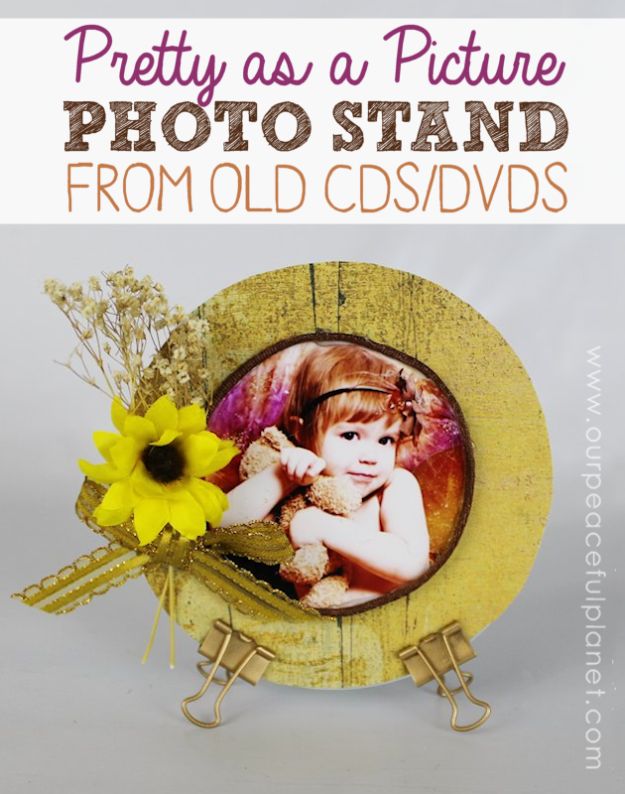
A disc, a photo and two small binder clips, and the clips are the whole idea: clamped to the bottom edge they become feet, so the frame stands up on its own with no easel. Spray paint them first, gold here, or they read as office supplies. Trace the disc onto patterned scrapbook paper for the background and glue that down, then trace a smaller circle around your photo using a cup or glass as a template so the picture sits centered. Glue the photo on and add whatever you like around it, dried flowers, ribbon, a paper punch. Simple enough for children to make for grandparents.
Get the full tutorial at Craft Your Happiness.
12. Recycled CD Mosaic Flower Pot
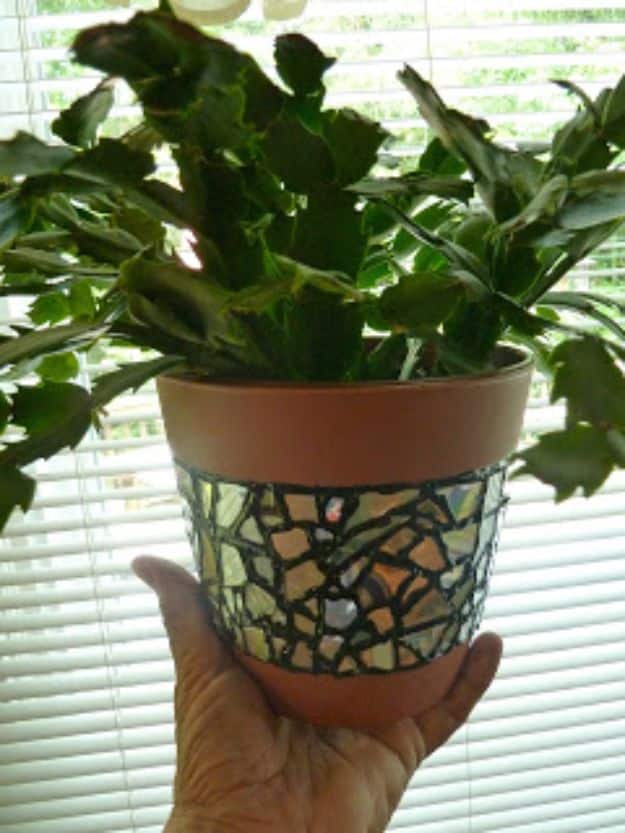
Three discs and a six inch plastic pot in terra cotta color, and the finish looks like real grouted mosaic. Cut the discs into varied shapes with old scissors or tin snips, and wear eye protection, because pieces do fly. Working in small sections, squeeze tacky glue under the edge of the pot’s top lip and press the pieces in one at a time, leaving deliberate space between each. The gaps are the point. Once dry, pipe black slick dimensional fabric paint into every gap as grout, squeezing a little onto scrap paper first to clear any air bubble. Hold the pot from the inside as you work round.
Get the full tutorial at Make It Easy Crafts.
13. Make House Numbers From CDs
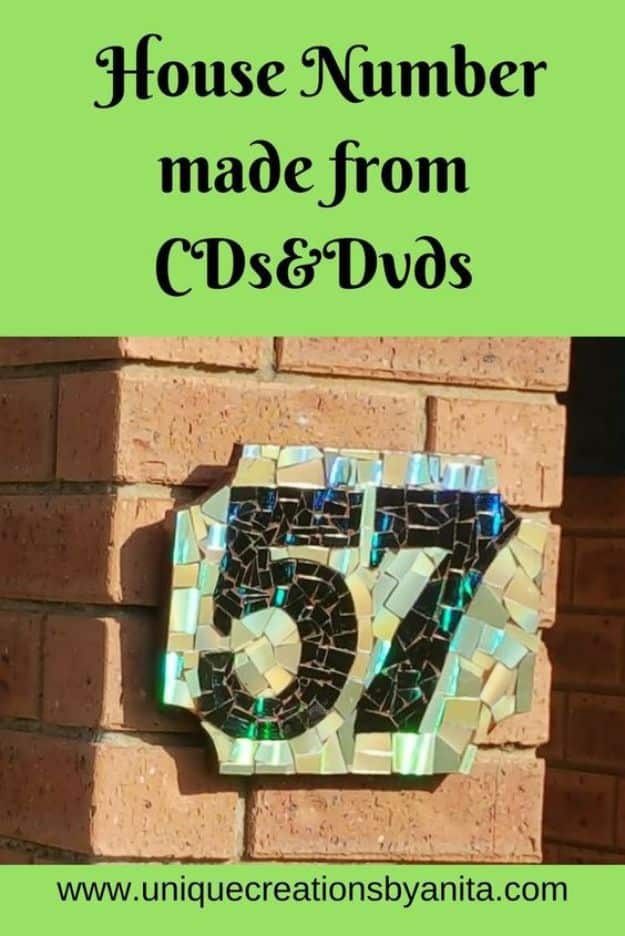
Boiling water is the tool nobody expects. DVDs are two bonded layers and it is the iridescent inner one you want, so drop a few into boiling water for two or three minutes, lift one out with tongs and pry the layers apart while it is still hot. CDs are single layered and skip that step. Put the discs back in the hot water for another minute before cutting, which makes them pliable instead of brittle. Use the rainbow DVDs for the numbers and the silver CDs for the background so the digits read from the street. Glue onto rounded plywood, dry a full day, then seal for outdoors.
Get the full tutorial at Unique Creations By Anita.
14. How To Make Earrings With CDs
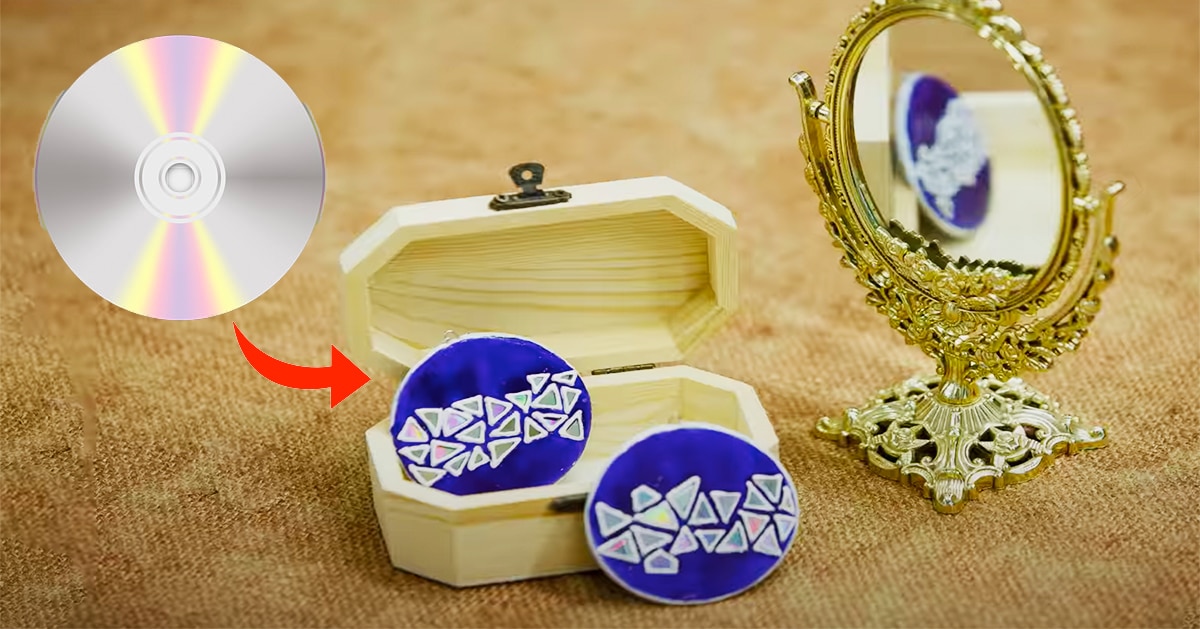
These build the earring from scratch rather than decorating a bought base. Knead modeling clay into a dough, split it into two equal balls, dust an acetate sheet with talcum powder so nothing sticks, and roll each ball out flat into a disc. Press the earring hooks into the clay while it is still soft. Cut the CD into small triangles with scissors and embed them into the face of each clay disc with fabric glue, then leave them to dry fully before painting. Water based glass colors go on last, over the clay and around the triangles, which is where you get to decide whether they read as bold or delicate.
Get the full tutorial at DIY Joy.
15. DIY Santa Claus Wall Hanging Using CDs
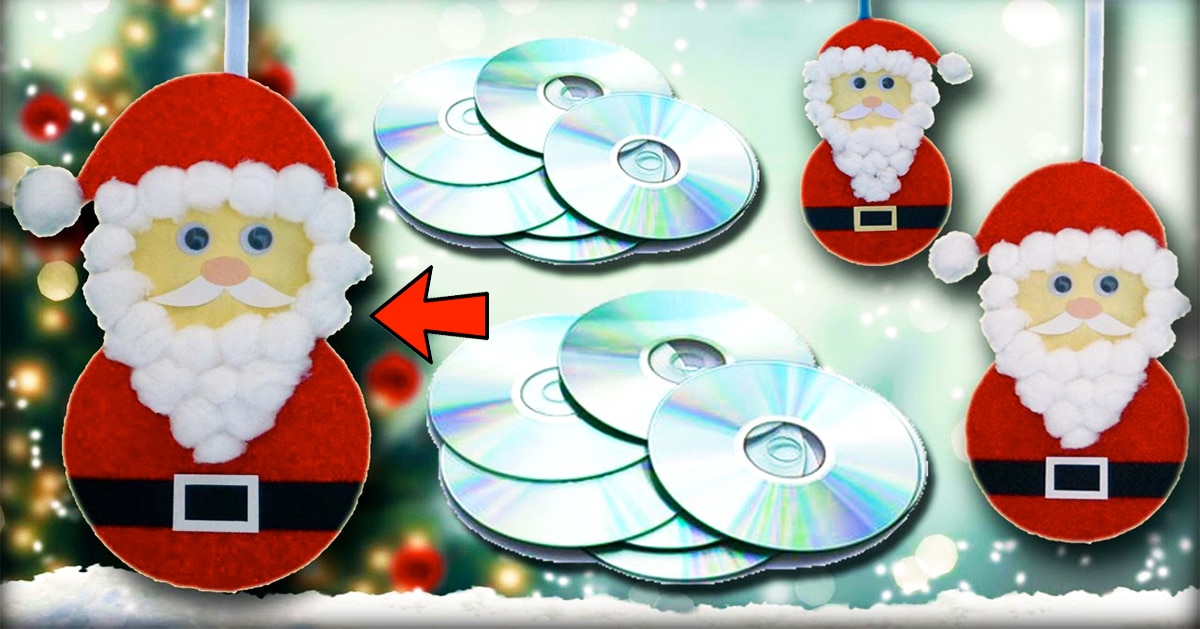
A Christmas project that uses the disc as a sturdy backing board rather than for its shine. Thread a ribbon through the center hole and glue it flat so the hanger is built in before anything covers it. Glue the disc onto colored paper, trace round it, cut the shape out and glue paper to both faces so the plastic disappears completely. From there it is construction paper, glitter cardstock, googly eyes and cotton balls for the beard, and the head and body get joined at the end. Discs are rigid and they do not warp, so a decoration built on one survives being boxed up year after year.
Get the full tutorial at DIY Joy.
16. Triangle Statement Necklace
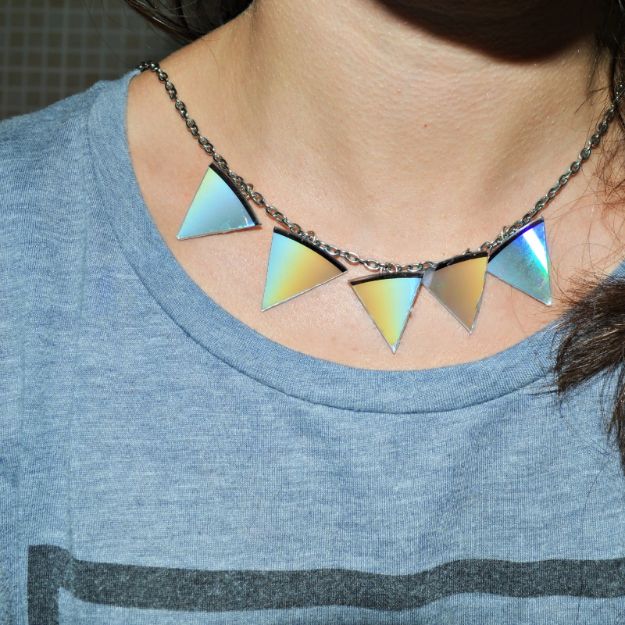
Five triangles and a chain, and it looks like a boutique piece. Trace a smaller circle inside the disc using a mug as a template, then draw your triangles inside the band between the two circles so every piece keeps a little of the curved outer edge. Cut them out with ordinary scissors. Make your own jump rings with pliers and flatten one side of each so it has a flat face to glue against, which is the detail that keeps the rings from rolling loose. Glue two rings to the back of every triangle, thread them onto a chain, and vary the sizes so the row graduates toward the center.
Get the full tutorial at Get Inspired By Us, Evanna.
17. Recycled CD iPhone Dock
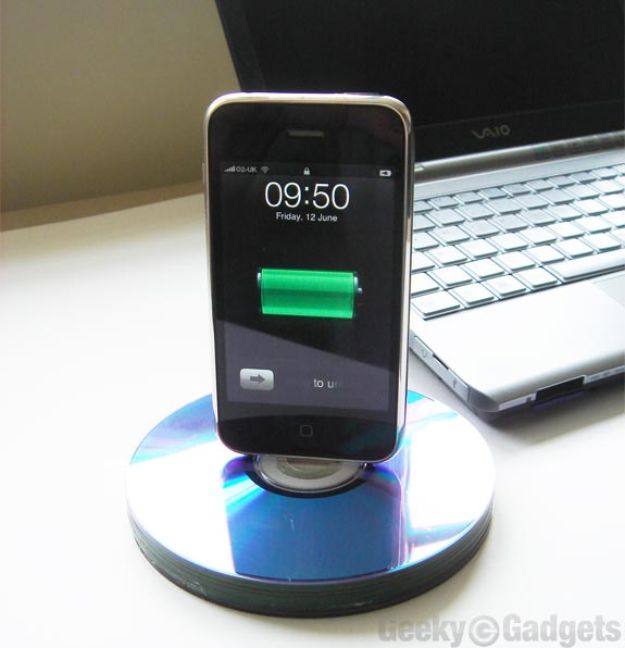
Eleven or twelve discs stacked and glued into a solid puck, with a channel cut through the middle for the charging connector. You need four or five more discs than the height of your connector. Mark the width of the metal connector tip on the first disc and cut just that out with a Dremel, so the tip pokes through but the plastic housing cannot. On every disc after that, cut the full width of the connector as a tight fit, and keep stacking until the bottom of the connector sits flush. Three or four more discs get a channel cut from edge to center for the cable. Glue and clamp hard.
Get the full tutorial at Geeky Gadgets.
18. Recycle CDs Into Wall Pouches
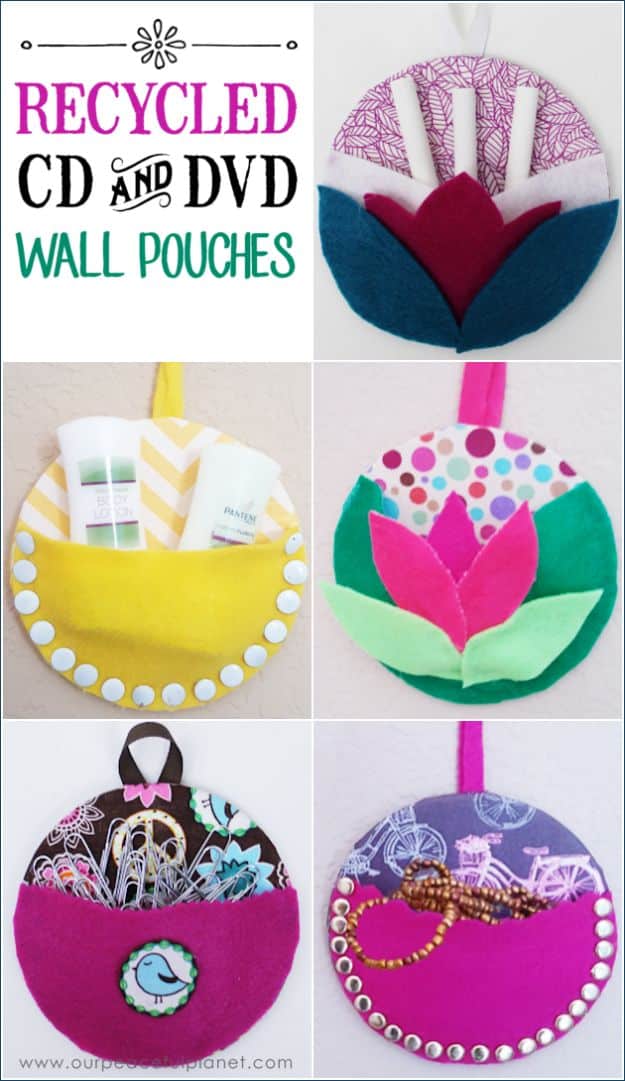
The disc is the stiff back of a small wall pocket, and a free printable pattern does the shaping. Run hot glue round the back edge in one to two inch stretches and wrap fabric over, pulling it snug as you go, then come back and pull down the unglued sections, which is what gives a smooth edge instead of a lumpy one. Trim bulk off the back and glue a felt circle, cut slightly smaller than the disc, over everything. For the pouch, pink the top edge of a felt piece, prop it out with any small object while you glue the two top corners, then trim round and glue the rest.
Get the full tutorial at Craft Your Happiness.
19. Photo Coasters from CDs
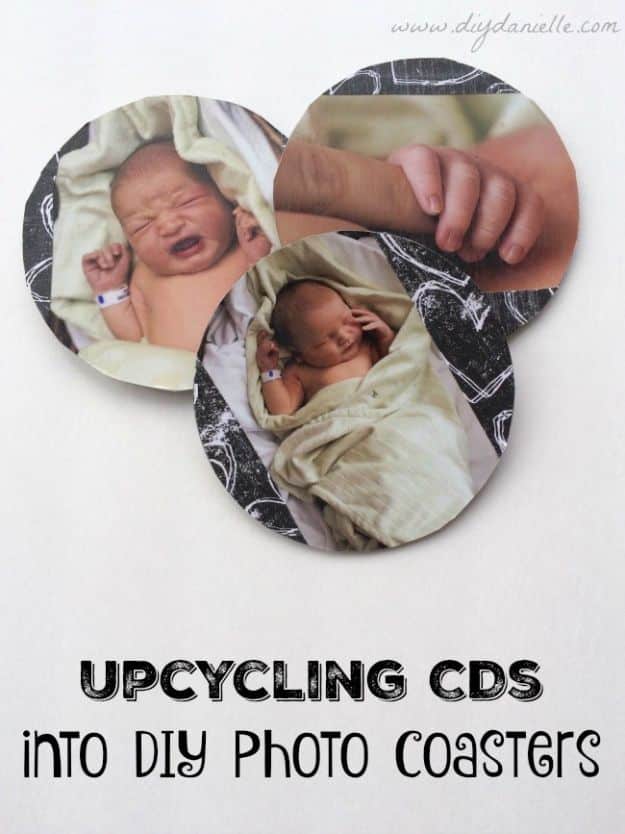
Mod Podge, a photo and a felt circle. The sizing catches people out: a standard four by six print is wider than a disc, so choose an image where nothing important sits near the edges, then lay the disc on the photo and trace around it before cutting. Scrapbook paper fills the top and bottom if the photo does not quite cover. Glue everything down with matte medium, then brush another coat over the whole face to seal it. Cut the felt backing slightly smaller than the disc and glue it on, keeping the glue well clear of the center hole so it cannot bleed through onto the picture.
Get the full tutorial at DIY Danielle.
20. Marker Spinners
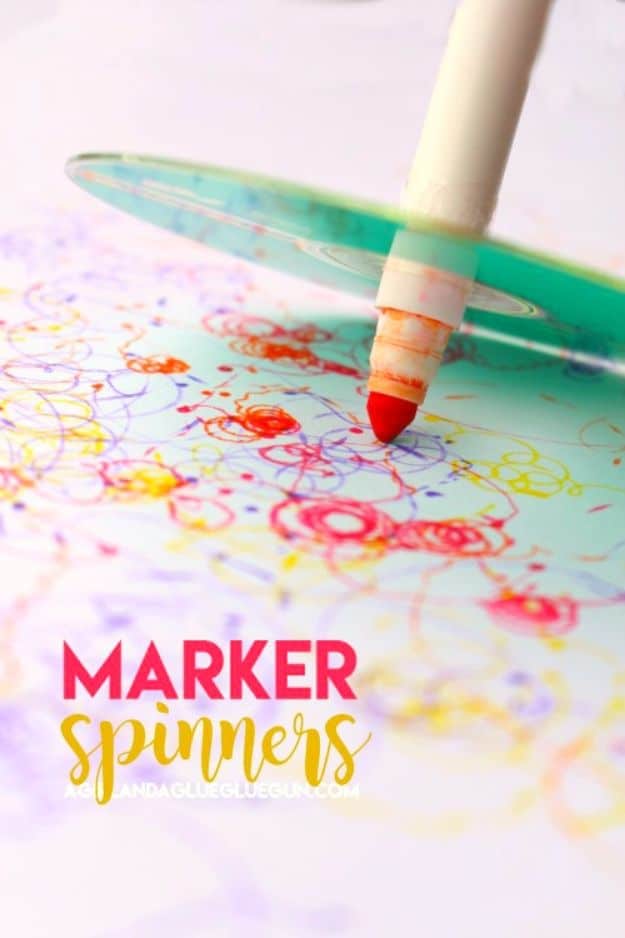
The simplest thing on this page and the one children will actually spend an hour on. Tape a fat marker through the center of a disc, cap end down, so the marker stands up like an axle and the disc sits flat around it. The whole trick is balance: if the disc is not sitting square to the marker it wobbles and stops almost immediately, so adjust the tape until it looks level before you commit. Pull the lid off, set it on a sheet of paper and spin. It draws looping spirograph doodles on its own, and watching it is most of the appeal.
Get the full tutorial at A Girl and a Glue Gun.
21. Mosaic Table
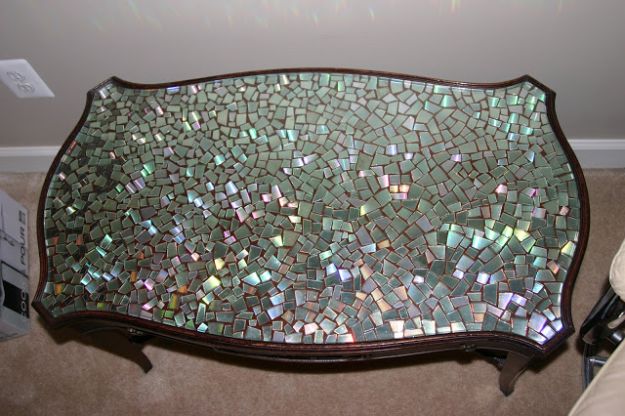
An inherited mahogany side table with a glass overlay, and the inlay underneath filled with a month of cut disc pieces. Boil the discs one at a time and cut them with sharp scissors while they are still hot, into assorted shapes and sizes. A tiny dab of glue under each piece is all that holds them, which is enough because the original glass top goes back over the whole thing and does the real work of sealing it. If your table has no glass, the maker’s own advice is a clear epoxy instead. Some pieces flake as you cut, so plan on cutting spares.
Get the full tutorial at Thoughts of a Nautical Girl.
22. CD Mini Album
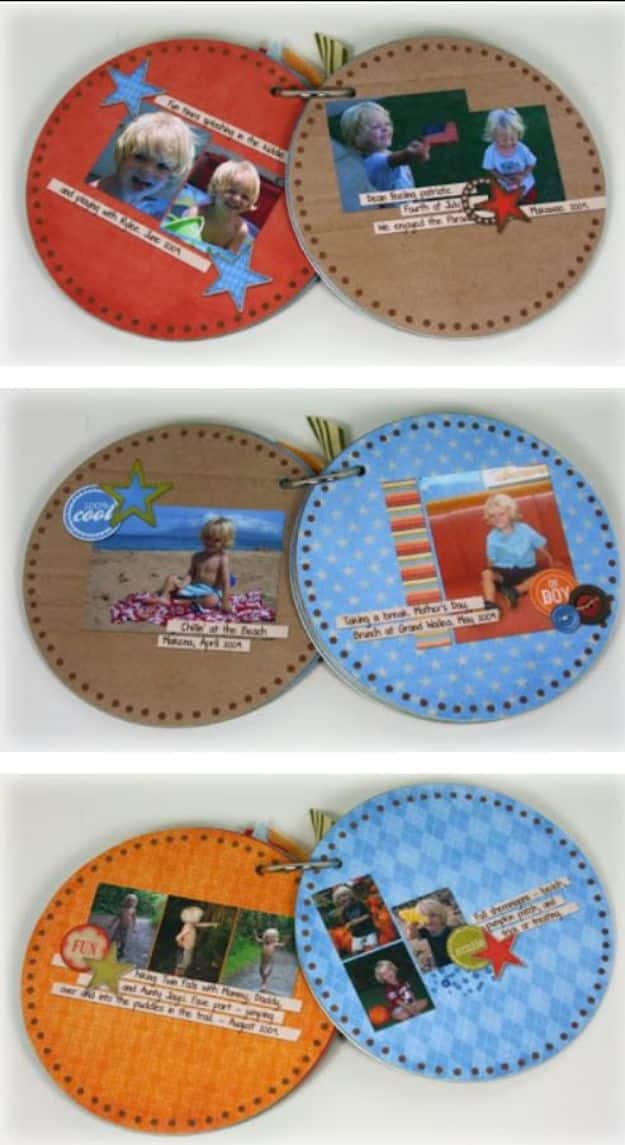
A circular scrapbook album bound on a ring, and the discs are the covers and the pages. Old scratched discs are better than chipboard here for one plain reason: they do not tear, so a small child can handle the book without destroying it. Design or print your pages onto matte double sided presentation paper, cut them out to the disc shape, and Mod Podge one to the front and one to the back of every disc. Punch a hole through the stack with a heavy duty punch, thread everything onto a book binding ring and tie ribbon scraps to the ring. A whole album comes together in one afternoon.
Get the full tutorial at Jen Tapler Designs.
23. Garden Art Sparkly Ornaments
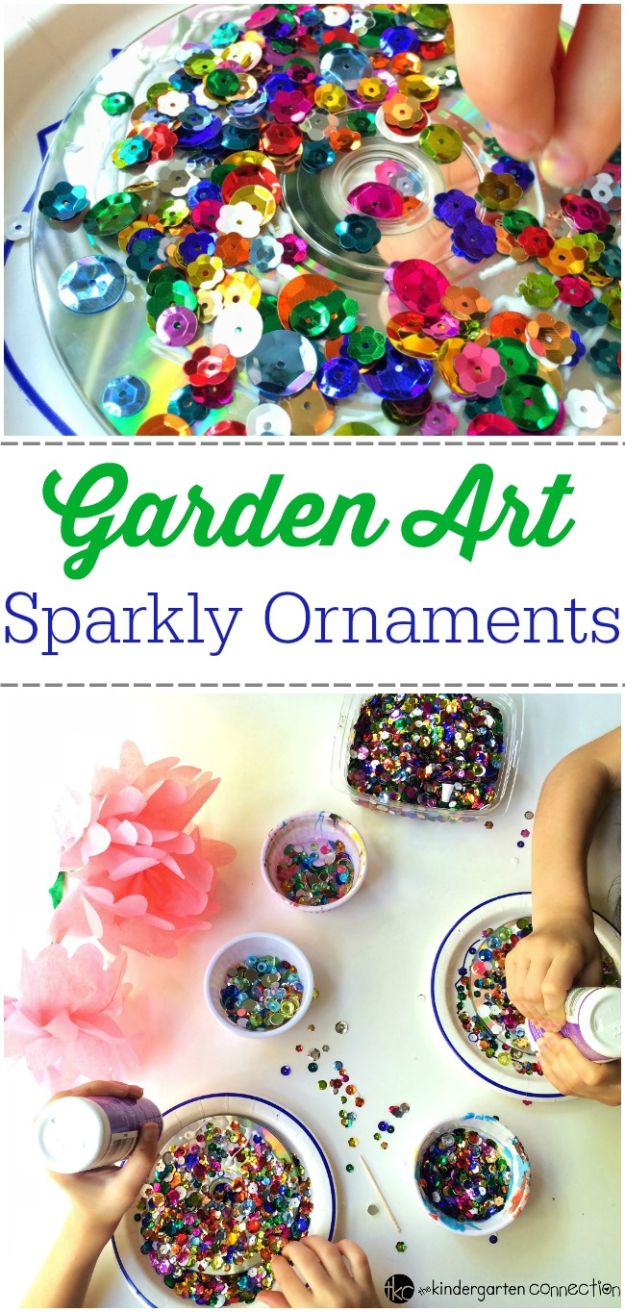
Tacky glue, sequins, gems and a length of cotton string, and it is a genuinely good fine motor exercise for small hands. Glue the sequins and gems to one face of the disc and let it dry completely before turning it over and doing the second side, because doing both at once means everything slides off the underside. Work on a tray or an old baking sheet to contain the fallout. Thread string through the center hole to hang it. The maker’s own report is that tacky glue held up outdoors for several months, and the note at the end is that you can decorate one face only and leave the shiny side bare.
Get the full tutorial at The Kindergarten Connection.
24. CD Mirror
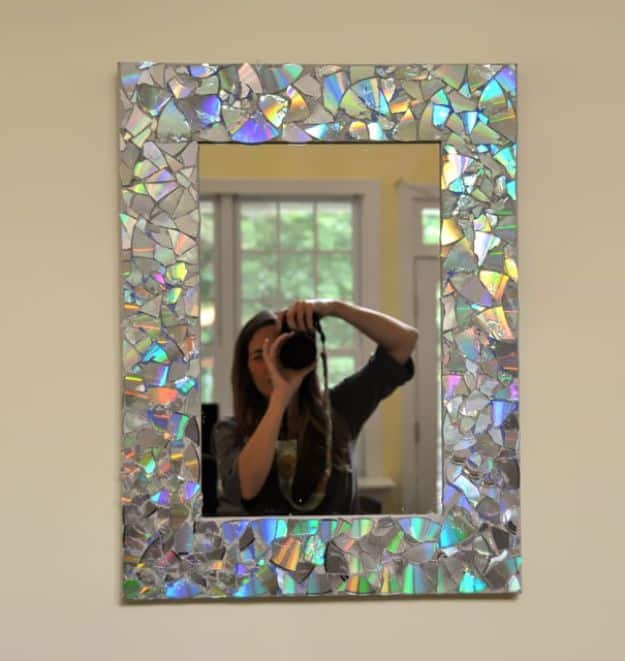
Smashing, not cutting, and the safety step is the whole method. Fold one scratched disc at a time inside a dish towel and hit it with a hammer, which breaks it into irregular shards while containing every fragment. Do them one by one rather than a stack. Then hot glue the pieces in a random pattern around the frame of a plain thrift shop mirror, leaving a little space between them so the frame reads as mosaic rather than a solid sheet. The effect is best from a few feet back, where the irregular angles catch the light and the mirror looks like it has been set with cut glass.
Get the full tutorial at Intuition Physician.
25. Recycled CD Mosaic House Number Plaque
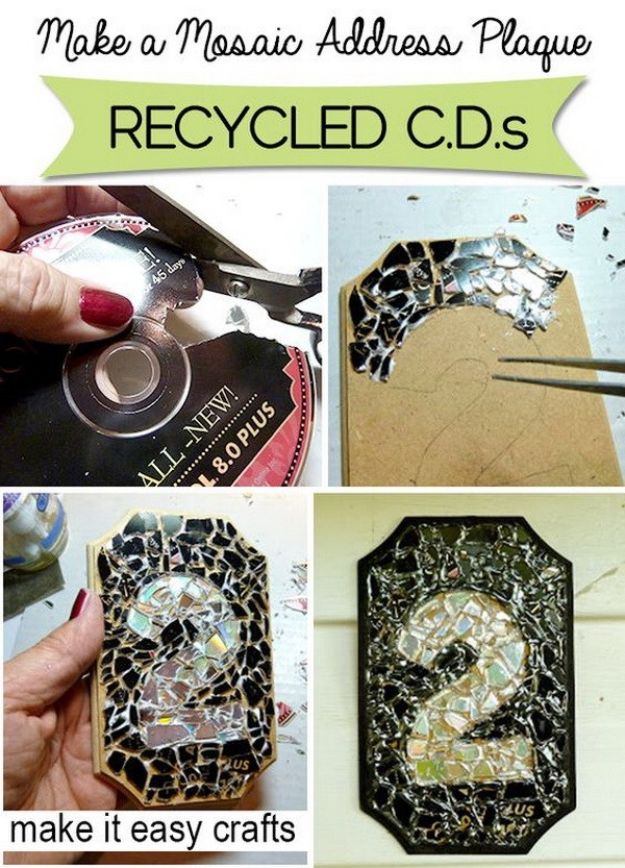
One disc with a dark painted face supplies both tones: the painted side becomes the background and the shiny side becomes the number, so the digits catch headlights at night. Print your number in the size and font you want, lay graphite paper on a small wood plaque, tape the printout over it and trace with a stylus. Cut the disc with tin snips or old scissors, eye protection on, and place the pieces with tweezers, spreading tacky glue in small sections as you go. Fill the background first, then the number. Dimensional fabric paint fills the gaps, sparkle inside the number and black metallic outside it.
Get the full tutorial at Make It Easy Crafts.