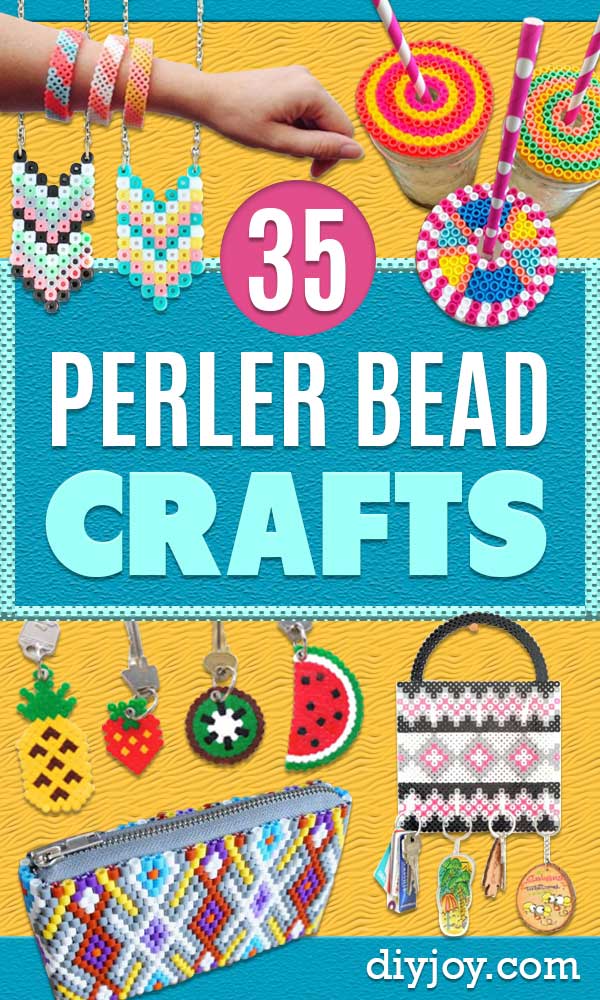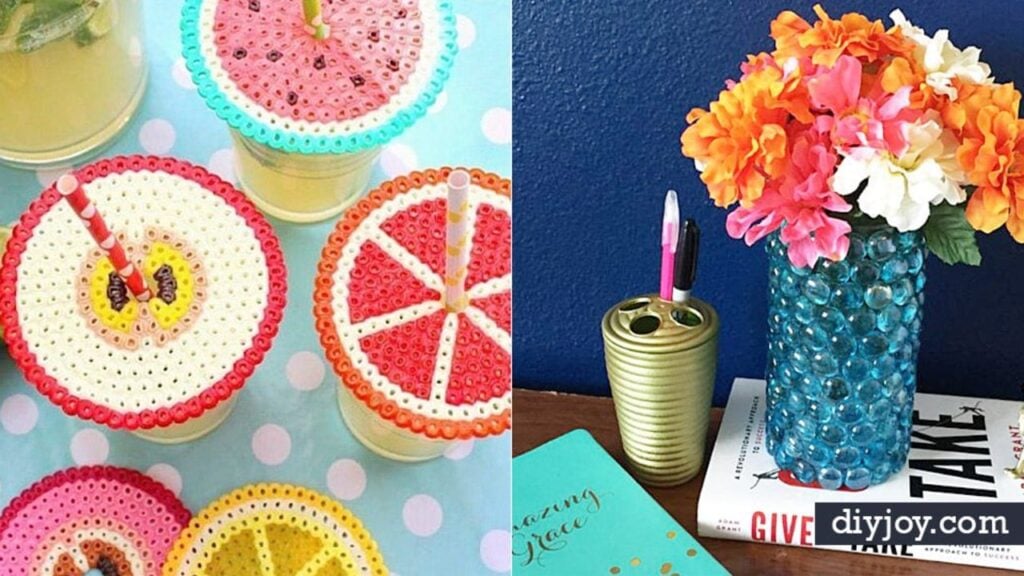
That jar of loose beads in the craft drawer has a lot more going for it than one more friendship bracelet. These 28 creative bead crafts cover the whole range: perler beads melted into bowls and key holders, wood beads strung into farmhouse garlands and trivets, seed beads stitched into tiny fruit bracelets and hama beads woven around glass jars into candle holders that glow at night. A few, like the beaded wind chime and the cherry seed bead bracelet, come together in a single sitting. Others take an afternoon and a little patience with a pegboard. Every one of them starts with beads and ends with something useful or wearable.
Table of Contents
- 1. Beaded Candle Holder
- 2. Picture Frame Suncatcher
- 3. Beaded Wind Chime
- 4. West Elm Inspired DIY Wood Trivet
- 5. Woven Bead Planter
- 6. DIY Glass Bead Ornaments
- 7. Cherry Bead Bracelet
- 8. Simple Farmhouse Wood Bead Garland
- 9. Perler Bead Tray
- 10. DIY Glass Bead Mirror
- 11. Flower Bead Bracelet
- 12. Fruit Perler Bead Magnets
- 13. Cute Bead Pouch
- 14. Bead Key Holder
- 15. Plastic Bead Bowls
- 16. Grape Bead Bracelet
- 17. Retro Camper Keychain
- 18. DIY Perler Beads Fruit Bowl
- 19. Beaded DIY Notebook
- 20. Mini Bookmarks
- 21. Easy Beaded Bracelet
- 22. DIY Beaded Plant
- 23. DIY Daisy Bead Rings
- 24. Beaded Plant Hanger and Lantern
- 25. Beaded Indian Corn
- 26. Beaded Wind Chime on a Branch
- 27. Beaded Christmas Wreath Ornament
- 28. Beaded Potted Plant
1. Beaded Candle Holder
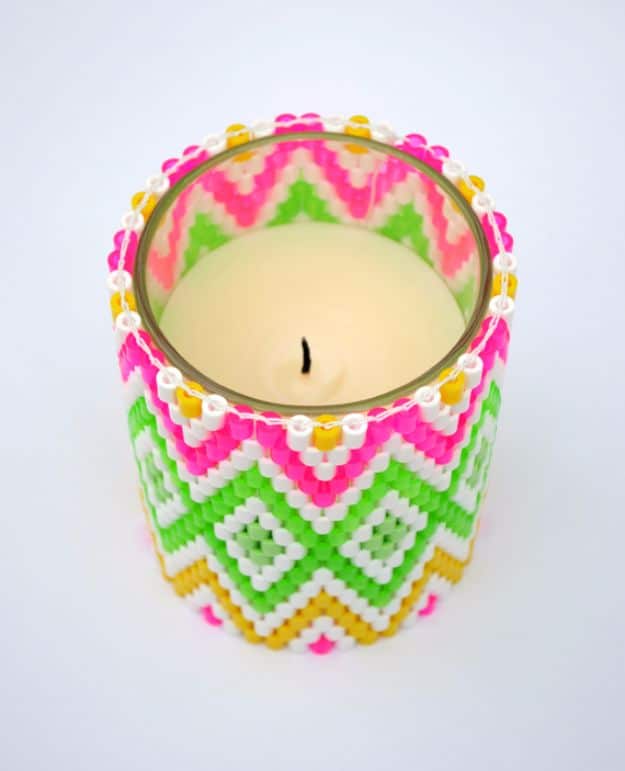
Neon semi-transparent hama beads woven against opaque white ones turn a plain glass jar into a candle holder that glows like stained glass once a tea light goes in. The weaving uses shirring elastic and a darning needle rather than an iron, so the beads stay loose and flexible enough to wrap the jar. The first few rows are fiddly, then it speeds right up. Sketching the design on paper first saves a lot of unpicking, and the same method makes bracelets, baskets and coasters.
Get the full tutorial at Minieco.
2. Picture Frame Suncatcher

An old picture frame gets a second life as a window suncatcher, and it might be the prettiest way to use up a bead stash. Chicken wire fits inside the frame, then little sets of beads and charms are linked on eye pins and hung from each opening with jump rings. Translucent and faceted beads throw the most sparkle once the sun hits them. Wear gloves while handling the wire, lay the design out before hanging anything and tie jute rope across the top for a hanger.
Get the full tutorial at DIY Joy.
3. Beaded Wind Chime
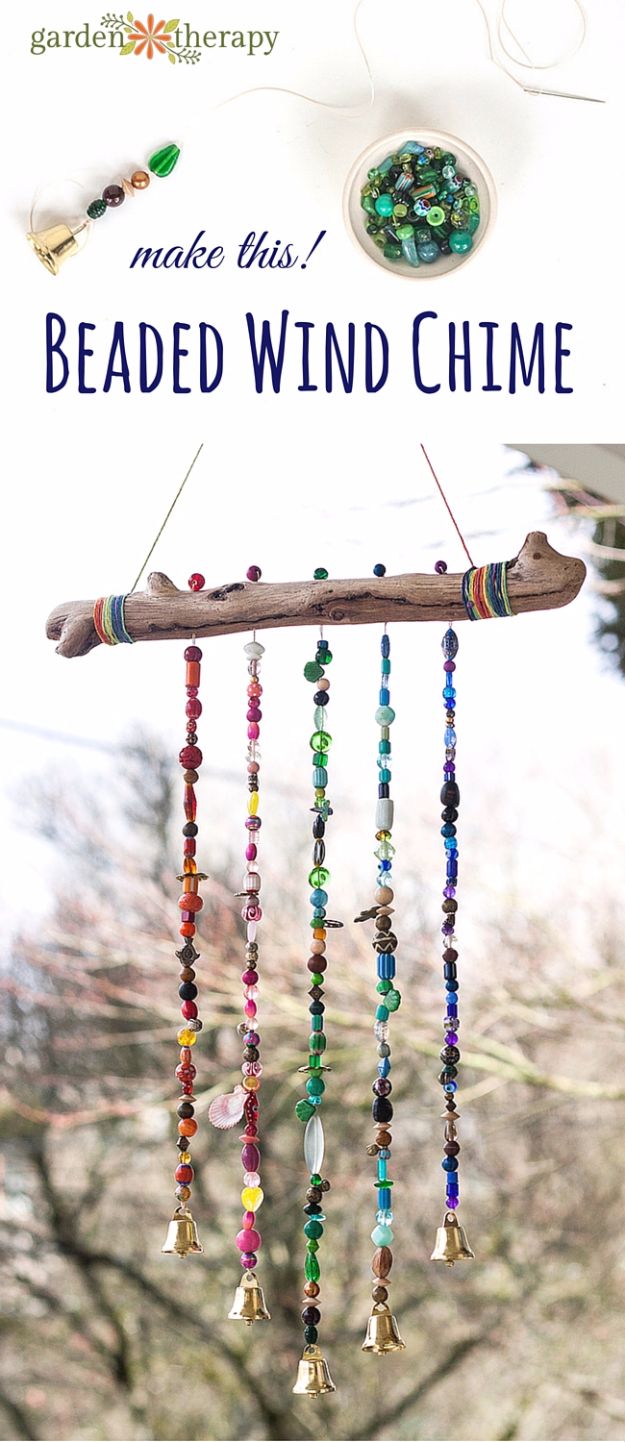
A piece of driftwood, a handful of beads and charms, and a few little bells make a wind chime that sparkles and jingles every time the breeze picks up. Holes drilled through the wood hold each strand, and nylon beading thread with a beading needle keeps everything sturdy enough for outdoors. Making every strand a different color gives a rainbow effect, and mixing in wood beads and metal charms adds texture. Lay the strands out before hanging so the lengths can be tweaked until they look just right.
Get the full tutorial at Garden Therapy.
4. West Elm Inspired DIY Wood Trivet
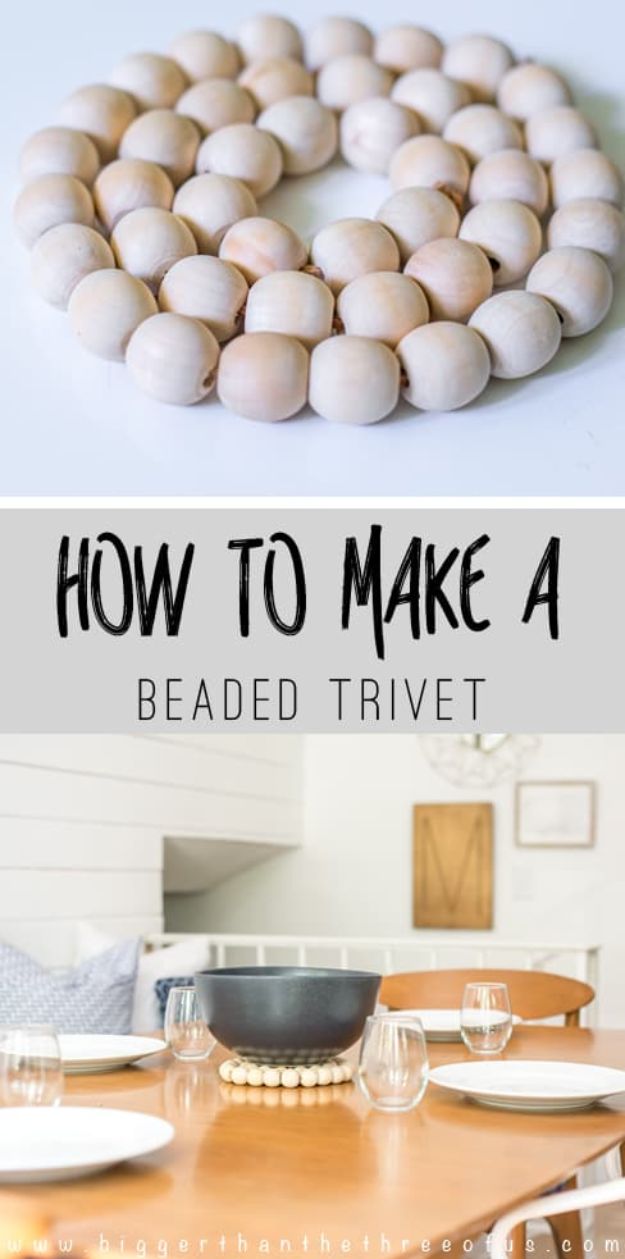
Wood bead trivets sell for a surprising amount in home stores, and this version copies the look for a fraction of the cost. It is basically wood beads threaded on string in a tight pattern, so it can be finished in under 10 minutes with minimal supplies. That makes it a great one to make with kids for holiday gifts. The natural wood looks modern on a kitchen table and protects it from a hot pan, which is a nice combination for something so quick.
Get the full tutorial at Bigger Than the Three of Us.
5. Woven Bead Planter
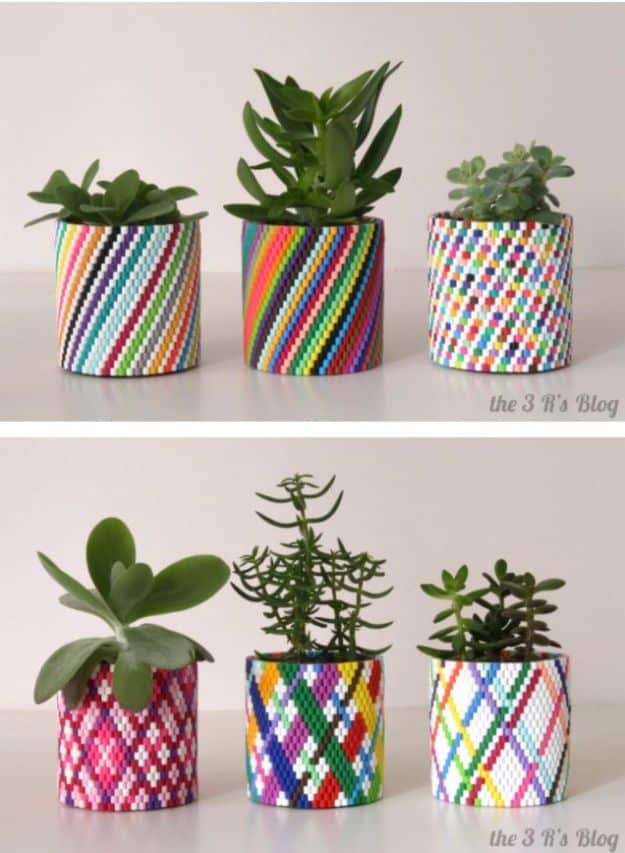
Plastic fuse beads woven around a small container become a planter with real pattern, from simple stripes to plaid and argyle. The trick is planning the design on graph paper first and marking off each row as it gets woven, otherwise it is easy to lose track halfway around. Diagonal stripes come from adding one bead of each color per row, then reversing the order on the way back. Once one is done it is hard to stop, and a windowsill full of these with succulents inside is a happy sight.
Get the full tutorial at the 3 R's blog.
6. DIY Glass Bead Ornaments
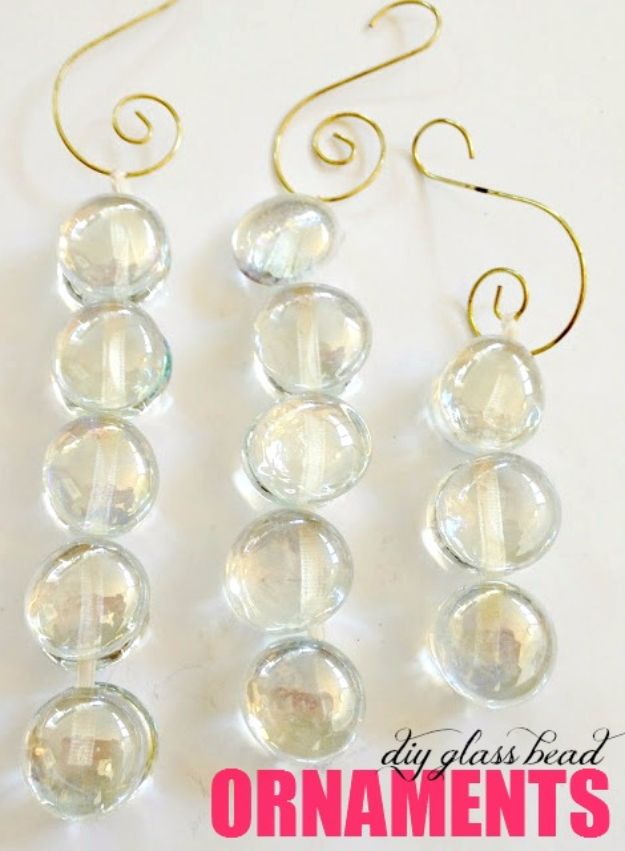
Dollar store glass beads and a length of ribbon are all these Christmas ornaments take. Loop the ribbon over an ornament hook, then hot glue the glass beads to each other with the ribbon running through the middle. The finished cluster catches every light on the tree and bounces it around the room. A few of these mixed in with regular ornaments add sparkle for almost nothing, and they are quick enough to make a batch for gift toppers too.
Get the full tutorial at LiveLoveDIY.
7. Cherry Bead Bracelet
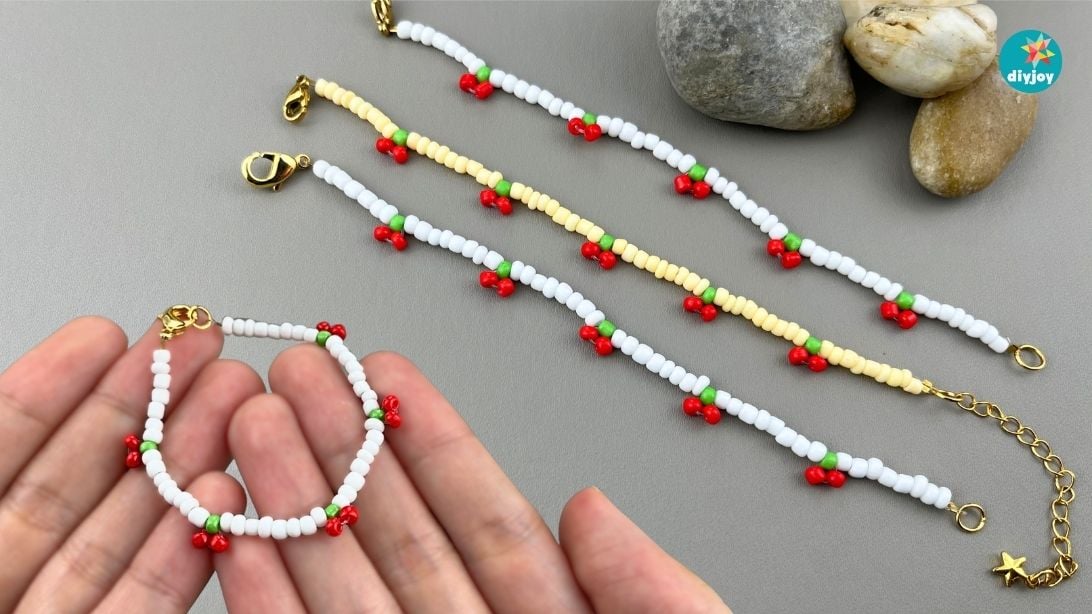
Tiny red and green seed beads make a cherry bracelet that is cute, minimal and honestly addictive. It takes just a few minutes and a handful of beads, and no bracelet making experience at all. Seed beads, bead thread and a basic bracelet making kit cover the supplies. Once the first pair of cherries clicks, it is easy to make a stack for friends. It is also a lovely screen free project and a fun little seller at craft fairs.
Get the full tutorial at DIY Joy.
8. Simple Farmhouse Wood Bead Garland
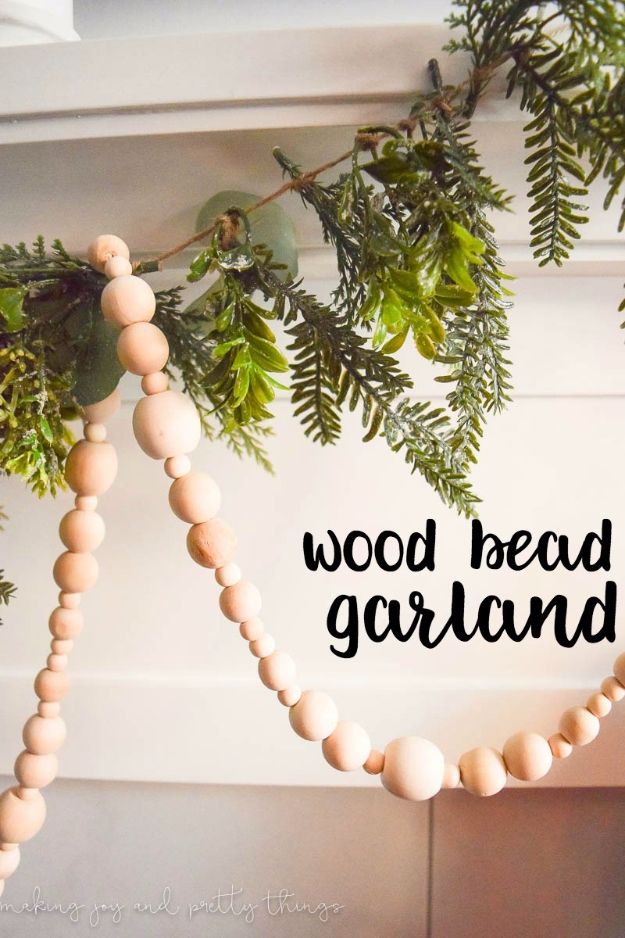
Twine and wood beads in a few different sizes are the whole supply list for this farmhouse garland, and it takes about 10 minutes from start to finish. Stringing beads onto twine is as easy as it sounds, and the pattern can be planned or completely random. Using four sizes, with plenty of the tiniest beads, keeps it from looking flat. Lay it along a mantel, wrap it around a banister or snake it through decor on a shelf, and it fits right in with natural wood decor. At the holidays it doubles as a simple tree garland.
Get the full tutorial at Making Joy and Pretty Things.
9. Perler Bead Tray
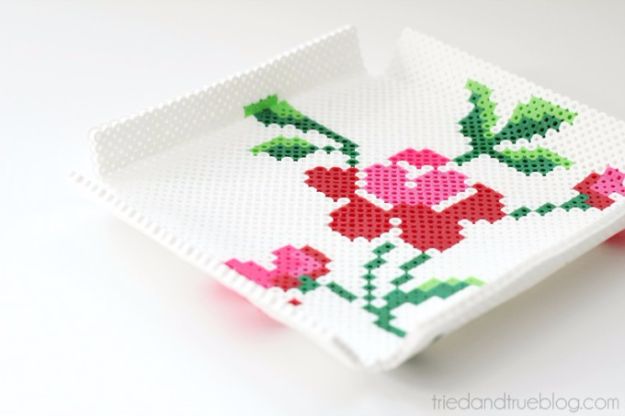
A vintage roses template slipped under a clear pegboard makes this perler bead tray much easier than it looks. Fill in the flowers, then the white background, leaving notched corners so the sides can fold up. After fusing, warm each side over the edge of a table until it bends, then hold it until it cools. Keep the iron on its lowest setting so the board does not warp. The finished tray is about 8 inches square and makes a sweet Mother’s Day gift.
Get the full tutorial at Tried & True Creative.
10. DIY Glass Bead Mirror
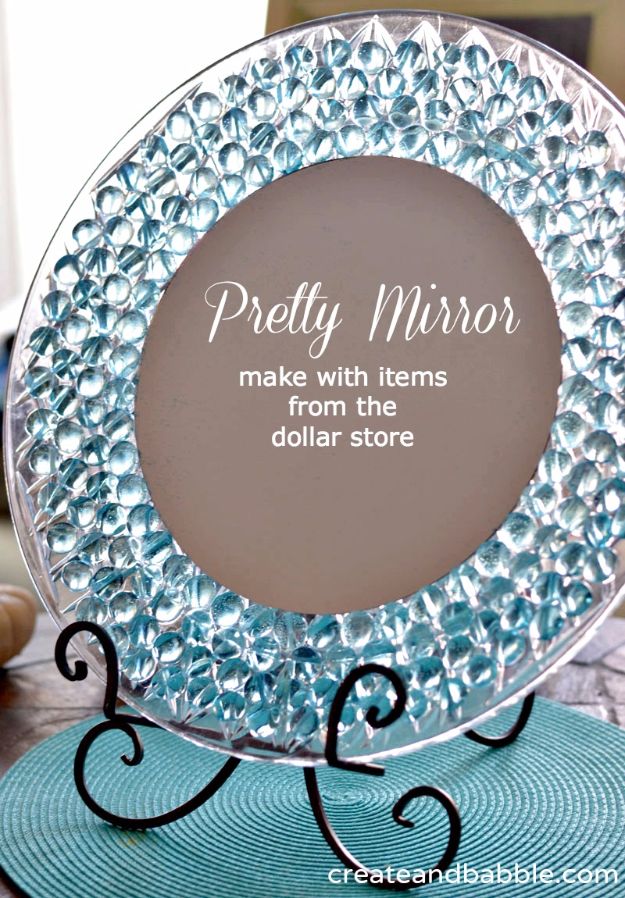
A round mirror, a big plastic tray from the dollar store and two or three bags of glass accent gems add up to a dresser mirror with real sparkle. Glue the mirror to the center of the tray, then work the gems around it in rows. Four rows fill the tray nicely. Use a glue made for nonporous surfaces like E6000 and let it cure flat overnight. It ends up heavy, so a sturdy plate stand works better than a wall hook.
Get the full tutorial at Create and Babble.
11. Flower Bead Bracelet
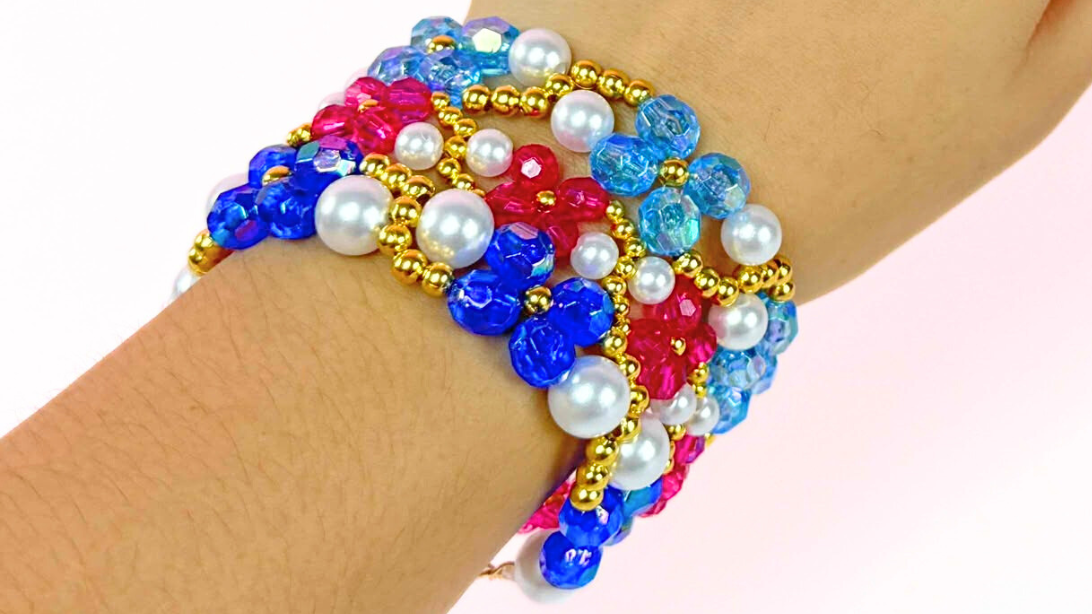
Gold, pearl and blue beads crossed through each other on fishing line form a chain of little flowers in this beginner bracelet. Tie the line to a clasp, slide on a gold bead and cross both ends through it, then build each flower with three gold beads, a pearl and blue accents. Keep crossing the lines through a gold bead until the bracelet is long enough to wrap the wrist. Keeping the fishing line tight the whole time is what makes the flowers sit neatly.
Get the full tutorial at DIY Joy.
12. Fruit Perler Bead Magnets
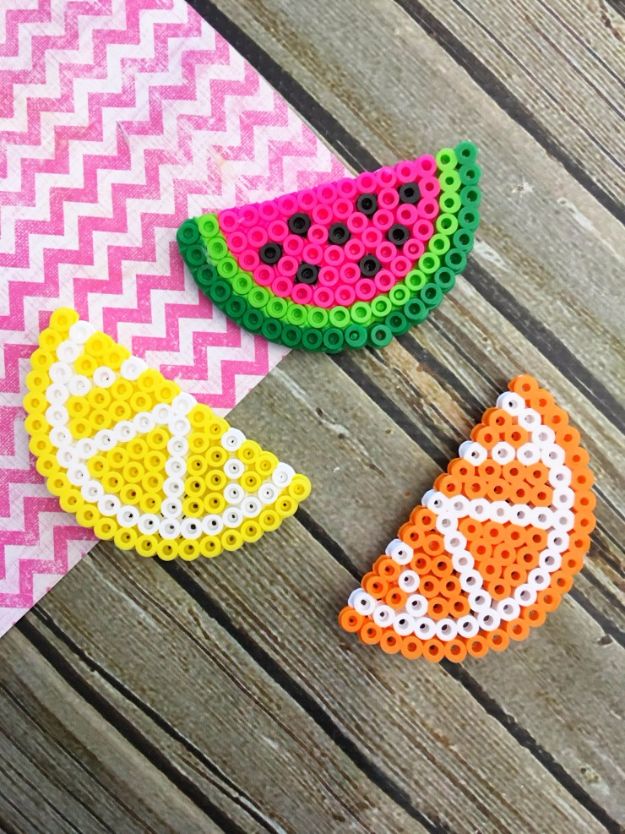
Watermelon, lemon and orange slices made on a small circle pegboard turn into the brightest fridge magnets around. Lay the U shaped peel first, then the white lines or black seeds, and fill in the fruit color last. Press with an iron over ironing paper for about 20 seconds per side. No ironing paper? Parchment paper works. Peel and stick magnets are easiest, but strong craft glue holds a plain magnet just fine. Free templates take the guesswork out.
Get the full tutorial at Frugal Mom Eh!.
13. Cute Bead Pouch
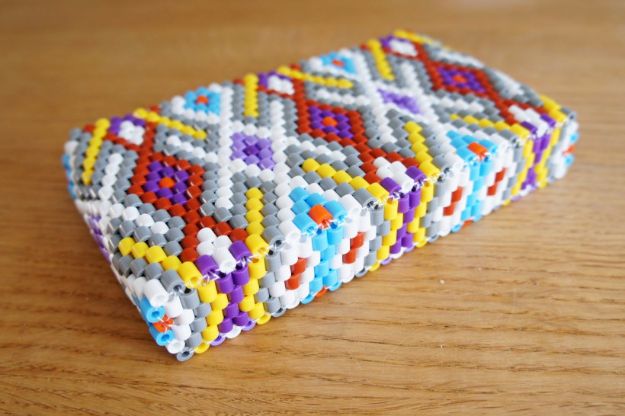
Hama beads are not only for ironing, and this patterned purse is sewn bead by bead instead of fused. It is one of the bigger bead purses this maker has made, longer and taller than the earlier ones, with a bottom twice as wide so it actually holds something. Counting rows and working out how the colors fit together is relaxing handwork, the kind that travels well to the garden, the beach or the back seat of the car. An English step by step guide with patterns for four purses is sold as a download, and an earlier guide is linked from the post.
Get the full tutorial at StyleDesignCreate.
14. Bead Key Holder
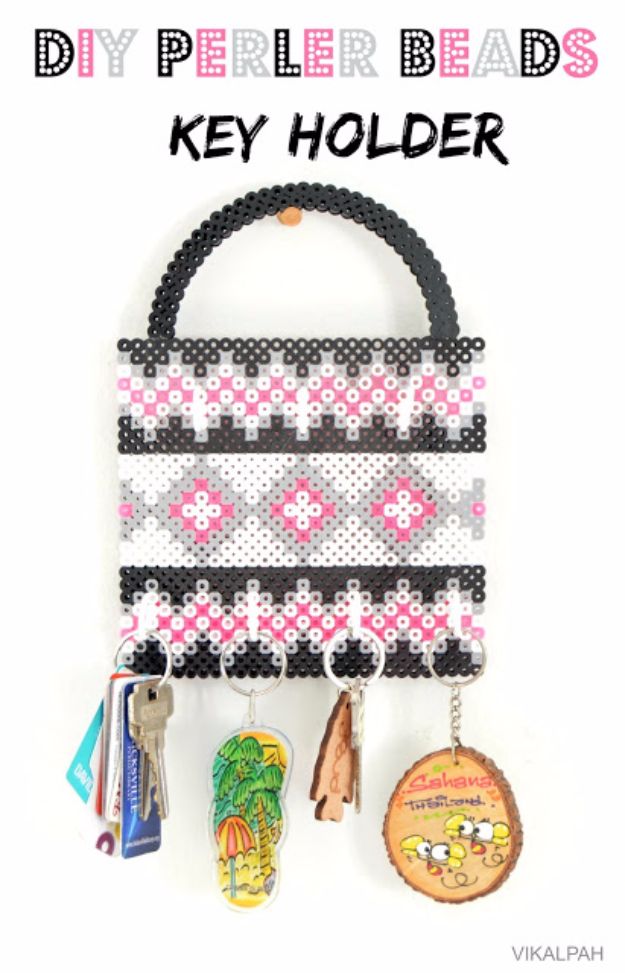
Perler beads become something genuinely useful here: a wall key holder with cup hooks along the bottom. Two square pegboards side by side give enough room for a chevron border in black, grey, white and neon pink. The center can spell out a word like Keys or Hello, or hold a diamond pattern. Fuse it with an iron and parchment paper, then hot glue the cup hooks in place. It is a smart way to use up a big box of leftover beads.
Get the full tutorial at Vikalpah.
15. Plastic Bead Bowls
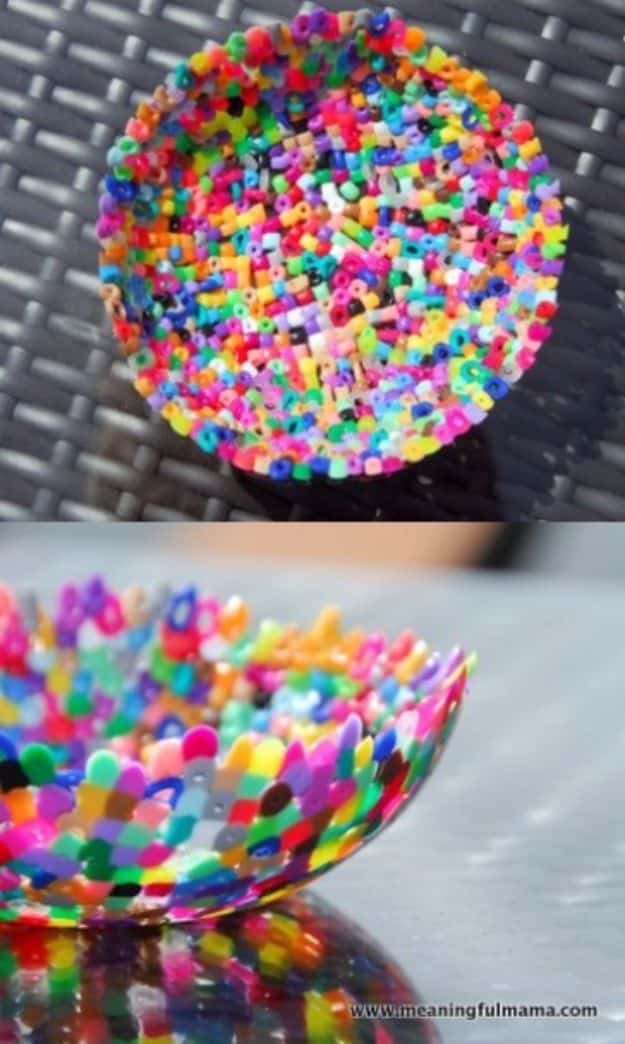
Perler beads melted in the oven make colorful little bowls with almost no effort. Spray an oven safe bowl with cooking spray, drop in handfuls of beads and push them into a single layer that climbs up the sides. Bake at 375 degrees for 12 to 14 minutes, checking that the beads fuse without melting too far. Worried about the plastic smell? A grill set to the same temperature outside works too. The finished bowls are perfect for coins, jewelry and tiny treasures.
Get the full tutorial at Meaningfulmama.com.
16. Grape Bead Bracelet
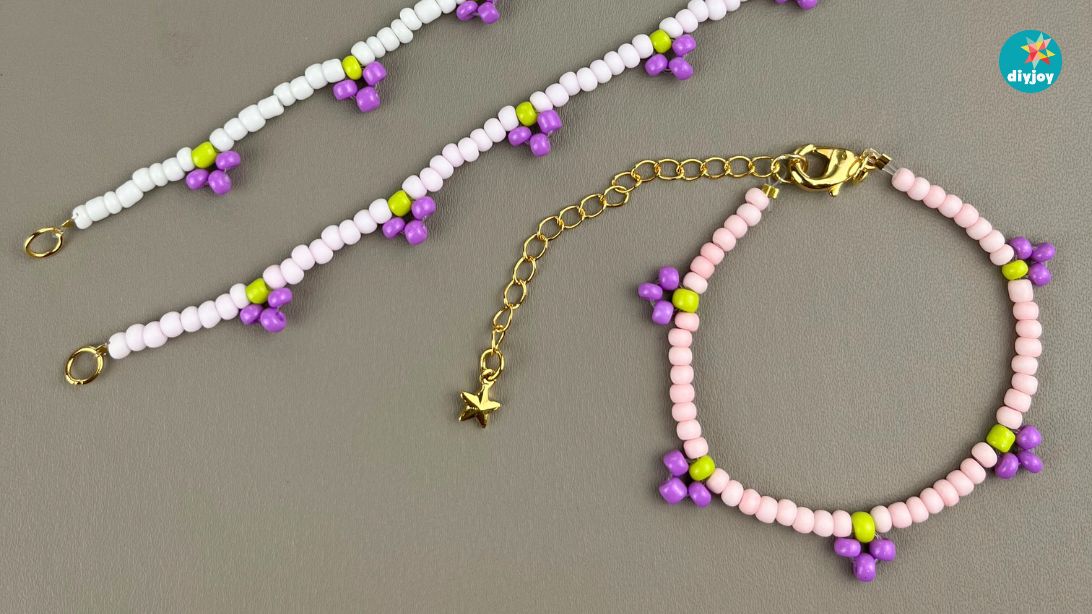
Clusters of purple and green seed beads form little bunches of grapes on this sweet friendship bracelet. The supplies are simple: seed beads, nylon string, jump rings, crimps and lobster clasps. It stretches enough to slip over the hand, and an extension chain makes it adjustable. The steps mirror the cherry bracelet, so after one the other is a breeze. It is a cute pop of color on a neutral outfit and an easy handmade gift for friends.
Get the full tutorial at DIY Joy.
17. Retro Camper Keychain
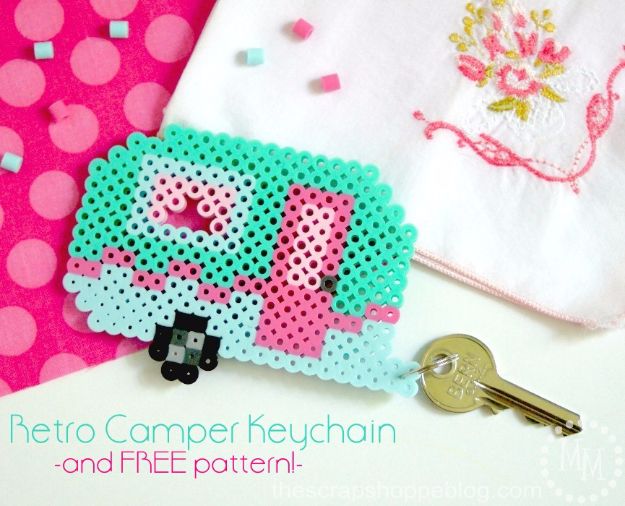
A turquoise retro camper made from perler beads and turned into a keychain is pure road trip happiness. The free pattern fits a square pegboard and uses about seven colors, and it would work for cross stitch too. Fuse the beads following the package directions, but stop before the holes close up. Then loop a thin keychain ring through a gap at the hitch. If the beads fused too tight, a paper piercer gently opens a hole. Camper keys, meet your match.
Get the full tutorial at The Scrap Shoppe.
18. DIY Perler Beads Fruit Bowl
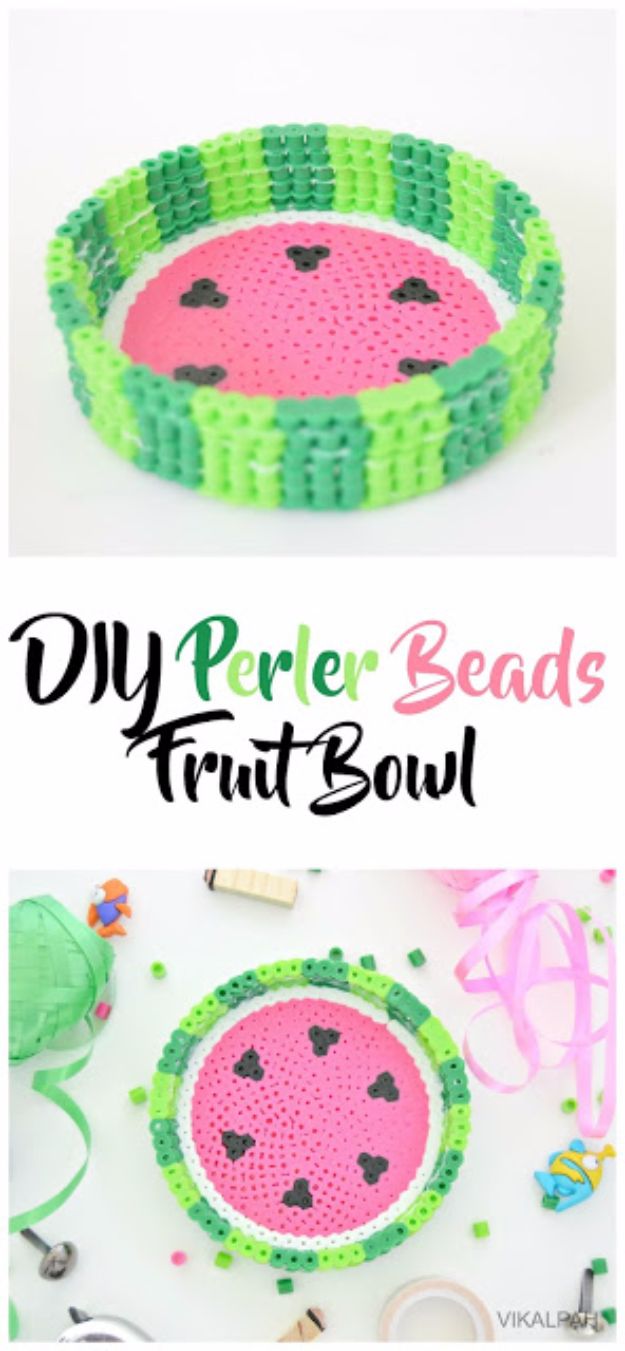
Fruit prints get the 3D treatment in these perler bead bowls, one a full watermelon circle and one a half grapefruit. A circle pegboard makes the base, fused with parchment paper and an iron for 30 to 45 seconds. The sides are five separate outline rings, in alternating light and dark green for the watermelon rind or light orange for the grapefruit. Stack and glue the rings onto the base with E6000. They are great for sorting desk supplies or small knickknacks.
Get the full tutorial at Vikalpah.
19. Beaded DIY Notebook
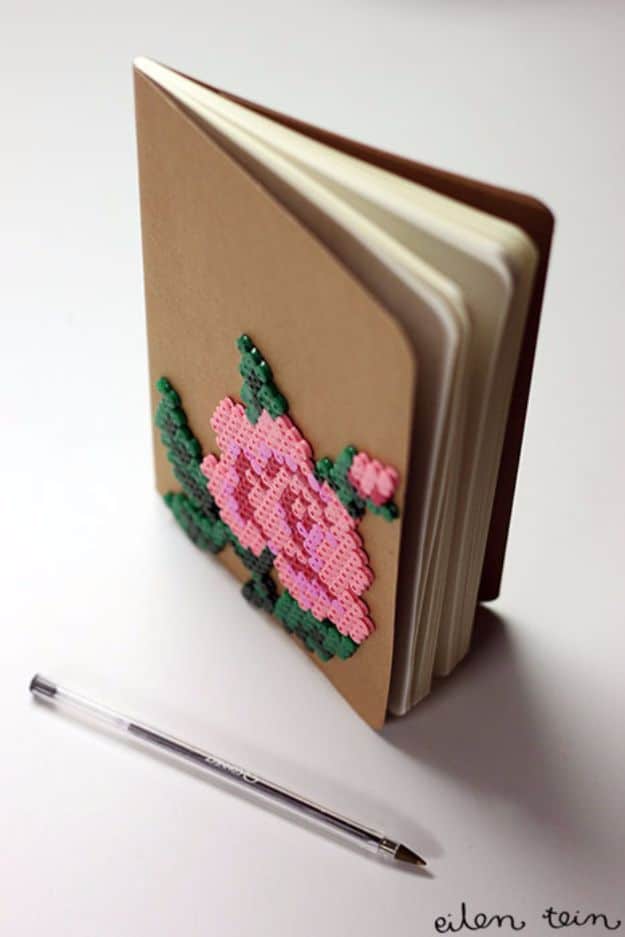
A fused hama bead panel glued to a plain notebook cover turns it into a one of a kind journal. Plan the design on graph paper or look up pixel or cross stitch patterns for ideas, then build it on a pegboard. Cover with baking paper and iron on a medium setting until the beads just melt together. A strong, thick epoxy glue is key, since a runny one seeps through the bead holes. A sturdy or hardcover notebook keeps the cover from bending.
Get the full tutorial at eilen tein.
20. Mini Bookmarks
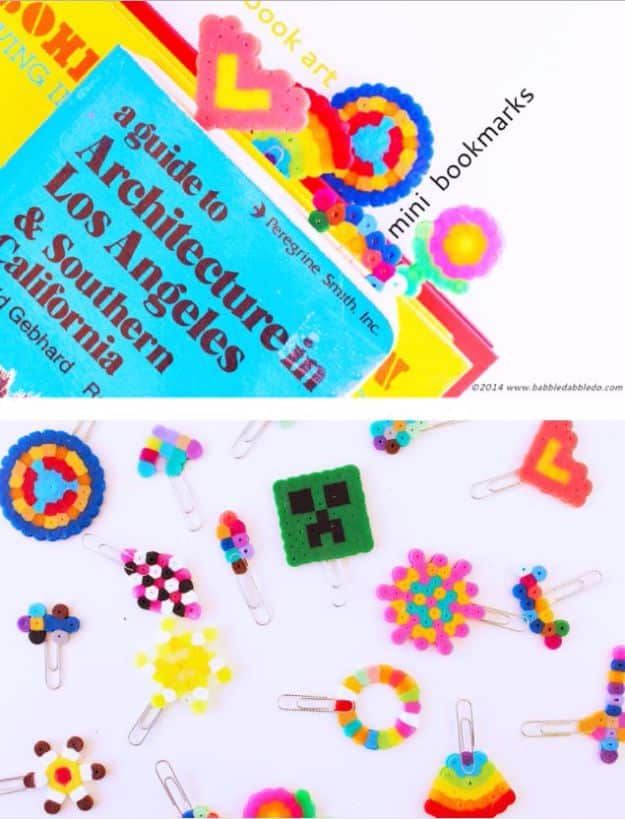
Perler beads and plain metal paper clips make mini bookmarks that clip onto a page and mark favorite passages. Build a small design on the pegboard, fuse one side, then flip it and set a paper clip near the bottom with the open end facing away. Iron again until the clip fuses into the beads. Use standard sized uncoated clips only, since plastic coating melts and big clips will not stick. It works for grown ups as well as kids, with an adult handling the iron.
Get the full tutorial at Babble Dabble Do.
21. Easy Beaded Bracelet

Three strands of seed bead loops in red, white and green weave together into one sturdy, eye catching bracelet. Each strand starts with a loop of 22 beads, then 11 beads go on each side of the cord before crossing through a single bead, repeated for about 12 loops. Once all three are done, thread one strand through the holes of the next. It takes more patience than simpler designs, but it holds up far better. Swap in black, gray or blue for a sleeker look.
Get the full tutorial at DIY Joy.
22. DIY Beaded Plant
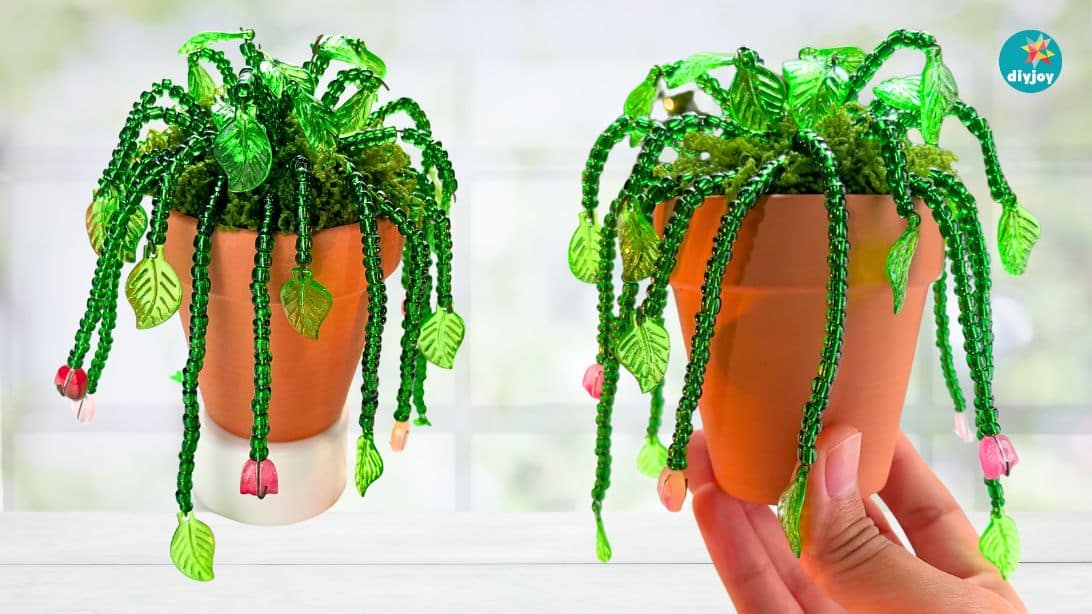
This beaded plant is styled after a strawberry plant, with leaves and little fruits dangling from the ends of each wire stem. Tulip beads stand in for the strawberries here, but strawberry beads or charms from the craft store would be even cuter. Green seed beads build the stems and leaves, and it sits happily on a desk or shelf. Set it near a window and the seed beads catch the light like a tiny suncatcher.
Get the full tutorial at DIY Joy.
23. DIY Daisy Bead Rings
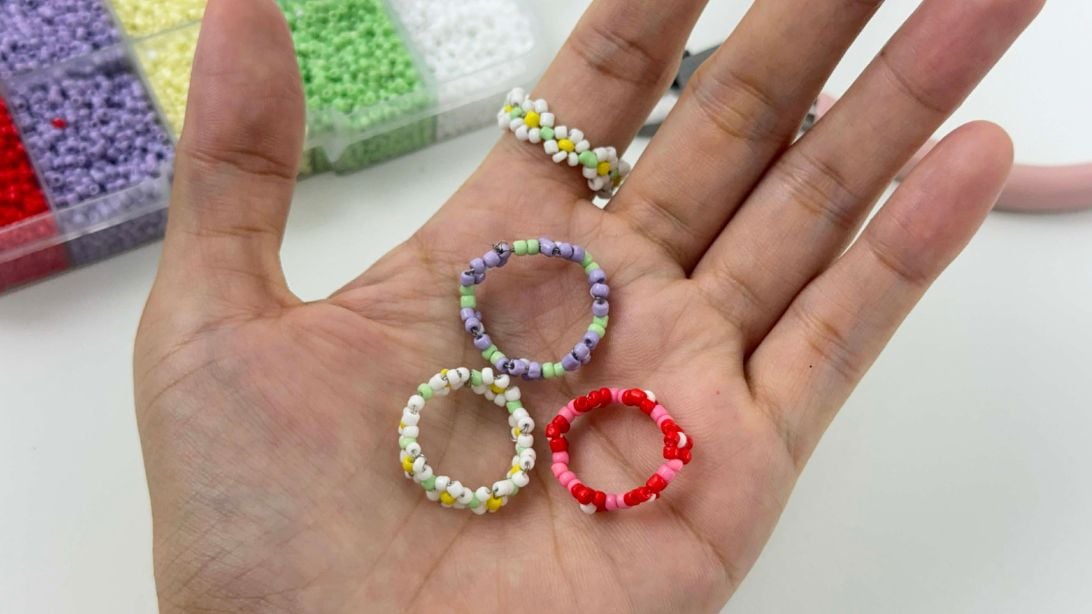
Little white daisies with yellow centers and green leaves circle the finger on these seed bead rings. Fold a piece of jewelry wire in half, add two white beads to each tail and a yellow bead to one, then cross both ends through a single bead. Threading back through the whites pulls the yellow into the center. A green bead locks each flower, and a few flowers in a row wrap the whole finger. Change the colors for sunflowers or pink blooms.
Get the full tutorial at DIY Joy.
24. Beaded Plant Hanger and Lantern
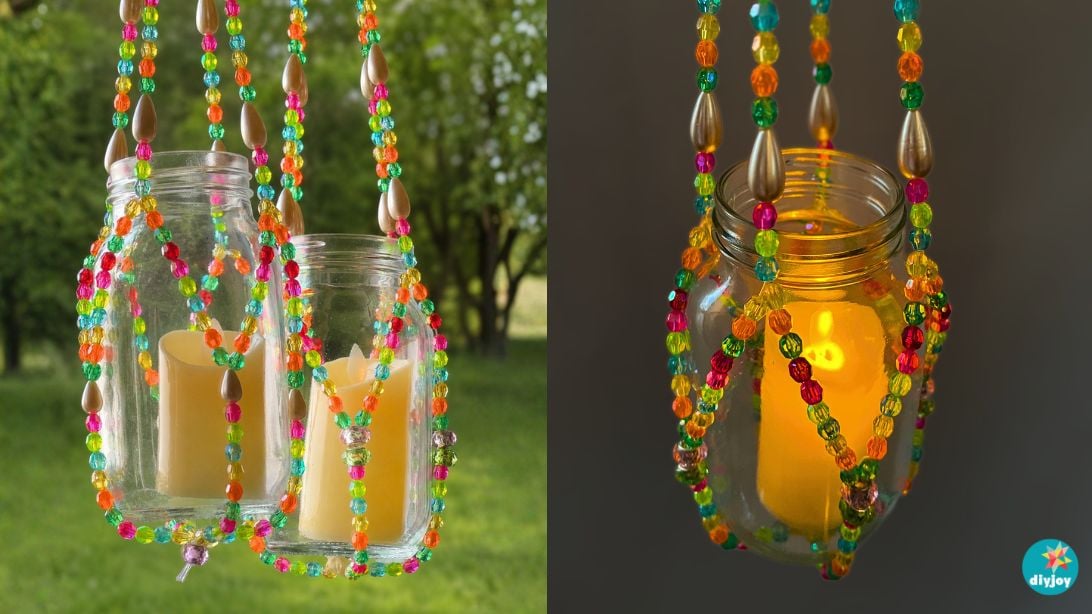
Two projects in one: a beaded hanger that cradles a mason jar with a candle inside one week and a small potted plant the next. Four 5 foot lengths of fishing line fold through a small wooden ring, then 8mm and 14mm glass beads build the strands into a cradle. Painter’s tape holds the top steady while beading, and if the beads are a different size, just keep adding until each strand hits about 16 inches. Knot all eight strands at the bottom and it is ready to hang indoors or out.
Get the full tutorial at DIY Joy.
25. Beaded Indian Corn
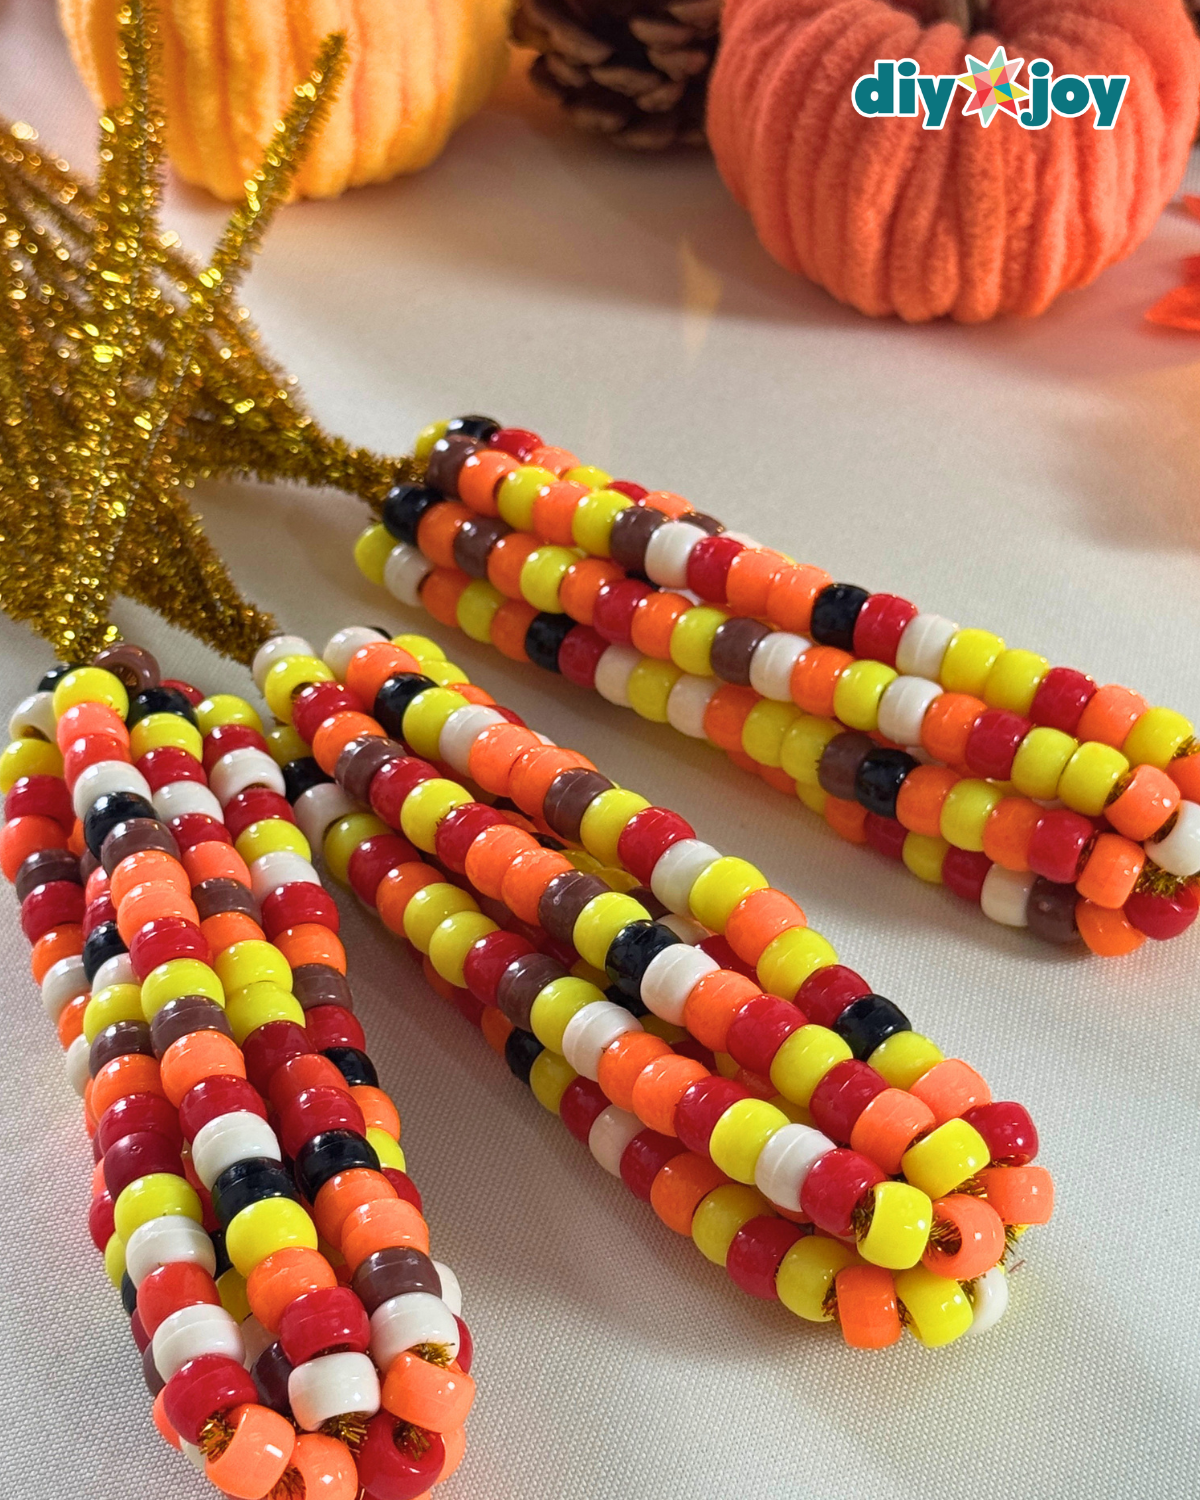
Pony beads and pipe cleaners turn into mini Indian corn cobs that look great piled in a wooden bowl for a Thanksgiving centerpiece. Bundle 7 or 8 pipe cleaners and twist them together near the bottom, then spread them out like a spider. Each one takes about 20 pony beads in reds, whites, yellows and oranges, or toss in some purple and blue. Gather them back up and twist the tops. There is no glue or glitter involved, which makes cleanup a dream.
Get the full tutorial at DIY Joy.
26. Beaded Wind Chime on a Branch
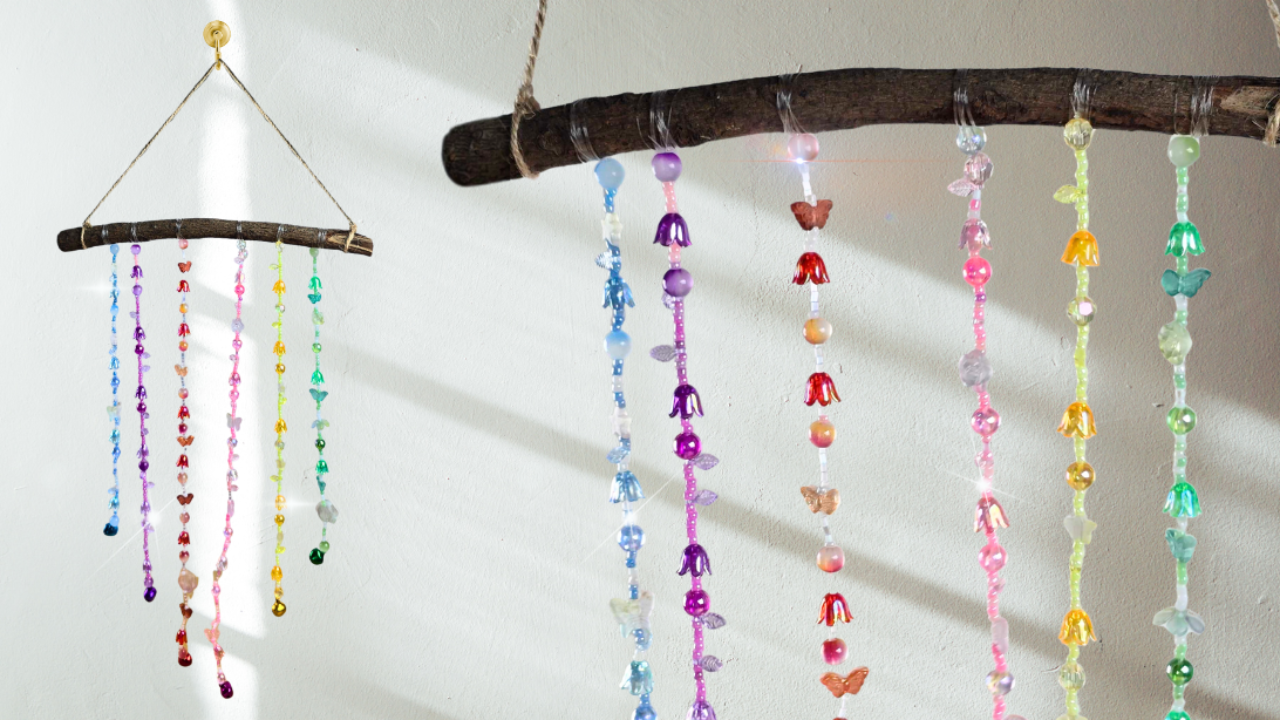
A twig from the yard, fishing line and a pile of leftover beads and charms are all this wind chime needs. Tie a bell to the end of each strand first, then layer beads and charms in any order until it hangs at the length you like. Six strands tied evenly along the branch keep it balanced, and jute rope makes the hanger. Fair warning, strings do slip and beads do scatter, so work over a tray. Mixing glass, wood and metal beads gives the best sparkle.
Get the full tutorial at DIY Joy.
27. Beaded Christmas Wreath Ornament
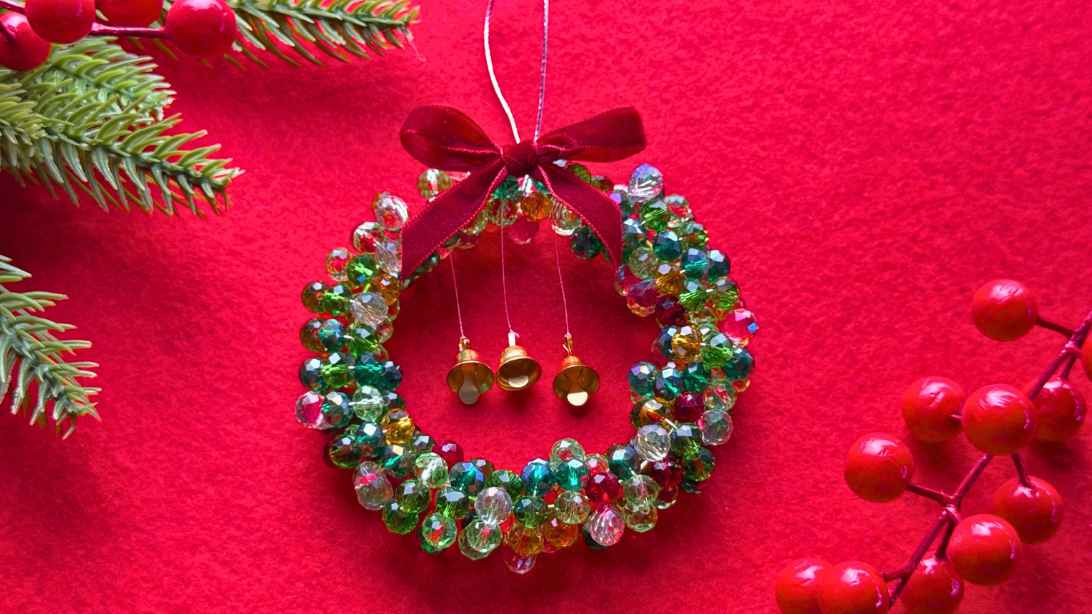
Faceted crystal beads wrapped around a 4 inch metal ring make a mini wreath ornament with a red bow, tiny gold bells and serious sparkle. String the beads on jewelry wire, then coil it around the ring, pushing the beads firmly together as you go. Cut the wire longer than seems necessary, since joining two short ends is a pain. Thin 0.3mm wire bends easily but snaps sooner; 0.6mm holds better. It is a great way to finally use up leftover beads.
Get the full tutorial at DIY Joy.
28. Beaded Potted Plant
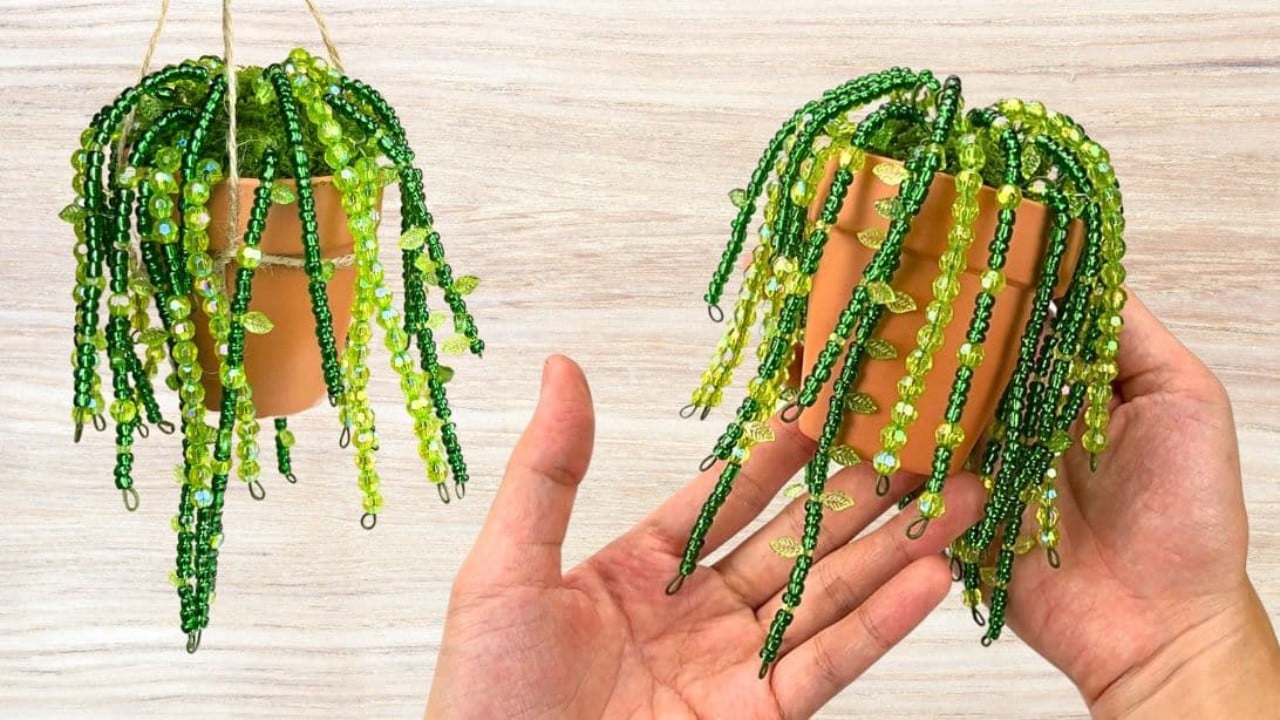
This tiny beaded vine plant spills over the edge of a mini terra cotta pot and never needs watering. Styrofoam fills the pot, floral wires cut in different lengths get a loop bent at one end, then each wire is filled with beads. Fake moss hides the foam, and the wires bend gently to look like trailing vines. Use glass beads and hang it in a sunny window, and it doubles as a suncatcher. Jute rope makes a simple hanger.
Get the full tutorial at DIY Joy.