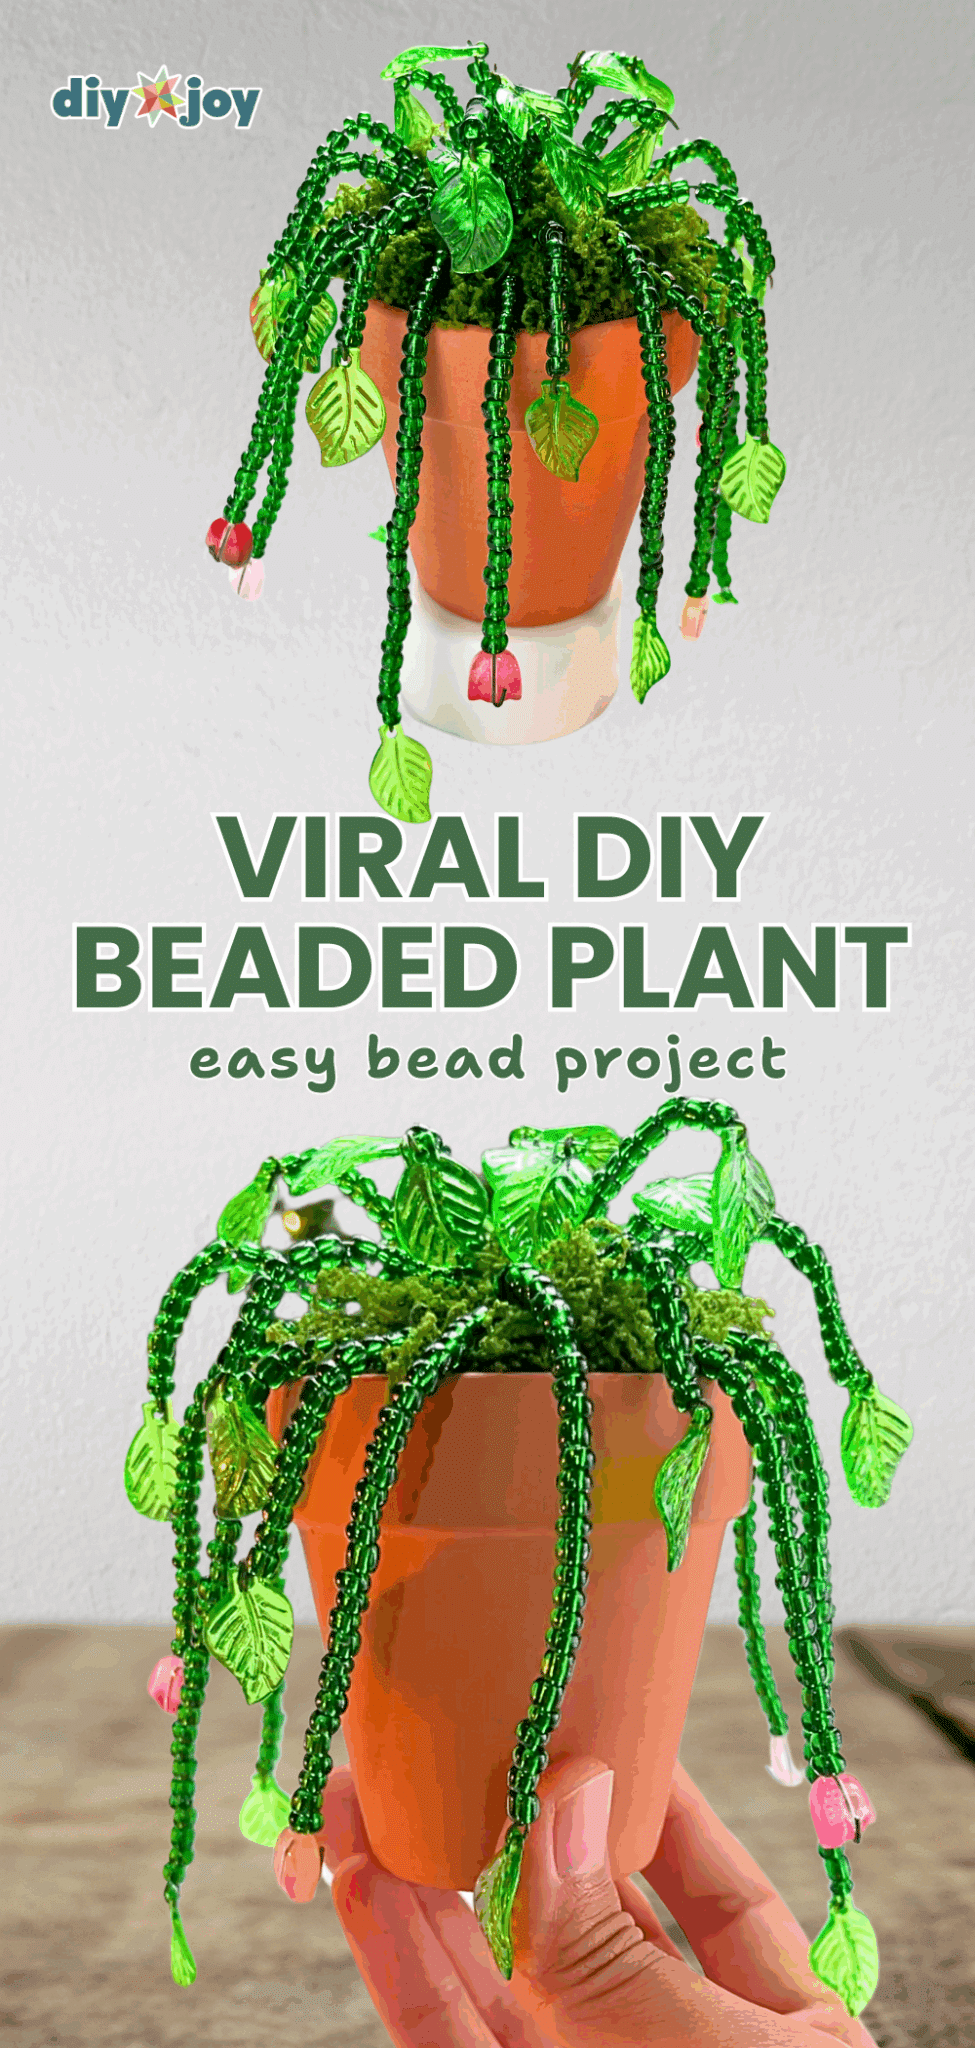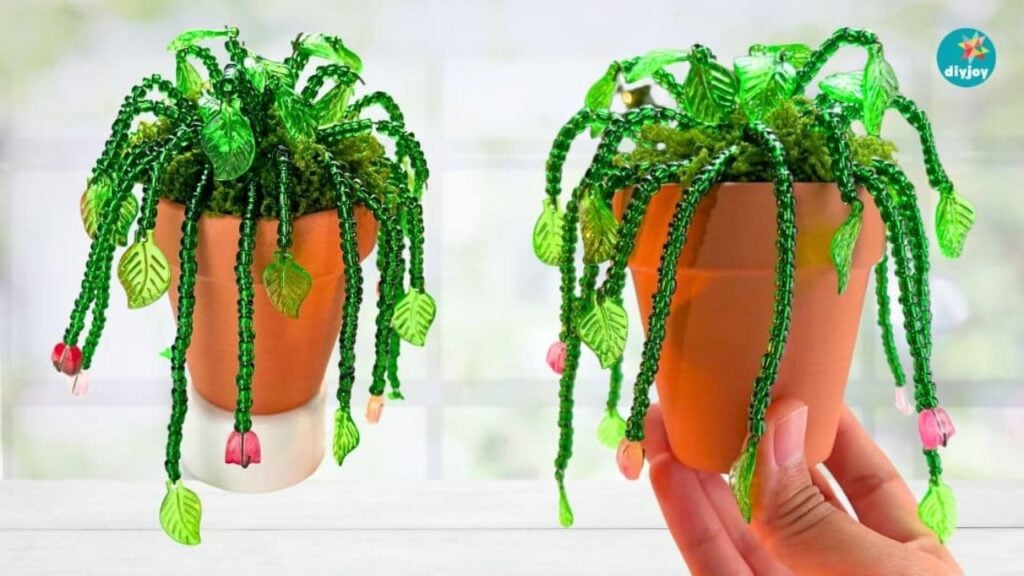
Beaded plants make the cutest desk plant decor, perfect for anyone looking for something unique. What I love about these DIY beaded plants is that they’re completely customizable, easy to make, and look absolutely gorgeous, especially when the sunlight hits the seed beads. Place one near your window, you’ll have an instant suncatcher! If you have extra beads lying around, definitely give this DIY mini plant decor a try. It’s absolutely one of my favorite bead crafts.

Here’s another wire and bead plant to try:
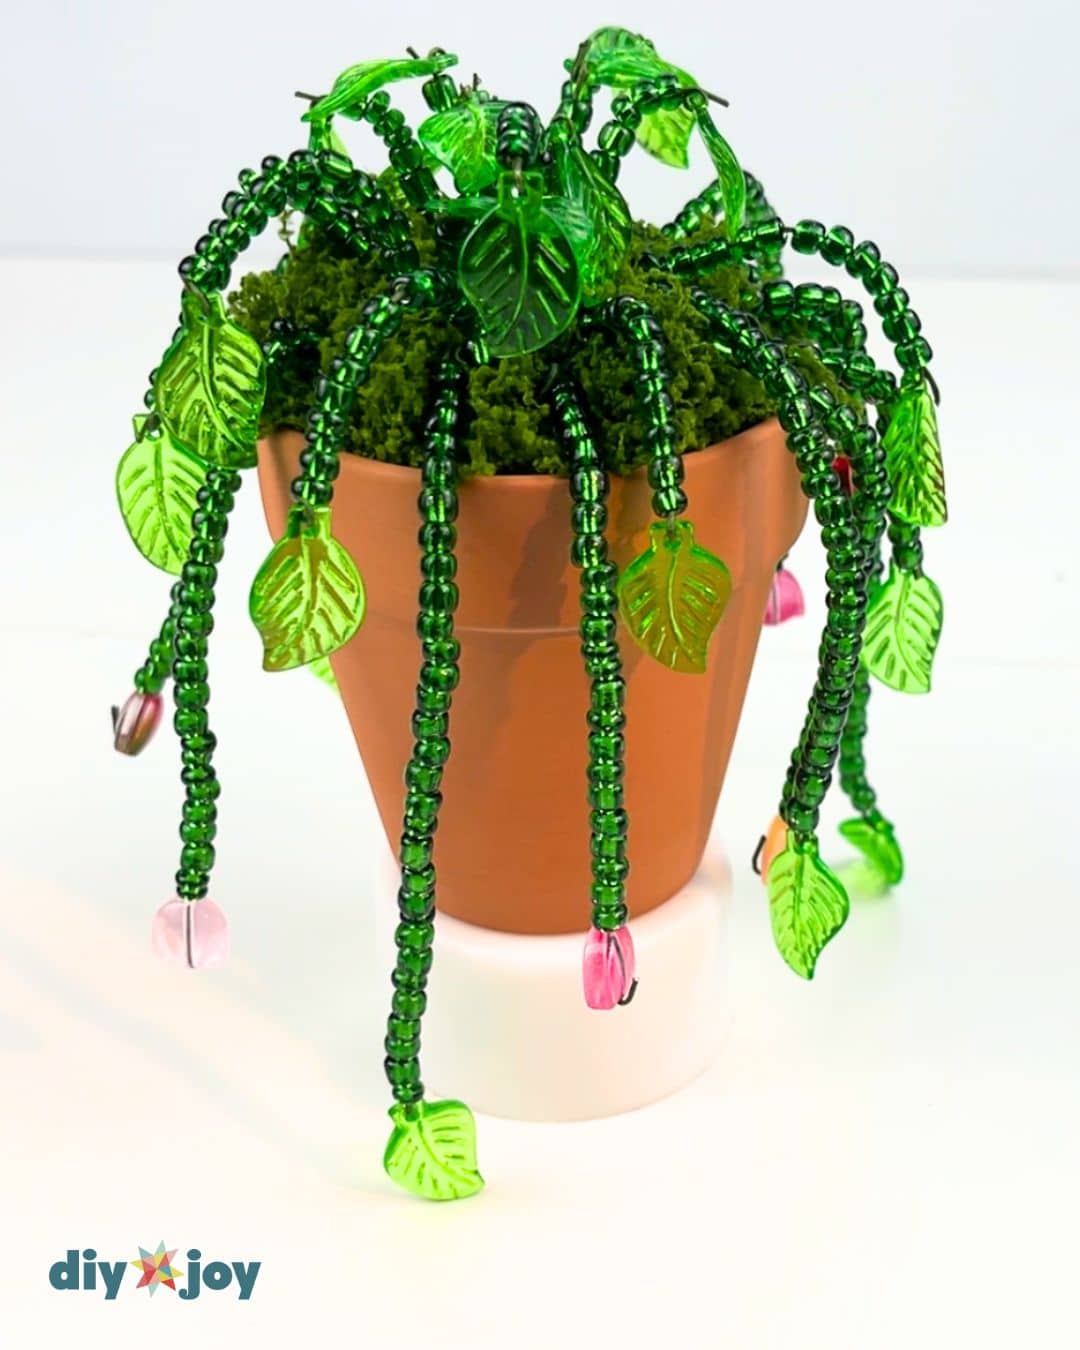
DIY Vine Desk Plant With Beads
![]()
Have you seen our TikTok & Instagram yet?
Our viral videos are super popular and fun to watch. Here’s the yarn chick Tiktok, but the YouTube video is also at the bottom of this post so you can watch the full tutorial. Links below for all our socials. Follow and be the first to see our latest crafts. ⬇️
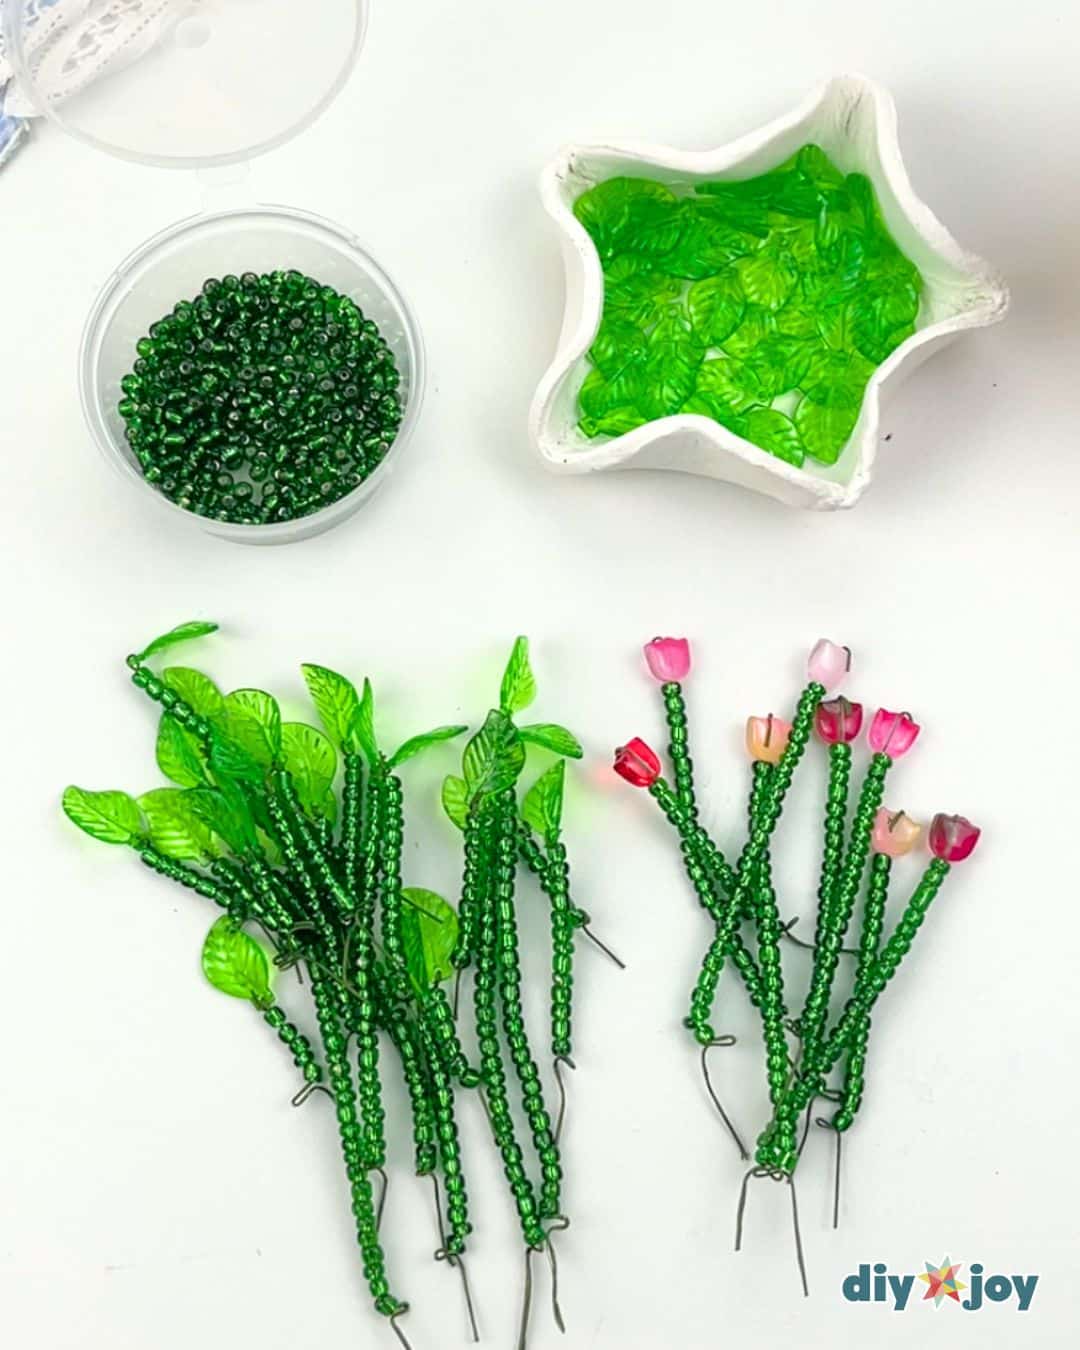
This isn’t the first beaded plant I’ve made. I only used small leaf beads and green beads for my first beaded vine plant, so I wanted to try something different this time. This version is inspired by the strawberry plant, where the leaves and fruits grow at the end of the stems. I didn’t have any strawberry beads, so I used tulip beads from my chicken wire suncatcher project instead.
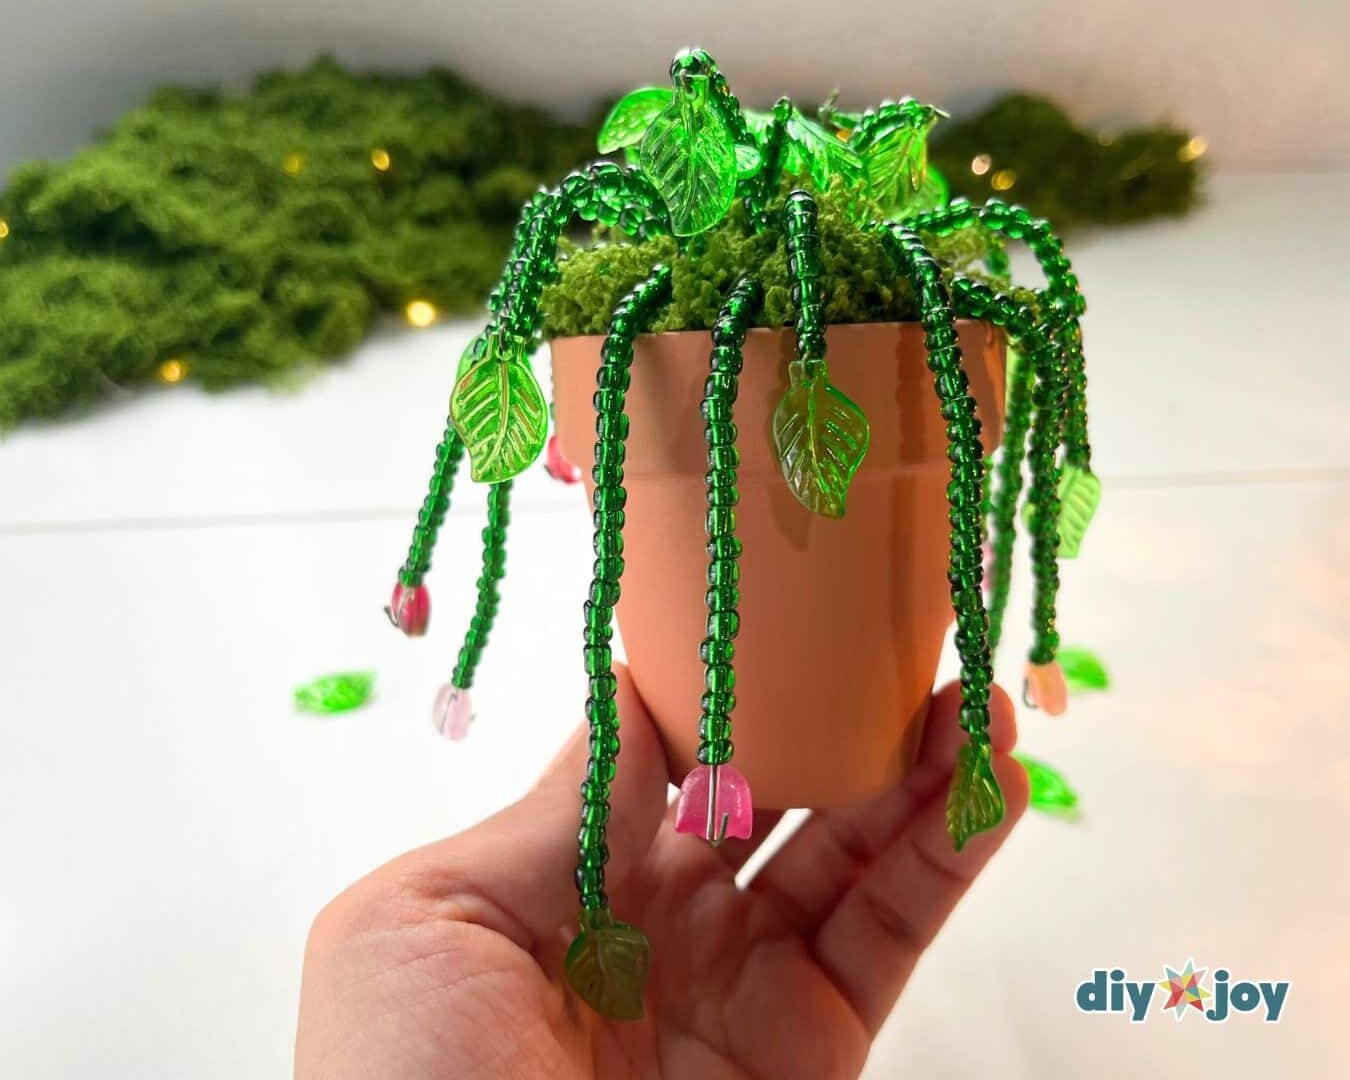
If you can find strawberry beads or charms at your local craft store or online, go ahead and grab them. They’ll definitely make your DIY faux plant even more amazing. Keep on reading the step-by-step instructions or watch the video tutorial below to learn how to make ta beaded plant, one of the cutest table decor ideas out there!
List of Supplies for the Beaded Plant
- leaf beads
- green glass beads
- floral wire
- flower beads or strawberry beads
- fake moss
- 2 round styrofoam pieces
- mini terracotta pot
These products are all listed on our DIY JOY Amazon store, so you can order and know exactly what you will get, and when. We do earn a small commission on these links and very much appreciate your support ❤️
How to Make a Beaded Vine Desk Plant
Learn how to make a DIY plant using beads for your desk with this step-by-step tutorial.
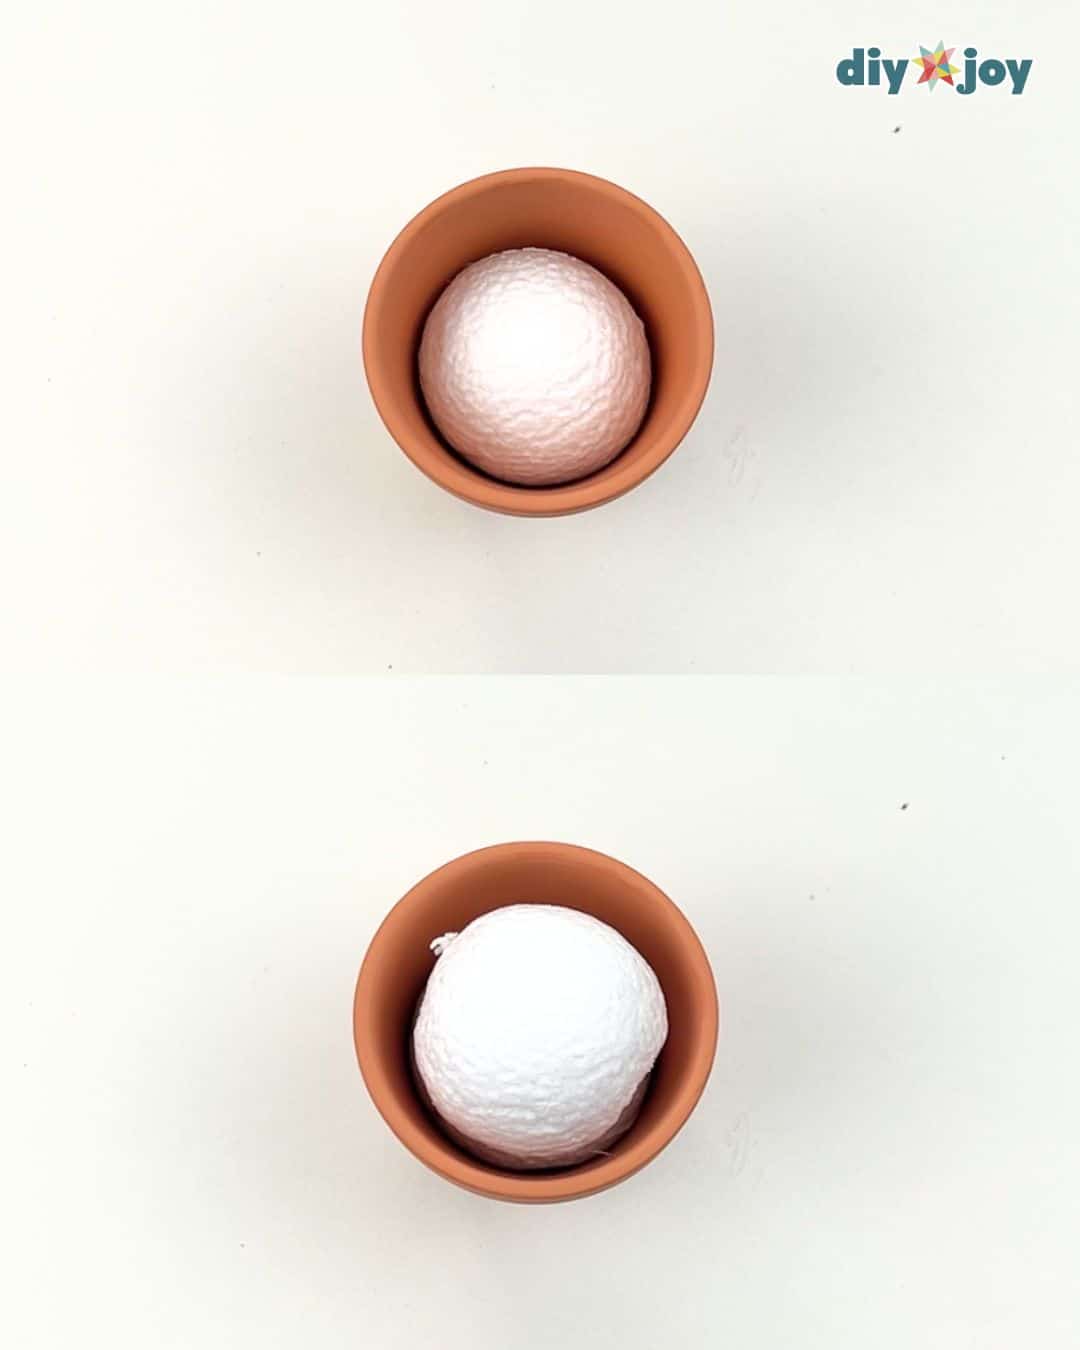
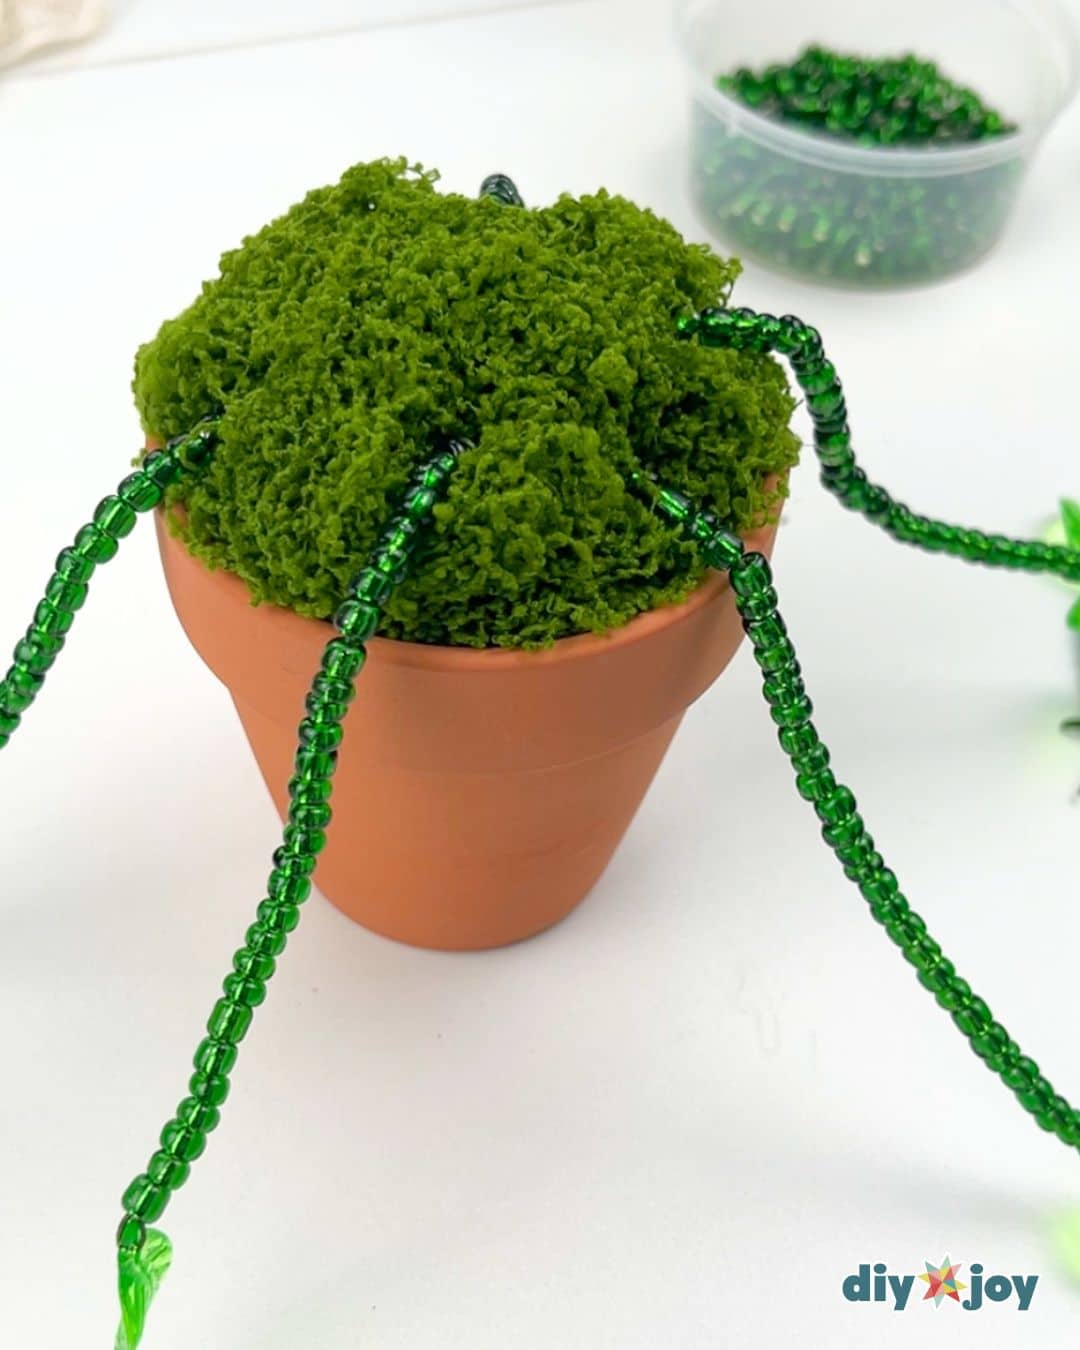
Place the styroam pieces
Place one round styrofoam inside the terracotta pot. Cut the other piece in half, then place it on top of the first one. Use a floral wire to keep them together.
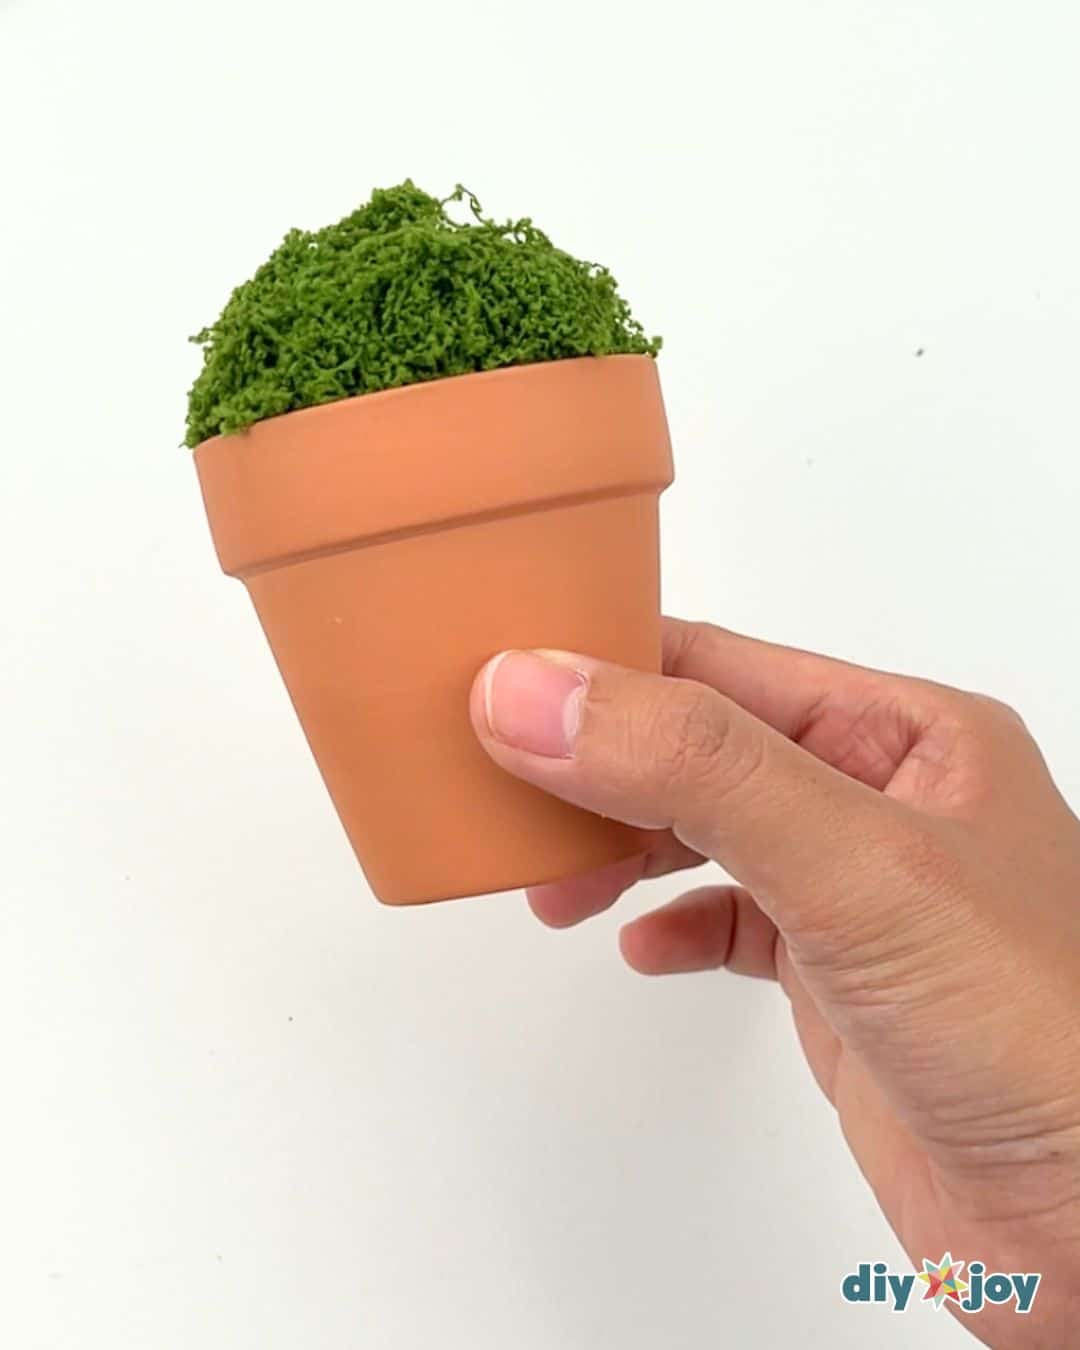
Cover the styrofoam
Take some fake moss and cover the styroam.
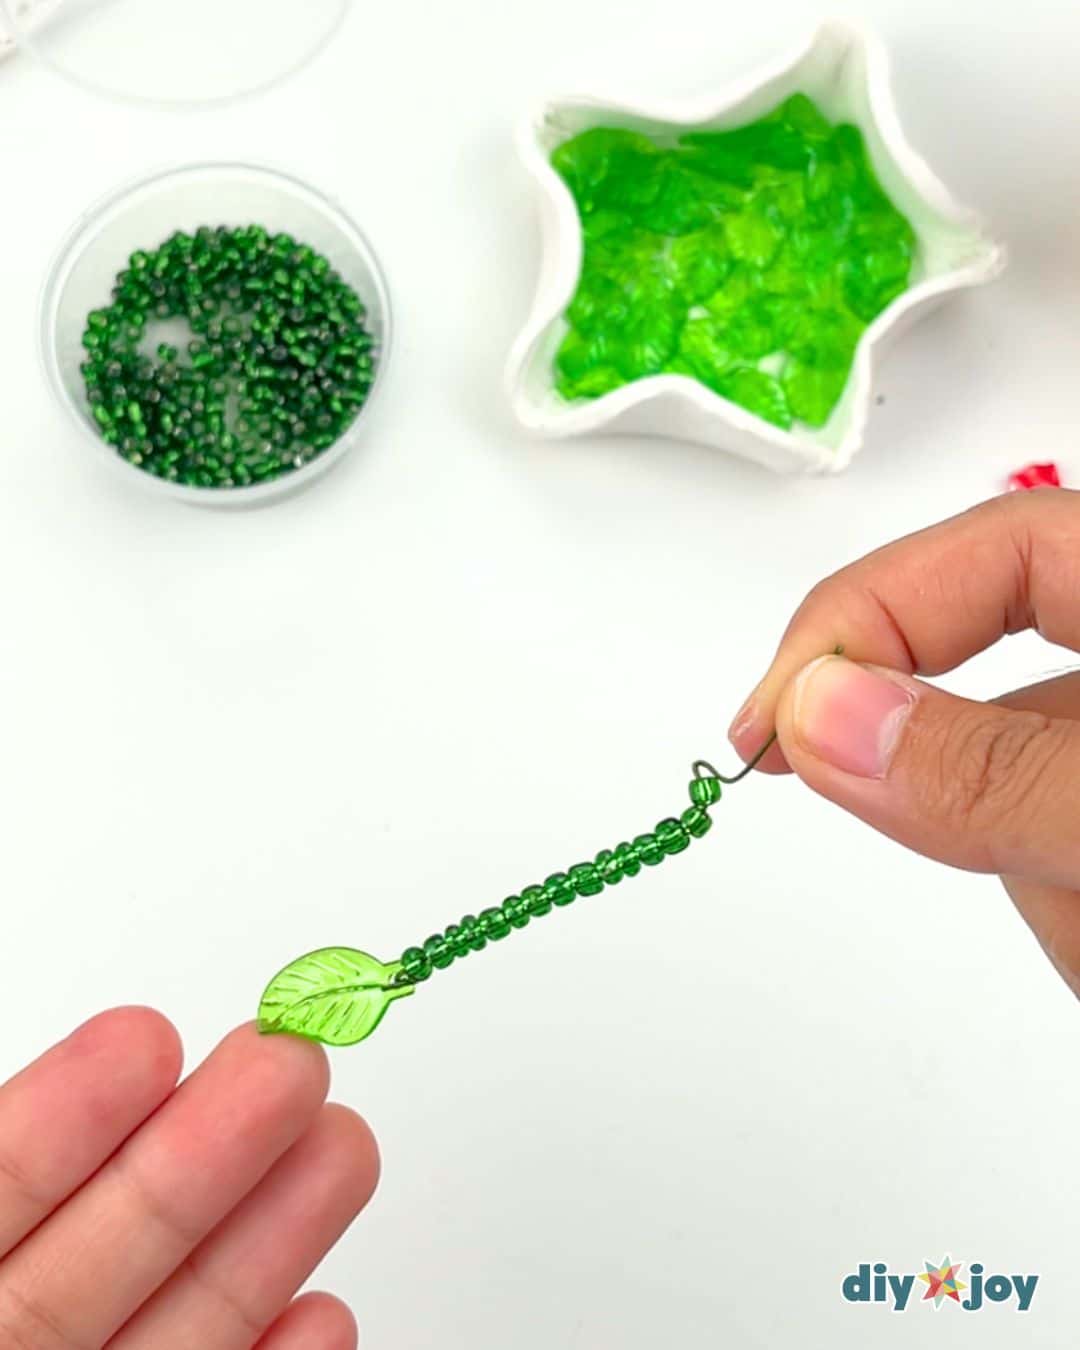
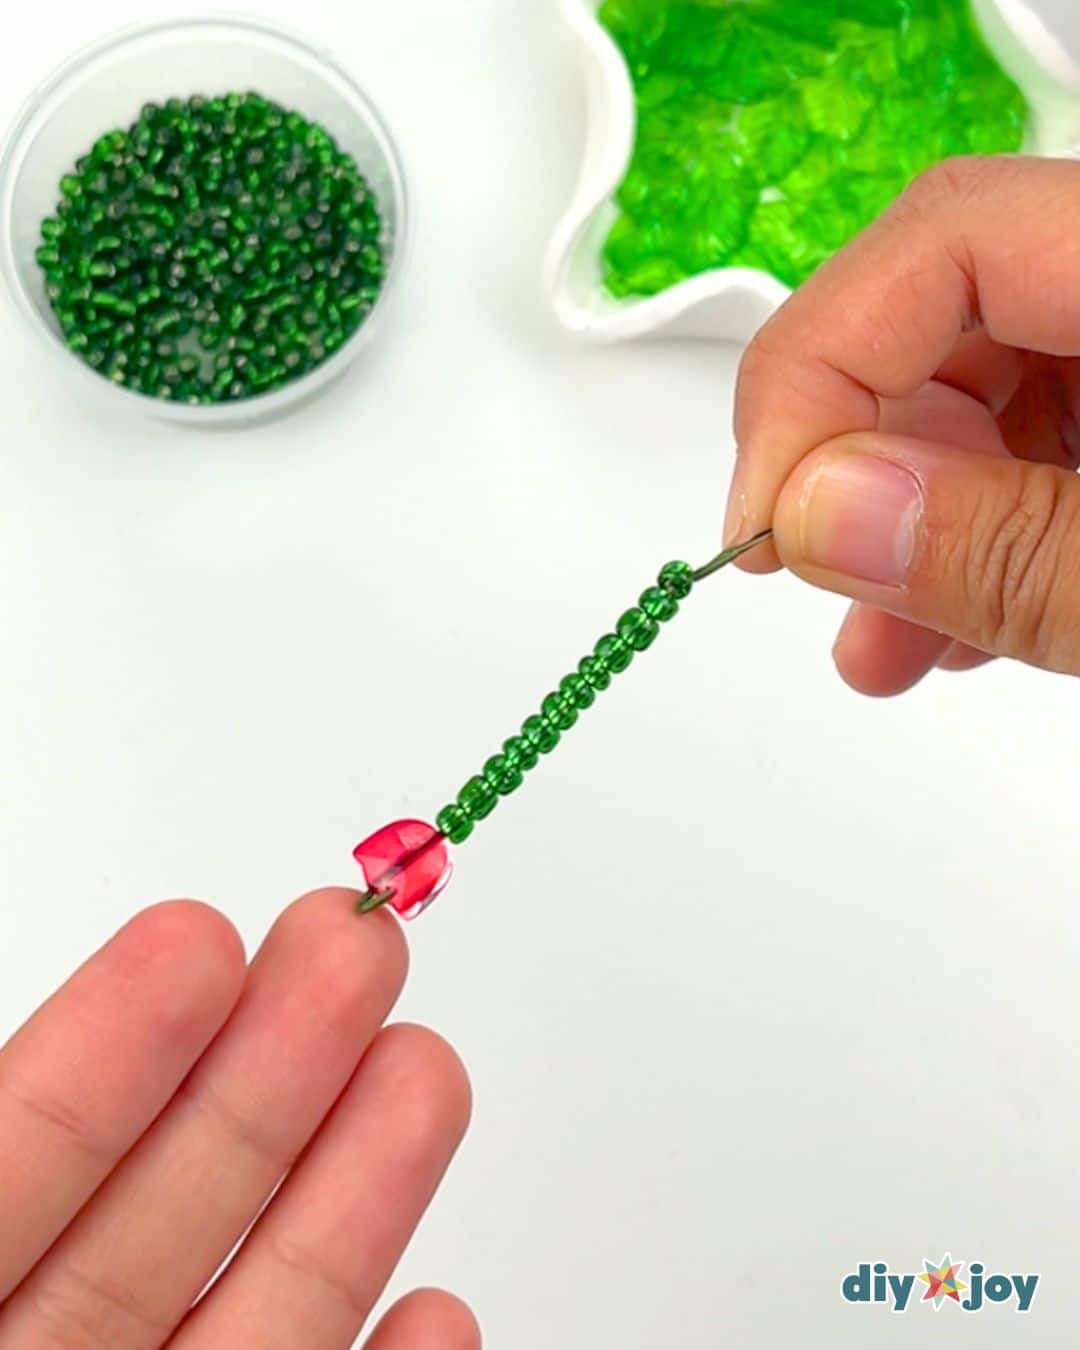
Make leaf steams
Place a leaf bead on a floral wire, and curl end into a loop just like in the photo below.

Filling the wire
Fill tthe wire with glass beads, leaving a few inches on top. To keep the beads in place, bend the end just like in the photo below.
Make flower stems
Repeat the same process with the flower beads.
Make several pieces
Use floral wire in different lengths to create variation.
Add the long stems
Start adding the stems. Insert the long stems to the styrofoam, making sure to add spaces in between each piece, then bend them so they fall staright down.
Add the short stems
Next, add the short stems. Keep the shortest ones in the middle.
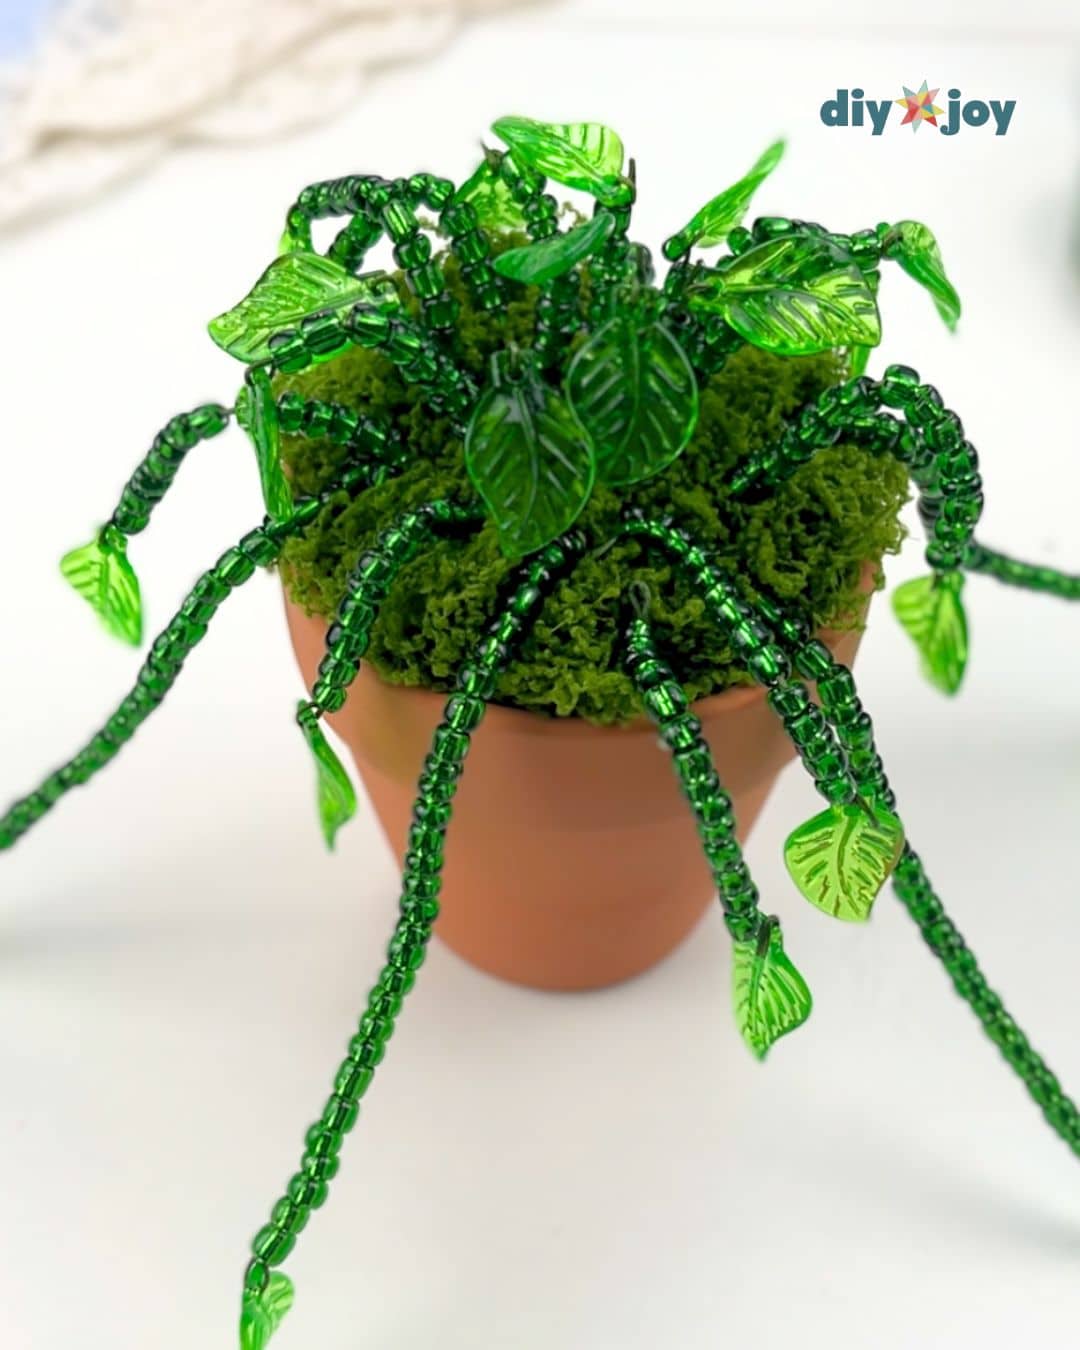
Add the flower stems
The last thing to do is add the flower stems and you are done! You can place it on your table or hang it near your window or door.
![]()
Crafting Tip
Don’t be afraid to experiment with different styles!
Creative Ideas and Variations
- Decorate the pot. Add personality by painting your terracotta pot in fun colors–think polka dots, stripes, or little flowers.
- Hang it up. Use a piece of jute twine to turn your pot into a hanging decoration beside your window.
- Make it a fridge magnet. Simply glue a magnet to the back of the pot and stick it on your refrigerator.
- Experiment with beads. Try using different shapes, sizes, and colors of glass beads to create a unique and eye-catching design.
More Easy Craft Ideas


Viral Beaded Plant Video Tutorial