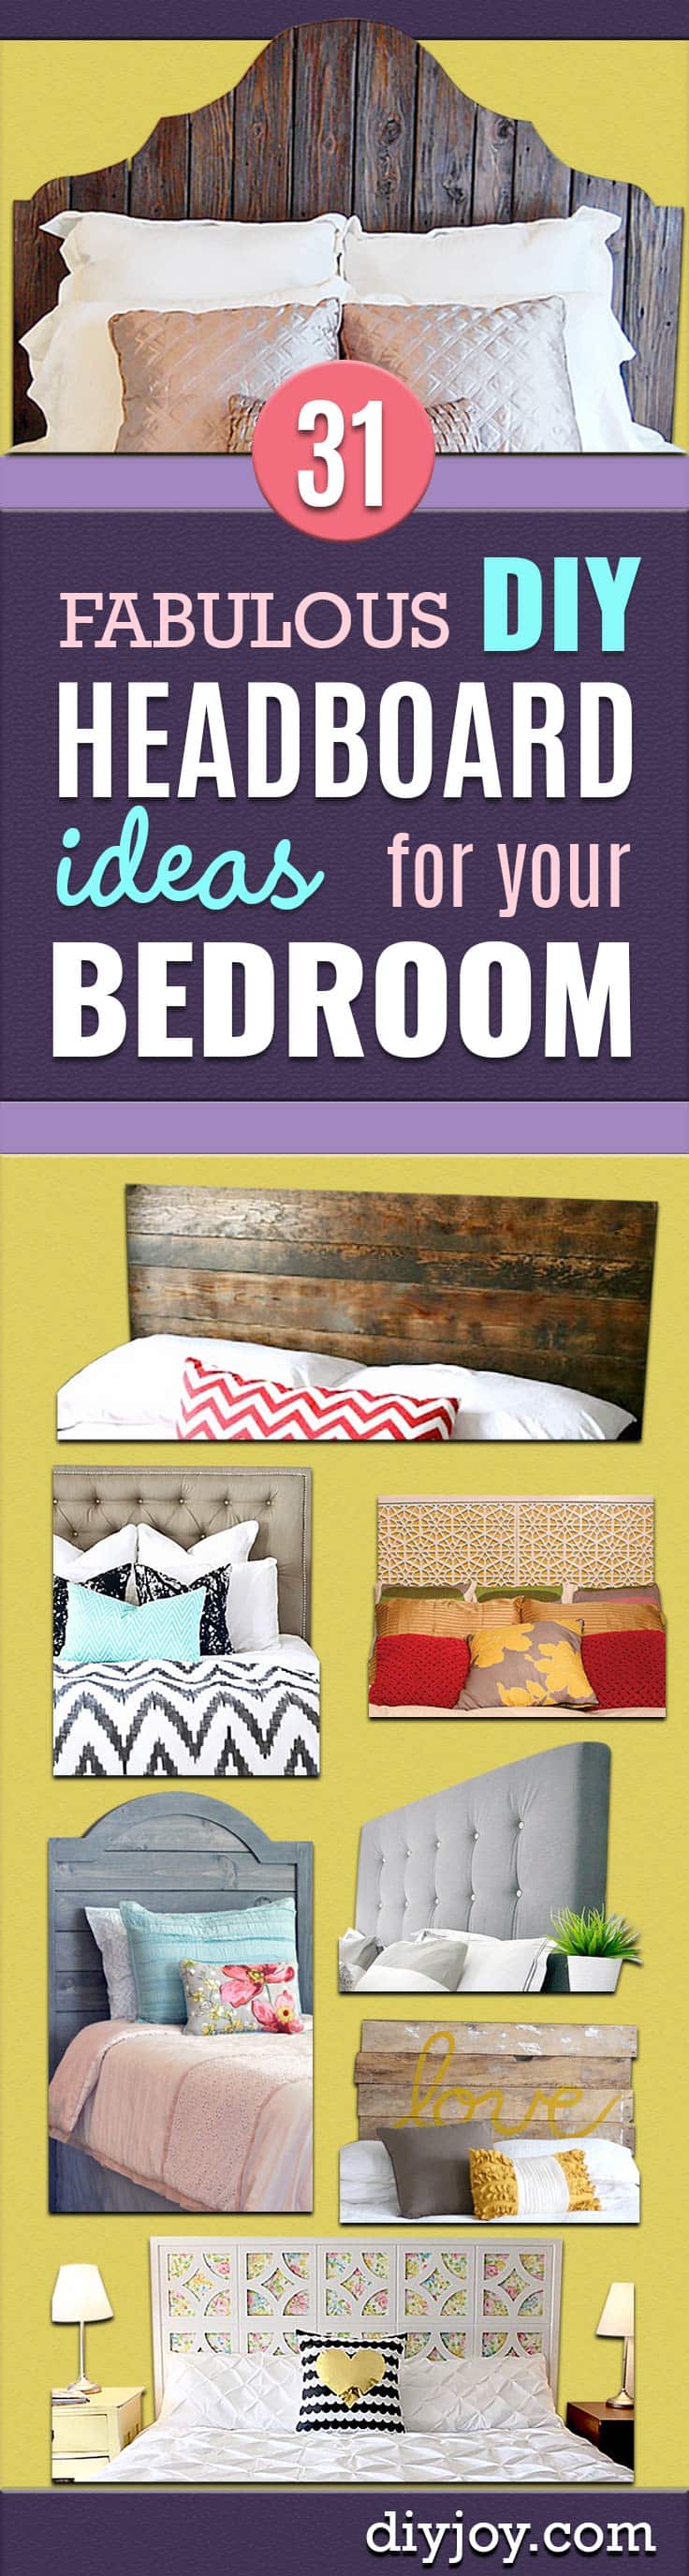
A bed without a headboard always looks like the room is not finished yet, and the price tag on a good one is exactly why so many bedrooms stay that way. So build one. These 17 DIY headboard ideas run from eleven cedar fence pickets at a couple of dollars apiece to a rubber doormat from Target that turns into a West Elm lookalike for under $100, and from five pool noodles split down the middle to a thrift store door painted slate gray. Some are pure woodwork. Some are foam, batting and a staple gun, with no sewing anywhere in them. A few need nothing but a drill and a wall, because they hang instead of stand, which makes them the renter friendly ones. Every project links back to the person who built it, and if the bedroom bug bites, there is a whole pile of DIY bedroom furniture waiting next.
1. DIY Upholstered Headboard With A High End Look

The hard part of a tufted headboard is getting the buttons evenly spaced, and this build hands that job to a sheet of pegboard. The holes are already laid out in a perfect grid, so the buttons feed straight through the back with no measuring and no guesswork. A 2×4 frame carries the pegboard, then one inch upholstery foam, lightweight batting and fabric go over the top. The king version here is 48 and a half inches tall by 74 inches wide. Before cutting anything, run painter’s tape across the wall at a few different heights to see which one looks right above the bed.
Get the full tutorial at Hey There, Home.
2. How To Build A Headboard With An Old Door
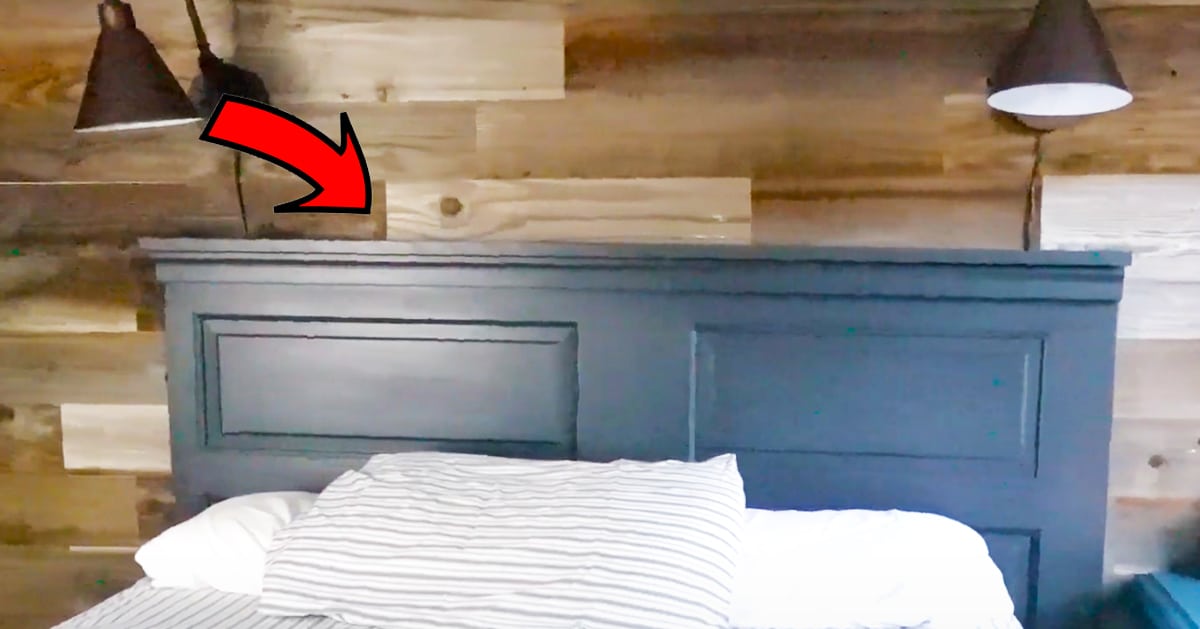
An old panel door, painted a deep slate gray and capped with a 1×4 topper and trim, which squares off the top edge and turns a found object into something that reads as furniture. Wood glue and a brad nailer do all the joinery, so there is nothing to mortise and nothing to clamp overnight. The one thing worth doing differently from the video: trim the same amount off both sides when the door is cut down to bed width, because taking it all off one edge leaves the panels sitting visibly off center behind the pillows.
Get the full tutorial at DIY JOY.
3. Tufted Headboard with Nailhead
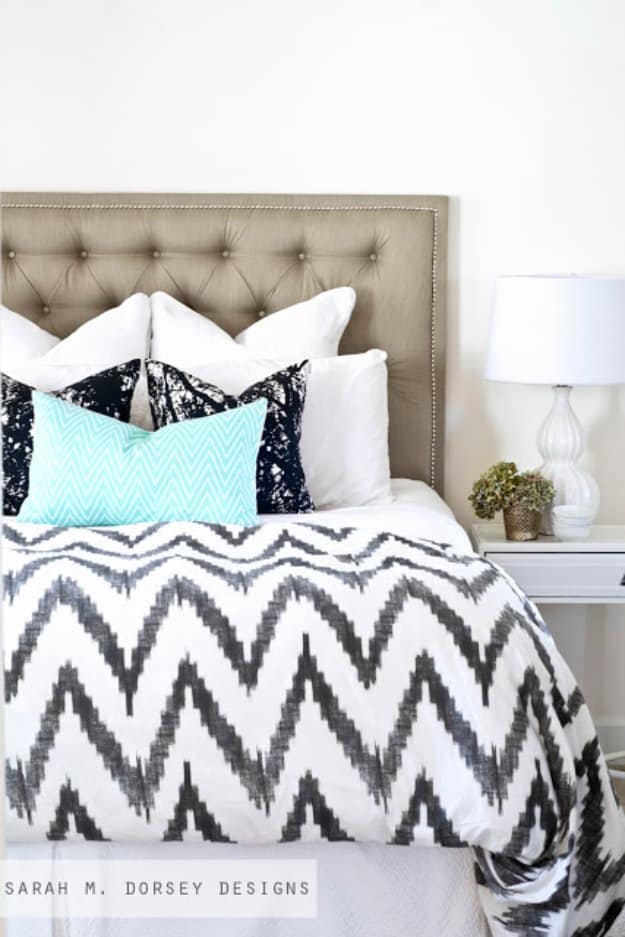
Deep tufting is the look a store charges the most for, and it comes down to drilling a grid of quarter inch holes through plywood before any fabric goes anywhere near it. Three inch camping foam gets glued on, the holes are poked through from the back, and the foam is sliced at an angle around each hole, wider at the top, so the fabric can fold down into the dip. Two tips that save a rebuild: put a dab of glue under each button before sealing the kit, and never pull the thread tight between buttons. The slack belongs in the folds.
Get the full tutorial at Dorsey Designs.
4. DIY Drop Cloth Headboard Tutorial
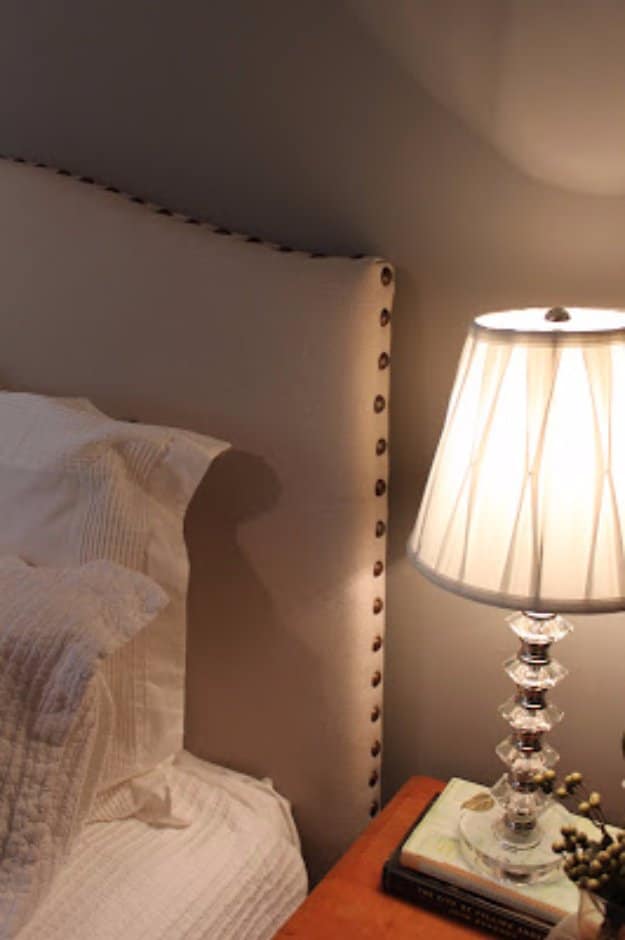
Painter’s drop cloth is the cheapest upholstery fabric in the hardware store, and on a camelback headboard it passes for heavy linen. The curve is cut from two pieces of plywood off a paper template, then traced onto foam, cut, and stuck down with spray adhesive. Drop cloth goes over two layers of batting, face down, and gets stapled from the back with the corners wrapped like a parcel. Nailheads finish the edge at one and a half to two inches apart, tapped in with a rubber mallet so the brass does not dent.
Get the full tutorial at DIY Show Off.
5. DIY Antique Window Headboard
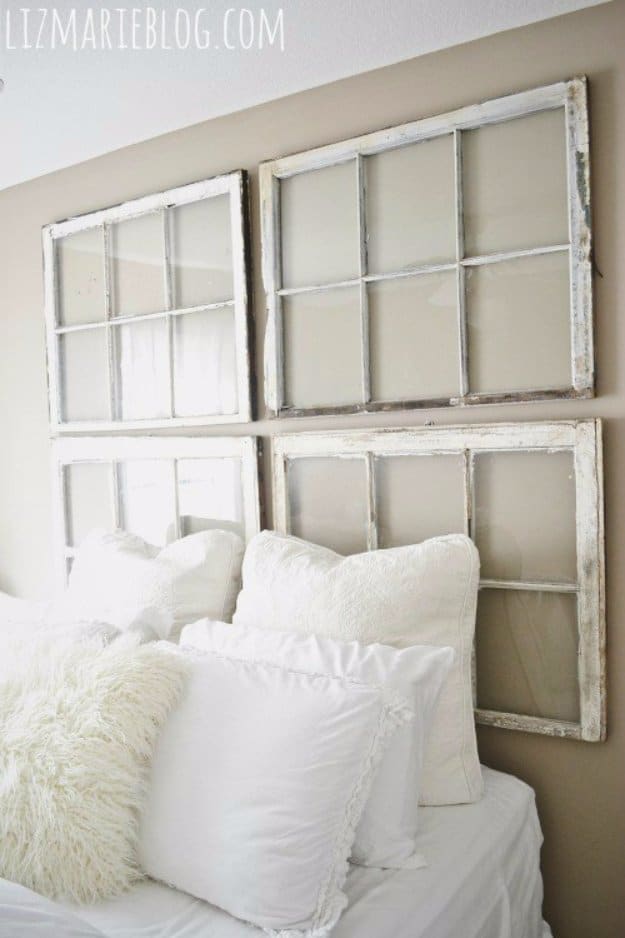
Four salvaged window sashes hung in a block above the bed, left chippy and unrestored, with nothing but glass and old white paint doing the work. This one is a hanging headboard rather than a standing one, which makes it the answer for a small room with a big bed. Plan it with painter’s tape on the wall first to get the spacing right. Each sash takes one picture hanger rated for its weight, and a nail tapped into the wall behind each one stops them swinging if somebody knocks the bed. Seal the paint so it stops chipping onto the pillows.
Get the full tutorial at Liz Marie Blog.
6. DIY Vintage Sheet Headboard
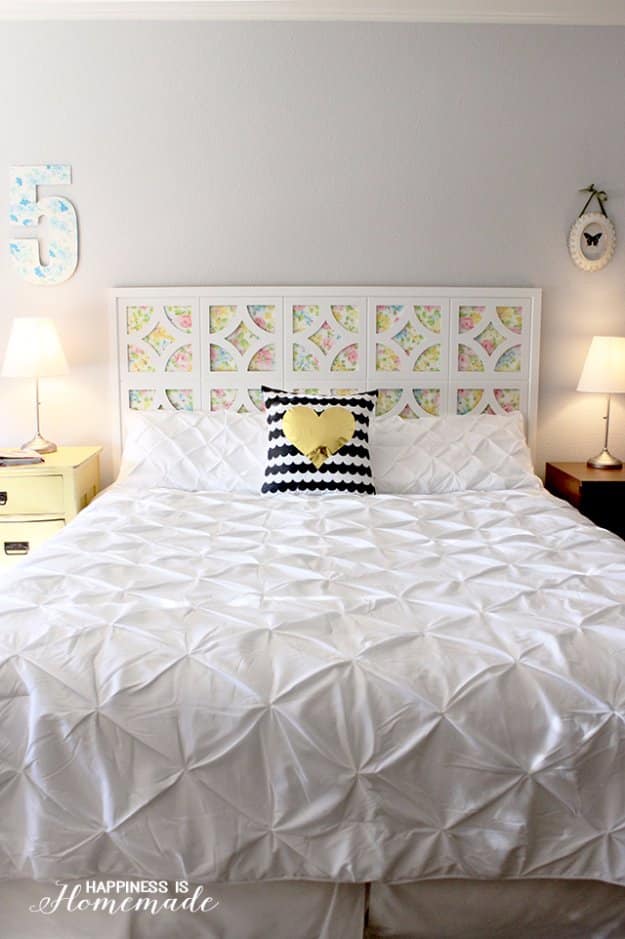
Square cut out MDF frames laid in a grid and joined into one panel with thin strips of wood, then primed and painted white, because MDF drinks paint and three coats over bare board still looks patchy. The clever part is at the back. Squares of white foam core press an ordinary vintage sheet against each opening and hold it there, so the sheet is never cut and the whole look changes whenever a different one goes in. Hanging the finished panel on eye hooks and heavy picture wire, the way a large piece of art hangs, makes that swap a five minute job.
Get the full tutorial at Happiness is Homemade.
7. DIY Fabric Headboard
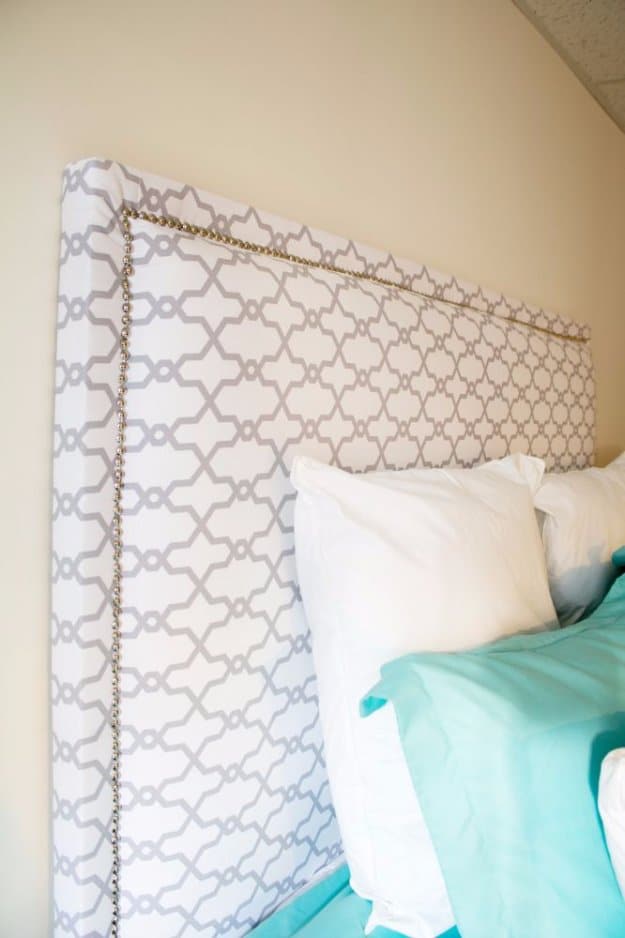
Sixty inches wide, thirty eight high, built on seven sixteenths plywood with three 2x4s doing all the structural work. Two of them run down the back as legs, cut to sixty two inches so the panel sits at the right height above the mattress, and the third braces across the top. The padding is an old memory foam mattress topper cut to fit with two or three inches of overhang, which is a good use for one that is past its best. Home Depot will cut the plywood to size on the spot. Nailhead trim finishes the perimeter.
Get the full tutorial at Jennifer Meyering.
8. Faux Tiled Headboard
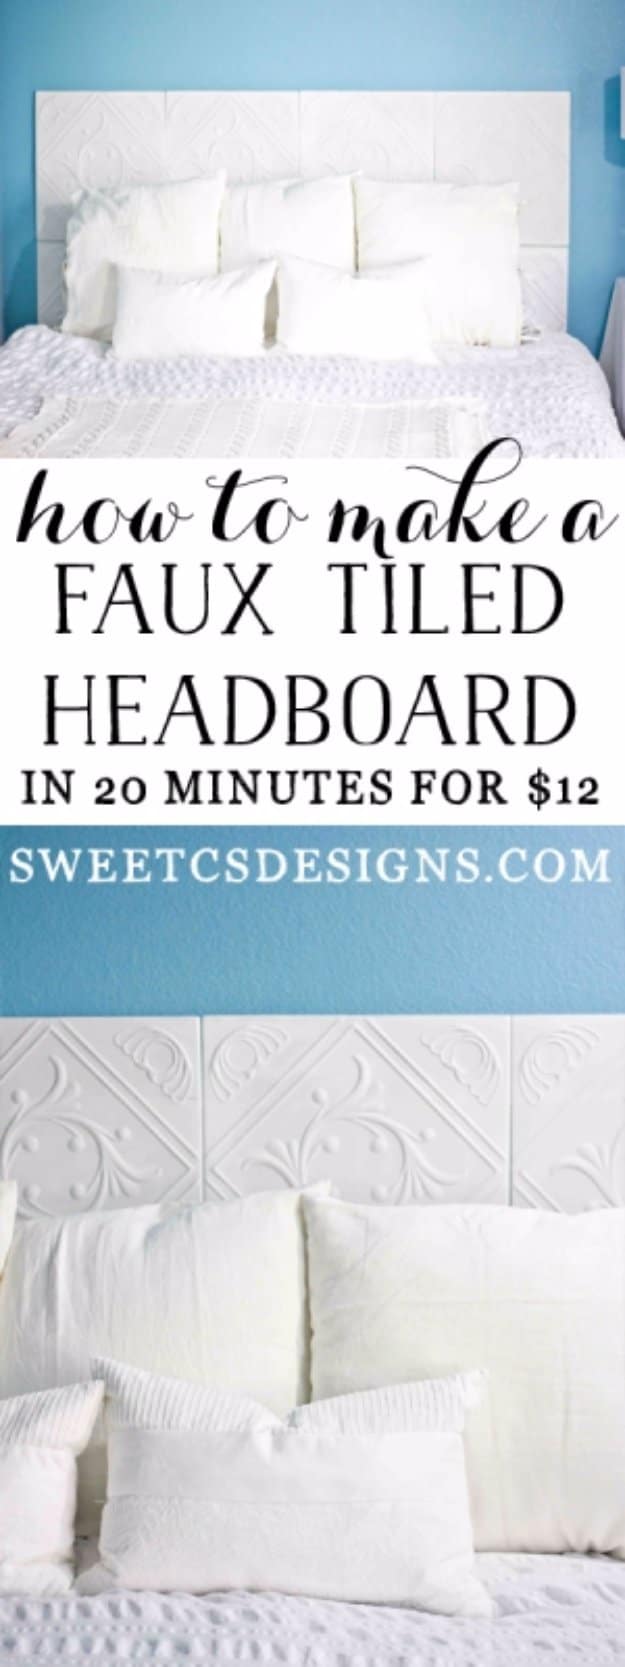
Foam faux tin tiles, a couple of dollars each, painted and stuck straight to the wall above the bed with mounting tape. The paint matters more than it sounds. The foam is slightly see through, so the adhesive strips behind show as lines unless a coat of primer goes on first, and the primer takes the styrofoam smell away at the same time. Four tiles across and two down covered this wall. Work outward from the center so the block lands square behind the pillows, and buy a spare, because the tiles are thin enough to tear if one has to come down and go back up.
Get the full tutorial at Sweet Cs Designs.
9. DIY Headboard Using Pool Noodles
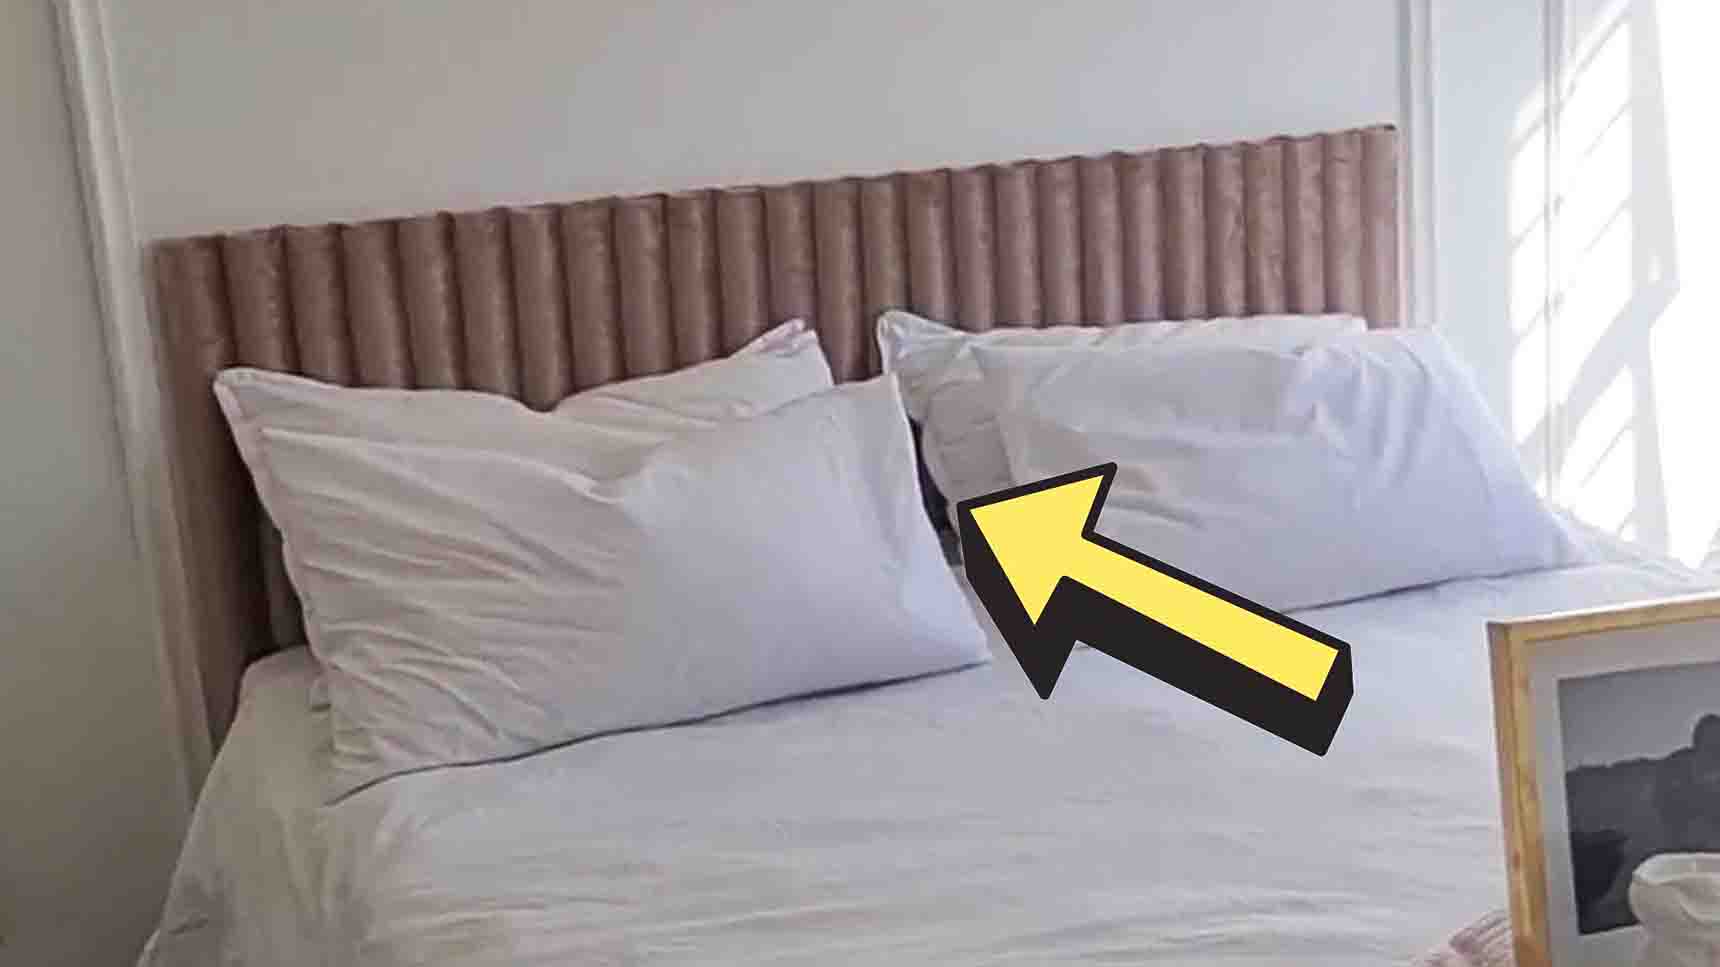
Five pool noodles, a sheet of hardboard and two meters of velour, and the result is the fluted channel tufted headboard that furniture shops have been charging a fortune for. Each noodle gets cut into three equal lengths and then split down the middle, which gives enough half rounds to cover the board in even ribs. Spray adhesive plus a bonding glue holds them to the base, because one on its own lets go under the fabric tension. Velour is the right cover: it has enough stretch to pull over the curves without creasing between them.
Get the full tutorial at DIY JOY.
10. DIY Vintage Shutter Headboard
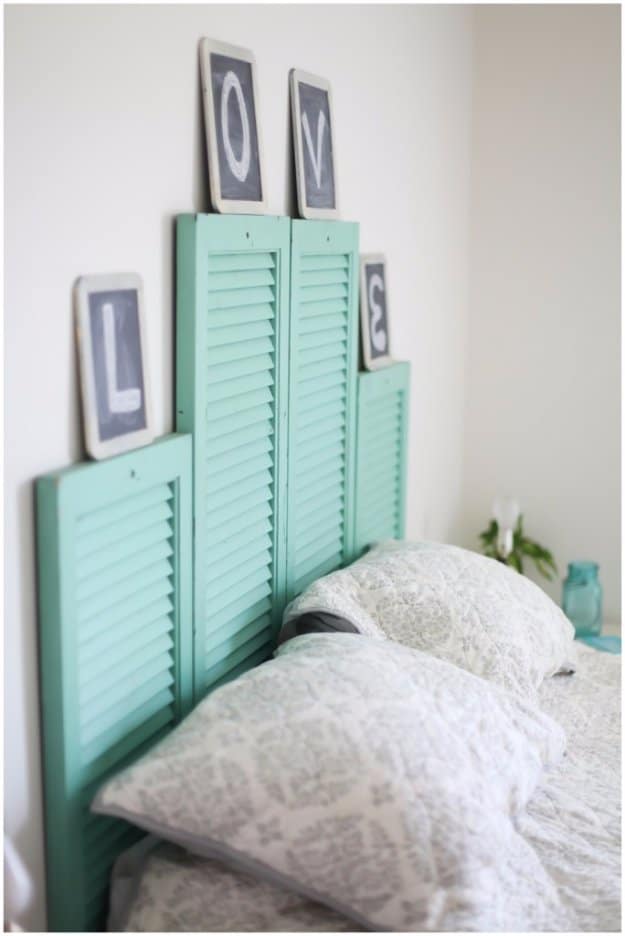
Two pairs of louvered shutters in a soft eggshell blue, hung straight on the wall behind the bed with sawtooth hangers, two per shutter. Different heights on purpose, so the silhouette steps up and down instead of sitting as one flat block, and small crackle painted chalkboards perched on top spelling a word. Antique shutters are filthy and often smell, so scrub them with hot water, dish soap and a little bleach before they go anywhere near a bedroom wall. Salvaged ones hold their original paint far better than anything you repaint yourself.
Get the full tutorial at Samantha Elizabeth.
11. DIY West Elm Inspired Morocco Headboard
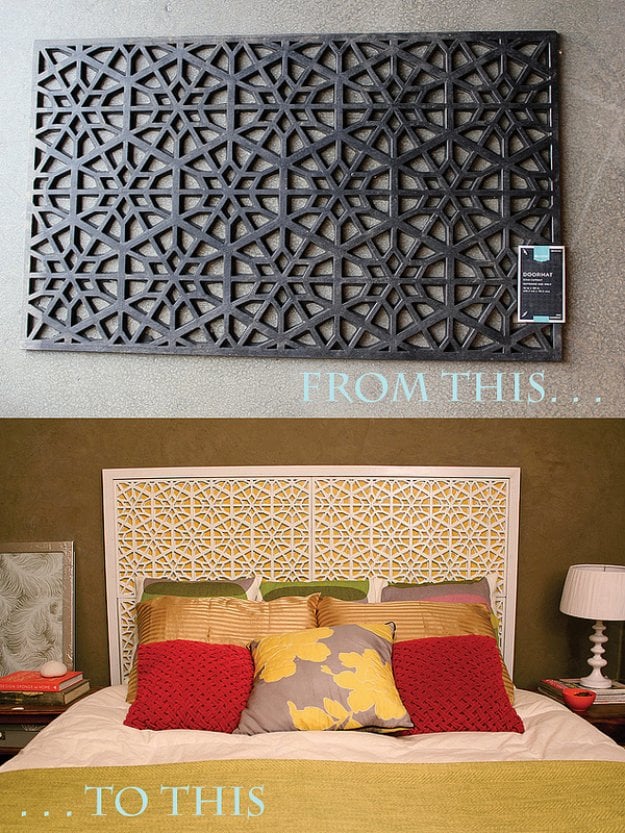
A rubber doormat from Target, spray painted and nailed to plywood, standing in for a four hundred dollar West Elm headboard. Two mats side by side make the right width for a queen. The one instruction that decides whether this looks clever or cheap is painting the plywood behind the mats the same color as the wall, so the fretwork appears to float with no backing. A finish nailer attaches the mats, trim wraps the edge, and the queen version came in under a hundred dollars all in.
Get the full tutorial at Kara Paslay Design.
12. Converted Shelf Headboard DIY
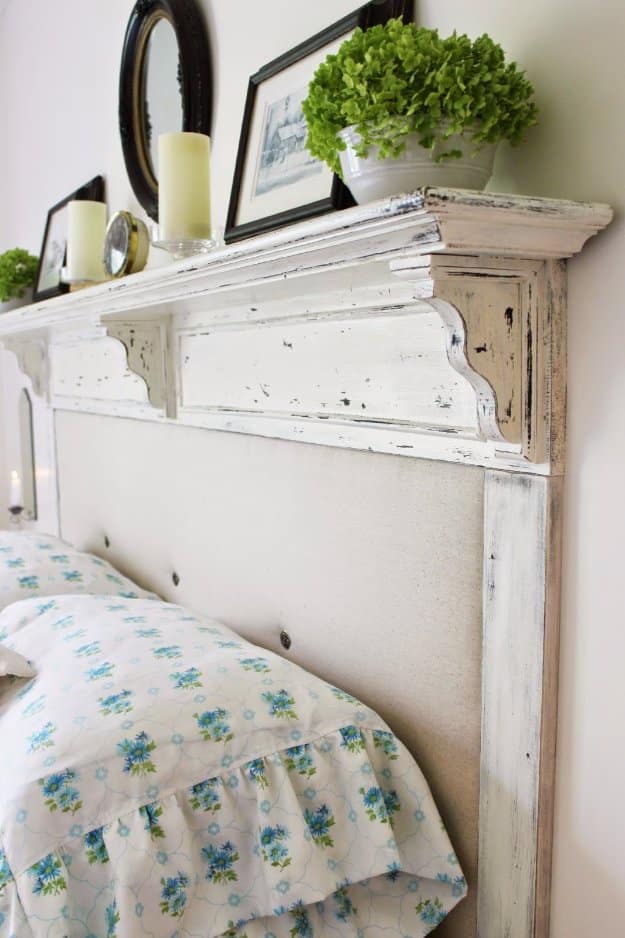
This one starts with a wall mounted shelf already hanging above the bed and fills in the dead space between the shelf and the pillows with an upholstered panel. Two 1x4s frame the opening, painted black then topcoated white and scraped with a paint scraper before the white sets, which gives a random distressed edge that sandpaper alone cannot fake. A quarter inch plywood insert, cut slightly undersized to leave room for batting and fabric, drops inside the frame. Three inch finishing nails into studs, construction adhesive everywhere a stud is out of reach.
Get the full tutorial at Happy At Home.
13. Easy Linen and Poplin Headboard Tutorial
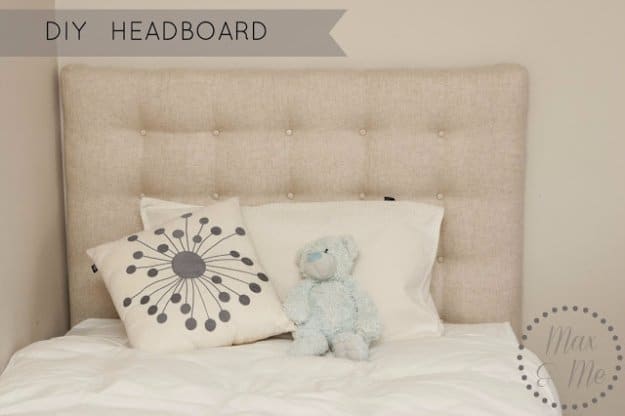
Linen over a 1100 by 1100 millimetre MDF panel, with two inch foam and covered buttons, built for a child’s single bed. The clever detail is a layer of cheap white poplin underneath the linen, because linen has a loose open weave and the bright patterned base underneath was showing straight through it. The honest detail is that the staples would not hold the fabric on the upper face, where there was nothing but fabric to bite into, and nails through into the plywood solved it. One day was the plan. It took two.
Get the full tutorial at Max & Me.
14. DIY Light Up Headboard
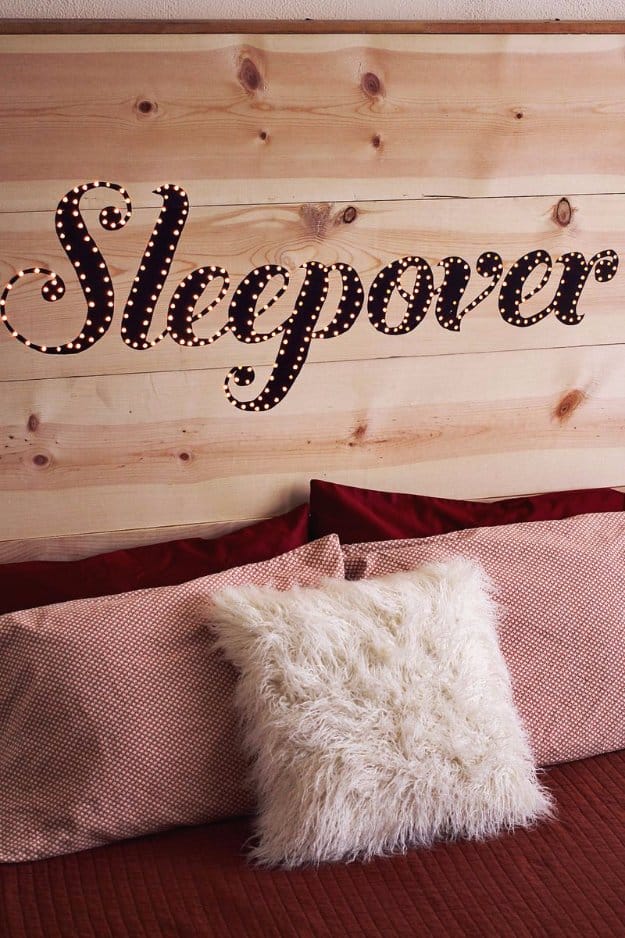
Six thin planks about the length of the bed, braced behind with two long 2x4s and framed with 1x4s across the top and down both sides, then a word traced across the front with a projector and painted in. More than 300 Christmas lights push through holes drilled along every stroke and are taped off behind with electrical tape, and the bracing is what leaves a gap for all that wiring to hide in. Drill a few practice holes in scrap first to settle on the bit size, because the bulbs have to grip without the hole showing around them.
Get the full tutorial at A Beautiful Mess.
15. Rope Headboard Tutorial
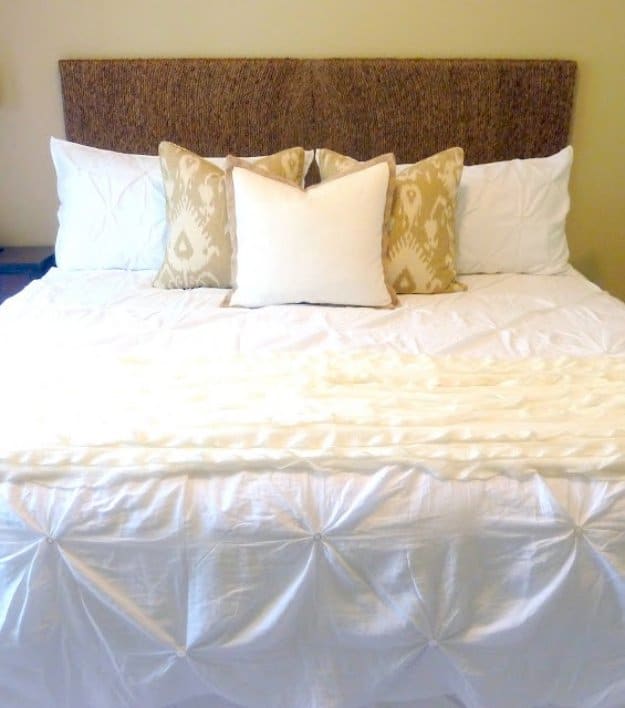
Manila rope wrapped around an old door, end to end, for a natural fiber headboard that knocks off a West Elm banana bark piece at roughly a third of the price. Three eighths inch rope is the sweet spot, thick enough to look substantial and thin enough to wrap neatly. Measure the bed and cut the door down first, allowing about half an inch on each side for the rope itself. Two things nobody mentions: new rope smells for about a week, and working on sawhorses instead of the floor makes the whole job twice as fast.
Get the full tutorial at Our Fifth House.
16. Vintage Sign Headboard
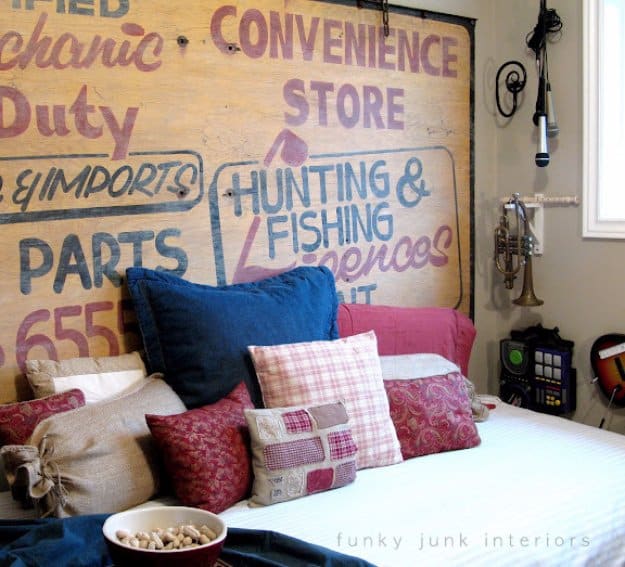
A huge painted wooden trade sign, rescued from the back lot of a gas station for the cost of asking, standing behind the bed exactly as found. Nothing was sanded, nothing was repainted and nothing was sealed. That is the appeal: the faded lettering and the rust marks are decades of weather no paint technique can reproduce. Old signs are heavy and usually wider than a bed, so secure it to the wall properly rather than leaning it, and check the paint for lead before it goes into a bedroom if it looks genuinely old.
Get the full tutorial at Funky Junk Interiors.
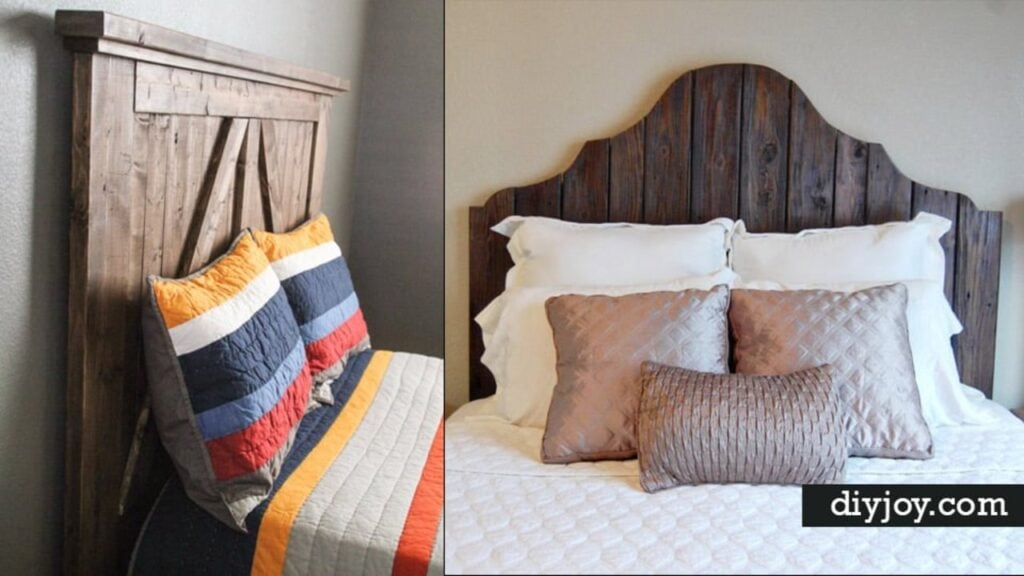
17. DIY Wood Headboard From Cedar Fence Pickets
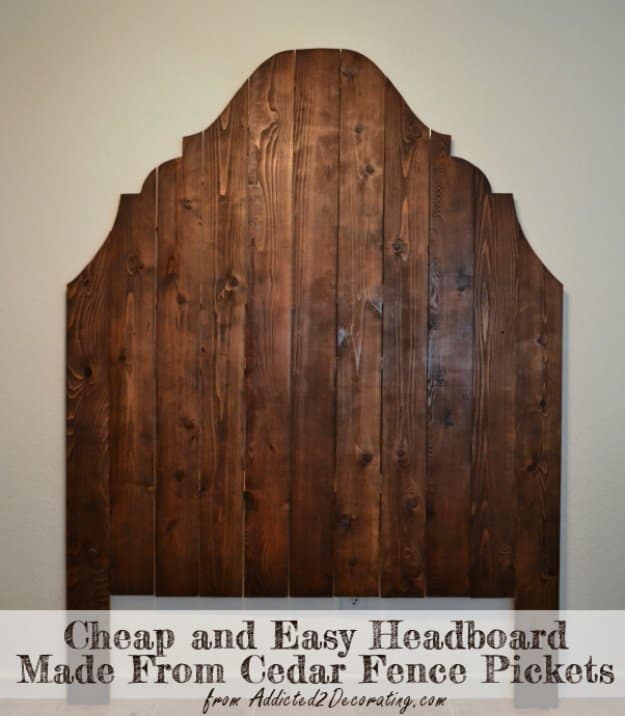
Eleven cedar fence pickets at $2.25 each, cut into a scalloped three peak silhouette and stained dark. Cedar is the cheapest decent wood in the lumber yard because it is sold as fencing rather than as furniture stock, and it takes stain beautifully once the surface is dealt with. That surface is the catch. Fence pickets are brutally rough, and sanding this one down took about two hours with a rotary sander. Wear hearing protection and do it outside if you can. Plan on polyurethane over the stain so it survives being leaned against.
Get the full tutorial at Addicted 2 Decorating.