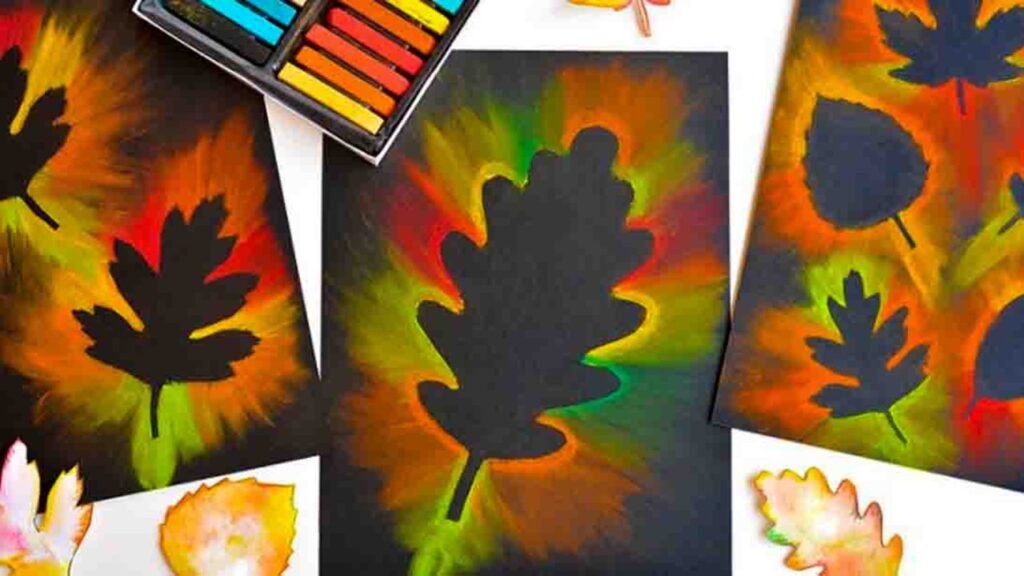
Are you looking for a weekend Fall project with your friends? Try this leaf chalk art project from One Little Project on YouTube. Whether you like drawing or not, you’ll surely be able to pull this one off as it’s beginner-friendly and super easy to make. This is one of the best Fall art I’ve ever done, and mine is still hanging in my bedroom. It’s also a fun activity to do with your kids and family. Watch the video tutorial below to learn the step by step instructions. Thanks to One Little Project for this gorgeous art project. Make sure to check the channel for more videos just like this.
Materials:
- black drawing paper (or construction paper)
- chalk pastels
- printable leaf template
- scissors
- painter’s tape
Directions:
Step 1
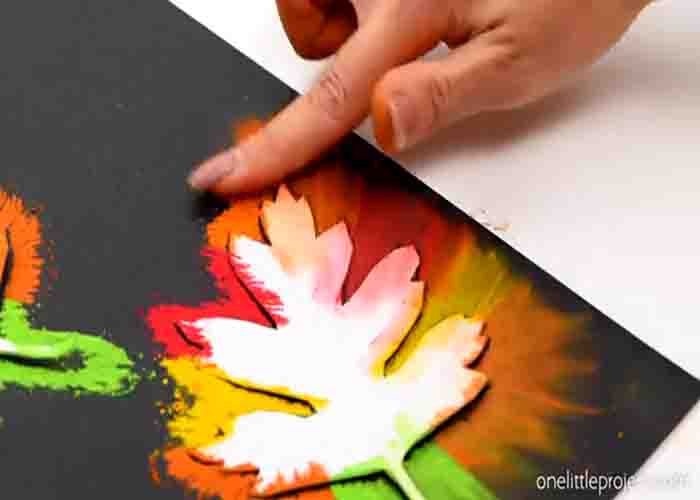
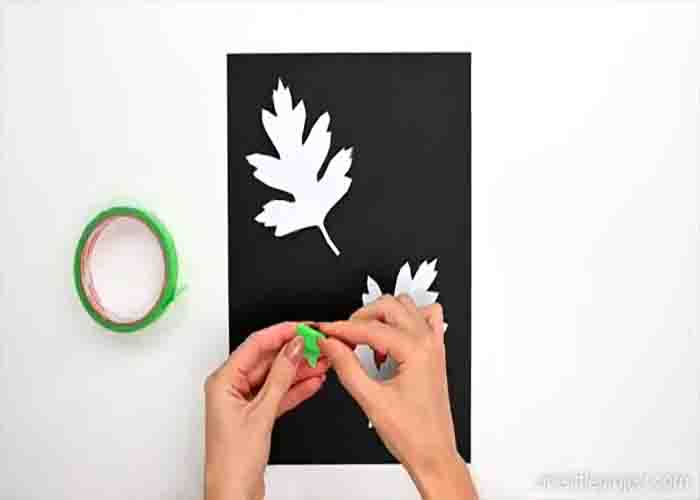
To start, cut the leaf template first, then place it on the black drawing paper (it’s up to you how you will place the leaf, you can also place multiple leaves depending on your design). Once you’re satisfied with the leaf placement, secure it in place with painter’s tape. Now, start designing with the chalk pastels. Color over the paper leaf and onto the black paper, extending about 1/2″ beyond the leaf with different colors of chalk pastel. Go all around until you finish coloring.
[social_warfare]
Step 2
Once you’re done, start smudging the chalk away from the leaf template using your finger. After this, shake off any dust, then remove the leaf template. Your DIY Fall leaf chalk art is now finished!