Country decor ideas are at their best when the materials already have a past, and these 29 projects lean hard on that: barn boards, a forgotten rake head, an old bed footboard, a honey extractor and a stack of ceiling fan blades nobody wanted. Rustic country decor is handmade home decor built from reclaimed wood, galvanized metal, jute rope, mason jars and thrift store finds, then finished with stain, whitewash or chippy paint so it looks collected over years instead of bought last weekend. Some of these take an afternoon and a pocket hole jig, like the plank coffee table. Others need ten minutes and a glue gun. DIY JOY video tutorials are mixed in too, from bandana hoop art and a chicken wire suncatcher to mason jar lights glowing with pressed flowers. One rule covers every project here: keep the dings, because they are the whole point. Find even more on the country crafts hub.
1. DIY Farmhouse Wooden Box Centerpiece

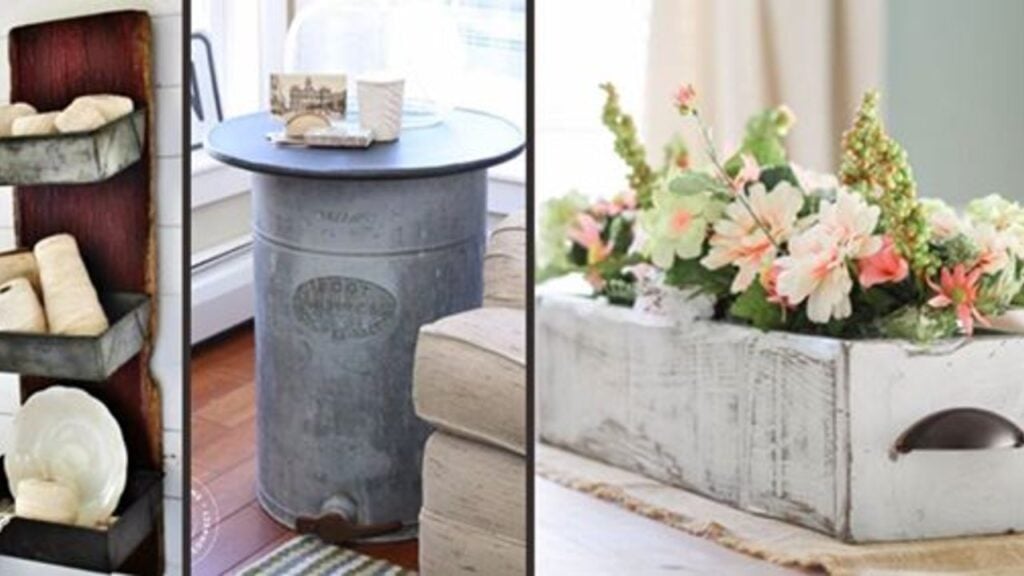
This DIY farmhouse wooden box centerpiece is built from scrap 1×6 boards, a few screws and paint, so it costs next to nothing. The finished box measures 27.5 inches long, 7 inches wide and 5.5 inches tall, but size it to your own table and to whatever goes inside, since mason jars need extra room. Cut three 26 inch boards for the sides and bottom, join them with a Kreg Jig, then measure the end pieces to fit before cutting them. Save the plainest board for the bottom, where nobody looks. Knots and dings are welcome here.
Get the full tutorial at The Turquoise Home.
2. How to Make a Jute Rope Tray

A coiled jute rope tray adds natural texture to a coffee table or a farmhouse kitchen counter for the price of a roll of rope and a jar of Mod Podge. Wrap an existing tray in cling wrap, brush on glue, then coil the rope from the center outward, pressing it flat with your palm and checking often that it stays level. Keep the sides low so they hold their shape. Once the surface dries, flip it, weigh it down and peel it off the wrap before it fully cures. Leftover rope makes matching coasters.
Get the full tutorial at DIY JOY.
3. Rustic Utensil Holder

An old rake head left behind in a farmhouse turns into a rustic utensil holder that fills a bare spot behind the stove. Pull off the handle (it may fight back), then screw the rake head onto a painted 1×6 board. Two picture hangers on the back handle the hanging, and a vintage style hook on each side holds pot holders. Spray paint a set of cheap wooden spoons and spatulas in one color, aqua here to match the china, and hang them from the tines. Check the garage first, since an old rake may already be waiting.
Get the full tutorial at The Gracious Wife.
4. DIY Rope Love Sign

This DIY rope love sign uses jute rope stiffened with homemade glue to write a word across a whitewashed board. Paint the board a light silvery gray, then wash it with white. Write the word on waxed paper with a marker. Mix 1/4 cup cornstarch with 3 tablespoons water, then stir in a whole bottle of wood glue. Wearing gloves, coat the rope in small sections and trace the letters, weighing them down until the glue hardens. Small finish nails attach the word to the board. A metal flooring transition strip on the wall makes big signs easy to hang and swap.
Get the full tutorial at Hymns and Verses.
5. Farmhouse-Style Revamped Ceiling Fan Blades

Old ceiling fan blades become farmhouse windmill decor for a fraction of what salvaged windmills cost. Trace a blade on cardboard, sketch a more angular windmill shape inside the outline and cut it out as a template, then trace and cut each blade to match. Bolt the blades to one quarter of a floral craft ring with large industrial nuts and bolts. Galvanized spray paint makes the wood read as weathered metal, and rust colored paint rubbed on with a rag ages it. A coat of matte sealer tones down the shine. A wire glued behind the blades adds realism.
Get the full tutorial at Sadie Seasongoods.
6. Rustic Farmhouse Entryway

A rustic farmhouse entryway can fix an awkward corner, not just a front hall. This one centers on a simple bench built to hold eight galvanized bins, so shoes, scarves and odds and ends disappear into one tidy piece. A wicker basket holds a throw on top, a lantern sits on a mirrored frame used as a tray, and a giant chalkboard and moss wreath fill the wall behind it. Most of the accessories are budget store finds, so everything can move to another room later. The blog links its tutorials for the bench, the chalkboard and a wood shim vase.
Get the full tutorial at The Crafty Blog Stalker.
7. DIY Farmhouse Style Wreath

This DIY farmhouse style wreath needs only a grapevine wreath, faux greenery, wire cutters and a door hanger. Cut every stem off the greenery bunches, clipping right at the main branch so each stem stays as long as possible. Weave the stems into the vines, covering about a third of the wreath and working downward so the leaves layer. No glue or wire is needed, because the grapevine grips the stems, which means the same wreath can be restyled every season. Hold it up, look for thin spots and fill them in.
Get the full tutorial at At Home With The Barkers.
8. DIY Rustic Iron Towel Rack And Shelf

An industrial pipe towel rack with a wood shelf on top gives a small bathroom storage where there was none. Galvanized pipe, flanges and elbows form a bar that holds towels, and a stained board rests on the uprights for a candle, a plant or extra toilet paper. The same pipe idea works in a laundry room for baskets, in a kitchen as a pot rack or under cabinets to hang utensils and measuring cups. It is a modular build, so the length is easy to adjust to the wall.
Get the full tutorial at DIY JOY.
9. Reclaimed Wood Heart Art

Reclaimed wood heart art starts with boards painted in a rainbow of colors. Cut a heart from newspaper, trace it onto two equal reclaimed boards and cut it out with a jigsaw; the cutout heart becomes a bonus piece for another project. Cut the painted boards to the width of the heart outline and brad nail them together, nailing from the front so you can see where each nail lands. The finished piece is 25 inches tall by 20 inches wide. Paint the frame white, sand it, then finish with dark wax mixed with coconut oil.
Get the full tutorial at Beyond The Picket Fence.
10. Easy DIY Bandana Wall Art

Easy DIY bandana wall art is one of the cheapest ways to bring country color to a wall, since each piece starts with a Dollar Tree bandana that costs a dollar. Stretch each bandana in a wooden embroidery hoop, centering the paisley medallion, then tighten the screw. Hang several hoops in different sizes and let the circles overlap for a grouping. Red, white and navy look patriotic for the Fourth of July, and leftover fabric scraps work just as well as bandanas, so the colors can match any room. The quick DIY JOY video shows the whole project in under a minute.
Get the full tutorial at DIY JOY.
11. DIY Rustic Wood Tray

A DIY rustic wood tray big enough for a coffee maker turns a corner of the counter into a coffee station. This one measures 28 by 16 inches, built from 3×1 boards cut from 8 foot lengths, though pallet wood works too. Line up six boards for the bottom, cut two long and two short sides, and screw the sides together first. Then screw the bottom boards to the frame with 1 1/4 inch screws so nothing pokes through. Paint it white, rub on a mix of dark and clear wax for a worn look, and add drawer pulls as handles.
Get the full tutorial at Liz Marie Blog.
12. DIY Farmhouse Message Board

This DIY farmhouse message board keeps school papers and reminders in one spot using pallet wood, wood glue or Liquid Nails, chicken wire and a couple of clips. Pull the pallet apart and sand the boards smooth, cut them to size and glue the frame together, since flimsy pallet wood holds better with glue. Staple chicken wire across the back of the frame. Attach the clips to the top board with a fast drying super glue. Vintage clips from a local shop give it an old look, but any clips work. A chalkboard insert is another option.
Get the full tutorial at Seeking Lavender Lane.
13. Repurposed Galvanized Side Table

This repurposed galvanized side table is a vintage honey extractor topped with the round metal top from an old side table. The barrel came from a vintage shop, and its stamped label and numbers do the decorating. Unbolt the old table’s base (three bolts here), set the top on the barrel and see how it looks in the room. A black top grounds the piece, though a wood top would suit a warmer space. Any large galvanized barrel or tub from a flea market works the same way. A lamp and a candle make it a reading corner.
Get the full tutorial at Finding Home Farms.
14. Chic and Simple Reclaimed Wood Wall Chevrons

Reclaimed wood wall chevrons bring warmth to a bare stretch of wall, and old barn boards can make them nearly free. These came from a torn down building, cut on a bandsaw into stacked arrow shapes and hung in a column. The whole project took about an hour from start to finish. The mix of gray, brown and weathered tones is the real star, so pick boards in different colors. They fit narrow spaces between furniture and doors especially well. Point them up for a tall look or turn them sideways along a hallway.
Get the full tutorial at Little Brick House.
15. Farmhouse Vegetable Stand

This farmhouse vegetable stand began as a flea market blanket rack. Move the top rod down to the bottom, clean the rack and brush on a bonding agent so milk paint sticks without sanding away the old finish. Paint one coat of Snow White and one of Oyster White tinted slightly gray, then distress the edges. Hand draw farm images on the side panels and rub antique brown wax over the worn spots. Wire baskets set across the rods hold apples, potatoes and garden vegetables, keeping produce off the counter.
Get the full tutorial at Redo It Yourself Inspirations.
16. DIY Farmhouse Coffee Table

This DIY farmhouse coffee table comes together in an afternoon with a Kreg Jig and basic lumber. The plan makes a big 46 1/2 by 38 1/2 inch table: four 18 inch 4×4 legs, 1×4 aprons, three 1×4 supports cut to fit and seven 1×6 top boards. Attach the aprons flush with the top of the legs using pocket holes and 2 inch screws, with a scrap 1×4 underneath as a spacer for an even inset. Sand well, then finish with dark walnut stain and dark wax. Shrink the measurements for a smaller room.
Get the full tutorial at Love Grows Wild.
17. DIY Curtain Rods

These DIY curtain rods copy the Restoration Hardware look for under $15 for a 6 foot rod. Use a 1 1/4 inch wood dowel cut 1 to 2 feet wider than the window and plain wood brackets. Cut a semicircle from each bracket with a 1 1/2 to 2 inch hole saw, sand the rough edges and lightly distress the brackets with a hammer. Stain with Special Walnut, then scrub hard with a stainless steel wire brush while the wood is still soft to fake a grain. Dry brush light warm gray paint and rub in dark wax. Treat the dowel the same way, minus the distressing.
Get the full tutorial at Maison de Pax.
18. Rustic Grater Wall Vase

A thrifted cheese grater becomes a rustic wall vase on a chunky weathered board. The grater cost $8 at a flea market, and its curly feet made it easy to attach. Pick a gray and white board, then dry brush it with creamy white chalk paint so the dark metal stands out. Center the grater with room above for flowers, pre-drill the holes and fasten it with black drywall screws that blend in. Tuck dried flowers or greenery in the top, or slip a small glass bottle behind the grater for fresh stems.
Get the full tutorial at Life on Kaydeross Creek.
19. Modern Farmhouse Towel Rack

This modern farmhouse towel rack is made from scrap wood planks left over from a plank wall, plus a row of vintage style doorknob hooks. Arrange the boards side by side into one long panel, stain them, then screw the doorknob hooks across the front. It adds rustic texture to a builder grade bathroom and holds bath towels, robes and a small hanging planter. The same post shares chunky beginner shelves stained Minwax Walnut, roughed up with a mouse sander and sealed with matte polyurethane. Leftover wood keeps the cost close to nothing.
Get the full tutorial at Bless'er House.
20. DIY Pallet Ampersand Art

DIY pallet ampersand art pairs a stained plank background with a big metal ampersand. This one measures 30 inches wide by 28 1/4 inches tall, built from 1×4 boards laid out, flipped face down and backed with thin scrap plywood stapled on with a pneumatic nail gun. Sand out any bumps, stain it Special Walnut and attach the ampersand with two deck screws. A simple picture hanger on the back holds it up. The total came in under $50, and swapping the ampersand for another shape takes just two screws.
Get the full tutorial at The White Cottage Farm.
21. Floating Shelves

Live edge floating shelves replace an upper kitchen cabinet with open storage that shows off dishes and plants. These are live edge alder, finished by a salvaged lumber shop and hung on Dolle Strongfix floating shelf brackets, three per shelf, screwed into wall studs. Drilling deep holes into the shelves and the wall is the tricky part. A corded drill handles it better than a cordless one, and clearing the wood shavings often keeps the motor from overheating. Paint the remaining cabinets so the new shelves stand out.
Get the full tutorial at DIY in PDX.
22. Footboard Towel Rack

An old French style footboard becomes a towel rack and shelf in one. Find the wall studs and plan where they fall on the board, then attach spacers to the studs, because the footboard’s ends stand away from the main panel. Screw the footboard through the spacers, checking with a level. Space hooks evenly so they cover the screw heads. Cut a shelf about 2 3/4 inches deep, rout the front edge and blend the corners with a rotary tool, then screw it down from the top. Paint everything one color.
Get the full tutorial at Finding Home Farms.
23. DIY Rustic Entryway Coat Rack

A DIY rustic entryway coat rack can start with an antique barn door. Screw wood brackets from the hardware store to the top of the door, fasten boards across them to make a shelf and stain the new wood dark walnut. Hooks salvaged from a clearance coat rack add five sturdy hangers for about $8. Because the piece is big and heavy, hang it with a metal bar hanging system, which also lets the shelf carry decor without budging. It turns a corner of a living room into a real drop zone.
Get the full tutorial at Liz Marie Blog.
24. DIY Chicken Wire Suncatcher

A chicken wire suncatcher mixes country texture with sparkle, and it doubles as a wind chime when a breeze moves the beads. Remove the inner ring of an embroidery hoop, lay it on chicken wire to line up the diamonds and cut a circle with a little extra, then fold the edges and lock it into the outer hoop. Thread a tulip bead and a leaf bead onto each head pin and bend the end. Link three jump rings into a chain for each charm and hook them onto the vertical wires. Glass beads catch light best.
Get the full tutorial at DIY JOY.
25. Farmhouse Style Hanging Wire Baskets

Farmhouse style hanging wire baskets on reclaimed wood bring dark wood contrast to a bright white room. Pull the screws from old weathered boards, here the legs of a retired bench, and leave the wood just as it is. Join the slats with wood glue and 1 1/4 inch nails from a nail gun, then add a D-ring on the back for hanging. Mount two wire baskets, about $6 each, onto the wood and fill them with faux greenery. Imperfect boards add character, so there is no need to sand or finish them.
Get the full tutorial at Thrifty and Chic.
26. Wood Slice Magnets

Wood slice magnets are a quick craft with a woodland feel. Small rounds cut from a branch get adhesive vinyl shapes, like hearts, a rabbit, a deer head and a dragonfly, cut on a Silhouette machine. Press a shape onto the center of each slice and add a magnet to the back. The contrast of raw wood and bark against a metal board is charming, and a set makes an easy hostess gift. Stencils and black paint work for anyone without a cutting machine.
Get the full tutorial at Suburble.
27. Mason Jar Fairy Lights With Pressed Flowers
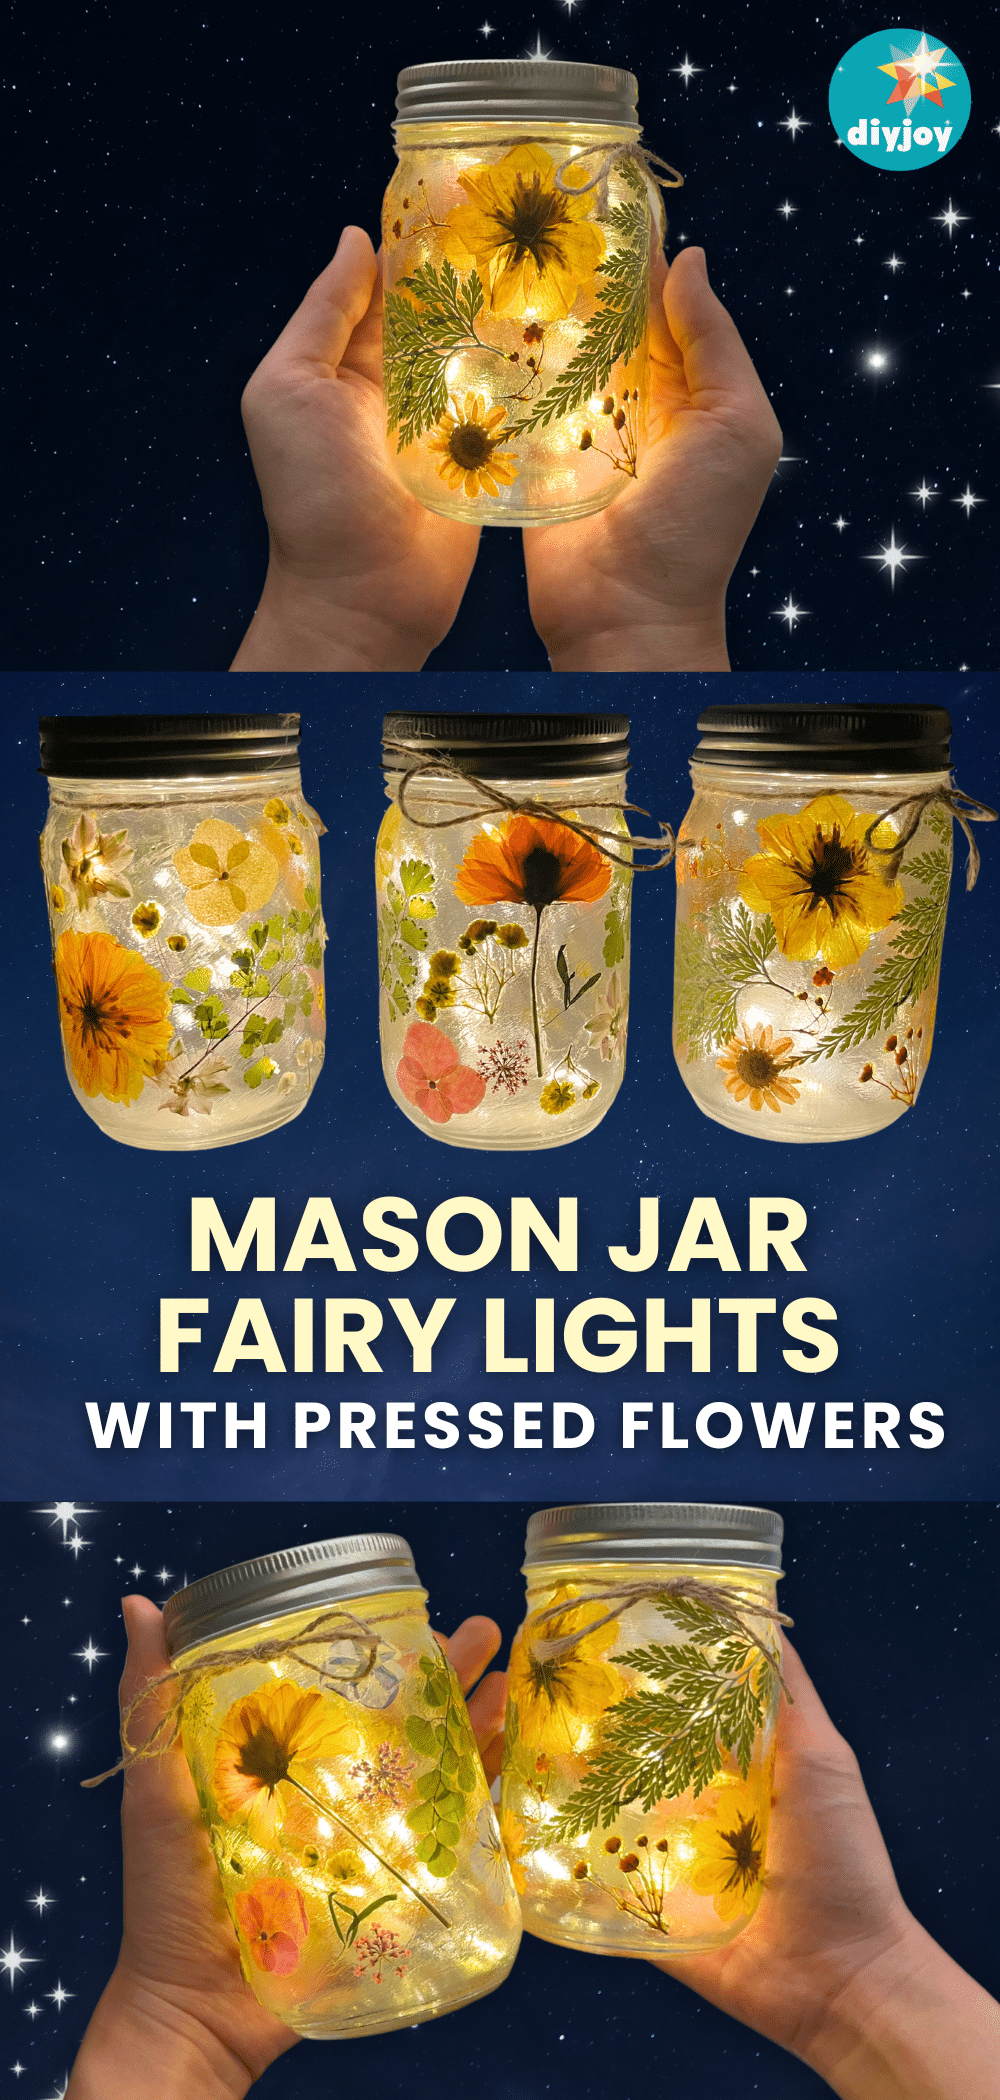
Mason jar fairy lights with pressed flowers turn an empty jar into a glowing country night light. Clean and dry the jar, then plan the design by laying out pressed flowers and leaves. Brush on a thin layer of Mod Podge, press a flower in place and brush more glue over it, working in sections so the glue stays wet. Thin, delicate blooms let the most light through, and a dab of glue at the end of a stem holds it down. Add a second coat once dry, drop in a string of fairy lights and tie on jute twine.
Get the full tutorial at DIY JOY.
28. Easy DIY Fairy Jar Lanterns
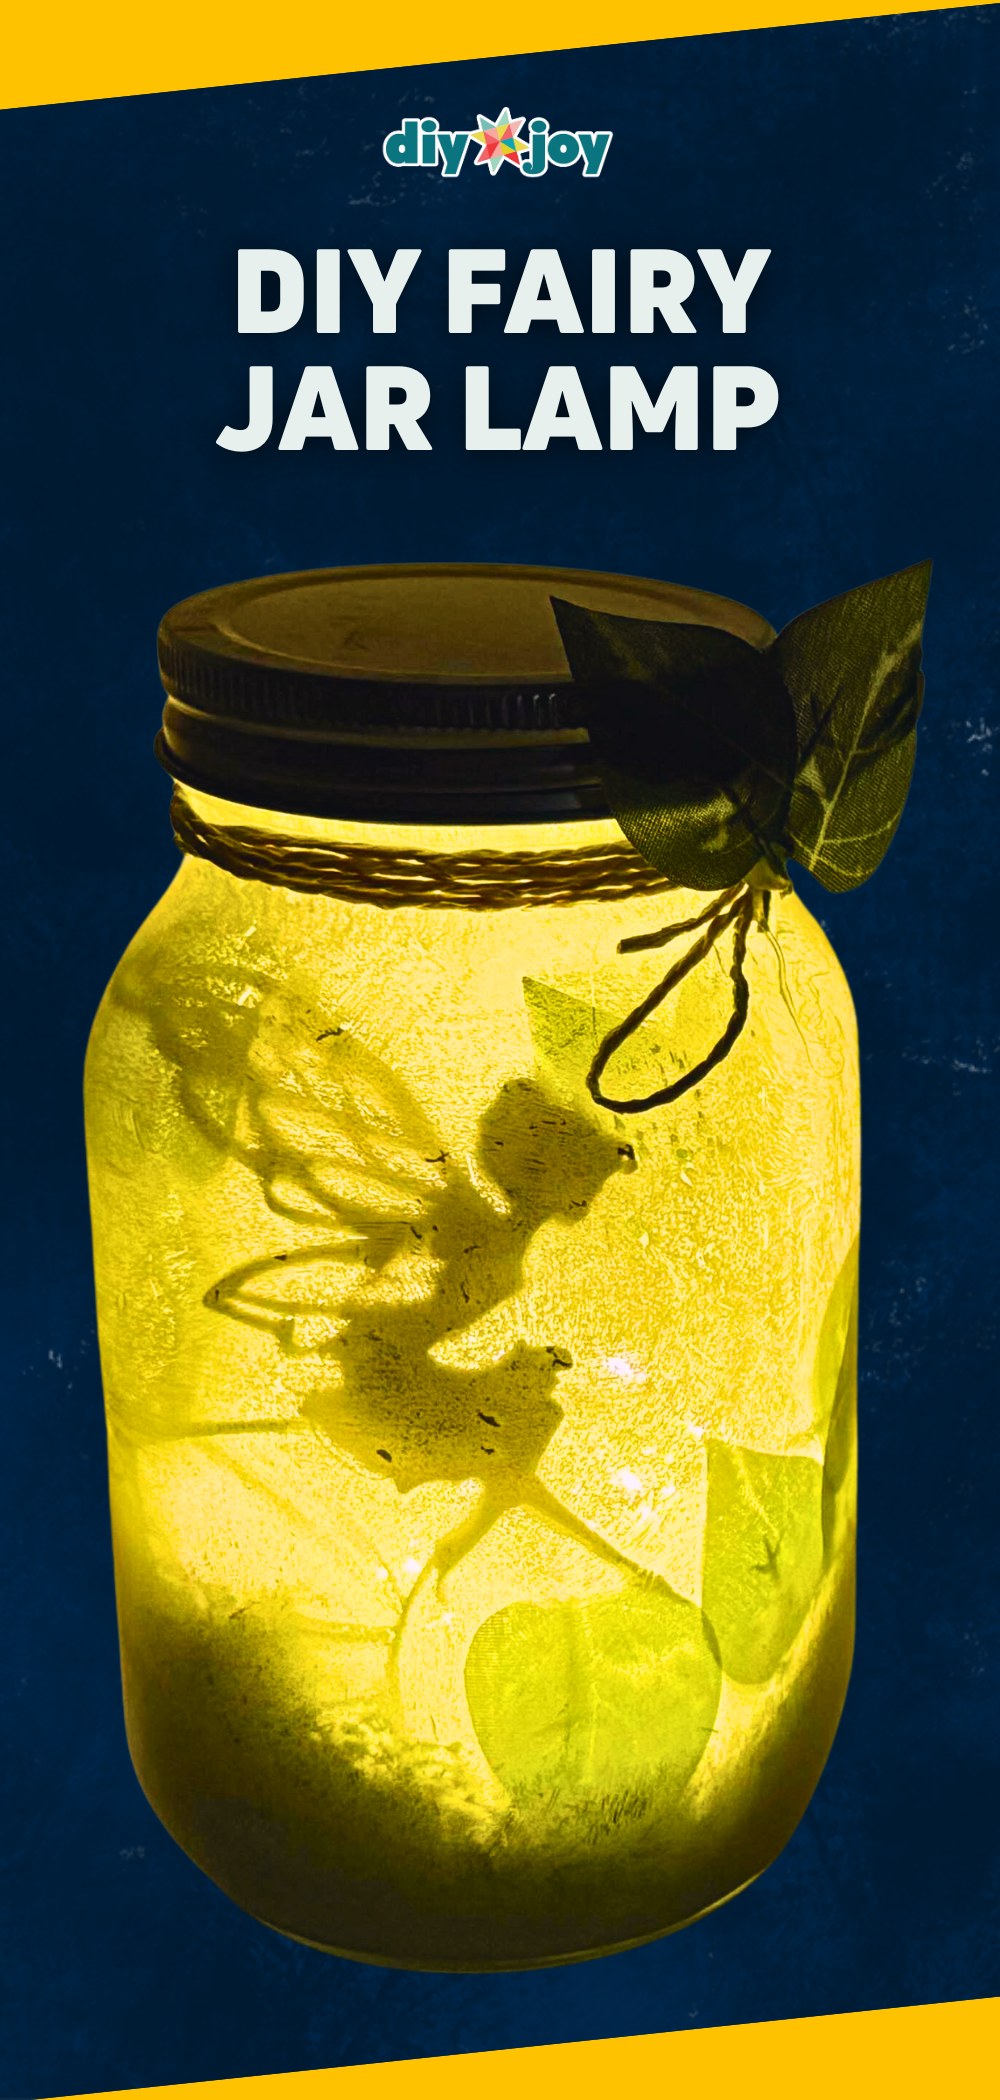
Easy DIY fairy jar lanterns give a soft, warm glow, and any empty glass jar works, pickle jars included. Print a fairy silhouette (or trees, mushrooms or a little house) and cut out every white part. Paint the inside of the jar with white acrylic or primer, keeping the coat thin enough for light to pass through. Add faux moss or crumpled tissue to the bottom, hot glue the cutout inside the jar facing out, then add a few leaves. Drop in a tea light or fairy lights, tie twine at the neck and glue leaves to the bow.
Get the full tutorial at DIY JOY.
29. DIY Fall Wreath With Felt Leaves
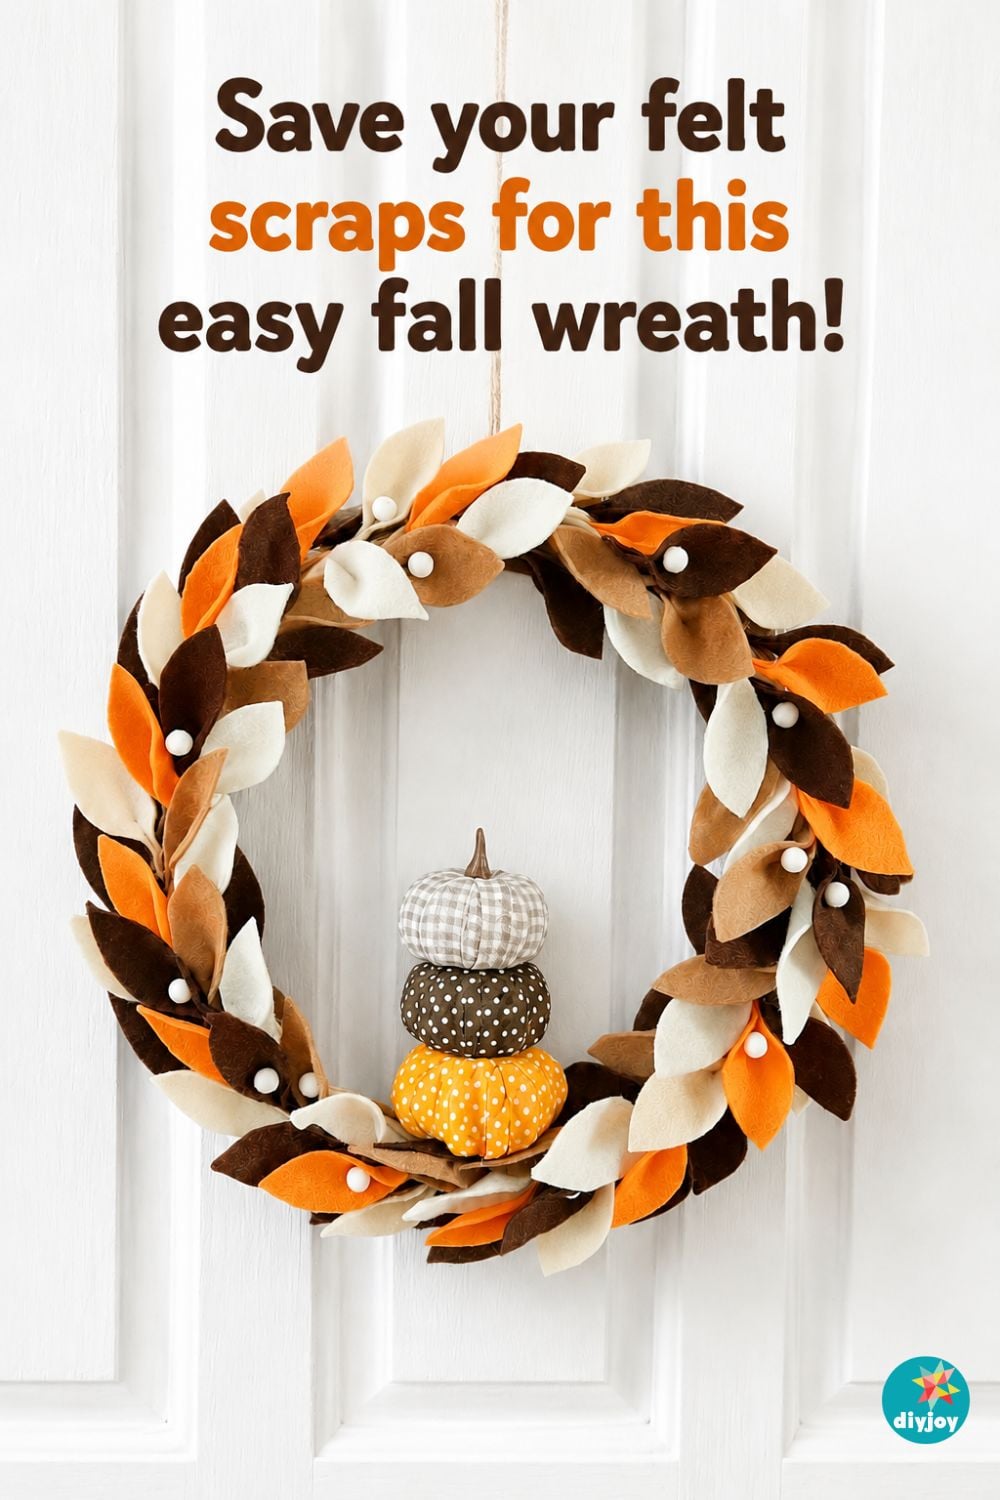
A DIY fall wreath with felt leaves stays neat for years, with no branches to shed or snap in storage. Stack felt sheets in fall colors, trace a 2 1/2 by 1 1/4 inch leaf pattern and cut through every layer. An 11 inch form takes 32 dark brown leaves and 14 each of medium brown, light brown, white and orange. Glue them all pointing the same direction, starting with evenly spaced orange leaves and filling in around them. Small white pom poms add texture, and fabric covered pumpkins in the center finish it.
Get the full tutorial at DIY JOY.