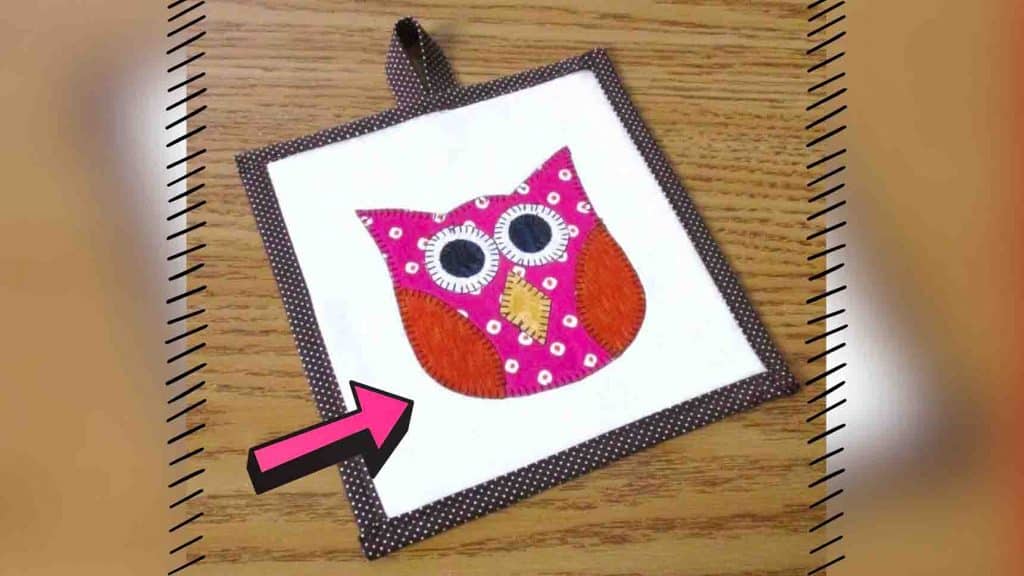
The fall season is here, and it’s time to take out our fall decorations! This appliqued owl potholder from Debs Days on Youtube is a perfect addition to your fall decor in your kitchen. It’s quite easy to make, perfect for beginners. This potholder is also great for gift giving! Learn the step-by-step instructions through the video below.
Materials:
- regular sewing supplies
- fabrics (for the front, back, and applique)
- cotton batting or insul-bright
- paper-backed fusible web
Directions:
Step 1
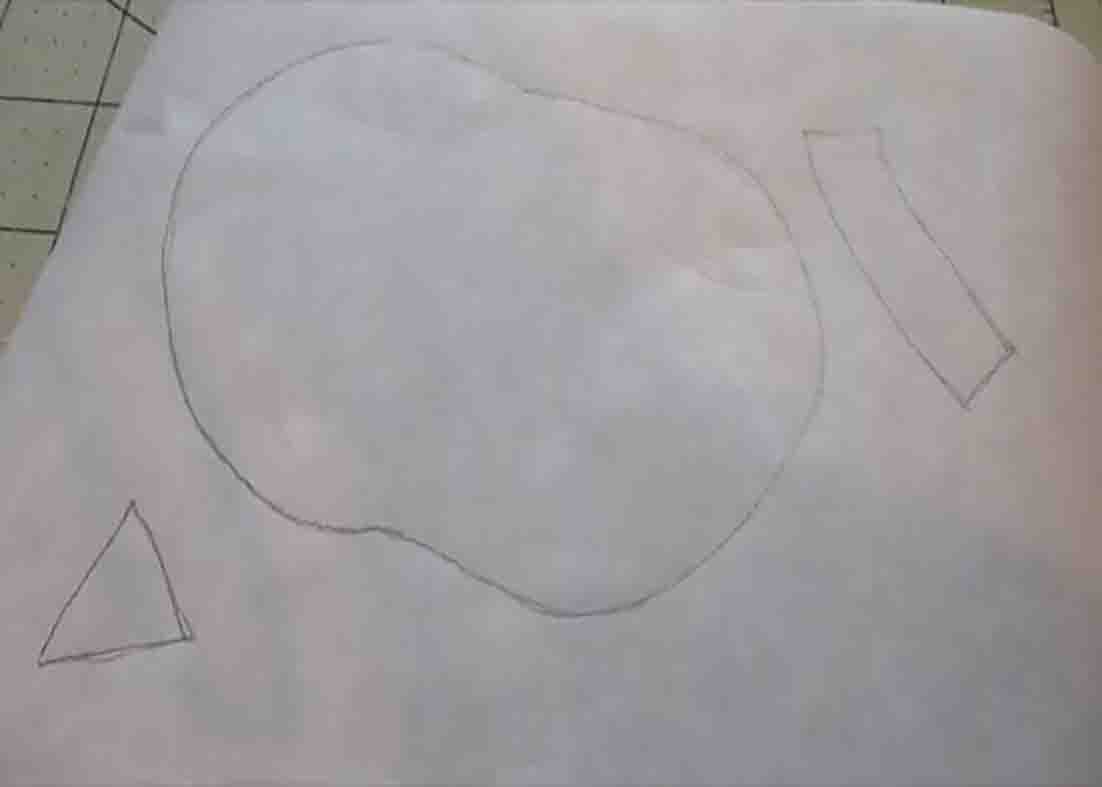
First, trace the individual parts of the design onto the paper side of the fusible web. Cut out each piece about a 1/4″ outside the tracing line. Next, fuse the pieces to the wrong sides of the appropriate fabric colors and let them cool. Cut the pieces out along the traced lines, then remove the paper backing from the fusible web. And referring to the placement diagram, center and arrange the applique pieces on the front fabric, then fuse them into place. Add a stabilizer to the back of the main fabric if you’d like and then finish the owl by stitching around the right edges of each of the fabric pieces with a blanket stitch, zigzag stitch, satin stitch, or straight stitch. Now, place the backing fabric on the wrong side of the fabric facing up. Center the batting pieces on top and place the applique on top of that.
[social_warfare]
Step 2
After this, baste all the layers together and quilt them as desired. Without cutting into the backing fabric, trim the batting to match the front of the pot holder, then trim the backing fabric so it measures 1″ away from the edge of the front fabric. To create the binding, fold the backing over so the raw edge meets near the raw edge of the front and press it. Fold the backing over one more time so it becomes the binding on the front and press it. Now, work your way around the sides, pressing as you go, and topstitch around the outside of the potholder near the open edge of the binding. If you prefer to miter the corners, measure 1″ away from each corner and mark it, then draw a straight line to connect the marks and cut on the line. Fold the raw edge corner over the corner of the front fabric and press it. Fold one of the sides so the raw edge of the fabric meets the right edge of the front and press it. Fold the backing over one more time so it becomes the binding on the front and press it. Now, fold the side in so the raw edge of the fabric meets the raw edge of the front and press it. Fold the backing fabric over one more time so it becomes the binding on the front and press it.
Step 3
If you like to hang up your pot holder, make a loop. To do this, fold the fabric strip in half lengthwise with the wrong sides of the fabric facing each other. Press to make a crease and open it back up. Fold one side to the midpoint crease and press it, fold the other side to the midpoint crease and press it, then fold the entire piece over and press it. Next, topstitch about an eighth of an inch from the edge all the way around across the fabric strip. After this, fold the strip in half to make a loop, and place the raw edges of the loop on the top of the back of the pot holder between the topstitching and the edge of the potholder. Now, secure the loop in place by stitching over the potholder’s previous topstitching. Press the loop up, and stitch across the loop one last time to hold the loop in the upward position. Your applique owl pot holder is now finished.

Appliquéd Owl Potholder Tutorial


