
Burlap Crafts & DIY Ideas
1. DIY Burlap Sunflower Wreath
The Country Chic Cottage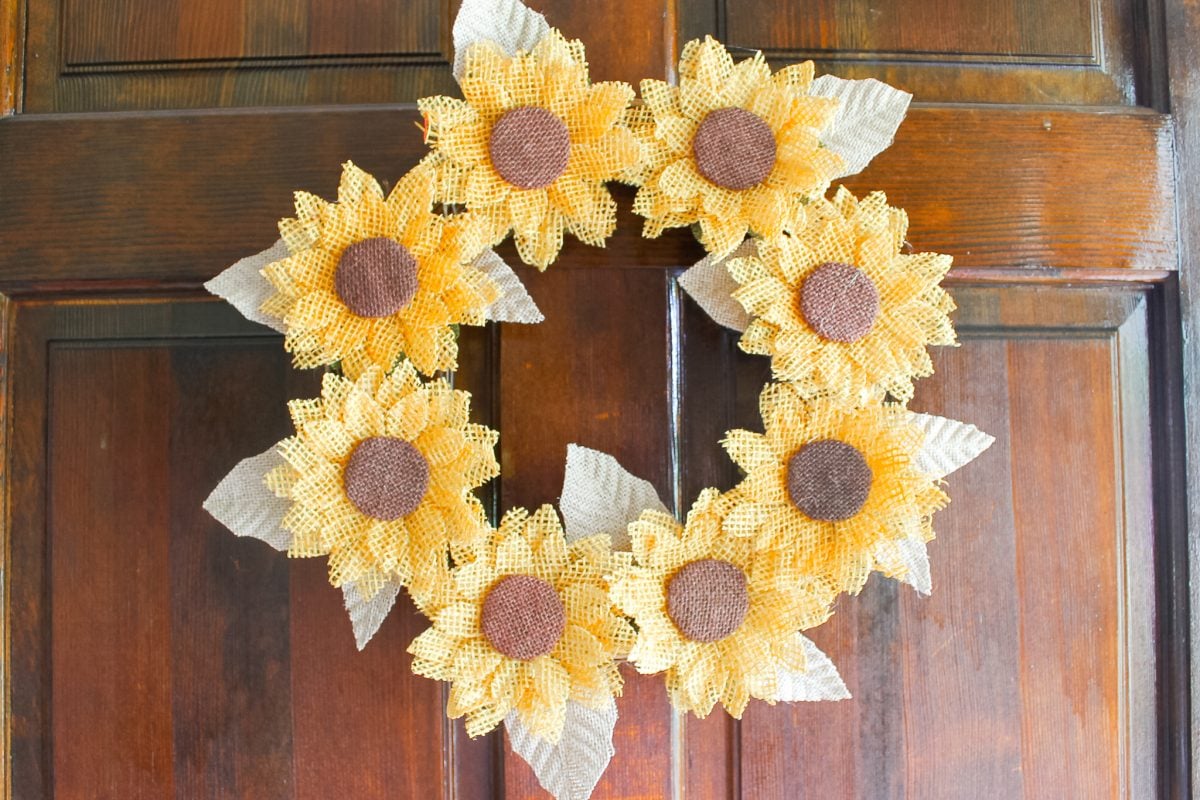
A burlap sunflower wreath like this one is such an easy way to bring some fall warmth to your front door without spending a ton of money. Angie at The Country Chic Cottage built hers on a grapevine base using eight burlap sunflowers and one burlap poinsettia, then hot glued everything into place. Her best trick is repurposing the poinsettia’s petals as the leaves instead of cutting a whole new set from scratch, which saves a ton of time. She’d had scrap burlap left over from an older project, so this one came together in just minutes, and honestly it’s proof you don’t need a big supply list to make something that looks like it came from a store.
4. Framed Burlap Monogram Wall Art
The Turquoise Home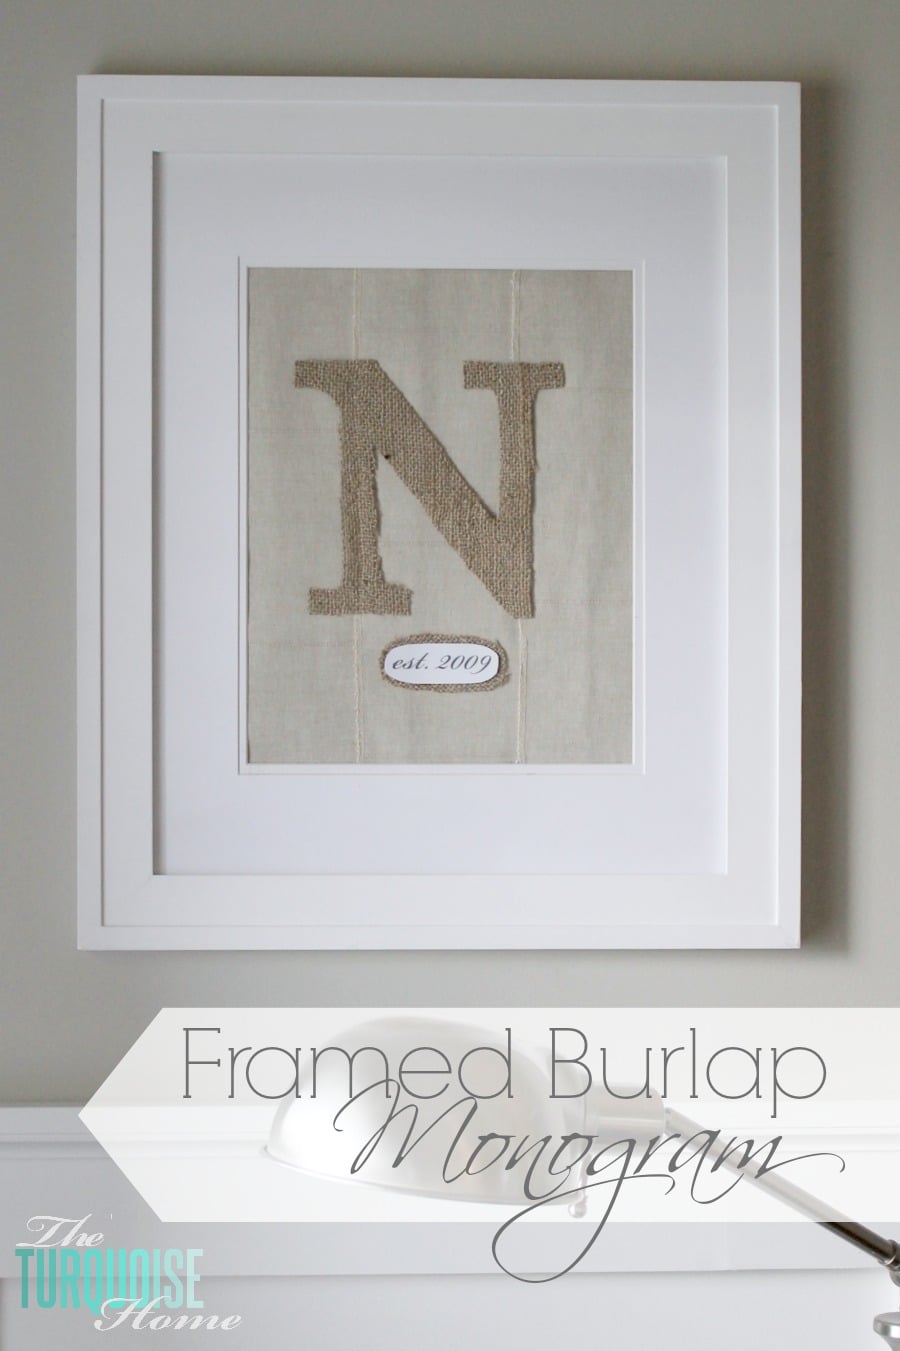
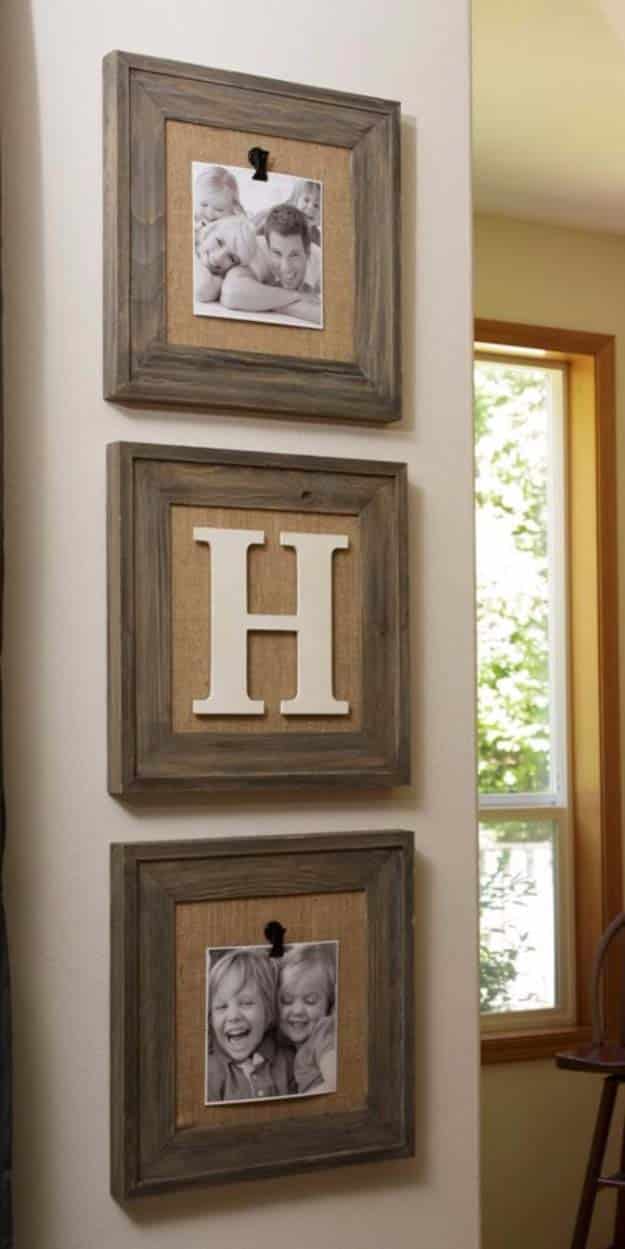
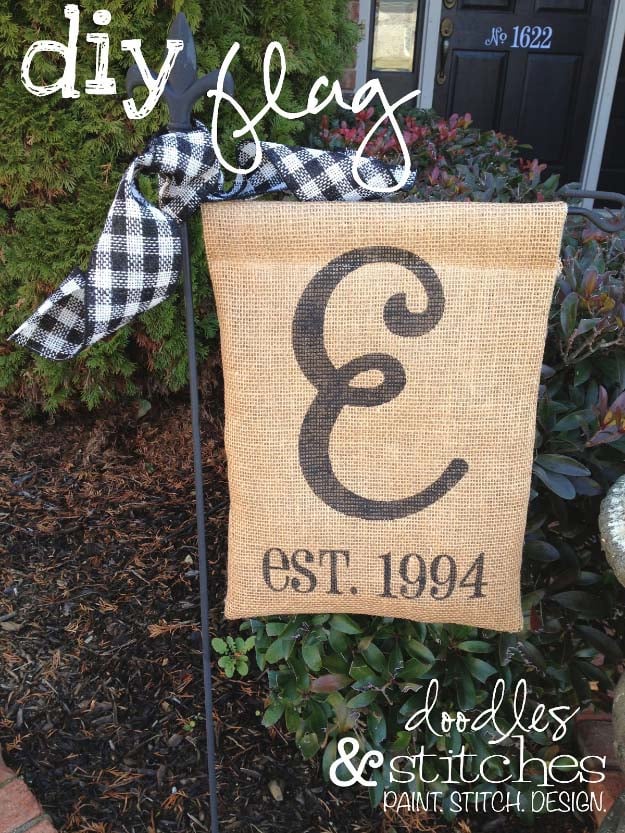
A framed burlap monogram like this one comes together fast enough for a lunch break, and it still looks like real wall art once it’s done. The blogger behind The Turquoise Home calls herself a fabric scrap hoarder, and she used leftover pieces from hemming her IKEA curtains for the backing here. She traced a Times New Roman letter onto plain burlap, cut it out and layered it over the scraps, then added a small “est.” tag underneath in a script font. Everything’s held together with double sided tape instead of glue, so you don’t have to redo the whole thing just to swap the letter out for a new season. She calls the wonky edges part of the charm, and honestly, she’s right.
8. Classic Burlap Wreath with Lace
Crafts by Amanda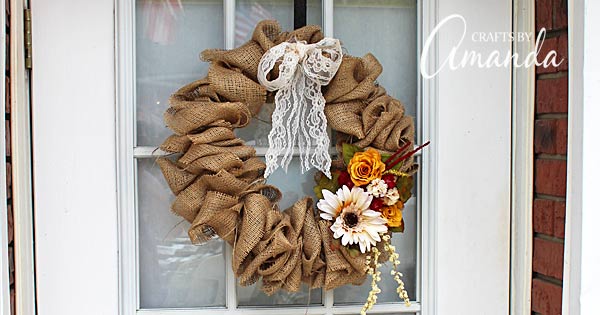
Crafts by Amanda built this wreath from something you probably already have lying around, a plain wire coat hanger, proof that a good burlap wreath doesn’t need fancy supplies. She bent the hanger into a circle, threaded a long roll of burlap through it over and over, then finished it off with a lace bow and a few silk flowers. Amanda found out the hard way that burlap gets heavy over time, so she recommends tucking a bit of hot glue or clay between the folds as you go so it doesn’t start drooping later. It’s a repetitive project, more of a zone out and repeat kind of task, and honestly that makes it perfect for a night when you don’t feel like thinking too hard.
10.Burlap Wreath
diyjoy
11. Buffalo Check Burlap Pumpkin Banner
Crafting Cheerfully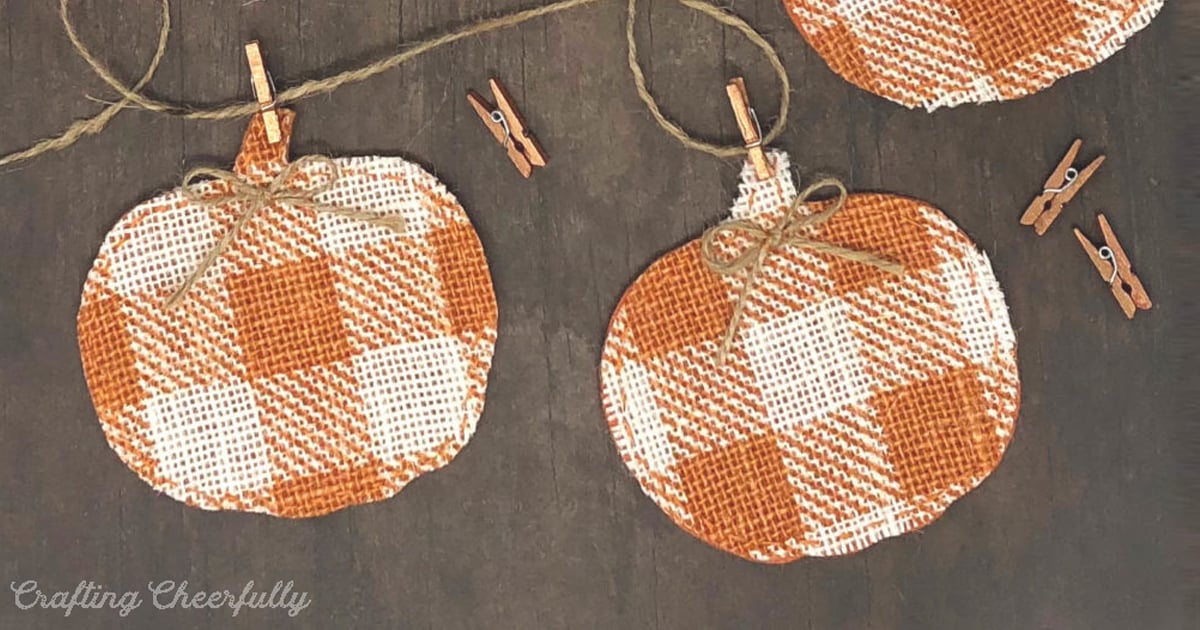
Buffalo check and burlap together make such a good pairing for fall, and this pumpkin banner from Crafting Cheerfully puts both to use. She found the orange buffalo check burlap while shopping for Halloween costume supplies at Joann’s and couldn’t resist bringing it home for a project of its own. Each pumpkin is felt topped with buffalo check burlap, hand stitched with a simple running stitch and finished with a little twine bow at the stem. Her tip for keeping the pumpkins uniform is lining up the checked pattern so it hits the same spot on every one before you start sewing. String them along twine with mini clothespins and you’ve got a banner that works clear through Thanksgiving.
12. DIY Burlap Photo Frame
Build Basic
If you’ve got basic woodworking tools and an afternoon free, this burlap photo frame from Build Basic is a fun step up from the usual store bought kind. Jenn built the surround out of lattice and trim pieces, glued and clamped it together, then covered the front in craft glue and burlap before adding a plywood back and a picture hanger. The build itself takes about 30 minutes of hands on work, though you’ll want extra time for the glue to dry between steps. When she ran out of the turnbuttons meant to hold the backing in, Jenn improvised with quarter inch washers instead, and you honestly can’t tell the difference. A cutting jig keeps the small trim strips from splitting, a tip you only learn by ruining one first.
13. DIY Burlap Last Name Sign
The Inspired Hive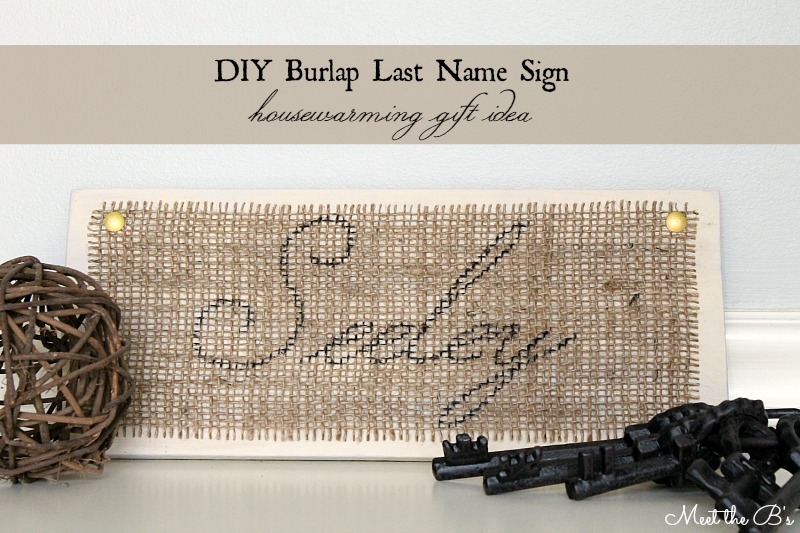
Nothing says housewarming gift quite like a burlap last name sign, and this one from The Inspired Hive is simple enough to knock out in an afternoon. Nicole made hers for friends who’d just bought a home, painting a piece of fence post wood with chalk paint and dry brushing over it with a lighter neutral shade to bring out the grain. She wrote the family name onto open weave burlap with permanent marker, then tacked it to the wood with gold painted thumbtacks at the corners. Her tip is using a stiff stencil brush for the dry brushing step, since it doesn’t skate around like a regular paintbrush would. She kept the colors neutral to match the couple’s rustic barn wedding style, and it’s the kind of detail that makes a handmade gift feel personal.
14. How to Cut Burlap with a Cricut
Crafting in the Rain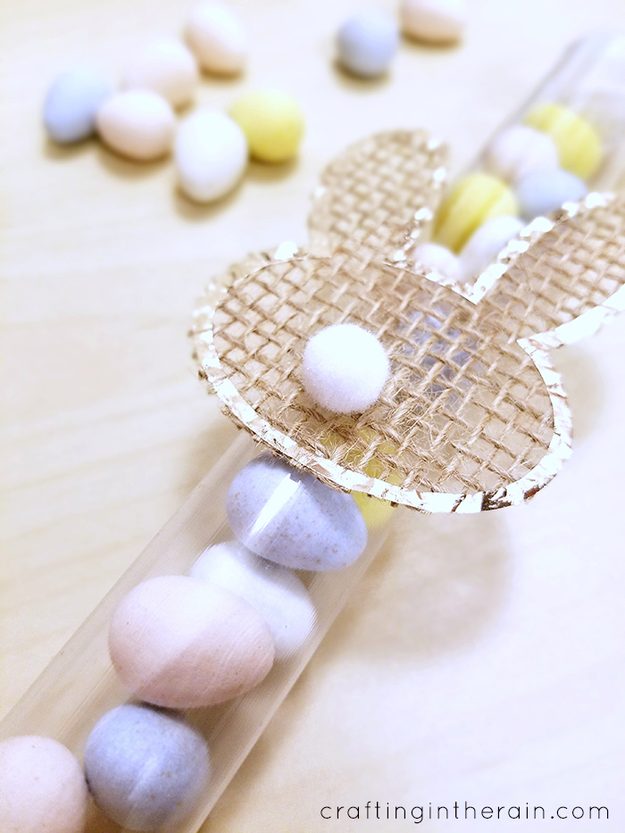
Here’s the fix for burlap that frays the second you look at it: transfer tape and the rotary blade on your Cricut. You press the burlap onto the tape’s sticky side, stick that to a green mat burlap side up, pick the Burlap setting and cut, and the tape holds every loose thread in place (it keeps the fuzz off your mat too, a small miracle in itself). The demo project is Easter bunnies for candy tubes, edged in metallic iron-on heat pressed at 305 degrees for 30 seconds and finished with a pom pom tail, though once you know this trick you’re going to want to cut burlap into everything. Crafting in the Rain has the Design Space file linked, and I’d bet you’ll have a whole litter of bunnies cut before the candy’s out of the bag.
16. Crochet Trimmed Burlap Placemats
One Mama’s Daily Drama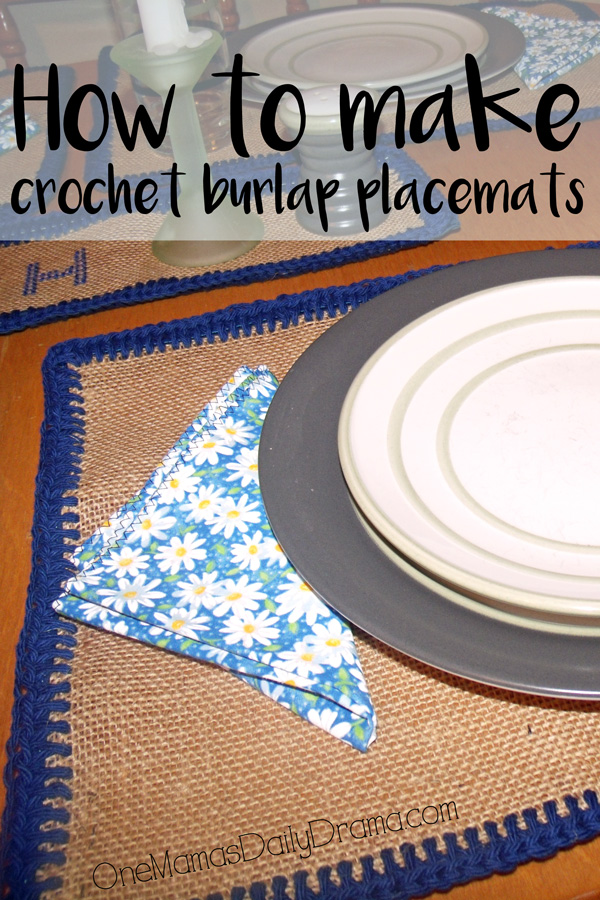
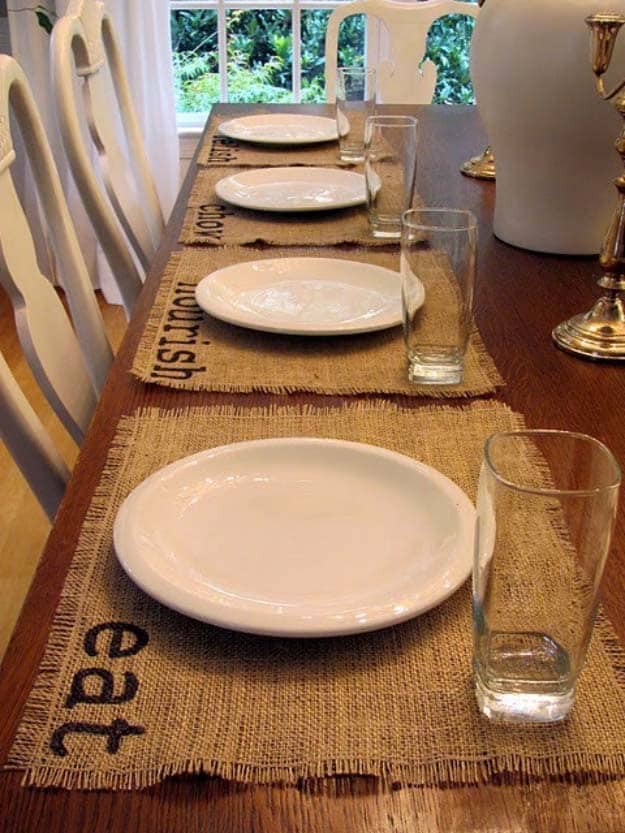
These crochet trimmed burlap placemats prove that burlap can be dressed up for the table just as easily as it can be left rustic. One Mama’s Daily Drama made a set of six as a Christmas gift for her mother in law, cutting burlap and cotton fabric to size, then sewing bias tape around every edge before crocheting a simple half double crochet border on top. She learned pretty quickly that burlap doesn’t like being crocheted straight into, so skipping the bias tape step isn’t really an option if you want the edges to hold. The matching napkins are just two squares of cotton sewn together, turned right side out and finished with a zigzag stitch. She liked the set so much that she’s already planning to make a second one for her own table.
18. Lighted Burlap Garland
Create Craft Love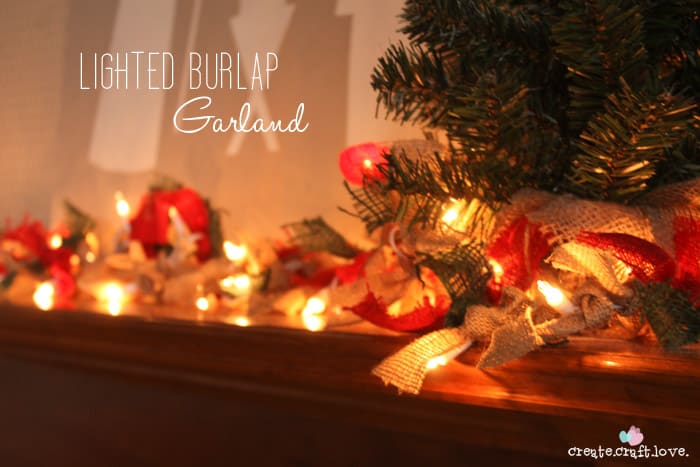
A lighted burlap garland is such a pretty way to dress up a mantel for the holidays, and this version from Create Craft Love only takes a strand of mini lights and a few rolls of burlap ribbon. She cut the burlap into short strips in natural, red and green, split each one down the middle so it wouldn’t look too bulky, then tied the strips around the light wire one at a time in whatever pattern she wanted. It’s a slow, repetitive project, the kind where you put on a movie and just keep tying knots until the whole strand is covered. She admits it turned out better than she’d pictured in her head, and once it’s strung across a mantel with the lights glowing through the burlap, it has that cozy look that’s hard to fake.
21. Stenciled Burlap Pillow Sleeve
The Polka Dot Chair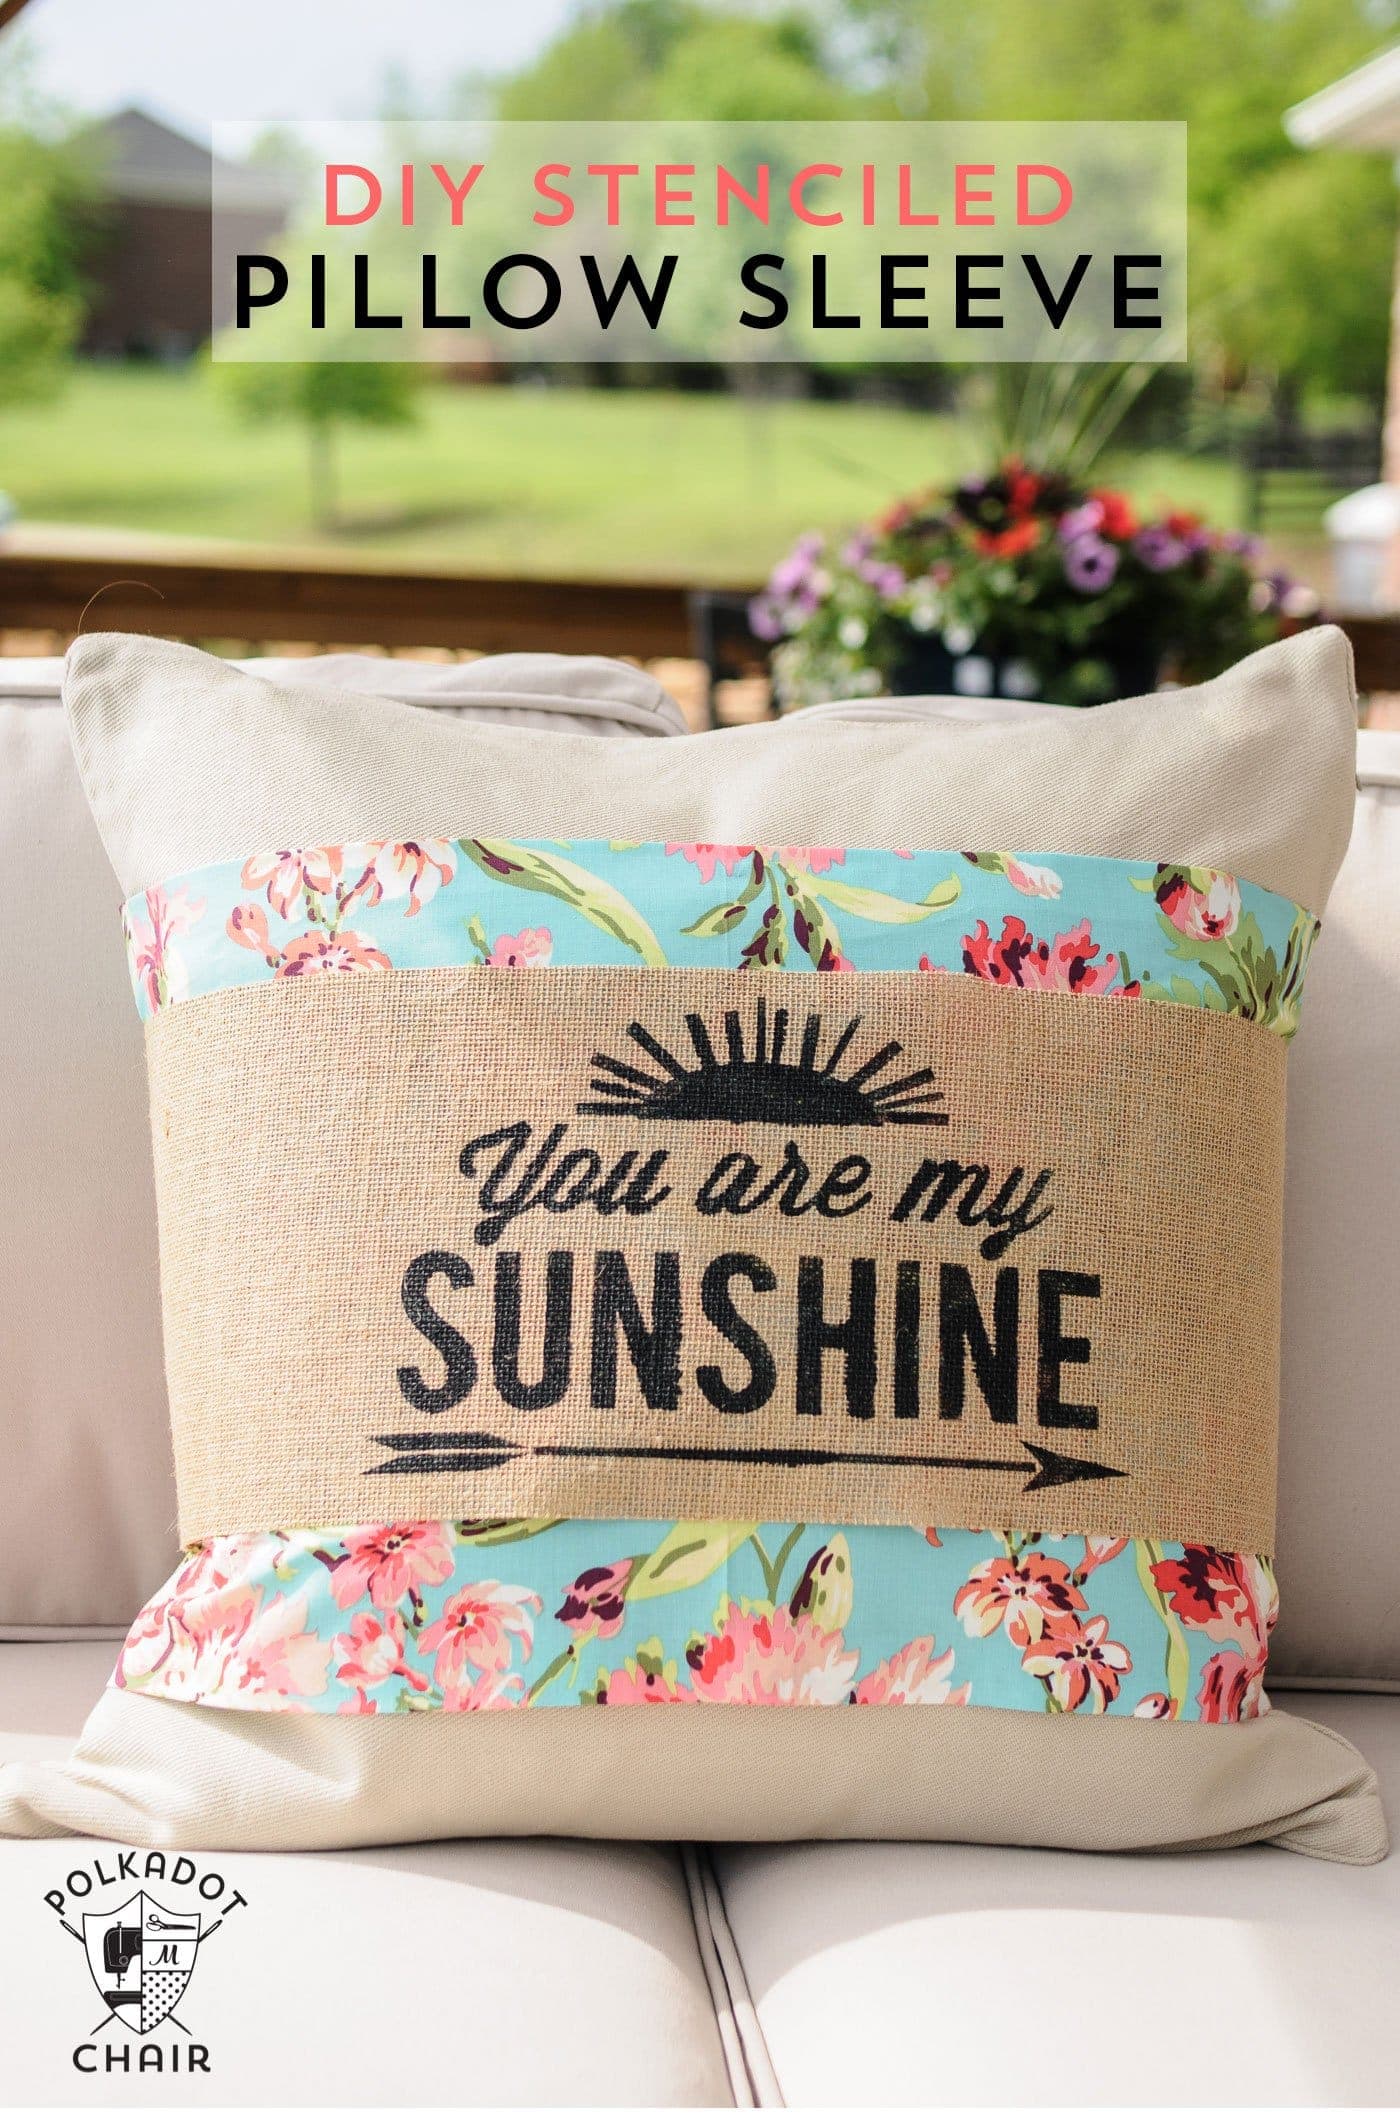
A pillow sleeve is such a smart way to update your look for a new season without buying a whole new pillow, and this stenciled burlap version from The Polka Dot Chair is one of Melissa’s own favorites. She used a Cricut to cut the “You Are My Sunshine” design from freezer paper, ironed it onto burlap as a stencil, then sponged fabric paint over the top before peeling it away. Her trick for keeping the paint from bleeding through is ironing a second layer of freezer paper onto the back of the burlap, right behind the design. The whole sleeve comes together with only two seams, and fusible seam tape means you don’t even have to hem it by hand. It’s also a handy way to hide a stain on a pillow you already own instead of buying a new one.
23. Burlap Wrapped Dollar Store Storage Bins
Simple Made Pretty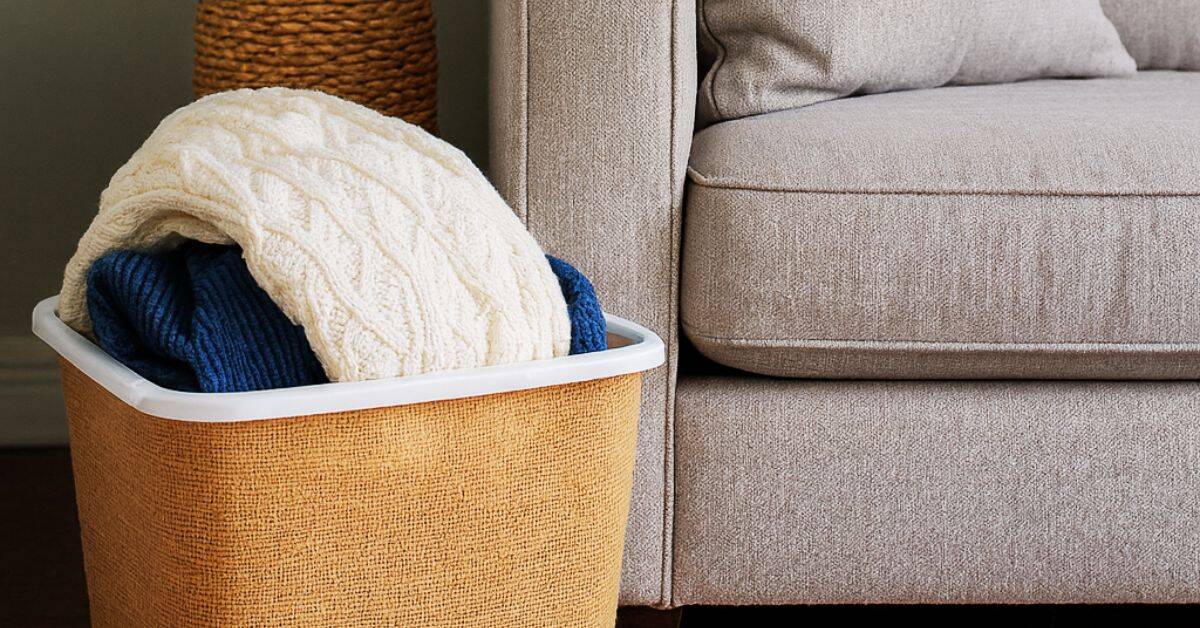
Turning a plain plastic bin into something that actually looks nice on a shelf is easier than you’d think, and Simple Made Pretty shows how with nothing more than burlap and a hot glue gun. Start by running a line of hot glue along the bottom edge of a Dollar Tree bin, then wrap burlap around tightly as you work your way up, folding the extra fabric over the rim and gluing it inside for a clean finish. She recommends a tight weave burlap or a sturdy canvas over loose burlap, since it doesn’t shed as much and gives crisper edges. Each basket takes about 15 minutes, not counting drying time if you paint the bin first. She made a batch of these years ago, and they’ve held up in her living room, craft room and garage ever since.
28. Burlap Wreath with Ribbon and Monogram
Kenarry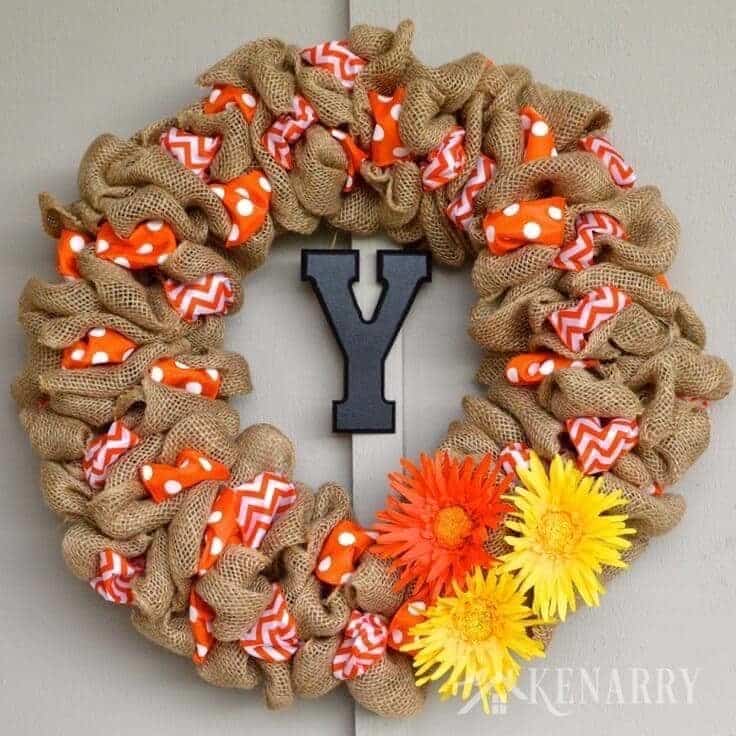
Kenarry mixes polka dot and chevron ribbon loops into this burlap wreath, along with a wooden monogram letter, so it reads more finished than a plain burlap wreath while still being simple to make. Carrie tied burlap to a wire wreath frame, then wove six to seven inch loops through the wires in a pattern of two burlap loops followed by one accent ribbon loop, pressing everything together every few additions to keep it full. She adds that the back doesn’t need to look pretty since nobody ever sees it, which takes the pressure off while you’re tying everything down. She made this one with her sister during the kids’ rest time with a movie playing, proof you can finish a full sized wreath in an afternoon without much fuss.
29. Pearl and Burlap Napkin Rings
Moms and Crafters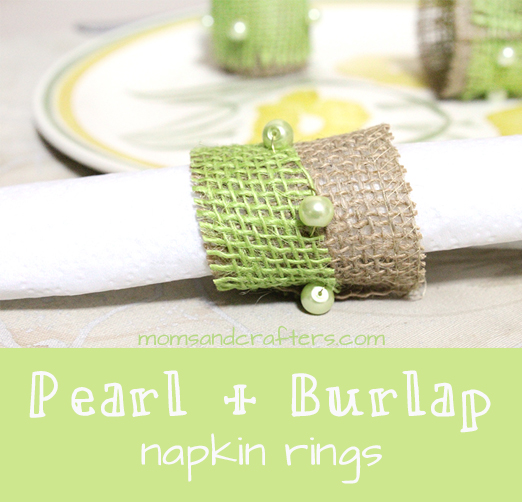
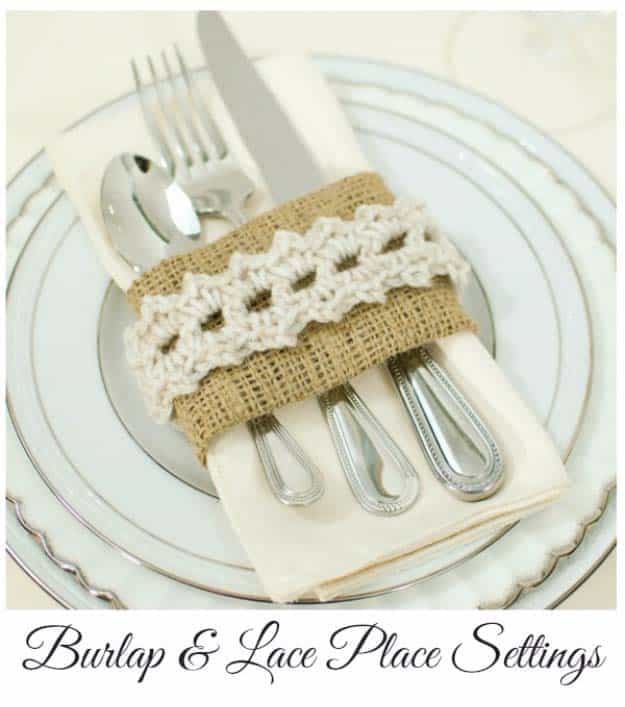
Napkin rings are such a small detail, but they make a table feel finished, and these pearl and burlap ones from Moms and Crafters come together with just a few supplies. She used a wider strip of natural jute ribbon with a finished edge as the base and a narrower strip of colored burlap ribbon with a frayed edge on top, then wrapped both around 24 gauge wire for structure. Glass pearls threaded onto the wire give it a little sparkle, though she notes you could swap them for wood beads or shells depending on the look you want. Because the rings use ribbon instead of raw burlap, there’s no measuring, you just cut to length and wrap. If you’re using these with linen napkins, tuck the wire ends in well so they don’t snag.
30. Small Burlap Gift Bags with Lavender
DIY Danielle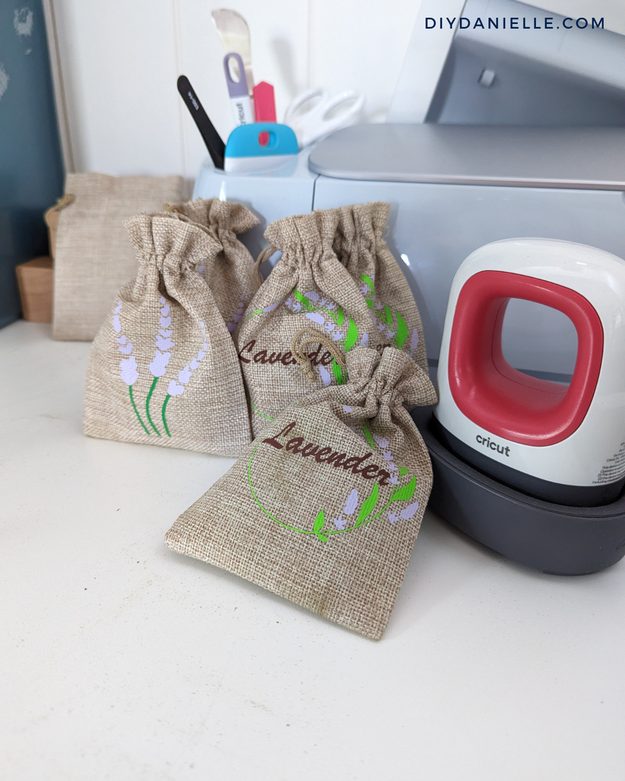
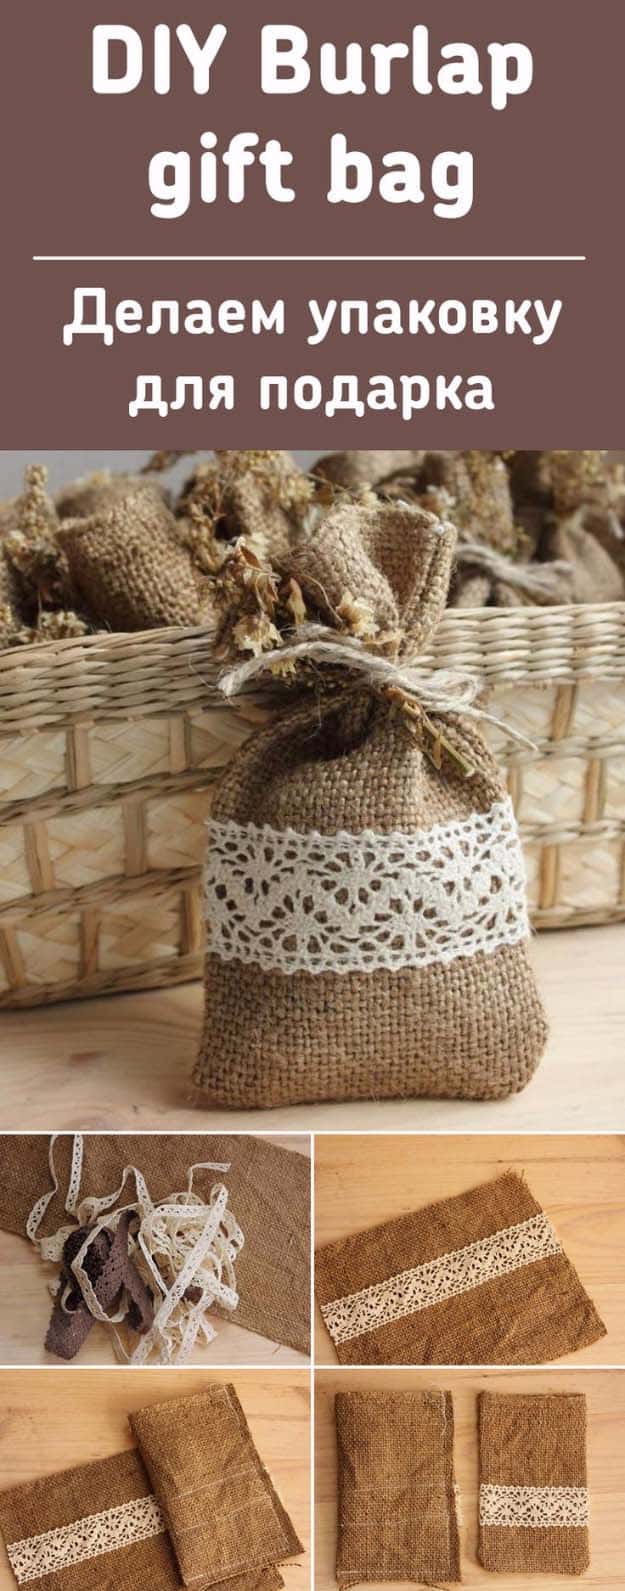
Tiny burlap drawstring bags with an iron-on lavender sprig on the front, the handmade gift Danielle packed for her hosts and roommates on a ten-day trip to the UK. You cut the sprig, green stems under purple flowers, from Smart Iron On on a Cricut Maker 3 and press it onto the burlap with the Mini Press, then each bag gets filled with dried lavender or a felted soap (hers was lavender from her own garden, which is showing off, and I respect it). One honest heads up: finely ground lavender sifts right through burlap, so she double bags with muslin, and I’d do the same unless you want lavender confetti all over your luggage. Head to DIY Danielle to see the bags up close, plus her list of what else fits inside, from bath salts to a small jar of jam.
33. Woven Heart Burlap Pillow
A Wonderful Thought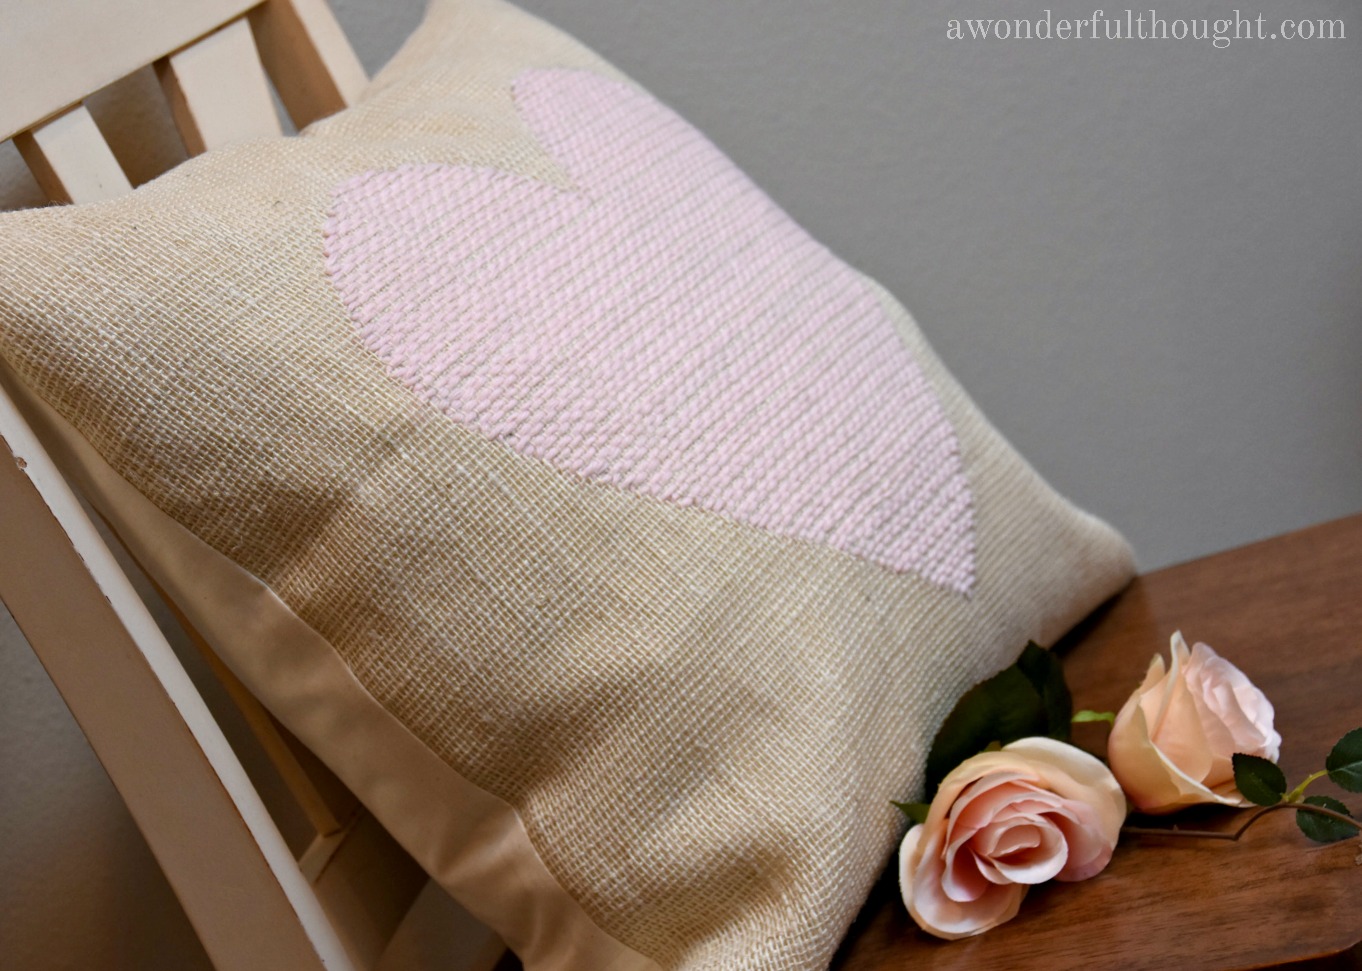
This woven heart pillow takes burlap somewhere I hadn’t really seen before, weaving pink yarn straight through the fabric squares to build a heart shape instead of stitching or painting one on. Kimberly cut her burlap into a 21 inch square, traced a heart using an existing decoration as her stencil, then wove the yarn back and forth square by square until the shape filled in. It’s not a fast project, she spent two to three hours a day for about three days on the weaving because she likes a tight weave, but a looser one would speed things up. Once the front is done, it gets backed with muslin, a zipper and a pillow form so it’s a real usable pillow. Her trick is rocking the needle between the squares instead of pulling it all the way through each time.


41. Burlap and Leaf Mason Jar Candles
Garden Therapy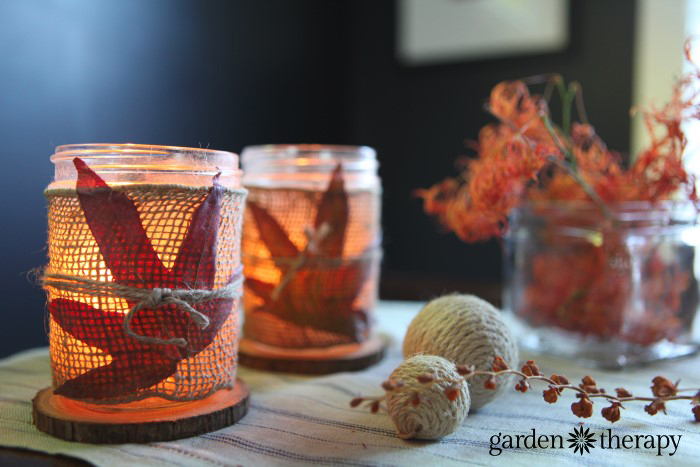
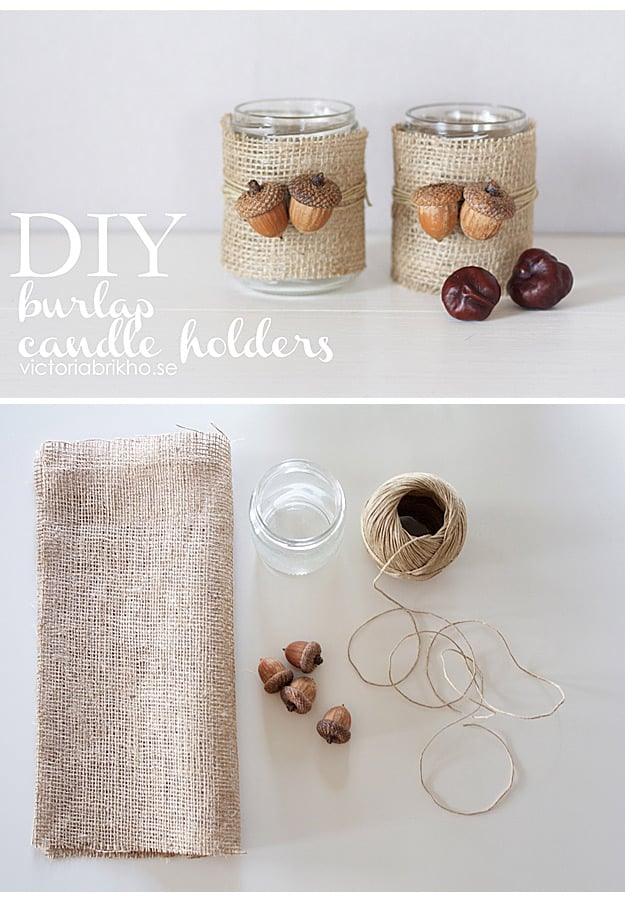
Mason jar candles wrapped in burlap and real leaves are such an easy way to bring a bit of the outdoors onto your table, and Garden Therapy shows how simple it is. Stephanie Rose wrapped burlap ribbon around a wide mouth mason jar with spray adhesive, hot glued a few fallen leaves onto the front, then tied a piece of jute twine around the middle to finish it off. She’s honest that she isn’t always a fan of burlap, since it sheds and doesn’t smell great, but she loves how the light glows through the loose weave once a tea light is lit inside. Head outside and grab whatever leaves are falling in your own yard so every jar ends up a little different. Group a few together with dried branches for a centerpiece that costs almost nothing.
43. Printed Burlap Pillow
DIY Beautify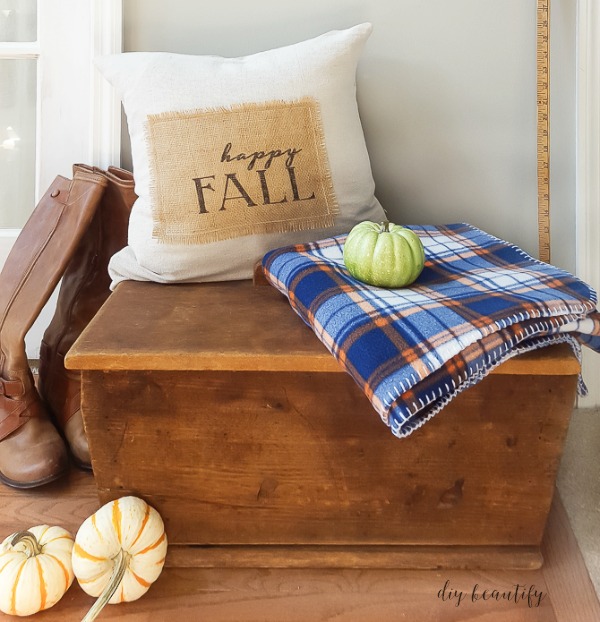
Printing directly onto burlap sounds like it would require special equipment, but DIY Beautify shows it just takes a regular inkjet printer and a roll of Reynolds freezer paper. She ironed the freezer paper onto the back of a burlap square, trimmed it to a standard 8.5 by 11 sheet, then fed the stiffened burlap through her printer with a “happy FALL” design she’d made herself. Her printer fought her at first, refusing to recognize the edges until she stacked regular paper behind the burlap to help it feed through. She’d tried stenciling on burlap before and found it messy, so this printing trick felt like a real discovery by comparison. Once it’s printed, the burlap patch gets sewn onto a plain pillow cover for an easy seasonal update.
45. No Sew DIY Clip Burlap Bow Ties
weddingwindow
46. No-Sew Burlap Owl Craft
Kids Craft Room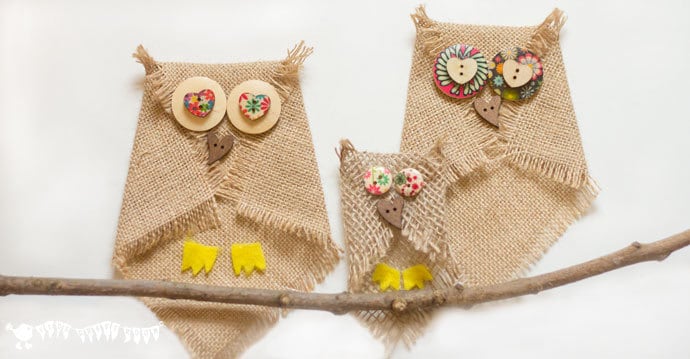
No sewing required for this burlap owl craft from Kids Craft Room, just a folded square of burlap and a handful of wooden buttons. Fray the edges of the burlap, fold it into the owl’s body shape and secure it with hot glue, then add a large round button for each eye and a small heart shaped button for the beak. The author calls herself a self described button addict who especially loves the wooden ones, and points out that a lot of the patterned buttons are plain on one side and colored on the other, so you can flip them for a different look on each owl. Felt talons glued to the bottom finish it off, and the whole thing comes together fast enough that it’s a solid last minute gift.
48. Striped Burlap Coasters
Hello Little Home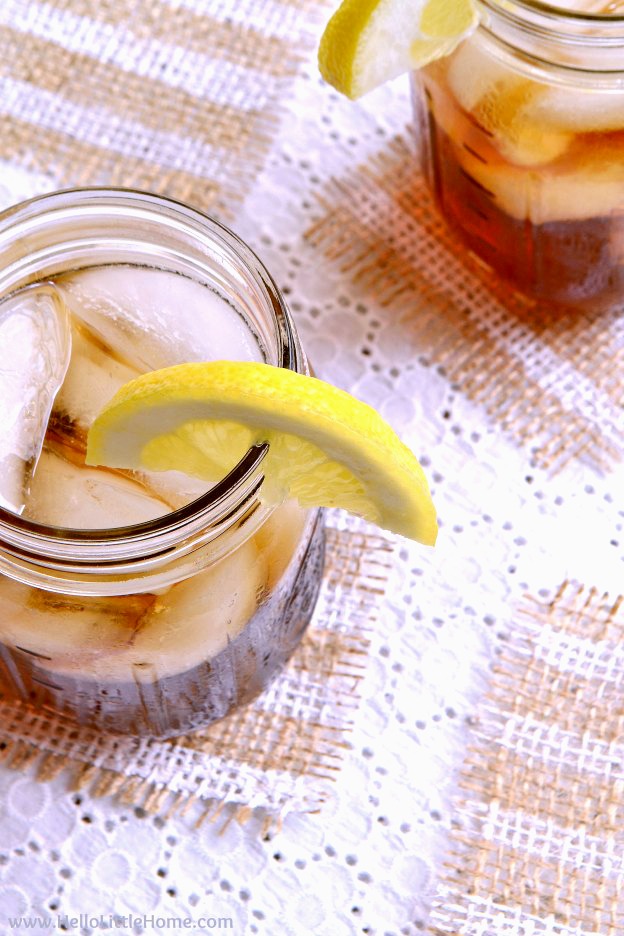
These striped burlap coasters are such a quick project, the kind that doesn’t take much more than one evening to finish a whole set. Ginnie from Hello Little Home cut four inch burlap squares, taped off a stripe pattern with painter’s tape and dabbed white craft paint over the top instead of brushing it on, for cleaner, more even coverage. Her tip is taping the outside edges first, then adding a strip down the center, which keeps the stripes looking roughly even without much measuring. Once the paint dries and the tape comes off, pull a few threads loose from each edge for a soft fringe, and you’re done. She made hers while getting ready to move into a new apartment with a patio, her first outdoor space to entertain on in over a decade.
50. Burlap Pinecone and Bauble Wreath
Lemon Thistle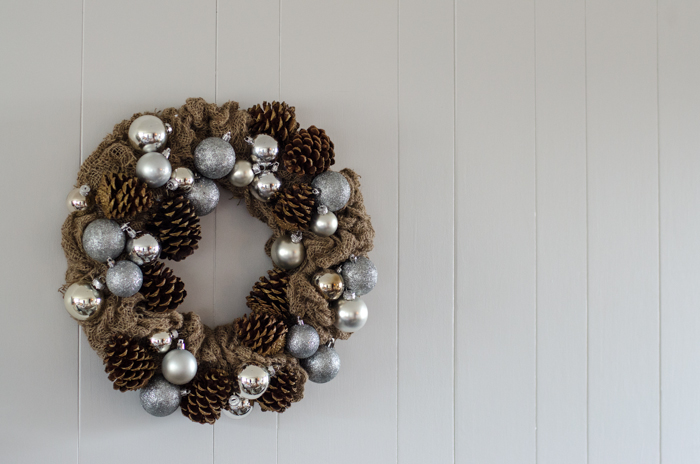
This pinecone and bauble wreath from Lemon Thistle started as a two dollar wreath form from the dollar store, and Colleen stripped the garland off before starting fresh with burlap. The burlap here is actually tree wrap from the gardening aisle, dirt cheap, and it gets a nice crinkled texture once you run it through the wash a couple times to knock out the smell. She wrapped strips of burlap around the form, hot glued on pinecones she’d collected from a friend’s yard with a mix of plastic and glass baubles, then tucked in a few ruffled pieces of burlap to fill it out. Her only real instruction is to just keep gluing until it looks full, which isn’t the most technical advice but it’s honestly accurate.






