

Burlap decor gives a room that warm, textured farmhouse look for a fraction of what the store versions cost, and these 23 DIY projects cover just about every corner of your home. Start at the windows with floor length curtains, a no-sew panel that skips the sewing machine entirely and simple shades that cost less than $20 each. Set the table with a ruffled tablecloth, monogram runners and placemats trimmed in crochet or dotted with gold foil (fancy!). Then finish with framed wall art, a canvas silhouette, a lampshade, vase covers and pillows you can change out with the seasons. Burlap does shed a bit while you work, so keep a lint roller handy. Looking for something smaller, like bows, wreaths and garlands? Try these burlap crafts.
Table of Contents
- 1. Burlap Coffee Bag Placemats
- 2. Burlap Framed Monogram Wall Art
- 3. Burlap Canvas Silhouette
- 4. Burlap Sack Framed Wall Art
- 5. Burlap Topiary
- 6. Burlap Vase
- 7. Burlap Mason Jar Chandelier
- 8. Monogram Burlap Table Runner
- 9. Burlap Coffee Bean Sack Window Shades
- 10. Ruffled Burlap Table Cloth
- 11. Burlap Lampshade
- 12. Floor Length Burlap Curtains
- 13. Leather And Burlap Fringe Coasters
- 14. Make Burlap Signs With Free Printable Wall Art
- 15. Burlap Mantel Garland
- 16. Crochet Trimmed Burlap Placemats
- 17. DIY Burlap Shades
- 18. Stenciled Burlap Pillow Sleeve
- 19. No-Sew Burlap Curtains
- 20. Woven Heart Burlap Pillow
- 21. Gold Foil Burlap Placemats
- 22. Easy Burlap Vase Project
- 23. Monogrammed Table Runner
1. Burlap Coffee Bag Placemats

Don’t toss that old coffee sack, because it’s a set of placemats in disguise! Hand wash the bag in a deep sink with a spoonful of detergent, rinse well, then iron it flat with a little spray starch. Cut 13 by 17 inch rectangles around the best graphics, and back each one with plain white burlap a half inch smaller. Pull a few strands from each edge for a soft fringe, stitch the layers together, then finish the raw edge with linen ribbon and fabric glue. One bag makes four mats.
Get the full tutorial at Rustic Crafts & DIY.
2. Burlap Framed Monogram Wall Art

This burlap framed monogram is so simple you can change it with the seasons. Pop the glass out of an 11 by 14 frame, then stick a small command hook to the insert right where the nail notch on a wooden letter lines up. Spray paint the letter to match the frame. Cover the insert with burlap using spray adhesive, poke the hook through the weave and trim the edges flush. Slide it back in the frame and hang the letter on the hook. Swap in a heart for February!
Get the full tutorial at That's What {Che} Said.
3. Burlap Canvas Silhouette

Got a stack of silhouettes from a family trip sitting in a drawer? Here’s a pretty way to finally show one off. Start with a burlap covered canvas from the craft store, then mount a black paper silhouette on a script printed background inside an ornate cut wood frame painted charcoal. Add the year in white paint along the bottom of the frame, then tie a twine bow under it. Hang it by a loop of twine and you’ve got a keepsake that feels both vintage and personal.
Get the full tutorial at Snazzy Little Things.
4. Burlap Sack Framed Wall Art
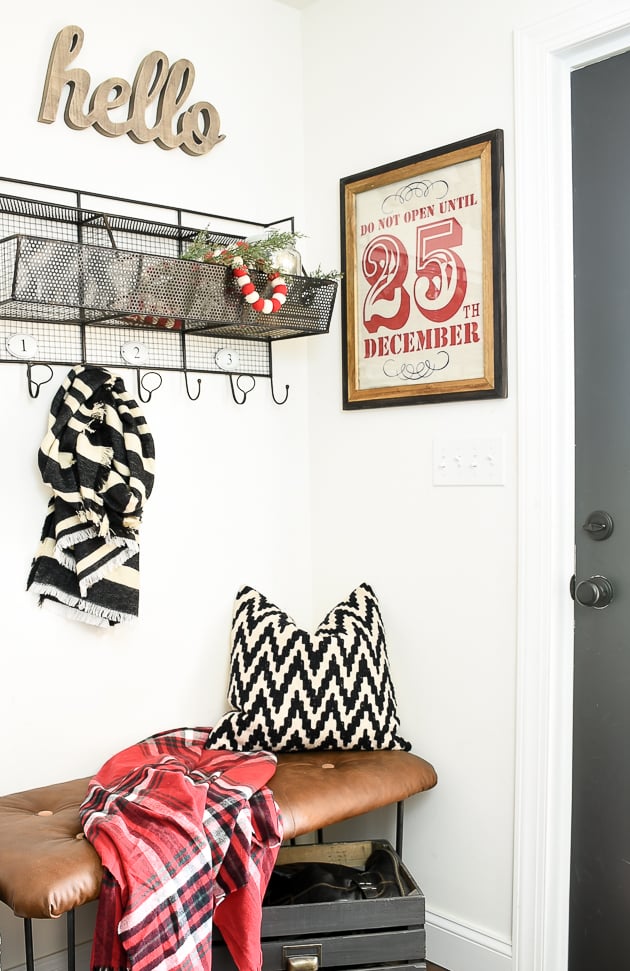
Holiday wall art doesn’t get easier than this. Grab a printed Christmas burlap sack and a plank frame, both often half off at the craft store. Use the picture that came with the frame as your template, trace it onto the sack, then cut it out. Slip the burlap into the frame where the stock print was and hang it. That’s it! When the season’s over, swap in a tea towel, a gift bag or a pretty piece of wrapping paper so the frame works all year long.
Get the full tutorial at Little House of Four.
5. Burlap Topiary

A burlap topiary looks fancy but it’s mostly cutting squares. Start with a white styrofoam topiary form that already has the ball, dowel and base attached, and make sure the base fits snugly in your clay pot. Cut a big stack of 4 inch burlap squares, fold each one into a puffy bubble and pin it to the ball, fitting them tight so no pins show. Keep going until the ball is covered. Tuck Spanish moss over the base to finish. It works on a mantel or porch all year.
Get the full tutorial at Cottage at the Crossroads.
6. Burlap Vase

Here’s a two minute vase you can make from the recycling bin. Hot glue a length of thick rope down each side of an old tin can for the look of handles, then wrap burlap around the can and glue the seam. Glue more rope around the top edge as trim. Instead of a stencil, write a number or a word straight onto the burlap with a Sharpie for a quick hand lettered look. Fill it with white lilies and daisies and it’s ready for the table.
Get the full tutorial at Craftberry Bush.
7. Burlap Mason Jar Chandelier

A mason jar chandelier gives a dining nook or porch that romantic rustic glow without the store price. The base is a wreath ring wrapped round and round in burlap strip until no metal shows. Wrap the necks of several mason jars in twine, then hang them from the ring at different heights so they cluster like a real chandelier. Add tea lights or a string of fairy lights inside the jars. The full step by step video makes the hanging part easy to follow.
Get the full tutorial at DIY JOY.
8. Monogram Burlap Table Runner
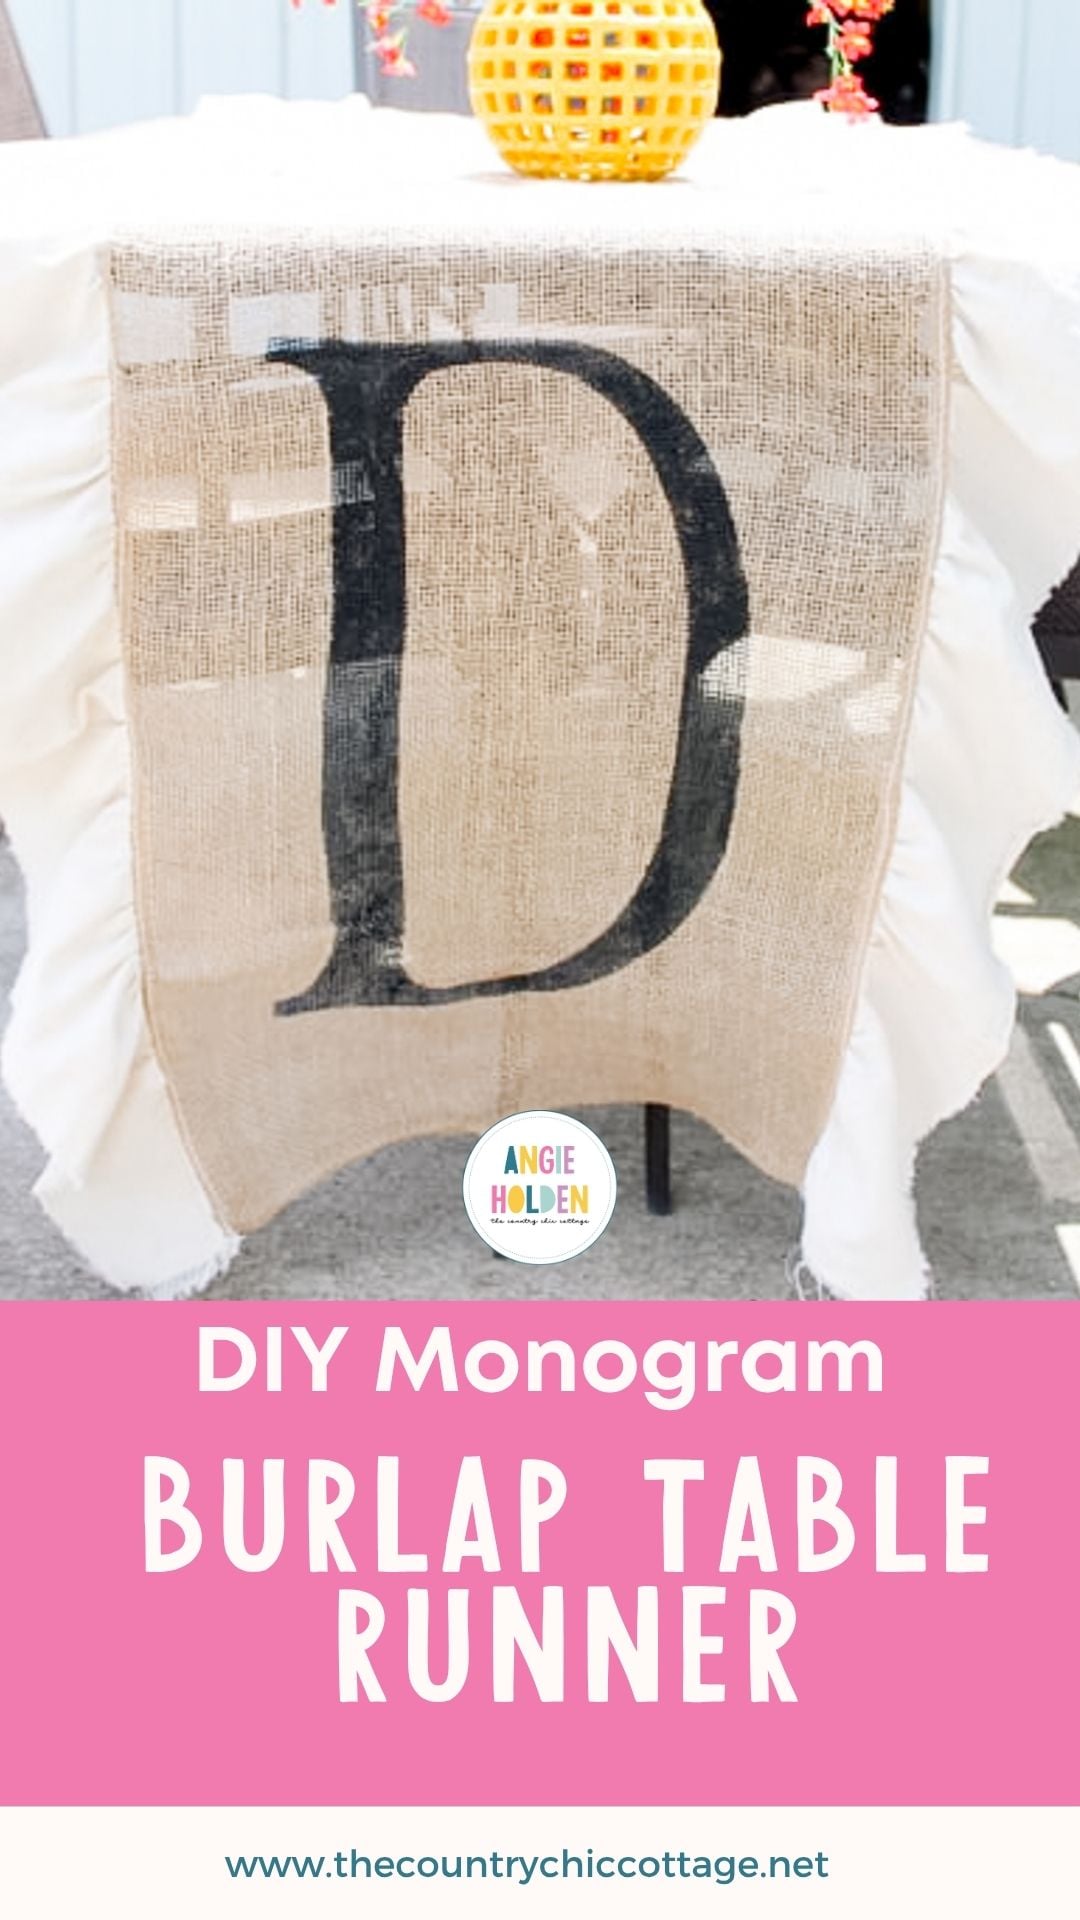
This monogram table runner looks custom but comes together in an afternoon. Cut a big monogram from vinyl, about 12 inches wide, weed out the inside of the letter and stick the stencil onto a plain burlap runner. Protect your work surface, since paint seeps right through. Dab black fabric paint up and down until the letter is covered, then peel the vinyl while it’s still wet. Once dry, sew a gathered ruffle of torn drop cloth strips along both long sides. It’s a sweet wedding gift too!
Get the full tutorial at Angie Holden The Country Chic Cottage.
9. Burlap Coffee Bean Sack Window Shades

Faux roll shades made from coffee bean sacks warm up a kitchen window for about seven dollars. Cut a closet dowel just short of the window width and mount it on two closet dowel brackets toward the front of the frame. Lay the dowel across half a sack, trim the burlap to match, fray the edges a little and line it with a similar colored fabric. Hot glue the top around the dowel, roll it up to valance height and you’re done. No sacks? Stencil plain burlap instead.
Get the full tutorial at Funky Junk Interiors.
10. Ruffled Burlap Table Cloth

Three tiers of burlap ruffles turn a plain table into the star of the patio. Cut a top piece the size of your tabletop plus an inch for seams, then one long muslin panel to wrap the sides. Cut each burlap strip twice the length of the muslin for fullness and hem one long edge. Pinch and pin about an inch of burlap every 6 inches, sew the bottom tier first, then layer the middle and top, offsetting the folds so they don’t look too matchy. If you can sew a fairly straight line, you can make this!
Get the full tutorial at Celebrating Everyday Life.
11. Burlap Lampshade

A burlap lampshade is a quick fall refresh that costs a few dollars. Find a plain straight shade at a discount store, spray it with adhesive and smooth a layer of burlap around it, trimming the top and bottom. Add fringe and ribbon trim along the edges for a finished look. For an even faster version, wrap a strip of burlap around a white shade and tie it with jute, so it slips right off when the season’s over. Warm and cozy!
Get the full tutorial at Dimples and Tangles.
12. Floor Length Burlap Curtains

Floor length burlap curtains let the light in, block the street view and cost a fraction of store panels. Cut burlap to your window height plus the width of your ribbon plus about an inch. Leave the selvedges as they are on both sides, so the only sewing is a single seam per panel. Fold the top over, sew a length of ribbon along it for strength and a hint of color, then clip the panels to curtain rings. Easy and so budget friendly!
Get the full tutorial at Chicken Scratch NY.
13. Leather And Burlap Fringe Coasters
These leather and burlap fringe coasters are a fun beginner sewing project with a polished result. Measure and cut burlap squares about 5 inches across, iron them flat with a warm iron, then pull four threads from each edge for a fringe. Zigzag stitch around the squares so the fringe stays put. Cut smaller 3.5 inch squares of faux leather, center one on each burlap square and zigzag around the leather. The faux leather wipes clean, so they’re practical too. They make a sweet hostess gift.
Get the full tutorial at Mama In A Stitch.
14. Make Burlap Signs With Free Printable Wall Art

Yes, you can print right on burlap with a regular inkjet printer! Cut freezer paper and burlap to 8.5 by 11 inches, then iron the shiny side of the freezer paper onto the burlap so it’s stiff enough to feed through the printer. Trim any stray threads, load it and print a quote or design from a free printable. Peel off the paper backing and pop it into an 8 by 10 frame. You’ll have custom wall art in minutes.
Get the full tutorial at Cassie Smallwood.
15. Burlap Mantel Garland

A burlap mantel garland is a cheap way to soften a painted fireplace. Cut two yards of burlap into 4 inch strips and thread a fairly thick wire through each strip, punching through every couple of inches and pushing the folds tight. Ruffle the edges and twist the folds this way and that so it looks full. Wire it to the mantel and hide the attachment points with burlap bows. Hot glue a few starfish and shells on top for a beachy summer look.
Get the full tutorial at Cottage at the Crossroads.
16. Crochet Trimmed Burlap Placemats
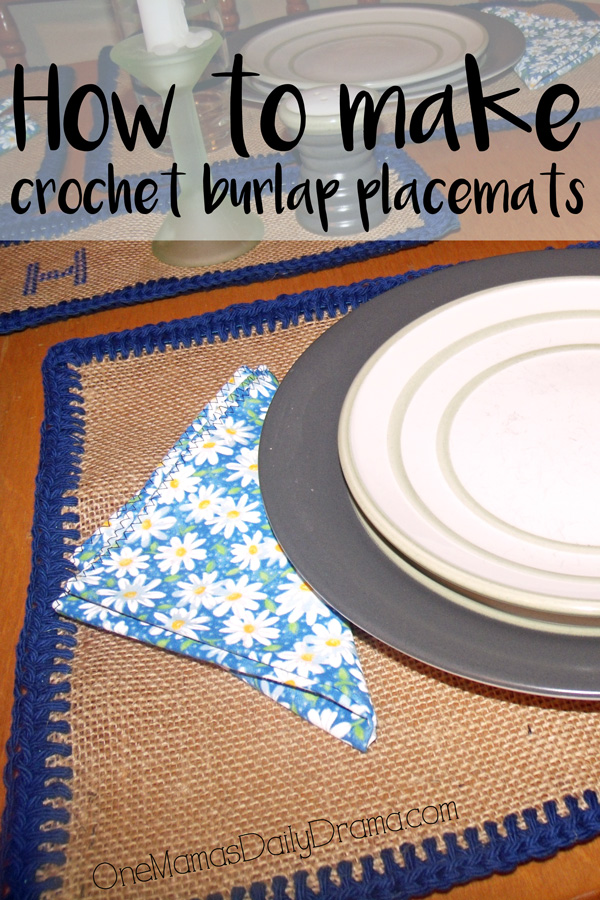
Want a table setting with a handmade touch? These crochet trimmed burlap placemats are cut 18 by 30 inches, and the tutorial has a tip that saves you a headache. Burlap comes apart if you crochet straight into it, so sew double-face bias tape over the edges first. Then a size H hook and cotton yarn work a single row of half double crochet into about every third hole. Pair them with simple sewn napkins and you have a beginner-friendly handmade gift set.
Get the full tutorial at One Mama's Daily Drama.
17. DIY Burlap Shades
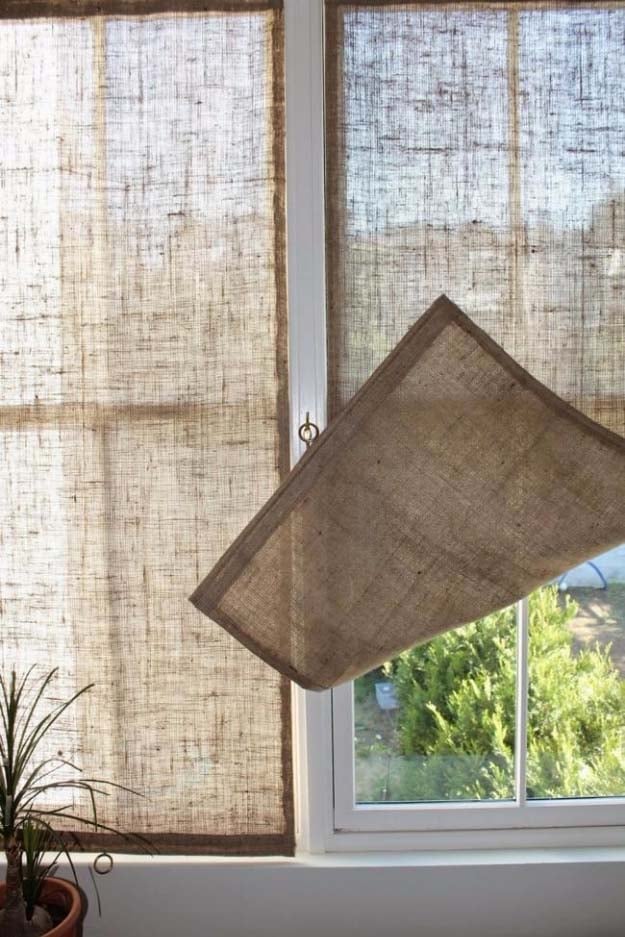
Need privacy without a pricey custom window treatment? These DIY burlap shades cost less than $20 a panel, and three panels took about five hours start to finish. Upholstery-grade all-cotton burlap (roughly a yard per window) hangs from spring tension rods, with a wooden dowel, a brass ring and a rope cleat for rigging. Burlap takes a seam easily, so it’s a friendly fabric to sew. You will, however, be covered in lint by the end. Worth it!
Get the full tutorial at Remodelista.
18. Stenciled Burlap Pillow Sleeve
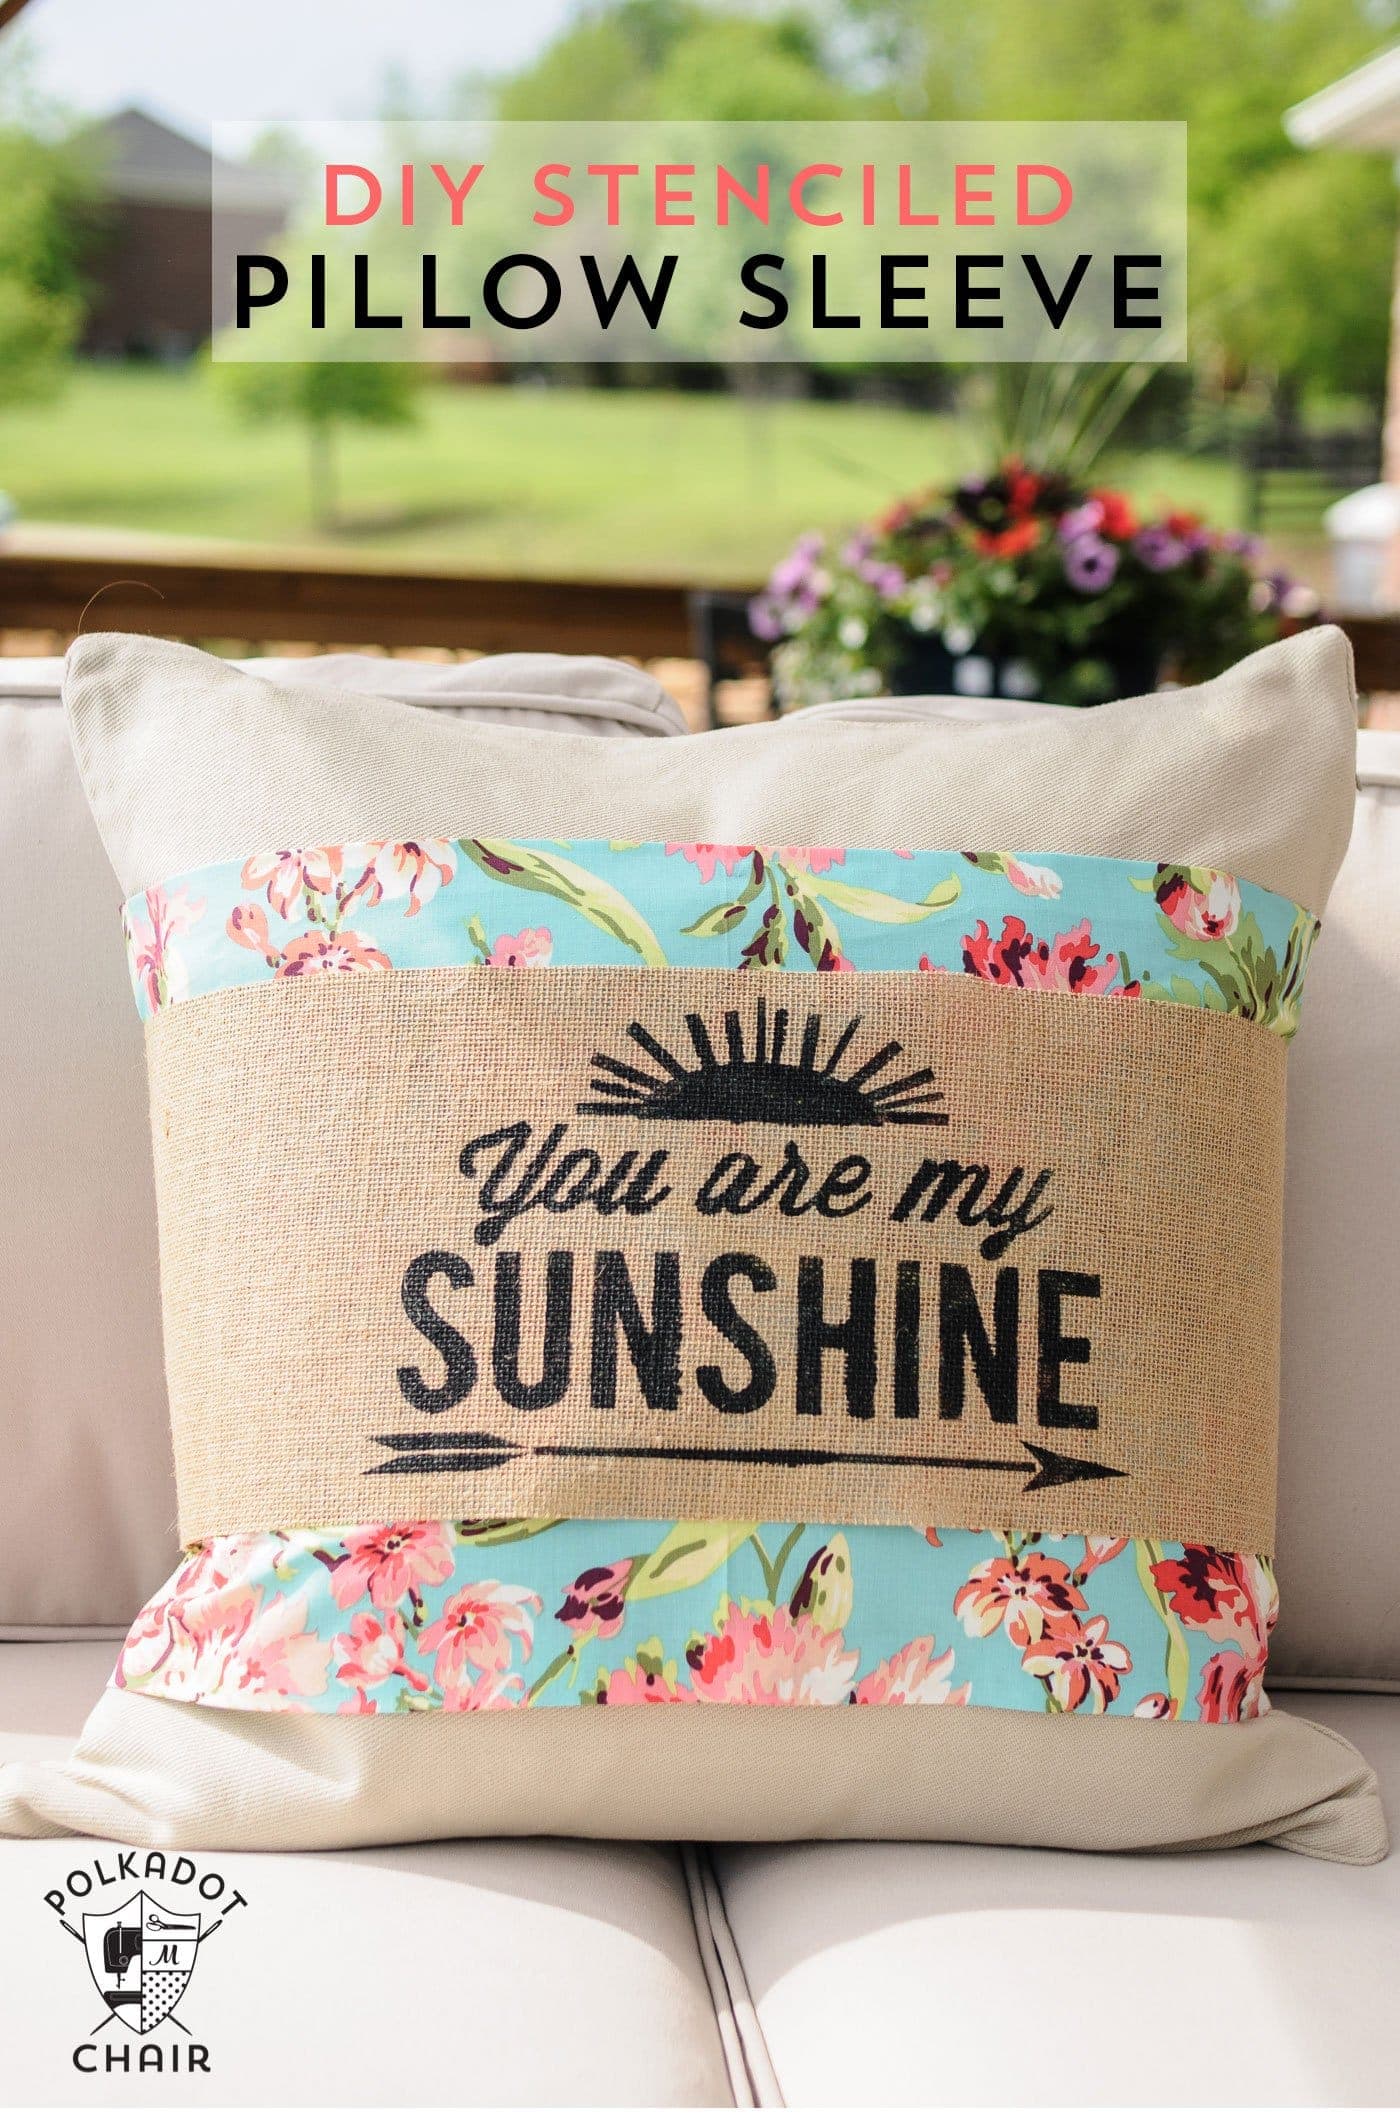
Tired of your throw pillows but not up for sewing all new covers? This stenciled burlap pillow sleeve wraps around a pillow you already own, and it has only two seams. A “You Are My Sunshine” saying is freezer paper stenciled onto burlap with fabric paint, then layered over a strip of colorful fabric that ties in the back. It’s also a sneaky way to cover a stain on an existing pillow (we’ve all got one). Swap them out with the seasons and holidays for a whole new look!
Get the full tutorial at The Polka Dot Chair.
19. No-Sew Burlap Curtains
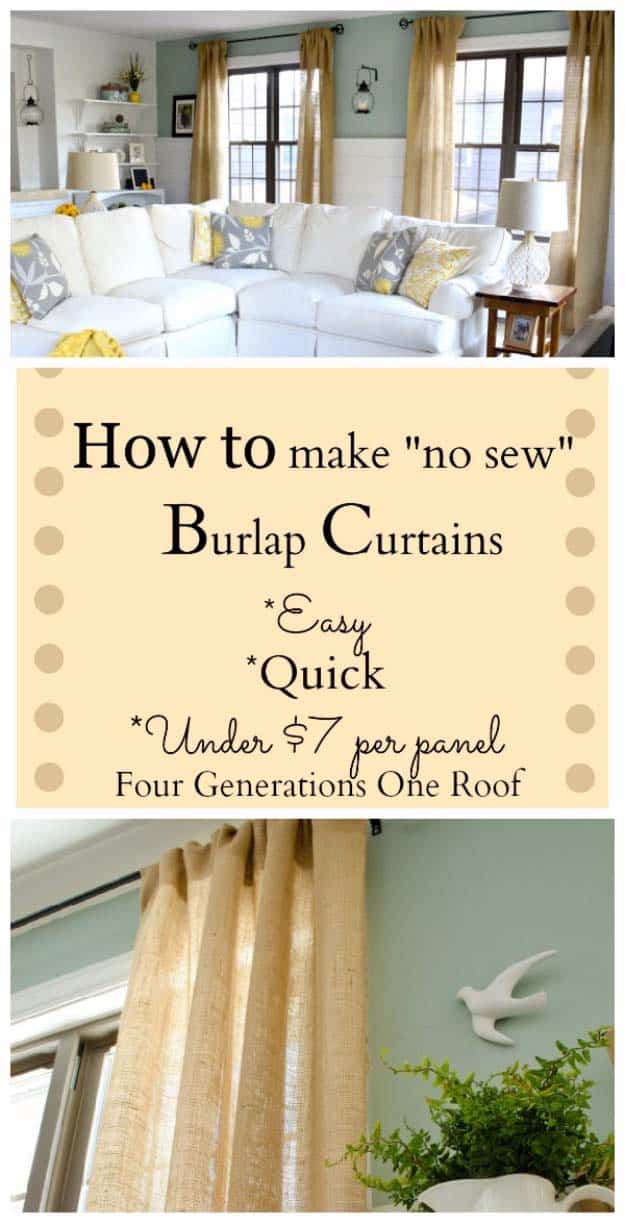
Love the look of burlap curtains but not the $55 panel price? These no-sew burlap curtains use inexpensive burlap fabric, about 3 1/2 yards per panel. You fold over a deep rod pocket at the top (about 10 inches) and iron it closed with Stitch Witchery fusible tape and a hot, steamy iron. The sides can stay frayed for a relaxed look. One heads up: burlap curtains can’t go in the wash, so give them a good shake outside a couple of times a year.
Get the full tutorial at Four Generations One Roof.
20. Woven Heart Burlap Pillow
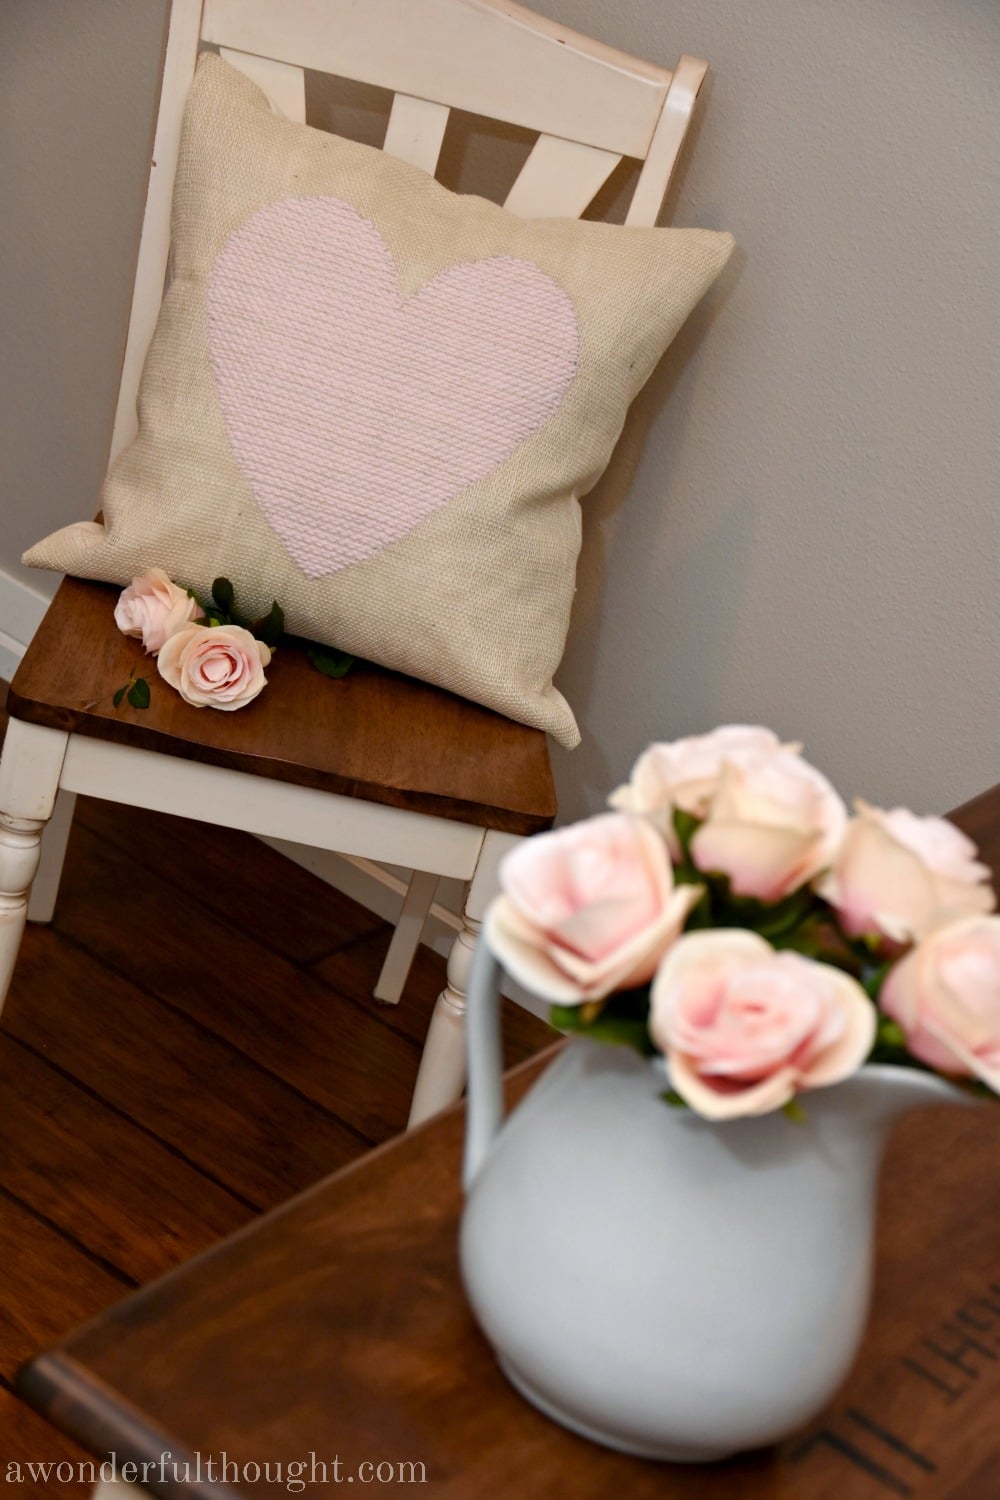
Want a Valentine’s pillow with real texture? This woven heart burlap pillow uses white burlap and pink yarn. You trace a heart, then weave yarn through with a large-eye blunt needle, skipping two squares of the burlap on each pass and staggering the rows. A muslin lining goes on the back of the burlap and a 14-inch zipper is sewn into the back panel rather than the bottom seam. Fair warning, a tight weave took about three days of a few hours each. So cozy, though!
Get the full tutorial at A Wonderful Thought.
21. Gold Foil Burlap Placemats
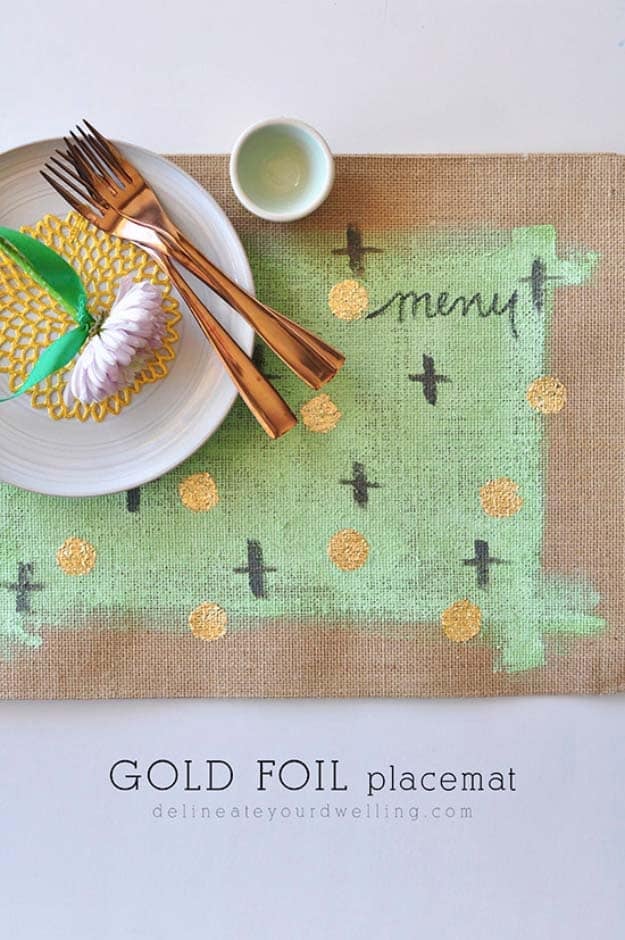
Want placemats that look fancy for a dinner party? These gold foil burlap placemats start with a store-bought burlap placemat. You paint a messy green rectangle, then dab metal leaf adhesive on with a wine cork to make polka dots. Once the glue goes tacky, lay gold leaf on top and brush away the extra (it likes to hide in the burlap’s crevices, so be patient). A few painted crosses and the word “menu” in dark gray finish them. Such a fun party touch!
Get the full tutorial at Delineate Your Dwelling.
22. Easy Burlap Vase Project
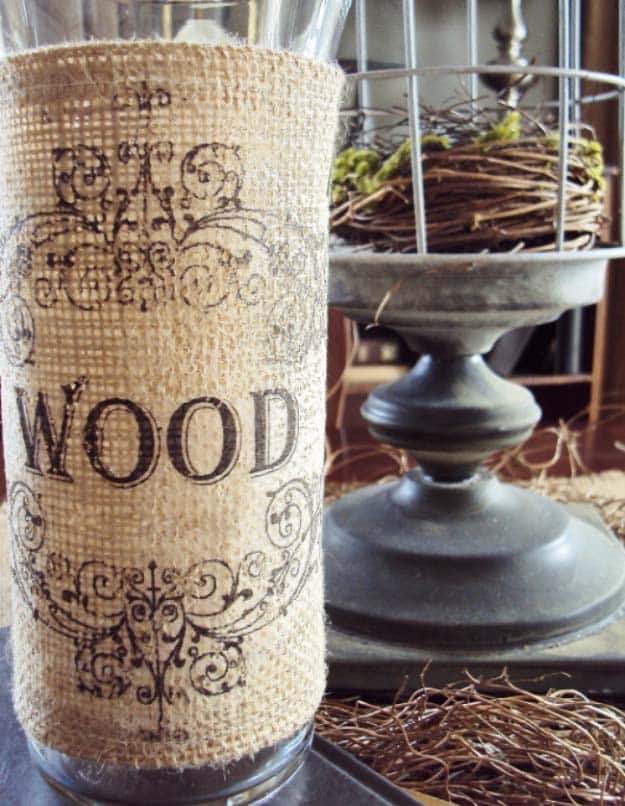
Got a plain dollar store vase? This easy burlap vase cover takes about 1/4 yard of burlap. Measure the vase’s height and circumference, add about 3/4 inch, cut a rectangle and fold over a 3/4-inch border to sew. Sew-on Velcro (not iron-on) at opposite ends holds it snug around the glass. Then print your design reversed on iron-on transfer sheets and press it on, like a name or a word. The cover pops off anytime for washing. Easy peasy!
Get the full tutorial at Thistlewood Farms.
23. Monogrammed Table Runner
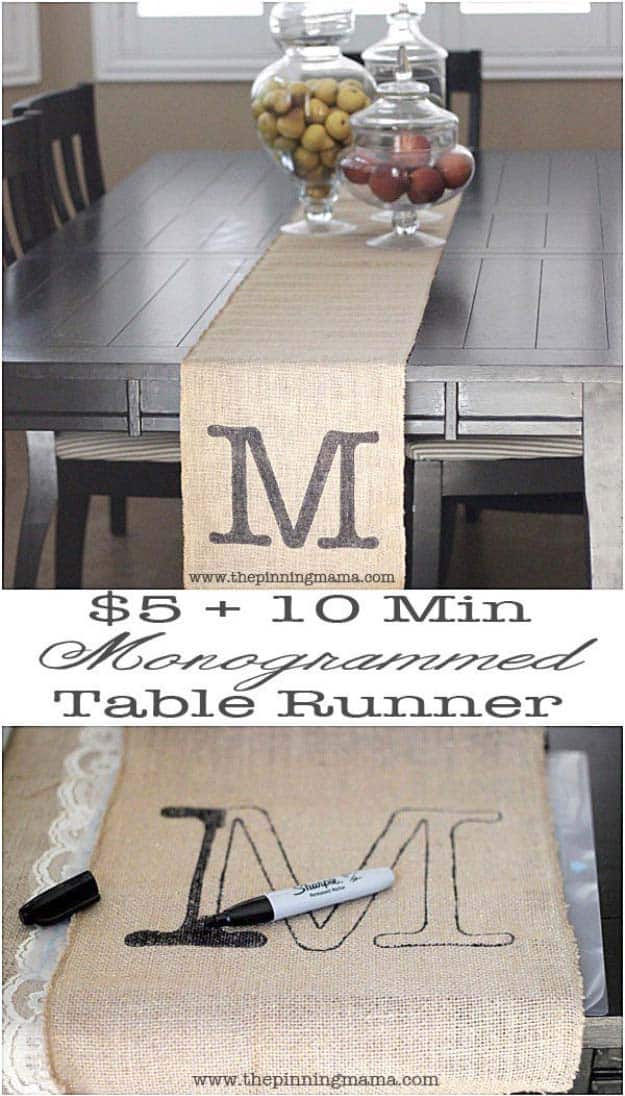
Need a custom table runner for a shower, a wedding or just fall? This monogrammed burlap table runner takes about $5 and 10 minutes. A plain burlap runner, a monogram stencil and a black Sharpie are all it takes. Lay the stencil where you want it (each end looks great), trace around the edges, lift it off and fill in the letter. Tape the stencil down if your design is fussy, because Sharpie is not very forgiving. Cleanup? Basically none. Love that!
Get the full tutorial at The Pinning Mama.






