A chippy salvaged board, an old window frame and a can of chalky paint go a long way, and that is the whole charm of DIY farmhouse decor. Worn, distressed finishes are practical as well as pretty, since every new ding just adds character. These 31 farmhouse decor ideas cover furniture builds (a weathered oak dining table and a barn door media console), lighting made from a ladder, a wood baluster and pipe fittings, signs you engrave, chalk or spell out in rope, and easy mason jar and jute rope crafts you can finish in an afternoon. One tip before you start: buy the salvaged wood and thrift pieces first and size the project to them, not the other way around. Old boards are rarely square, and that is exactly why they look so good.
1. Farmhouse Style Stool
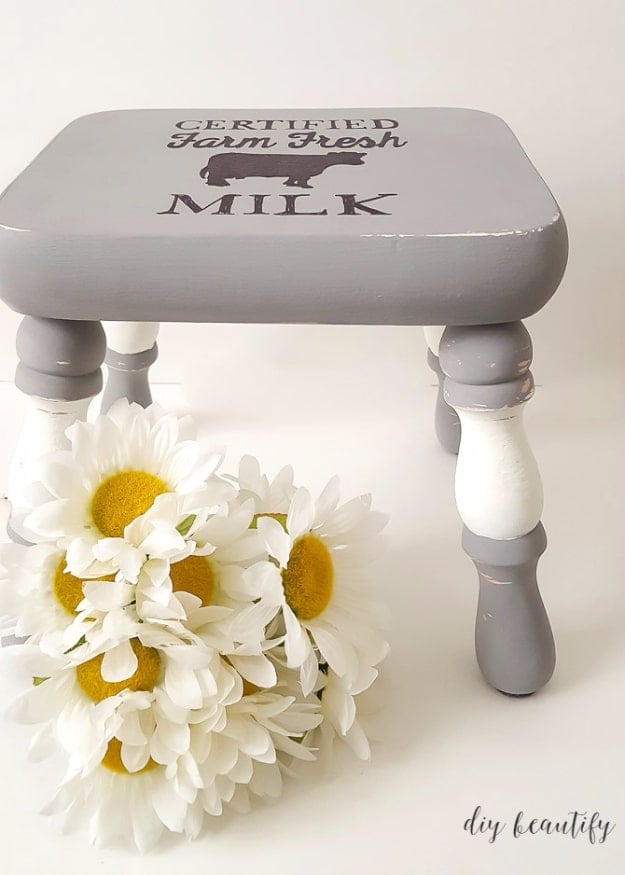
A farmhouse style stool starts as any plain wooden step stool, even a tired pink one. Paint it in two farmhouse shades, gray on the top and legs with creamy white accents, using a chalky furniture paint that needs no wax. Once dry, rub the edges with a sanding sponge so the white and wood peek through (go gently, chalky paint distresses fast). Trace a vintage cow graphic onto the seat and fill it in with a black Sharpie, then finish with a glaze wiped on with a damp rag.
Get the full tutorial at DIY Beautify.
2. DIY Farmhouse Table

This DIY farmhouse table follows free online build plans with two smart tweaks: the stretcher supports move to the inside so fewer screws show, and two extra 2×4 supports go in under the tabletop for strength. After building, sand it, then distress it hard (banging it with a rock adds believable dings). Brush on pre-stain wood conditioner and a custom stain of 1 part dark walnut to 6 parts weathered oak for an aged gray look that still shows the grain. Seal with two coats of matte polyurethane, never gloss.
Get the full tutorial at Love Grows Wild.
3. Rustic Ladder Chandelier

A rustic ladder chandelier turns an old wooden ladder into the prettiest light catcher in the room. Hang the ladder flat from the ceiling with sturdy hooks and rope, close to a window so it can catch the afternoon sun. Wind a strand of tiny fairy lights along the rungs and rails, then dangle crystals from it at different lengths. Thrifted chandelier drops, vintage prisms and even crystal Christmas ornaments all work. It can stay up all year long, sparkling by day and glowing at night.
Get the full tutorial at What Meegan Makes.
4. Stylish Farmhouse Canisters

Stylish farmhouse canisters start as a dated thrift store canister set. Set the pieces upside down on newspaper and spray them all white, lids and handles included, so nothing needs taping off. Let them dry a few hours, then sand lightly along the edges and rims to add a little worn character. Finish by stenciling Flour, Sugar, Coffee and Tea in black on the fronts. One can of spray paint and a stencil set turn a dated set into something any farmhouse kitchen would love.
Get the full tutorial at Twelve On Main.
5. Mason Jar Fairy Lights
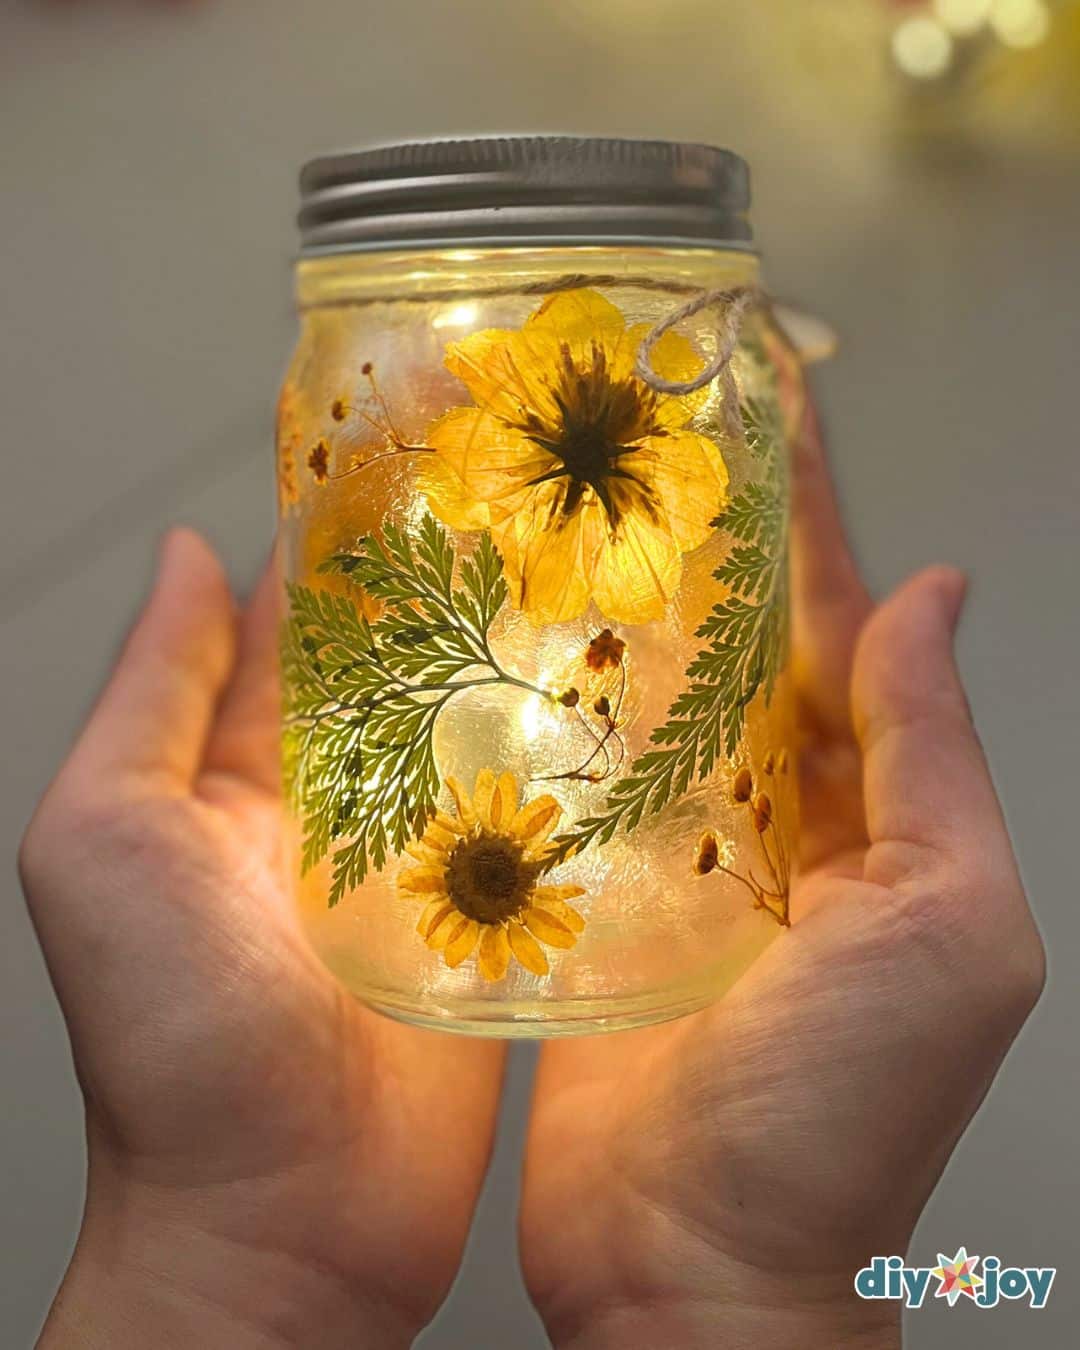
Mason jar fairy lights with pressed flowers glow like a little garden in a jar. Clean the jar well and let it dry completely. Lay out pressed flowers and ferns to plan the design, then brush a thin layer of Mod Podge on the glass and press each flower in place. Brush another coat over the top to seal them down. Once dry, tuck a strand of battery fairy lights inside. Pressed blooms from the garden are perfect here, and the jars make lovely night lights or gifts.
Get the full tutorial at DIY JOY.
6. Farmhouse Bathroom Mirror Tutorial

A farmhouse bathroom mirror frame dresses up a plain builder grade mirror for the cost of a few 1x4s. Measure the mirror, then cut the boards with 45 degree miters, making sure the long side of each cut matches the mirror’s width or height. Flip the boards face down, add wood glue to each mitered joint and staple across the seam to hold it while the glue dries. Stain or finish the wood, then add spray painted L shaped corner braces for that rustic farmhouse look.
Get the full tutorial at The Crafty Blog Stalker.
7. Farmhouse Wood Tote Centerpiece

A farmhouse wood tote is built from scrap 1×8, hobby board and a 1 inch dowel. Cut two 12 inch end pieces with a peaked top and a 22 1/2 inch bottom, and drill a hole near the top of each end for the dowel handle. Glue and nail the ends to the bottom, set the dowel, then add two strips of hobby board to each side with a 1 inch gap. Paint it, layer a lighter color on top and sand the edges for a chippy finish.
Get the full tutorial at Refresh Restyle.
8. Kitchen Wall Display

This kitchen wall display starts with one board. Wash an old piece of barn wood, seal it with water based poly and screw on three mismatched hooks, then hang wooden breadboards and cutting boards from them. Rub the boards with coconut oil first to bring out the warm grain. Layer a green shutter above the rail and a vintage sign at the top, and lean a chippy step stool to one side. Collect a mix of round and paddle shapes so the display looks gathered over years.
Get the full tutorial at Organized Clutter.
9. Industrial Spool Clock

An industrial spool clock turns one side of a big wooden cable spool into a statement wall clock. Remove the bolts (a little oil helps loosen them) and take the spool apart, which gives two round clock faces. Cut a rough circle from a scrap of the spool to fill the center hole, drill through it and hammer it into place. Then add a high torque clock movement sized to the wood’s thickness, plus long curvy hands, following the kit’s instructions. The weathered stamped lettering does the rest.
Get the full tutorial at Maison de Pax.
10. DIY Industrial Pendant Light

This DIY industrial pendant light costs under $10 per fixture and starts with a builder grade mini pendant. Tape off the electrical parts and spray the fixture with two coats of oil rubbed bronze paint, then let it dry a full 24 hours. Wrap 3/8 inch sisal rope tightly around the downrod with a high temp glue gun, using about a dime size of glue per wrap and holding the first few turns in place. Screw on a metal lamp guard and add an Edison bulb.
Get the full tutorial at Bless'er House.
11. Decoupage Flower Vase
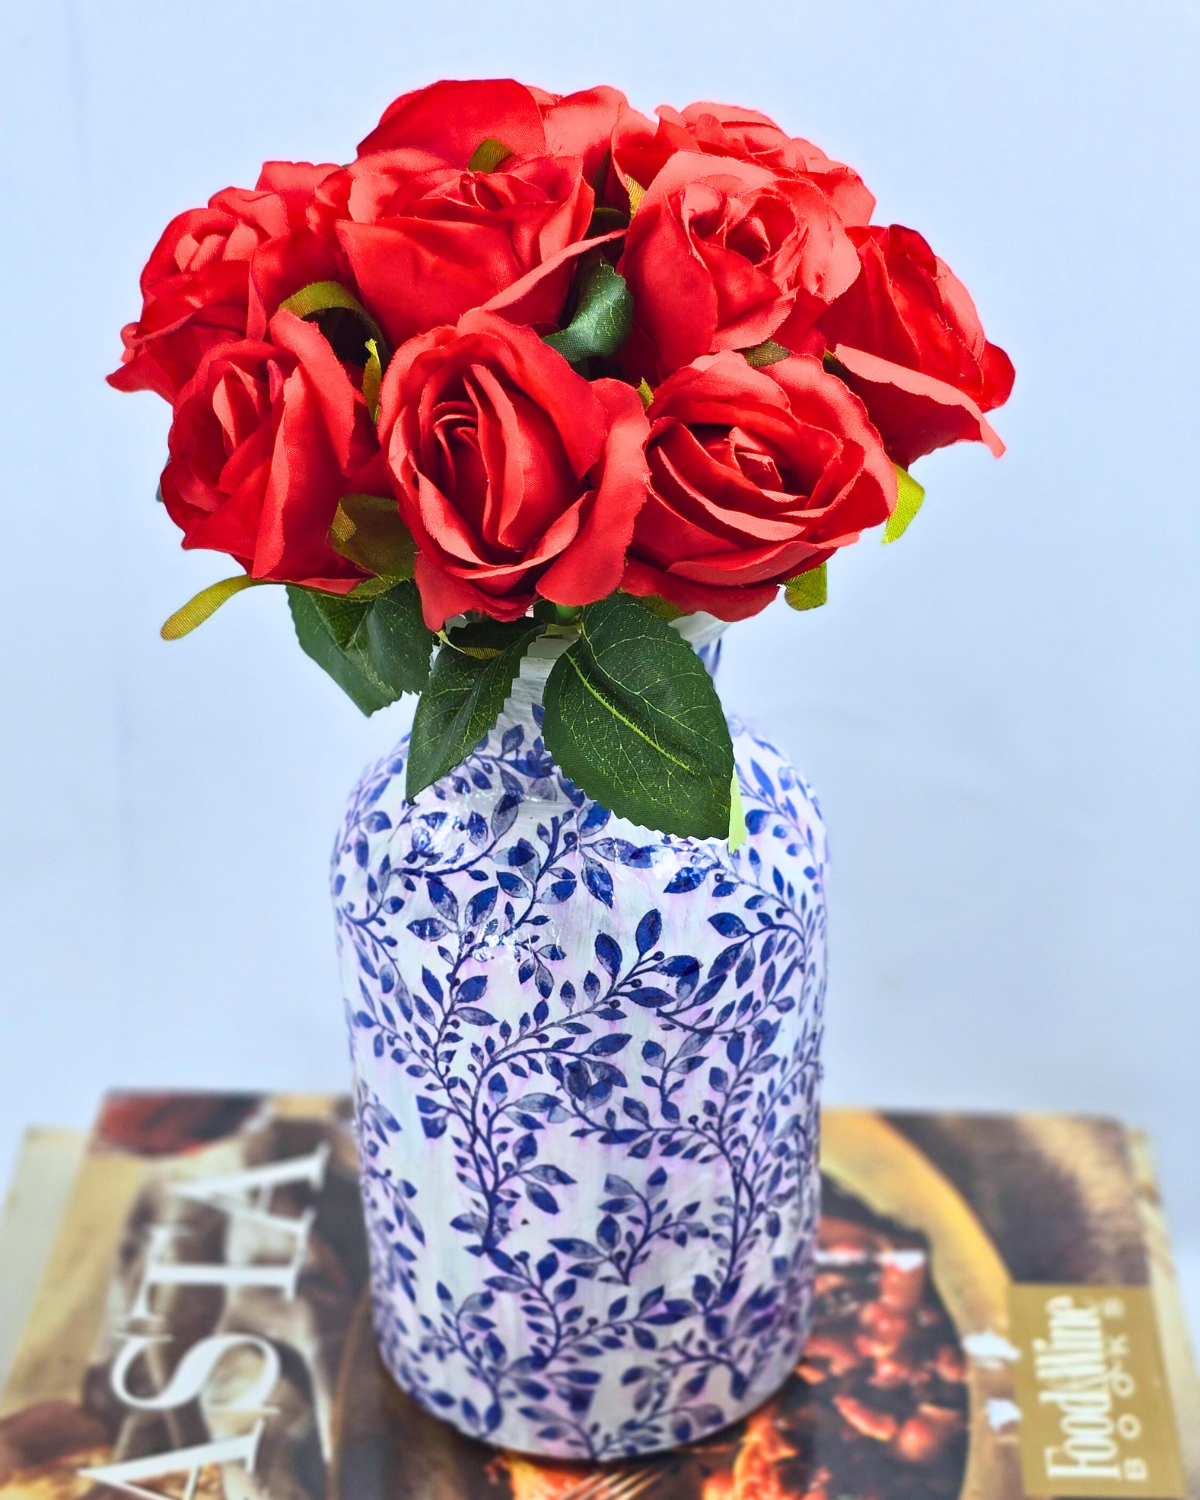
A decoupage flower vase starts as a cheap glass jar and a pretty paper napkin. Paint the outside of the jar white, adding a second coat if the glass shows through. Cut the napkin pattern out close to the design and peel away the backing ply so only the thin printed layer is left. Brush Mod Podge (or a white glue and water mix) on the jar, smooth the napkin on, then brush more over the top until it settles flat. Blue and white patterns look like vintage china.
Get the full tutorial at DIY JOY.
12. Chippy Window Love With Chicken Wire And Jute

An old window frame with no glass gets a second life as a photo and memo board. Staple chicken wire across the back of the two small openings so cards and photos can clip right onto the mesh. Across the large opening, staple two strands of jute rope and hang printables and photos from them with mini clothespins. Little metal shower curtain clips hold more photos along the bottom. Leave the chippy paint as is, since that worn finish is the whole charm, and add a burlap banner.
Get the full tutorial at Kammy's Korner.
13. DIY Rustic Farmhouse Chalkboard

A DIY rustic farmhouse chalkboard needs no power tools, just a 20 by 48 inch board, stain, painter’s tape and chalkboard paint. Lightly sand the board, wipe it down and stain it, adding a second coat for rich color. Once dry, tape off a 3 inch border all around and paint the center with chalkboard paint, brushing away from the tape. Pull the tape right away, then re-tape and add a second coat. Hang it with screw eye hooks and loops of twine.
Get the full tutorial at Our Handcrafted Life.
14. Fairy Jar Candle Lantern

A fairy jar candle lantern glows with a little silhouette inside. Print a fairy shape (or trees, mushrooms or a tiny house) on cardstock and cut it out. Paint the inside of the jar white with acrylic paint or primer, keeping it thin enough for light to pass through. Add faux moss to the bottom, hot glue the silhouette to the inside of the glass and tuck in a few leaves. Drop in a tea light or fairy lights, then tie twine around the neck with leaves glued on.
Get the full tutorial at DIY JOY.
15. DIY Farmhouse Frames

DIY farmhouse frames may be the easiest piece of rustic art there is. Start with salvaged wood with real history, like chippy pieces of an old porch column. Set a miter saw to 45 degrees and cut both ends of each piece to the frame size you want. Then screw flat brackets across the back of each corner with a drill to join the four sides. Leave the frame empty and lean it as art, or layer one inside another.
Get the full tutorial at Live Laugh Rowe.
16. DIY String Art
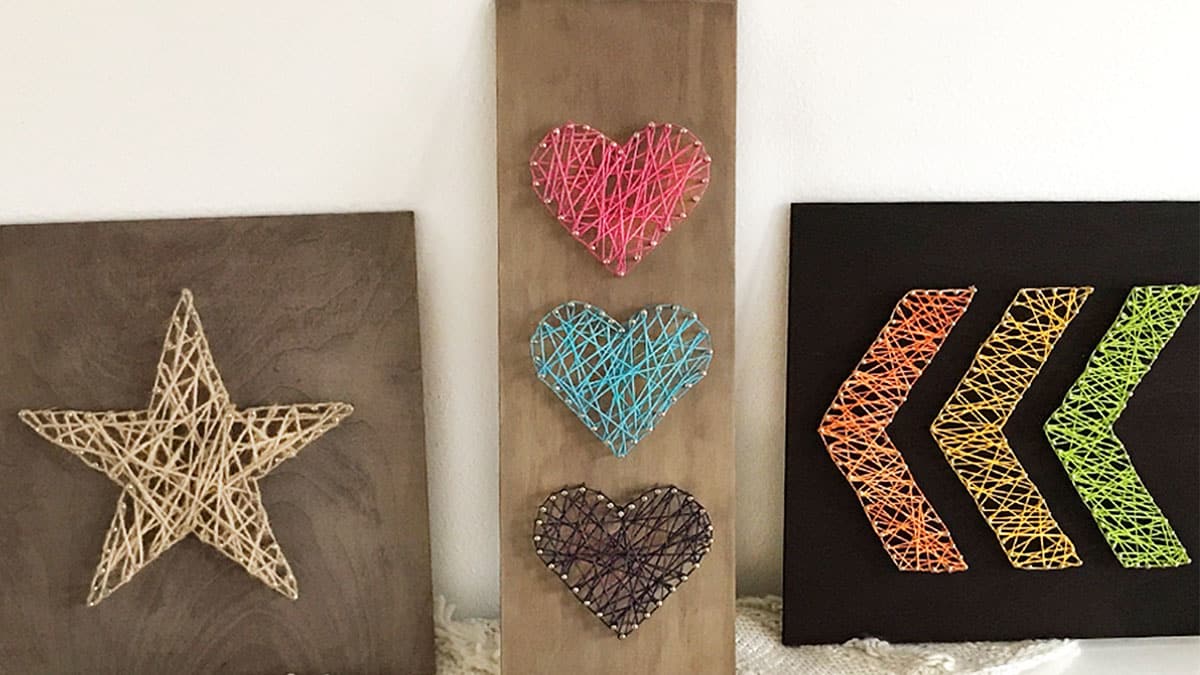
DIY string art needs no artistic skill, just a wood plank, small nails, a printed shape and twine or embroidery thread. Tape the printed graphic to the board and hammer nails along the outline, then tear the paper away. Tie the thread to one nail and wrap back and forth across the shape until it fills in. A star in natural twine looks rustic, while hearts and chevrons pop in bright thread. Stain or paint the board first for a finished farmhouse look.
Get the full tutorial at DIY JOY.
17. DIY Wooden Arrow Tutorial

DIY wooden arrows take about 20 minutes of active time plus drying. Use 1x4s or thin craft boards. Mark the center of each board and cut it in half with the miter saw set to 45 degrees, which gives two pointed pieces. Two 24 inch boards make one arrow. Stain the pieces (dark walnut looks great) with a lint free cloth and skip the sealer for a matte finish. Join each arrow’s halves with mending plates on the back and add a sawtooth hanger.
Get the full tutorial at The Crafty Blog Stalker.
18. Industrial Cart Coffee Table DIY

An industrial cart coffee table starts with a vintage metal factory cart. Measure the opening, then cut 2×12 boards to fill it with a 2×2 strip down the middle. Mark rounded corners from the bottom and cut them with a jigsaw, sand the pieces smooth and stain them. Spray the center strip silver. Clean the metal cart and spray it with a clear protective coat to seal in the rust without losing it. Then just wiggle the boards snugly into the frame.
Get the full tutorial at Refresh Restyle.
19. DIY Planked Walls

DIY planked walls use 4×8 sheets of 1/4 inch underlayment cut into 8 inch strips (many hardware stores will cut them). Remove the trim and paint the wall white first so the gaps don’t show gray. Sand the plank edges, then level the first row carefully and nail each plank on with a brad nailer. Use nickels as spacers between rows and ends, and start each new row with the leftover piece from the last so the seams fall randomly. Roll paint over everything at once.
Get the full tutorial at Love Grows Wild.
20. Flower Pot Candy Jars
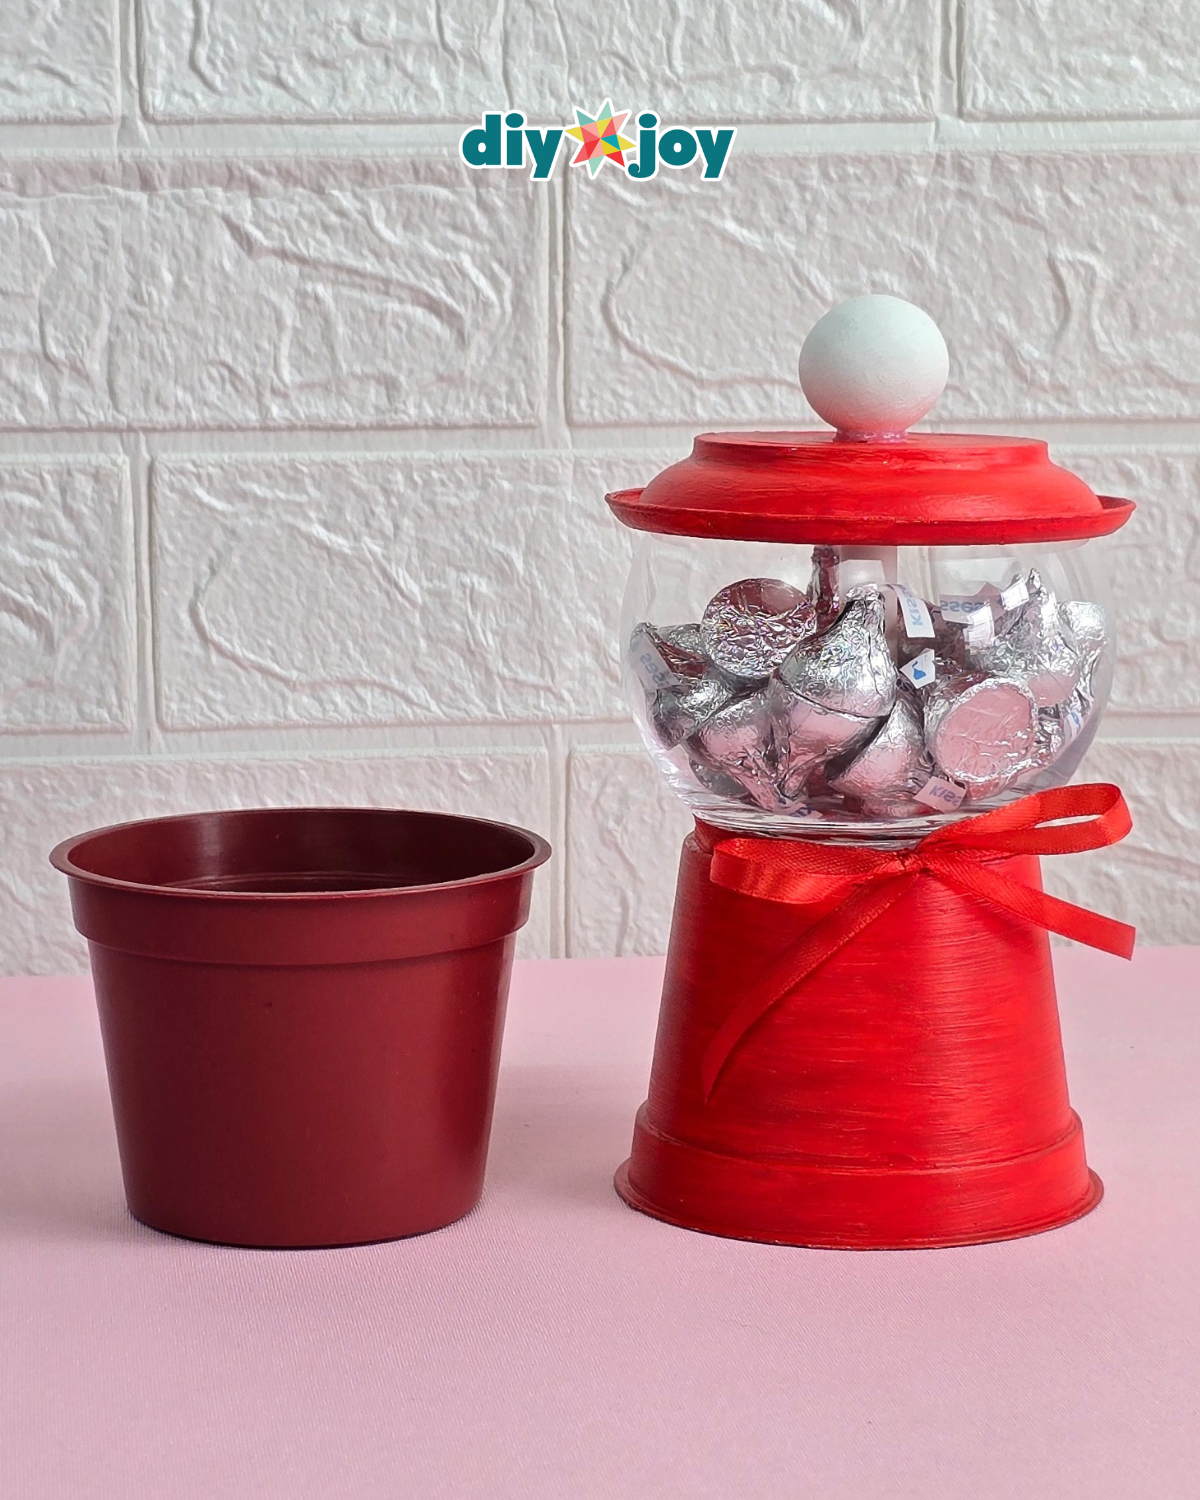
A flower pot candy jar looks just like an old fashioned gumball machine. Prime and paint a flower pot, a tray and a wooden ball in the same color. Flip the tray over and glue the ball to the center as a knob, then glue a straw cut to the bowl’s height underneath to keep everything aligned. Join a small glass fish bowl to the upside down pot with E6000 plus hot glue around it. Tie a ribbon at the seam, fill with candy and cap it.
Get the full tutorial at DIY JOY.
21. DIY Planter Box
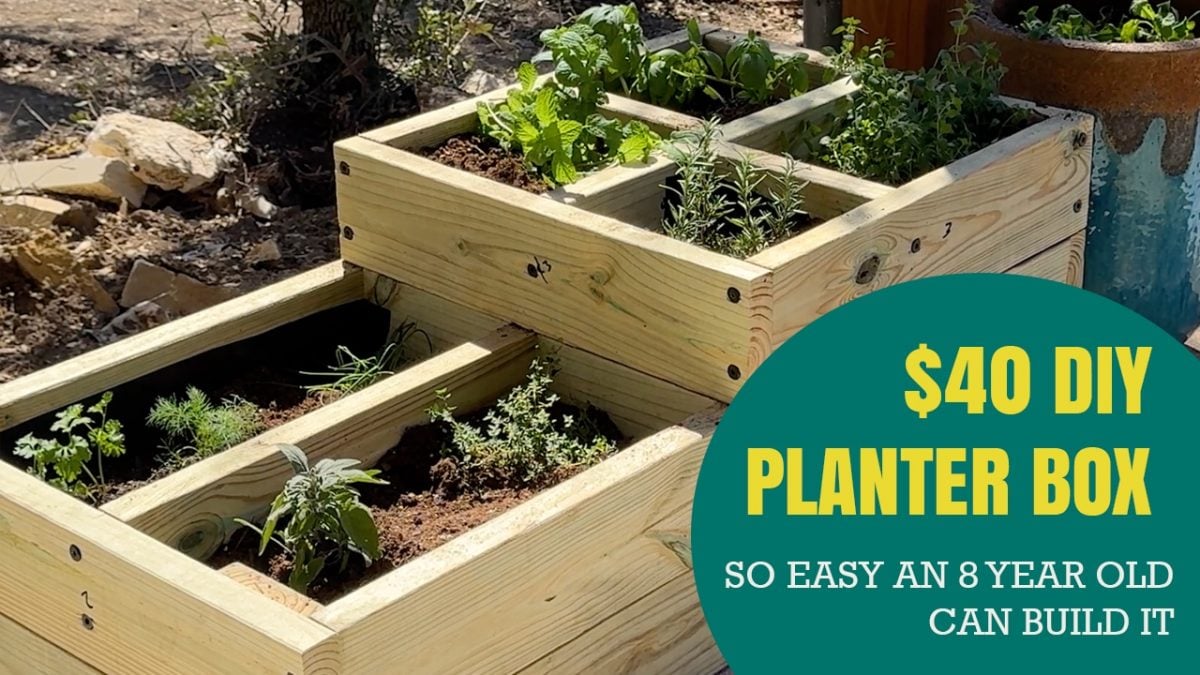
This two tier DIY planter box costs under $40 and is simple enough that an 8 year old can help build it. It takes five 2×6 boards, a saw, a drill and screws. Cut the boards to length, screw them into a lower open box and a smaller upper box, then add dividers to make separate planting pockets. Set the upper tier across the back of the lower one so plants step up. Fill with soil and plant herbs, vegetables or flowers.
Get the full tutorial at DIY JOY.
22. DIY Flower Light

A DIY flower light turns a faux rose into a glowing lamp with a battery tea light inside. Take the rose apart and cut it into petals. Cut the handles off four clear plastic spoons, glue a large petal to the back of each and hot glue the spoons around the tea light. Cover the base with more petals, layering yellow then pink and following the original flower’s layers. Glue the sepals and leaves around the bottom, trim and switch it on.
Get the full tutorial at DIY JOY.
23. Reclaimed Wood Love Rope Sign

A reclaimed wood love rope sign starts with three old fence planks and heavy twine. Sketch the word on paper first in a continuous script, so the rope can bend through every letter without sharp corners (Love ending in a heart works perfectly). Write it on the boards in white chalk, then lay hot glue a few inches at a time along the line and press the rope into it. Join the planks with two support boards screwed across the back and hang it anywhere.
Get the full tutorial at Funky Junk Interiors.
24. DIY Window Map

A DIY window map pairs an old multi pane window with a vintage map. Find a map that fits the window, trimming as needed (trial and error is part of it). Mount the map on a piece of foam core cut to the window’s opening, then set it in behind the frame and secure it with glazing points or small nails. The foam core keeps the map flat and protects the old window, so the map can be swapped out later. Leave the chippy paint for character.
Get the full tutorial at Robb Restyle.
25. DIY Jute Rope Tray

A DIY jute rope tray is made with Dollar Tree supplies and Mod Podge. Wrap a tray completely in cling wrap so nothing sticks to it, then brush on a generous coat of Mod Podge. Coil the end of the jute rope into a tight spiral and keep winding outward, adding glue as you go and pressing it flat. Cut the rope once the tray is covered, glue down the end and coat everything again. Let it dry under weights so it stays flat.
Get the full tutorial at DIY JOY.
26. Industrial Bathroom Light Fixture

This industrial bathroom light fixture is built from a 4 foot 1×6 pine board stained dark walnut, mounted on 2×2 spacers. Mark the board at 8 inch increments for five lights. Each light is a black 1/2 inch flange, a 4 inch nipple and a reducing elbow pointing down to an outdoor light socket, with silver screws spray painted to match. Edison bulbs finish it. The whole fixture cost about $67. Have an electrician do or guide the wiring.
Get the full tutorial at Snazzy Little Things.
27. DIY Welcome Farmhouse Sign
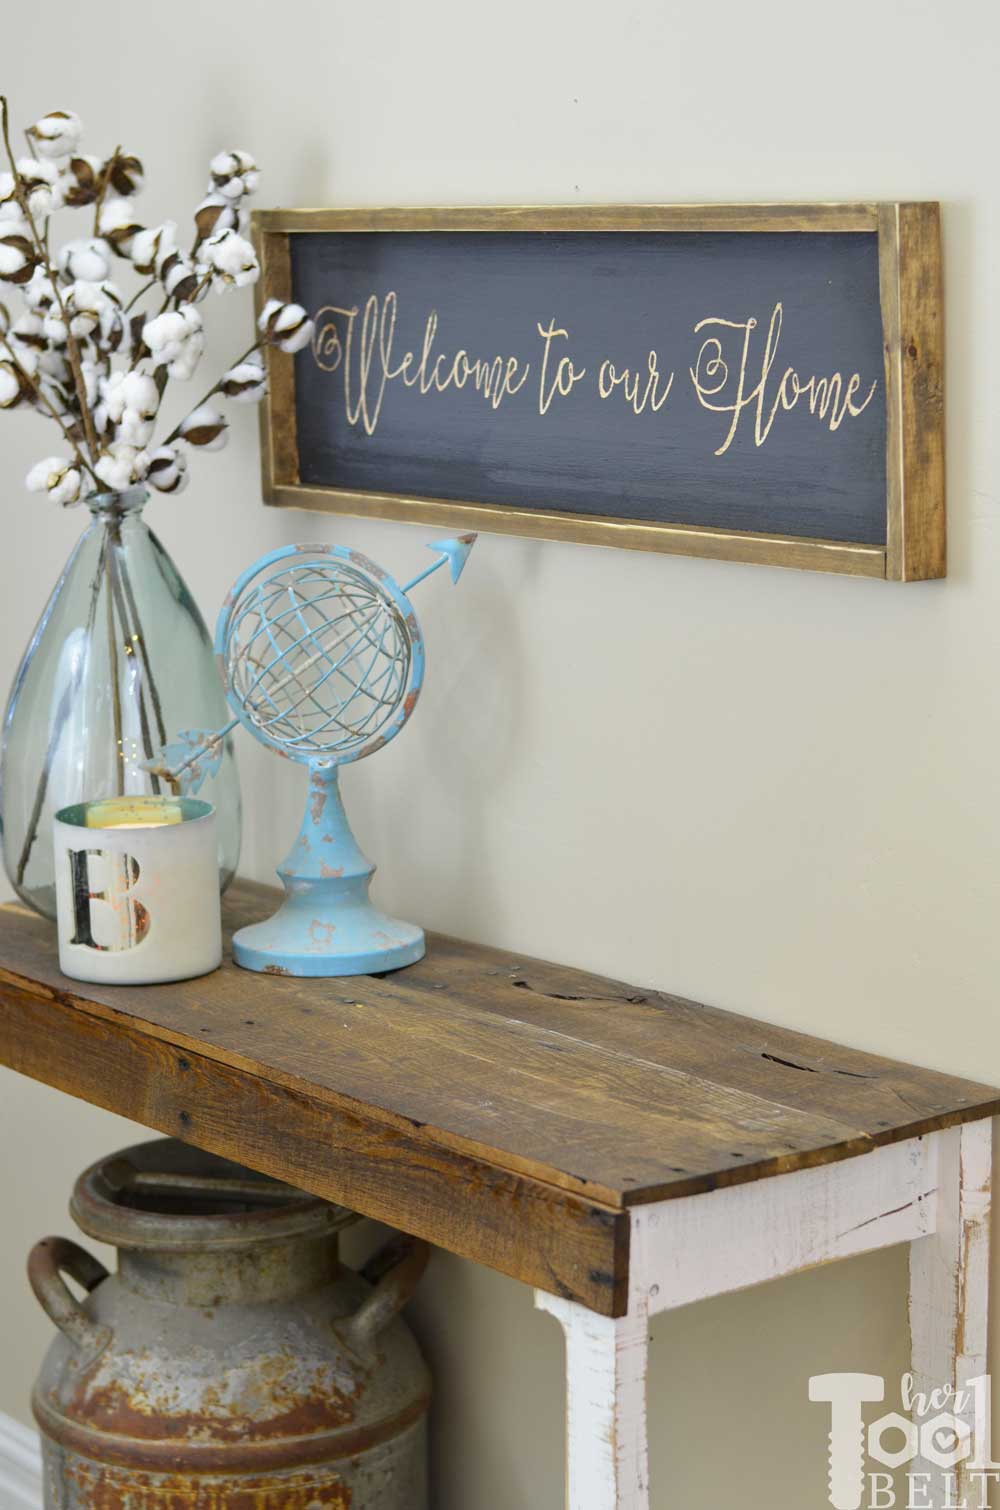
A DIY welcome farmhouse sign is engraved, not painted. Cut 1/2 inch plywood to 8 1/2 by 30 inches and paint it dark gray with a chalky finish. Print the free Welcome to our Home pattern, rub white chalk on the back and trace it onto the board to transfer the letters. Carve them with a rotary tool and engraving bit, which reveals the light wood underneath. Frame the sign with 1×2 boards glued and brad nailed on, then stain the frame and hang it.
Get the full tutorial at Her Tool Belt.
28. DIY Farmhouse 2-Tier Shelves
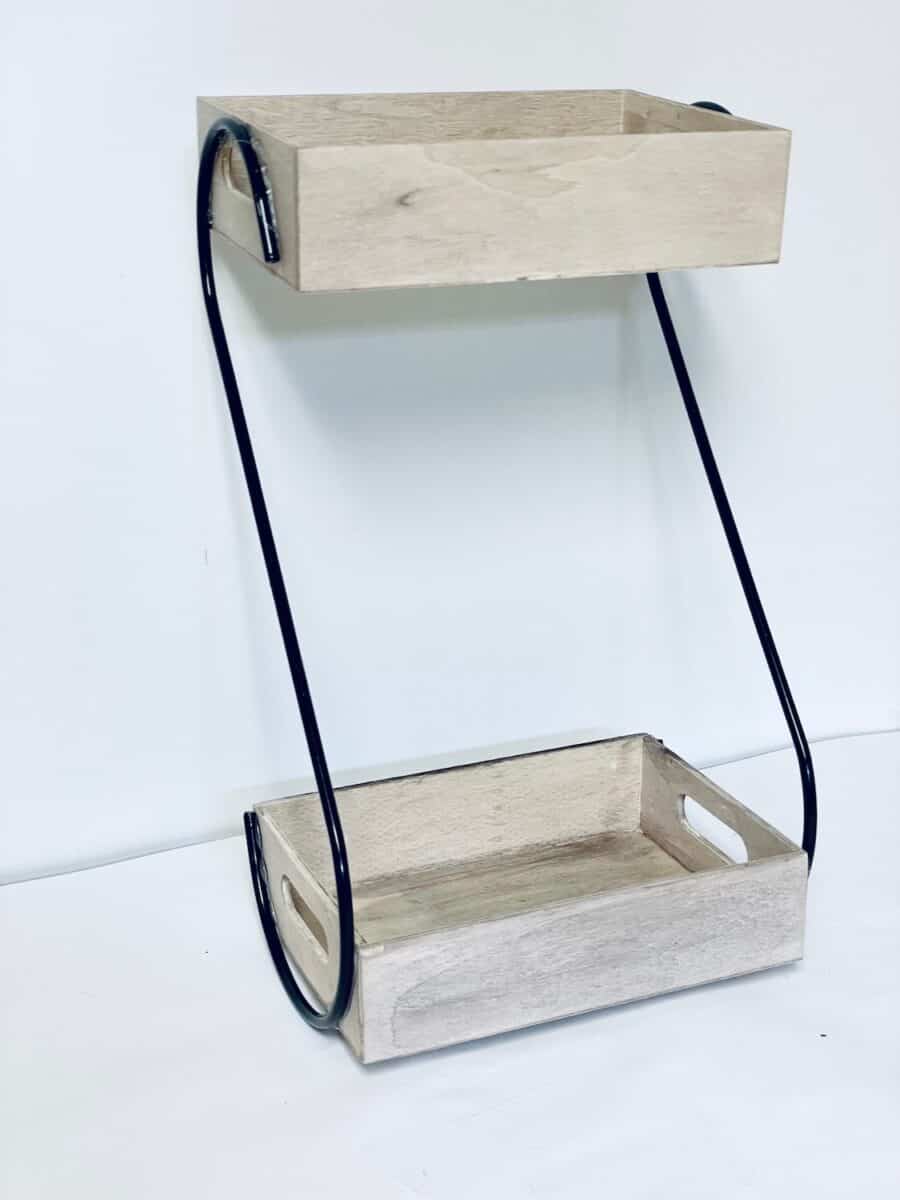
DIY farmhouse 2-tier shelves come together from four Dollar Tree pieces: two wooden rectangle boxes and two S shaped metal garden hooks. Mix a few drops of burnt umber acrylic paint into about 1/2 cup of water to make a light stain and brush it over both boxes, then let them dry about 20 minutes. Hot glue the small end of each hook to the sides of the top box and the larger curve to the bottom box. Let it set fully before loading it up.
Get the full tutorial at Single Girl's DIY.
29. DIY Farmhouse Media Console
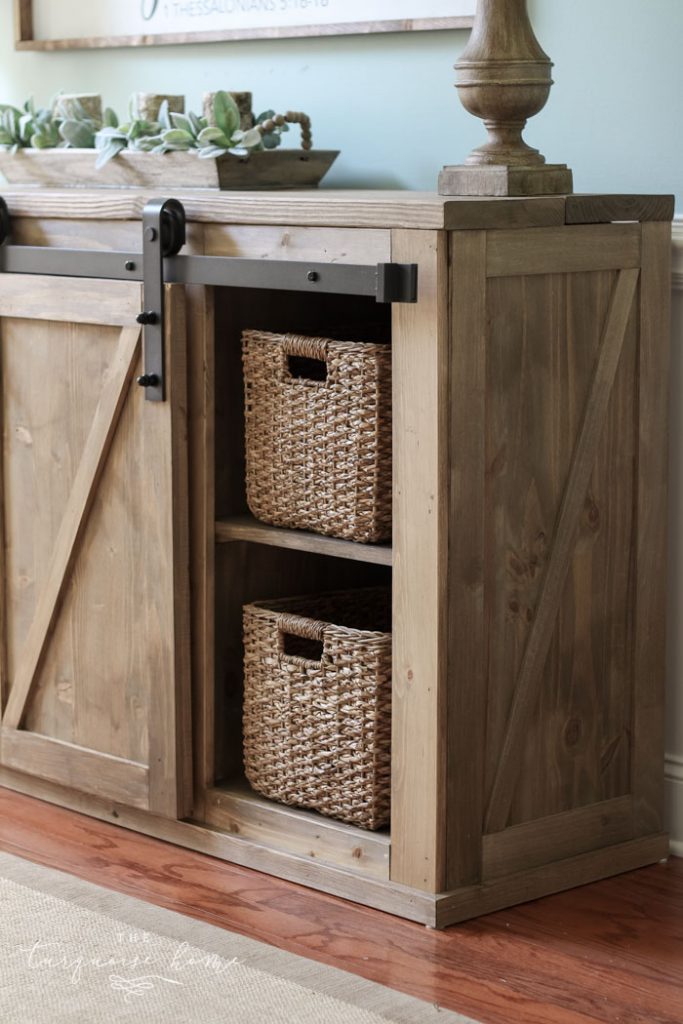
This DIY farmhouse media console is built from free online console plans, modified to fit a 6.6 foot sliding barn door hardware set (choose the hardware first, since it sets the length). Assemble a 2×3 frame with screws and wood glue, then add a 1×4 face frame, side panels and shelves on cleats. Plywood strips form the back, a 2×10 top goes on with pocket holes and project panel doors slide on the barn door track. Woven baskets fill the open shelves.
Get the full tutorial at The Turquoise Home.
30. DIY Wooden House Centerpiece
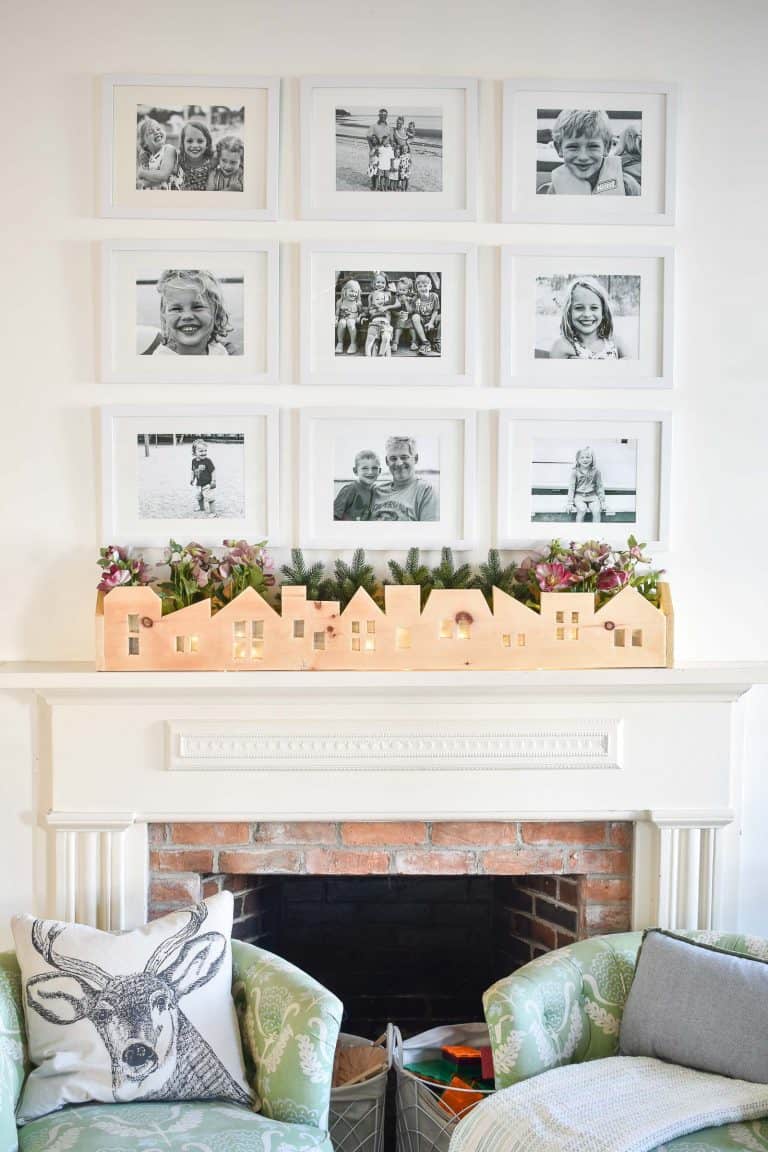
A DIY wooden house centerpiece is cut from one piece of scrap 1×8 lumber, about 4 feet long. Mark a guideline 4 inches up, then draw a skyline of roofs above it with varied heights and angles and cut it out with a jigsaw. Trace windows with a stencil, drill holes in opposite corners of each one and cut them out with the jigsaw. Sand and file the edges smooth. Assemble the sides into a long box with pocket holes and fill it with greenery and flowers.
Get the full tutorial at At Charlotte's House.
31. Farmhouse Lamp From A Wood Baluster
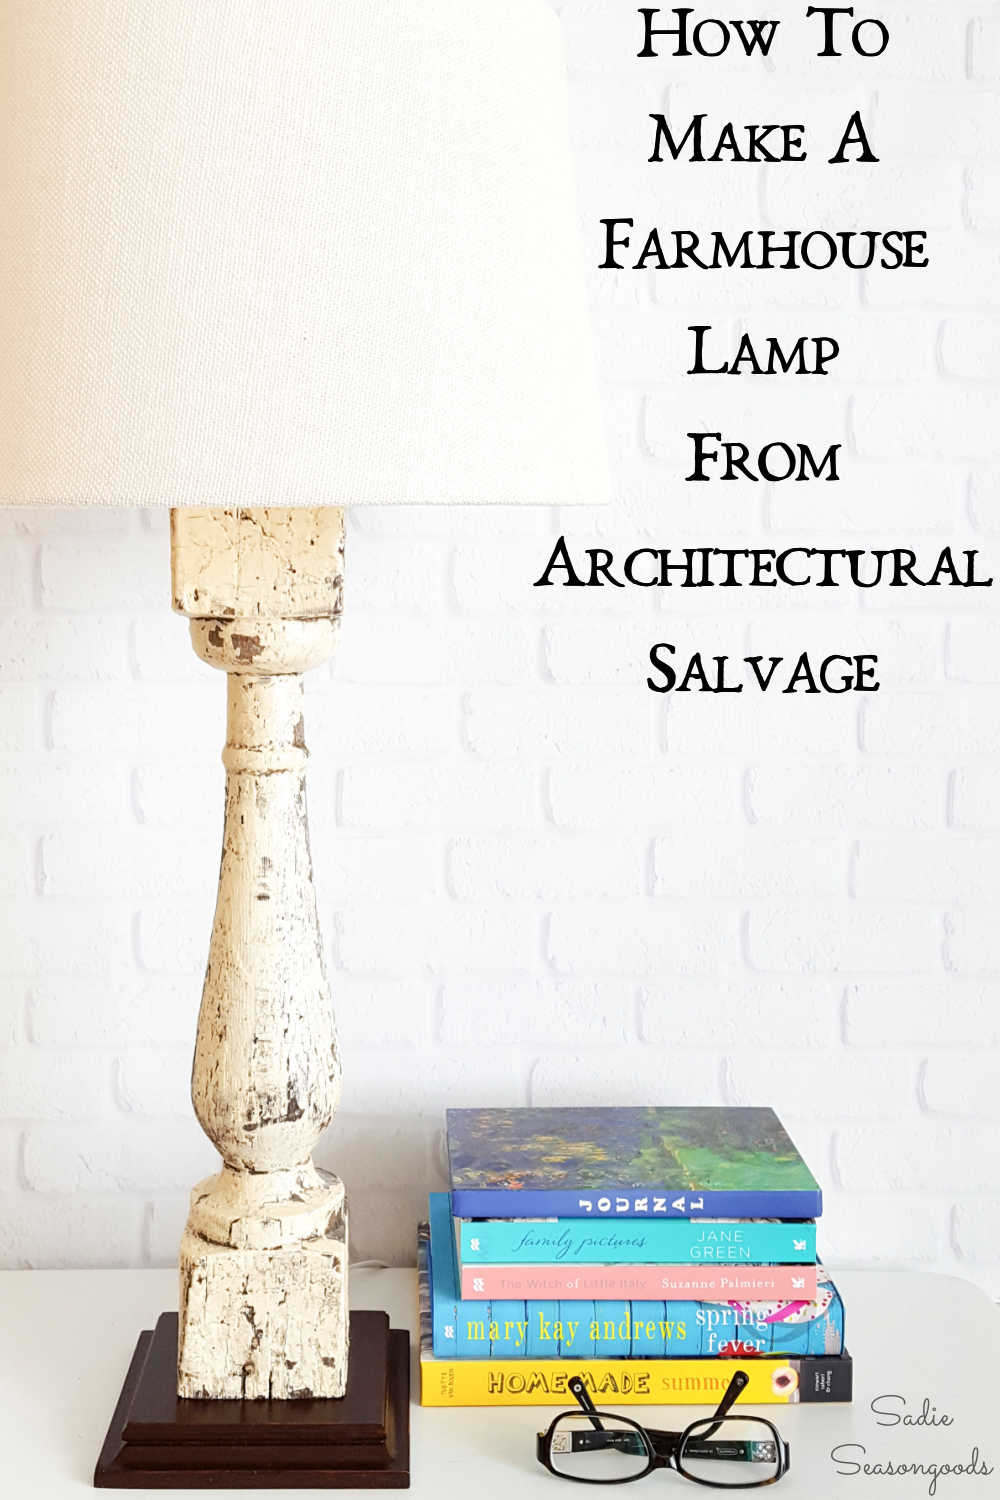
A farmhouse lamp from a wood baluster gives architectural salvage a new job. Find the exact center of each end with a speed square and drill pilot holes. Use a portable drill guide and a long auger style bit to drill straight through the baluster, working in from both ends until the holes meet in the middle. It’s slow, so let the drill do the work. Stain a wooden base dark, attach it to the bottom, then thread a lamp kit through and add a shade.
Get the full tutorial at Sadie Seasongoods.