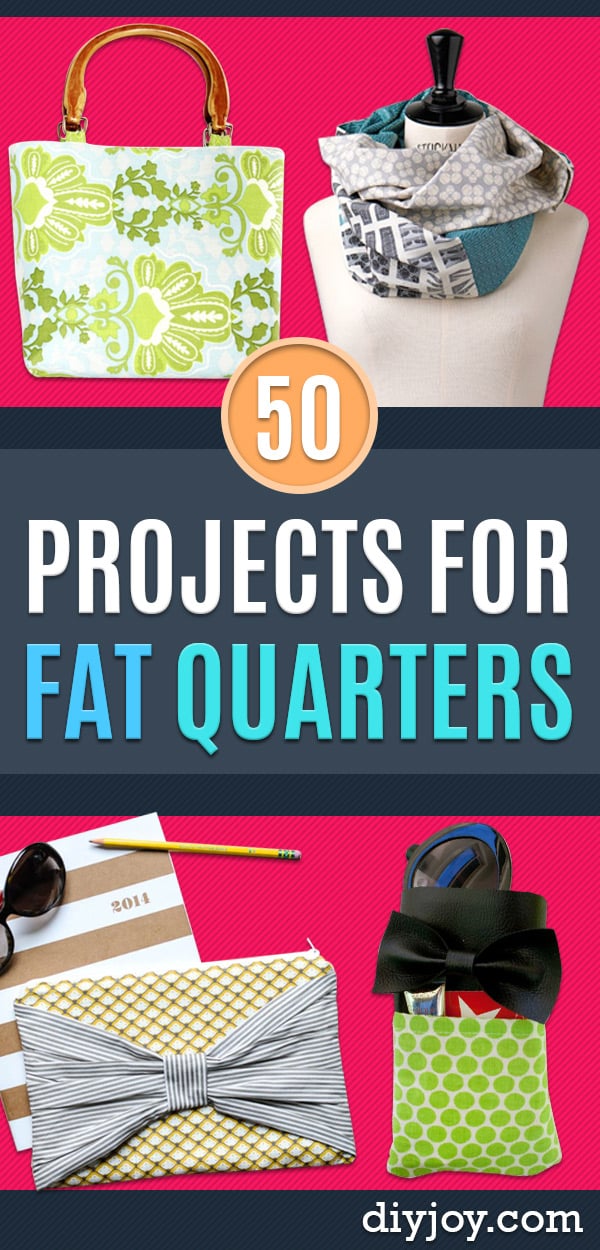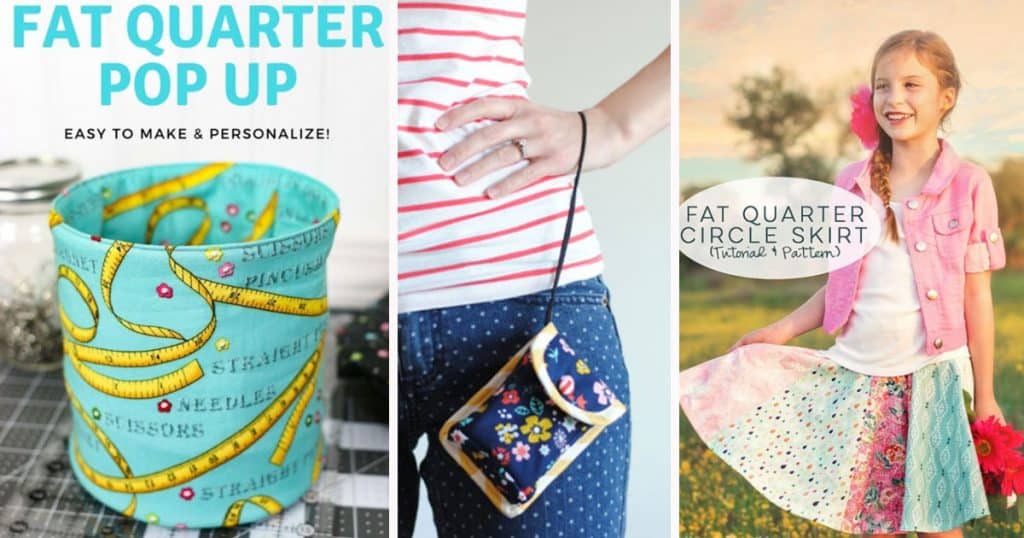
A fat quarter is eighteen by twenty two inches, which is exactly the amount of fabric that is too pretty to leave on the bolt and too small to become anything serious, which is how most of us end up with a drawer of them. So here are 33 sewing projects for fat quarters that are sized for what you already own. One fat quarter is a pop up fabric bucket, a toddler skirt, a passport holder or five yards of bias tape. Two are a toiletry bag, a bike basket or a guest towel. Three are a whale plushie or a grocery bag that holds two gallons of milk. Everything here comes with real cut numbers, most of it is straight seams, and only a handful of them ask you to put in a zipper.
Table of Contents
- 1. Fat Quarter Pop Up Fabric Bucket
- 2. Camera Cozy
- 3. Hanging Beach Chair Caddy
- 4. Origami Fat Quarter Bento Bag
- 5. Fat Quarter Infinity Scarf
- 6. Passport Holder
- 7. Fabric Trash Can
- 8. Fat Quarter Toiletry Bag
- 9. Free Camper Zipper Pouch
- 10. DIY Dinner Napkins
- 11. Sunglasses Case
- 12. Knotted Bow Tie
- 13. Charm Square Fabric Tray
- 14. 20 Minute Makeup Bag Sewing Tutorial
- 15. Sweet Deer Embroidered Zipper Pouch
- 16. Summertime Wallet
- 17. Fat Quarter Pillows DIY
- 18. Guest Towel With Crochet Trim
- 19. Embroidery Hoop Wall Art
- 20. Bow Front Clutch
- 21. Fat Quarter Toddler Skirt
- 22. Whale Plushies
- 23. No-Sew Fabric Bunting
- 24. Easy Fat Quarter Drawstring Bag
- 25. Fabric Luggage Tags
- 26. Boho Sling Tutorial
- 27. Bike Basket
- 28. Make a Fabric Wreath
- 29. Fat Quarter Bias Tape
- 30. DIY Easy Envelope Pillows From Fat Quarters
- 31. Fat Quarter Reusable Grocery Bag
- 32. Ragged Tassels Party Decor
- 33. Puffy Heart Bunting
1. Fat Quarter Pop Up Fabric Bucket
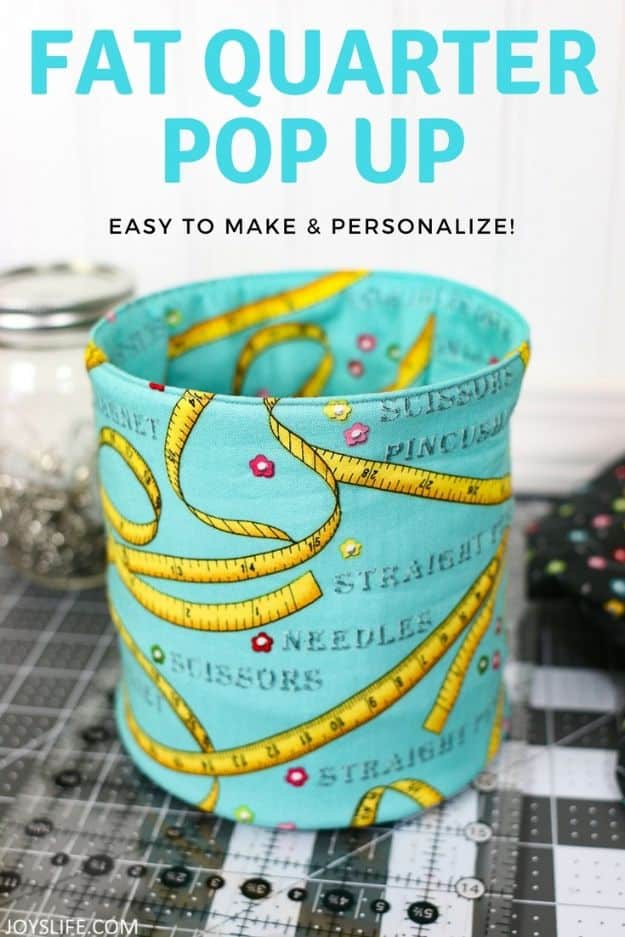
One fat quarter, seventeen and a half by nineteen and a half inches, plus half a yard of light to medium fusible interfacing, and the whole thing is two circles and a rectangle. The clever part is a heavy duty metal spring that rides inside the seam, so the bucket collapses flat in a drawer and springs open when you need somewhere to put scraps. Four large safety pins hold the spring while you clip the circles on with Wonder Clips, and pulling the pins is the last step. Directional prints need half a yard instead, because the pattern has to run the same way all the way around.
Get the full tutorial at Joy's Life.
2. Camera Cozy
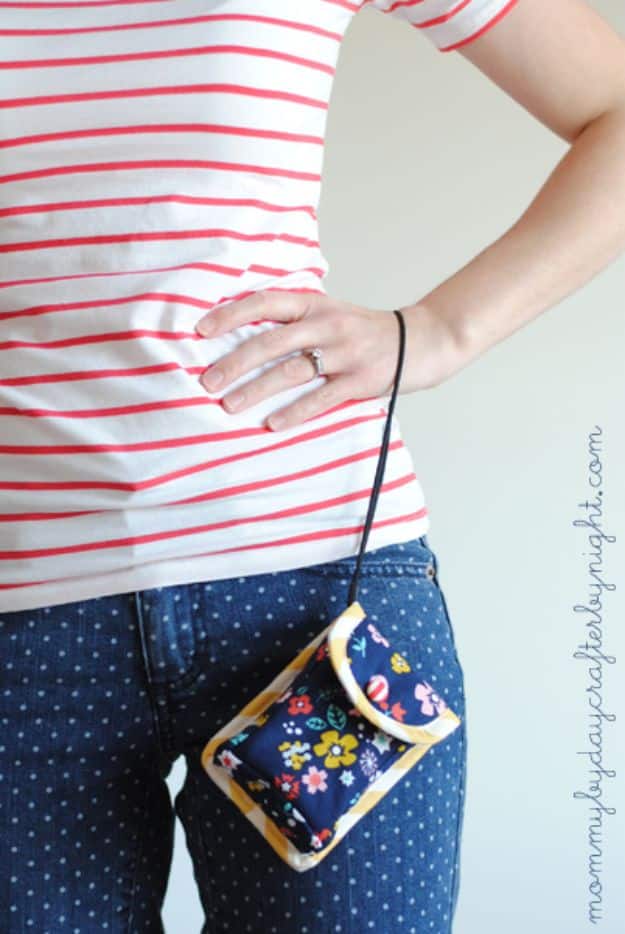
Built to your camera rather than to a pattern, which is the only honest way to make a case that actually fits. Measure width, height and depth, then add three quarters of an inch to the width and one inch to the height for the front panel, and four and a quarter inches to the width for the back so the flap wraps over and snaps. One or two fat quarters covers it, one if you want the lining to match. Every one of the six panels gets fusible fleece, the top edge is finished in half inch double fold bias tape, and a large snap closes it. About an hour, longer if you make your own bias tape.
Get the full tutorial at Mommy by Day Crafter by Night.
3. Hanging Beach Chair Caddy
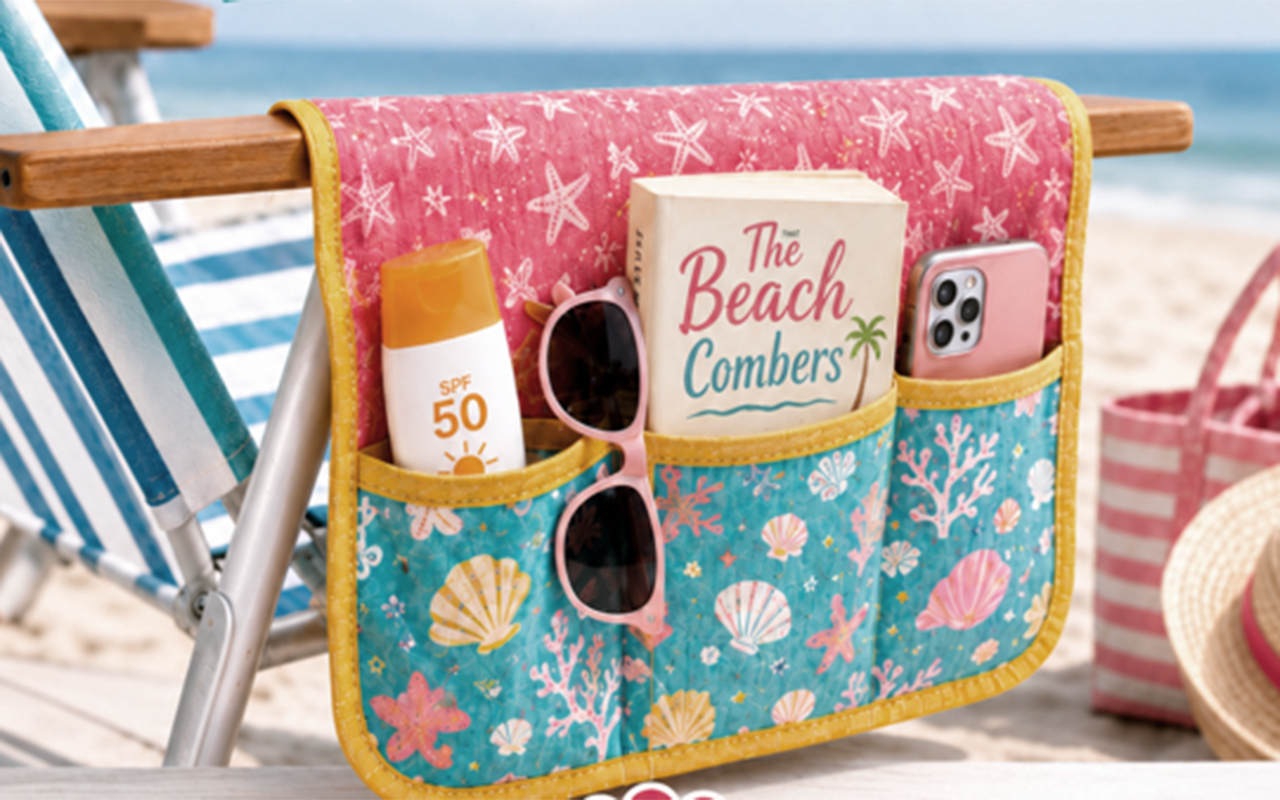
If your beach bag is a black hole with sunscreen at the bottom and a paperback bent in half somewhere above it, this is the fix. The caddy wraps over the arm rail of any folding chair and velcros shut behind it, so it clamps on and cannot slide or blow away. Three box pleated front pockets expand as you fill them, sized 4 inches for sunscreen, 6 for a paperback and 4 for a phone, and a hidden full width zip pocket sits against the chair where nobody can see it. Every piece is a rectangle, every raw edge is finished in one pass of bias binding, and the printable pattern is free.
Get the full tutorial at DIY Joy.
4. Origami Fat Quarter Bento Bag
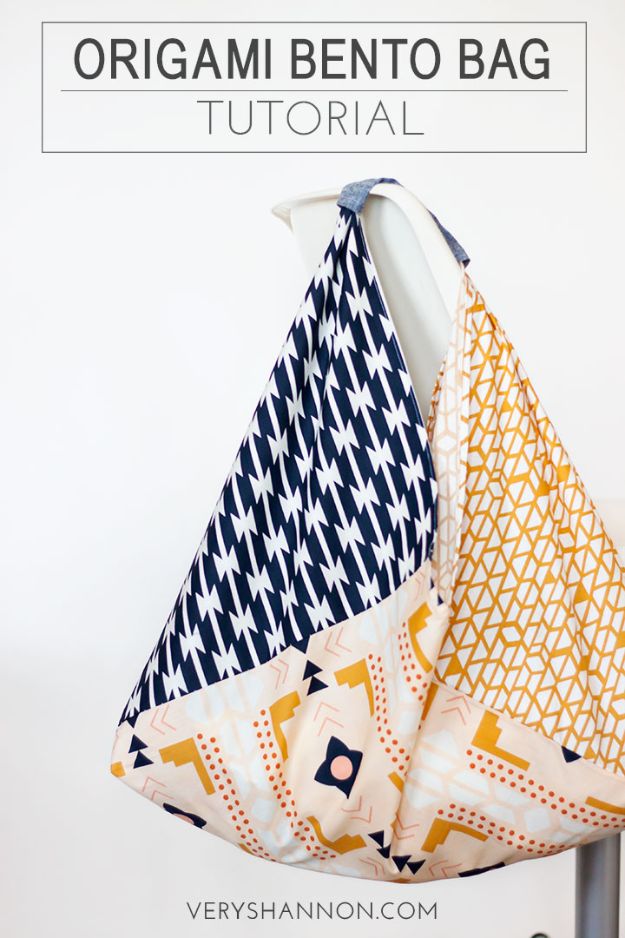
Japanese in origin, sometimes sold as a market bag or a triangle bag, and it folds from flat panels rather than being pieced into a shape. Three fat quarters, two cut sixteen and a half by seventeen inches and one seventeen by seventeen, join into a long rectangle at a quarter inch seam, and the seams are finished French style by trimming to an eighth of an inch and enclosing them. Then you fold corner to corner and stitch the fold lines, which is where the bag appears. Finished it is about forty eight inches wide by sixteen tall, and box corners two inches in from the seam give it a flat base.
Get the full tutorial at Very Shannon.
5. Fat Quarter Infinity Scarf
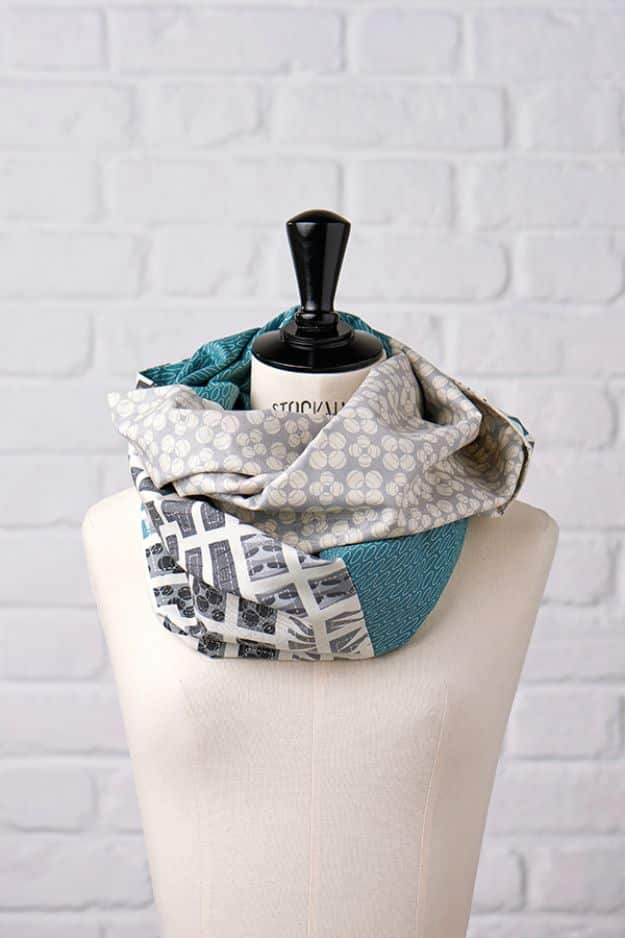
A loop scarf in muted gray and teal, pieced from fat quarters rather than bought by the yard, which is what lets you run three or four prints around the same loop without any of them dominating. There is no fitting involved and no closure, so the only decisions are the print order and how long you want the loop to hang. Shown here on a dress form, it falls to about the waist doubled. Lightweight cottons keep it wearable into spring; a flannel or a double gauze turns the same shape into a winter scarf.
Get the full tutorial at Simply Sewing.
6. Passport Holder
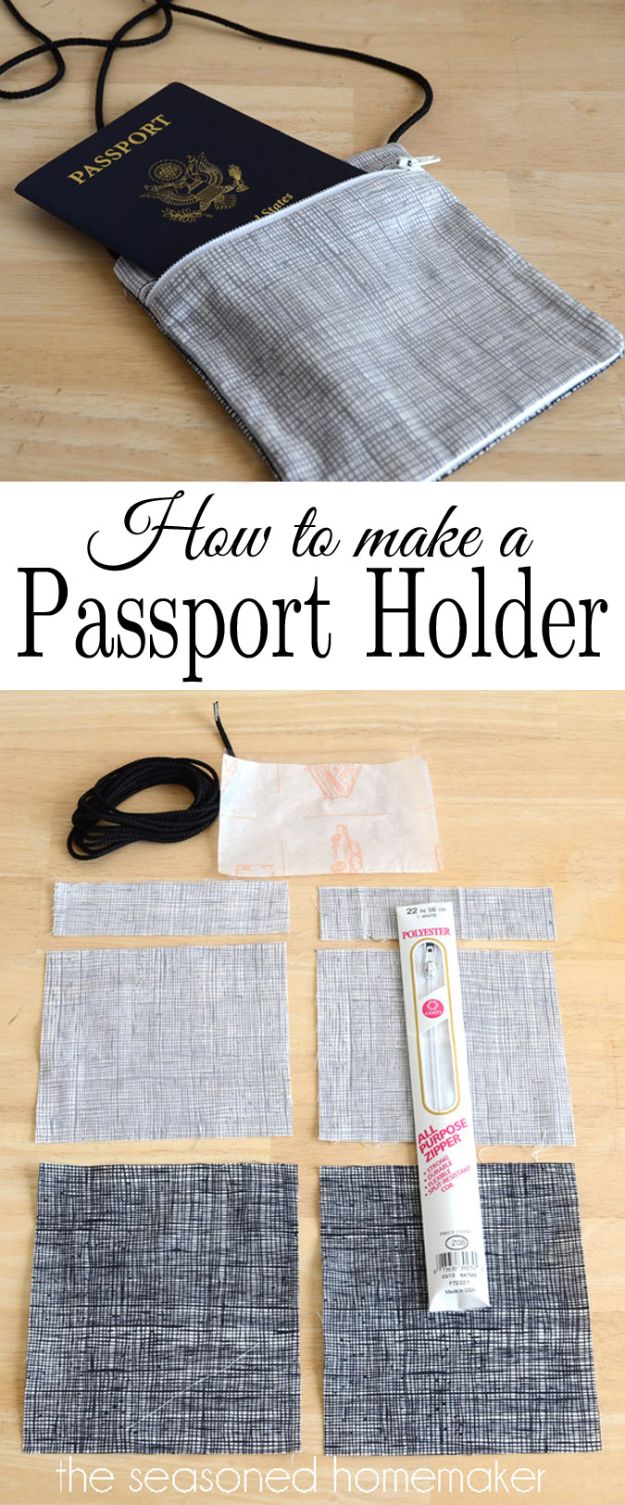
Scraps or one fat quarter, a zipper, a quarter yard of clear vinyl and a yard and a quarter of cotton cording, and the cut list is short enough to write on your hand: two large fronts at 5 by 5.75 inches, two small fronts at 1.5 by 5.75, two backs at 6.5 by 5.75 and one vinyl pocket at 3.5 by 5.75. The zipper goes on the large front pieces first, the small fronts follow, then the vinyl becomes a see through pocket for a boarding pass. Cording at the top edge means it hangs rather than floats loose in a bag. The maker says buying the zipper took longer than sewing it.
Get the full tutorial at The Seasoned Homemaker.
7. Fabric Trash Can
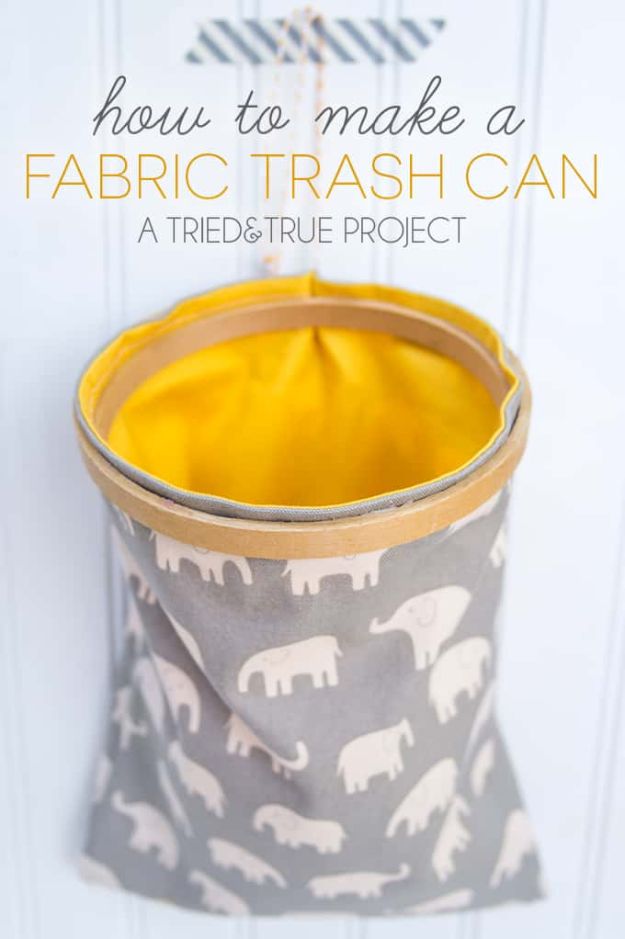
Four straight seams. That is the entire skill list. Two pieces cut 8.5 by 11 inches on the fold, which means a sheet of printer paper is your template, sewn into two bags, one nested inside the other. Turn the whole thing through a slit opened in the lining bottom, close the slit, press and topstitch the rim. A 5.25 inch embroidery hoop dropped in at the end gives it a rigid mouth and something to hang it from, which is what makes it live in a car console instead of tipping over. Good first project for anybody who has never lined anything.
Get the full tutorial at Tried & True.
8. Fat Quarter Toiletry Bag
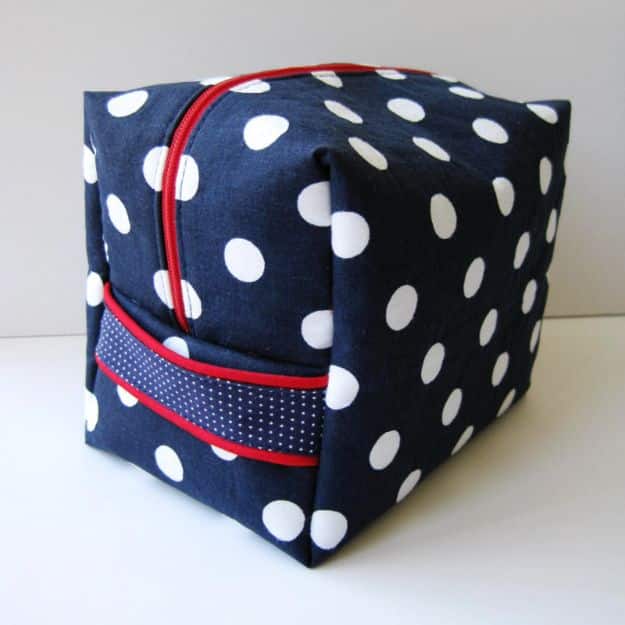
Two fat quarters for the bag, a third made into bias tape, plus fusible vinyl, fusible fleece and a fourteen inch or longer zipper. The vinyl is the whole reason to make this one instead of buying one: it laminates the lining so a leaking bottle of shampoo stays inside the bag and wipes out, and it means you can use a white interior and actually see what is in there. Cut a four inch strip off the long edge of each fat quarter and you are left with 14 by 21 inches, which is the bag. Finishes around 8 by 5 by 5 inches. Piping on the handle is optional and does a lot.
Get the full tutorial at She's Got the Notion.
9. Free Camper Zipper Pouch
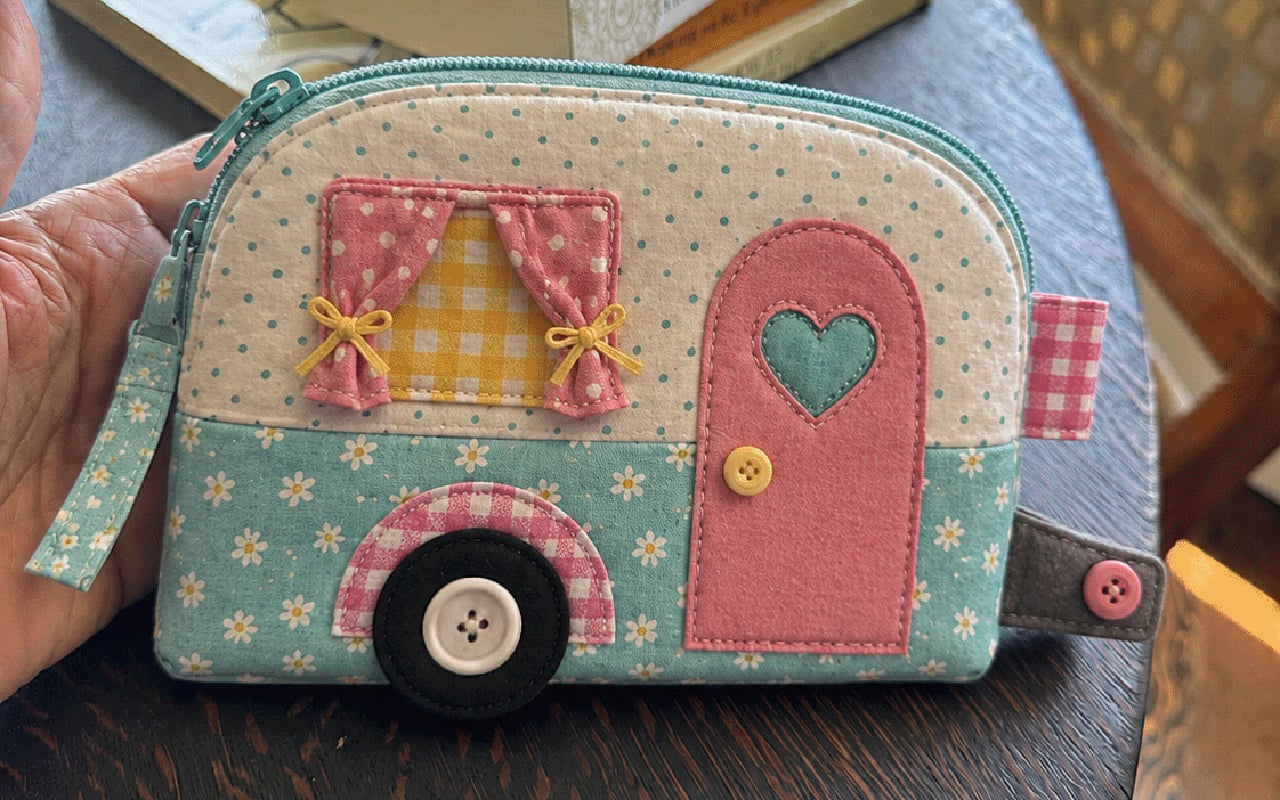
A retro camper trailer built out of fusible applique on the front of a boxed zipper pouch, complete with an arched door, a heart shaped window, gingham curtains tied back with ribbon, a felt wheel with a button hub and a tiny stitched trailer hitch tucked into the side seam. It finishes about 7.25 inches wide by 6 tall with a 3.25 inch boxed bottom, which is big enough to be an actual makeup bag rather than a novelty. One fat quarter each of main, accent and lining, a 10 inch zipper and a handful of buttons. The printable pattern is free and prints at 100% with a calibration square.
Get the full tutorial at DIY Joy.
10. DIY Dinner Napkins
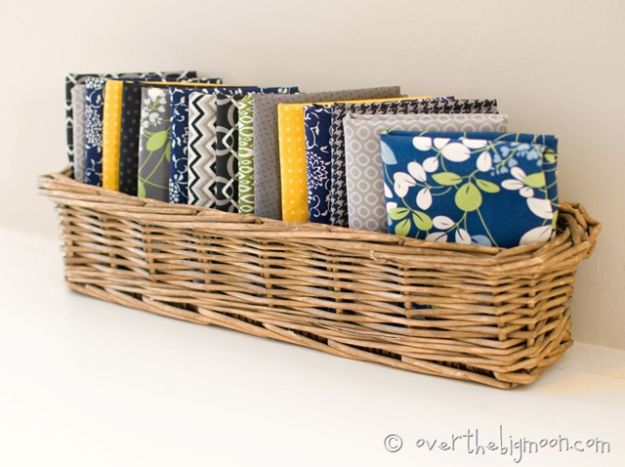
Straight lines, four of them, and a double fold hem. Cut the fabric to 17 by 21 inches, fold one edge down half an inch and press, fold again and press, clip it down, then stitch a quarter inch in from the inner edge and backstitch at both ends. Repeat on the parallel side, then on the other two. Standard napkins finish at 20 inches square, so cut 21 by 21 if you want that; the maker went smaller to get more napkins out of the same fabric, which is the right instinct. Wash and dry linen twice before you cut it, because it will shrink and it will not ask first.
Get the full tutorial at Over the Big Moon.
11. Sunglasses Case
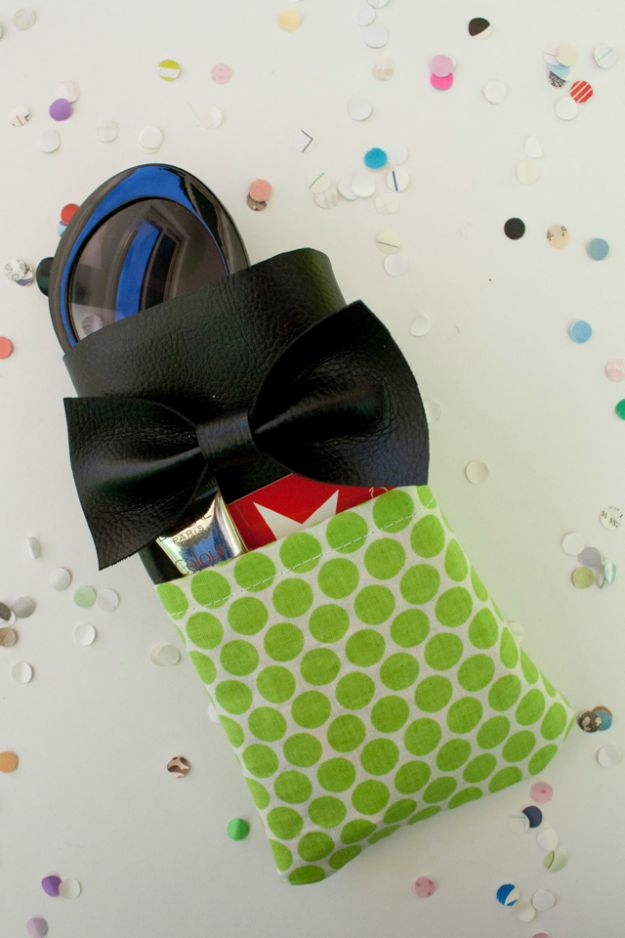
Cotton on the inside, faux leather on the outside, and an open pocket across the front for a lip gloss and a credit card, which is the detail that makes this a small bag rather than a sleeve. Cut the cotton 9.5 by 5.75 inches and the leather 8.5 by 7, plus two leather scraps for the bow at 4 by 2 and 4 by half an inch. One warning worth taking seriously: leave a little more slack in the cotton than in the leather when you sew the side, because the leather will not stretch and the pocket needs to sit slightly wider so it lies flat. The bow is folded accordion style and hand stitched on.
Get the full tutorial at Jessica of The Ladyette, published at See Kate Sew.
12. Knotted Bow Tie
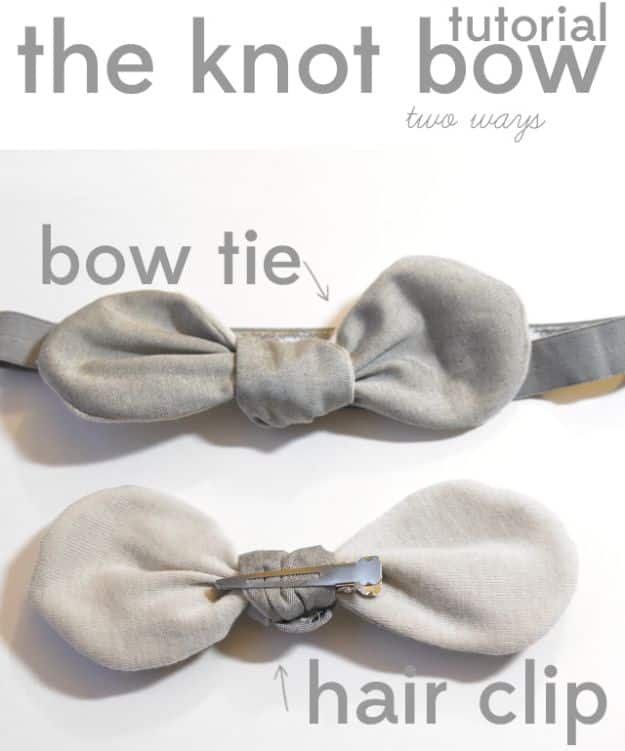
One pattern piece, drawn not printed: a long shape with rounded ends, 9.5 inches long, 2.75 inches at the widest point and 1.75 inches at the narrowest. Cut one layer in a knit and one in a woven, because the knit is what gives the finished bow its soft slumped shape instead of a stiff one. Pin heavily, since you are sewing a stretchy fabric to a stable one, sew all the way around at an eighth of an inch and leave a one inch gap in the middle to turn. Then tie it in a knot. Around elastic it is a bow tie or a headband; around a hair clip with a bead of hot glue it is a clip.
Get the full tutorial at See Kate Sew.
13. Charm Square Fabric Tray
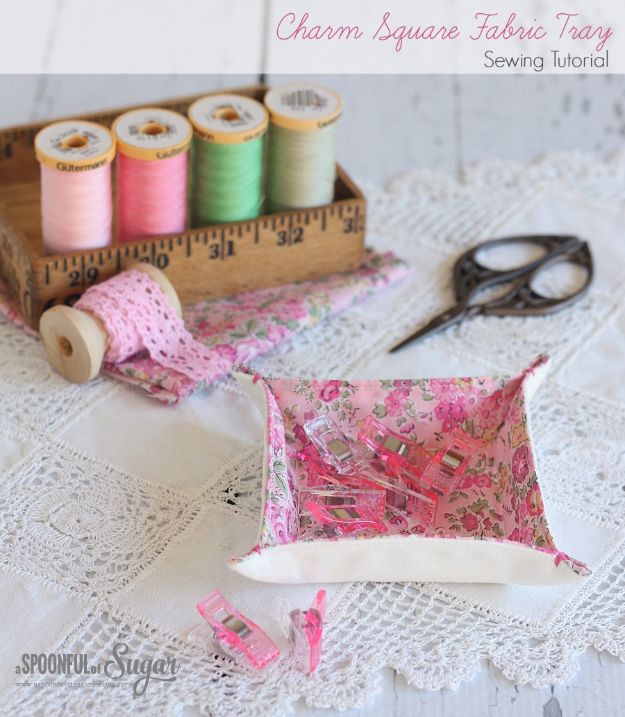
Zakka style, which is a Japanese category meaning small useful domestic things, and these have been in Japanese sewing magazines for years. Three 5 inch squares, one linen, one cotton lawn, one cotton batting, stacked batting first, linen right side up, lawn wrong side up, stitched at a quarter inch with a 1.5 inch gap for turning. Topstitch at an eighth of an inch, then mark a 2.5 inch square in the middle and stitch it, because that square is the base. Fold the corners, take two stitches in embroidery floss half an inch from each corner, done. Ten minutes, and they hold wonder clips, buttons, tea bags and earrings.
Get the full tutorial at A Spoonful of Sugar.
14. 20 Minute Makeup Bag Sewing Tutorial
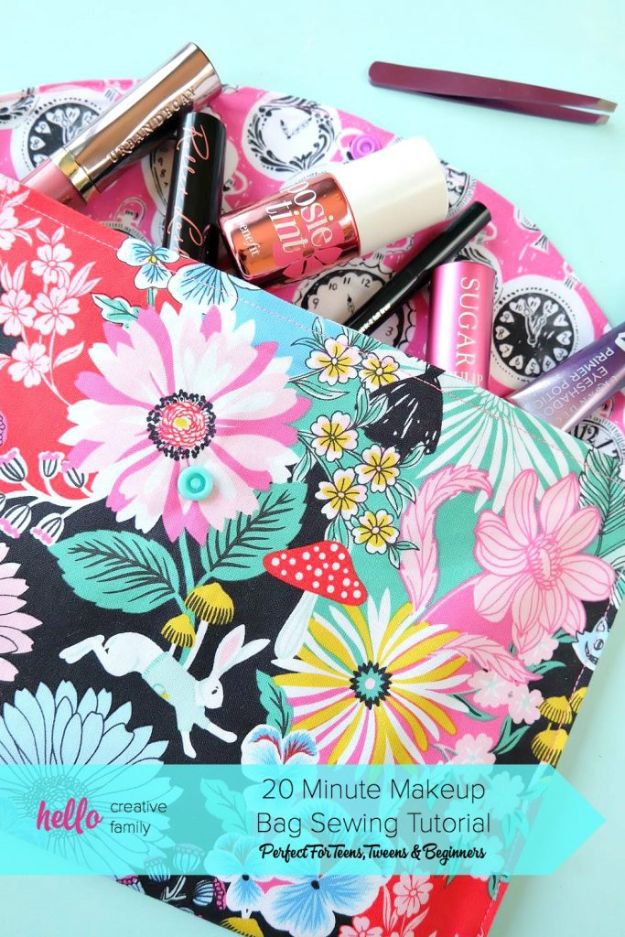
No zipper, which is the entire reason it takes twenty minutes. A curved flap folds over the front and closes with a snap, so the fussiest step in bag making is simply removed. It is built for fat quarters and scraps, two coordinating fabrics, one for the outside and one for the lining that you see every time it opens. If it is going to travel, add fusible interfacing, because cotton alone will go soft in a suitcase within a month. Written specifically as a project to sew alongside a teen or tween, and it holds up as one, since there is nothing in it that punishes a wobbly seam.
Get the full tutorial at Hello Creative Family.
15. Sweet Deer Embroidered Zipper Pouch
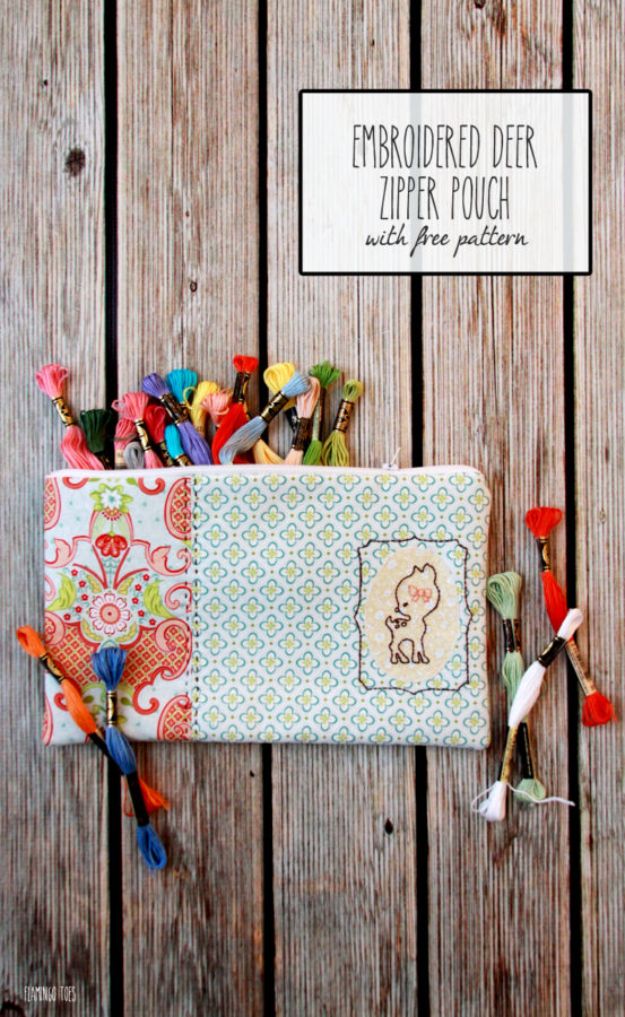
Three fat quarters, a quarter yard of fusible fleece, fusible webbing, a fourteen inch zipper and embroidery floss, and the deer comes as a free pattern. Cut 5 by 13 inches for the left front panel, 9 by 13 for the right, 8 by 13 for the back and two 8 by 13 linings. The deer is back stitched inside a hoop on a separate scrap, then fused down as an oval and zigzagged around the edge, which is far easier than embroidering on an assembled panel. Open the zipper before you sew the pouch closed. Every zipper pouch tutorial says this and everyone learns it the hard way exactly once.
Get the full tutorial at Bev of Flamingo Toes, originally a guest post for The Ribbon Retreat.
16. Summertime Wallet
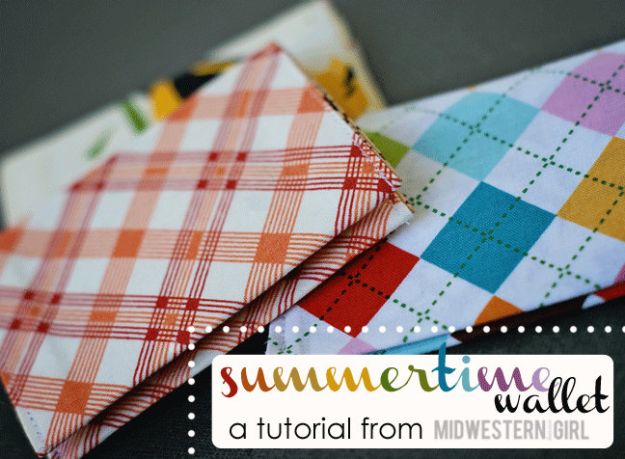
A flat card wallet that folds in thirds and fits in a back pocket, which is the point of it, since the maker built it so she could stop carrying a purse to the beach. Two pieces of fabric at least 12 by 5 inches and four pieces of double sided fusible bonding, placed either side of the six inch midpoint with about half an inch of fabric showing top and bottom. Sew all four sides at a half inch seam, leave a couple of inches open on a short side to turn, clip the corners, press, close the opening, then fold and press the thirds and stitch down each long side at an eighth of an inch.
Get the full tutorial at Maggie Massey, Midwestern Girl.
17. Fat Quarter Pillows DIY
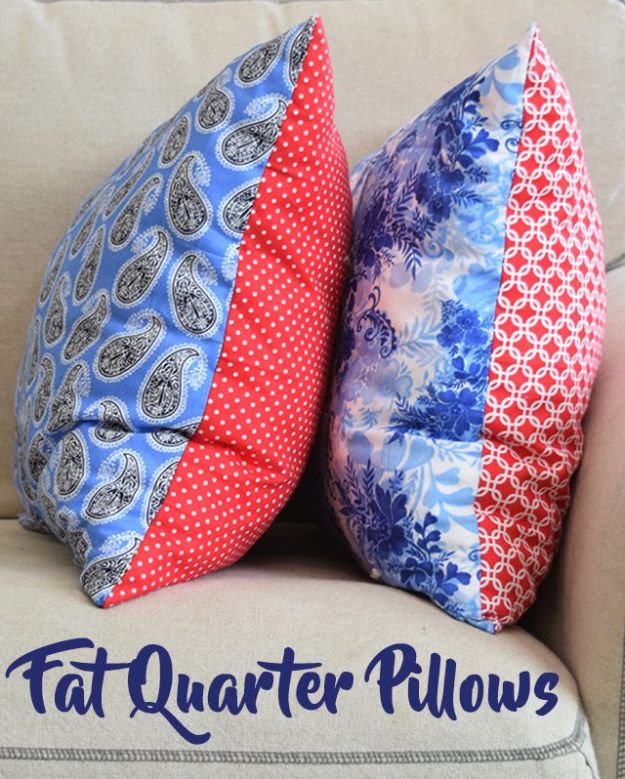
Two fat quarters per pillow, right sides together, pinned every four or five inches, with a square drawn inside the edge as your stitching line so it comes out square even if your eye does not. Leave a gap in the middle of one side for turning and stuffing, and backstitch an inch either side of that gap, because a seam that has not been reinforced will pull open while you are stuffing it. At each corner, stop with the needle down, lift the foot, pivot, drop the foot. Snip the corner at an angle before turning. Stuff with Poly-fil or gut an old bed pillow.
Get the full tutorial at Mom Spark.
18. Guest Towel With Crochet Trim
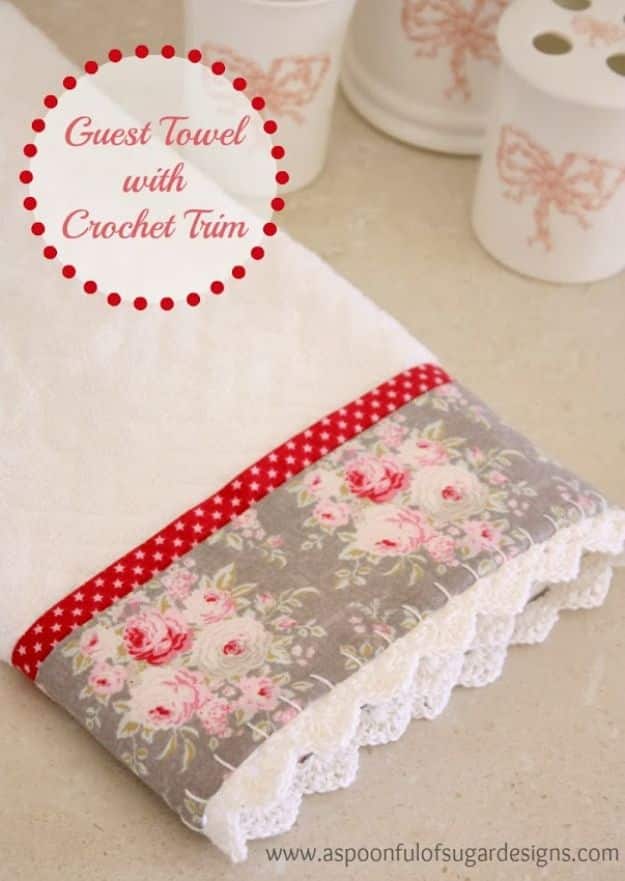
A bought white towel, two fat quarters and a crochet hook, and the result reads like something from a linen cupboard forty years older than it is. Cut the main print 3.75 inches by the towel width plus one inch, and the accent print 1.5 inches by the same. Fold the accent lengthwise, press, stitch it to the top edge of the main print at a quarter inch, then press under a quarter inch at the bottom and half an inch at the sides. Machine stitch along the join, hand stitch the rest. The trim is a blanket stitch foundation with three single crochet into each stitch, then a shell stitch row.
Get the full tutorial at A Spoonful of Sugar.
19. Embroidery Hoop Wall Art
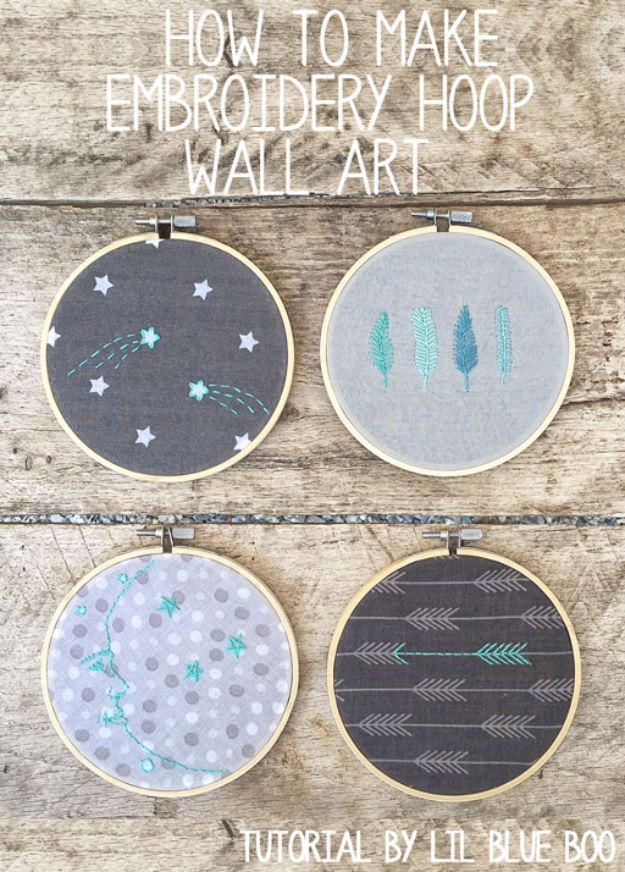
Four hoops, gray fabrics, and a running stitch, which is the only stitch involved. The idea worth stealing is that the print does most of the work: a star fabric becomes shooting stars once you add tails, a polka dot becomes the surface of the moon with a face stitched on, an arrow print just gets emphasized. Sketch first with a disappearing ink fabric pen, stretch the fabric taut in the hoop, stitch, then run a bead of craft glue around the back of the fabric and trim the excess off once it dries. Hang them as a set or scatter them.
Get the full tutorial at Ashley Hackshaw, Lil Blue Boo.
20. Bow Front Clutch
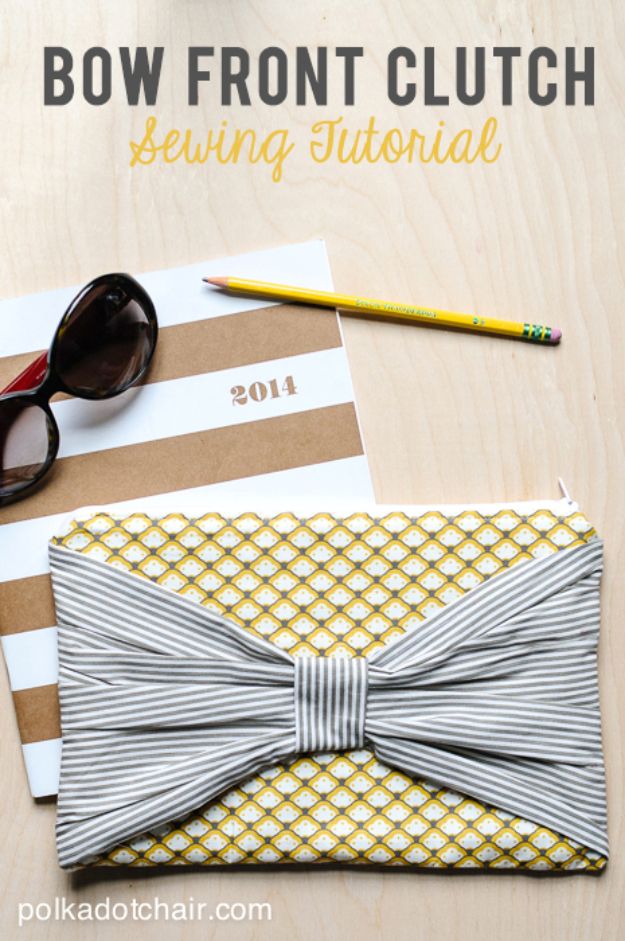
Two pieces of fabric cut 8 by 12 inches for the outside and two for the lining, plus interfacing and a zipper, and a bow across the front big enough that nobody looks at the zipper. It is a flat zip pouch underneath, which means the skills are a zipper install, shaping the corners and getting the interfacing right, and the bow is a separate piece stitched on at the end. Designed and taught as a conference class, so the instructions assume you will be confused at exactly the places people usually get confused. Cut sizes fit inside one fat quarter.
Get the full tutorial at Melissa Mortenson, Polka Dot Chair.
21. Fat Quarter Toddler Skirt
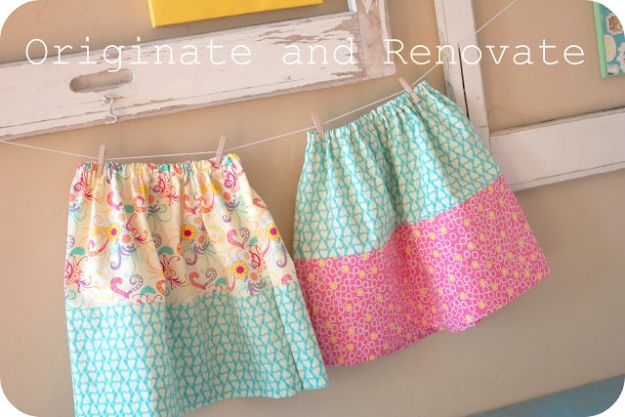
Fits roughly 3T to 5T and uses exactly two fat quarters, one main and one accent. Cut each in half lengthwise so you have four strips at 9 by 22 inches, sew a main strip to an accent strip twice, and you have a front and a back. Quarter inch seams throughout, finished with a serger or a zigzag so nothing frays in the wash, which matters more on a child’s skirt than on almost anything else. Fold the accent up two inches for the hem, stitch an eighth of an inch from the folded edge, then make a one inch casing at the top and thread half inch elastic cut to the child’s waist minus one inch.
Get the full tutorial at Annie, Originate and Renovate.
22. Whale Plushies
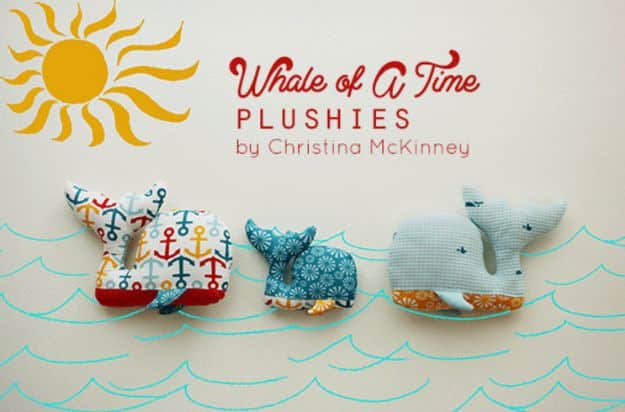
Three fat quarters, one main, one contrast for the belly and one for the fins, plus Polyfil and a free printed pattern that comes in two sizes. The large finishes at 13.5 by 10 inches and the small at 9 by 7. Quarter inch seams throughout, snip the curves on the fins before turning so they lie flat, and press every piece before and during, which on a stuffed toy is the difference between a whale and a lump. The maker suggests stitching ribbon loops around the edge to turn it into a taggie, which is the kind of change a baby will find more interesting than the whale.
Get the full tutorial at Christina McKinney, published at Birch Fabrics.
23. No-Sew Fabric Bunting
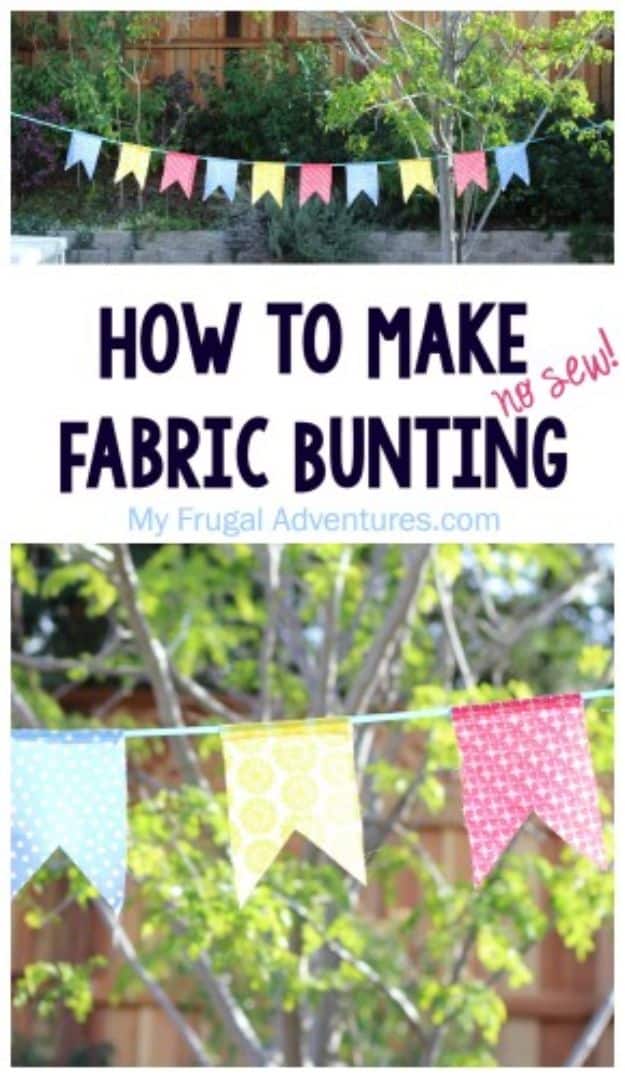
Three fat quarters, cut into pieces roughly 4 by 6 inches, folded over a length of ribbon and fixed down with a few dabs of hot glue, and the maker’s whole bunting cost three dollars because the fat quarters were a dollar each on sale. She writes that bunting is traditionally cut into a V and that she prefers a plain square, which also removes the only fiddly cut in the project, though the photograph here shows the notched version if you would rather have points. A folded paper treat bag made the template. The thing to get right is print contrast, because bunting seen from across a room is just a row of colors.
Get the full tutorial at Charlene, My Frugal Adventures.
24. Easy Fat Quarter Drawstring Bag
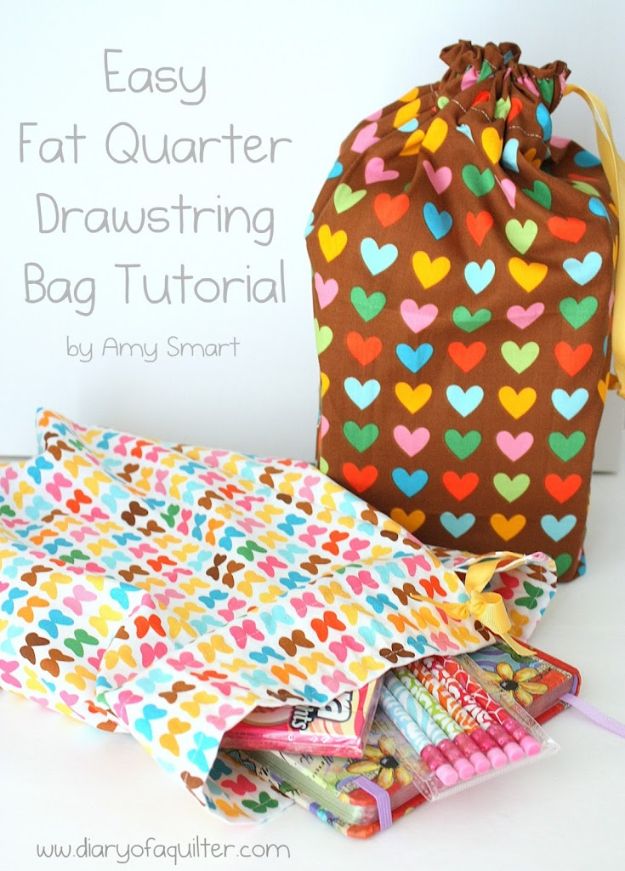
A lined drawstring bag in a multicolor heart print, the kind that becomes a shoe bag, a project bag or the gift wrap itself, since nobody throws a fabric bag away. One fat quarter makes one bag at this size, which is what makes it the standard thing to hand a beginner after the pillowcase. The structure is two rectangles sewn into a tube, a casing folded at the top with an opening left at each side seam, and a cord threaded through from both directions so it cinches evenly. Lining it hides every raw edge inside without any extra finishing.
Get the full tutorial at Amy Smart of Diary of a Quilter, guest post at U Create.
25. Fabric Luggage Tags
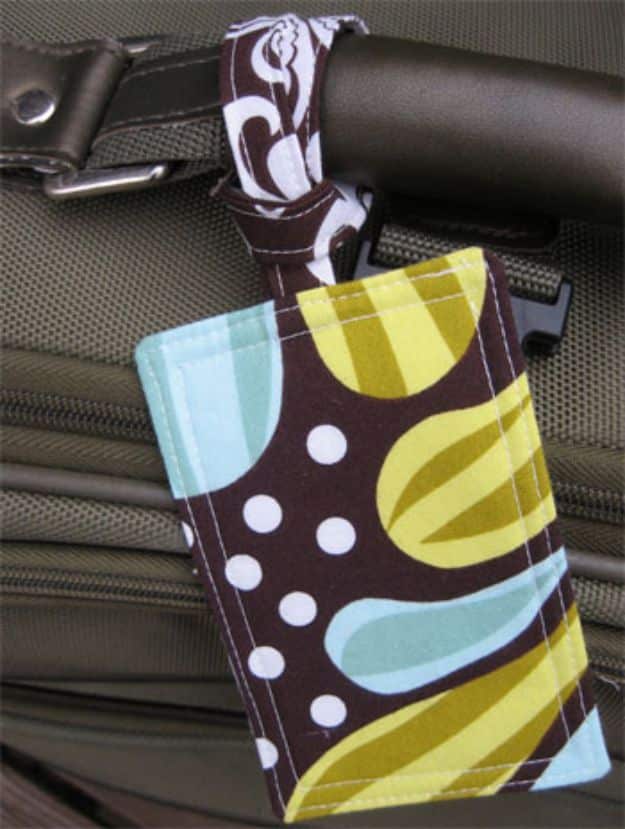
The part that makes these worth making is printed, not sewn: iron freezer paper shiny side down onto white muslin cut 8.5 by 11 inches, run that sheet through an inkjet printer with your name and address on it, then press the printing to set the ink. Cut one printed piece and one fabric piece at 3.5 by 5 inches, two matching pieces of heavyweight iron on interfacing and a strap at 2 by 12. Press the strap in half, open, press each side to the middle, fold and edge stitch. Sew around at a quarter inch with the folded strap tucked inside, leave a gap, turn, press and edge stitch.
Get the full tutorial at Cindy Hopper, Skip to My Lou.
26. Boho Sling Tutorial
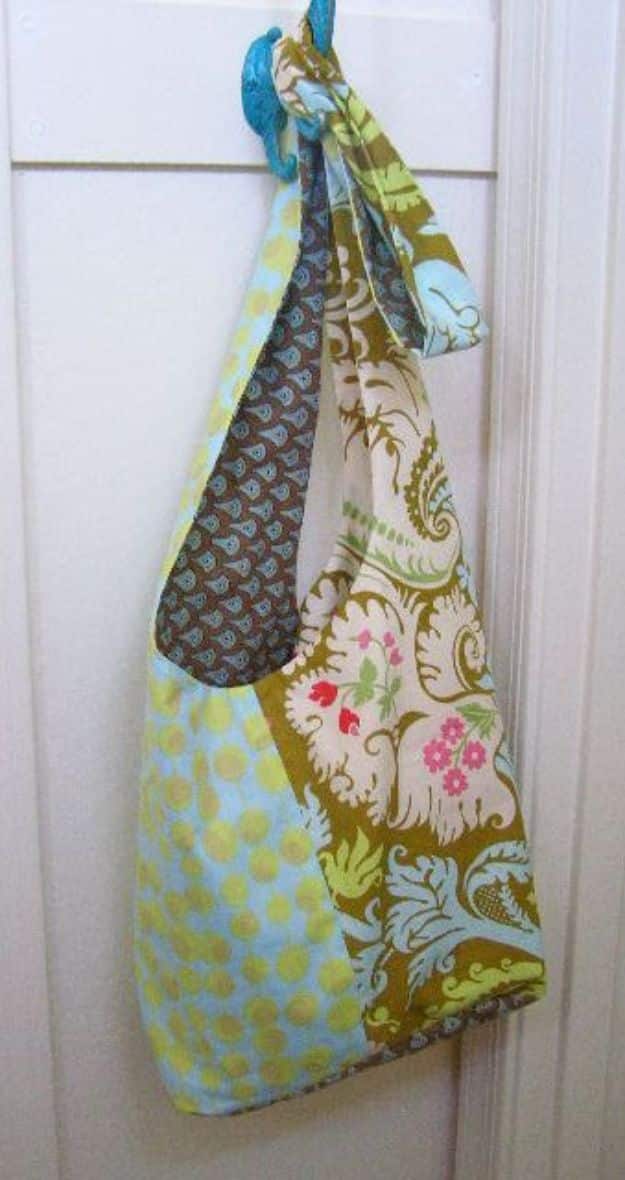
This page exists specifically to solve the fat quarter problem on a bag that was not drafted for one. Lay the pattern close to a corner of the fat quarter and cut, and you will find the handle section runs short, which is expected. The fix is one seam: cut the rest of the handle from the leftover fabric with at least a one inch overlap, snip quarter inch registration slits at the marked points, line the two pieces up right sides together at those slits, sew straight across from slit to slit and press the seam open. Under the shoulder nobody will ever see it.
Get the full tutorial at The Destashification Project.
27. Bike Basket
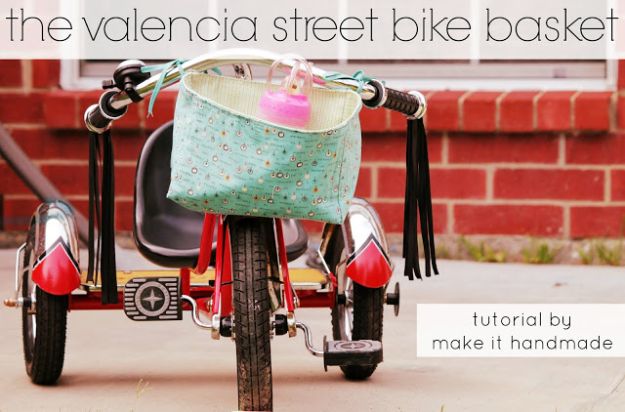
Two fat quarters, four 12 inch lengths of ribbon and an 18 by 22 inch piece of quilt batting or sturdy interfacing, and it hangs off the handlebars rather than bolting on, which is why it fits a trike, a kid’s bike with training wheels or an adult’s. Deep enough for a teddy bear, a cup and a pocketful of park pebbles, and the honest selling point is the one the maker makes: at the end of summer you put the whole thing in the washing machine and it comes out looking new. Designed for preschoolers and sized generously enough to borrow.
Get the full tutorial at Make It Handmade.
28. Make a Fabric Wreath
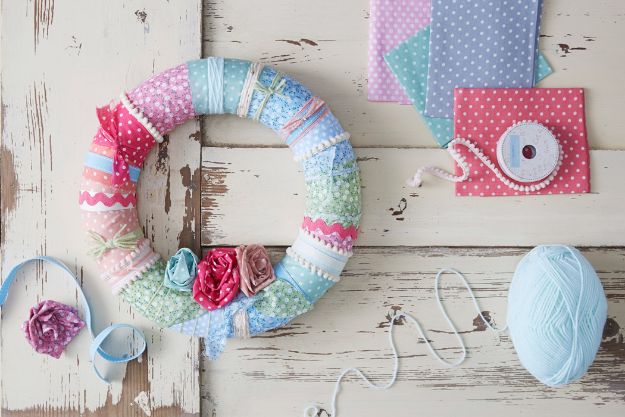
Fabric strips wrapped around a wreath form in pale pinks, blues and a floral, with rolled fabric roses and a few buttons stuck on where the joins are. There is no pattern to follow and no way to do it wrong, which makes it the project to hand somebody who is nervous, or to leave out on a table for a group to poke at. The one useful rule is to tear the strips rather than cut them, because a torn edge frays into something soft and a cut edge stays sharp and reads like a craft store kit.
Get the full tutorial at Hobbycraft.
29. Fat Quarter Bias Tape
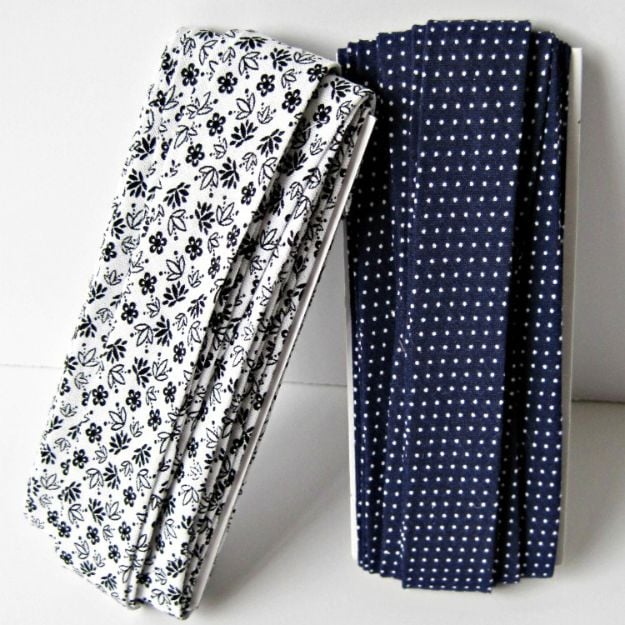
Five yards of bias tape from one fat quarter with little to no waste, which is the number that makes this worth learning. It is cheaper than the packaged kind, it comes in whatever print you want, and it is actual cotton rather than the polyester most store bought tape is made of. Square the edges of the fat quarter first, fold the top right corner down and finger crease it, cut along the crease, move that piece to the left side and carry on. Small prints work best, because only about half an inch of the tape ever shows on the finished project.
Get the full tutorial at She's Got the Notion.
30. DIY Easy Envelope Pillows From Fat Quarters
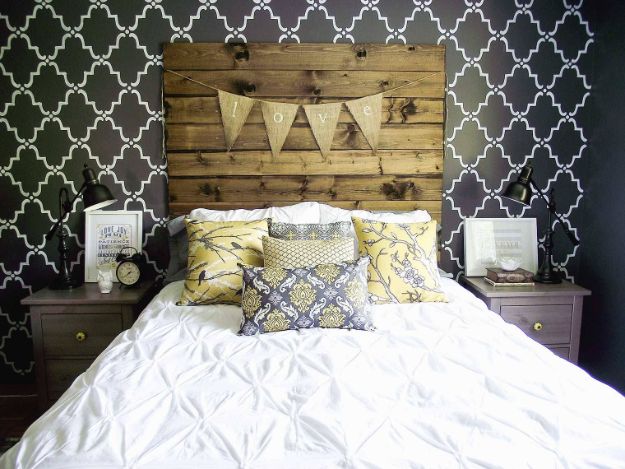
One fat quarter per pillow, trimmed to 17 by 17 inches, with the back cut from plain muslin in two pieces at 17 by 12.5 inches. Hem one long edge of each muslin piece, lay the fat quarter face up, lay the two hemmed pieces on top right sides down so they overlap by about four inches, pin and sew the perimeter. Turn it out and you have an envelope back, which means no zipper to install and a cover you can pull off and wash. Measurements here are for a 16 inch pillow form; the rule is to cut an inch larger than the form so the cover sits full rather than baggy.
Get the full tutorial at Shannon Acheson, Homemade Lovely.
31. Fat Quarter Reusable Grocery Bag
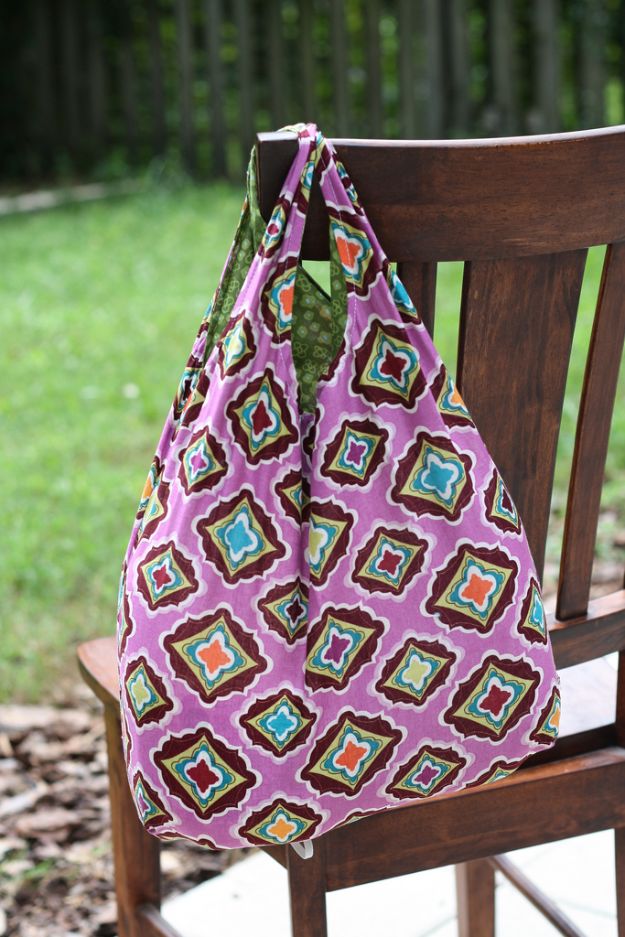
Three fat quarters, two for the outside and one for the lining, six inches of elastic and a free printable pattern. It is not fully lined, which keeps it light, and the seams are French seams, which is what makes a lightweight bag strong enough to carry two gallons of milk without the maker sounding optimistic about it. The elastic at the bottom is the detail worth copying: it lets the whole bag roll up and tuck into a diaper bag or a glove box, which is the difference between owning reusable bags and actually having one with you. Beginner level, and half a yard plus a quarter works instead of fat quarters.
Get the full tutorial at Crystal, Stitched by Crystal.
32. Ragged Tassels Party Decor
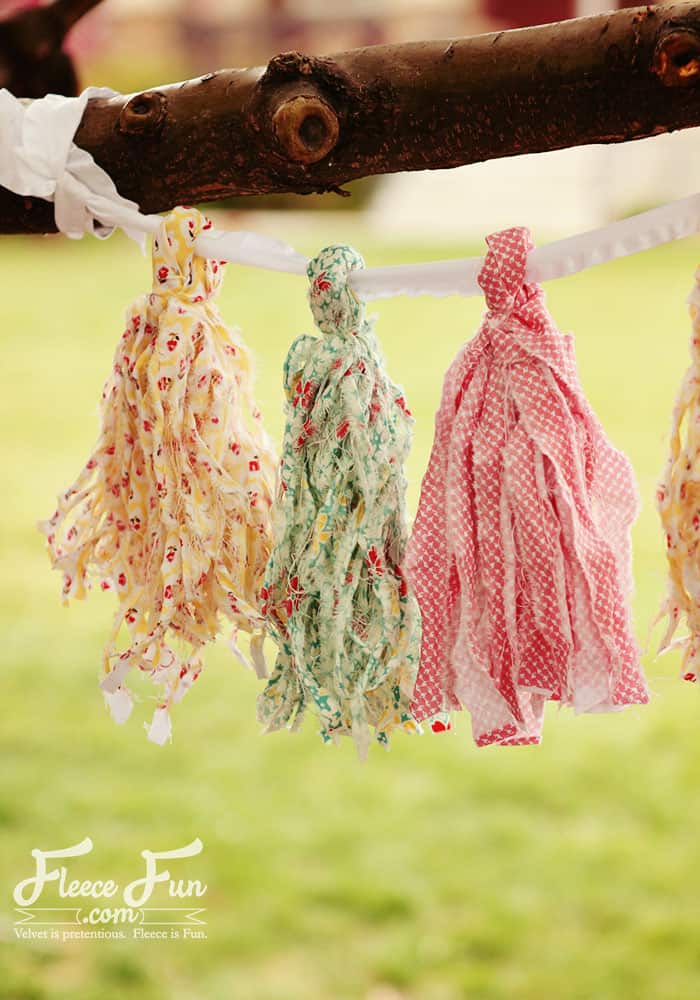
One fat quarter per tassel, clear rubber bands, scissors and some ribbon, and no sewing at all despite the company it keeps on this list. Fold the fat quarter in half, snip a slit every half inch along the edge opposite the fold, then tear each slit down to two or three inches from the fold. If a tab will not tear, cut the slit deeper and try again. Unfold, lay it face down, roll the untorn center tightly, twist it into a loop and band it. Fabric tassels beat tissue ones because they survive being packed away and used again.
Get the full tutorial at Fleece Fun.
33. Puffy Heart Bunting
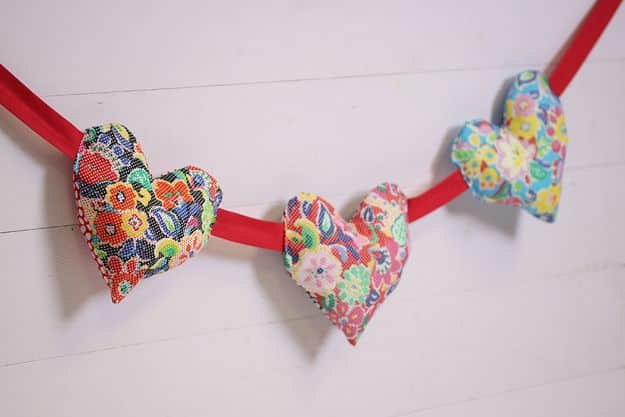
Stuffed fabric hearts in small florals strung along a length of bias binding, which is the version of bunting that survives a toddler. Six heart shapes cut from fat quarters give you three hearts, and the clever part is the order: lay the binding across the hearts first and mark where it crosses, then stitch each heart closed around a gap at exactly that point, so the binding feeds straight through the middle rather than being sewn on afterwards. Stuff lightly through the same gap before you close it, and do not overstuff. A heart packed hard goes round and stops reading as a heart.
Get the full tutorial at Hobbycraft.